Presentation Software
EDTS100Lecture 7
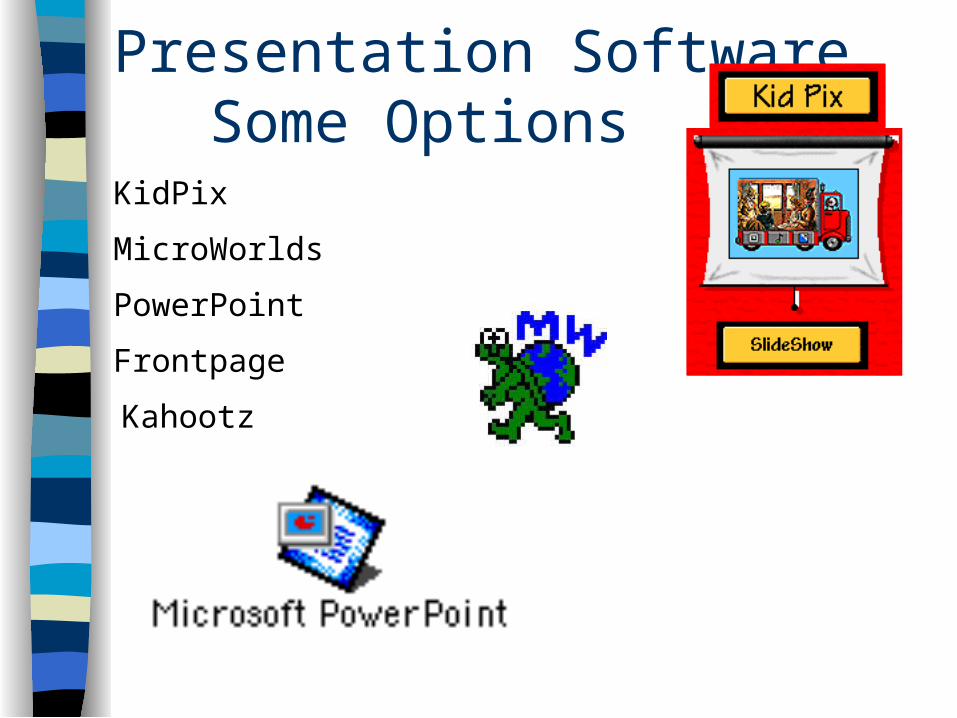
Presentation SoftwareSome Options
KidPix
MicroWorlds
PowerPoint
Frontpage
Kahootz
MicroWorlds 2
MicroWorlds is a Logo-based curriculum construction kit that makes the actual process of creating a school project a rich, learning experience.
MicroWorlds fosters the development of problem-solving strategies, critical thinking skills and creativity
Logo Programming
The logo language is simple and allows you to instruct the turtle to do a wide variety of tasks.
You need to type instructions into the command centre or on the procedures page (flipside).
An instruction is the name of a procedure followed by input.
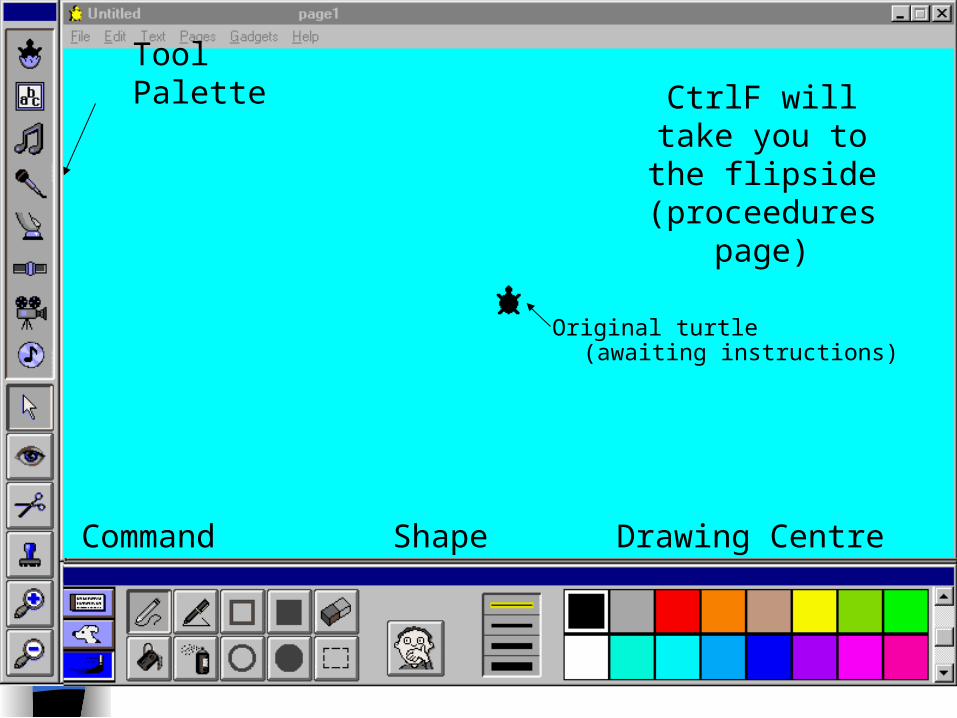
Original turtle(awaiting instructions)
Command Centre Shape Centre Drawing Centre
Tool PaletteCtrlF will take you
to the flipside (proceedures page)
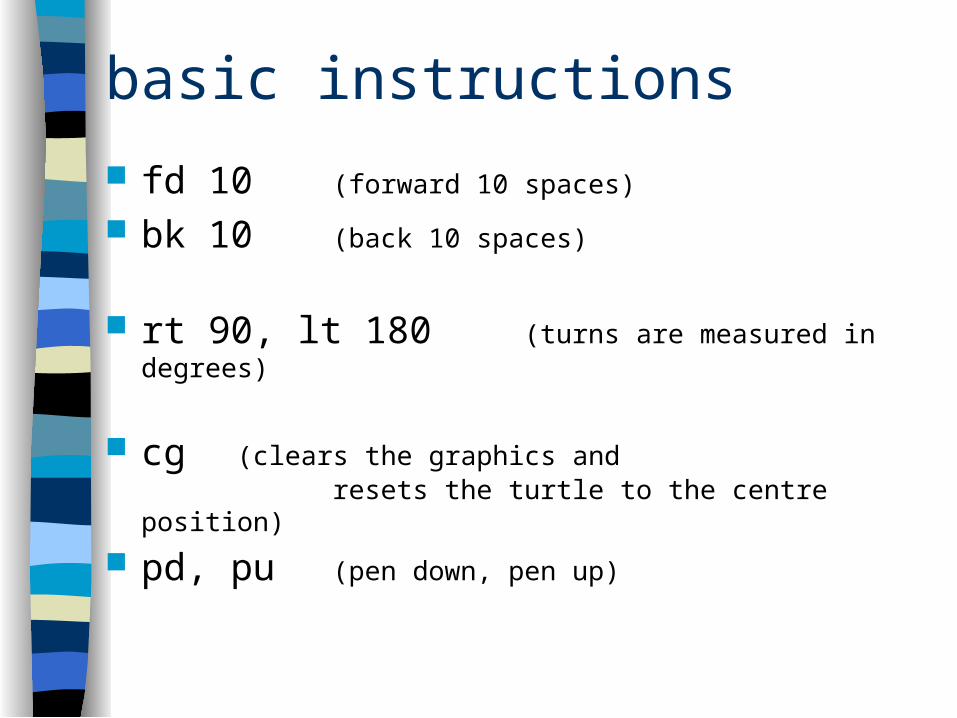
basic instructions
fd 10 (forward 10 spaces)
bk 10 (back 10 spaces)
rt 90, lt 180 (turns are measured in degrees)
cg (clears the graphics and resets the turtle to the centre position)
pd, pu (pen down, pen up)
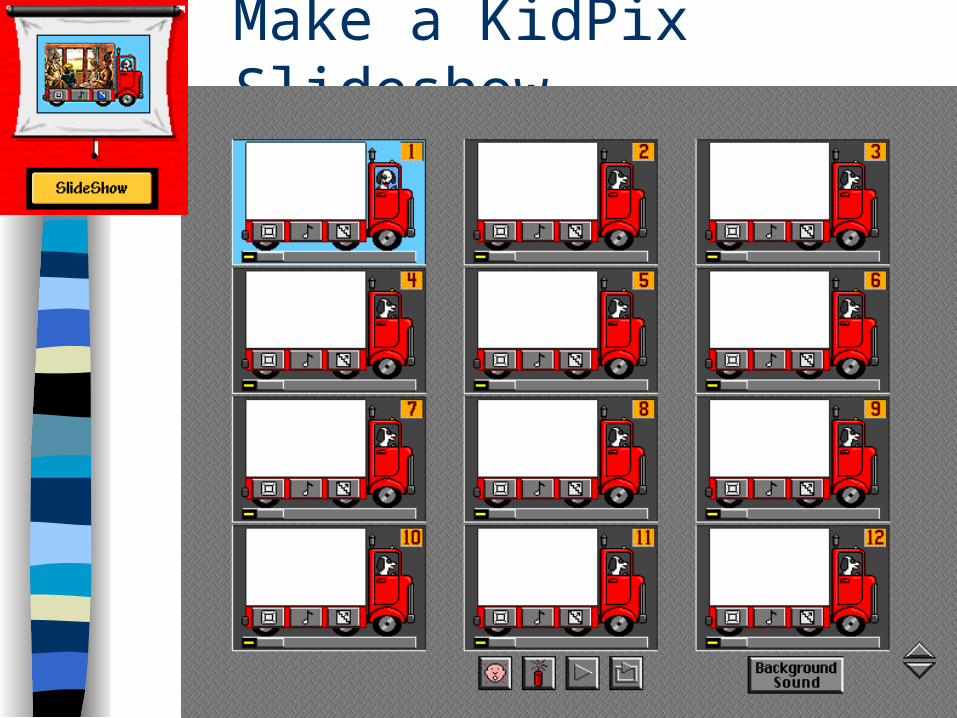
Make a KidPix Slideshow

•Click on the square button on the truck.
•Select the picture for the first slide
Make a KidPix Slideshow
KIDPIX Connections
Kidpix Resources Sample Lesson Plans Integrating KidPix into the Curriculum KidPix Tools Curriculum Ideas Some Victorian Examples

Kahootz
Imagination Kahootz Learning Centre An Overview of Kahootz Some Victorian Examples
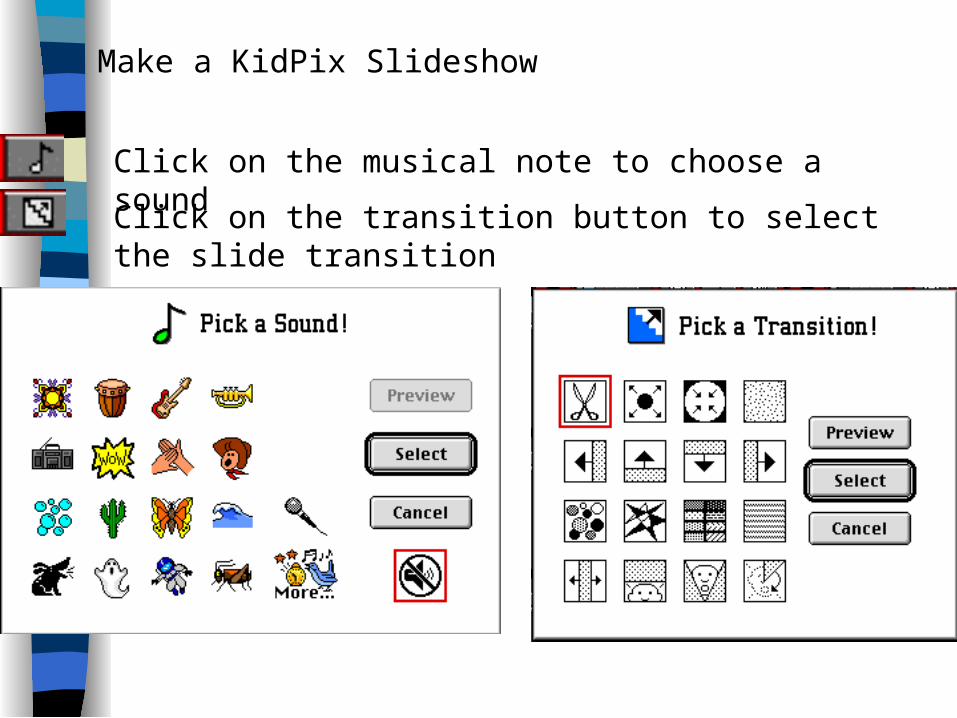
Click on the musical note to choose a sound
Make a KidPix Slideshow
Click on the transition button to select the slide transition

PowerPoint

Starting with PowerPoint
2. Select the slide layout, then click on the screen to start
1. Choose from a range of presentation options

View Master>Slide Master
The Slide Master allows you to format the look of the whole presentation in one screen.
Set this up first!
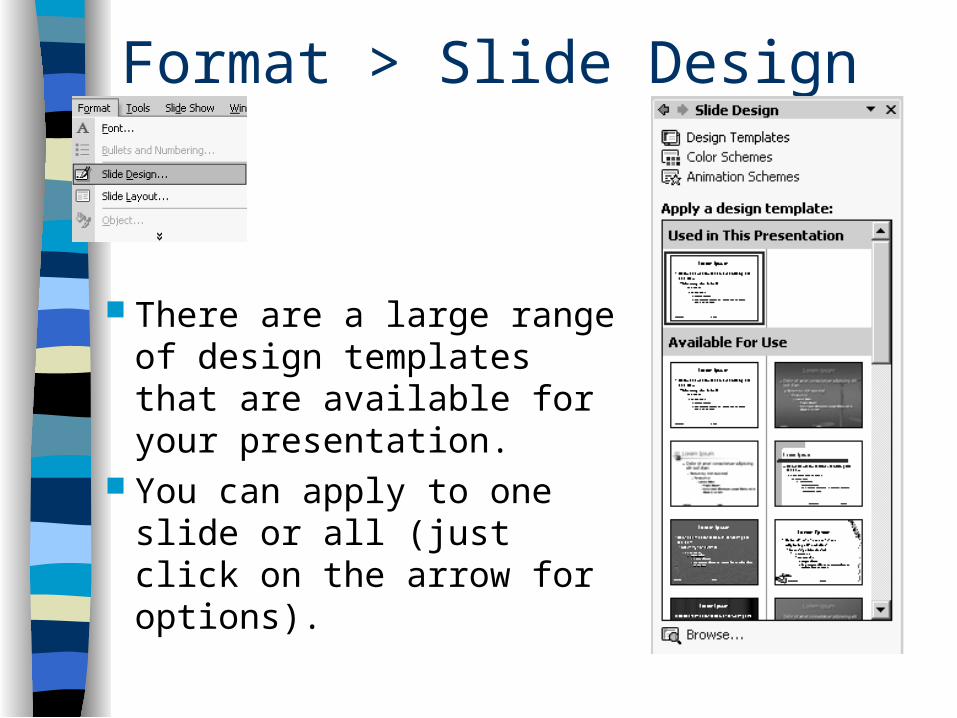
Format > Slide Design
There are a large range of design templates that are available for your presentation.
You can apply to one slide or all (just click on the arrow for options).

Format>Slide Design
Color Scheme Select color scheme from
the slide design palette. You can apply to one slide
or all (just click on the arrow for options).

Format>Slide Design Animation Schemes
Here you are able to apply an animation scheme to selected slides or all slides
Animation Schemes allow a set of animations to the slides.
This includes Transition, Title and Body Animation.
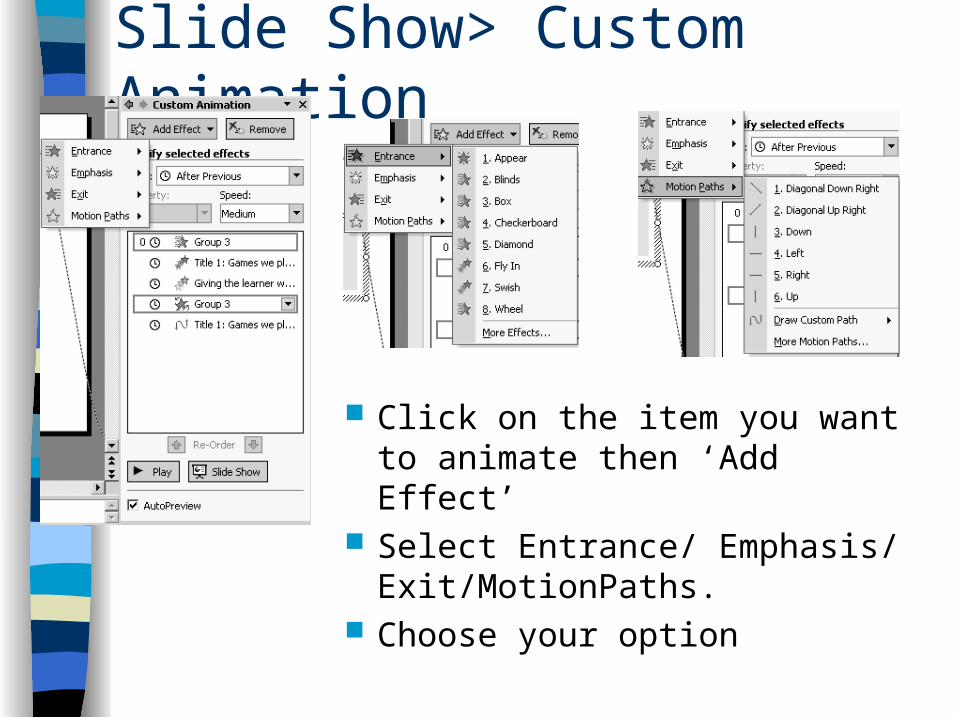
Slide Show> Custom Animation
Click on the item you want to animate then ‘Add Effect’
Select Entrance/ Emphasis/ Exit/MotionPaths.
Choose your option
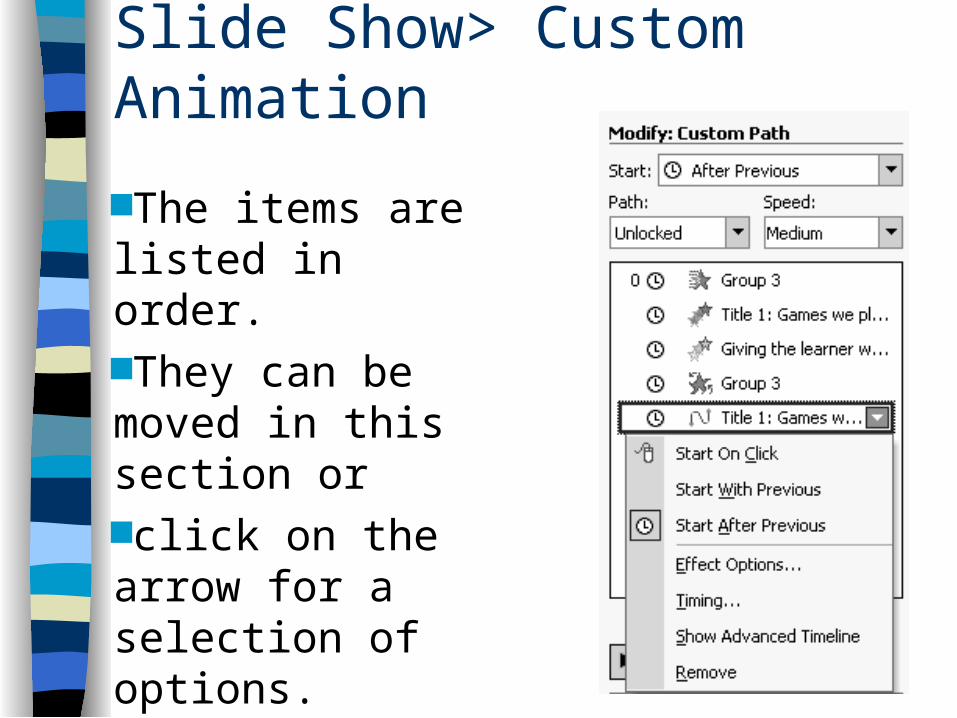
Slide Show> Custom Animation
The items are listed in order. They can be moved in this section or click on the arrow for a selection of options.

Format - Background The background can be a single color or may contain
a graphic.
NOTE: Apply (one slide only) OR Apply to all.
•Click here to delete a preselected background
•Be careful this wont allow you to apply a design

Text is easy!
Just click and type Formatting is done for
you
To add extra text boxes Insert Text box Click and drag where
you want the text box.
Format text as in MSWord

Insert > Picture ClipArt From File Auto Shape
Word Art
Organisation Chart
Graphic objects can be edited just as in MS Word.

Insert > Picture ClipArt
Graphic objects can be edited just as in MS Word.
Click on the arrow beside the picture you want and select the option you want.
Type in the item you wish to search for. Select the options and Search.

Views in PowerPoint
Outline
Slide Sorter
Notes Page
Slide Show

File>PrintPrint range:
Select the number of a slide or choose all
Print what:
•Slides - Prints all pages individually
•Handout - prints multiple pages (up to 9 per page) Like slide sorter view
•Notes - prints slide and notes pages (per slide)
•Outline - Prints outline view

View > Toolbars
To add a toolbar to your screen
Toolbars offer shortcut icons that are not readily available.

Slide Show > Slide Transition
Transitions are the effects you see as you move from one slide to the next.
You can move between slides automatically (by selecting a time frame) or on the click of the mouse.

To use PowerPoint shows on older versions.
Save As Change “Save File As Type” to an
earlier version. Save

Remember: Less is More
Don’t overdo the “bells And whistles”
PowerPoint is about getting your message across!
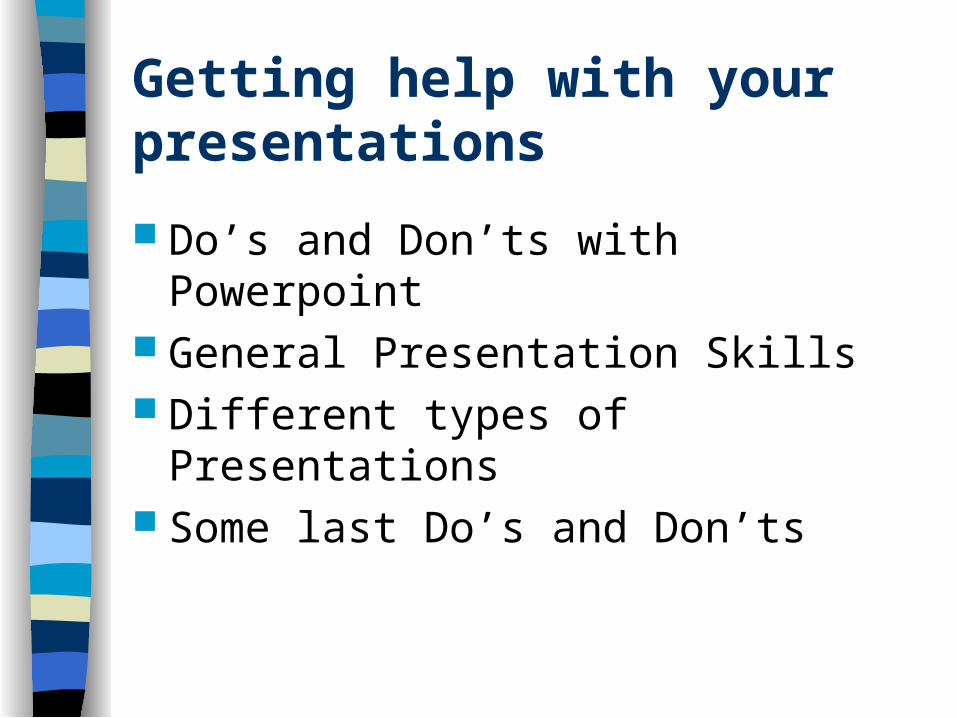
Getting help with your presentations
Do’s and Don’ts with Powerpoint General Presentation Skills Different types of Presentations Some last Do’s and Don’ts