CLICK FLASK FOR TUTORIAL


Step 1Know your equipment
Back to TutorialClick for movie

Back to Tutorial
Step 1 Know your equipment
Next Step

Step 2
Shut the air control.
Back to TutorialClick for movie

Back to Tutorial
Step 2 Shut the gas control and open the wall valve
Next Step

Step 3
Shut the gas control and open
the wall valve
Back to TutorialClick for movie

Back to Tutorial
Step 3 Shut the gas control and open the wall valve
Next Step
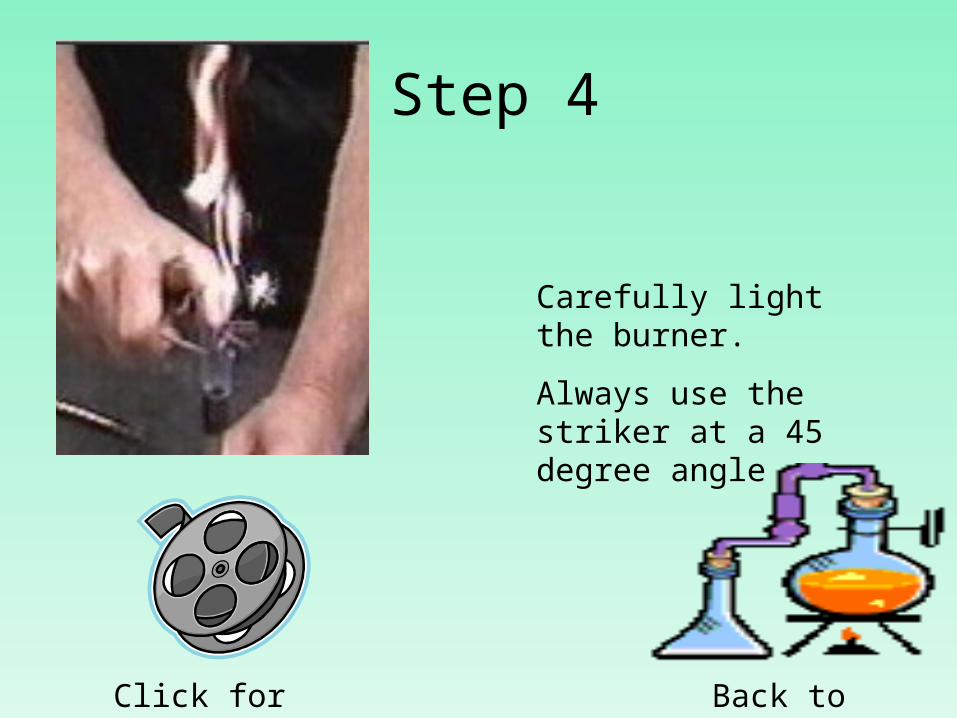
Step 4
Carefully light the burner.
Always use the striker at a 45 degree angle
Back to TutorialClick for movie

Back to Tutorial
Step 4 Carefully light the burner
Next Step

Step 5
Control the flame by closing the wall valve until you have a 2 inch flame then begin opening the air valve
Back to Tutorial
Click for movie

Back to Tutorial
Step 5 Controlling the flame
Next Step
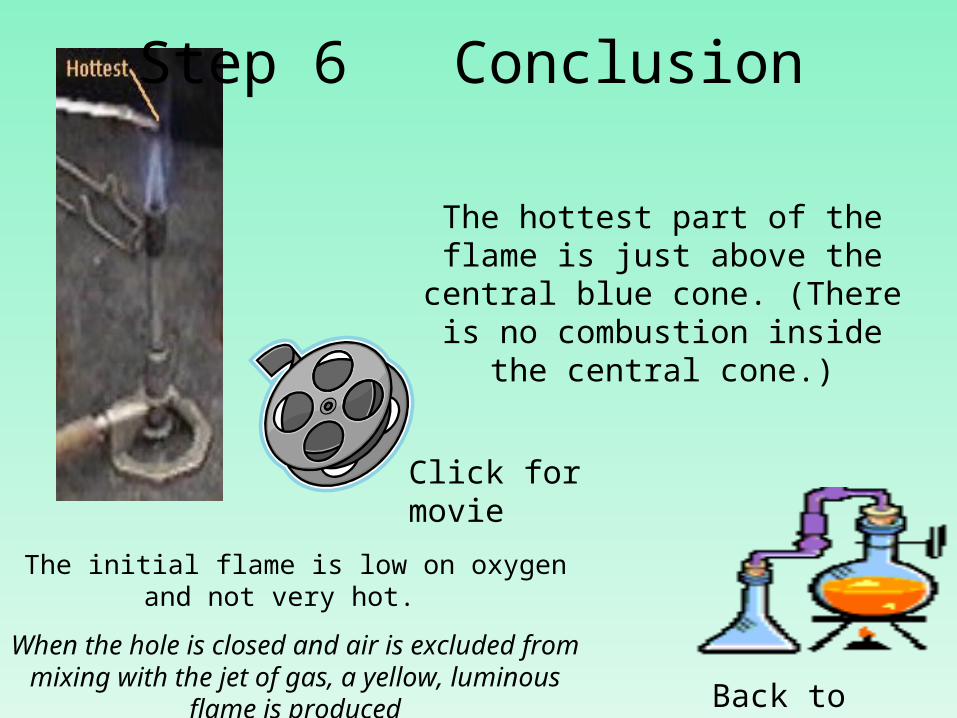
The hottest part of the flame is just above the central blue cone. (There is
no combustion inside the central cone.)
Back to Tutorial
Step 6 Conclusion
The initial flame is low on oxygen and not very hot.
When the hole is closed and air is excluded from mixing with the jet of gas,
a yellow, luminous flame is produced
Click for movie

Back to Tutorial
Step 6 Determining the hottest part of the flame
Click me for some lab
safety tips

Back to Tutorial
Lab Safety
Tip 1: Always tie long hair back, and do not light on fire.
Tip 2: Always turn air valve clockwise to close.

Back to Tutorial
Tip 1
Next Tip

Back to Tutorial
Tip 2
Back to lab safety