8.2 Litre Performance Parts Albuquerque, New Mexico
www.cad500parts.com
‘54-’62 Cadillac Engine Swap, Page 1
This is the basic information for installing a ‘68-’85 Cadillac 472 / 500 / 425 /
368 engine into a 1954, 1955, 1956, 1957, 1958, 1959, 1960, 1961, or 1962 Cadillac
car. This is by no means a comprehensive ‘how-to’, but all of the essential infor-
mation specific to this particular engine swap. This swap is not for the faint of
heart or the inexperienced. While someone of just about any skill level can suc-
cessfully complete this swap, it is not what anyone (even a skilled, experienced hot
-rod builder) would call ‘quick and easy’. On the other hand, if you stick it out and
get it in there, the results are quite rewarding.
⊕ We will start with engine preparation - the stuff you want to do to the engine
while it’s on the stand, before you even remove the old engine from the car.
⊕ It’s a good idea to go ahead and do a full reseal (at least everything ex-
cept for the head gaskets) and a new timing chain set, prior to installing
a used engine in your car. Beats the heck out of fixing leaks, etc. in the
car. Also, if you are going to be changing the cam, do it now. It is not
reasonable to change the cam in the car with this swap.
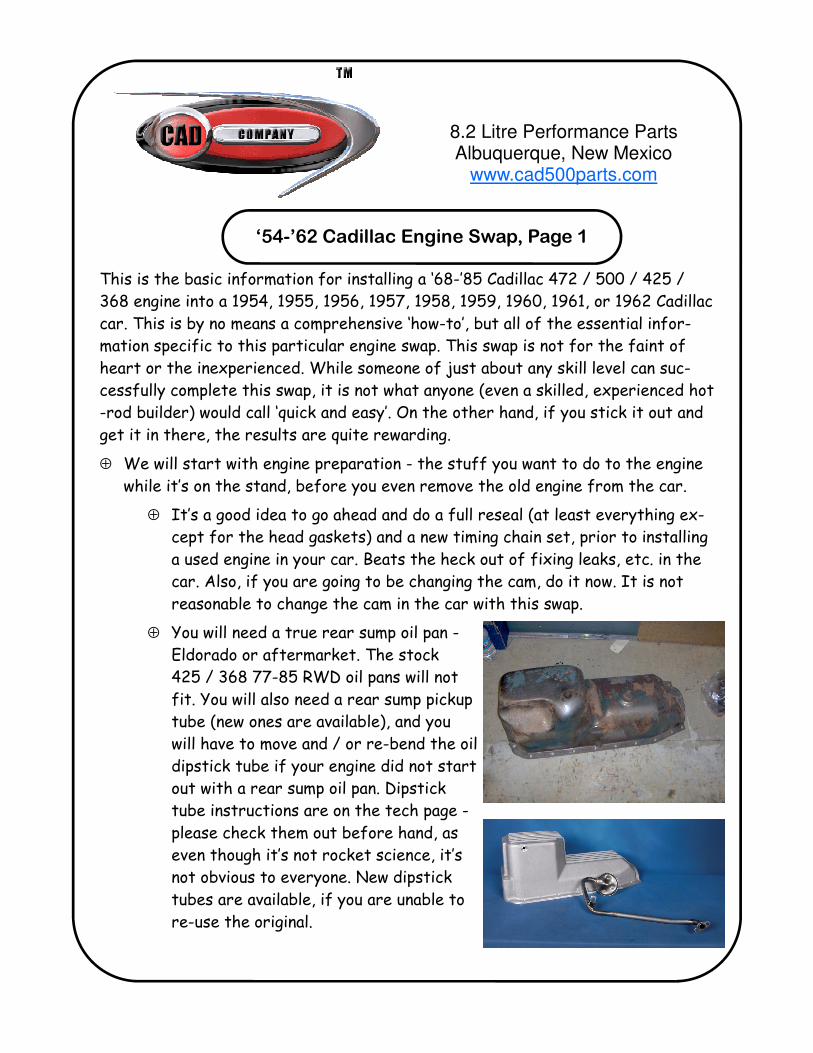
⊕ You will need a true rear sump oil pan -
Eldorado or aftermarket. The stock
425 / 368 77-85 RWD oil pans will not
fit. You will also need a rear sump pickup
tube (new ones are available), and you
will have to move and / or re-bend the oil
dipstick tube if your engine did not start
out with a rear sump oil pan. Dipstick
tube instructions are on the tech page -
please check them out before hand, as
even though it’s not rocket science, it’s
not obvious to everyone. New dipstick
tubes are available, if you are unable to
re-use the original.
8.2 Litre Performance Parts Albuquerque, New Mexico
www.cad500parts.com
‘54-’62 Cadillac Engine Swap, Page 2
⊕ Remove the exhaust manifolds, and extract any bolts you break along
the way.
⊕ Change the oil pump. You will have to pull the distributor out to change
the pump. Technically, you can use the original pump, but in most cases
this results in excessive frame modifications, and people often end up
running a bearing-killing remote oil filter, as well. With our Special Chas-
sis Gold oil pump, the pump body is smaller, requiring substantially less
frame modifications, and will allow you to keep the oil filter mounted di-
rectly to the pump, without any further modification to the frame.
⊕ Set up your transmission mating after pulling the engine off of the
stand, before setting the engine in the car. If you need a transmission
adapter, this is the time to install it. If you need to change the Flex
plate, install a flywheel, pilot bushing, etc., this is the time to do it. If
nothing else, test fit the tranny to the engine, and make sure everything
lines up and goes together nice.
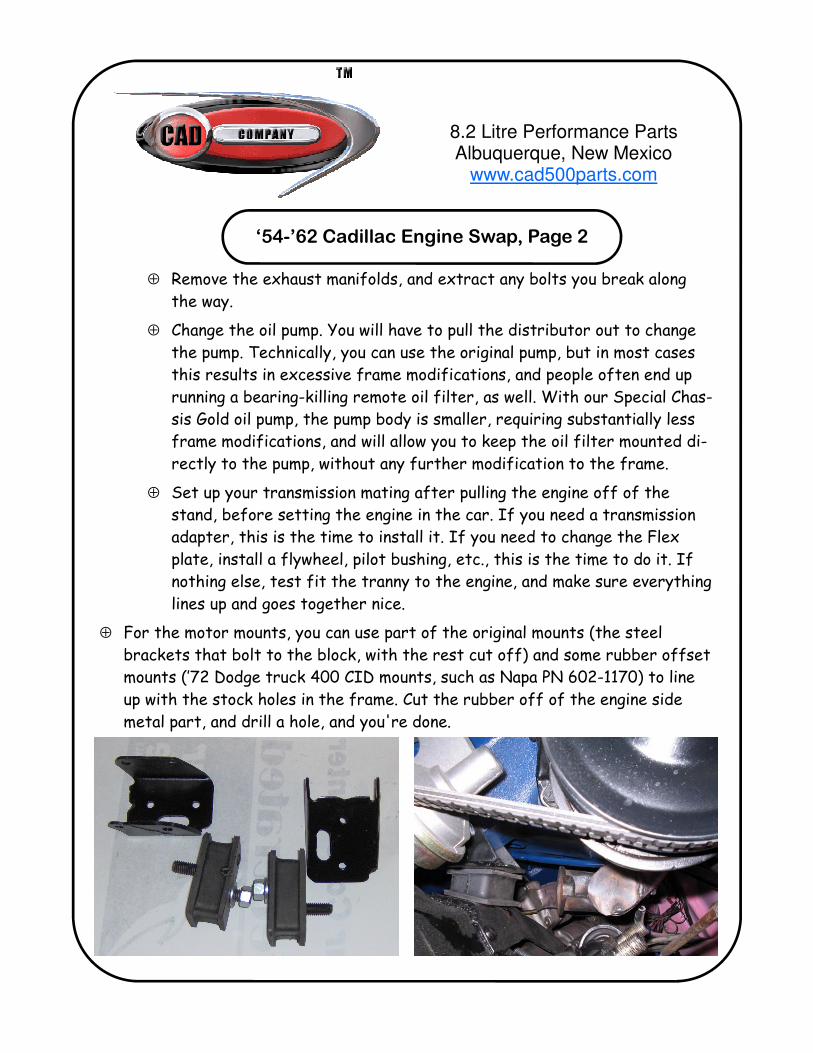
⊕ For the motor mounts, you can use part of the original mounts (the steel
brackets that bolt to the block, with the rest cut off) and some rubber offset
mounts (’72 Dodge truck 400 CID mounts, such as Napa PN 602-1170) to line
up with the stock holes in the frame. Cut the rubber off of the engine side
metal part, and drill a hole, and you're done.
8.2 Litre Performance Parts Albuquerque, New Mexico
www.cad500parts.com
‘54-’62 Cadillac Engine Swap, Page 3
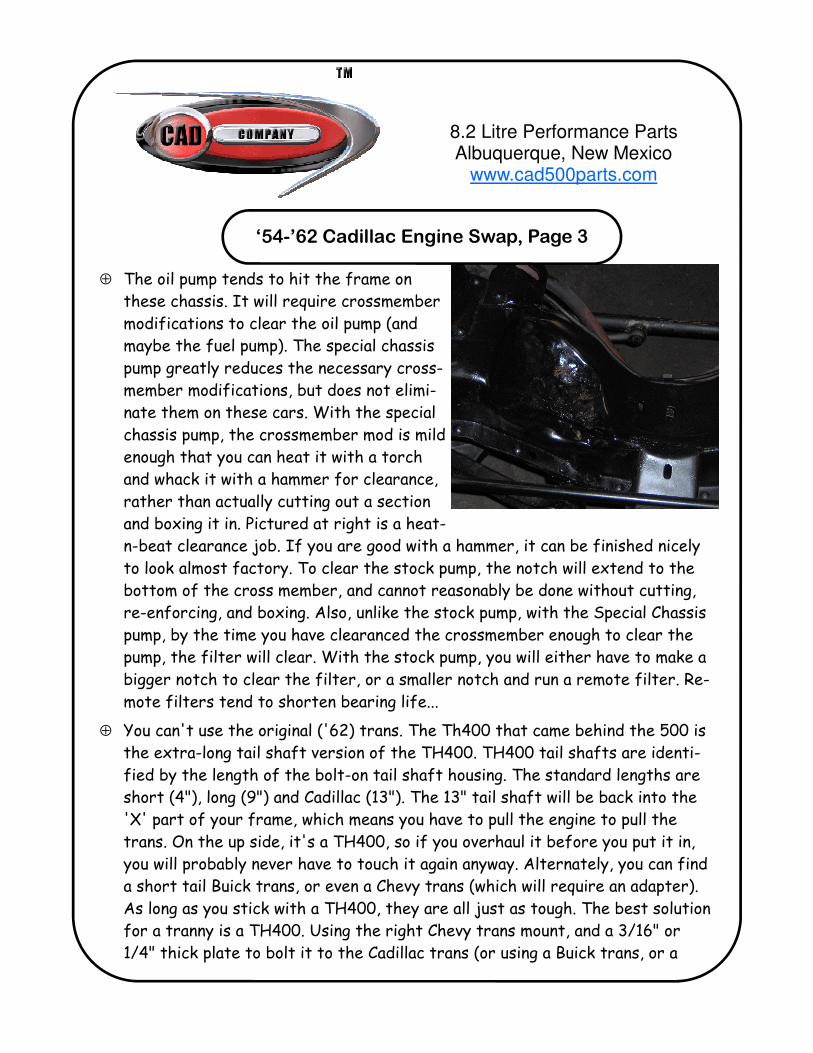
⊕ The oil pump tends to hit the frame on
these chassis. It will require crossmember
modifications to clear the oil pump (and
maybe the fuel pump). The special chassis
pump greatly reduces the necessary cross-
member modifications, but does not elimi-
nate them on these cars. With the special
chassis pump, the crossmember mod is mild
enough that you can heat it with a torch
and whack it with a hammer for clearance,
rather than actually cutting out a section
and boxing it in. Pictured at right is a heat-
n-beat clearance job. If you are good with a hammer, it can be finished nicely
to look almost factory. To clear the stock pump, the notch will extend to the
bottom of the cross member, and cannot reasonably be done without cutting,
re-enforcing, and boxing. Also, unlike the stock pump, with the Special Chassis
pump, by the time you have clearanced the crossmember enough to clear the
pump, the filter will clear. With the stock pump, you will either have to make a
bigger notch to clear the filter, or a smaller notch and run a remote filter. Re-
mote filters tend to shorten bearing life...
⊕ You can't use the original ('62) trans. The Th400 that came behind the 500 is
the extra-long tail shaft version of the TH400. TH400 tail shafts are identi-
fied by the length of the bolt-on tail shaft housing. The standard lengths are
short (4"), long (9") and Cadillac (13"). The 13" tail shaft will be back into the
'X' part of your frame, which means you have to pull the engine to pull the
trans. On the up side, it's a TH400, so if you overhaul it before you put it in,
you will probably never have to touch it again anyway. Alternately, you can find
a short tail Buick trans, or even a Chevy trans (which will require an adapter).
As long as you stick with a TH400, they are all just as tough. The best solution
for a tranny is a TH400. Using the right Chevy trans mount, and a 3/16" or
1/4" thick plate to bolt it to the Cadillac trans (or using a Buick trans, or a
8.2 Litre Performance Parts Albuquerque, New Mexico
www.cad500parts.com
‘54-’62 Cadillac Engine Swap, Page 4
Chevy trans and trans adapter) allows you to leave the trans crossmember rel-
atively un-molested.
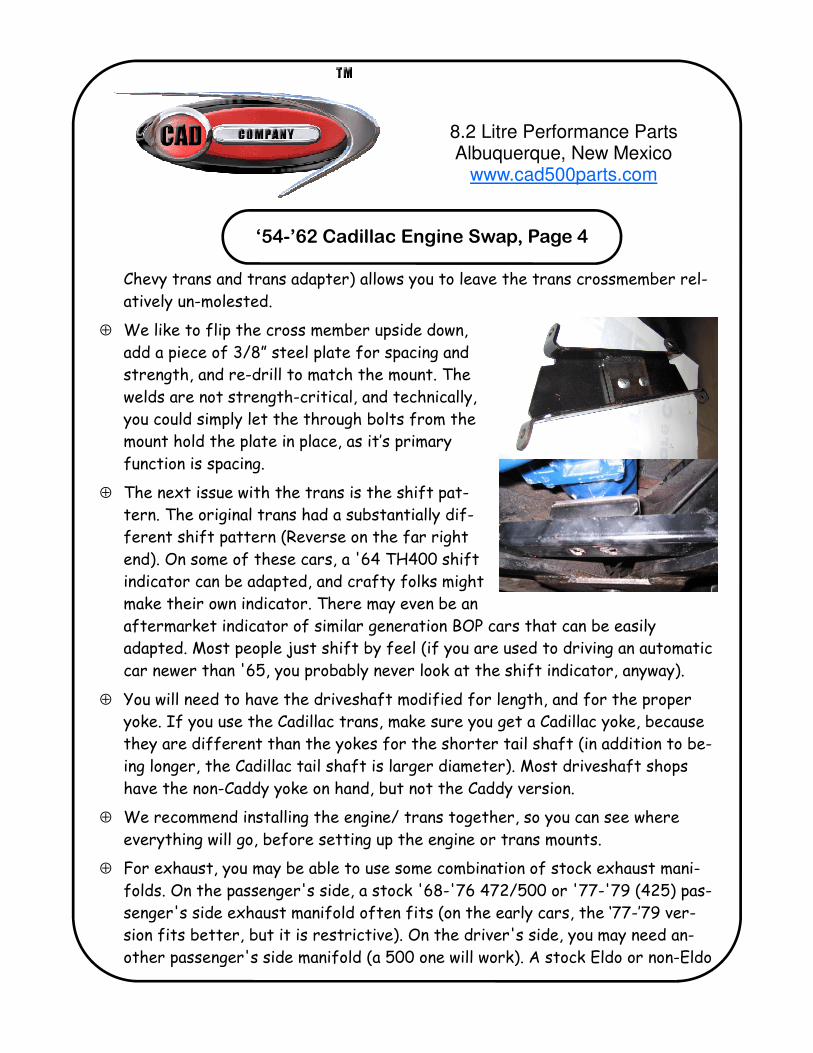
⊕ We like to flip the cross member upside down,
add a piece of 3/8” steel plate for spacing and
strength, and re-drill to match the mount. The
welds are not strength-critical, and technically,
you could simply let the through bolts from the
mount hold the plate in place, as it’s primary
function is spacing.
⊕ The next issue with the trans is the shift pat-
tern. The original trans had a substantially dif-
ferent shift pattern (Reverse on the far right
end). On some of these cars, a '64 TH400 shift
indicator can be adapted, and crafty folks might
make their own indicator. There may even be an
aftermarket indicator of similar generation BOP cars that can be easily
adapted. Most people just shift by feel (if you are used to driving an automatic
car newer than '65, you probably never look at the shift indicator, anyway).
⊕ You will need to have the driveshaft modified for length, and for the proper
yoke. If you use the Cadillac trans, make sure you get a Cadillac yoke, because
they are different than the yokes for the shorter tail shaft (in addition to be-
ing longer, the Cadillac tail shaft is larger diameter). Most driveshaft shops
have the non-Caddy yoke on hand, but not the Caddy version.
⊕ We recommend installing the engine/ trans together, so you can see where
everything will go, before setting up the engine or trans mounts.
⊕ For exhaust, you may be able to use some combination of stock exhaust mani-
folds. On the passenger's side, a stock '68-'76 472/500 or '77-'79 (425) pas-
senger's side exhaust manifold often fits (on the early cars, the ‘77-’79 ver-
sion fits better, but it is restrictive). On the driver's side, you may need an-
other passenger's side manifold (a 500 one will work). A stock Eldo or non-Eldo
8.2 Litre Performance Parts Albuquerque, New Mexico
www.cad500parts.com
‘54-’62 Cadillac Engine Swap, Page 5
driver's side manifold may fit. Or cut up the manifold and weld the collector in
just the right place to make for a really clean install. Headers could be built,
they will have to be custom built in the car. Exhaust fit is dependent on which
brake and steering setup you have. There are variations even within the same
model and year on some of these cars, so there is no standard answer. Also,
many people change the brake and or steering configuration.
⊕ Speaking of steering, the '68-'80s GM power steering pump is close enough in
output pressure, to use without any issues on any '54-newer Caddy. We have
done this, and it works just fine. Note: The high pressure hose to the steering
gearbox may be an oddball fitting (i.e. on the mid 50s cars). You can have a
custom hose made by taking the old late model hose (that fits the pump) and
the old original hose (that fits the gear box), to a shop with the tools to make
a custom hose. Most full service auto repair shops, and any hydraulic shop, can
do it.
⊕ You will most likely not have room for a mechanical fan. You may have to move
the radiator forward just to clear the pulleys. As much as I dislike electric
fans, on these cars, an electric pusher fan on the front of the radiator is the
easy solution. Don't forget to add a fitting in the radiator for the heater core
return (preferably on the driver's side, same radiator tank as the lower radia-
tor hose).
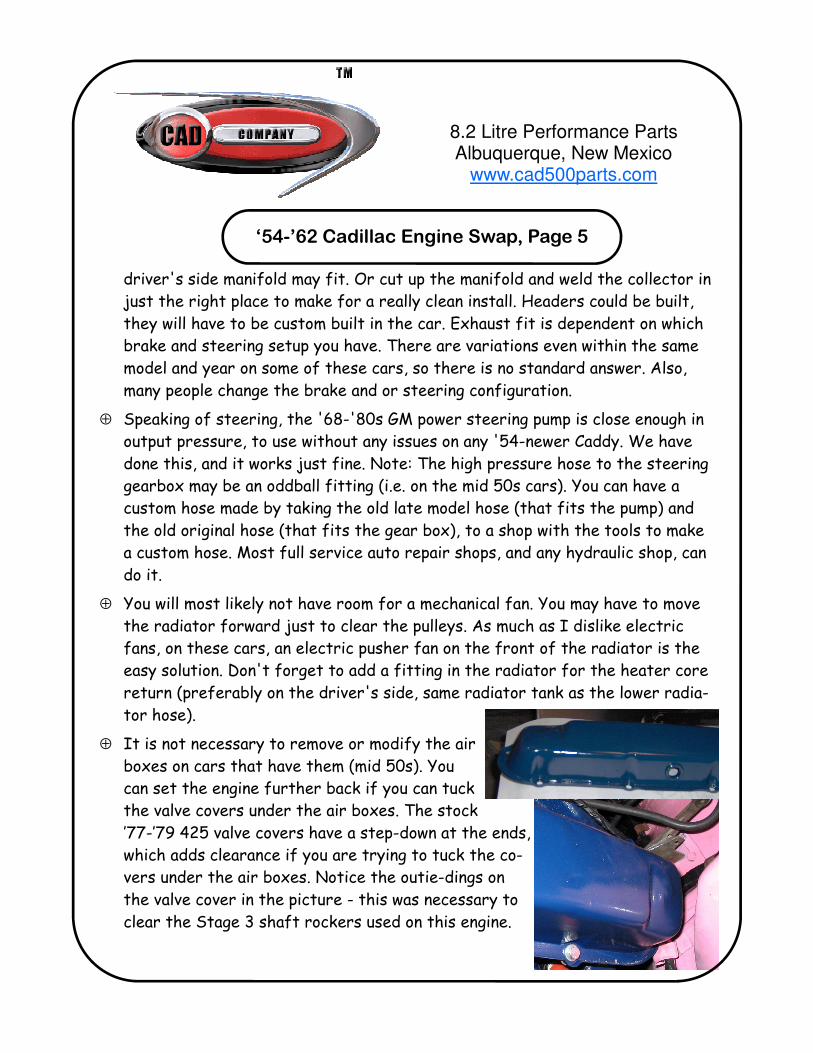
⊕ It is not necessary to remove or modify the air
boxes on cars that have them (mid 50s). You
can set the engine further back if you can tuck
the valve covers under the air boxes. The stock
’77-’79 425 valve covers have a step-down at the ends,
which adds clearance if you are trying to tuck the co-
vers under the air boxes. Notice the outie-dings on
the valve cover in the picture - this was necessary to
clear the Stage 3 shaft rockers used on this engine.
8.2 Litre Performance Parts Albuquerque, New Mexico
www.cad500parts.com
‘54-’62 Cadillac Engine Swap, Page 6
⊕ It is also not necessary to modify the fire wall. However, adding a little clear-
ance there, can solve the whole radiator / fan headache. Some folks switch to
a short (up and down height) cross flow radiator, and push it quite a ways for-
ward, to run a mechanical fan. This is quite a bit of work (you are getting into
messing with the support bracket for the hood latch, among other things), but
it makes for a really clean install with a good old reliable mechanical fan. The
later the car, the more room you have to work with without getting into the
hood latch.
⊕ On most of these cars, you'll need a bell-crank for the throttle (if you use the
stock throttle linkage) because the stock throttle linkage goes the wrong di-
rection. We stock them, if you can’t find one at your local auto parts store. If
you use an aftermarket intake and carb (though we don't generally recommend
aftermarket carbs for street engines), or an aftermarket intake and a Q-jet
with a Chevy style linkage, you can hook the throttle linkage to the arm hanging
below the throttle shaft (intended for the kick down cable for a light duty
tranny). You can't use a carb with that on a stock intake, because it won't
clear (you can use the carb, but you have to cut off the arm)
⊕ The wiring can get a little tricky. If your car has gauges, you will have to
change the sending units out for the right ones. And, of course, they are in
different places on the engine. The distributor will have to be re-wired, as
well, as it is moving to the front.
⊕ If you get an electronic distributor, you will have to bypass the resistor that
drops the 'key on' voltage (sometimes a resistor wire in the harness, which
means re-wiring all the way back to the switch). There is info on handling this
on the tech page of our website.
⊕ If you use an early alternator, such as for a '68, and the external regulator
that goes with it, it will bolt to the stock 472/500/425/368 and be easy to
wire into the old VR wires. You will also need a ‘62-’69 voltage regulator for an
alternator. Later engines had internal regulators (wiring these into an early car
is not too bad - there is a diagram on our tech page). We also carry 1 wire high

8.2 Litre Performance Parts Albuquerque, New Mexico
www.cad500parts.com
‘54-’62 Cadillac Engine Swap, Page 7
output alternators from in various output ranges, in both chrome and polished.
With a 1-wire alternator, you just run the single wire back to the battery +,
and remove all of the original generator and VR wiring. However, I don't rec-
ommend it. One wire alternators can sometimes quit charging in heavy traffic,
with no warning. I recommend wiring up the 3 wire alternator setup one way or
another. The one-wire alternators have a rubber plug that can be removed, so
you can wire them as a 3-wire alternator.
⊕ The rest of this swap is fairly basic - plumbing, cleanup, etc.. On the earlier
cars, coolant plumbing is more complex, But it’s not too hard to work out - the
supply hose hooks to the engine (either the back of the passenger’s side head
or the block, just below the thermostat). On most of these cars, we end up us-
ing the location on the block - if it was not drilled from the factory on your en-
gine, it is not difficult to drill and tap. The return from the heater core(s)
goes to the radiator (the bung I mentioned adding to earlier).
⊕ If you spend time on the details, this swap comes out really nice, and leaves
you with a much more powerful and lower maintenance car. It is a very time
consuming swap to do nicely, but if you have the skills and the time, it can be
made show-quality without the use of any special tools aside from a torch for
the cross member mod. As you progress through the swap, and the time invest-
ed is stacking up, you may be tempted to rush through to get it drivable, but if
you resist the urge, and do a nice job, you will be much happier with the end
result.
⊕ Feel free to call or e-mail for advice if you run into anything you are unsure of
during the swap. We are always happy to lend a second opinion from the stand-
point of experience. E-mailing with pictures is often the best way to go - a pic-
ture is worth 1000 words.
⊕ Most of all, remember to have fun - if you look at the swap as part of the jour-
ney, and not just a means to an end, it will be much less stressful, and can be
quite enjoyable.