GDS500A GDS500A Installation of ver. 1.71 GDS500A Software Using Win 7 Operating System M.Poirier 10-25-10

Win 7 NiDaq GDS500A Install (3)
Dec 13, 2015
Win 7 NiDaq GDS500A install (
Welcome message from author
This document is posted to help you gain knowledge. Please leave a comment to let me know what you think about it! Share it to your friends and learn new things together.
Transcript

GDS500AGDS500A
Installation of ver. 1.71 GDS500A Software
Using Win 7 Operating System
M.Poirier
10-25-10
Ver. 1.71 GDS500A software Installation requires NIDAQ MX 9.0 (NIDAQ 900f2.exe file)

Installation of ver. 1.71 GDS500A Software using Win 7 operating system
Install NiDaq software-
Load the Ni Daq CD or .exe file
Double click to select Files Currently on the Disc
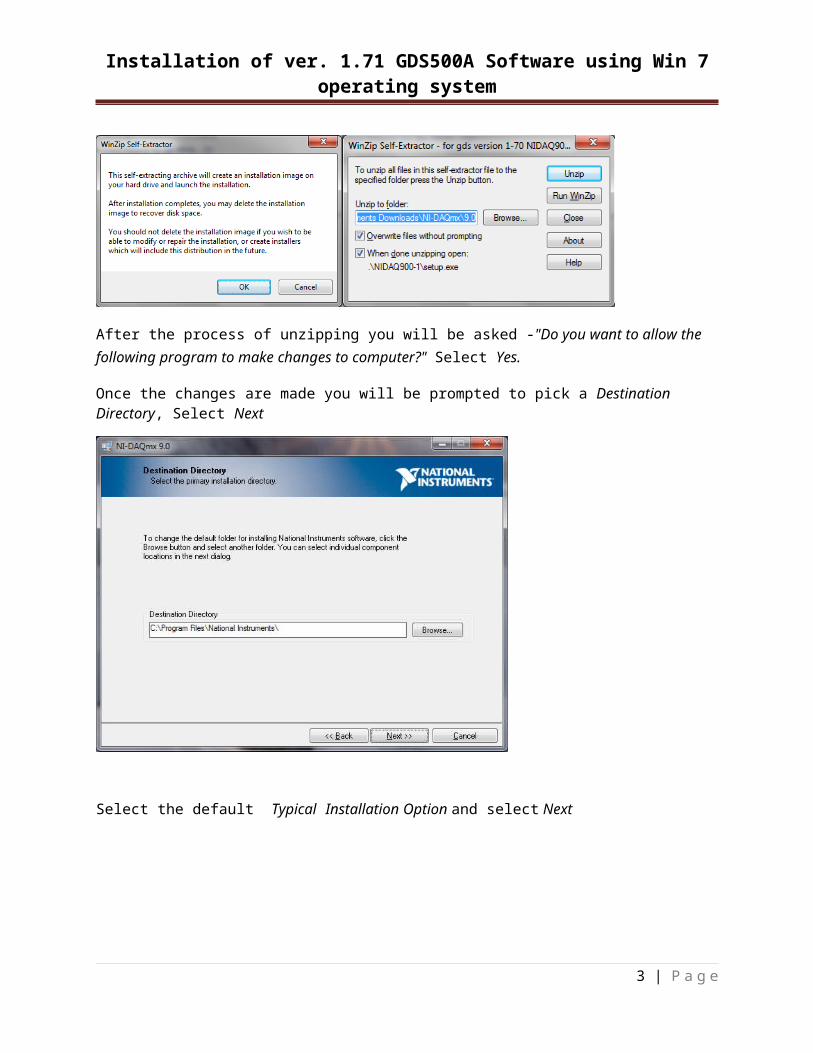
The software maybe compressed. Select Ok and Unzip
After the process of unzipping you will be asked -"Do you want to allow the following program to make changes to computer?" Select Yes.
Once the changes are made you will be prompted to pick a Destination Directory, Select Next
2 | P a g e
Installation of ver. 1.71 GDS500A Software using Win 7 operating system
Select the default Typical Installation Option and select Next
Uncheck the Product Notifications tab and select Next
3 | P a g e

Installation of ver. 1.71 GDS500A Software using Win 7 operating system
Select ”I accept the License Agreement” and select Next
Select “I accept the above 3 License Agreement(s)” and select Next
4 | P a g e

Installation of ver. 1.71 GDS500A Software using Win 7 operating system
Select Next to start the actual installation
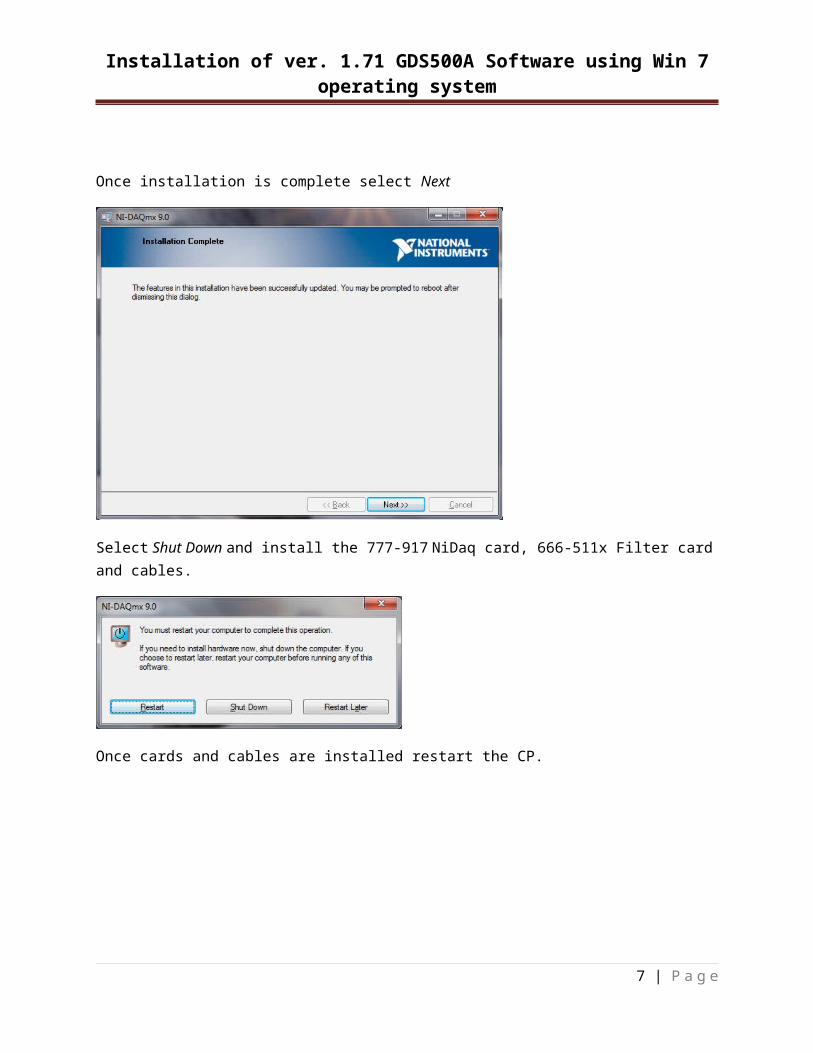
Once installation is complete select Next
5 | P a g e

Installation of ver. 1.71 GDS500A Software using Win 7 operating system
Select Shut Down and install the 777-917 NiDaq card, 666-511x Filter card and cables.
Once cards and cables are installed restart the CP.
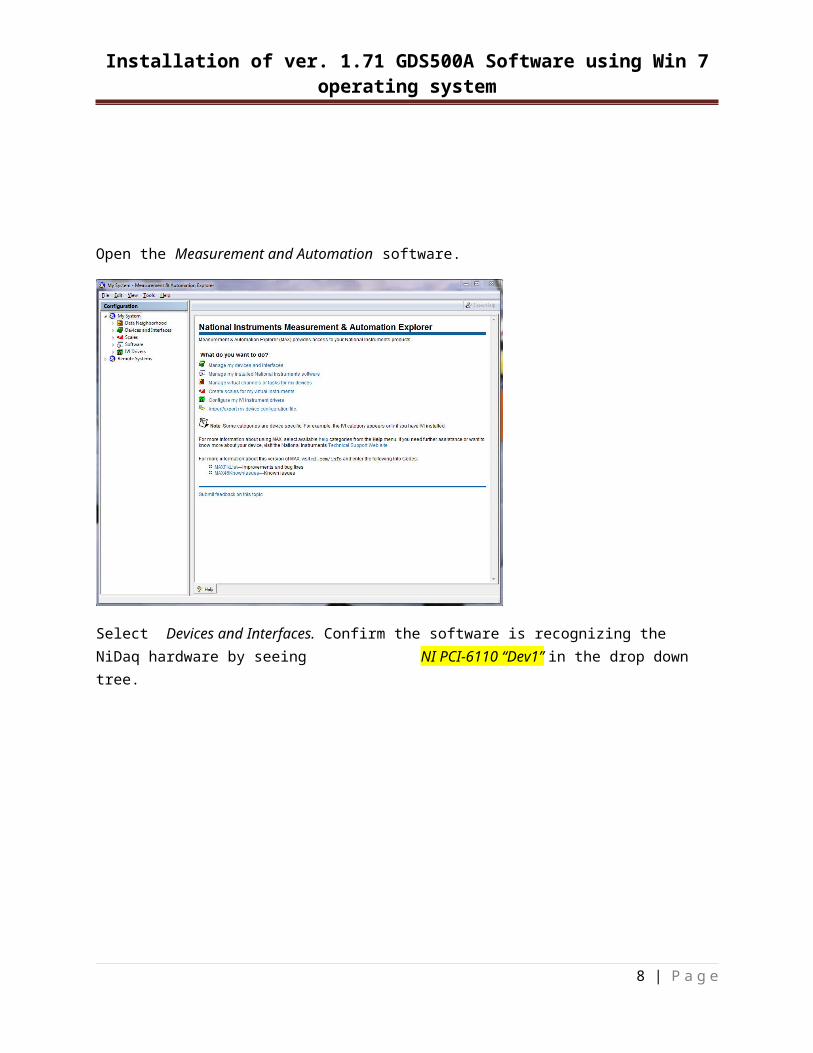
Open the Measurement and Automation software.
6 | P a g e
Installation of ver. 1.71 GDS500A Software using Win 7 operating system
Select Devices and Interfaces. Confirm the software is recognizing the NiDaq hardware by seeing NI PCI-6110 “Dev1” in the drop down tree.
7 | P a g e
Installation of ver. 1.71 GDS500A Software using Win 7 operating system
Select by double clicking on NI PCI-6110 “Dev1” to reveal the test options.
Select Test Panels
8 | P a g e

Installation of ver. 1.71 GDS500A Software using Win 7 operating system
Use the drop down menu, Channel Name to select the proper channels to be tested
Channel 1 = Dev1/ai0 Channel 2 = Dev1/ai1
Channel 3 = Dev1/ai2 Channel 4 = Dev/ai3
Select Start to enable test.
Voltages for each Channel should be approx. 1.7 to 1.9 Volts
9 | P a g e

Installation of ver. 1.71 GDS500A Software using Win 7 operating system
Once the voltages are confirmed for all 4 Channels, exit the Measurement and Automation software
and install the GDS500A version 1.70+ software.
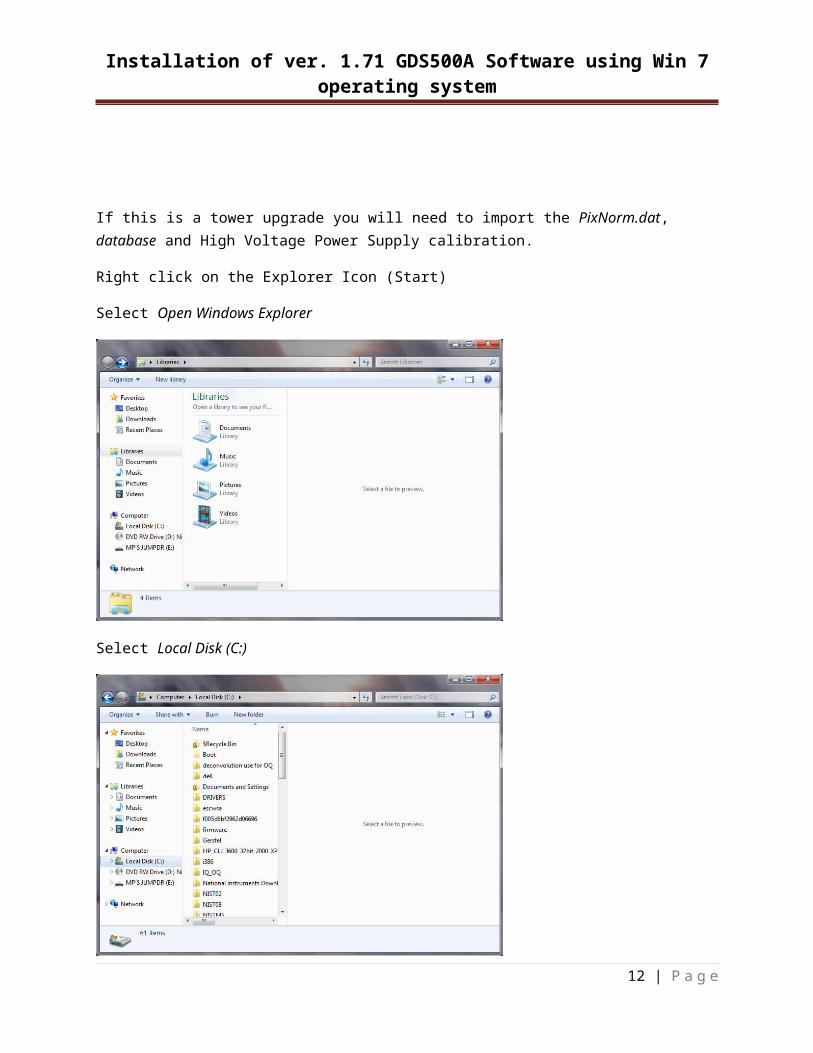
If this is a tower upgrade you will need to import the PixNorm.dat, database and High Voltage Power Supply calibration.
Right click on the Explorer Icon (Start)
Select Open Windows Explorer
10 | P a g e

Installation of ver. 1.71 GDS500A Software using Win 7 operating system
Select Local Disk (C:)
Select Users
11 | P a g e
Installation of ver. 1.71 GDS500A Software using Win 7 operating system
Select All Users
Note- You may have to enable Folder options to Show Hidden Folders and Drives
Select LECO
12 | P a g e

Installation of ver. 1.71 GDS500A Software using Win 7 operating system
Select GDS500A
Import PixNorm.dat and High Voltage Power Supply calibration (Settings.xml) into the GDS500A folder.
13 | P a g e

Installation of ver. 1.71 GDS500A Software using Win 7 operating system
-On new installs the High Voltage Calibration is not held in the registry and the settings may need to be manually transposed to the Settings.xml file.
-On software upgrades from earlier versions than 1.70, the settings are transferred automatically from the registry to the Settings.xml file in the GDS500A folder.
To edit this file, right click on the Settings.xml icon and open with NotePad to add the needed calibration values.
Note- There may or may not have control rates and proportional gain settings in your Settings.xml file.
Disregard these settings and just add your voltage settings to the highlighted area with the proper spacing.
Once editing is complete on the Settings.xml file Select File and select Save.
14 | P a g e

Installation of ver. 1.71 GDS500A Software using Win 7 operating system
In the GDS500A folder select Databases
Inside the Databases folder is the location to place your current database. It must be named Database to be recognized.
Once installed close all software and re-open the GDS500A software to confirm proper operation.
15 | P a g e
Related Documents
![重点研究 難加工材のオイルレス旋削加工の開発NIDAQ Devl/aiO NIDAQ Devl/ail 2000 al 000 ty-current=4524.05] -36700 NIDAQ Devl/ai2 -36473[frame] O[ind ex] -36100 Third](https://static.cupdf.com/doc/110x72/60d4b6695b21b97b854c978b/eccc-effec-nidaq-devlaio.jpg)

![621 Mx Install Bea814 Win [RexonaVn.com]](https://static.cupdf.com/doc/110x72/577d1d0f1a28ab4e1e8b86b0/621-mx-install-bea814-win-rexonavncom.jpg)