Unit of Study: Small Moments that Matter – Personal Narrative 1Cypress-Fairbanks Independent School District Elementary Language Arts Department, Grades 2, 3, & 4 Updated June 2012 with Crunchtime Strategies for STAAR

Welcome message from author
This document is posted to help you gain knowledge. Please leave a comment to let me know what you think about it! Share it to your friends and learn new things together.
Transcript

Unit of Study: Small Moments that Matter –
Personal Narrative
1Cypress-Fairbanks Independent School District Elementary Language Arts Department, Grades 2, 3, & 4
Updated June 2012 with Crunchtime Strategies for STAAR
Cy-Fair ISD Curriculum Department Small Moments that Matter – Personal Narrative DRAFT – June 2012 Writing Unit of Study
ii
Small Moments that Matter – Personal Narrative
TABLE OF CONTENTS
Preface Purpose of this Document ..................................................................................................................... iv The Role of Read Aloud in the Personal Narrative Genre Study......................................................v Personal Narrative Mentor Texts ...........................................................................................................v Writing Homework ..................................................................................................................................v A Note about Writing Process Boards...................................................................................................v Format of the Lessons ............................................................................................................................ vi The Framework of the Personal Narrative Unit of Study (Phases)................................................ vii A Discussion of the Personal Narrative Genre.................................................................................. vii When a Student Says, “I Have Nothing to Write About” .............................................................. viii Anchor Charts ....................................................................................................................................... viii Lessons Included in the Unit of Study .................................................................................................ix
Minilessons
Setting the Stage: Introduction to Personal Narrative Writing..........................................................1 Thinking About the Elements of Narrative Stories .............................................................................2 Reading Mentor Texts Through the Eyes of a Writer .........................................................................3 Rereading the Notebook: Exploring the Idea of Small Moment Writing.........................................4 Generating Ideas through the Quicklist ................................................................................................5 Weaving Experience and Beliefs Together to Create Thoughtful, Engaging Writing....................6 Photographs: The Story Behind the Picture..........................................................................................7 Fabric of Depth: Retrieving Memories through Associations............................................................8 Reflecting on My Levels of Personal Experience .................................................................................9 Getting Acquainted with Truisms Using Picture Prompts ..............................................................10 Investigating Text Organizational Structures Found in Narrative Writing ..................................11 Writing a Kernel Essay with Text Structures......................................................................................12 Getting Right to the Story You Have to Tell.......................................................................................13 Telling the Story and Asking the Questions.......................................................................................14 Hooking Readers with Effective Leads ...............................................................................................15

Cy-Fair ISD Curriculum Department Small Moments that Matter – Personal Narrative DRAFT – June 2012 Writing Unit of Study
iii
Great Beginnings: Draw a Picture........................................................................................................16 Reeling Readers in with Satisfying Endings.......................................................................................17 Getting Our Writing F.I.T. .....................................................................................................................18 Adding Revision “Bling” with Sensory Details .................................................................................19 Exploding the Moment ..........................................................................................................................20 The Golden Line: Crafting Sparkling Sentences ...............................................................................21 Strengthening Leads and Endings with Truisms ..............................................................................22 Ba-da-bing Sentences .............................................................................................................................23 Introduction to Punctuation Dialogue ................................................................................................24 Using an Editing Checklist....................................................................................................................25 Publishing Decisions: Preparing the Final Copy for an Audience..................................................26 Celebrate and Reflect on Good Times .................................................................................................27

Cy-Fair ISD Curriculum Department Small Moments that Matter – Personal Narrative DRAFT – June 2012 Writing Unit of Study
iv
PREFACE
PURPOSE OF THIS DOCUMENT The Personal Narrative Unit of Study serves as a resource to help develop students’ awareness, understanding, and proficiency in writing about everyday life topics in a highly personal way. This unit of study provides a rich connection between what we read and what we write. The more students read, analyze, and discuss personal narratives before they write them, the better their writing will be. Within this unit, students will learn the unique strategies associated with crafting narrative texts by investigating a variety of exemplars, including teacher models, peer models, and published works. For this reason, teachers will need samples from their own writing notebooks as well as a number of narrative texts, including picture books, to teach this genre study (See Appendices). The Personal Narrative Unit of Study emphasizes the idea that learning to write is a cumulative process and that any new work that writers do will always stand on the shoulders of previous work. Hence, students will spend time revisiting existing entries in their notebooks as well as spending time developing new strategies for writing. The teacher launches the unit of study by celebrating narrative texts and raising the students’ expectations for what it means to write powerful personal narratives. The teacher and students spend time getting better acquainted with personal narrative writing by studying mentor texts. They make notes of things they notice about the ways that the texts are written. They think about the processes that writers use to craft narrative texts. As students begin collecting ideas for their own narrative writing, they are encouraged to draw upon familiar strategies for collecting ideas as well as apply newly acquired strategies that they have learned. After choosing a topic, students will write under the influence of the genre, writing in a way that meaningfully reflects their learning within this genre study. In the end, the students should feel an increased sense of accomplishment and understand that their writing identities are further developed through the stories that they hear and construct. While this publication is meant to be a resource for teachers that are implementing writing workshop, it can certainly be adapted to meet the unique needs of students from year to year and grade to grade. This document is meant to spark conversations about the order in which mini-lessons related to the personal narrative genre are presented to students and what those mini-lessons might look like in the context of the classroom.

Cy-Fair ISD Curriculum Department Small Moments that Matter – Personal Narrative DRAFT – June 2012 Writing Unit of Study
v
THE ROLE OF READ ALOUD IN THE PERSONAL NARRATIVE GENRE STUDY Often, young writers view personal narratives as bed-to-bed stories that begin when the writer awakes and ends when they fall asleep (Serafini, 2006). Students need to hear numerous examples of narratives texts being read aloud in order to become familiar to the nuances and unique characteristics of this genre. When beginning the study of personal narratives, it is important that you select engaging, focused, prototypical examples of first-person narrative texts in order to establish a working definition of the genre. First-person narrative picture books, short stories, and excerpts featuring a slice-of-life story line typically work best when introducing the genre. Ideally, the texts chosen would represent the personal narrative genre; however, when such texts are unavailable, teachers may occasionally choose a fictional story to share with the students, explaining that although the text is really fiction, it is written as a narrative and can therefore demonstrate the narrative craft. Teachers are strongly encouraged to share narrative texts in both reading and writing minilessons to facilitate seamless integration and repeated exposure to the genre. PERSONAL NARRATIVE MENTOR TEXTS An electronic copy of a mentor text for each grade level has been provided as a resource for teachers to use throughout the unit of study. Teachers may use texts featured in previous grade levels, but they are asked to reserve the mentor texts for the grade levels designated below.
Grade 2 – “Eating the World” by Ralph Fletch Grade 3 – “Car Trip” by Jon Scieszka Grade 4 – “Eleven” by Sandra Cisneros
WRITING HOMEWORK Several mini-lessons in this unit refer to writing homework and suggest that students collect ideas in their writing notebook. Homework policies should be discussed at the campus and agreed upon during team planning sessions. Homework policies should be consistent with those established during the first six-weeks. A NOTE ABOUT WRITING PROCESS BOARDS Some teachers opt to have a writing process board in their classroom, such as the one depicted on page 78 of Guiding Readers & Writers by Fountas & Pinnell. Please note that during this unit of study, students will move through the project stages at different paces and would move their name to the appropriate stage on the chart throughout the unit.

Cy-Fair ISD Curriculum Department Small Moments that Matter – Personal Narrative DRAFT – June 2012 Writing Unit of Study
vi
FORMAT OF THE LESSONS Lessons in this unit are written using the format recommended by Lucy Calkins and other teacher researchers working at Teacher’s College at Columbia University. More detailed information about the format of the mini-lesson can be found in Chapter 5 of The Art of Teaching Reading. Below, however, is a short checklist which describes the amount of time spent in each part of the mini-lesson, as well as a brief description of what should be happening during each portion.
The Steps in a Mini-lesson Connect: 1-2 minutes Teaching: 5-6 minutes
Active Engagement: 2-3 minutes Link: 1-2 minutes
Connect ___ I connected today's work with our ongoing work. ___ I explicitly stated my teaching point. Teach ___ I restated my teaching point. ___ I told a personal or class story connected to the teaching point. ___ I demonstrated by thinking aloud. ___ I pointed out things students should have noticed. Active Involvement ___ I asked students to be actively involved by turning and talking. ___ I listened / observed / coached their active involvement. ___ I shared an example of what I heard / observed. Link ___ I restated the teaching point. ___ I told students how what I had taught can be used in the future.
Cy-Fair ISD Curriculum Department Small Moments that Matter – Personal Narrative DRAFT – June 2012 Writing Unit of Study
vii
THE FRAMEWORK OF THE PERSONAL NARRATIVE UNIT OF STUDY (PHASES) This unit of study conforms to stages in the writing process detailed in Katie Wood Ray’s book, The Writing Workshop: Working Through the Hard Parts (And They’re All Hard Parts) and Katherine Bomer’s Writing a Life. Phase 1: Immersion - Students will be immersed in the genre of personal narrative writing. Students will explore attributes and qualities of the genre by investigating mentor texts (picture books and excerpts from book-length memoirs and personal narratives). In this phase, students will spend an extensive portion of time reading texts and gathering ideas for writing during their independent writing block. While teachers will naturally want to make examples of personal narrative and memoir writing available to students at the beginning of the unit of study, it is important for the class to read and explore model texts throughout the course of the entire unit of study. Phase 2: Writing in a Writer’s Notebook/Generating - Students will begin generating ideas for personal narrative writing inside of their writer’s notebook in the form of lists, sketches, bits of remembered dialogue, description, events, episodes, and images. It is important that writers see this phase as a risk-free opportunity to think on the page without being bound to rules, structures, and consequences. Phase 3: Project Planning - Students will have the opportunity to reread entries from their writer’s notebook, looking for seed ideas that can be developed into focused personal narratives. Students will examine their ideas with a discerning eye, and will self-select topics for writing. Students may look for patterns and themes that are evident throughout their notebook. During this phase, students will also begin to envision how they want to organize their personal narratives and plan accordingly. Students will spend time in their notebooks making informal timelines, storyboards, or diagrams in preparation for drafting their personal narrative. These tools should be viewed only as temporary planning guides. Students should be aware that the organization may likely change during the revision process. Phase 4: Drafting and Revising - Students will begin a first draft using materials collected during phase three. Throughout the drafting and revising phase, the teacher will reveal author’s craft techniques and revision strategies through the mini-lessons. As students continue to draft their personal narratives, they will apply techniques and strategies to rework the structure, develop characters/scenes (as appropriate), and rearrange/delete portions of the text to create new versions of a draft. They will share their revised version with classmates and the teacher, getting feedback on what works and what needs fine-tuning.

Cy-Fair ISD Curriculum Department Small Moments that Matter – Personal Narrative DRAFT – June 2012 Writing Unit of Study
viii
Phase 5: Editing, Publishing, and Celebrating - Students will reread their final drafts, adding, changing, and fixing the surface features such as capitalization, punctuation, spelling, and grammar. A final, corrected copy might be typed or handwritten, illustrated or bound. Students will read their published personal narrative to an audience, pass it along in some printed form, or make their story public in some fashion.
A DISCUSSION OF THE PERSONAL NARRATIVE GENRE Many people use the terms memoir and personal narrative interchangeably and confuse both with realistic fiction. Here are some working definitions of each genre: Personal Narratives are chronological stories about one’s life. They often contain characters, a
plot, and a setting. The author usually hails as the central character. The plot usually involves a problem that is solved, a tension that is resolved, or a significant change.
In memoirs, authors try to say something important about themselves. Memoirs often contain
one or more personal narratives, structured as lists rather than stories, and linked by some common thread or theme. For example a memoirist may share several vignettes from their life and state, “My love of music made me who I am today.” Memoirs always contain an element of reflection.
Realistic fiction contains the elements of story. Certain elements of the text may or may not
be true; either way, it unfolds as continuous events. The reader enters the world of the story, experiencing it as it happens.
It is not easy to locate published examples of personal narratives written for children. Quite often by the time a personal narrative reaches the printing press, the author has usually developed it into a fictional story or a memoir. Because of the limited number of examples of published personal narrative texts for children, this unit of study will incorporate the use of fictional stories and memoirs as mentor texts as well as published personal narrative texts.
(Adapted from Calkins,L. & Oxenhorn, A. (2003). Small Moments: Personal Narrative Writing. Portsmouth, NH: Firsthand Heinemann)

Cy-Fair ISD Curriculum Department Small Moments that Matter – Personal Narrative DRAFT – June 2012 Writing Unit of Study
ix
WHEN A STUDENT SAYS, “I HAVE NOTHING TO WRITE ABOUT” Many teachers wonder what they might do for a student who says he/she has no memories or can’t remember the details of what he/she is attempting to write. Here are several ideas for how to address this issue:
1. Trust the process. If we fill our classrooms with model texts, conversations, storytelling, and with at least one week of generating activities, most if not all, students will have something to write about. The power of a safe, stimulating writing community is usually enough to open up even the most reluctant writer.
2. Confer. In writing conferences, we can talk more personally with individual students to
find out more about their particular barriers to writing. For some, the barrier might be emotional. For these students, a gentle reminder that they need not write about anything that feels unsafe should be enough to get them started. Other students might need validation, the reassurance that their ordinary or obscure topics can be used to develop a personal narrative.
3. Accept what the writers are able to do for now. Some students cannot or will not put their inner
lives on the page. They may avoid writing about intense feelings of inferiority. They may be fearful of disclosing difficult home issues. There is no final publication, grade, or promotion worth causing a student to feel horrible about themselves or terrible about writing. We should never force a student to go to a place inside of themselves that they are not ready to meet.
ANCHOR CHARTS Anchor charts are living, breathing, organic documents that are co-constructed with your students. The anchor charts capture student learning and can be revisited continuously throughout the year. The items recorded on the class anchor chart should be based upon the lessons that you teach. You will guide the development of these charts using language of the students to highlight key concepts and strategies. Sample anchor charts have been provided to help you think about some of the attributes, categories, and topics that could be recorded. These sample charts are intended to serve as a teacher reference.
(Adapted from Bomer, K. (2005). Writing a Life. Portsmouth, NH: Firsthand Heinemann)

Cy-Fair ISD Curriculum Department Small Moments that Matter – Personal Narrative DRAFT – June 2012 Writing Unit of Study
x
LESSONS INCLUDED IN THE UNIT OF STUDY The revised personal narrative unit integrates strategies from Gretchen Bernabei’s Crunchtime: Lessons to Help Students Blow the Roof Off Writing Tests--and Become Better Writers in the Process. After analyzing the grade level expectations, district curriculum, and student needs, teachers should select specific minilessons to customize for their students. The mini-lessons are based upon the grade-level expectations found in the English Language Arts and Reading TEKS objectives. A possible teaching sequence is shown below. Fourth grade teachers are encouraged to spend additional days on personal narrative writing to strengthen students’ skill in moving towards writing to a personal narrative prompt for STAAR.
Day 1 Day 2 Day 3 Day 4 Day 5 Genre Attributes
Ex: Intro to Personal Narrative Writing
Generating Ideas Ex: Choosing a Small Moment
Generating Ideas Ex: Quicklist
Generating Ideas Ex: Story Behind
the Picture
Generating Ideas Ex: Fabric of Depth
Day 6 Day 7 Day 8 Day 9 Day 10 Selecting a topic
Ex: Levels of Personal Experiences
Organizational Structure
Ex: Kernel Essay
Drafting Ex: Oral Story
Telling
Revision Strategy Ex: Leads
Revision Strategy Ex: F.I.T Chart
Day 11 Day 12 Day 13 Day 14 Day 15 Revision Strategy
Ex: Exploding a Moment
Revision Strategy Ex: Listing Events
without Detail
Revision Strategy Ex: Where’s the
Beef?
Revision Strategy Ex: Ba-da-bing
Sentences
Revision Strategy Ex: Endings
Day 16 Day 17 Day 18 Day 19 Day 20 Editing Strategy
Ex: Using a Checklist
Editing Strategy Ex: Commas
Publishing Publishing Celebration
Cy-Fair ISD Curriculum Department Small Moments that Matter – Personal Narrative DRAFT – June 2012 Writing Unit of Study
xi
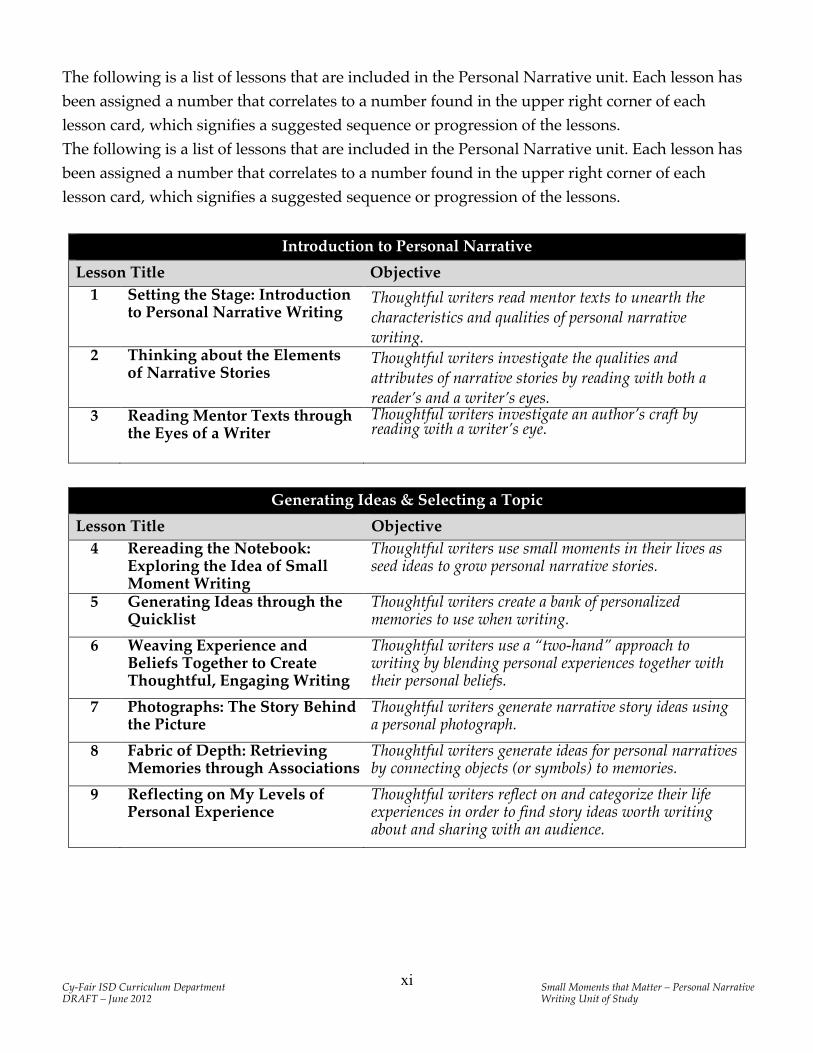
The following is a list of lessons that are included in the Personal Narrative unit. Each lesson has been assigned a number that correlates to a number found in the upper right corner of each lesson card, which signifies a suggested sequence or progression of the lessons. The following is a list of lessons that are included in the Personal Narrative unit. Each lesson has been assigned a number that correlates to a number found in the upper right corner of each lesson card, which signifies a suggested sequence or progression of the lessons.
Introduction to Personal Narrative Lesson Title Objective
1 Setting the Stage: Introduction to Personal Narrative Writing
Thoughtful writers read mentor texts to unearth the characteristics and qualities of personal narrative writing.
2
Thinking about the Elements of Narrative Stories
Thoughtful writers investigate the qualities and attributes of narrative stories by reading with both a reader’s and a writer’s eyes.
3
Reading Mentor Texts through the Eyes of a Writer
Thoughtful writers investigate an author’s craft by reading with a writer’s eye.
Generating Ideas & Selecting a Topic Lesson Title Objective
4 Rereading the Notebook: Exploring the Idea of Small Moment Writing
Thoughtful writers use small moments in their lives as seed ideas to grow personal narrative stories.
5 Generating Ideas through the Quicklist
Thoughtful writers create a bank of personalized memories to use when writing.
6 Weaving Experience and Beliefs Together to Create Thoughtful, Engaging Writing
Thoughtful writers use a “two-hand” approach to writing by blending personal experiences together with their personal beliefs.
7 Photographs: The Story Behind the Picture
Thoughtful writers generate narrative story ideas using a personal photograph.
8 Fabric of Depth: Retrieving Memories through Associations
Thoughtful writers generate ideas for personal narratives by connecting objects (or symbols) to memories.
9 Reflecting on My Levels of Personal Experience
Thoughtful writers reflect on and categorize their life experiences in order to find story ideas worth writing about and sharing with an audience.

Cy-Fair ISD Curriculum Department Small Moments that Matter – Personal Narrative DRAFT – June 2012 Writing Unit of Study
xii
Organizing and Prewriting Structures Lesson Title Objective
10 Getting Acquainted with Truisms Using Picture Prompts
Thoughtful writers use truisms in their writing to share a truth or life lesson about the world and its people.
11 Investigating Text Organizational Structures Found in Narrative Writing
Thoughtful writers investigate text organizational structures that lend themselves to narrative writing.
12 Writing a Kernel Essay with Text Structures
Thoughtful writers use a kernel essay to structure and guide their story step-by-step.
13 Getting Right to the Story You Have to Tell
Thoughtful writers use strategies for rehearsing their stories in preparation for drafting.
14 Telling the Story & Asking the Questions
Thoughtful writers tell their story and use their listeners’ questions to revise with relevant details.
Writing with Style Using Revision Strategies
Lesson Title Objective 15 Hooking Readers with
Effective Leads
Thoughtful writers revise their drafts by crafting effective leads that hook the reader.
16 Great Beginnings: Draw a Picture
Thoughtful writers use a picture to focus their stories and check for relevant details.
17 Reeling Readers in with Satisfying Endings
Thoughtful writers compose satisfying endings that give their readers something to remember.
18 Getting Our Writing F.I.T. Thoughtful writers use a F.I.T. chart to write stories with more depth and detail the first time they write them.
19 Adding Revision “Bling” with Sensory Details
Thoughtful writers revise their drafts by adding sensory details that allow the reader to experience the story using their 5 senses.
20 Exploding the Moment Thoughtful writers revise their drafts by slowing down an important moment in the story.
21 The Golden Line: Crafting Sparkling Sentences
Thoughtful writers use strong verbs and precise language to create memorable “golden lines” that make readers stop and take notice.
22 Strengthening Leads and Endings with Truisms
Thoughtful writers craft interesting and memorable stories with a unifying message (truisms) when they share important life lessons or truths about the world and people with their readers.
23 Ba-da-bing Sentences Thoughtful writers make their writing come alive when they revise and add 1 or more well-crafted “ba-da-bing” sentences to help the reader “step into” the story and visualize the events.

Cy-Fair ISD Curriculum Department Small Moments that Matter – Personal Narrative DRAFT – June 2012 Writing Unit of Study
xiii
Editing Strategies and Publication and Celebration Lesson Title Objective
24 Introduction to Punctuation Dialogue
Thoughtful writers apply strategies for punctuating dialogue in their drafts.
25 Using an Editing Checklist
Thoughtful writers use an editing checklist and other resources to proofread their personal narratives for correctness in capitalization, grammar usage, punctuation, and spelling.
26 Publishing: Preparing The Final Copy for an Audience
Thoughtful writers make careful publishing decisions and polish the presentation of their stories for readers.
27 Celebrate and Reflect on Good Times
Thoughtful writers celebrate their work by sharing their stories with an audience and reflecting on what they have learned about themselves as a writer.
STRATEGY GROUPS To assist students who need help improving common problems found in student writing, pull them together for a short strategy group. Teachers may use the following lessons from the Crunchtime Strategies unit, along with other resources to address issues found in their students’ writing. Alternatively, teachers may opt to use some ideas from these lessons as mid-workshop teaching points.
Reteaching Minilessons from Crunchtime Strategies Lesson Title Objective
8 Expanding a Sentence: Revision Stations (Where’s the Beef?)
Thoughtful writers use icons and questions as concrete guides to help them “show, not tell.”
17 Common Mistakes & Quick Fixes: Listing Events without Details
Thoughtful writers reread their sentences and think about what else the reader needs to know.
18 Common Mistakes & Quick Fixes: Writing That Rambles On and On
Thoughtful writers decide what events are most important and eliminate unimportant events and details.
19 Common Mistakes & Quick Fixes: Repeating Yourself
Thoughtful writers reread their writing to locate and eliminate repeated words, phrases, or ideas.
20 Common Mistakes & Quick Fixes: Writing “Big” Instead of “Small”
Thoughtful writers reread their stories and locate places to revise vague sentences.

Cy-Fair ISD Curriculum Department Small Moments that Matter – Personal Narrative DRAFT – June 2012 Writing Unit of Study
xiv
MID-WORKSHOP TEACHING POINTS This is an opportunity for the teacher to check back in with students about halfway through the writing workshop time, after having conferred with several students after the mini-lesson. At this time, the teacher may extend the day’s mini-lesson or go back and reteach, if it seems that the class has attempted the strategy and is having difficulties. Teachers may use the mid-workshop conference topic listed or choose one that best suits the needs of their class. The mid-workshop teaching points are located after the minilesson number noted in the first column. They do not need to be taught in this order or after the specific lesson. Select and or create mid-workshop teaching points that are appropriate for your students’ instructional needs.
Lesson Mid-Workshop Teaching Point
1 Focusing Writing around Objects &/or Artifacts 2 Collecting Ideas by Thinking about People and Places 3 Collecting Ideas Using Small Moments 4 Revisiting Entries to Generate More Personal Writing 7 Revisiting the Concept of Writing Deadlines 8 Revisiting the Concept of Writing on a Focused Topic 13 Audience and Purpose 15 Ways Author Make Paragraphing Decisions 19 Developing Memorable Characters (or Setting) 20 Time Transitions 27 Rereading with Your Writing Partner

Cy-Fair ISD Curriculum Department Small Moments that Matter – Personal Narrative DRAFT – June 2012 Writing Unit of Study
1
Materials: Your Story Matters slide show – Appendix A Grade level mentor text – Appendix B Engaging first-person narrative text for read aloud Published examples of personal writing for students to
read during independent writing time Teacher and student writing notebooks Chart paper and markers Note: When beginning the study of personal narratives, it is important to select engaging, focused, prototypical examples of first-person narrative texts in order to establish a working definition of the genre. First-person narrative picture books, short stories, and excerpts featuring a slice-of-life story line typically work best when introducing the genre. As you prepare for this lesson, flag specific places within the text where you will pause and make observations related to the genre’s characteristics. Use an engaging personal narrative text for modeling during the teach and active engagement portions of the lesson. During independent writing time, allow students to read a variety of examples of personal narratives. Teachers may opt to introduce the mentor text provided for their grade level. Purpose: Thoughtful writers read mentor texts to unearth the characteristics and qualities of personal narrative writing. TEKS: 2.17 A, 2.18 A, 3.17 A, 3.19 A, 4.15 A, 4.17 A Connection: connect today’s work with our ongoing work tell a personal or class story linked to teaching point explicitly state my teaching point Introduce the personal narrative study by telling the students that people often write about special memories from their lives. Display a copy of the Your Story Matters slide show with the quote and tell them everyone has stories that matter. Explain to students that recording the stories of our every day experiences is an important way to remember these moments in the future and to share them with others today. Writers, I’m excited. We are launching our personal narrative story unit, and I can’t wait to hear the stories you
have to tell. Artist Kelly Rae Roberts says, “Your story matters – tell it!” I love writing in this genre because it is a way for me to capture the memorable moments in my life. Relate a time when a significant person, such as a grandparent, shared a story from their childhood that was memorable to you. Connect the idea to passing on this legacy to future generations. Today, writers, we are going to take a closer look at the genre and study the author’s craft that will help us create our own memorable, small moment stories that others are sure to enjoy for many years to come! Teach: restate my teaching point think aloud & point out things for students to notice Explain to students that a personal narrative is a first-person account of an individual’s experiences that includes the thoughts and feelings of the author. Explain that as students listen to you read aloud portions of the text, to think about these questions. Have them listed on chart paper for students’ reference. 1) What is being told/ shared in the story? 2) Who is telling the story? 3) Why does that matter? During your read-aloud, focus on details that help students better understand the characteristics of personal narrative writing (i.e., the focus on family events, the use of descriptive language, the slice-of-life story line, the first-person voice, etc.). Writers, today we are beginning a new unit. We are going to look at characteristics of a personal narrative. I am going to read to you a personal narrative and I want you to think about these questions as I am reading. I will then write them on our class chart. Use a think aloud process to point out some of the effective craft moves that the author uses, along with the genre attributes. Record your observations about the genre on chart paper similar to the chart shown below.
Personal Narratives
Focuses on one moment in time (event) Shares importance of memory (clear to reader) Is written in first person (I, me, we) Has many relevant, sensory details that the reader can
“see,” “hear,” “feel,” “smell,” & “taste” Includes author’s thoughts & feelings about
experience May include dialogue Active Engagement: involve students by asking them to turn and talk listen, observe, and coach active involvement share an example of what you heard or observed
After reading the story, ask the students to turn and talk to a partner about the things that they have noticed about personal narrative writing. Guide them in sharing what they liked about the story, along with the author’s craft and genre attributes. Record the students’ observations on the anchor chart. Link: restate the teaching point explain how the learning can be used in the future
Inform students that instead of independently writing today, they will read and discuss examples of personal narrative text during workshop time. Provide a wide assortment of personal narrative mentor texts for the students to explore. Invite them to make a list of the things they notice about effective personal narratives on sticky notes or in their writer’s notebook. Share: Draw all members of the class back together to discuss what they learned about personal narratives during their review of the various texts. Add and/or modify descriptions on the anchor chart. Possible Conference Questions: What is being told or shared in the story? Who is telling the story? Why does that matter? What other things do you notice about this story?
Setting the Stage: Introduction to Personal Narrative Writing
Minilesson: 1

Cy-Fair ISD Curriculum Department Small Moments that Matter – Personal Narrative DRAFT – June 2012 Writing Unit of Study
Mid-Workshop Teaching Point: Focusing Writing around Objects and/or Artifacts
Writers, may I have your eyes and ears? I’ve noticed that as I’ve been conferring with you, many of you are noticing that writers sometimes build their memorable stories by focusing on an object or artifact. Is anyone else noticing that in their story? I think that we should add that to our anchor chart. We’ve talked about using objects and artifacts as one way to collect ideas in our notebook. This is a wonderful way to get ideas for the stories from our lives. I want to show you how I recently started a new entry in my notebook, by taping and/or gluing different objects and artifacts (i.e., movie ticket stub, receipts, pictures, etc.) in my notebook. Notice how I’ve written down personal narrative story possibilities next to these objects (See Appendix L for an example.) We will talk more about this concept during our share time. Anchor Chart Ideas: The items recorded on the class anchor chart should be based upon conversations that you and your students have in class. A sample anchor chart has been provided to help you think about topics and categories that could be recorded on the anchor chart. This is not a comprehensive list. Please choose and/or revise items to meet the needs of your students.
What is Personal Narrative Writing? Writing that… says something about the author tells a story about yourself and/or what you have done. (YOU are the author
and the main character of the story.) tells the story as the you (the author) see(s) it. focuses on one important event, not your whole life. uses words like I and we (1st person). sometimes records the exact words a character uses (dialogue or talking).

Cy-Fair ISD Curriculum Department Small Moments that Matter – Personal Narrative DRAFT – June 2012 Writing Unit of Study
Materials: 3-Column chart paper and markers A familiar (previously-read), first-person narrative text Published examples of personal writing for students to read
during independent writing time Teacher and student writing notebooks Note: Prior to the lesson, select a previously read first-person narrative text to model how the author uses story elements to relate the experience. Locate and mark the excerpts that show the introduction of the characters, setting, problem, &/or key events. Additionally, find parts that show the author’s craft through sensory details, effective word choice, and well-crafted sentences. Purpose: Thoughtful writers investigate the qualities and attributes of narrative stories by reading with both a reader’s and a writer’s eyes. TEKS: 2.17 A, 2.18 A, 3.17 A, 3.19 A, 4.15 A, 4.17 A Connection: connect today’s work with our ongoing work tell a personal or class story linked to teaching point explicitly state my teaching point Tell the students that in today’s mini-lesson, they will engage in deep thinking about the elements of stories. Reassure the students that are already familiar the elements of a story from their reading. Tell them that as they think about the elements of stories, they will think about the texts in two different ways: first as readers and then as writers. Writers, you are right on track to creating memorable stories about the small moments that matter in your lives. Yesterday, you discovered that personal narratives are first-person stories that share the author’s thoughts and feelings about a significant experience in his life. When you read the personal narratives, you were reading with a writer’s eye to discover the author’s craft. We also read stories with our reader’s eye when we pay attention to the story craft. Relate a time when you were reading a well-crafted story and discuss how you used both your reader’s eye (noticing story elements) and your writer’s eye (noticing author’s craft) to both
appreciate the construction and craftsmanship of the story. Explain that students will use both their reader’s and writer’s eyes to appreciate and analyze personal narratives. Today, we will read personal narratives using two different lenses. We will use both our reader’s eye and our writer’s eye to help us learn how to create our own engaging stories. Teach: restate my teaching point think aloud & point out things for students to notice Show students how to think about the elements of narrative stories (fiction and literary nonfiction) both as readers and as writers. Create a 2-column chart using headings shown on the sample chart.
A Reader’s & Writer’s Eyes on Personal Narratives What We Expect As
Readers Story Elements How This Helps Us as Writers
Explain to the students that as the reader I expect that the writer will introduce me to the main characters of a story (fiction or literary nonfiction) and share the story’s setting (when and where the story takes place). Effective personal narratives (literary nonfiction) use story structure to relate the true, first-hand account of an experience. Ask students to give a thumbs-up if they believe that most readers expect the author of a story to share the main characters and setting of a story. I am going to read a portion of one of my favorite books. I want you to use your reader’s eye to notice how the author includes the story elements in this piece. Read aloud an excerpt that introduces the main character &/or setting. Stop and use a think aloud process to explain how your reader’s eye helps you understand the significance of the story elements in the text. Record this detail in the left-column entitled What We Expect as a Reader. Discuss how this helps you as a writer and record the information in the right-column titled How This Helps Us as Writers.
Active Engagement: involve students by asking them to turn and talk listen, observe, and coach active involvement share an example of what you heard or observed
Ask students to name the other story elements that they expect to encounter in a personal narrative. Read aloud an excerpt that shows how the writer establishes the story’s problem. Invite students to turn and talk to a partner about the importance of sharing the story’s problem with the reader. Record the comments in the left-column. Then, ask students to think about how knowing this information can help them as a writer. Record the students’ comments in the right-column.
Link: restate the teaching point explain how the learning can be used in the future Encourage students to continue to think deeply about the elements of stories, both as a reader and as a writer. During the independent writing block, students will spend time reading and analyzing texts. Provide a wide assortment of personal narrative mentor texts (including multiple copies) for the students to read, analyze, and discuss with a partner or in a small group.
Share: Ask students to share the observations that they made as they read the personal narratives during the independent time. On the anchor chart, add details relating to other story elements that students noticed. Remind students of their writing homework assignment for this week--taping/gluing objects and artifacts that relate to stories that they want to share about themselves. Invite one or two students to share entries related to this homework assignment. Remind students to include at least one photograph in the collection. Possible Conference Questions: What do you know about stories? As a reader, what would you expect to see in this story?
Why is that important to a reader? How does knowing this help you as a writer?
2
Understanding the Expository Writing Rubric (4s and 3s) Minilesson: 2 Minilesson:
Thinking about the Elements of Narrative Stories
Minilesson: 2

Cy-Fair ISD Curriculum Department Small Moments that Matter – Personal Narrative DRAFT – June 2012 Writing Unit of Study
Mid-Workshop Teaching Point: Collecting Ideas by Thinking of People and Places
Writers, I want to teach you a strategy that I use when I can’t figure out what to write. Sometimes when I get stuck, I think of a person who is very special to me or sometimes I think of a place that is very important to me. I write that person or place down in my notebook, and then I list small moments that I’ve had with that person or small moments that occurred at that place. I only list the moments that I remember with crystal-clear clarity. Let me show you how I do this. (Model the process.) Now, I want you to take a moment to try this strategy in your notebook. (Add this strategy to the ongoing chart entitled Ideas for Notebooks from the Launching Writing Workshop Unit of Study.) Anchor Chart Ideas: The items recorded on the class anchor chart should be based upon the conversations that you and your students have in class. The sample chart below has been provided to help you think about some of the attributes that could be recorded.
What We Expect as Readers Story Element How this Helps Us as Writers We expect to meet the main characters and find out when and where the story takes place. Characters and Setting
We need to introduce the main character(s) of the story and share when and/or where the story takes place.
Every story has a problem/conflict that sets all other events into motion. The problem can be a good or bad. We expect to learn about the problem early in the story.
Story Problem/Conflict
We need to introduce the problem/conflict in a way that sets other events into motion.
The events in the story give us more details about the problem and show how the main character tries to deal with the problem. The story events build upon one another.
Events
Our events should focus on giving the reader more details about the problem and showing how the main character tries to deal with the problem.
The story reaches the point where the character solves the problem. Usually there is one main event that helps him/her solve the problem. We expect the writer to say something to wrap-up the story and give the story a sense of completeness.
Solution/Resolution Ending
Our stories should reach a point where the problem gets solved. There might be one main event that leads to the problem getting solved. Our readers expect us to say something that will wrap-up the story and give the story a sense of completeness.

Cy-Fair ISD Curriculum Department Small Moments that Matter – Personal Narrative DRAFT – June 2012 Writing Unit of Study
Materials: An unfamiliar first-person narrative text Published examples of personal writing for
students to read during independent writing time
Teacher’s writing notebook entry (See Mid-workshop Teaching Point)
Teacher and student writing notebooks Chart paper and markers Purpose: Thoughtful writers investigate an author’s craft by reading with a writer’s eye. TEKS: 2.17 A, 2.18 A, 3.17 A, 3.19 A, 4.15 A, 4.17 A Connection: connect today’s work with our ongoing work tell a personal or class story linked to teaching point explicitly state my teaching point Tell students that today you’ve “invited” your favorite authors into the c to help us uncover the secrets to good personal narrative writing. Tell the students that even published authors like Cynthia Rylant study the writing of other authors to create powerful writing. Writers, I can’t wait for you to meet a few of my favorite authors today. They are going to help us discover the secrets to crafting engaging personal narratives. Author Cynthia Rylant once said, “I learned how to write from writers. I didn’t know any personally, but I read.” I know just what Cynthia Rylant means. Relate a personal story sharing one of your favorite authors as a child and discuss what your learned as a writer from reading their books. Tell students that you will be teaching them how to read mentor texts through the eyes of the writer—that is reading mentor text to uncover the writing secrets of some of the best authors. Today, we will read like writers, stopping to pay attention to the structure of the story and the
author’s craft. We will look for moments that make us stop and think, for words and sentences that wow us, and parts that make us feel as though we are right there experiencing the moment with the author. We will use what we discover to create our own compelling stories that our readers are sure to find irresistible. Teach: restate my teaching point think aloud & point out things for students to notice Reiterate to the students that they can learn a great deal about writing just by reading mentor texts. Explain how writers sometimes read the work of other authors in order to learn more about author’s craft. The reader must first visualize, experience, and understand the story (reading the text as a reader) before he/she can analyze what the author has done (reading the text as a writer). Today I am going to read a piece of text through the eyes of a writer and reader. (Begin reading then find a stopping point.) Hmmm… I’m wondering as a reader what’s going on with this character? (Share your thinking aloud about the text.) As a writer, I am thinking how can I make my writer powerful like this piece. What did the author do? (Share your thinking aloud about the text.) Remind students that writer’s often write about a small episode that has a big meaning for author. Record your observation about author’s craft on the ongoing anchor chart from lesson 1 entitled What is Personal Narrative Writing? Active Engagement: involve students by asking them to turn and talk listen, observe, and coach active involvement share an example of what you heard or observed
Ask students to practice this strategy as they listen to another excerpt being read aloud. The students will first listen as readers (comprehending and
experiencing the text), and then they will listen as writers (analyzing what the author has done). Read aloud the excerpt from the text. Then ask students to turn and talk to a partner about the things that they have noticed as a writer. Listen in to student conversations and provide guidance as needed. Debrief by sharing a few of the ideas you overheard with the class. Add these observations to the anchor chart. Link: restate the teaching point explain how the learning can be used in the future
Encourage students to continue to study texts with a writer’s eye during workshop time. Students will record their observations as a writer on sticky notes. Provide a wide assortment of personal narrative mentor texts (including multiple copies) for the students to read, analyze, and discuss with a partner or in a small group. Share: Ask them to sit with their partners and share how they used the strategy of reading mentor texts through the eyes of a writer. Add additional personal narrative characteristics to the anchor chart. Invite one or two students to share entries related to the writing homework assignment for the week-- taping/gluing objects and artifacts that relate to stories that they want to share about themselves. Remind students to include at least one photograph in the collection. Possible Conference Questions: What is happening in this story? As a writer, what do you like about this piece of
writing? What is this author doing that you could also do
in order to make your own writing more powerful?
Reading Mentor Texts through the Eyes of a Writer
Minilesson: 3

Cy-Fair ISD Curriculum Department Small Moments that Matter – Personal Narrative DRAFT – June 2012 Writing Unit of Study
Mid-Workshop Teaching Point: Collecting Ideas Using Small Moments
Writers, I’m getting some very good ideas about the types of topics that would make good personal narrative writing. I’m noticing that it’s not the big stories about entire vacations that make good stories. I’m noticing that it’s the small everyday moments that make great stories. Are you noticing that? This is giving me lots of ideas for my notebook. I think that I’m going to start a jot-list of those small everyday moments from my life. Let me show you. (Model the process.) Before you continue to read, take a moment to jot a few of the small, everyday moments inside of your notebook. Anchor Chart Ideas: The items recorded on the class anchor chart should be based upon the texts that you and your students explore in class. The sample chart below has been provided to help you think about some of the attributes that could be recorded.
What is Personal Narrative Writing (continued)
Writing that… uses lots of details and description/ appeals to your five senses. is about a seemingly small episode—yet it has big meaning for the writer. tells the story in such a way that the reader can almost experience it from start to
finish (there is a sense that the story has a B-M-E) conveys strong feelings (often shows rather than tell about those feelings).

Cy-Fair ISD Curriculum Department Small Moments that Matter – Personal Narrative DRAFT – June 2012 Writing Unit of Study
Rereading the Notebook: Exploring the Idea of Small Moment Writing Minilesson: 4
Materials: Pumpkin Idea vs. Seed Idea with a Common Thread- Appendix I Using Webbing to Pull Seed Ideas from Pumpkin Ideas –
Appendix J Growing Stories from Seeds graphic organizer – Appendix K Teacher and student writing notebooks Chart paper and markers Note: Prior to the lesson brainstorm at least 3 large “pumpkin ideas” and at least 3 small “seed ideas” that represent typical personal narrative topics to use in the active engagement portion of the lesson. Purpose: Thoughtful writers use small moments in their lives as seed ideas to grow personal narrative stories. TEKS: 2.17 A, 2.18 A, 3.17 A, 3.19 A, 4.15 A, 4.17 A
Connection: connect today’s work with our ongoing work tell a personal or class story linked to teaching point explicitly state my teaching point Tell the students that sometimes the moments that they consider for a personal narrative topic are too big. Explain that you will share advice that will help them focus their writing on a small moment. Writers, you’ve discovered that the most memorable personal narratives are ones that have a tightly focused storyline and purpose. The best stories seem to come from the small moments in our everyday lives. Relate a time when you had trouble writing a personal narrative because your topic was too broad. Explain the frustration you felt and what you learned from the experience about choosing small moments as seed ideas for composing engaging personal narratives. There’s a saying, “Mighty oaks from little acorns grow.” In writing, this means that great stories begin with a small seed idea. Choosing the “just right” seed idea allows us to grow powerful stories that make our readers stop and take notice. Today, we will learn how to choose the perfect seed idea that will allow us to grow an unforgettable story.
Teach: restate my teaching point think aloud & point out things for students to notice Inform students that pumpkin ideas are typically very difficult to handle when writing a personal narrative. They are very heavy and hard to carry, like a large pumpkin. Pumpkin ideas would be those ideas that typically lend themselves to bed-to-bed stories. In contrast, seed ideas are those ideas that are narrower in scope. They are easier to handle and typically make for better writing topics because they are more focused. Begin an anchor chart (see sample below) illustrating the analogy.
Pumpkin Idea Seed Idea Broad Difficult to Handle Creates bed-to-bed or list-
like stories
Narrow and Focused Easier to handle Usually makes better, more
focused narrative writing Examples My trip to Sea World
Examples The terrifying 30 seconds of riding the Steel Eel rollercoaster at Sea World
Use a gesture of spreading your arms wide apart to represent the large scope of the pumpkin ideas. Use a gesture of pinching your thumb and index finger together to represent the narrow scope of seed ideas. Share examples of pumpkin ideas and contrast them to seed ideas to illustrate the differences. I’ve been thinking that I would like to write about my grandmother, but I’m not sure where to start. There are so many things I could say. The topic, “grandmother,” is way too broad. (Spread arms wide part). Grandmother is a pumpkin idea that is just too big to write about in a memorable way. I am thinking that it would help to make a list of the different experiences that I’ve shared with my grandmother. (Share a few examples of small moments with grandmother.) Now, I am going to pick one small moment idea from the list to focus my grandmother story. I have zoomed into one moment in time with my grandmother. (Pinch fingers together.) This memorable moment is the perfect seed idea to grow my personal narrative. Show students how you might take a broad pumpkin idea and spend time in your notebook pulling out the seed stories and narrowing the topic.
Active Engagement: involve students by asking them to turn and talk listen, observe, and coach active involvement share an example of what you heard or observed
Display a list of pumpkin and seed ideas on the board. Possible pumpkin ideas might include neighborhood bully, playing with friends, or a memorable teacher. Possible seed ideas might include standing up to a bully, surprising your friend in a game of hide-and-seek, or a funny teacher cartwheeling down the hallway. Ask students to turn and talk to a partner and discuss which ideas are pumpkin ideas vs. seed ideas. Have them explain their thinking. Listen in on the conversations and then debrief as a whole group by classifying the topics as pumpkin or seed ideas. Record a “P” for pumpkin next to the broad ideas, and write an “S” for seed next to the small, focused ideas.
Link: restate the teaching point explain how the learning can be used in the future Tell students they will reread their notebooks by looking over some of the entries, including any stories that they’ve written. At the start of each entry, invite them to write “P” for pumpkin or “S” for seed. Students may work with a partner to do this. Send students off to reread their notebooks. After identifying pumpkin and seed ideas within their own notebooks, ask students to find at least two entries that they are most interested in developing into personal narratives. The ideas can be recorded on the Growing Stories from Seeds graphic organizer to help students focus the ideas even further.
Share: Reconvene students as a group and rally their enthusiasm for writing more and for a longer time by having them engage in a goal-setting activity. Allow them to share a topic that they want to write about and the reasons why they selected the idea.
Possible Conference Questions: How’s it going? What are you currently working on? Which notebook entries are you thinking of developing? Are
they pumpkin or seed entries? If they are pumpkin entries, have you spent time working on narrowing the topic? Can I see?

Cy-Fair ISD Curriculum Department Small Moments that Matter – Personal Narrative DRAFT – June 2012 Writing Unit of Study
Mid-Workshop Teaching Point: Revisiting Entries to Generate More Personal Narrative Writing Writers, can I have your eyes. We’ve already learned lots of strategies for generating ideas for our narrative writing. For your writing homework last week, you collected lots of different objects that told a story about you. You know that writers sometime look at objects to jog memories. Today, I want to remind you that as you reflect on possible topics, you might consider rehearsing a story related to one of these objects that were taped in your notebook. For example, right now I’m looking in my notebook, and I see that I’ve taped a receipt from Wal-Mart as an entry. Well, if I told you about my whole trip to Wal-Mart, that wouldn’t make for a very good story. That’s more of a pumpkin idea, and it would read more like a list than a story. But, if I focused on a seed idea related to the topic of Wal-Mart—like the time when I thought that my car had been stolen from the Wal-Mart parking lot—I think that I might have a better story. I can now go and rehearse this story step-by-step. So writers, spend a moment looking back at one of these objects to see if any memories related to those objects can be developed into focused story ideas.
Cy-Fair ISD Curriculum Department Small Moments that Matter – Personal Narrative DRAFT – June 2012 Writing Unit of Study
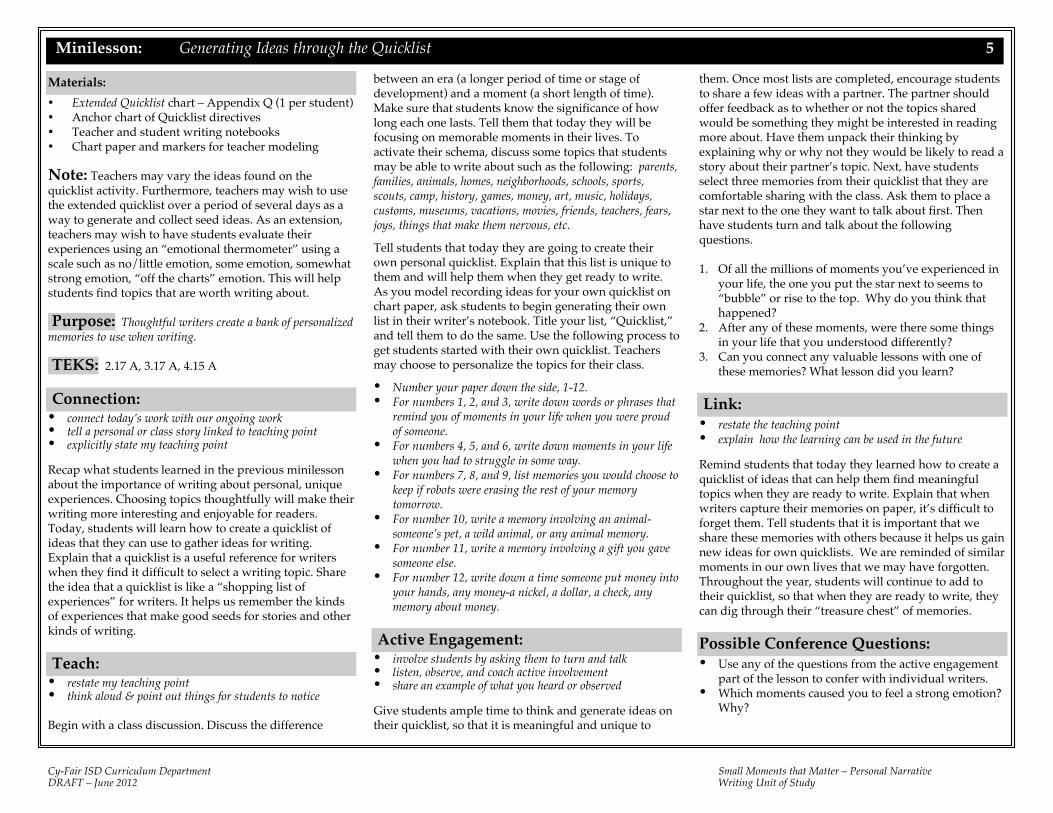
Materials: Extended Quicklist chart – Appendix Q (1 per student) Anchor chart of Quicklist directives Teacher and student writing notebooks Chart paper and markers for teacher modeling
Note: Teachers may vary the ideas found on the quicklist activity. Furthermore, teachers may wish to use the extended quicklist over a period of several days as a way to generate and collect seed ideas. As an extension, teachers may wish to have students evaluate their experiences using an “emotional thermometer” using a scale such as no/little emotion, some emotion, somewhat strong emotion, “off the charts” emotion. This will help students find topics that are worth writing about. Purpose: Thoughtful writers create a bank of personalized memories to use when writing. TEKS: 2.17 A, 3.17 A, 4.15 A Connection: connect today’s work with our ongoing work tell a personal or class story linked to teaching point explicitly state my teaching point Recap what students learned in the previous minilesson about the importance of writing about personal, unique experiences. Choosing topics thoughtfully will make their writing more interesting and enjoyable for readers. Today, students will learn how to create a quicklist of ideas that they can use to gather ideas for writing. Explain that a quicklist is a useful reference for writers when they find it difficult to select a writing topic. Share the idea that a quicklist is like a “shopping list of experiences” for writers. It helps us remember the kinds of experiences that make good seeds for stories and other kinds of writing. Teach: restate my teaching point think aloud & point out things for students to notice Begin with a class discussion. Discuss the difference
between an era (a longer period of time or stage of development) and a moment (a short length of time). Make sure that students know the significance of how long each one lasts. Tell them that today they will be focusing on memorable moments in their lives. To activate their schema, discuss some topics that students may be able to write about such as the following: parents, families, animals, homes, neighborhoods, schools, sports, scouts, camp, history, games, money, art, music, holidays, customs, museums, vacations, movies, friends, teachers, fears, joys, things that make them nervous, etc. Tell students that today they are going to create their own personal quicklist. Explain that this list is unique to them and will help them when they get ready to write. As you model recording ideas for your own quicklist on chart paper, ask students to begin generating their own list in their writer’s notebook. Title your list, “Quicklist,” and tell them to do the same. Use the following process to get students started with their own quicklist. Teachers may choose to personalize the topics for their class. Number your paper down the side, 1-12. For numbers 1, 2, and 3, write down words or phrases that
remind you of moments in your life when you were proud of someone.
For numbers 4, 5, and 6, write down moments in your life when you had to struggle in some way.
For numbers 7, 8, and 9, list memories you would choose to keep if robots were erasing the rest of your memory tomorrow.
For number 10, write a memory involving an animal-someone’s pet, a wild animal, or any animal memory.
For number 11, write a memory involving a gift you gave someone else.
For number 12, write down a time someone put money into your hands, any money-a nickel, a dollar, a check, any memory about money.
Active Engagement: involve students by asking them to turn and talk listen, observe, and coach active involvement share an example of what you heard or observed
Give students ample time to think and generate ideas on their quicklist, so that it is meaningful and unique to
them. Once most lists are completed, encourage students to share a few ideas with a partner. The partner should offer feedback as to whether or not the topics shared would be something they might be interested in reading more about. Have them unpack their thinking by explaining why or why not they would be likely to read a story about their partner’s topic. Next, have students select three memories from their quicklist that they are comfortable sharing with the class. Ask them to place a star next to the one they want to talk about first. Then have students turn and talk about the following questions. 1. Of all the millions of moments you’ve experienced in
your life, the one you put the star next to seems to “bubble” or rise to the top. Why do you think that happened?
2. After any of these moments, were there some things in your life that you understood differently?
3. Can you connect any valuable lessons with one of these memories? What lesson did you learn?
Link: restate the teaching point explain how the learning can be used in the future
Remind students that today they learned how to create a quicklist of ideas that can help them find meaningful topics when they are ready to write. Explain that when writers capture their memories on paper, it’s difficult to forget them. Tell students that it is important that we share these memories with others because it helps us gain new ideas for own quicklists. We are reminded of similar moments in our own lives that we may have forgotten. Throughout the year, students will continue to add to their quicklist, so that when they are ready to write, they can dig through their “treasure chest” of memories. Possible Conference Questions: Use any of the questions from the active engagement
part of the lesson to confer with individual writers. Which moments caused you to feel a strong emotion?
Why?
Generating Ideas through the Quicklist
Minilesson: 5

Cy-Fair ISD Curriculum Department Small Moments that Matter – Personal Narrative DRAFT – June 2012 Writing Unit of Study
Today, we will learn how to weave together our personal experiences with our beliefs and feelings to create memorable writing that entices our readers. Teach: restate my teaching point tell a personal or class story linked to teaching point think aloud & point out things for students to notice Ask students to hold up both of their hands. Then direct them to wiggle the fingers on their right hand and repeat, “Everything I know. Every belief I have. Everything that’s true. Everything that’s not true. Every fact. Every opinion. Every thought for the day. Life lessons. Sayings. Dichos.” Next, have students wiggle the fingers on their left hand and repeat, “All my experience. Every place I’ve been. Every step I’ve taken. Everything I’ve seen. Everything I’ve eaten. Or smelled. Or heard. Every conversation. Every song, movie, book.” Now direct students to put their two hands together side-by-side and ponder this thought, “Every really good piece of writing has something from each hand.” Tell students to link their fingers together and say, “The best writing weaves together our experiences and beliefs.” Display an enlarged copy of Two Hands Approach to Writing. Briefly highlight the difference between experience and belief using the details found on the two hands. Revisit the memory shared in the connection portion of the lesson by describing some of the sensory details related to the experience hand found on the chart. Then share some of your thoughts and feelings about the experience and point to the belief hand. Reiterate the idea that the best writing has both an author’s experience and their beliefs. Tell students that they will listen to the mentor text as you read it aloud. Explain that they will pay attention to the sensory details that convey the experience, and they will listen for the thoughts, feelings, and beliefs that the writer conveys about the experience. As various parts of the mentor text is read aloud, stop and use a think aloud process to point out details related to the author’s experience and his beliefs. Record them on an enlarged copy of the two hands on chart paper.
Materials: A Paper Weaving Craft: and Belief Together in Our
Writing – Appendix M (teacher reference) Two-Hands Approach to Writing – Appendix N (1 per
student) Manila construction paper (1 per student) 1” Lengthwise strips of colored construction paper (5
– 8 per student) Chart paper, crayons, markers, scissors, rulers, glue
(optional), and/or pencils Sample woven paper of illustrated memory Mentor text representing genre for unit of study Teacher and student writing notebooks Note: This lesson can be used to model how high-quality personal narrative writing blends together a writer’s experiences with his beliefs and feelings. Select a text that can be used to analyze the author’s experiences and beliefs. The lesson idea is adapted from the introduction to Crunchtime Strategies. In the teach portion of the lesson, the Spanish word “dichos” (pronounced “theechos”) is used. They are sayings or expressions such as proverbs. Prior to the lesson, the teacher will create a model of the illustrated memory woven paper to share with students. Purpose: Thoughtful writers use a “two-hand” approach to writing by weaving personal experiences together with their personal beliefs. TEKS: 2.17 A, 3.17 A, 4.15 A Connection: connect today’s work with our ongoing work tell a personal or class story linked to teaching point explicitly state my teaching point Sharing with students the special memory illustrated on the woven paper. Retell the memory using sensory details to help students recreate the experience in their mind. Include your thoughts and feelings about the memory. Tell students that the best writing blends together an individual’s experiences with his or her beliefs. This helps to create a thoughtful, engaging story.
Active Engagement: involve students by asking them to turn and talk listen, observe, and coach active involvement share an example of what you heard or observed Ask students to recall a memorable experience. Then have them hold up their right hand, wiggle their fingers, and describe the experience to partner using the sensory details. After a few moments, have them hold up their left hand, wiggle their fingers, and describe their beliefs about the experience to their partner. Repeat this process for the other student, so that he describes his personal experience and beliefs about it to his partner. Link: restate the teaching point explain how the learning can be used in the future
Provide students with a copy of the Two Hands Approach to Writing visual and glue it into their writing notebook as a resource. Share with students the sample woven paper memory that includes the visual recreation of the experience with the beliefs that are woven together. Explain that they will create a similar woven paper visual about their memorable experience during independent writing. The memory will be illustrated on the manila paper, and the beliefs will be recorded on the colored strips. Tell students this will help them remember that the best writing blends together an individual’s experiences and beliefs to create engaging, thoughtful writing. Possible Conference Questions: Describe an experience or memory that you’ve seen,
heard, “been there, and done that.” What makes it memorable?
What do you know, and how do you know it? What’s one thing you believe, and what makes you
belief it? What’s something you know in your heart, and how
you know it in your heart? What’s something you know is true, and how do you
know it’s true? What’s one thing you didn’t always know, but you
know now? How do you know it now?
Weaving Experience and Beliefs Together to Create Thoughtful, Engaging Writing
Minilesson: 6

Cy-Fair ISD Curriculum Department Small Moments that Matter – Personal Narrative DRAFT – June 2012 Writing Unit of Study
Materials: A picture book that uses photos to reveal moments
in time such as Family Pictures by Carmen Lomas Garza
Revealing the Story Behind the Picture – Appendix H (teacher reference with student example)
Personal photograph of a memorable moment from teacher’s life for modeling
Writing deadline calendars (monthly) Teacher and student writing notebooks Chart paper and markers Note: Students will need to bring in photographs for this lesson. Remind them of this homework task in the days prior to the lesson. Purpose: Thoughtful writers generate narrative story ideas using a personal photograph. TEKS: 2.17 A, 2.18 A, 3.17 A, 3.19 A, 4.15 A, 4.17 A Connection: connect today’s work with our ongoing work tell a personal or class story linked to teaching point explicitly state my teaching point Tell students that sometimes authors build stories around photographs. Some stories are personal memories sparked by connections the author made to the photographs. Relate a personal story about a time you reviewed a collection of photos from different moments in your life. Discuss how the experience helped you recall memories from the past and the feelings you had at the time of the photo. Writers, we can use photos from different moments in our lives to help us recall the details and feelings we had at that time. Today, I will show you how to build a story around a photo from a significant moment in my life. Teach: restate my teaching point think aloud & point out things for students to notice
Share a significant photograph from a picture book that uses photographs to reveal moments in time. Talk briefly about how the author develops the story around the idea of a photograph. Next, demonstrate the process of developing a piece of writing around a photograph by sharing one of your own photographs. Writers, today I am going to show you how I can generate a story around this picture I brought. When I look at this picture I know there is so much going on here besides what you see in the actual photograph. I am going to stop and think about the picture. First, write about the obvious facts of the picture inside the left column of the chart. Refer to the student example in the appendix – Revealing the Story Behind the Picture – for an example.
The Story Behind the Picture
Obvious Facts (External)
Hidden Gems (Internal)
Next, share your internal thoughts, your inner dialogue, and other details that couldn’t be extracted just by looking at the picture. Record the hidden (internal) details on the right side of the t-chart. Explain to students that you have provided them with details – hidden gems – that could not be discovered just by looking at the picture. Remind them that the picture, just like a simple retelling of any story, only holds part of the story. You, the writer, hold the other part and that is what is important for you to uncover in your writing.
Ways to Investigate the Story Behind the Photo Ask questions. Make a t-chart to tell about the obvious (external)
details and the hidden (internal) details. Tell what happened right before and right after
the picture was taken.
Active Engagement: involve students by asking them to turn and talk listen, observe, and coach active involvement share an example of what you heard or observed Allow students to spend some time thinking about their photos to try to find the deeper meaning. Ask them to reflect upon the moment or event represented in the picture. Have students talk about their pictures with a partner by revealing the hidden story. Have them engage in dialogue with a partner about both the obvious and the hidden stories behind their pictures.
Link: restate the teaching point explain how the learning can be used in the future Tell the students that their pictures hold stories, waiting to burst onto the page. Send the students off to write in their notebooks. Students may record both the obvious and hidden stories on a T-chart that is similar to the External/Internal events T-chart or they may dive right in, rehearsing the story in their notebooks. Share: Ask students to sit in small groups to share successes &/or difficulties they experienced as they recorded their thoughts and observations about the photo. Ask them to reflect on the following questions: How did the pictures help you think of story
ideas? Did any of the pictures spark connections and lead
to writing personal narratives? Did the talking about the pictures help? How? When might you use this strategy again? Possible Conference Questions: How’s it going? Tell me the story behind your picture. What is the
obvious story? What is the hidden story?
Photographs: The Story Behind the Picture
Minilesson: 7
Cy-Fair ISD Curriculum Department Small Moments that Matter – Personal Narrative DRAFT – June 2012 Writing Unit of Study
Mid-Workshop Teaching Point: Revisiting the Concept of Writing Deadlines Remind the students of the value of deadlines in the writing workshop. Distribute writing calendars. Ask students to place a star on the date when you expect all students to have finished publishing their personal narratives (approximately 3 weeks). Have students make note of holidays and planned disruptions to the writing workshop schedule. Guide students through the process of marking their calendars. Since students tend to over and/or underestimate deadlines, you may suggest a minimum number of days for each phase, but please allow individual students to slightly vary the time frames according to their own needs. Students should mark the days that they expect to spend on generating and developing ideas with an “I” or another decided upon code. Continue the process by marking days for project planning, drafting, revising, editing, and publishing. Invite the students to briefly discuss their writing deadline calendars with a partner. Please note that slight variations in calendars might exist as students may be in different phases of the writing process during this unit.

Cy-Fair ISD Curriculum Department Small Moments that Matter – Personal Narrative DRAFT – June 2012 Writing Unit of Study
Materials: Small envelopes (the number should match the
number of students in class) A minimum of 10 different patterns of- 4” X 4” inch
fabric squares [Duplication is fine, but the patterned cloth will need to be repeated enough times to have at least the same number of cloth pieces as the number of students in the class. For example, the activity would require a total number of 25 pieces of cloth for 25 students.]
Timer, bell, music or chime to pace the passing of the envelopes
One envelope containing a fabric pattern not included in the rotation [Sample used for demo & practice in minilesson]
Teacher and student writing notebooks Chart paper and markers Note: Before the lesson, assign a number to each type of patterned cloth. Put each 4” X 4” patterned cloth into an envelope. Write the corresponding number on the outside of the envelope. If duplicate patterns are being used to accommodate the number of students in the class, then some envelopes will have the same number marked on the outside. Prior to teaching the lesson, use the process listed below to collect entries in your own writing notebook. Have 3-4 sample entries in your notebook prepared to share with students. Purpose: Thoughtful writers generate ideas for personal narratives by connecting objects (or symbols) to memories. TEKS: 2.17 A, 2.18 A, 3.17 A, 3.19 A, 4.15 A, 4.17 A Connection: connect today’s work with our ongoing work tell a personal or class story linked to teaching point explicitly state my teaching point Explain to the students that the details from our lives create a large mental box of memories. Explain that today you will show them how to use fabric to help spark memories of special moments from their lives.
Teach: restate my teaching point think aloud & point out things for students to notice Students will use fabric to spark memories. These memories will serve as a springboard for writing. Explain the process. 1. Tell students that you have several numbered
envelopes containing a fabric square inside each one. Explain to the students that these numbered envelopes will be rotated around the room.
2. Explain that upon receiving an envelope, students will record the number of the envelope in their notebook.
3. Tell the students that they will then open the envelope and remove the fabric square.
4. Tell them they will be given a couple of minutes to look at the fabric square and write about a specific memory that comes to mind.
5. Tell them that the memory does not have to be directly related to the fabric (only the writer will truly know the exact connection).
Emphasize that they should focus on exploring a single memory rather than creating a list of everything that could possibly be associated with the fabric. Demonstrate this process using one of the envelopes. On the chart paper, writing freely about a specific memory comes to mind when you saw that fabric. Explain that students will have the opportunity to use the fabric squares to help them recall specific moments in their life. Share your thinking with the students. Focus on exploring a single memory rather than creating a list of all the things that could possibly be associated with the fabric.
Active Engagement: involve students by asking them to turn and talk listen, observe, and coach active involvement share an example of what you heard or observed For this practice round, the students will use the sample envelope. Reveal the piece of fabric by removing it from the envelope. Give the students a few minutes to freely
write about a small moment from their lives that they associate with the pattern on the fabric. After a few minutes, ask the students to put their pencils down. Link: restate the teaching point explain how the learning can be used in the future Remind the students that they can use fabric to help them think of special moments from their lives. The goal is for the fabric to spark memories and serve as a springboard for writing. Begin the rotation by allowing students to spend two or three minutes with each envelope, depending on their needs. At the beginning of each exchange, remind students to record the envelope number before taking the fabric out of the envelope. Reassure students that it is okay if they did not complete the entry before time is called. They will have the opportunity to revisit some of their entries later on in the workshop. Share: At the end of the workshop, direct students to identify one memory / idea that they find interesting and are willing to share with a partner. Provide time for students to share the memory/idea with their partner. Invite students to share entries related to the writing homework assignment for the week-- taping/gluing objects and artifacts that relate to stories that they want to share about themselves. Remind students to finish this homework assignment soon if they have not yet done so. Remind students to include at least one photograph in the collection. Possible Conference Questions: How’s it going? Tell me about this memory. How/why did you choose to explore it? What does it
say about you? How might you tell this story in a way that no one
else could?
Fabric of Depth: Gathering Seeds by Recalling Memories through Associations Minilesson: 8

Cy-Fair ISD Curriculum Department Small Moments that Matter – Personal Narrative DRAFT – June 2012 Writing Unit of Study
Mid-Workshop Teaching Point: Revisiting the Concept of Writing on a Focused Topic Once the students have recorded at least four small moment memories, pause to show the students your fabric of depth entries within the notebook. Demonstrate how you would go about rereading each of your ideas to select an entry to explore. Revisit the anchor chart: Finding a Great Idea from Your Notebook (from the Launching Writing Workshop Unit of Study). Focus the students’ attention on writing tip/strategy #4 -- writing a half of a page in the notebook. Circle the idea that you want to use. Spend a few moments in your notebook (or on chart paper) showing students how you go about writing a half of a page on that focused topic. Have the student reread each of their ideas and circle the idea that they are most interested in exploring within an extended piece of writing. Allow them to spend a few moments in their notebooks writing a half of a page on that focused topic.
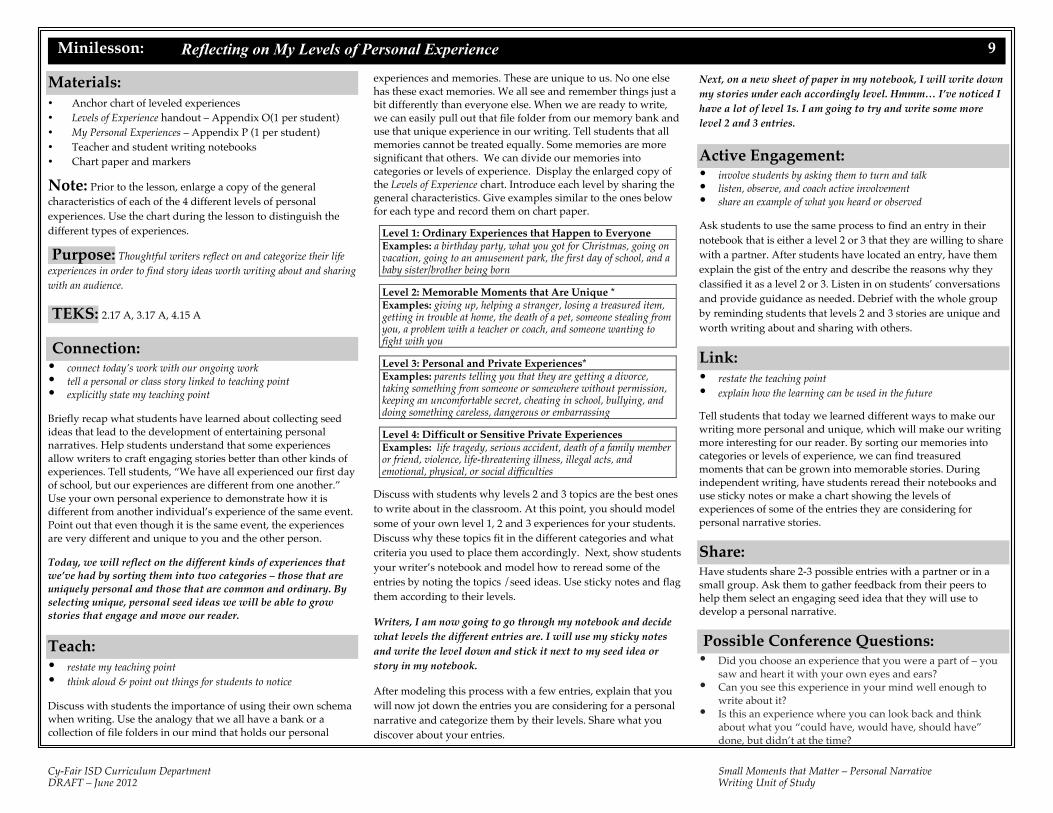
Cy-Fair ISD Curriculum Department Small Moments that Matter – Personal Narrative DRAFT – June 2012 Writing Unit of Study
Materials: Anchor chart of leveled experiences Levels of Experience handout – Appendix O(1 per student) My Personal Experiences – Appendix P (1 per student) Teacher and student writing notebooks Chart paper and markers
Note: Prior to the lesson, enlarge a copy of the general characteristics of each of the 4 different levels of personal experiences. Use the chart during the lesson to distinguish the different types of experiences. Purpose: Thoughtful writers reflect on and categorize their life experiences in order to find story ideas worth writing about and sharing with an audience. TEKS: 2.17 A, 3.17 A, 4.15 A Connection: connect today’s work with our ongoing work tell a personal or class story linked to teaching point explicitly state my teaching point Briefly recap what students have learned about collecting seed ideas that lead to the development of entertaining personal narratives. Help students understand that some experiences allow writers to craft engaging stories better than other kinds of experiences. Tell students, “We have all experienced our first day of school, but our experiences are different from one another.” Use your own personal experience to demonstrate how it is different from another individual’s experience of the same event. Point out that even though it is the same event, the experiences are very different and unique to you and the other person. Today, we will reflect on the different kinds of experiences that we’ve had by sorting them into two categories – those that are uniquely personal and those that are common and ordinary. By selecting unique, personal seed ideas we will be able to grow stories that engage and move our reader.
Teach: restate my teaching point think aloud & point out things for students to notice
Discuss with students the importance of using their own schema when writing. Use the analogy that we all have a bank or a collection of file folders in our mind that holds our personal
experiences and memories. These are unique to us. No one else has these exact memories. We all see and remember things just a bit differently than everyone else. When we are ready to write, we can easily pull out that file folder from our memory bank and use that unique experience in our writing. Tell students that all memories cannot be treated equally. Some memories are more significant that others. We can divide our memories into categories or levels of experience. Display the enlarged copy of the Levels of Experience chart. Introduce each level by sharing the general characteristics. Give examples similar to the ones below for each type and record them on chart paper.
Level 1: Ordinary Experiences that Happen to Everyone Examples: a birthday party, what you got for Christmas, going on vacation, going to an amusement park, the first day of school, and a baby sister/brother being born
Level 2: Memorable Moments that Are Unique * Examples: giving up, helping a stranger, losing a treasured item, getting in trouble at home, the death of a pet, someone stealing from you, a problem with a teacher or coach, and someone wanting to fight with you
Level 3: Personal and Private Experiences* Examples: parents telling you that they are getting a divorce, taking something from someone or somewhere without permission, keeping an uncomfortable secret, cheating in school, bullying, and doing something careless, dangerous or embarrassing
Level 4: Difficult or Sensitive Private Experiences Examples: life tragedy, serious accident, death of a family member or friend, violence, life-threatening illness, illegal acts, and emotional, physical, or social difficulties
Discuss with students why levels 2 and 3 topics are the best ones to write about in the classroom. At this point, you should model some of your own level 1, 2 and 3 experiences for your students. Discuss why these topics fit in the different categories and what criteria you used to place them accordingly. Next, show students your writer’s notebook and model how to reread some of the entries by noting the topics /seed ideas. Use sticky notes and flag them according to their levels. Writers, I am now going to go through my notebook and decide what levels the different entries are. I will use my sticky notes and write the level down and stick it next to my seed idea or story in my notebook. After modeling this process with a few entries, explain that you will now jot down the entries you are considering for a personal narrative and categorize them by their levels. Share what you discover about your entries.
Next, on a new sheet of paper in my notebook, I will write down my stories under each accordingly level. Hmmm… I’ve noticed I have a lot of level 1s. I am going to try and write some more level 2 and 3 entries. Active Engagement: involve students by asking them to turn and talk listen, observe, and coach active involvement share an example of what you heard or observed Ask students to use the same process to find an entry in their notebook that is either a level 2 or 3 that they are willing to share with a partner. After students have located an entry, have them explain the gist of the entry and describe the reasons why they classified it as a level 2 or 3. Listen in on students’ conversations and provide guidance as needed. Debrief with the whole group by reminding students that levels 2 and 3 stories are unique and worth writing about and sharing with others. Link: restate the teaching point explain how the learning can be used in the future Tell students that today we learned different ways to make our writing more personal and unique, which will make our writing more interesting for our reader. By sorting our memories into categories or levels of experience, we can find treasured moments that can be grown into memorable stories. During independent writing, have students reread their notebooks and use sticky notes or make a chart showing the levels of experiences of some of the entries they are considering for personal narrative stories. Share: Have students share 2-3 possible entries with a partner or in a small group. Ask them to gather feedback from their peers to help them select an engaging seed idea that they will use to develop a personal narrative. Possible Conference Questions: Did you choose an experience that you were a part of – you
saw and heart it with your own eyes and ears? Can you see this experience in your mind well enough to
write about it? Is this an experience where you can look back and think
about what you “could have, would have, should have” done, but didn’t at the time?
Reflecting on My Levels of Personal Experience
Minilesson: 9

Cy-Fair ISD Curriculum Department Small Moments that Matter – Personal Narrative DRAFT – June 2012 Writing Unit of Study
Materials: Truisms PowerPoint – Appendix D4 Process for Introducing Truisms – Appendix I9 Familiar fable(s) with morals Teacher & student pictures from lesson 7 (story behind the
picture) 2-3 Sample truisms connected to teacher’s picture/story Chart paper and markers Teacher and student notebooks
Note: Writing with truisms is a strategy from Gretchen Bernabei’s Crunchtime that helps students formulate the message of their writing using a statement that conveys a truth or life lesson. Bernabei suggests introducing truisms using photos and moving towards the abstract – composing truisms as sentences without visuals. For more details on introducing truisms, refer to the Process for Introducing Truisms (Appendix I9). Teachers may also choose to relate truisms to the life lessons found in fables, such as Arnold Lobel’s Caldecott Medal book, Fables. Purpose: Thoughtful writers use truisms in their writing to share a truth or life lesson about the world and its people. TEKS: 3.19 A, 4.17 A, 5.17 A Connection: connect today’s work with our ongoing work tell a personal or class story linked to teaching point explicitly state my teaching point Recall a time when you learned an important truth or life lesson and share it with students. Briefly highlight how you discovered the truth/life lesson, and how it has impacted you. Connect the idea to personal narratives by telling students that writers often share what they have learned or discovered in their own life experiences by using it as message for the readers of their stories. Writers, authors of personal narratives share important life lessons or truths about the world and its people by telling what they have learned through their own life experiences. These life lessons or truths create a powerful, unifying message that makes a reader stop and think. Share an example of a story that conveyed a thoughtful message using a life lesson or truth. Explain how the truism strengthened the story. Tell students that today you are going to introduce them to truisms, so that they can use the strategy to strengthen
their own writing.
Teach: revise writing by adding a truism think aloud & point out things for students to notice
Explain that a truism is something that is true for almost everyone everywhere. Share examples of morals from fables that teach life lessons. Ask students to share some of the life lessons that they have learned. Record these ideas, along with the definition of a truism on chart paper similar to the chart below.
Truisms Truisms are statements that teach life lessons or truths about our world and its people. They provide our stories with a unifying message that links all the details together. Examples from Aesop’s fables: Little by little does the trick. Little friends may prove great friends. Plodding wins the race. Honesty is the best policy.
Tell students they will learn more about truisms by examining photographs and “reading” the messages they hold.
1. Show Slide 2 of the Truisms PowerPoint. Ask students to describe shat they see.
2. Share the truism statement for the photo. Have students explain what the statement means to them and how it connects to the photo. Ask if they agree with the statement, and if they believe it to be true for most people.
3. Discuss more photos in the same manner (slides 3-7). 4. Show more photos, asking students to make up their own
truisms, and then compare them with the truisms given in the photo (slides 8-12).
Show students the picture that you drew to depict the memorable moment from your personal narrative in minilesson 7. Tell students that you’ve been thinking about truisms that describe a truth or life lesson related to the experience. Share the examples you created and the process you used to create them.
Active Engagement: involve students by asking them to turn and talk listen, observe, and coach active involvement share an example of what you heard or observed
Have students turn and talk to a partner about which truism they believes share a stronger message and explain the reasons for their thinking. Listen in on their conversations and share a few of the ideas you overheard. Then ask students to tell their partner what they learned about truisms today and how it could help them strengthen their writing. Debrief by sharing some of the ideas you heard students express. Link: restate the teaching point explain how the learning can be used in the future Remind students that truisms allow us to connect our writing to the real world. They prod the reader to think more deeply about our message. Truisms can be found all around us. Encourage students to look for truisms in the stories they read each and every day. Tell students to think about a truism for the picture they drew depicting the memorable moment of their story. Future Practice Activities: Teachers may choose to engage students in these activities over several sessions on different days. They can be done as warmups, in small group, or as mid-workshop teaching points. Show a photo of any of the remaining slides and have
students respond with a truism. Discuss with the class how a truism might be used to write a story, and where it might be placed (title, beginning, middle, and end).
Brainstorm a list of possible truisms. Record responses on chart paper. Read aloud a paper that lacks voice. As a class, find the main idea of the story and brainstorm truisms that might fit. Revise the paper by including a truism.
Ask students to go back to previous papers they have written and try to come up with a truism that might fit. They can share their ideas with a partner or small group.
Ask students to choose one truism and make a list of their experiences that they could write about using the truism.
Share stories as a small group or as the class listens to find the truism.
Possible Conference Questions: Where did you use a truism in your story? Why did you
place it there? Do you think a truism makes a story more effective? What
does it add? How does a truism make you feel when you read it in a
story1?
Minilesson:
Getting Acquainted with Truisms Using Picture Prompts Minilesson: 10
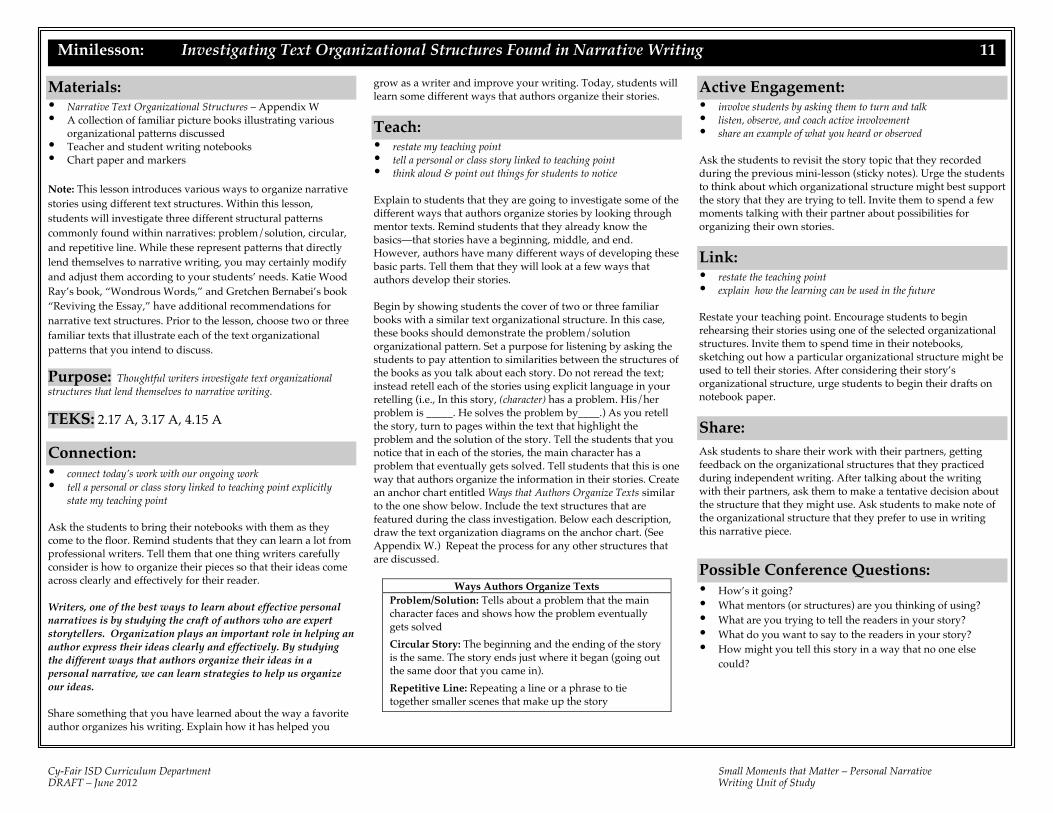
Cy-Fair ISD Curriculum Department Small Moments that Matter – Personal Narrative DRAFT – June 2012 Writing Unit of Study
Materials: Narrative Text Organizational Structures – Appendix W A collection of familiar picture books illustrating various
organizational patterns discussed Teacher and student writing notebooks Chart paper and markers Note: This lesson introduces various ways to organize narrative stories using different text structures. Within this lesson, students will investigate three different structural patterns commonly found within narratives: problem/solution, circular, and repetitive line. While these represent patterns that directly lend themselves to narrative writing, you may certainly modify and adjust them according to your students’ needs. Katie Wood Ray’s book, “Wondrous Words,” and Gretchen Bernabei’s book “Reviving the Essay,” have additional recommendations for narrative text structures. Prior to the lesson, choose two or three familiar texts that illustrate each of the text organizational patterns that you intend to discuss. Purpose: Thoughtful writers investigate text organizational structures that lend themselves to narrative writing. TEKS: 2.17 A, 3.17 A, 4.15 A Connection: connect today’s work with our ongoing work tell a personal or class story linked to teaching point explicitly
state my teaching point Ask the students to bring their notebooks with them as they come to the floor. Remind students that they can learn a lot from professional writers. Tell them that one thing writers carefully consider is how to organize their pieces so that their ideas come across clearly and effectively for their reader. Writers, one of the best ways to learn about effective personal narratives is by studying the craft of authors who are expert storytellers. Organization plays an important role in helping an author express their ideas clearly and effectively. By studying the different ways that authors organize their ideas in a personal narrative, we can learn strategies to help us organize our ideas. Share something that you have learned about the way a favorite author organizes his writing. Explain how it has helped you
grow as a writer and improve your writing. Today, students will learn some different ways that authors organize their stories.
Teach: restate my teaching point tell a personal or class story linked to teaching point think aloud & point out things for students to notice
Explain to students that they are going to investigate some of the different ways that authors organize stories by looking through mentor texts. Remind students that they already know the basics—that stories have a beginning, middle, and end. However, authors have many different ways of developing these basic parts. Tell them that they will look at a few ways that authors develop their stories. Begin by showing students the cover of two or three familiar books with a similar text organizational structure. In this case, these books should demonstrate the problem/solution organizational pattern. Set a purpose for listening by asking the students to pay attention to similarities between the structures of the books as you talk about each story. Do not reread the text; instead retell each of the stories using explicit language in your retelling (i.e., In this story, (character) has a problem. His/her problem is _____. He solves the problem by____.) As you retell the story, turn to pages within the text that highlight the problem and the solution of the story. Tell the students that you notice that in each of the stories, the main character has a problem that eventually gets solved. Tell students that this is one way that authors organize the information in their stories. Create an anchor chart entitled Ways that Authors Organize Texts similar to the one show below. Include the text structures that are featured during the class investigation. Below each description, draw the text organization diagrams on the anchor chart. (See Appendix W.) Repeat the process for any other structures that are discussed.
Ways Authors Organize Texts Problem/Solution: Tells about a problem that the main character faces and shows how the problem eventually gets solved Circular Story: The beginning and the ending of the story is the same. The story ends just where it began (going out the same door that you came in). Repetitive Line: Repeating a line or a phrase to tie together smaller scenes that make up the story
Active Engagement: involve students by asking them to turn and talk listen, observe, and coach active involvement share an example of what you heard or observed
Ask the students to revisit the story topic that they recorded during the previous mini-lesson (sticky notes). Urge the students to think about which organizational structure might best support the story that they are trying to tell. Invite them to spend a few moments talking with their partner about possibilities for organizing their own stories.
Link: restate the teaching point explain how the learning can be used in the future Restate your teaching point. Encourage students to begin rehearsing their stories using one of the selected organizational structures. Invite them to spend time in their notebooks, sketching out how a particular organizational structure might be used to tell their stories. After considering their story’s organizational structure, urge students to begin their drafts on notebook paper.
Share: Ask students to share their work with their partners, getting feedback on the organizational structures that they practiced during independent writing. After talking about the writing with their partners, ask them to make a tentative decision about the structure that they might use. Ask students to make note of the organizational structure that they prefer to use in writing this narrative piece.
Possible Conference Questions: How’s it going? What mentors (or structures) are you thinking of using? What are you trying to tell the readers in your story? What do you want to say to the readers in your story? How might you tell this story in a way that no one else
could?
Investigating Text Organizational Structures Found in Narrative Writing
Minilesson: 11
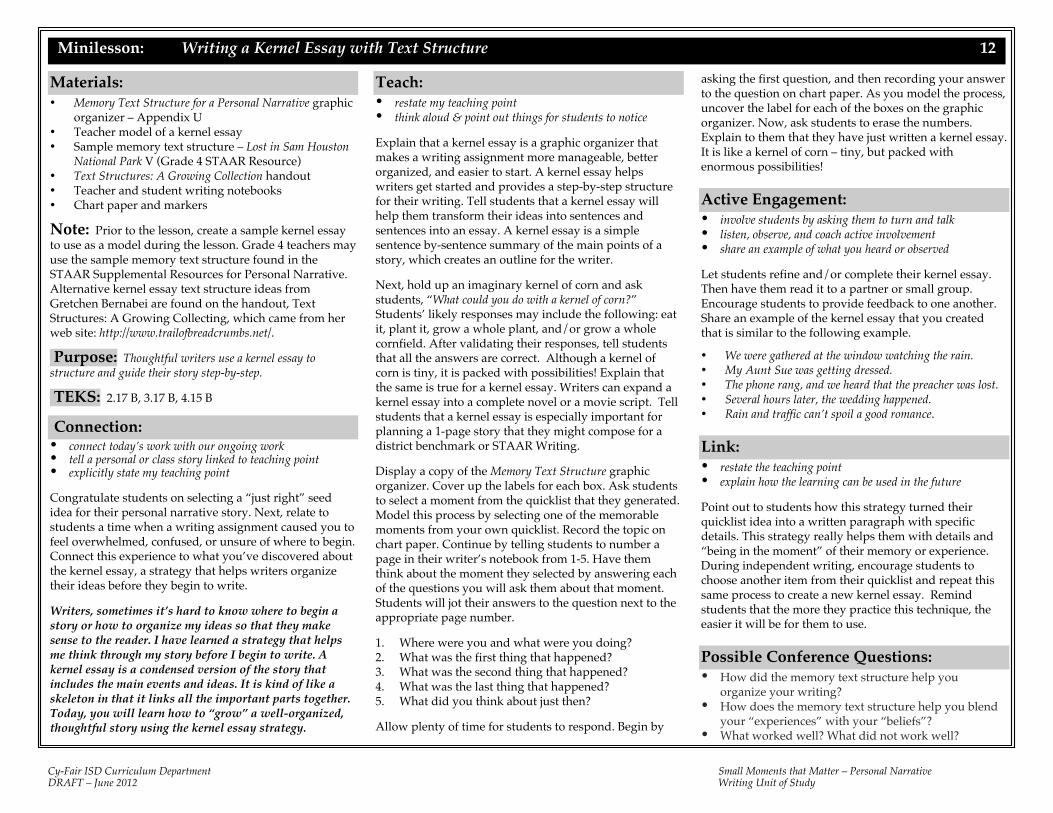
Cy-Fair ISD Curriculum Department Small Moments that Matter – Personal Narrative DRAFT – June 2012 Writing Unit of Study
1
Materials: Memory Text Structure for a Personal Narrative graphic
organizer – Appendix U Teacher model of a kernel essay Sample memory text structure – Lost in Sam Houston
National Park V (Grade 4 STAAR Resource) Text Structures: A Growing Collection handout Teacher and student writing notebooks Chart paper and markers
Note: Prior to the lesson, create a sample kernel essay to use as a model during the lesson. Grade 4 teachers may use the sample memory text structure found in the STAAR Supplemental Resources for Personal Narrative. Alternative kernel essay text structure ideas from Gretchen Bernabei are found on the handout, Text Structures: A Growing Collecting, which came from her web site: http://www.trailofbreadcrumbs.net/. Purpose: Thoughtful writers use a kernel essay to structure and guide their story step-by-step. TEKS: 2.17 B, 3.17 B, 4.15 B Connection: connect today’s work with our ongoing work tell a personal or class story linked to teaching point explicitly state my teaching point Congratulate students on selecting a “just right” seed idea for their personal narrative story. Next, relate to students a time when a writing assignment caused you to feel overwhelmed, confused, or unsure of where to begin. Connect this experience to what you’ve discovered about the kernel essay, a strategy that helps writers organize their ideas before they begin to write. Writers, sometimes it’s hard to know where to begin a story or how to organize my ideas so that they make sense to the reader. I have learned a strategy that helps me think through my story before I begin to write. A kernel essay is a condensed version of the story that includes the main events and ideas. It is kind of like a skeleton in that it links all the important parts together. Today, you will learn how to “grow” a well-organized, thoughtful story using the kernel essay strategy.
Teach: restate my teaching point think aloud & point out things for students to notice Explain that a kernel essay is a graphic organizer that makes a writing assignment more manageable, better organized, and easier to start. A kernel essay helps writers get started and provides a step-by-step structure for their writing. Tell students that a kernel essay will help them transform their ideas into sentences and sentences into an essay. A kernel essay is a simple sentence by-sentence summary of the main points of a story, which creates an outline for the writer. Next, hold up an imaginary kernel of corn and ask students, “What could you do with a kernel of corn?” Students’ likely responses may include the following: eat it, plant it, grow a whole plant, and/or grow a whole cornfield. After validating their responses, tell students that all the answers are correct. Although a kernel of corn is tiny, it is packed with possibilities! Explain that the same is true for a kernel essay. Writers can expand a kernel essay into a complete novel or a movie script. Tell students that a kernel essay is especially important for planning a 1-page story that they might compose for a district benchmark or STAAR Writing. Display a copy of the Memory Text Structure graphic organizer. Cover up the labels for each box. Ask students to select a moment from the quicklist that they generated. Model this process by selecting one of the memorable moments from your own quicklist. Record the topic on chart paper. Continue by telling students to number a page in their writer’s notebook from 1-5. Have them think about the moment they selected by answering each of the questions you will ask them about that moment. Students will jot their answers to the question next to the appropriate page number. 1. Where were you and what were you doing? 2. What was the first thing that happened? 3. What was the second thing that happened? 4. What was the last thing that happened? 5. What did you think about just then?
Allow plenty of time for students to respond. Begin by
asking the first question, and then recording your answer to the question on chart paper. As you model the process, uncover the label for each of the boxes on the graphic organizer. Now, ask students to erase the numbers. Explain to them that they have just written a kernel essay. It is like a kernel of corn – tiny, but packed with enormous possibilities! Active Engagement: involve students by asking them to turn and talk listen, observe, and coach active involvement share an example of what you heard or observed Let students refine and/or complete their kernel essay. Then have them read it to a partner or small group. Encourage students to provide feedback to one another. Share an example of the kernel essay that you created that is similar to the following example. We were gathered at the window watching the rain. My Aunt Sue was getting dressed. The phone rang, and we heard that the preacher was lost. Several hours later, the wedding happened. Rain and traffic can’t spoil a good romance.
Link: restate the teaching point explain how the learning can be used in the future Point out to students how this strategy turned their quicklist idea into a written paragraph with specific details. This strategy really helps them with details and “being in the moment” of their memory or experience. During independent writing, encourage students to choose another item from their quicklist and repeat this same process to create a new kernel essay. Remind students that the more they practice this technique, the easier it will be for them to use. Possible Conference Questions: How did the memory text structure help you
organize your writing? How does the memory text structure help you blend
your “experiences” with your “beliefs”? What worked well? What did not work well?
Writing a Kernel Essay with Text Structure
Minilesson: 12

Cy-Fair ISD Curriculum Department Small Moments that Matter – Personal Narrative DRAFT – June 2012 Writing Unit of Study
Materials: Kernel essays from previous lesson Teacher’s writing notebook entry Teacher and student writing notebooks Chart paper and markers
Note: Prior to the lesson, select a seed idea from your notebook and rehearse telling the story aloud so that you can use it as a model for the teach portion of the lesson. Purpose: Thoughtful writers use strategies for rehearsing their stories in preparation for drafting. TEKS: 2.17 B, 2.18 A, 3.17 B, 3.19 A, 4.15 B, 4.17 A Connection: connect today’s work with our ongoing work tell a personal or class story linked to teaching point explicitly state my teaching point
Recognize the work that students have done in selecting a meaningful topic for their personal narrative. Then share a personal experience in which someone relayed a story that rambled on and on with extraneous details. Explain that it was hard for you to follow the story line, and as a result, you lost interest. Tell students that many writers suffer from this same problem when they begin to write the first draft of their story. They can avoid the problem by rehearsing the oral telling of their story before they write it down on paper. Writers, I am eager to hear about the stories you have chosen to grow from your seed ideas. You’ve heard the expression, “Practice makes perfect.” When we have a chance to share our stories aloud with a writing partner before we begin to write, it helps us find our focus. Telling our story aloud also helps us relive the experience by making a movie in our minds and relating the significance of the important scenes. This process helps us organize our ideas and retell the experience in an order that makes sense to our reader. Today, we will practice telling our stories aloud to a partner, so that we are
better prepared to write them down in a way that engages our readers and provides them with a clear picture of the experience. Teach: restate my teaching point think aloud & point out things for students to notice Share the topic for the seed idea that you selected and explain the reasons why you chose it. Tell students that the topic allows you to relate a personal experience that is unique to you. Demonstrate how you communicate the topic as a vivid and engaging oral story using your kernel essay as a guide. As you share your story, be sure to include the basic story structure elements – characters, setting, problem, and plot. Explain to the students that rehearsing the story aloud helps the writer focus on the content of the story before the ideas are recorded on paper. I am going to share with you one of my memories that I would like to turn into a published piece. (Share the story.) Now I am going to begin jotting down my story. I am going to begin writing my draft. I am noticing it is easier to write because I have just shared it aloud with an audience. Share situations of when implementing this strategy would be useful. After telling your story, jot it down on chart paper so that students are able to see the connection between the oral and the written record of the story. Demonstrate that your main priority is to record the oral story in written form. Show students that you are working arduously to put your thoughts on paper, and you are spending less time concerning yourself with the intricacies of spelling, grammar, usage, and mechanics. Tell them that their focus should be on getting right to the stories that they have to tell. Active Engagement: involve students by asking them to turn and talk listen, observe, and coach active involvement share an example of what you heard or observed
Give students a moment to visualize their narrative story using the kernel essay they created. Then ask the students to work with their partners by taking turns storytelling and revealing how they have pictured the story in their mind. While partners are sharing, note which individuals are experiencing difficulty in telling their stories and make it a point to confer with them during independent writing. Link: restate the teaching point explain how the learning can be used in the future
Rearticulate the day’s strategy, and send students off to record their stories on paper. Urge them to return to their writing spots quickly to begin or continue their drafts on notebook paper.
Digging Deeper Rehearse the topic by telling someone else the entire story aloud. Be sure to include the basic parts of the story. After telling the story, jot the story on paper.
Share: Reconvene and debrief on the strategy that was used today. Remind students of situations when the storytelling strategy would be useful to them. Invite students to share their written stories with their original partners. In pairs, students will compare the written version with the oral retelling of the story. Ask students to assess themselves and to set goals with their partners. Remind students to complete their Daily Logs if they have not already done so. Possible Conference Questions: How’s it going? What are you trying to tell the readers in your
story? Tell me the story. What happened? Why is this story important to you?
2 Minilesson:
Getting Right To The Story You Have To Tell
Minilesson: 13

Cy-Fair ISD Curriculum Department Small Moments that Matter – Personal Narrative DRAFT – June 2012 Writing Unit of Study
Mid-Workshop Teaching Point: Audience and Purpose Revisit the anchor chart entitled Reasons to Write. Talk to students about other purposes for writing as they relate to personal narrative writing. These reasons might include:
- to say something important about you and your life - to make someone laugh, cry, or connect with you - to remember or tell what happened - to share how you feel about someone or something
Add these purposes to the anchor chart. Additional purposes for writing personal narratives can be found in the appendix. Next, use the think aloud process to describe which purpose would be best for communicating your piece of writing. Continue to think aloud by discussing your audience - the individuals who might most enjoy reading your piece of writing. This could be a family member, a friend, or an organization. Remind the students that they are not writing just for the teacher. Model recording the audience and purpose on your piece of paper. Give students a few moments to consider the audience and purpose of their pieces.

Cy-Fair ISD Curriculum Department Small Moments that Matter – Personal Narrative DRAFT – June 2012 Writing Unit of Study
Materials: A short personal experience Teacher and student writing notebooks Chart paper and markers
Purpose: Thoughtful writers tell their story and use their listeners’ questions to revise with relevant details. TEKS: 2.18 A, 3.18 A, 3.19 A, 4.16 A, 4.17 A Connection: connect today’s work with our ongoing work tell a personal or class story linked to teaching point explicitly state my teaching point
Share your excitement about the important work your students have been doing to prepare for the writing of their personal narratives. Writers, your small moment stories are emerging from the tiny seed ideas you planted, and they are now growing into lively and thoughtful stories that your readers are sure to enjoy. An important part of the writing process is gathering feedback from an audience to help you make your story as clear and as engaging as it can be. When we ask for feedback, it’s important to put our feelings aside and listen carefully to what our reader is saying and the kinds of questions she is asking. Writers hold the story in their mind, and sometimes the little details that we know about our experience may not be clearly expressed in our writing. As a result, our reader may come to a place in our story and say, “Hey, wait a minute. I’m confused. What just happened in the story?” Relate a time when someone’s feedback on your work helped you improve its quality. Connect this concept to the value of gathering feedback about your writing from readers. Explain to students that it is time to gather some feedback about their work, so that they can use it to enhance their writing. Today, students will learn how to use the questions that listeners ask to offer suggestions, clarify ideas, and strengthen a writer’s composition.
Teach: restate my teaching point think aloud & point out things for students to notice Share with students a short personal experience, leaving out the most intriguing details and cutting the ending short. Once the lesson is finished, be sure to remind students to tell their complete story and not to leave anything out on purpose. Ask the students if they had any questions about the story. Model how to carefully listen to their questions and answer them. Jot down the questions on chart paper. Discuss with your class what they thought the strengths of the story were and acknowledge the confusion of listeners who feel they were left with too many questions. Explain that writers often think they have written their story well, because they hold the memory of the story in their mind. But sometimes little details are left out or are written in a way that confuses the reader. As a writer, it’s important to reread our piece as a reader and anticipate the questions our reader may have. Wow, I can’t believe there are so many questions. That makes me think that I left out a lot of information. But you know what? That information was all in my mind. I didn’t stop to think about how you as a reader don’t know any of that. I am now going to look over my questions and add information in parts of my story that were unclear. Debrief the process that you modeled and discussed the importance of listening to the questions the reader is asking. Remind students that it helps to record the questions, so that you can go back and revise the parts of your story that need more work. Active Engagement: involve students by asking them to turn and talk listen, observe, and coach active involvement share an example of what you heard or observed
Explain to students that this strategy will provide a way to hear what questions readers might have even before a story is written. Ask students to turn and talk to a partner
about how and why this strategy can strengthen their writing. Listen in on the conversations, and then debrief as a whole group by sharing a few of the ideas you heard. Reiterate the importance of listening to the questions a reader has about a writer’s story. Link: restate the teaching point explain how the learning can be used in the future
Explain to students that during independent writing they will work with a partner or in a small group of 3. Each student will take turns sharing their story and gathering feedback about the kinds of questions the listener(s) has about their story. Encourage students to ask questions that require more than a one-word answer. The listener(s) or audience will then write down three questions about the story that they would like answered, and then they will give them to the author. Point out to students that by using this strategy, it will help to eliminate possible confusion a reader may have about specific parts of their story. After students have gathered feedback from their writing partner or group, direct them to return to their desk to continue work on their personal narrative. Remind them to address the specific questions that their audience asked about their story. Share: As a whole group, debrief what students learned about their writing by gathering feedback from their audience. Possible Conference Questions: How did you feel when you were telling your story? Did telling your story help you remember more parts
of your story? How did you feel when you had to listen and come
up with questions? Was it difficult to find questions that took more than
one word to answer? How did telling your story and answering questions
you received help you write your story?
Telling the Story and Asking the Questions
Minilesson: 14

Cy-Fair ISD Curriculum Department Small Moments that Matter – Personal Narrative DRAFT – June 2012 Writing Unit of Study
Materials: Story Beginnings handout – Appendix X (1 per
student) Story Beginnings Slide Show – Appendix R 10-15 Narrative texts with various types of leads Teacher’s writing notebook entry Teacher and student writing notebooks Chart paper and markers Note: Prior to the lesson, select 10-15 narrative texts that include both effective and less effective leads for students to analyze during the minilesson. Teachers may choose to use the Story Beginnings slide show as another resource for introducing different kinds of leads. Purpose: Thoughtful writers revise their drafts by crafting effective leads that hook the reader. TEKS: 2.17 B, 2.18 A, 3.17 B, 3.19 A, 4.15 B, 4.17 A Connection: connect today’s work with our ongoing work tell a personal or class story linked to teaching point explicitly state my teaching point Explain the concept of a lead—the first line/first few lines of a piece of writing. Tell them that an effective lead grabs a reader’s attention and draws them into the story. Connect this concept to the decision a reader makes when determining whether he wants to read a specific book. Relate a time when you picked up a book and decided to read it after reading the lead. Contrast it with a time when a book’s lead did not draw you into the story and make you want to continue reading it. Tell students that as writers, they should always think about writing an interesting lead that will make the reader want to continue reading their stories. Writers, the other day I decided to read this book from my library. I began reading the first couple of lines and was already thinking to myself this is not the book for me. As a reader, I need to be hooked into a book to get my attention from the beginning. As a writer, we should always think about writing an interesting lead that will make the reader want to continue reading their stories.
Today, we will learn some different ways that authors craft the leads to their stories. Teach: restate my teaching point think aloud & point out things for students to notice Tell the students that they will judge whether or not an author has constructed an effective lead. Explain that you will read aloud the first few lines of various books, and students will indicate whether or not they like the lead by showing a thumbs-up or a thumbs-down. Today, we are going to look through some texts and judge whether or not the author has constructed an effective lead that makes the reader want to find out what’s happened in the story. I am going to read the beginning of a few books, and I would like you to show me if you like the lead or not by doing thumbs up or down. As students offer their opinion about the leads, form two piles—one pile of stories with interesting leads and another pile of stories with uninteresting leads. Then guide students in a discussion about the books that they identified as having interesting or effective leads. Ask the students, “What did the author do well? How did (s)he begin this story?” Start an anchor chart with the headings: 1) Type of Lead, 2) Example from Mentor Text, and 3) Who Has Tried it in Our Class. As you discuss the effective leads, record the title and author of the book with the examples, so that the students are able to revisit the mentor text during independent writing. Leave the last column blank as students will eventually post their own attempts in recreating a type of lead.
Type of Lead Example from Mentor Text Sound Words (Onomatopoeia)
Shuffle-shlump. Shuffle-shlump. Shuffle-shlump, shlumped bleary-eyed Oliver out of bed, down the hall, and into the bathroom.
from Bedhead by Margie Palatini
Active Engagement: involve students by asking them to turn and talk listen, observe, and coach active involvement Provide students with a copy of the Story Beginnings handout. Tell the students that they will now have the opportunity to use one of the structures to write an interesting lead with a small group. Place students in groups of three and give each group a sticky note or sentence strip. You may decide upon a topic for the students to practice with (i.e., getting lost, bullies, etc.) or assign a particular type of lead for the groups to mimic. Allow students a few minutes to work together and record a lead on the sticky note or sentence strip. Call the students together and have them share the different leads that they created. Discuss the qualities that make them effective and/or changes they might make to improve them. Reassure them that great leads do not happen instantly. Writers often spend a long time working on their leads to find one that they feel will hook their reader. Link: restate the teaching point explain how the learning can be used in the future Rearticulate the day’s strategy, and send students off to practice crafting an effective lead for the story that they are currently writing. Urge students to complete their drafts by the end of today’s workshop. Share: Invite students to share their revised leads. In pairs, students will compare the original version with their revised version. Possible Conference Questions: How’s it going? How does your story begin? Are you considering
revising this lead according to one of the types that we discussed today? If so, how might that look/sound?
Hooking Readers with Effective Leads
Minilesson: 15

Cy-Fair ISD Curriculum Department Small Moments that Matter – Personal Narrative DRAFT – June 2012 Writing Unit of Study
Mid-Workshop Teaching Point: Ways Author Make Paragraphing Decisions Writers, the stories that you are writing are very powerful ones. You are letting your words flow quickly on the page. That is great! However, we need to make sure that people’s eyes don’t fly right past our words. If we really want readers to take in our writing, we need to chunk or organize our writing into paragraphs. This is what published authors do. Paragraphs give readers a pausing point; it’s a time for them to stop and think about what we’ve just said. In general, we use new paragraphs when— (Begin an anchor chart with some of the ideas shown on the following chart.)
When to Use Paragraphs in Narrative Writing
new character comes along new event happens new idea is introduced new setting new person speaking time moves forward (or backward) a lot
Let’s take a peek at a piece of my writing. Here’s what a new paragraph looks like. (Point to a paragraph found in text.) See mine here? Notice how I have indented the beginning of each paragraph. There isn’t a rule that will tell me exactly where to begin a new paragraph, but I can use some of the tips that I’ve recorded on this chart to help me. (Discuss your paragraphing decisions with your students.) As you write, remember to chunk your story into paragraphs. For now, mark a box (or draw a bracket) around the sentences that you think go in a chunk. When you publish the story, you can put remember to put them into paragraphs.

Cy-Fair ISD Curriculum Department Small Moments that Matter – Personal Narrative DRAFT – June 2012 Writing Unit of Study
Materials: Draw a Picture anchor chart Teacher and student writing notebooks Chart paper and markers
Note: Prior to the lesson, select a story beginning from your notebook that exhibits one or more of the problems shown on the “Tips for Great Beginnings” anchor chart. You will model drawing a picture of the story’s most important part, and you will model how to start your story at this moment. To make the modeling more effective, compose a draft of a stronger beginning related to the picture you will draw. Teachers may also wish to create the Draw a Picture anchor chart prior to the lesson. Purpose: Thoughtful writers use a picture to focus their stories and check for relevant details. TEKS: 2.17 C, 3.17 C, 4.15 C Connection: connect today’s work with our ongoing work tell a personal or class story linked to teaching point explicitly state my teaching point Remind students that a good hook or lead can make or break a piece of writing. Connect the idea to what you’ve observed about students’ habits in the library. Writers, I have noticed when we visit the library that many of you read the beginning of a book, but you do not end up choosing to check out the book. That happens to me, too. If a book has a great lead, then I am hooked, and I want to read more. Tell students that sometimes it’s hard to for writers to know where to start. Relate a time when you had difficulty beginning a story and explain what made it especially difficult. Point out what did not work well in your beginning. Then explain that you’ve learned some tips that have helped you get started with your writing that you’d like to share. Tell them that today they are going to explore drawing a picture of the most important part of their story to help them start it with a bang!
Teach: restate my teaching point think aloud & point out things for students to notice
Tell students that we can learn from our mistakes by following the lead of the great inventor Thomas Edison who once said, “I have not failed. I've just found 10,000 ways that won't work.” Learning “what not to do” when we begin a story can help us avoid some common mistakes that writers make. Point out the fact that students frequently start their papers with information that is not relevant to their story. Many times when I am listening to your stories, I notice there is a lot of information happening before I get to the main point of your story. As writers, we are going to learn ways to start our stories. Create an anchor chart of tips for starting a story and discuss the common problems that student writing often exhibits by relaying a specific example of “what not to do” for each tip.
Tips for Great Beginnings Remember NOT to start: 1. too far back before the real story begins. 2. with the wrong focus by including details that are not
important to the story. 3. with too much confusing information.
Explain to students that one strategy they can use to help them with their beginning is to draw a picture of the most important part of the story. Model the strategy by using a think aloud process to explain each step. 1. I am going to draw a picture of my story showing the most
important moment. (Draw the picture.)
2. (Think out loud.) Now I am going to start writing about where I was and what was happening at that very moment. (Don’t simply identify the scene and move on. Instead, capture the moment by replaying the movie in your mind and thinking aloud for students.)
3. (As you model writing the scene, you may include irrelevant details, but then model how to cross them out since they are not important to the story.) Wait a minute. I’m noticing that I’m getting a little off track. I need to look back at my picture and think back to what’s really important so that I don’t confuse my readers.
4. (Think aloud.) I need to write slowly, so that I capture the important details and keep the action moving forward.
Draw a Picture
1. Draw a picture of your story showing the most important moment.
2. Start writing about where you were in the picture and what was happening at that very moment. Don’t go back in time.
3. Look at your picture and focus on what is most important.
4. Write slowly, remembering details that are important to your main event and move the story forward.
Active Engagement: involve students by asking them to turn and talk listen, observe, and coach active involvement share an example of what you heard or observed Ask students to turn and talk with their partner about what picture they would draw to illustrate the most important part of their story. Have students discuss with their partner everything they can think about that was going on during the time of that picture. Listen in on the conversations and debrief the process as a whole group. Link: restate the teaching point explain how the learning can be used in the future Remind students that sometimes, drawing a picture prior to writing can be a helpful tool for writer to use to stay focused and to zoom in on what is really important to tell. Encourage students to try drawing a picture to help them focus the beginning of their stories. Writers, you are going to draw a picture of the more important moment of your story. Really think about your story and what you are trying to say and then draw that picture. Once you have your picture drawn, write about where you were at that time and what was happening. Use the anchor chart for helpful tips.
Possible Conference Questions: Did your story match your picture the first time you tried
this? How can this help you when you begin planning your
writing? Does this strategy help you stay focused? Did the picture help you provide feedback for your partner?
Great Beginnings: Draw a Picture
Minilesson: 16

Cy-Fair ISD Curriculum Department Small Moments that Matter – Personal Narrative DRAFT – June 2012 Writing Unit of Study
Materials: Story Endings handout – Appendix Y (1 per student) Story Endings Slide Show – Appendix S (optional) Connecting Beginnings & Endings Slide Show – Appendix T
(optional) Teacher’s personal narrative draft with an ending that needs
revision 3-5 familiar books with well-crafted endings Teacher and student notebooks Chart paper and markers Note: Prior to the lesson, compose at least two different endings for your personal narrative. Include one that features an emotional impact and another one that uses a circular ending. Additional lessons for crafting memorable endings can be found at NCTE’s Read, Write, Think web site: http://www.readwritethink.org. Refer to the lesson, “Once They’re Hooked, Reel Them In: Writing Good Endings.” Purpose: Thoughtful writers compose satisfying endings that give their readers something to remember. TEKS: 2.17 C, 3.17 C, 4.15 C Connection: connect today’s work with our ongoing work tell a personal or class story linked to teaching point explicitly state my teaching point Recognize students’ effort in working on their stories by describing some of the specific work you have observed. Tell students that composing a strong ending creates a feeling of satisfaction for our readers. Relate a time when you finished a good book and explain how you felt. Tell students that writers take the time to carefully compose the ending so that they provide their reader with a sense of satisfaction. Writers, you have been working hard to craft stories that are memorable and hook your readers with a strong beginning. Really good writing keeps the reader’s attention all the way from the beginning of the story to the end. The ending is the last thing a reader remembers about your writing. Endings are important because they tie up loose ends and give the reader something to think about at the end of the story. Today, we’re
going to learn ways to revise our endings, so that our reader feels a sense of satisfaction when he or she reads the final word.
Teach: restate my teaching point think aloud & point out things for students to notice Endings matter. They leave a reader with the final impression of your writing. Wrapping up our story with a powerful ending, makes our reader stop and think, “Wow! That was great writing. I think I’d like to read more.” Authors use different techniques to help them craft effective endings. Read and discuss ending lines from literature such as the following examples. “My Great-Aunt Arizona” by Gloria Houston is the story of a teacher who taught generations of children in the same one-room schoolhouse she attended as a little girl and how her way of teaching inspired her students. The last line reads, “She goes with us in our minds.” Ask students what this line makes them think (i.e., that the teacher is remembered in different ways by different people; that they will never forget her). Note that this ending ties up the loose ends of the story and provides an effective conclusion. Ask students how they would feel if the last line had been, “And that’s the story about my Great-Aunt Arizona.” Discuss why this is a less satisfying ending. “The Baby Sister” by Tomie de Paola is the story of a boy named Tommy who is looking forward to the birth of his new sister. Unfortunately, he is unhappy staying with his Nana while his mother is in the hospital. All the trouble is forgotten once the baby arrives. The last line reads, “And Tommy was the happiest boy in the world.” This ending concludes that the events at the end of the story made Tommy happy. Ask students if they think “And they all lived happily ever after” would have been a better ending. Discuss why this ending is best used only for fairy tales. Next, explain that some writers use an emotional ending to help the reader feel as though he or she were part of the experience. As a writer, you have many choices when you decide how you want your story to end. You can write an ending that is funny, one that’s happy, or even one that’s sad. Try to match the
ending with the kind of story that you are writing. You want to leave the reader with the same strong feeling you had when the story happened to you. Introduce circular endings and explain that the author connects the end back to the beginning of the story. Writers work hard to find the right way to shape their story. Some stories build to an exciting conclusion at the end. Other stories use a circular ending. A circular story circles back to the way it began.
Active Engagement: involve students by asking them to turn and talk listen, observe, and coach active involvement share an example of what you heard or observed Share two different endings for your personal narrative – emotional and circular. Ask students to evaluate the effectiveness of the endings and describe which one leaves the reader feeling more satisfied. Have students share at least one idea for their story ending – emotional or circular – with a partner. Provide students with a copy of the Story Endings handout that they can use as models for composing the ending of their personal narrative. Link: restate the teaching point explain how the learning can be used in the future Students will work on “transplanting” their endings by trying out one of the strategies that they learned about strong endings. Now it is your turn to craft a powerful ending that leaves your reader with a satisfied feeling. Experiment with an emotional ending or give a circular ending a try. Read the endings aloud to see which one packs the greater punch.
Possible Conference Questions: How’s it going? What changes have you made to your ending? Which type of ending – emotional or circular – do you think
would provide your readers with a satisfying feeling?
Reeling Readers in with Satisfying Endings
Minilesson: 17

Cy-Fair ISD Curriculum Department Small Moments that Matter – Personal Narrative DRAFT – June 2012 Writing Unit of Study
Materials: F.I.T. Chart graphic organizer - Appendix L Teacher and student kernel essays & drafts Teacher and student writing notebooks Chart paper and markers
Note: In this lesson, students deconstruct an existing story by using it to fill in the Ideas column with typical graphic organizer categories (e.g., characters, setting, problem, events/details, etc.). Students then add details to the Feelings and Thoughts columns. If time permits, students will discuss/add meaningful details to a draft. Purpose: Thoughtful writers use a F.I.T. chart to write stories with more depth and detail the first time they write them. TEKS: 2.18 A, 3.18 A, 3.19 A, 4.16 A, 4.17 A Connection: connect today’s work with our ongoing work tell a personal or class story linked to teaching point explicitly state my teaching point Remind students that well-crafted writing uses a two-hand approach by blending our experiences (point to one hand) with our beliefs and feelings (point to the other hand). Relate a time when you finished a draft only to discover that it left you feeling flat when you reread it. Tell students that although you related the important details of the experience, you forgot one very important part of writing – to include your thoughts and feelings about the experience. Tell students that a solution to this problem is using a special graphic organizer called a F.I.T. chart, which helps a writer reflect on his thoughts and feelings about specific part of the experience. A F.I.T. chart is a useful tool that writer s can use to revise their story by embedding his thoughts and feelings into the personal narrative. Writers, today we will use a special graphic organizer called a F.I.T. chart to help us reflect on our thoughts and feelings about an experience. We will use what we learn
to revise our stories, so that our writing is transformed from wimpy to simply WOW! Teach: restate my teaching point think aloud & point out things for students to notice Explain that the F.I.T. chart is a graphic organizer that helps writers plan and think about the ideas they want to share with their readers. Display a copy of the graphic organizer and explain the contents, starting with the middle column. Ideas (or Information): The middle part of the graphic
organizer is where writers add the story elements or main points that they want to include in their composition.
Feelings: The first column shows the feelings or emotions
that the writer wants to convey about the details or events in the story. Adding feelings to our writing makes it more engaging and personable.
Thoughts (or Dialogue): The last column shows the
thoughts that the writer wants to share about the details or events in the story. It may also include dialogue that tells what the writer or character(s) says about the topic/event.
Show how to use the F.I.T. chart organizer using the key events from your kernel essay. Begin by adding the key details in the Ideas column. Then model how to add feelings about each idea under the Feelings column. Brainstorm synonyms for common feeling words to encourage precise and varied word choice. Use only a few words in both the Feelings and Idea columns. Finally, model adding your thoughts or dialogue into the Thoughts column. Typically, this column has the longest entries, and it may include multiple thoughts for each idea. Once the F.I.T. chart is complete, model how to turn a row into one fluent paragraph for the students. Active Engagement: involve students by asking them to turn and talk listen, observe, and coach active involvement share an example of what you heard or observed
Have the students turn and talk about what they noticed you doing as a writer to add elaboration to my story. Ask them to share with their partner how the F.I.T. chart allowed the teacher to add her thoughts and feelings about specific parts of the experience. Listen in on the conversations and provide feedback as needed. Debrief by sharing a few of the ideas you heard students express. Link: restate the teaching point explain how the learning can be used in the future Reiterate the important role that careful planning plays in creating entertaining and thoughtful stories. Remind students that they can enhance their writing by taking the time to carefully plan a story by using the F.I.T. chart to add the feelings and thoughts about the ideas in their writing. They can then use each row of the organizer to help them revise specific parts of their story. Encourage students to use the F.I.T. chart and their kernel essay/draft to revise one or more parts of their story. Share: Allow students to share one way they have “transformed” their original draft using an idea generated on the F.I.T. chart. Possible Conference Questions: What do you think of the F.I.T. chart as a way to write
your story? Did anything surprise you? How does adding feelings and thoughts help a reader
understand your piece more thoroughly? Why is it important to have a balance of these things
(feelings, information, thoughts)?
Getting Our Writing F.I.T.
Minilesson: 18

Cy-Fair ISD Curriculum Department Small Moments that Matter – Personal Narrative DRAFT – June 2012 Writing Unit of Study
Materials: Gary Paulsen’s “Tuning” excerpt – Appendix or an excerpt
from a familiar book that uses sensory details An excerpt from a familiar book highlighting sensory details
describing a memorable character or setting [See Mid-workshop teaching point]
Where’s the Beef? Quick Guide and graphic organizer – Appendix M & N
Revision Bling Wands – Appendix G7 Sticky notes Teacher’s writing notebook entry Teacher and student writing notebooks Chart paper and markers Note: Prior to the lesson, select an excerpt from a text that uses vivid sensory details to paint scenes for the reader. Create the Revision Bling Wands using the directions found in the appendix. Have students bring their drafts to the minilesson teaching area. Teachers may opt to use the Where’s the Beef? resources as an alternative to add sensory details as well as thoughts and feelings. Purpose: Thoughtful writers revise their drafts by adding sensory details that allow the reader to experience the story using their 5 senses. TEKS: 2.17 C, 2.18 A, 3.17 C, 3.19 A, 4.15 C, 4.17 A Connection: connect today’s work with our ongoing work tell a personal or class story linked to teaching point explicitly state my teaching point Relate a time when you got “lost in the story,” because the author used vivid sensory details that made you feel as though you were experiencing the story firsthand. Explain to students that this is the kind of writing that invites the reader to feel as though they are living each moment of the story. Remind students that narrative stories are filled with descriptive details that help the reader picture the events of the story. Explain that sometimes in our rush to talk about the people and the events in our stories, we sometimes forget to describe some of the other important details that allow the reader to picture the scene. Tell the students that authors use the five senses as an important tool for making these details come alive for the reader. Remind students that sensory details – what we can see taste, touch,
hear, and smell – help create a movie in the reader’s mind. Explain that today you will show them how authors use sensory details to make their writing come alive for the reader. Writers, creating a movie in the mind of our readers is hard work. Authors use the five senses to paint a picture of each scene in their story, so that the reader feels as if they are right there experiencing the story along side the narrator of the story. When we write, we have to slow down and take a mental snapshot of each scene and then use sensory details to allow the reader to see what we see, smell what we smell, hear what we hear, taste what we taste, and feel what we feel. Sensory details paint lively pictures that make our words leap off the page and into the mind of readers. Today, we will learn strategies for painting scenes that help our readers experience the story in 3D! Teach: restate my teaching point think aloud & point out things for students to notice Tell students that good writers use their five senses—sight, touch, smell, taste, and sound—to bring the world of their stories to their readers. Record these categories of sensory details on a large chart.
Sensory Details Revision “Bling” See Smell Touch/Feel Hear Taste
Writers, today I will show you another strategy to help revise your story. I am going to read a portion of a picture book through the eyes of a writer aloud to them. Display a copy of the text. Tell the students that you will read a portion of a picture book aloud to them through the eyes of a writer. Explain that as you read the book aloud, you will be paying attention to which of the five senses the author uses in the writing. Read a section of the text aloud. Pause and share your thoughts on the author’s use of sensory details and use the revision bling wand(s) to point out which type of sensory detail is being used. Record the sensory details on the anchor chart under the appropriate categories. Next, explain that you have looked over your story and discovered important parts that aren’t as clear as they can be. Use a think aloud process to share what is missing in a specific part and discuss which sensory detail(s) will best help you paint a vivid picture for your reader. Use the revision wands to point out the areas that need more
detail. Then model how you would revise the scene using 1 or more of the sensory details.
Active Engagement: involve students by asking them to turn and talk listen, observe, and coach active involvement share an example of what you heard or observed Explain to students that you would like them to look through their draft and mark a place with a sticky note or an asterisk that needs some sensory detail “bling.” Provide a few moments for students to identify a part and then ask students to turn and talk to their partner about how they can use sensory details to revise that part. Listen in on the students’ conversations. Debrief by reminding the students that writers include these types of details to help the reader better visualize the scenes in the story. Link: restate the teaching point explain how the learning can be used in the future Recap what students have learned about sensory details. Explain that today you want students to reread their narrative pieces to determine if they have given the readers enough sensory details to paint a movie in their minds. Ask them to consider which of the five senses they tend to use the most. Encourage them to see if they can vary the kinds of sensory description in their writing. Have them mark places in the text using asterisks or sticky notes that can use sensory details. Then have them revise 1 or more parts of their draft using sensory detail “bling.”
Share: Invite students to share ways that they added sensory details to their writing. In pairs, students will compare the original version with the revised version. In addition, allow students to spend some time discussing ways that they used details to help develop characters or setting. Possible Conference Questions: Can you show me a place in your writing where you have
used sensory details? Which of the five senses do you tend to use the most? How might adding sensory details make your story even
better? Where might you add those details?
Adding Revision “Bling” with Sensory Details
Minilesson: 19

Cy-Fair ISD Curriculum Department Small Moments that Matter – Personal Narrative DRAFT – June 2012 Writing Unit of Study
Mid-Workshop Teaching Point: Developing Memorable Characters (or Setting)
Writer, can I have your eyes? In a good piece of writing, the characters come alive. We feel like we know them, we care about them, and they become part of who we are. If you want your readers to care about your characters, they have to be able to picture them. In a picture book, you can draw the characters, but in a story you have to include enough written description so that the reader can picture them. Let’s revisit a very memorable character from a story that is familiar to us. Close your eyes while I read the description of this character. (Read aloud the excerpt that describes the memorable character.) Did you notice how the author used sensory details to describe this character? The author described the character in such a way that you could actually picture the character. All of you have stories with characters, and at least one of those characters is you. Today, I’d like you to revisit the writing that you are working on and decide if you have given your reader enough of a description to picture the characters in your story. If not, spend some time in your notebook describing this character. Then ask yourself, “Would the description make my writing stronger? Where would you insert it into my text?” [Alternatively, a similar format may be used to help students focus on developing the setting of their story. Explain to students that sometimes in the rush to write about the people and the events in stories, we sometimes forget to describe the setting of the story. Tell the students that authors often use sensory details to describe the setting.]

Cy-Fair ISD Curriculum Department Small Moments that Matter – Personal Narrative DRAFT – June 2012 Writing Unit of Study
Materials: Exploding a Moment slide show – Appendix M13 Mentor text excerpt List-like entry from a personal narrative Teacher’s writing notebook entry Teacher & student notebooks & kernel essays Chart paper and markers Note: Prior to the lesson, select an example of a moment in a mentor text in which the author has slowed down the telling of an important event to the story. All grade levels can use slide 1 of the Exploding a Moment Slide Show as a visual for ways an author slows down the telling of a single moment. The remaining portion of the slide show matches the 4th grade mentor text, “Eleven.” Purpose: Thoughtful writers revise their drafts by slowing down an important moment in the story. TEKS: 2.17 C, 2.18 A, 3.17 C, 3.19 A, 4.15 C, 4.17 A Connection: connect today’s work with our ongoing work tell a personal or class story linked to teaching point explicitly state my teaching point Relate an experience in which your adrenaline was racing due to nerves, and it seemed as though everything was happening in slow motion. Tell what you were thinking and experiencing using sensory details. Remind students that as writers, they want the readers to pay attention to the most exciting or interesting parts of their stories. One way that writers capture a reader’s attention is by slowing down an important part of the story. Writers, we want our readers to stop and take notice when we share an important part of our story. One trick authors use is to slow down the action in a specific scene by using sensory details, adding their thoughts and feelings, and telling each part of the action one moment at a time. We call this strategy exploding a moment. Today, I’m going to share some ways that you can stretch out a moment in your story to draw the reader into the scene and make them feel as though they are experiencing it for themselves.
Teach: restate my teaching point tell a personal or class story linked to teaching point think aloud & point out things for students to notice Introduce the concept of exploding a moment by asking students to listen as you read a short excerpt from a familiar text where the author has dramatized the events using slow motion. Ask students to picture the scene in their mind as you read the excerpt and to think about the type of details the author uses to stretch out the moment. Use a think aloud process and periodically stop to allow students to turn and talk to a partner about the scene they are envisioning. Display slide 1 of the Exploding a Moment slide show and ask students which techniques the author used to stretch out the scene. Next, tell students the first step in using the strategy of exploding a moment is to identify the part(s) that needs to be slowed down. Explain that you will now share a list-like story in which the author treats the events as if they are all the same. Ask students to listen and identify a “hot spot” or dramatic, important moment in the story that could be stretched out. After reading the excerpt, ask students to turn and talk to a partner and tell which part they believe is a hot spot that should be slowed down. Ask them to explain their thinking, and then identify the part(s) that most students agree was important to slow down. Reiterate the importance of taking the time to stretch out the “hot spot” in a story by letting students know that if all parts in a story are treated equally, the reader may not clearly see the significance of the event, and they may even miss out on clearly understanding the author’s message. Begin an anchor chart of some of the ways that an author might choose to explode a moment.
Ways that Authors Explode a Moment in a Story Find a “hot-spot” then… Use sensory details by zooming with what you
see, smell, taste, touch, and hear. Add dialogue. Having the characters talk makes
us feel like we’re in the middle of the scene. Close your eyes and imagine yourself there. Then
share the details, step-by-step and frame-by-frame. Paint a picture with similes & metaphors. Share the inner thoughts & feelings of the
character.
Briefly share the scene from your personal narrative that you have stretched out. Explain how you decided which part of the story was your “hot spot” and discuss the kinds of details that you used to slow the moment down. Active Engagement: involve students by asking them to turn and talk listen, observe, and coach active involvement share an example of what you heard or observed Ask students to look at their kernel essay to determine the “hot spot” of their story. Have them share the “hot spot” with a partner by slowing the moment down using one or more of the techniques shared during the teach portion of the minilesson. Listen in on the conversations and provide feedback as needed. Debrief by sharing a few of the ideas you heard students share with one another. Link: restate the teaching point explain how the learning can be used in the future Reiterate what students have learned about slowing down the “hot spots” in their writing. Explain that during writing workshop, you want them to work with a partner and read through their stories to clearly identify a “hot spot” that needs revision. Ask them to make sure that they haven’t rushed through this part of the story. Then have them spend some time in their notebooks exploding this moment using one of the techniques recorded on the anchor chart. Share: Invite students to share ways that they have exploded moments in their writing. In pairs, students will compare the original version with the revised version. In addition, allow students to spend some time discussing ways that they have used time transitions to skip ahead and leave out unimportant things. Possible Conference Questions: Can you show me a place in your writing where you
are thinking of exploding a moment? What technique would you use?
Exploding the Moment Minilesson: 20

Cy-Fair ISD Curriculum Department Small Moments that Matter – Personal Narrative DRAFT – June 2012 Writing Unit of Study
Mid-Workshop Teaching Point: Time Transitions
Writers, I want to share something with you. I’ve noticed that some of you are having trouble getting to the important parts of your story. Sometimes I find that you are trying to tell everything, even some of the unimportant parts and your writing is getting lost in all of the clutter. Writers, when you write you don’t have to include everything that happened between one time and another. For instance, let’s say you are writing about building a sand castle on the beach. You might want the story to start when you excitedly packed the pails and towels in the car and end at the moment when placed your flag on top of your amazing sand castle. You don’t have to tell every little thing that happened in between the time when you started loading the car and the time when you finished the sandcastle. For instance you might not tell about everything that happened as you rode in the car to the beach. You would probably want to just tell about certain parts of that day. There would be some places that you would want to skip over. Today, I want to share with you some of the words or phrases that writers use to help them jump forward in time. These time order words act as signals that help the reader follow the story events. (Generate a list of phrases similar to the following ones on an anchor chart.)
Words That Signal Time Changes
In the morning Later that day (or afternoon) Later in the day After a while Finally
These types of words allow you to skip ahead in time and leave things out of your writing that aren’t important. Take a moment to reread what you’ve already written. See if you’ve included some less important events that you’d prefer to leave out. If so, you may want to use one of these words or phrases to skip forward in time and to help the reader move from one story event to the next.

Cy-Fair ISD Curriculum Department Small Moments that Matter – Personal Narrative DRAFT – June 2012 Writing Unit of Study
Materials: Large piece of bulletin board or butcher paper Collection of “sparkling sentences” pulled from mentor
texts, student writing, and teacher’s writing “The Golden Line,” chapter 13 excerpt from Ralph
Fletcher’s Live Writing: Breathing Life into Your Words Sparkling golden pointer (optional) Chart paper and markers Teacher and student writing notebooks
Note: Prior to the lesson, select several golden lines from mentor texts and your students’ writing. The lines should evoke an emotional response (e.g., laugh or grimace), use a precise word that is just right for a situation, demonstrate an unusual way to begin a sentence, or exhibit a unique effect on the writing. Be sure to have students’ permission to share the sentences with the class. Post the sparkling sentences on chart paper. Teachers may read aloud a portion of Ralph Fletcher’s excerpt on “The Golden Line” during the teach portion of the lesson. Furthermore, teachers may wish to a use a sparkling golden pointer to use as a visual for pointing out the author’s craft. Over several days’ time, share “golden lines” from each student’s writing & display them in the classroom, so that all students are recognized in some way. Purpose: Thoughtful writers use strong verbs and precise language to create memorable “golden lines” that make readers stop and take notice. TEKS: 2.17 C, 3.17 C, 4.15 C Connection: connect today’s work with our ongoing work tell a personal or class story linked to teaching point explicitly state my teaching point Introduce the idea of the “golden line” or “sparkling sentences” by describing a time when you sampled a tasty treat that left you longing for more. Connect the concept to the sampling of “delicious words that seem to melt in your mouth” as you read them aloud from a favorite author. Explain that these “tasty word treats” are called golden lines or sparkling sentences.
Writers, author Ralph Fletcher defines a golden line as a “sweet sentence that makes you sit up straight, go back, and read it all over again.” We all have golden lines, phrases, or words buried within our writing. Like jewelry, sometimes these lines need a little polishing to make them sparkle even brighter. Today, we will “mine” our writing in search of the golden lines that make our readers sit up and take notice. Teach: restate my teaching point tell a personal or class story linked to teaching point think aloud & point out things for students to notice Writers, I invite you to enjoy a sampling of some treasured golden lines with me. Let’s take a look at one from one of my favorite authors – me! (Share a golden line from one of your notebook entries and relate a personal connection to the sentence.) Wow! When I read that line it made me think of that very special moment in my life I will never forget. This line really surprised when I wrote it, because… (Share your thoughts about the craft of the line.) Continue to share a few more golden lines from favorite authors and discuss the attributes that make a sentence sparkle. Ask students, “Does it evoke emotions? Make you think? Create a picture in your mind with just a few words? Make you wonder? Surprise you? Take you back to a familiar place and time?” Record students’ answers on chart paper with the heading, “Golden lines make readers…” Next, explain that contrary to what many writers think, it is strong verbs, not flowery adjectives, which add the “Wow” factor to a sentence. Read the excerpt from Ralph Fletcher about strong verbs. Re-examine the golden lines from the mentor texts and point out examples that have strong verbs. Then, introduce another strategy for crafting sentences that “sizzle” by sharing Fletcher’s section about “surprising comparisons,” which are similes or metaphors. Share an example of a mentor text sentence that uses one of these literary devices. Tell students that you would now like to share golden lines from some students in your class. Use chart paper to create a table similar to the one below to record the golden lines and
what you notice about the use of literary devices.
Golden Lines from Our Class Golden Line Student Comments
Active Engagement: involve students by asking them to turn and talk listen, observe, and coach active involvement share an example of what you heard or observed Discuss each sentence and ask the class what makes the sentence sparkle. Record specific ideas about the author’s use of literary devices in the “comments” column. Point out to students that this activity will not only validate the writer and build self-confidence, but it will also be a good example for other students to use in their writing. It also makes us think critically about our writing and the writing of others and what we can do to enhance it. Link: restate the teaching point explain how the learning can be used in the future Restate that we are all capable of writing golden lines because we all have that sparkling potential within us. Strong verbs, precise language, and comparisons (metaphors or similes) work together to create golden lines. Remind students that the collection of golden lines serves as a tool that writers can use to help them craft new, original golden lines for their writing. During independent writing, have students work with a partner or in a small group to locate “golden lines” in their writing. Encourage them to look for sentences that could be improved by using one or more of the techniques they learned about today. Possible Conference Questions: How does discussing all these sentences help you in your
writing? How will you feel having your sentences published in our
classroom and school? What ideas have you taken away from our discussion?
The Golden Line: Crafting Sparkling Sentences Minilesson: 21

Cy-Fair ISD Curriculum Department Small Moments that Matter – Personal Narrative DRAFT – June 2012 Writing Unit of Study
Materials: Brother-sitting excerpt from Knucklehead by Jon Scieszka
– Appendix K11 Truism slide show – L12 Example of a truism embedded in the lead and ending
of the teacher’s personal narrative Teacher’s and students’ pictures from minilesson 7 Chart paper and markers Teacher and student notebooks
Note: Prior to the lesson, create a draft of a revised lead and ending that include a truism about your story. Record it on chart paper so that students can refer to it as a model. Purpose: Thoughtful writers craft interesting and memorable stories with a unifying message (truisms) when they share important life lessons or truths about the world and people with their readers. TEKS: 3.19 A, 4.17 A Connection: connect today’s work with our ongoing work tell a personal or class story linked to teaching point explicitly state my teaching point Share a personal story about a time that you worked hard to perfect a skill or technique doing something that you enjoy (e.g., shooting freethrows). Tell students that the extra effort paid off as your skill grew. Connect the idea to writing by explaining that the more work we put into strengthening the leads and endings of our stories, the stronger the message in our story will be. Writers, you are growing in your ability to hook readers with strong leads and stretch out the important moments in your stories. I’m excited to see the thoughtful changes you are making to engage and maintain the interest of your readers. Well-crafted writing with a powerful message engages our audience and evokes an emotional response. We have learned that truisms provide a unifying message that connects the ideas throughout a piece. Some authors use truisms in both their lead and their ending to make their message stand out even further. Today, we will put truisms to work by trying them out in our leads and connecting them to our endings, so that readers stop and think, “Wow, that
writing has a powerful message!” Teach: revise writing by adding a truism think aloud & point out things for students to notice Display and discuss the definition and significance of a truism with slide 1 of the Truism slide show. Tell students that truisms are often found in the leads or endings of some stories. They usually express the main idea or message of a piece. Briefly review the process students have learned about crafting truisms using a photo as a prompt using slide 2. Have students generate some possible truisms about the photo of a babysitter. Discuss the reasons for their thinking. Then share the truism for the photo. Ask students how it connects to the people in the photo. Explain that students will now take a closer look at a truism that is integrated in the lead and ending of a personal narrative from a familiar author. Introduce the selection called Brother-sitting from Jon Scieskza’s book, Knucklehead. The excerpt tells about Jon and his older brother Jim’s experiences with babysitting their younger brothers. To share the main message of his story, Scieszka uses a truism about babysitters. Ask students to listen to the story and notice how the author’s truism, stated at the beginning of the story, is woven throughout the piece. After reading the selection, have students turn and talk with a partner about the author’s message and then share their ideas with the group. Underline or highlight the truism found in the story using slide 3 of the PowerPoint. Reiterate the key elements of a truism – important truths or life lessons about the world and its people, and true for most everyone everywhere. Tell students that you have experimented with using truisms in the lead and ending of your personal narrative. Show students the picture you drew of the important moment in your story from lesson 7 and discuss some of the possible truisms you brainstormed for the picture and how it connected to your story. Explain the process you used to decide on the truism you wanted to try with your story. Then share the revised lead and ending for your story. Have students discuss how the connected lead and ending makes the reader stop and think.
Active Engagement: involve students by asking them to turn and talk listen, observe, and coach active involvement share an example of what you heard or observed
Provide a few moments for students to look at the pictures they have created for their memorable moment and think about a truism they might like to try out. Then ask students to turn and talk to a partner about the truism they thought about for their picture and story and how they might use it in their lead and/or ending. Listen in on the conversations and provide guidance as needed. Share a few of the ideas you heard students discuss with the whole group. Link: restate the teaching point explain how the learning can be used in the future
Tell students that we have the power to transform our writing by sharing truisms about our world and the way we live. Whether we are writing for a specific purpose (prompt-based) or on a self-selected piece, adding a truism to the beginning and/or ending of our story will leave our readers with a strong impression. Truisms help readers understand the message we want to convey about our topic. During the independent writing activity, provide time for students to craft a lead and/or ending using a truism that can be added to their draft. Students may cut and paste the lead or ending into their draft. Have students share their revised leads and/or endings with the group. Share: Invite a few students to share their revised leads and/or endings that incorporate truisms. Remind them that truisms add the “Pow Wow!” to our writing by making readers think deeply about our message and respond to the story with emotion. Possible Conference Questions: What message do you want your reader to know about
your topic? What is a life lesson that you learned about the topic? How can the truism strengthen your lead and ending?
What does it add to your message? How does a truism make you feel when you read it in a
story?
Minilesson:
Strengthening Leads and Endings Using Truisms
Minilesson: 22

Cy-Fair ISD Curriculum Department Small Moments that Matter – Personal Narrative DRAFT – June 2012 Writing Unit of Study
Materials: Ba-Da-Bing Challenge poster - Appendix E5 Ba-Da-Bing Sentences Graphic Organizer – Appendix F6 Ba-Da-Bing Sentence Photos – Appendix O15 Teacher and student writing notebooks
Note: Prior to the lesson, create a ba-da-bing sentence about a memorable moment from your own experiences that you will share as a personal story during the connection portion of the minilesson. Record the sentence on chart paper or a sentence strip. Gather and/or create a variety of examples of ba-da-bing sentences to share with your students during the minilesson. Gretchen Bernabei has a few examples on her web site: http://www.trailofbreadcrumbs.net. Student examples can also be found on the Encinitas Union School District wikispace: http://wc2008.wikispaces.com/. Purpose: Thoughtful writers make their writing come alive when they revise and add one or more well-crafted “ba-da-bing” sentences to help the reader “step into” the story and visualize the events. TEKS: 2.17 C, 3.17 C, 4.15 C Connection: connect today’s work with our ongoing work explicitly state my teaching point Praise students for the work they have been doing to make their writing stand out and come alive by sharing a few of the strategies they have learned so far. Relay a personal story about a memorable moment using the key parts of a ba-da-bing sentence. Describe where you were, what you saw, and what you thought. Explain to students that you just shared a “ba-da-bing” moment with them. Writers, we can make our sentences sparkle by using a strategy called ba-da-bing sentences. Well-crafted writing uses a variety of sentence structures to convey the events in a story. If all the sentences started in the same way, our writing would sound “blah,” and we would risk losing the interest of our reader. Today, we will learn a fun way to revise our writing by adding a little “Ba-da-Bing” sparkle to our story to make it really shine!
Teach: revise writing by adding a truism think aloud & point out things for students to notice Writers, when a reader gets “lost” in a story, it feels like they’ve slipped “into the skin” of the writer. This is a goal of good writing – to engage the reader so much that they can imagine living the experience they’re reading about. So how do writers do this? Author C.S. Lewis once said, “Don’t say it was ‘delightful’; make us say ‘delightful’ when we’ve read the description.” Explain that using ba-da-bing sentences in your story is one way to write from the heart and help a reader get lost in the story. Writers, sometimes it’s hard to capture the thoughts and feelings we had during an important moment in our story. Ba-da-bing sentences help us recreate the experience for our readers by using a simple pattern. Let me show you how I created the ba-da-bing sentence for my memorable moment. Describe the important moment in your story. Then draw three icons on chart paper, one at a time, and describe what each symbol represents. Share your ba-da-bing sentence and point to your feet, eye, and head as you read the different parts. Where You Were
BA
What You Saw
DA
What You Thought
BING
Explain that ba-da-bing sentences often start with an adverbial clause using a word like “as” or “when.” Show students an example with one of these words. “When Ellie walked out onto the stage, she saw bright lights and hundreds of people. Her heart began thumping and she thought she would faint.” Let them know it’s okay if they start their sentences using the subject. Share an example such as, “Brandon stumbled into the classroom and fell flat on his face. He wondered if his life was over.” Let’s look at this sentence. “I saw a vase full of flowers when I came home from work.“ Writers, I think we need to let the reader really understand what is going on here. I am going to try this new strategy. (Point to the feet icon.) “I walked through the back door when I got home.” (Point to the eyes icon.) “I saw a round vase with a dozen red roses.” (Point to the thought bubble icon.) “Are those for me? They are beautiful. I hope they are for me.”
Now I am going to put it all together. (Record the sentence on chart paper.) “As I walked through the back door, I stopped and froze. On the kitchen table was a beautiful vase with 12 dozen red roses. “Are those for me?” I thought to myself.” Together as a class, create a ba-da-bing sentence about a photo or a shared experience. Record the sentence on chart paper. Point out that sentences do not have to be written in a particular order and other senses (nose, mouth, ears, heart) and actions can be substituted. Tell students that writers make careful decisions about where they will use ba-da-bing sentences, and they limit the number of ba-da-bing sentences so that they are not overused. Active Engagement: involve students by asking them to turn and talk listen, observe, and coach active involvement share an example of what you heard or observed Ask students to find one or more places in their draft where they could add a ba-da-bing sentence to make the memory or scene more vivid and engaging. After students identify a place in their draft, ask them to turn and talk to a partner about how they can use the ba-da-bing sentence in their piece. Allow them to try out the strategy by composing the ba-da-bing sentence on paper and then adding it to their draft during independent writing. Partners should share and discuss the “before” and “after” versions of their sentences. Listen to the discussions and coach as needed. Link: restate the teaching point explain how the learning can be used in the future Reiterate the value of revising writing by making the writing come alive. Adding a ba-da-bing sentence in a meaningful place can help a reader experience a scene or memory by vividly seeing the details and recalling the thoughts and feelings about the event to give voice to your writing and make it sizzle. Possible Conference Questions: What is the difference between your original sentence and the
new one you created? How does using the ba-da-bing strategy improve the
sentence? What do you notice about voice, word choice, and sentence fluency?
Where could you use this tool in your own writing? Do you think you might have some dead sentences in your own writing that you could bring to life?
Ba-da-Bing Sentences
Minilesson: 23
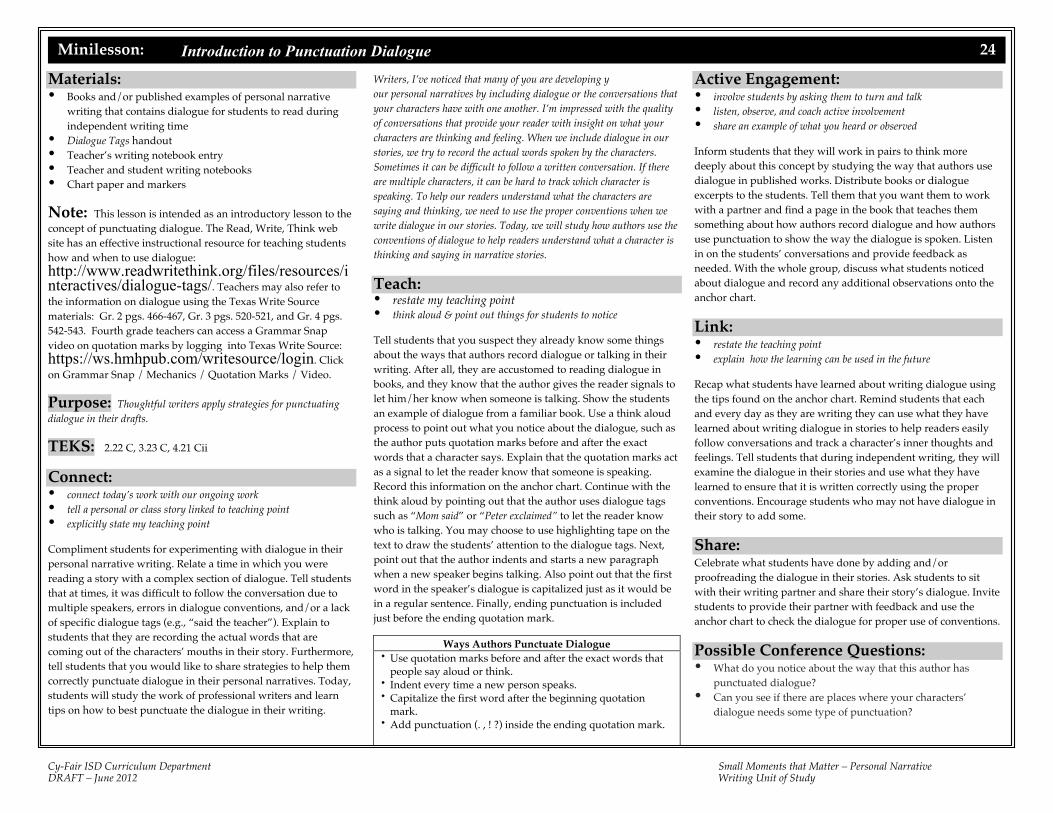
Cy-Fair ISD Curriculum Department Small Moments that Matter – Personal Narrative DRAFT – June 2012 Writing Unit of Study
Materials: Books and/or published examples of personal narrative
writing that contains dialogue for students to read during independent writing time
Dialogue Tags handout Teacher’s writing notebook entry Teacher and student writing notebooks Chart paper and markers Note: This lesson is intended as an introductory lesson to the concept of punctuating dialogue. The Read, Write, Think web site has an effective instructional resource for teaching students how and when to use dialogue: http://www.readwritethink.org/files/resources/interactives/dialogue-tags/. Teachers may also refer to the information on dialogue using the Texas Write Source materials: Gr. 2 pgs. 466-467, Gr. 3 pgs. 520-521, and Gr. 4 pgs. 542-543. Fourth grade teachers can access a Grammar Snap video on quotation marks by logging into Texas Write Source: https://ws.hmhpub.com/writesource/login. Click on Grammar Snap / Mechanics / Quotation Marks / Video. Purpose: Thoughtful writers apply strategies for punctuating dialogue in their drafts. TEKS: 2.22 C, 3.23 C, 4.21 Cii Connect: connect today’s work with our ongoing work tell a personal or class story linked to teaching point explicitly state my teaching point Compliment students for experimenting with dialogue in their personal narrative writing. Relate a time in which you were reading a story with a complex section of dialogue. Tell students that at times, it was difficult to follow the conversation due to multiple speakers, errors in dialogue conventions, and/or a lack of specific dialogue tags (e.g., “said the teacher”). Explain to students that they are recording the actual words that are coming out of the characters’ mouths in their story. Furthermore, tell students that you would like to share strategies to help them correctly punctuate dialogue in their personal narratives. Today, students will study the work of professional writers and learn tips on how to best punctuate the dialogue in their writing.
Writers, I’ve noticed that many of you are developing y our personal narratives by including dialogue or the conversations that your characters have with one another. I’m impressed with the quality of conversations that provide your reader with insight on what your characters are thinking and feeling. When we include dialogue in our stories, we try to record the actual words spoken by the characters. Sometimes it can be difficult to follow a written conversation. If there are multiple characters, it can be hard to track which character is speaking. To help our readers understand what the characters are saying and thinking, we need to use the proper conventions when we write dialogue in our stories. Today, we will study how authors use the conventions of dialogue to help readers understand what a character is thinking and saying in narrative stories. Teach: restate my teaching point think aloud & point out things for students to notice
Tell students that you suspect they already know some things about the ways that authors record dialogue or talking in their writing. After all, they are accustomed to reading dialogue in books, and they know that the author gives the reader signals to let him/her know when someone is talking. Show the students an example of dialogue from a familiar book. Use a think aloud process to point out what you notice about the dialogue, such as the author puts quotation marks before and after the exact words that a character says. Explain that the quotation marks act as a signal to let the reader know that someone is speaking. Record this information on the anchor chart. Continue with the think aloud by pointing out that the author uses dialogue tags such as “Mom said” or “Peter exclaimed” to let the reader know who is talking. You may choose to use highlighting tape on the text to draw the students’ attention to the dialogue tags. Next, point out that the author indents and starts a new paragraph when a new speaker begins talking. Also point out that the first word in the speaker’s dialogue is capitalized just as it would be in a regular sentence. Finally, ending punctuation is included just before the ending quotation mark.
Ways Authors Punctuate Dialogue Use quotation marks before and after the exact words that
people say aloud or think. Indent every time a new person speaks. Capitalize the first word after the beginning quotation
mark. Add punctuation (. , ! ?) inside the ending quotation mark.
Active Engagement: involve students by asking them to turn and talk listen, observe, and coach active involvement share an example of what you heard or observed
Inform students that they will work in pairs to think more deeply about this concept by studying the way that authors use dialogue in published works. Distribute books or dialogue excerpts to the students. Tell them that you want them to work with a partner and find a page in the book that teaches them something about how authors record dialogue and how authors use punctuation to show the way the dialogue is spoken. Listen in on the students’ conversations and provide feedback as needed. With the whole group, discuss what students noticed about dialogue and record any additional observations onto the anchor chart. Link: restate the teaching point explain how the learning can be used in the future
Recap what students have learned about writing dialogue using the tips found on the anchor chart. Remind students that each and every day as they are writing they can use what they have learned about writing dialogue in stories to help readers easily follow conversations and track a character’s inner thoughts and feelings. Tell students that during independent writing, they will examine the dialogue in their stories and use what they have learned to ensure that it is written correctly using the proper conventions. Encourage students who may not have dialogue in their story to add some. Share: Celebrate what students have done by adding and/or proofreading the dialogue in their stories. Ask students to sit with their writing partner and share their story’s dialogue. Invite students to provide their partner with feedback and use the anchor chart to check the dialogue for proper use of conventions. Possible Conference Questions: What do you notice about the way that this author has
punctuated dialogue? Can you see if there are places where your characters’
dialogue needs some type of punctuation?
Introduction to Punctuation Dialogue Minilesson: 24

Cy-Fair ISD Curriculum Department Small Moments that Matter – Personal Narrative DRAFT – June 2012 Writing Unit of Study
Materials: Enlarged, unedited copy of teacher discovery draft (or
former student’s draft) Classroom editing checklist Proofreading Marks – Texas Write Source (TWS) Gr. 2 pg.
451 (see Mechanics pgs. 452-526); Gr. 3 pg. 505 (see Mechanics pgs. 506-590); Gr. 4 pg. 525 (see Mechanics pgs. 526-637)
CUPS/Revision Editing Checklist – 1 per student CUPS and MINTS anchor charts – Appendix Student writing folders (with daily log, draft, & editing
checklists) Teacher and student writing notebooks Chart paper and markers Note: CUPS is an acronym is used to remind students of the different kinds of conventions that need to edit and focus on one at a time. The U in some methods stands for “Understanding,” which is generally more of a revision skill. It is recommended that revision skills be discussed in a separate minilesson. For purposes in this lesson, conventions or “Usage” will be the focus. Teachers should adapt the CUPS Revision/Editing Checklist to include skills appropriate for students. MINTS is an acronym for reminding students of when to use capitalization that can be introduced in another minilesson. Teachers may want to break this lesson into multiple days. Purpose: Thoughtful writers use an editing checklist and other resources to proofread their personal narratives for correctness in capitalization, grammar usage, punctuation, and spelling. TEKS: 2.17 D, 3.17 D, 4.15 D, 5.15 D Connection: connect today’s work with our ongoing work tell a personal or class story linked to teaching point explicitly state my teaching point Recognize students’ efforts for their work on revising their personal narratives. Explain to students that they are very close to publishing their projects and sharing them with an audience. Remind them that an important part of preparing our writing for an audience is proofreading our work. Using proper conventions allows a reader to focus on the ideas and understand an author’s message. Relate a personal experience in which you read an engaging story that had key errors in conventions that made it
difficult for you to clearly understand the ideas. Tell students that there are many reasons that authors write, but they can not effectively achieve their goal when there are significant errors in conventions that impair a reader’s understanding. Explain to students that you will share some strategies and resources to help them check their work for correctness. Writers, we are getting very close to sharing our personal stories with our audience. You’ve put so much hard work and heart into crafting stories that move your reader to experience the feelings expressed in your stories. To help readers truly appreciate your work, we need to take time to proofread our stories to present them in the best way possible. Editing is an important part of the writing process in which authors clean up any errors in conventions, usage, punctuation, and spelling. When we use correct conventions, it allows our readers to focus on the ideas in our writing and makes it easier for them to understand our message. One strategy that authors use to help them with proofreading their work is an editing checklist. As a class, we have been revisiting what we already know about the correct use of conventions, and we have been adding new strategies to our editing toolkit. Today, we will use an editing checklist and other resources to help us check our writing and prepare it for our audience, so that it is the best that it can be. Teach: restate my teaching point think aloud & point out things for students to notice Revisit the important role that correct conventions play in helping an author communicate their ideas clearly. Tell students that they need to take care to check for spelling, punctuation, capitalization, and usage before sending their writing out into the world. Share some of the resources such as a word wall, high frequency words, and anchor charts with tips for editing conventions. Model how to use the CUPS Revision/Editing Checklist strategy as a color-coding tool for checking the written conventions in an unedited draft. CUPS is an amazing color-coded editing system that really makes my life so much easier, and I LOVE it! It helps me see the different kinds of corrections I need to make in my final draft. Most times our drafts become very MESSY, and it's hard to see exactly what needs to be fixed. When we use different colors to represent the different types of conventions, it helps us see more easily the different corrections a writer makes. I think you’ll find CUPS is great strategy for you, too! Show students how to use the color-coded editing process using
your draft by focusing on one area at a time. Active Engagement: involve students by asking them to turn and talk listen, observe, and coach active involvement share an example of what you heard or observed Have students practice applying the CUPS strategy using an unedited excerpt or paragraph from a draft on chart paper and/or a half-sheet of paper. Guide students through the process of editing by asking student partnerships to proofread the excerpt for errors in capitalization using a green pencil. Listen in on students’ conversations and monitor their process. As a class, check the capitalization errors and reteach as needed. Then move on to usage using a purple pencil by having partners check for complete sentences, parts of speech, paragraphing, and other grammar skills appropriate to the grade level. Debrief as a whole group and then direct partners to check punctuation using a red pencil. Finally, check students’ work and review spelling. Explain that students should resources such as high frequency words, word walls, etc. to check familiar words. For more complex words, students can circle in blue pencil the words that they need help with. Once again, debrief the whole process of color-coding the different types of convention errors and rereading a piece multiple times for the conventions that have been previously taught. Link: restate the teaching point explain how the learning can be used in the future
Let students know that their job during the writing workshop today is to go back into their revised draft and edit it for the conventions that you’ve been talking about in your minilessons using your class resources and editing checklist. Share: Have students share with their partner some places in their draft where they edited appropriately. As a whole group, have a few students share what they learned about the editing process. Possible Conference Questions: What kinds of edits are you making? Why? What kinds of errors are you discovering as you edit? How does rereading and proofreading a draft for a specific
convention help you edit your work accurately?
Using an Editing Checklist or C.U.P.S. Minilesson: 25

Cy-Fair ISD Curriculum Department Small Moments that Matter – Personal Narrative DRAFT – June 2012 Writing Unit of Study
Materials: Publishing Decisions slide show - Appendix Familiar published book(s) Teacher and student writing notebooks Student writing folders (with daily log, draft, editing
checklists & spelling resource pages) Publishing materials (e.g., assorted paper, pencils,
stapler, glue, markers, crayons, etc.) Note: Allow 2-3 days for the publication phase. Refer to Crunchtime for strategies on preparing for final copy lesson as needed. This lesson can be broken up into multiple days with the first day focusing on the types of decisions that authors make regarding the layout and format of the story. Follow-up mid-workshop teaching points and/or minilessons can focus on paragraphing, proofreading, and handwriting as needed. Refer to the teaching tips found in the mid-workshop teaching point section. Purpose: Thoughtful writers make careful publishing decisions and polish the presentation of their stories for readers. TEKS: 2.17 D, 2.22 A, 3.17 D, 3.23 A, 4.15 D, 4.21 A, 4.21 Cii Connection: connect today’s work with our ongoing work tell a personal or class story linked to teaching point explicitly state my teaching point Tell students that you have good news! All of the strategies that they have learned over the last few weeks are coming together in what we call a final draft! Explain that authors have many important decisions to make as they prepare the final copy of their personal narrative for an audience. Relate a personal story in which you formed a first impression about someone or something based on the way that the individual or thing looked. Connect the idea to the way that readers evaluate potential books that they might like to read. Tell students that just as they form a first impression about a book they are considering reading by looking at a cover, an audience forms an initial impression on whether a story is interesting based upon the appearance of their writing. Today, students will consider many factors and make
decisions about preparing the final version of their writing for their audience. Teach: restate my teaching point think aloud & point out things for students to notice
Teachers may opt to use the Publishing Decisions slide show to review the kinds of decisions authors make in regards to form and layout. Using the PowerPoint, click the mouse to reveal the different questions that the students have about their final draft. Explain that writers consider their audience and message when making decisions about the way they want their writing to look. For dramatic effect, pull out one of the published books and tell students that the author and editor made specific decisions about the format of the book. Point out a few items that reflect the author’s and editor’s decisions. Then introduce some of the factors that writers consider using the topics found on slide 2. Click the mouse to reveal each topic. Discuss the kinds of choices that students can make in regards to each topic. Sample questions for each topic are shown below. What kind of format will I use? (e.g., picture book, newspaper,
article) What information will I include on my cover page? Should I include a dedication page? Who will I dedicate it to?
What message will I include? Do I want borders around my pages? What will the border look
like? Will illustrations enhance my story? What parts of the story
will I illustrate? How many illustrations should I include? Should I use color to create visual appeal? What type of paper should I use? What medium will I use to illustrate my work? (e.g., watercolor,
markers, crayons, chalk) What kind of information, if any, do I want to include about the
author? Use a think aloud process to briefly explain a few of the decisions that you are making in regards to the format of your published work. Remind students about the different kinds of materials available to them for publishing their final draft. Share with students the publication deadline and discuss the actions that will help them achieve their goals and complete the project by the deadline.
Active Engagement: involve students by asking them to turn and talk listen, observe, and coach active involvement share an example of what you heard or observed Have students take a moment to silently consider the decisions they will make and what kind of materials they might need as they begin publishing. In pairs, have students share their initial ideas with one another. Encourage them to share the reasons for their decisions. Walk around and visit with partners. Then choose a few student examples to share with the group as a whole. Link: restate the teaching point explain how the learning can be used in the future Tell students that when we envision the kind of writing that we want to do when we first begin writing a piece, it helps us mentally prepare for the kinds of decisions that we’ll make when we begin the publishing process. Let students know that their job during today’s writing workshop is to begin publishing their writing. Inform students that they may want to examine a few of the published books for formatting ideas. Remind them of the deadline for completing the draft. Share: Call students to the floor and ask them to share with their partner about the progress of their publishing work. Walk around and visit with partners. With student permission, choose a few student examples to share with the group as a whole. Possible Conference Questions: What format are you going to use to publish your
piece? How does the format enhance your message? What have you done to make your writing visually
appealing for readers?
Publishing Decisions: Preparing The Final Copy for an Audience
Minilesson: 26

Cy-Fair ISD Curriculum Department Small Moments that Matter – Personal Narrative DRAFT – June 2012 Writing Unit of Study
Mid-Workshop Teaching Point: Rereading with Your Writing Partner Writers, may I stop you for a moment. You are doing a great job of rereading your writing to find places that you can improve upon. Now, I want to teach you that after you’ve looked over your writing carefully, you can reread your writing with your writing partner to make sure that your writing makes sense. All writers have a friend or buddy to help them think about their writing. Many times this writing partner can ask us questions like why, what, who, or when to help us make our writing clearer. This person acts as a second pair of eyes and ears, a person that can help us tell our stories in a clear way. Let me show you how this works. (Demonstrate. You may choose to record the steps that you take on chart paper.) So writers, before you begin publishing, I want you to read your stories to your writing partners. Pause after each paragraph and ask your partner if what you read makes sense. Writing partners, as you listen to each others stories, be prepared to ask questions like why, what, who, or when after each paragraph. These questions will help your partner add or change details to make the story clear. Today during the share session we will practice this.
Mid-Workshop Teaching Point: Handwriting Remind students of the following:
Remember not to turn your paper in if it contains any of the following: Handwriting is too big or too small,
sloppy, or illegible. Words have big gaps between them or
not enough space. Letters are loopy, swinging from the
tops to the bottom of the lines. The letters i and j have bubbles over
them instead of dots. Try this:
As you begin a new composition, write the first few lines of your paper.
Stop and look at your handwriting. Ask yourself if you have any of the above
problems. If so, erase two or three words at a time and
rewrite. Continue with good handwriting.
Remember that neat handwriting is: 1. Neat and easy to read. 2. Dark enough to read. 3. Spaced appropriately between words. 4. Consistently good from beginning to end of
paper.
Mid-Workshop Teaching Point: Paragraphing Remind students of the following:
Remember NOT to write a composition in one big, long, paragraph, because it gets confusing to read and looks immature.
Instead, try this:
Begin a new paragraph each time you change location, time, action, person, dialogue, mood, focus, and so on.
Keep in mind that you shouldn’t paragraph every sentence. It is better to paragraph too much than too little…or not at all. Be sure you indent each new paragraph.
Mid-Workshop Teaching Point: Proofreading Remind students of the following:
Remember NOT to turn in your paper without correcting common mistakes.
Remind students to check your paper for the following problems: Word/ words left out Letter left out Wrong words Missing punctuation Spelling errors Indention errors Dialogue with missing or wrong
quotations Try this strategy as you write:
Place a dot on your writing draft on the margin on every fifth line.
When you reach each dot, stop and reread what you have written.
Correct mistakes. When you finish writing, reread the whole
paper and correct anything you have missed.

Cy-Fair ISD Curriculum Department Small Moments that Matter – Personal Narrative DRAFT – June 2012 Writing Unit of Study
Materials: Published story written by teacher from childhood Published personal narratives Celebrating and Reflecting on Our Writing anchor chart Teacher and student writing notebook Note: There are multiple ways to celebrate the publication of students’ writing. You might consider partnering up with another class from the same grade level or from a younger grade. Consider having students invite a listening “guest” such as a stuffed animal that they can read their story to during the share time. Alternatively, teachers may choose to publish the stories in a multimedia video. Students can illustrate their story with photographs and/or hand drawn pictures of key story events and then narrate the video using Photostory or some other publishing tool. To start the celebration, play a festive song such as Kool and the Gang’s Celebration, which can be downloaded from iTunes. A video performance of the group is found on YouTube: http://youtu.be/3GwjfUFyY6M. Purpose: Thoughtful writers celebrate their work by sharing their stories with an audience and reflecting on what they have learned about themselves as a writer. TEKS: 2.17 E, 3.17 E, 4.15 E, 4.17 E Connection: connect today’s work with our ongoing work tell a personal or class story linked to teaching point explicitly state my teaching point Congratulate students on completing their personal narratives and the endurance that they demonstrated in staying focused and persevering until the completion of the long-term project. Explain to students that writing is a challenging process. However, little by little the writing eventually comes together. Now, it's time for all the hard work to pay off as students will share their work with the selected audience. Writers, I am so impressed with all the work that you have done to create your memorable stories. I can't wait for you to share them with your audience as you recall a treasured moment from your life. Not only will you have opportunity to share your writing today, but now you will have a story that you can go back to and reread in the future. Today, we will celebrate your accomplishment by sharing our stories
and providing one another with positive feedback. Let's celebrate our good times together! Teach: restate my teaching point think aloud & point out things for students to notice
Share a personal story about finding and rereading a piece of writing that you wrote when you were younger. Describe how the experience of rereading the story made you feel as you “relived” the event through your writing. Point out how much you've grown as a writer since the time that you wrote the original piece of writing and discuss what you learned about yourself as a writer. Writers, when I reread the story about winning the race against my friend Amy whom I had never beaten, it was almost as if I was 12 years old and reliving the experience once again. I felt my heart pounding in my chest as I crouched down at the starting line ready for the sound of the gun. In my mind, I pushed away the cheers of the crowd and pictured myself stepping across the finish line ahead of everyone else. At the start of the gun, I leaped forward out of the starting blocks and slowly rose until I was upright. Each stride brought me closer to my goal, until finally I pushed myself across the finish line in first place. I had finally done it! I had won the race and defeated my friend Amy. What a treasured moment that was! I was a champion. When I looked back at my writing of this story, I noticed that I used “telling” statements in some parts of the writing whereas other parts allowed my reader to visualize the scene as it occurred. As a younger writer, I wasn’t as skilled at “painting” a scene for my readers. Since that time, I’ve learned how to use all of my senses to recreate a scene by describing each moment as the events unfolded. I’ve also learned that I need to show my feelings about the event through my actions rather than saying how I felt. Explain why it's important for writers to revisit pieces that they've already completed. Tell students that rereading their writing allows them to enjoy the experience again and again and again. Furthermore, writers can feel a sense of satisfaction that comes from finishing a challenging project that takes place over several days. Writers periodically take time to reflect on the work that they have done and set goals for the future. Create an anchor chart with questions that allow students to reflect on what they have learned and what areas of writing they need to continue to work on to improve their written communication. Model the reflection process using a piece of writing that you have done.
Celebrating & Reflecting on Our Writing
Celebrate What do you like best about your personal narrative?
Why? What trait of writing is a strength in your story? Why? Reflect What part (or trait of writing) of the personal narrative
do you feel needs more work? Why? What have you learned about yourself as a writer? What goal do you have for your next writing project?
Active Engagement: involve students by asking them to turn and talk listen, observe, and coach active involvement share an example of what you heard or observed Next, explain the process that students will use to share their writing with an audience and provide one another with feedback. You may wish to role play how to give specific feedback about writing and how to receive compliments. Then ask students to practice giving feedback and accepting compliments with a partner. Listen in on the conversations and provide coaching as needed. Debrief the process with the whole group and point out some of the things that you noticed worked especially well. Link: restate the teaching point explain how the learning can be used in the future
Remind students that each and every day they can practice reflecting on what they have learned about themselves as a writer, and they can set goals for improving their writing in the future. Reiterate the expectations for the writing celebration and provide time for students to share their personal narratives. Share: With the whole group, have each child share one thing that they have discovered about themselves as a writer during the personal narrative writing experience. Possible Conference Questions: What have you said about yourself in this piece of writing? Use the questions on the anchor chart.
Celebrate and Reflect on Good Times
Minilesson: 27
Related Documents