


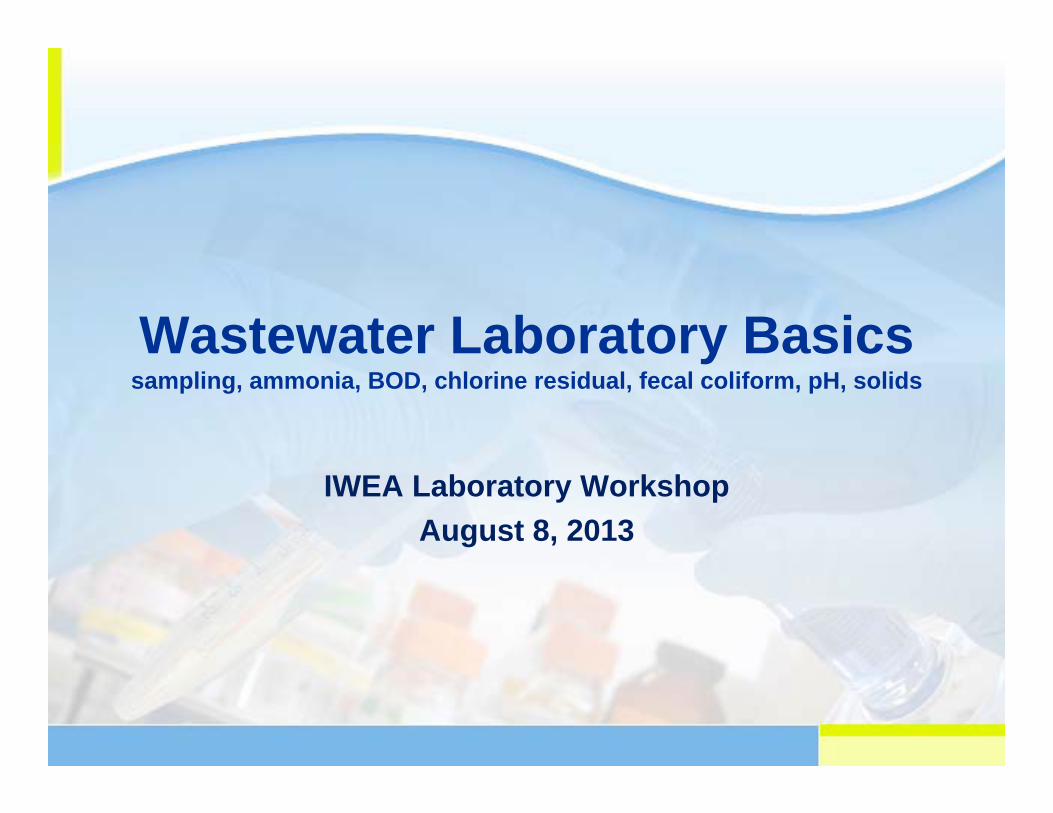
Wastewater Laboratory Basicssampling, ammonia, BOD, chlorine residual, fecal coliform, pH, solids
IWEA Laboratory WorkshopAugust 8, 2013

Sampling
Sample Types
• Grab Samples• Composite Samples
–Time intervals–Flow proportional
• Split Samples
Labels
• Sample Identification• Location• Date• Time• Sampler (initials)• Preservative• Analyses requested
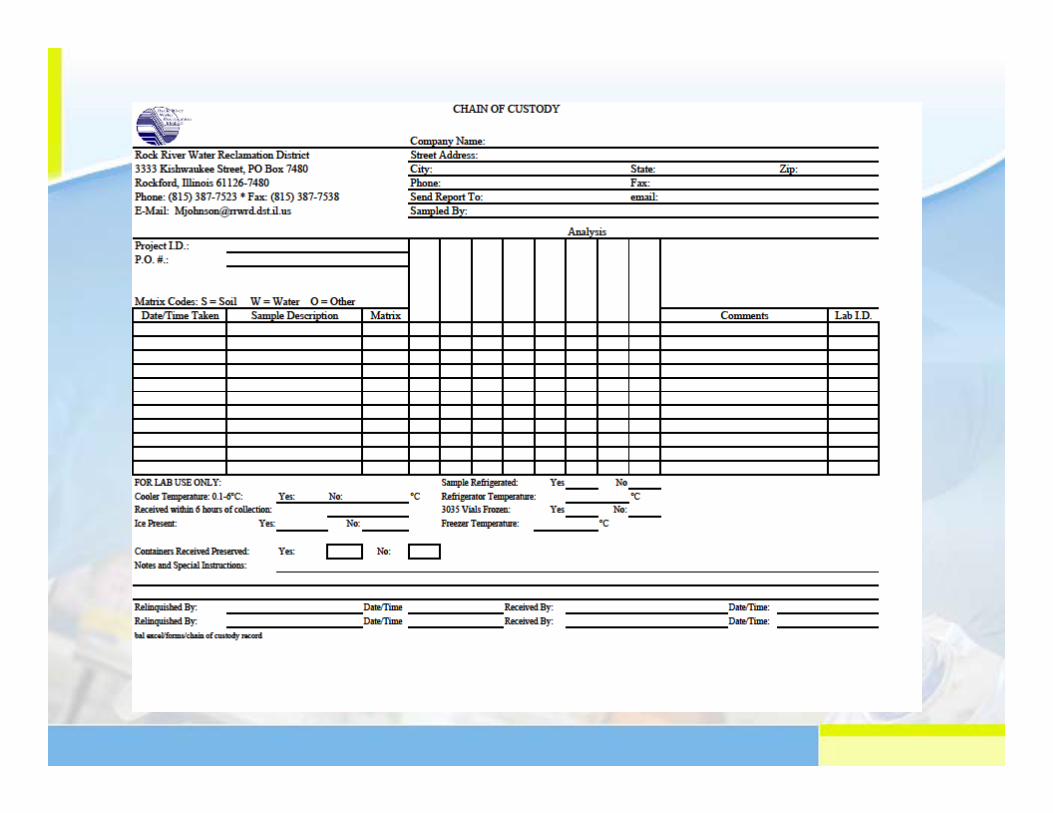
Chain of Custody
Chain of Custody is documentation of how the sample moves through the laboratory and in whose possession it is at any specified time.
Maintaining chain of custody allows you to trace all operations associated with the sample.

Quality Assurance
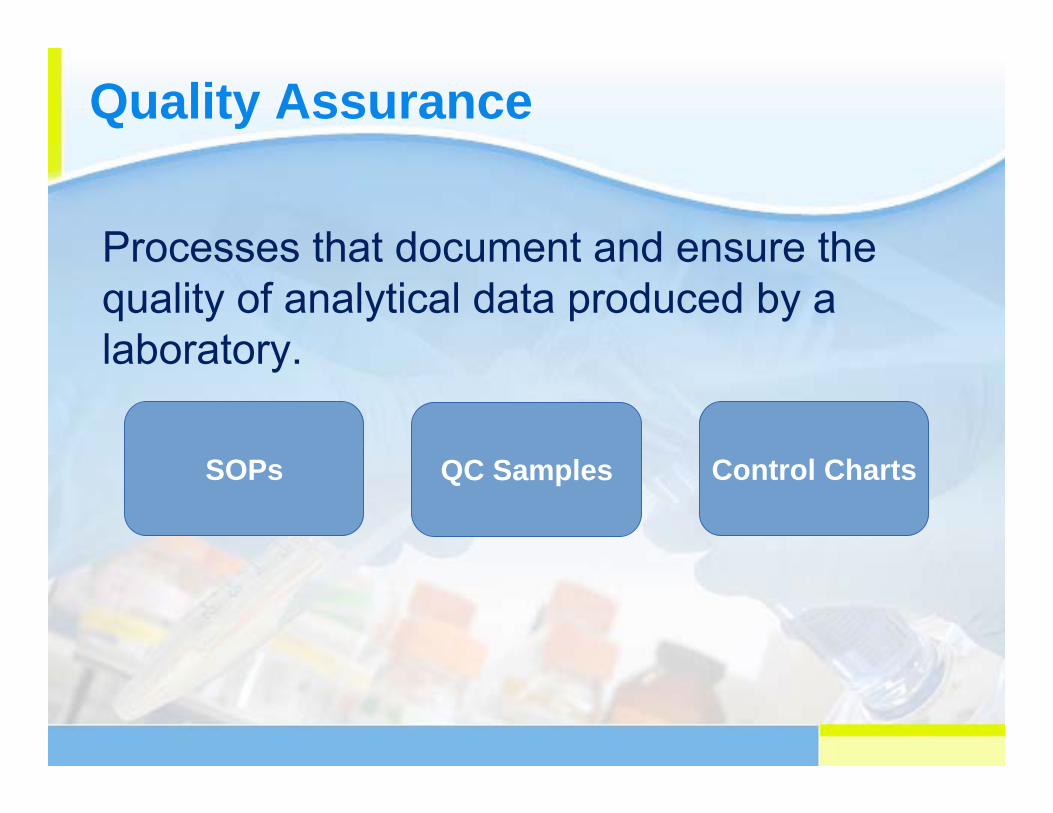
Quality Assurance
Processes that document and ensure the quality of analytical data produced by a laboratory.
QC Samples Control ChartsSOPs
What is a SOP?
SOP - Standard Operating Procedures
An SOP is a written laboratory specific document which details the method of an operation or analysis with procedures thoroughly described. The SOP is the accepted method for performing certain routine and repetitive tasks.
For labs doing NPDES compliance testing, SOPs should be based on reference methods listed in 40 CFR 136.
What is an Analytical Batch?
One to twenty samples of the same matrix that are prepared together with the same process and personnel, using the same lot of reagents, and analyzed on the same day.
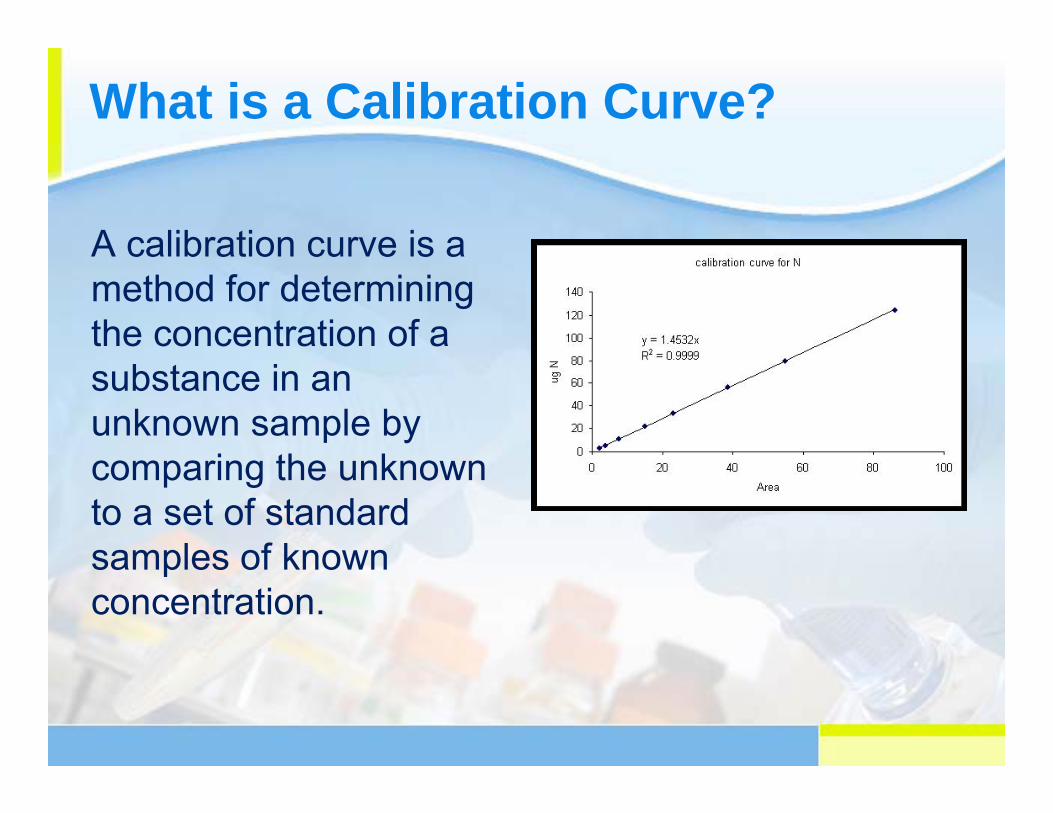
What is a Calibration Curve?
A calibration curve is a method for determining the concentration of a substance in an unknown sample by comparing the unknown to a set of standard samples of known concentration.

Batch Quality Control Data
● CV – Calibration Verification
● MB – Method Blank
● LCS – Laboratory Control Sample
● MSD – Matrix Spike Duplicate
CV - Calibration Verification
A solution of known concentration containing the analyte(s) of interest. This solution is used to verify calibration curve accuracy.
● It is a good idea to read the CV at both the beginning and the end of a batch.
● The CV does not need sample preparation such as digestion or extraction.

MB – Method Blank
A sample which does not contain the analyte of interest and which is carried through all sample preparation and analysis steps.
● Method blanks are used to determine if the preparation and analysis procedures contaminate the sample.
● The method blank is usually deionized water.● The method blank must go through sample
preparation steps.● When you run DI water on an instrument without
going through sample prep first, it is considered an instrument blank, not a method blank.
LCS – Laboratory Control Sample
A LCS is a solution containing a known quantity of the analyte(s) of interest.
● The LCS is a measure of analysis accuracy.● The LCS is usually purchased from an outside
vendor.● Purchased LCS solutions should be supplied
with a Certificate of Analysis which includes acceptance ranges.
● The LCS must go through all sample preparation and analysis steps.
MSD – Matrix Spike Duplicates
MSDs are samples to which a known amount of the analyte(s) of interest have been added. (You analyze the original sample as well as two spiked replicates.)
● The MSD is a measure of analysis precision.● The MSD can indicate whether the sample
matrix interferes with the analysis.● The MSD must go through all sample
preparation and analysis steps.

Solids
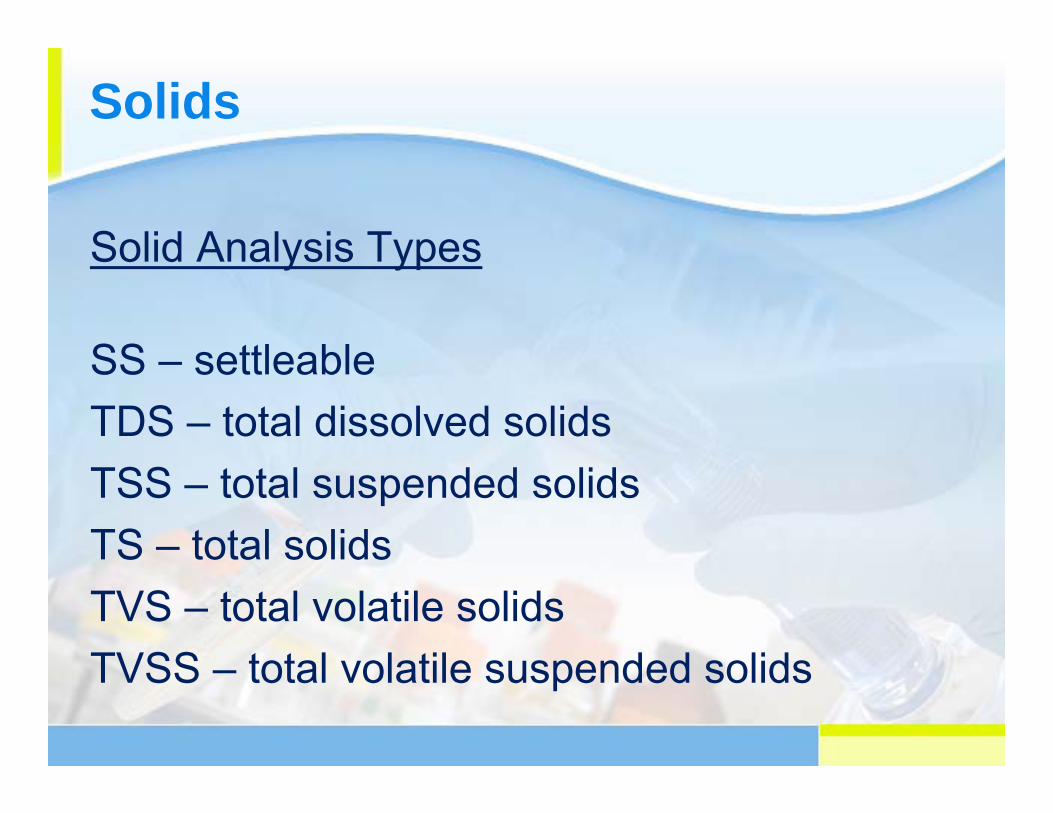
Solids
Solid Analysis Types
SS – settleableTDS – total dissolved solidsTSS – total suspended solidsTS – total solidsTVS – total volatile solidsTVSS – total volatile suspended solids
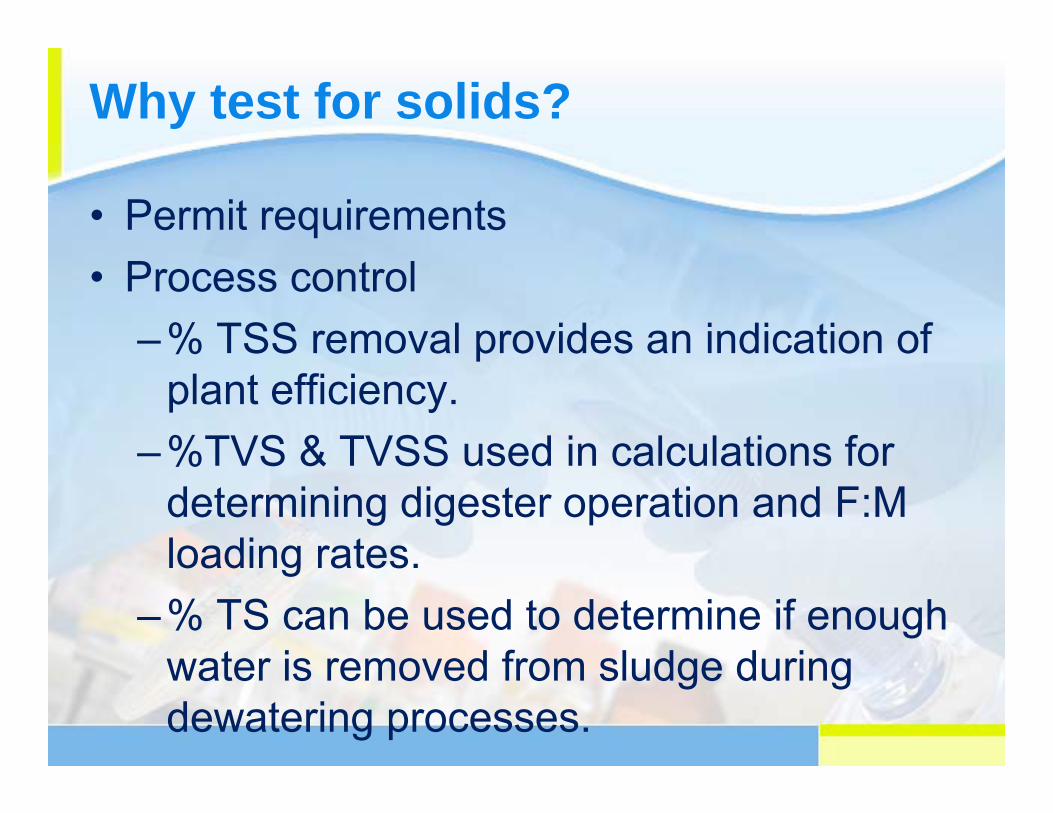
Why test for solids?
• Permit requirements• Process control
–% TSS removal provides an indication of plant efficiency.
–%TVS & TVSS used in calculations for determining digester operation and F:M loading rates.
–% TS can be used to determine if enough water is removed from sludge during dewatering processes.
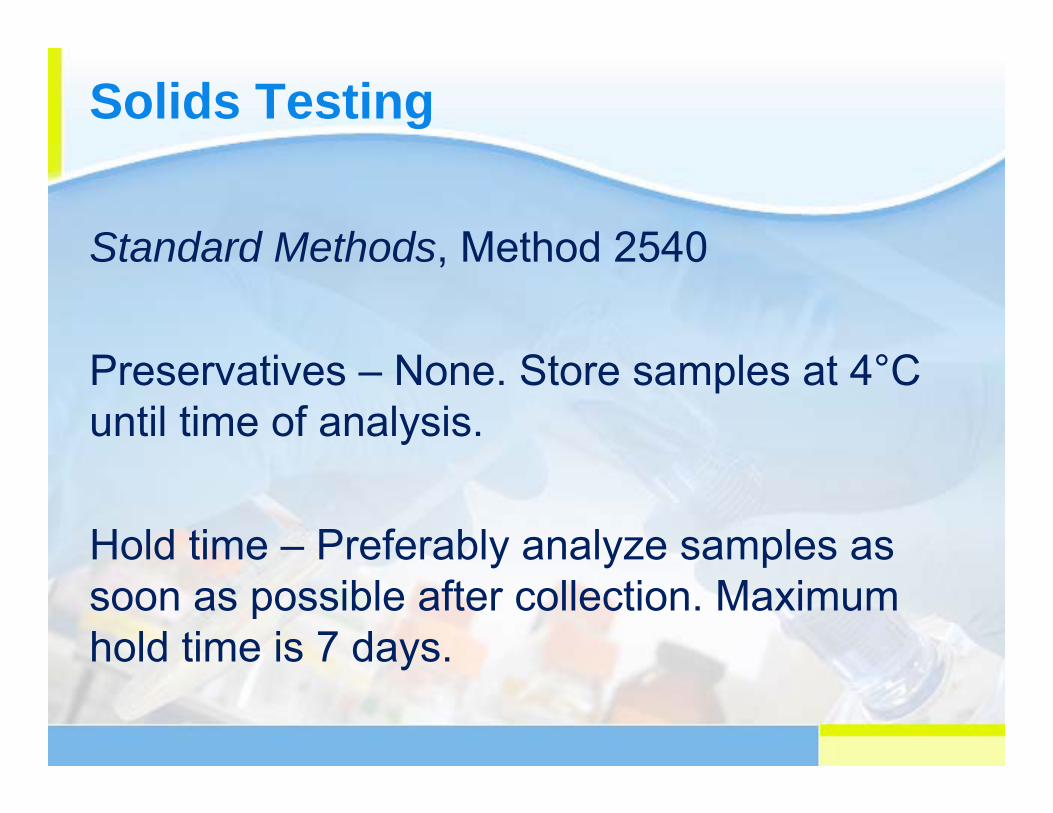
Solids Testing
Standard Methods, Method 2540
Preservatives – None. Store samples at 4°C until time of analysis.
Hold time – Preferably analyze samples as soon as possible after collection. Maximum hold time is 7 days.
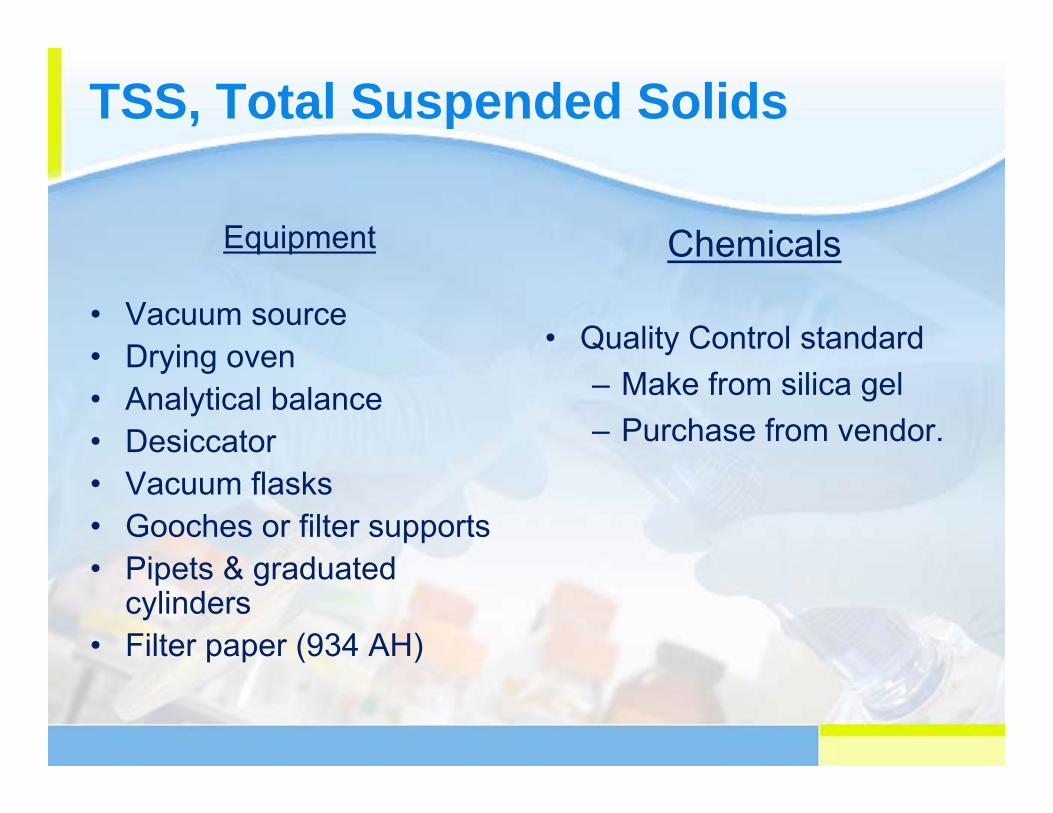
TSS, Total Suspended Solids
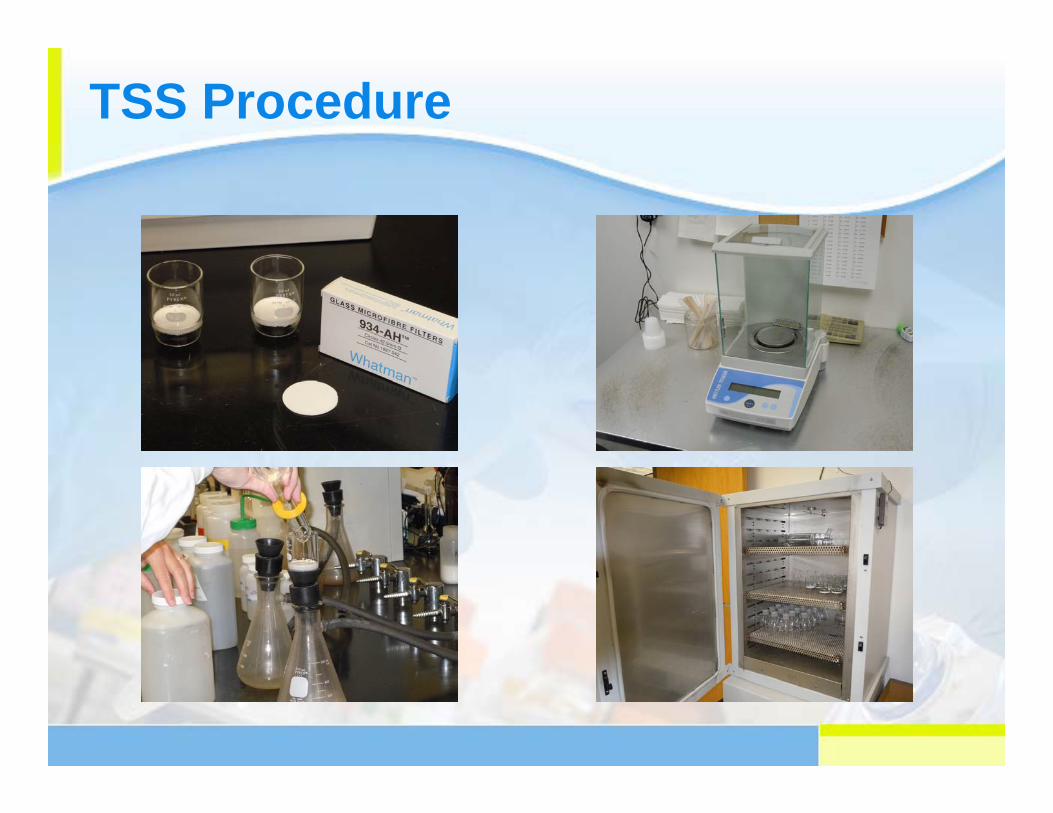
Equipment
• Vacuum source• Drying oven• Analytical balance• Desiccator• Vacuum flasks• Gooches or filter supports• Pipets & graduated
cylinders• Filter paper (934 AH)
Chemicals
• Quality Control standard– Make from silica gel– Purchase from vendor.
TSS Procedure
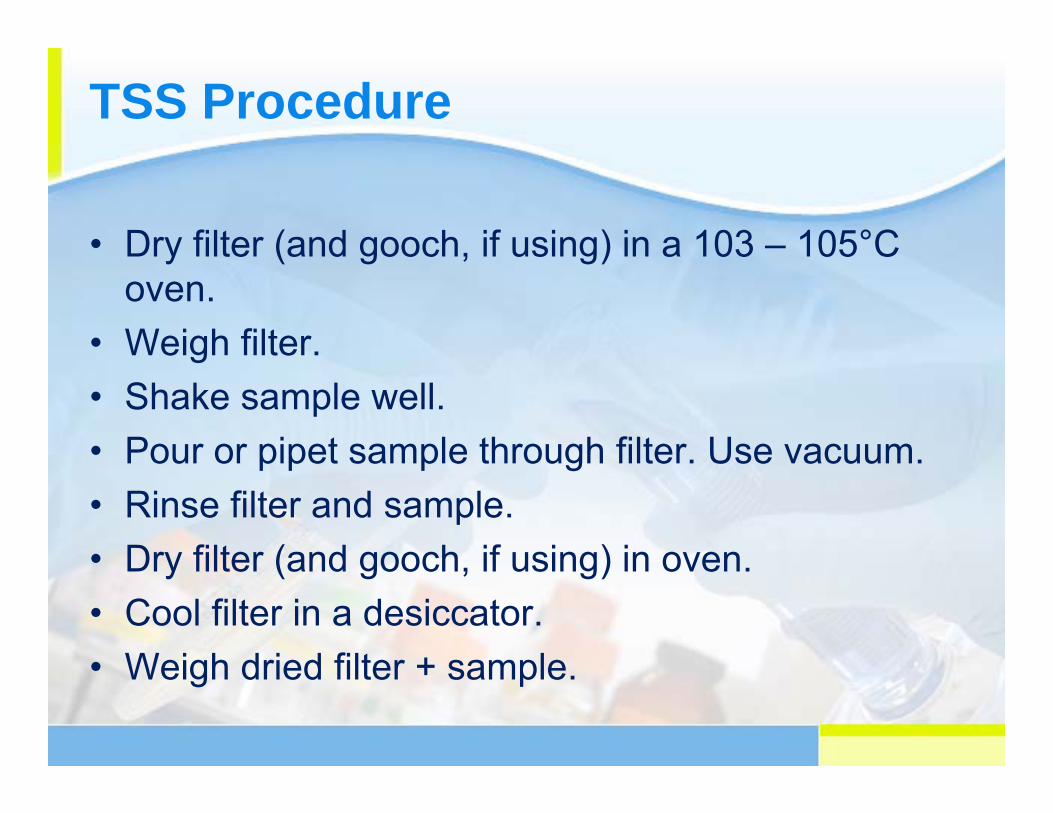
• Dry filter (and gooch, if using) in a 103 – 105°C oven.
• Weigh filter.• Shake sample well.• Pour or pipet sample through filter. Use vacuum.• Rinse filter and sample.• Dry filter (and gooch, if using) in oven.• Cool filter in a desiccator.• Weigh dried filter + sample.
TSS Procedure
TSS Calculation
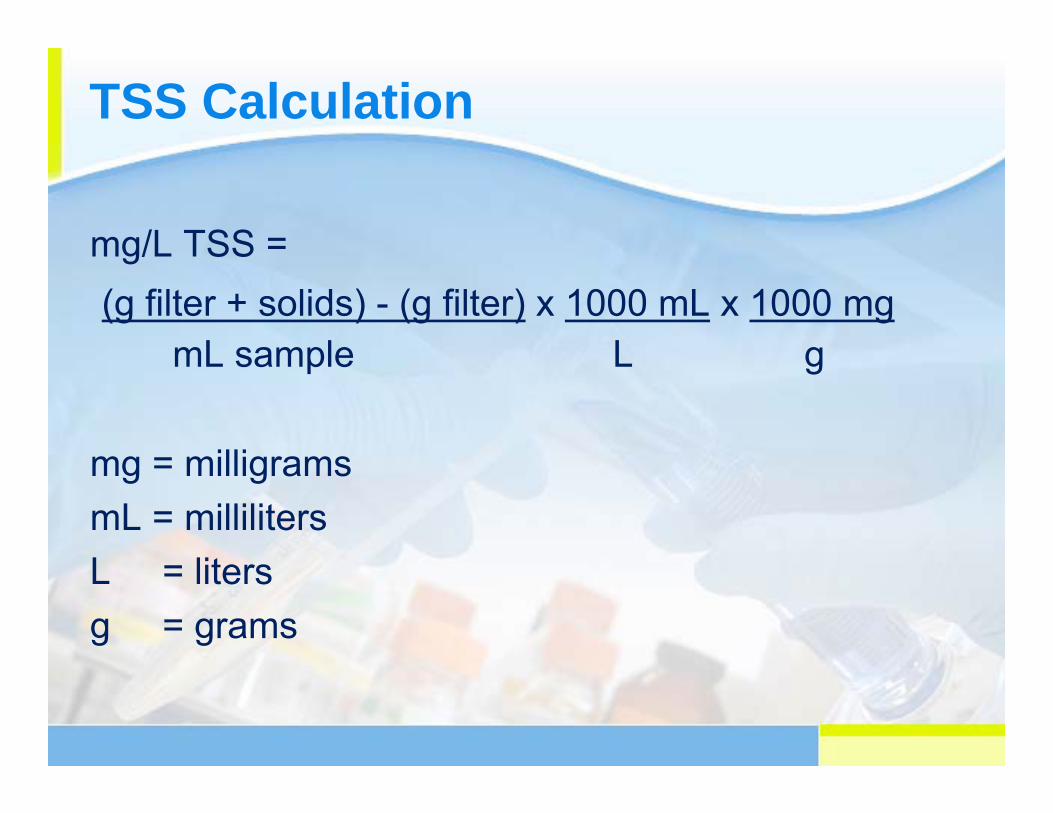
mg/L TSS =(g filter + solids) - (g filter) x 1000 mL x 1000 mg
mL sample L g
mg = milligramsmL = millilitersL = litersg = grams
TSS – Helpful Hints
• Shake sample well.• Rinse graduate with DI water and add
rinsings to filter.• You can remove large, atypical material
such as bugs.• Verify oven temperature daily. • Verify balance calibration daily. • Make sure weights are stable before
recording.
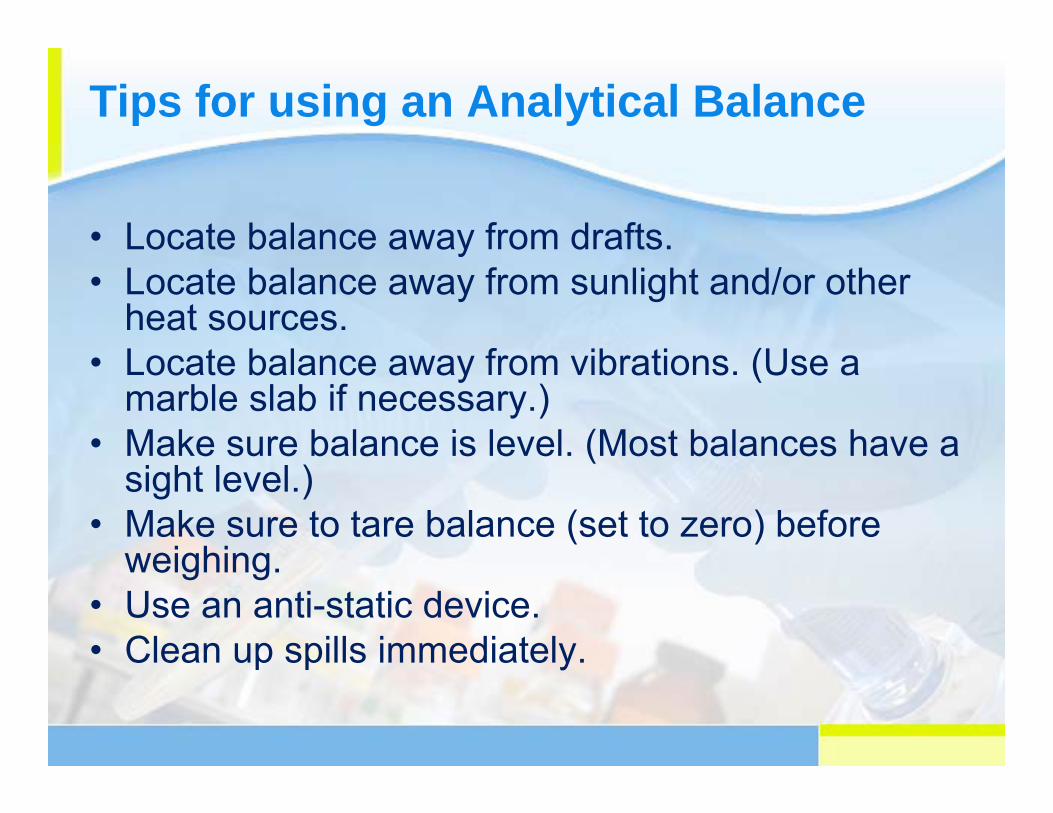
Tips for using an Analytical Balance
• Locate balance away from drafts.• Locate balance away from sunlight and/or other
heat sources.• Locate balance away from vibrations. (Use a
marble slab if necessary.)• Make sure balance is level. (Most balances have a
sight level.)• Make sure to tare balance (set to zero) before
weighing.• Use an anti-static device.• Clean up spills immediately.
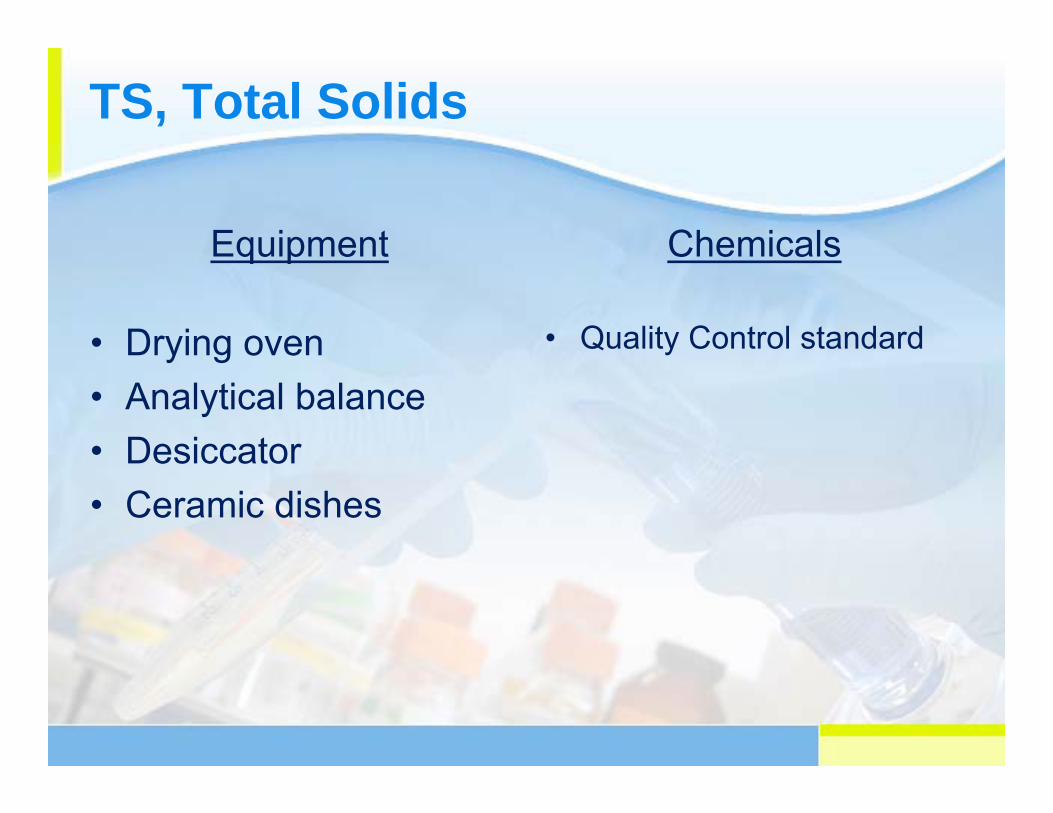
TS, Total Solids
Equipment
• Drying oven• Analytical balance• Desiccator• Ceramic dishes
Chemicals
• Quality Control standard

TS Procedure
• Weigh empty ceramic dish on analytical balance.
• Shake or mix sample well.• Transfer sample to dish.• Weigh dish + sample.• Dry dish + sample in a 103 - 105 °C oven.• Cool dish in a desiccator,• Weigh dish + dry sample.
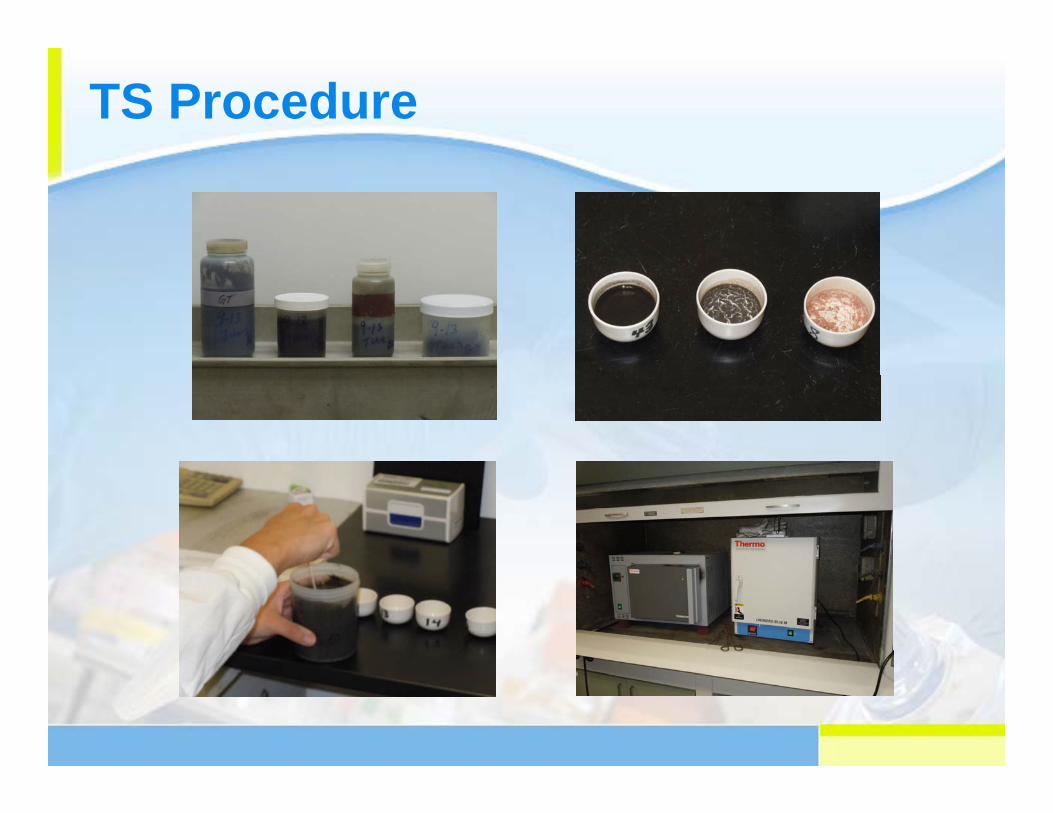
TS Procedure
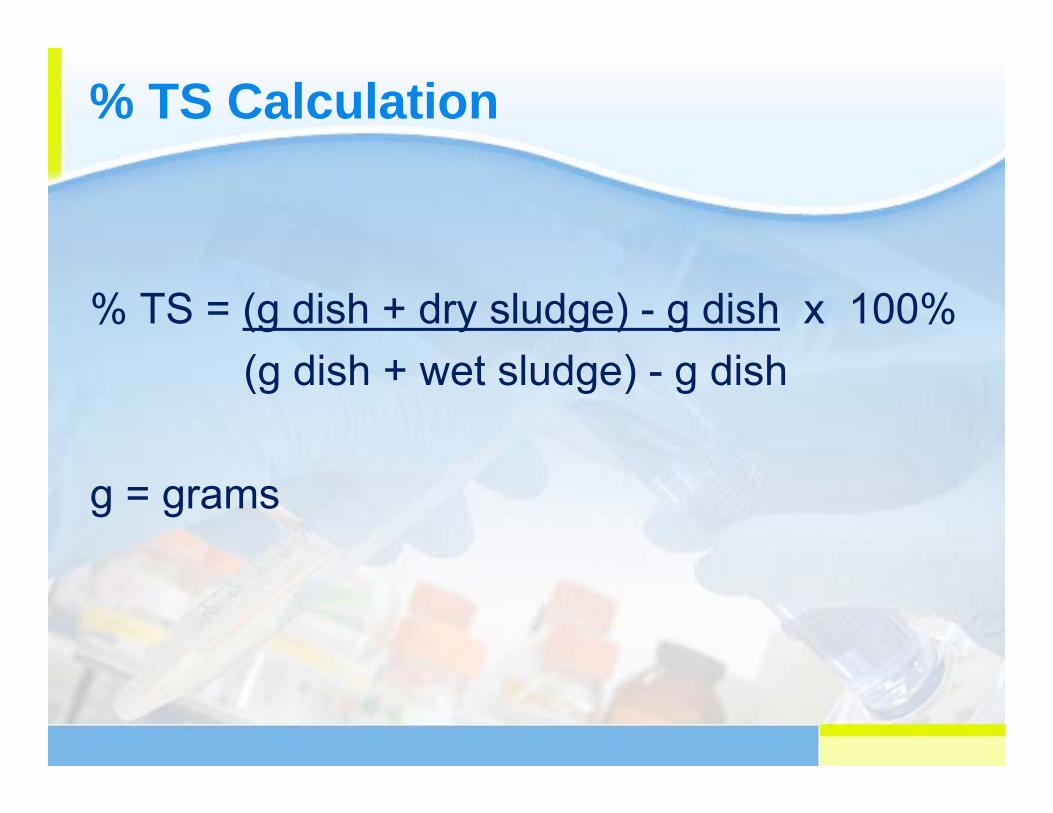
% TS Calculation
% TS = (g dish + dry sludge) - g dish x 100%(g dish + wet sludge) - g dish
g = grams
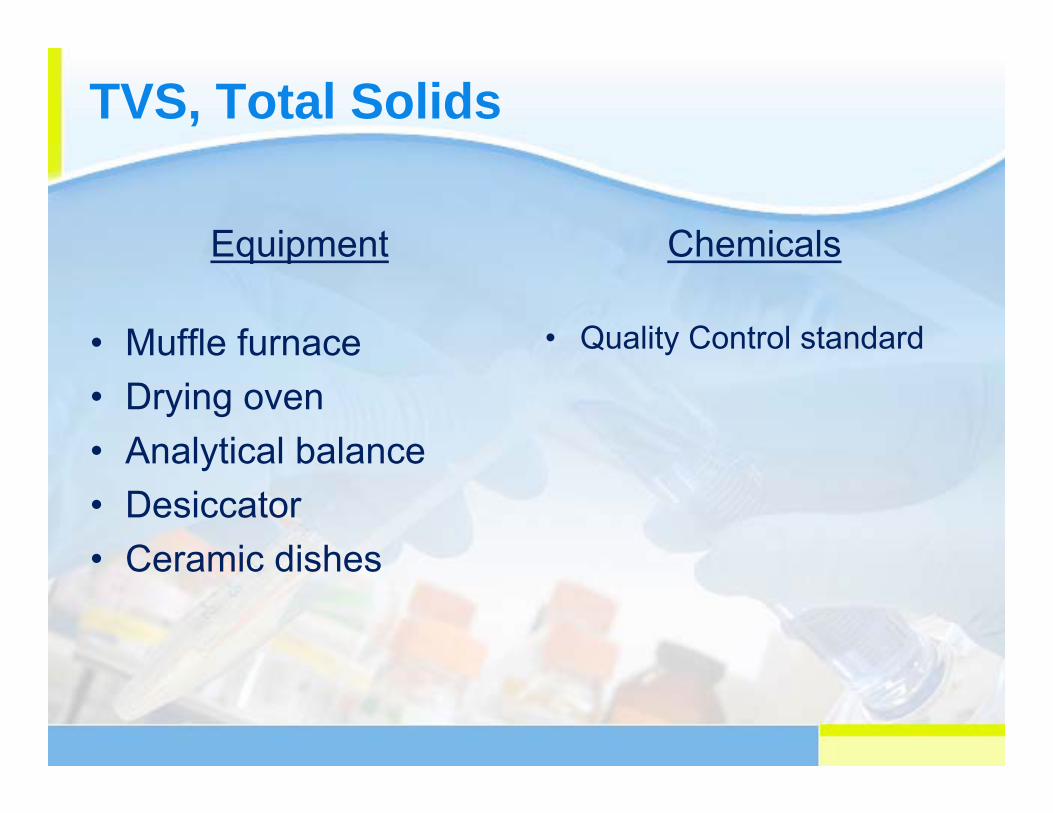
TVS, Total Solids
Equipment
• Muffle furnace• Drying oven• Analytical balance• Desiccator• Ceramic dishes
Chemicals
• Quality Control standard
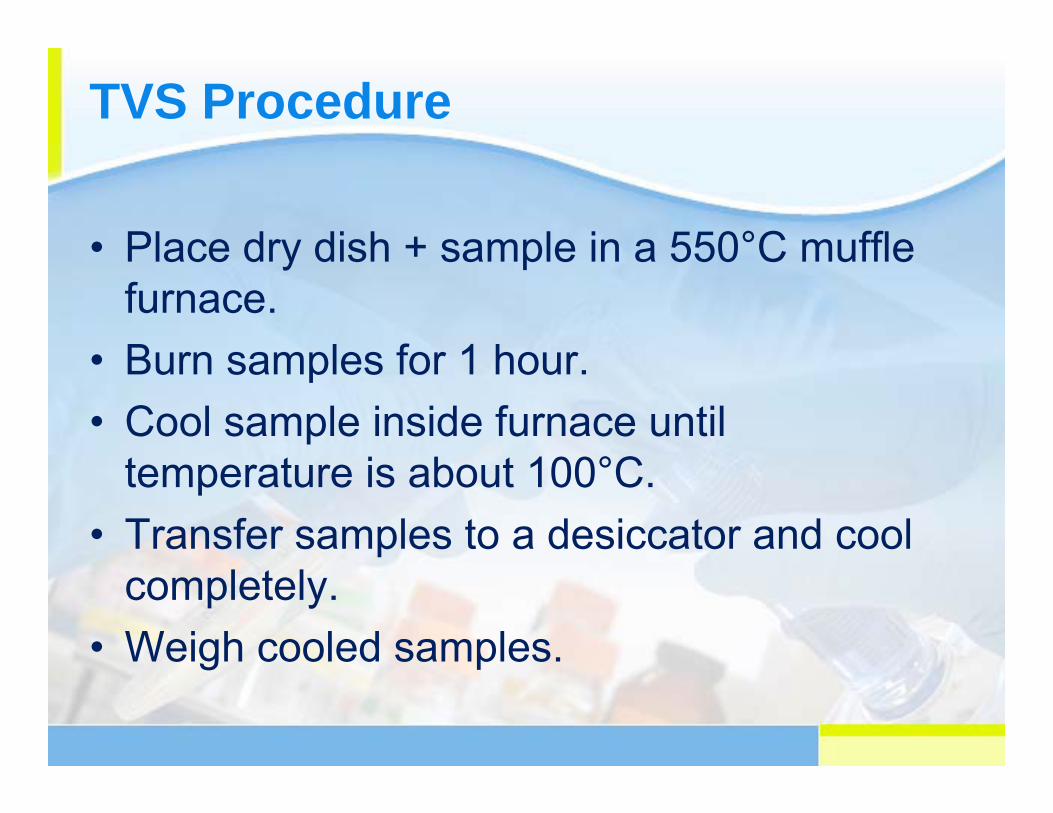
TVS Procedure
• Place dry dish + sample in a 550°C muffle furnace.
• Burn samples for 1 hour.• Cool sample inside furnace until
temperature is about 100°C.• Transfer samples to a desiccator and cool
completely.• Weigh cooled samples.

% TVS Calculation
% TVS =
(g dish + dry sludge) - (g dish + ashed sludge) x 100%(g dish + dry sludge) - g dish
g = grams
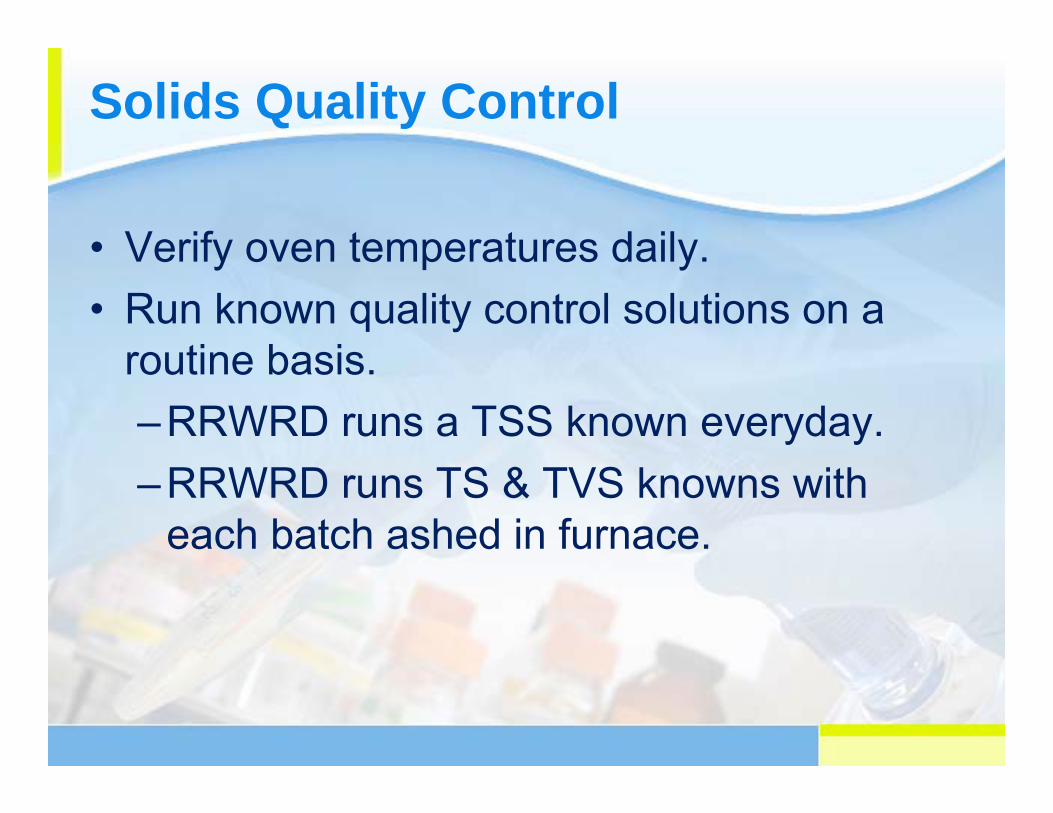
Solids Quality Control
• Verify oven temperatures daily.• Run known quality control solutions on a
routine basis.–RRWRD runs a TSS known everyday. –RRWRD runs TS & TVS knowns with
each batch ashed in furnace.
BOD
What is BOD?
BOD is biochemical oxygen demand. It is the rate at which organisms use the oxygen in wastewater while digesting organic matter. The BOD test measures the oxygen demand due to both carbon and nitrogen based compounds.
CBOD is carbanaceous BOD. It is a variation of the BOD test that measures the oxygen demand due to carbon based compounds.
Why test for BOD?
• Permit requirements• Determine the relative strength of the
wastewater• Determine plant loadings• Evaluate the efficiency of a plant’s waste
removal
BOD Testing
Standard Methods, Method 5210
Preservatives – None. Store samples at 4°C until time of analysis.
Hold time – Preferably begin sample analysis within 6 hours of collection. Maximum hold time is 24 hours.
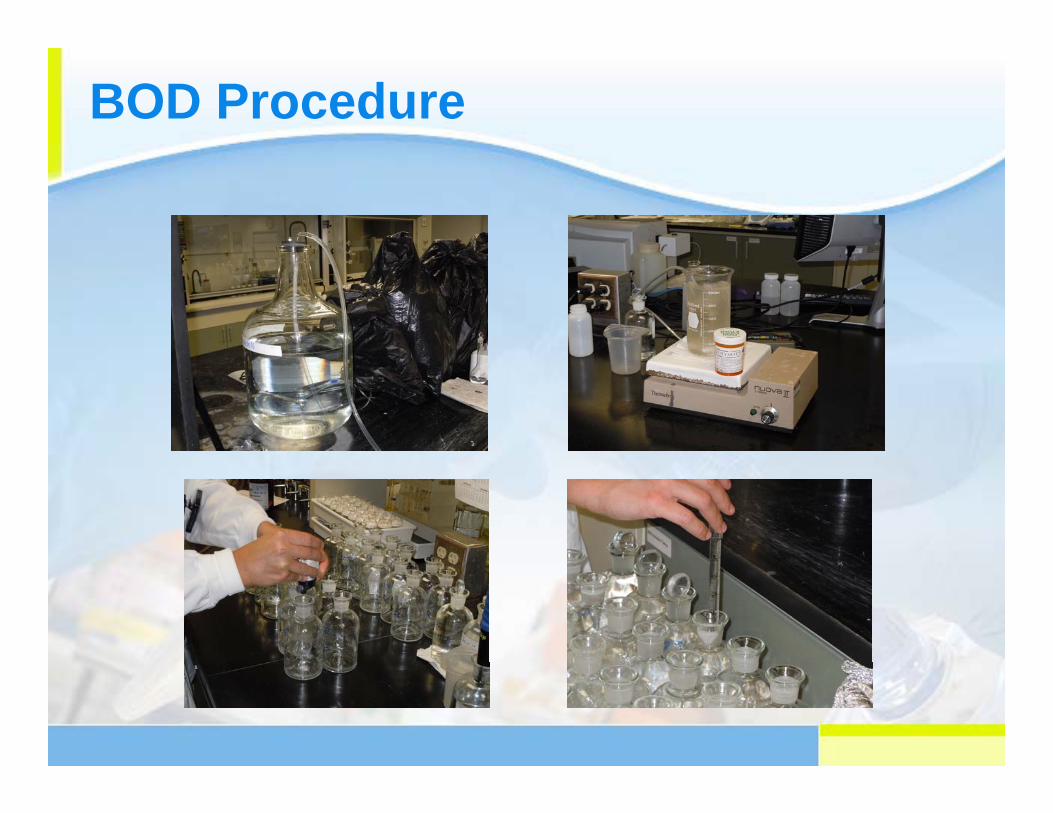
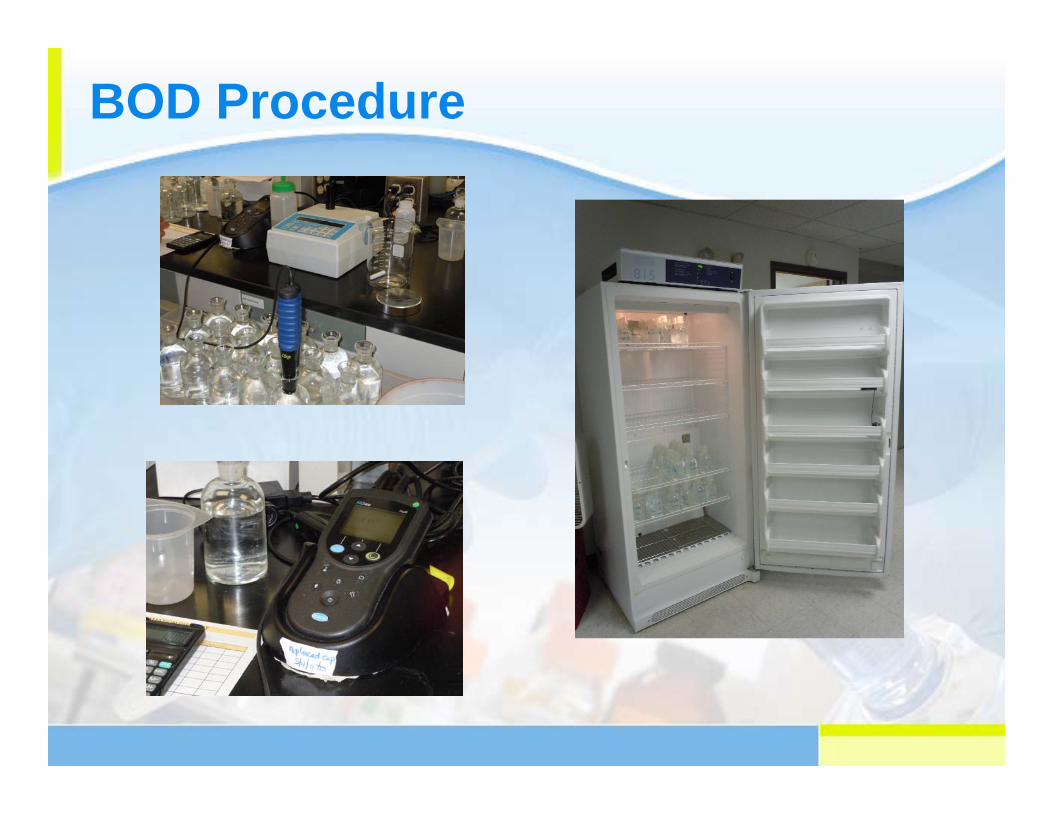
BOD Procedure
Equipment
• Dissolved oxygen meter & probe
• Incubator• BOD bottles & caps• Graduated cylinders
and pipets
Chemicals
• Dilution water nutrients• Seed source or
polyseed• Nitrification inhibitor
(for CBOD)• Glucose-glutamic acid
quality control solution

BOD Procedure
• Prepare dilution water.• Prepare seed source.• Add appropriate volume of sample to BOD
bottle. Add seed. Fill with dilution water.• Measure initial dissolved oxygen.• Incubate for five days at 20°C.• Measure final dissolved oxygen.
BOD Procedure
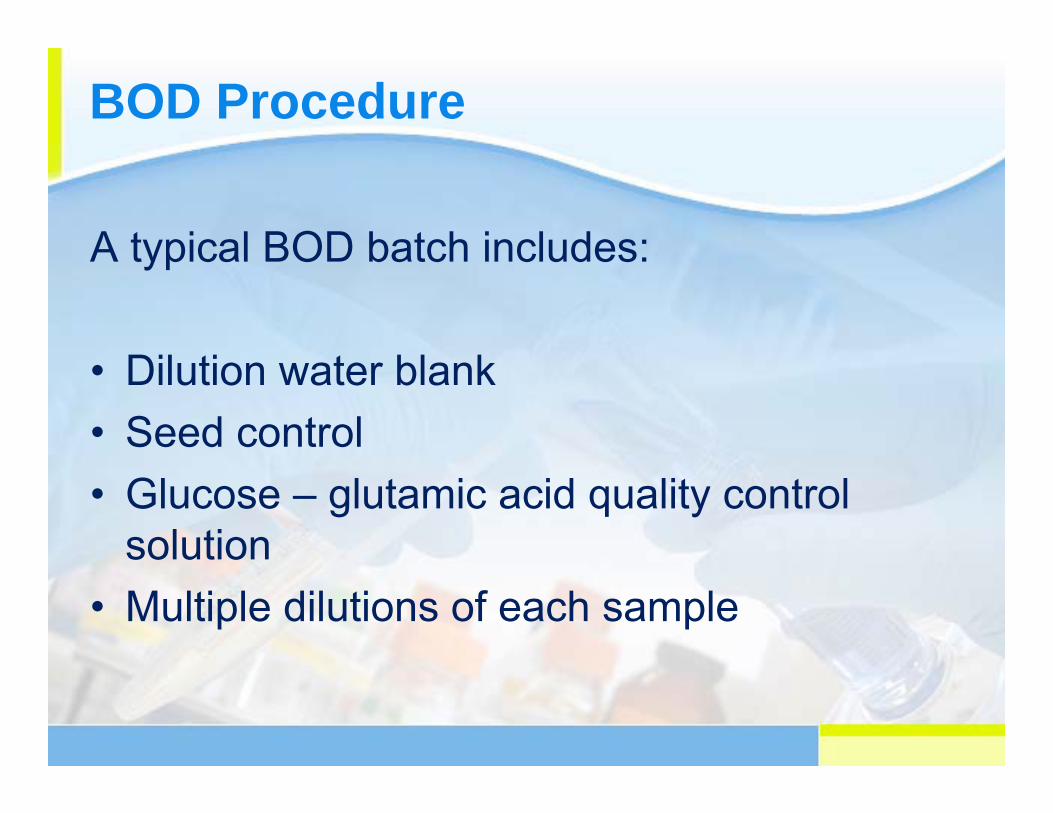
A typical BOD batch includes:
• Dilution water blank• Seed control• Glucose – glutamic acid quality control
solution• Multiple dilutions of each sample
BOD Procedure
BOD Procedure
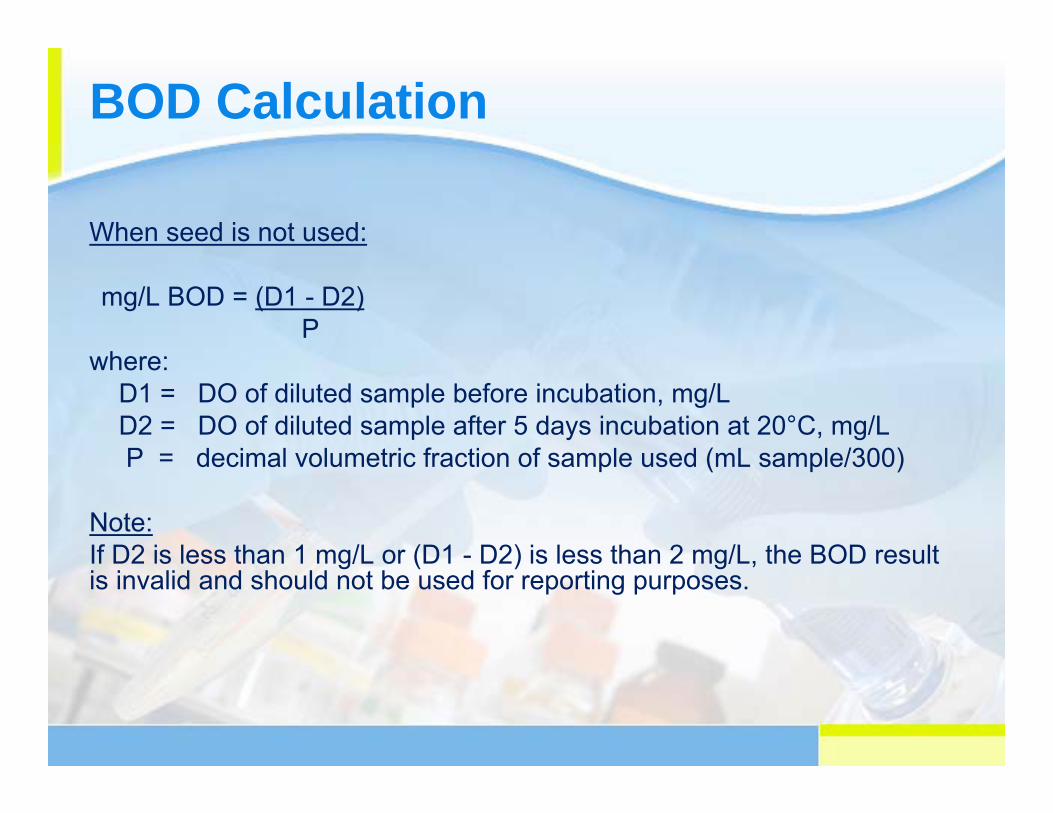
When seed is not used:
mg/L BOD = (D1 - D2)P
where:D1 = DO of diluted sample before incubation, mg/LD2 = DO of diluted sample after 5 days incubation at 20°C, mg/LP = decimal volumetric fraction of sample used (mL sample/300)
Note:If D2 is less than 1 mg/L or (D1 - D2) is less than 2 mg/L, the BOD result is invalid and should not be used for reporting purposes.
BOD Calculation
BOD Calculation
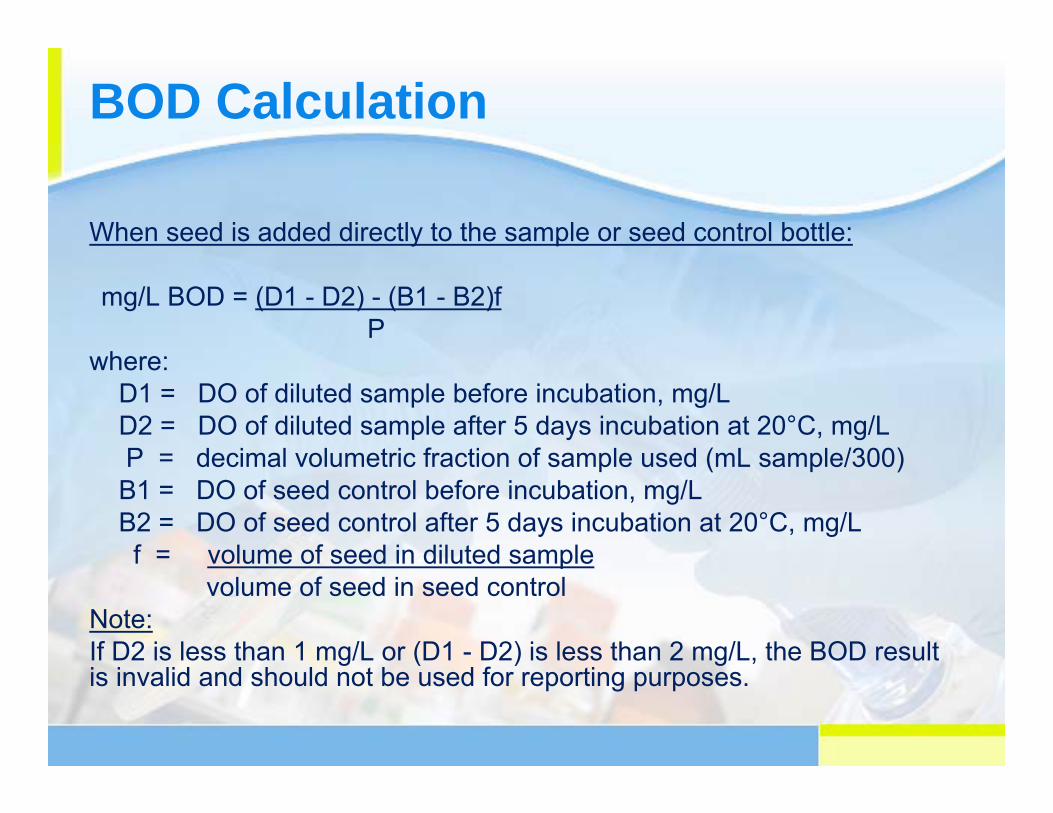
When seed is added directly to the sample or seed control bottle:
mg/L BOD = (D1 - D2) - (B1 - B2)fP
where:D1 = DO of diluted sample before incubation, mg/LD2 = DO of diluted sample after 5 days incubation at 20°C, mg/LP = decimal volumetric fraction of sample used (mL sample/300)B1 = DO of seed control before incubation, mg/LB2 = DO of seed control after 5 days incubation at 20°C, mg/Lf = volume of seed in diluted sample
volume of seed in seed control Note:If D2 is less than 1 mg/L or (D1 - D2) is less than 2 mg/L, the BOD result is invalid and should not be used for reporting purposes.
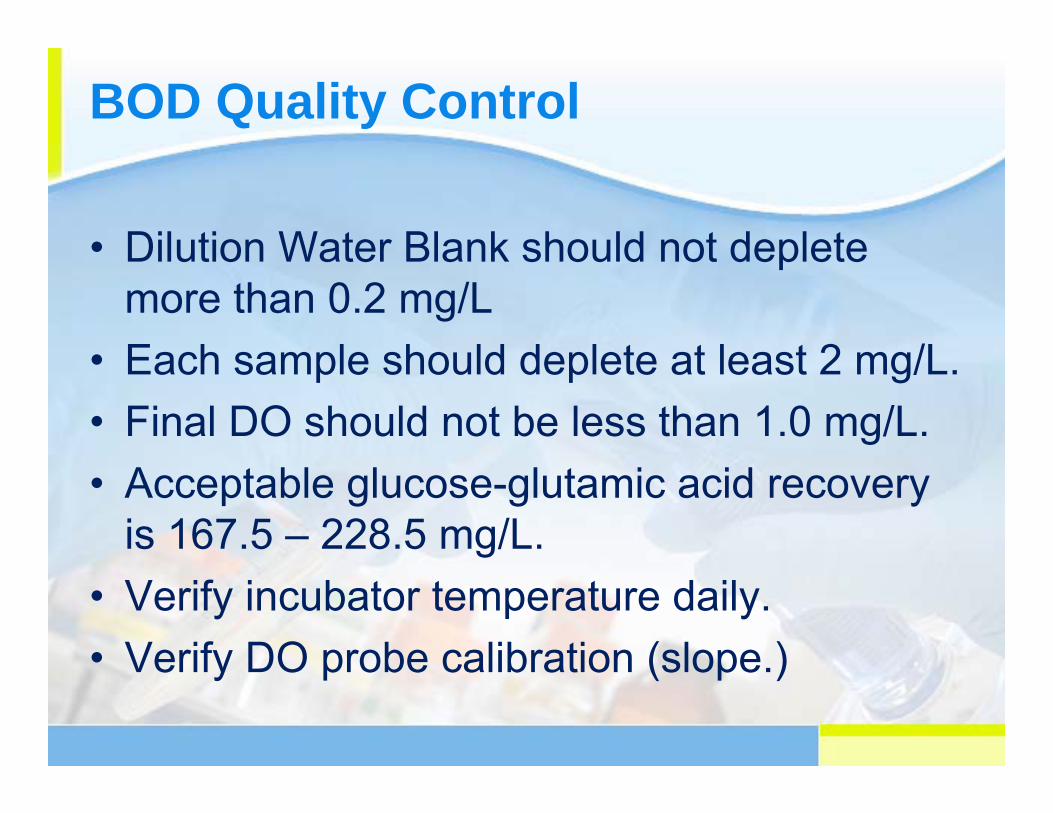
BOD Quality Control
• Dilution Water Blank should not deplete more than 0.2 mg/L
• Each sample should deplete at least 2 mg/L.• Final DO should not be less than 1.0 mg/L.• Acceptable glucose-glutamic acid recovery
is 167.5 – 228.5 mg/L.• Verify incubator temperature daily.• Verify DO probe calibration (slope.)
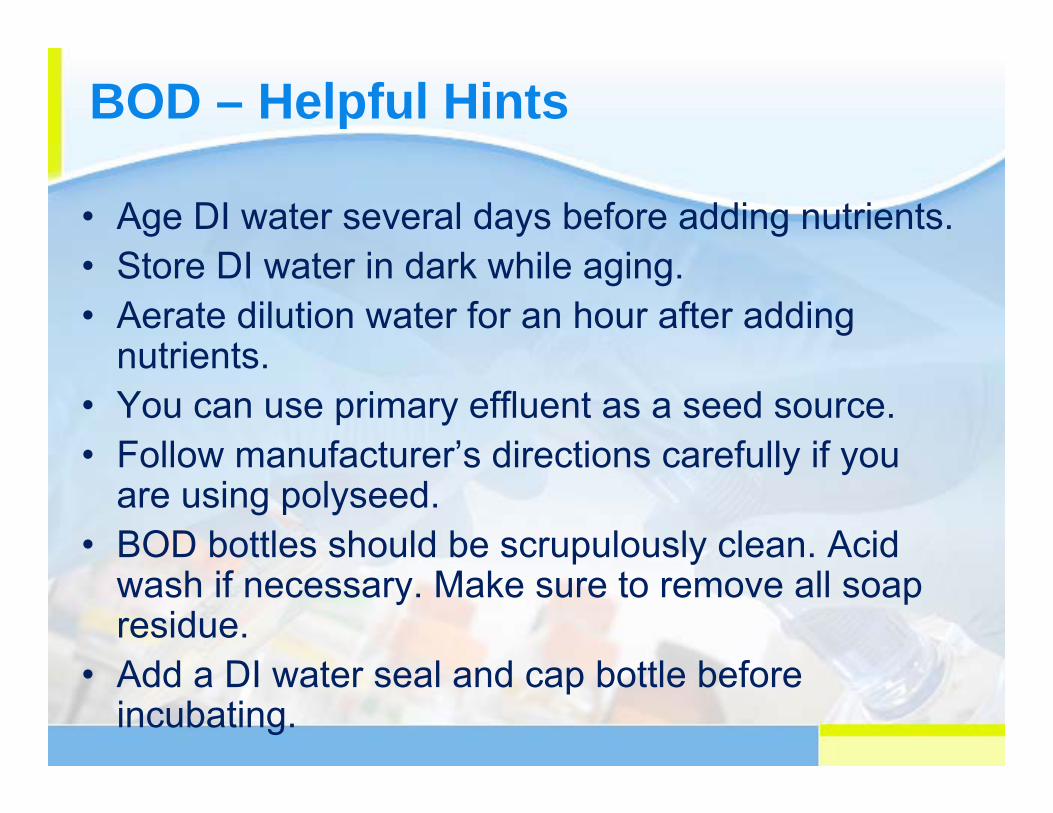
BOD – Helpful Hints
• Age DI water several days before adding nutrients.• Store DI water in dark while aging. • Aerate dilution water for an hour after adding
nutrients.• You can use primary effluent as a seed source.• Follow manufacturer’s directions carefully if you
are using polyseed. • BOD bottles should be scrupulously clean. Acid
wash if necessary. Make sure to remove all soap residue.
• Add a DI water seal and cap bottle before incubating.
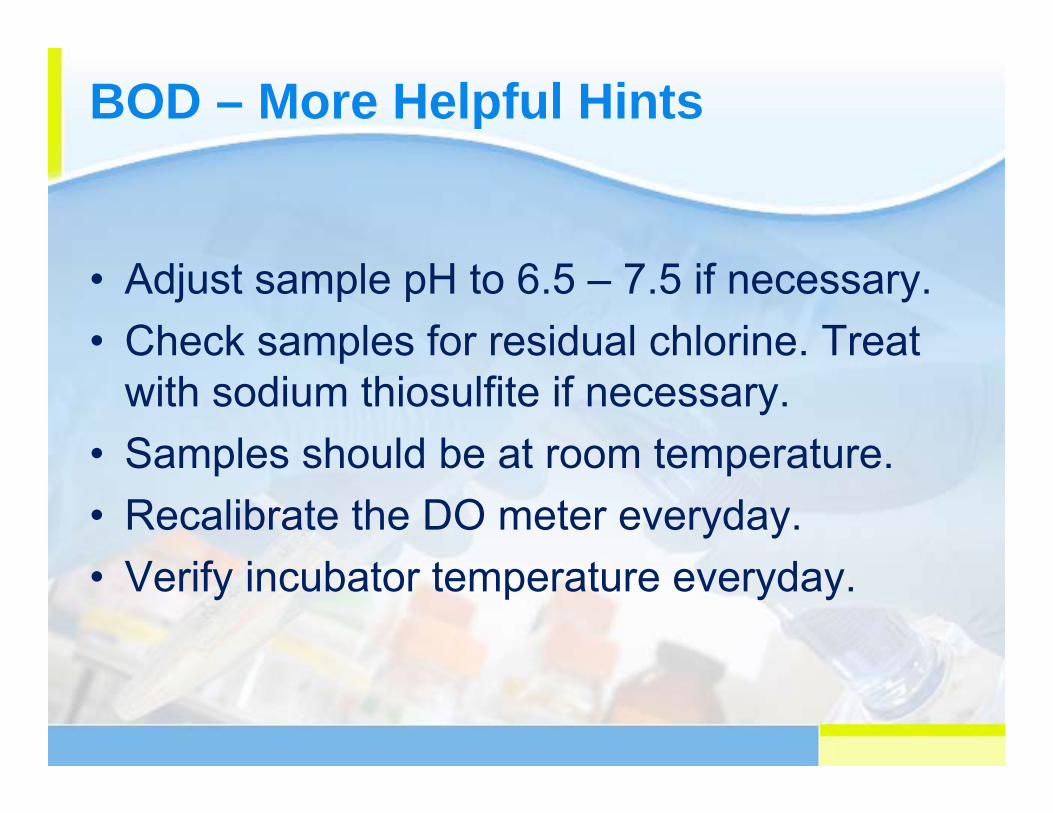
BOD – More Helpful Hints
• Adjust sample pH to 6.5 – 7.5 if necessary.• Check samples for residual chlorine. Treat
with sodium thiosulfite if necessary.• Samples should be at room temperature.• Recalibrate the DO meter everyday.• Verify incubator temperature everyday.

pH
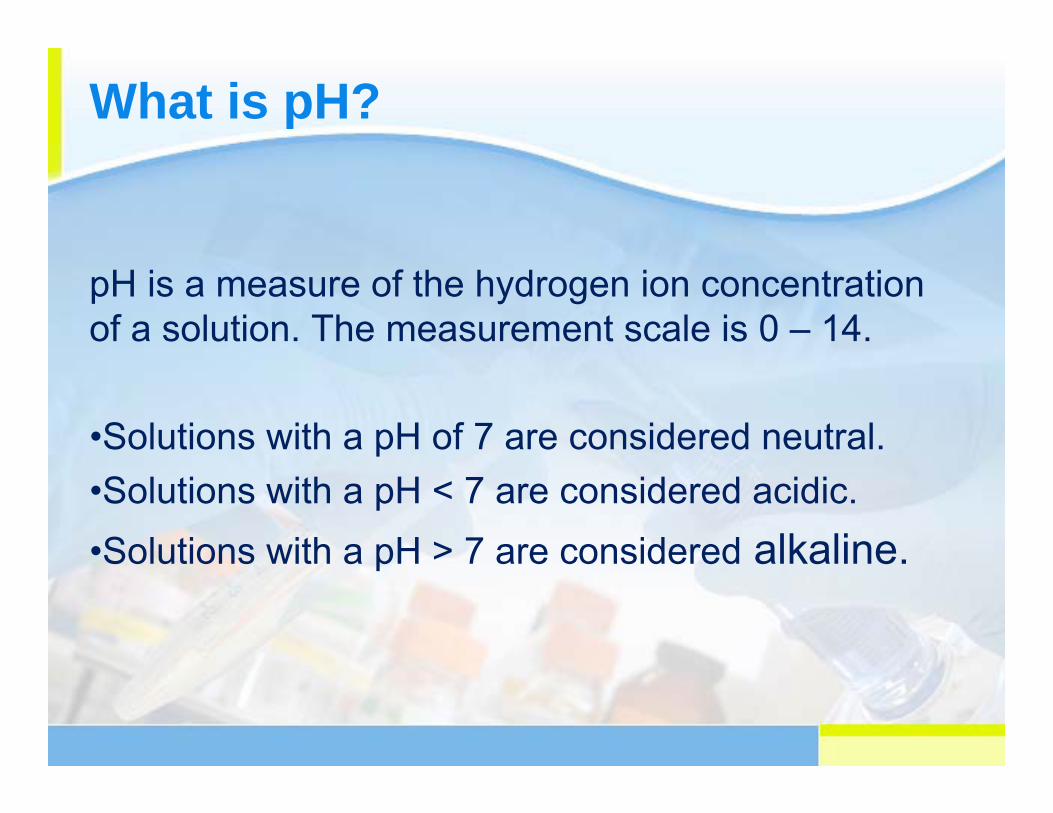
What is pH?
pH is a measure of the hydrogen ion concentration of a solution. The measurement scale is 0 – 14.
•Solutions with a pH of 7 are considered neutral.•Solutions with a pH < 7 are considered acidic.•Solutions with a pH > 7 are considered alkaline.
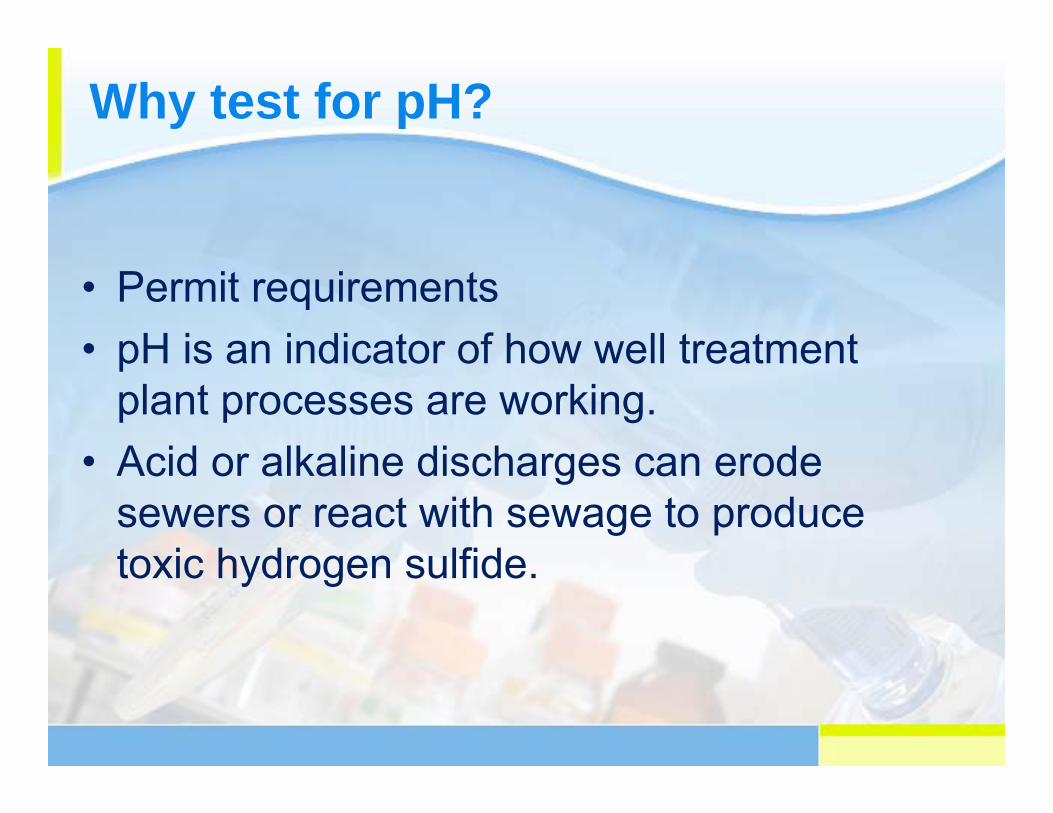
Why test for pH?
• Permit requirements• pH is an indicator of how well treatment
plant processes are working. • Acid or alkaline discharges can erode
sewers or react with sewage to produce toxic hydrogen sulfide.
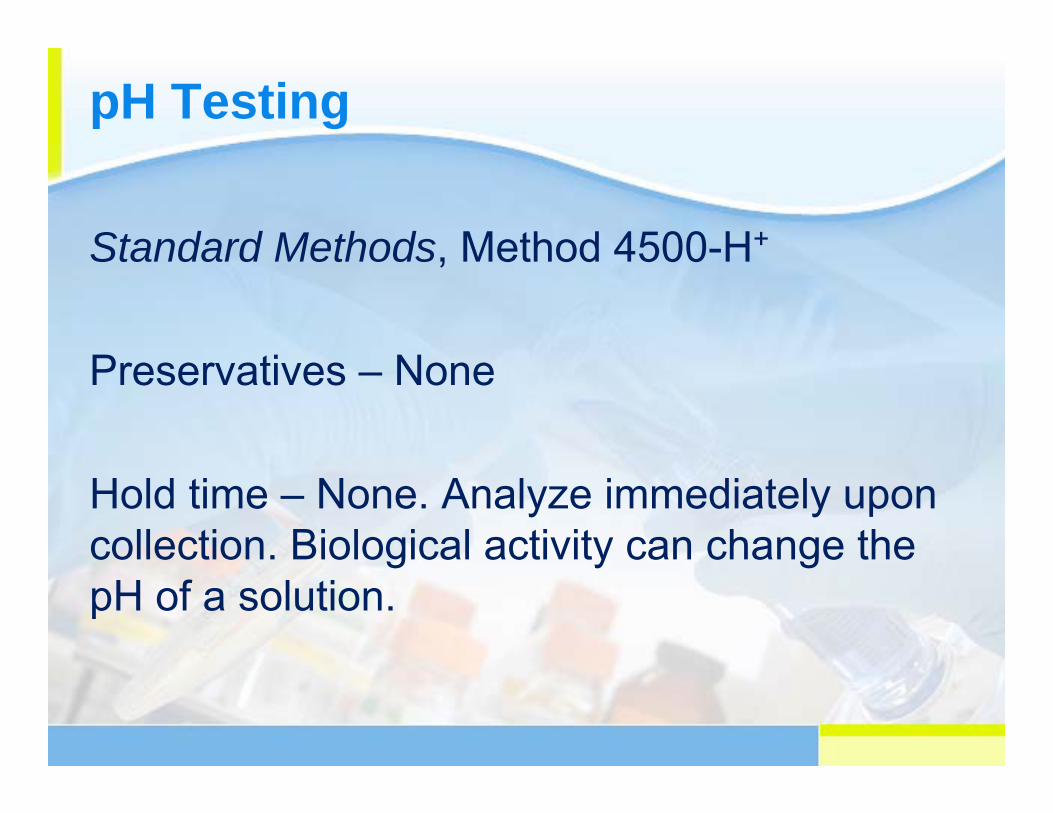
pH Testing
Standard Methods, Method 4500-H+
Preservatives – None
Hold time – None. Analyze immediately upon collection. Biological activity can change the pH of a solution.
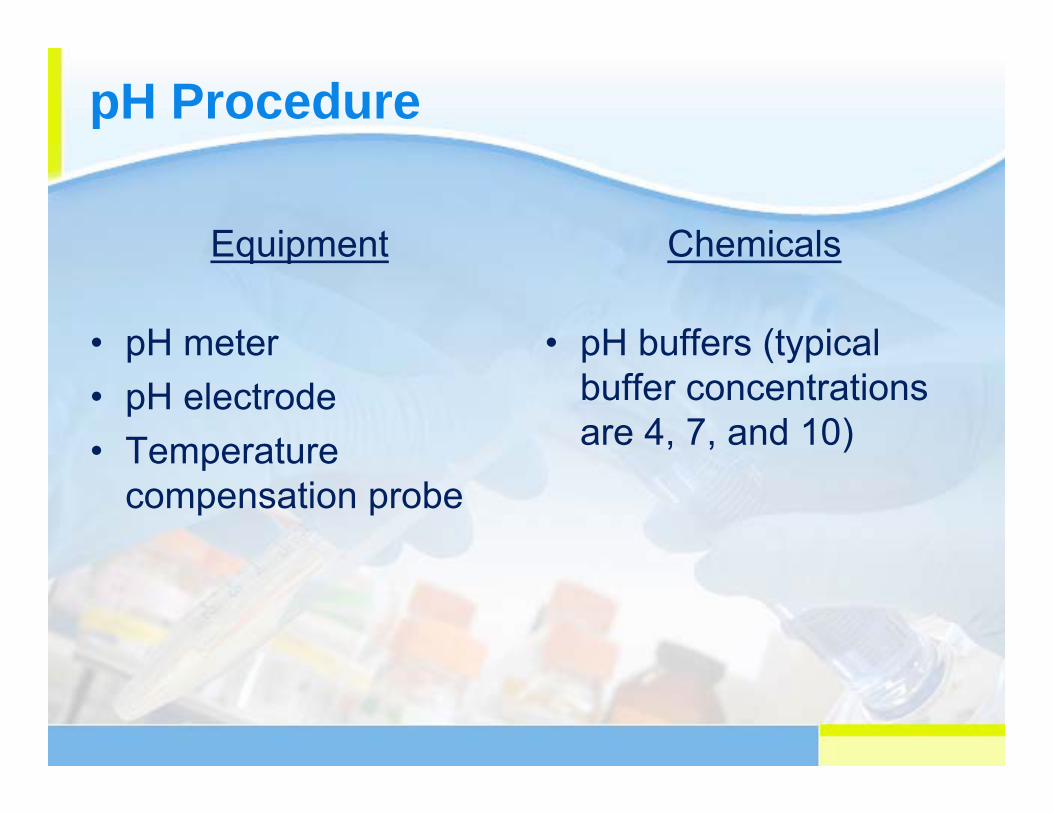
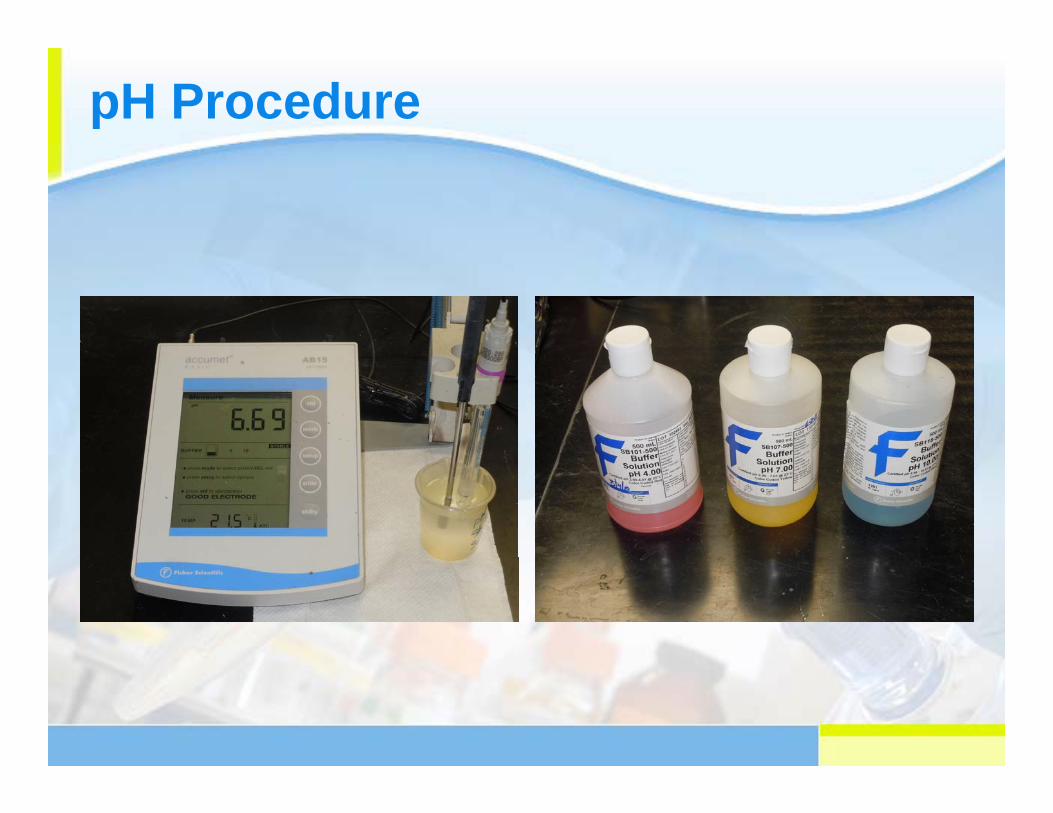
pH Procedure
Equipment
• pH meter• pH electrode• Temperature
compensation probe
Chemicals
• pH buffers (typical buffer concentrations are 4, 7, and 10)
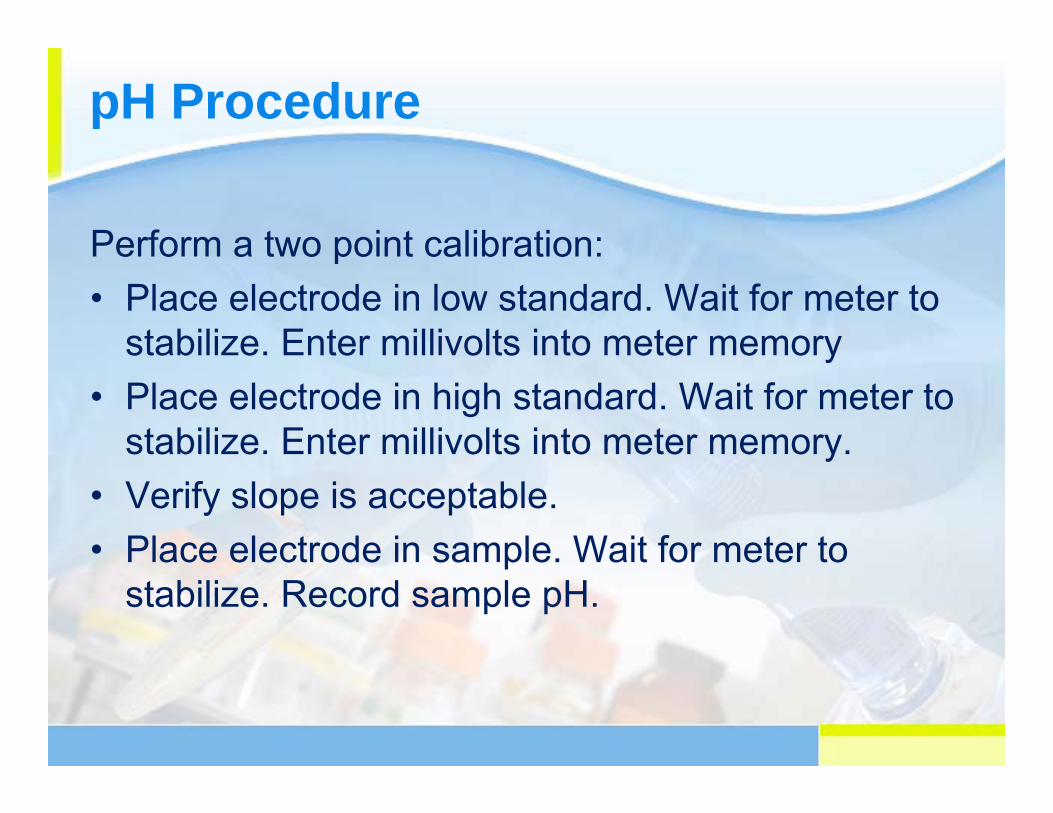
pH Procedure
Perform a two point calibration:• Place electrode in low standard. Wait for meter to
stabilize. Enter millivolts into meter memory• Place electrode in high standard. Wait for meter to
stabilize. Enter millivolts into meter memory.• Verify slope is acceptable.• Place electrode in sample. Wait for meter to
stabilize. Record sample pH.
pH Procedure
pH – Helpful Hints
• Use color coded buffers.• Samples and standards should be at the same
temperature. Or use a temperature compensation probe.• Make sure electrode contains sufficient electrolyte (usually
saturated KCl.)• Make sure electrolyte fill hole is open when taking
measurements.• Close electrolyte fill hole when electrode is not in use.• Rinse electrode between samples.• Store electrode in pH 7 buffer or pH storage solution
between uses.

Ammonia
Why test for ammonia?
• Permit requirements
• Ammonia is a nutrient. Releasing nutrients to a receiving stream may lead to eutrophication.
eutrophication - a process by which pollution from such sources as sewage effluent or leachate from fertilized fields causes a lake, pond, or fen to become over rich in organic and mineral nutrients, so that algae and cyanobacteriagrow rapidly and deplete the oxygen supply.
Ammonia Sources
• Municipal wastewater treatment plants• Agricultural runoff (fertilizers & manure)• Industrial discharges (paper mills, mines,
food processing)
Ammonia Analysis
Standard Methods 4500 NH3
• Titrimetric Method
• Ammonia Selective Electrode Method*
• Phenate Method
Ammonia Analysis Sample Preservation and Storage
• If samples will be analyzed within 24 hours, refrigerate at 4°C.
• If samples will be analyzed after 24 of collection, acidify to pH < 2 with sulfuric acid and store at 4°C.
• Preserved samples can be stored at 4°C for up to 28 days.
Ammonia by ISE
Equipment
• pH/ISE Meter• Ammonia ion selective
electrode• Stir plate• Volumetric flasks• Erlenmeyer flasks• pipets
Chemicals
• Ammonia standard (1000 ppm)
• 10 N sodium hydroxide
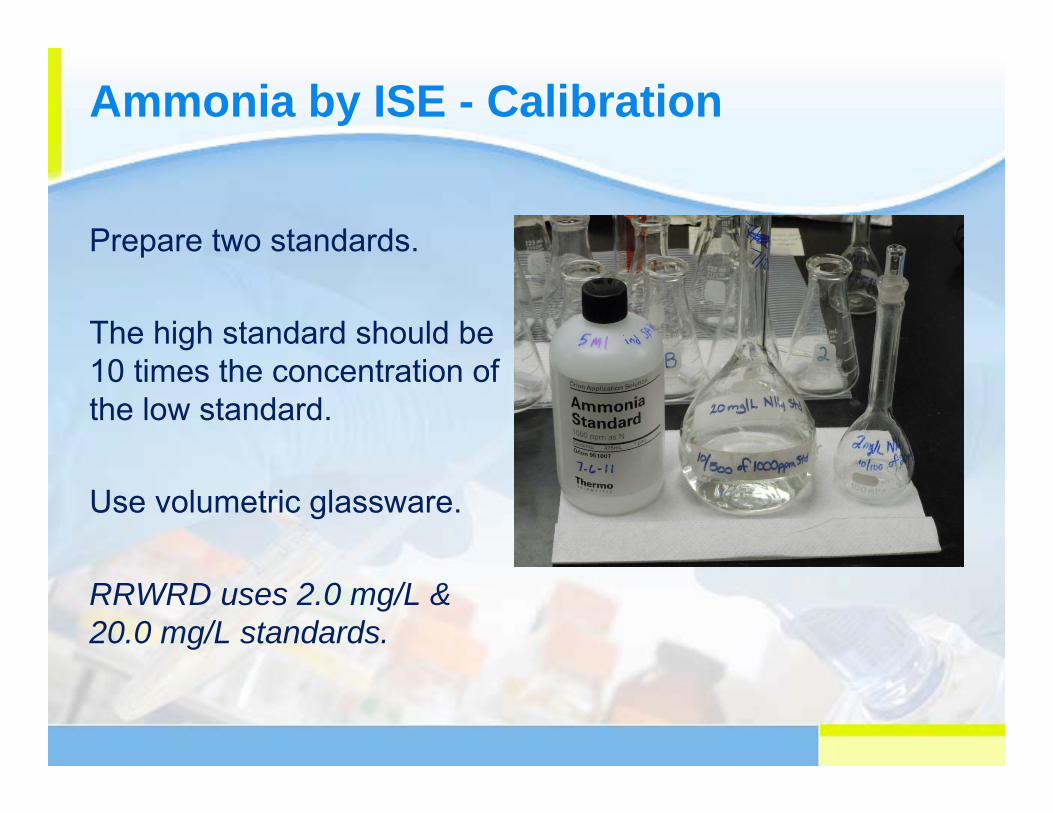
Ammonia by ISE - Calibration
Prepare two standards.
The high standard should be 10 times the concentration of the low standard.
Use volumetric glassware.
RRWRD uses 2.0 mg/L & 20.0 mg/L standards.
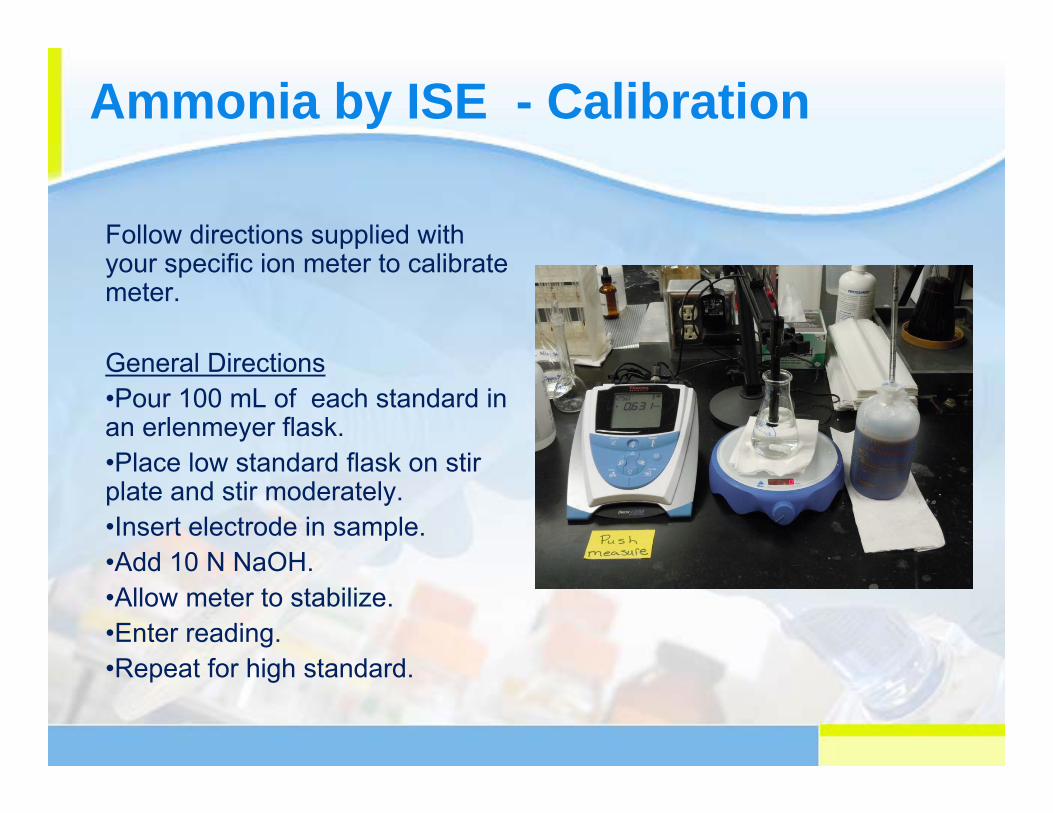
Ammonia by ISE - Calibration
Follow directions supplied with your specific ion meter to calibrate meter.
General Directions•Pour 100 mL of each standard in an erlenmeyer flask.•Place low standard flask on stir plate and stir moderately.•Insert electrode in sample.•Add 10 N NaOH. •Allow meter to stabilize.•Enter reading.•Repeat for high standard.
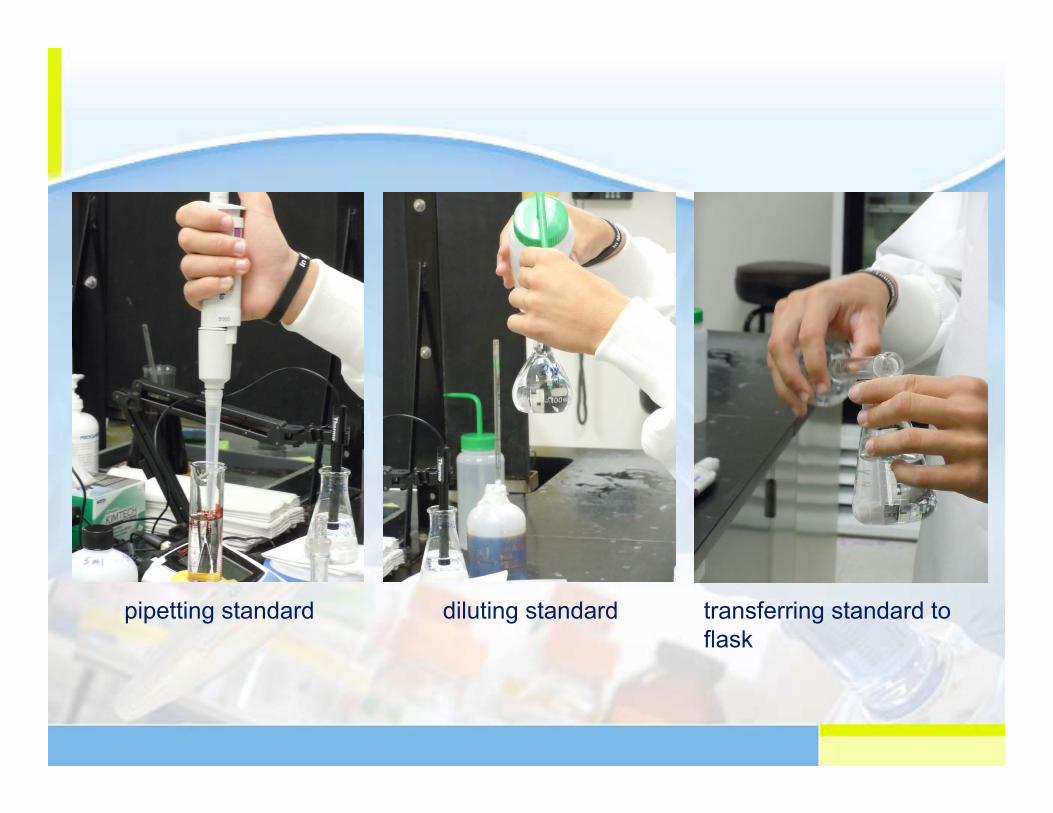
pipetting standard diluting standard transferring standard to flask

adding sodium hydroxide waiting for meter to stabilize
Ammonia by ISE - Calibration
Slope is the change in millivolts observed with every tenfold change in concentration.
An acceptable slope is -54 to -60 at 25 + 5°C.
Do not analyze samples unless your slope is acceptable.
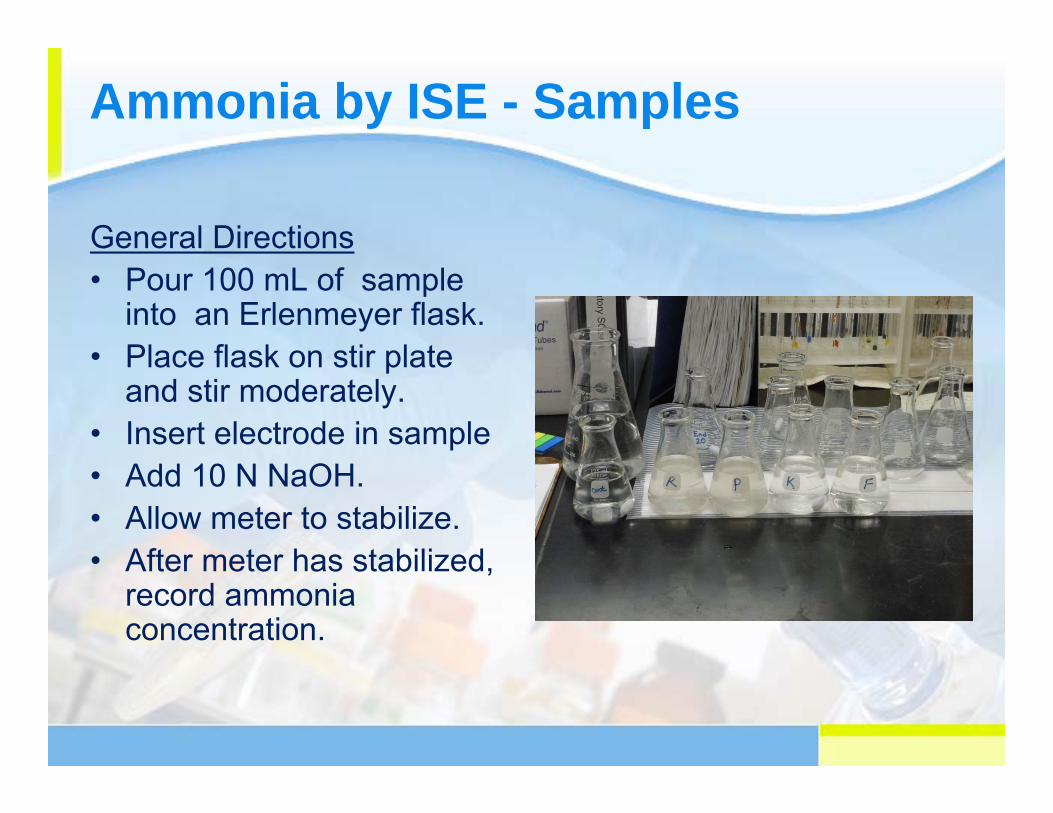
Ammonia by ISE - Samples
General Directions• Pour 100 mL of sample
into an Erlenmeyer flask.• Place flask on stir plate
and stir moderately.• Insert electrode in sample• Add 10 N NaOH. • Allow meter to stabilize.• After meter has stabilized,
record ammonia concentration.
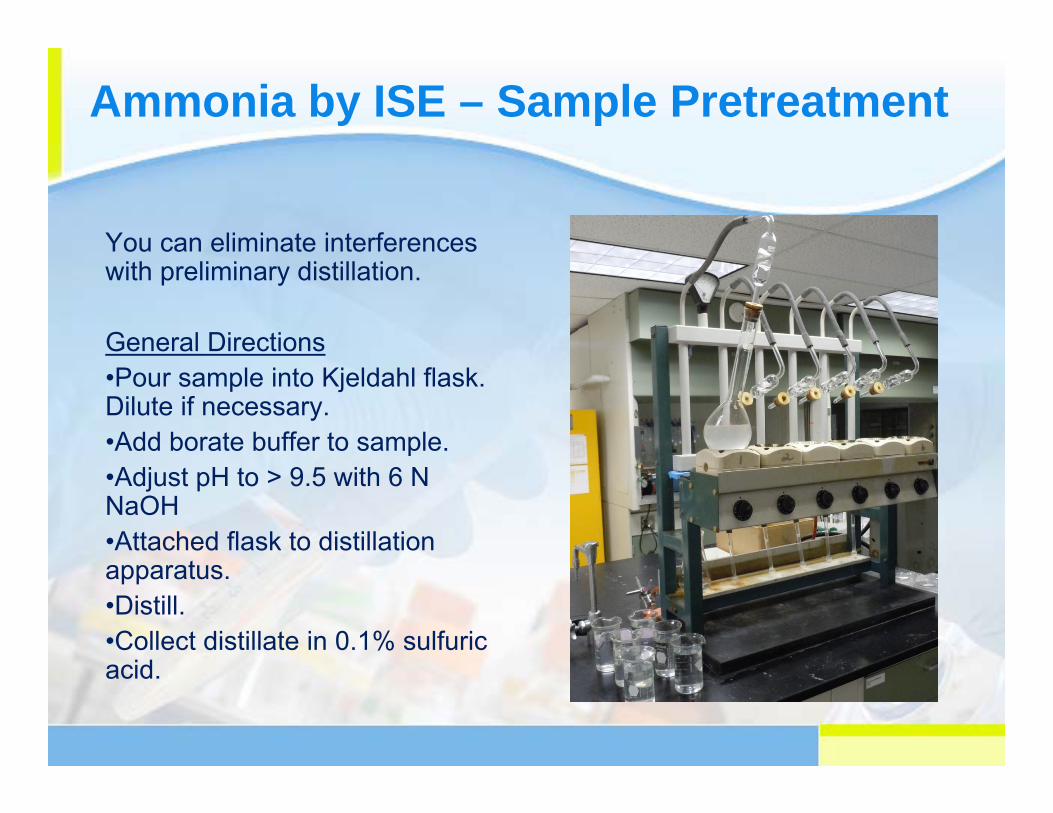
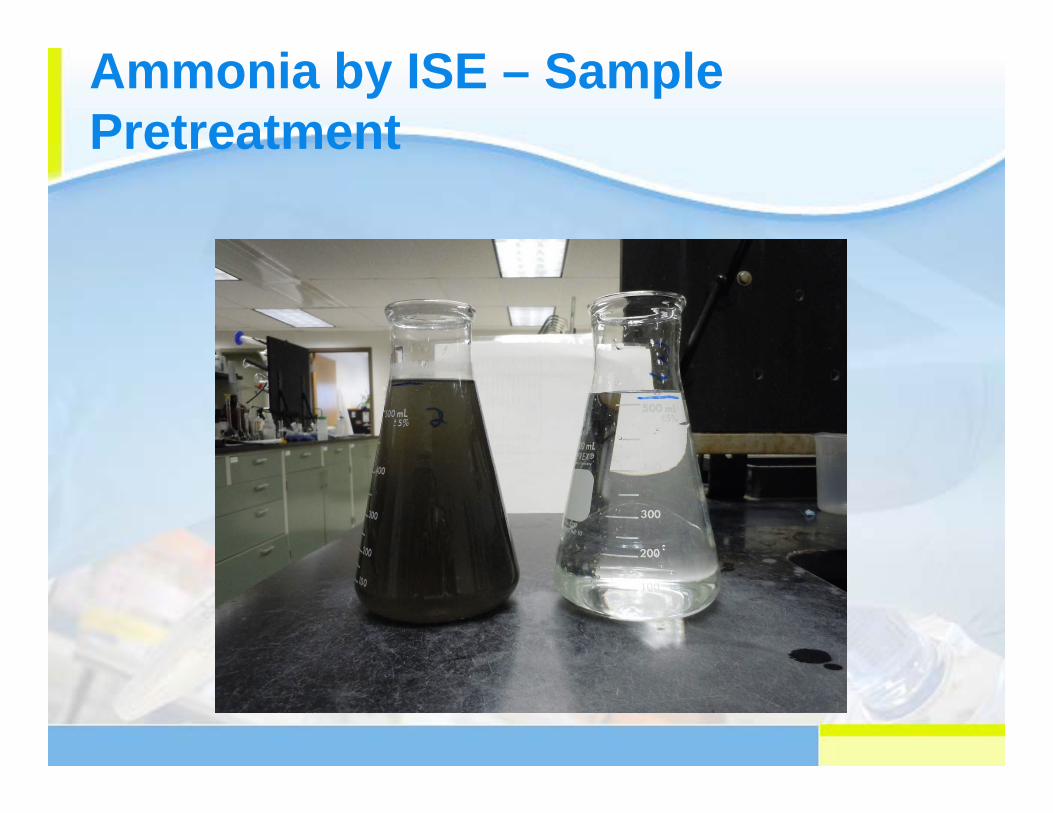
Ammonia by ISE – Sample Pretreatment
You can eliminate interferences with preliminary distillation.
General Directions•Pour sample into Kjeldahl flask. Dilute if necessary.•Add borate buffer to sample.•Adjust pH to > 9.5 with 6 N NaOH•Attached flask to distillation apparatus.•Distill. •Collect distillate in 0.1% sulfuric acid.
Ammonia by ISE – Sample Pretreatment
Ammonia by ISE – solid samples
You can determine the ammonia present in sludge using pre-distillation.
Just weigh the sample before adding it to the Kjeldahl flask.
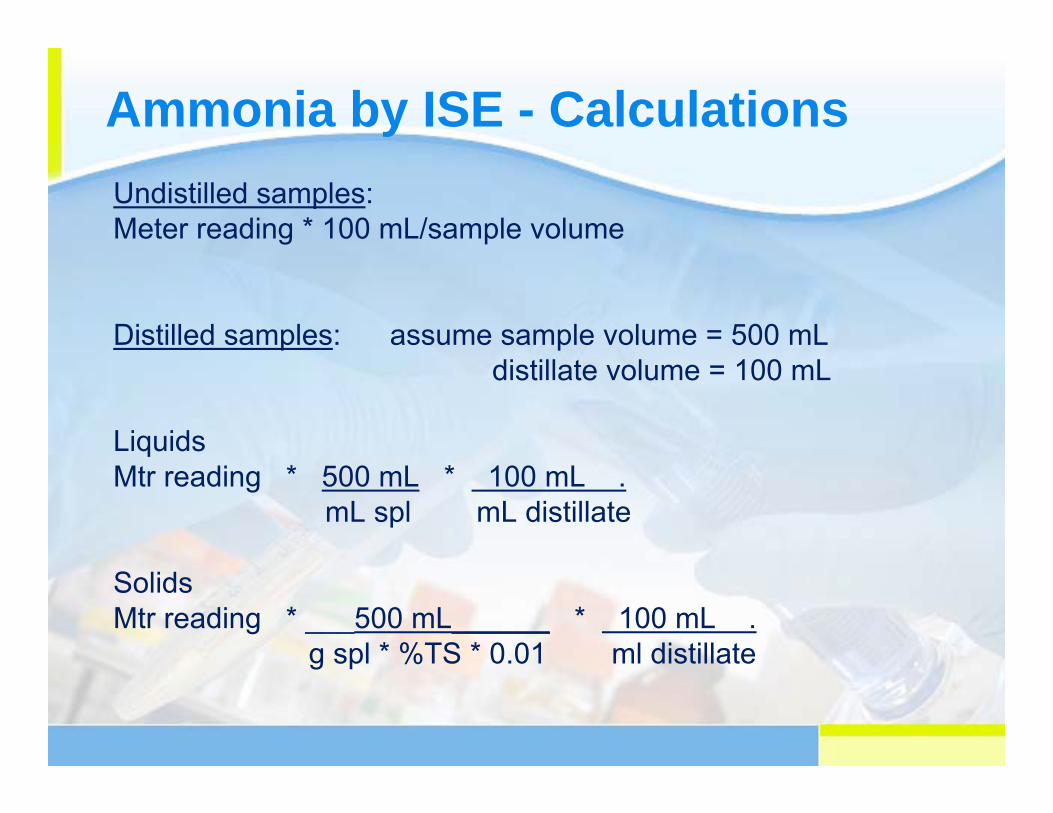
Ammonia by ISE - CalculationsUndistilled samples:Meter reading * 100 mL/sample volume
Distilled samples: assume sample volume = 500 mLdistillate volume = 100 mL
LiquidsMtr reading * 500 mL * 100 mL .
mL spl mL distillate
SolidsMtr reading * ___500 mL______ * 100 mL .
g spl * %TS * 0.01 ml distillate

Ammonia by ISE – Analysis Range
Low Level– Use an approved EPA procedure to determine your
method detection limit (MDL)(RRWRD MDL is 0.1)
– Your reporting limit is typically about 3 times your MDL.
High level– High end of range is your high standard.
(RRWRD high is 20 mg/L.)– You can extend high end of range by using a smaller
sample volume and diluting it to 100 mL.
Ammonia by ISE – Helpful Hints
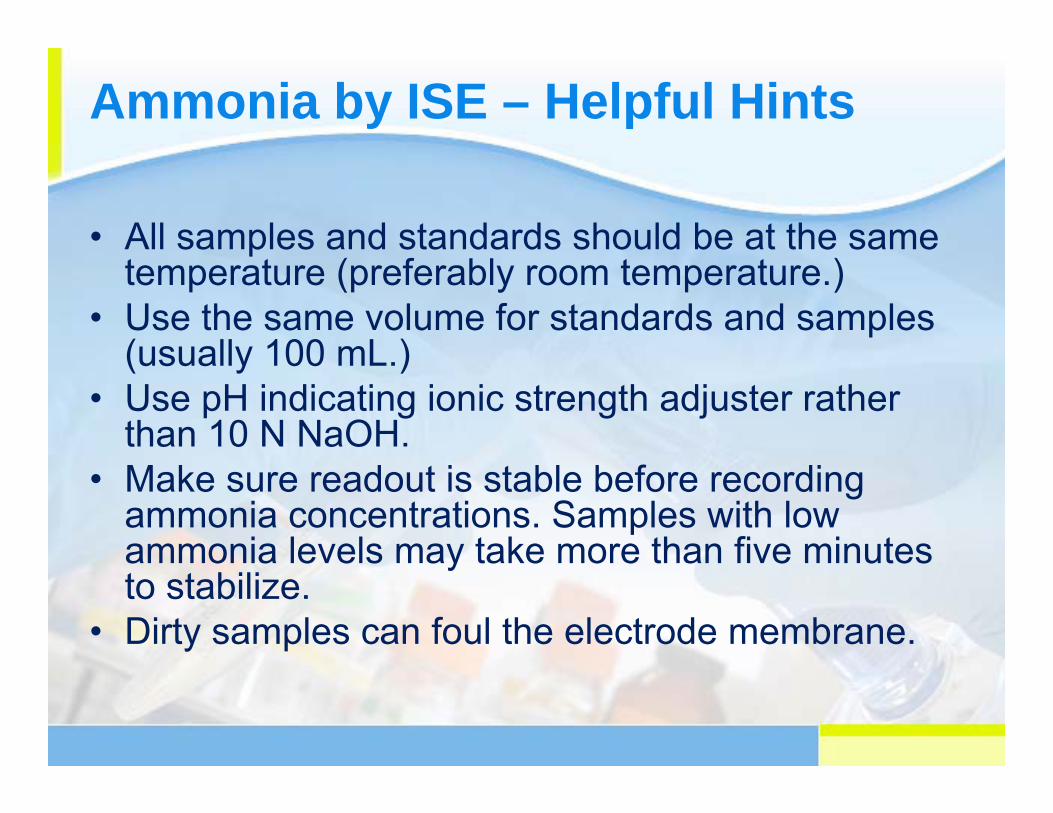
• All samples and standards should be at the same temperature (preferably room temperature.)
• Use the same volume for standards and samples (usually 100 mL.)
• Use pH indicating ionic strength adjuster rather than 10 N NaOH.
• Make sure readout is stable before recording ammonia concentrations. Samples with low ammonia levels may take more than five minutes to stabilize.
• Dirty samples can foul the electrode membrane.
Ammonia Quality Control
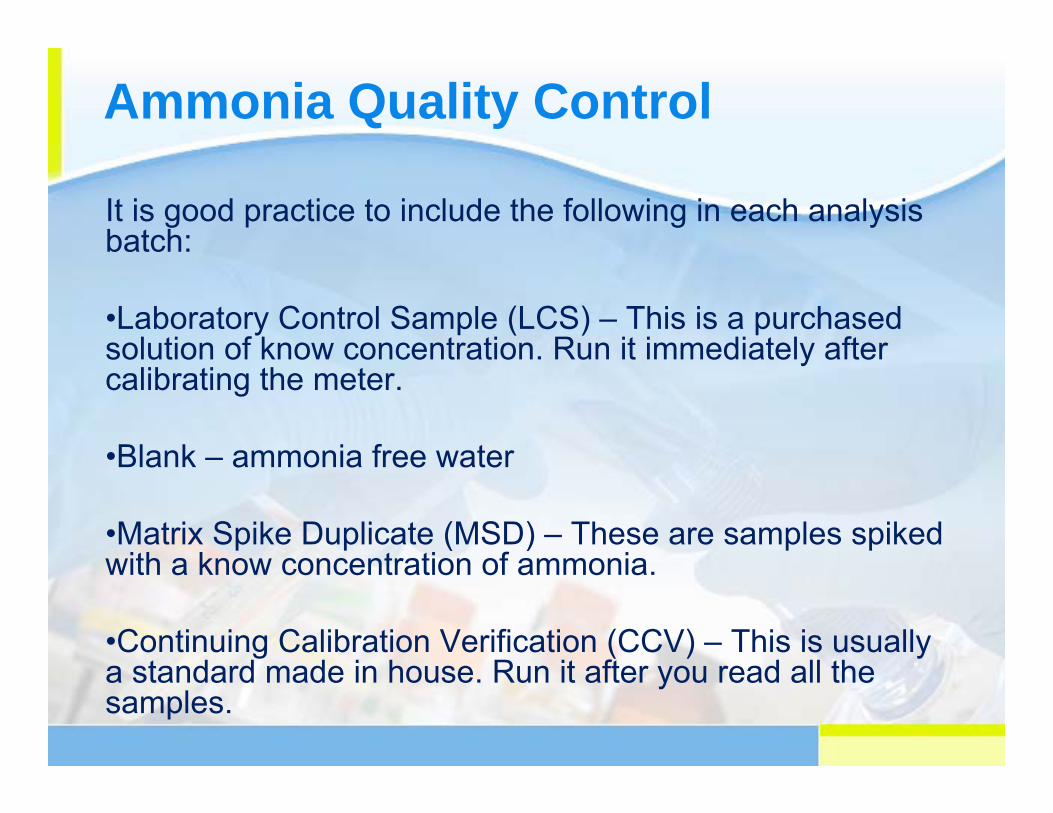
It is good practice to include the following in each analysis batch:
•Laboratory Control Sample (LCS) – This is a purchased solution of know concentration. Run it immediately after calibrating the meter.
•Blank – ammonia free water
•Matrix Spike Duplicate (MSD) – These are samples spiked with a know concentration of ammonia.
•Continuing Calibration Verification (CCV) – This is usually a standard made in house. Run it after you read all the samples.
Ammonia Quality Control
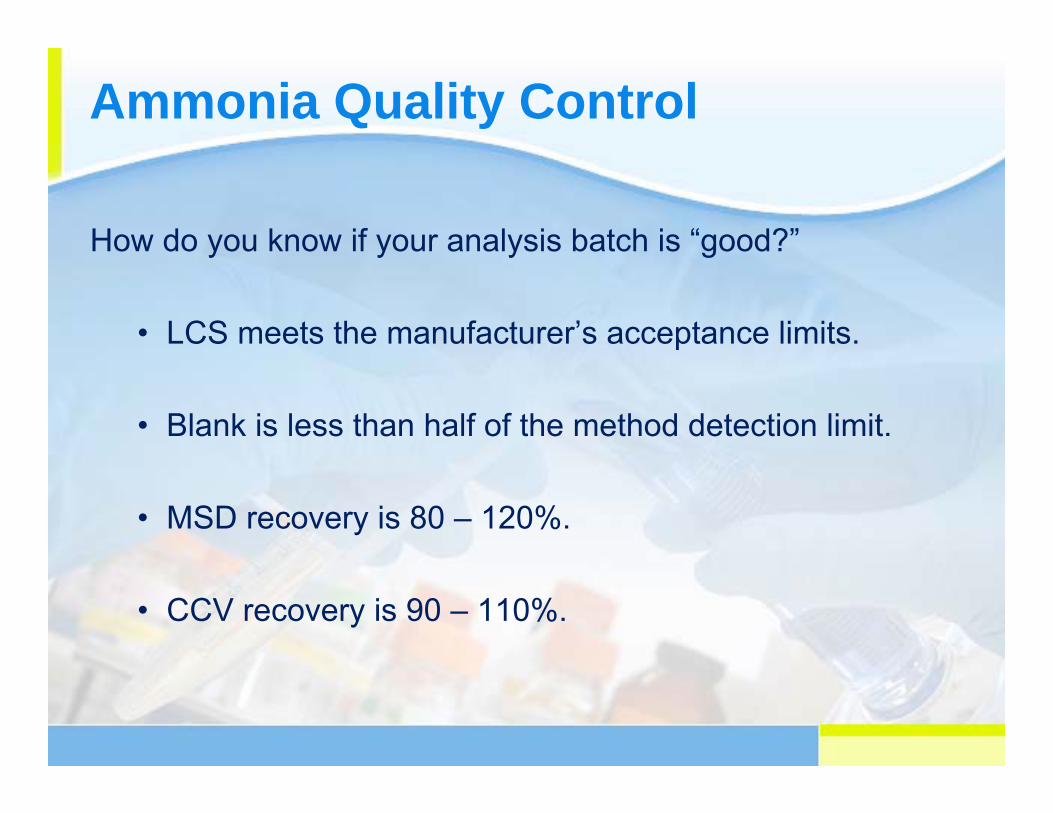
How do you know if your analysis batch is “good?”
• LCS meets the manufacturer’s acceptance limits.
• Blank is less than half of the method detection limit.
• MSD recovery is 80 – 120%.
• CCV recovery is 90 – 110%.
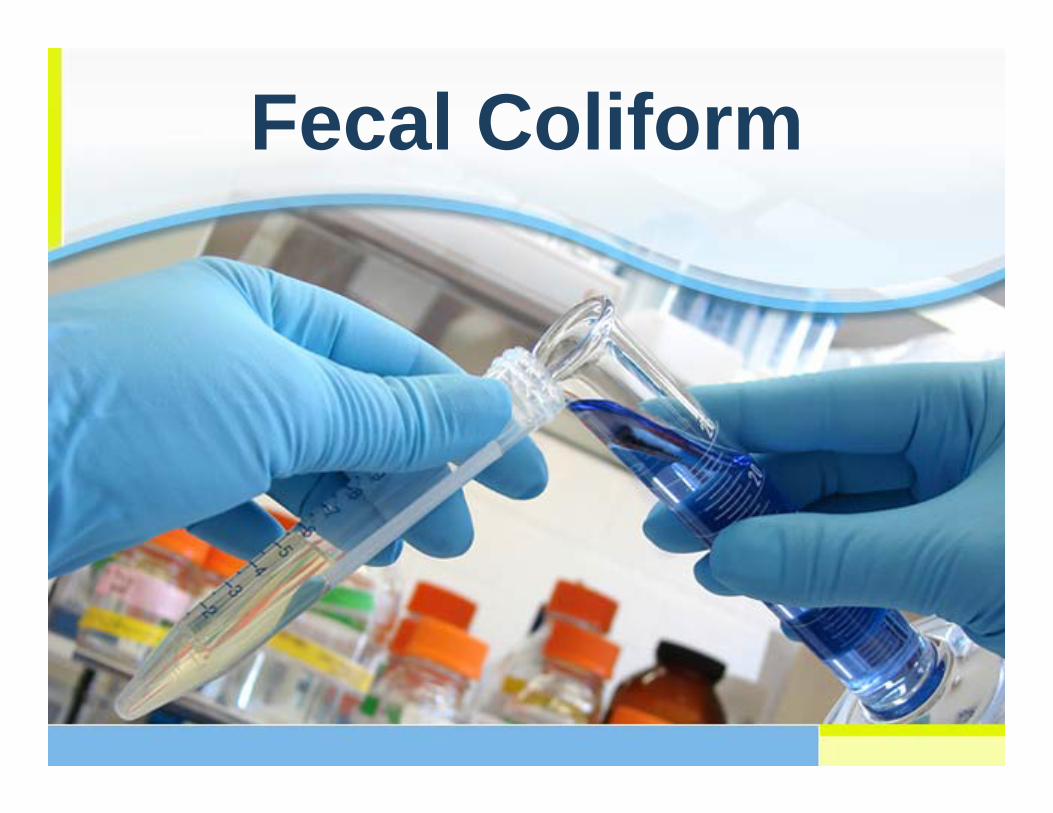
Fecal Coliform
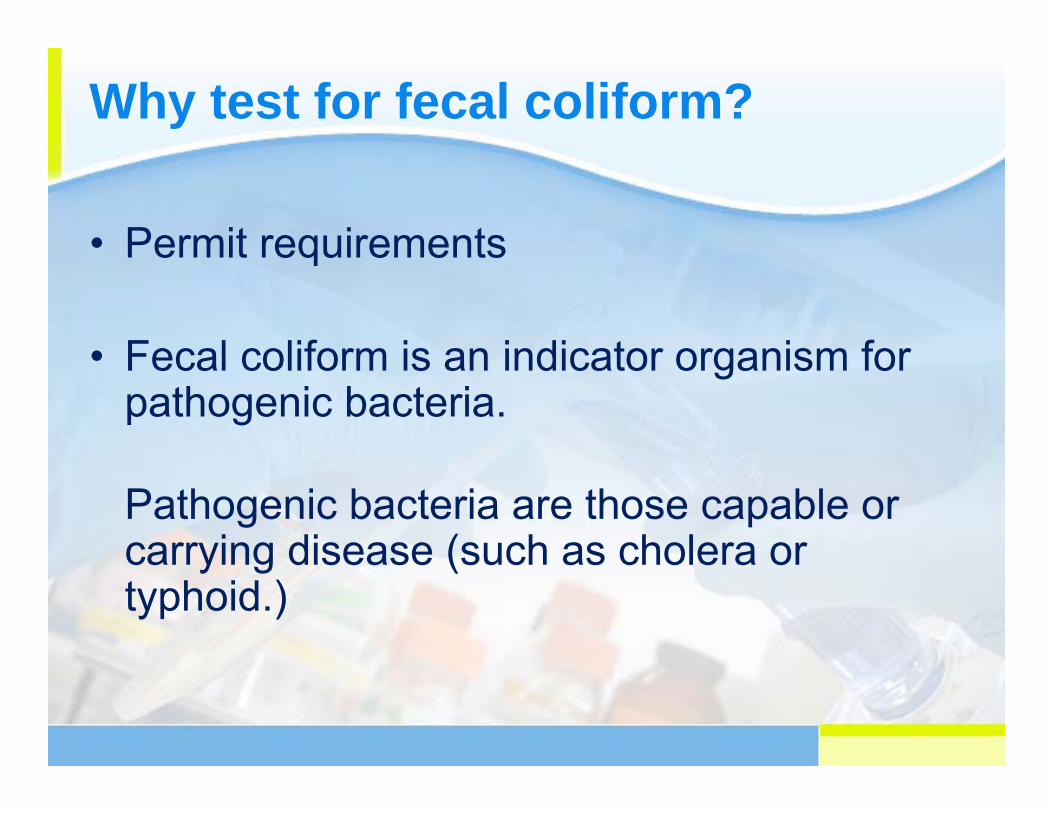
Why test for fecal coliform?
• Permit requirements
• Fecal coliform is an indicator organism for pathogenic bacteria.
Pathogenic bacteria are those capable or carrying disease (such as cholera or typhoid.)
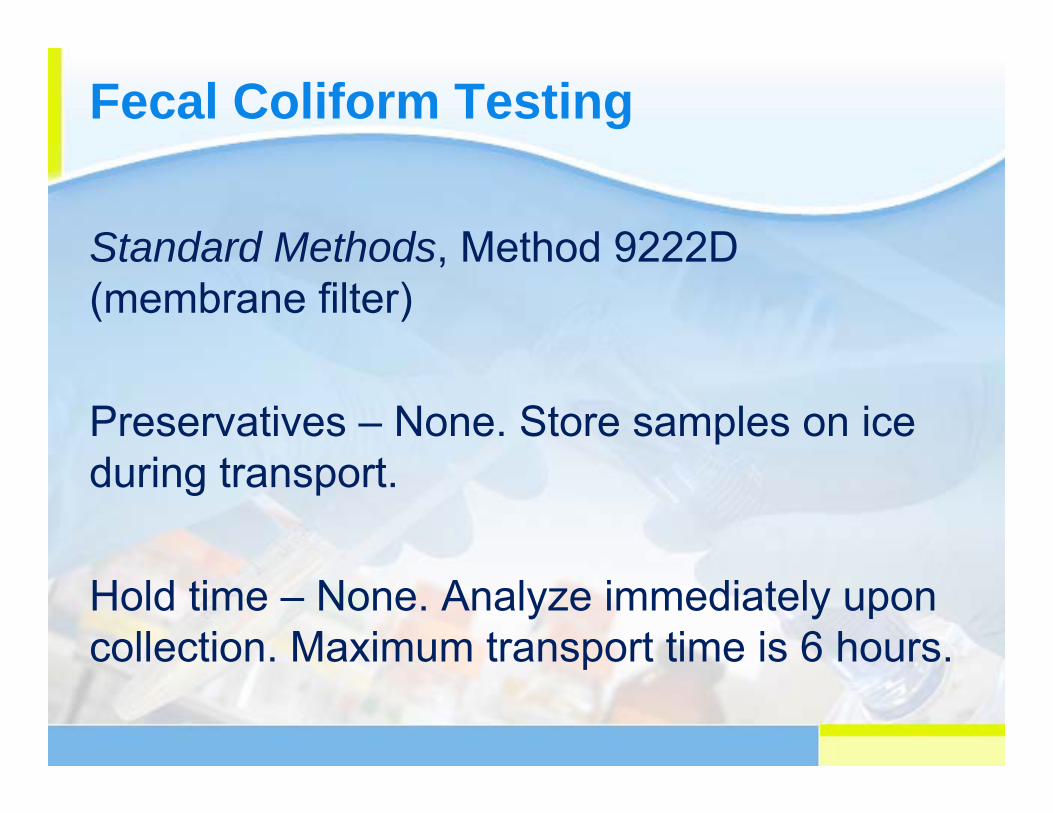
Fecal Coliform Testing
Standard Methods, Method 9222D(membrane filter)
Preservatives – None. Store samples on ice during transport.
Hold time – None. Analyze immediately upon collection. Maximum transport time is 6 hours.
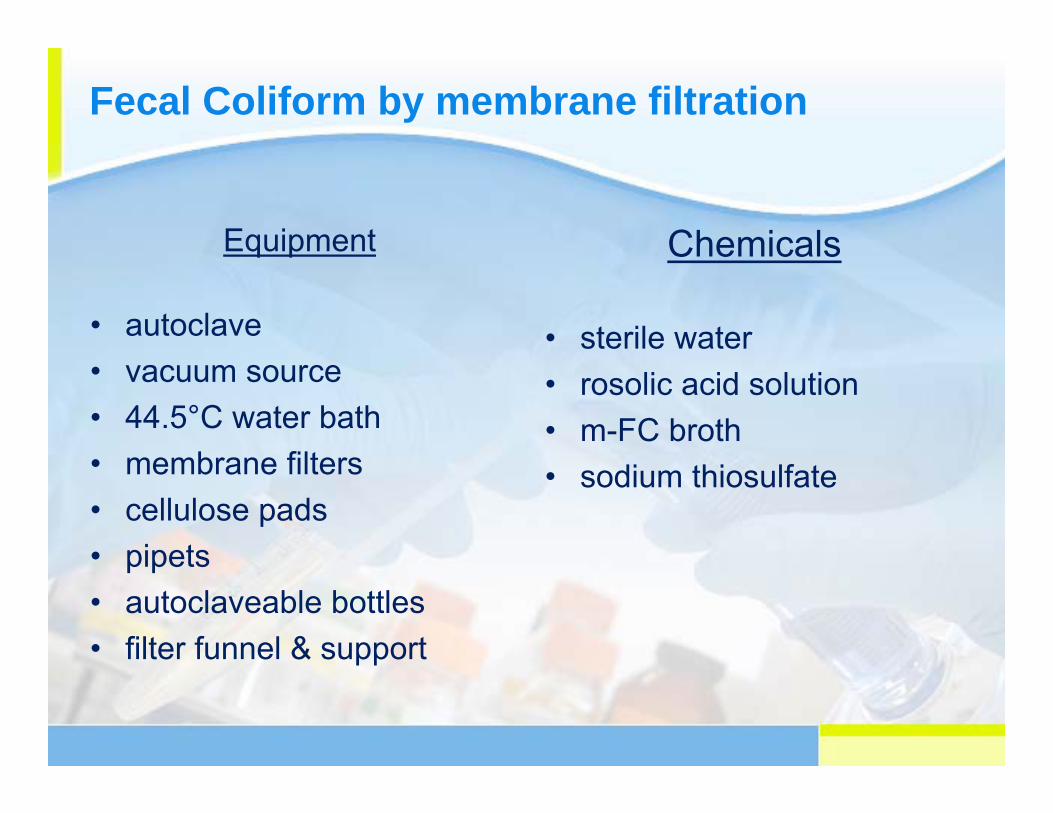
Fecal Coliform by membrane filtration
Equipment
• autoclave• vacuum source• 44.5°C water bath• membrane filters• cellulose pads• pipets• autoclaveable bottles• filter funnel & support
Chemicals
• sterile water• rosolic acid solution• m-FC broth• sodium thiosulfate
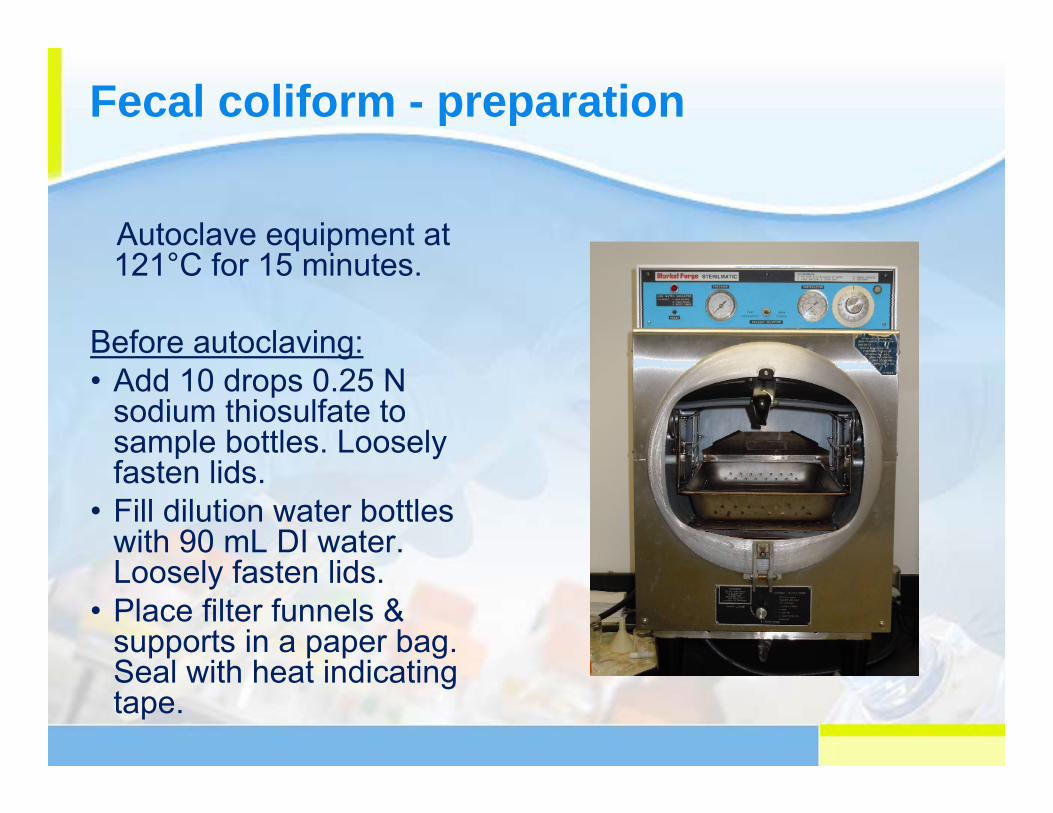
Fecal coliform - preparation
Autoclave equipment at 121°C for 15 minutes.
Before autoclaving:• Add 10 drops 0.25 N
sodium thiosulfate to sample bottles. Loosely fasten lids.
• Fill dilution water bottles with 90 mL DI water. Loosely fasten lids.
• Place filter funnels & supports in a paper bag. Seal with heat indicating tape.
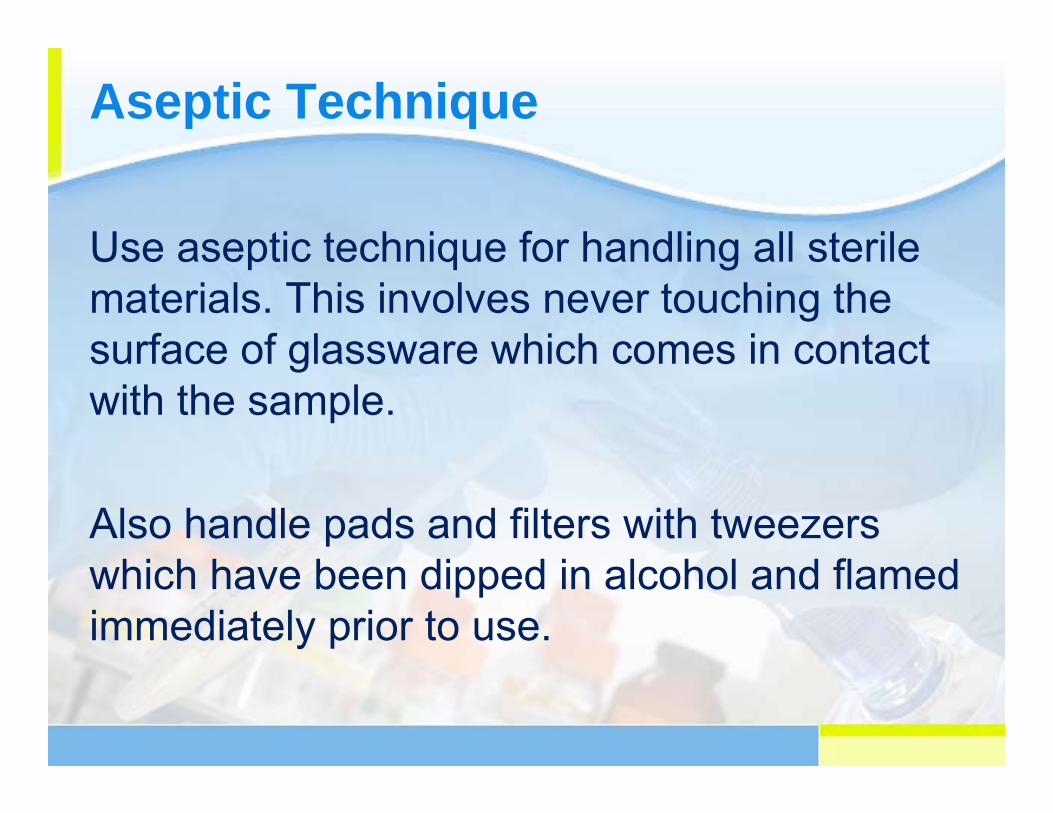
Aseptic Technique
Use aseptic technique for handling all sterile materials. This involves never touching the surface of glassware which comes in contact with the sample.
Also handle pads and filters with tweezers which have been dipped in alcohol and flamed immediately prior to use.
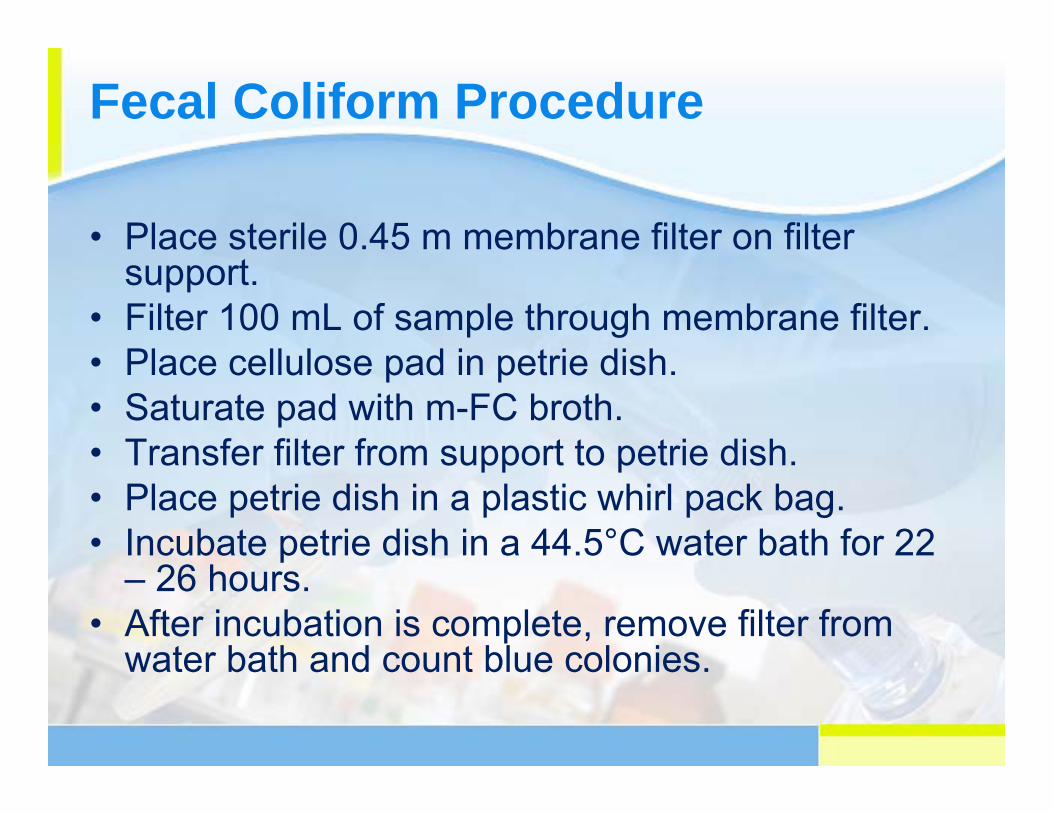
Fecal Coliform Procedure
• Place sterile 0.45 m membrane filter on filter support.
• Filter 100 mL of sample through membrane filter.• Place cellulose pad in petrie dish. • Saturate pad with m-FC broth.• Transfer filter from support to petrie dish.• Place petrie dish in a plastic whirl pack bag.• Incubate petrie dish in a 44.5°C water bath for 22
– 26 hours.• After incubation is complete, remove filter from
water bath and count blue colonies.

Fecal Coliform Procedure
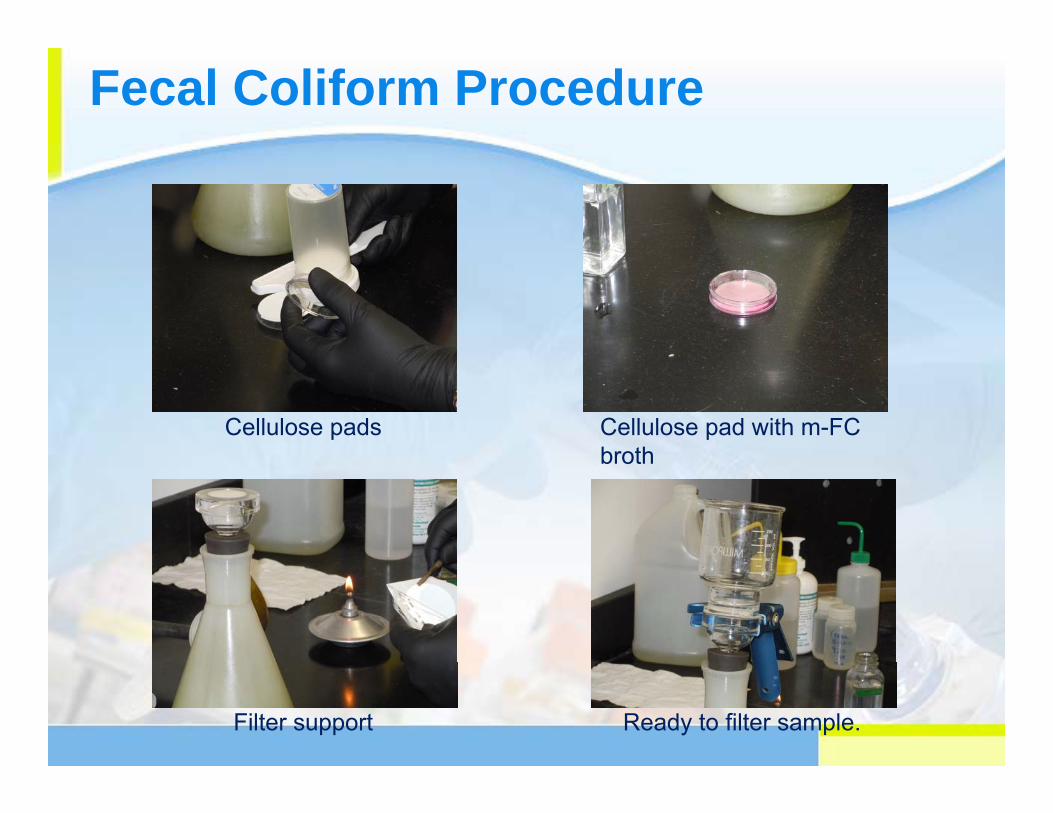
Fecal Coliform Procedure
Cellulose pads Cellulose pad with m-FC broth
Filter support Ready to filter sample.
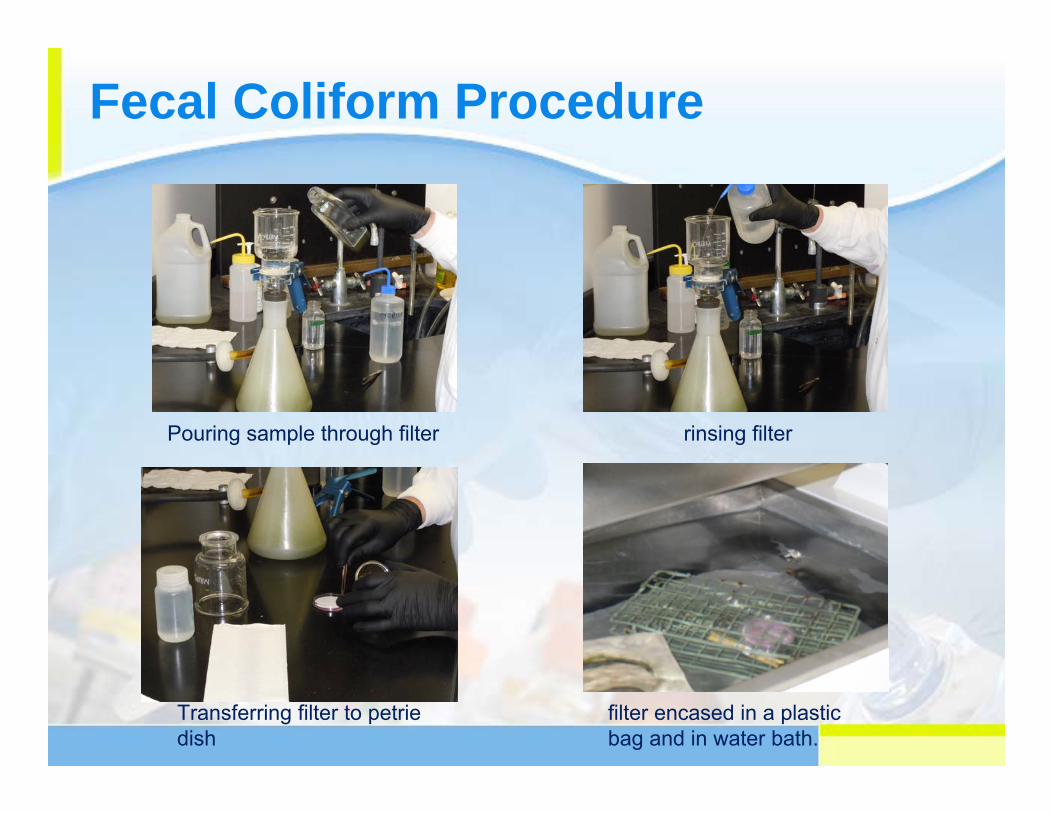
Fecal Coliform Procedure
Pouring sample through filter rinsing filter
Transferring filter to petriedish
filter encased in a plastic bag and in water bath.
Fecal Coliform
Fecal Coliform – Helpful Hints
• Use aseptic technique.• As little as 20 mg/L solids can clog filter.
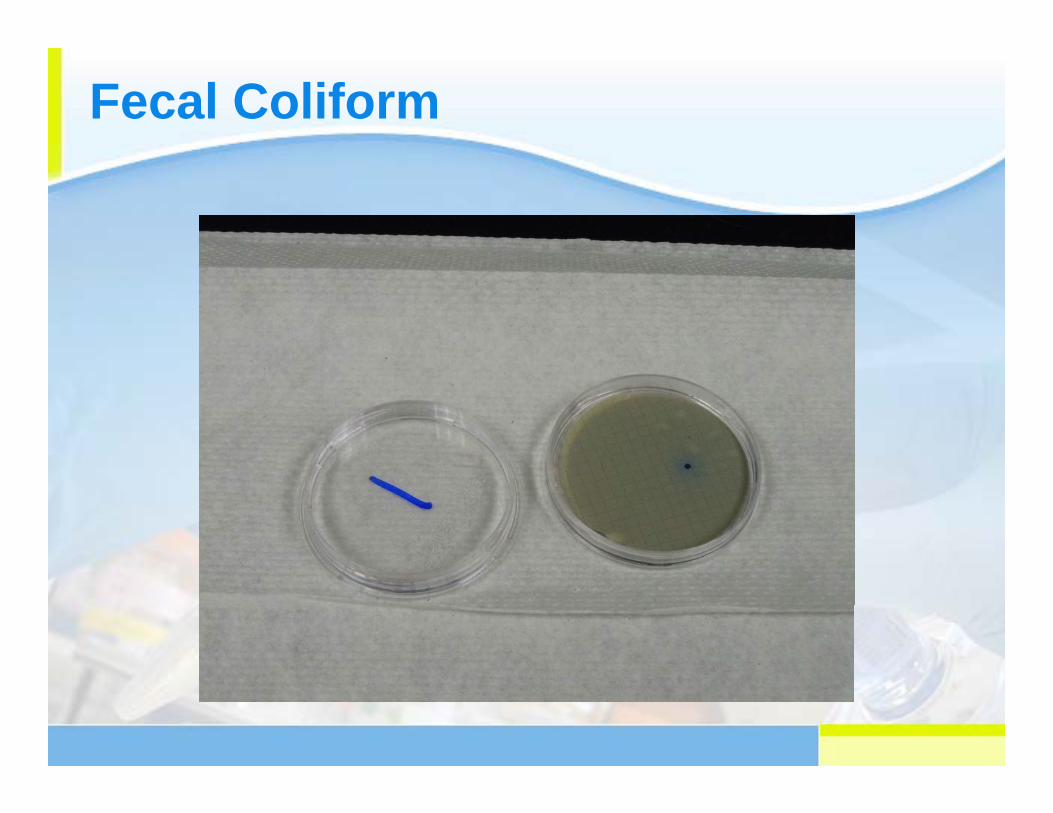
Dilute sample if solids are a problem.• Fecal coliform colonies are blue with a
sheen. Do not count pink or white colonies.• If there are too many colonies for you to see
them distinctly, report as TNTC (too numerous to count.)
• m-FC broth is only stable for a week.
Fecal Coliform Quality Control
• Verify water bath temperature daily.• Run sterile water blanks on a routine basis.
RRWRD does so once each week.• Run samples in duplicate on a routine basis.
RRWRD does so once each week.• Run a positive source water (known qc
sample) quarterly.

Residual Chlorine
Why test for Residual Chlorine?
• Permit requirement• To verify you are adding enough chlorine to
treat pathogenic bacteria.• To verify you are not sending too much
chlorine to your receiving stream. • To optimize chlorine usage (to reduce
costs.)
Chlorine by Amperometric Titration
Standard Methods, Method 4500-Cl D
Preservatives – None.
Hold time – None. Analyze samples as soon as possible after collection.
Exposure to sunlight or excess agitation will cause chlorine concentration to decrease rapidly, especially in weak solutions.
Chlorine by Amperometric Titration
Chemical Interferences:• Halogens other than chlorine will titrate as chlorine
(for example, bromine and iodide.)• Copper & silver ions may “poison” the electrode.
Physical Interferences:• Vigorous stirring may lower chlorine values by
volatilization.• Exposure to sunlight may lower chlorine values.
Chlorine by Amperometric Titration
Equipment
• Amperometric titrater• Buret• Stir plate & magnet• Assorted beakers,
flasks, and pipets
Chemicals
• Acetate buffer (pH 4)• .00564 N Phenylarsine
oxide*• 5 % potassium iodide• Chlorine reference solution
* Use 0.001128 N Phenylarsine oxide for low level chlorine.
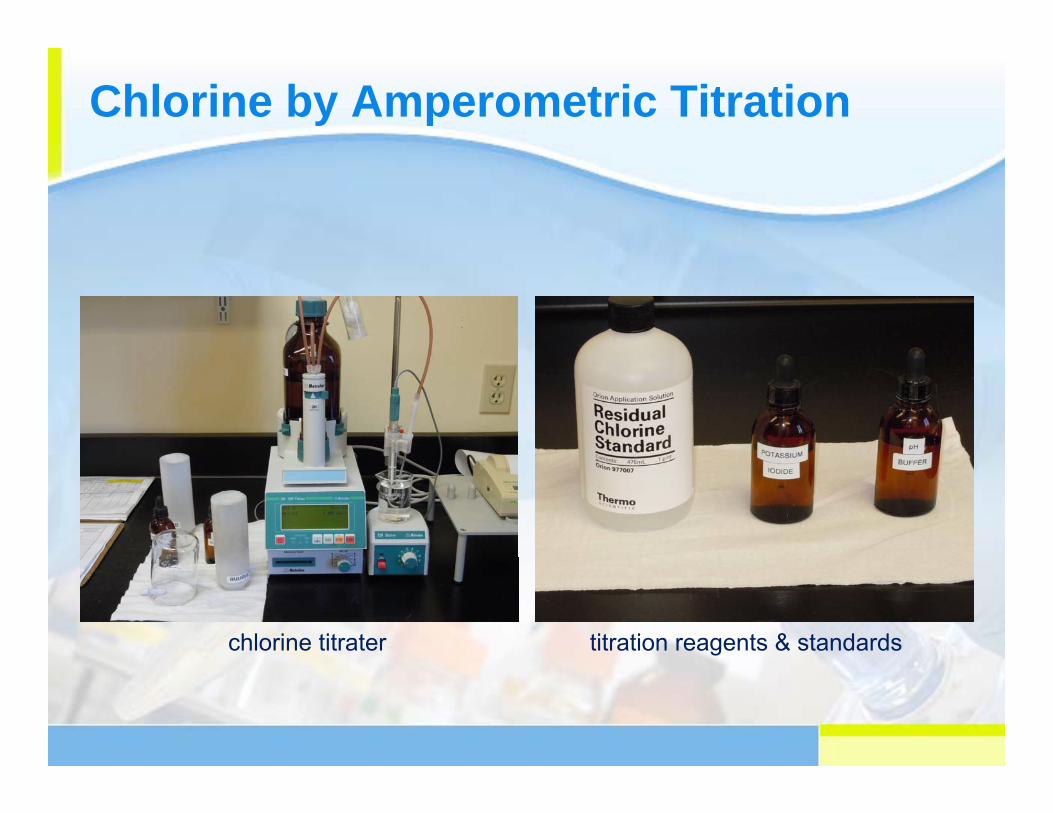
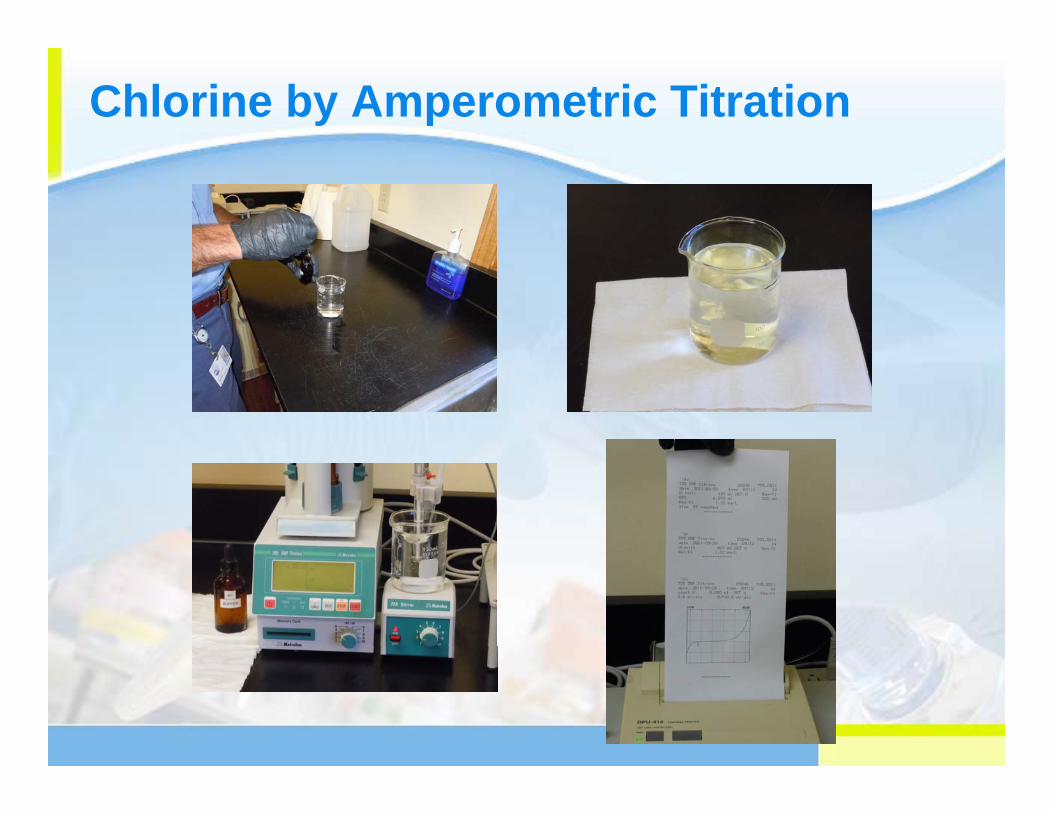
Chlorine by Amperometric Titration
titration reagents & standardschlorine titrater
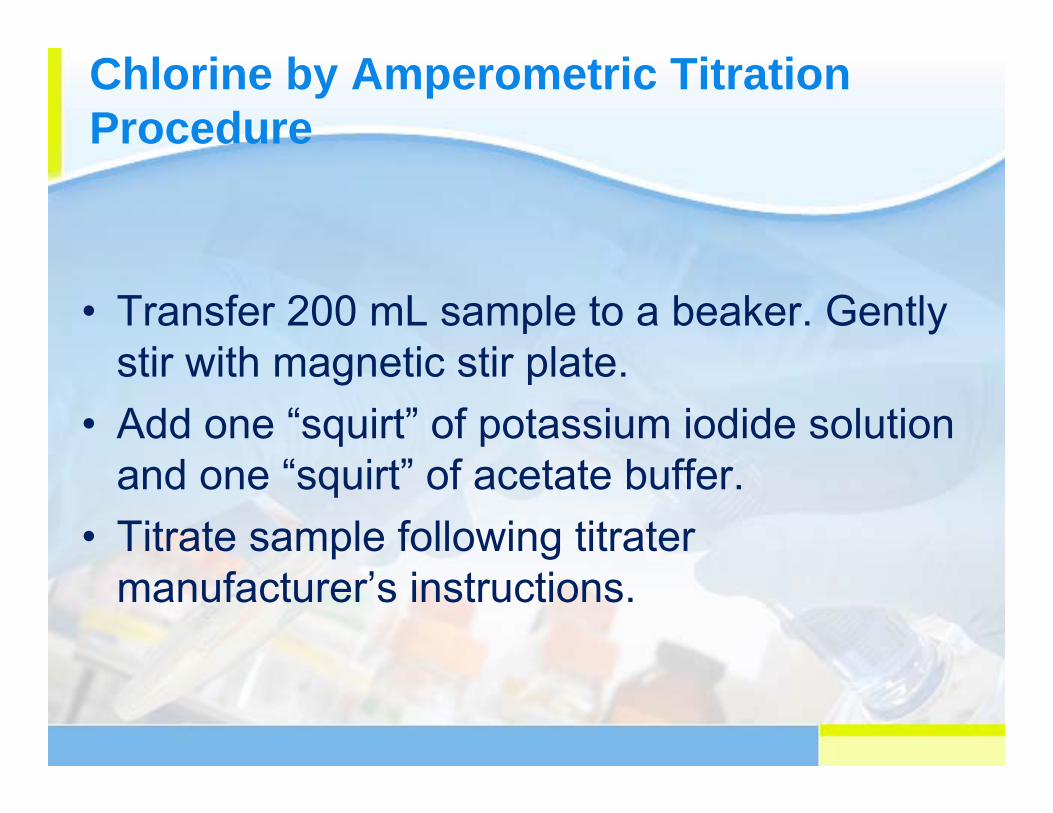
Chlorine by Amperometric Titration Procedure
• Transfer 200 mL sample to a beaker. Gently stir with magnetic stir plate.
• Add one “squirt” of potassium iodide solution and one “squirt” of acetate buffer.
• Titrate sample following titratermanufacturer’s instructions.
Chlorine by Amperometric Titration
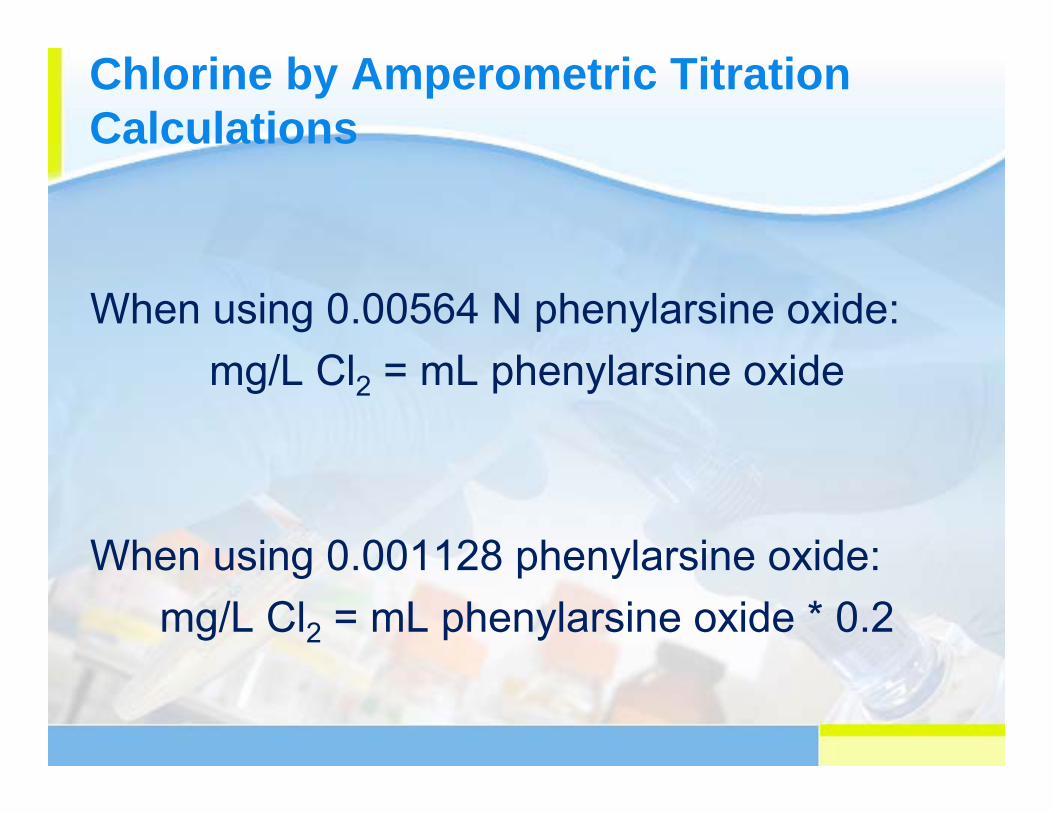
Chlorine by Amperometric Titration Calculations
When using 0.00564 N phenylarsine oxide:mg/L Cl2 = mL phenylarsine oxide
When using 0.001128 phenylarsine oxide:mg/L Cl2 = mL phenylarsine oxide * 0.2
Chlorine by Amperometric TitrationHelpful Hints
• Use a graduated cylinder to measure sample. (Don’t use a beaker.)
• Stir samples at a slow, gentle pace.• Add phenylarsine oxide in small increments
so you don’t miss the endpoint.• Phenylarsine oxide has an expiration date.
Buy new titrant before it expires.
Chlorine by Amperometric TitrationQuality Control
Analyze a purchased known solution on a routine basis. (RRWRD does this on a daily basis.)
The known solution is 100 ppm iodide diluted to an appropriate level.
(RRWRD dilutes the 100 ppm solution 1 mL: 200 mL. This results in a 0.5 mg/L solution.)


![Basics of Bose-Einstein Condensation V.I.Yukalov · PDF filearXiv:1105.4992v1 [cond-mat.stat-mech] 25 May 2011 Basics of Bose-Einstein Condensation V.I.Yukalov Bogolubov Laboratory](https://static.cupdf.com/doc/110x72/5aad58457f8b9aa9488e2026/basics-of-bose-einstein-condensation-viyukalov-11054992v1-cond-matstat-mech.jpg)


