LabVIEW FPGA @ CERN 2020
• Unofficial
• For fun
• Share knowledge
LabVIEW FPGA @ CERN 2020
• Unofficial
• Fan based
• Afterwork
• Knowledge sharing
About the workshop
• 2 sessions• 29.09 at 16:00 2 hours
• 05.10 at 16:00 2 hours
Repeat
• 16.11 at 16:00 2 hours
• 17.11 at 16:00 2 hours

About the workshops
• Minimize theory
• Maximize practice
• Some fun examples

LabVIEW
• Intuitive
• Data driven
• Hardware integration

Eric Starkloff CEO
National Instruments
Leader in data acquisition technology with
innovative modular instruments and
LabVIEW graphical programming software
Corporate headquarters in Austin, TX
Offices in nearly 50 countries
35,000+ companies served annually
More than 1,000 products
Approx. 7,100 employees
600 Alliance Partners

Diversity of applications

Diversity of applications
SpaceX
Falcon rocket launch pad software
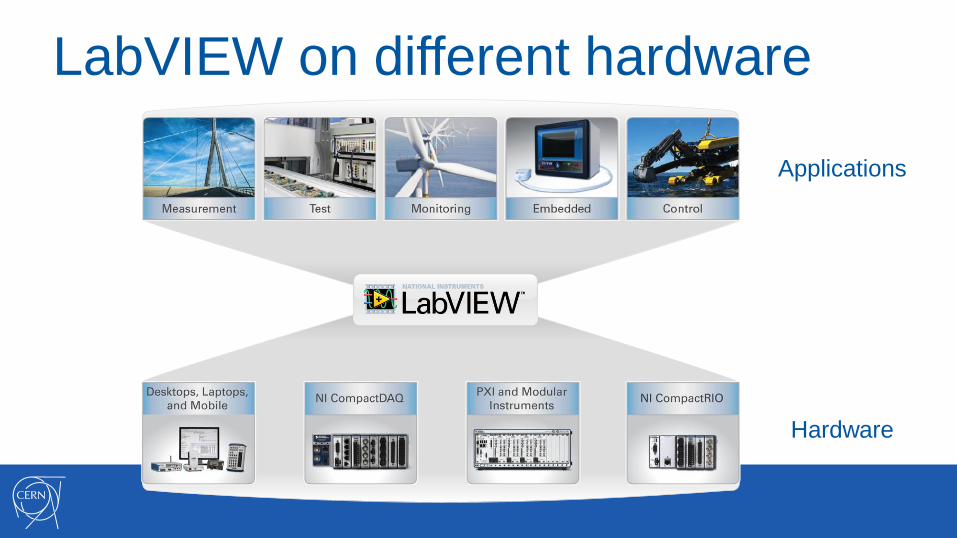
LabVIEW on different hardware
Applications
Hardware
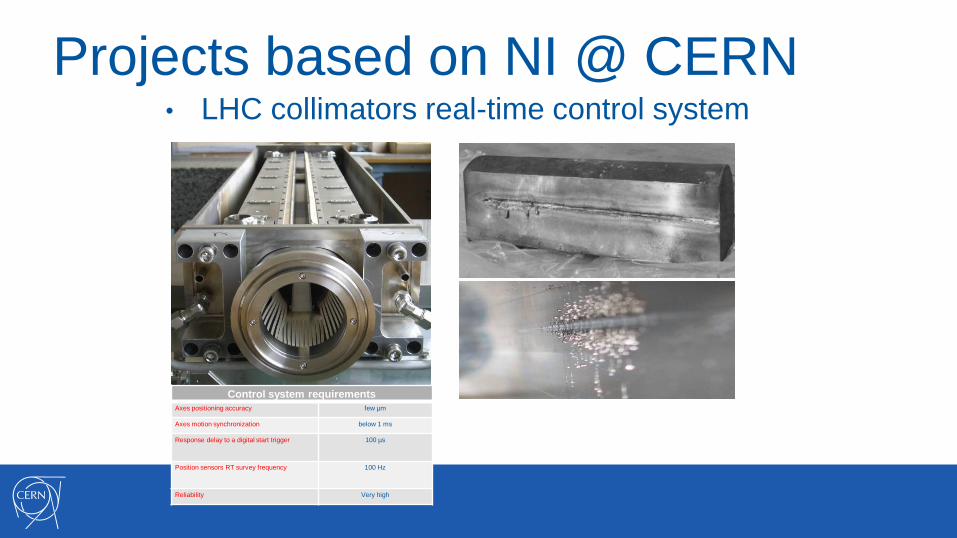
Projects based on NI @ CERN• LHC collimators real-time control system
Control system requirements
Axes positioning accuracy few µm
Axes motion synchronization below 1 ms
Response delay to a digital start trigger 100 µs
Position sensors RT survey frequency 100 Hz
Reliability Very high

• LHC collimators real-time control system
Layout Architecture120 systems

Projects based on NI @ CERN
L
R
≈ 30𝑚Measurement setup assembly and closed cryostat
LHC by-pass diodes
Mu-metal shield (against magnetic
field)
Feedthrough 18kA
Cryostat
Measurement rack
PXI system components:
- 7 x DMM 4081
- DAQ M-series 6251
- GPIB
- Ethernet
Power supplies for heaters
HV power supply – 3kV max
Discharge circuit
Capacitor bank 13,3 mF, 1500V
• Measurement setup for characterization of the radiation
hardness of cryogenic bypass diodes for the LHC-HL

Getting the Most out of This Course• Ask questions!
• One finger – question / comment regarding to the presentation
• Two fingers – you need assistance
• Experiment with hands-on exercises to understand the
methods used
• Explore a possible solution - you may find a better one

Why LabVIEW?• Same concepts as in most traditional languages (data types,
loops, event handling, recursion and OOP)
• Data flow (execution is data-driven, not determined by
sequential lines of text)
• Intuitive
• Easy to debug
• Automatic parallelism
• Hardware integration
• Combines with other languages

B. Project Explorer
Project Explorer Window
Files Types
Project Folders
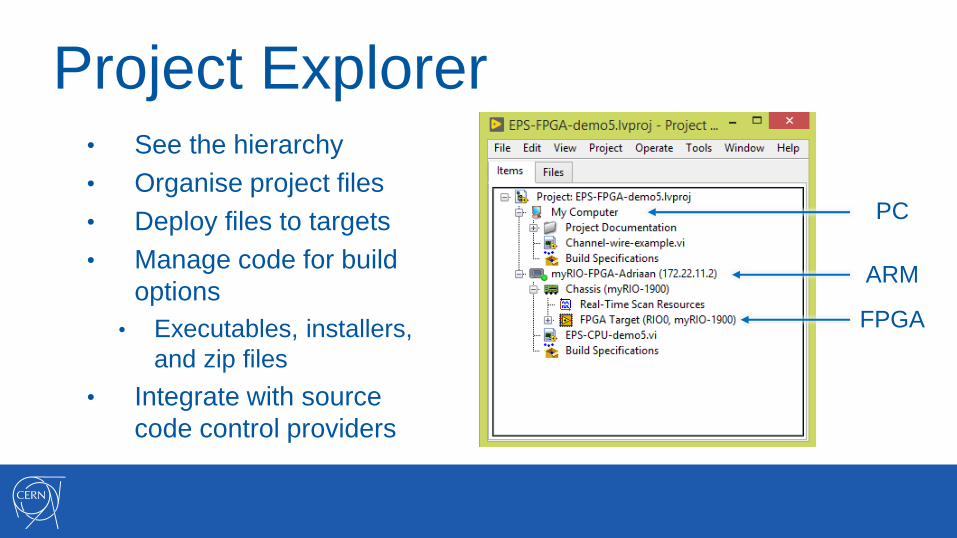
Project Explorer• See the hierarchy
• Organise project files
• Deploy files to targets
• Manage code for build
options
• Executables, installers,
and zip files
• Integrate with source
code control providers
PC
ARM
FPGA
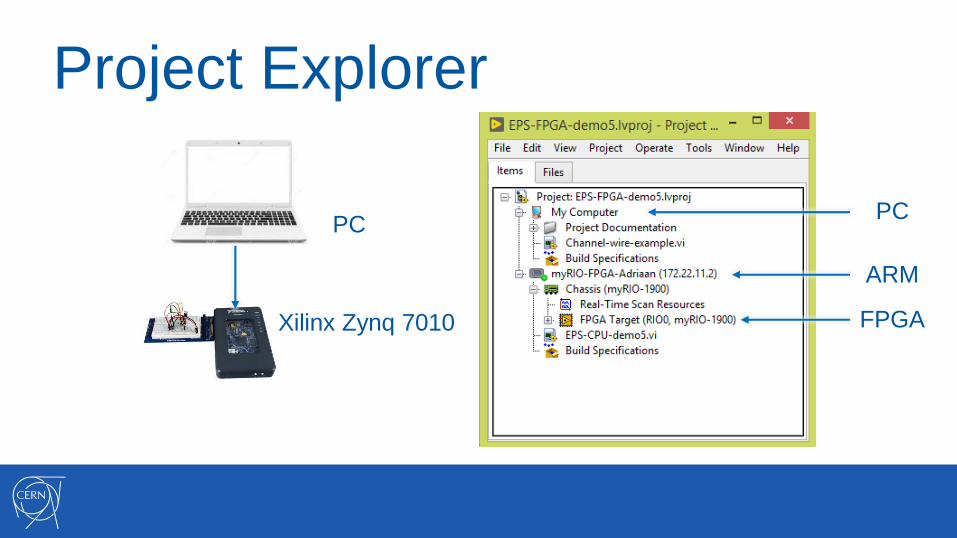
Project Explorer
PC
ARM
FPGAXilinx Zynq 7010
PC
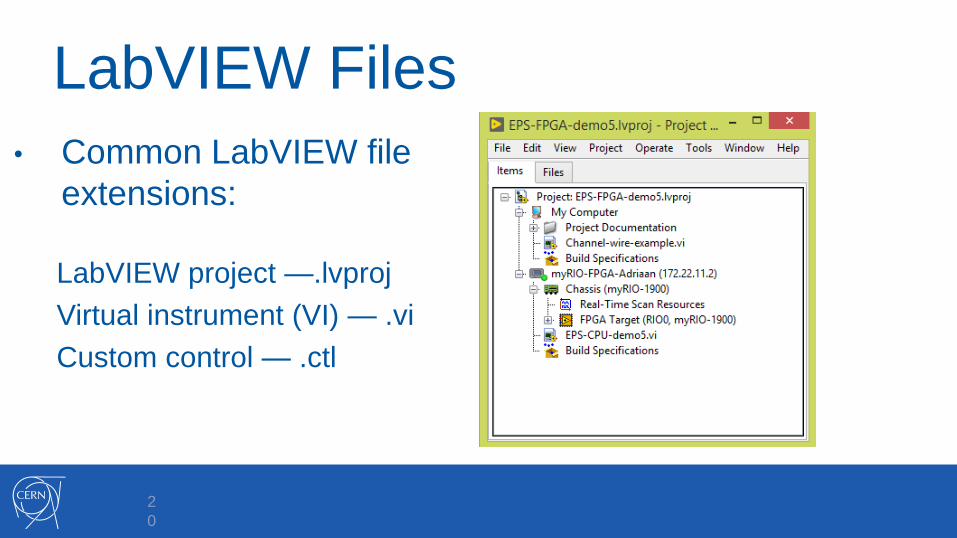
LabVIEW Files
• Common LabVIEW file
extensions:
LabVIEW project —.lvproj
Virtual instrument (VI) — .vi
Custom control — .ctl
2
0

Adding Folders to a Project• Virtual folder
• Organizes project items and does not represent files on disk
• Auto-populating folder• Adds a directory on disk
to the project
• LabVIEW continuously monitors and updates the folder according to changes made in the project and on disk

Show-off(1)
Project Explorer

C. Parts of a VI
Front Panel
Block Diagram
Icon
Connector Pane
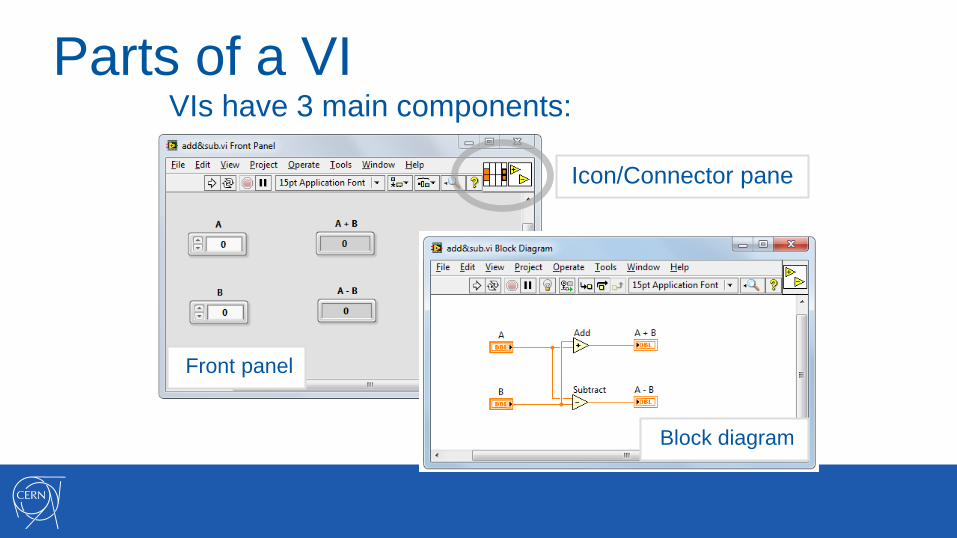
Parts of a VIVIs have 3 main components:
Block diagram
Front panel
Icon/Connector pane
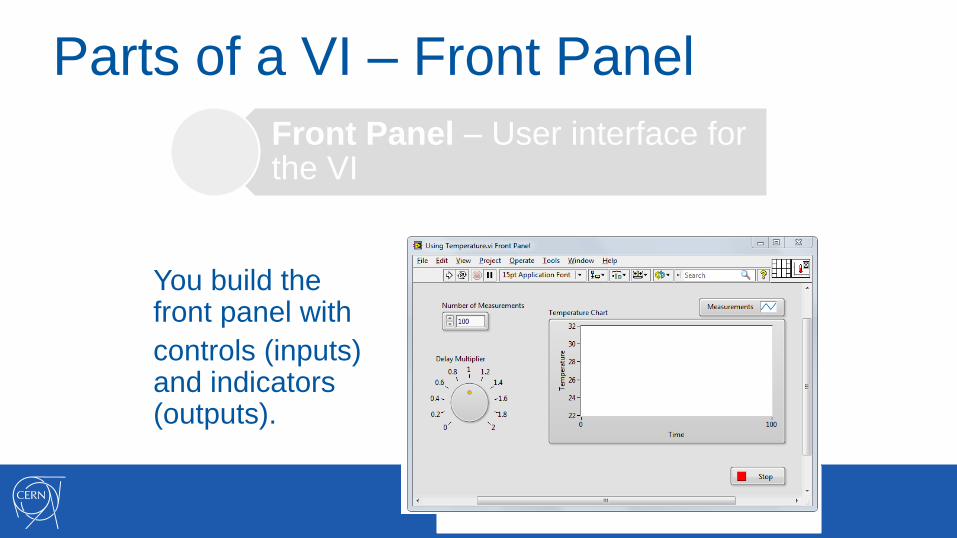
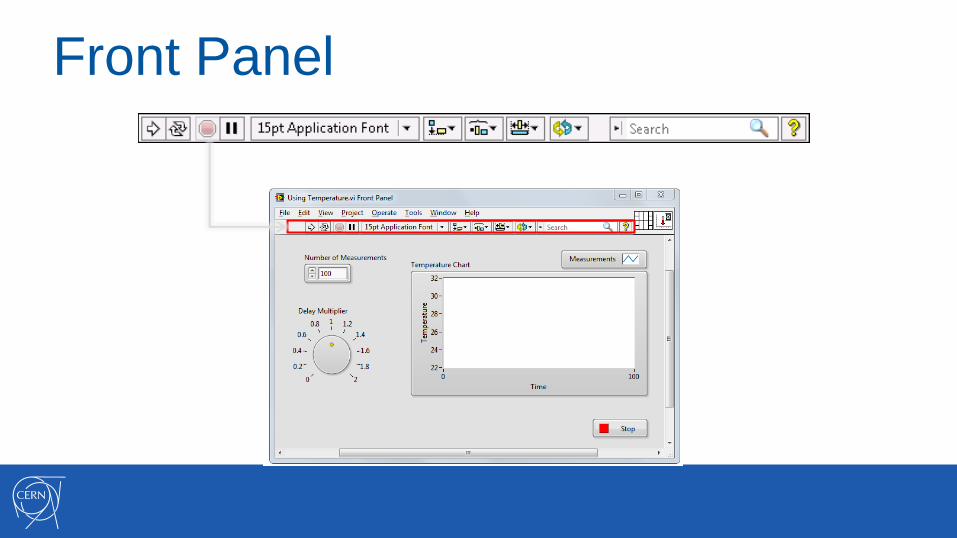
Parts of a VI – Front Panel
You build the front panel with
controls (inputs) and indicators (outputs).
Front Panel – User interface for the VI
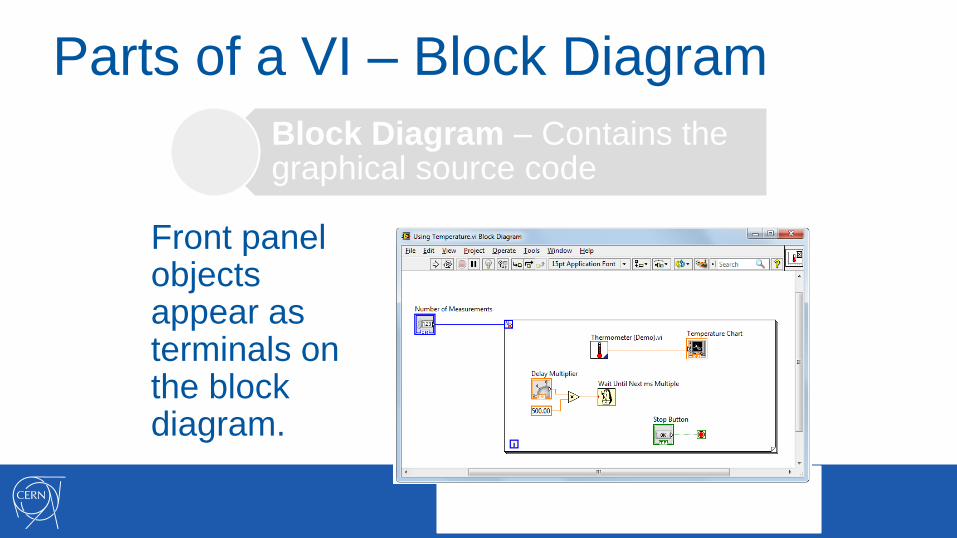
Parts of a VI – Block Diagram
Front panel objects appear as terminals on the block diagram.
Block Diagram – Contains the graphical source code

Parts of a VI – Icon/Connector
Pane
Icons and connector panes are necessary to use a VI as a subVI.
• A subVI is a VI that appears on the block diagram of another VI.
• A subVI is similar to a subroutine or function in a text-based programming language.
Icon – Graphical representation of a VI
Connector Pane – Map of the inputs and outputs of a VI
Show – off (2)
Figures
D. Front PanelControls and Indicators
Object Styles
Object Types
Boolean
Numeric
String
Front Panel
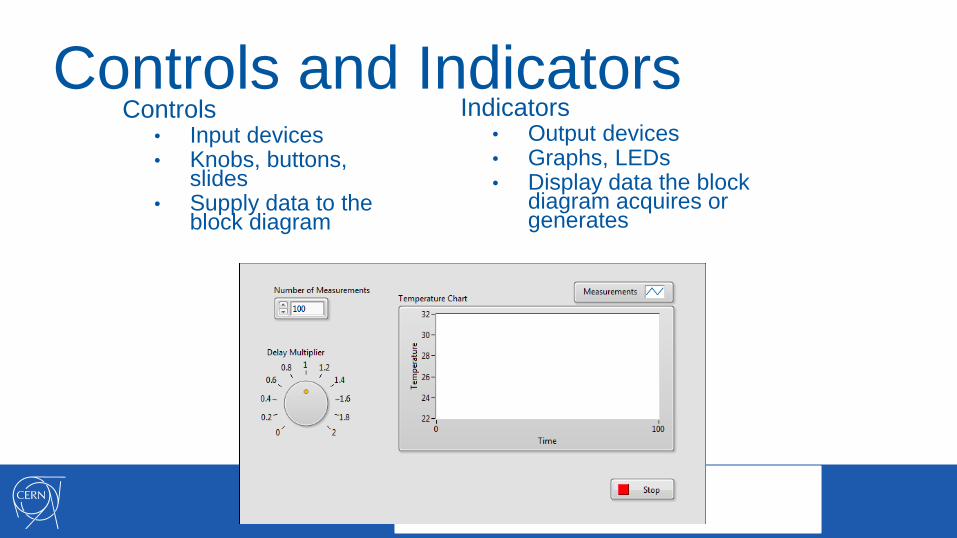
Controls and IndicatorsControls
• Input devices• Knobs, buttons,
slides• Supply data to the
block diagram
Indicators• Output devices• Graphs, LEDs• Display data the block
diagram acquires or generates
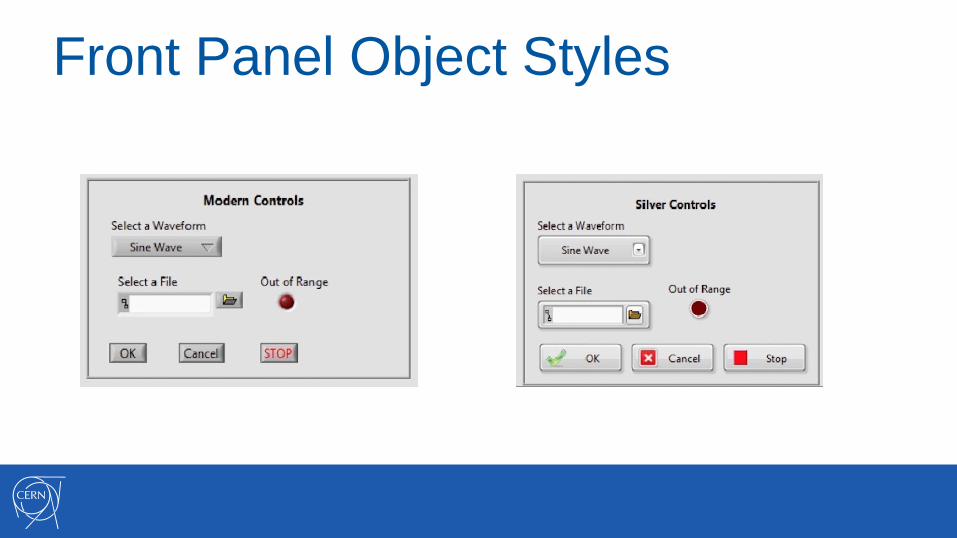
Front Panel Object Styles
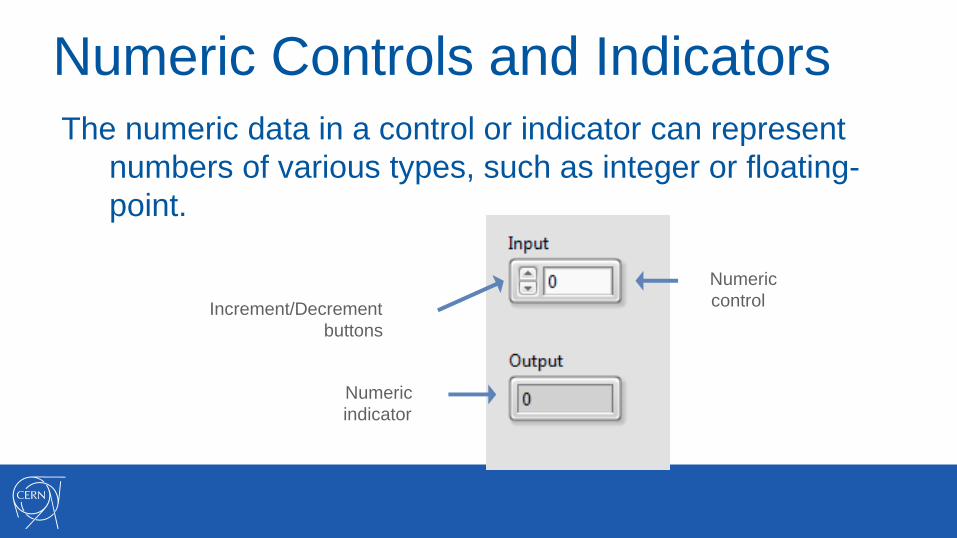
Numeric Controls and Indicators
The numeric data in a control or indicator can represent
numbers of various types, such as integer or floating-
point.
Numeric
indicator
Numeric
controlIncrement/Decrement
buttons
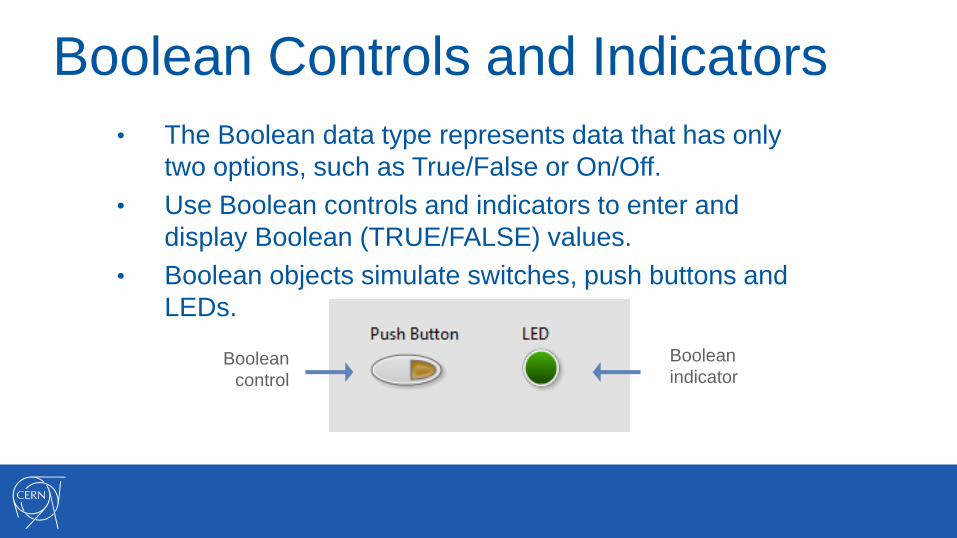
Boolean Controls and Indicators
• The Boolean data type represents data that has only
two options, such as True/False or On/Off.
• Use Boolean controls and indicators to enter and
display Boolean (TRUE/FALSE) values.
• Boolean objects simulate switches, push buttons and
LEDs.
Boolean
control
Boolean
indicator
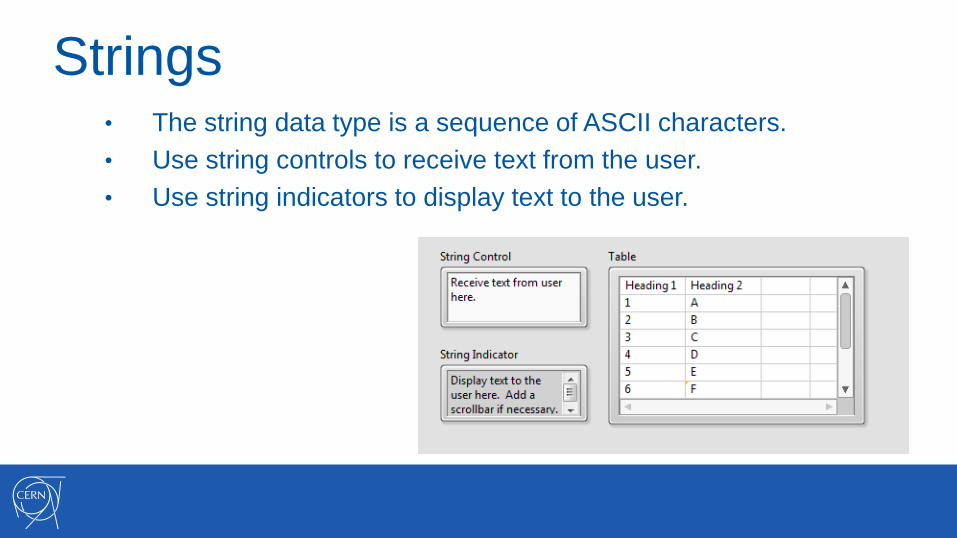
Strings• The string data type is a sequence of ASCII characters.
• Use string controls to receive text from the user.
• Use string indicators to display text to the user.

E. Block Diagram
Terminals
Nodes
Wires
Help
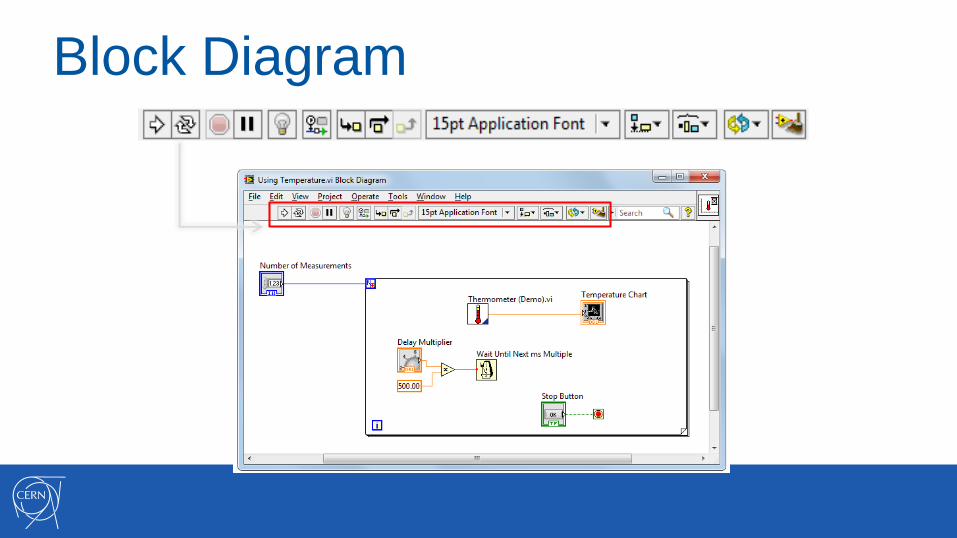
Block Diagram

Block Diagram• Block diagram items:
• Terminals
• Constants
• Nodes• Functions
• SubVIs
• Structures
• Wires
• Free labels

Terminals
Same label name
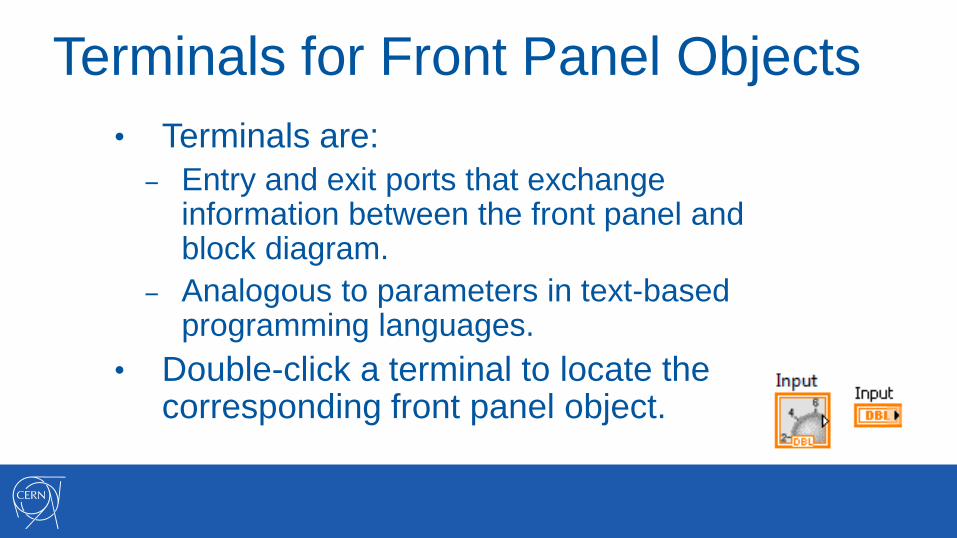
Terminals for Front Panel Objects
• Terminals are:
– Entry and exit ports that exchange information between the front panel and block diagram.
– Analogous to parameters in text-based programming languages.
• Double-click a terminal to locate the corresponding front panel object.

View Terminals as Icons
• By default, View as Icon
option enabled.
• Deselect View as Icon for a
more compact view.

Nodes
Nodes are objects on the block diagram that have inputs and/or outputs and perform operations when a VI runs.
Nodes
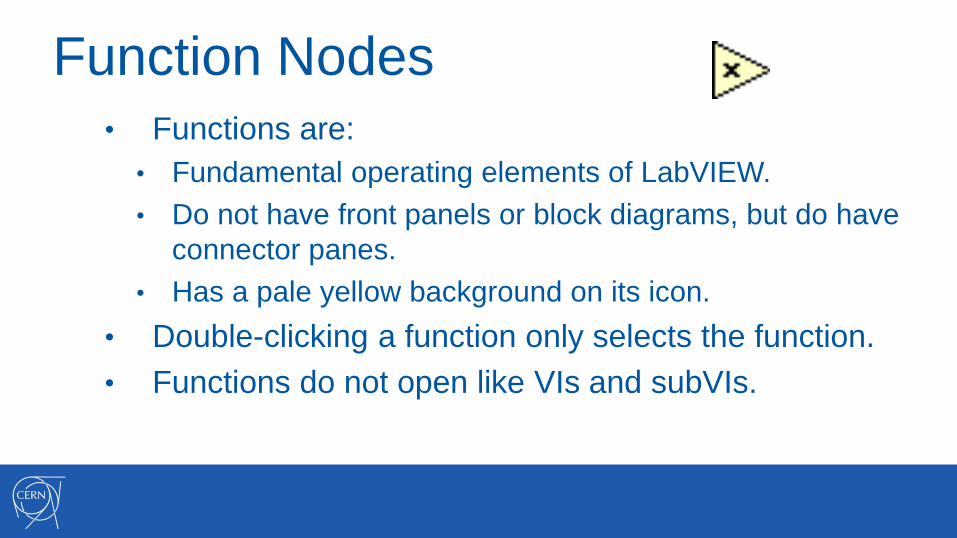
Function Nodes
• Functions are:
• Fundamental operating elements of LabVIEW.
• Do not have front panels or block diagrams, but do have
connector panes.
• Has a pale yellow background on its icon.
• Double-clicking a function only selects the function.
• Functions do not open like VIs and subVIs.

SubVI Nodes
• SubVIs :• Are VIs that you use on the block diagram of another
VI.
• Have front panels and block diagrams.
• Use the icon from the upper-right corner of the front panel as the icon that appears when you place the subVI on a block diagram.
• When you double-click a subVI, the front panel and block diagram open.
• Any VI has the potential to be used as a subVI.
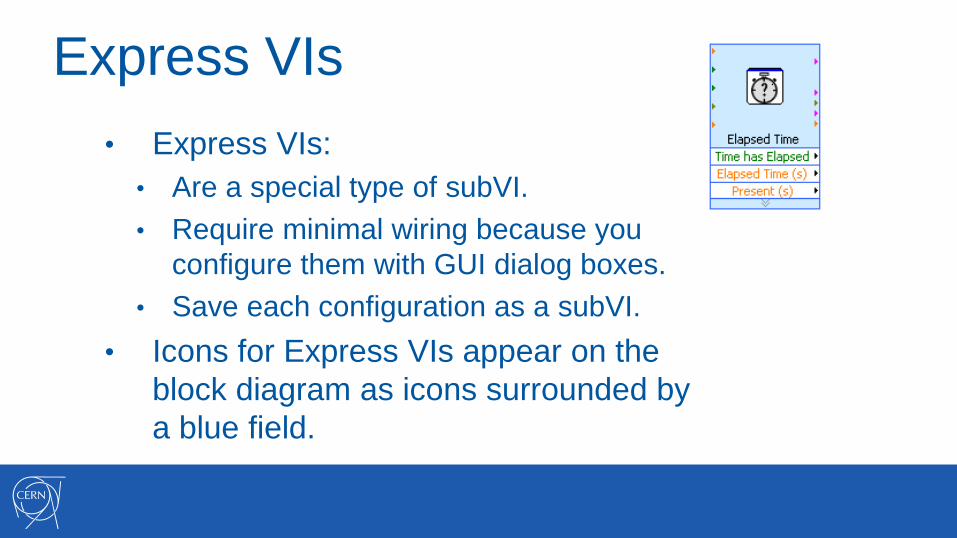
Express VIs
• Express VIs:
• Are a special type of subVI.
• Require minimal wiring because you
configure them with GUI dialog boxes.
• Save each configuration as a subVI.
• Icons for Express VIs appear on the
block diagram as icons surrounded by
a blue field.

Structures
• Structures in LabVIEW have theform of frames.
• Other nodes (functions, subVIs, more structures) can be inserted intothe frames.

Wires
• Wires transfer data between block diagram objects.
• Wires are different colors, styles, and thicknesses, depending on their data types.
• A broken wire appears as a dashed black line with a red X in the middle.
Scalar
Floating-point Integer String Boolean
1-D Array
2-D Array

Constants
• Constants are the source of values just as
control terminals, but their value is fixed in the
code.
• You can create a constant of each data type.
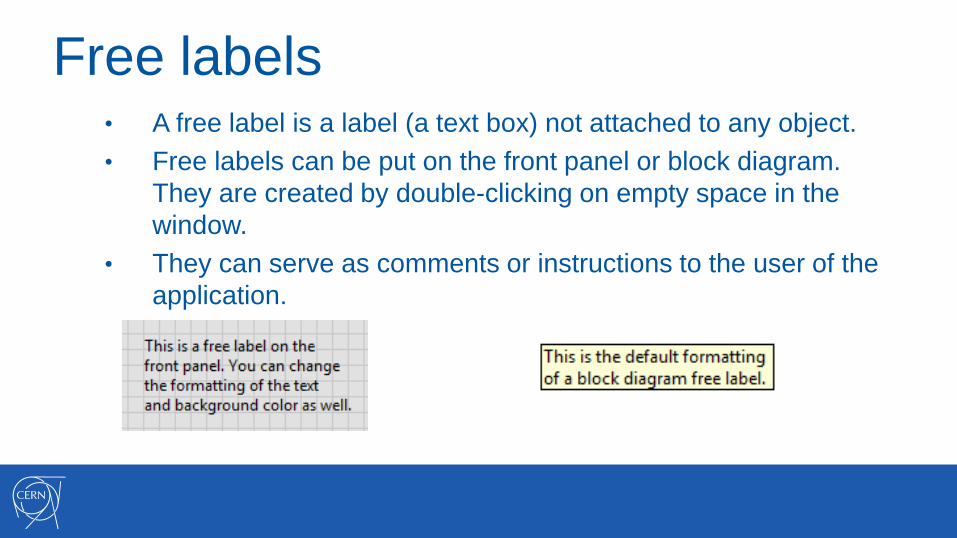
Free labels• A free label is a label (a text box) not attached to any object.
• Free labels can be put on the front panel or block diagram.
They are created by double-clicking on empty space in the
window.
• They can serve as comments or instructions to the user of the
application.
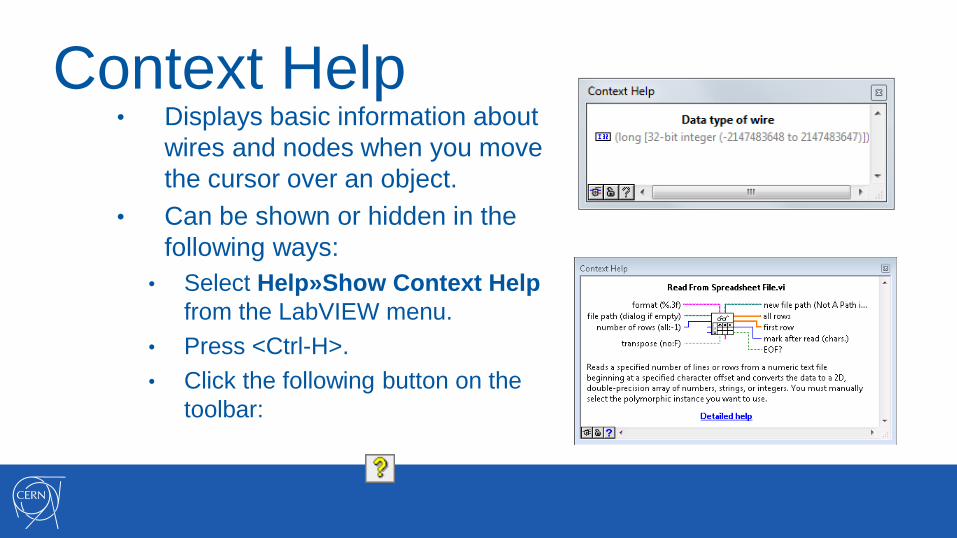
Context Help• Displays basic information about
wires and nodes when you move
the cursor over an object.
• Can be shown or hidden in the
following ways:
• Select Help»Show Context Help
from the LabVIEW menu.
• Press <Ctrl-H>.
• Click the following button on the
toolbar:
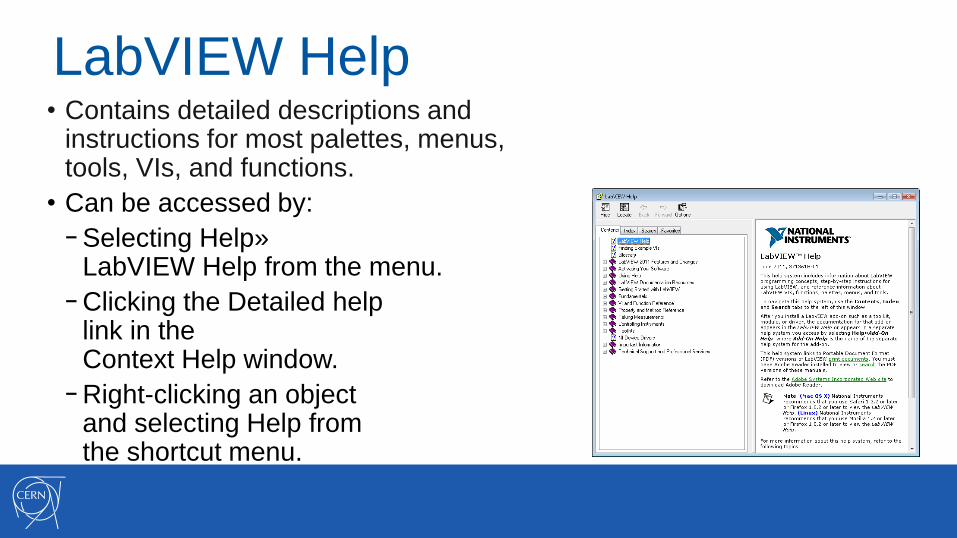
LabVIEW Help• Contains detailed descriptions and
instructions for most palettes, menus, tools, VIs, and functions.
• Can be accessed by:
− Selecting Help»LabVIEW Help from the menu.
− Clicking the Detailed help link in the Context Help window.
− Right-clicking an object and selecting Help from the shortcut menu.
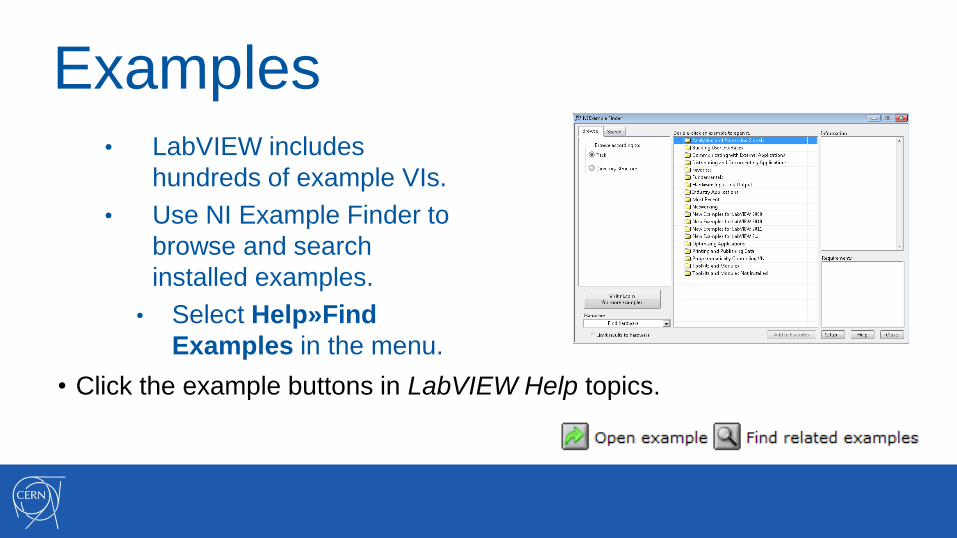
Examples• LabVIEW includes
hundreds of example VIs.
• Use NI Example Finder to
browse and search
installed examples.
• Select Help»Find
Examples in the menu.
• Click the example buttons in LabVIEW Help topics.

Group Exercise
Concept: Exploring a VI
Identify the parts of an existing VI.

F. Searching for Controls, VIs
and Functions
Palettes
Quick Drop
NI Global Search

Searching for Controls, VIs
and FunctionsWays to find controls, VIs, and functions:
• Search or navigate the palettes.
• Controls palette
• Functions palette
• Search by name of object.
• Quick Drop dialog box
• Search palettes, LabVIEW Help, and ni.com.
• Search text box in toolbar

Controls Palette• Contains the controls and
indicators you use to
create the front panel.
• Navigate the subpalettes
or use the Search button
to search the Controls
palette.

Functions Palette• Contains the VIs, functions,
and constants you use to
create the block diagram.
• Navigate the subpalettes or
use the Search button to
search the Functions
palette.

Searching with Quick Drop• Lets you quickly find
controls, functions, VIs,
and other items by name.
• Press the <Ctrl-Space>
keys to display the Quick
Drop dialog box.
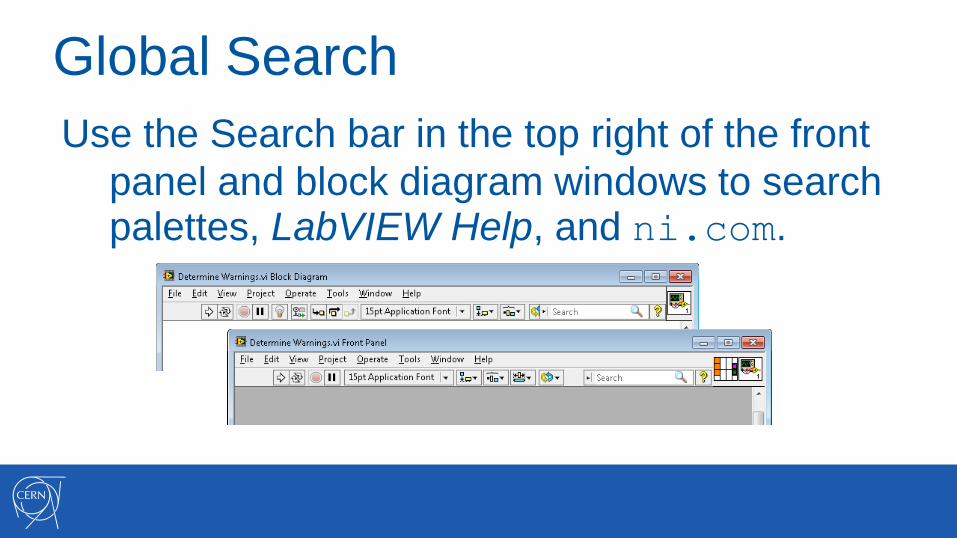
Global Search
Use the Search bar in the top right of the front
panel and block diagram windows to search palettes, LabVIEW Help, and ni.com.

Search for Controls, VIs and
Functions• Configure palettes to customize visible palettes.
• Search and navigate the palettes.
• Search for help using global search.
• Use Quick Drop to search by name.

G. Selecting a Tool
Selecting a Tool
Block Diagram Clean-Up
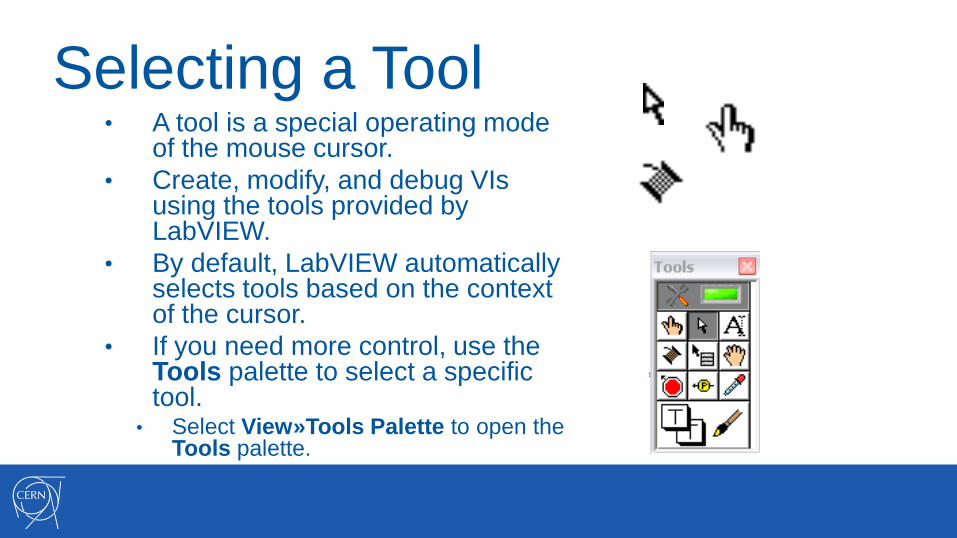
Selecting a Tool• A tool is a special operating mode
of the mouse cursor.
• Create, modify, and debug VIs using the tools provided by LabVIEW.
• By default, LabVIEW automatically selects tools based on the context of the cursor.
• If you need more control, use the Tools palette to select a specific tool.
• Select View»Tools Palette to open the Tools palette.

Wiring Tips
• Press <Ctrl-B> to delete broken wires.
• Right-click and select Clean Up Wire to
reroute the wire.
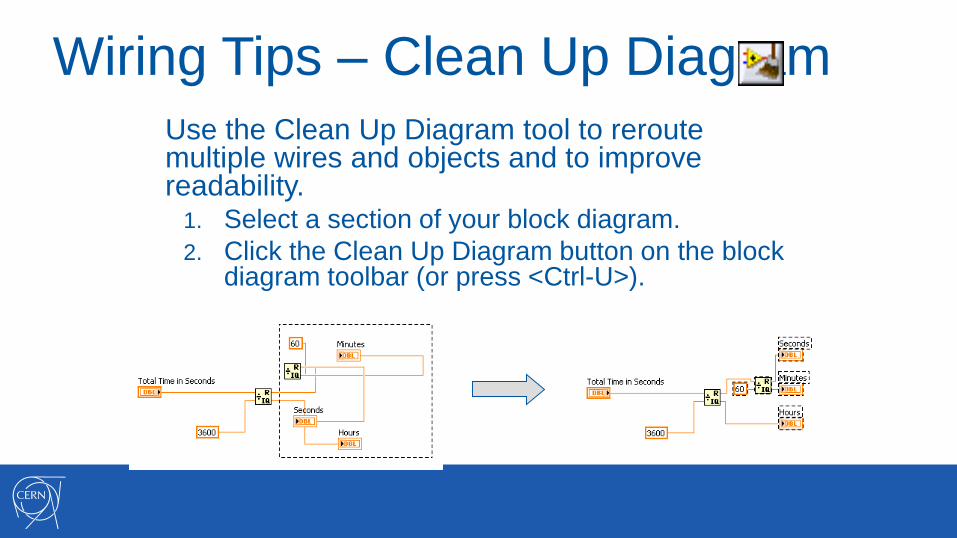
Wiring Tips – Clean Up Diagram
Use the Clean Up Diagram tool to reroute multiple wires and objects and to improve readability.
1. Select a section of your block diagram.
2. Click the Clean Up Diagram button on the block diagram toolbar (or press <Ctrl-U>).
Cloning and Moving Items• Clone an object in Windows using the following steps:
1. Select the Positioning tool.
2. Press the <Ctrl> key while clicking an object.
3. Drag the copy to new location.
• Move an object using the following steps:
1. Select the Positioning tool.
2. Click and drag the object to new location.
Note: Avoid cutting and pasting objects as this can impact related items. For example, cutting
and pasting a block diagram terminal also moves the front panel object.

Selecting, Editing, Resizing and
Wiring
• Select item to move, copy, or delete
• Edit text
• Resize an object
• Wire terminals and nodes
• Automatic and manual tool selection
Setting Options for the
Environment• In Tools»Options… dialog box you can customize settings for the
LabVIEW environment.
• Suggested changes:
• Front Panel page
• Set Control Style for New VIs to Silver style
• Block Diagram page
• Uncheck Place front panel terminals as icons
• Configure Block Diagram Cleanup to customize your block diagram

H. Dataflow
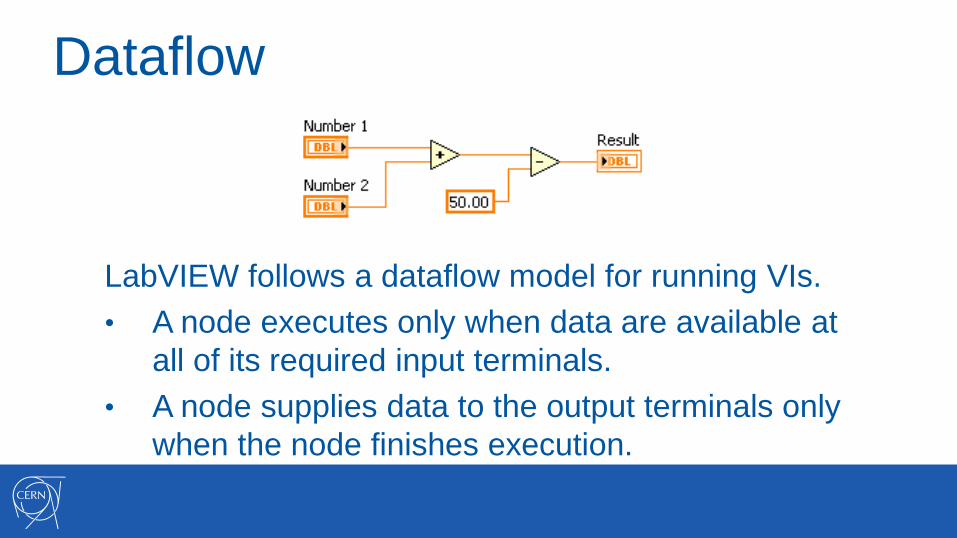
Dataflow
LabVIEW follows a dataflow model for running VIs.
• A node executes only when data are available at
all of its required input terminals.
• A node supplies data to the output terminals only
when the node finishes execution.
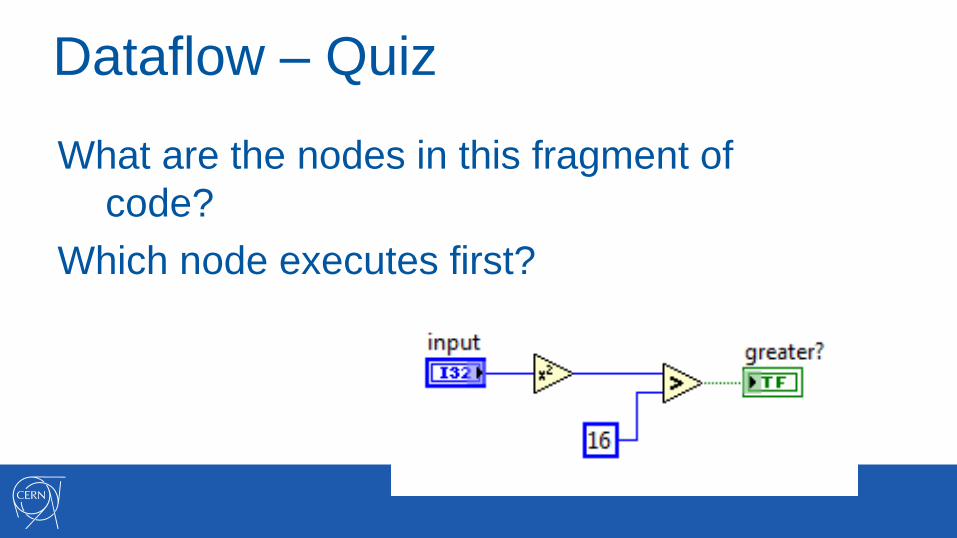
Dataflow – Quiz
What are the nodes in this fragment of
code?
Which node executes first?

Dataflow – Quiz Answer
There are two nodes: „square” and
„greater than?” functions.
Square executes first.
72
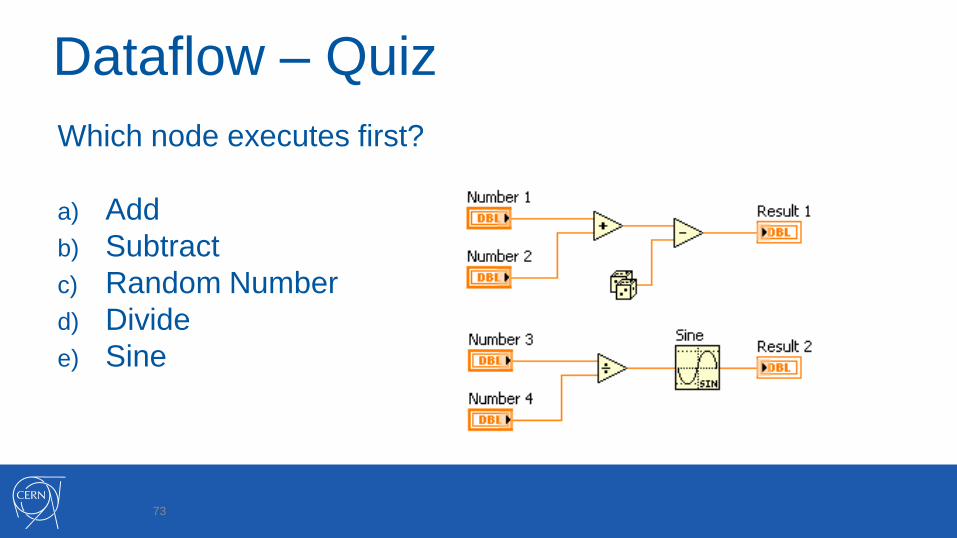
Dataflow – Quiz
Which node executes first?
a) Add
b) Subtract
c) Random Number
d) Divide
e) Sine
73

Dataflow – Quiz AnswerNo single correct answer.
Which node executes first?
a) Add – Possibly
b) Subtract –Definitely not
c) Random Number –Possibly
d) Divide – Possibly
e) Sine – Definitely not
74

Group Exercise
Concept: Dataflow
Identify dataflow execution order in the
following block diagrams.
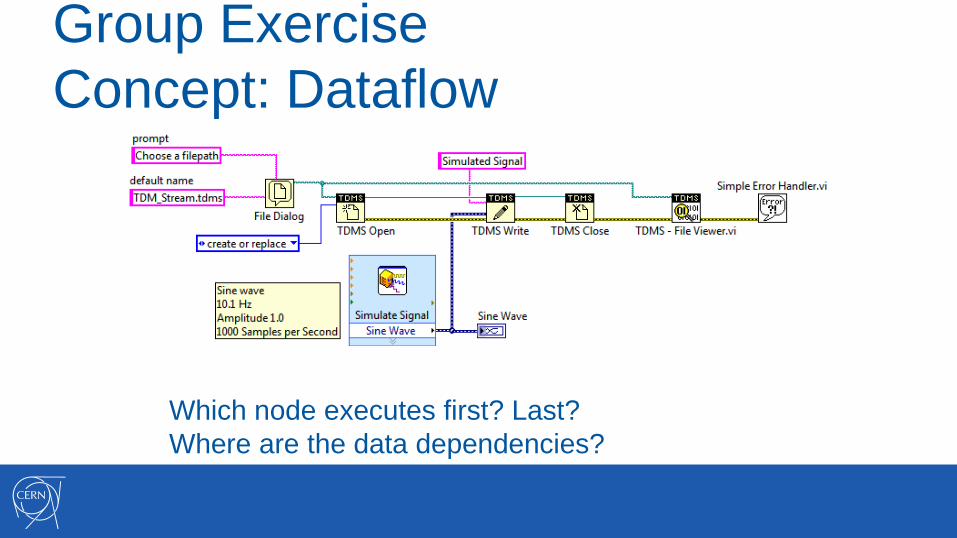
Group Exercise
Concept: Dataflow
Which node executes first? Last?
Where are the data dependencies?

I. Building a Simple VI
77
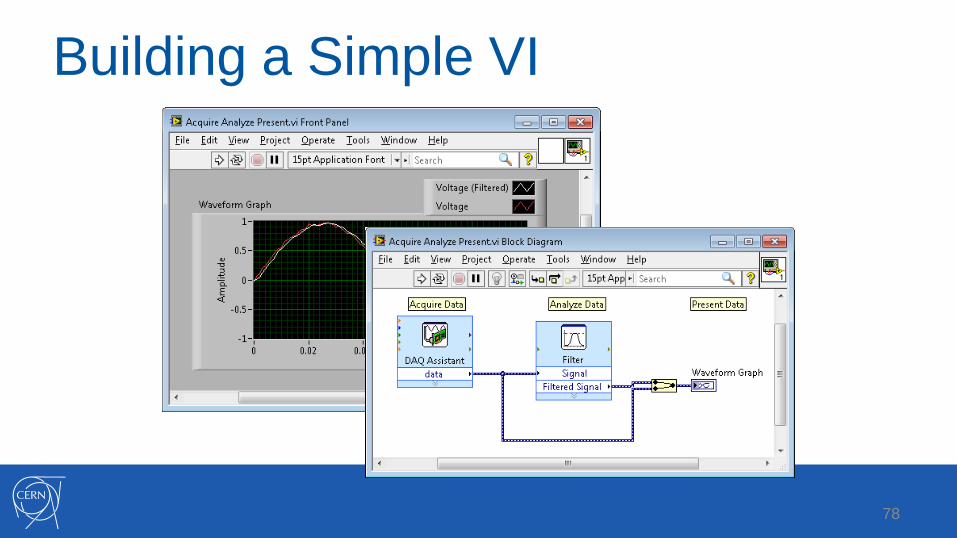
Building a Simple VI
78
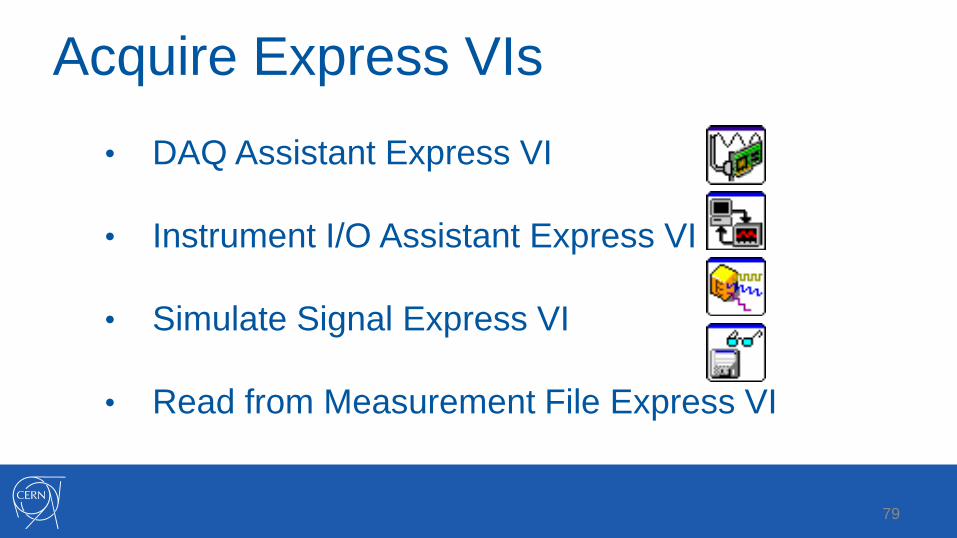
Acquire Express VIs
• DAQ Assistant Express VI
• Instrument I/O Assistant Express VI
• Simulate Signal Express VI
• Read from Measurement File Express VI
79
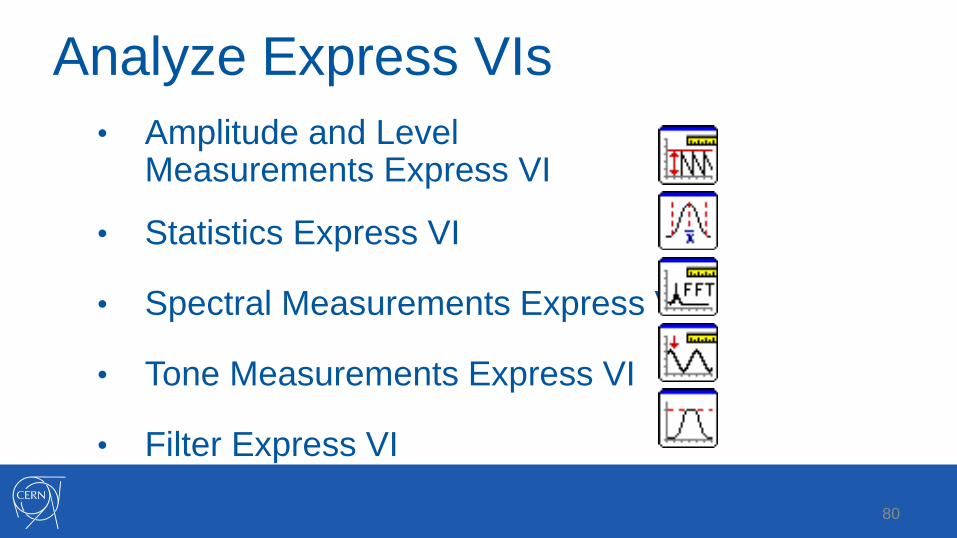
Analyze Express VIs
• Amplitude and Level Measurements Express VI
• Statistics Express VI
• Spectral Measurements Express VI
• Tone Measurements Express VI
• Filter Express VI
80

Present Express VIs and Indicators
• Display Message Express VI
• Play Waveform Express VI
• Report Express VI
• Write to Measurement File Express VI
• DIAdem Report Express VI

Building and Running a VI
1. Place Express VI on the block diagram.
2. Configure the dialog box that opens.
3. Wire Express VIs together.
4. Save and run the VI.
The Run button appears broken when the VI you are creating or editing contains errors.

Homework:
Navigating LabVIEW
• Practice navigating the LabVIEW
environment - add things to the front panel
and block diagram, align and resize objects,
use simple functions.

Homework:
Simple AAP VI• Build a simple Acquire-Analyze-Present VI.
• You may use some of the Express VIs mentionedon the slides or different VIs that can be found inLabVIEW palettes.
• To find a function or VI, use ‘Search’ button on thepalette or use Quick Drop window (<Ctrl+space>).
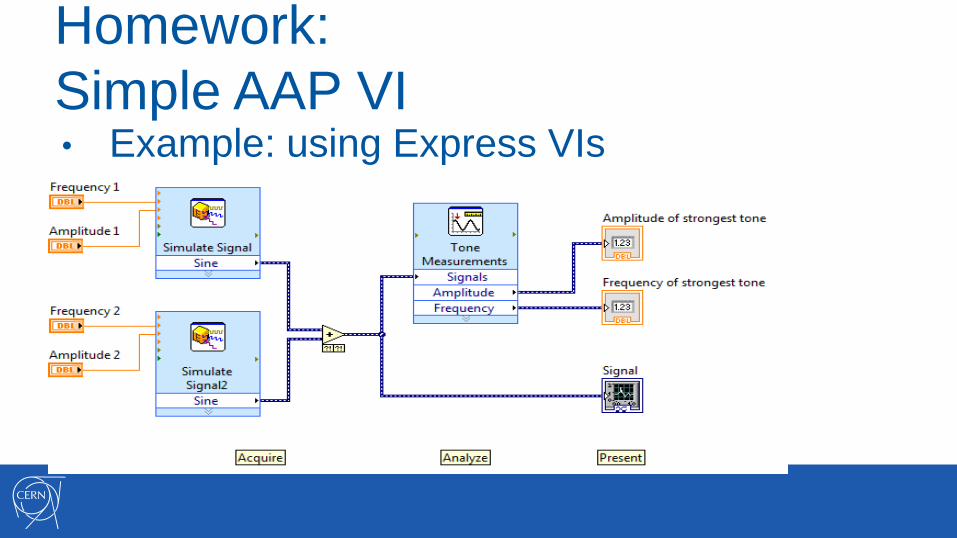
Homework:
Simple AAP VI• Example: using Express VIs

Homework:
Simple AAP VI• Example: without Express VIs

Example – scenario:• Acquire a sine waveform for 0.1 seconds.
• Determine the average value of the waveform.
• Log the data to a file.
• Display the data to a graph.
Homework:
Simple AAP VI