LAB 4
Managed Switches

Lab Reports
Must have proper cover! Include the Lab Section # you are in on the 2nd line!
E.g. ITIS 2110-L05
The Lab Name and Number go on the 3rd and 4th line! E.g.
VMs Lab 3
Points will be taken off if the data is incorrect or missing!
Hints from the grader: Label your screenshots, text files and tables! Make things easy to find
Makes them easy to grade!

Overview – Why this lab
Linux Tricks User IDs
Managed Switch Lab Get to know networks Get a feeling for using Linux
Get a feeling for using VMs Understand switches
Understand managed switches
User IDs
New User IDs
For local userids only Different methods for network IDs
Note: Usually want a home directory for each
user Personal data and files kept there Usually in /home
Default location Can be placed anywhere reasonable

Add a new user to the system
Create a new user

GUI – DebianUsers and Groups
GUI - Debian Classic Gnome
Users and Groups In System Administration
Click Add User Enter information Click OK
Note: Users and groups no longer included in default installation Part of gnome-system-tools
apt-get install gnome-system-tools Gnome 3
Click on your user name System settings User Accounts Unlock the screen (root password) Click +
Enter data Click on the UID password box and enter PW, clck change Relock screen

CLI – Method 1:useradd
“Old School” Terminal
root authority required Commands needed:
useradd passwd mkdir chown
Can roll some options into one command, e.g.: useradd –p password –d HOME_DIR
Still must manually create HOME_DIR

CLI – Method 2: adduser
“Friendlier” script Uses useradd
Terminal root authority required
Commands needed: adduser passwd mkdir chown
Can roll into one or two commands adduser --home DIR userid
will create DIR if does not exist passwd userid

useradd or adduser?
useradd More primitive Part of core Linux
adduser script varies by distro
on some it is a more automated process others it is a wrapper to useradd
check the use on your distro with man
User ID files, directories and contents
Key files and directories

Key Files/Directories
/etc/passwd name password etc. NOT ENCRYPTED!
/etc/shadow Encrypted sensitive data
/home default location for user home directories
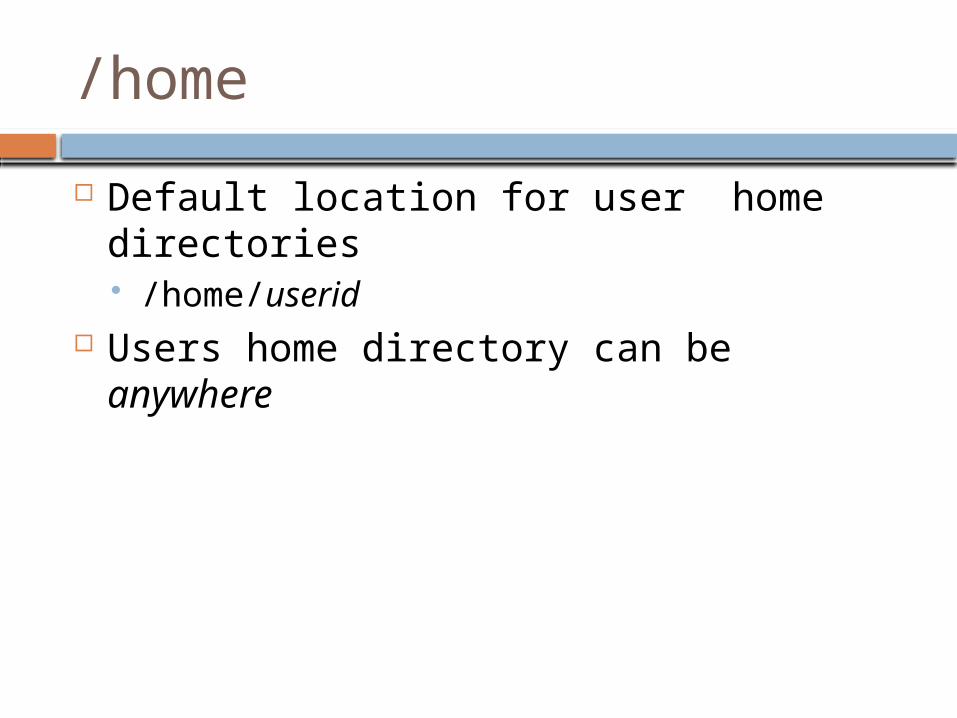
/home
Default location for user home directories /home/userid
Users home directory can be anywhere

Sample /home directory
Two user directories in /home tkombol webadmin
root has its own home directory /root
#cd /home#ls -altotal 60drwxr-xr-x 15 root root 4096 2013-09-06 13:45 .drwxr-xr-x 22 root root 4096 2013-04-10 13:26 ..drwxr-xr-x 37 tkombol tkombol 4096 2014-01-23 20:04 tkomboldrwxr-xr-x 3 webadmin webadmin 4096 2008-09-16 16:13 webadmin

/etc/passwd file format
1. Username: Used when user logs in. Between 1 and 32 characters in length.
2. Password: ‘x’ indicates that encrypted password is stored in /etc/shadow file'*' indicates uid expired
3. User ID (UID): Each user must be assigned a user ID (UID). UID 0 (zero) is reserved for root and UIDs 1-99 are reserved for other predefined accounts. UID 100-999 are reserved by system for administrative and system accounts/groups.
4. Group ID (GID): The primary group ID (stored in /etc/group file)

/etc/passwd file format
5. Comment field: Usually used for the User ID info. Allows extra information about the users such as user's full name, phone number etc. This field use by finger command. There are defacto standards for content.
6. Home directory: Absolute path to the user’s directory (e.g. /home/userid).
7. Command/shell: Absolute path of a command or the default shell (/bin/bash). Typically, this is the default shell, but does not have to be. It could be a script. This is run every time the user logs on.
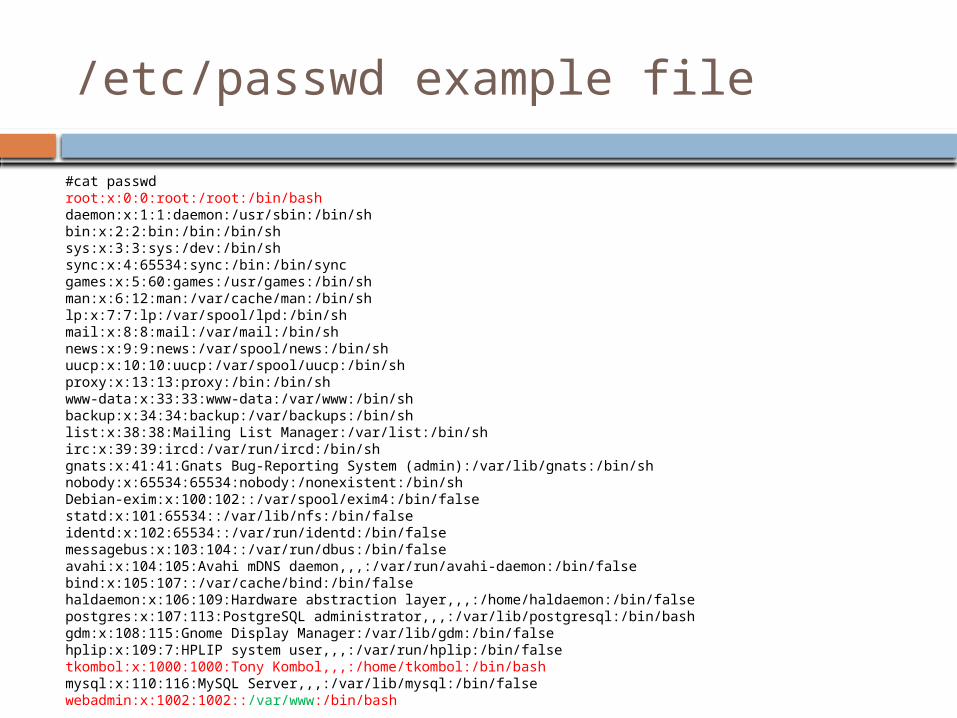
/etc/passwd example file
#cat passwdroot:x:0:0:root:/root:/bin/bashdaemon:x:1:1:daemon:/usr/sbin:/bin/shbin:x:2:2:bin:/bin:/bin/shsys:x:3:3:sys:/dev:/bin/shsync:x:4:65534:sync:/bin:/bin/syncgames:x:5:60:games:/usr/games:/bin/shman:x:6:12:man:/var/cache/man:/bin/shlp:x:7:7:lp:/var/spool/lpd:/bin/shmail:x:8:8:mail:/var/mail:/bin/shnews:x:9:9:news:/var/spool/news:/bin/shuucp:x:10:10:uucp:/var/spool/uucp:/bin/shproxy:x:13:13:proxy:/bin:/bin/shwww-data:x:33:33:www-data:/var/www:/bin/shbackup:x:34:34:backup:/var/backups:/bin/shlist:x:38:38:Mailing List Manager:/var/list:/bin/shirc:x:39:39:ircd:/var/run/ircd:/bin/shgnats:x:41:41:Gnats Bug-Reporting System (admin):/var/lib/gnats:/bin/shnobody:x:65534:65534:nobody:/nonexistent:/bin/shDebian-exim:x:100:102::/var/spool/exim4:/bin/falsestatd:x:101:65534::/var/lib/nfs:/bin/falseidentd:x:102:65534::/var/run/identd:/bin/falsemessagebus:x:103:104::/var/run/dbus:/bin/falseavahi:x:104:105:Avahi mDNS daemon,,,:/var/run/avahi-daemon:/bin/falsebind:x:105:107::/var/cache/bind:/bin/falsehaldaemon:x:106:109:Hardware abstraction layer,,,:/home/haldaemon:/bin/falsepostgres:x:107:113:PostgreSQL administrator,,,:/var/lib/postgresql:/bin/bashgdm:x:108:115:Gnome Display Manager:/var/lib/gdm:/bin/falsehplip:x:109:7:HPLIP system user,,,:/var/run/hplip:/bin/falsetkombol:x:1000:1000:Tony Kombol,,,:/home/tkombol:/bin/bashmysql:x:110:116:MySQL Server,,,:/var/lib/mysql:/bin/falsewebadmin:x:1002:1002::/var/www:/bin/bash

/etc/shadow file format
1. User name : Login name
2. Password: The encrypted password. The first $n tells the algorithm used, the second $aaaa the salt, the last $ is the encrypted or hashed password
3. Last password change (lastchanged): Days since Jan 1, 1970 that password was last changed
4. Minimum: Minimum number of days required between password changes i.e. the number of days left before the user is allowed to change his/her password

/etc/shadow file format
5. Maximum: Maximum number of days the password is valid (after that user is forced to change his/her password)
6. Warn : Number of days before password is to expire that user is warned that his/her password must be changed
7. Inactive : Number of days after password expires that account is disabled
8. Expire : Days since Jan 1, 1970 that account is disabled i.e. an absolute date specifying when the login may no longer be used

/etc/shadow example
#cat shadowroot:$1$5w70zY1O$BS/7QaJsdBD1hq3gN9znf/:14155:0:99999:7:::daemon:*:14155:0:99999:7:::bin:*:14155:0:99999:7:::sys:*:14155:0:99999:7:::sync:*:14155:0:99999:7:::games:*:14155:0:99999:7:::man:*:14155:0:99999:7:::lp:*:14155:0:99999:7:::mail:*:14155:0:99999:7:::news:*:14155:0:99999:7:::uucp:*:14155:0:99999:7:::proxy:*:14155:0:99999:7:::www-data:*:14155:0:99999:7:::backup:*:14155:0:99999:7:::list:*:14155:0:99999:7:::irc:*:14155:0:99999:7:::gnats:*:14155:0:99999:7:::nobody:*:14155:0:99999:7:::Debian-exim:!:14155:0:99999:7:::statd:!:14155:0:99999:7:::identd:!:14155:0:99999:7:::messagebus:!:14155:0:99999:7:::avahi:!:14155:0:99999:7:::bind:!:14155:0:99999:7:::haldaemon:!:14155:0:99999:7:::postgres:!:14155:0:99999:7:::gdm:!:14155:0:99999:7:::hplip:!:14155:0:99999:7:::tkombol:$1$m581HZ1O$2bkrwS7QLE4vHrB0Ic6kG1:14155:0:99999:7:::mysql:!:14155:0:99999:7:::webadmin:$1$ES8FvEAv$pwsqCzQC.zANeTrvkoL0h1:14155:0:99999:7:::

Local access
Switches

Switches: quick review
Connects computers together in a Local Network
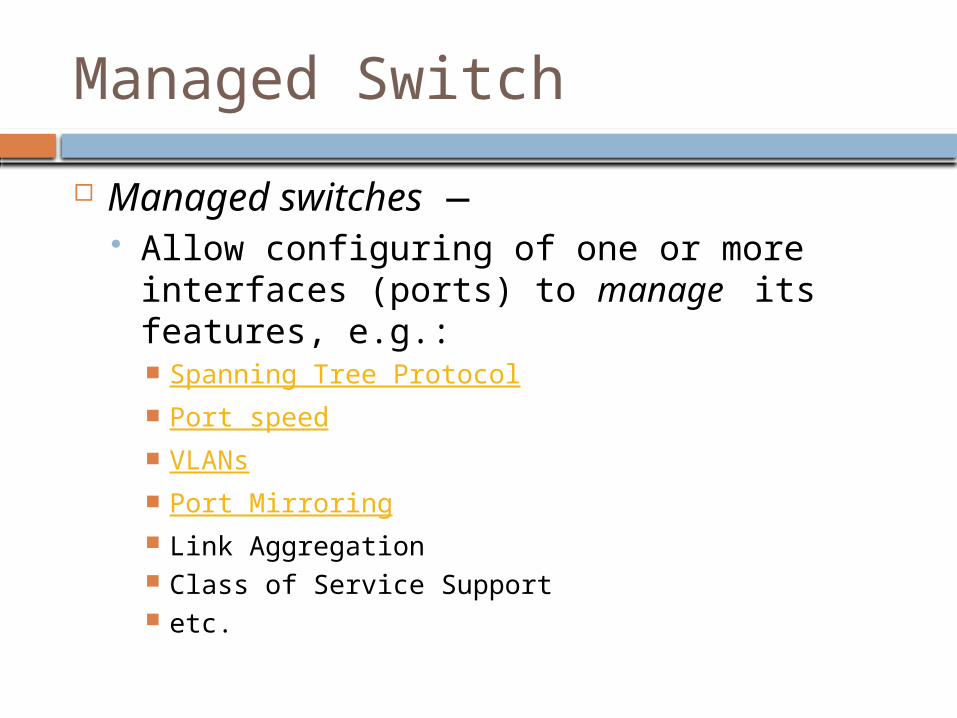
Managed Switch
Managed switches — Allow configuring of one or more interfaces
(ports) to manage its features, e.g.: Spanning Tree Protocol Port speed VLANs Port Mirroring Link Aggregation Class of Service Support etc.

Managed Switch
Managed switches — Typical access control:
High-end or "enterprise" switches may have: Serial console and command-line access Internet access and command-line access
Telnet Secure Shell
Management via SNMP
Some low end devices may provide a web interface
Limited functions may be available: Push buttons on the switch
E.g. complete reset

Managed Switch
Managed switches — Typically found in medium or large "enterprise"
networks Devices are usually:
More expensive Higher quality
Task of managing usually requires understanding of Layer 2 networks (e.g. Ethernet)

Objectives of Lab 4
Major Managed switch maintenance Creation and impact of a Virtual LAN
Minor NIC configuration root authority is required for certain
operations
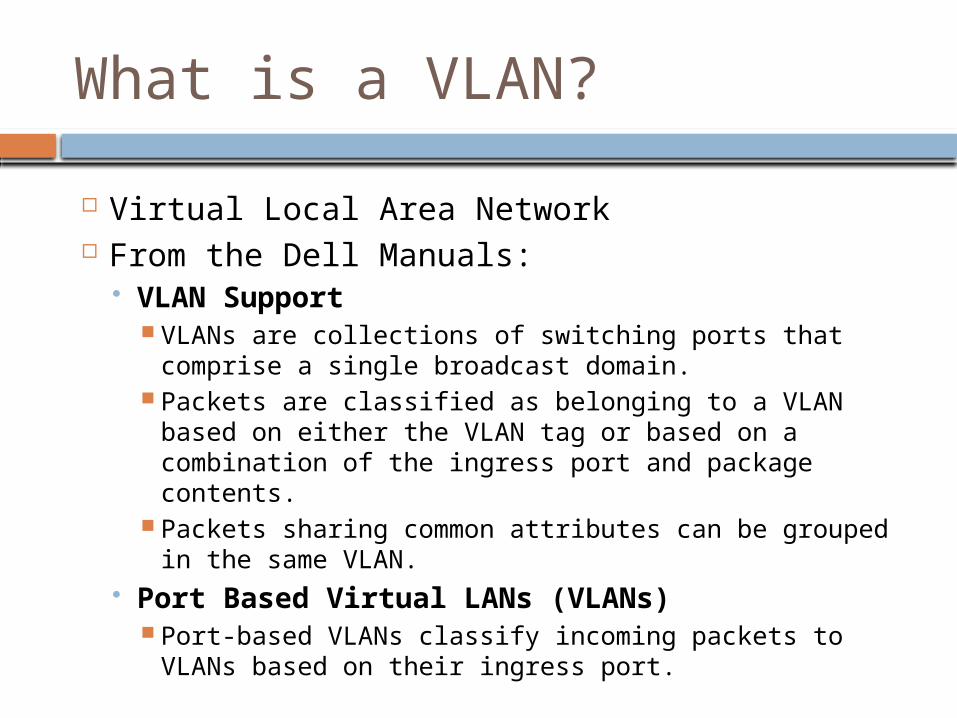
What is a VLAN?
Virtual Local Area Network From the Dell Manuals:
VLAN Support VLANs are collections of switching ports that
comprise a single broadcast domain. Packets are classified as belonging to a VLAN based
on either the VLAN tag or based on a combination of the ingress port and package contents.
Packets sharing common attributes can be grouped in the same VLAN.
Port Based Virtual LANs (VLANs) Port-based VLANs classify incoming packets to
VLANs based on their ingress port.

3 Major steps
Working in groups of 3 (or 4 if needed)1. Start VMs in each of 3 separate workstations2. Connect workstations to switch
Switch set to unmanaged mode Get all VMs to ping each other Note: if the workstations are connected to the switch
they are no longer connected to the lab network
3. Create a VLAN on the Switch Change switch to managed mode Create the VLAN Move ports to the new VLAN
Note effect on pings as ports are moved to new VLAN one at a time

Gotchas
Default IP address for Dell 2716 is 192.168.2.1 If machines isolated on stand alone LAN or VLAN
No problems What if need to connect to network to keep home OS
alive? Be careful of identical IP addresses on a LAN
192.168.2.21 – How can everyone use that same address?
Removing the VM from the LAN will remove the physical machine from the LAN Lose connection to NFS server
No access to your network_storage
Notice
The lab can be done with either the CentOS or Debian VMs
The lab is written for CentOS Configuration files and directories are
different between CentOS and Debian
If you do the lab using Debian it is your responsibility to cipher the differences

Lab Report
Document your completed work! Formal Lab Report
Grammar, Spelling and Style count! All Lab reports should have:
Overview or Introduction Lab Results Summary
Reporting/documenting information Use text files when possible
Copies of file Redirection of output to text file Copy and paste into your report
Limit screen captures to GUI items only Points will be removed if GUI is used to document and it could have
been done with text This include using your smartphone camera to capture text data
20 pts

Last minute reminders
USB devices can only be connected to one "computer" at a time This includes physical and virtual computers Plan accordingly
Disconnecting the workstation from the lab's network will remove your access to your network_storage directory Plan accordingly
Your base OS may time out and go into screen lock mode You need a password to reactivate Think: where is that PW kept so you may continue
i.e. what must you to for the PW to be recognized?

Last minute reminders
When editing configuration files: Always make a backup copy of the file before
editing cp file1.conf file1.conf.backup cp file2.conf file2.conf.orig
When making a major change to a line: Make a copy of the line and comment it out to
remember what the original was like Change the copy
In general, do not delete, comment them out You may need them later
Root authority is needed for many commands If a command doesn’t work, check: do you have
root authority?

Last minute reminders
One object of all the labs is to get you to THINK! If something doesn't work stop and think:
Why? Investigate what went wrong
Analyze logs and error messages What works and what doesn't When did it quit working
Try something different or new Notice the new results Analyze