1
CONFIGURATION AND FINE TUNING GUIDE DIGITAL EXPERIENCE MANAGER 7.2

CONFIGURATION AND FINE TUNING GUIDE DIGITAL EXPERIENCE MANAGER 7.2
© 2002 – 2016 Jahia Solutions Group SA Page 2 / 115
TABLE OF CONTENTS
1 OVERVIEW .............................................................................................................................................. 9
1.1 Introduction .............................................................................................................. 9
1.2 What’s in this documentation? ............................................................................. 9
2 PREREQUISITES .................................................................................................................................. 10
2.1 Minimal system requirements ........................................................................... 10
2.2 Java Virtual Machine (JVM) ................................................................................ 11
2.2.1 Under Windows .................................................................................................... 12
2.2.2 Under Linux ............................................................................................................ 12
2.2.3 Under Solaris ......................................................................................................... 12
2.3 Database ................................................................................................................. 13
2.3.1 MySQL .................................................................................................................... 13
2.3.1.1 MySQL on Mac OS X ........................................................................................... 15
2.3.2 PostgreSQL ............................................................................................................ 15
2.3.3 Oracle ...................................................................................................................... 16
2.3.4 Microsoft SQL Server .......................................................................................... 17
2.4 Other preparations and checks ......................................................................... 17
3 INSTALLATION ................................................................................................................................... 18
3.1 Main installation steps ......................................................................................... 18
3.2 Settings during installation ................................................................................. 19
3.2.1 Installation path .................................................................................................... 19
3.2.2 Installation type – Discovery install ................................................................. 19
3.2.2.1 Default application server .................................................................................. 19
3.2.2.2 Default database ................................................................................................... 19
3.2.3 Installation type – Custom install ..................................................................... 20
3.2.3.1 Application server ................................................................................................. 20

CONFIGURATION AND FINE TUNING GUIDE DIGITAL EXPERIENCE MANAGER 7.2
© 2002 – 2016 Jahia Solutions Group SA Page 3 / 115
3.2.3.2 Database ................................................................................................................. 20
3.2.3.3 Application and server settings ......................................................................... 21
3.2.3.3.1 Apache Tomcat configuration ........................................................................... 21
3.2.3.3.2 Web application settings .................................................................................... 21
3.2.3.4 Operating mode .................................................................................................... 21
3.2.3.4.1 Differences between Development and Production modes ...................... 22
3.2.3.4.2 LDAP configuration .............................................................................................. 24
3.2.3.4.3 Cluster configuration ........................................................................................... 24
3.2.3.5 System administrator settings ........................................................................... 24
3.2.3.6 Mail server .............................................................................................................. 25
3.3 Folder structure after installation with bundled Tomcat ............................ 26
3.4 Discovering Digital Experience Manager - first usage ................................. 33
3.5 Installing a production server – additional steps ........................................... 33
3.6 Different types of environment ........................................................................ 34
3.7 Application server specific installations .......................................................... 35
3.7.1 Apache Tomcat 8.0.x ........................................................................................... 35
3.7.1.1 Installation .............................................................................................................. 35
3.7.1.2 Deployment ........................................................................................................... 36
3.7.1.3 JVM tuning options .............................................................................................. 37
3.7.1.4 HTTP/AJP connector tuning options .............................................................. 38
3.7.2 IBM WebSphere 8.5.5 ......................................................................................... 39
3.7.3 Red Hat JBoss EAP 6.x ........................................................................................ 39
3.7.3.1 Installation .............................................................................................................. 39
3.7.3.2 Deployment preparation ..................................................................................... 40
3.7.3.3 JVM tuning options .............................................................................................. 40
3.7.3.4 Server configuration (JBoss should be running) ............................................ 41
3.7.3.4.1 Create management user .................................................................................... 42
3.7.3.4.2 Apply Digital Experience Manager specific configuration .......................... 42

CONFIGURATION AND FINE TUNING GUIDE DIGITAL EXPERIENCE MANAGER 7.2
© 2002 – 2016 Jahia Solutions Group SA Page 4 / 115
3.7.3.4.3 Deploy and start Digital Experience Manager ............................................... 43
3.8 Modules .................................................................................................................. 43
3.8.1 Module deployment ............................................................................................. 43
3.8.1.1 Module management UI ..................................................................................... 44
3.8.1.2 REST API and command line scripts ................................................................ 45
3.8.1.2.1 Installing a module ................................................................................................ 45
3.8.1.2.2 Starting a module .................................................................................................. 45
3.8.1.2.3 Stopping a module ................................................................................................ 45
3.8.1.2.4 Uninstalling a module .......................................................................................... 46
3.8.1.3 Notes about deployment into /modules folder ............................................. 46
3.8.2 Cluster deployment .............................................................................................. 47
3.8.3 Module undeployment ........................................................................................ 48
3.8.4 Deployment on sites ............................................................................................ 48
4 CONFIGURING SOME DIGITAL EXPERIENCE MANAGER FEATURES ............................... 49
4.1 Configuration files ................................................................................................ 49
4.1.1 Main configuration files ...................................................................................... 49
4.1.2 Technical details ................................................................................................... 50
4.2 Personalizing URLs ............................................................................................... 50
4.2.1 URL Rewriting ....................................................................................................... 50
4.2.2 Removing jsessionid from URLs ........................................................................ 50
4.2.3 Changing context and port number ................................................................. 51
4.2.3.1 During the installation ......................................................................................... 51
4.2.3.2 After the installation ............................................................................................ 51
4.2.3.3 Permanent move for vanity URLs ..................................................................... 51
4.3 Caching ................................................................................................................... 52
4.3.1 Introduction ........................................................................................................... 52
4.3.2 The browser cache layer ..................................................................................... 53
4.3.3 The front-end HTML cache layer ..................................................................... 53

CONFIGURATION AND FINE TUNING GUIDE DIGITAL EXPERIENCE MANAGER 7.2
© 2002 – 2016 Jahia Solutions Group SA Page 5 / 115
4.3.4 Object caches ........................................................................................................ 54
4.3.5 Content repository caches ................................................................................. 54
4.3.6 Ehcache configuration ......................................................................................... 54
4.4 Clustering ............................................................................................................... 54
4.4.1 Introduction ........................................................................................................... 54
4.4.1.1 BROWSING nodes ............................................................................................... 56
4.4.1.2 AUTHORING nodes ............................................................................................. 56
4.4.1.3 PROCESSING node .............................................................................................. 56
4.4.2 Configuration ......................................................................................................... 56
4.4.3 Sharing webapps ................................................................................................... 57
4.4.4 Sticky sessions ....................................................................................................... 57
4.4.5 Starting up .............................................................................................................. 58
4.4.6 Distributed sessions and failover support ...................................................... 58
4.5 LDAP ....................................................................................................................... 61
4.6 Authentication ....................................................................................................... 62
4.6.1 Single Sign-On: CAS ............................................................................................. 62
4.6.1.1 Digital Experience Manager side ...................................................................... 62
4.6.1.2 Configuring ticket validator ................................................................................ 64
4.6.1.3 Troubleshooting .................................................................................................... 65
4.6.2 SSO with Kerberos ............................................................................................... 65
4.6.2.1 Prerequisites .......................................................................................................... 66
4.6.2.2 Set up the Active Directory ............................................................................... 66
4.6.2.3 Create the Keytab file ......................................................................................... 67
4.6.2.4 Create Kerberos configuration file (krb5.conf) .............................................. 67
4.6.2.5 Create JAAS login configuration file (jaas-login.conf) .................................. 68
4.6.2.6 Test the SPN account .......................................................................................... 69
4.6.2.7 Set up the browser ............................................................................................... 70
4.6.2.7.1 Internet Explorer (min 5.0.1) .............................................................................. 70
4.6.2.7.2 Firefox (min 0.9) .................................................................................................... 70

CONFIGURATION AND FINE TUNING GUIDE DIGITAL EXPERIENCE MANAGER 7.2
© 2002 – 2016 Jahia Solutions Group SA Page 6 / 115
4.6.2.8 Activate the SPNEGO HTTP filter and authentication valve in Digital
Experience Manager ............................................................................................ 70
4.6.2.9 Activate the SPNEGO filter for specific subnets only ................................. 70
4.6.2.10 Related links ........................................................................................................... 72
4.6.2.11 Tips and Tricks ...................................................................................................... 72
4.6.2.11.1 ERROR [ErrorLoggingFilter] - Unexpected exception occurred ................ 72
4.6.2.11.2 KrbException: Clock skew too great (37) ....................................................... 73
4.7 Document converter ............................................................................................ 73
4.7.1 LocalOpenOffice instance .................................................................................. 74
4.7.2 RemoteOpenOffice service ................................................................................ 74
4.8 Document viewer ................................................................................................. 75
4.9 Document thumbnails ......................................................................................... 77
4.10 Video thumbnails .................................................................................................. 78
4.11 Image service ......................................................................................................... 79
4.11.1 How-to Install ImageMagick? ............................................................................ 79
4.12 Error and thread dump directories ................................................................... 80
4.12.1 Error file dumper server ...................................................................................... 80
4.12.2 Thread dumps ........................................................................................................ 80
4.13 OSGi SSH Console ............................................................................................... 81
5 FINE TUNING ...................................................................................................................................... 83
5.1 Tomcat .................................................................................................................... 84
5.1.1 bin/setenv.sh or bin/setenv.bat ........................................................................ 84
5.1.2 conf/server.xml ..................................................................................................... 84
5.2 Database ................................................................................................................. 84
5.3 Cache configuration ............................................................................................. 85
5.3.1 How to configure/size your caches ................................................................. 86
5.3.2 How to monitor and tune caches ..................................................................... 87
5.3.3 List of eternal caches ........................................................................................... 88
5.3.4 Behavior of HTML Caches ................................................................................. 89

CONFIGURATION AND FINE TUNING GUIDE DIGITAL EXPERIENCE MANAGER 7.2
© 2002 – 2016 Jahia Solutions Group SA Page 7 / 115
5.4 Module generation queue .................................................................................. 89
5.5 Operating mode .................................................................................................... 90
5.6 Maintenance mode .............................................................................................. 91
5.7 Read-only mode .................................................................................................... 91
5.8 JCR DataStore garbage collector ...................................................................... 92
5.9 Storing binary files ................................................................................................ 92
5.10 Increasing bundleCacheSize ............................................................................... 93
5.10.1 DX 7.1.2.0+ ............................................................................................................ 94
5.10.2 Older DX versions (<7.1.2.0) .............................................................................. 94
5.11 JCR indexing configuration ................................................................................ 95
5.12 Logging .................................................................................................................... 95
5.12.1 Modifying the Logging Level .............................................................................. 95
5.12.2 Logging configuration location .......................................................................... 96
6 MONITORING ..................................................................................................................................... 98
6.1 Stack trace dumps ................................................................................................ 98
6.1.1 Unix .......................................................................................................................... 98
6.1.2 Windows ................................................................................................................. 99
6.1.3 Tools ........................................................................................................................ 99
6.2 Memory dumps ..................................................................................................... 99
6.3 Java profilers ........................................................................................................ 100
6.4 Tools ...................................................................................................................... 101
6.4.1 System and Maintenance ................................................................................. 101
6.4.2 Logging .................................................................................................................. 102
6.4.3 Administration and Guidance .......................................................................... 102
6.4.4 Enterprise Tools – Cluster view ...................................................................... 103
6.4.5 JCR Data ............................................................................................................... 103
6.4.6 JCR Rendering ..................................................................................................... 104
6.4.7 Cache ..................................................................................................................... 105
6.4.8 Miscellaneous Tools ........................................................................................... 105
6.5 Other Issues ......................................................................................................... 106

CONFIGURATION AND FINE TUNING GUIDE DIGITAL EXPERIENCE MANAGER 7.2
© 2002 – 2016 Jahia Solutions Group SA Page 8 / 115
7 FREQUENTLY ASKED QUESTIONS (FAQ) ................................................................................ 107
7.1 How to backup Digital Experience Manager? .............................................. 107
7.1.1 Database ............................................................................................................... 107
7.1.2 Digital Experience Manager runtime data .................................................... 107
7.1.3 Web applications/portlets ................................................................................ 107
7.1.4 Configuration files .............................................................................................. 108
7.2 How to restore an environment from a backup? ........................................ 108
7.2.1 Restore your database dump ........................................................................... 108
7.2.2 Reinstall Digital Experience Manager ............................................................ 108
7.2.3 Apply your specific configurations on your new installation ................... 109
7.2.4 Deploy your templates and modules ............................................................. 109
7.2.5 Restore the binaries stored on the filesystem ............................................. 109
7.2.6 Restart the Digital Experience Manager server ........................................... 110
7.3 How to handle module generation timeouts? ............................................. 110
7.4 How to clean referencesKeeper nodes? ....................................................... 111
7.5 How to configure Digital Experience Manager to run behind Apache
HTTP Server (httpd) ......................................................................................................................... 112
7.5.1 Apache httpd 2.2.x / 2.4.x with mod_proxy_* ............................................. 113
7.5.1.1 Using mod_proxy_ajp ........................................................................................ 113
7.5.1.2 Using mod_proxy_http ...................................................................................... 113
7.5.2 Apache httpd 2.2.x / 2.4.x with mod_jk ........................................................ 114

CONFIGURATION AND FINE TUNING GUIDE DIGITAL EXPERIENCE MANAGER 7.2
© 2002 – 2016 Jahia Solutions Group SA Page 9 / 115
1 OVERVIEW 1.1 INTRODUCTION Jahia Digital Experience Manager is a platform for managing a variety of digital initiatives in a
productive and secure fashion. Initiatives such as building websites, mobile sites, intranets and
portals, all of which can interact with visitors to deliver the best user experience possible.
1.2 WHAT’S IN THIS DOCUMENTATION? This document is intended to give an overview of the various aspects of advanced installation,
configuration and the fine-tuning of Digital Experience Manager v7.2.0 - Enterprise Distribution.
It is intended for system administrators and advanced users.
This guide is structured in the following way:
• Chapter 2: Prerequisites and system requirements
• Chapter 3: Installation of Digital Experience Manager on various platforms
• Chapter 4: Configuring main Digital Experience Manager features
• Chapter 5: Fine tuning your Digital Experience Manager server
• Chapter 6: Monitoring your server for performance
• Chapter 7: FAQ
For the ease of reading, all previous product names have been updated in this document by
Digital Experience Manager (DX) because it is the same product line. For better understanding
DX 6.6 is referring to “Jahia 6.6”, the DX 7.0 – to “Digital Factory 7.0” and so on.
Should you have questions, please do not hesitate to contact us as mentioned on our website
(http://www.jahia.com).

CONFIGURATION AND FINE TUNING GUIDE DIGITAL EXPERIENCE MANAGER 7.2
© 2002 – 2016 Jahia Solutions Group SA Page 10 / 115
2 PREREQUISITES 2.1 MINIMAL SYSTEM REQUIREMENTS Please find below the minimum system requirements to properly run Digital Experience
Manager v7.2.0 - Enterprise Distribution.
OS:
• Windows
• Linux
• Solaris
• Mac OSX
SuggestedMin.DevelopmentConfiguration:
• Dual Core 2GHz or +
• 2 GB RAM
• 5 GB HDD
SuggestedMin.ProductionEnvironments:
• Quad Core (64 bit CPU and OS)
• 4 GB RAM
• 100 GB HDD
Warning: 32 bit JVM are limited in max memory (1.5 GB under Windows - 2 or 3 GB under
Linux/Solaris). Digital Experience Manager v7.2.0 tries to cache a maximum of data to boost
performance. So, we highly recommend 64 bit environments with enough memory available at
least for all production environments.

CONFIGURATION AND FINE TUNING GUIDE DIGITAL EXPERIENCE MANAGER 7.2
© 2002 – 2016 Jahia Solutions Group SA Page 11 / 115
2.2 JAVA VIRTUAL MACHINE (JVM) To run Digital Experience Manager, you first need to install an Oracle’s Java SE (Java Platform,
Standard Edition) 7 or 8 on your system. Digital Experience Manager requires the JDK (Java
Development Kit) package to run. The JRE (Java Runtime Environment) only won’t be sufficient.
To check if Java is already installed on your system, type the following command line at the
prompt of your system:
java -version
You should get a message indicating which Java version is installed on your system. Please note
that the same message will be displayed if you only have a JRE installed. If an error is returned,
you probably don't have a Java Platform installed.
If you have installed other versions of the Java Platform, Java Runtime Environment or other
Java servers on your system, we recommend that you run a few checks before starting the
installation to be sure that Digital Experience Manager will run without problems.
If you need to obtain and install a new Java SE, you can find both Linux and Windows versions
on the Oracle Web site:
http://www.oracle.com/technetwork/java/javase/downloads/index.html.
To install a Java Virtual Machine on a Windows system, you need to have administrator rights on
your computer. Please contact your system administrator if you don’t have sufficient
permissions.
It is recommended that the installation path of the Java Platform does not contain any spaces
(not like in the default C:\Program Files\Java\jdk1.7.0_xx, where “xx” is the release number – so
please change it to a path without spaces, like C:\Java\jdk1.7.0_xx).
After the installation, you have to set the JAVA_HOME environment variable to the directory
where you have installed the Java SE. Note that at run time Digital Experience Manager will
check that this variable is correctly set, and will stop if it is not the case.
To setup this variable, follow the steps, described in next sections.

CONFIGURATION AND FINE TUNING GUIDE DIGITAL EXPERIENCE MANAGER 7.2
© 2002 – 2016 Jahia Solutions Group SA Page 12 / 115
2.2.1 Under Windows i) Open the Control Panel, and the System option. In Windows 7 and Vista it is: Control Panel →
System and Security → System → Advanced System Settings. Then, depending on your system:
• Select the Advanced tab and click on the Environment Variables button (Windows
7/Vista/XP/2000)
• Select the Properties tab and click on the Environment button (Windows NT)
ii) Click on New in the "System variables" section to add a new environment variable. Enter the
following information:
• Variable name: JAVA_HOME
• Variable value: c:\Java\jdk1.7.0_xx (replace this value with the correct path)
Click on OK to validate your entry. The Java Virtual Machine should now be correctly set-up.
Please note that on Windows NT you will need to restart your computer to apply the changes.
2.2.2 Under Linux Set the JAVA_HOME variable to the root directory of your JDK installation. Both examples below
suppose you have installed the JDK version 1.7 in your /usr/java directory. The classpath is
usually set by typing:
In bash or ksh:
export JAVA_HOME=usr/java/jdk1.7.0_xx
In csh or tcsh:
export JAVA_HOME usr/java/jdk1.7.0_xx
2.2.3 Under Solaris Set the JAVA_HOME variable to the root directory of your JDK installation. Both examples below
suppose you have installed the JDK version 1.7 in your /usr/java directory. The classpath is
usually set by typing:

CONFIGURATION AND FINE TUNING GUIDE DIGITAL EXPERIENCE MANAGER 7.2
© 2002 – 2016 Jahia Solutions Group SA Page 13 / 115
In ksh:
export JAVA_HOME=/usr/java
In sh:
JAVA_HOME=/usr/java;export
In csh or tcsh:
setenv JAVA_HOME /usr/java
2.3 DATABASE Digital Experience Manager v7.2.0 Enterprise Distribution is by default distributed with the Sun
Java DB / Apache Derby database engine. If you wish to get started rapidly or for rapid
prototyping purposes, you can use the provided database as is.
But in production and also for developing a serious project, you should use a standalone
database instead. This section addresses only the mandatory configurations. Please refer to the
“Fine tuning” section, before going live.
Your database should be UTF-8 compliant! Have this in mind when creating a new database for
Digital Experience Manager.
Default settings are currently already predefined to allow Digital Experience Manager to run on
Sun Java DB / Apache Derby, PostgreSQL, MySQL and the Enterprise Distribution also supports
Microsoft SQL Server and Oracle. During the Digital Experience Manager installation, you will
have to provide the URL to the database you have created for Digital Experience Manager.
These connection strings are different for each database.
Digital Experience Manager may have also detected bugs in certain DB versions, which would
cause errors in Digital Experience Manager, so we integrated validations during installation,
which will not allow installing Digital Experience Manager with these database versions.
2.3.1 MySQL The default database URL (the connection string) for MySQL is:

CONFIGURATION AND FINE TUNING GUIDE DIGITAL EXPERIENCE MANAGER 7.2
© 2002 – 2016 Jahia Solutions Group SA Page 14 / 115
jdbc:mysql://localhost/jahia?useUnicode=true&characterEncoding=UTF-8&useServerPrepStmts=false
where localhost should be replaced by the fully qualified domain name (e.g.
mysql.mydomain.com) or IP address of the MySQL server if it is not located on the same
machine as the Digital Experience Manager server, and jahia is just the default name of the
database where Digital Experience Manager tables will be created.
If your MySQL server is not running on the standard port (3306), you should add “:port” after
the domain name where port is the port number.
Digital Experience Manager is using InnoDB engine for its database engine on MySQL, so be
sure that you have configured your MySQL for InnoDB. Here are some default configuration
options for your database to be put in your my.cnf or my.ini file:
#
# * InnoDB
#
# InnoDB is enabled by default with a 10MB datafile in /var/lib/mysql/.
# Read the manual for more InnoDB related options. There are many!
#
# You can write your other MySQL server options here
# ...
# Data files must be able to hold your data and indexes.
# Make sure that you have enough free disk space.
innodb_data_file_path = ibdata1:100M:autoextend
#
# Set buffer pool size to 50-80% of your computer's memory
innodb_buffer_pool_size=1024M
innodb_additional_mem_pool_size=256M

CONFIGURATION AND FINE TUNING GUIDE DIGITAL EXPERIENCE MANAGER 7.2
© 2002 – 2016 Jahia Solutions Group SA Page 15 / 115
#
# Set the log file size to about 25% of the buffer pool size
innodb_log_file_size=256M
innodb_log_buffer_size=64M
#
innodb_flush_log_at_trx_commit=1
max_allowed_packet has to be at least set to 100M, otherwise Digital Experience Manager
will prohibit installation. In case you have chosen to store the files in the database, it should be
at least the same size as the biggest file that will be uploaded on your server. Said differently,
your users won’t be able to upload any file bigger than the size you specify here. You should also
configure jahiaFileUploadMaxSize in WEB-INF/etc/config/jahia.properties
accordingly. The Digital Experience Manager limitation should not be bigger than the database
limitation, otherwise the Digital Experience Manager UIs will allow files to be uploaded that the
database will not be able to store.
max_allowed_packet = 1024M
2.3.1.1 MySQL on Mac OS X Please note that for MySQL versions from 5.5.9 to 5.5.12 on MacOSX, you must set the value of
lower_case_table_names to 1 (http://bugs.mysql.com/bug.php?id=60309).
2.3.2 PostgreSQL The default database URL (the connection string) for PostgreSQL 9.x is:
jdbc:postgresql://localhost:5432/jahia
where jahia is the default name of the database where Digital Experience Manager tables will
be created. If your PostgreSQL server is located on a distant computer and/or on a non-default
port (5432), please, adjust the connection URL accordingly.

CONFIGURATION AND FINE TUNING GUIDE DIGITAL EXPERIENCE MANAGER 7.2
© 2002 – 2016 Jahia Solutions Group SA Page 16 / 115
Make sure your PostgreSQL server is accepting TCP connections. Please refer to your database
documentation for detailed instructions on how to configure PostgreSQL to accept TCP
connections.
Please know that an issue has recently been identified on the Digital Factory / Digital
Experience Manager line of products when using PostgreSQL database. The issue comes up
when using the maintenance and cleanup command "vacuumlo" on the database side. This
action is supposed to free some space inside the database by removing unreferenced objects
inside large objects fields table "pg_largeobject".
Because of the way the database creation schema is designed, it may - in some cases -
incorrectly identify some large objects inside the table "pg_largeobject" as unreferenced,
whereas these objects are actually in use. By running the "vacuumlo" command, PostgreSQL
may delete from the database these large objects if they are identified as not referenced
anymore from any of the other tables, even though they actually are in use. This can have an
unexpected effect on the internal functioning of Jahia / Digital Factory / Digital Experience
Manager.
We are working on identifying the best course of action to address this behavior; in the
meantime, we STRONGLY recommend that you do NOT run a "vacuumlo" command on the
PostgreSQL database schema of your Digital Experience Manager instance.
2.3.3 Oracle Digital Experience Manager v7.2.0 Enterprise Distribution also comes with JDBC drivers for
Oracle. These drivers work with Oracle 11g and above.
The default database URL (the connection string) for Oracle is:
jdbc:oracle:thin:@localhost:1521:jahia
where localhost should be replaced by the fully qualified domain name (e.g.
oracle.mydomain.com) or the IP address of the Oracle Server if it is not located on the same
machine as the Digital Experience Manager server, and jahia is the default name of the
database where Digital Experience Manager tables will be created.

CONFIGURATION AND FINE TUNING GUIDE DIGITAL EXPERIENCE MANAGER 7.2
© 2002 – 2016 Jahia Solutions Group SA Page 17 / 115
1521 is the standard port for Oracle. If you Oracle server is running on a different port, please
change it here.
2.3.4 Microsoft SQL Server Enterprise Distribution is provided with JDBC drivers for Microsoft SQL Server.
The default database URL (the connection string) for Microsoft SQL Server is:
jdbc:sqlserver://localhost;databaseName=jahia
where localhost should be replaced by the fully qualified domain name (e.g.
sqlserver.mydomain.com) or the IP address of the Microsoft SQL Server if it is not located on the
same machine as the Digital Experience Manager server, and jahia is the default name of the
database where Digital Experience Manager tables will be created.
If your Microsoft SQL Server is not running on the standard port (1433), you should add
“:port” after the domain name, where port is the port number, i.e.:
jdbc:sqlserver://localhost:port;databaseName=Jahia
2.4 OTHER PREPARATIONS AND CHECKS Check that you have no TOMCAT_HOME and no CATALINA_HOME environment variable set.

CONFIGURATION AND FINE TUNING GUIDE DIGITAL EXPERIENCE MANAGER 7.2
© 2002 – 2016 Jahia Solutions Group SA Page 18 / 115
3 INSTALLATION Digital Experience Manager's official and nightly builds are distributed as installation packages,
which contain the entire software suite (Digital Experience Manager, Jahia Core Content
Platform, Studio) as well as the Digitall Website demo, several template sets and dozens of
composite modules.
3.1 MAIN INSTALLATION STEPS
• Download the latest stable Digital Experience Manager 7.2.0 build from
http://www.jahia.com by choosing the right downloadable package for your operating
system
• Double-click on the downloaded installation package, which will start the installation
wizard.
• On Unix servers with graphical environment, you can start the installation wizard running java -jar <your-downloaded-digital-experience-manager-jar>
• On Unix servers where you have no graphical environment, you can start the installation
also in the Console Mode: java -jar <your-downloaded-digital-experience-manager-jar> -
console
• In case you would require running the wizard in Console Mode on Windows, you will
need to open your command prompt with administrator privileges.
• Follow the installation wizard. See next sections for a detailed description of the settings.
• At the end, you can let the wizard launch Digital Experience Manager (if the bundled
Apache Tomcat server was selected as an option). Otherwise, you can launch Digital
Experience Manager using the generated shortcut or within the created installation folder
using a console window launch the command “./start.sh” (on Linux/MacOSX) or
“start.bat” (on Windows).
• Important: the first start of your Digital Experience Manager may take up to 3 minutes,
depending on your hardware (initial templates publication and modules deployment). The
next starts will be much faster.

CONFIGURATION AND FINE TUNING GUIDE DIGITAL EXPERIENCE MANAGER 7.2
© 2002 – 2016 Jahia Solutions Group SA Page 19 / 115
3.2 SETTINGS DURING INSTALLATION
3.2.1 Installation path There shouldn’t be any spaces in your folder naming. For example,
C:\DigitalExperienceManager-7.2\ is OK while C:\Digital Experience Manager 7.2\ is not.
3.2.2 Installation type – Discovery install This option allows to discover Digital Experience Manager without specific configuration thanks
to the installation of an Apache Tomcat 8 server & Sun Java DB / Apache Derby DBMS bundle.
This installation also provides and deploys all interesting and available modules, applications and
templates.
3.2.2.1 Default application server The default Digital Experience Manager v7.2.0 is distributed with an Apache Tomcat 8.0.39
application server.
No manual configuration of the server is required, as it will be directly setup during the Digital
Experience Manager installation. By default, Tomcat will use standard ports (8080, 8009 and
8005). Please ensure that you do not have any other servers/services running and using those
ports. Optionally, you can change Tomcat ports during the "Custom install" installation type (see
"3.2.3 Installation type – Custom install").
3.2.2.2 Default database Digital Experience Manager v7.2.0 is installed with the embedded Sun Java DB / Apache Derby
database engine with the “Discovery install” option. If you wish to get started rapidly, you can
use the provided database as is. With the “Custom Install” option you can choose to install
Digital Experience Manager to another more robust standalone database during the
configuration wizard of Digital Experience Manager.
Please note that you cannot simply switch the database at a later stage on the same installation.
You will have to export the content and import it into a new Digital Experience Manager
installation configured with the different database.

CONFIGURATION AND FINE TUNING GUIDE DIGITAL EXPERIENCE MANAGER 7.2
© 2002 – 2016 Jahia Solutions Group SA Page 20 / 115
3.2.3 Installation type – Custom install If you want to install Digital Experience Manager on a custom environment (application server,
database, mail server configuration, different port numbers), choose a particular operating mode
(development, production, distant publication server), configure clustering or LDAP providers,
you need to choose the “Custom Install” option.
3.2.3.1 Application server Digital Experience Manager v7.2.0 Enterprise Distribution can be installed with an Apache
Tomcat 8.0.39 application server. If you want to install into your own server, you need to
deselect the “Apache Tomcat” checkbox on Step 5 of the installation wizard and click Next. On
the next page, you will be able to choose whether the installation is targeted into one of these
application servers:
• Apache Tomcat 8.0.x (in case you want to deploy Digital Experience Manager yourself
into an existing Tomcat server other than the one bundled by default)
• IBM WebSphere 8.5.5
• Red Hat JBoss EAP 6.x
The installed Digital Experience Manager will then include some specific configurations, which
are needed to make it run smoothly in the targeted application server. See the next chapter “3.7
Application server specific installations” for further information.
3.2.3.2 Database The embedded Sun Java DB / Apache Derby database engine, which is used with “Discovery
install” option is not suited for production. During installation, you can choose between:
• Microsoft SQL Server
• MySQL 5.x
• Oracle 11g
• PostgreSQL 9.x
• Sun Java DB / Apache Derby (standalone)

CONFIGURATION AND FINE TUNING GUIDE DIGITAL EXPERIENCE MANAGER 7.2
© 2002 – 2016 Jahia Solutions Group SA Page 21 / 115
Please note, that you cannot simply switch the database at a later stage on the same installation.
You will have to export the content and import it into a new Digital Experience Manager
installation configured with the different database.
During installation, you will be asked to provide the connection URL (see chapter "2.3 Database"
for details) and the user/password for accessing the database.
Furthermore, you also will be able to set whether binary data should be stored in the database
or directly on a file system (for clustered Digital Experience Manager setup the file system need
to be shared by all cluster nodes). By default, the binary files are stored on the file system, which
in most cases results in a better performance as the file content can be directly streamed from
the file system (utilizing low level OS mechanism) and a higher level of concurrency can be
achieved. There is also an option present to define if the Digital Experience Manager DB
structure (tables, indexes, sequences) has to be created first (this option needs to be unchecked
e.g. when running the installation wizard for installing second, third, etc. cluster nodes).
3.2.3.3 Application and server settings
3.2.3.3.1 ApacheTomcatconfiguration
This section is available only if you have chosen to use the bundled Tomcat application server.
Here you have the possibility to configure the different ports used by Tomcat.
3.2.3.3.2 Webapplicationsettings
Here you have the possibility to specify the context path for Digital Experience Manager Web
application. If you want to deploy it into the root context (“/”), just leave the field blank.
You also need to specify a login and password that will be required to access the Tools Area:
monitoring and debugging tools embedded in Digital Experience Manager.
3.2.3.4 Operating mode Here you have to choose in which mode you want to install Digital Experience Manager.

CONFIGURATION AND FINE TUNING GUIDE DIGITAL EXPERIENCE MANAGER 7.2
© 2002 – 2016 Jahia Solutions Group SA Page 22 / 115
• Development – enables development mode for Digital Experience Manager including
access to Studio.
• Development+Modules/JahiApps/Demos – same as "Development" mode.
Additionally, includes the set of all optional modules, template sets and pre-packaged
demo sites.
• Production – includes the "core" set of Digital Experience Manager modules. Disables
development mode for template deployment. Studio mode access is also disabled.
• Distantpublicationserver – Same as "Production". Additionally, content editing
activities are limited to the Live content only.
Just take care that even if you can switch later between the modes (you can reconfigure it in
jahia.properties), some modules will be packaged only when you perform the installation
in “Development + Modules/JahiApps/Demos” Mode. Installing in Production Mode, and then
switching to Development Mode will activate the development dedicated features (like the
Studio), but will not deploy the additional modules. You will have to deploy them using Module
Management Panel in Digital Server Administration. Please refer to the “3.8 Modules” section
for more information.
3.2.3.4.1 DifferencesbetweenDevelopmentandProductionmodes
Here we will list the differences in terms of available features and Digital Experience Manager
behavior between the Development and Productions modes. From the packaged modules point
of view, there are no differences between plain Development (not the second option, which is
“Development + Modules/JahiApps/Demos”) and Production mode.
Development mode Production mode
Studio Yes Not accessible
Cache Display extra information directly in the
rendered page by passing request
n/a

CONFIGURATION AND FINE TUNING GUIDE DIGITAL EXPERIENCE MANAGER 7.2
© 2002 – 2016 Jahia Solutions Group SA Page 23 / 115
parameter “cacheinfo=true” in the
page URL
Rendering Display extra view/area rendering
information by passing request
parameter “moduleinfo=true” in the
page URL
n/a
Error handling Exception stacktraces are rendered in
the error page. Additional (more
verbose) error reporting using
ErrorFileDumper in the rendering of
views.
n/a
Rules Watch for changes in rule files under <digital-experience-manager-
web-app-dir>/WEB-
INF/etc/repository/rules and
automatically rebuild the rule base
n/a
Job scheduling
(from Spring)
If a background job is scheduled from a
Spring definition file, the job is
recreated (all the job data is deleted)
and rescheduled on each Digital
Experience Manager restart.
Spring-based configured jobs
are never deleted. If the change
is detected in the trigger
configuration the job is re-
scheduled on Digital Experience
Manager startup.
URL rewriting
rules
Scanned for changes each 5 seconds.
The rule base is reloaded if changes are
detected.
No implicit scanning for
changes.

CONFIGURATION AND FINE TUNING GUIDE DIGITAL EXPERIENCE MANAGER 7.2
© 2002 – 2016 Jahia Solutions Group SA Page 24 / 115
Groovy patcher Scans for new patches each 5 seconds
and executes them.
Scan interval is configurable at is
set to 5 minutes by default.
Scanning can be disabled
completely.
3.2.3.4.2 LDAPconfiguration
In case you will use LDAP directory as a provider for application users or/and groups, you can
choose to configure LDAP provider settings during installation. If you check this option, you will
then access an additional screen, where you can setup your configuration for user and group
providers.
If you do not configure them during the installation process, you will still be able to do it later
from the configuration files. Please refer to the “4.5 LDAP ” section for more information.
3.2.3.4.3 Clusterconfiguration
You can also configure Digital Experience Manager to be run in cluster mode. If you check this
option, you will then access an additional screen where you can setup your cluster configuration.
Here, you will have to specify if the node you are installing is the processing server. Remember
that only one node of this type is allowed in the same cluster. Please refer to the “4.4 Clustering”
section for more information.
You will also have to specify a unique server identifier (or leave the <auto> value for it to be
auto-generated) and declare the IP and listening port.
3.2.3.5 System administrator settings You need to at least provide the password for the root user, who, like a super-user, always has
all of the privileges in Digital Experience Manager. So, you should choose a strong password and
keep it secret.

CONFIGURATION AND FINE TUNING GUIDE DIGITAL EXPERIENCE MANAGER 7.2
© 2002 – 2016 Jahia Solutions Group SA Page 25 / 115
3.2.3.6 Mail server
Mailserver: this field contains the SMTP host name, with advanced options.
Digital Experience Manager uses the Apache Camel framework for messaging, and the format of
the mail endpoint should conform to the one, required by the Camel Mail Component
(http://camel.apache.org/mail.html), i.e.:
[smtp|smtps]://[username@]host[:port][?options]
All parts except the host are optional. See use cases below.
Mailadministrator: the field contains a single e-mail address or multiple addresses (separated
by a comma) of users who will receive system-level notifications (e.g. about errors, if this option
is enabled).
Mailfrom: the default sender e-mail address for an e-mail message.
Here are several use cases for "Mail server" field values:
1. SMTP server does not require authentication and uses the standard port 25:
smtp.acme.com
2. SMTP server requires authentication and uses non-standard port 11019:
smtp.acme.com:11019?username=myuser&password=secretpassword
3. GMail example: SMTP server requires authentication and SSL enabled (or TLS):
smtps://[email protected]&password=mypassword
or
smtp.gmail.com:[email protected]&password=mypassword&mail.smtp.starttls.enable=true
CONFIGURATION AND FINE TUNING GUIDE DIGITAL EXPERIENCE MANAGER 7.2
© 2002 – 2016 Jahia Solutions Group SA Page 26 / 115
4. Enable the mail server debugging option to see the details of e-mail server
communication:
smtp.acme.com?mail.debug=true
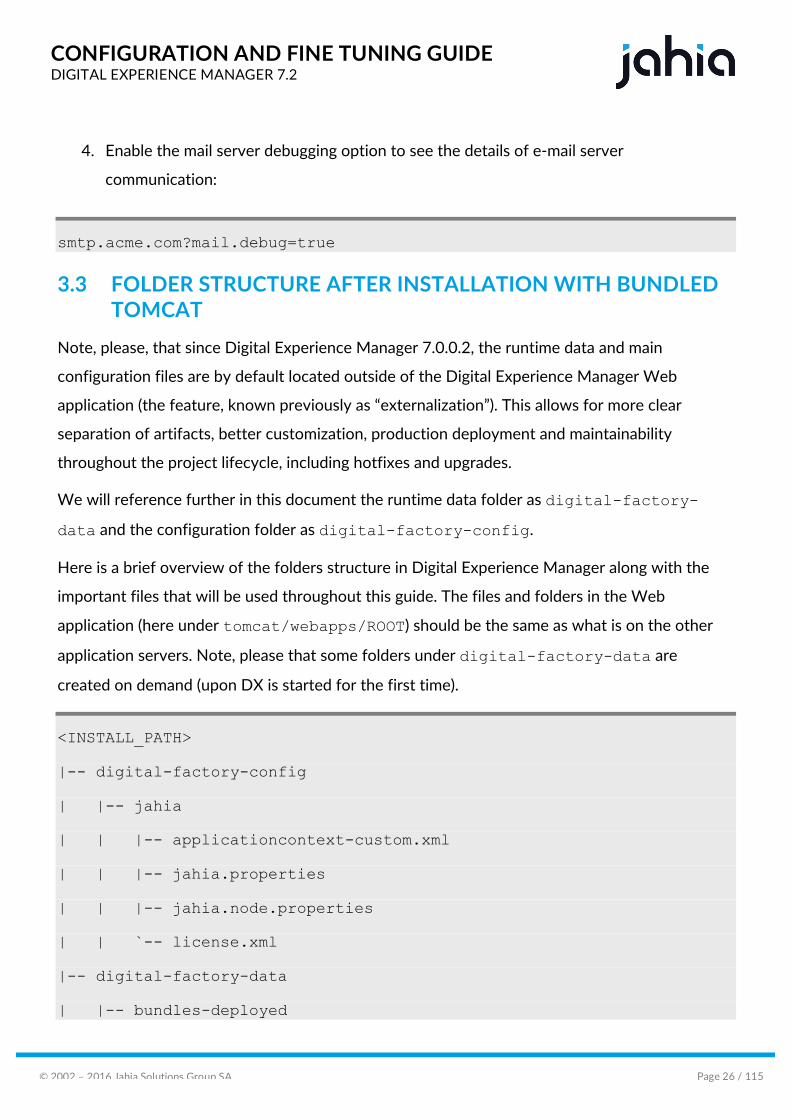
3.3 FOLDER STRUCTURE AFTER INSTALLATION WITH BUNDLED TOMCAT
Note, please, that since Digital Experience Manager 7.0.0.2, the runtime data and main
configuration files are by default located outside of the Digital Experience Manager Web
application (the feature, known previously as “externalization”). This allows for more clear
separation of artifacts, better customization, production deployment and maintainability
throughout the project lifecycle, including hotfixes and upgrades.
We will reference further in this document the runtime data folder as digital-factory-
data and the configuration folder as digital-factory-config.
Here is a brief overview of the folders structure in Digital Experience Manager along with the
important files that will be used throughout this guide. The files and folders in the Web
application (here under tomcat/webapps/ROOT) should be the same as what is on the other
application servers. Note, please that some folders under digital-factory-data are
created on demand (upon DX is started for the first time).
<INSTALL_PATH>
|-- digital-factory-config
| |-- jahia
| | |-- applicationcontext-custom.xml
| | |-- jahia.properties
| | |-- jahia.node.properties
| | `-- license.xml
|-- digital-factory-data
| |-- bundles-deployed

CONFIGURATION AND FINE TUNING GUIDE DIGITAL EXPERIENCE MANAGER 7.2
© 2002 – 2016 Jahia Solutions Group SA Page 27 / 115
| |-- compiledRules
| |-- db
| | `-- sql
| | `-- schema
| |-- dbdata
| |-- generated-resources
| |-- imports
| |-- karaf
| | |-- data
| | |-- deploy
| | |-- etc
| | |-- instances
| |-- modules
| |-- patches
| | |-- groovy
| | |-- sql
| |-- prepackagedSites
| |-- repository
| | |-- datastore
| | |-- workspaces
| | |-- indexing_configuration.xml
| | |-- indexing_configuration_version.xml
| |-- scripts
| | `-- groovy
|-- docs
|-- icons

CONFIGURATION AND FINE TUNING GUIDE DIGITAL EXPERIENCE MANAGER 7.2
© 2002 – 2016 Jahia Solutions Group SA Page 28 / 115
|-- licences
|-- logs
|-- tomcat
| |-- bin
| | |-- catalina.bat
| | |-- catalina.sh
| | |-- setenv.bat
| | |-- setenv.sh
| | |-- shutdown.bat
| | |-- shutdown.sh
| | |-- startup.bat
| | `-- startup.sh
| |-- conf
| | |-- catalina.properties
| | |-- server.xml
| | `-- web.xml
| |-- lib
| |-- logs
| | |-- jahia-errors
| | |-- jahia-threads
| | |-- jahia.log
| | |-- jahia_access.log
| | `-- jahia_profiler.log
| |-- temp
| | |-- jahia-caches
| | `-- jahia-jsps

CONFIGURATION AND FINE TUNING GUIDE DIGITAL EXPERIENCE MANAGER 7.2
© 2002 – 2016 Jahia Solutions Group SA Page 29 / 115
| |-- webapps
| | `-- ROOT
| | |-- css
| | |-- engines
| | |-- errors
| | |-- gwt
| | |-- icons
| | |-- iphone
| | |-- META-INF
| | | `-- context.xml
| | |-- tools
| | `-- WEB-INF
| | |-- classes
| | |-- etc
| | | |-- config
| | | | |-- log4j.xml
| | | | `-- urlrewrite.xml
| | | |-- repository
| | | | |-- export
| | | | |-- jackrabbit
| | | | | |-- repository.xml
| | | | |-- nodetypes
| | | | |-- rules
| | | | |-- root.xml
| | | | |-- root-mail-server.xml
| | | | |-- root-permissions.xml

CONFIGURATION AND FINE TUNING GUIDE DIGITAL EXPERIENCE MANAGER 7.2
© 2002 – 2016 Jahia Solutions Group SA Page 30 / 115
| | | | |-- root-roles.xml
| | | | |-- root-user.xml
| | | | |-- site.xml
| | | | |-- template-root-mail-server.xml
| | | | |-- template-root-user.xml
| | | | `-- user.xml
| | | `-- spring
| | |-- lib
| | |-- notifications
| | `-- web.xml
| |-- work
|-- tools
|-- uninstaller
|-- OpenAdministration.URL
|-- OpenHome.URL
|-- start.bat
|-- start.sh
|-- stop.bat
`-- stop.sh
Here is a brief overview of the important folders:
digital-factory-config/: Contains Digital Experience Manager configuration and license file
under jahia sub-folder

CONFIGURATION AND FINE TUNING GUIDE DIGITAL EXPERIENCE MANAGER 7.2
© 2002 – 2016 Jahia Solutions Group SA Page 31 / 115
digital-factory-data/: Runtime Digital Experience Manager data, including database creation
scripts, modules and prepackaged sites to be deployed, JCR repository folder etc
digital-factory-data/bundles-deployed: Contains all the bundles, corresponding to the
deployed modules. Note: when restarting the server after flushing the contents of this folder,
the modules present in the digital-factory-data/modules will be redeployed, but the
other modules (uploaded via UI, RESR API, downloaded from store) will NOT be redeployed, and
will require to be manually deployed again.
digital-factory-data/compiledRules: folder with the pre-compiled business rules, which are
generated on module deployment and “cached” here.
digital-factory-data/db: The database scripts to create the DB schema of Jahia and to connect
to the corresponding database can be found here.
digital-factory-data/generated-resources: contains aggregated and minified CSS and
JavaScript assets which are generated during rendering of live pages.
digital-factory-data/karaf: The configuration and runtime data of the OSGi container (Apache
Karaf).
digital-factory-data/karaf/etc: Configuration files for the Apache Karaf OSGi container.
digital-factory-data/modules: Modules and template-sets located in that directory will be
deployed to the server on startup or whenever a file changes during runtime. Template-sets will
be available in the drop-down list when you create a new virtual site, and modules will be seen
in the left panel of the Studio or in the Edit mode.
digital-factory-data/patches/groovy: Includes Groovy-based patch scripts. The folder is also
“watched” for the new scripts during runtime on the processing server to allow execution of
patches during runtime.
digital-factory-data/patches/sql: Contains SQL scripts which are executed against database
schema on DX startup.

CONFIGURATION AND FINE TUNING GUIDE DIGITAL EXPERIENCE MANAGER 7.2
© 2002 – 2016 Jahia Solutions Group SA Page 32 / 115
digital-factory-data/repository: The Jackrabbit repository home, where the workspace
configuration, and version storage is located as well as search indexes.
digital-factory-data/repository/datastore: The Jackrabbit datastore folder where the binary
resources will be stored.
digital-factory-data/repository/index
and digital-factory-data/repository/workspaces/*/index: The search indexes will be stored in
these directories.
tomcat/: Contains pre-configured Apache Tomcat server
tomcat/logs/jahia-errors: Folder where Digital Experience Manager error dumper service
writes error reports into.
tomcat/logs/jahia-threads: Folder where Digital Experience Manager thread dumper service
writes thread dump files into.
tomcat/temp/jahia-jsps: This directory will contain complied JSPs of the Digital Experience
Manager modules. It will include both compiled class and Java file for each JSP. This can prove
helpful in case you have an error in a template showing in the Tomcat logs, for instance:
sitemap_jsp.java:984: illegal start of expression. If you want to make sure that all JSP files of the
templates are recompiled after a change, you may want to delete the jahia-jsps directory
and also the Standalone directory in work. Next time you access a page, Tomcat will
recompile all JSP files used by the page.
tomcat/webapps/ROOT/engines: This directory contains all the JSP, images and JavaScript
files of Digital Experience Manager engines (Content Manager, Content Picker, Live Content
Picker etc.).
tomcat/webapps/ROOT/META-INF/context.xml: Database connection information. This
configuration is applicable only for Apache Tomcat server.
tomcat/webapps/ROOT/WEB-INF/classes: Besides some configuration files, here you will find
mainly resource bundle files used to translate the Digital Experience Manager interface in other

CONFIGURATION AND FINE TUNING GUIDE DIGITAL EXPERIENCE MANAGER 7.2
© 2002 – 2016 Jahia Solutions Group SA Page 33 / 115
languages. There are normally at least 2 files for each language:
JahiaInternalResources.properties and JahiaTypesResources.properties.
tomcat/webapps/ROOT/WEB-INF/etc: The etc directory contains most of the configuration
files of Jahia. The config sub-directory contains several configuration files (log4j.xml, seo-
urlrewrite.xml, etc.). The repository directory contains the configuration files for Jackrabbit
repository. The spring directory may contain custom Spring bean definition files, but is empty
by default. The internal Spring files are located inside jahia-impl-*.jar file.
start.*/stop.*: The Digital Experience Manager start and stop scripts.
3.4 DISCOVERING DIGITAL EXPERIENCE MANAGER - FIRST USAGE
This applies only if you want to discover Digital Experience Manager 7.2, using the prepackaged
demonstration site. It assumes that you have installed Digital Experience Manager using
“Discovery install” or selecting “Development + Modules/JahiApps/Demos” Mode, so that the
example templates and the modules they require have been automatically deployed.
• Open a browser and go to http://localhost:8080/start.Use the root user credentials set
up during the installation process. You will discover the new Digital Experience Manager
landing page. Click on the “Create new Web-Projects” button and you're ready to create
your first site.
• Import the new “Digitall Prepackaged Demo Website” package. After successful import,
click on the “Go to Edit Mode” button to see the Edit Mode for this Digitall Web site.
• Switch to the Live or Contribute Mode and enjoy!
3.5 INSTALLING A PRODUCTION SERVER – ADDITIONAL STEPS This applies when you install your production server, and assumes that you have installed Digital
Experience Manager in Production Mode.
Before being able to create your first website, you will have to deploy your custom set of
templates and modules. But during the development process, you may have used some Digital
Experience Manager standard modules, automatically available on your installation. Notice that

CONFIGURATION AND FINE TUNING GUIDE DIGITAL EXPERIENCE MANAGER 7.2
© 2002 – 2016 Jahia Solutions Group SA Page 34 / 115
most of those modules were available because you installed your development server using the
development mode. As your production server uses the production mode, only the core modules
will be available. So, you also need to deploy yourself the standard modules you want to use.
• Prepare all the JAR files for your custom templates and modules, and the one for each
standard module you want to use. For the standard modules, you can either download
them from the Jahia Private App Store (http://store.jahia.com/), or retrieve them from
your development server (they are available in digital-factory-data/modules/).
In case you download the modules from the Jahia Private App Store, take care to
download the same version of the module as the one you have tested during your
validation process.
• In order to deploy additional modules, you could use a dedicated screen in the Digital
Experience Manager installer, where you are offered to provider a folder to additional
modules, which have to be deployed to the Digital Experience Manager instance, you are
installing. Alternatively, after the installation you could use Module management screen in
Digital Experience Manager Administration or manually copy the required modules to
digital-factory-data/modules folder.
• The modules will be automatically deployed
• Now you can either import your site data from an export of your
integration/development platform, or create a new empty site.
• Now let your users enter content on their site.
3.6 DIFFERENT TYPES OF ENVIRONMENT During the life-cycle of a project you will need different types of environments:
• Development environment - each of your developers will have their own environment.
Those developer environments are normally much lighter than the one needed for
production. Your developers can either use the integrated DBMS (Apache Derby) or use
another DBMS (MySQL, Microsoft SQL Server, PostgreSQL or Oracle).

CONFIGURATION AND FINE TUNING GUIDE DIGITAL EXPERIENCE MANAGER 7.2
© 2002 – 2016 Jahia Solutions Group SA Page 35 / 115
• Integration environment - this environment will help you integrate the work of all your
developers on the same platform and prepare the site(s) you are going to deploy in
production.
• Production environment - this one is the last step in the development life-cycle of your
project.
3.7 APPLICATION SERVER SPECIFIC INSTALLATIONS
3.7.1 Apache Tomcat 8.0.x To deploy Digital Experience Manager into an existing Apache Tomcat 8.0.x installation a
number of required steps has to be completed.
Nextsubsectionsdescribeallthosesteps,whichareallmandatory.
3.7.1.1 Installation The installation procedure for an existing Apache Tomcat 8 is as follows:
• Launch the Installer.
• Choose the CustomInstall(advanced) installation type.
• Select only DigitalExperienceManager+JahiaCoreContentPlatform pack,
unselecting the AddApacheTomcat one
• On the next screen choose the ApacheTomcat8.0.x as the target application server
• Follow the next steps of the Installer.
Once the Installer is finished in your installation directory you should find among others the
tomcat folder and, if the locations of runtime data and configuration folders were not changed
during the installation, the digital-factory-config and digital-factory-data
folders.

CONFIGURATION AND FINE TUNING GUIDE DIGITAL EXPERIENCE MANAGER 7.2
© 2002 – 2016 Jahia Solutions Group SA Page 36 / 115
3.7.1.2 Deployment Further, it is assumed that your target Apache Tomcat server is installed in the <tomcat> folder
and <install-dir> will reference the folder, where you’ve installed Digital Experience
Manager into using the installer.
1. Copy the content of the <install-dir>/tomcat/lib folder into your
<tomcat>/lib directory.
2. In case ROOT was configured as the Web application context name, please, remove or
rename the default Tomcat’s ROOT Web application at <tomcat>/webapps/ROOT, if it
exists, to e.g. tomcat-root or similar.
3. Copy the content of the <install-dir>/tomcat/webapps folder into your
<tomcat>/webapps directory.
4. The configuration folder path (digital-factory-config) has to be added into the
class path to make it available to Digital Experience Manager. The easiest way is to
modify the common.loader variable value in the
<tomcat>/conf/catalina.properties file to point to the digital-factory-
config folder path. For example, if the Digital Experience Manager configuration folder
has a path /opt/DigitalExperienceManager-7/digital-factory-config than
the value of common.loader should look like:
common.loader="${catalina.base}/lib","${catalina.base}/lib/*.jar","${catalina.home}/lib","${catalina.home}/lib/*.jar","/opt/DigitalExperienceManager-7/digital-factory-config"
If your digital-factory-config folder is inside the installation folder, you could use
the path, relative to catalina.home, i.e.:
common.loader="${catalina.base}/lib","${catalina.base}/lib/*.jar","${catalina.home}/lib","${catalina.home}/lib/*.jar","${catalina.home}/../digital-factory-config"

CONFIGURATION AND FINE TUNING GUIDE DIGITAL EXPERIENCE MANAGER 7.2
© 2002 – 2016 Jahia Solutions Group SA Page 37 / 115
5. Please, note, if you decide to move the digital-factory-data folder to other
location, the jahiaVarDiskPath value in the digital-factory-
config/jahia/jahia.properties file should be adjusted to reflect its new path.
6. Adjust the JVM and connector options appropriately (see next sections).
3.7.1.3 JVM tuning options The default JVM options of the Apache Tomcat must be adjusted to reflect the Digital
Experience Manager requirements.
We recommend creating a setenv.bat (Windows) or setenv.sh (non-Windows OS) script in
the <tomcat>/bin folder to put those options.
An example of the <tomcat>/bin/setenv.bat for Windows OS could be:
rem ------------------------------------------------------------------
rem Digital Experience Manager settings
rem ------------------------------------------------------------------
set CATALINA_OPTS=%CATALINA_OPTS% -server -Dsun.io.useCanonCaches=false -verbose:gc -XX:+HeapDumpOnOutOfMemoryError -XX:+PrintConcurrentLocks -Djava.net.preferIPv4Stack=true -Xms2048m -Xmx2048m -XX:MaxPermSize=384m
set CATALINA_OPTS=%CATALINA_OPTS% -Dderby.system.home="%CATALINA_HOME%\..\digital-factory-data\dbdata"
In a similar way, the <tomcat>/bin/setenv.sh script for a non-Windows OS can look like:
#!/bin/sh
# --------------------------------------------------------------------
# Digital Experience Manager settings
# --------------------------------------------------------------------

CONFIGURATION AND FINE TUNING GUIDE DIGITAL EXPERIENCE MANAGER 7.2
© 2002 – 2016 Jahia Solutions Group SA Page 38 / 115
CATALINA_OPTS="$CATALINA_OPTS -server -Djava.awt.headless=true -verbose:gc -XX:+HeapDumpOnOutOfMemoryError -XX:+PrintConcurrentLocks -Djava.net.preferIPv4Stack=true -Xms2048m -Xmx2048m -XX:MaxPermSize=384m"
CATALINA_OPTS="$CATALINA_OPTS -Dderby.system.home=$CATALINA_HOME/../digital-factory-data/dbdata"
export CATALINA_OPTS
export CATALINA_PID=$CATALINA_HOME/temp/tomcat.pid
The JVM heap sizes (-Xms and -Xmx) as well as the permanent generation space size (-
XX:MaxPermSize) should be adjusted according to your needs. Note that the minimal value of
the -Xmx value, required by Digital Experience Manager is 2048m.
If you have chosen Apache Derby as the target DBMS server during the installation, the value of
the -Dderby.system.home in the setenv.bat/setenv.sh script should point to your
digital-factory-data/dbdata folder.
3.7.1.4 HTTP/AJP connector tuning options The following configuration for the HTTP and AJP connectors (configured in the
<tomcat>/conf/server.xml file) is recommended1, which includes maximum threads and
accept count configuration, compression of the response content etc.:
<Connector port="8080"
protocol="HTTP/1.1"
redirectPort="8443"
1 Connector settings, especially maxThreads and acceptCount values, should be adjusted accordingly to
achieve high performance and scalability in production run.

CONFIGURATION AND FINE TUNING GUIDE DIGITAL EXPERIENCE MANAGER 7.2
© 2002 – 2016 Jahia Solutions Group SA Page 39 / 115
maxThreads="300" acceptCount="100"
compression="on"
compressableMimeType="text/plain,text/html,text/xml,text/css,text/javascript,application/x-javascript,application/javascript" />
<Connector port="8009" protocol="AJP/1.3" redirectPort="8443"
connectionTimeout="20000" keepAliveTimeout="300000" maxThreads="300" />
3.7.2 IBM WebSphere 8.5.5 The installation and configuration steps for IBM WebSphere are covered in a separate
“WebSphere 8.5.5 Installation Guide” which can be found on our documentation Web page:
https://www.jahia.com/extranet/digital-experience-manager/previous-version-7-
releases/digital-factory-70/digital-factory-70-documentation
3.7.3 Red Hat JBoss EAP 6.x To deploy Digital Experience Manager into an existing Red Hat JBoss EAP 6.x installation several
required steps have to be completed.
Note, please, here we assume the deployment into a JBoss EAP instance, running in a
standalone mode with a default configuration profile.
Nextsubsectionsdescribeallthosesteps,whichareallmandatory.
3.7.3.1 Installation The installation procedure for an existing JBoss server is as follows:
• Launch the Installer.
• Choose the CustomInstall(advanced) installation type.
• Select only DigitalExperienceManager+JahiaCoreContentPlatform pack,
unselecting the AddApacheTomcat one

CONFIGURATION AND FINE TUNING GUIDE DIGITAL EXPERIENCE MANAGER 7.2
© 2002 – 2016 Jahia Solutions Group SA Page 40 / 115
• On the next screen choose the RedHatJBossEAP6.x as the target application server
• Follow the next steps of the Installer.
Once the Installer is finished in your installation directory you should find among others the
jboss folder and, if the location of runtime data folder was not changed during the installation,
the digital-factory-data folder.
3.7.3.2 Deployment preparation Further, it is assumed that your target Red Hat JBoss server is installed in the <jboss> folder
and <install-dir> will reference the folder, where you’ve installed Digital Experience
Manager into using the installer.
1. Copy the content of the <install-dir>/jboss folder into your <jboss> directory.
2. Continue with the steps, described in the next sections.
3.7.3.3 JVM tuning options The default JVM options in the JBoss’ startup script (<jboss>/bin/standalone.conf.bat
or <jboss>/bin/standalone.conf) should be adjusted to use server JVM ("-server"
option), have at least 1280 MB2 heap size (-Xms1280m) and at least 256 MB2 as a limit for the
permanent generation heap size (-XX:MaxPermSize=256M), if applicable, also adding other
tuning options.
This can be done by adjusting the corresponding line in your
<jboss>/bin/standalone.conf.bat file (Windows OS):
set "JAVA_OPTS=-server –Xms2G –Xmx2G -XX:MaxPermSize=384M"
2 For production systems, the memory options should be adjusted accordingly to achieve high performance and
scalability.

CONFIGURATION AND FINE TUNING GUIDE DIGITAL EXPERIENCE MANAGER 7.2
© 2002 – 2016 Jahia Solutions Group SA Page 41 / 115
or in the <jboss>/bin/standalone.conf file (non-Windows OS) – here we use larger
values as an example:
JAVA_OPTS="-server –Xms4G –Xmx4G -XX:MaxPermSize=512M"
The following lines needs to be added to:
• have temporary data (Digital Experience Manager caches, errors, thread and heap dumps)
inside JBoss’ directory structure
• in case the embedded Apache Derby DBMS is used, a Derby home must be set properly,
pointing to the digital-factory-data/dbdata folder
• further GC, thread and heap dump options, which we recommend
On Windows OS:
set "JAVA_OPTS=%JAVA_OPTS% -Djava.io.tmpdir=%JBOSS_HOME%\standalone\tmp"
set "JAVA_OPTS=%JAVA_OPTS% -Dderby.system.home=c:\DigitalExperienceManager-7\digital-factory-data\dbdata"
set "JAVA_OPTS=%JAVA_OPTS% -verbose:gc -XX:+HeapDumpOnOutOfMemoryError -XX:+PrintConcurrentLocks"
And for non-Windows OS:
JAVA_OPTS="$JAVA_OPTS -Djava.io.tmpdir=$JBOSS_HOME/standalone/tmp"
JAVA_OPTS="$JAVA_OPTS -Dderby.system.home=/opt/DigitalExperienceManager-7/digital-factory-data/dbdata"
JAVA_OPTS="$JAVA_OPTS -verbose:gc -XX:+HeapDumpOnOutOfMemoryError -XX:+PrintConcurrentLocks"
3.7.3.4 Server configuration (JBoss should be running) The next steps have to be performed on a started JBoss server instance.
Please, start your JBoss server instance from <jboss>/bin folder by using:

CONFIGURATION AND FINE TUNING GUIDE DIGITAL EXPERIENCE MANAGER 7.2
© 2002 – 2016 Jahia Solutions Group SA Page 42 / 115
On Windows OS:
standalone.bat -b 0.0.0.0
On non-Windows OS:
./standalone.sh -b 0.0.0.0
The 0.0.0.0 value after -b switch means that JBoss will be bound to all available network
interfaces. You could use particular one instead, e.g. 192.168.1.101.
When omitted the JBoss will bind to the loopback address (127.0.0.1) only.
After the JBoss instance is started continue with the next steps.
3.7.3.4.1 Createmanagementuser
When JBoss is running, you could create a server management user (for accessing JBoss
Management UI) by using <jboss>\bin\add-user.bat (Windows platform) or
<jboss>/bin/add-user.sh (non-Windows platform). Provide the required information to
add the user. Alternatively, you could add a user in a non-interactive mode:
On Windows OS:
add-user.bat -u manager -p manager_123
On non-Windows OS:
./add-user.sh -u manager -p manager_123
3.7.3.4.2 ApplyDigitalExperienceManagerspecificconfiguration
For configuring JDBC driver, DB datasource and also deactivating default JBoss ROOT
application (in case Digital Experience Manager will use ROOT Web application context), the
following script has to be executed against running JBoss server instance from <jboss>/bin
folder:

CONFIGURATION AND FINE TUNING GUIDE DIGITAL EXPERIENCE MANAGER 7.2
© 2002 – 2016 Jahia Solutions Group SA Page 43 / 115
Windows OS:
jboss-cli.bat --file=jahia-config.cli
Non-Windows OS:
./jboss-cli.sh --file=jahia-config.cli
3.7.3.4.3 DeployandstartDigitalExperienceManager
The configuration is ready now and we can deploy and start the Digital Experience Manager.
To trigger the deployment, you need to delete the marker file:
<jboss>/standalone/deployments/digitalexperiencemanager.ear.skipdeploy
This will trigger the deployment and startup of the Digital Experience Manager Web application.
3.8 MODULES This chapter applies to the module deployment in DX 7.2.0.0+. For earlier versions of DX,
please, refer to the corresponding versions of this document.
3.8.1 Module deployment Modules are extensions to Digital Experience Manager, which are packaged as JAR files and can
be deployed on a server. A module can contain different kinds of resources: JSPs, definitions in
CND files, CSS and images, resource bundles, XML or ZIP import files, rules definitions, libraries,
Spring files etc.
Modules are deployed by using the built-in module management screen in Server Settings, using
REST API (with supplied command line scripts) or by dropping them into the digital-
factory-data/modules folder (this last option is mostly suited for development
environment).

CONFIGURATION AND FINE TUNING GUIDE DIGITAL EXPERIENCE MANAGER 7.2
© 2002 – 2016 Jahia Solutions Group SA Page 44 / 115
3.8.1.1 Module management UI The module management UI since DX version 7.2 contains an explicit checkbox for starting or
not a module, uploaded via that UI:
as well as a similar checkbox for the modules, downloaded from private app store:

CONFIGURATION AND FINE TUNING GUIDE DIGITAL EXPERIENCE MANAGER 7.2
© 2002 – 2016 Jahia Solutions Group SA Page 45 / 115
3.8.1.2 REST API and command line scripts A new REST API was introduced for module management in DX 7.2 and corresponding
command line scripts are provided in the DX distribution (in a default installation they are
located in the <dx-install-dir>/tools folder).
Examples of usage of such scripts are listed below.
3.8.1.2.1 Installingamodule
./installBundle.sh article-2.0.2.jar true
Installs the specified file as a module and starts it after the installation. if last parameter (true) is
omitted, the module is just installed, but not started automatically.
3.8.1.2.2 Startingamodule
./startBundle.sh org.jahia.modules/article/2.0.2
Starts the article module version 2.0.2. The org.jahia.modules/article/2.0.2 is a full
module key in this case, which is composed like <groupId>/<artifactId>/<version>
string.
The start/stop/ uninstall commands can operate on a full module key as well as on a short one,
like article/2.0.2 or event article, if the corresponding bundle can be resolved by that
key unambiguously, e.g. if there is only one bundle with symbolic name article installed on
your DX instance.
The shorter form will be:
./startBundle.sh article
3.8.1.2.3 Stoppingamodule
./stopBundle.sh org.jahia.modules/article/2.0.2
Or in a shorter form:

CONFIGURATION AND FINE TUNING GUIDE DIGITAL EXPERIENCE MANAGER 7.2
© 2002 – 2016 Jahia Solutions Group SA Page 46 / 115
./stopBundle.sh article
This command stops the target article module.
3.8.1.2.4 Uninstallingamodule
./uninstallBundle.sh org.jahia.modules/article/2.0.2
And the shorter form:
./uninstallBundle.sh article
Uninstalls the target article module from your DX instance.
3.8.1.3 Notes about deployment into /modules folder The deployment of modules is still supported via digital-factory-data/modules folder in
DX 7.2. Although it should be mainly considered for a development phase, rather than for test /
production phases.
The folder is “watched” for changes (new modules are dropped, existing modified or deleted) and
actions are performed by DX to react on those changes. The folder supports module operations
in “hot” (online, while DX is running) as well as in “cold” (offline, when DX is shut down) mode.
If a new module is dropped into that folder, it is by default automatically started if DX is running
in development operating mode (“operatingMode” flag value in jahia.properties file) or
just installed without auto-starting it in case of other operating modes (say, “production”).
If needed, the behavior can be explicitly controlled by adding the following flag into
jahia.properties (or your own jahia.custom.properties) file:
jahia.modules.fileinstall.bundles.new.start=true
Supported values are true or false.

CONFIGURATION AND FINE TUNING GUIDE DIGITAL EXPERIENCE MANAGER 7.2
© 2002 – 2016 Jahia Solutions Group SA Page 47 / 115
3.8.2 Cluster deployment DX 7.2 comes with a built-in clustered module management support, i.e. all module operations,
performed via Module management UI (in Server Settings) or via new REST API / command-line
scripts on any node, are automatically replayed on other nodes in the cluster, so the state of
bundles should be consistent across all nodes in the cluster. When a cluster node is joining the
cluster it “pulls” the bundle state from the cluster and “applies” it locally.
So, the module operations, listed in chapter “3.8.1 Module deployment”, are cluster-wide (e.g. a
module deployed on any node of the cluster will be automatically deployed on the other nodes).
Be aware, please, that direct bundle operations, performed via Java code (on BundleContext
or Bundle instances), any custom scripts, OSGi Web Console or SSH Console (except clustered
commands under cluster:* group), are only effective locally (until the next cluster-wide
operation is performed which synchronizes the cluster state in any case).
Note, please, when a module is deployed in cluster, it becomes “available” only after its
deployment has been successfully completed by a DX processing node.
For information and troubleshooting you could refer to a SSH console and “cluster:*” group
of commands.
The following command:
cluster:bundle-list default
shows the clustered state of bundles in the default group – the global cluster group, which
includes all nodes. This command has a shortcut alias:
clb
which does the same. Here is the sample snapshot of the output of this command:

CONFIGURATION AND FINE TUNING GUIDE DIGITAL EXPERIENCE MANAGER 7.2
© 2002 – 2016 Jahia Solutions Group SA Page 48 / 115
In case of bundle state desynchronization in cluster, e.g. due to a cluster split (network partition)
or other issues, it could be required to force synchronization of cluster state for bundles:
cluster:sync –bundle
or for all resources (bundles, config, features):
cluster:sync
3.8.3 Module undeployment You can undeploy your modules using REST API (or corresponding uninstallBundle.sh
command-line script).
Alternatively, you can undeploy the modules from the Administration > Server settings > System
components > Modules screen. The advantage of doing so using the UI approach is that Digital
Experience Manager will inform you of any modules that might depend on the one you're trying
to undeploy and will first ask you to disable the module from all the sites that might be using it.
In any case, the module undeployment in both cases is a cluster-wide operation as described in
the section “3.8.2 Cluster deployment”.
3.8.4 Deployment on sites Once the JAR file has been deployed, modules become available. They can then be deployed to
Web projects via module management screen in Server Settings or via Studio.
If a new version of the module is uploaded on the server, it will be automatically deployed on all
sites that are currently using it. All updates will be immediately available in the site.

CONFIGURATION AND FINE TUNING GUIDE DIGITAL EXPERIENCE MANAGER 7.2
© 2002 – 2016 Jahia Solutions Group SA Page 49 / 115
4 CONFIGURING SOME DIGITAL EXPERIENCE MANAGER FEATURES
4.1 CONFIGURATION FILES Digital Experience Manager features can be configured in various files. Nevertheless, the main
configuration options are gathered in the jahia.properties and
jahia.node.properties files. The latter one is responsible only for clustering settings.
Since Digital Experience Manager 7.0.0.2 the runtime data and configuration files are located
outside the Web application for better maintainability and customization.
4.1.1 Main configuration files The content of the digital-factory-config folder (or the one, which you’ve chosen as a
target for configuration location during Digital Experience Manager installation) is as follows:
digital-factory-config
`-- jahia
|-- applicationcontext-custom.xml
|-- jahia.properties
|-- jahia.node.properties
`-- license.xml
Where:
• applicationcontext-custom.xml - is a Spring bean definition file (empty by
default), where custom bean definitions could be placed or the Digital Experience
Manager once can be overridden (a bean definition is overridden by its bean ID).
• jahia.properties – main configuration file, which allows customization of most of
Digital Experience Manager features and services.
• jahia.node.properties – configuration file for the clustering options
• license.xml – is a file with your current Digital Experience Manager license

CONFIGURATION AND FINE TUNING GUIDE DIGITAL EXPERIENCE MANAGER 7.2
© 2002 – 2016 Jahia Solutions Group SA Page 50 / 115
4.1.2 Technical details Technically, the digital-factory-config folder is made available to the Digital Experience
Manager via class path, either by adding the path location to some application server specific
files or by creating a JAR file with the content of the digital-factory-config folder and
deploying it to your application server. In effect the content is available for the application using
the classpath lookup like:
getClass().getResource("/jahia/jahia.properties")
or in a Spring framework resource lookup format as:
classpath*:jahia/jahia.properties
4.2 PERSONALIZING URLS
4.2.1 URL Rewriting Please refer to the URL rewriting section in the Developers TechWiki for more information:
http://www.jahia.com/get-started/for-developers/developers-techwiki/urls-management/url-
rewriting
4.2.2 Removing jsessionid from URLs Digital Experience Manager requires that the user’s session is correctly handled. Usually,
applications use cookies to track the session. If cookies are not available on the client or the
client connects for the first time, the application server adds a parameter in all links to handle
session tracking. This parameter can create issues when indexing links by search engines. Digital
Experience Manager can automatically remove it from all links. This feature can be enabled in
the jahia.properties file:
# Disable the jsessionid parameter added by application server to track session when no cookie is present
disableJsessionIdParameter = true

CONFIGURATION AND FINE TUNING GUIDE DIGITAL EXPERIENCE MANAGER 7.2
© 2002 – 2016 Jahia Solutions Group SA Page 51 / 115
By default, the session ID parameter removal is enabled, and it won’t appear in links. If you need
to support browsers which do not handle cookies, you can disable this feature.
4.2.3 Changing context and port number
4.2.3.1 During the installation Changing the Digital Experience Manager Web application context path (the default one is
ROOT) as well as default Apache Tomcat port numbers – in case Tomcat pack is selected – is
possible during the installation via Installer UI, by choosing and completing the “Custom install”
option at the beginning. See the “3.2.3.3.1 Apache Tomcat configuration” and “3.2.3.3.2 Web
application settings” sections for more details.
4.2.3.2 After the installation Once you have installed Digital Experience Manager, you will still be able to change those values
if required.
To change the port, you just need to configure it at application server level. Please refer to your
application server documentation.
If you need to change the context path, you will need to redeploy your Jahia application using
this new context path. Refer to your application server documentation if you need some
additional information about how to do this.
4.2.3.3 Permanent move for vanity URLs In Digital Experience Manager, you can define SEO friendly vanity URLs. There can be more than
one URL for the same resource, whereas only one can be set as the default one. With the
permanentMoveForVanityURL setting in the jahia.properties configuration file you can
control access with a non-default vanity URL. Digital Experience Manager should inform the
client that the resource has permanently moved (HTTP status code 301). This is the default
behavior. If you set the parameter to false, then Digital Experience Manager will serve the
request without changing the URL to the new default one.

CONFIGURATION AND FINE TUNING GUIDE DIGITAL EXPERIENCE MANAGER 7.2
© 2002 – 2016 Jahia Solutions Group SA Page 52 / 115
4.3 CACHING
4.3.1 Introduction
Caches are essential to high-performing web systems such as Digital Experience Manager to be
able to avoid recreating dynamic content under large system loads. In the graph above, we can
see the basic architecture of the cache sub-system.
The main focus in Digital Experience Manager v7.2.0 lies on the Module Cache (HTML content
output cache) which is using the Ehcache implementation.
Digital Experience Manager uses multiple cache layers to optimize the performance of page
delivery:
• the browser cache
• front-end HTML caches (skeleton/module cache)
• object caches
• content repository/database caches
Each of these cache layers plays a different role in making sure values are only computed once.

CONFIGURATION AND FINE TUNING GUIDE DIGITAL EXPERIENCE MANAGER 7.2
© 2002 – 2016 Jahia Solutions Group SA Page 53 / 115
4.3.2 The browser cache layer While not integrated in Digital Experience Manager, but in the browser, the browser cache plays
a critical role in guaranteeing good performance for the end-user.
For example, Digital Experience Manager’s usage of the GWT framework makes it possible for
AJAX source code to be aggressively cached in the browser cache; therefore making sure we
don’t reload script code that has not changed. Digital Experience Manager also properly
manages the browser cache to make sure it does not cache page content that has changed. It
also controls expiration times for cached content, so that the browser does not request content
that is rarely changed.
4.3.3 The front-end HTML cache layer Historically, Jahia has had many front-end HTML cache layer implementations. The first was the
full-page HTML cache. While very efficient when a page was already available in the cache, it did
not degrade very well for pages that had a fragment of the HTML that changed from page to
page, or from user to user (for example, displaying the user name on the page). Digital
Experience Manager v6.5 changed that and it combines the sheer efficiency of the embedded
full-page cache with the fragment handling of a page.
This new cache implementation is called the “Module Cache” (previously Container Cache) and
integrates fragment caching at a module level, making the interaction with templates very
natural. Template developers usually do not have to add any markup in order to have their
fragments correctly cached. Even when they need to control the fragment generation, this is
much easier to do than in previous versions of Digital Experience Manager.
The HTML code of each module is aggregated on runtime to render the page for the end user.
For each module, we try to maximize its sharing by building complex keys, considering several
parameters like roles/templates/etc. That way we can share this rendering with a maximum
number of other users that have the same rights.
We also detect cases where more than one parallel request tries to obtain the same fragment,
which is not yet cached. In such cases, to not waste resources we let just one request do the
work and make the other request(s) wait for it. If rendering the module takes too long, the

CONFIGURATION AND FINE TUNING GUIDE DIGITAL EXPERIENCE MANAGER 7.2
© 2002 – 2016 Jahia Solutions Group SA Page 54 / 115
waiting request gets cancelled with an exception saying “Module generation takes too long due
to module not generated fast enough (>10000 ms)”. As such errors should be taken seriously see
chapter “7.3 How to handle module generation timeouts?” for hints how to solve such issues.
4.3.4 Object caches The next layer below the front-end HTML cache sub-systems are the object caches. This layer
handles all Digital Experience Manager objects that represent sites, users, groups, etc. It serves
as a layer on top of the content repository/database caches to avoid reconstructing objects for
each model request. This is all handled internally by Digital Experience Manager and it is only
important to interact with these caches if integrators are directly calling Digital Experience
Manager’s API to perform object changes that do not automatically update the caches
scheduling / batching.
4.3.5 Content repository caches As we moved all content objects to the Java content repository, the object and database caches
are used less than in previous Digital Experience Manager versions. Retrieving content objects
from the JCR does not require as many additional caches as before. The content repository
optimizes the performance with some internal caches. See section “5.10 Increasing
bundleCacheSize” for how to tune the content repository bundle caches for optimized
performance.
4.3.6 Ehcache configuration A new section “5.3 Cache configuration” has been added.
4.4 CLUSTERING
4.4.1 Introduction Deploying Digital Experience Manager in a cluster is a very powerful way of distributing CPU
and memory load to handle larger traffic sites.
A typical Digital Experience Manager cluster installation is illustrated in the graph below.

CONFIGURATION AND FINE TUNING GUIDE DIGITAL EXPERIENCE MANAGER 7.2
© 2002 – 2016 Jahia Solutions Group SA Page 55 / 115
All Digital Experience Manager nodes, belonging to the same cluster, share the same database
schema to have a common data storage.
Digital Experience Manager v7.2.0 is largely based on Apache Jackrabbit and thus relies on its
clustering capabilities and configuration. See http://wiki.apache.org/jackrabbit/Clustering for
more details. In Digital Experience Manager uses Jackrabbit’s DataStore (see
http://wiki.apache.org/jackrabbit/DataStore for more details of how it works). This way it is now
possible and recommended to store large files on a shared file-system, while storing everything
in the database is still an option.
Indexes in Jackrabbit have to be local to each cluster node and cannot be shared.
For Jackrabbit, every change made by one cluster node is reported in a journal (database table).
Cluster nodes read the journal and update their state at a configurable synchronization interval.
Ehcache is another component, which needs communication between nodes. We are using
JGroups as a communication channel, by default.
Since DX 7.2, there is one more cluster communication channel (using Hazelcast) which is part of
the clustered module deployment feature.

CONFIGURATION AND FINE TUNING GUIDE DIGITAL EXPERIENCE MANAGER 7.2
© 2002 – 2016 Jahia Solutions Group SA Page 56 / 115
4.4.1.1 BROWSING nodes “Browsing” nodes are specialized Digital Experience Manager nodes that only serve as content
publishing nodes. They also interact with portlets to render pages. Using this node specialization
allows to separate the browsing load from authoring and background processing loads.
4.4.1.2 AUTHORING nodes Digital Experience Manager “authoring” nodes are cluster nodes that can be used to either
browse or edit Digital Experience Manager content. This is the most common usage of Digital
Experience Manager nodes, and therefore it is interesting to have multiple instances of these
nodes to distribute the load.
4.4.1.3 PROCESSING node In Digital Experience Manager, long-running tasks such as workflow validation operations, copy
and pasting, content import and indexing are executed as background tasks, which can be
resource intensive. This way, while these long operations are executed, other nodes are still able
to process content browsing and editing requests.
TherecanbeonlyoneprocessingnodeinDigitalExperienceManagercluster.
4.4.2 Configuration It is essential that when binary data is stored on a file system (the default and preferred option),
all cluster nodes should point to the same shared directory to store binary data in a common file
data store. During installation of a cluster node you will be asked to enter the “Path to Data
Store files” (on the step for configuring database: see section “3.2.3.2 Database”).
To install your Digital Experience Manager cluster, you will have to install your cluster nodes one
after the other.
• For the first one, proceed as if you were installing a standalone Digital Experience
Manager, excepted that you need to specify that you are installing a cluster at the
“Operating mode” step. If you have chosen to use the bundled Tomcat as application
server, do not start it at the end of the wizard.

CONFIGURATION AND FINE TUNING GUIDE DIGITAL EXPERIENCE MANAGER 7.2
© 2002 – 2016 Jahia Solutions Group SA Page 57 / 115
• For the other nodes, execute the wizard again, connecting to same database. This time
just specify that the schema does not have to be created (uncheck “Create required
database tables” checkbox). On the screen where you configure your cluster, take care to
define a new server ID or keep <auto> for an auto-generated value. If you have already
set a node to be the processing server, uncheck the option as only one node can have this
role in your cluster.
The cluster configuration is by default located in the digital-factory-
config/jahia/jahia.node.properties file under:
######################################################################
### Cluster settings ################################################
######################################################################
Note, please, that with the Digital Experience Manager v7.2.0 there is no longer needed to
configure a fixed list of IP addresses of all cluster nodes. We switched to a DB-based member
discovery mechanism (all Digital Experience Manager cluster nodes share the same DB schema)
to make the configuration much simpler.
4.4.3 Sharing webapps Web applications need to support clustering on their own to be able to fully work in a clustered
Digital Experience Manager environment.
You have to deploy the webapp on each node of the Digital Experience Manager cluster. If this
webapp stores some data, you will have to ensure that each instance of your webapp shares the
same data, and do not duplicate it, otherwise you may encounter some functional issues. Refer
to your webapp documentation to perform this.
4.4.4 Sticky sessions If you are using a hardware or software load balancer in front of Digital Experience Manager to
handle the distribution of load among all Digital Experience Manager nodes in the cluster, you
will need to activate "sticky sessions" on your application server and the load balancer. This is

CONFIGURATION AND FINE TUNING GUIDE DIGITAL EXPERIENCE MANAGER 7.2
© 2002 – 2016 Jahia Solutions Group SA Page 58 / 115
required to force an open session to make all requests on the same server for the time of the
session.
On Tomcat, this is done by adding a unique jvmRoute attribute in the server.xml file:
<Engine name="Catalina" defaultHost="localhost" jvmRoute="jvm1">
where jvm1 is the name of the worker as declared in the load-balancer.
The jvmRoute attribute value can be specified during the installation of Digital Experience
Manager instance on the screen with cluster configuration settings (="Server ID of this node").
You can also see the reference guide for the configuration of the load balancer on the Apache
web site: http://tomcat.apache.org/connectors-doc/reference/workers.html.
4.4.5 Starting up The first time the cluster is started, the processing server must be started first and standalone.
Once the initialization process is completely finished, you can start the other cluster nodes.
4.4.6 Distributed sessions and failover support For authenticated users, the Digital Experience Manager stores data in the HTTP session. By
default, this data is stored in memory of the server, where requests of a session are routed to.
When the server is shut down, all this session data disappears and the user will have to login
again and eventually re-do steps.
For higher availability and up-time we recommend storing the session data in an external
system, so that sessions survive a stopped server and that other servers can continue working
on user requests, which were previously served from the stopped server. This way the user will
not even perceive that there was a problem and will not get unsatisfied.
From Digital Experience Manager v7.1.2 onwards you can deploy the distributed-sessions
module, which in its first version offers the ability to store session data in Redis. As the module’s
session manager is based on Spring Session more technologies may get added in future.
So, for now you first need to install and run Redis 2.8+ (http://redis.io/download).
Then download and install the distributed-sessions module from our AppStore.

CONFIGURATION AND FINE TUNING GUIDE DIGITAL EXPERIENCE MANAGER 7.2
© 2002 – 2016 Jahia Solutions Group SA Page 59 / 115
You need to make the following configuration changes on all Digital Experience Manager cluster
nodes.
In WEB-INF/web.xml of the DX web-application add the following two filter definitions:
<filter> <filter-name>springSessionRepositoryFilter</filter-name> <filter-class>org.jahia.bin.filters.ModuleDelegatingFilterProxy</filter-class> <async-supported>true</async-supported> </filter> <filter> <filter-name>httpSessionSynchronizerFilter</filter-name> <filter-class>org.jahia.bin.filters.ModuleDelegatingFilterProxy</filter-class> <async-supported>true</async-supported> </filter>
Lower in the same file you need to add filter-mapping elements, which must be placed right
after the first filter-mapping element for CharacterEncodingFilter:
<filter-mapping> <filter-name>springSessionRepositoryFilter</filter-name> <url-pattern>/*</url-pattern> </filter-mapping> <filter-mapping> <filter-name>httpSessionSynchronizerFilter</filter-name> <url-pattern>/*</url-pattern> </filter-mapping>
It is also important that in digital-factory-config/jahia/jahia.properties the
setting for jahiaGeneratedResourcesDiskPath needs to be uncommented and should
point to a shared network folder, which is accessed by all cluster nodes:
jahiaGeneratedResourcesDiskPath=${jahia.data.dir}/generated-resources/
To configure the session manager with the connection to Redis, the cookie and jvmRoute
settings (the settings from Tomcat’s server.xml are not detected) you need to add the
following parameters to digital-factory-config/jahia/jahia.node.properties
(adapt them to your environment):
jahia.session.redis.host = localhost jahia.session.redis.port = 6379 jahia.session.redis.database = 0 jahia.session.redis.timeout = 2000 jahia.session.cookieName = JSESSIONID

CONFIGURATION AND FINE TUNING GUIDE DIGITAL EXPERIENCE MANAGER 7.2
© 2002 – 2016 Jahia Solutions Group SA Page 60 / 115
jahia.session.cookiePath = / jahia.session.cookieMaxAge = -1 jahia.session.useHttpOnlyCookie = true jahia.session.jvmRoute = node1
You do not need to set the jvmRoute (which will be appended to the session cookie name) if
your load balancer does not use that cookie to ensure sticky sessions, but sets an own routing
cookie.
Like mentioned in section 4.4.4 Sticky sessions it is required in Digital Experience Manager to
have sticky sessions configured. Only for live mode, when the content is just read-only, sticky
sessions are not mandatory. The reason is that writes to the content repository can take up to
around 5 seconds to get synchronized to other cluster nodes. So to make an immediate
subsequent read request see the current update, the read request needs to be served by the
same server as the write request, which is ensured with sticky sessions.
For some actions in administration or our tools section, we recommend bypassing the load
balancer, especially for
• module or portlet deployment/activation
• site import (for site import in Digital Experience Manager we do not provide failover
support)
• obtaining the status of certain cluster nodes.
Another limitation is that Atmosphere websockets cannot be used together with our module
based on Spring Session.
Notice that for now we have tested and support the distributed-sessions module just with
Tomcat.
Also, before you start using the feature you need to first thoroughly test it with your application
in a test environment. You need to make sure that all the custom objects you write to the HTTP
session are serializable. The objects should also not be too huge in size, because the
HTTPSession object now is created and deserialized on each single request (so there no longer is
a HTTPSession object, which exists for the whole session lifetime). Therefore, you should also
not store references to HTTPSession objects, because these just show the parameters at the

CONFIGURATION AND FINE TUNING GUIDE DIGITAL EXPERIENCE MANAGER 7.2
© 2002 – 2016 Jahia Solutions Group SA Page 61 / 115
time, when the session object instance was created to serve that specific request. This instance
will afterwards not see changes whenever session objects are added or removed. You should
also not update a mutable object held in session from some custom background thread, which
does not pass through the servlet filter to write back session object changes to the external
store.
You should also check that your custom processing does not rely on storing or reading data on a
resource, which is just available from one cluster node, because after failover to a different
server node this resource will not be available.
4.5 LDAP LDAP is an application protocol for querying and modifying directory services running over
TCP/IP. Digital Experience Manager has default connectors to retrieve users/groups from an
LDAP server. Digital Experience Manager supports most LDAP servers right out of the box,
including OpenLDAP and ActiveDirectory. It is most commonly used with SSO technologies to
provide a seamless experience to end-users.
The LDAP configuration is deployed as an OSGi configuration, bound to the “Jahia LDAP
connection (ldap)” module bundle, available in the Digital Experience Manager 7.2.0 Enterprise
Distribution.
The LDAP user and group providers can be configured during the Installation Wizard by
activating “Configure an LDAP user/group provider” option and providing your LDAP server
specific parameters. After the installation, an LDAP user/group provider can be configured using
the administration UI under Server settings / Users and Roles / User and group providers.
Please visit the following documentation for more details: https://www.jahia.com/community/extend/developers-techwiki/users-and-groups/ldap-connector-71

CONFIGURATION AND FINE TUNING GUIDE DIGITAL EXPERIENCE MANAGER 7.2
© 2002 – 2016 Jahia Solutions Group SA Page 62 / 115
4.6 AUTHENTICATION
4.6.1 Single Sign-On: CAS The Central Authentication Service (CAS) is a single sign-on protocol for the web. Its purpose is
to permit a user to access multiple applications while providing their credentials (such as user id
and password) only once.
When the client visits Digital Experience Manager and wants to authenticate, Digital Experience
Manager redirects the user to the CAS server. CAS validates the client's authenticity, usually by
checking a username and password against a database (such as LDAP or Active Directory).
If the authentication succeeds, CAS returns the client to Digital Experience Manager, passing
along a security ticket. Digital Experience Manager then validates the ticket by contacting CAS
over a secure connection and providing its own service identifier and the ticket. CAS then gives
the application trusted information about whether a specific user has successfully authenticated.
Digital Experience Manager uses Jasig CAS 3.1 Java client, which adds support for CAS 2.0
specification features (http://www.jasig.org/cas/protocol), like multi-tier proxy authentication
etc.
The following section gives an overview of configuration options.
4.6.1.1 Digital Experience Manager side Step 1 - The first file to configure is:
<digital-factory-config>\jahia\jahia.properties
Here the values that you would want to change are:
######################################################################
### CAS Authentication config ########################################
######################################################################
# Enable CAS authentication valve
auth.cas.enabled = false

CONFIGURATION AND FINE TUNING GUIDE DIGITAL EXPERIENCE MANAGER 7.2
© 2002 – 2016 Jahia Solutions Group SA Page 63 / 115
# URL prefix of the CAS server
auth.cas.serverUrlPrefix = https://localhost:8443/cas
# Redirect URL to the CAS server for login
auth.cas.loginUrl = ${auth.cas.serverUrlPrefix}/login
# Logout URL to invalidate the user session on the CAS server
auth.cas.logoutUrl = ${auth.cas.serverUrlPrefix}/logout
Please note, the CAS server should be accessed using HTTPS protocol. See “4.6.1.2 Configuring
ticket validator” section for advanced configuration.
Step 2 - Add the login link in a Digital Experience Manager view:
In the Studio mode, you can use the “Login” component to place a link for the login page into
your template.
Alternatively, in your template code you can use the following expression to have a proper link
(considering CAS server login page):
<%@ taglib prefix="c" uri="http://java.sun.com/jsp/jstl/core" %>
<a href="<c:url value='${url.login}'/>">Log in</a>
To add only a logout URL, you can use:
<%@ taglib prefix="c" uri="http://java.sun.com/jsp/jstl/core" %>
<a href="<c:url value='${url.logout}'/>">Log out</a>
The page https://wiki.jasig.org/ contains some information to configure your CAS server. The
following “How-To” can be also helpful: http://jira.jahia.org/browse/JKB-22.
A good architecture would separate the CAS server from the other application servers.

CONFIGURATION AND FINE TUNING GUIDE DIGITAL EXPERIENCE MANAGER 7.2
© 2002 – 2016 Jahia Solutions Group SA Page 64 / 115
4.6.1.2 Configuring ticket validator By default, Digital Experience Manager uses the org.jasig.cas.client.validation.Cas20ServiceTicketValidator
implementation for ticket validation, which validates Service Tickets in compliance with the CAS
2 (using /serviceValidate service endpoint).
The validator implementation is pluggable and can be replaced with e.g. the
org.jasig.cas.client.validation.Cas20ProxyTicketValidator one
(/proxyValidate endpoint), which also supports ticket validation using configured list of
proxies.
To override the default implementation the following configuration option should be added into
jahia.properties file with the ID of the Spring bean, representing the validator
(implementation of the org.jasig.cas.client.validation.TicketValidator
interface), for example:
auth.cas.ticketValidator=Cas20ProxyTicketValidator
And the corresponding bean can be defined in a Spring file, e.g. <digital-factory-
config>\jahia\applicationcontext-custom.xml as follows:
<bean id="Cas20ProxyTicketValidator" class="org.jasig.cas.client.validation.Cas20ProxyTicketValidator" scope="prototype">
<constructor-arg index="0" value="${auth.cas.serverUrlPrefix}" />
<property name="acceptAnyProxy" value="true"/>
<property name="allowedProxyChains">
<value>
http://proxy1 http://proxy2
http://proxy3 http://proxy4
</value>
</property>

CONFIGURATION AND FINE TUNING GUIDE DIGITAL EXPERIENCE MANAGER 7.2
© 2002 – 2016 Jahia Solutions Group SA Page 65 / 115
</bean>
The bean defines a list of proxy chains and can accept other supported parameters, like renew,
encoding, proxyCallbackUrl, proxyGrantingTicketStorage, etc.
4.6.1.3 Troubleshooting If you have errors of the form:
org.jahia.exceptions.JahiaException: User message=Cannot validate CAS credentials, System message=Cannot validate CAS credentials, root
It is most probably due to your SSL certificate, and that the JVM that runs the Jahia does not
recognize it.
Refer to https://wiki.jasig.org/display/CAS/Solving+SSL+issues for more details.
4.6.2 SSO with Kerberos Digital Experience Manager is able to plug-in different authentication policies via HTTP filters
and a pipeline of authentication valves. Some filters and valves are provided and can be
activated by configuration, like NTLM or the integration of a CAS (Central Authentication
Service) server.
We also provide a filter and valve for integration with SPNEGO (Simple and Protected GSSAPI
Negotiation Mechanism) to negotiate with the client and use either Kerberos or NTLM as a
fallback. This way a non-interactive login is possible, which takes the user logged in to the
operating system running the browser.
Such a secure solution is especially interesting for intranets running with Windows servers. This
document describes how to configure such an environment.

CONFIGURATION AND FINE TUNING GUIDE DIGITAL EXPERIENCE MANAGER 7.2
© 2002 – 2016 Jahia Solutions Group SA Page 66 / 115
4.6.2.1 Prerequisites
If using WindowsServer2008, then at least ServicePack2 needs to be installed (otherwise
only simple Kerberos user logons, e.g. via CAS, work, but checks against a Service Principle
Name, SPN, will not work, as this one contains slashes, see Microsoft KB article: 951191).
For this guide, we assume that you are using the Windows Active Directory server. If you want
to use Kerberos, then all clients and servers need to be joined in the same AD domain. If this
requirement is not met, then SPNEGO will fall back to NTLM. It should also be possible to use
other directory servers supporting Kerberos and you can take this guide to get some useful
information also relevant for alternative environments.
In the guide, all terms in angle brackets <> should be replaced by terms fitting your environment
or your choice. Notice also that realm names are case-sensitive and recommended to be used in
UPPER CASE. Also with Kerberos you will not be able to use IP addresses or localhost but
rather you will have to use the server name (DNS must be properly set up).
4.6.2.2 Set up the Active Directory A Service Principal Name (SPN) account needs to be created for the Jahia server. Note that this
account can't be used to log in.
1. Start the ActiveDirectoryUserandComputers from the AdministrationTools menu.
2. Right click on the Users repository and select New>User.
3. Enter the user information (by example <your-spn-account> for user login), press
Next.
4. Enter the <password> and select Passwordneverexpires, click on Next and then on
Finish.
Now in Windows server 2008 there is an extra step, which is not required in Windows server
2003:
In a console enter the command:

CONFIGURATION AND FINE TUNING GUIDE DIGITAL EXPERIENCE MANAGER 7.2
© 2002 – 2016 Jahia Solutions Group SA Page 67 / 115
setspn -a http/<your.jahia.server.name><your-spn-account>
4.6.2.3 Create the Keytab file The Keytab file enables a trust link between the Digital Experience Manager server and the Key
Distribution Center (KDC). This file contains a cryptographic key. The ktpass tool, which comes
from the Windows Resource Kit (http://go.microsoft.com/fwlink/?LinkId=62270), is used to
generate this file (in Windows Server 2008 the tool is already part of the product).
In a console, enter the command:
ktpass.exe /out <your-spn-account>.keytab /princ host/<your.jahia.server.name>@<YOUR.AD.REALM> /pass * /mapuser <your-spn-account> /ptype {krb5_nt_principal} /crypto {rc4-hmac-nt}
This command will generate the <your-spn-account>.keytab file, which has to be copied
to a secret place on the Jahia server, which only the Jahia server application can read.
4.6.2.4 Create Kerberos configuration file (krb5.conf) On the Digital Experience Manager server create the Kerberos configuration file (krb5.conf)
and place it somewhere on the Digital Experience Manager server. In the startup script of the
Digital Experience Manager server you need to add the following parameter to pick up this file:
set JAVA_OPTS=%JAVA_OPTS% -Djava.security.krb5.conf=<path>\krb5.conf
Here is an example:
<YOUR.REALM> is the same as the domain in caps. With evolving versions, you may, for
instance, have to change the enctypes settings.
[libdefaults]
ticket_lifetime = 24000
default_realm = <YOUR.REALM>
default_tkt_enctypes = rc4-hmac des3-cbc-sha1 des-cbc-md5 des-cbc-crc

CONFIGURATION AND FINE TUNING GUIDE DIGITAL EXPERIENCE MANAGER 7.2
© 2002 – 2016 Jahia Solutions Group SA Page 68 / 115
default_tgs_enctypes = rc4-hmac des3-cbc-sha1 des-cbc-md5 des-cbc-crc
permitted_enctypes = rc4-hmac des3-cbc-sha1 des-cbc-md5 des-cbc-crc
[realms]
<YOUR.REALM> = {
kdc = <hostname.of.your.kdc>.<your.domain>
}
[domain_realm]
.<your.domain> = <YOUR.REALM>
<your.domain> = <YOUR.REALM>
[logging]
kdc = FILE:/var/log/krb5kdc.log
admin_server = FILE:/var/log/kadmin.log
default = FILE:/var/log/krb5lib.log
4.6.2.5 Create JAAS login configuration file (jaas-login.conf) On the Digital Experience Manager server create the JAAS login configuration file (jaas-
login.conf) and place it in a secret place accessible for the Digital Experience Manager server
only. In the startup script of the Digital Experience Manager server you need to add the
following parameter to pick up this file:
set JAVA_OPTS=%JAVA_OPTS% -Djava.security.auth.login.config=<path>\jaas-login.conf
set JAVA_OPTS=%JAVA_OPTS% -Djavax.security.auth.useSubjectCredsOnly=false

CONFIGURATION AND FINE TUNING GUIDE DIGITAL EXPERIENCE MANAGER 7.2
© 2002 – 2016 Jahia Solutions Group SA Page 69 / 115
Here is an example of the content:
com.sun.security.jgss.accept {
com.sun.security.auth.module.Krb5LoginModule
required
storeKey=true
keyTab="<path>/<your-spn-account>.keytab"
doNotPrompt=true
useKeyTab=true
principal="HTTP/<your.jahia.server.name>@<YOUR.REALM>"
isInitiator=false
debug=false;
};
4.6.2.6 Test the SPN account As it is quite easy to make mistakes in the Kerberos configuration, you should test your
configuration with the tools provided by Java, before starting Digital Experience Manager.
In order to have those tests work, you have to copy your krb5.conf file in your windows
system directory and rename it krb5.ini (most often c:\windows\krb5.ini)
Verify that you are able to read the keytab file:
%JAVA_HOME%/bin/klist -k FILE:<path>/<your-spn-account>.keytab
and
%JAVA_HOME%/bin/kinit -k -t FILE:<path>/<your-spn-account>.keytab HTTP/<your.jahia.server.name>@<YOUR.REALM>
%JAVA_HOME%/bin/klist

CONFIGURATION AND FINE TUNING GUIDE DIGITAL EXPERIENCE MANAGER 7.2
© 2002 – 2016 Jahia Solutions Group SA Page 70 / 115
4.6.2.7 Set up the browser
4.6.2.7.1 InternetExplorer(min5.0.1)
1. In Internet Explorer, click InternetOptions on the Tools menu.
2. Click on the Advanced tab, click to select the EnableIntegratedWindows
Authentication(requiresrestart) check box in the Security section, and then click OK.
3. Click on the Security tab, click to select LocalIntranet, then click on Sites, lastly click on
Advanced.
4. Enter https://<your.jahia.server.name> and validate it by clicking on Add and
OK.
5. Restart Internet Explorer.
4.6.2.7.2 Firefox(min0.9)
1. In Firefox, enter about:config as the URL and click on Go.
2. On the line network.negotiate-auth.trusted-uris, right-click on Modify and
enter https://<your.jahia.server.name>
4.6.2.8 Activate the SPNEGO HTTP filter and authentication valve in Digital Experience Manager
Kerberos authentication in Digital Experience Manager 7.2.0 is only supported with Enterprise
Distribution. To activate it, you need to set the auth.spnego.enabled property in
jahia.properties to true and restart the server.
4.6.2.9 Activate the SPNEGO filter for specific subnets only This feature is supported since DX version 7.1.2.0.
To activate SPNEGO filter for specific subnets only, you need to specify these subnets via the
auth.spnego.onlyForSubnets property in jahia.properties. Please note that the

CONFIGURATION AND FINE TUNING GUIDE DIGITAL EXPERIENCE MANAGER 7.2
© 2002 – 2016 Jahia Solutions Group SA Page 71 / 115
desired subnets have to be declared using the CIDR notation. Activating the SPNEGO filter only
for some subnets still allows guest users from other IPs to access the website.
CIDR notation is a compact representation of an IP address and its associated routing prefix. The
notation is constructed from an IP address, a slash ('/') character, and a decimal number. The
number is the count of leading 1 bits in the routing mask, traditionally called the network mask.
The IP address is expressed according to the standards of IPv4 or IPv6.
As example:
192.168.100.14/24 represents the IPv4 address 192.168.100.14 and its associated routing
prefix 192.168.100.0, or equivalently, its subnet mask 255.255.255.0, which has 24 leading 1-
bits.
CIDR Host bits Subnet mask Addresses in subnet Typical usage /8 24 255.0.0.0 16777216 = 224 /9 23 255.128.0.0 8388608 = 223
/10 22 255.192.0.0 4194304 = 222 /11 21 255.224.0.0 2097152 = 221 /12 20 255.240.0.0 1048576 = 220 /13 19 255.248.0.0 524288 = 219 /14 18 255.252.0.0 262144 = 218 /15 17 255.254.0.0 131072 = 217 /16 16 255.255.0.0 65536 = 216 /17 15 255.255.128.0 32768 = 215 ISP / large business /18 14 255.255.192.0 16384 = 214 ISP / large business /19 13 255.255.224.0 8192 = 213 ISP / large business /20 12 255.255.240.0 4096 = 212 Small ISP / large business /21 11 255.255.248.0 2048 = 211 Small ISP / large business /22 10 255.255.252.0 1024 = 210 /23 9 255.255.254.0 512 = 29 /24 8 255.255.255.0 256 = 28 Large LAN /25 7 255.255.255.128 128 = 27 Large LAN /26 6 255.255.255.192 64 = 26 Small LAN /27 5 255.255.255.224 32 = 25 Small LAN /28 4 255.255.255.240 16 = 24 Small LAN /29 3 255.255.255.248 8 = 23 Smallest multi-host network /30 2 255.255.255.252 4 = 22 "Glue network" (point to point links)

CONFIGURATION AND FINE TUNING GUIDE DIGITAL EXPERIENCE MANAGER 7.2
© 2002 – 2016 Jahia Solutions Group SA Page 72 / 115
/31 1 255.255.255.254 2 = 21 Point to point links (RFC 3021) /32 0 255.255.255.255 1 = 20 Host route
4.6.2.10 Related links Here are some links for further reading and troubleshooting:
Title URL
Kerberos with Java
Troubleshooting
http://java.sun.com/j2se/1.5.0/docs/guide/security/jgss/tutor
ials/Troubleshooting.html
Advanced Security
Programming in Java SE ...
Single Sign-On
http://java.sun.com/javase/6/docs/technotes/guides/security
/jgss/lab/
Kerberos Authentication
problems – Service Principal
Name (SPN) issues
http://blogs.technet.com/b/askds/archive/2008/05/29/kerbe
ros-authentication-problems-service-principal-name-spn-
issues-part-1.aspx
Setting up CAS with SPNEGO
Authentication Handler
https://wiki.jasig.org/display/CASUM/SPNEGO
4.6.2.11 Tips and Tricks First of all, we recommend you to take a look at
http://blogs.technet.com/b/askds/archive/2008/03/06/kerberos-for-the-busy-admin.aspx for
information about how Kerberos works.
This Article shows how to resolve common errors
4.6.2.11.1 ERROR[ErrorLoggingFilter]-Unexpectedexceptionoccurred
ERROR [SpnegoParser] - Failed to parse: 32
INFO [SpnegoParser] - [0,APPLICATION_CONSTRUCTED_OBJECT,0x4e] Expected type identifier

CONFIGURATION AND FINE TUNING GUIDE DIGITAL EXPERIENCE MANAGER 7.2
© 2002 – 2016 Jahia Solutions Group SA Page 73 / 115
INFO [SpnegoParser] - Expected length 84 mismatch against actual 30
INFO [SpnegoParser] - [2,OID,0x4c] Expected oid identifier
ERROR [ErrorLoggingFilter] - Unexpected exception occurred
java.lang.NullPointerException
This error means that the Kerberos authentication is not done on the client browser.
Resolution: Check your Kerberos configuration with klist and kinit tools. Look at
http://support.microsoft.com/default.aspx?scid=kb;EN-US;262177 to activate Kerberos event
logging.
4.6.2.11.2 KrbException:Clockskewtoogreat(37)
This error occurs when there is more than 5 minutes between the Kerberos’ domain controller
and the Digital Experience Manager server times.
Resolution: Check time and time zone.
4.7 DOCUMENT CONVERTER Digital Experience Manager Document Converter Service delegates conversion tasks to an
OpenOffice/LibreOffice instance, either to a local one or a remote service. To use the converter
service, you need OpenOffice/LibreOffice v3 or higher installed (the latest stable 4.x version is
recommended). Further in this document, we refer to OpenOffice or LibreOffice as
“OpenOffice” for the sake of simplicity.
In order to enable the service the following setting should be set to true in the
jahia.properties file:
######################################################################
### Document Converter Service #######################################
######################################################################
# Set this to true to enable the document conversion service
documentConverter.enabled = true

CONFIGURATION AND FINE TUNING GUIDE DIGITAL EXPERIENCE MANAGER 7.2
© 2002 – 2016 Jahia Solutions Group SA Page 74 / 115
4.7.1 LocalOpenOffice instance The converter service is capable of creating an OpenOffice process and using it, in case Digital
Experience Manager and OpenOffice are located on the same machine.
In such case, the converter service starts a local instance of the OpenOffice service for
processing conversion tasks.
The configuration in this case is pretty simple: a service needs to be enabled (see above) and a
path to the OpenOffice folder has to be provided in the jahia.properties file:
######################################################################
### Document Converter Service #######################################
######################################################################
# Set this to true to enable the document conversion service
documentConverter.enabled = false
# The filesystem path to the OpenOffice
# Usually for Linux it is: /usr/lib/openoffice
# for Windows: c:/Program Files (x86)/OpenOffice 4
# and for Mac OS X: /Applications/OpenOffice.org.app/Contents
documentConverter.officeHome = /usr/lib/openoffice
4.7.2 RemoteOpenOffice service The converter service is capable of using an OpenOffice process started as a service on a local
or remote machine.
This connection is configured as given below in the snapshot of the applicationcontext-
doc-converter.xml file:
<bean id="DocumentConverterService"
class="org.jahia.services.transform.DocumentConverterService"
init-method="start" destroy-method="stop">

CONFIGURATION AND FINE TUNING GUIDE DIGITAL EXPERIENCE MANAGER 7.2
© 2002 – 2016 Jahia Solutions Group SA Page 75 / 115
<property name="enabled" value="true"/>
<property name="officeManagerBeanName" value="remoteOfficeManagerFactory"/>
</bean>
<bean name="remoteOfficeManagerFactory"
class="org.jahia.services.transform.RemoteOfficeManagerFactory"
lazy-init="true">
<property name="host" value="192.168.1.101"/>
<property name="portNumber" value="19001"/>
</bean>
OpenOffice in this case should be started as a service on the 192.168.1.101 machine.
A sample command for starting OpenOffice as a service looks like:
soffice -headless -accept="socket,host=192.168.1.101,port=19001;urp;" -nofirststartwizard
More details can be found on the JODConverter Web Site (http://artofsolving.com/node/10),
including the HowTo for:
• Creating an OpenOffice.org Service on Windows (http://artofsolving.com/node/11)
• Creating an OpenOffice.org Service on Unix-like systems
(http://artofsolving.com/node/12).
4.8 DOCUMENT VIEWER Digital Experience Manager offers a built-in support for previewing various types of documents
(PDF, Office, etc.) as a SWF flash using a player in a Web page. The direct conversion to flash is
available for PDF documents only. To have a preview for non-PDF files (Microsoft Office,

CONFIGURATION AND FINE TUNING GUIDE DIGITAL EXPERIENCE MANAGER 7.2
© 2002 – 2016 Jahia Solutions Group SA Page 76 / 115
OpenOffice etc.) the document converter service (see section “4.7 Document converter” above)
should be enabled to perform an intermediate conversion of documents to PDF files.
The viewer service requires the pdf2swf utility (from SWFTools: http://www.swftools.org/) to
be installed. The installation guidelines are available on the corresponding Wiki pages:
http://wiki.swftools.org/wiki/Installation.
The following two configuration parameters in digital-factory-
config/jahia/jahia.properties file are responsible for enabling and configuring the
document viewer service:
######################################################################
### Document Viewer Service ##########################################
######################################################################
# Viewer service enables previewing of documents of various formats
# (PDF, Office, etc.) as a SWF flash.
# The direct conversion to flash is available for PDF files only.
# In order for this service to work with non-PDF files a document
# converter service (see section above) should be enabled to perform
# an intermediate conversion of documents to PDF files.
# Set this to true to enable the document viewer service
jahia.dm.viewer.enabled = false
# Viewer service requires the pdf2swf utility (from SWFTools) to be installed
# The following specifies the path to the pdf2swf executable file
# Usually for Linux it is: /usr/bin/pdf2swf
# for Windows: C:/Program Files (x86)/SWFTools/pdf2swf.exe
# If the SWFTools installation folder is present in your PATH, you can
# specify only the executable name here
jahia.dm.viewer.pdf2swf = pdf2swf

CONFIGURATION AND FINE TUNING GUIDE DIGITAL EXPERIENCE MANAGER 7.2
© 2002 – 2016 Jahia Solutions Group SA Page 77 / 115
The jahia.dm.viewer.pdf2swf parameter should contain an absolute path to the pdf2swf
executable file or, in case the corresponding folder is included into the PATH environment
variable, just the executable name, i.e. pdf2swf.
4.9 DOCUMENT THUMBNAILS In Digital Experience Manager we are pleased to offer an out-of-the-box support for automatic
creation of image thumbnails for uploaded documents that significantly improves the usability
and user experience when working with Jahia Document Manager or document-related
components.
The service is enabled by default for all PDF documents. A thumbnail is automatically created for
the first page of an uploaded document.
To have thumbnails for non-PDF files (Microsoft Office, OpenOffice etc.) the document
converter service (see section “4.7 Document converter” above) should be enabled to perform
an intermediate conversion of documents to PDF files.
The following entry in the digital-factory-config/jahia/jahia.properties file is
responsible for enabling/disabling the document thumbnails service:
######################################################################
### Document Thumbnails Service ######################################
######################################################################
# Document thumbnails service enables automatic creation of thumbnail
# images for uploaded documents.
# The direct creation of a thumbnail is available for PDF files only.
# In order for this service to work with non-PDF files a document
# converter service (see section above) should be enabled to perform
# an intermediate conversion of documents to PDF files.
# The following enables/disables the document thumbnails service
jahia.dm.thumbnails.enabled = true

CONFIGURATION AND FINE TUNING GUIDE DIGITAL EXPERIENCE MANAGER 7.2
© 2002 – 2016 Jahia Solutions Group SA Page 78 / 115
4.10 VIDEO THUMBNAILS For an improved media experience, Digital Experience Manager offers a possibility of automatic
thumbnail generation for uploaded video files.
The video thumbnails service requires the ffmpeg utility (http://ffmpeg.org/) to be installed.
The following two configuration parameters in digital-factory-
config/jahia/jahia.properties file control the service:
######################################################################
### Video Thumbnails Service ##########################################
######################################################################
# Video thumbnails service enables automatic creation of thumbnail images
# for uploaded video files.
# Set this to true to enable the video thumbnails service
jahia.dm.thumbnails.video.enabled = false
# Video thumbnails service requires the ffmpeg utility to be installed
# The following specifies the path to the ffmpeg executable file
# Usually for Linux it is: /usr/bin/ffmpeg
# for Windows, for example: C:/Program Files (x86)/ffmpeg-20120503-git-c1fe2db-win64-static/bin/ffmpeg.exe
# If the ffmpeg/bin folder is present in your PATH, you can
# specify only the executable name here
jahia.dm.thumbnails.video.ffmpeg = ffmpeg
The jahia.dm.thumbnails.video.ffmpeg parameter should contain an absolute path to
the ffmpeg executable file or, in case the corresponding folder is included into the PATH
environment variable, just the executable name, i.e. ffmpeg.

CONFIGURATION AND FINE TUNING GUIDE DIGITAL EXPERIENCE MANAGER 7.2
© 2002 – 2016 Jahia Solutions Group SA Page 79 / 115
4.11 IMAGE SERVICE The Digital Experience Manager Image Service is here to manipulate images from Digital
Experience Manager itself. For licensing reasons, the service is by default using a Java native API
named ImageJ, but this is not a really powerful API nor really efficient.
So, if you want to boost the quality of your thumbnails or the result of your other image
manipulation operations, Digital Experience Manager allows you to define the path to your
ImageMagick installation so that we can use it instead of the ImageJ API.
4.11.1 How-to Install ImageMagick? Follow the instructions for your system on the Image Magick Binary Releases page:
http://www.imagemagick.org/script/binary-releases.php
Once ImageMagick is installed, modify your jahia.properties file to activate ImageMagick
instead of the ImageJ API.
######################################################################
### Image conversion Service #########################################
######################################################################
# The image service to use
# Native java service : "ImageJImageService"
# Set to "ImageMagickImageService" to use ImageMagick. You'll then have to set
# theimageMagick path
imageService = ImageJImageService
# The path to image magick and exiftools
# For windows : C:\\Programs\\ImageMagick;C:\\Programs\\exiftool
imageMagickPath = /usr/bin:/usr/local/bin:/opt/local/bin

CONFIGURATION AND FINE TUNING GUIDE DIGITAL EXPERIENCE MANAGER 7.2
© 2002 – 2016 Jahia Solutions Group SA Page 80 / 115
4.12 ERROR AND THREAD DUMP DIRECTORIES
4.12.1 Error file dumper server Digital Experience Manager’s error file dumper service is used to automatically create reports
when an error occurs.
The location of those files is by default: ${jahia.log.dir}/jahia-errors. In case the
jahia.log.dir system property is not set explicitly or detected automatically by Digital
Experience Manager (for Apache Tomcat and JBoss EAP / AS servers) the following location is
used: ${java.io.tmpdir}/jahia-errors.
Effectively, for Apache Tomcat this is by default under: <tomcat-home>/logs/jahia-
errors.
And for the JBoss EAP / AS: <jboss-home>/standalone/log/jahia-errors.
It is possible to override the error folder location with a system property named
jahia.error.dir, e.g. by adding -Djahia.error.dir=/var/logs/jahia/errors to
the JVM options (CATALINA_OPTS for Apache Tomcat).
4.12.2 Thread dumps Via a “System Health -> Memory and thread dumps” panel in Server settings or via Jahia Tools
Area it is possible to perform single thread dumps as well as a series of thread dumps into a file.
The location of those files is by default: ${jahia.log.dir}/jahia-threads. In case the
jahia.log.dir system property is not set explicitly or detected automatically by Digital
Experience Manager (for Apache Tomcat and JBoss EAP / AS servers) the following location is
used: ${java.io.tmpdir}/jahia-threads.
Effectively, for Apache Tomcat this is by default under: <tomcat-home>/logs/jahia-
threads.
And for the JBoss EAP / AS: <jboss-home>/standalone/log/jahia-threads.

CONFIGURATION AND FINE TUNING GUIDE DIGITAL EXPERIENCE MANAGER 7.2
© 2002 – 2016 Jahia Solutions Group SA Page 81 / 115
It is possible to override the error folder location with a system property named
jahia.thread.dir, e.g. by adding -Djahia.thread.dir=/var/logs/jahia/threads
to the JVM options (CATALINA_OPTS for Apache Tomcat).
4.13 OSGI SSH CONSOLE In DX 7.2 we’ve dropped the Felix gogo shell (Telnet-based) and replaced it with more powerful,
flexible and secure Apache Karaf SSH shell.
The SSH shell is enabled by default and listens, for the sake of security, by default only on host
127.0.0.1, i.e. on connections from localhost. The default port number is 8101.
The configuration of port number and host can be found in the digital-factory-
config/jahia/jahia.properties:
###################################################################### ### OSGi settings #################################################### ###################################################################### # The following setting is used to change the port which the # Apache Karaf OSGi command line shell will listen to for SSH

CONFIGURATION AND FINE TUNING GUIDE DIGITAL EXPERIENCE MANAGER 7.2
© 2002 – 2016 Jahia Solutions Group SA Page 82 / 115
# connections. Set it to a negative value to disable this feature # entirely. karaf.remoteShell.port = 8101 # The bind address for the SSH shell. '127.0.0.1' means the SSH shell # will only allow local connections to be established. You may want to # define here an dedicated IP address, the console will bind to, or # a '0.0.0.0' which will mean it will be bound to all available # network interfaces. karaf.remoteShell.host = 127.0.0.1
The port number for the SSH console can also be configured during the DX installation wizard
(in Advanced install mode).
The SSH console requires a login and password, which are the same as the ones, configured for
the DX administration tools (/tools).

CONFIGURATION AND FINE TUNING GUIDE DIGITAL EXPERIENCE MANAGER 7.2
© 2002 – 2016 Jahia Solutions Group SA Page 83 / 115
5 FINE TUNING After having implemented all your templates and you are satisfied with your website, there may
be some modifications to be done to enhance the performance of your server.
Before changing any values on your production server, you should ask yourself the following
questions:
• How many editors do you have working simultaneously on the system?
• What is the number of authenticated users that can log into your system (in general, not
necessarily at the same time)?
• What is the number of pages that you have in your system, and if they contain a lot of
resources (PDF files, etc.)?
As a general rule, in order to test the performance of any system running Digital Experience
Manager, here are the issues that need to be addressed:
1. Tomcat and the amount of virtual memory (typically the -Xmx part in the
setenv.sh/setenv.bat file)
2. The database and its default settings
3. Digital Experience Manager properties configuration
The values given here are the high values and have been tested, but that does not mean that this
corresponds to the values you should set. The way to find the proper values that will fit your
system is to increase progressively, and set the values here one at a time (except for the
server.xml and database pool size, they go by pair). Then run a load test (bearing in mind the
answers to the questions at the beginning of this section) to see if it corresponds to your
expectations.

CONFIGURATION AND FINE TUNING GUIDE DIGITAL EXPERIENCE MANAGER 7.2
© 2002 – 2016 Jahia Solutions Group SA Page 84 / 115
5.1 TOMCAT
5.1.1 bin/setenv.sh or bin/setenv.bat We usually recommend raising the amount of virtual memory (-Xms and -Xmx parameters) in
your bin/setenv.sh (non-Windows OS) or bin/setenv.bat (on Windows) file to 2048,
4096 or even higher.
It is not necessarily true that the more virtual memory you give to your system, the faster you
get, as sometimes having a lot of memory can benefit you in the beginning, but then garbage
collection may take longer, which will make your server unavailable for a longer period of time.
5.1.2 conf/server.xml Here you can increase the amount of maxThreads as well as the amount of acceptCount.
These settings are the ones handling the connections to your server. maxThreads is the
maximum number of threads processing requests in Tomcat, whether serving pages from Digital
Experience Manager cache or not. If this one is exceeded, then errors will be sent to the client.
In case you need to modify those settings, do it in the HTTP connector, the AJP connector or
both, depending how you access your application server.
On the other hand, raising this number may not bring the wanted effect. For example, if you
leave maxModulesToGenerateInParallel at 50 in jahia.properties, as no more than
that number will do the real work, while the other threads will queue. But we will talk about that
configuration in chapter “5.4 Module generation queue”.
5.2 DATABASE As we have increased the amount of threads in Tomcat, we have to tune the database
connection pool on Digital Experience Manager side and also eventually the maximum number
of connection your DBMS is allowing.
Note please that the maximum number of active DB connections in your pool should be in any
case higher than maximum number of HTTP or AJP threads, your application server is
processing at a time. And in turn your DBMS server should allow that maximum number of DB
connections (also considering other applications, which access the same DBMS).

CONFIGURATION AND FINE TUNING GUIDE DIGITAL EXPERIENCE MANAGER 7.2
© 2002 – 2016 Jahia Solutions Group SA Page 85 / 115
5.3 CACHE CONFIGURATION Starting with Digital Experience Manager 7.0.0.5, we have separated the caches into two
memory spaces. One will hold the big caches (HTML, dependencies and files), the other one will
hold all the other caches (users, groups, ACLs, etc.).
This decision about the split was taken after intensive performance tests to achieve the best
results and the easiest configuration. This campaign of performance tests will help us guide you
through the configuration of your cache behavior.
First thing to know is by default your Digital Experience Manager configuration is a generic one,
this means we try to find the best compromise for every configuration. As is by default your
caches are configured using a percentage of your memory:
<ehcache xmlns:xsi="http://www.w3.org/2001/XMLSchema-instance"
xsi:noNamespaceSchemaLocation="ehcache.xsd"
updateCheck="false" monitoring="autodetect"
name="org.jahia.ehcachemanager"
dynamicConfig="true"
maxBytesLocalHeap="400M">
and
<ehcache xmlns:xsi="http://www.w3.org/2001/XMLSchema-instance"
xsi:noNamespaceSchemaLocation="ehcache.xsd"
updateCheck="false" monitoring="autodetect"
name="org.jahia.ehcachemanager.big"
dynamicConfig="true"
maxBytesLocalHeap="1600M">
Which on a default minimum production configuration of 4Gb give us 2Gb of cache (50% of
heap).

CONFIGURATION AND FINE TUNING GUIDE DIGITAL EXPERIENCE MANAGER 7.2
© 2002 – 2016 Jahia Solutions Group SA Page 86 / 115
First, we will give you some guidelines on how to set up those limits depending on your JVM
memory, and then we will see how to check the status of your caches so that you can best adapt
those sizes.
5.3.1 How to configure/size your caches The HTML cache is the cache that can grow very fast depending on how many pages and
authenticated users you have and ACLs. So, this is the one that will be the one to increase
mostly.
Jvm Memory General Cache HTML Cache %
4Gb 400M 1600M 50
6Gb 500M 2500M 50
8Gb 1G 5G 75
To update your configuration, you need to update two files in your Digital Experience Manager
installation, they are by default located in tomcat/webapps/ROOT/WEB-INF/classes.
Those files are ehcache-jahia.xml and ehcache-jahia-html.xml or ehcache-jahia-
cluster.xml and ehcache-jahia-cluster-html.xml if you are in cluster.
Look up for the <ehcache> tag near the top of the file and update the value of
maxBytesLocalHeap, save and restart the Digital Experience Manager.
This is only a general guideline to give you a head starts when you increase the amount of RAM
available for Digital Experience Manager, you need to adapt the cache first following those
generic guidelines then we will see how to refine them. However, the important part is that if
you do increase your memory available to your Jahia, you need to increase the limit for those
Ehcache managers otherwise the increase in performance might not be the one expected.

CONFIGURATION AND FINE TUNING GUIDE DIGITAL EXPERIENCE MANAGER 7.2
© 2002 – 2016 Jahia Solutions Group SA Page 87 / 115
5.3.2 How to monitor and tune caches To monitor your caches behavior, go to: http://localhost:8080/tools/cache.jsp
There you should see something like this:
Once the page is displayed click on “show size in bytes” to display the sizes of all the caches.

CONFIGURATION AND FINE TUNING GUIDE DIGITAL EXPERIENCE MANAGER 7.2
© 2002 – 2016 Jahia Solutions Group SA Page 88 / 115
At the bottom line of each table you will see the overall size of each manager. This is already a
very good indicator if your caches are near their maximum size or not. If they are not, keep an
eye on them on a regular basis for the first few weeks after launching your platform.
Monitoring those numbers will give you the best size needed, if you do have 8Gb of RAM but
not that many pages but a lot of users and ACLs you might need more space for the
users/groups cache manager than for the html one.
The main rule to follow here is that the HTML caches will deal with whatever space they have, if
too little you will regenerate more fragments than needed which will have an impact on
rendering but maybe not so much as most of the shared fragments will still be in memory. On
the other side the general cache manager need to have plenty of space to keep all objects in
memory, if you start to see a lot of misses on eternal caches in this manager you need to
increase the memory limit (to see if a cache is configured as eternal click on “show config details”
then on the “?” next to the cache name). As some of those caches have to be eternal Ehcache
should never evict them.
5.3.3 List of eternal caches
• ApplicationCache
• ApplicationContextCache
• ApplicationEntryPointCache
• ExternalIdentifierMapping
• FileLastModifiedCache
• HTMLNodeUsersACLs (50M limit by default)
• HTMLRequiredPermissionsCache
• JCRGroupCache (100M limit by default)
• JCRGroupMembershipCache (100M limit by default)
• RenderService.TemplatesCache (10M limit by default)
• WorkflowRuleCache
• org.jahia.security.matchingPermissions (1M by default)
• org.jahia.security.privilegesInRolesCache

CONFIGURATION AND FINE TUNING GUIDE DIGITAL EXPERIENCE MANAGER 7.2
© 2002 – 2016 Jahia Solutions Group SA Page 89 / 115
• org.jahia.services.usermanager.JahiaGroupManagerService.groupPathByGroupNameCach
e
• org.jahia.services.usermanager.JahiaGroupManagerService.membershipCache
• org.jahia.services.usermanager.JahiaUserManagerService.userPathByUserNameCache
• org.jahia.sitesService.siteDefaultLanguageBySiteKey
• org.jahia.sitesService.siteKeyByServerNameCache
• org.jahia.sitesService.sitesListCache
• vanityUrlByUrlCache
5.3.4 Behavior of HTML Caches The HTMLCache contains all the generated fragments of your pages/users. The
HTMLDependenciesCache and HTMLREGEXPDependenciesCache contain a mapping of
dependencies (nodes or regular expression) and the fragment keys linked to them, so that when
you publish a node we know which fragments need to be regenerated.
Those caches have a strong interdependency, so when memory is needed and Ehcache will have
to evict/expire some entries in one of the “HTML*DependenciesCache” a listener will remove
the dependent entries in HTMLCache. So that everything in cache is always in sync.
5.4 MODULE GENERATION QUEUE The queue can be configured in:
<digital-factory-config>/jahia/jahia.properties
Here you should increase the following value for your server:
######################################################################
### Concurrent processing options ####################################
######################################################################
# This variable controls how many threads are allowed to do heavy weight
# processing (module creation not served from the cache)

CONFIGURATION AND FINE TUNING GUIDE DIGITAL EXPERIENCE MANAGER 7.2
© 2002 – 2016 Jahia Solutions Group SA Page 90 / 115
maxModulesToGenerateInParallel = 50
This value controls how many parallel threads will be allowed to start rendering modules not
coming from cache, meaning that they will open JCR and DB connections to obtain the content
from there.
maxModulesToGenerateInParallelinjahia.propertiesshouldnotbebiggerthanthe
maxThreadsvalueinserver.xml.
The factor between maxModulesToGenerateInParallel and maxThreads (HTTP or/and
AJP) should be around 2-3, meaning:
maxThreads = maxModulesToGenerateInParallel * (2-3)
For example:
maxModulesToGenerateInParallel = 100, maxThreads = 300
maxModulesToGenerateInParallel = 200, maxThreads = 600
5.5 OPERATING MODE Setting the operating mode to “production” enhances the performance of your server as when
set to “development”, we check more often, which resources (templates, rules) on the server
changed to redeploy or reinitialize them. The Development Mode will also write more debug
information or not compress certain data to have it readable.
The Distant Publication Server Mode provides similar performances as the Production Mode,
but deactivates some authoring features, as you are not supposed to perform authoring actions
directly on this server.
This mode is configured in digital-factory-config/jahia/jahia.properties:
# This setting can be used to activate particular profile:
# - development
# - production

CONFIGURATION AND FINE TUNING GUIDE DIGITAL EXPERIENCE MANAGER 7.2
© 2002 – 2016 Jahia Solutions Group SA Page 91 / 115
# - distantPublicationServer
operatingMode = development
5.6 MAINTENANCE MODE You can enable the maintenance mode to disable rendering of any pages except for the tools
section of your Digital Experience Manager instance. This allows system administrators to
perform operations on the instance without running into possible interference from users’
actions. You can enable the maintenance mode from the System Maintenance page of the Tools
section of your Digital Experience Manager instance:
http://localhost:8080/tools/maintenance.jsp
As noted on that page, the setting will not persist across server restarts. If you want to stay in
maintenance mode after a server restart, you will need to set the maintenanceMode property
to true in digital-factory-config/jahia/jahia.properties:
# Set this to true to enable maintenance mode, i.e. no requests will be
# served except to /tools/
#maintenanceMode = false
5.7 READ-ONLY MODE It is possible to disable any editing operations on a specific Digital Experience Manager instance.
This is particularly useful in a clustering scenario to create “pure” browsing nodes. You can
enable the read-only mode from the System Maintenance page of the Tools section of your
Digital Experience Manager instance: http://localhost:8080/jahia/tools/maintenance.jsp.
As noted on that page, the setting will not persist across server restarts. If you want your Digital
Experience Manager instance to stay in read-only mode even after a server restart, you will need
to set the readOnlyMode property to true in digital-factory-
config/jahia/jahia.properties:
# Set this to true to enable read-only mode, where access

CONFIGURATION AND FINE TUNING GUIDE DIGITAL EXPERIENCE MANAGER 7.2
© 2002 – 2016 Jahia Solutions Group SA Page 92 / 115
# to edit/studio/administration modes is disabled
#readOnlyMode = false
5.8 JCR DATASTORE GARBAGE COLLECTOR The goal of the JCR DataStore garbage collector is to clean the DataStore up by removing the no
longer referenced binaries, i.e. entries which are no longer referenced from any workspace (live,
default and versioning). As the nature of the DataStore is append-only (meaning it does not
update or delete binaries automatically), this maintenance task should be run periodically (once a
week, month or quarter).
As the process could be resource intensive, the operation should be planned for times when the
processing node is not under stress. The job can be triggered manually from the Jahia Tools
Area -> JCR DataStore garbage collection (http://localhost:8080/ tools/jcrGc.jsp).
5.9 STORING BINARY FILES During the installation process when setting the database connection settings an option allows
you to either check or uncheck the box “Store binary data in the database”.
According to the Apache Jackrabbit wiki
(http://wiki.apache.org/jackrabbit/DataStore#File_Data_Store), “FileDataStore is usually faster
than the DbDataStore, and the preferred choice unless you have strict operational reasons to
put everything into a database.”
We recommend you leave the “Store binary data in the database” checkbox unchecked.
Youcannotswitchbetweenthestoreimplementationatalatertime,unlessonemakesan
export-importoftherepositorydata.
When using a FileDataStore in cluster, a shared file system needs to be used, where all cluster-
nodes point to.
By default the datastore is located at digital-factory-data/repository/datastore.

CONFIGURATION AND FINE TUNING GUIDE DIGITAL EXPERIENCE MANAGER 7.2
© 2002 – 2016 Jahia Solutions Group SA Page 93 / 115
You can override that location (and move the folder to any other place, when the Digital
Experience Manager server is shut down), if needed, by changing the path value for
jackrabbit.datastore.path in the jahia.properties file, for example:
# JCR file datastore path in case of the file-based binary storage
jackrabbit.datastore.path = /opt/DigitalExperienceManager-7/share/datastore
5.10 INCREASING BUNDLECACHESIZE Another recommendation is to increase the value of the bundleCacheSize settings. There are
three PersistenceManagers using bundle caches: one for default workspace, one for live
workspace and one for the version space. Each is on default just 8MB small. For large production
systems you should increase the values, so that they together occupy around 1/10th of the JVM
maximum heap space.
More information about this, can be found at this link:
https://www.jahia.com/community/extend/technical-blog/performance-sizing-the-jackrabbit-
bundle-cache-properly
At that linked article you get some information how to read the bundleCache related log output
in the console. Based on the miss to access ratio in your environment you can decide whether
you should dedicate more or less memory to either default, live or the version bundle cache. In
cluster, it also depends whether a cluster node is used for authoring/processing content or just
for serving the published live content. So, you should adapt the setting to the cluster node role,
and if for instance it is just used to serve live content, then the live bundle cache should get most
of the 1/10th of heap.
Usually the versioning bundleCache can be 2-4 times smaller than the default/live bundleCache,
but it depends on the environment and usage, so you can decide on your own by checking the
bundleCache lines in the console output.
Let’s take as example that we have a system using 3GB of heap, we may set the
bundleCacheSize to the following values: default: 128MB, live: 128MB, version: 64MB.
Depending on the DX version, please, follow the steps in the next sections.

CONFIGURATION AND FINE TUNING GUIDE DIGITAL EXPERIENCE MANAGER 7.2
© 2002 – 2016 Jahia Solutions Group SA Page 94 / 115
5.10.1 DX 7.1.2.0+ To increase the bundleCacheSize parameter of the different PersistenceManagers you can
provide the following settings in the <digital-factory-
config>/jahia/jahia.properties file:
jahia.jackrabbit.bundleCacheSize.workspace=128 jahia.jackrabbit.bundleCacheSize.versioning=64
The first entry sets the bundle cache size of the persistence manager for live and default
workspaces to 128 MB. The second one – the size of the cache for versioning persistence
manager.
If you would like to set different cache size for default and live workspace, please, follow the
instructions in the next section.
5.10.2 Older DX versions (<7.1.2.0) To increase the bundleCacheSize parameter of the different PersistenceManagers you have
to do this in the following files:
For the version bundleCache open WEB-
INF/etc/repository/jackrabbit/repository.xml and in the section
Versioning/PersistenceManager adjust the value for the the bundleCacheSize parameter:
<param name="bundleCacheSize" value="64">
For the default bundleCache open digital-factory-
data/repository/workspaces/default/workspace.xml and in the
Workspace/PersistenceManager edit the following parameter value:
<param name="bundleCacheSize" value="128" />
For the live bundleCache open digital-factory-
data/repository/workspaces/live/workspace.xml and in the
Workspace/PersistenceManager edit the value for the bundleCacheSize parameter:

CONFIGURATION AND FINE TUNING GUIDE DIGITAL EXPERIENCE MANAGER 7.2
© 2002 – 2016 Jahia Solutions Group SA Page 95 / 115
<param name="bundleCacheSize" value="128" />
A Digital Experience Manager server restart is needed for changes to be effective.
5.11 JCR INDEXING CONFIGURATION If you would like to override the indexing configuration of the JCR repository, you could place
the files, named indexing_configuration.xml and
indexing_configuration_version.xml into the digital-factory-config/jahia
folder. Digital Experience Manager will detect them on startup and use them (instead of the
digital-factory-data/repository/indexing_configuration.xml and digital-
factory-data/repository/indexing_configuration_version.xml files).
5.12 LOGGING
5.12.1 Modifying the Logging Level The following instructions apply to modify logging levels permanently. If you want to only
change the level for a short time, you can use the runtime tool, described in chapter “6.4.2
Logging”.
When you install a release of Digital Experience Manager, the logging level is set to the
minimum to avoid slowing down the platform. If you need to increase it for debugging purpose,
you need to modify the file log4j.xml which is in the following directory:
<digital-experience-manager-web-app-dir>/WEB-INF/etc/config
Log4j defines the logging levels as follows (from the more to the less verbose):
ALL < DEBUG < INFO < WARN < ERROR < FATAL < OFF
At the bottom of the file, you have the <root>... </root> part. Change the:
<level value="info"/>
To

CONFIGURATION AND FINE TUNING GUIDE DIGITAL EXPERIENCE MANAGER 7.2
© 2002 – 2016 Jahia Solutions Group SA Page 96 / 115
<level value="debug"/>
for example, to have more debugging information in the console. You can also change this
parameter for some specific part of Digital Experience Manager like Jackrabbit or Lucene. You
can even add your own logger on a specific set of classes, for example:
<logger name="org.quartz">
<level value="info"/>
</logger>
By default, logs are redirected to the standard out, which is normally the console. Under
Windows, logs will be displayed in the DOS window where Tomcat is running. On Linux, logs will
be redirected to the catalina.out file. As Digital Experience Manager uses Apache Log4j for
its logging system, you can use tools like Chainsaw (part of the Log4j project) to better work
with logging messages.
You can change the log-level of Digital Experience Manager “on-the-fly” without having to
shutdown and restart it. This is very useful when you need to have extra logs on a production
server, but do not want to restart it just for this. Digital Experience Manager watches for
changes in the log4j.xml file every 60 seconds, so once you have changed the log level, you
will need to wait a few seconds before the changes will be effective.
Do not forget to change the values of INFO back, as the DEBUG log level has a pretty important
impact on performance.
5.12.2 Logging configuration location If you would like to override the WEB-INF/etc/config/log4j.xml file completely or change
its location, you have several options:
1) By placing a file, named log4j.xml into the digital-factory-config/jahia
folder. Digital Experience Manager will detect it on startup and use it (instead of the WEB-
INF/etc/config/log4j.xml file)

CONFIGURATION AND FINE TUNING GUIDE DIGITAL EXPERIENCE MANAGER 7.2
© 2002 – 2016 Jahia Solutions Group SA Page 97 / 115
2) By providing a Java system property named jahia.log4j.config you could specify
the resource location for the Log4j configuration (using Spring resource’s format), e.g. in
the tomcat/bin/setenv.sh:
CATALINA_OPTS="$CATALINA_OPTS -Djahia.log4j.config=file:///opt/DigitalExperienceManager-7/log4j.xml"

CONFIGURATION AND FINE TUNING GUIDE DIGITAL EXPERIENCE MANAGER 7.2
© 2002 – 2016 Jahia Solutions Group SA Page 98 / 115
6 MONITORING There are multiple ways of monitoring a Digital Experience Manager installation's behavior in
real-time; we will present it in this chapter.
Also, if you have identified an issue with a Digital Experience Manager installation and want to
communicate it back to us, we have a section below that describes what is required to efficiently
provide us with the data that will help us assist you in a timely manner.
6.1 STACK TRACE DUMPS Stack trace dumps are a very useful way of figuring out exactly what the JVM is executing at a
specific point in time. Basically, the JVM has a way of dumping onto the console output a list of
all the threads currently executing with, for each thread, a detailed stack trace of where in the
code each thread is currently
If errors occur, Digital Experience Manager automatically generates thread dumps. To create
thread dumps on demand you can also use the “System Health -> Memory and thread dumps“
panel in the Server Settings or a “Thread State Information” Tool available in Jahia Tools Area
(see chapter “6.4 Tools”), which can also automatically create multiple thread dumps in an
interval. If you want to analyze the thread dumps created by Digital Experience Manager with a
tool, you may have to switch the useJstackForThreadDumps in jahia.properties to
true, provided that the jstack command (from Oracle Java Platform SE package) is available
in your PATH. That allows you to generate more accurate thread dumps (although the generation
process is slightly slower), and it is guaranteed that in this case a dump can be read by any
thread dump analyzer tool available on the market.
You may also trigger such standard thread dumps manually in a Java standard way. Performing a
stack trace dump is different on various platforms:
6.1.1 Unix On UNIX platforms, you can send a signal to a program by using the kill command. This is the
quit signal, which is handled by the JVM. For example, on Linux you can use the command kill

CONFIGURATION AND FINE TUNING GUIDE DIGITAL EXPERIENCE MANAGER 7.2
© 2002 – 2016 Jahia Solutions Group SA Page 99 / 115
-QUIT process_id, where process_id is the process number of your JVM. Don't be
alarmed by the fact that the command is called "kill", despite the name, all this command will do
is perform a stack trace dump and the JVM will continue executing. Alternatively, you can enter
the key sequence <ctrl>\ in the window where the JVM was started (this works only if the
java process is running in foreground in this window, not if you are doing a tail on the log file).
Sending this signal instructs a signal handler in the JVM to recursively print out all the
information on the threads and monitors inside the JVM.
6.1.2 Windows To generate a stack trace on Windows platforms, enter the key sequence <ctrl><break> in
the window where the Java program is running
The output of the stack trace will go to the console output, so under Windows it will be
displayed in the JVM window, and under UNIX it will be usually in
tomcat/logs/catalina.out.
Once the dump has been performed, you can look for threads that are blocked, or see the
amount of threads that are performing some operations, which might not be expected.
6.1.3 Tools A more convenient way to generate the stacktrace on all platforms is to use the JVM’s “jstack
<pid>” command if you are using an Oracle Java. This will render the thread dump in your
console or you could redirect an output into a file.
6.2 MEMORY DUMPS In order to analyze the memory usage of a JVM, it is possible to perform memory dumps that
can then later be analyzed to determine if the application is behaving as expected, or if a data
structure is eating up too many resources.
There are two ways of performing memory dumps with the JVM:
• via Java VM parameters:

CONFIGURATION AND FINE TUNING GUIDE DIGITAL EXPERIENCE MANAGER 7.2
© 2002 – 2016 Jahia Solutions Group SA Page 100 / 115
o -XX:+HeapDumpOnOutOfMemoryError writes heap dump on
OutOfMemoryError (recommended)
o -XX:+HeapDumpOnCtrlBreak writes heap dump together with thread dump on
CTRL+BREAK
• via tools:
o Oracle JMap: jmap.exe -dump:format=b,file=HeapDump.hprof<pid>
o Oracle JConsole: Launch jconsole.exe and invoke operation dumpHeap() on
HotSpotDiagnosticMBean
The heap dump will be written to the working directory.
Once you have the heap dump, you can use a Java profiler (see below) to load up the dump, but
they usually have problems analyzing large files.
You could use dedicated tools, like e.g.:
• Eclipse Memory Analyzer Tool: http://www.eclipse.org/mat/
• SAP Memory Analyzer:
http://wiki.scn.sap.com/wiki/display/Java/Java%20Memory%20Analysis?original_fqdn=
wiki.sdn.sap.com&bc=true
• etc.
What you will be looking for in memory dumps is the largest structures in memory. Usually these
will be cached objects, but they may also be objects referenced from the sessions.
6.3 JAVA PROFILERS The most powerful tool to analyze in real-time what is going on inside a Digital Experience
Manager installation is a JVM profiler. There are multiple tools that exist, but we recommend
YourKit Java Profiler (http://www.yourkit.com/), which is a commercial tool that can be used
even in production with lesser performance impacts.
You can find a more extensive list of profilers here:

CONFIGURATION AND FINE TUNING GUIDE DIGITAL EXPERIENCE MANAGER 7.2
© 2002 – 2016 Jahia Solutions Group SA Page 101 / 115
• Free Profilers:
http://www.javaperformancetuning.com/resources.shtml#ProfilingToolsFree
• Commercial Profilers:
http://www.javaperformancetuning.com/resources.shtml#ProfilingToolsNotFree
6.4 TOOLS Digital Experience Manager provides several tools as JSP's files that you can call to run certain
commands on your server (activate Maintenance Mode, get information about the system,
display thread dump, view the cache, cluster statistics etc.)
Those tools are password protected by a security realm with the Jahia Tool Manager user. Its
username and password are configured during the installation wizard (defaults are:
jahia/password).
The list of tools can be found after Jahia installation at http://localhost:8080/tools (adapt the
URL, if you use other domains, ports or server contexts).
6.4.1 System and Maintenance The tools under system and maintenance allow you to see the status of your platform. They also
allow you to put your system under maintenance. This mode will display a nice page of
information while you update your server (Jahia needs to be running, otherwise use a HTTP
server in front to deliver a static maintenance page). The JSP pre-compiler should be run after
deploying new releases of modules to pre-compile the JSPs, so that this will not happen once
the server is already under load.
Tool Description
System information gather system information to analyze all the current settings
Thread state information create one or multiple thread dumps
Memory information show the current memory status
JCR sessions information displays the information about currently running JCR sessions

CONFIGURATION AND FINE TUNING GUIDE DIGITAL EXPERIENCE MANAGER 7.2
© 2002 – 2016 Jahia Solutions Group SA Page 102 / 115
System maintenance set system into Maintenance mode to block access
JSP pre-compilation trigger the precompiling of JSPs after deployment
System benchmarks this tool will benchmark the database read performance as
well as perform both read and write performance checks for
the filesystem
6.4.2 Logging These tools are here to manage your log4j configuration (change the log level for certain
categories) over a user interface. Notice that these settings then only apply to the current
runtime – they are not persistent, so on the next server startup the settings will be taken from
log4j.xml.
You can also control the activation of the error file dumper.
Tool Description
Log4j administration tool to change log levels immediately
Error file dumper ability to switch on/off error dumping to files
6.4.3 Administration and Guidance The tools in this section give you an overview of the currently running or scheduled background
jobs in Digital Experience Manager, allow you to trigger re-indexing of the content and run SQL
statements or Groovy scripts. As you may update a runtime database with that, you have to be
very cautious and do backups before manipulations.
Tool Description
OSGi console The management and monitoring tool for the OSGi bundles

CONFIGURATION AND FINE TUNING GUIDE DIGITAL EXPERIENCE MANAGER 7.2
© 2002 – 2016 Jahia Solutions Group SA Page 103 / 115
Background job
administration
view active or scheduled background jobs
Search engine management various indexing related actions and integrity checks
DB query tool run SQL queries/updates using a connection from the
configured Jahia data source
Groovy console paste Groovy code you would like to execute against Digital
Experience Manager
Workflow monitoring View currently running workflow processes
6.4.4 Enterprise Tools – Cluster view This section in the Jahia Tools Area is only available when the clustering is activated for Digital
Experience Manager.
Tool Description
Cluster view Shows the current cluster membership, communication
statistics and configuration
6.4.5 JCR Data The data tools contain a JCR repository browser that can be really helpful to browse your JCR
content and have all data displayed in a particular node. You can also run JCR queries and
Groovy scripts within a JCRTemplate.
Furthermore, there are housekeeping tools to clean-up the version history and to run the data
store garbage collector.
Tool Description
JCR repository browser browse the JCR content tree in a simple UI.

CONFIGURATION AND FINE TUNING GUIDE DIGITAL EXPERIENCE MANAGER 7.2
© 2002 – 2016 Jahia Solutions Group SA Page 104 / 115
JCR query tool run JCR queries with SQL-2, XPath or SQL syntax
JCR query statistics provides information about slow queries and most popular
queries
JCR console paste Groovy code to execute in a JCRTemplate against the
JCR repository
JCR DataStore garbage
collection
run the JCR DataStore garbage collector
JCR version history
management
perform cleanup tasks on the version store
JCR integrity tools perform some integrity checks on the JCR repository, and also
implements some fixes
JCR external providers Lists active external providers and current mount points
JCR components and
nodetypes integrity tools
perform integrity checks and fixes for component nodes and
node types
6.4.6 JCR Rendering Some tools to display information about the installed modules, definitions and render filters:
Tool Description
Installed modules browser display details of installed modules
Installed definitions
browser
display details of installed node/property definitions
Render filters display details of installed render filters

CONFIGURATION AND FINE TUNING GUIDE DIGITAL EXPERIENCE MANAGER 7.2
© 2002 – 2016 Jahia Solutions Group SA Page 105 / 115
Actions list of registered render actions
Choicelist initializers &
renderers
Information about registered choicelist initializers and
renderers
6.4.7 Cache Cache monitoring and management tools. You can also access the content of the HTML output
caches if needed by accessing the following tools.
Tool Description
Cache management view the statistics of all available caches; flush particular
caches or all at once
Output cache statistics view the stats of the HTML cache
Output cache view and search HTML cache elements
Output dependencies cache view and search HTML dependencies cache elements
6.4.8 Miscellaneous Tools These are various tools that could not be classified into the other categories.
Tool Description
Password encryption tool to encrypt passwords
Document converter convert documents into other formats if the conversion
service is active
Document text extractor check the text extraction from documents
WCAG checker paste HTML to validate against Web Content Accessibility
Guidelines

CONFIGURATION AND FINE TUNING GUIDE DIGITAL EXPERIENCE MANAGER 7.2
© 2002 – 2016 Jahia Solutions Group SA Page 106 / 115
URL rewriting rules view the rules for the UrlRewriteFilter
CKEditor configuration allows creating and deploying custom CKEditor (rich text
editor) configuration
6.5 OTHER ISSUES The best way to get support for your issues is to contact us for a support agreement. Please see
the following page for more information: https://www.jahia.com/enterprise-now/support
If you have a commercial support contract, you will get your own space to submit issues that will
be handled according to our SLA (https://support.jahia.com/). Otherwise, you can report issues
to the general JIRA projects (https://jira.jahia.org/), but here there will be no guarantee as to
how and when the issue will be handled. When submitting an issue to our JIRA Issue tracker,
make sure you include as much information as possible, including:
• A detailed description of your environment with the version number and patches (J2EE
server, JDK, OS) as well as memory and architecture (32-bit, 64-bit).
• A detailed (or complete) log file, including date and times at which the problem occurs, to
be able to corroborate with log file.
• A list of steps to reproduce the problem (if not random).
• A stack trace dump or, in case of performance issues, multiple thread dumps in intervals
(see chapter “6.1 Stack trace dumps”).
• If dealing with an OutOfMemory issue, please include a memory dump (see chapter “6.2
Memory dumps”).
A convenient way to get all the relevant system, Digital Experience Manager and environment
information is to use the “Jahia Tools Area -> System information -> download as a file” action,
which will allow you to download and later attach to the JIRA ticket the relevant information.
Asabasicrule,wealsoprefertohavetoomuchinformationthantoolittle.

CONFIGURATION AND FINE TUNING GUIDE DIGITAL EXPERIENCE MANAGER 7.2
© 2002 – 2016 Jahia Solutions Group SA Page 107 / 115
7 FREQUENTLY ASKED QUESTIONS (FAQ) 7.1 HOW TO BACKUP DIGITAL EXPERIENCE MANAGER? Backing up your system is useful in many cases as it minimizes the risk of losing all of your data,
whether it is on the database or server side.
7.1.1 Database A database dump contains a record of the table structure and/or the data from a database, and it
is usually in the form of a list of SQL statements. A database dump is useful for backing up a
database so that its contents can be restored in the event of data loss (or in our case reusing an
environment). It can be performed anytime (even when the Digital Experience Manager server is
running), but it is usually preferable to shut down your Digital Experience Manager before
dumping your database.
There are many software products (proprietary or Open Source) that can perform a database
dump for all types of databases. Here, we will use the example of MySQL:
mysqldump -urootUser -p digitalExperienceManager7 > digital_experience_manager_7_v1.sql
7.1.2 Digital Experience Manager runtime data You should backup the whole digital-factory-data folder. It includes modules, JCR
repository and other runtime data.
If during the configuration wizard you’ve chosen filesystem-based binary storage (default option)
and changed the location of the datastore folder, you should backup also that folder.
7.1.3 Web applications/portlets If you have no additional Web applications (or portlets) used inside your Digital Experience
Manager server, you can skip this part.
All the additional Web applications, you may have deployed, will be usually located on Apache
Tomcat under:

CONFIGURATION AND FINE TUNING GUIDE DIGITAL EXPERIENCE MANAGER 7.2
© 2002 – 2016 Jahia Solutions Group SA Page 108 / 115
<tomcat-home>/webapps
You can backup all web applications or only the one you use. If you installed some third-party
portlets, be sure to check on their respective documentation. Depending on wetheror not the
webappis storing information, the way you backup the webapp will be different. If the webapp
stores nothing, you can either backup the .war file you had used to deploy the portlet, or the
subfolder of “webapps/” in which the webapp has been deployed. If the webapp stores some
data, you will also have to backup it.
7.1.4 Configuration files All major configuration files are situated under in the digital-factory-config folder and
also under <digital-factory-web-app-dir>/WEB-INF/etc/ folder.
If you are under UNIX, for regular backup of you Digital Experience Manager data, you can
create a script file and run it through a Cron job. A typical example of this script could be:
DAY=`date +%u`
/bin/tar cvfz /home/backup/tomcat_$DAY.tar.gz /home/jahia/tomcat/ #list of folders to copy
7.2 HOW TO RESTORE AN ENVIRONMENT FROM A BACKUP?
7.2.1 Restore your database dump Please refer your database documentation for specific instructions of how to perform this.
7.2.2 Reinstall Digital Experience Manager During the configuration wizard, instead of connecting to a new empty database, connect to
your newly restored database. Uncheck the option to create the tables inside this database.
Take care to specify the same value as you did for your former installation regarding the storage
of the binaries (inside the database or on the filesystem).

CONFIGURATION AND FINE TUNING GUIDE DIGITAL EXPERIENCE MANAGER 7.2
© 2002 – 2016 Jahia Solutions Group SA Page 109 / 115
If you do not remember, open <digital-experience-manager-web-app-dir>/WEB-
INF/etc/repository/jackrabbit/repository.xml and check the DataStore element,
which could either be a DbDataStore or a FileDataStore.
Do not start the application server at the end of the install process.
7.2.3 Apply your specific configurations on your new installation Apply your backed-up configuration (usually the digital-factory-config folder content is
enough) to your new installation.
7.2.4 Deploy your templates and modules Deploy your templates set(s) and modules.
7.2.5 Restore the binaries stored on the filesystem If you have chosen to store the binaries in your database, just skip this step.
Copy your digital-factory-data/repository/ folder from your backup to your new
installation. You will have the following structure:
repository
|_________datastore
|_________index
|_________version
|_________workspaces
| |___default
| | |____index
| | |____lock
| | |____repository.xml
| |___live
| |____index

CONFIGURATION AND FINE TUNING GUIDE DIGITAL EXPERIENCE MANAGER 7.2
© 2002 – 2016 Jahia Solutions Group SA Page 110 / 115
| |____lock
| |____repository.xml
|_________indexing_configuration.xml
|_________indexing_configuration_version.xml
If you have chosen an alternative location of the datastore folder during the Digital Experience
Manager configuration wizard (cluster installation), please restore it at the appropriate location.
Remove the 2 “lock” files. If possible, we also recommend you to also remove the 3 “index”
folders. Those folders store the JCR indexes, which will be regenerated at first startup if missing.
Regenerating it will improve the performances, but this operation will take a variable amount of
time, depending on the amount of data you have. If you are doing an emergency restore of a
production server, you can keep the former indexes to save time.
7.2.6 Restart the Digital Experience Manager server For the last step, you must restart your reinstalled Digital Experience Manager application.
7.3 HOW TO HANDLE MODULE GENERATION TIMEOUTS? As mentioned in chapter “4.3.3 The front-end HTML cache layer”, you may sometimes get
exceptions saying, “Module generation takes too long due to module not generated fast enough
(>10000 ms).” This happens when two requests try to get the same module output at the same
time. To save resources, Digital Experience Manager decides to let just one request render the
output and the other request wait for it. The maximum wait time is configured in
jahia.properties with the parameter moduleGenerationWaitTime. If rendering the
module takes longer than this time, the waiting request gets cancelled with the exception.
The reasons for this exception are various. It could either be an indication that sufficient
configured resources are lacking (number of database connections, heap memory, maximum
number of file handles, etc.), bottlenecks (slow disk, locks, unnecessary synchronization, etc.),
problems with modules (JSPs getting compiled, modules opening sockets and waiting for
response without timeout, etc.) or bugs/performance issues in the code.

CONFIGURATION AND FINE TUNING GUIDE DIGITAL EXPERIENCE MANAGER 7.2
© 2002 – 2016 Jahia Solutions Group SA Page 111 / 115
The best way to identify the issue is to analyze thread dumps. Along with the exception, Digital
Experience Manager should have automatically created a thread dump (unless the server load is
too high), which already is a good start. If the scenario is reproducible, it would also be good to
create multiple thread dumps in short intervals of a few seconds (see Thread dump Management
tool mentioned in chapter “6.4.1 System and Maintenance”, which is able to create multiple
thread dumps).
The thread dump may, for instance, show that the JSP compilation is the cause of the problem.
In this case, you have to ensure that JSPs are getting precompiled after deployment (see JSP
Pre-Compilation tool in chapter “6.4.1 System and Maintenance”) before the server is exposed
to public requests (e.g. keep it in the Maintenance Mode). In the error log you should be able to
see the URL of the request leading to the timeout, and you should see the cache-key of the
module, that is not getting rendered quickly enough. You can also watch out for the other
thread, which is rendering the same module and see whether, for instance, it is stuck in some
slow or non-responding methods, locks etc.
You should also analyze the error log file from that time to see if there are other exceptions
before or after the incident that indicate that the server is running out of resources. In such a
case, you may have to utilize or configure more resources for the server.
It could also be an indication that the server is overloaded and not able to serve the number of
requests. In such a case, you should think of running Digital Experience Manager in cluster or
add more cluster nodes to handle the expected load.
7.4 HOW TO CLEAN REFERENCESKEEPER NODES? The /referencesKeeper node is used during the import of content/sites. Whenever there is
a reference property in the imported content, where the value cannot be resolved immediately,
because e.g. the path or UUID does not exist yet, we create(d) a jnt:reference entry under
/referencesKeeper in order to resolve the reference at a later time, when this path or UUID
gets available (e.g. after importing other related content). After the path gets available, the
reference is correctly set and the node from referencesKeeper gets removed. Digital Experience
Manager can’t know whether these references will be resolvable in future, that’s why we do not
delete them. On the other side the problem is that this list can grow and grow.

CONFIGURATION AND FINE TUNING GUIDE DIGITAL EXPERIENCE MANAGER 7.2
© 2002 – 2016 Jahia Solutions Group SA Page 112 / 115
If the number of referencesKeeper nodes is growing in your environment, you need to look at
the nodes and identify from the j:node reference, the j:propertyName and
j:originalUuid if the reason is an unresolvable reference found in one of your import files.
In that case you need to fix the repository.xml (or live-repository.xml) in the import
file and delete the corresponding jnt:reference nodes manually.
Since Digital Experience Manager 6.6.2.3, meaning also in 7.0.0, we have reduced the cases,
where we make use of the referencesKeeper node, as we saw that on customer’s sites the
number of sub-nodes could grew to hundred thousand, causing performance degradation on
import and module deployment. We now also started to log a warning when the number of sub-
nodes exceeds 5000. In that case, it is necessary to clean the nodes manually.
For that please go to the JCR query tool (see “6.4.5 JCR Data”), set limit to 10000 and use the
SQL-2 request:
SELECT * FROM [jnt:reference]
You could also add a where clause if you want to delete just specific nodes, for which you know
that they are unresolvable, but most of the time it will be seen that all of them are unresolvable.
After entering the query and the limit activate the checkbox: "Show actions". After fetching the
first 10000 results, select the link: "Delete ALL", which will remove all these 10000 entries. You
will have to run the query multiple times until you get rid of all entries. You should do that at
low-peak times. To run it overnight you could also raise the limit to e.g. 50000 (modify it in the
URL: ...&limit=50000&offset=0&displayLimit=100) to remove 50000 references in
one attempt.
7.5 HOW TO CONFIGURE DIGITAL EXPERIENCE MANAGER TO RUN BEHIND APACHE HTTP SERVER (HTTPD)
This chapter contains an overview of the Apache HTTP Server (aka “httpd”) configuration to
serve as a front-end server for Digital Experience Manager 7.2.
Please, follow the instructions of the corresponding section, depending on chosen
communication type.

CONFIGURATION AND FINE TUNING GUIDE DIGITAL EXPERIENCE MANAGER 7.2
© 2002 – 2016 Jahia Solutions Group SA Page 113 / 115
7.5.1 Apache httpd 2.2.x / 2.4.x with mod_proxy_* This section is related to the configuration where the requests are proxied to the Tomcat’s AJP
connector (port 8009) or HTTP connector (port 8080). The mod_proxy_ajp or mod_proxy_http
module is used in this case, so the following modules have to be enabled:
LoadModule proxy_module modules/mod_proxy.so
LoadModule proxy_ajp_module modules/mod_proxy_ajp.so
LoadModule proxy_http_module modules/mod_proxy_http.so
7.5.1.1 Using mod_proxy_ajp The configuration via mod_proxy_ajp in this case is as follows:
<VirtualHost *:80>
ServerName digital-experience-manager-server
ProxyPreserveHost On
ProxyPass / ajp://localhost:8009/ connectiontimeout=20 timeout=300 ttl=120
ProxyPassReverse / ajp://localhost:8009/
</VirtualHost>
7.5.1.2 Using mod_proxy_http In a similar way, the configuration via mod_proxy_http is as follows:
<VirtualHost *:80>
ServerName digital-experience-manager-server

CONFIGURATION AND FINE TUNING GUIDE DIGITAL EXPERIENCE MANAGER 7.2
© 2002 – 2016 Jahia Solutions Group SA Page 114 / 115
ProxyPreserveHost On
ProxyPass / http://localhost:8080/ connectiontimeout=20 timeout=300 ttl=120
ProxyPassReverse / http://localhost:8080/
</VirtualHost>
7.5.2 Apache httpd 2.2.x / 2.4.x with mod_jk This section is related to the configuration where the requests are proxied to the Tomcat’s AJP
connector (port 8009). The mod_jk module is used in this case, so it has to be enabled:
LoadModule jk_module modules/mod_jk.so
The configuration looks as follows:
JkWorkersFile conf/workers.properties
<VirtualHost *:80>
ServerName digital-experience-manager-server
ProxyPreserveHost On
JkMount / df
JkMount /* df
</VirtualHost>
And the workers.properties file content is:
worker.list=df
worker.df.port=8009

CONFIGURATION AND FINE TUNING GUIDE DIGITAL EXPERIENCE MANAGER 7.2
© 2002 – 2016 Jahia Solutions Group SA Page 115 / 115
worker.df.host=localhost
worker.df.type=ajp13
worker.df.ping_mode=A
worker.df.socket_connect_timeout=10000
worker.df.reply_timeout=300000
worker.df.connection_pool_timeout=600
![D Configuration and fine tuning Guide - Digital … and fine tuning Guide - Digital Factory 7.0.0.5 5RRWHGLQ2SHQ6RXUFH&06 -DKLD V'LJLWDO,QGXVWULDOL]DWLRQSDUDGLJPLV about streamlining](https://static.cupdf.com/doc/110x72/5b1fbbf97f8b9ac3688b4fed/d-configuration-and-fine-tuning-guide-digital-and-fine-tuning-guide-digital.jpg)