COMPUTERS: BEYOND BASICS

Welcome message from author
This document is posted to help you gain knowledge. Please leave a comment to let me know what you think about it! Share it to your friends and learn new things together.
Transcript
COMPUTERS: BEYOND BASICS
WHAT IS THIS CLASS? • This is an intermediate-level class that goes beyond the
basics of keyboard and mouse skills. • We will cover files and folders, computer maintenance
with defragmenting and disk cleanup, task manager and more.
FILES • All the information on your computer is stored in files. • A computer file can be seen as the modern counterpart to
paper files. • A file can be a Word document, a picture, a video, a song,
or code for software. • Every file has its own unique name – you cannot give two
different files the same name in the same location. If you do, it will save over one of the files with the other file, thereby deleting one.

FILES • Files can be saved in different locations – you can save
files to your computer, a flash drive, a DVD or CD, or other storage devices.
• When saving to your computer, you have a choice of location. You can save it to your desktop, your documents folder, or wherever makes sense to you.
Duplicate Files • You can make multiple copies of a file, however. You can
save one to your desktop and one on your flash drive. In this case it would be ok to have a two files with the same name – because it is the same file and you are just making a copy of it in another location. It is not two different files.
Let’s Create a File! • Open Microsoft Word. You should see an icon on your
desktop that looks like this: • Type a sentence. • Press the Save icon. Hint: it’s in the upper-left corner. • A dialog box will pop up. When you first save a file this
dialog box will appear. The dialog box is Windows way of asking you what you want to name the file and where you want to save it.
FILE PRACTICE • Windows gives the file a default name but you have the
ability to name it what you like – up to a point. Windows doesn’t allow:
• quotation marks (“ ”) • colons (; :) • slashes (/ \) • asterisks (*) • greater than or less than signs (< >) • question marks (?)
• See how the words are highlighted in the File Name field? If it’s highlighted, that means you can go ahead and just start typing over what’s there.
• Go ahead and give the file a new name.
FILE PRACTICE • Now that we’ve named it, let’s decide where to save it. • You can choose where to put the file in the left-hand
navigation pane. Click on Desktop in the navigation pane and then press Save at the bottom of the dialog box.
• You’ve done it! You have now created a new file and saved it to the computer’s desktop.
• You may now exit Microsoft Word by pressing the red x in the upper-right corner.

FILE PRACTICE • Let’s practice renaming a file. • Right-click on the file we just saved. • In the menu that appears, you should see Rename as
an option. • Click on Rename. You should see the file name
become highlighted in blue. This means you can rename it!
• Go ahead and type a new name. • Press Enter when you’re done. • Ta da! You’ve renamed a file. It’s that easy.

FOLDERS • Windows stores files in folders. These folders can be
seen as the modern replacement of a filing cabinet. Think of them as little storage compartments.
• Folders can contain files as well as additional folders. • For example, you could create a folder entitled “Europe
Trip Photos” and in that folder create additional folders called “England” and “Spain”. That way you could organize your photos as specifically as you want. These folders within folders are called subfolders.

FOLDERS • Windows has predefined folders – Documents,
Pictures, Music, and Videos, but you aren’t limited to just those. You can create as many folders as you want.
• To see a computer’s files and folders, click on the Start button and then choose Computer.
• The Computer window displays a computer’s storage areas, which you can open to look at the files.

Let’s Create a Folder! • Get to your desktop by closing out of any windows you have
open.
• Right click on an empty area of the desktop and hover over New. Remember hover means to put the cursor over it, but you don’t have to click.
• In the menu that appears, choose Folder.
• You should a see a picture of a folder pop up on the desktop, with the name New Folder highlighted beneath it. Remember, highlighted means you can start typing over it!
• Go ahead and give your folder a name and then press Enter. The same rules apply to folders as those to file names.

FOLDER PRACTICE • You’ve done it! You’ve created a new folder on the
computer desktop. • Once you have created a folder, you can add files to it. • You can create folders in other areas of the computer
besides the desktop with the same technique. Just right click in an empty area of the screen or you may use the New Folder button. The desktop isn’t equipped with a New Folder button, but the storage areas of your computer are.
• You can also rename a folder, using the exact same technique we used to rename a file.

COMPUTER WINDOW • Click on the Start button, then click Pictures.
Navigation pane
New folder button
Views
Search box

CHANGING VIEW • Let’s practice changing how we’re viewing files. Double
click on the Sample Pictures folder. • Click on the arrow next to the Views button and choose
Details. • This sorts your files alphabetically in one column and
you can further sort them by name, date, and type. • Click on the arrow again and choose Large Icons. • This sorts your files alphabetically and displays a
thumbnail of the file. If you’re working with photos, you’ll probably want the icon view.
CUT, COPY & PASTE • Being able to move files and folders helps you stay
organized. • Cut, copy, and paste will help you move your files. Cut,
copy, and paste are helpful with all manner of computer operations. In this instance, we’re going to use it to move files around.
• Cut means moving a file from one location to another. • Copy means making a copy of a file to create a second
copy in another location. • Paste is the act of relocating the file, whether you cut or
copied it.
CUT, COPY & PASTE STEPS • Select what you want to cut or copy. • Right click on that selection and choose Cut or Copy
from the menu, depending on which one you want to do.
• Find where you want the item to go. • Right click and choose Paste from the menu.

CUT& PASTE PRACTICE • Let’s practice cutting and pasting! • Right-click on the file you created today. • In the menu that appears, click on Cut. • Open the folder we created today. • Right-click inside the folder. • In the menu that appears, click on Paste. • You should see the item appear in the folder. This means
you’ve successfully moved the file from one location (the desktop) to another (the folder).
• See if you can cut and paste the file back to it’s original location. Right-click on the file, choose Cut, right click on the desktop and choose Paste.
COPY & PASTE PRACTICE • Now that we’ve mastered cut & paste, let’s try copy &
paste. Remember, copy makes a duplicate of the item and leaves the original item intact.
• Right-click on the file you created. • Choose Copy in the menu that appears. • Open the folder we created today. • Right-click inside the folder. • In the menu that appears, click on Paste. • You should see the item appear in the folder. This
means you’ve successfully made a copy of the file. Now you have a copy on your desktop and a copy in your folder.

CUT, COPY & PASTE SHORTCUTS • There are easy keyboard shortcuts that correspond to cut,
copy & paste. • Cut is Ctrl + X (hold down the Ctrl key and then tap X) • Copy is Ctrl + C (hold down the Ctrl key and then tap C) • Paste is Ctrl + V (hold down the Ctrl key and then tap V) • Let go of the keys as soon as you press the second key. • Try copying one of the desktop icons and pasting it into
the folder you created using only these keyboard shortcuts. Can you do it?
• Try to memorize these shortcuts if you can – they really come in handy!

DELETING A FILE • When you delete a file from your computer, it is moved
to the Recycle Bin. This allows you to recover the file if you change your mind. At this stage the file is not permanently deleted, it is just sitting in the Recycle Bin.
• There are multiple ways to delete a file: 1. Click once on the file and then press the Delete key
on your keyboard. 2. Right click on the file and choose Delete from the
menu that appears. 3. Click and drag the file to the Recycle Bin if you’re
on the desktop.
DELETING A FILE • If you use an option other than dragging the file to the
Recycle Bin, Windows will pop up a dialog box asking if you’re sure you want to delete the file. Click Yes.
• Let’s practice deleting a file! We’ll practice using the file you created today.
• See if you can delete your file by any of the 3 methods we covered.
RESTORING A FILE • If you deleted something on accident or changed your
mind, the file is recoverable from the Recycle Bin. • Let’s practice restoring a deleted file! • You should see the Recycle Bin icon on your desktop.
Open the Recycle Bin and find the file you deleted. • You may restore the file multiple ways:
• Double click on the file and in the dialog box that appears, click the Restore button.
• Right click on the file and choose Restore from the menu that appears.
• Click on the file and drag it out of the Recycle Bin and drop it on the desktop.
RESTORING A FILE • See if you can restore the file you deleted using any of
these methods. Were you able to do it? • If you empty your Recycle Bin, the file or files that are in
there are then permanently deleted. • To empty the Recycle Bin, right click on the icon and
choose Empty Recycle Bin in the menu that appears. • Windows will ask you if you’re sure you want to
permanently delete the items. • Go ahead and see if you can empty the Recycle Bin.
This is how you permanently delete a file from your computer, so make sure when you do this that you really don’t want any of the files in the bin.
BACKING UP YOUR FILES • Your hard drive (the main storage device in your
computer) will eventually die and it will take everything with it – years of photos, financial records and tax documents, songs, anything and everything you’ve saved to your computer.
• For this reason, it is important for you to back up your files regularly. When your hard drive does its final bow, you have a backup copy of everything and have prevented a disaster.
• You can back up your files by burning them onto CDs or DVDs or you can back them up on a portable hard drive or flash drive.
BACKING UP YOUR FILES • Click the Start button and choose Control Panel. • Click System and Security category. • Click Backup and Restore. • Here you can create a system repair disk, which allows
you to reinstall Windows in case of problems, and Set up backup, which backs up all your files for you.
• We can’t actually do these operations on these computers due to security settings, but know that you should do this on your personal computer.
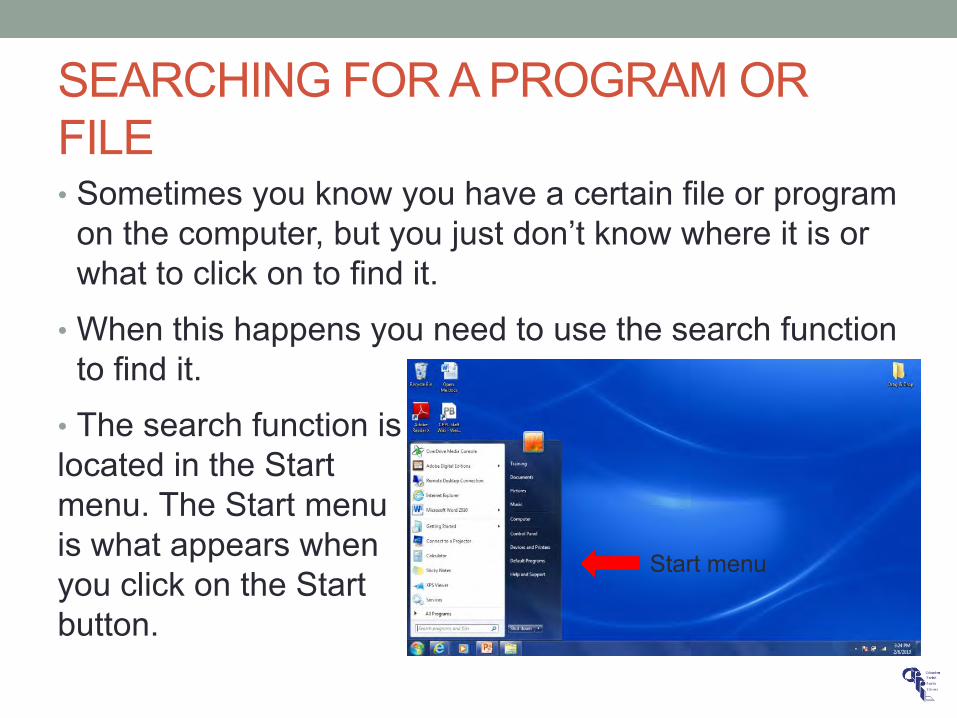
SEARCHING FOR A PROGRAM OR FILE • Sometimes you know you have a certain file or program
on the computer, but you just don’t know where it is or what to click on to find it.
• When this happens you need to use the search function to find it.
• The search function is located in the Start menu. The Start menu is what appears when you click on the Start button.
Start menu
SEARCHING PRACTICE • Let’s practice searching for a file! • Click on the Start button. • Type in the words Find Me in the search box. • Windows will search for the words Find Me and will
display the search results. • Click on the file called Find Me in the search results. • Well done! You’ve searched for and opened a file. • This is very handy for when you saved something to
your computer and have no idea where it ended up. • You may now close the file by clicking the red X (the
Close button).

SEARCHING PRACTICE • Let’s practice searching for a program! • Follow the same procedure that you did for searching
for a file: • Click on the Start button. • Type in the words Microsoft Excel. • Click on the program Microsoft Excel in the search
results. • Good job! You’ve searched for and opened a program
called Microsoft Excel. • You may now close the program by clicking the red X
(the Close button).

CREATING A SHORTCUT • A shortcut (also called an icon) is a handy push button
that opens files and programs. • Some items that you use frequently are buried beneath
several clicks in your computer – meaning you have to click several times to get it to it and it’s inconvenient.
• An easy way to get around this is to create a shortcut. You aren’t stuck with the default ones that come with Windows – you can create your own!
• A shortcut is safe and easy to create, move, or delete. You can tell something is a shortcut rather than the original because it will have an arrow in the corner.

SHORTCUT PRACTICE • Let’s practice making a shortcut! • The first thing we’ll do is find something we want to
make a shortcut to – how about Paint? • Click on the Start button. • In the search box, type Paint. • When Paint pops up in the results, right click on it. • Choose Send To and then choose Desktop. • Look on the desktop – do you see a new shortcut for
Paint? • Go ahead and double click on it. It should open the
program.
SHORTCUT PRACTICE • Let’s practice making a shortcut to a document. • Click on the Start button. • Click on Documents. • Right click on the document named Practice. • Choose Send To and then choose Desktop. • Look at the desktop – is there another new shortcut
now? • Double click on the new shortcut and it should open the
document.

SHORTCUT PRACTICE • You may delete shortcuts multiple ways, just like
deleting a file: • Click once on the file and then press the Delete key
on your keyboard. • Right click on the file and choose Delete from the
menu that appears. • Click and drag the file to the Recycle Bin if you’re on
the desktop. • See if you can delete the two shortcuts you made
today.
USER ACCOUNTS • If you share your computer with other people, you may
want to create separate user accounts. User accounts neatly separate one person from another.
• When you log onto your user account, the computer looks tailor-made for you. It will have your desktop background, programs, and files. It’s as if each user is using a separate computer.
• You can’t see what other users’ items and they can’t see yours.
• You can set a password as well, to keep your profile secure.

USER ACCOUNTS • To create additional user accounts, click on the Start
button. • Choose Control Panel in the Start menu. • Click User Accounts. • Click Add or Remove Use Accounts. • This is where you can manage your accounts.

USER ACCOUNTS • Or there’s a shortcut – click on the Start button. • Click on the user account icon. You should see a Manage
User Accounts link.
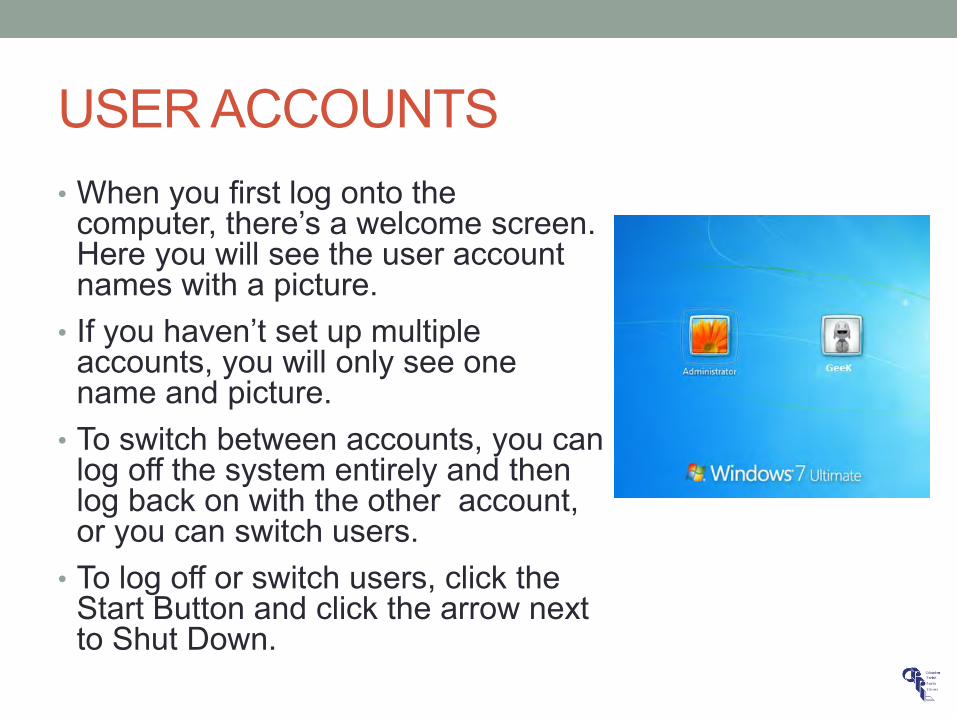
USER ACCOUNTS • When you first log onto the
computer, there’s a welcome screen. Here you will see the user account names with a picture.
• If you haven’t set up multiple accounts, you will only see one name and picture.
• To switch between accounts, you can log off the system entirely and then log back on with the other account, or you can switch users.
• To log off or switch users, click the Start Button and click the arrow next to Shut Down.
PERSONALIZE • Adding a desktop background (also called wallpaper) can
be fun and lend some personality to your computer. • You can either add one of the backgrounds that Windows
has preloaded on the computer or you can find a picture you like and add it.
• To add one of Windows backgrounds, right click on the desktop.
• Click Personalize. • Click Desktop Background. • Click in the Picture Location drop-down menu, you can
choose different locations. Choose Windows Desktop Backgrounds.
• Click on one you like and then click “Save changes.”

PERSONALIZE • To choose a picture from the Internet, simply find one
that you like that is big enough. (Small pictures will stretch and look unattractive as a desktop background.)
• Right click on the picture and choose “Set as background.”
• I will show you an example.
ALT-TAB • Alt-tab is a keyboard shortcut. It’s a fast way to switch
between programs and files you’re working with. • Open Internet Explorer. • Now open Microsoft Word. • We are now running two programs and we can easily
switch between the two by pressing the keyboard shortcut. The more programs you have open, the handier this shortcut is.
• Press and hold the Alt key (located by the space bar) and then press the Tab key.
ALT-TAB • If you press Alt and Tab and let go immediately,
Windows will switch you from the window you are currently in to the other window you have open.
• If you press and hold Alt, you can leisurely switch between the programs by tapping the Tab key.
• Try it for yourself. Are you able to switch between the programs?

TASK MANAGER • If your computer becomes frozen or a program crashes,
you can bring up the Task Manager. • With Task Manager, you are able to shut down
unresponsive programs. • You can access the Task Manger multiple ways:
• Press the Control (Ctrl), Alt, and Delete keys together and then click the Task Manger button.
• You can also press Control, Shift, and Escape (Esc) to access Task Manager
• Right-click on the time in the lower right corner and choose Start Task Manager in the menu of options.
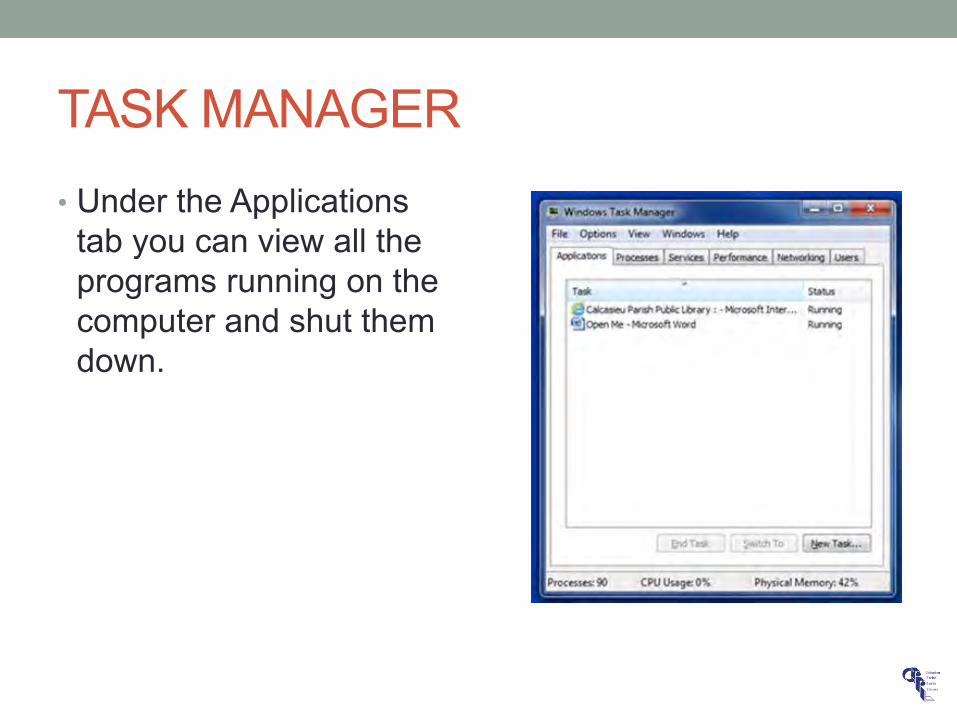
TASK MANAGER • Under the Applications
tab you can view all the programs running on the computer and shut them down.
TASK MANAGER PRACTICE • Open Task Manager any of the three ways we learned. • You should see the list of programs running. We are
currently running 2 programs, Internet Explorer and Microsoft Word. The status should say Running. If we were having trouble with the program, the status would say Not Responding.
• Click on Internet Explorer and then click the End Task button.
• Click on Microsoft Word and then click the End Task button.
• You have now successfully closed programs using the Task Manager.
SPEEDING UP YOUR COMPUTER 1. Clean it up
• Uninstall unused programs • Defragmenting & disk cleanup
2. Add more RAM • Add hardware to boost system memory
3. Remove malware • Remove spyware & viruses • Update computer security regularly
4. Better software • Use smaller, faster alternatives
5. Change programs that launch at boot-up • Limit the number of programs that automatically launch
6. Check your Internet speed
DEFRAGMENTING & DISK CLEANUP • Defragmenting and cleaning the hard disk (your largest
storage area) are part of good computer maintenance. • Defragmenting makes sure large files can be stored in
such a way that access to them is as easy and quick as possible.
• Disk cleanup finds files you do not need, such as temporary files and items in the Recycle Bin, and deletes them to free up memory.
• These processes can take up to a half hour or more, so don’t start unless you have the time to finish them.

DEFRAGMENTING & DISK CLEANUP • To access these tools, click on the Start button and then
All Programs. • Click on the folder labeled Accessories and then System
Tools. Here you will see Disk Cleanup and Disk Defragmenter.
• You can run these at any time or you can schedule your computer to run the program at a certain time each week, such as overnight when you won’t be using it. Just remember to leave the computer on that night.
• Once you’ve clicked on Disk Defragmenter, a dialogue box opens and this is where you can “Configure Schedule.”
DEFRAGMENTING & DISK CLEANUP • We can’t actually defragment the library’s computers, but
remember to do this at home. Go ahead and click the Close button.
• Click on the Start and then All Programs. • Click on the folder labeled Accessories and then System
Tools. • This time click on Disk Cleanup. • In the dialog box that pops up, check all of the boxes.
Then click OK. • Windows will ask if you’re sure you want to permanently
delete the files. Press Delete Files. • You’ve now successfully done Disk Cleanup! Remember
this is a part of good computer maintenance.
CONTROL PANEL • The Control Panel lives in the Start menu. • It has hundreds of options and switches to customize
Windows to your preferences. • Here you can personalize your computer’s appearance,
add a printer, backup your files, install or uninstall programs, and much more.
• The Control Panel now comes with a handy search box feature.

CONTROL PANEL PRACTICE • Open the Control Panel from the Start menu. • Click in the search box. • Type screen saver. • You should see search results appear. • Click the Change screen saver link. • In the Screen Saver drop-down menu, pick a screen
saver you like and then press OK. • You’ve done it! You used the Control Panel to
customize a part of Windows.
ACCESSIBILITY FEATURES • You can customize your computer to fit your needs. For
example, if you have trouble seeing your cursor, you can make it larger. Or if you are constantly looking for your cursor, you can change it to where your cursor “alerts” when you press the Ctrl key.
• You can also resize text to be medium or large.

RESIZING YOUR MOUSE CURSOR/POINTER
Right click on the desktop. Click Personalize. Click Change Mouse Pointers. Click on the Pointers tab. Under Scheme, choose Magnified (system scheme) in
the drop-down menu. Choose the Apply button at the bottom of the dialog
box. You should see the cursor is now larger and more
defined, making it easier to see.
LOCATION OF POINTER/CURSOR HELP
• Now click on the Pointer Options tab. • Click in the box at the bottom next to “Show location of
pointer when I press CTRL key.” • Choose the Apply button at the bottom of the dialog
box. • Now press the Ctrl key. • Notice that Windows alerts you where the cursor is by
ringing it with a circle. • Now press the OK button.
RESIZING TEXT I’m going to demonstrate resizing text. It requires
logging the computer on and off so I’m not going to have you follow along.
Right click on the desktop. Click on Display. You can choose the Medium (125%) option and then
press the Apply button. You must log off and then on again to see the results.
There is also an option in the menu on the left to set custom text size to go even larger.
REFERENCES • Rathbone, Andy. Windows 7 for Dummies. Hoboken, NK:
Wiley Publishing, 2009. Print. • Saltzman, Marc. “5 Ways to Speed Up an Aging
Computer.” http://shopping.yahoo.com/blogs/digital-crave/5-ways-speed-aging-computer-180535890.html. Accessed 8 November, 2013.
• West, Jessamyn C. Without a Net: Librarians Bridging the
Digital Divide. Santa Barbara, CA: Libraries Unlimited, 2012. Print.
Related Documents