UCC Library and UCC researchers have made this item openly available. Please let us know how this has helped you. Thanks! Title Formatting information: A beginner's introduction to typesetting with LATEX Beginners' LaTeX Author(s) Flynn, Peter Publication date 2002-06 Original citation Flynn, Peter; (2002) Formatting information: A beginner's introduction to typesetting with LATEX. Portland, OR: TeX Users Group. Type of publication Book Link to publisher's version http://www.ctan.org/tex-archive/info/beginlatex/ Access to the full text of the published version may require a subscription. Rights Copyright © 1999-2005 by Silmaril Consultants under the terms of what is now the GNU Free Documentation License (copyleft) http://www.ctan.org/license/fdl Item downloaded from http://hdl.handle.net/10468/1732 Downloaded on 2022-08-24T18:16:58Z

Welcome message from author
This document is posted to help you gain knowledge. Please leave a comment to let me know what you think about it! Share it to your friends and learn new things together.
Transcript

UCC Library and UCC researchers have made this item openly available.Please let us know how this has helped you. Thanks!
Title Formatting information: A beginner's introduction to typesetting withLATEXBeginners' LaTeX
Author(s) Flynn, Peter
Publication date 2002-06
Original citation Flynn, Peter; (2002) Formatting information: A beginner's introductionto typesetting with LATEX. Portland, OR: TeX Users Group.
Type of publication Book
Link to publisher'sversion
http://www.ctan.org/tex-archive/info/beginlatex/Access to the full text of the published version may require asubscription.
Rights Copyright © 1999-2005 by Silmaril Consultants under the terms ofwhat is now the GNU Free Documentation License (copyleft)http://www.ctan.org/license/fdl
Item downloadedfrom
http://hdl.handle.net/10468/1732
Downloaded on 2022-08-24T18:16:58Z

In CONGRESS, July 4, 1776.
The unanimou‘ Declaration of t˙ thirteen united State‘ of America,
When �� �� � ���� � � � � � �� � � �� � � � �� � �� � �� �� � � � �� � � � � � ���� �
� �� �� � �� � � �� � � �� � � �� � �� � � � �� � � � � � � � � �� � �� �� � � � �� � � �� �� � �� � � � � � � � � �
�� � � � � ��� � �� � � � �� � �� �� �� � � � �� � � � � � � � � � � � � � � �� � �� � �� � ��� � ��
� �� � ��� �� � � � � �� � �� � � � �� � � �� �� � � � � � � �� � �� �� � � �� � �� ��� � � � � �� �� �� � �� � �
� � ��� � � ��� � � �� � � �� �� � � �� � � � �� �� � � � �� �� �� � � � � � � � � �� � �� �� � �� � ���
� � �� �� �� �� � � � � �� � � � � � � � �� � � �� � � � � � �� � �� � � � � � �� � � �� � �� � �� � � � ��
� � �� � �� � �� � � � � � � � � �� � �� � �� � � � � �� �� � � � � � � � �� � � �� �� � � ��� � � � �
� � �� �� � � � � � �� �� � � � �� �� � � �� � �� � � � �� � � � �� � � ��� � � �� � �� � � � � � � � �� �� �� �
�� � �� � �� � � � � ��� � � �� � � � �� � � � � �� � � � � �� � �� � � � � � � � �� �� � � �� � � � �� � � � �
�� � �� � �� �� � � � �� � � �� �� � � �� � � � � �� �� � �� � � � �� � � ���� � � � � � �� �� � � �� �� � � � �
�� � � ��� � � �� � � � � � � � �� � � � � �� � �� � � �� �� �� � � � � � � � � � � � � �� � ���� �� �� �� � � � � �� � � ��
� � � ��� �� � � � � �� � � � � �� � � � � � � � � �� �� �� �� � � � � �� � �� � �� � � � �� � � �� �� � �
\title{f
orm
att
ing
info
rmati
on}
Abeg
inner
’sin
troduct
ion
toty
pes
etti
ng
wit
hLAT E
X
Pete
rFly
nn

Formatting information
A beginner’s introduction totypesetting with LATEX
This document is Copyright © 1999–2005 by Silmaril Consultantsunder the terms of what is now the GNU Free Documentation License(copyleft).
Permission is granted to copy, distribute and/or modify this documentunder the terms of the GNU Free Documentation License, Version 1.2or any later version published by the Free Software Foundation; withno Invariant Sections, no Front-Cover Texts, and no Back-Cover Texts.A copy of the license is included in the section entitled The GNU FreeDocumentation License1.
You are allowed to distribute, reproduce, and modify it without feeor further requirement for consent subject to the conditions in § D.4.The author has asserted his right to be identified as the author of thisdocument. If you make useful modifications you are asked to informthe author so that the master copy can be updated. See the full text ofthe License in Appendix D.
1FSF (2003/02/10 23:42:49)
Acknowledgments
This edition of Formatting Information was prompted by the gener-ous help I have received from TEX users too numerous to mentionindividually. Shortly after TUGboat published the November2003 edition, I was reminded by a spate of email of the fragility ofdocumentation for a system like LATEX which is constantly underdevelopment. There have been revisions to packages; issues ofnew distributions, new tools, and new interfaces; new books andother new documents; corrections to my own errors; suggestionsfor rewording; and in one or two cases mild abuse for havingomitted package X which the author felt to be indispensableto users.
I am grateful as always to the people who sent me correctionsand suggestions for improvement. Please keep them coming: onlythis way can this book reflect what people want to learn. Thesame limitation still applies, however: no mathematics, as thereare already a dozen or more excellent books on the market —as well as other online documents — dealing with mathematicaltypesetting in TEX and LATEX in finer and better detail than I amcapable of.
The structure remains the same, but I have revised andrephrased a lot of material, especially in the earlier chapterswhere a new user cannot be expected yet to have acquired anydepth of knowledge. Many of the screenshots have been up-dated, and most of the examples and code fragments have beenretested.
As I was finishing this edition, I was asked to review an articlefor The PracTEX Journal2, which grew out of the Practical TEXConference in 2004. The author specifically took the writers ofdocumentation to task for failing to explain things more clearly,and as I read more, I found myself agreeing, and resolving toclear up some specific problems areas as far as possible. It isvery difficult for people who write technical documentation to
2Carnes/Berry (2004)
Formatting information����i
remember how they struggled to learn what has now becomea familiar system. So much of what we do is second nature,and a lot of it actually has nothing to do with the software, butmore with the way in which we view and approach information,and the general level of knowledge of computing. If I haveobscured something by making unreasonable assumptions aboutyour knowledge, please let me know so that I can correct it.
Peter Flynn is author of The HTML Handbook and UnderstandingSGML and XML Tools, and editor of The XML FAQ.
Technical note
The text is written and maintained in DocBook with a customiza-tion layer for typographics. XSLT is used to generate HTML (forthe Web and plain-text versions) and LATEX (for PDF and Post-Script). The November 2003 edition was published in TUGboat3.This edition contains extensive revisions and simplifications tothe text, and many corrections to the way in which the packagesand their capabilities are presented.
3Beeton (Since 1980)
��
��ii Formatting information
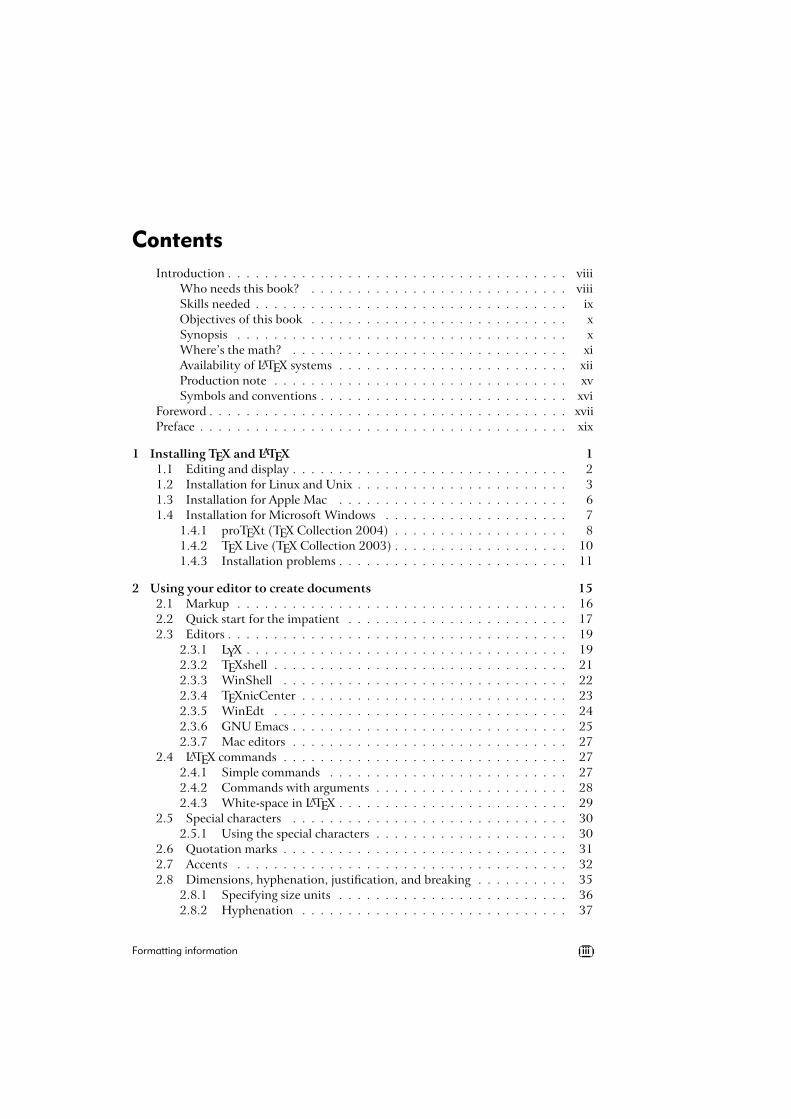
Contents
Introduction . . . . . . . . . . . . . . . . . . . . . . . . . . . . . . . . . . . . . viiiWho needs this book? . . . . . . . . . . . . . . . . . . . . . . . . . . . . viiiSkills needed . . . . . . . . . . . . . . . . . . . . . . . . . . . . . . . . . . ixObjectives of this book . . . . . . . . . . . . . . . . . . . . . . . . . . . . xSynopsis . . . . . . . . . . . . . . . . . . . . . . . . . . . . . . . . . . . . xWhere’s the math? . . . . . . . . . . . . . . . . . . . . . . . . . . . . . . xiAvailability of LATEX systems . . . . . . . . . . . . . . . . . . . . . . . . . xiiProduction note . . . . . . . . . . . . . . . . . . . . . . . . . . . . . . . . xvSymbols and conventions . . . . . . . . . . . . . . . . . . . . . . . . . . . xvi
Foreword . . . . . . . . . . . . . . . . . . . . . . . . . . . . . . . . . . . . . . . xviiPreface . . . . . . . . . . . . . . . . . . . . . . . . . . . . . . . . . . . . . . . . xix
1 Installing TEX and LATEX 11.1 Editing and display . . . . . . . . . . . . . . . . . . . . . . . . . . . . . . 21.2 Installation for Linux and Unix . . . . . . . . . . . . . . . . . . . . . . . 31.3 Installation for Apple Mac . . . . . . . . . . . . . . . . . . . . . . . . . 61.4 Installation for Microsoft Windows . . . . . . . . . . . . . . . . . . . . 7
1.4.1 proTEXt (TEX Collection 2004) . . . . . . . . . . . . . . . . . . . 81.4.2 TEX Live (TEX Collection 2003) . . . . . . . . . . . . . . . . . . . 101.4.3 Installation problems . . . . . . . . . . . . . . . . . . . . . . . . . 11
2 Using your editor to create documents 152.1 Markup . . . . . . . . . . . . . . . . . . . . . . . . . . . . . . . . . . . . 162.2 Quick start for the impatient . . . . . . . . . . . . . . . . . . . . . . . . 172.3 Editors . . . . . . . . . . . . . . . . . . . . . . . . . . . . . . . . . . . . . 19
2.3.1 LYX . . . . . . . . . . . . . . . . . . . . . . . . . . . . . . . . . . . 192.3.2 TEXshell . . . . . . . . . . . . . . . . . . . . . . . . . . . . . . . . 212.3.3 WinShell . . . . . . . . . . . . . . . . . . . . . . . . . . . . . . . 222.3.4 TEXnicCenter . . . . . . . . . . . . . . . . . . . . . . . . . . . . . 232.3.5 WinEdt . . . . . . . . . . . . . . . . . . . . . . . . . . . . . . . . 242.3.6 GNU Emacs . . . . . . . . . . . . . . . . . . . . . . . . . . . . . . 252.3.7 Mac editors . . . . . . . . . . . . . . . . . . . . . . . . . . . . . . 27
2.4 LATEX commands . . . . . . . . . . . . . . . . . . . . . . . . . . . . . . . 272.4.1 Simple commands . . . . . . . . . . . . . . . . . . . . . . . . . . 272.4.2 Commands with arguments . . . . . . . . . . . . . . . . . . . . . 282.4.3 White-space in LATEX . . . . . . . . . . . . . . . . . . . . . . . . . 29
2.5 Special characters . . . . . . . . . . . . . . . . . . . . . . . . . . . . . . 302.5.1 Using the special characters . . . . . . . . . . . . . . . . . . . . . 30
2.6 Quotation marks . . . . . . . . . . . . . . . . . . . . . . . . . . . . . . . 312.7 Accents . . . . . . . . . . . . . . . . . . . . . . . . . . . . . . . . . . . . 322.8 Dimensions, hyphenation, justification, and breaking . . . . . . . . . . 35
2.8.1 Specifying size units . . . . . . . . . . . . . . . . . . . . . . . . . 362.8.2 Hyphenation . . . . . . . . . . . . . . . . . . . . . . . . . . . . . 37
Formatting information��
��iii
FORMATTING INFORMATION
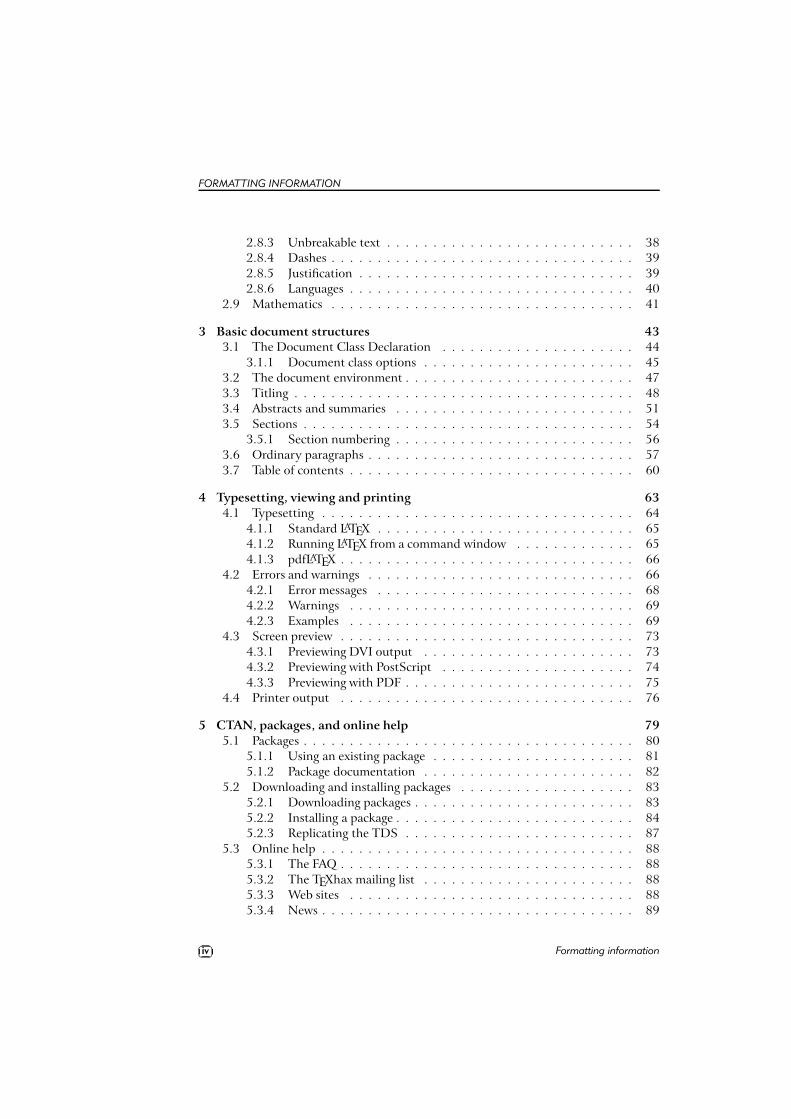
2.8.3 Unbreakable text . . . . . . . . . . . . . . . . . . . . . . . . . . . 382.8.4 Dashes . . . . . . . . . . . . . . . . . . . . . . . . . . . . . . . . . 392.8.5 Justification . . . . . . . . . . . . . . . . . . . . . . . . . . . . . . 392.8.6 Languages . . . . . . . . . . . . . . . . . . . . . . . . . . . . . . . 40
2.9 Mathematics . . . . . . . . . . . . . . . . . . . . . . . . . . . . . . . . . 41
3 Basic document structures 433.1 The Document Class Declaration . . . . . . . . . . . . . . . . . . . . . 44
3.1.1 Document class options . . . . . . . . . . . . . . . . . . . . . . . 453.2 The document environment . . . . . . . . . . . . . . . . . . . . . . . . . 473.3 Titling . . . . . . . . . . . . . . . . . . . . . . . . . . . . . . . . . . . . . 483.4 Abstracts and summaries . . . . . . . . . . . . . . . . . . . . . . . . . . 513.5 Sections . . . . . . . . . . . . . . . . . . . . . . . . . . . . . . . . . . . . 54
3.5.1 Section numbering . . . . . . . . . . . . . . . . . . . . . . . . . . 563.6 Ordinary paragraphs . . . . . . . . . . . . . . . . . . . . . . . . . . . . . 573.7 Table of contents . . . . . . . . . . . . . . . . . . . . . . . . . . . . . . . 60
4 Typesetting, viewing and printing 634.1 Typesetting . . . . . . . . . . . . . . . . . . . . . . . . . . . . . . . . . . 64
4.1.1 Standard LATEX . . . . . . . . . . . . . . . . . . . . . . . . . . . . 654.1.2 Running LATEX from a command window . . . . . . . . . . . . . 654.1.3 pdfLATEX . . . . . . . . . . . . . . . . . . . . . . . . . . . . . . . . 66
4.2 Errors and warnings . . . . . . . . . . . . . . . . . . . . . . . . . . . . . 664.2.1 Error messages . . . . . . . . . . . . . . . . . . . . . . . . . . . . 684.2.2 Warnings . . . . . . . . . . . . . . . . . . . . . . . . . . . . . . . 694.2.3 Examples . . . . . . . . . . . . . . . . . . . . . . . . . . . . . . . 69
4.3 Screen preview . . . . . . . . . . . . . . . . . . . . . . . . . . . . . . . . 734.3.1 Previewing DVI output . . . . . . . . . . . . . . . . . . . . . . . 734.3.2 Previewing with PostScript . . . . . . . . . . . . . . . . . . . . . 744.3.3 Previewing with PDF . . . . . . . . . . . . . . . . . . . . . . . . . 75
4.4 Printer output . . . . . . . . . . . . . . . . . . . . . . . . . . . . . . . . 76
5 CTAN, packages, and online help 795.1 Packages . . . . . . . . . . . . . . . . . . . . . . . . . . . . . . . . . . . . 80
5.1.1 Using an existing package . . . . . . . . . . . . . . . . . . . . . . 815.1.2 Package documentation . . . . . . . . . . . . . . . . . . . . . . . 82
5.2 Downloading and installing packages . . . . . . . . . . . . . . . . . . . 835.2.1 Downloading packages . . . . . . . . . . . . . . . . . . . . . . . . 835.2.2 Installing a package . . . . . . . . . . . . . . . . . . . . . . . . . . 845.2.3 Replicating the TDS . . . . . . . . . . . . . . . . . . . . . . . . . 87
5.3 Online help . . . . . . . . . . . . . . . . . . . . . . . . . . . . . . . . . . 885.3.1 The FAQ . . . . . . . . . . . . . . . . . . . . . . . . . . . . . . . . 885.3.2 The TEXhax mailing list . . . . . . . . . . . . . . . . . . . . . . . 885.3.3 Web sites . . . . . . . . . . . . . . . . . . . . . . . . . . . . . . . 885.3.4 News . . . . . . . . . . . . . . . . . . . . . . . . . . . . . . . . . . 89
��
��iv Formatting information

CONTENTS
5.3.5 Commercial support . . . . . . . . . . . . . . . . . . . . . . . . . 89
6 Other document structures 916.1 A little think about structure . . . . . . . . . . . . . . . . . . . . . . . . 926.2 Lists . . . . . . . . . . . . . . . . . . . . . . . . . . . . . . . . . . . . . . 93
6.2.1 Itemized lists . . . . . . . . . . . . . . . . . . . . . . . . . . . . . 956.2.2 Enumerated lists . . . . . . . . . . . . . . . . . . . . . . . . . . . 966.2.3 Description lists . . . . . . . . . . . . . . . . . . . . . . . . . . . 976.2.4 Inline lists . . . . . . . . . . . . . . . . . . . . . . . . . . . . . . . 986.2.5 Reference lists and segmented lists . . . . . . . . . . . . . . . . . 996.2.6 Lists within lists . . . . . . . . . . . . . . . . . . . . . . . . . . . 99
6.3 Tables . . . . . . . . . . . . . . . . . . . . . . . . . . . . . . . . . . . . . 1016.3.1 Floats . . . . . . . . . . . . . . . . . . . . . . . . . . . . . . . . . 1026.3.2 Formal tables . . . . . . . . . . . . . . . . . . . . . . . . . . . . . 1026.3.3 Tabular matter . . . . . . . . . . . . . . . . . . . . . . . . . . . . 1036.3.4 Tabular techniques for alignment . . . . . . . . . . . . . . . . . . 106
6.4 Figures . . . . . . . . . . . . . . . . . . . . . . . . . . . . . . . . . . . . . 1086.5 Images . . . . . . . . . . . . . . . . . . . . . . . . . . . . . . . . . . . . . 108
6.5.1 Making images . . . . . . . . . . . . . . . . . . . . . . . . . . . . 1116.5.2 Graphics storage . . . . . . . . . . . . . . . . . . . . . . . . . . . 113
6.6 Verbatim text . . . . . . . . . . . . . . . . . . . . . . . . . . . . . . . . . 1146.6.1 Inline verbatim . . . . . . . . . . . . . . . . . . . . . . . . . . . . 1146.6.2 Display verbatim . . . . . . . . . . . . . . . . . . . . . . . . . . . 116
6.7 Boxes, sidebars, and panels . . . . . . . . . . . . . . . . . . . . . . . . . 1176.7.1 Boxes of text . . . . . . . . . . . . . . . . . . . . . . . . . . . . . 1176.7.2 Framed boxes . . . . . . . . . . . . . . . . . . . . . . . . . . . . . 1206.7.3 Sidebars and panels . . . . . . . . . . . . . . . . . . . . . . . . . 121
7 Textual tools 1237.1 Quotations . . . . . . . . . . . . . . . . . . . . . . . . . . . . . . . . . . 1237.2 Footnotes and end-notes . . . . . . . . . . . . . . . . . . . . . . . . . . 1267.3 Marginal notes . . . . . . . . . . . . . . . . . . . . . . . . . . . . . . . . 1277.4 Cross-references . . . . . . . . . . . . . . . . . . . . . . . . . . . . . . . 128
7.4.1 Normal cross-references . . . . . . . . . . . . . . . . . . . . . . . 1287.4.2 Bibliographic references . . . . . . . . . . . . . . . . . . . . . . . 129
7.5 Indexes and glossaries . . . . . . . . . . . . . . . . . . . . . . . . . . . . 1367.6 Multiple columns . . . . . . . . . . . . . . . . . . . . . . . . . . . . . . 138
8 Fonts and layouts 1418.1 Changing layout . . . . . . . . . . . . . . . . . . . . . . . . . . . . . . . 141
8.1.1 Spacing . . . . . . . . . . . . . . . . . . . . . . . . . . . . . . . . 1438.1.2 Headers and footers . . . . . . . . . . . . . . . . . . . . . . . . . 146
8.2 Using fonts . . . . . . . . . . . . . . . . . . . . . . . . . . . . . . . . . . 1488.2.1 Changing the default font family . . . . . . . . . . . . . . . . . . 1528.2.2 Changing the font-family temporarily . . . . . . . . . . . . . . . 153
Formatting information��
��v
FORMATTING INFORMATION
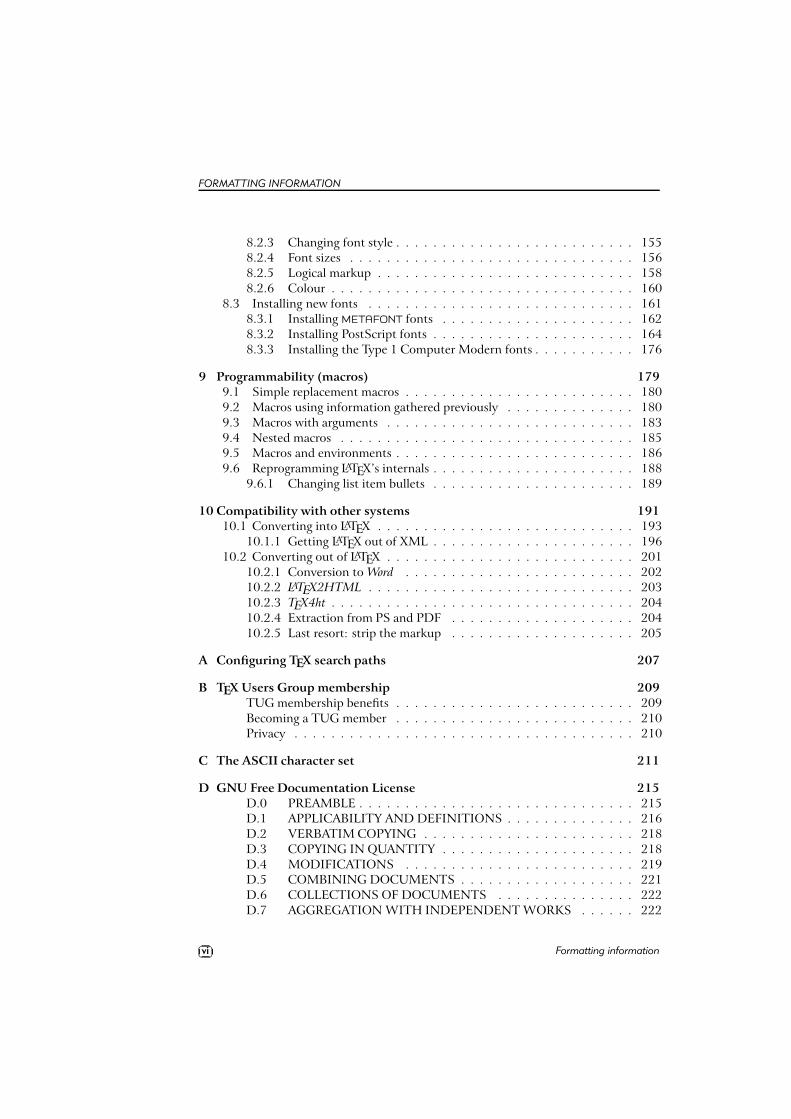
8.2.3 Changing font style . . . . . . . . . . . . . . . . . . . . . . . . . . 1558.2.4 Font sizes . . . . . . . . . . . . . . . . . . . . . . . . . . . . . . . 1568.2.5 Logical markup . . . . . . . . . . . . . . . . . . . . . . . . . . . . 1588.2.6 Colour . . . . . . . . . . . . . . . . . . . . . . . . . . . . . . . . . 160
8.3 Installing new fonts . . . . . . . . . . . . . . . . . . . . . . . . . . . . . 1618.3.1 Installing METAFONT fonts . . . . . . . . . . . . . . . . . . . . . 1628.3.2 Installing PostScript fonts . . . . . . . . . . . . . . . . . . . . . . 1648.3.3 Installing the Type 1 Computer Modern fonts . . . . . . . . . . . 176
9 Programmability (macros) 1799.1 Simple replacement macros . . . . . . . . . . . . . . . . . . . . . . . . . 1809.2 Macros using information gathered previously . . . . . . . . . . . . . . 1809.3 Macros with arguments . . . . . . . . . . . . . . . . . . . . . . . . . . . 1839.4 Nested macros . . . . . . . . . . . . . . . . . . . . . . . . . . . . . . . . 1859.5 Macros and environments . . . . . . . . . . . . . . . . . . . . . . . . . . 1869.6 Reprogramming LATEX’s internals . . . . . . . . . . . . . . . . . . . . . . 188
9.6.1 Changing list item bullets . . . . . . . . . . . . . . . . . . . . . . 189
10 Compatibility with other systems 19110.1 Converting into LATEX . . . . . . . . . . . . . . . . . . . . . . . . . . . . 193
10.1.1 Getting LATEX out of XML . . . . . . . . . . . . . . . . . . . . . . 19610.2 Converting out of LATEX . . . . . . . . . . . . . . . . . . . . . . . . . . . 201
10.2.1 Conversion to Word . . . . . . . . . . . . . . . . . . . . . . . . . 20210.2.2 LATEX2HTML . . . . . . . . . . . . . . . . . . . . . . . . . . . . . 20310.2.3 TEX4ht . . . . . . . . . . . . . . . . . . . . . . . . . . . . . . . . . 20410.2.4 Extraction from PS and PDF . . . . . . . . . . . . . . . . . . . . 20410.2.5 Last resort: strip the markup . . . . . . . . . . . . . . . . . . . . 205
A Configuring TEX search paths 207
B TEX Users Group membership 209TUG membership benefits . . . . . . . . . . . . . . . . . . . . . . . . . . 209Becoming a TUG member . . . . . . . . . . . . . . . . . . . . . . . . . . 210Privacy . . . . . . . . . . . . . . . . . . . . . . . . . . . . . . . . . . . . . 210
C The ASCII character set 211
D GNU Free Documentation License 215D.0 PREAMBLE . . . . . . . . . . . . . . . . . . . . . . . . . . . . . . 215D.1 APPLICABILITY AND DEFINITIONS . . . . . . . . . . . . . . 216D.2 VERBATIM COPYING . . . . . . . . . . . . . . . . . . . . . . . 218D.3 COPYING IN QUANTITY . . . . . . . . . . . . . . . . . . . . . 218D.4 MODIFICATIONS . . . . . . . . . . . . . . . . . . . . . . . . . 219D.5 COMBINING DOCUMENTS . . . . . . . . . . . . . . . . . . . 221D.6 COLLECTIONS OF DOCUMENTS . . . . . . . . . . . . . . . 222D.7 AGGREGATION WITH INDEPENDENT WORKS . . . . . . 222
��
��vi Formatting information
CONTENTS
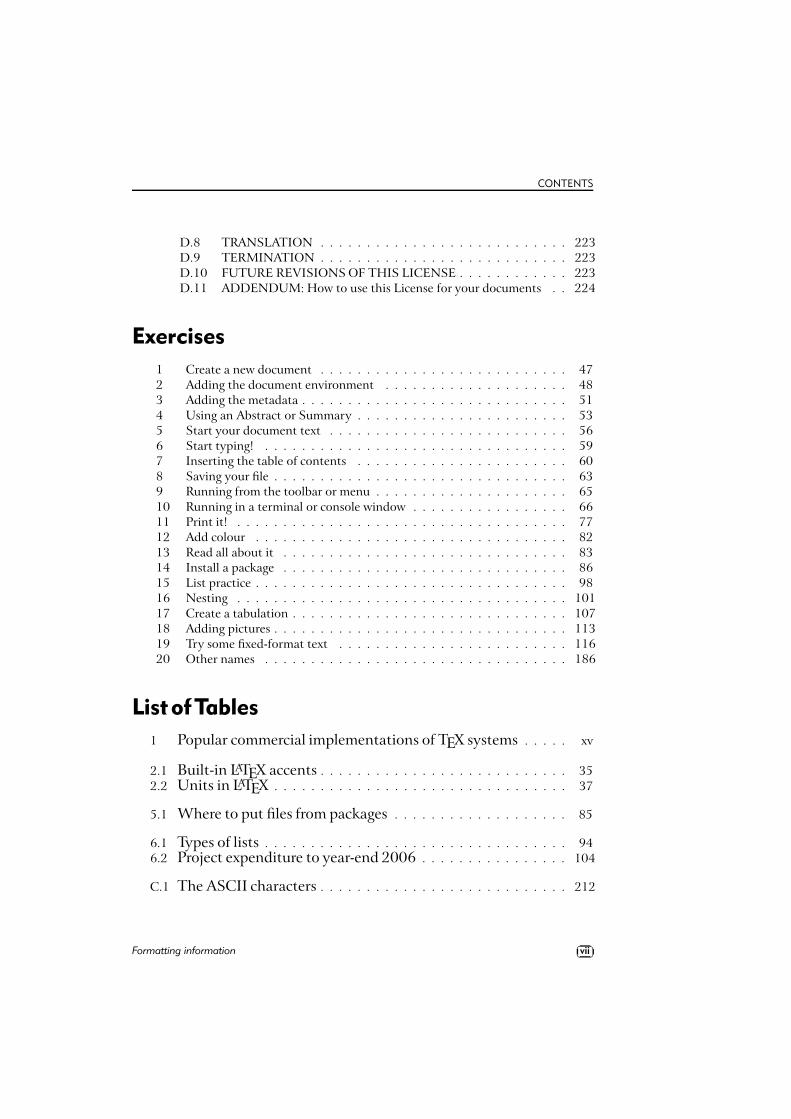
D.8 TRANSLATION . . . . . . . . . . . . . . . . . . . . . . . . . . . 223D.9 TERMINATION . . . . . . . . . . . . . . . . . . . . . . . . . . . 223D.10 FUTURE REVISIONS OF THIS LICENSE . . . . . . . . . . . . 223D.11 ADDENDUM: How to use this License for your documents . . 224
Exercises
1 Create a new document . . . . . . . . . . . . . . . . . . . . . . . . . . . 472 Adding the document environment . . . . . . . . . . . . . . . . . . . . 483 Adding the metadata . . . . . . . . . . . . . . . . . . . . . . . . . . . . . 514 Using an Abstract or Summary . . . . . . . . . . . . . . . . . . . . . . . 535 Start your document text . . . . . . . . . . . . . . . . . . . . . . . . . . 566 Start typing! . . . . . . . . . . . . . . . . . . . . . . . . . . . . . . . . . 597 Inserting the table of contents . . . . . . . . . . . . . . . . . . . . . . . 608 Saving your file . . . . . . . . . . . . . . . . . . . . . . . . . . . . . . . . 639 Running from the toolbar or menu . . . . . . . . . . . . . . . . . . . . . 6510 Running in a terminal or console window . . . . . . . . . . . . . . . . . 6611 Print it! . . . . . . . . . . . . . . . . . . . . . . . . . . . . . . . . . . . . 7712 Add colour . . . . . . . . . . . . . . . . . . . . . . . . . . . . . . . . . . 8213 Read all about it . . . . . . . . . . . . . . . . . . . . . . . . . . . . . . . 8314 Install a package . . . . . . . . . . . . . . . . . . . . . . . . . . . . . . . 8615 List practice . . . . . . . . . . . . . . . . . . . . . . . . . . . . . . . . . . 9816 Nesting . . . . . . . . . . . . . . . . . . . . . . . . . . . . . . . . . . . . 10117 Create a tabulation . . . . . . . . . . . . . . . . . . . . . . . . . . . . . . 10718 Adding pictures . . . . . . . . . . . . . . . . . . . . . . . . . . . . . . . . 11319 Try some fixed-format text . . . . . . . . . . . . . . . . . . . . . . . . . 11620 Other names . . . . . . . . . . . . . . . . . . . . . . . . . . . . . . . . . 186
ListofTables
1 Popular commercial implementations of TEX systems . . . . . xv
2.1 Built-in LATEX accents . . . . . . . . . . . . . . . . . . . . . . . . . . . 352.2 Units in LATEX . . . . . . . . . . . . . . . . . . . . . . . . . . . . . . . . 37
5.1 Where to put files from packages . . . . . . . . . . . . . . . . . . . 85
6.1 Types of lists . . . . . . . . . . . . . . . . . . . . . . . . . . . . . . . . . 946.2 Project expenditure to year-end 2006 . . . . . . . . . . . . . . . . 104
C.1 The ASCII characters . . . . . . . . . . . . . . . . . . . . . . . . . . . 212
Formatting information��
��vii
Introduction
This book originally accompanied a 2-day course on using theLATEX typesetting system. It has been extensively revised andupdated and can now be used for self-study or in the classroom.It is aimed at users of Linux, Macintosh, or Microsoft Windowsbut it can be used with LATEX systems on any platform, includingother Unix workstations, mainframes, and even your PersonalDigital Assistant (PDA).
Who needs this book?
The audience for the original training course was assumed to becomputer-literate and composed of professional, business, aca-demic, technical, or administrative computer users. The readersof the book (you) are mostly assumed to be in a similar position,but may also come from many other backgrounds, including hob-byists, students, and just people interested in quality typesetting.You are expected to have one or more of the following or similarobjectives:�
producing typesetter-quality formatting;�formatting long, complex, highly-structured, repetitive, orautomatically-generated documents;4�saving time and effort by automating common tasks;�achieving or maintaining your independence from specificmakes or models of proprietary hardware, software, or fileformats (portability);�using Open Source software (free of restrictions, sometimesalso free of charge).
4LATEX can easily be used for once-off or short and simple documents aswell, but its real strengths lie in consistency and automation.
Formatting information��
��viii
INTRODUCTION
Skills needed
LATEX is a very easy system to learn, and requires no specialistknowledge, although literacy and some familiarity with the pub-lishing process is useful. It is, however, assumed that you arecompletely fluent and familiar with using your computer beforeyou start. Specifically, effective use of this document requiresthat you already know and understand the following very thor-oughly:
�how to use a good plain-text editor (not a wordprocessor likeOpenOffice, WordPerfect, or Microsoft Word, and not a toy likeMicrosoft Notepad); 2.1.3
�where to find all 95 of the printable ASCII characters onyour keyboard and what they mean, and how to type accentsand symbols, if you use them; 3.2.1.2
�how to create, open, save, close, rename, move, and deletefiles and folders (directories); 2.3
�how to use a Web browser and/or File Transfer Protocol(FTP) program to download and save files from the Internet; 7.3.1.6
�how to uncompress and unwrap (unzip or detar) down-loaded files. 2.3.7
If you don’t know how to do these things yet, it’s importantto go and learn them first. Trying to become familiar withthe fundamentals of using a computer at the same time as learningLATEX is not likely to be as effective as doing them in order.
These are not specialist skills — they are all included in theEuropean Computer Driving Licence (ECDL) and the relevantsections of the ECDL syllabus are noted in the margin above,so they are well within the capability of anyone who uses acomputer.
Formatting information��
��ix
FORMATTING INFORMATION
Objectives of this book
By the end of this book, you should be able to undertake thefollowing tasks:�
use a plain-text editor to create and maintain your docu-ments;�add LATEX markup to identify your document structure andformatting requirements;�typeset LATEX documents, correct simple formatting errors,and display or print the results;�identify, install, and use additional packages (using CTANfor downloading where necessary);�recognise the limitations of procedural markup systemsand choose appropriate generic markup methods whereappropriate.
Synopsis
The original course covered the following topics as separate ses-sions, which are represented in the book as chapters:
1. Where to get and how to install LATEX (teTEX, fpTEX, orproTEXt from the TEX Collection disks);
2. How to type LATEX documents: using an editor to create files(half a dozen editors for LATEX);
3. Basic structures (the Document Class Declaration and itslayout options; the document environment with sectionsand paragraphs);
4. Typesetting, viewing, and printing;
5. The use of packages and CTAN to adapt formatting usingstandard tools;
��
��x Formatting information
INTRODUCTION
6. Other document structures (lists, tables, figures, images,and verbatim text);
7. Textual tools (footnotes, marginal notes, cross-references,indexes and glossaries, and bibliographic citations);
8. Typographic considerations (white-space and typefaces; in-line markup and font changes; extra font installation andautomation);
9. Programmability and automation (macros and modifyingLATEX’s behaviour);
10. Conversion and compatibility with other systems (XML,Word, etc.).
A few changes have been made in the transition to printedand online form, but the basic structure is the same, and thedocument functions as a workbook for the course as well as astandalone self-teaching guide.
Where’s the math?
It is important to note that the document does not cover mathe-matical typesetting, complex tabular material, the design oflarge-scale macros and document classes, or the finer points oftypography or typographic design, although it does refer to thesetopics in passing on a few occasions. There are several otherguides, introductions, and ‘get-started’ documents on the Weband on CTAN which cover these topics and more. Among themore popular are:�
Getting Started with TEX, LATEX, and friends5, where all begin-ners should start;�The (Not So) Short Guide to LATEX 2ε: LATEX 2ε in 131 Minutes6
is a good beginner’s tutorial;5TUG (November 2003)6Oetiker et al. (2001)
Formatting information��
��xi
FORMATTING INFORMATION
A Gentle Introduction to TEX: A Manual for Self-Study7 is aclassic tutorial on Plain TEX; Using imported graphics in LATEX 2ε8 shows you how to do(almost) anything with graphics: side-by-side, rotated, etc.; Short Math Guide for LATEX9 gets you started with the Ameri-can Math Society’s powerful packages; A comprehensive list of symbols in TEX10 shows over 2,500symbols available.
This list was taken from the CTAN search page. There are alsolots of books published about TEX and LATEX: the most importantof these for users of this document are listed in the last paragraphof the Foreword on p. xviii.
Availability of LATEX systems
Because the TEX program (the ‘engine’ which actually does thetypesetting) is separate from whichever editor you choose, TEX-based systems are available in a variety of different modes usingdifferent interfaces, depending on how you want to use them.
Graphical interface
The normal way to run LATEX is to use a toolbar button (icon), amenu item, or a keystroke in your editor. Click on it and yourdocument gets saved and typeset. All the other features of LATEXsystems (the typeset display, spellchecker, related programs likemakeindex and BIBTEX) are run the same way. This works both ina normal Graphical User Interface (GUI) as well as in text-onlyinterfaces.
7Doob (2002)8Reckdahl (1997)9AMS (2001)
10Pakin (2002)
��
��xii Formatting information
INTRODUCTION
In the popular LATEX editors like Emacs, TEXshell, TEXnicCenter,WinShell, or WinEdt, a record of the typesetting process is shownin an adjoining window so that you can see the progress of pagesbeing typeset, and any errors or warnings that may occur.11
Command-line interface
However, the graphical interface is useless if you want to runLATEX unattended, as part of an automated system, perhaps in aweb server or e-commerce environment, where there is no directconnection between user and program. The underlying TEXengine is in fact a Command-Line Interface (CLI) program, thatis, it is used as a ‘console’ program which you run from a standardUnix or Mac terminal or shell window (or from an MS-DOScommand window in Microsoft Windows systems). You type thecommand latex followed by the name of your document file (seeFigure 4.1 in § 4.1.2 for an example).
Commands like these let you run LATEX in an automated en-vironment like a Common Gateway Interface (CGI) script on aweb server or a batch file on a document system. All the populardistributions for Unix and Windows, both free and commer-cial, include this interface as standard (teTEX, fpTEX, MiKTEX,proTEXt, PC-TEX, TrueTEX, etc.).
Typeset displays
LATEX usually displays your typeset results in a separate win-dow, redisplayed automatically every time the document is re-processed, because the typesetting is done separately from theediting. Some systems, however, can format the typesetting whileyou type, at the expense of some flexibility.
Asynchronous typographic displays This method is called an asyn-chronous typographic display because the typeset window
11Recent versions of some editors hide this display by default unless errorsoccur in the typesetting.
Formatting information��
��xiii
FORMATTING INFORMATION
only updates after you have typed something and repro-cessed it, not while you are still typing, as it would with awordprocessor.12
Synchronous typographic displays Some distributions of LATEX of-fer a synchronous typographic interface. In these, you typedirectly into the typographic display, as with a wordproces-sor. Three popular examples are Textures, Scientific Word, andVTEX (see table below). At least one free version (LYX, seeFigure 2.2 in § 2.3) offers a similar interface.With a synchronous display you get Instant Textual Grat-ification™, but your level of control is restricted to that ofthe GUI you use, which cannot provide access to everythingthat LATEX can do. For complete control of the formattingyou may still need access to your normal source (input) filein the same way as for asynchronous implementations.
Near-synchronous displays There are several other methods avail-able free for Unix and some other systems for close-to-synchronous updates of the typeset display (includ-ing Jonathan Fine’s Instant Preview and the TEX daemon),and for embedding typographic fragments from the type-set display back into the editor window (David Kastrup’spreview-latex package).
Commercial distributions
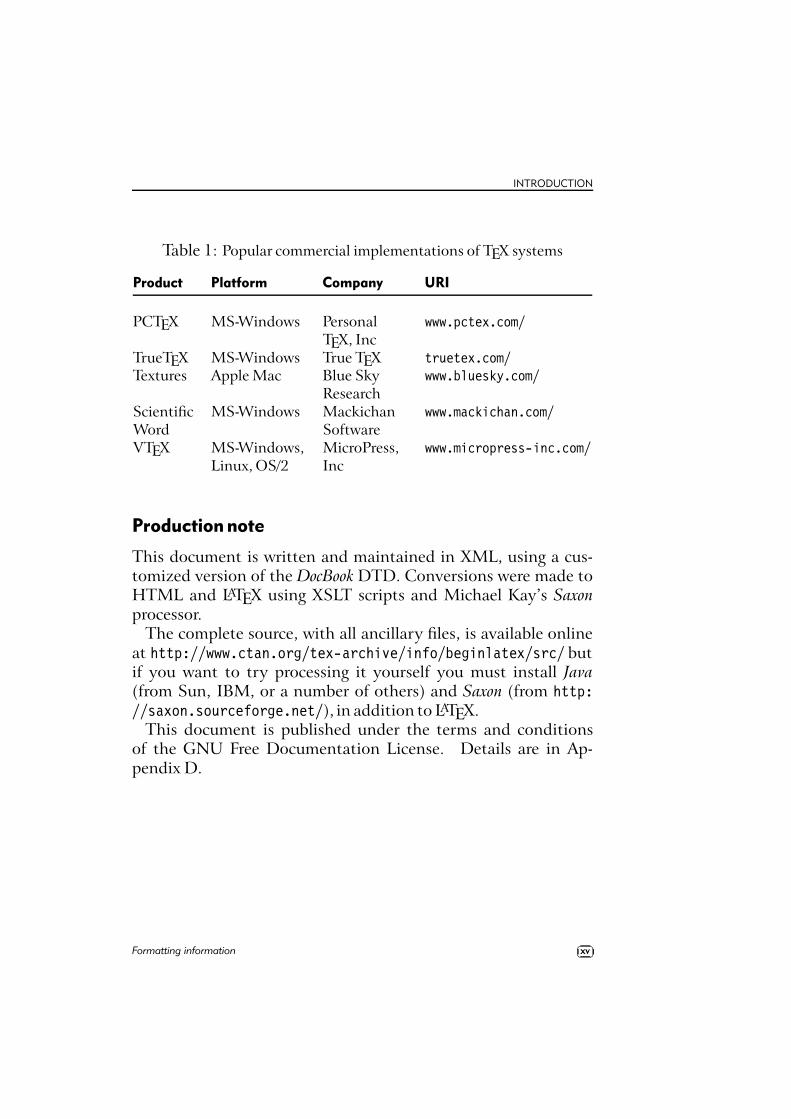
Whatever method you choose, the TEX Collection CD and CTANare not the only source of software. The vendors listed inTable offer excellent commercial implementations of TEX andLATEX, and if you are in a position where their enhanced supportand additional features are of benefit, I urge you to support them.In most cases their companies, founders, and staff have been goodfriends of the TEX and LATEX communities for many years.
12Among other reasons, TEX typesets whole paragraphs at a time, not line-by-line as lesser systems do, in order to get the hyphenation and justification(H&J) right (see § 2.8).
��
��xiv Formatting information
INTRODUCTION
Table 1: Popular commercial implementations of TEX systems
Product Platform Company URI
PCTEX MS-Windows PersonalTEX, Inc
www.pctex.com/
TrueTEX MS-Windows True TEX truetex.com/Textures Apple Mac Blue Sky
Researchwww.bluesky.com/
ScientificWord
MS-Windows MackichanSoftware
www.mackichan.com/
VTEX MS-Windows,Linux, OS/2
MicroPress,Inc
www.micropress-inc.com/
Production note
This document is written and maintained in XML, using a cus-tomized version of the DocBook DTD. Conversions were made toHTML and LATEX using XSLT scripts and Michael Kay’s Saxonprocessor.
The complete source, with all ancillary files, is available onlineat http://www.ctan.org/tex-archive/info/beginlatex/src/ butif you want to try processing it yourself you must install Java(from Sun, IBM, or a number of others) and Saxon (from http://saxon.sourceforge.net/), in addition to LATEX.
This document is published under the terms and conditionsof the GNU Free Documentation License. Details are in Ap-pendix D.
Formatting information��
��xv
FORMATTING INFORMATION
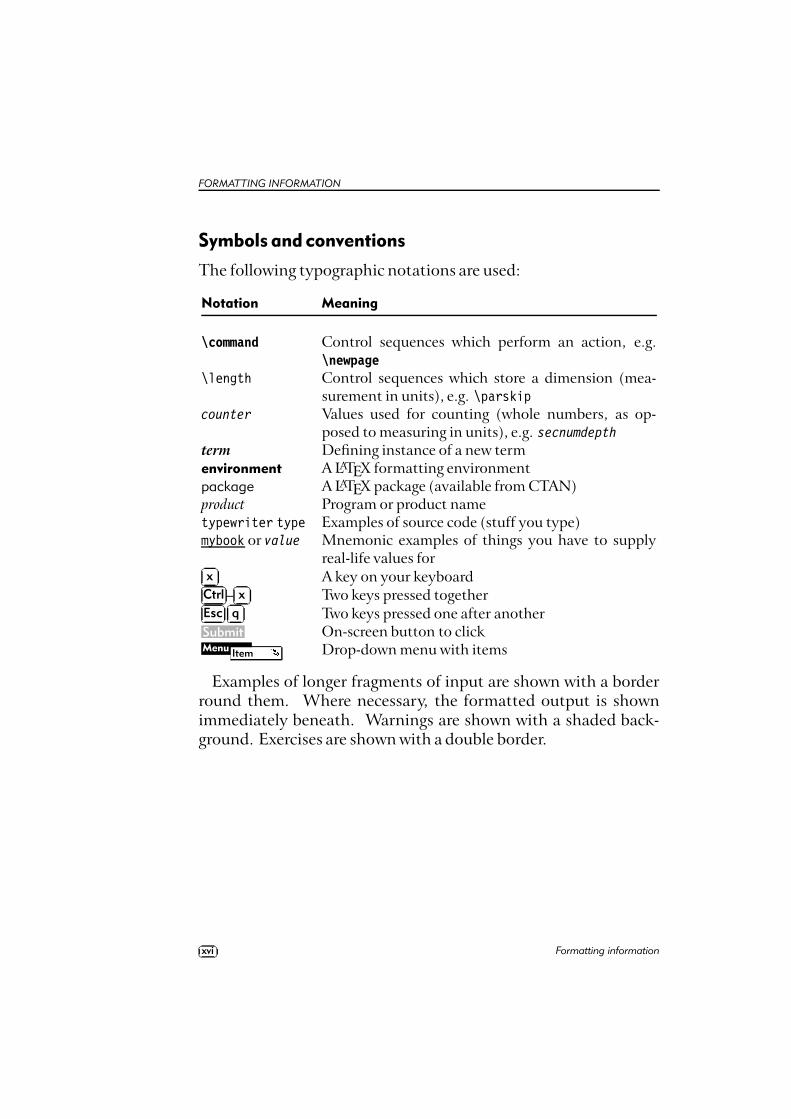
Symbols and conventions
The following typographic notations are used:
Notation Meaning
\command Control sequences which perform an action, e.g.\newpage
\length Control sequences which store a dimension (mea-surement in units), e.g. \parskip
counter Values used for counting (whole numbers, as op-posed to measuring in units), e.g. secnumdepth
term Defining instance of a new termenvironment A LATEX formatting environmentpackage A LATEX package (available from CTAN)product Program or product nametypewriter type Examples of source code (stuff you type)mybook or value Mnemonic examples of things you have to supply
real-life values for��
��x A key on your keyboard�
���Ctrl–��
��x Two keys pressed together�
���Esc��
��q Two keys pressed one after another
Submit On-screen button to clickMenu Item ! Drop-down menu with items
Examples of longer fragments of input are shown with a borderround them. Where necessary, the formatted output is shownimmediately beneath. Warnings are shown with a shaded back-ground. Exercises are shown with a double border.
��
��xvi Formatting information
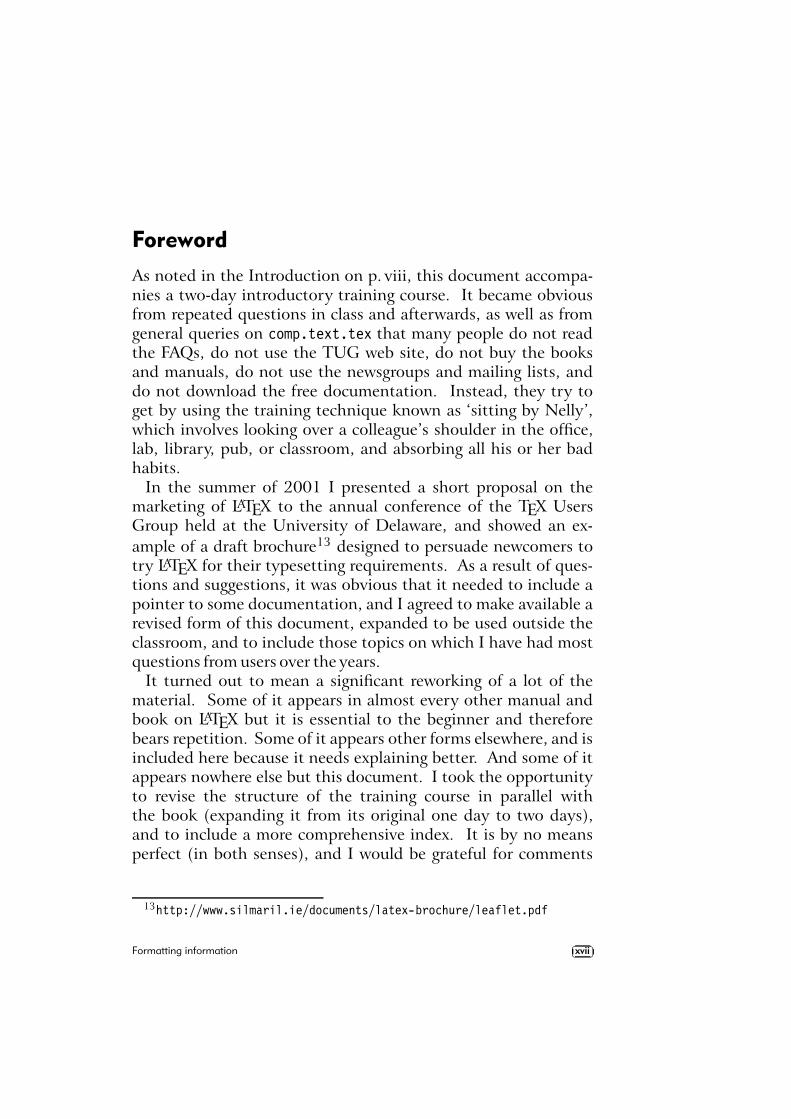
Foreword
As noted in the Introduction on p. viii, this document accompa-nies a two-day introductory training course. It became obviousfrom repeated questions in class and afterwards, as well as fromgeneral queries on comp.text.tex that many people do not readthe FAQs, do not use the TUG web site, do not buy the booksand manuals, do not use the newsgroups and mailing lists, anddo not download the free documentation. Instead, they try toget by using the training technique known as ‘sitting by Nelly’,which involves looking over a colleague’s shoulder in the office,lab, library, pub, or classroom, and absorbing all his or her badhabits.
In the summer of 2001 I presented a short proposal on themarketing of LATEX to the annual conference of the TEX UsersGroup held at the University of Delaware, and showed an ex-ample of a draft brochure13 designed to persuade newcomers totry LATEX for their typesetting requirements. As a result of ques-tions and suggestions, it was obvious that it needed to include apointer to some documentation, and I agreed to make available arevised form of this document, expanded to be used outside theclassroom, and to include those topics on which I have had mostquestions from users over the years.
It turned out to mean a significant reworking of a lot of thematerial. Some of it appears in almost every other manual andbook on LATEX but it is essential to the beginner and thereforebears repetition. Some of it appears other forms elsewhere, and isincluded here because it needs explaining better. And some of itappears nowhere else but this document. I took the opportunityto revise the structure of the training course in parallel withthe book (expanding it from its original one day to two days),and to include a more comprehensive index. It is by no meansperfect (in both senses), and I would be grateful for comments
13http://www.silmaril.ie/documents/latex-brochure/leaflet.pdf
Formatting information��
��xvii
FORMATTING INFORMATION
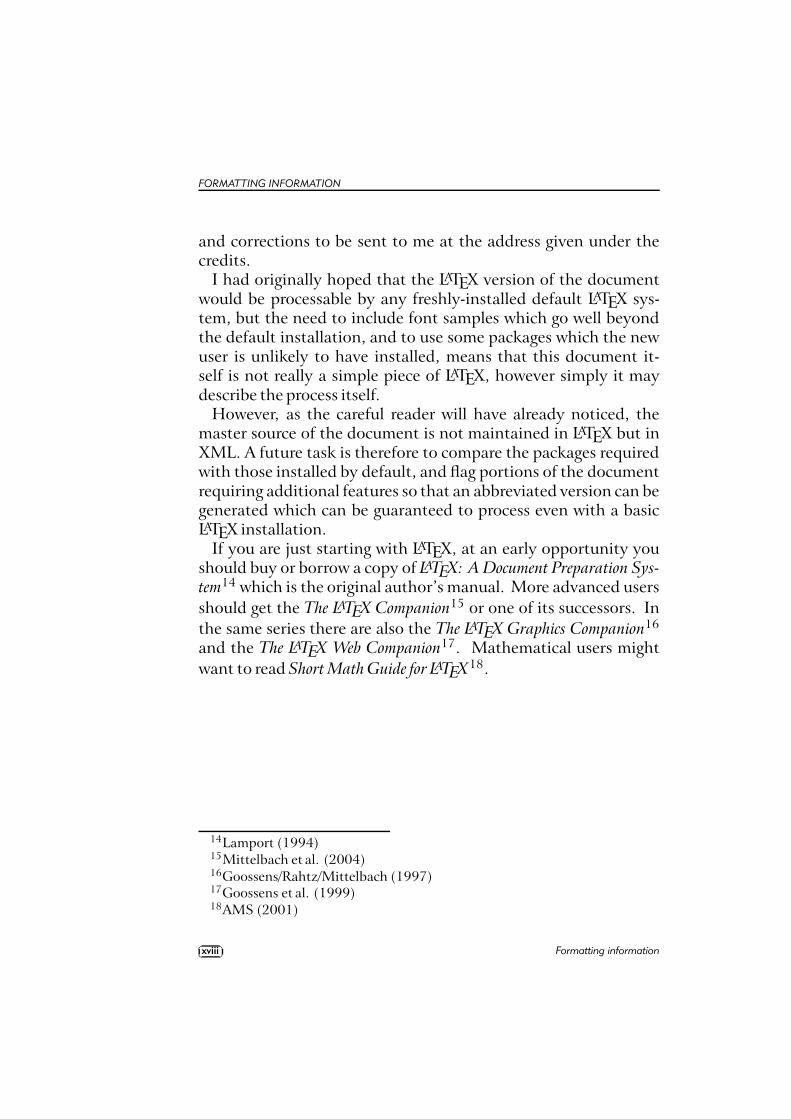
and corrections to be sent to me at the address given under thecredits.
I had originally hoped that the LATEX version of the documentwould be processable by any freshly-installed default LATEX sys-tem, but the need to include font samples which go well beyondthe default installation, and to use some packages which the newuser is unlikely to have installed, means that this document it-self is not really a simple piece of LATEX, however simply it maydescribe the process itself.
However, as the careful reader will have already noticed, themaster source of the document is not maintained in LATEX but inXML. A future task is therefore to compare the packages requiredwith those installed by default, and flag portions of the documentrequiring additional features so that an abbreviated version can begenerated which can be guaranteed to process even with a basicLATEX installation.
If you are just starting with LATEX, at an early opportunity youshould buy or borrow a copy of LATEX: A Document Preparation Sys-tem14 which is the original author’s manual. More advanced usersshould get the The LATEX Companion15 or one of its successors. Inthe same series there are also the The LATEX Graphics Companion16
and the The LATEX Web Companion17. Mathematical users mightwant to read Short Math Guide for LATEX18.
14Lamport (1994)15Mittelbach et al. (2004)16Goossens/Rahtz/Mittelbach (1997)17Goossens et al. (1999)18AMS (2001)
��
��xviii Formatting information
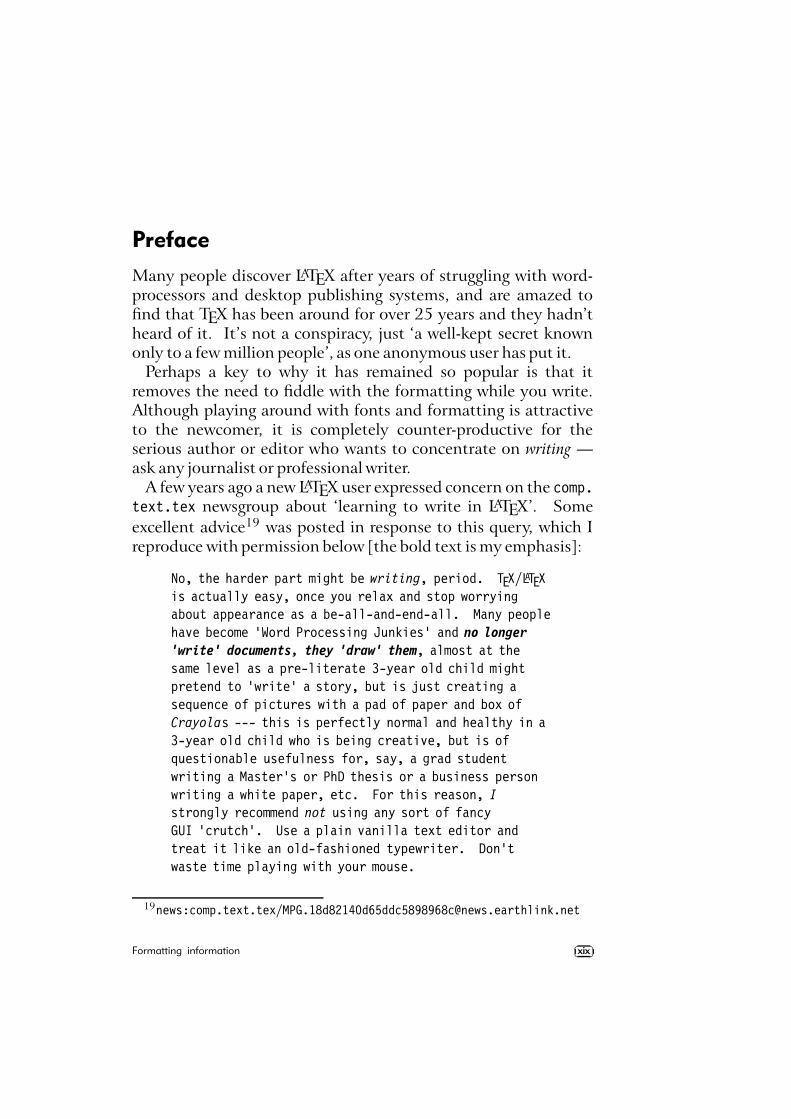
Preface
Many people discover LATEX after years of struggling with word-processors and desktop publishing systems, and are amazed tofind that TEX has been around for over 25 years and they hadn’theard of it. It’s not a conspiracy, just ‘a well-kept secret knownonly to a few million people’, as one anonymous user has put it.
Perhaps a key to why it has remained so popular is that itremoves the need to fiddle with the formatting while you write.Although playing around with fonts and formatting is attractiveto the newcomer, it is completely counter-productive for theserious author or editor who wants to concentrate on writing —ask any journalist or professional writer.
A few years ago a new LATEX user expressed concern on the comp.text.tex newsgroup about ‘learning to write in LATEX’. Someexcellent advice19 was posted in response to this query, which Ireproduce with permission below [the bold text is my emphasis]:
No, the harder part might be writing, period. TEX/LATEXis actually easy, once you relax and stop worryingabout appearance as a be-all-and-end-all. Many peoplehave become ‘Word Processing Junkies’ and no longer
‘write’ documents, they ‘draw’ them, almost at thesame level as a pre-literate 3-year old child mightpretend to ‘write’ a story, but is just creating asequence of pictures with a pad of paper and box ofCrayolas --- this is perfectly normal and healthy in a3-year old child who is being creative, but is ofquestionable usefulness for, say, a grad studentwriting a Master’s or PhD thesis or a business personwriting a white paper, etc. For this reason, I
strongly recommend not using any sort of fancyGUI ‘crutch’. Use a plain vanilla text editor andtreat it like an old-fashioned typewriter. Don’twaste time playing with your mouse.
19news:comp.text.tex/[email protected]
Formatting information��
��xix
FORMATTING INFORMATION
Note: I am not saying that you should have no concernsabout the appearance of your document, just that youshould write the document (completely) first and tweakthe appearance later…not [spend time on] lots ofrandom editing in the bulk of the document itself.
[Heller, New To LATEX…Unlearning Bad Habits (11 March 2003)]
Learning to write well can be hard, but authors shouldn’t haveto make things even harder for themselves by using manually-driven systems which break their concentration every few secondsfor some footling adjustment to the appearance, simply becausethe software is incapable of doing it right by itself.
Don Knuth originally wrote TEX to typeset mathematics for thesecond edition of his master-work The Art of Computer Program-ming20, and it remains pretty much the only typesetting programto include fully-automated mathematical formatting done theway mathematicians want it. But he also published a bookletcalled Mathematical Writing21 which shows how important it is tothink about what you write, and how the computer should be ableto help, not hinder.
And TEX is much more than math: it’s a programmable type-setting system which can be used for almost any formatting task,and LATEX has made it usable by almost anyone. Professor Knuthgenerously placed the entire system in the public domain, so formany years there was no publicity of the commercial kind whichwould have got TEX noticed outside the technical field.
Nowadays, however, there are many companies selling TEXsoftware or services,22 dozens of publishers accepting LATEX docu-ments for publication, and hundreds of thousands of users usingLATEX for millions of documents.23
20Knuth (1980)21Knuth/Larrabee/Roberts (1989)22See, for example, the list of TEX vendors on p. xv, and the list of
consultants published by TUG.23A guesstimate. With free software it’s impossible to tell how many people
are using it, but it’s a lot.
��
��xx Formatting information
PREFACE
To count yourself as a TEX or LATEX user, visit the TEX UsersGroup’s ‘TEX Counter’ web site (and get a nice certificate!).
There is occasionally some confusion among newcomers be-tween the two main programs, TEX and LATEX:"
TEX is a typesetting program, originally written by ProfKnuth at Stanford around 1978. It implements a macro-driven typesetters’ programming language of some 300 ba-sic operations and it has formed the core of many otherdesktop publishing (DTP) systems. Although it is stillpossible to write in the raw TEX language, you need tostudy it in depth, and you need to be able to write macros(subprograms) to perform even the simplest of repetitivetasks."LATEX is a user interface for TEX, designed by Leslie Lam-port at Digital Equipment Corporation (DEC) in 1985 toautomate all the common tasks of document preparation.It provides a simple way for authors and typesetters to usethe power of TEX without having to learn the underlyinglanguage. LATEX is the recommended system for all usersexcept professional typographic programmers and computerscientists who want to study the internals of TEX.
Both TEX and LATEX have been constantly updated since theirinception. Knuth has now frozen development of the TEXengine so that users and developers can have a virtually bug-free,rock-stable platform to work with.24 Typographic programmingdevelopment continues with the New Typesetting System (NTS),planned as a successor to TEX. The LATEX3 project has taken overdevelopment of LATEX, and the current version is LATEX 2ε, whichis what we are concentrating on here. Details of all developmentscan be had from the TUG at http://www.tug.org
24Knuth still fixes bugs, although the chances of finding a bug in TEX thesedays approaches zero.
Formatting information��
��xxi
FORMATTING INFORMATION
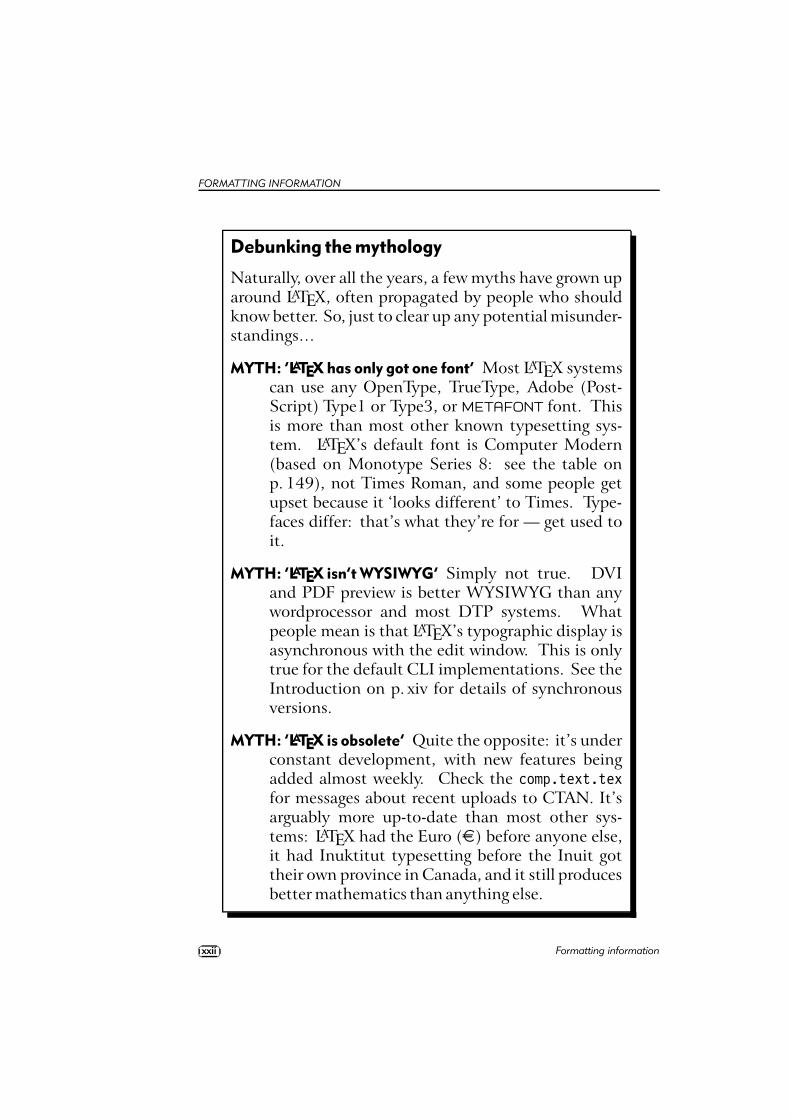
Debunking the mythology
Naturally, over all the years, a few myths have grown uparound LATEX, often propagated by people who shouldknow better. So, just to clear up any potential misunder-standings…
MYTH: ‘LATEX has only got one font’ Most LATEX systemscan use any OpenType, TrueType, Adobe (Post-Script) Type1 or Type3, or METAFONT font. Thisis more than most other known typesetting sys-tem. LATEX’s default font is Computer Modern(based on Monotype Series 8: see the table onp. 149), not Times Roman, and some people getupset because it ‘looks different’ to Times. Type-faces differ: that’s what they’re for — get used toit.
MYTH: ‘LATEX isn’t WYSIWYG’ Simply not true. DVIand PDF preview is better WYSIWYG than anywordprocessor and most DTP systems. Whatpeople mean is that LATEX’s typographic display isasynchronous with the edit window. This is onlytrue for the default CLI implementations. See theIntroduction on p. xiv for details of synchronousversions.
MYTH: ‘LATEX is obsolete’ Quite the opposite: it’s underconstant development, with new features beingadded almost weekly. Check the comp.text.texfor messages about recent uploads to CTAN. It’sarguably more up-to-date than most other sys-tems: LATEX had the Euro (¤) before anyone else,it had Inuktitut typesetting before the Inuit gottheir own province in Canada, and it still producesbetter mathematics than anything else.
��
��xxii Formatting information
PREFACE
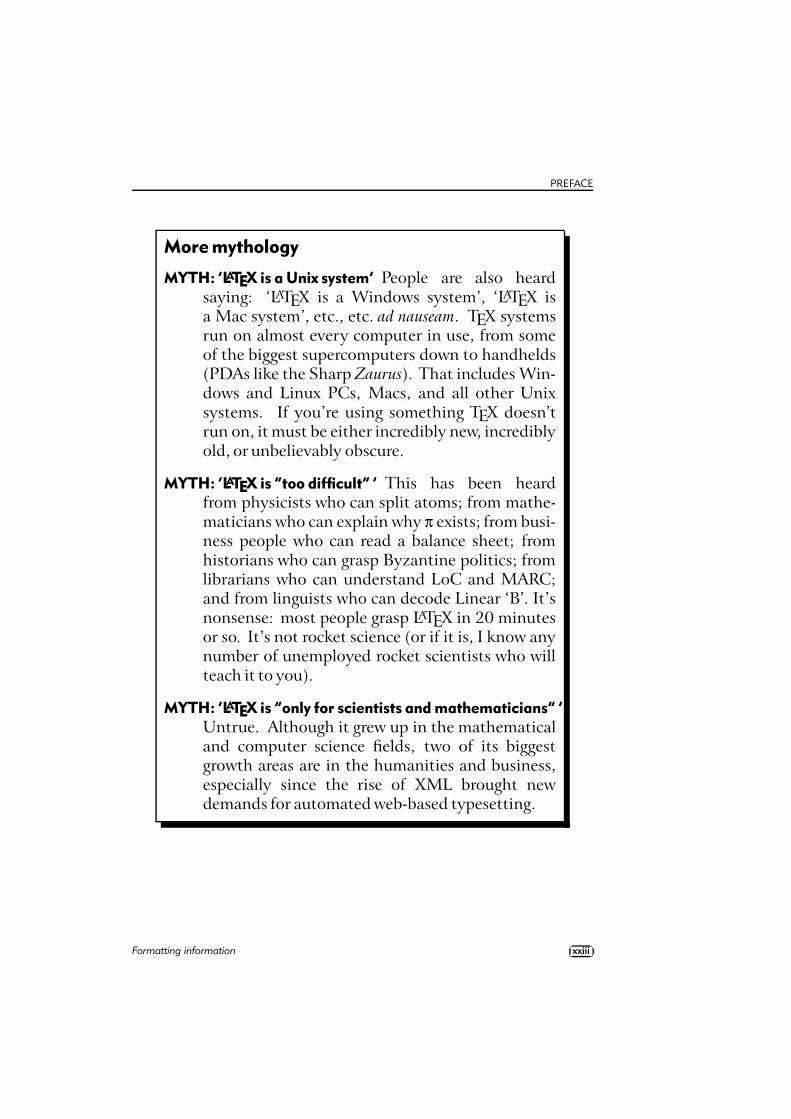
More mythology
MYTH: ‘LATEX is a Unix system’ People are also heardsaying: ‘LATEX is a Windows system’, ‘LATEX isa Mac system’, etc., etc. ad nauseam. TEX systemsrun on almost every computer in use, from someof the biggest supercomputers down to handhelds(PDAs like the Sharp Zaurus). That includes Win-dows and Linux PCs, Macs, and all other Unixsystems. If you’re using something TEX doesn’trun on, it must be either incredibly new, incrediblyold, or unbelievably obscure.
MYTH: ‘LATEX is “too difficult” ’ This has been heardfrom physicists who can split atoms; from mathe-maticians who can explain why π exists; from busi-ness people who can read a balance sheet; fromhistorians who can grasp Byzantine politics; fromlibrarians who can understand LoC and MARC;and from linguists who can decode Linear ‘B’. It’snonsense: most people grasp LATEX in 20 minutesor so. It’s not rocket science (or if it is, I know anynumber of unemployed rocket scientists who willteach it to you).
MYTH: ‘LATEX is “only for scientists and mathematicians” ’Untrue. Although it grew up in the mathematicaland computer science fields, two of its biggestgrowth areas are in the humanities and business,especially since the rise of XML brought newdemands for automated web-based typesetting.
Formatting information��
��xxiii


1Installing TEX and LATEX
This course is based on using one of the following distributionsof TEX on the 2004 TEX Collection DVD or the 2003 TEXLive CD:
teTEX for Linux and other Unix-like systems, including Mac OS X(Thomas Esser);
proTEXt for Microsoft Windows (Thomas Feuerstack), based onChristian Schenk’s MikTEX;
fpTEX for Microsoft Windows (Fabrice Popineau) from the 2003TEX Live CD.
Many other implementations of TEX, such as Tom Kiffe’sCMacTEX for the Apple Macintosh, can be downloaded fromCTAN. LATEX is included with all modern distributions of TEX.
The TEX Collection CD is issued annually on behalf of mostof the local TEX user groups around the world (see http://www.tug.org/lugs.html for addresses), and edited by SebastianRahtz, Karl Berry, Manfred Lotz, and the authors of the software
Formatting information��
��1
CHAPTER 1. INSTALLING TEX AND LATEX
mentioned above. These people give an enormous amount oftheir personal time and energy to building and distributing thesesystems, and they deserve the thanks and support of the usercommunity for all they do.
There are many other distributions of LATEX both free andcommercial, as described in the Introduction on p. viii: they allprocess LATEX identically, but there are some differences in size,speed, packaging, and (in the case of commercial distributions)price, support, and extra software provided.
One final thing before we start: publicly-maintained softwarelike TEX is updated faster than commercial software, so alwayscheck to see if there is a more recent version of the installation. See the liston p. 12 in § 1.4.3 for more details.
1.1 Editinganddisplay
When you install LATEX you will have the opportunity to decidea) which plain-text editor[s] you want to use to create andmaintain your documents; and b) which preview programs youwant to use to see your typesetting. This isn’t much use to youif you’re unfamiliar with editors and previewers, so have a lookat the table below, and maybe flip ahead to § 2.3 for a moment,where there are descriptions and screenshots.
The best bet is probably to install more than one — if you’ve gotthe disk space — or maybe all of them, because you can alwaysdelete the ones you don’t like.
Editors There is a wide range of editors available: probably noother piece of software causes more flame-wars in Internetand other discussions than your choice of editor. It’s ahighly personal choice, so feel free to pick the one youlike. My personal biases are probably revealed below, so feelequally free to ignore them.
Previewers For displaying your typesetting before printing, youwill need a previewer. All systems come with a DVI pre-
��
��2 Formatting information
1.2. INSTALLATION FOR LINUX AND UNIX
viewer for standard LATEX, but if you are intending to pro-duce industry-standard PostScript or PDF (Adobe Acrobat)files you will need a previewer for those formats. GSviewdisplays both PostScript and PDF files; xpdf and Adobe’sown Acrobat Reader just display PDF files.
For brief details of some of the most popular editors used forLATEX, see § 2.3.
Additional downloads
For licensing reasons, the GSview PostScript/PDF previewer, theAcrobat Reader PDF previewer, and the WinEdt editor could notbe distributed on the 2003 CDs. In those cases you have todownload and install them separately.#
GSview is available for all platforms from http://www.ghostscript.com/gsview/index.htm (on Unixand VMS systems it’s also available as GhostView and gv:see http://www.cs.wisc.edu/^ghost/)#Acrobat Reader (all platforms) can be downloaded fromhttp://www.adobe.com/products/acrobat/readstep2.html#WinEdt (Microsoft Windows only) comes from http://www.winedt.com
1.2 Installation forLinuxandUnix
Make sure your system libraries and utilities are up to date. Ifyou are using Red Hat Linux, use yum or up2date to download andinstall updates. For Debian and other distributions, use apt-getor similar. On Red Hat systems, remove any RPM version ofteTEX and associated utilities which may have been preinstalled,in order to avoid version conflicts.
If you are installing TEX Live to a new partition, and you havethe opportunity to reformat the partition before use, use mkfs with
Formatting information��
��3
CHAPTER 1. INSTALLING TEX AND LATEX
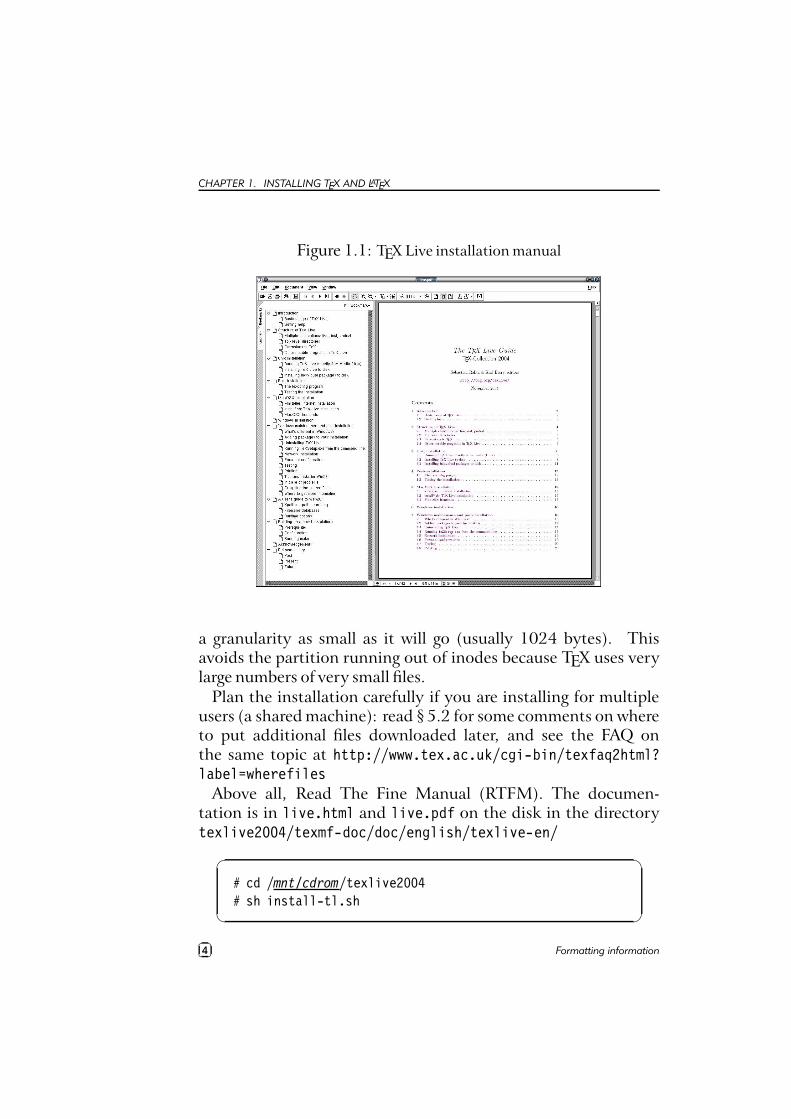
Figure 1.1: TEX Live installation manual
a granularity as small as it will go (usually 1024 bytes). Thisavoids the partition running out of inodes because TEX uses verylarge numbers of very small files.
Plan the installation carefully if you are installing for multipleusers (a shared machine): read § 5.2 for some comments on whereto put additional files downloaded later, and see the FAQ onthe same topic at http://www.tex.ac.uk/cgi-bin/texfaq2html?label=wherefiles
Above all, Read The Fine Manual (RTFM). The documen-tation is in live.html and live.pdf on the disk in the directorytexlive2004/texmf-doc/doc/english/texlive-en/
�
�
# cd /mnt/cdrom/texlive2004# sh install-tl.sh
��
��4 Formatting information
1.2. INSTALLATION FOR LINUX AND UNIX
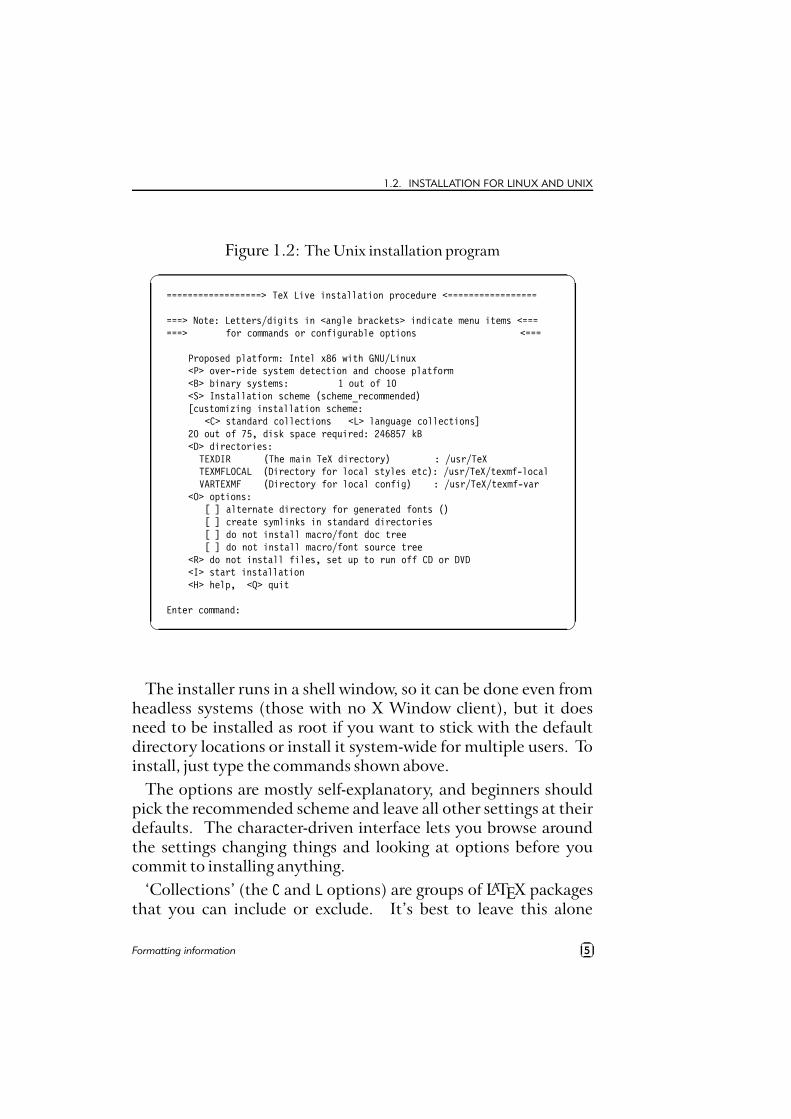
Figure 1.2: The Unix installation program�
�
==================> TeX Live installation procedure <=================
===> Note: Letters/digits in <angle brackets> indicate menu items <======> for commands or configurable options <===
Proposed platform: Intel x86 with GNU/Linux<P> over-ride system detection and choose platform<B> binary systems: 1 out of 10<S> Installation scheme (scheme_recommended)[customizing installation scheme:
<C> standard collections <L> language collections]20 out of 75, disk space required: 246857 kB<D> directories:
TEXDIR (The main TeX directory) : /usr/TeXTEXMFLOCAL (Directory for local styles etc): /usr/TeX/texmf-localVARTEXMF (Directory for local config) : /usr/TeX/texmf-var
<O> options:[ ] alternate directory for generated fonts ()[ ] create symlinks in standard directories[ ] do not install macro/font doc tree[ ] do not install macro/font source tree
<R> do not install files, set up to run off CD or DVD<I> start installation<H> help, <Q> quit
Enter command:
The installer runs in a shell window, so it can be done even fromheadless systems (those with no X Window client), but it doesneed to be installed as root if you want to stick with the defaultdirectory locations or install it system-wide for multiple users. Toinstall, just type the commands shown above.
The options are mostly self-explanatory, and beginners shouldpick the recommended scheme and leave all other settings at theirdefaults. The character-driven interface lets you browse aroundthe settings changing things and looking at options before youcommit to installing anything.
‘Collections’ (the C and L options) are groups of LATEX packagesthat you can include or exclude. It’s best to leave this alone
Formatting information��
��5
CHAPTER 1. INSTALLING TEX AND LATEX
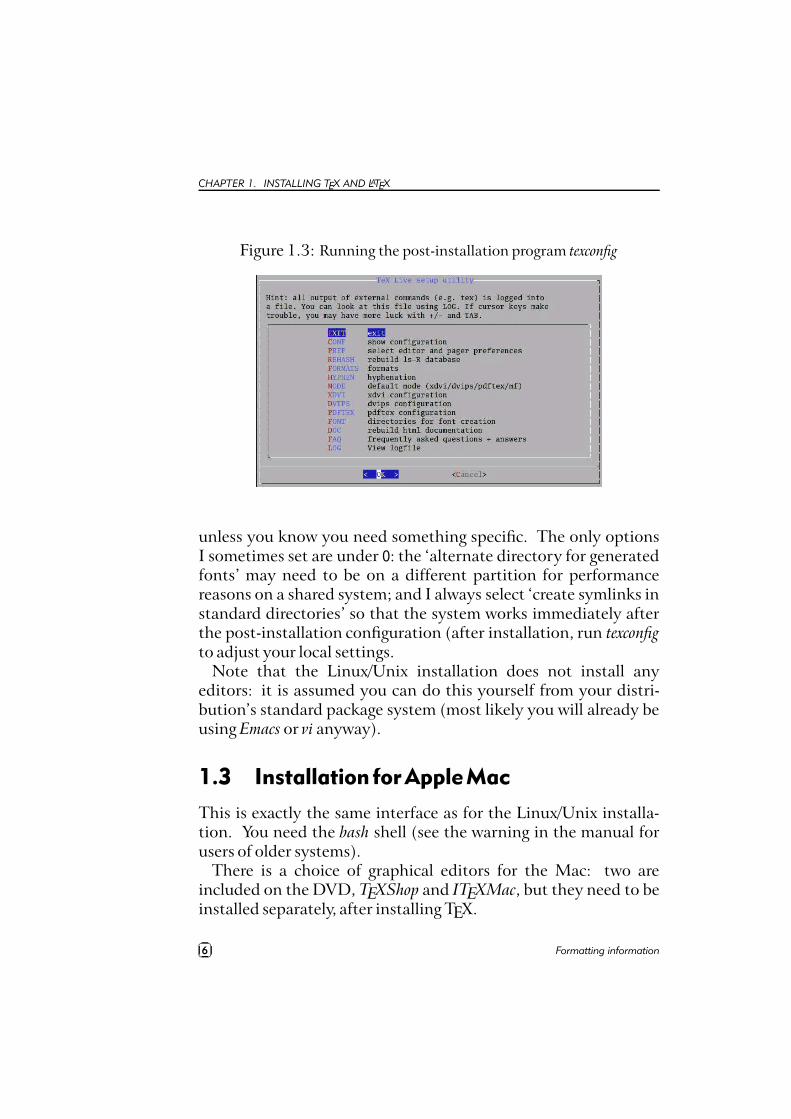
Figure 1.3: Running the post-installation program texconfig
unless you know you need something specific. The only optionsI sometimes set are under O: the ‘alternate directory for generatedfonts’ may need to be on a different partition for performancereasons on a shared system; and I always select ‘create symlinks instandard directories’ so that the system works immediately afterthe post-installation configuration (after installation, run texconfigto adjust your local settings.
Note that the Linux/Unix installation does not install anyeditors: it is assumed you can do this yourself from your distri-bution’s standard package system (most likely you will already beusing Emacs or vi anyway).
1.3 Installation forAppleMac
This is exactly the same interface as for the Linux/Unix installa-tion. You need the bash shell (see the warning in the manual forusers of older systems).
There is a choice of graphical editors for the Mac: two areincluded on the DVD, TEXShop and ITEXMac, but they need to beinstalled separately, after installing TEX.
��
��6 Formatting information
1.4. INSTALLATION FOR MICROSOFT WINDOWS
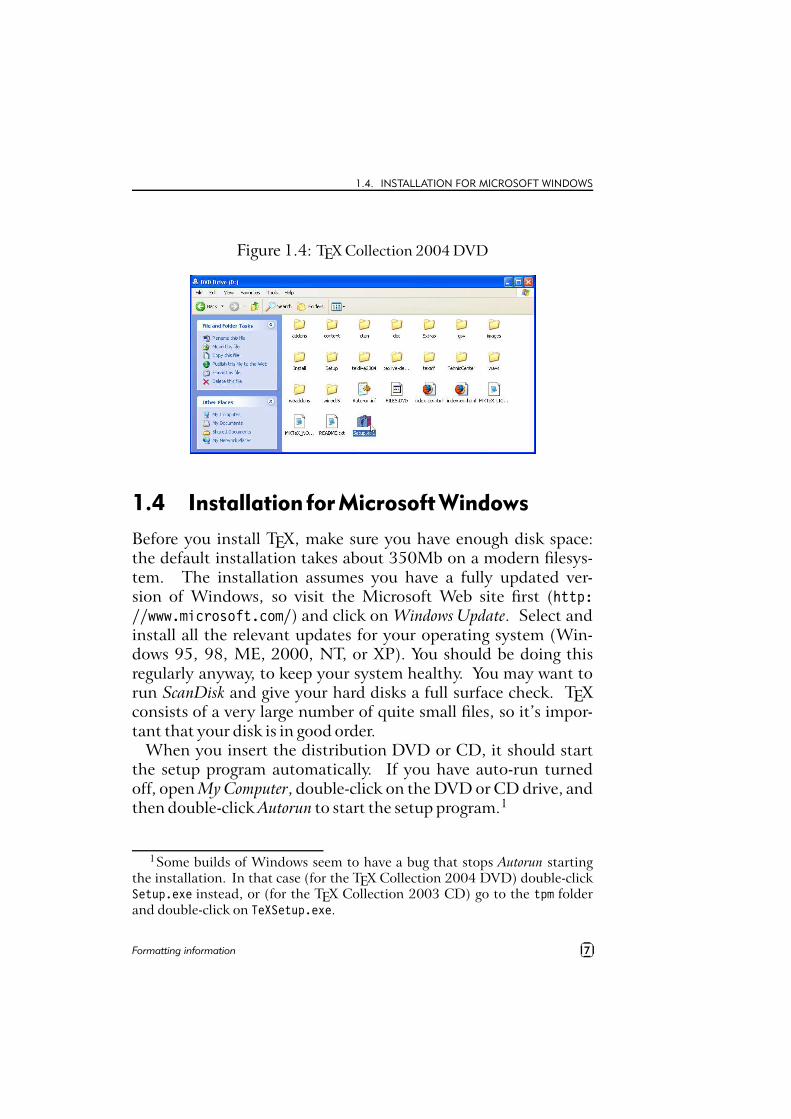
Figure 1.4: TEX Collection 2004 DVD
1.4 Installation forMicrosoftWindows
Before you install TEX, make sure you have enough disk space:the default installation takes about 350Mb on a modern filesys-tem. The installation assumes you have a fully updated ver-sion of Windows, so visit the Microsoft Web site first (http://www.microsoft.com/) and click on Windows Update. Select andinstall all the relevant updates for your operating system (Win-dows 95, 98, ME, 2000, NT, or XP). You should be doing thisregularly anyway, to keep your system healthy. You may want torun ScanDisk and give your hard disks a full surface check. TEXconsists of a very large number of quite small files, so it’s impor-tant that your disk is in good order.
When you insert the distribution DVD or CD, it should startthe setup program automatically. If you have auto-run turnedoff, open My Computer, double-click on the DVD or CD drive, andthen double-click Autorun to start the setup program.1
1Some builds of Windows seem to have a bug that stops Autorun startingthe installation. In that case (for the TEX Collection 2004 DVD) double-clickSetup.exe instead, or (for the TEX Collection 2003 CD) go to the tpm folderand double-click on TeXSetup.exe.
Formatting information��
��7
CHAPTER 1. INSTALLING TEX AND LATEX
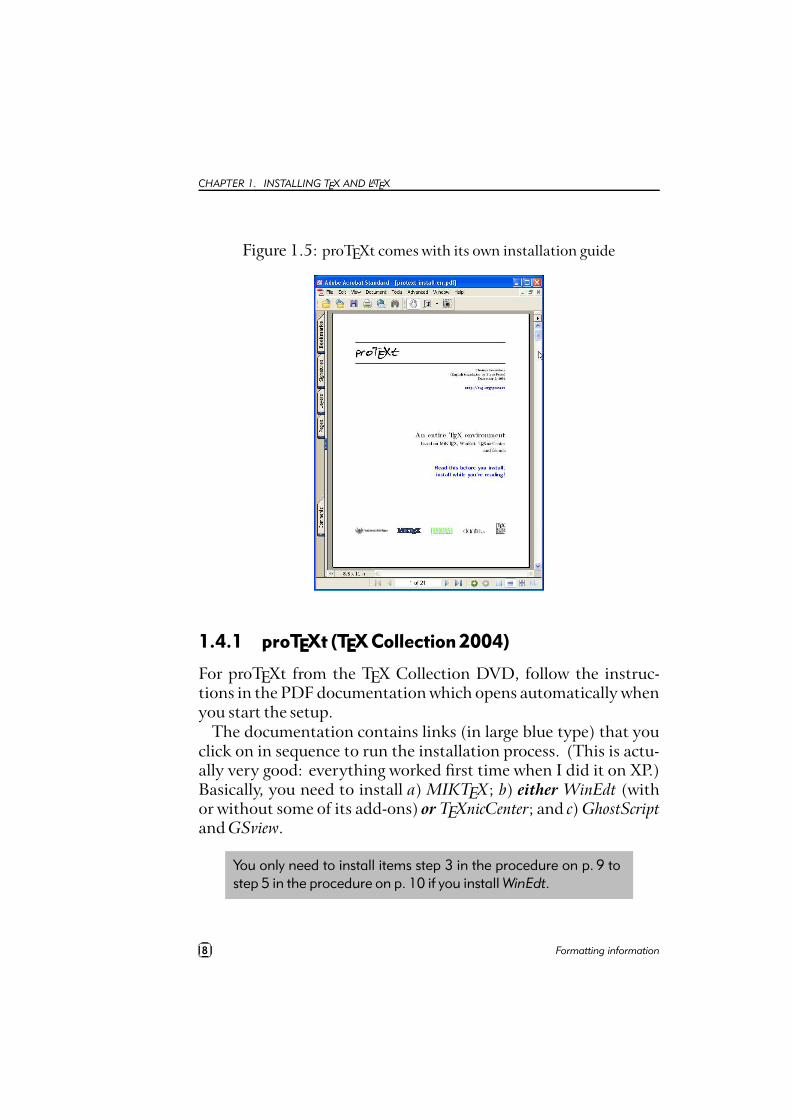
Figure 1.5: proTEXt comes with its own installation guide
1.4.1 proTEXt (TEX Collection 2004)
For proTEXt from the TEX Collection DVD, follow the instruc-tions in the PDF documentation which opens automatically whenyou start the setup.
The documentation contains links (in large blue type) that youclick on in sequence to run the installation process. (This is actu-ally very good: everything worked first time when I did it on XP.)Basically, you need to install a) MIKTEX; b) either WinEdt (withor without some of its add-ons) or TEXnicCenter; and c) GhostScriptand GSview.
You only need to install items step 3 in the procedure on p. 9 tostep 5 in the procedure on p. 10 if you install WinEdt.
��
��8 Formatting information
1.4. INSTALLATION FOR MICROSOFT WINDOWS
1. Install MIKTEXproTEXt uses the MIKTEX distribution as its core, a long-established and popular distribution for Windows.
2. Install WinEdtThis is optional: it’s a good editor, especially for the heavyuser of a MIKTEX-based system. This is a free month’strial — after that it reminds you to cough up and register.
3. Install the WinEdt New LATEX Document InterfaceOptional again, and only applicable if you installed WinEdtanyway. It lets you save commonly-used document settingsfor use in other documents of the same type.
4. Install the WinEdt Graphics InterfaceAnother optional add-on for WinEdt to provide drag-and-drop graphics insertion.
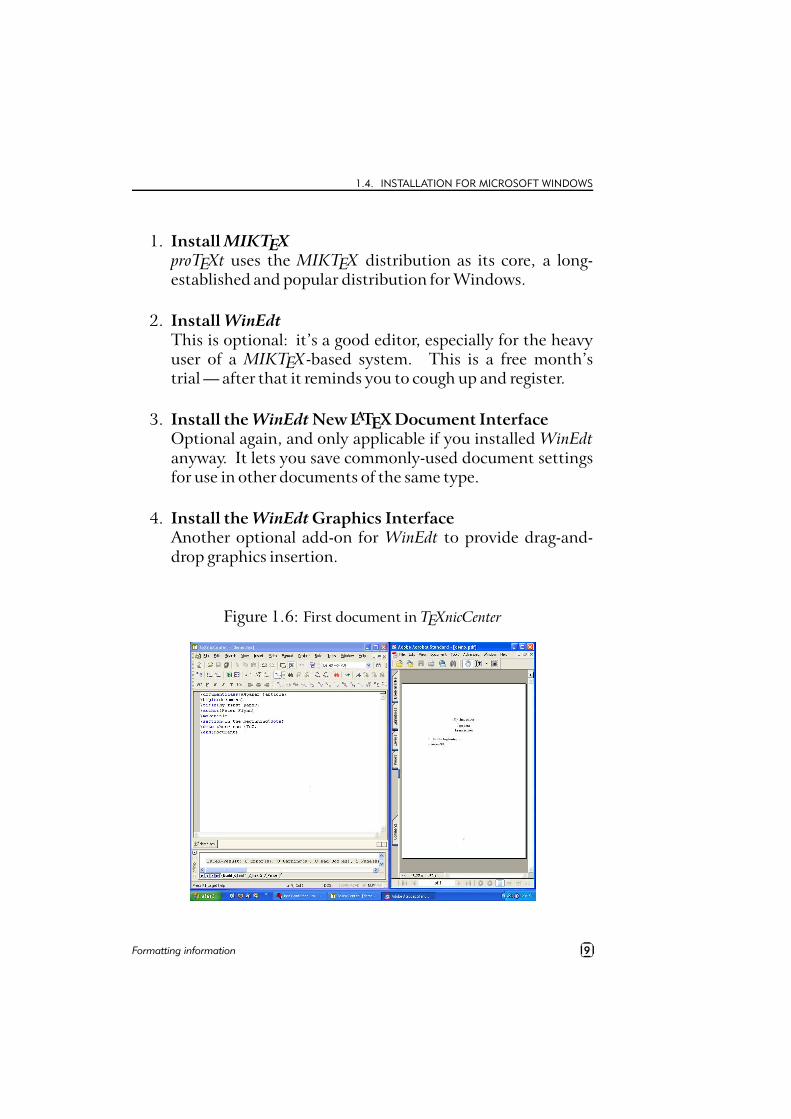
Figure 1.6: First document in TEXnicCenter
Formatting information��
��9
CHAPTER 1. INSTALLING TEX AND LATEX
5. Install the WinEdt Table DesignerLast optional add-on for WinEdt, providing a new tableeditor.
6. Install TEXnicCenterThis is a free equivalent to WinEdt. The interface is slightlydifferent (see Figure 1.6) but it is becoming very popular.
7. Install GhostScript and GSviewThese are essential for viewing the PostScript and PDFoutput, especially if you don’t have any other PDF viewerinstalled.
You get a choice of editors, but the one which features in proTEXtis TEXnicCenter. This is an Integrated Development Environment(IDE) which lets you manage all the files related to each docu-ment. In many cases, of course, you’ll only have one (the textitself) but if you are working with anything beyond simple arti-cles, you’ll probably have illustrations (images or diagrams), andpossibly separate chapter files for larger documents, plus indexes,glossaries, bibliographies, etc. I recommend that you create a newproject for each new document, even if it’s a single-file article, as Idid for the example in Figure 1.6.
1.4.2 TEX Live (TEX Collection 2003)
Once the installation program is running:
1. LATEXInstall LATEX itself from the TeXLive Software
Install on Hard Disk $menu. If you’re new to LATEX, pick Quick Install on thefollowing screen. This gives you everything you need to getstarted, and doesn’t ask any questions, it just installs it allstraight away.
If you’re installing under Windows NT, 2000, or XP, youmay want to click on the option to install for all users if youhave other users on your system.
��
��10 Formatting information
1.4. INSTALLATION FOR MICROSOFT WINDOWS
If you want to use Emacs as your editor, click the option forXemTEX Support.2
2. EmacsAfter installation, right-click and drag Xemacs.exe from theC:\ProgramFiles\TeXLive\bin\win32 folder out onto yourdesktop and let go, then pick ‘Create Shortcut’. This placesEmacs on your desktop for easy access.
3. WinShell and WinEdtIf you want to install WinShell, run the installer program inthe support/winshell directory. For WinEdt you must goto their Web site (http://www.winedt.com/) for a download-able version.You don’t have to install just one editor: if you’ve got thespace, install them all so you can try them out. You canalways uninstall the ones you don’t want afterwards.
4. GSViewGhostscript is installed automatically, but for GSView youneed to go to http://www.cs.wisc.edu/^ghost/gsview/, anddownload the most recent version.If you use GSView, please register your copy with Ghostgum,Pty. (http://www.ghostgum.com.au/).
Please read the TEX Live update pages at http://www.tug.org/texlive/bugs.html for details of any changes since the diskswere released, and download and install any additional softwarerequired.
1.4.3 Installation problems
It’s always annoying when a program that’s supposed to installpainlessly causes trouble, and none the more so when everyone
2Note this unfortunate choice of name is nothing to do with EberhardMatthes’ MS-DOS implementation of TEX called emTEX — the ‘Xem’ is shortfor Xemacs.
Formatting information��
��11
CHAPTER 1. INSTALLING TEX AND LATEX
else seems to have been able to install it without problems.I’ve installed TEX hundreds of times and very rarely had anydifficulties, but these are a few of the occasions when I did.
Bad hard disks As recommended in § 1.4, run a scan and defrag-mentation of your hard disk[s] before you start. It shouldtake under an hour on a modern machine unless you havea very large disk, and it may need overnight on an oldermachine. Clean your CD or DVD drive if it’s been in heavyuse. TEX uses a very large number of very small files, sothere is a lot of disk activity during an installation. As alsorecommended in § 1.2, if you have the chance to reformatthe hard disk, pick the smallest granularity (cluster size)possible.
Registry errors This only affects Microsoft Windows users. TheRegistry is where Microsoft want software companies au-tomatically to store details of all the programs you install.Unfortunately the Registry is grossly abused by marketingdepartments to try and foist undesirable links on you, theuser. You will see this with many commercial programs,where a particular type of file you’ve been able to double-click on for years suddenly runs a different program. Someprograms install obsolete or broken copies of program li-braries (DLL files), overwriting ones which were workingperfectly. Worse, the viruses, trojans, and worms whichtypically infect unprotected Windows systems can leave un-wanted links to web pages, or change some of the ways inwhich Windows operates. The overall effect can be that thewhole machine slows down, or that files which are expectedto do one thing do another. The best solution is a thor-ough Registry clean-out, using one of the many programsavailable for the purpose.
Use the latest versions Before installing, check the CTAN website (http://www.ctan.org/ for any updated copy of theinstallation program. This is called install-tl.sh for
��
��12 Formatting information
1.4. INSTALLATION FOR MICROSOFT WINDOWS
Linux and Mac systems, and Setup.exe for MicrosoftWindows (on the TEX Collection 2003 CD it was calledTeXSetup.exe). Just occasionally a bug slips through ontothe production CD or DVD, and although it’s always fixedand notified on comp.text.tex, that’s a high-volume news-group and even the sharpest eyes may miss an announce-ment.
Stick to the defaults Unless you’re a computer scientist or a soft-ware engineer, I suggest you never change or fiddle with thedefault directories for installation. I know some of themlook odd, but they’re that way for a purpose, especiallywhen it comes to avoiding directories will spaces in theirnames, like the notorious C:\Program Files. Although mostmodern systems cope happily with spaces in filenames anddirectory names, they are usually A Bad Design Idea, andshould be avoided like the plague (spaces are forbidden inweb addresses for the same reason: the people who designedthem knew the pitfalls). It may look snazzier to put theinstallation in My Cute Stuff, but please don’t: you’ll justmake it harder to find, harder to fix problems, and moreembarrassing if you have to explain it to someone else tryingto help you.
Formatting information��
��13

2Using your editorto create documents
LATEX documents are all plain-text files.1 You can edit themwith any editor, and transfer them to any other computer systemrunning LATEX and they will format exactly the same. Becausethey are plain text they cannot corrupt your system, as theycannot be used for hiding or transporting virus infections asbinary wordprocessor files can. Everything you can see is inthe file and everything in the file is there for you to see: thereis nothing hidden or secret and there are no manufacturers’proprietary ‘gotchas’ like suddenly going out of date with a newversion.
1‘Plain-text’ originally meant just the 95 printable characters of the Ameri-can Standard Code for Information Interchange (ASCII) — see Table C.1 —but now more commonly includes both these and the relevant 8-bit charac-ters from one (only) character set such as ISO-8859-1 (Western Latin–1) orISO-8859-15 (Western Latin plus the Euro sign). These are internationalstandards which work everywhere: you should avoid using manufacturers’proprietary character sets like Microsoft Windows–1252 or Apple MacintoshRoman–8, because they may make your documents unusable on some othersystems.
Formatting information��
��15
CHAPTER 2. USING YOUR EDITOR TO CREATE DOCUMENTS
2.1 Markup
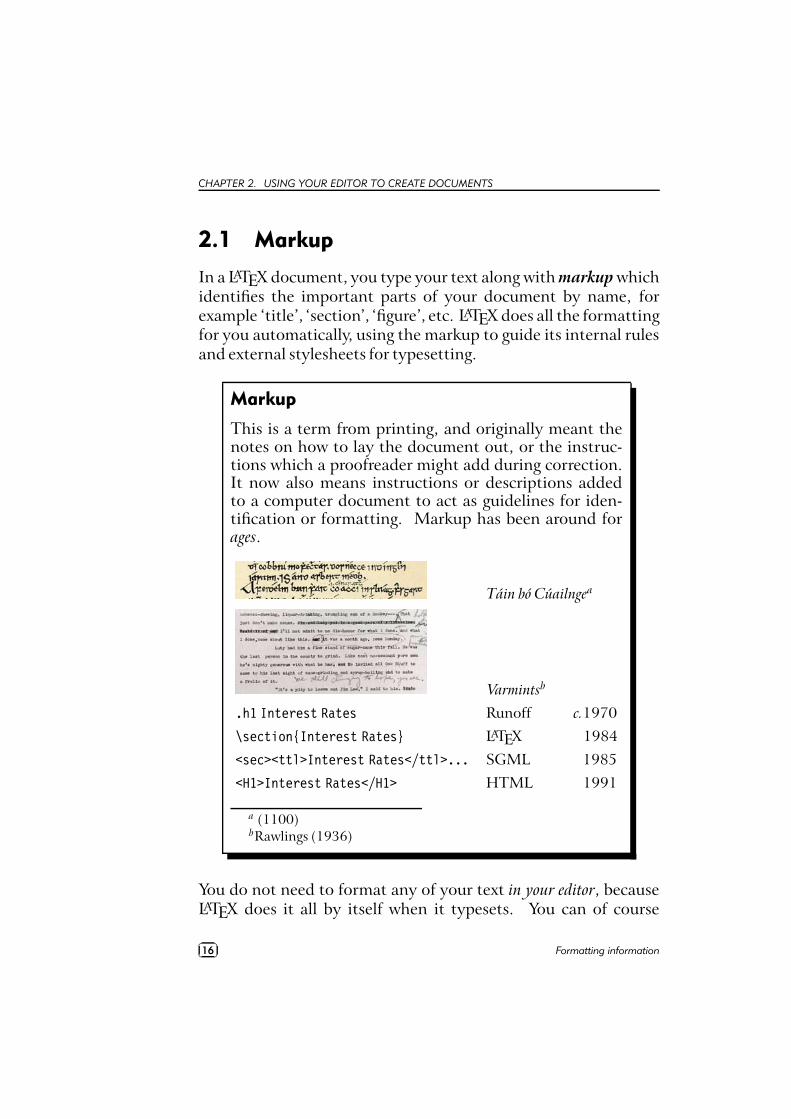
In a LATEX document, you type your text along with markup whichidentifies the important parts of your document by name, forexample ‘title’, ‘section’, ‘figure’, etc. LATEX does all the formattingfor you automatically, using the markup to guide its internal rulesand external stylesheets for typesetting.
Markup
This is a term from printing, and originally meant thenotes on how to lay the document out, or the instruc-tions which a proofreader might add during correction.It now also means instructions or descriptions addedto a computer document to act as guidelines for iden-tification or formatting. Markup has been around forages.
Táin bó Cúailngea
Varmintsb
.h1 Interest Rates Runoff c.1970
\section{Interest Rates} LATEX 1984
<sec><ttl>Interest Rates</ttl>... SGML 1985
<H1>Interest Rates</H1> HTML 1991
a (1100)bRawlings (1936)
You do not need to format any of your text in your editor, becauseLATEX does it all by itself when it typesets. You can of course
��
��16 Formatting information
2.2. QUICK START FOR THE IMPATIENT
regularise or neaten its appearance in your editor for ease of editing(for example, keeping each item in a list on a separate line), butthis is not required.
You will often hear LATEX markup referred to as ‘commands’or sometimes ‘control sequences’ (the proper TEXnical term forthem). For all practical purposes these terms all mean thesame thing.
This course assumes that users have one of TEXshell, TEXnicCenter,WinShell, or WinEdt (Windows only), or Emacs or LYX (any plat-form) installed. These are discussed briefly in § 2.3, and themenus and toolbars for running LATEX are explained in Chapter 4.
2.2 Quickstart for the impatient
If you already know all this stuff about editors and plain-textfiles and running programs, and you know your system is alreadycorrectly installed (including your editor), you’d probably like totype something in and see LATEX do its job. If you don’t, then skipforward to § 2.4 and read a bit more about LATEX first.Up and running in a few minutes
1. Install the softwareMake sure you have a properly-installed LATEX system and acopy of a suitable editor.
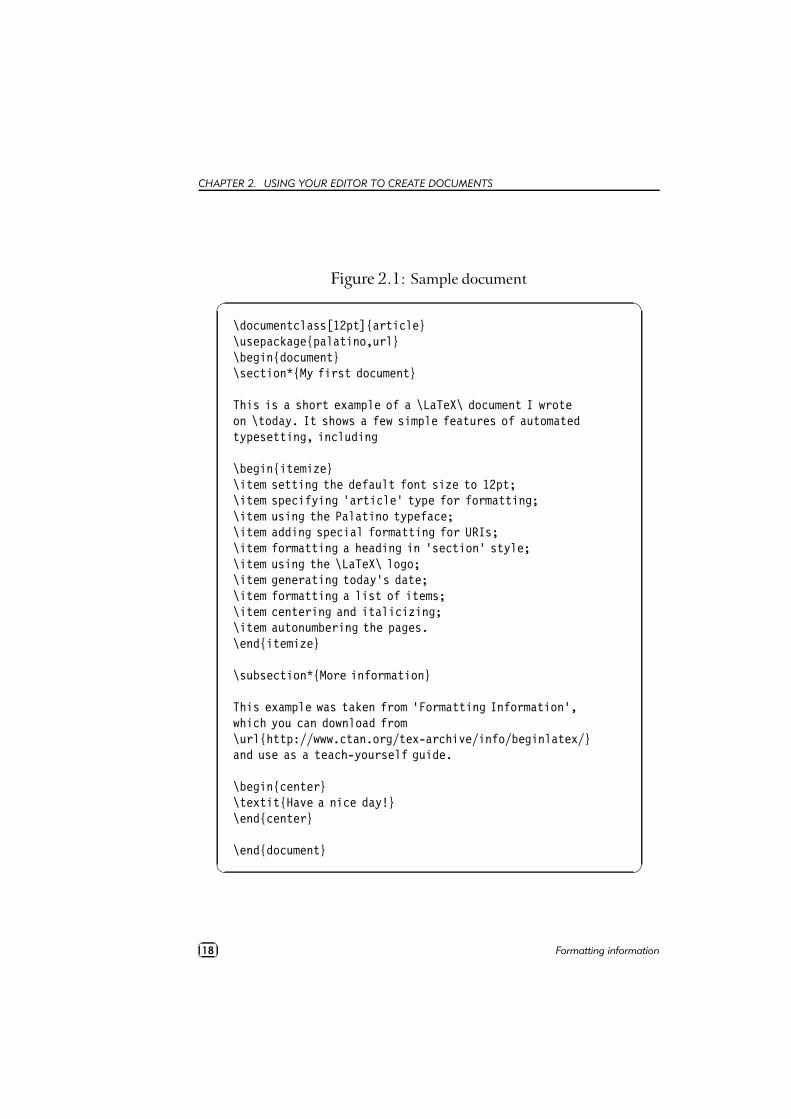
2. Create a sample documentOpen your editor and type in the text exactly as shown inFigure 2.1. Do not make any changes or miss anything out oradd anything different at this stage.
3. Save the documentSave the document as demo.tex
4. Run LATEX or pdfLATEXClick on the LATEX or pdfLATEX toolbar icon or the TEX
TEX File %menu item; or type latex demo or pdflatex demo in a com-mand window.
Formatting information��
��17
CHAPTER 2. USING YOUR EDITOR TO CREATE DOCUMENTS
Figure 2.1: Sample document�
�
\documentclass[12pt]{article}\usepackage{palatino,url}\begin{document}\section*{My first document}
This is a short example of a \LaTeX\ document I wroteon \today. It shows a few simple features of automatedtypesetting, including
\begin{itemize}\item setting the default font size to 12pt;\item specifying ‘article’ type for formatting;\item using the Palatino typeface;\item adding special formatting for URIs;\item formatting a heading in ‘section’ style;\item using the \LaTeX\ logo;\item generating today’s date;\item formatting a list of items;\item centering and italicizing;\item autonumbering the pages.\end{itemize}
\subsection*{More information}
This example was taken from ‘Formatting Information’,which you can download from\url{http://www.ctan.org/tex-archive/info/beginlatex/}and use as a teach-yourself guide.
\begin{center}\textit{Have a nice day!}\end{center}
\end{document}
��
��18 Formatting information
2.3. EDITORS
5. Preview the typesettingClick on the DVI or PDFview toolbar icon or the TEX
TEX View &menu item; or type your previewer command in a terminalshell.
(Note that there may be a pause the first time you use yourDVI viewer, while WYSIWYG font files are created.2)
6. Print itClick on the Print toolbar icon within the viewer, or usethe TEX
TEX Print & menu item, or type dvips -f demo | lpr(Unix/Linux).
If you encounter any errors, it means you do need to study thischapter after all!
2.3 Editors
All the text of your documents can be typed into your LATEXdocument from a standard keyboard using any decent plain-text editor. However, it is more convenient to use an editorwith special features to make using LATEX easier. Some of themost popular are TEXshellWinShell, TEXnic Center, and WinEdt(Windows only); and LYX and Emacs (all platforms).
2.3.1 LYX
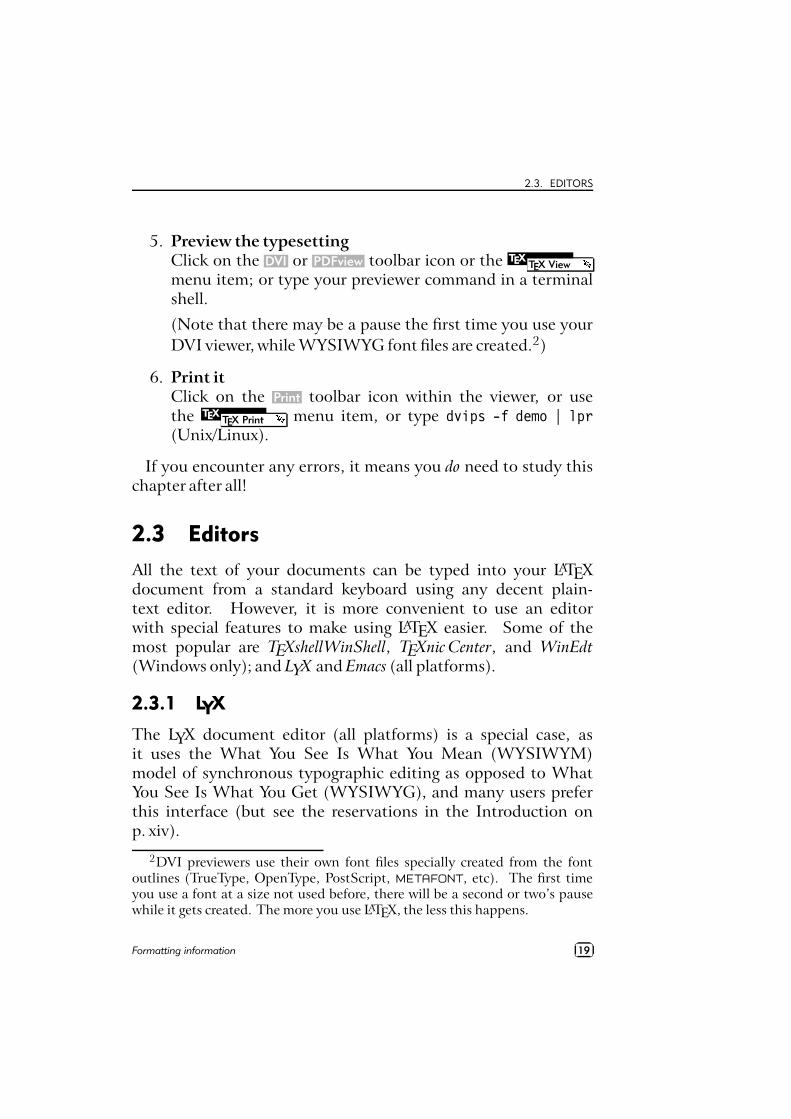
The LYX document editor (all platforms) is a special case, asit uses the What You See Is What You Mean (WYSIWYM)model of synchronous typographic editing as opposed to WhatYou See Is What You Get (WYSIWYG), and many users preferthis interface (but see the reservations in the Introduction onp. xiv).
2DVI previewers use their own font files specially created from the fontoutlines (TrueType, OpenType, PostScript, METAFONT, etc). The first timeyou use a font at a size not used before, there will be a second or two’s pausewhile it gets created. The more you use LATEX, the less this happens.
Formatting information��
��19
CHAPTER 2. USING YOUR EDITOR TO CREATE DOCUMENTS
Figure 2.2: The LYX document editor
LYX makes a strong case for using synchronous typographicalediting: it is possible to create even quite large and complexdocuments without seeing a backslash very often, although withmath or complex macros there is probably no way to avoid havingto do some manual insertion of LATEX code.
The free availability on multiple platforms makes this a clearanswer to the myth of ‘having to edit like a programmer’, and as itis an Open Source project, there is constant improvement, both tothe facilities and to the interface.
Probably the only real reservation is that it does not save nativeLATEX files by default. It uses its own internal format, and it canexport LATEX for use in other editors, but the exported files arenot designed for human legibility, only for LATEX processing. In aco-operative environment this would be a serious drawback, butfor the individual user this interface is an excellent tool.
��
��20 Formatting information
2.3. EDITORS
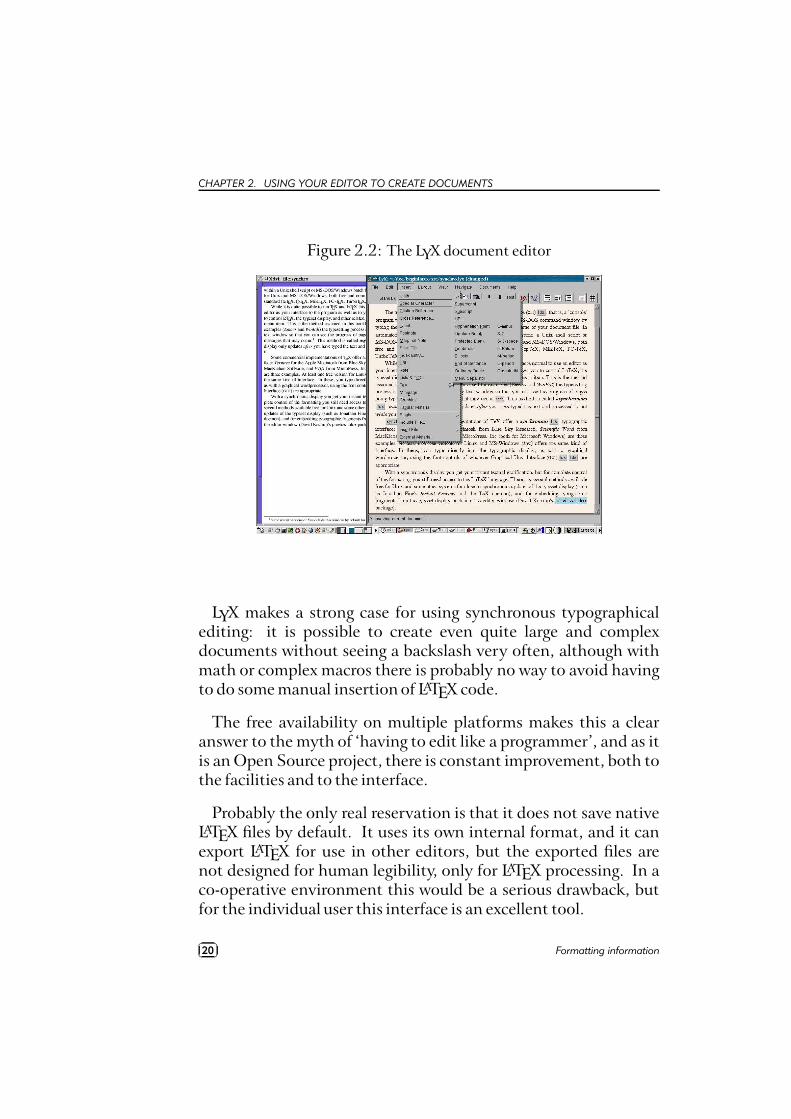
Figure 2.3: The TEXshell editor
2.3.2 TEXshell
This is one of the simplest of all the plaintext Windows editors,but it has most of the tools needed to begin with. Sectioning,lists, and graphics can be inserted from the menus, and thereare buttons for running LATEX on the open document and forpreviewing the typeset document.
The syntactic highlighting distinguishes between commandsand your text, and it comes with options for spellchecking (youneed to install ispell), and for adding math, Greek (math), andsome symbol characters from a pickchart. The typeset display isdone using your installed DVI viewer (there is no provision forPDF, although as it is configurable, that could probably be editedinto the menus).
Download the .tar.gz file from CTAN in the support/TeXshell/directory and unwrap it into somewhere like C:\ProgramFiles\
Formatting information��
��21
CHAPTER 2. USING YOUR EDITOR TO CREATE DOCUMENTS
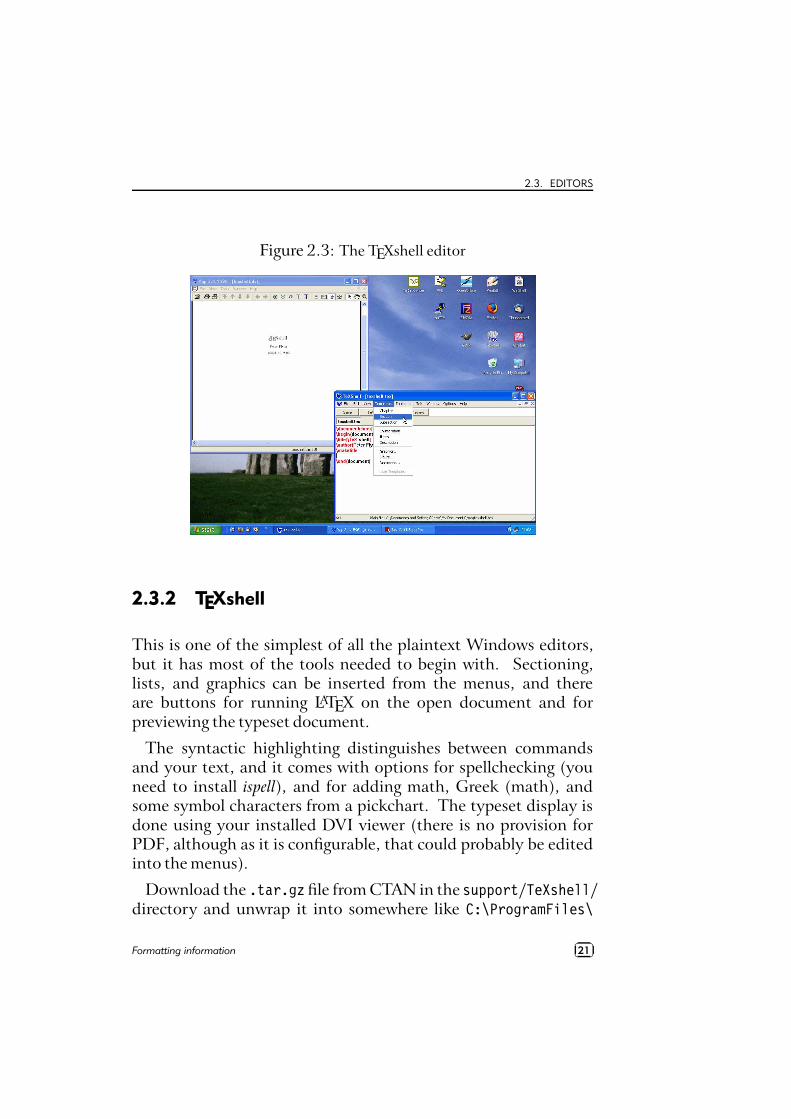
Figure 2.4: The WinShell editor
TeXshell\.3 There is a tsconfig program in the same directory onCTAN, which is designed to help with reconfiguring TEXshell.
2.3.3 WinShell
This is another free Windows editor for beginners with LATEX.Despite its simplicity, it is capable of a considerable amount ofdocument management and assistance with editing. As well ashandling stand-alone LATEX files, you can create a ‘Project’ forlarger documents, which helps you keep track of additional fileslike separate chapters, illustrations, diagrams, indexes, etc.
You run LATEX direct from the toolbar icons or with F-keyshortcuts. Both standard LATEX and pdfLATEX are supported, aswell as creation and previewing of PostScript and PDF output.There are additional toolbars for math characters, and there is
3Yes, I know I said don’t use directory names with spaces in them — andso you shouldn’t, for your LATEX documents — but Windows programs areusually safe enough in them.
��
��22 Formatting information
2.3. EDITORS
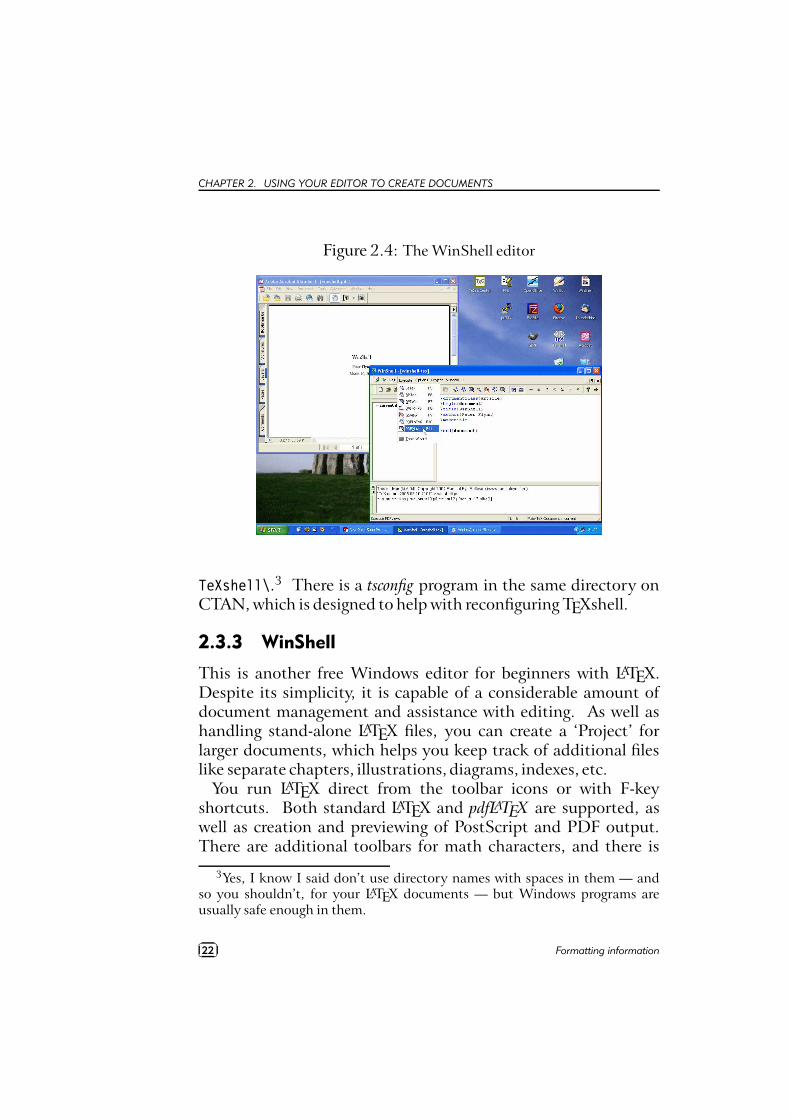
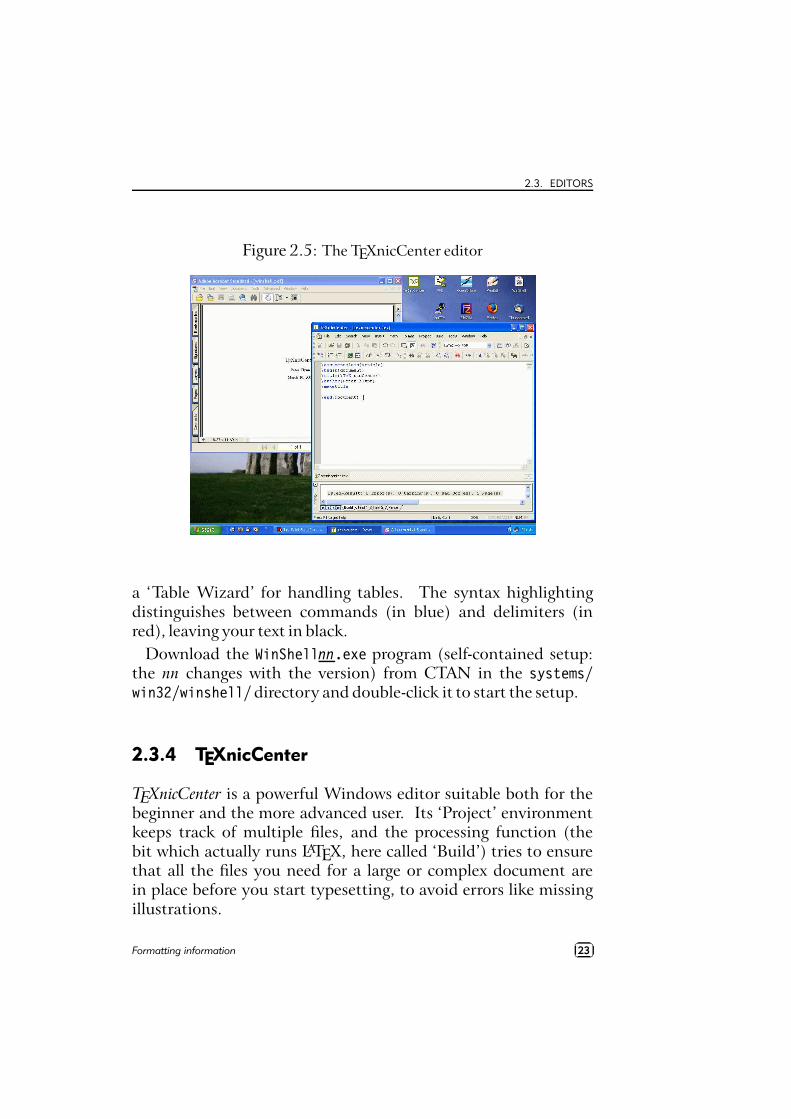
Figure 2.5: The TEXnicCenter editor
a ‘Table Wizard’ for handling tables. The syntax highlightingdistinguishes between commands (in blue) and delimiters (inred), leaving your text in black.
Download the WinShellnn.exe program (self-contained setup:the nn changes with the version) from CTAN in the systems/win32/winshell/directory and double-click it to start the setup.
2.3.4 TEXnicCenter
TEXnicCenter is a powerful Windows editor suitable both for thebeginner and the more advanced user. Its ‘Project’ environmentkeeps track of multiple files, and the processing function (thebit which actually runs LATEX, here called ‘Build’) tries to ensurethat all the files you need for a large or complex document arein place before you start typesetting, to avoid errors like missingillustrations.
Formatting information��
��23
CHAPTER 2. USING YOUR EDITOR TO CREATE DOCUMENTS
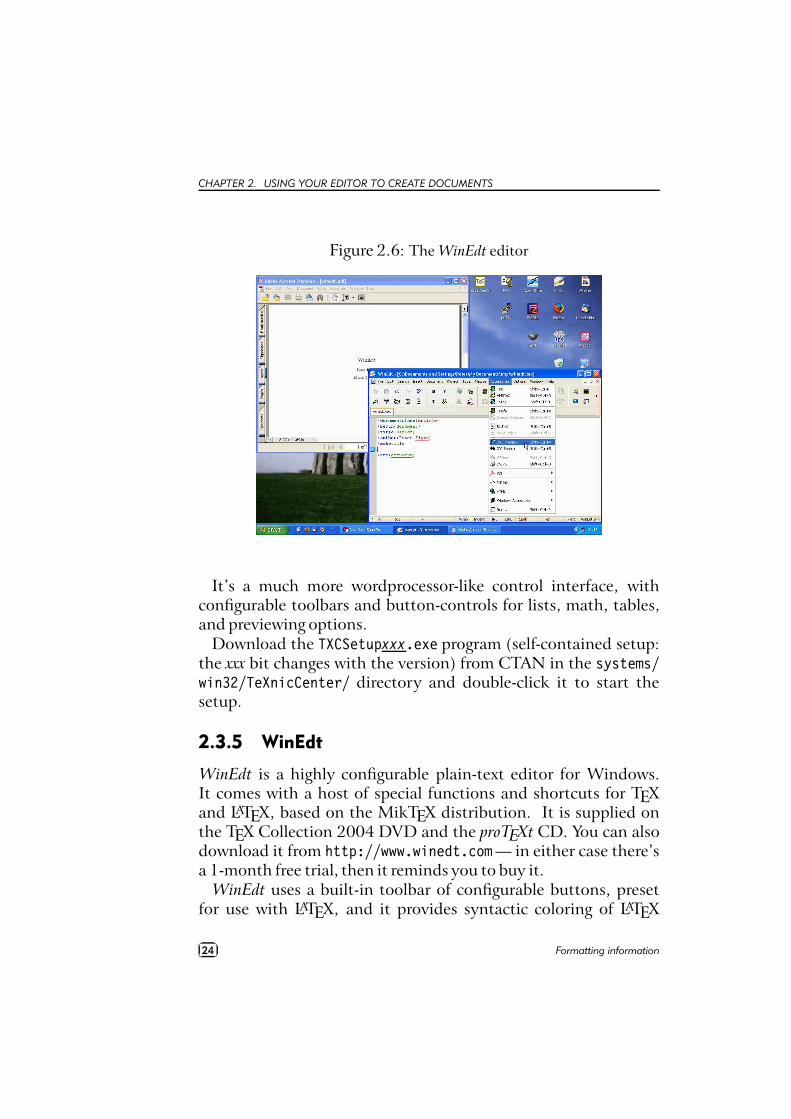
Figure 2.6: The WinEdt editor
It’s a much more wordprocessor-like control interface, withconfigurable toolbars and button-controls for lists, math, tables,and previewing options.
Download the TXCSetupxxx.exe program (self-contained setup:the xxx bit changes with the version) from CTAN in the systems/win32/TeXnicCenter/ directory and double-click it to start thesetup.
2.3.5 WinEdt
WinEdt is a highly configurable plain-text editor for Windows.It comes with a host of special functions and shortcuts for TEXand LATEX, based on the MikTEX distribution. It is supplied onthe TEX Collection 2004 DVD and the proTEXt CD. You can alsodownload it from http://www.winedt.com — in either case there’sa 1-month free trial, then it reminds you to buy it.
WinEdt uses a built-in toolbar of configurable buttons, presetfor use with LATEX, and it provides syntactic coloring of LATEX
��
��24 Formatting information
2.3. EDITORS
commands. Both the positioning and effect of the buttons can bechanged, using an editable file of icons and a configuration panel.This flexibility lets you bind a program and arguments (equivalentto a typed command) to a particular icon.
There are default buttons on the toolbar for one-click typeset-ting, previewing, and PostScript or PDF generation from LATEXdocuments, and it manages multi-file document projects like mostof the other editors. Winedt is also used by many people fornormal plaintext file-editing tasks, in preference to more limitedprograms like Notepad. If you’re using the fpTEX which came withthe 2003 TEX Collection, some editing of the menus is required(explained in the local installation document) because the defaultsetup is for MikTEX/proTEXt.
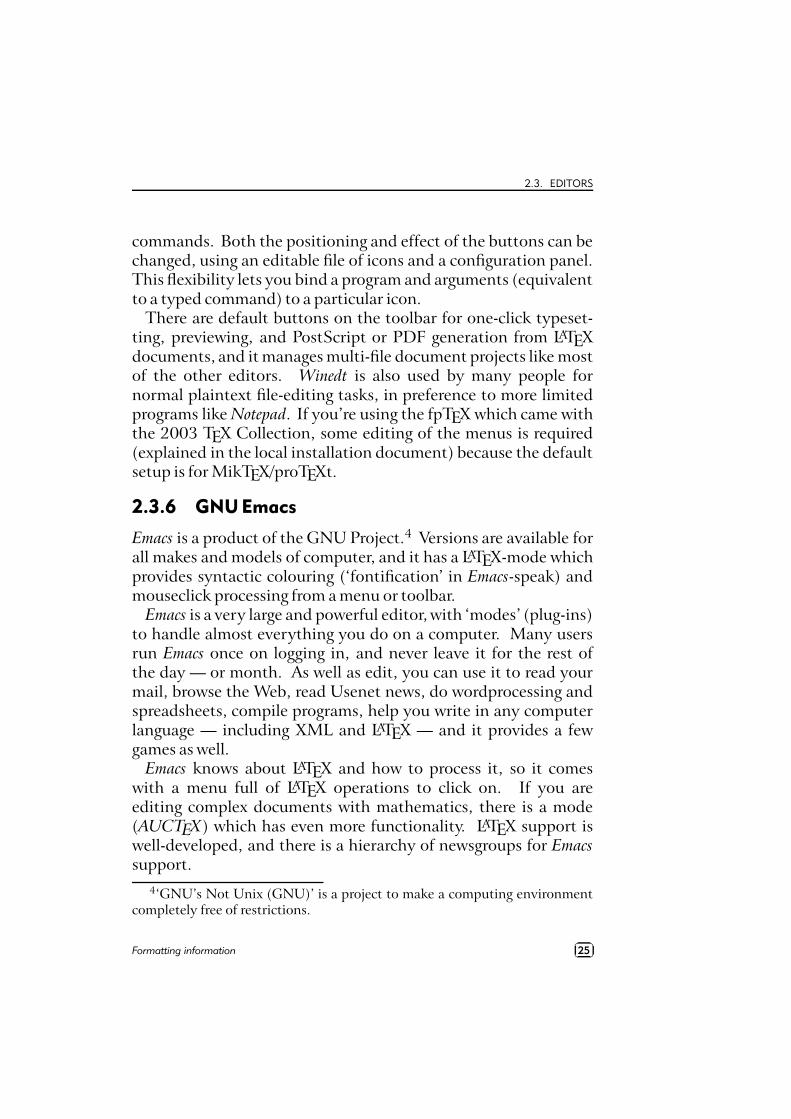
2.3.6 GNU Emacs
Emacs is a product of the GNU Project.4 Versions are available forall makes and models of computer, and it has a LATEX-mode whichprovides syntactic colouring (‘fontification’ in Emacs-speak) andmouseclick processing from a menu or toolbar.
Emacs is a very large and powerful editor, with ‘modes’ (plug-ins)to handle almost everything you do on a computer. Many usersrun Emacs once on logging in, and never leave it for the rest ofthe day — or month. As well as edit, you can use it to read yourmail, browse the Web, read Usenet news, do wordprocessing andspreadsheets, compile programs, help you write in any computerlanguage — including XML and LATEX — and it provides a fewgames as well.
Emacs knows about LATEX and how to process it, so it comeswith a menu full of LATEX operations to click on. If you areediting complex documents with mathematics, there is a mode(AUCTEX) which has even more functionality. LATEX support iswell-developed, and there is a hierarchy of newsgroups for Emacssupport.
4‘GNU’s Not Unix (GNU)’ is a project to make a computing environmentcompletely free of restrictions.
Formatting information��
��25
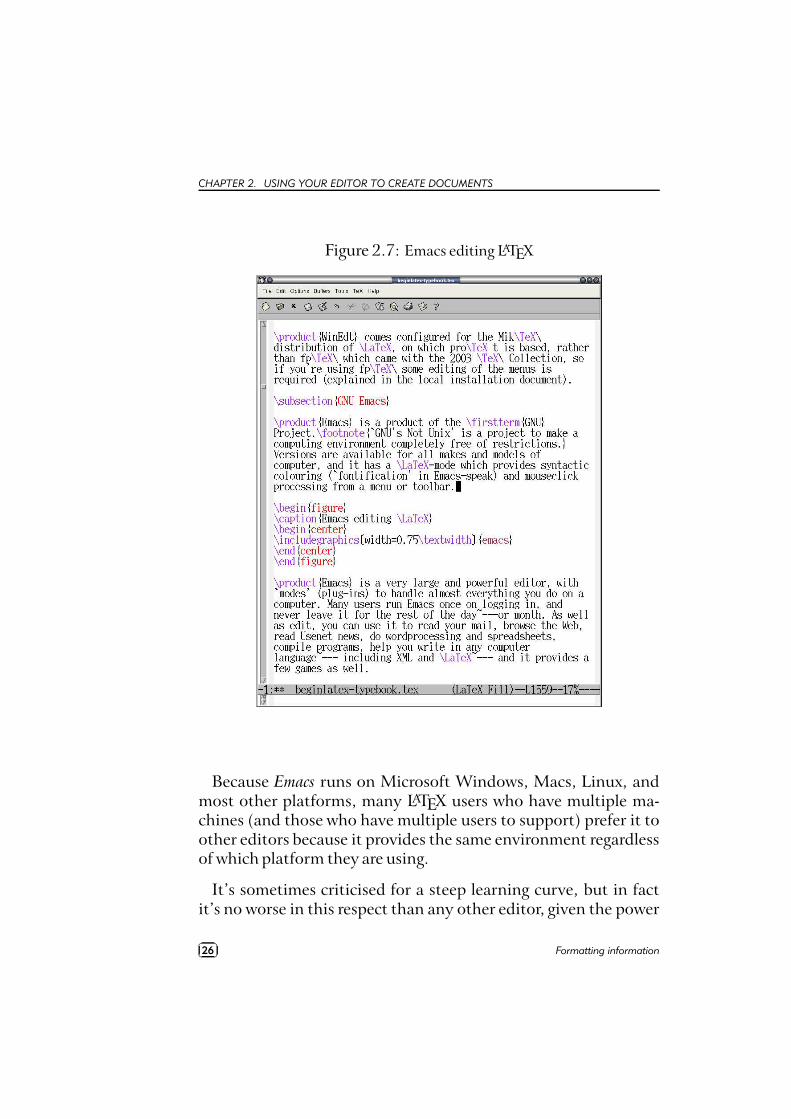
CHAPTER 2. USING YOUR EDITOR TO CREATE DOCUMENTS
Figure 2.7: Emacs editing LATEX
Because Emacs runs on Microsoft Windows, Macs, Linux, andmost other platforms, many LATEX users who have multiple ma-chines (and those who have multiple users to support) prefer it toother editors because it provides the same environment regardlessof which platform they are using.
It’s sometimes criticised for a steep learning curve, but in factit’s no worse in this respect than any other editor, given the power
��
��26 Formatting information
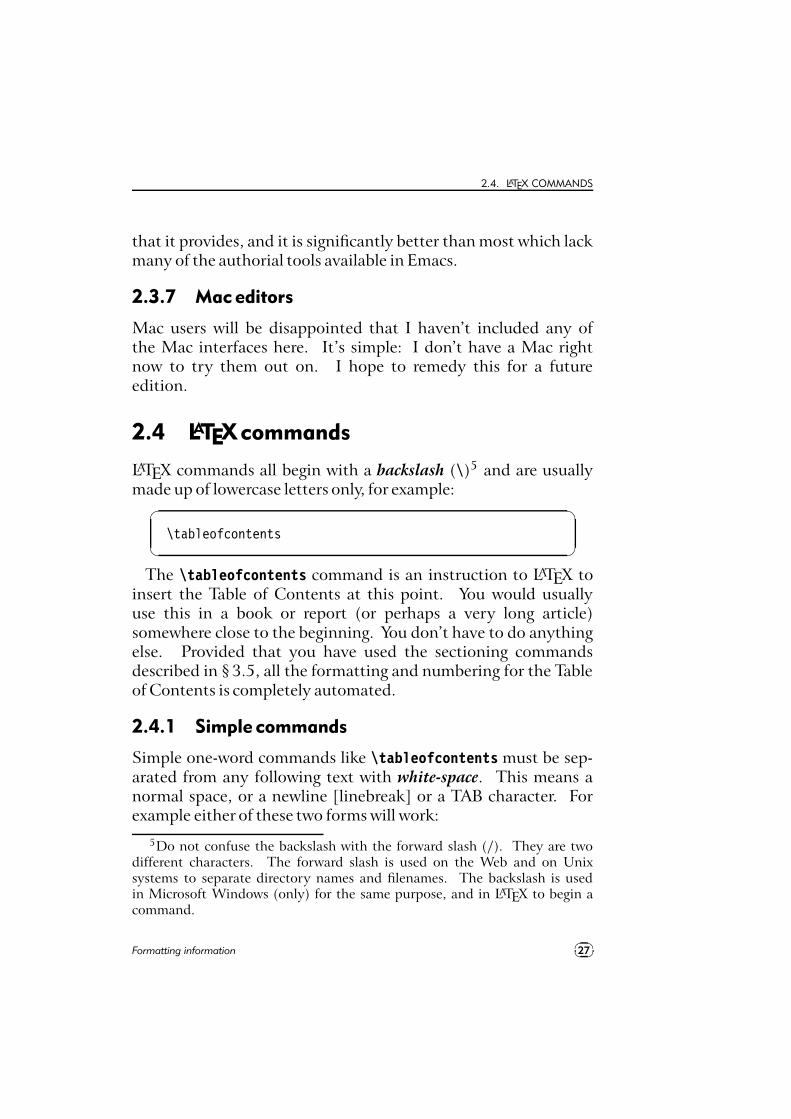
2.4. LATEX COMMANDS
that it provides, and it is significantly better than most which lackmany of the authorial tools available in Emacs.
2.3.7 Mac editors
Mac users will be disappointed that I haven’t included any ofthe Mac interfaces here. It’s simple: I don’t have a Mac rightnow to try them out on. I hope to remedy this for a futureedition.
2.4 LATEXcommands
LATEX commands all begin with a backslash (\)5 and are usuallymade up of lowercase letters only, for example:
�
�
\tableofcontents
The \tableofcontents command is an instruction to LATEX toinsert the Table of Contents at this point. You would usuallyuse this in a book or report (or perhaps a very long article)somewhere close to the beginning. You don’t have to do anythingelse. Provided that you have used the sectioning commandsdescribed in § 3.5, all the formatting and numbering for the Tableof Contents is completely automated.
2.4.1 Simple commands
Simple one-word commands like \tableofcontents must be sep-arated from any following text with white-space. This means anormal space, or a newline [linebreak] or a TAB character. Forexample either of these two forms will work:
5Do not confuse the backslash with the forward slash (/). They are twodifferent characters. The forward slash is used on the Web and on Unixsystems to separate directory names and filenames. The backslash is usedin Microsoft Windows (only) for the same purpose, and in LATEX to begin acommand.
Formatting information��
��27
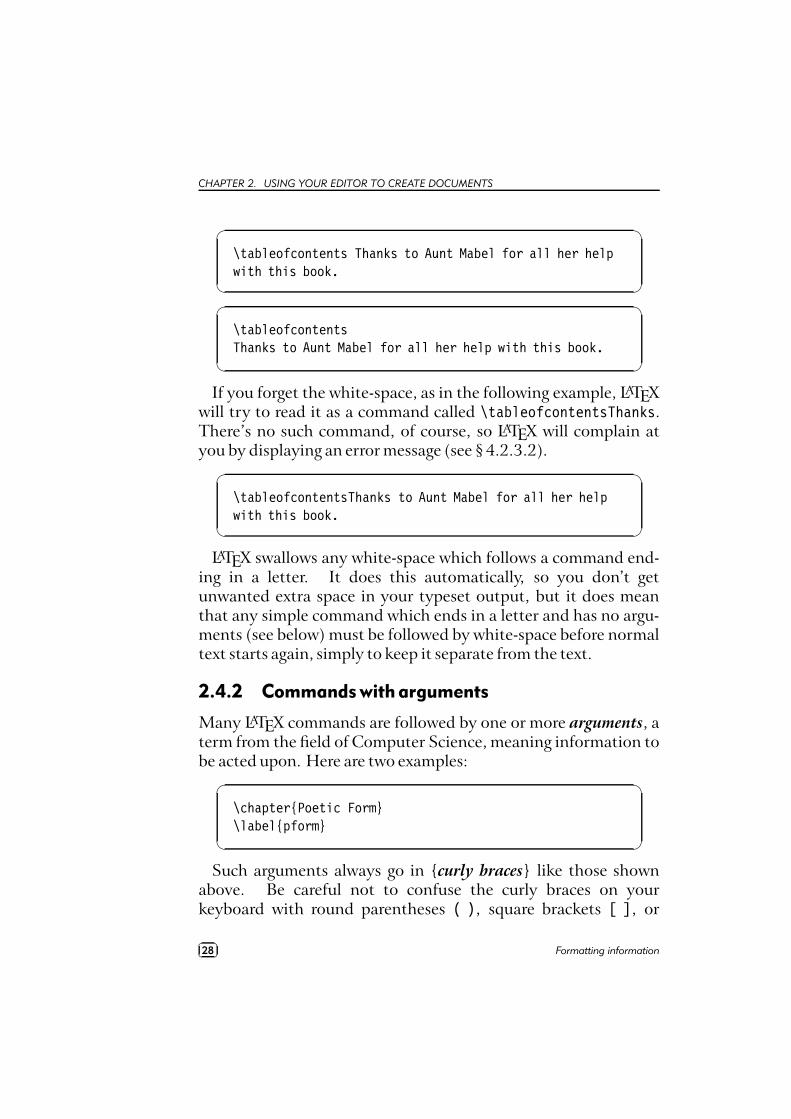
CHAPTER 2. USING YOUR EDITOR TO CREATE DOCUMENTS
�
�
\tableofcontents Thanks to Aunt Mabel for all her helpwith this book.
�
�
\tableofcontentsThanks to Aunt Mabel for all her help with this book.
If you forget the white-space, as in the following example, LATEXwill try to read it as a command called \tableofcontentsThanks.There’s no such command, of course, so LATEX will complain atyou by displaying an error message (see § 4.2.3.2).
�
�
\tableofcontentsThanks to Aunt Mabel for all her helpwith this book.
LATEX swallows any white-space which follows a command end-ing in a letter. It does this automatically, so you don’t getunwanted extra space in your typeset output, but it does meanthat any simple command which ends in a letter and has no argu-ments (see below) must be followed by white-space before normaltext starts again, simply to keep it separate from the text.
2.4.2 Commands with arguments
Many LATEX commands are followed by one or more arguments, aterm from the field of Computer Science, meaning information tobe acted upon. Here are two examples:
�
�
\chapter{Poetic Form}\label{pform}
Such arguments always go in {curly braces} like those shownabove. Be careful not to confuse the curly braces on yourkeyboard with round parentheses ( ), square brackets [ ], or
��
��28 Formatting information
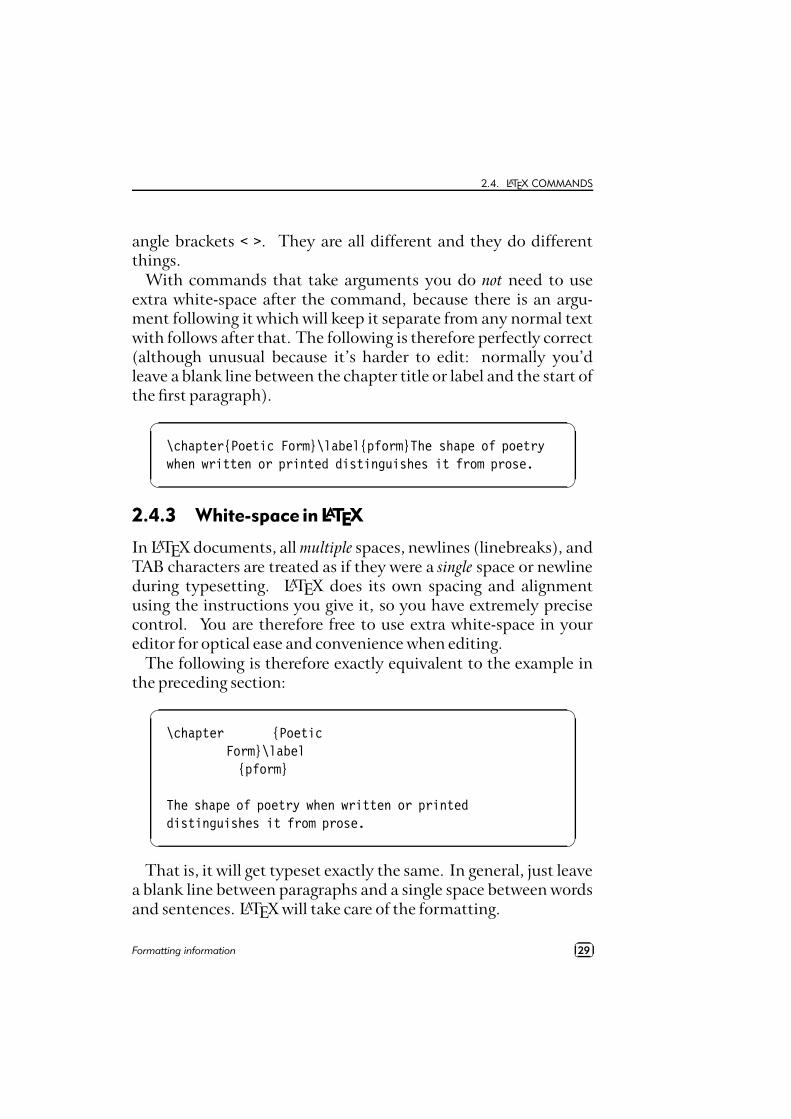
2.4. LATEX COMMANDS
angle brackets < >. They are all different and they do differentthings.
With commands that take arguments you do not need to useextra white-space after the command, because there is an argu-ment following it which will keep it separate from any normal textwith follows after that. The following is therefore perfectly correct(although unusual because it’s harder to edit: normally you’dleave a blank line between the chapter title or label and the start ofthe first paragraph).
�
�
\chapter{Poetic Form}\label{pform}The shape of poetrywhen written or printed distinguishes it from prose.
2.4.3 White-space in LATEX
In LATEX documents, all multiple spaces, newlines (linebreaks), andTAB characters are treated as if they were a single space or newlineduring typesetting. LATEX does its own spacing and alignmentusing the instructions you give it, so you have extremely precisecontrol. You are therefore free to use extra white-space in youreditor for optical ease and convenience when editing.
The following is therefore exactly equivalent to the example inthe preceding section:
�
�
\chapter {PoeticForm}\label{pform}
The shape of poetry when written or printeddistinguishes it from prose.
That is, it will get typeset exactly the same. In general, just leavea blank line between paragraphs and a single space between wordsand sentences. LATEX will take care of the formatting.
Formatting information��
��29
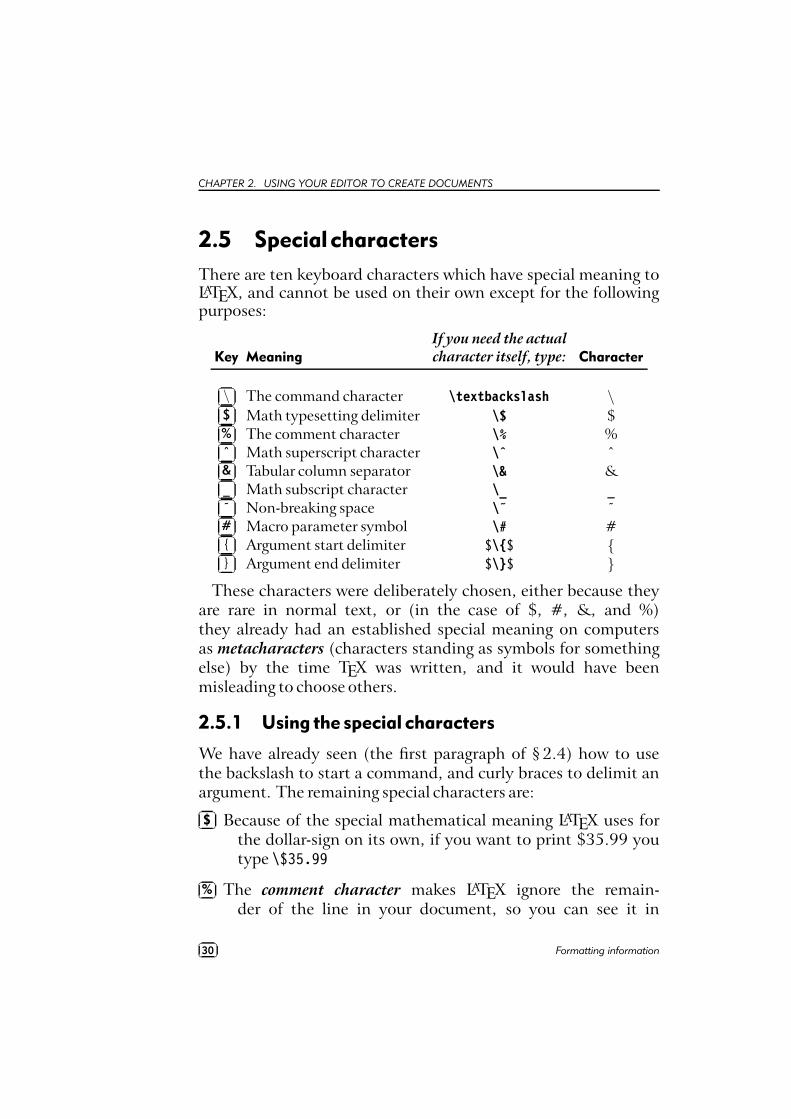
CHAPTER 2. USING YOUR EDITOR TO CREATE DOCUMENTS
2.5 Special characters
There are ten keyboard characters which have special meaning toLATEX, and cannot be used on their own except for the followingpurposes:
Key MeaningIf you need the actualcharacter itself, type: Character
��
��\ The command character \textbackslash \�
���$ Math typesetting delimiter \$ $�
���% The comment character \% %�
���ˆ Math superscript character \ˆ ˆ�
���& Tabular column separator \& &�
���_ Math subscript character \_ _�
���˜ Non-breaking space \˜ ˜�
���# Macro parameter symbol \# #�
���{ Argument start delimiter $\{$ {�
���} Argument end delimiter $\}$ }
These characters were deliberately chosen, either because theyare rare in normal text, or (in the case of $, #, &, and %)they already had an established special meaning on computersas metacharacters (characters standing as symbols for somethingelse) by the time TEX was written, and it would have beenmisleading to choose others.
2.5.1 Using the special characters
We have already seen (the first paragraph of § 2.4) how to usethe backslash to start a command, and curly braces to delimit anargument. The remaining special characters are:��
��$ Because of the special mathematical meaning LATEX uses for
the dollar-sign on its own, if you want to print $35.99 youtype \$35.99
��
��% The comment character makes LATEX ignore the remain-
der of the line in your document, so you can see it in
��
��30 Formatting information
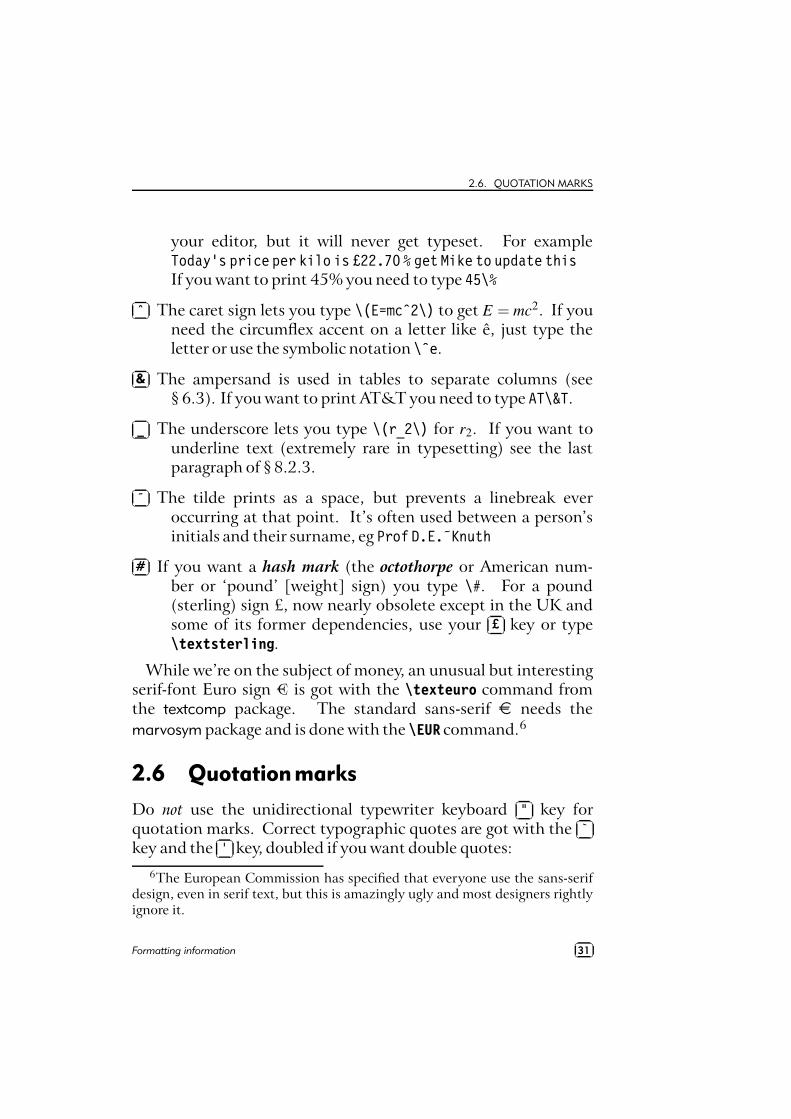
2.6. QUOTATION MARKS
your editor, but it will never get typeset. For exampleToday’s price per kilo is £22.70 % get Mike to update thisIf you want to print 45% you need to type 45\%
��
��ˆ The caret sign lets you type \(E=mcˆ2\) to get E = mc2. If you
need the circumflex accent on a letter like ê, just type theletter or use the symbolic notation \ˆe.
��
��& The ampersand is used in tables to separate columns (see
§ 6.3). If you want to print AT&T you need to type AT\&T.��
��_ The underscore lets you type \(r_2\) for r2. If you want to
underline text (extremely rare in typesetting) see the lastparagraph of § 8.2.3.
��
��˜ The tilde prints as a space, but prevents a linebreak ever
occurring at that point. It’s often used between a person’sinitials and their surname, eg Prof D.E.˜Knuth
��
��# If you want a hash mark (the octothorpe or American num-
ber or ‘pound’ [weight] sign) you type \#. For a pound(sterling) sign £, now nearly obsolete except in the UK andsome of its former dependencies, use your
��
��£ key or type
\textsterling.
While we’re on the subject of money, an unusual but interestingserif-font Euro sign € is got with the \texteuro command fromthe textcomp package. The standard sans-serif ¤ needs themarvosym package and is done with the \EUR command.6
2.6 Quotationmarks
Do not use the unidirectional typewriter keyboard��
��" key for
quotation marks. Correct typographic quotes are got with the��
��`
key and the��
��’ key, doubled if you want double quotes:
6The European Commission has specified that everyone use the sans-serifdesign, even in serif text, but this is amazingly ugly and most designers rightlyignore it.
Formatting information��
��31
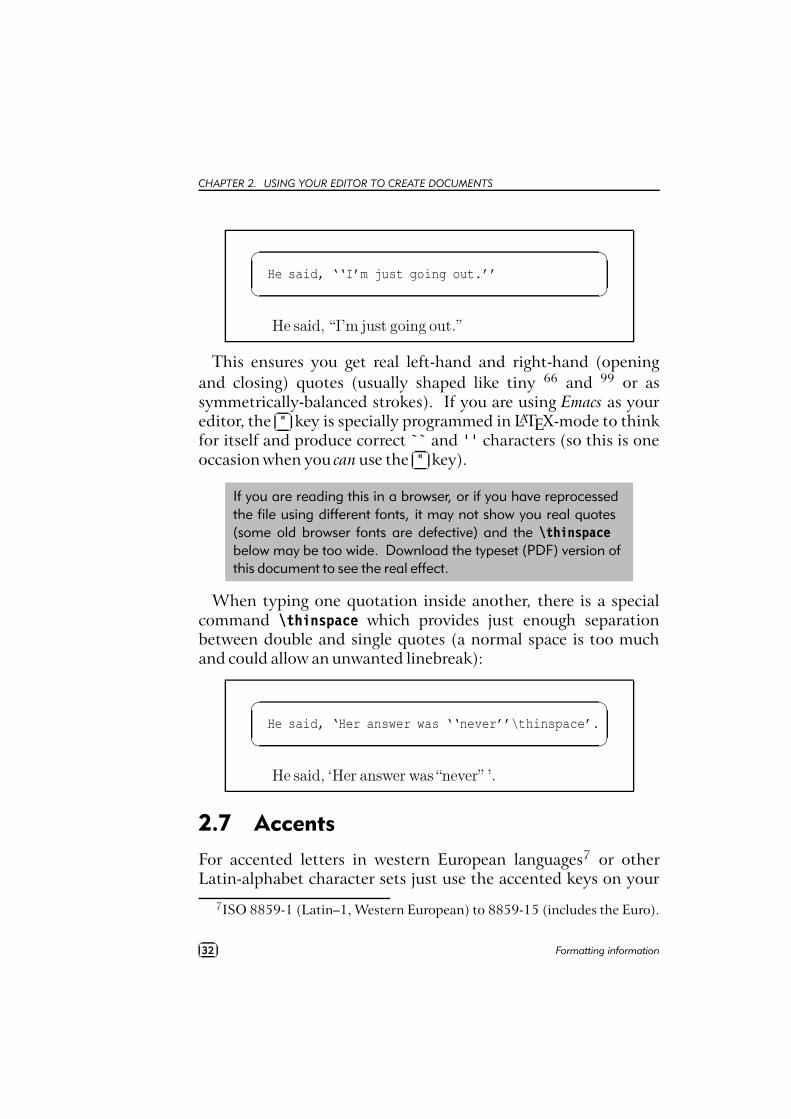
CHAPTER 2. USING YOUR EDITOR TO CREATE DOCUMENTS
�
�
He said, ‘‘I’m just going out.’’
He said, “I’m just going out.”
This ensures you get real left-hand and right-hand (openingand closing) quotes (usually shaped like tiny 66 and 99 or assymmetrically-balanced strokes). If you are using Emacs as youreditor, the
��
��" key is specially programmed in LATEX-mode to think
for itself and produce correct `` and ’’ characters (so this is oneoccasion when you can use the
��
��" key).
If you are reading this in a browser, or if you have reprocessedthe file using different fonts, it may not show you real quotes(some old browser fonts are defective) and the \thinspacebelow may be too wide. Download the typeset (PDF) version ofthis document to see the real effect.
When typing one quotation inside another, there is a specialcommand \thinspace which provides just enough separationbetween double and single quotes (a normal space is too muchand could allow an unwanted linebreak):
�
�
He said, ‘Her answer was ‘‘never’’\thinspace’.
He said, ‘Her answer was “never” ’.
2.7 Accents
For accented letters in western European languages7 or otherLatin-alphabet character sets just use the accented keys on your
7ISO 8859-1 (Latin–1, Western European) to 8859-15 (includes the Euro).
��
��32 Formatting information
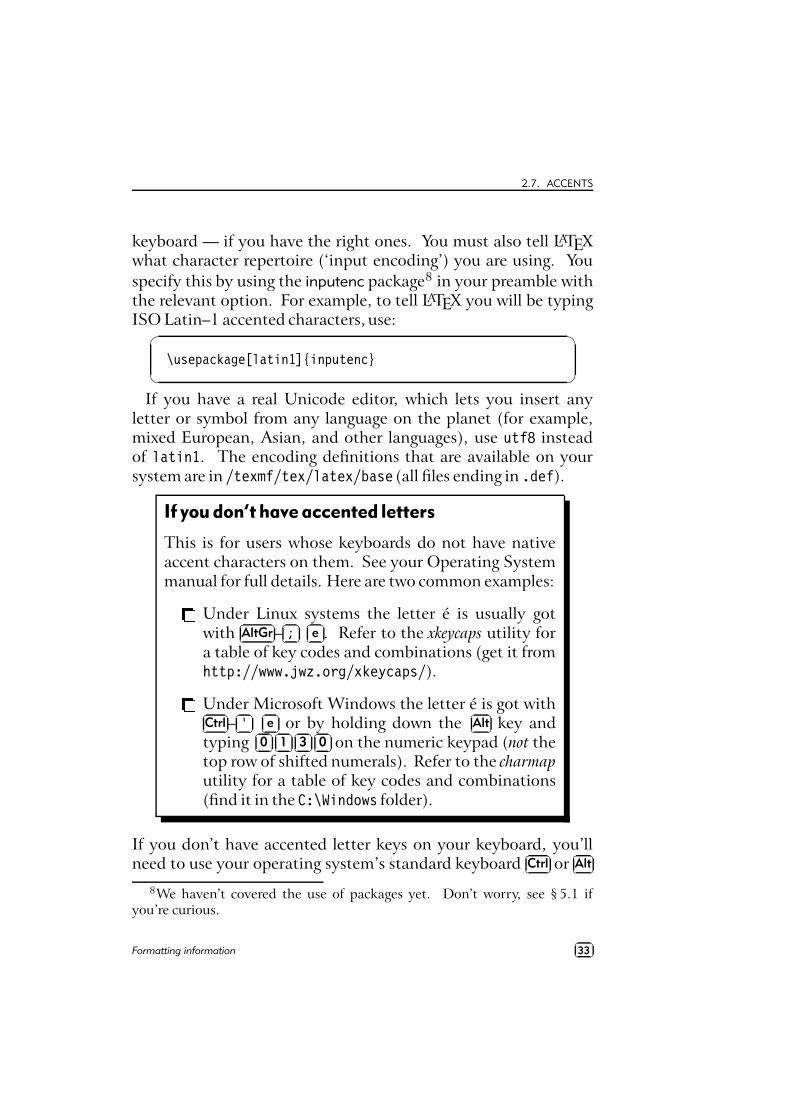
2.7. ACCENTS
keyboard — if you have the right ones. You must also tell LATEXwhat character repertoire (‘input encoding’) you are using. Youspecify this by using the inputenc package8 in your preamble withthe relevant option. For example, to tell LATEX you will be typingISO Latin–1 accented characters, use:
�
�
\usepackage[latin1]{inputenc}
If you have a real Unicode editor, which lets you insert anyletter or symbol from any language on the planet (for example,mixed European, Asian, and other languages), use utf8 insteadof latin1. The encoding definitions that are available on yoursystem are in /texmf/tex/latex/base (all files ending in .def).
If you don’t have accented letters
This is for users whose keyboards do not have nativeaccent characters on them. See your Operating Systemmanual for full details. Here are two common examples:'
Under Linux systems the letter é is usually gotwith
��
��AltGr–��
��;��
��e . Refer to the xkeycaps utility for
a table of key codes and combinations (get it fromhttp://www.jwz.org/xkeycaps/).'Under Microsoft Windows the letter é is got with��
��Ctrl–��
��’
��
��e or by holding down the
��
��Alt key and
typing��
��0��
��1��
��3��
��0 on the numeric keypad (not the
top row of shifted numerals). Refer to the charmaputility for a table of key codes and combinations(find it in the C:\Windows folder).
If you don’t have accented letter keys on your keyboard, you’llneed to use your operating system’s standard keyboard
��
��Ctrl or
��
��Alt
8We haven’t covered the use of packages yet. Don’t worry, see § 5.1 ifyou’re curious.
Formatting information��
��33
CHAPTER 2. USING YOUR EDITOR TO CREATE DOCUMENTS
key combinations to generate the characters (see the panel ‘If youdon’t have accented letters’ above ).
If you cannot generate accented characters from your keyboardat all, or if you need additional accents or symbols which are notin any of the keyboard tables, you can use the symbolic notationin Table 2.1. In fact, this can be used to put any accent overany letter: if you particularly want a g you can have one with thecommand \˜g (and Welsh users can get w with \ˆw).
If you use this symbolic method only, you do not need touse the inputenc package. Before the days of keyboards andscreens with their own real accented characters, the symbolicnotation was the only way to get accents, so you may comeacross a lot of older documents (and users!) using this methodall the time: it does have the advantage in portability that theLATEX file remains plain ASCII, which will work on all machineseverywhere, regardless of their internal encoding, and even withvery old TEX installations.9
Irish and Turkish dotless-ı is done with the special command\i, so an í-fada (which is normally typed with
��
��í ) requires \’\i if
you need to type it in the long format, followed by a backslash-space or dummy pair of curly braces if it comes at the end of aword and there is no punctuation, because of the rule that LATEXcontrol sequences which end in a letter (see the first paragraph of§ 2.4.1) always absorb any following space. So what you mightsee as Rí Teamrac has to be R\’\i\ Tea\.mra\.c when typed infull (there are not usually any keyboard keys for the dotless-ı orthe lenited characters). A similar rule applies to dotless- and touppercase Í.
9Remember not everyone is lucky enough to be able to install newsoftware: many users on corporate and academic networks still have to use oldversions of TEX because their system administrators are too busy to install newones.
��
��34 Formatting information
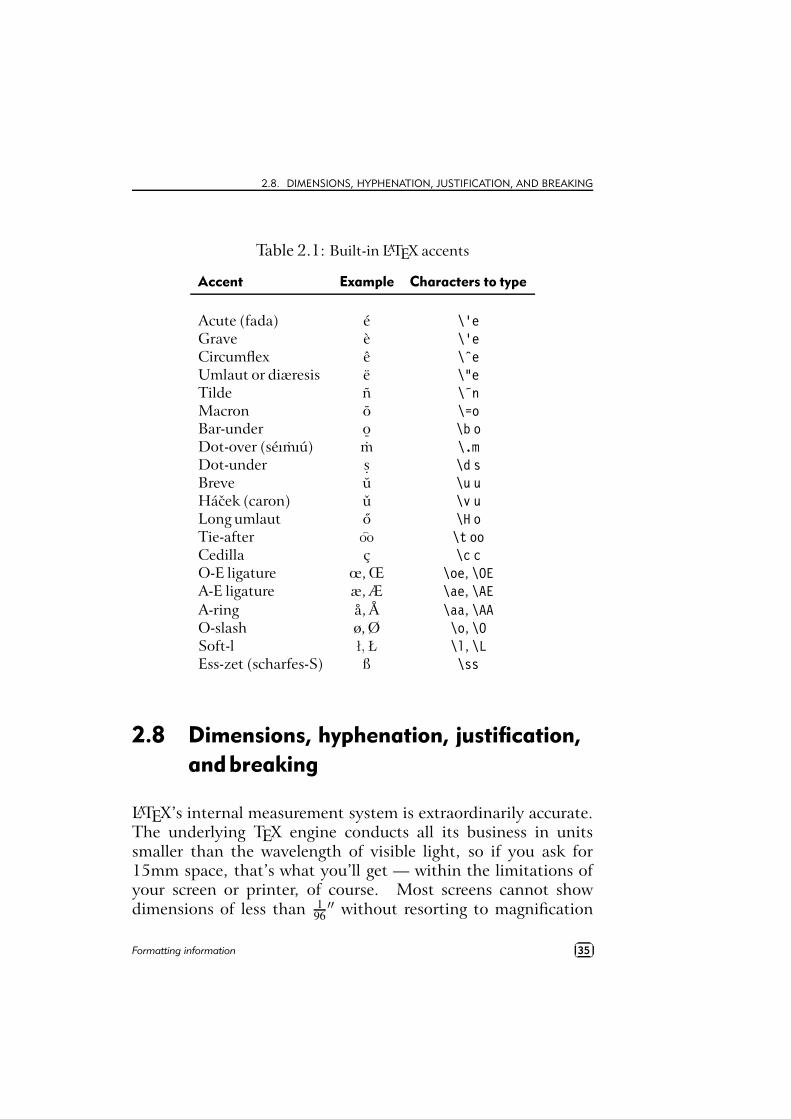
2.8. DIMENSIONS, HYPHENATION, JUSTIFICATION, AND BREAKING
Table 2.1: Built-in LATEX accents
Accent Example Characters to type
Acute (fada) é \’eGrave è \‘eCircumflex ê \ˆeUmlaut or diæresis ë \"eTilde ñ \˜nMacron o \=oBar-under o
¯\b o
Dot-over (séımıú) m \.mDot-under s. \d sBreve u \u uHácek (caron) u \v uLong umlaut o \H oTie-after �oo \t ooCedilla ç \c cO-E ligature œ, Œ \oe, \OEA-E ligature æ, Æ \ae, \AEA-ring å, Å \aa, \AAO-slash ø, Ø \o, \OSoft-l ł, Ł \l, \LEss-zet (scharfes-S) ß \ss
2.8 Dimensions, hyphenation, justification,andbreaking
LATEX’s internal measurement system is extraordinarily accurate.The underlying TEX engine conducts all its business in unitssmaller than the wavelength of visible light, so if you ask for15mm space, that’s what you’ll get — within the limitations ofyour screen or printer, of course. Most screens cannot showdimensions of less than 1
96′′ without resorting to magnification
Formatting information��
��35
CHAPTER 2. USING YOUR EDITOR TO CREATE DOCUMENTS
or scaling; and on printers, even at 600dpi, fine oblique lines orcurves can still sometimes be seen to stagger the dots.
At the same time, many dimensions in LATEX’s preprogrammedformatting are specially set up to be flexible: so much space, plusor minus certain limits to allow the system to make its own adjust-ments to accommodate variations like overlong lines, unevenly-sized images, and non-uniform spacing around headings.
TEX uses a very sophisticated justification algorithm to achievea smooth, even texture to normal paragraph text. The program-ming for this has been borrowed by a large number of other DTPsystems, and users of these are often quite unaware that they arein fact using a significant part of TEX in their work. Occasionally,however, you will need to hand-correct an unusual word-breakor line-break, and there are facilities for doing this on individualoccasions as well as throughout a document.
2.8.1 Specifying size units
Most people in printing and publishing habitually use points andpicas and ems. Some designers use cm and mm. Many English-language speakers still use inches. You can specify lengths in LATEXin any of these units, plus some others (see Table 2.2).
The em can cause beginners some puzzlement because it’sbased on the ‘point size’ of the type, which is itself misleading.The point size refers to the depth of the metal body on whichfoundry type was cast in the days of metal typesetting, not theprinted height of the letters themselves. Thus the letter-size of10pt type in one face can be radically different from 10pt type inanother (look at the table on p. 150, where all the examples are10pt). An em is the height of the type-body in a specific size, so1em of 10pt type is 10pt and 1em of 24pt type is 24pt.
Another name for a 1em space is a ‘quad’, and LATEX has acommand \quad for leaving exactly that much horizontal space. Aspecial name is given to the 12pt em, a ‘pica’ em, as it has becomea fixed measure in its own right.
��
��36 Formatting information
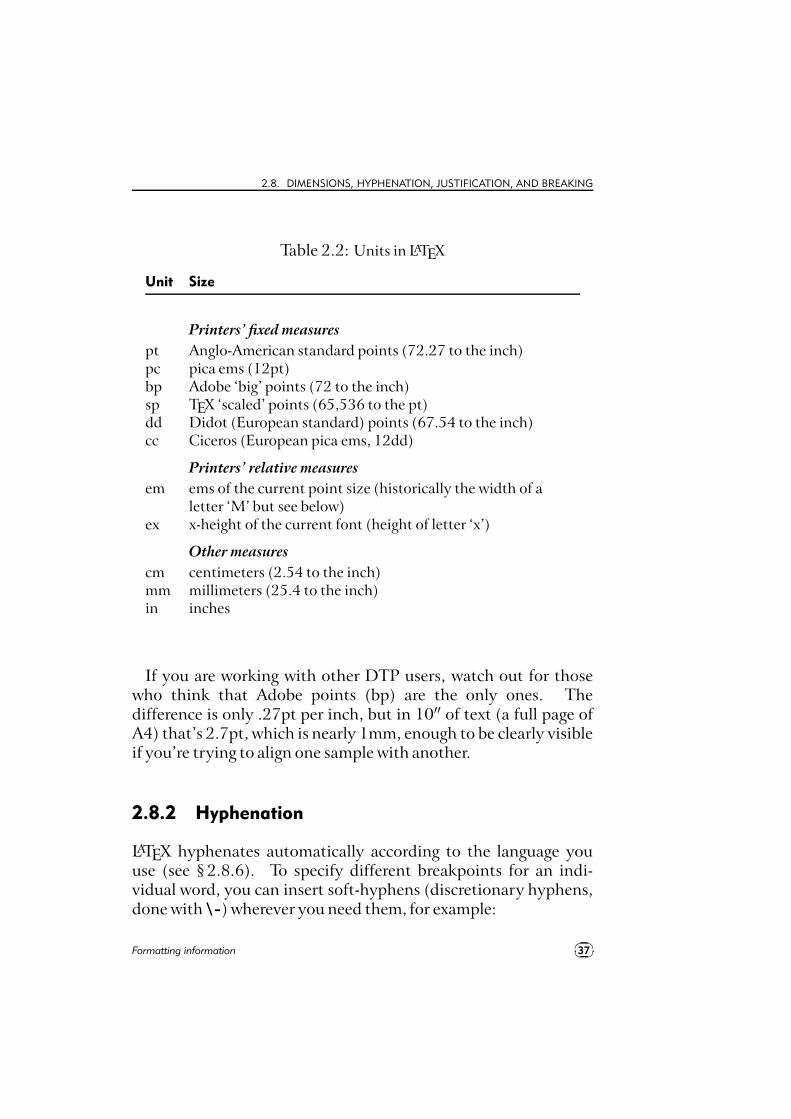
2.8. DIMENSIONS, HYPHENATION, JUSTIFICATION, AND BREAKING
Table 2.2: Units in LATEX
Unit Size
Printers’ fixed measures
pt Anglo-American standard points (72.27 to the inch)pc pica ems (12pt)bp Adobe ‘big’ points (72 to the inch)sp TEX ‘scaled’ points (65,536 to the pt)dd Didot (European standard) points (67.54 to the inch)cc Ciceros (European pica ems, 12dd)
Printers’ relative measures
em ems of the current point size (historically the width of aletter ‘M’ but see below)
ex x-height of the current font (height of letter ‘x’)
Other measures
cm centimeters (2.54 to the inch)mm millimeters (25.4 to the inch)in inches
If you are working with other DTP users, watch out for thosewho think that Adobe points (bp) are the only ones. Thedifference is only .27pt per inch, but in 10′′ of text (a full page ofA4) that’s 2.7pt, which is nearly 1mm, enough to be clearly visibleif you’re trying to align one sample with another.
2.8.2 Hyphenation
LATEX hyphenates automatically according to the language youuse (see § 2.8.6). To specify different breakpoints for an indi-vidual word, you can insert soft-hyphens (discretionary hyphens,done with \-) wherever you need them, for example:
Formatting information��
��37

CHAPTER 2. USING YOUR EDITOR TO CREATE DOCUMENTS
�
�
When in Mexico, we visited Popoca\-tépetl by helicopter.
To specify hyphenation points for all occurrences of a word,use the \hyphenation command in your preamble (see the panel‘The Preamble’ on p. 54 ) with one or more words in its argu-ment, separated by spaces. This will even let you break ‘helico-pter’ correctly. In this command you use normal hyphens, notsoft-hyphens.
�
�
\hyphenation{helico-pter Popoca-tépetlim-mer-sion}
If you have frequent hyphenation problems with long, unusual,or technical words, ask an expert about changing the value of\spaceskip, which controls the flexibility of the space betweenwords. This is not something you would normally want to do, as itcan change the appearance of your document quite significantly.
If you are using a lot of unbreakable text (see next sectionand also § 6.6.1) it may also cause justification problems. Onepossible solution to this is shown in § 9.3.
2.8.3 Unbreakable text
To force LATEX to treat a word as unbreakable, use the \mbox com-mand: \mbox{pneumonoultramicroscopicsilicovolcanoconiosis}.This may have undesirable results, however, if you change mar-gins or the width of the text: pneumonoultramicroscopicsilicovolcanoconiosis…
To tie two words together with an unbreakable space (hardspace), use a tilde (˜) instead of the space (see the list on p. 31 in§ 2.5.1). This will print as a normal space but LATEX will neverbreak the line at that point. You should make this standard typingpractice for things like people’s initials followed by their surname,as in Prof. D. E. Knuth: Prof.\ D.˜E.˜Knuth.
��
��38 Formatting information
2.8. DIMENSIONS, HYPHENATION, JUSTIFICATION, AND BREAKING
Note that a full point after a lowercase letter is treated asthe end of a sentence, and creates more space before thenext word. Here, after ‘Prof.’, it’s not the end of a sentence,and the backslash-space forces LATEX to insert just an ordinaryword-space because it’s OK to break the line after ‘Prof.’,whereas it would look wrong to have initials separated withProf. D.E. Knuth broken over a line-end.
2.8.4 Dashes
For a long dash — what printers call an ‘em rule’ like this — usethree hyphens typed together, like˜--- this, and bind them tothe preceding word with a tilde to avoid the line being brokenbefore the dash. It’s also common to see the dash printed withoutspaces—like that: the difference is purely æsthetic. Never use asingle hyphen for this purpose.
Between digits like page ranges (35–47), it is normal to use theshort dash (what printers call an en-rule) which you get by typingtwo hyphens together, as in 35--47. If you want a minus sign, usemath mode (§ 2.9).
2.8.5 Justification
The default mode for typesetting is justified (two parallel margins,with word-spacing adjusted automatically for the best optical fit).In justifying, LATEX will never add space between letters, onlybetween words. There is a special package called so (‘space-out’) ifyou need special effects like letter-spacing, but these are best leftto the expert.
There are two commands \raggedright and \raggedleft whichset ragged-right (ranged left) and ragged-left (ranged right). Usethem inside a group (see the panel ‘Grouping’ on p. 154 ) toconfine their action to a part of your text.
These modes also exist as ‘environments’ (see the last paragraphof § 3.2) called raggedright and raggedleft which are more
convenient when applying this formatting to a whole paragraphor more, like this one.
Formatting information��
��39
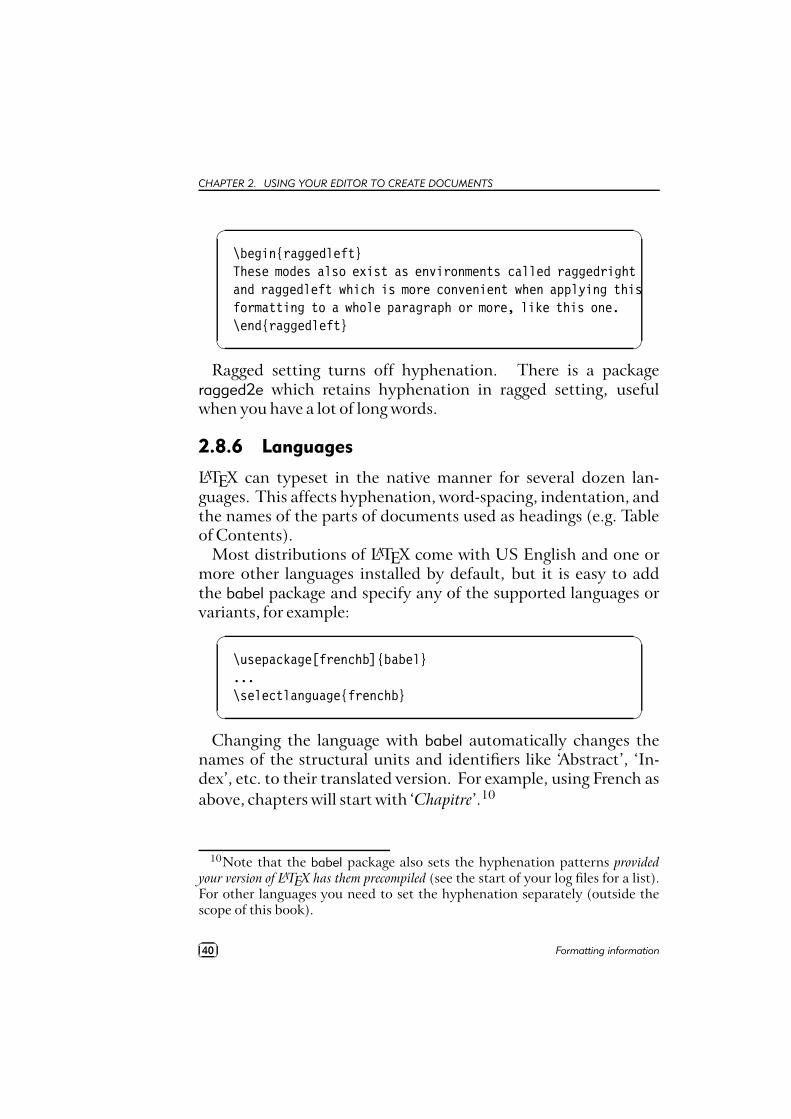
CHAPTER 2. USING YOUR EDITOR TO CREATE DOCUMENTS
�
�
\begin{raggedleft}These modes also exist as environments called raggedrightand raggedleft which is more convenient when applying thisformatting to a whole paragraph or more, like this one.\end{raggedleft}
Ragged setting turns off hyphenation. There is a packageragged2e which retains hyphenation in ragged setting, usefulwhen you have a lot of long words.
2.8.6 Languages
LATEX can typeset in the native manner for several dozen lan-guages. This affects hyphenation, word-spacing, indentation, andthe names of the parts of documents used as headings (e.g. Tableof Contents).
Most distributions of LATEX come with US English and one ormore other languages installed by default, but it is easy to addthe babel package and specify any of the supported languages orvariants, for example:
�
�
\usepackage[frenchb]{babel}...\selectlanguage{frenchb}
Changing the language with babel automatically changes thenames of the structural units and identifiers like ‘Abstract’, ‘In-dex’, etc. to their translated version. For example, using French asabove, chapters will start with ‘Chapitre’.10
10Note that the babel package also sets the hyphenation patterns providedyour version of LATEX has them precompiled (see the start of your log files for a list).For other languages you need to set the hyphenation separately (outside thescope of this book).
��
��40 Formatting information
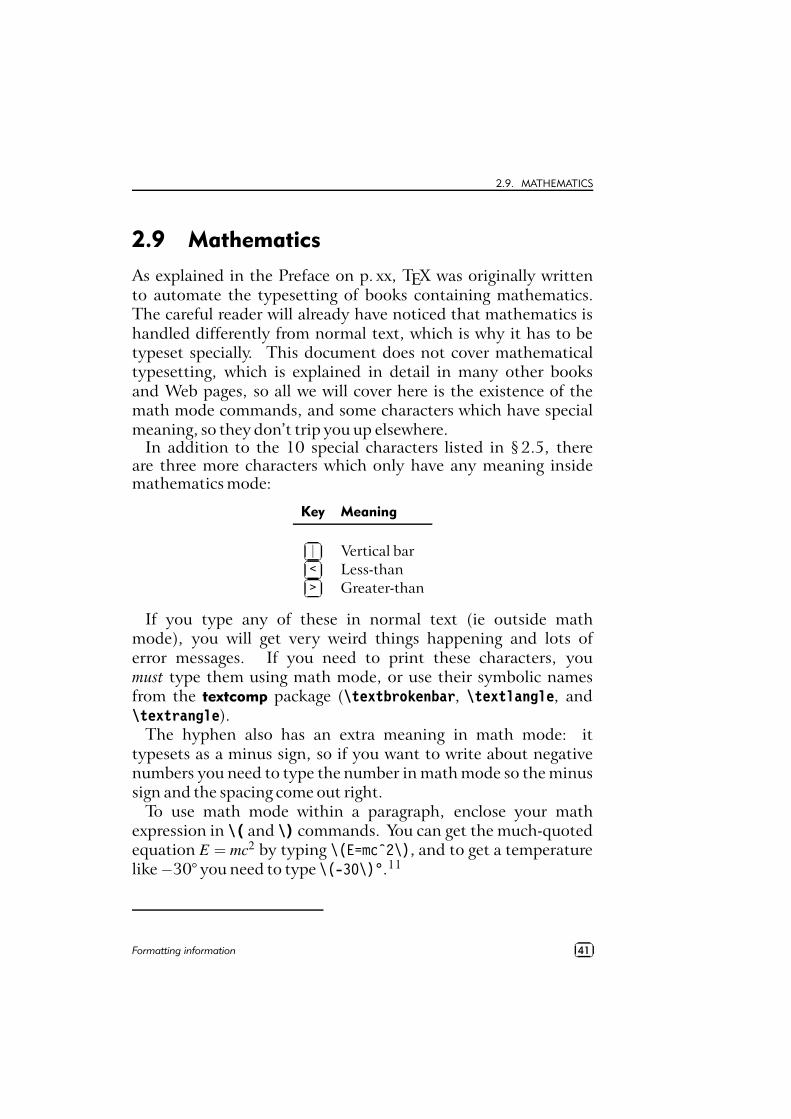
2.9. MATHEMATICS
2.9 Mathematics
As explained in the Preface on p. xx, TEX was originally writtento automate the typesetting of books containing mathematics.The careful reader will already have noticed that mathematics ishandled differently from normal text, which is why it has to betypeset specially. This document does not cover mathematicaltypesetting, which is explained in detail in many other booksand Web pages, so all we will cover here is the existence of themath mode commands, and some characters which have specialmeaning, so they don’t trip you up elsewhere.
In addition to the 10 special characters listed in § 2.5, thereare three more characters which only have any meaning insidemathematics mode:
Key Meaning
��
��| Vertical bar�
���< Less-than�
���> Greater-than
If you type any of these in normal text (ie outside mathmode), you will get very weird things happening and lots oferror messages. If you need to print these characters, youmust type them using math mode, or use their symbolic namesfrom the textcomp package (\textbrokenbar, \textlangle, and\textrangle).
The hyphen also has an extra meaning in math mode: ittypesets as a minus sign, so if you want to write about negativenumbers you need to type the number in math mode so the minussign and the spacing come out right.
To use math mode within a paragraph, enclose your mathexpression in \( and \) commands. You can get the much-quotedequation E = mc2 by typing \(E=mcˆ2\), and to get a temperaturelike −30° you need to type \(-30\)°.11
Formatting information��
��41
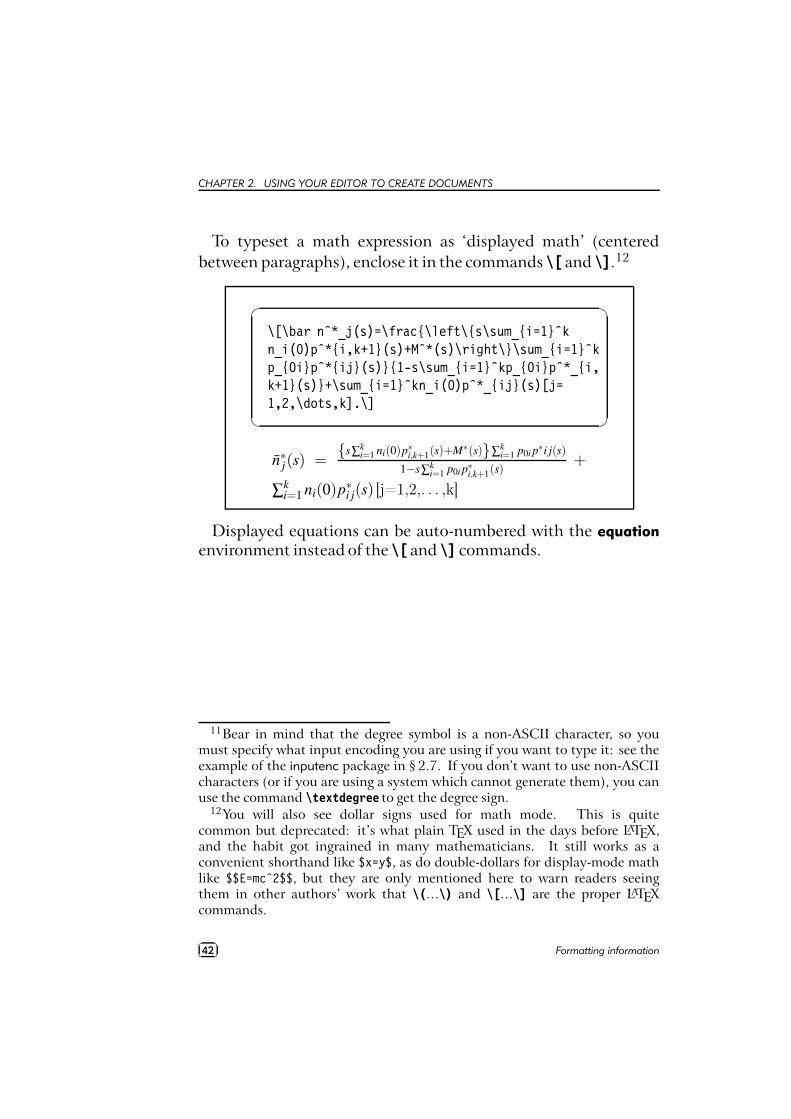
CHAPTER 2. USING YOUR EDITOR TO CREATE DOCUMENTS
To typeset a math expression as ‘displayed math’ (centeredbetween paragraphs), enclose it in the commands \[ and \].12
�
�
\[\bar nˆ*_j(s)=\frac{\left\{s\sum_{i=1}ˆkn_i(0)pˆ*{i,k+1}(s)+Mˆ*(s)\right\}\sum_{i=1}ˆkp_{0i}pˆ*{ij}(s)}{1-s\sum_{i=1}ˆkp_{0i}pˆ*_{i,k+1}(s)}+\sum_{i=1}ˆkn_i(0)pˆ*_{ij}(s)[j=1,2,\dots,k].\]
n∗j(s) ={s∑k
i=1 ni(0)p∗i,k+1(s)+M∗(s)}∑ki=1 p0i p∗i j(s)
1−s∑ki=1 p0i p∗i,k+1(s)
+
∑ki=1 ni(0)p∗i j(s) [j=1,2,. . . ,k]
Displayed equations can be auto-numbered with the equationenvironment instead of the \[ and \] commands.
11Bear in mind that the degree symbol is a non-ASCII character, so youmust specify what input encoding you are using if you want to type it: see theexample of the inputenc package in § 2.7. If you don’t want to use non-ASCIIcharacters (or if you are using a system which cannot generate them), you canuse the command \textdegree to get the degree sign.
12You will also see dollar signs used for math mode. This is quitecommon but deprecated: it’s what plain TEX used in the days before LATEX,and the habit got ingrained in many mathematicians. It still works as aconvenient shorthand like $x=y$, as do double-dollars for display-mode mathlike $$E=mcˆ2$$, but they are only mentioned here to warn readers seeingthem in other authors’ work that \(…\) and \[…\] are the proper LATEXcommands.
��
��42 Formatting information
3Basic document structures
LATEX’s approach to formatting is to aim for consistency. Thismeans that as long as you identify each element of your documentcorrectly, it will be typeset in the same way as all the otherelements like it, so that you achieve a consistent finish withminimum effort. Consistency helps make documents easier toread and understand.
Elements are the component parts of a document, all the pieceswhich make up the whole. Almost everyone who reads books,newspapers, magazines, reports, articles, and other classes ofdocuments will be familiar with the popular structure of chapters,sections, subsections, subsubsections, paragraphs, lists, tables,figures, and so on, even if they don’t consciously think about it.
Consistency is also what publishers look for. They have a housestyle, and often a reputation to keep, so they rightly insist that ifyou do something a certain way once, you should do it the sameway each time.
To help achieve this consistency, every LATEX document starts bydeclaring what document class it belongs to.
Formatting information��
��43
CHAPTER 3. BASIC DOCUMENT STRUCTURES
3.1 TheDocumentClassDeclaration
To tell LATEX what class of document you are going to create, youtype a special first line into your file which identifies it.1 Tostart a report, for example, you would type the \documentclasscommand like this as your first line:
�
�
\documentclass{report}
There are four built-in classes provided, and many others thatyou can download (some may already be installed for you):
report for business, technical, legal, academic, or scientific re-ports;
article for white papers, magazine or journal articles, reviews,conference papers, or research notes;
book for books and theses;
letter for letters.2
The article class in particular can be used (some would say‘abused’) for almost any short piece of typesetting by simplyomitting the titling and layout (see below).
The built-in classes are intended as starting-points, especiallyfor drafts and for compatibility when exchanging documentswith other LATEX users, as they come with every copy of LATEXand are therefore guaranteed to format identically everywhere.They are not intended as final-format publication-quality layouts. Formost other purposes, especially for publication, you use add-inpackages (§ 5.1) to extend these classes to do what you need:
1Readers familiar with SGML, HTML, or XML will recognize the conceptas similar to the Document Type Declaration.
2The built-in letter class is rather idiosyncratic: there are much better onesyou can download, such as the memoir and komascript packages.
��
��44 Formatting information
3.1. THE DOCUMENT CLASS DECLARATION
(The memoir and komascript packages contain more sophisti-cated replacements for all the built-in classes;(Many academic and scientific publishers provide their ownspecial class files for articles and books (often on their Websites for download);(Conference organisers may also provide class files for au-thors to write papers for presentation;(Many universities provide their own thesis document classfiles in order to ensure exact fulfillment of their formattingrequirements;(Businesses and other organizations can provide their userswith corporate classes on a central server and configureLATEX installations to look there first for packages, fonts, etc.
Books and journals are not usually printed on office-size paper.Although LATEX’s layouts are designed to fit on standard A4 orLetter stationery for draft purposes, it makes them look odd:the margins are too wide, or the positioning is unusual, or thefont size is too small, because the finished job will normally betrimmed to a different size entirely — try trimming the marginsof the PDF version of this book to 185mm by 235mm (the sameas The LATEX Companion3 series) and you’ll be amazed at how itchanges the appearance!
3.1.1 Document class options
The default layouts are designed to fit as drafts on US Lettersize paper.4 To create documents with the correct proportions
3Mittelbach et al. (2004)4Letter size is 8½′′×11′′, which is the trimmed size of the old Demi Quarto,
still in use in North America. The other common US office size is ‘Legal’,which is 8½′′×14′′, a bastard cutting close to the old Foolscap (8¼′′×13¼′′).ISO standard ‘A’, ‘B’, and ‘C’ paper sizes are still virtually unknown in manyparts of North America.
Formatting information��
��45
CHAPTER 3. BASIC DOCUMENT STRUCTURES
for standard A4 paper, you need to specify the paper size in anoptional argument in square brackets before the document classname, e.g.
�
�
\documentclass[a4paper]{report}
The two most common options are a4paper and letterpaper.However, many European distributions of TEX now come presetfor A4, not Letter, and this is also true of all distributions ofpdfLATEX.
The other default settings are for: a) 10pt type (all documentclasses); b) two-sided printing (books and reports) or one-sided(articles and letters); and c) separate title page (books and reportsonly). These can be modified with the following document classoptions which you can add in the same set of square brackets,separated by commas:
11pt to specify 11pt type (headings, footnotes, etc. get scaled upor down in proportion);
12pt to specify 12pt type (again, headings scale);
oneside to format one-sided printing for books and reports;
twoside to format articles for two-sided printing;
titlepage to force articles to have a separate title page;
draft makes LATEX indicate hyphenation and justification prob-lems with a small square in the right-hand margin of theproblem line so they can be located quickly by a human.
If you were using pdfLATEX for a report to be in 12pt type onLetter paper, but printed one-sided in draft mode, you woulduse:
�
�
\documentclass[12pt,letterpaper,oneside,draft]{report}
��
��46 Formatting information
3.2. THE DOCUMENT ENVIRONMENT
There are extra preset options for other type sizes which can bedownloaded separately, but 10pt, 11pt, and 12pt between themcover probably 99% of all document typesetting. In additionthere are the hundreds of add-in packages which can automateother layout and formatting variants without you having toprogram anything by hand or even change your text.
EXERCISE 1
Create a new document
1. Use your editor to create a new document.
2. Type in a Document Class Declaration as shownabove.
3. Add a font size option if you wish.
4. In North America, omit the a4paper option orchange it to letterpaper.
5. Save the file (make up a name) ensuring the nameends with .tex
3.2 Thedocumentenvironment
After the Document Class Declaration, the text of your documentis enclosed between two commands which identify the beginningand end of the actual document:
�
�
\documentclass[11pt,a4paper,oneside]{report}
\begin{document}...\end{document}
(You would put your text where the dots are.) The reason formarking off the beginning of your text is that LATEX allows you to
Formatting information��
��47
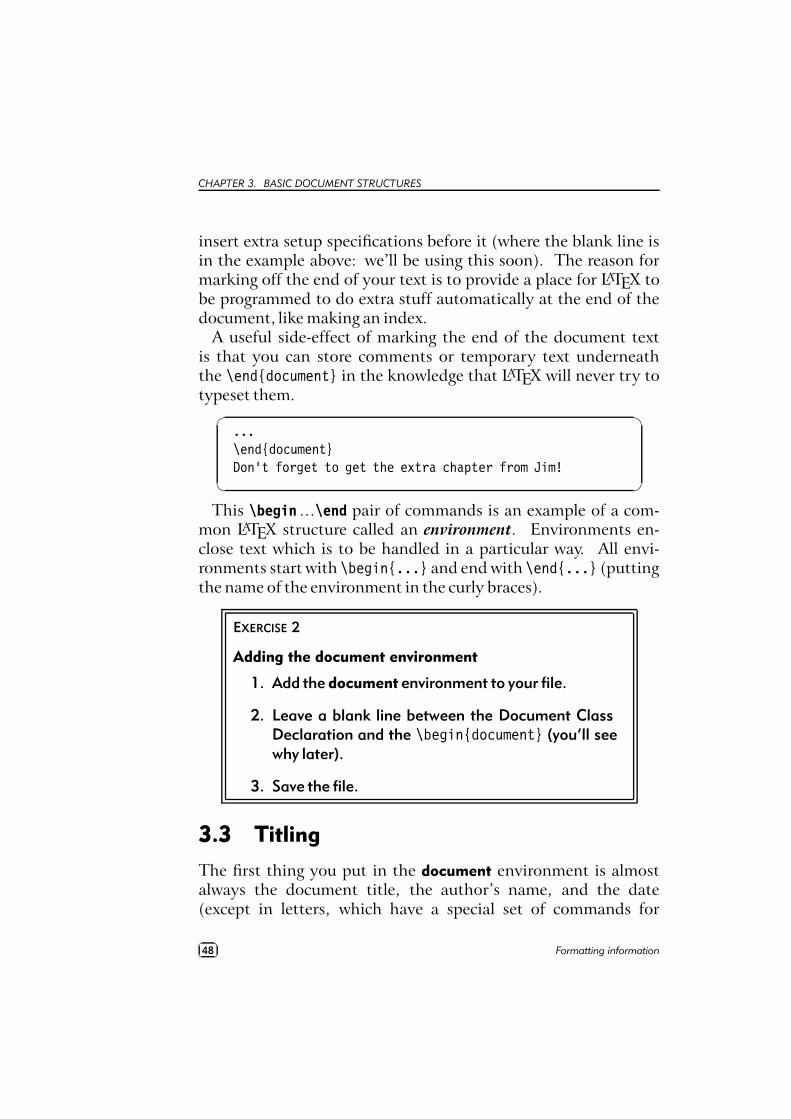
CHAPTER 3. BASIC DOCUMENT STRUCTURES
insert extra setup specifications before it (where the blank line isin the example above: we’ll be using this soon). The reason formarking off the end of your text is to provide a place for LATEX tobe programmed to do extra stuff automatically at the end of thedocument, like making an index.
A useful side-effect of marking the end of the document textis that you can store comments or temporary text underneaththe \end{document} in the knowledge that LATEX will never try totypeset them.
�
�
...\end{document}Don’t forget to get the extra chapter from Jim!
This \begin…\end pair of commands is an example of a com-mon LATEX structure called an environment. Environments en-close text which is to be handled in a particular way. All envi-ronments start with \begin{...} and end with \end{...} (puttingthe name of the environment in the curly braces).
EXERCISE 2
Adding the document environment
1. Add the document environment to your file.
2. Leave a blank line between the Document ClassDeclaration and the \begin{document} (you’ll seewhy later).
3. Save the file.
3.3 Titling
The first thing you put in the document environment is almostalways the document title, the author’s name, and the date(except in letters, which have a special set of commands for
��
��48 Formatting information
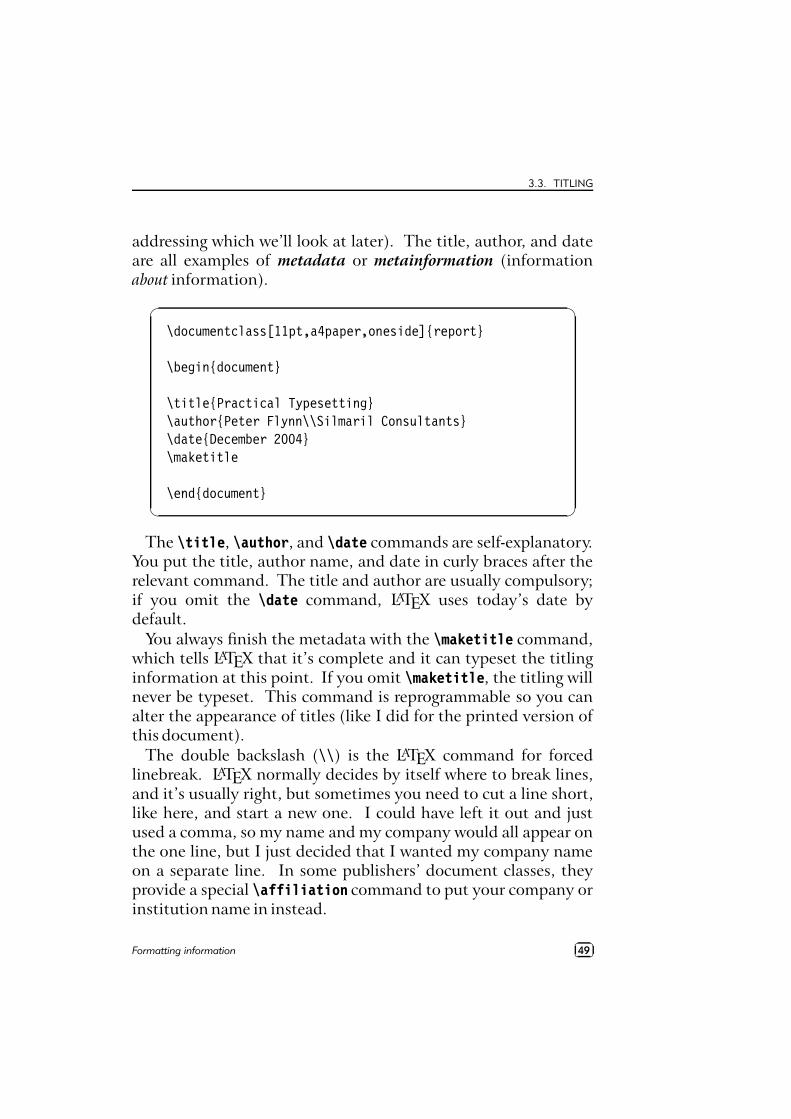
3.3. TITLING
addressing which we’ll look at later). The title, author, and dateare all examples of metadata or metainformation (informationabout information).
�
�
\documentclass[11pt,a4paper,oneside]{report}
\begin{document}
\title{Practical Typesetting}\author{Peter Flynn\\Silmaril Consultants}\date{December 2004}\maketitle
\end{document}
The \title, \author, and \date commands are self-explanatory.You put the title, author name, and date in curly braces after therelevant command. The title and author are usually compulsory;if you omit the \date command, LATEX uses today’s date bydefault.
You always finish the metadata with the \maketitle command,which tells LATEX that it’s complete and it can typeset the titlinginformation at this point. If you omit \maketitle, the titling willnever be typeset. This command is reprogrammable so you canalter the appearance of titles (like I did for the printed version ofthis document).
The double backslash (\\) is the LATEX command for forcedlinebreak. LATEX normally decides by itself where to break lines,and it’s usually right, but sometimes you need to cut a line short,like here, and start a new one. I could have left it out and justused a comma, so my name and my company would all appear onthe one line, but I just decided that I wanted my company nameon a separate line. In some publishers’ document classes, theyprovide a special \affiliation command to put your company orinstitution name in instead.
Formatting information��
��49
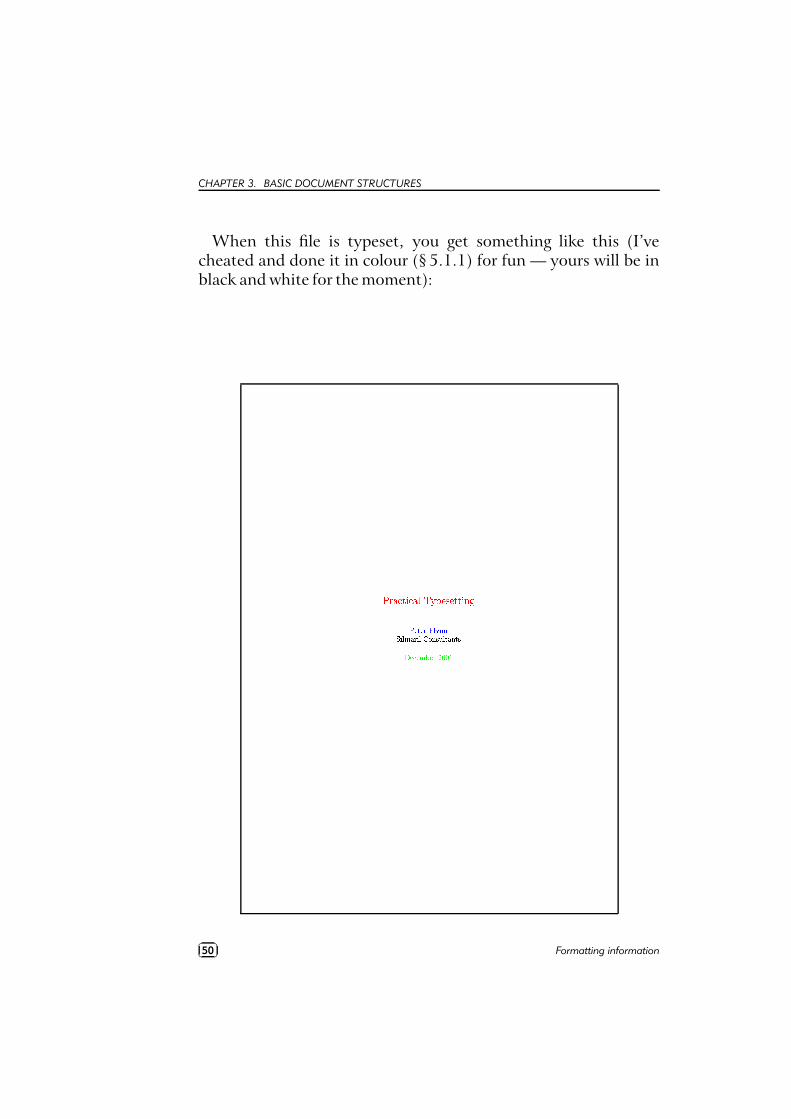
CHAPTER 3. BASIC DOCUMENT STRUCTURES
When this file is typeset, you get something like this (I’vecheated and done it in colour (§ 5.1.1) for fun — yours will be inblack and white for the moment):
)+*-,/.1032 .4,/576+8:9<;1=1;-0>0-2 ?A@BDCFE CFGAHDI J>K1KL3M I NPOQG M ISRUT>K-V W-I E OQK3E VX:CFYFCFN[Z1CFGA\^]>]3_
��
��50 Formatting information
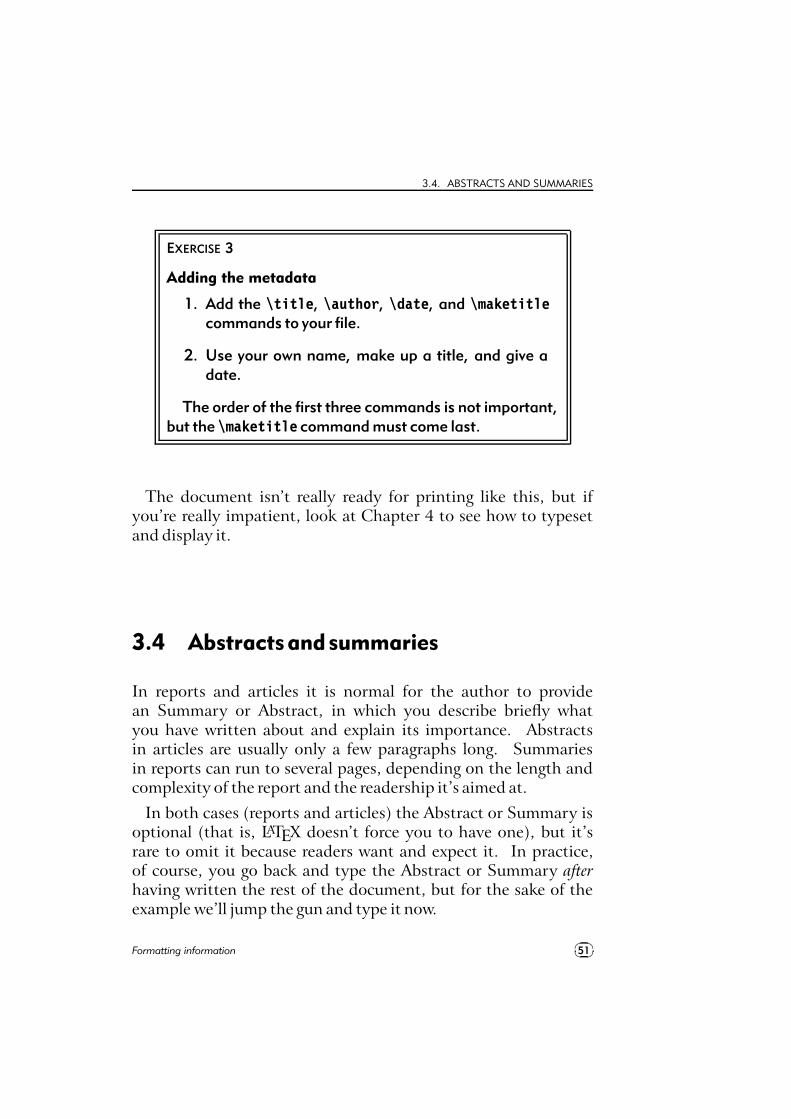
3.4. ABSTRACTS AND SUMMARIES
EXERCISE 3
Adding the metadata
1. Add the \title, \author, \date, and \maketitlecommands to your file.
2. Use your own name, make up a title, and give adate.
The order of the first three commands is not important,but the \maketitle command must come last.
The document isn’t really ready for printing like this, but ifyou’re really impatient, look at Chapter 4 to see how to typesetand display it.
3.4 Abstractsandsummaries
In reports and articles it is normal for the author to providean Summary or Abstract, in which you describe briefly whatyou have written about and explain its importance. Abstractsin articles are usually only a few paragraphs long. Summariesin reports can run to several pages, depending on the length andcomplexity of the report and the readership it’s aimed at.
In both cases (reports and articles) the Abstract or Summary isoptional (that is, LATEX doesn’t force you to have one), but it’srare to omit it because readers want and expect it. In practice,of course, you go back and type the Abstract or Summary afterhaving written the rest of the document, but for the sake of theexample we’ll jump the gun and type it now.
Formatting information��
��51
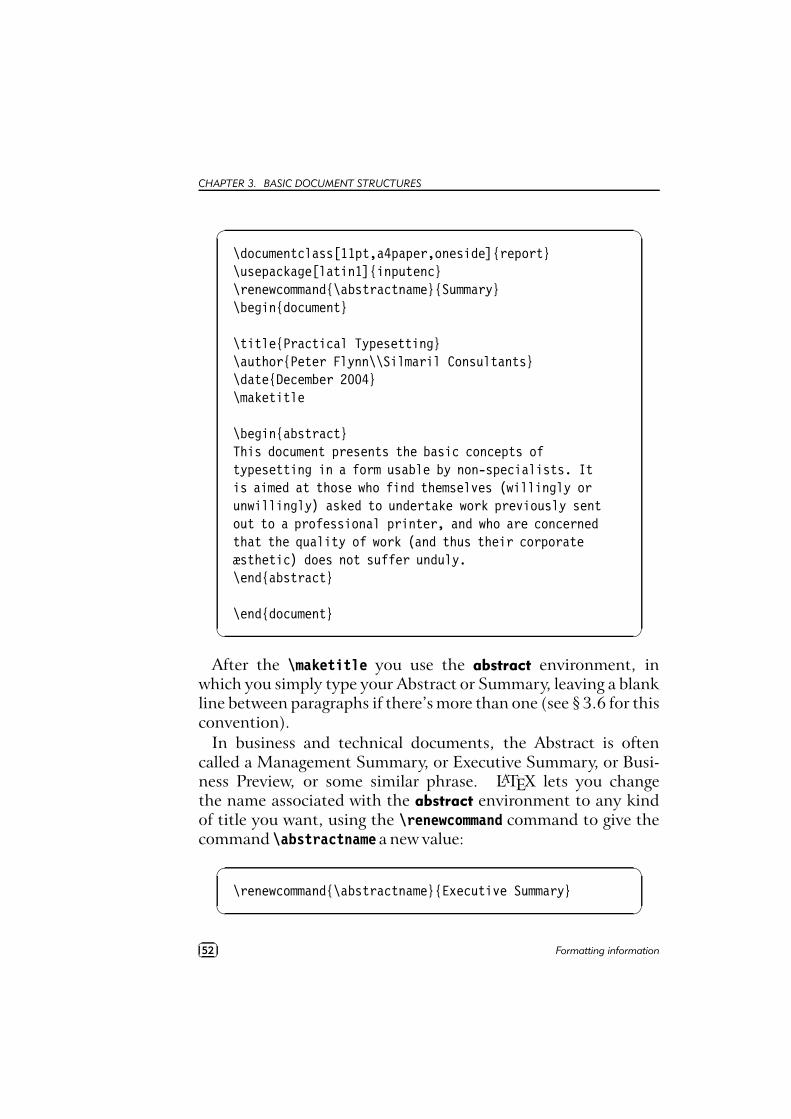
CHAPTER 3. BASIC DOCUMENT STRUCTURES
�
�
\documentclass[11pt,a4paper,oneside]{report}\usepackage[latin1]{inputenc}\renewcommand{\abstractname}{Summary}\begin{document}
\title{Practical Typesetting}\author{Peter Flynn\\Silmaril Consultants}\date{December 2004}\maketitle
\begin{abstract}This document presents the basic concepts oftypesetting in a form usable by non-specialists. Itis aimed at those who find themselves (willingly orunwillingly) asked to undertake work previously sentout to a professional printer, and who are concernedthat the quality of work (and thus their corporateæsthetic) does not suffer unduly.\end{abstract}
\end{document}
After the \maketitle you use the abstract environment, inwhich you simply type your Abstract or Summary, leaving a blankline between paragraphs if there’s more than one (see § 3.6 for thisconvention).
In business and technical documents, the Abstract is oftencalled a Management Summary, or Executive Summary, or Busi-ness Preview, or some similar phrase. LATEX lets you changethe name associated with the abstract environment to any kindof title you want, using the \renewcommand command to give thecommand \abstractname a new value:
�
�
\renewcommand{\abstractname}{Executive Summary}
��
��52 Formatting information
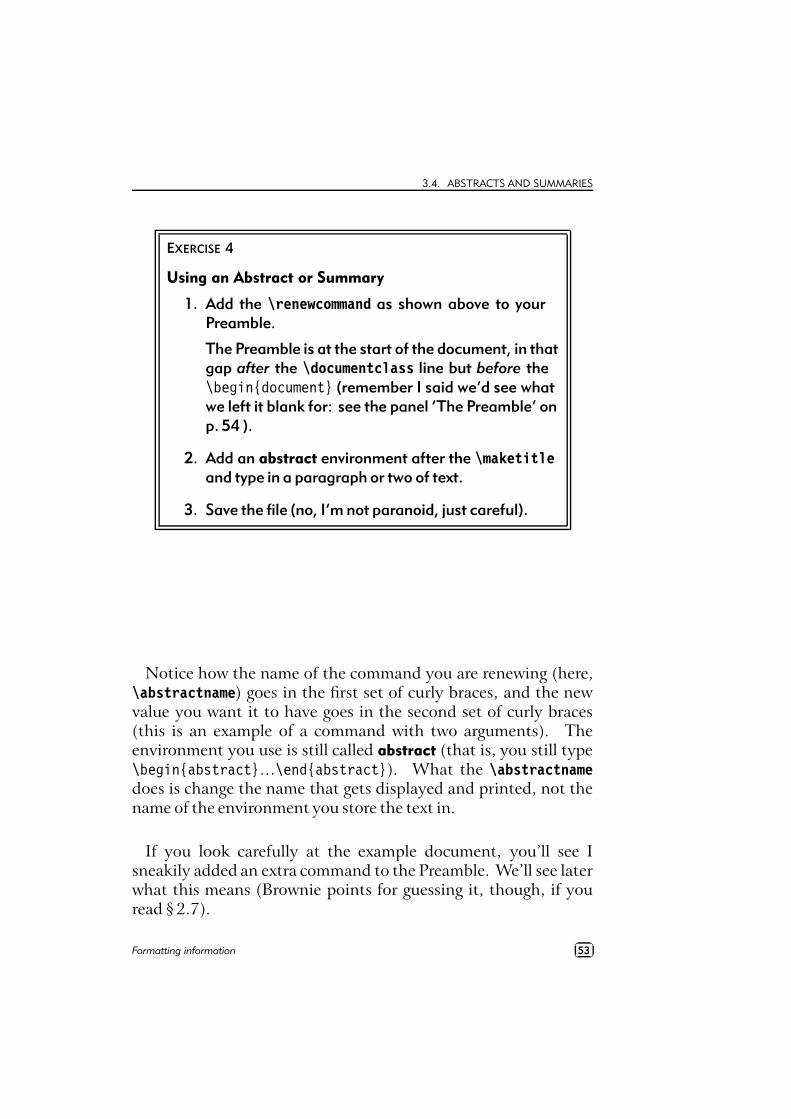
3.4. ABSTRACTS AND SUMMARIES
EXERCISE 4
Using an Abstract or Summary
1. Add the \renewcommand as shown above to yourPreamble.
The Preamble is at the start of the document, in thatgap after the \documentclass line but before the\begin{document} (remember I said we’d see whatwe left it blank for: see the panel ‘The Preamble’ onp. 54 ).
2. Add an abstract environment after the \maketitleand type in a paragraph or two of text.
3. Save the file (no, I’m not paranoid, just careful).
Notice how the name of the command you are renewing (here,\abstractname) goes in the first set of curly braces, and the newvalue you want it to have goes in the second set of curly braces(this is an example of a command with two arguments). Theenvironment you use is still called abstract (that is, you still type\begin{abstract}…\end{abstract}). What the \abstractnamedoes is change the name that gets displayed and printed, not thename of the environment you store the text in.
If you look carefully at the example document, you’ll see Isneakily added an extra command to the Preamble. We’ll see laterwhat this means (Brownie points for guessing it, though, if youread § 2.7).
Formatting information��
��53
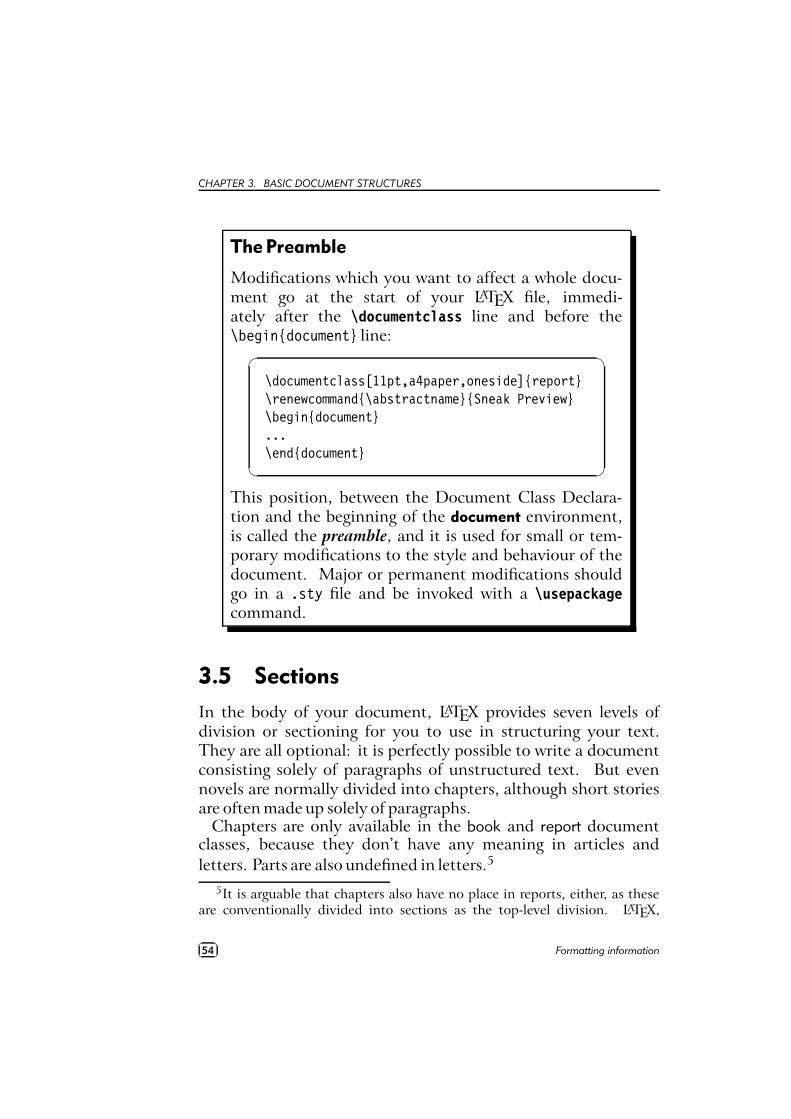
CHAPTER 3. BASIC DOCUMENT STRUCTURES
The Preamble
Modifications which you want to affect a whole docu-ment go at the start of your LATEX file, immedi-ately after the \documentclass line and before the\begin{document} line:
�
�
\documentclass[11pt,a4paper,oneside]{report}\renewcommand{\abstractname}{Sneak Preview}\begin{document}...\end{document}
This position, between the Document Class Declara-tion and the beginning of the document environment,is called the preamble, and it is used for small or tem-porary modifications to the style and behaviour of thedocument. Major or permanent modifications shouldgo in a .sty file and be invoked with a \usepackagecommand.
3.5 Sections
In the body of your document, LATEX provides seven levels ofdivision or sectioning for you to use in structuring your text.They are all optional: it is perfectly possible to write a documentconsisting solely of paragraphs of unstructured text. But evennovels are normally divided into chapters, although short storiesare often made up solely of paragraphs.
Chapters are only available in the book and report documentclasses, because they don’t have any meaning in articles andletters. Parts are also undefined in letters.5
5It is arguable that chapters also have no place in reports, either, as theseare conventionally divided into sections as the top-level division. LATEX,
��
��54 Formatting information

3.5. SECTIONS
Depth Division Command Notes
−1 Part \part Not in letters0 Chapter \chapter Books and reports1 Section \section Not in letters2 Subsection \subsection Not in letters3 Subsubsection \subsubsection Not in letters4 Titled paragraph \paragraph Not in letters5 Titled subparagraph \subparagraph Not in letters
In each case the title of the part, chapter, section, etc. goes incurly braces after the command. LATEX automatically calculatesthe correct numbering and prints the title in bold. You can turnsection numbering off at a specific depth: details in § 3.5.1.
�
�
\section{New recruitment policies}...\subsection{Effect on staff turnover}...\chapter{Business plan 2005--2007}
There are packages6 to let you control the typeface, style,spacing, and appearance of section headings: it’s much easier touse them than to try and reprogram the headings manually. Twoof the most popular are the ssection and sectsty packages.
Headings also get put automatically into the Table of Contents,if you specify one (it’s optional). But if you make manual stylingchanges to your heading, for example a very long title, or somespecial line-breaks or unusual font-play, this would appear inthe Table of Contents as well, which you almost certainly don’twant. LATEX allows you to give an optional extra version of theheading text which only gets used in the Table of Contents andany running heads, if they are in effect (§ 8.1.2). This optional
however, assumes your reports have chapters, but this is only the default, andcan be changed very simply (see § 9.6).
6Details of how to use LATEX packages are in § 5.1.
Formatting information��
��55
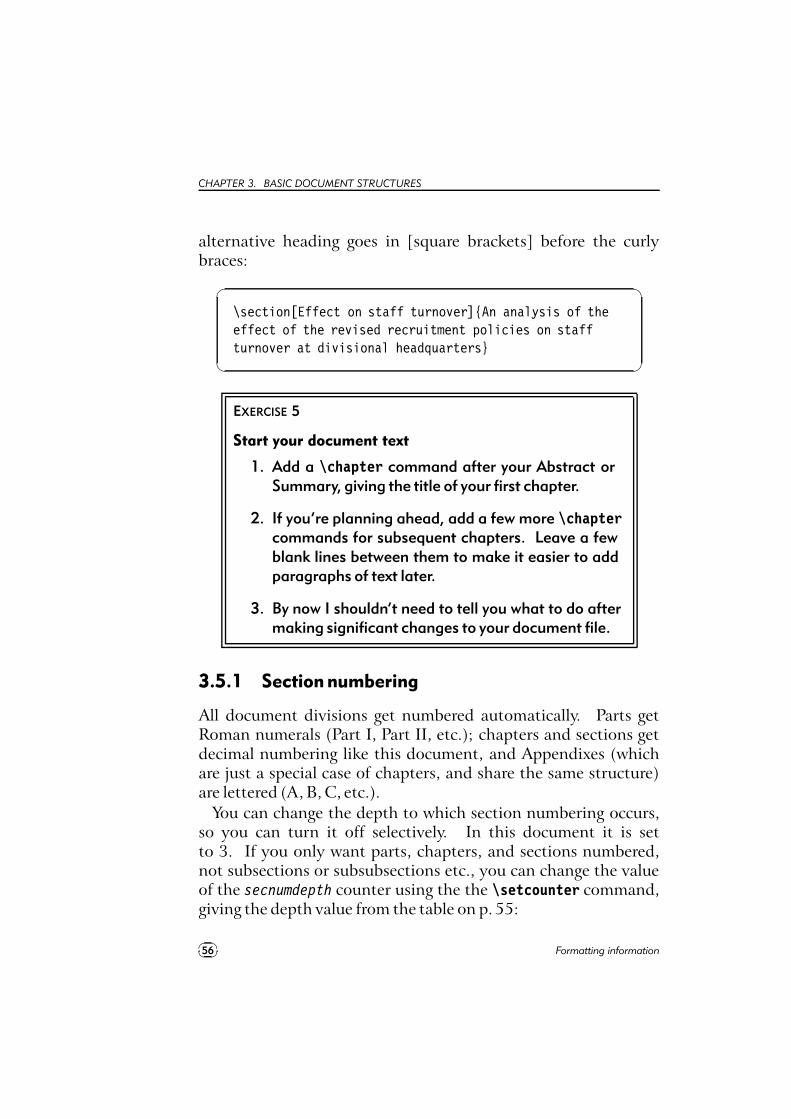
CHAPTER 3. BASIC DOCUMENT STRUCTURES
alternative heading goes in [square brackets] before the curlybraces:
�
�
\section[Effect on staff turnover]{An analysis of theeffect of the revised recruitment policies on staffturnover at divisional headquarters}
EXERCISE 5
Start your document text
1. Add a \chapter command after your Abstract orSummary, giving the title of your first chapter.
2. If you’re planning ahead, add a few more \chaptercommands for subsequent chapters. Leave a fewblank lines between them to make it easier to addparagraphs of text later.
3. By now I shouldn’t need to tell you what to do aftermaking significant changes to your document file.
3.5.1 Section numbering
All document divisions get numbered automatically. Parts getRoman numerals (Part I, Part II, etc.); chapters and sections getdecimal numbering like this document, and Appendixes (whichare just a special case of chapters, and share the same structure)are lettered (A, B, C, etc.).
You can change the depth to which section numbering occurs,so you can turn it off selectively. In this document it is setto 3. If you only want parts, chapters, and sections numbered,not subsections or subsubsections etc., you can change the valueof the secnumdepth counter using the the \setcounter command,giving the depth value from the table on p. 55:
��
��56 Formatting information
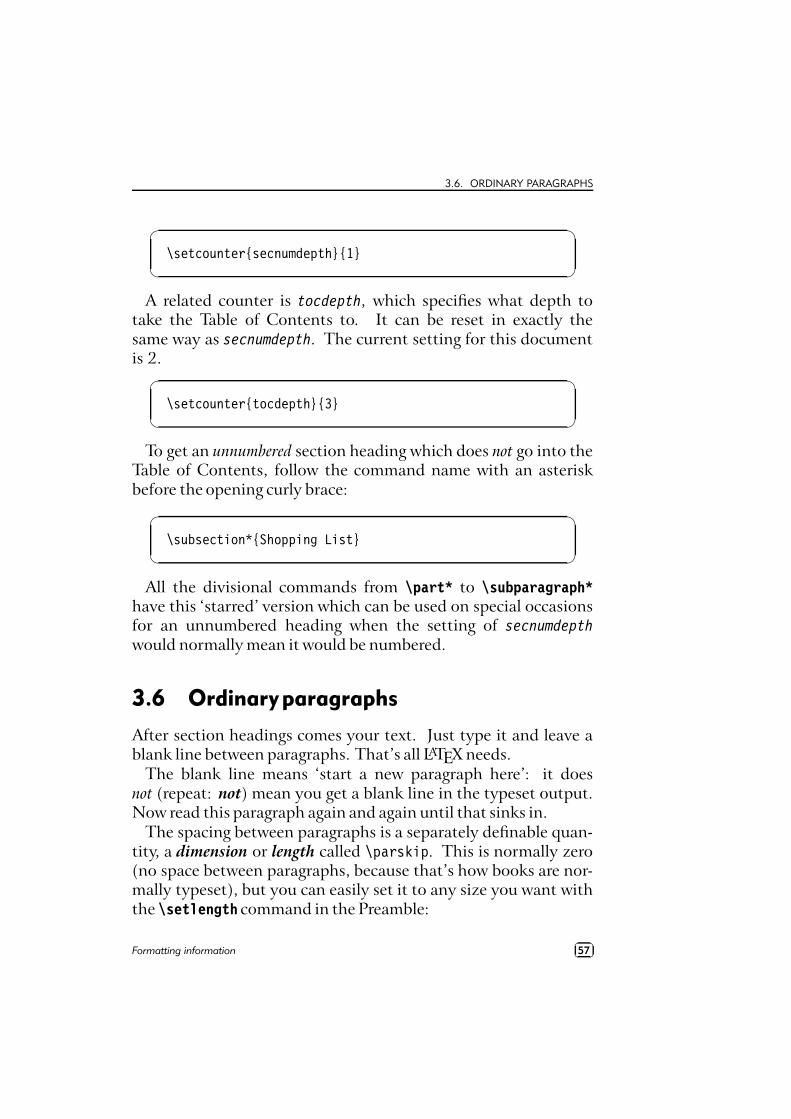
3.6. ORDINARY PARAGRAPHS
�
�
\setcounter{secnumdepth}{1}
A related counter is tocdepth, which specifies what depth totake the Table of Contents to. It can be reset in exactly thesame way as secnumdepth. The current setting for this documentis 2.
�
�
\setcounter{tocdepth}{3}
To get an unnumbered section heading which does not go into theTable of Contents, follow the command name with an asteriskbefore the opening curly brace:
�
�
\subsection*{Shopping List}
All the divisional commands from \part* to \subparagraph*have this ‘starred’ version which can be used on special occasionsfor an unnumbered heading when the setting of secnumdepth
would normally mean it would be numbered.
3.6 Ordinaryparagraphs
After section headings comes your text. Just type it and leave ablank line between paragraphs. That’s all LATEX needs.
The blank line means ‘start a new paragraph here’: it doesnot (repeat: not) mean you get a blank line in the typeset output.Now read this paragraph again and again until that sinks in.
The spacing between paragraphs is a separately definable quan-tity, a dimension or length called \parskip. This is normally zero(no space between paragraphs, because that’s how books are nor-mally typeset), but you can easily set it to any size you want withthe \setlength command in the Preamble:
Formatting information��
��57
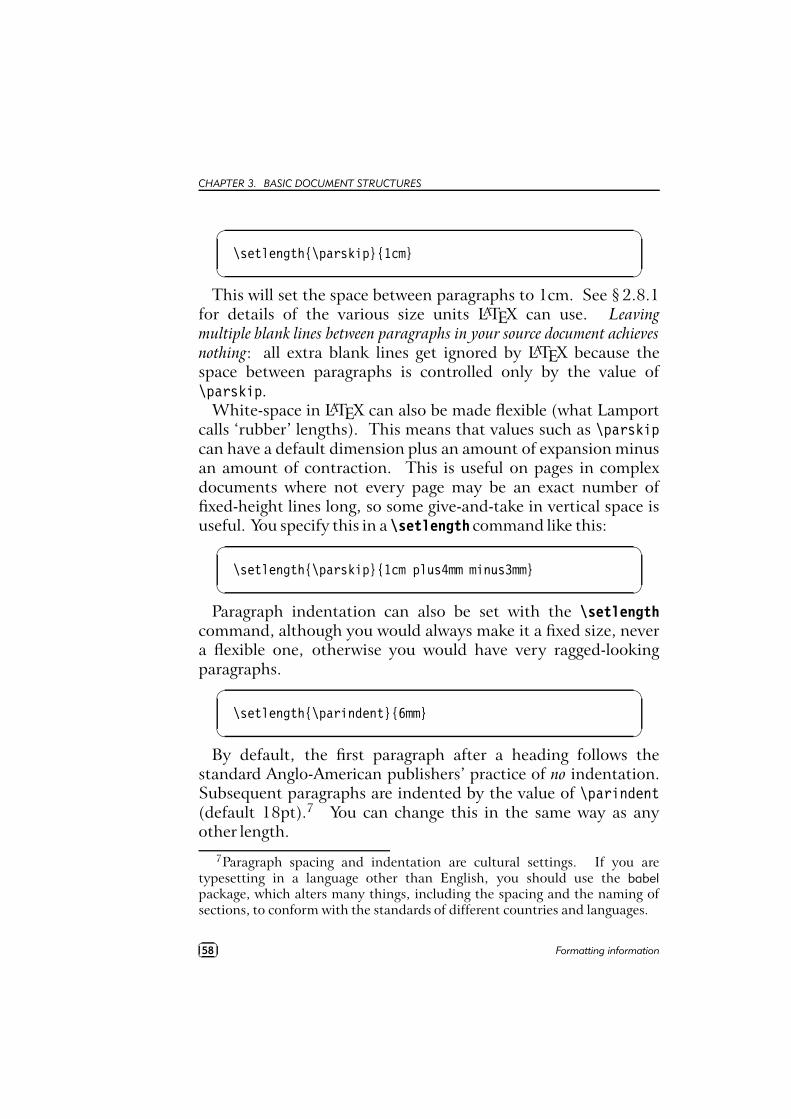
CHAPTER 3. BASIC DOCUMENT STRUCTURES
�
�
\setlength{\parskip}{1cm}
This will set the space between paragraphs to 1cm. See § 2.8.1for details of the various size units LATEX can use. Leavingmultiple blank lines between paragraphs in your source document achievesnothing: all extra blank lines get ignored by LATEX because thespace between paragraphs is controlled only by the value of\parskip.
White-space in LATEX can also be made flexible (what Lamportcalls ‘rubber’ lengths). This means that values such as \parskipcan have a default dimension plus an amount of expansion minusan amount of contraction. This is useful on pages in complexdocuments where not every page may be an exact number offixed-height lines long, so some give-and-take in vertical space isuseful. You specify this in a \setlength command like this:
�
�
\setlength{\parskip}{1cm plus4mm minus3mm}
Paragraph indentation can also be set with the \setlengthcommand, although you would always make it a fixed size, nevera flexible one, otherwise you would have very ragged-lookingparagraphs.
�
�
\setlength{\parindent}{6mm}
By default, the first paragraph after a heading follows thestandard Anglo-American publishers’ practice of no indentation.Subsequent paragraphs are indented by the value of \parindent(default 18pt).7 You can change this in the same way as anyother length.
7Paragraph spacing and indentation are cultural settings. If you aretypesetting in a language other than English, you should use the babelpackage, which alters many things, including the spacing and the naming ofsections, to conform with the standards of different countries and languages.
��
��58 Formatting information
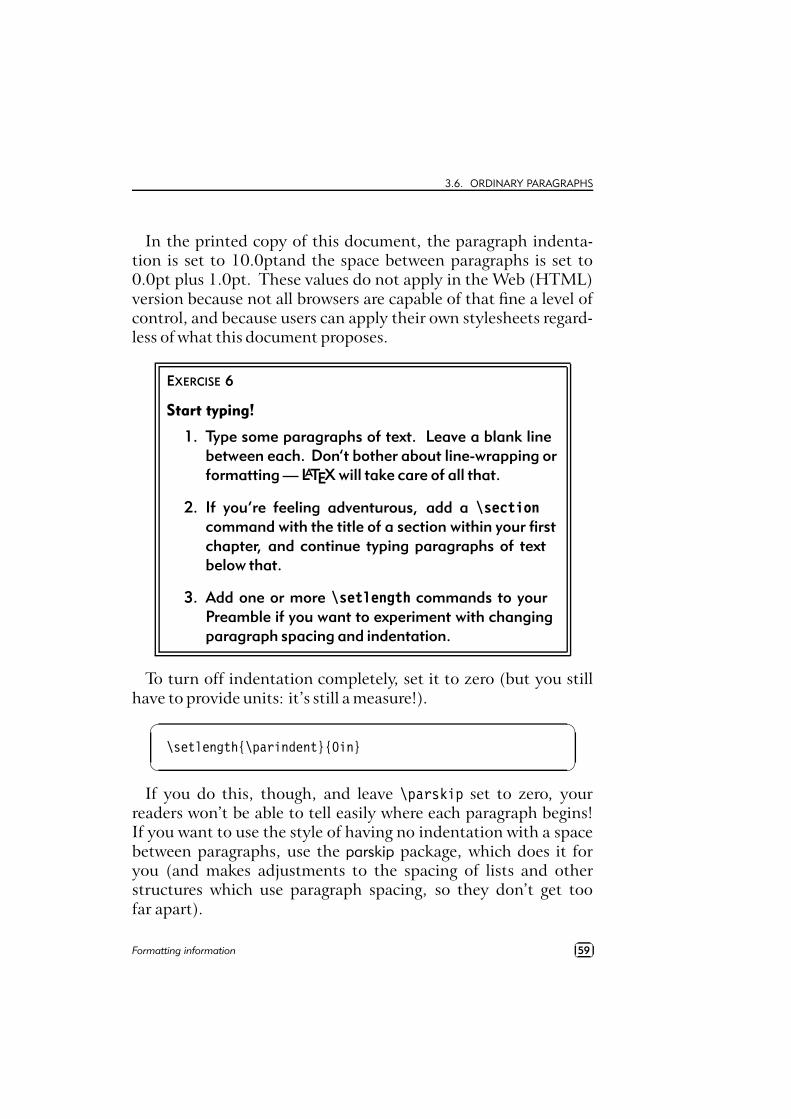
3.6. ORDINARY PARAGRAPHS
In the printed copy of this document, the paragraph indenta-tion is set to 10.0ptand the space between paragraphs is set to0.0pt plus 1.0pt. These values do not apply in the Web (HTML)version because not all browsers are capable of that fine a level ofcontrol, and because users can apply their own stylesheets regard-less of what this document proposes.
EXERCISE 6
Start typing!
1. Type some paragraphs of text. Leave a blank linebetween each. Don’t bother about line-wrapping orformatting — LATEX will take care of all that.
2. If you’re feeling adventurous, add a \sectioncommand with the title of a section within your firstchapter, and continue typing paragraphs of textbelow that.
3. Add one or more \setlength commands to yourPreamble if you want to experiment with changingparagraph spacing and indentation.
To turn off indentation completely, set it to zero (but you stillhave to provide units: it’s still a measure!).
�
�
\setlength{\parindent}{0in}
If you do this, though, and leave \parskip set to zero, yourreaders won’t be able to tell easily where each paragraph begins!If you want to use the style of having no indentation with a spacebetween paragraphs, use the parskip package, which does it foryou (and makes adjustments to the spacing of lists and otherstructures which use paragraph spacing, so they don’t get toofar apart).
Formatting information��
��59
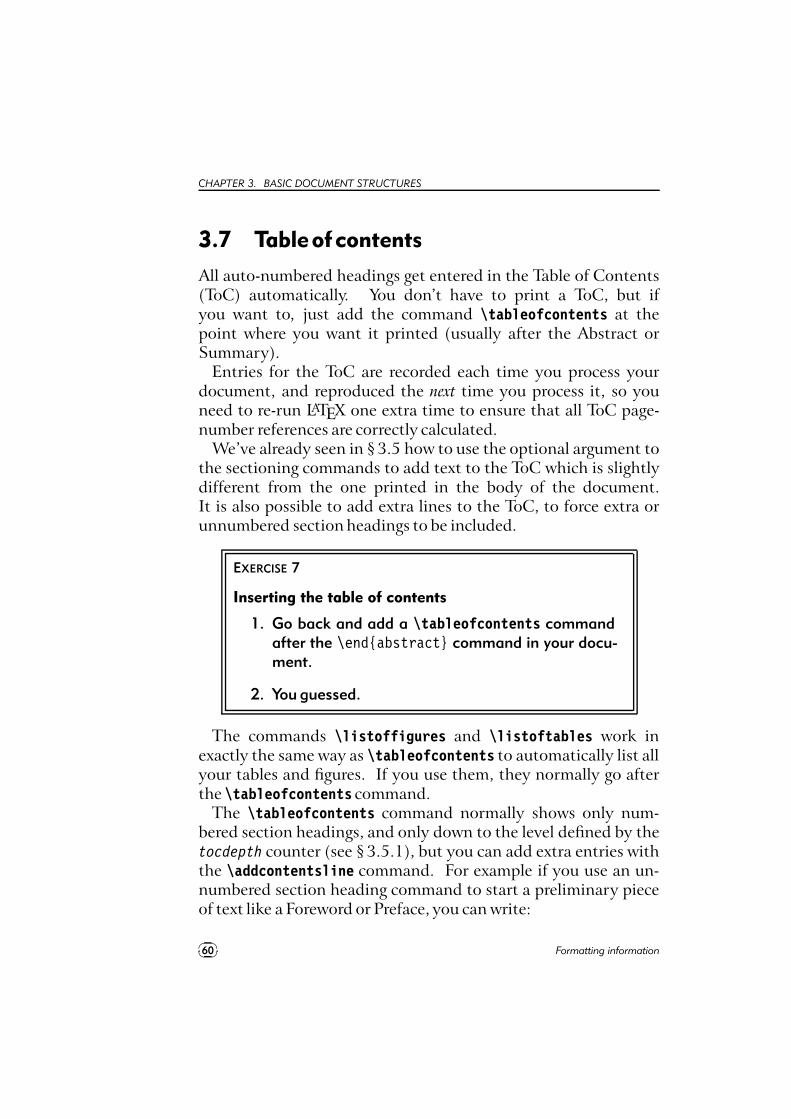
CHAPTER 3. BASIC DOCUMENT STRUCTURES
3.7 Tableofcontents
All auto-numbered headings get entered in the Table of Contents(ToC) automatically. You don’t have to print a ToC, but ifyou want to, just add the command \tableofcontents at thepoint where you want it printed (usually after the Abstract orSummary).
Entries for the ToC are recorded each time you process yourdocument, and reproduced the next time you process it, so youneed to re-run LATEX one extra time to ensure that all ToC page-number references are correctly calculated.
We’ve already seen in § 3.5 how to use the optional argument tothe sectioning commands to add text to the ToC which is slightlydifferent from the one printed in the body of the document.It is also possible to add extra lines to the ToC, to force extra orunnumbered section headings to be included.
EXERCISE 7
Inserting the table of contents
1. Go back and add a \tableofcontents commandafter the \end{abstract} command in your docu-ment.
2. You guessed.
The commands \listoffigures and \listoftables work inexactly the same way as \tableofcontents to automatically list allyour tables and figures. If you use them, they normally go afterthe \tableofcontents command.
The \tableofcontents command normally shows only num-bered section headings, and only down to the level defined by thetocdepth counter (see § 3.5.1), but you can add extra entries withthe \addcontentsline command. For example if you use an un-numbered section heading command to start a preliminary pieceof text like a Foreword or Preface, you can write:
��
��60 Formatting information
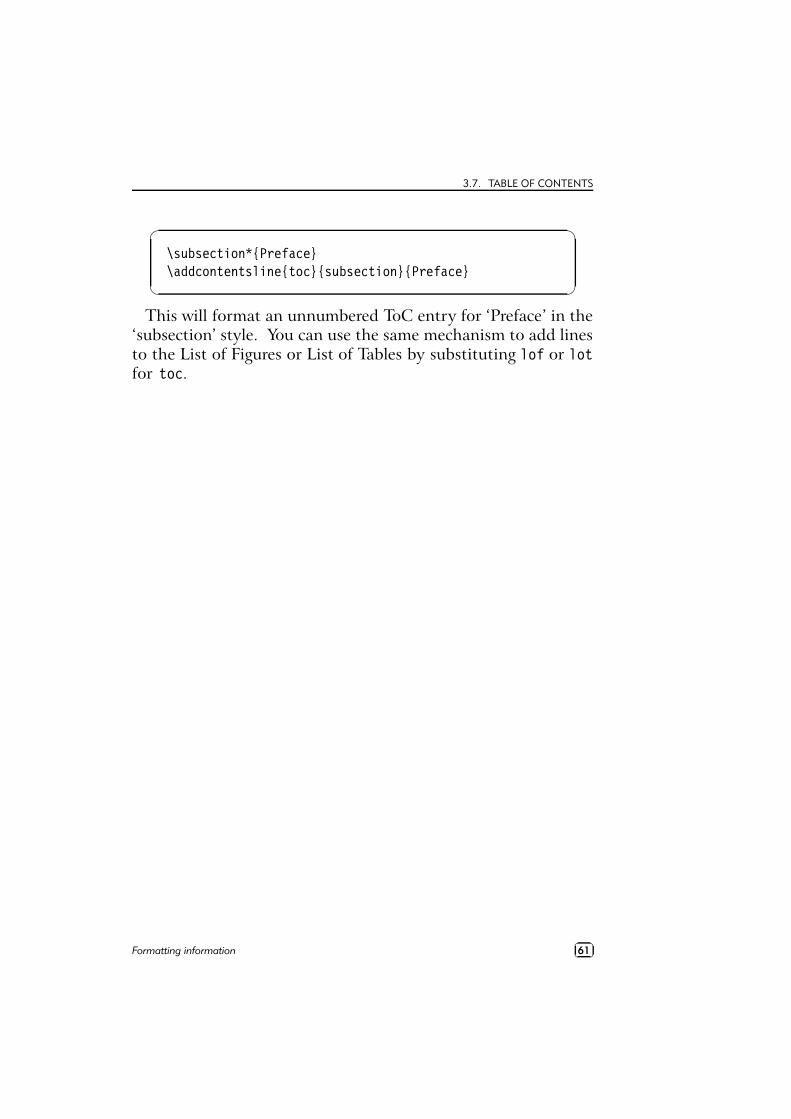
3.7. TABLE OF CONTENTS
�
�
\subsection*{Preface}\addcontentsline{toc}{subsection}{Preface}
This will format an unnumbered ToC entry for ‘Preface’ in the‘subsection’ style. You can use the same mechanism to add linesto the List of Figures or List of Tables by substituting lof or lotfor toc.
Formatting information��
��61

4Typesetting, viewing andprinting
We’ve now got far enough to typeset what you’ve entered. I’massuming at this stage that you have typed some sample text inthe format specified in the previous chapter, and you’ve saved itin a plain-text file with a filetype of .tex and a name of your ownchoosing.
EXERCISE 8
Saving your file
If you haven’t already saved your file, do so now (someeditors and interfaces let you typeset the documentwithout saving it!).
Pick a sensible filename in a sensible directory. Namesshould be short enough to display and search for, butdescriptive enough to make sense. See the panel ‘Pickingsuitable filenames’ on p. 64 for more details.
Formatting information��
��63
CHAPTER 4. TYPESETTING, VIEWING AND PRINTING
Picking suitable filenames
Never, ever use directories (folders) or file names whichcontain spaces. Although your operating system proba-bly supports them, some don’t, and they will only causegrief and tears with TEX.Make filenames as short or as long as you wish, butstrictly avoid spaces. Stick to upper- and lower-caseletters without accents (A–Z and a–z), the digits 0–9,the hyphen (-), and the full point or period (.), (similarto the conventions for a Web URI): it will let you referto TEX files over the Web more easily and make yourfiles more portable.
4.1 Typesetting
Typesetting your document is usually done by clicking on abutton in a toolbar or an entry in a menu. Which one you clickon depends on what output you want — there are two formatsavailable:`
The standard (default) LATEX program produces a device-independent (DVI) file which can be used with any TEXpreviewer or printer driver on any make or model of com-puter. There are dozens of these available: at least oneof each (previewer and printer driver) should have beeninstalled with your distribution of TEX.`The pdfLATEX program produces an Adobe Acrobat PDF filewhich can be used with any suitable previewer, such asGSview, PDFview, Xpdf , the Opera browser, or Adobe’s ownAcrobat Reader.
Depending on which one you choose, you may have to[re]configure your editor so that it runs the right program. They
��
��64 Formatting information
4.1. TYPESETTING
can all do all of them, but they don’t always come pre-set withbuttons or menus for every possible option, because they can’tguess which one you want.
4.1.1 Standard LATEX
There are also two ways of running LATEX: from the toolbar ormenu, or from the command line. Toolbars and menus are mostcommon in graphical systems, and are the normal way to runLATEX. Command lines are used in non-graphical systems andin automated processes where LATEX is run unattended (so-called‘batch’ or ‘scripted’ processing).
Whichever way you run LATEX, it will process your file anddisplay a log or record of what it’s doing (see Exercise 10: it looksthe same no matter what system you use). This is to let you seewhere (if!) there are any errors or problems.
EXERCISE 9
Running LATEX from the toolbar or menu
Run LATEX on your file. According to which system you’reusing this will either be the LATEX toolbar icon or theTEX
TEX File a menu item.Your editor may suggest you save your file if you haven’t
already done so. Do it.
If LATEX reports any errors — easily identifiable as lines in thelog beginning with an exclamation mark (!) — don’t panic! Turnto § 4.2, identify what went wrong, and fix it in your input file.Then re-run LATEX. If there were no errors, your file is ready fordisplaying or printing.
4.1.2 Running LATEX from a command window
This is worth practising even if you normally use a GUI, so thatyou understand what it does. See Figure 4.1 for an example.
Formatting information��
��65
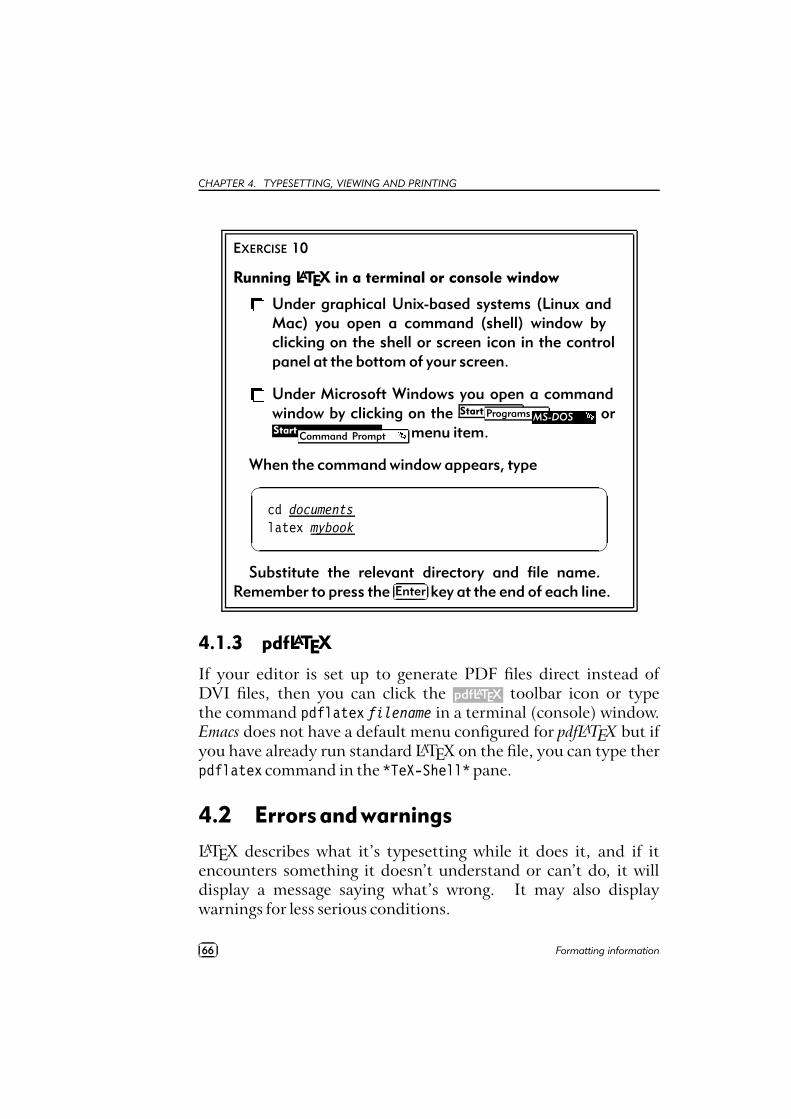
CHAPTER 4. TYPESETTING, VIEWING AND PRINTING
EXERCISE 10
Running LATEX in a terminal or console windowbUnder graphical Unix-based systems (Linux andMac) you open a command (shell) window byclicking on the shell or screen icon in the controlpanel at the bottom of your screen.bUnder Microsoft Windows you open a commandwindow by clicking on the Start Programs MS-DOS c orStart
Command Prompt c menu item.
When the command window appears, type�
�
cd documents
latex mybook
Substitute the relevant directory and file name.Remember to press the
��
��Enter key at the end of each line.
4.1.3 pdfLATEX
If your editor is set up to generate PDF files direct instead ofDVI files, then you can click the pdfLATEX toolbar icon or typethe command pdflatex filename in a terminal (console) window.Emacs does not have a default menu configured for pdfLATEX but ifyou have already run standard LATEX on the file, you can type therpdflatex command in the *TeX-Shell*pane.
4.2 Errorsandwarnings
LATEX describes what it’s typesetting while it does it, and if itencounters something it doesn’t understand or can’t do, it willdisplay a message saying what’s wrong. It may also displaywarnings for less serious conditions.
��
��66 Formatting information
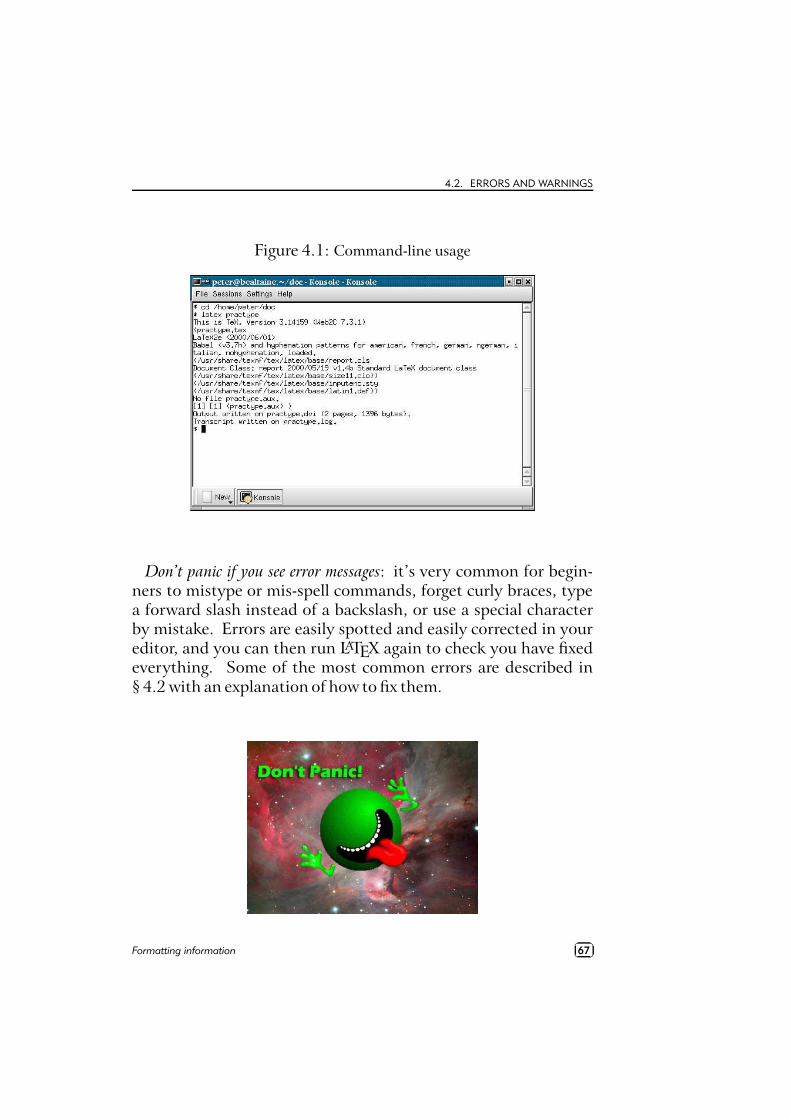
4.2. ERRORS AND WARNINGS
Figure 4.1: Command-line usage
Don’t panic if you see error messages: it’s very common for begin-ners to mistype or mis-spell commands, forget curly braces, typea forward slash instead of a backslash, or use a special characterby mistake. Errors are easily spotted and easily corrected in youreditor, and you can then run LATEX again to check you have fixedeverything. Some of the most common errors are described in§ 4.2 with an explanation of how to fix them.
Formatting information��
��67
CHAPTER 4. TYPESETTING, VIEWING AND PRINTING
4.2.1 Error messages
The format of an error message is always the same. Error messagesbegin with an exclamation mark at the start of the line, and givea description of the error, followed by another line starting withthe number, which refers to the line-number in your document filewhich LATEX was processing when the error was spotted. Here’s anexample, showing that the user mistyped the \tableofcontentscommand:
�
�
! Undefined control sequence.l.6 \tableofcotnetns
When LATEX finds an error like this, it displays the error messageand pauses. You must type one of the following letters tocontinue:
Key Meaning
��
��x Stop immediately and exit the program.�
���q Carry on quietly as best you can and don’t bother me with
any more error messages.��
��e Stop the program but re-position the text in my editor at
the point where you found the error. a��
��h Try to give me more help.�
���i (followed by a correction) means input the correction in
place of the error and carry on. b
a. This only works if you’re using an editor which LATEX can communicatewith.
b. This is only a temporary fix to get the file processed. You still have tomake that correction in the editor.
Some systems (Emacs is one example) run LATEX with a ‘non-stop’ switch turned on, so it will always process through to the endof the file, regardless of errors, or until a limit is reached.
��
��68 Formatting information
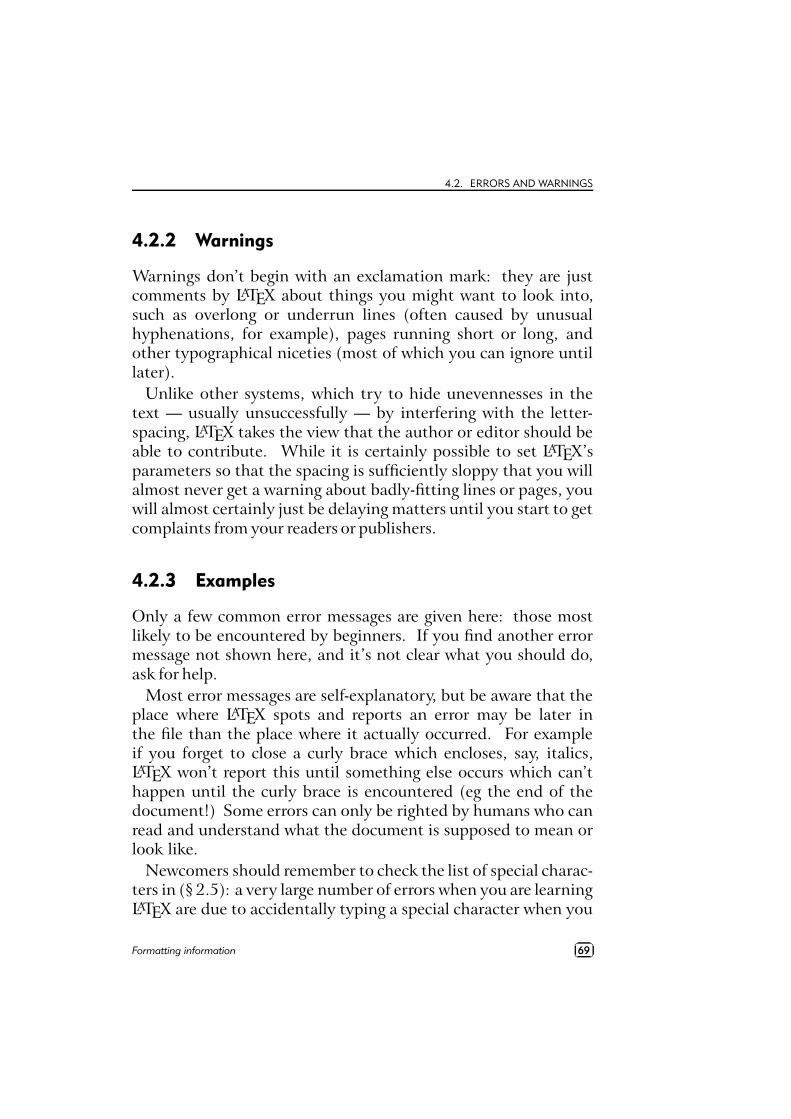
4.2. ERRORS AND WARNINGS
4.2.2 Warnings
Warnings don’t begin with an exclamation mark: they are justcomments by LATEX about things you might want to look into,such as overlong or underrun lines (often caused by unusualhyphenations, for example), pages running short or long, andother typographical niceties (most of which you can ignore untillater).
Unlike other systems, which try to hide unevennesses in thetext — usually unsuccessfully — by interfering with the letter-spacing, LATEX takes the view that the author or editor should beable to contribute. While it is certainly possible to set LATEX’sparameters so that the spacing is sufficiently sloppy that you willalmost never get a warning about badly-fitting lines or pages, youwill almost certainly just be delaying matters until you start to getcomplaints from your readers or publishers.
4.2.3 Examples
Only a few common error messages are given here: those mostlikely to be encountered by beginners. If you find another errormessage not shown here, and it’s not clear what you should do,ask for help.
Most error messages are self-explanatory, but be aware that theplace where LATEX spots and reports an error may be later inthe file than the place where it actually occurred. For exampleif you forget to close a curly brace which encloses, say, italics,LATEX won’t report this until something else occurs which can’thappen until the curly brace is encountered (eg the end of thedocument!) Some errors can only be righted by humans who canread and understand what the document is supposed to mean orlook like.
Newcomers should remember to check the list of special charac-ters in (§ 2.5): a very large number of errors when you are learningLATEX are due to accidentally typing a special character when you
Formatting information��
��69
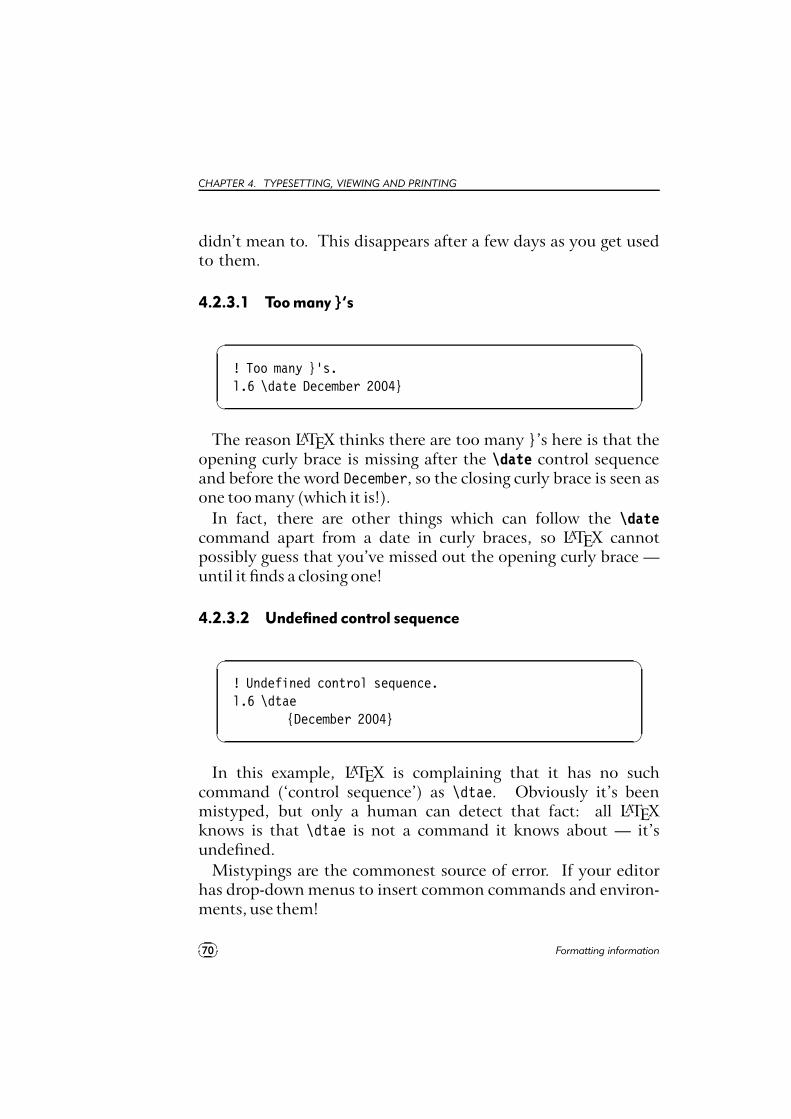
CHAPTER 4. TYPESETTING, VIEWING AND PRINTING
didn’t mean to. This disappears after a few days as you get usedto them.
4.2.3.1 Too many }’s
�
�
! Too many }’s.l.6 \date December 2004}
The reason LATEX thinks there are too many }’s here is that theopening curly brace is missing after the \date control sequenceand before the word December, so the closing curly brace is seen asone too many (which it is!).
In fact, there are other things which can follow the \datecommand apart from a date in curly braces, so LATEX cannotpossibly guess that you’ve missed out the opening curly brace —until it finds a closing one!
4.2.3.2 Undefined control sequence
�
�
! Undefined control sequence.l.6 \dtae
{December 2004}
In this example, LATEX is complaining that it has no suchcommand (‘control sequence’) as \dtae. Obviously it’s beenmistyped, but only a human can detect that fact: all LATEXknows is that \dtae is not a command it knows about — it’sundefined.
Mistypings are the commonest source of error. If your editorhas drop-down menus to insert common commands and environ-ments, use them!
��
��70 Formatting information
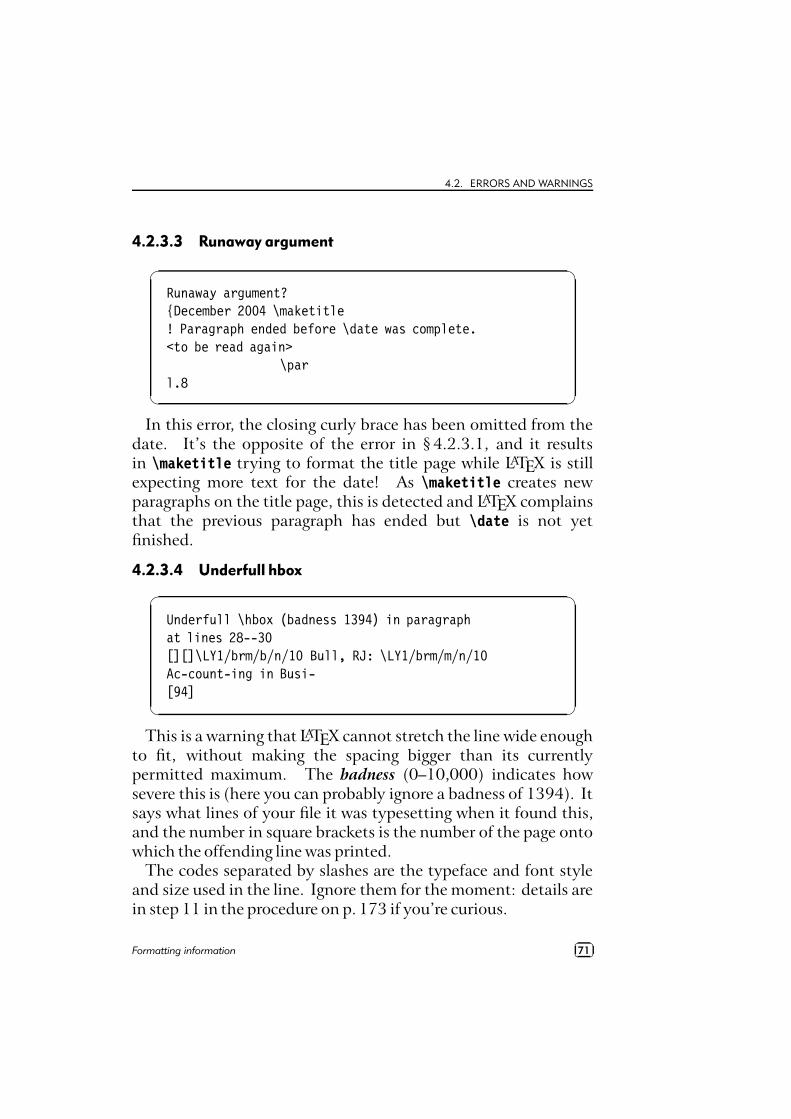
4.2. ERRORS AND WARNINGS
4.2.3.3 Runaway argument
�
�
Runaway argument?{December 2004 \maketitle! Paragraph ended before \date was complete.<to be read again>
\parl.8
In this error, the closing curly brace has been omitted from thedate. It’s the opposite of the error in § 4.2.3.1, and it resultsin \maketitle trying to format the title page while LATEX is stillexpecting more text for the date! As \maketitle creates newparagraphs on the title page, this is detected and LATEX complainsthat the previous paragraph has ended but \date is not yetfinished.
4.2.3.4 Underfull hbox
�
�
Underfull \hbox (badness 1394) in paragraphat lines 28--30[][]\LY1/brm/b/n/10 Bull, RJ: \LY1/brm/m/n/10Ac-count-ing in Busi-[94]
This is a warning that LATEX cannot stretch the line wide enoughto fit, without making the spacing bigger than its currentlypermitted maximum. The badness (0–10,000) indicates howsevere this is (here you can probably ignore a badness of 1394). Itsays what lines of your file it was typesetting when it found this,and the number in square brackets is the number of the page ontowhich the offending line was printed.
The codes separated by slashes are the typeface and font styleand size used in the line. Ignore them for the moment: details arein step 11 in the procedure on p. 173 if you’re curious.
Formatting information��
��71
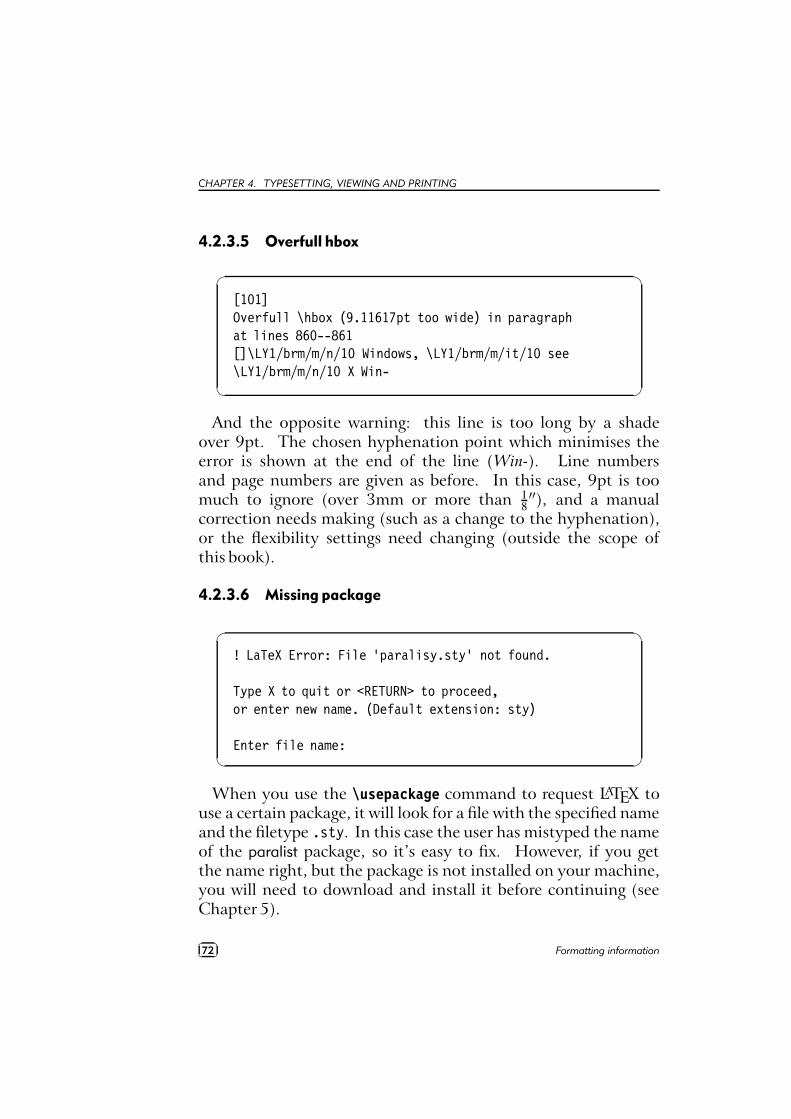
CHAPTER 4. TYPESETTING, VIEWING AND PRINTING
4.2.3.5 Overfull hbox
�
�
[101]Overfull \hbox (9.11617pt too wide) in paragraphat lines 860--861[]\LY1/brm/m/n/10 Windows, \LY1/brm/m/it/10 see\LY1/brm/m/n/10 X Win-
And the opposite warning: this line is too long by a shadeover 9pt. The chosen hyphenation point which minimises theerror is shown at the end of the line (Win-). Line numbersand page numbers are given as before. In this case, 9pt is toomuch to ignore (over 3mm or more than 1
8′′), and a manual
correction needs making (such as a change to the hyphenation),or the flexibility settings need changing (outside the scope ofthis book).
4.2.3.6 Missing package
�
�
! LaTeX Error: File ‘paralisy.sty’ not found.
Type X to quit or <RETURN> to proceed,or enter new name. (Default extension: sty)
Enter file name:
When you use the \usepackage command to request LATEX touse a certain package, it will look for a file with the specified nameand the filetype .sty. In this case the user has mistyped the nameof the paralist package, so it’s easy to fix. However, if you getthe name right, but the package is not installed on your machine,you will need to download and install it before continuing (seeChapter 5).
��
��72 Formatting information
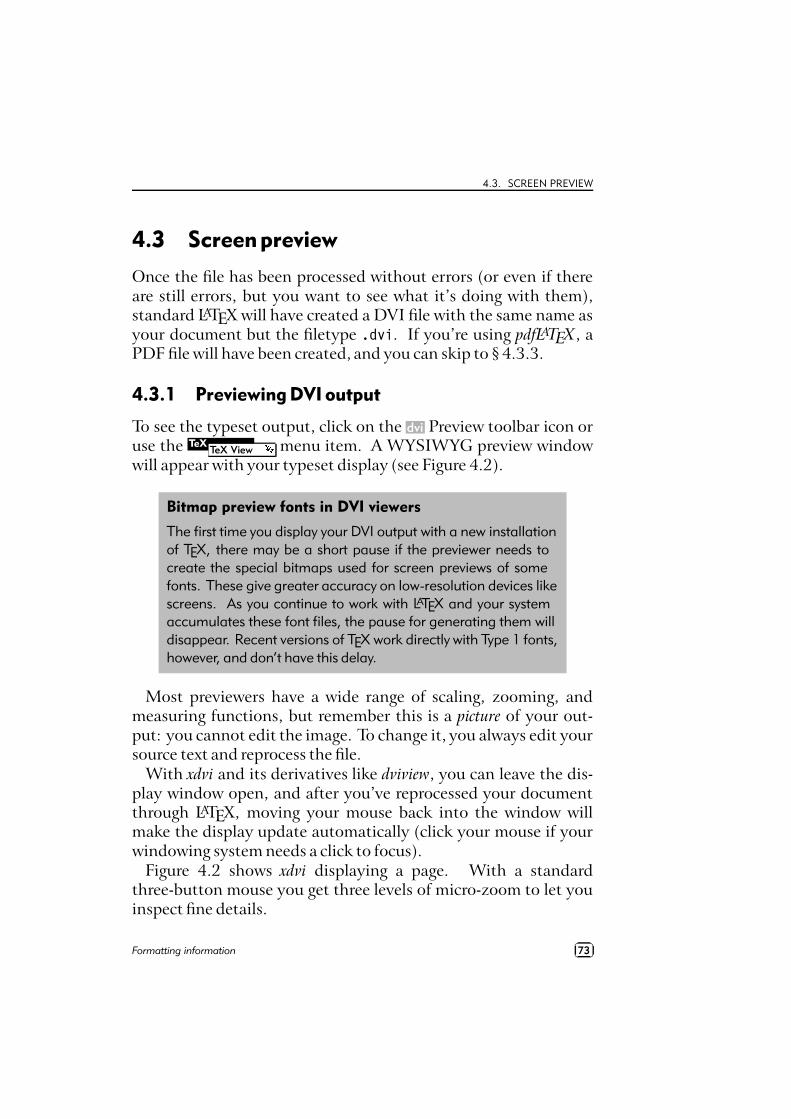
4.3. SCREEN PREVIEW
4.3 Screenpreview
Once the file has been processed without errors (or even if thereare still errors, but you want to see what it’s doing with them),standard LATEX will have created a DVI file with the same name asyour document but the filetype .dvi. If you’re using pdfLATEX, aPDF file will have been created, and you can skip to § 4.3.3.
4.3.1 Previewing DVI output
To see the typeset output, click on the dvi Preview toolbar icon oruse the TeX
TeX View d menu item. A WYSIWYG preview windowwill appear with your typeset display (see Figure 4.2).
Bitmap preview fonts in DVI viewers
The first time you display your DVI output with a new installationof TEX, there may be a short pause if the previewer needs tocreate the special bitmaps used for screen previews of somefonts. These give greater accuracy on low-resolution devices likescreens. As you continue to work with LATEX and your systemaccumulates these font files, the pause for generating them willdisappear. Recent versions of TEX work directly with Type 1 fonts,however, and don’t have this delay.
Most previewers have a wide range of scaling, zooming, andmeasuring functions, but remember this is a picture of your out-put: you cannot edit the image. To change it, you always edit yoursource text and reprocess the file.
With xdvi and its derivatives like dviview, you can leave the dis-play window open, and after you’ve reprocessed your documentthrough LATEX, moving your mouse back into the window willmake the display update automatically (click your mouse if yourwindowing system needs a click to focus).
Figure 4.2 shows xdvi displaying a page. With a standardthree-button mouse you get three levels of micro-zoom to let youinspect fine details.
Formatting information��
��73
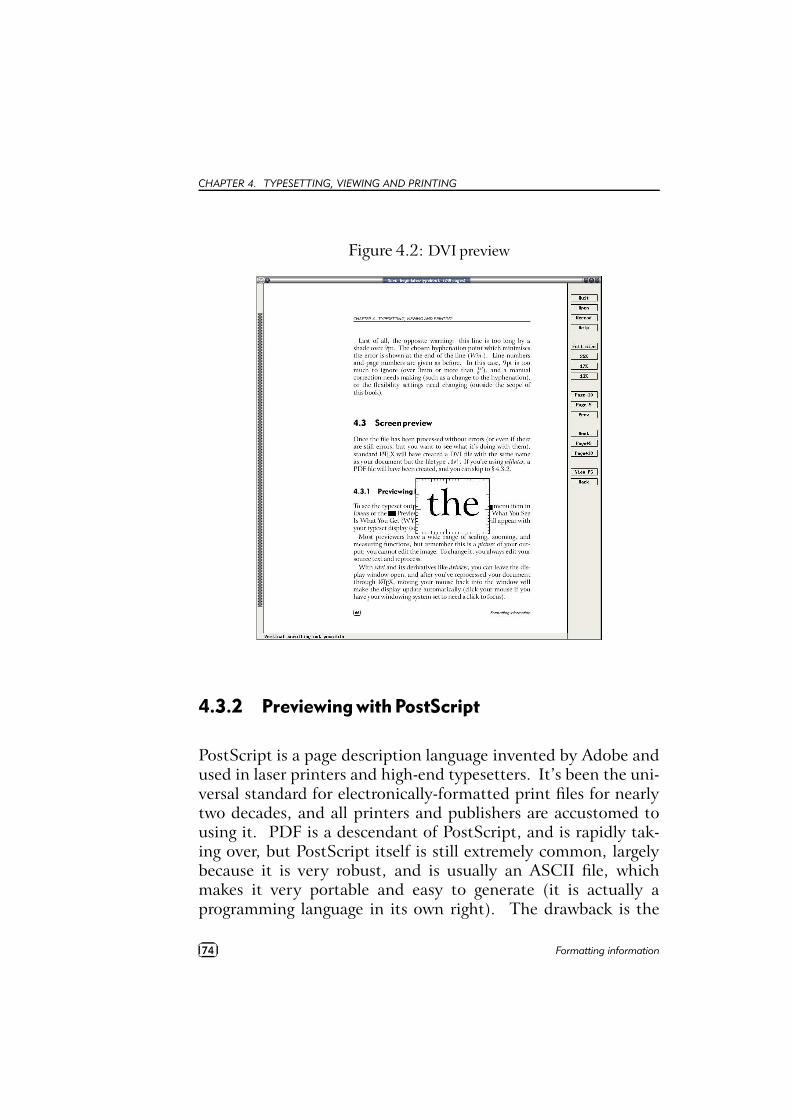
CHAPTER 4. TYPESETTING, VIEWING AND PRINTING
Figure 4.2: DVI preview
4.3.2 Previewing with PostScript
PostScript is a page description language invented by Adobe andused in laser printers and high-end typesetters. It’s been the uni-versal standard for electronically-formatted print files for nearlytwo decades, and all printers and publishers are accustomed tousing it. PDF is a descendant of PostScript, and is rapidly tak-ing over, but PostScript itself is still extremely common, largelybecause it is very robust, and is usually an ASCII file, whichmakes it very portable and easy to generate (it is actually aprogramming language in its own right). The drawback is the
��
��74 Formatting information
4.3. SCREEN PREVIEW
large size of PostScript files, especially if they contain bitmappedgraphics.
The dvips program which comes with all TEX systems is used togenerate PostScript files directly from your DVI output. These.ps files can be viewed, printed, sent to a platemaker or filmsetter,or put online for downloading.
DVI viewers cannot render some PostScript graphical manipu-lations like rotating and deforming, so an alternative to viewingthe DVI file direct is to generate a PostScript file and use a Post-Script viewer. You may have to to do this for your publisheranyway, and many editors can be configured to do this by default.Look for a dvips toolbar icon or menu entry and click on it.
It’s also very simple to do manually: let’s assume your LATEX filewas called mydoc.tex, so processing it has created mydoc.dvi. Justtype:
�
�
dvips -o mydoc.ps mydoc
in a command window (see Exercise 10 for how to use one) anddvips will create mydoc.ps which can be used both for previewingand printing.
To view a PostScript file, you need a PostScript previewer likeGSview, which works with the PostScript interpreter Ghostscript,which should have been installed automatically along with yourTEX system (if not, install both now: GSview is separately licensedand cannot legally be included in some older TEX distributions, soyou may have to download it yourself).
GSview can be set to watch the PostScript file and automaticallyupdate the display any time the file is changed, without you evenhaving to click on the window.
4.3.3 Previewing with PDF
The Portable Document Format (PDF) is a derivative of Post-Script. Whereas PostScript is a programming language in itself,
Formatting information��
��75
CHAPTER 4. TYPESETTING, VIEWING AND PRINTING
PDF is in effect the result of processing a document throughPostScript: it’s a binary file format, extremely compact, andwell-supported on all platforms.
If your system is configured to generate PDF files direct insteadof DVI files, just open the .pdf file using any PDF previewer orbrowser.
Most editors are configured to display a toolbar icon which willpop up Acrobat Reader or some other viewer with the current PDFoutput file.
Adobe’s Acrobat Reader cannot automatically update the view ifyou reprocess your document, in the way that xdvi and GSviewcan. You have to close the display with
��
��Ctrl–��
��W and reload the file
with��
��Alt–��
��F��
��1 .
Bitmap preview fonts in Acrobat Reader
Acrobat Reader is extremely poor at rendering Type 3 (bitmap)fonts. If you are using these (either in an old LATEX installationwhich has not been upgraded to Type 1, or with files usingspecialist fonts only available in Type 3 format), you will see avery fuzzy display at low magnifications. It will print perfectly, butAcrobat Reader’s display is disappointing. The solution is to usea better previewer or to upgrade to the Type 1 versions of thefonts if possible, or both. If you need to use Type 3 fonts in PDFs,you probably need to warn your readers to expect a fuzzy displayfrom Acrobat Reader (but good printout), and to change to abetter reader if they can.
4.4 Printeroutput
TEX systems print on almost anything from the simplest dot-matrix printers to the biggest phototypesetters, including all thelaser printers and a host of other devices in between. How youdo it varies slightly according to how you do your typesetting andpreviewing:
��
��76 Formatting information

4.4. PRINTER OUTPUT
If you are using DVI and you have a previewer which has a printfunction configured for your printer, you can use that. Ifnot, create a PostScript file and use GSview instead.
If you are using PDF you can print directly from your PDF viewer.Be careful about using the ‘Fit to page’ options, as they willchange the size of your document so all your measurementswill be different.
Non-PostScript printers You can create a PostScript file with dvips(see § 4.3.2) and use GSview to print it (GSview can printPostScript files to almost any make or model of non-PostScript printer).
If you have a real PostScript printer or you are using a system withbuilt-in PostScript printing support (such as Linux or Mac),you can create and send PostScript output directly fromyour editor to the printer without the need to open it in apreviewer first. In Emacs, for example, this is what happenswhen you use the TEX
TEX Print e menu item.
Both the dvips program and all the previewers that print tendto have facilities for printing selected pages, printing in reverse,scaling the page size, and printing only odd or even pages fortwo-sided work. If you are using PostScript there are programsfor manipulating the output (pstops), for example to perform pageimposition to get 4, 8, or 16 pages to a sheet for making booklets(psnup).
EXERCISE 11
Print it!
Show that you have understood the process of type-setting, previewing, and printing, by displaying yourdocument and printing it.
Formatting information��
��77
CHAPTER 4. TYPESETTING, VIEWING AND PRINTING
If you need a non-PostScript/Ghostscript solution, install a sep-arate TEX print driver for your printer. Some may be suppliedwith your TEX installation, and there are dozens more on CTAN.Their names all start with dvi and are followed by an abbreviationfor the printer make or model like dvieps for Epson, dvihp forHewlett-Packard, dvialw for Apple LaserWriters, etc.. Configurethe driver to print directly to the print queue, or pipe it to theprint queue manually. On Linux with an HP printer, for example,this would be
�
�
dvihp mydoc | lpr
Microsoft Windows has no easy way to bypass the print spool,but you can do it from an MS-DOS command window with(using a HP printer as an example):
�
�
dvihp mydoc -o mydoc.hpcopy /b mydoc.hp LPT1:
Read the documentation for the driver, as the options anddefaults vary.
��
��78 Formatting information
5CTAN, packages,and online help
The Comprehensive TEX Archive Network (CTAN) is a reposi-tory of Web and FTP servers worldwide which contain copies ofalmost every piece of free software related to TEX and LATEX.
CTAN is based on three main servers, and there are severalonline indexes available. There are complete TEX and LATEXsystems for all platforms, utilities for text and graphics processing,conversion programs into and out of LATEX, printer drivers, extratypefaces, and (possibly the most important) the LATEX packages.The three main servers are:
fTEX Users Group: http://www.ctan.org/
fUK TEX Users Group: http://www.tex.ac.uk/
fDeutschsprachige Anwendervereinigung TEX e.V. (DANTE,the German-speaking TEX Users Group); http://dante.ctan.org/
Formatting information��
��79
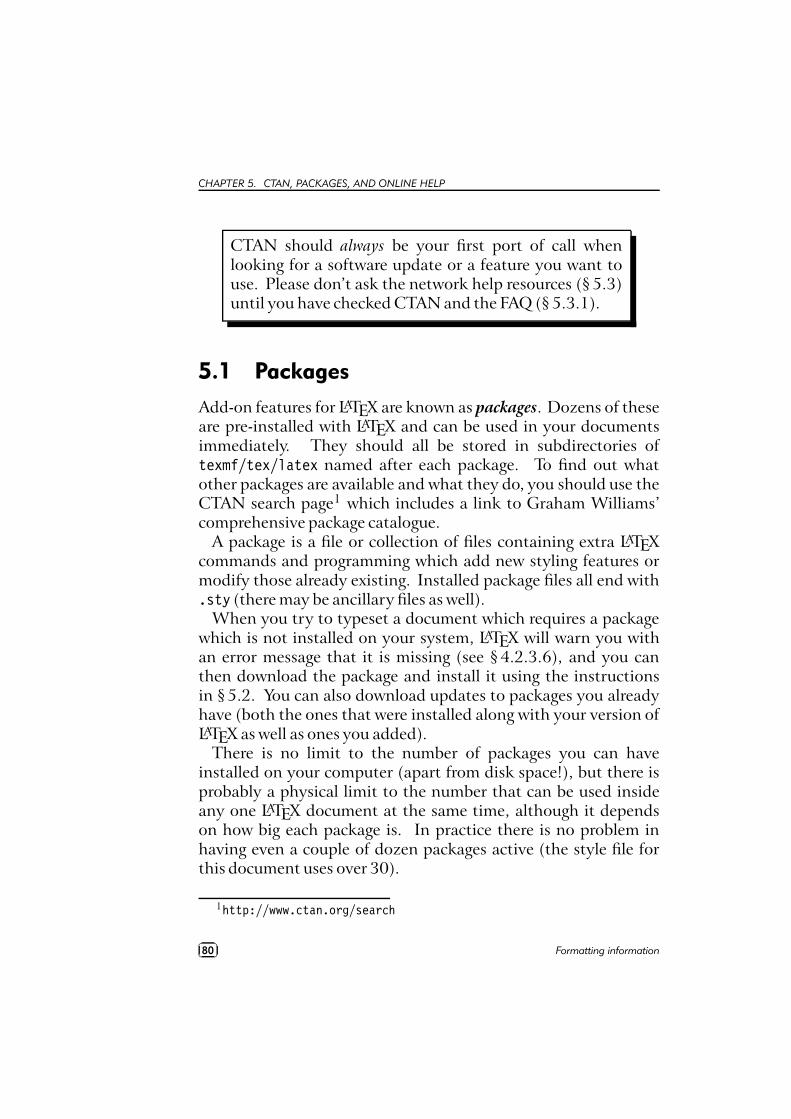
CHAPTER 5. CTAN, PACKAGES, AND ONLINE HELP
CTAN should always be your first port of call whenlooking for a software update or a feature you want touse. Please don’t ask the network help resources (§ 5.3)until you have checked CTAN and the FAQ (§ 5.3.1).
5.1 Packages
Add-on features for LATEX are known as packages. Dozens of theseare pre-installed with LATEX and can be used in your documentsimmediately. They should all be stored in subdirectories oftexmf/tex/latex named after each package. To find out whatother packages are available and what they do, you should use theCTAN search page1 which includes a link to Graham Williams’comprehensive package catalogue.
A package is a file or collection of files containing extra LATEXcommands and programming which add new styling features ormodify those already existing. Installed package files all end with.sty (there may be ancillary files as well).
When you try to typeset a document which requires a packagewhich is not installed on your system, LATEX will warn you withan error message that it is missing (see § 4.2.3.6), and you canthen download the package and install it using the instructionsin § 5.2. You can also download updates to packages you alreadyhave (both the ones that were installed along with your version ofLATEX as well as ones you added).
There is no limit to the number of packages you can haveinstalled on your computer (apart from disk space!), but there isprobably a physical limit to the number that can be used insideany one LATEX document at the same time, although it dependson how big each package is. In practice there is no problem inhaving even a couple of dozen packages active (the style file forthis document uses over 30).
1http://www.ctan.org/search
��
��80 Formatting information
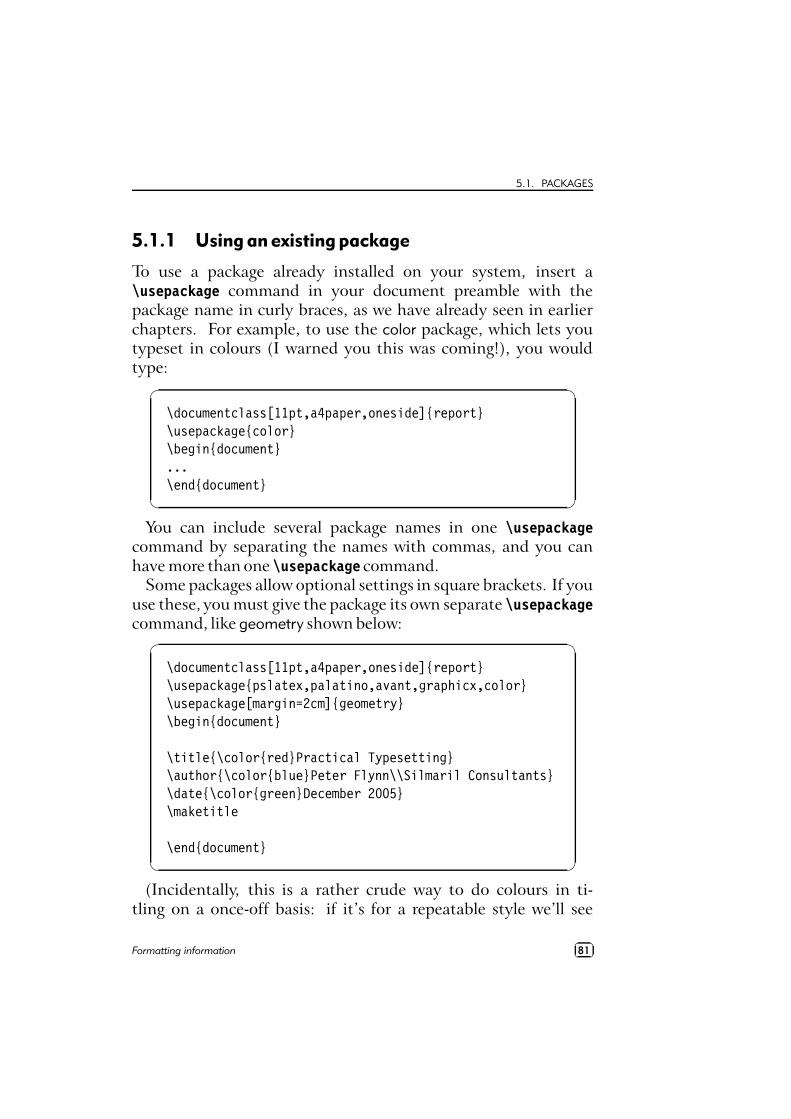
5.1. PACKAGES
5.1.1 Using an existing package
To use a package already installed on your system, insert a\usepackage command in your document preamble with thepackage name in curly braces, as we have already seen in earlierchapters. For example, to use the color package, which lets youtypeset in colours (I warned you this was coming!), you wouldtype:
�
�
\documentclass[11pt,a4paper,oneside]{report}\usepackage{color}\begin{document}...\end{document}
You can include several package names in one \usepackagecommand by separating the names with commas, and you canhave more than one \usepackage command.
Some packages allow optional settings in square brackets. If youuse these, you must give the package its own separate \usepackagecommand, like geometry shown below:
�
�
\documentclass[11pt,a4paper,oneside]{report}\usepackage{pslatex,palatino,avant,graphicx,color}\usepackage[margin=2cm]{geometry}\begin{document}
\title{\color{red}Practical Typesetting}\author{\color{blue}Peter Flynn\\Silmaril Consultants}\date{\color{green}December 2005}\maketitle
\end{document}
(Incidentally, this is a rather crude way to do colours in ti-tling on a once-off basis: if it’s for a repeatable style we’ll see
Formatting information��
��81
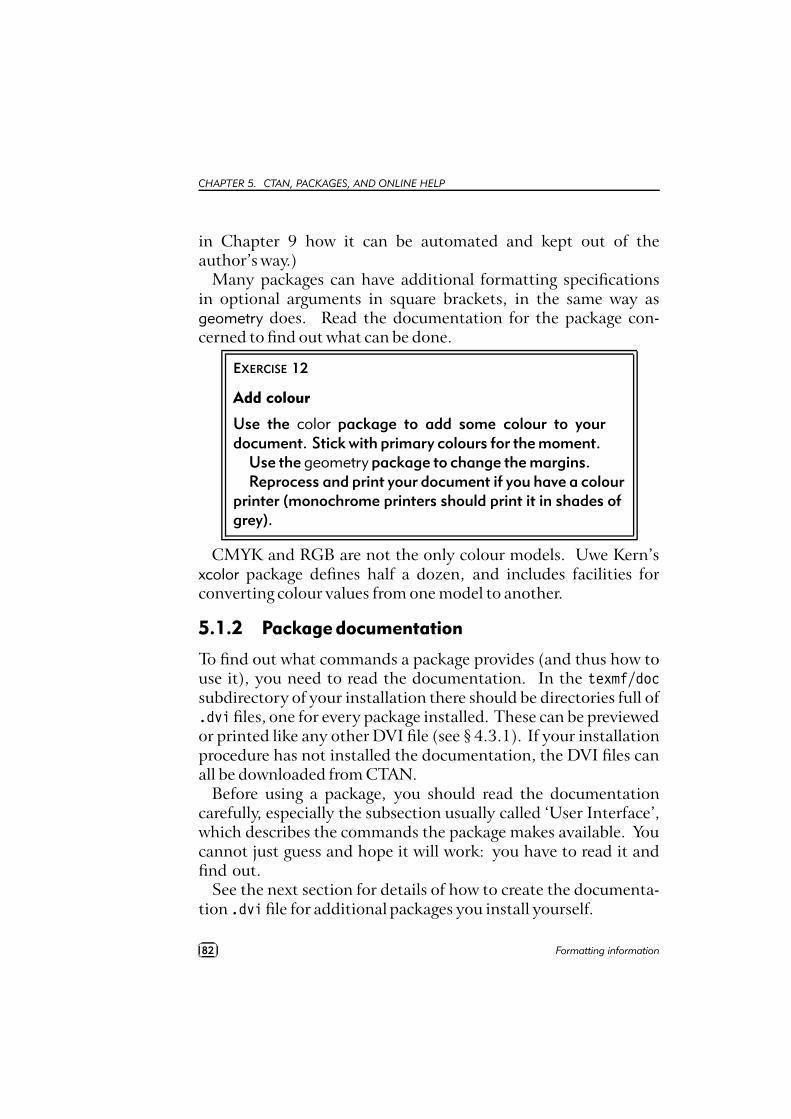
CHAPTER 5. CTAN, PACKAGES, AND ONLINE HELP
in Chapter 9 how it can be automated and kept out of theauthor’s way.)
Many packages can have additional formatting specificationsin optional arguments in square brackets, in the same way asgeometry does. Read the documentation for the package con-cerned to find out what can be done.
EXERCISE 12
Add colour
Use the color package to add some colour to yourdocument. Stick with primary colours for the moment.
Use the geometry package to change the margins.Reprocess and print your document if you have a colour
printer (monochrome printers should print it in shades ofgrey).
CMYK and RGB are not the only colour models. Uwe Kern’sxcolor package defines half a dozen, and includes facilities forconverting colour values from one model to another.
5.1.2 Package documentation
To find out what commands a package provides (and thus how touse it), you need to read the documentation. In the texmf/docsubdirectory of your installation there should be directories full of.dvi files, one for every package installed. These can be previewedor printed like any other DVI file (see § 4.3.1). If your installationprocedure has not installed the documentation, the DVI files canall be downloaded from CTAN.
Before using a package, you should read the documentationcarefully, especially the subsection usually called ‘User Interface’,which describes the commands the package makes available. Youcannot just guess and hope it will work: you have to read it andfind out.
See the next section for details of how to create the documenta-tion .dvi file for additional packages you install yourself.
��
��82 Formatting information
5.2. DOWNLOADING AND INSTALLING PACKAGES
EXERCISE 13
Read all about it
Find and view (or print) the documentation on thegeometry package you used in Exercise 12.
Investigate some of the other package documentationfiles in the directory.
5.2 Downloadingand installingpackages
Once you have identified a package you need and haven’t alreadygot (or you have got it and need to update it), use the indexes onany CTAN server to find the package you need and the directorywhere it can be downloaded from.
5.2.1 Downloading packages
What you need to look for is always two files, one ending in .dtxand the other in .ins. The first is a DOCTEX file, which combinesthe package program and its documentation in a single file. Thesecond is the installation routine (much smaller). You must alwaysdownload both files.
If the two files are not there, it means one of two things:gEither the package is part of a much larger bundle whichyou shouldn’t normally update unless you change version ofLATEX;2gor it’s one of a few rare or unusual packages still supplied as asingle .sty file intended for the now obsolete LATEX 2.09.3
2For example, there is no color.dtx and color.ins for the color packagebecause it forms part of the graphics bundle, which is installed on all LATEXsystems anyway. Such packages change very rarely, as they
form part of the core of LATEX and are very stable. In general you shouldnever try to update these packages in isolation.
Formatting information��
��83
CHAPTER 5. CTAN, PACKAGES, AND ONLINE HELP
Download both files to a temporary directory. If you useWindows, keep a folder like C:\tmp or C:\temp for this; Mac andLinux systems already have a /tmp directory.
5.2.2 Installing a package
There are four steps to installing a LATEX package:
1. Extract the filesRun LATEX on the .ins file. That is, open the file in youreditor and process it as if it were a LATEX document (which isit), or if you prefer, type latex followed by the .ins filenamein a command window in your temporary directory.
This will extract all the files needed from the .dtx file (whichis why you must have both of them present in the temporarydirectory). Note down or print the names of the files createdif there are a lot of them (read the log file if you want to seetheir names again).
2. Create the documentationRun LATEX on the .dtx file twice. This will create a .dvifile of documentation explaining what the package is for andhow to use it. Two passes through LATEX are needed in orderto resolve any internal crossreferences in the text (a featurewe’ll come onto later). If you prefer to create PDF then runpdfLATEX instead. View or print this file in the usual manner(see § 4.3).
3. Install the filesWhile the documentation is printing, move or copy thefiles created in step 1 from your temporary directory tothe right place[s] in your TEX local installation directorytree — always your ‘local’ directory tree, a) to prevent your
3You can try to use these if you wish but they are not guaranteed to work,and have now almost all been replaced by LATEX2ε versions. Always look forthe .dtx and .ins pair of files first.
��
��84 Formatting information
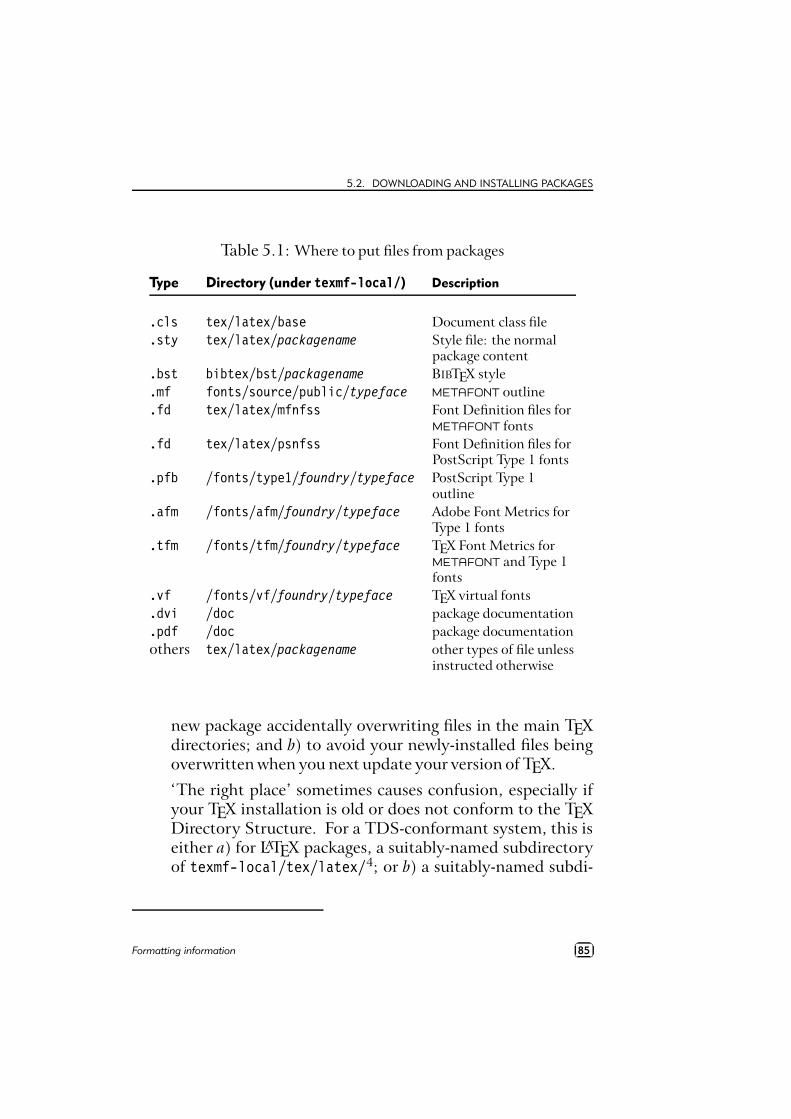
5.2. DOWNLOADING AND INSTALLING PACKAGES
Table 5.1: Where to put files from packages
Type Directory (under texmf-local/) Description
.cls tex/latex/base Document class file
.sty tex/latex/packagename Style file: the normalpackage content
.bst bibtex/bst/packagename BIBTEX style
.mf fonts/source/public/typeface METAFONT outline
.fd tex/latex/mfnfss Font Definition files forMETAFONT fonts
.fd tex/latex/psnfss Font Definition files forPostScript Type 1 fonts
.pfb /fonts/type1/foundry/typeface PostScript Type 1outline
.afm /fonts/afm/foundry/typeface Adobe Font Metrics forType 1 fonts
.tfm /fonts/tfm/foundry/typeface TEX Font Metrics forMETAFONT and Type 1fonts
.vf /fonts/vf/foundry/typeface TEX virtual fonts
.dvi /doc package documentation
.pdf /doc package documentationothers tex/latex/packagename other types of file unless
instructed otherwise
new package accidentally overwriting files in the main TEXdirectories; and b) to avoid your newly-installed files beingoverwritten when you next update your version of TEX.
‘The right place’ sometimes causes confusion, especially ifyour TEX installation is old or does not conform to the TEXDirectory Structure. For a TDS-conformant system, this iseither a) for LATEX packages, a suitably-named subdirectoryof texmf-local/tex/latex/4; or b) a suitably-named subdi-
Formatting information��
��85
CHAPTER 5. CTAN, PACKAGES, AND ONLINE HELP
rectory of texmf-local/ for files like BIBTEX styles which arenot just for LATEX but can be used in other TEX systems.
‘Suitably-named’ means sensible and meaningful (and prob-ably short). For a package like paralist, for example, I’d callthe directory paralist.
Often there is just a .sty file to move but in the case ofcomplex packages there may be more, and they may belongin different locations. For example, new BIBTEX packagesor font packages will typically have several files to install.This is why it is a good idea to create a subdirectory forthe package rather than dump the files into misc along withother unrelated stuff.
If there are configuration or other files, read the documenta-tion to find out if there is a special or preferred location tomove them to.
4. Update your indexFinally, run your TEX indexer program to update the packagedatabase. This program comes with every modern version ofTEX and is variously called texhash, mktexlsr, or even configure,or it might just be a mouse click on a button or menu inyour editor. Read the documentation that came with yourinstallation to find out which it is.
This last step is utterly essential, otherwise nothing will work.
EXERCISE 14
Install a package
Download and install the paralist package (whichimplements inline lists).
4See § 5.2.3 for how to create a parallel structure in your local directory ifyour installation didn’t create one for you.
��
��86 Formatting information
5.2. DOWNLOADING AND INSTALLING PACKAGES
The reason this process has not been automated widely is thatthere are still thousands of installations which do not conform tothe TDS, such as old shared Unix systems and some MicrosoftWindows systems, so there is no way for an installation programto guess where to put the files: you have to know this. There arealso systems where the owner, user, or installer has chosen not tofollow the recommended TDS directory structure, or is unableto do so for political or security reasons (such as a shared systemwhere she cannot write to a protected directory).
The reason for having the texmf-local directory (called texmf.local on some systems) is to provide a place for local modifica-tions or personal updates, especially if you are a user on a sharedor managed system (Unix, Linux, VMS, Windows NT/2000/XP,etc.) where you may not have write-access to the main TEXinstallation directory tree. You can also have a personal texmfsubdirectory in your own login directory. Your installation mustbe configured to look in these directories first, however, so thatany updates to standard packages will be found there before thesuperseded copies in the main texmf tree. All modern TEXinstallations should do this anyway, but if not, you can edittexmf/web2c/texmf.cnf yourself. There is an example in Ap-pendix A.
5.2.3 Replicating the TDS
The TEX Directory Structure (TDS) is documented at http://www.tug.org/tds/. I find it useful to make the directorystructure of texmf-local the same as that of texmf. Examine thesubdirectories of texmf/tex/latex/ for examples. For updates ofpackages which came with your LATEX distribution (as distinctfrom new ones you are adding yourself), you can then use thesame subdirectory name and position in texmf-local/... as theoriginal used in texmf/....
If you want to create the entire subdirectory structure ready foruse, you can do it under Unix with the following commands:
Formatting information��
��87
CHAPTER 5. CTAN, PACKAGES, AND ONLINE HELP
�
�
cd /usr/TeX/texmffind . -type d -exec mkdir -p /usr/TeX/texmf-local/{} \;
If you are using Microsoft Windows, you can download Cygwin,which provides you with the standard Unix tools in a shellwindow. The above command should also work on a Macrunning OS X. In all cases, if your installation directory is not/usr/TeX, you need to substitute the actual paths to your texmfand texmf-localdirectories.
5.3 Onlinehelp
The indexes and documentation files on CTAN are the primaryonline resource for self-help on specific packages, and you shouldread these carefully before asking questions about packages.
5.3.1 The FAQ
For general queries you should read the Frequently-Asked Ques-tions (FAQ) document so that you avoid wasting online timeasking about things for which there is already an easily-accessibleanswer.
The FAQ is managed by the UK TEX Users Group and can befound at http://www.tex.ac.uk/faq/ .
5.3.2 The TEXhax mailing list
Another support resource is the mailing list [email protected], feel free to ask questions, but again, try to answer the ques-tion yourself first (and say what you’ve tried in your message).
5.3.3 Web sites
The TEX Users Group, as well as most local user groups, main-tains a web site (http://www.tug.org) with lots of information
��
��88 Formatting information
5.3. ONLINE HELP
about various aspects of the TEX system. See Appendix B forinformation on joining TUG.
5.3.4 News
The Usenet newsgroup comp.text.tex is the principal forumfor other questions and answers about LATEX. Feel free to askquestions, but please do not ask frequently-asked questions: readthe FAQ instead. The people who answer the questions do sovoluntarily, unpaid, and in their own time, so please don’t treatthis as a commercial support service.
To access Usenet news, type the following URI into yourbrowser’s ‘Location’ or ‘Address’ window: news:comp.text.tex(if your browser doesn’t support Usenet news properly, change itfor one that does, like Mozilla5), or download one of the many freenewsreaders.6
5.3.5 Commercial support
If you need commercial levels of support, such as 24-hour phonecontact, or macro-writing services, you can buy one of the severalexcellent commercial versions of TEX, or contact a consultancywhich deals with TEX (details on the TUG Web site).
5http://www.mozilla.org/6Note that this means newsreaders for the Usenet News (NNTP) service.
It does not mean syndication readers for RSS, which are a different thingentirely — these are unfortunately also sometimes referred to as ‘newsreaders’.
Formatting information��
��89

6Other document structures
It is perfectly possible to write whole documents using nothingbut section headings and paragraphs. As mentioned in § 3.5,novels, for example, usually consist just of chapters divided intoparagraphs. However, it’s more common to need other features aswell, especially if the document is technical in nature or complexin structure.
It’s worth pointing out that ‘technical’ doesn’t necessarily mean‘computer technical’ or ‘engineering technical’: it just means itcontains a lot of τηχνε (tekne), the specialist material or artistry ofits field. A literary analysis such as La Textualisation de MadameBovary1 (on the marginal notes in the manuscripts of Flaubert’snovel) is every bit as technical in the literary or linguistic fieldas the maintenance manual for the Airbus 380 is in the aircraftengineering field.
This chapter covers the most common features needed in writ-ing structured documents: lists, tables, figures (including images),sidebars like boxes and panels, and verbatim text (computer
1Mac Namara (2003)
Formatting information��
��91
CHAPTER 6. OTHER DOCUMENT STRUCTURES
program listings). In Chapter 7 we will cover footnotes, cross-references, citations, and other textual tools.
6.1 A little thinkabout structure
It’s very easy to sit down at a keyboard with a traditional word-processor and just start typing. If it’s a very short document,or something transient or relatively unimportant, then you justwant to type it in and make it look ‘right’ by highlighting with themouse and clicking on font styles and sizes.
In doing so, you may achieve the effect you wanted, but youractions have left no trace behind of why you made these changes.This is usually unimportant for trivial or short-term documents,but if you write longer or more complex documents, or if youoften write documents to a regular pattern, then making themconsistent by manual methods becomes a nightmare. LATEX’sfacilities for automation are based on you providing this ‘why’information.
If your documents have any of the features below, then you haveprobably already started thinking about structure.h
The document naturally divides into sections (parts, chap-ters, etc.).hThe document is long.hThere is lots of repetitive formatting in the document.hThe document is complex (intellectually or visually).hThere are lots of figures or tables (or examples, exercises,panels, sidebars, etc.).hAccuracy is important in formatting the document.hA master copy is needed for future reference or reprinting.
��
��92 Formatting information
6.2. LISTS
iThis is a formal or official document needing special careand attention.iIt’s my thesis, book, leaflet, pamphlet, paper, article, etc.That’s why I care.iThe document (or part of it) may need ongoing or occa-sional re-editing and republishing.
If you’ve got that far, you’re over half-way done. Using astructural editor — even a simple outliner — can make a hugedifference to the quality of your thinking because you are con-sciously organising your thoughts before setting them down. Andit can make just as big a difference to your formatting as well:more consistent, better presented, easier for the reader to nav-igate through, and more likely to be read and understood —which is presumably why you are writing the document in thefirst place.
6.2 Lists
Lists are useful tools for arranging thoughts in a digestible format,usually a small piece of information at a time. There are four basictypes of list, shown in Table 6.1.
There are actually two other types, segmented lists and refer-ence lists, but these are much rarer, and outside the scope of thisdocument. The structure of lists in LATEX is identical for eachtype, but with a different environment name. Lists are anotherexample of this LATEX technique (environments), where a pairof matched commands surrounds some text which needs specialtreatment.
Within a list environment, list items are always identified by thecommand \item (followed by an item label in [square brackets] inthe case of labelled lists). You don’t type the bullet or the numberor the formatting, it’s all automated.
Formatting information��
��93
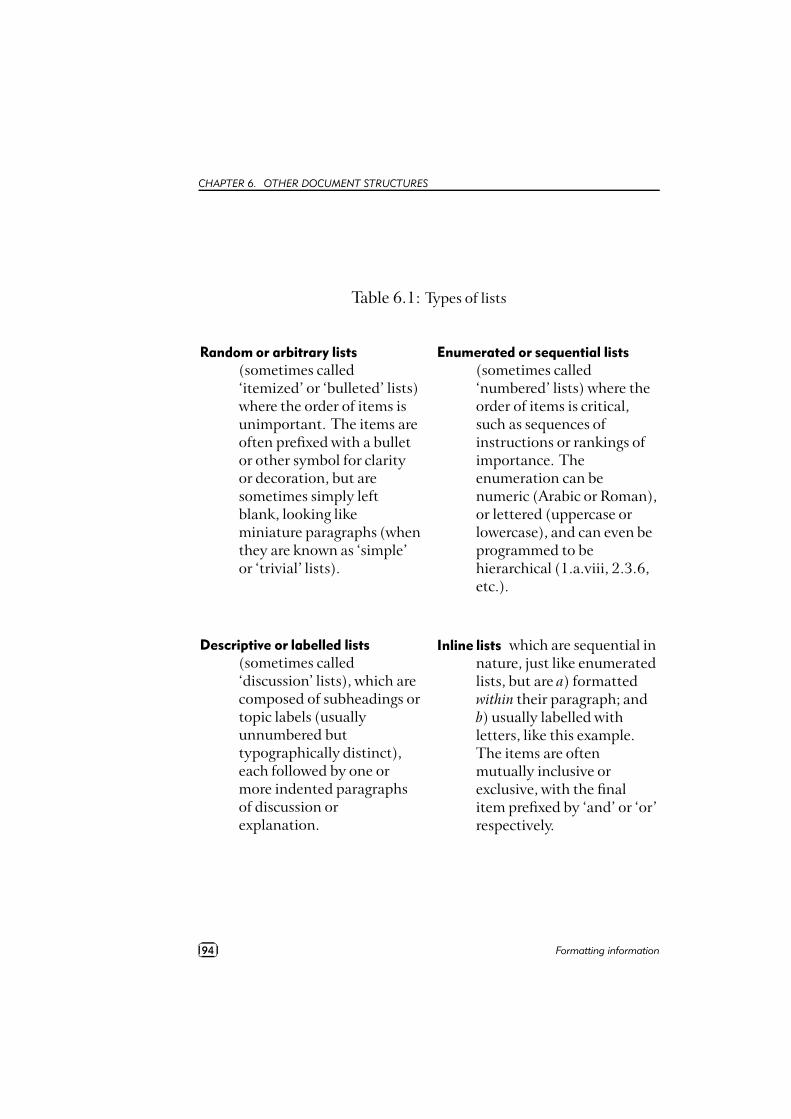
CHAPTER 6. OTHER DOCUMENT STRUCTURES
Table 6.1: Types of lists
Random or arbitrary lists(sometimes called‘itemized’ or ‘bulleted’ lists)where the order of items isunimportant. The items areoften prefixed with a bulletor other symbol for clarityor decoration, but aresometimes simply leftblank, looking likeminiature paragraphs (whenthey are known as ‘simple’or ‘trivial’ lists).
Enumerated or sequential lists(sometimes called‘numbered’ lists) where theorder of items is critical,such as sequences ofinstructions or rankings ofimportance. Theenumeration can benumeric (Arabic or Roman),or lettered (uppercase orlowercase), and can even beprogrammed to behierarchical (1.a.viii, 2.3.6,etc.).
Descriptive or labelled lists(sometimes called‘discussion’ lists), which arecomposed of subheadings ortopic labels (usuallyunnumbered buttypographically distinct),each followed by one ormore indented paragraphsof discussion orexplanation.
Inline lists which are sequential innature, just like enumeratedlists, but are a) formattedwithin their paragraph; andb) usually labelled withletters, like this example.The items are oftenmutually inclusive orexclusive, with the finalitem prefixed by ‘and’ or ‘or’respectively.
��
��94 Formatting information
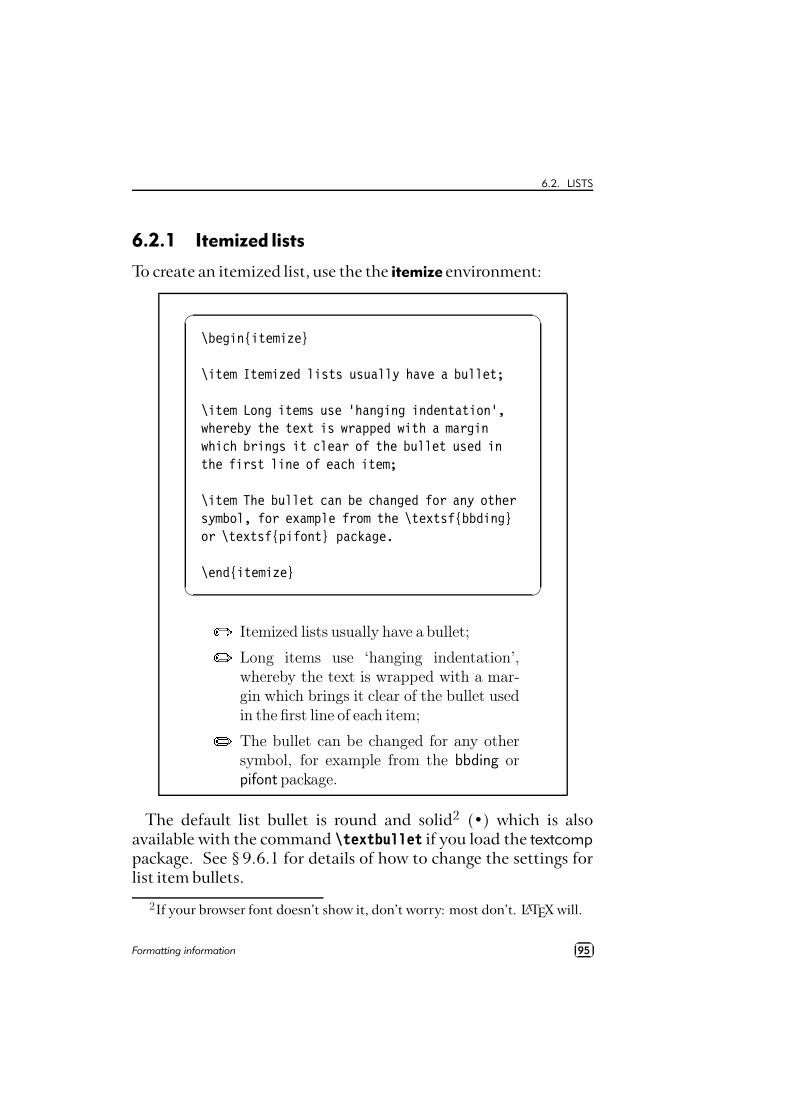
6.2. LISTS
6.2.1 Itemized lists
To create an itemized list, use the the itemize environment:
�
�
\begin{itemize}
\item Itemized lists usually have a bullet;
\item Long items use ‘hanging indentation’,whereby the text is wrapped with a marginwhich brings it clear of the bullet used inthe first line of each item;
\item The bullet can be changed for any othersymbol, for example from the \textsf{bbding}or \textsf{pifont} package.
\end{itemize}
jItemized lists usually have a bullet;jLong items use ‘hanging indentation’,whereby the text is wrapped with a mar-gin which brings it clear of the bullet usedin the first line of each item;jThe bullet can be changed for any othersymbol, for example from the bbding orpifont package.
The default list bullet is round and solid2 (•) which is alsoavailable with the command \textbullet if you load the textcomppackage. See § 9.6.1 for details of how to change the settings forlist item bullets.
2If your browser font doesn’t show it, don’t worry: most don’t. LATEX will.
Formatting information��
��95
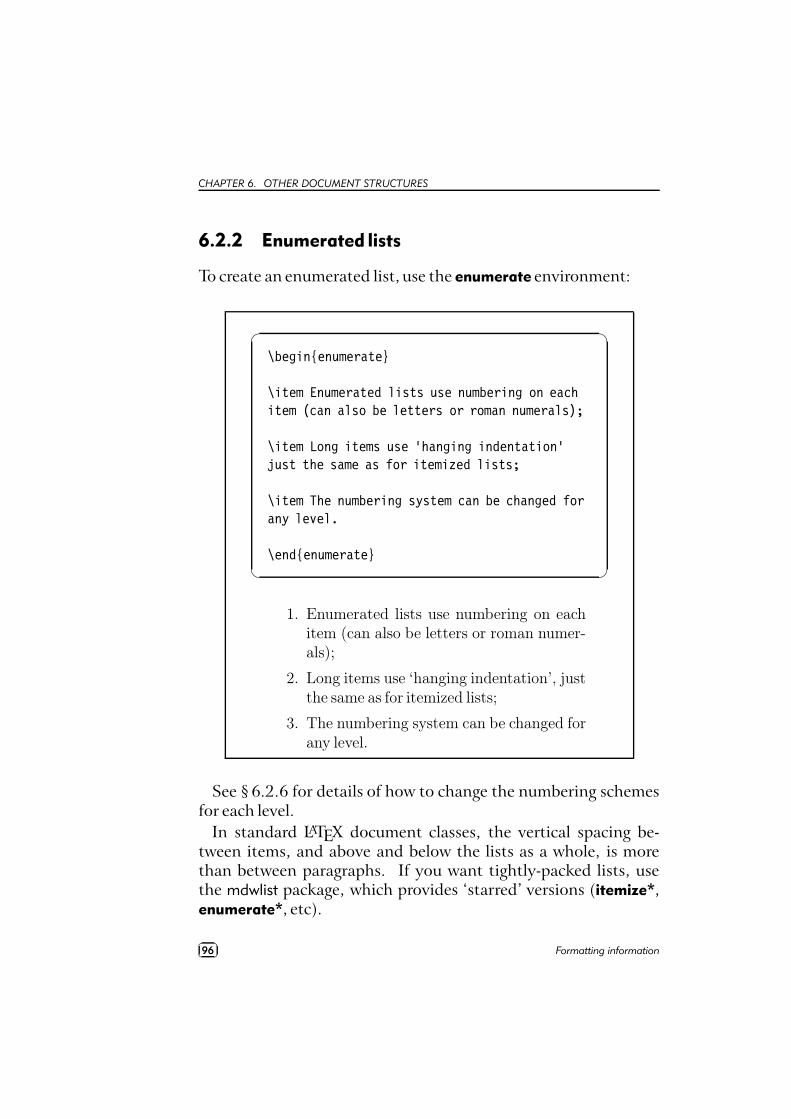
CHAPTER 6. OTHER DOCUMENT STRUCTURES
6.2.2 Enumerated lists
To create an enumerated list, use the enumerate environment:
�
�
\begin{enumerate}
\item Enumerated lists use numbering on eachitem (can also be letters or roman numerals);
\item Long items use ‘hanging indentation’just the same as for itemized lists;
\item The numbering system can be changed forany level.
\end{enumerate}
1. Enumerated lists use numbering on eachitem (can also be letters or roman numer-als);
2. Long items use ‘hanging indentation’, justthe same as for itemized lists;
3. The numbering system can be changed forany level.
See § 6.2.6 for details of how to change the numbering schemesfor each level.
In standard LATEX document classes, the vertical spacing be-tween items, and above and below the lists as a whole, is morethan between paragraphs. If you want tightly-packed lists, usethe mdwlist package, which provides ‘starred’ versions (itemize*,enumerate*, etc).
��
��96 Formatting information
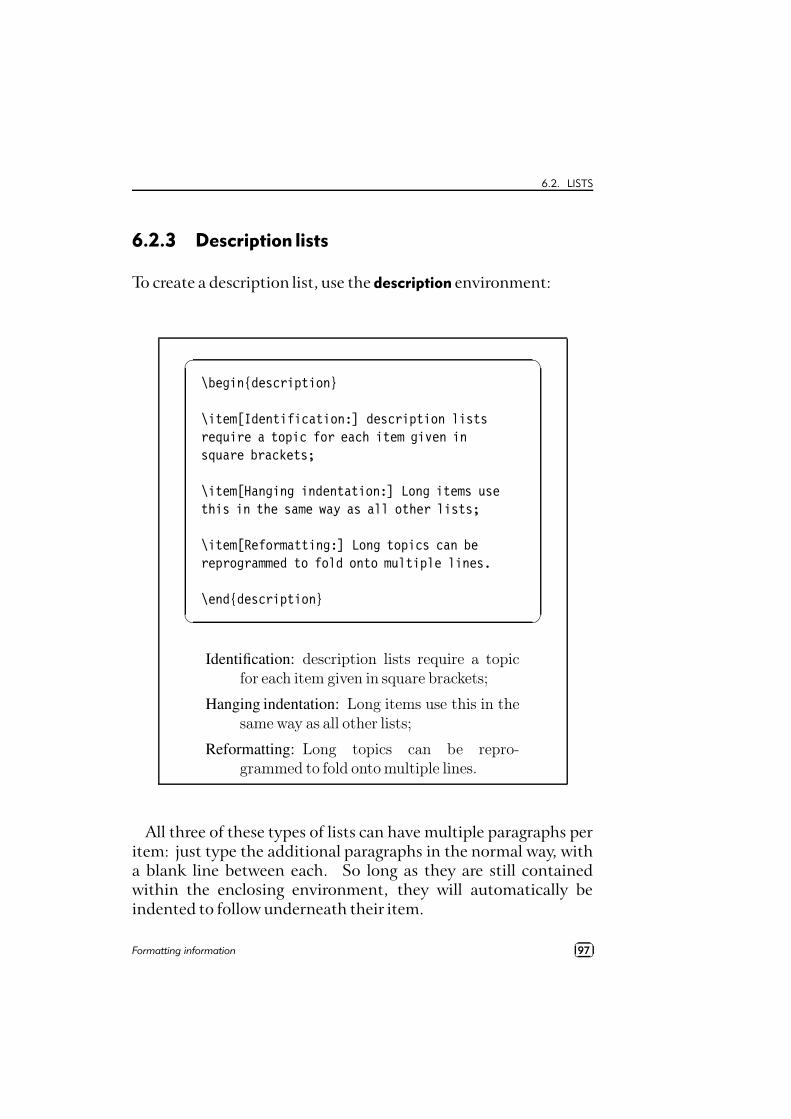
6.2. LISTS
6.2.3 Description lists
To create a description list, use the description environment:
�
�
\begin{description}
\item[Identification:] description listsrequire a topic for each item given insquare brackets;
\item[Hanging indentation:] Long items usethis in the same way as all other lists;
\item[Reformatting:] Long topics can bereprogrammed to fold onto multiple lines.
\end{description}
Identification: description lists require a topicfor each item given in square brackets;
Hanging indentation: Long items use this in thesame way as all other lists;
Reformatting: Long topics can be repro-grammed to fold onto multiple lines.
All three of these types of lists can have multiple paragraphs peritem: just type the additional paragraphs in the normal way, witha blank line between each. So long as they are still containedwithin the enclosing environment, they will automatically beindented to follow underneath their item.
Formatting information��
��97
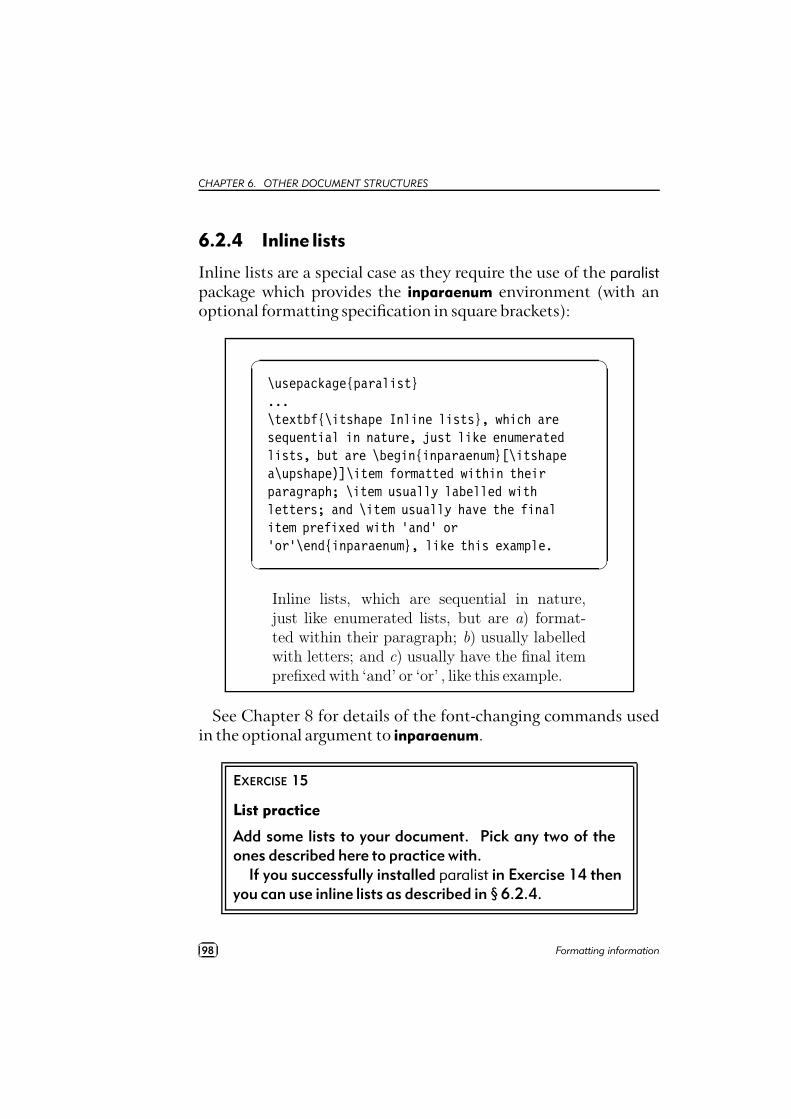
CHAPTER 6. OTHER DOCUMENT STRUCTURES
6.2.4 Inline lists
Inline lists are a special case as they require the use of the paralistpackage which provides the inparaenum environment (with anoptional formatting specification in square brackets):
�
�
\usepackage{paralist}...\textbf{\itshape Inline lists}, which aresequential in nature, just like enumeratedlists, but are \begin{inparaenum}[\itshapea\upshape)]\item formatted within theirparagraph; \item usually labelled withletters; and \item usually have the finalitem prefixed with ‘and’ or‘or’\end{inparaenum}, like this example.
Inline lists, which are sequential in nature,just like enumerated lists, but are a) format-ted within their paragraph; b) usually labelledwith letters; and c) usually have the final itemprefixed with ‘and’ or ‘or’ , like this example.
See Chapter 8 for details of the font-changing commands usedin the optional argument to inparaenum.
EXERCISE 15
List practice
Add some lists to your document. Pick any two of theones described here to practice with.
If you successfully installed paralist in Exercise 14 thenyou can use inline lists as described in § 6.2.4.
��
��98 Formatting information
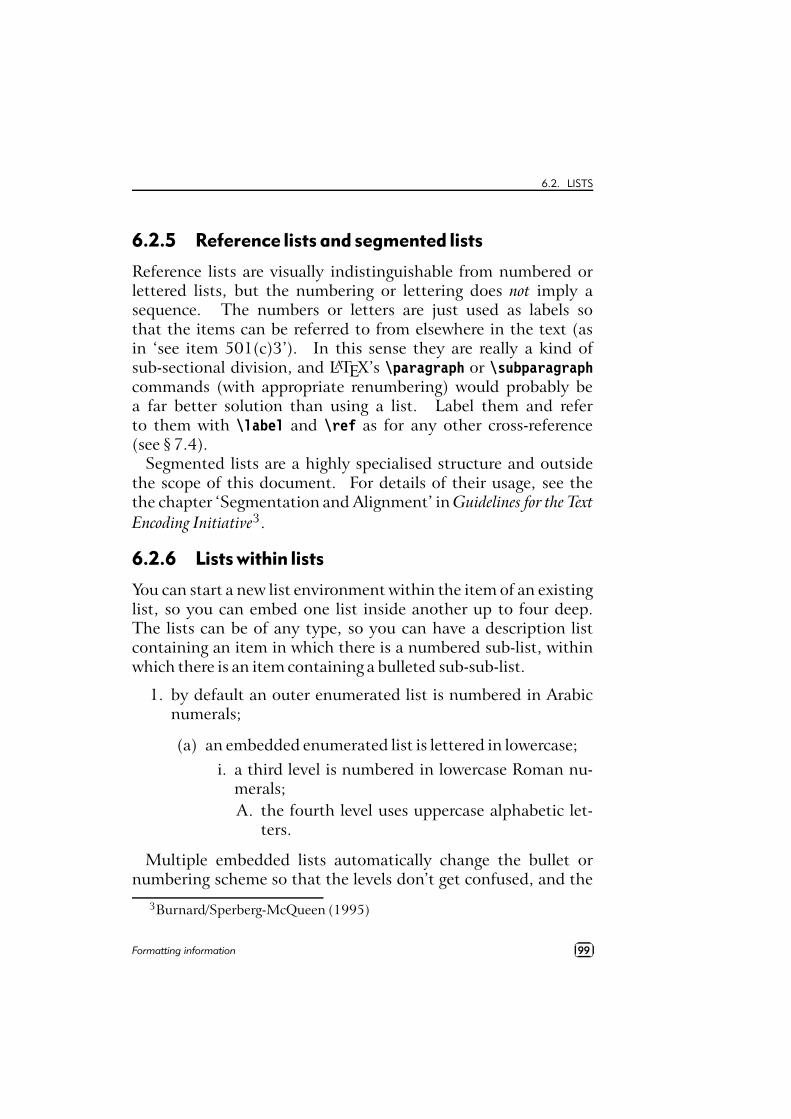
6.2. LISTS
6.2.5 Reference lists and segmented lists
Reference lists are visually indistinguishable from numbered orlettered lists, but the numbering or lettering does not imply asequence. The numbers or letters are just used as labels sothat the items can be referred to from elsewhere in the text (asin ‘see item 501(c)3’). In this sense they are really a kind ofsub-sectional division, and LATEX’s \paragraph or \subparagraphcommands (with appropriate renumbering) would probably bea far better solution than using a list. Label them and referto them with \label and \ref as for any other cross-reference(see § 7.4).
Segmented lists are a highly specialised structure and outsidethe scope of this document. For details of their usage, see thethe chapter ‘Segmentation and Alignment’ in Guidelines for the TextEncoding Initiative3.
6.2.6 Lists within lists
You can start a new list environment within the item of an existinglist, so you can embed one list inside another up to four deep.The lists can be of any type, so you can have a description listcontaining an item in which there is a numbered sub-list, withinwhich there is an item containing a bulleted sub-sub-list.
1. by default an outer enumerated list is numbered in Arabicnumerals;
(a) an embedded enumerated list is lettered in lowercase;i. a third level is numbered in lowercase Roman nu-
merals;A. the fourth level uses uppercase alphabetic let-
ters.
Multiple embedded lists automatically change the bullet ornumbering scheme so that the levels don’t get confused, and the
3Burnard/Sperberg-McQueen (1995)
Formatting information��
��99
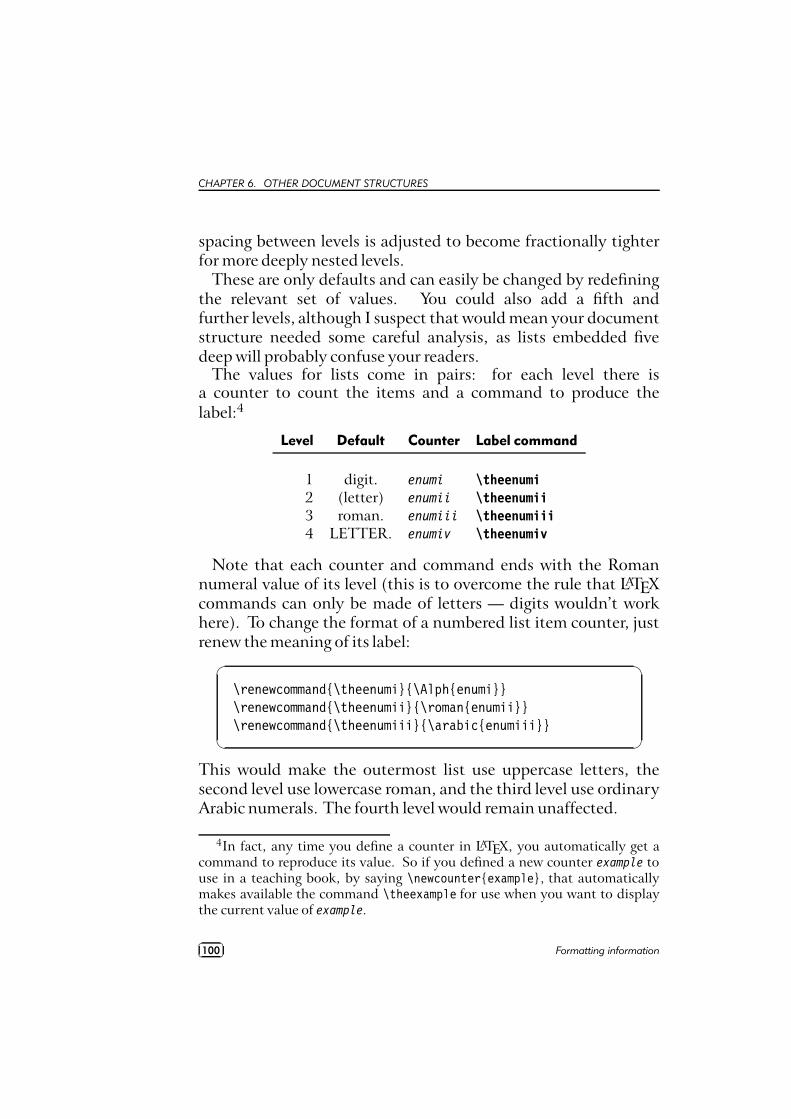
CHAPTER 6. OTHER DOCUMENT STRUCTURES
spacing between levels is adjusted to become fractionally tighterfor more deeply nested levels.
These are only defaults and can easily be changed by redefiningthe relevant set of values. You could also add a fifth andfurther levels, although I suspect that would mean your documentstructure needed some careful analysis, as lists embedded fivedeep will probably confuse your readers.
The values for lists come in pairs: for each level there isa counter to count the items and a command to produce thelabel:4
Level Default Counter Label command
1 digit. enumi \theenumi2 (letter) enumii \theenumii3 roman. enumiii \theenumiii4 LETTER. enumiv \theenumiv
Note that each counter and command ends with the Romannumeral value of its level (this is to overcome the rule that LATEXcommands can only be made of letters — digits wouldn’t workhere). To change the format of a numbered list item counter, justrenew the meaning of its label:
�
�
\renewcommand{\theenumi}{\Alph{enumi}}\renewcommand{\theenumii}{\roman{enumii}}\renewcommand{\theenumiii}{\arabic{enumiii}}
This would make the outermost list use uppercase letters, thesecond level use lowercase roman, and the third level use ordinaryArabic numerals. The fourth level would remain unaffected.
4In fact, any time you define a counter in LATEX, you automatically get acommand to reproduce its value. So if you defined a new counter example touse in a teaching book, by saying \newcounter{example}, that automaticallymakes available the command \theexample for use when you want to displaythe current value of example.
��
��100 Formatting information
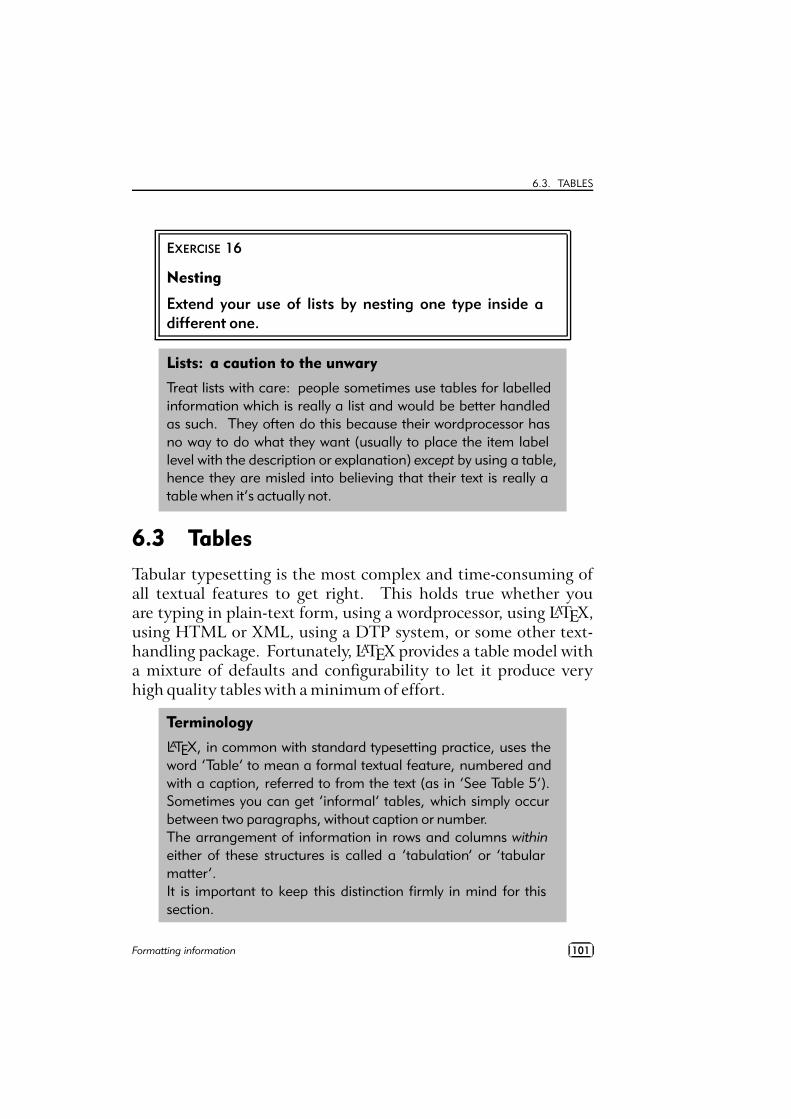
6.3. TABLES
EXERCISE 16
Nesting
Extend your use of lists by nesting one type inside adifferent one.
Lists: a caution to the unwary
Treat lists with care: people sometimes use tables for labelledinformation which is really a list and would be better handledas such. They often do this because their wordprocessor hasno way to do what they want (usually to place the item labellevel with the description or explanation) except by using a table,hence they are misled into believing that their text is really atable when it’s actually not.
6.3 Tables
Tabular typesetting is the most complex and time-consuming ofall textual features to get right. This holds true whether youare typing in plain-text form, using a wordprocessor, using LATEX,using HTML or XML, using a DTP system, or some other text-handling package. Fortunately, LATEX provides a table model witha mixture of defaults and configurability to let it produce veryhigh quality tables with a minimum of effort.
Terminology
LATEX, in common with standard typesetting practice, uses theword ‘Table’ to mean a formal textual feature, numbered andwith a caption, referred to from the text (as in ‘See Table 5’).Sometimes you can get ‘informal’ tables, which simply occurbetween two paragraphs, without caption or number.The arrangement of information in rows and columns within
either of these structures is called a ‘tabulation’ or ‘tabularmatter’.It is important to keep this distinction firmly in mind for thissection.
Formatting information��
��101
CHAPTER 6. OTHER DOCUMENT STRUCTURES
6.3.1 Floats
Tables and Figures are what printers refer to as ‘floats’. Thismeans they are not part of the normal stream of text, but separateentities, positioned in a part of the page to themselves (top,middle, bottom, left, right, or wherever the designer specifies).They always have a caption describing them and they are alwaysnumbered so they can be referred to from elsewhere in the text.
LATEX automatically floats Tables and Figures, depending onhow much space is left on the page at the point that they areprocessed. If there is not enough room on the current page, thefloat is moved to the top of the next page. This can be changed bymoving the Table or Figure definition to an earlier or later pointin the text, or by adjusting some of the parameters which controlautomatic floating.
Authors sometimes have many floats occurring in rapid succes-sion, which raises the problem of how they are supposed to fit onthe page and still leave room for text. In this case, LATEX stacksthem all up and prints them together if possible, or leaves them tothe end of the chapter in protest. The skill is to space them outwithin your text so that they intrude neither on the thread of yourargument or discussion, nor on the visual balance of the typesetpages. But this is a skill few authors have, and it’s one pointat which professional typographic advice or manual interventionmay be needed.
There is a float package which lets you create new classes offloating object (perhaps Examples or Exercises).
6.3.2 Formal tables
To create a LATEX Table, use the table environment containinga \caption command where you type the caption, and a \labelcommand to give the Table a label by which you can refer toit.
��
��102 Formatting information
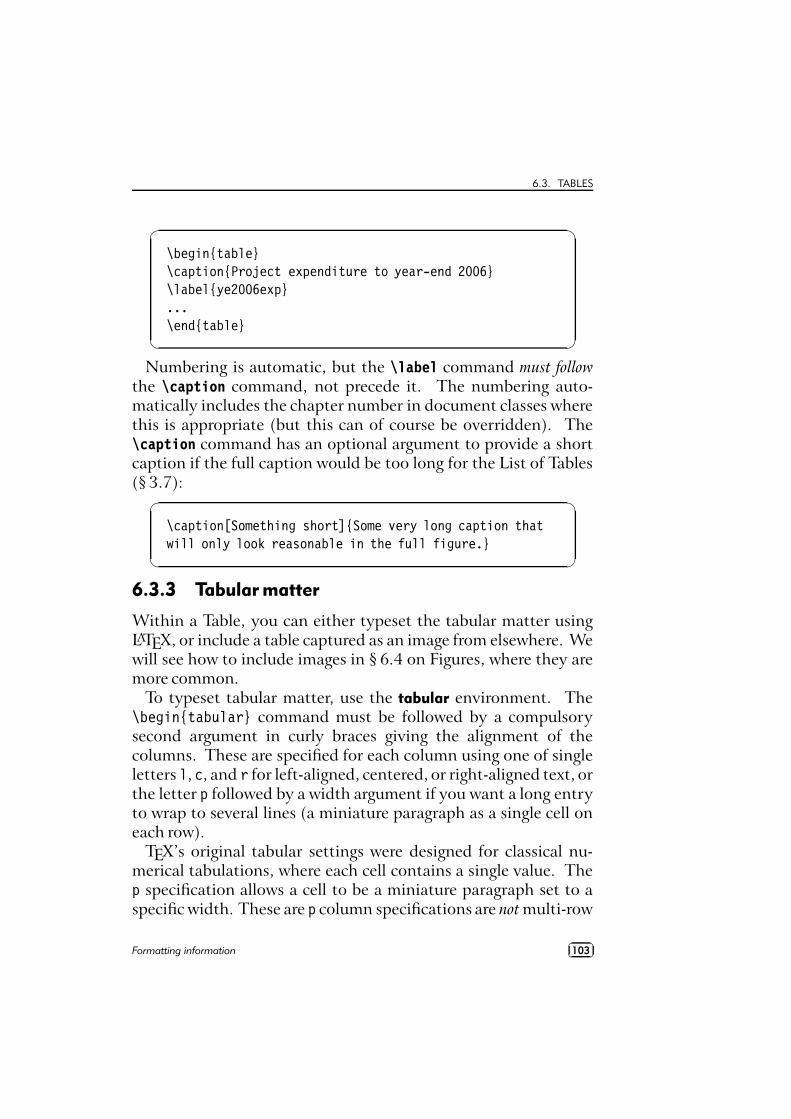
6.3. TABLES
�
�
\begin{table}\caption{Project expenditure to year-end 2006}\label{ye2006exp}...\end{table}
Numbering is automatic, but the \label command must followthe \caption command, not precede it. The numbering auto-matically includes the chapter number in document classes wherethis is appropriate (but this can of course be overridden). The\caption command has an optional argument to provide a shortcaption if the full caption would be too long for the List of Tables(§ 3.7):
�
�
\caption[Something short]{Some very long caption thatwill only look reasonable in the full figure.}
6.3.3 Tabular matter
Within a Table, you can either typeset the tabular matter usingLATEX, or include a table captured as an image from elsewhere. Wewill see how to include images in § 6.4 on Figures, where they aremore common.
To typeset tabular matter, use the tabular environment. The\begin{tabular} command must be followed by a compulsorysecond argument in curly braces giving the alignment of thecolumns. These are specified for each column using one of singleletters l, c, and r for left-aligned, centered, or right-aligned text, orthe letter p followed by a width argument if you want a long entryto wrap to several lines (a miniature paragraph as a single cell oneach row).
TEX’s original tabular settings were designed for classical nu-merical tabulations, where each cell contains a single value. Thep specification allows a cell to be a miniature paragraph set to aspecific width. These are p column specifications are not multi-row
Formatting information��
��103
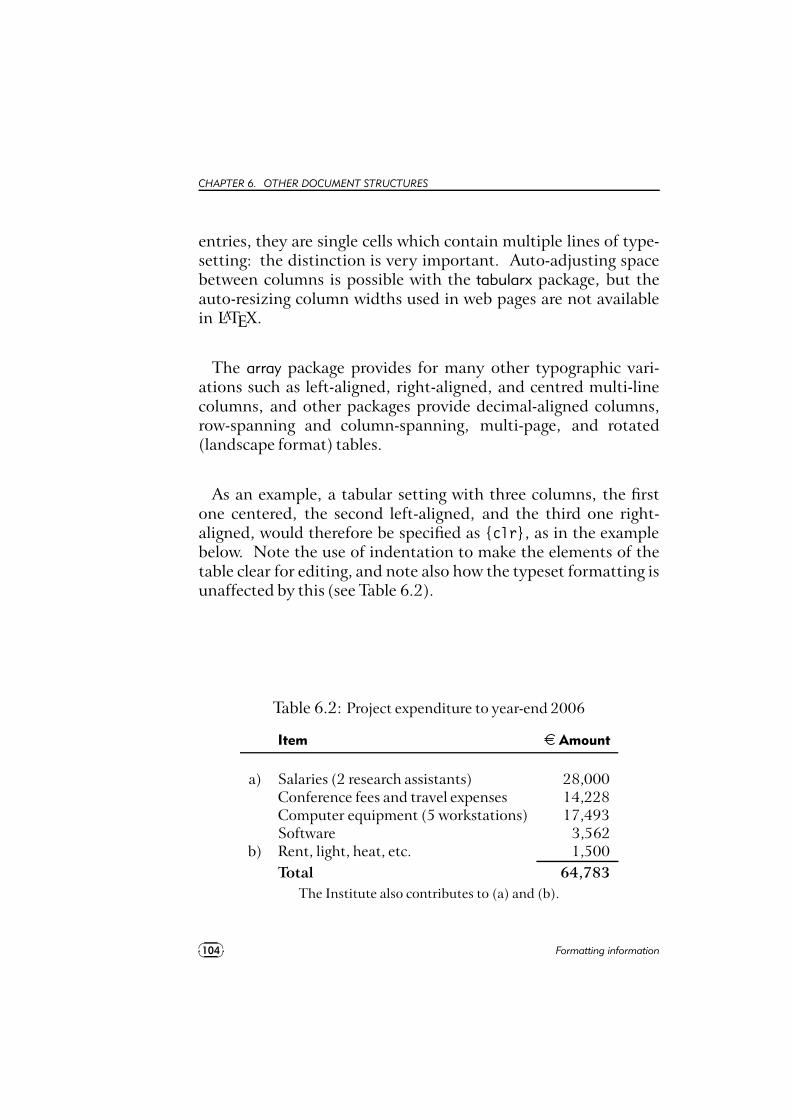
CHAPTER 6. OTHER DOCUMENT STRUCTURES
entries, they are single cells which contain multiple lines of type-setting: the distinction is very important. Auto-adjusting spacebetween columns is possible with the tabularx package, but theauto-resizing column widths used in web pages are not availablein LATEX.
The array package provides for many other typographic vari-ations such as left-aligned, right-aligned, and centred multi-linecolumns, and other packages provide decimal-aligned columns,row-spanning and column-spanning, multi-page, and rotated(landscape format) tables.
As an example, a tabular setting with three columns, the firstone centered, the second left-aligned, and the third one right-aligned, would therefore be specified as {clr}, as in the examplebelow. Note the use of indentation to make the elements of thetable clear for editing, and note also how the typeset formatting isunaffected by this (see Table 6.2).
Table 6.2: Project expenditure to year-end 2006
Item ¤ Amount
a) Salaries (2 research assistants) 28,000Conference fees and travel expenses 14,228Computer equipment (5 workstations) 17,493Software 3,562
b) Rent, light, heat, etc. 1,500Total 64,783
The Institute also contributes to (a) and (b).
��
��104 Formatting information
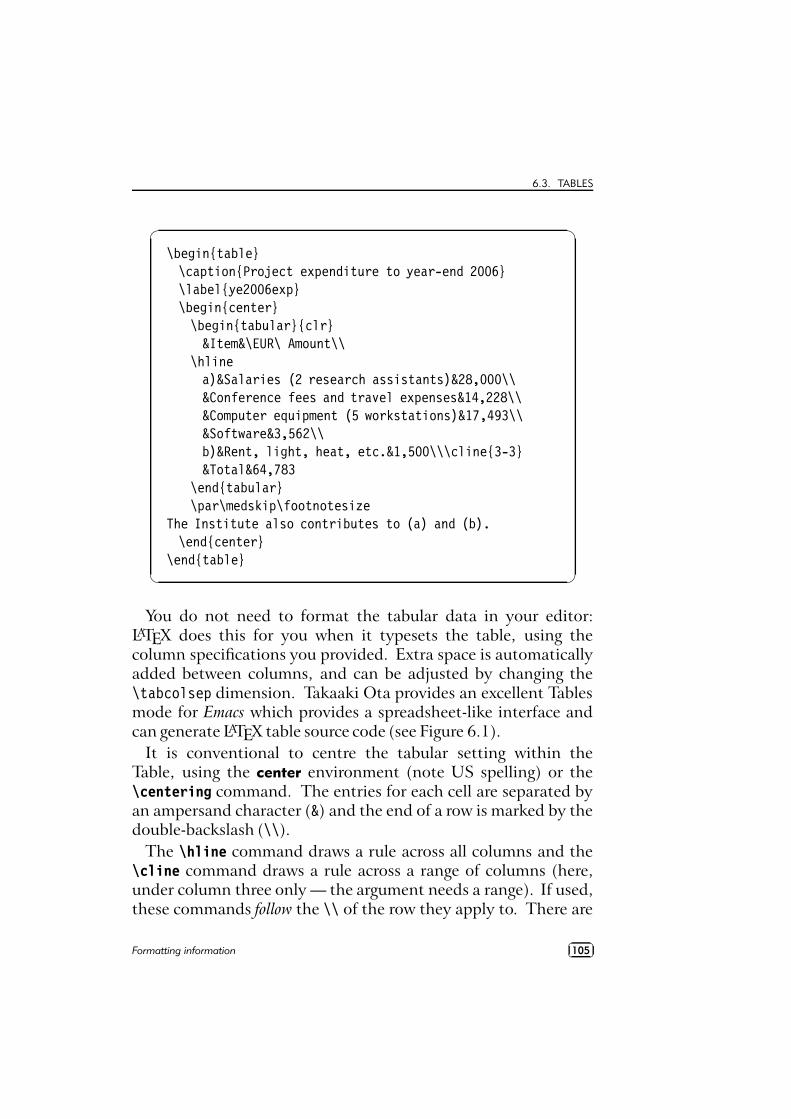
6.3. TABLES
�
�
\begin{table}\caption{Project expenditure to year-end 2006}\label{ye2006exp}\begin{center}\begin{tabular}{clr}&Item&\EUR\ Amount\\
\hlinea)&Salaries (2 research assistants)&28,000\\&Conference fees and travel expenses&14,228\\&Computer equipment (5 workstations)&17,493\\&Software&3,562\\b)&Rent, light, heat, etc.&1,500\\\cline{3-3}&Total&64,783
\end{tabular}\par\medskip\footnotesize
The Institute also contributes to (a) and (b).\end{center}
\end{table}
You do not need to format the tabular data in your editor:LATEX does this for you when it typesets the table, using thecolumn specifications you provided. Extra space is automaticallyadded between columns, and can be adjusted by changing the\tabcolsep dimension. Takaaki Ota provides an excellent Tablesmode for Emacs which provides a spreadsheet-like interface andcan generate LATEX table source code (see Figure 6.1).
It is conventional to centre the tabular setting within theTable, using the center environment (note US spelling) or the\centering command. The entries for each cell are separated byan ampersand character (&) and the end of a row is marked by thedouble-backslash (\\).
The \hline command draws a rule across all columns and the\cline command draws a rule across a range of columns (here,under column three only — the argument needs a range). If used,these commands follow the \\ of the row they apply to. There are
Formatting information��
��105
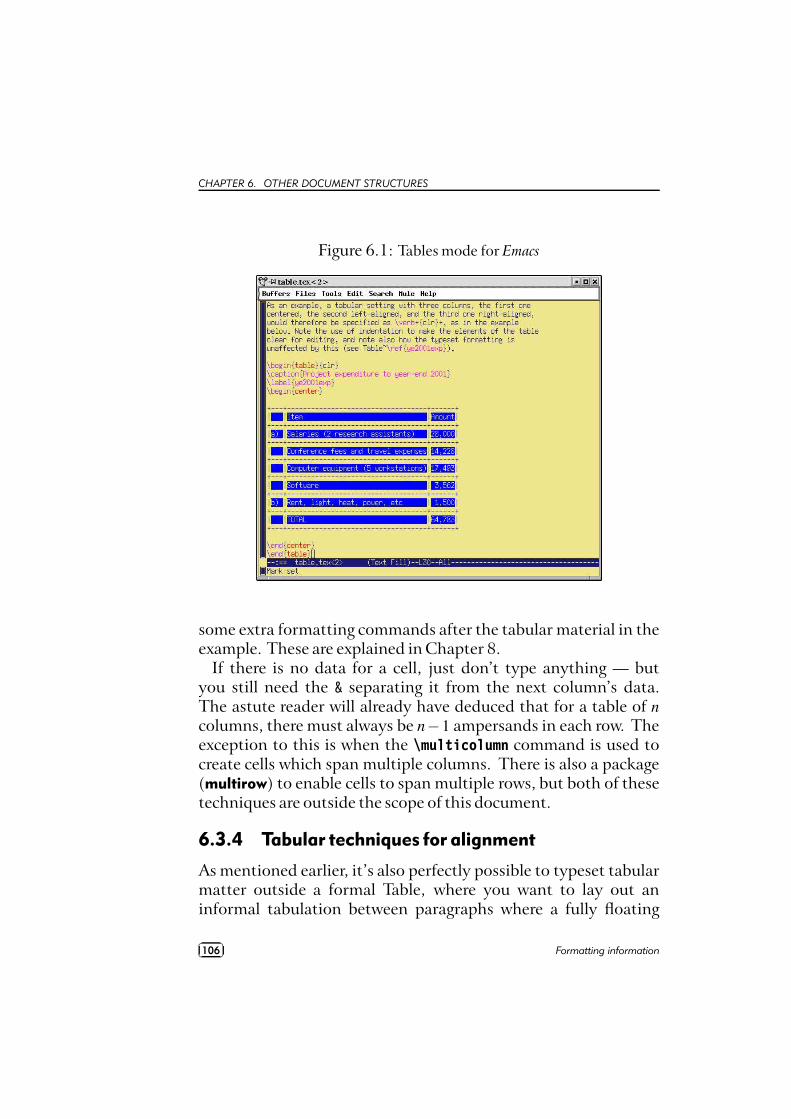
CHAPTER 6. OTHER DOCUMENT STRUCTURES
Figure 6.1: Tables mode for Emacs
some extra formatting commands after the tabular material in theexample. These are explained in Chapter 8.
If there is no data for a cell, just don’t type anything — butyou still need the & separating it from the next column’s data.The astute reader will already have deduced that for a table of ncolumns, there must always be n−1 ampersands in each row. Theexception to this is when the \multicolumn command is used tocreate cells which span multiple columns. There is also a package(multirow) to enable cells to span multiple rows, but both of thesetechniques are outside the scope of this document.
6.3.4 Tabular techniques for alignment
As mentioned earlier, it’s also perfectly possible to typeset tabularmatter outside a formal Table, where you want to lay out aninformal tabulation between paragraphs where a fully floating
��
��106 Formatting information
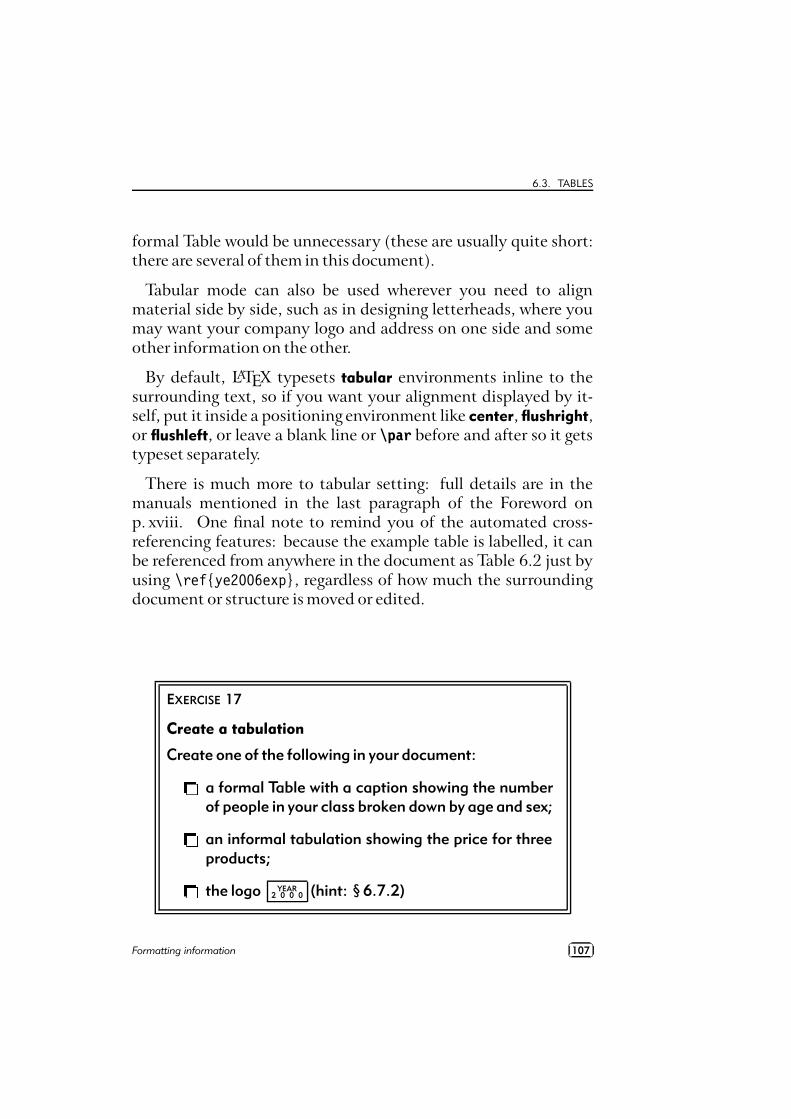
6.3. TABLES
formal Table would be unnecessary (these are usually quite short:there are several of them in this document).
Tabular mode can also be used wherever you need to alignmaterial side by side, such as in designing letterheads, where youmay want your company logo and address on one side and someother information on the other.
By default, LATEX typesets tabular environments inline to thesurrounding text, so if you want your alignment displayed by it-self, put it inside a positioning environment like center, flushright,or flushleft, or leave a blank line or \par before and after so it getstypeset separately.
There is much more to tabular setting: full details are in themanuals mentioned in the last paragraph of the Foreword onp. xviii. One final note to remind you of the automated cross-referencing features: because the example table is labelled, it canbe referenced from anywhere in the document as Table 6.2 just byusing \ref{ye2006exp}, regardless of how much the surroundingdocument or structure is moved or edited.
EXERCISE 17
Create a tabulation
Create one of the following in your document:ka formal Table with a caption showing the numberof people in your class broken down by age and sex;kan informal tabulation showing the price for threeproducts;kthe logo YEAR
2 0 0 0 (hint: § 6.7.2)
Formatting information��
��107

CHAPTER 6. OTHER DOCUMENT STRUCTURES
6.4 Figures
As explained in § 6.3.1, Figures and Tables float to a vacant part ofthe page, as they are not part of the sequence of sentences makingup your text, but illustrative objects that you refer to.
Figures can contain text, diagrams, pictures, or any other kindof illustration. To create a figure, use the figure environment:like Tables, they automatically get numbered, and must include acaption (with a label after the caption, if needed, exactly the sameas for Tables)
�
�
\begin{figure}\caption{Total variable overhead variance (after
\citeauthor[p.191]{bull}}\label{workeff}\begin{center}\includegraphics[width=.75\columnwidth]{diagram}\end{center}\end{figure}
You can see that the structure is very similar to the tableenvironment, but in this case we have a graphic included. Detailsof this command (\includegraphics) are in the next section.Details of the bibliographic citation mechanism are in § 7.4.2
The content of the Figure could of course also be textual, inthe form of a list or a text diagram. LATEX has a simple drawingenvironment called picture, which lets you create a limited set oflines and curves, but for a diagram of any complexity, you shoulduse a standard vector drawing program (see § 6.5.1).
6.5 Images
Images (graphics) can be included anywhere in a LATEX document,although in most cases of formal documents they will occur in
��
��108 Formatting information
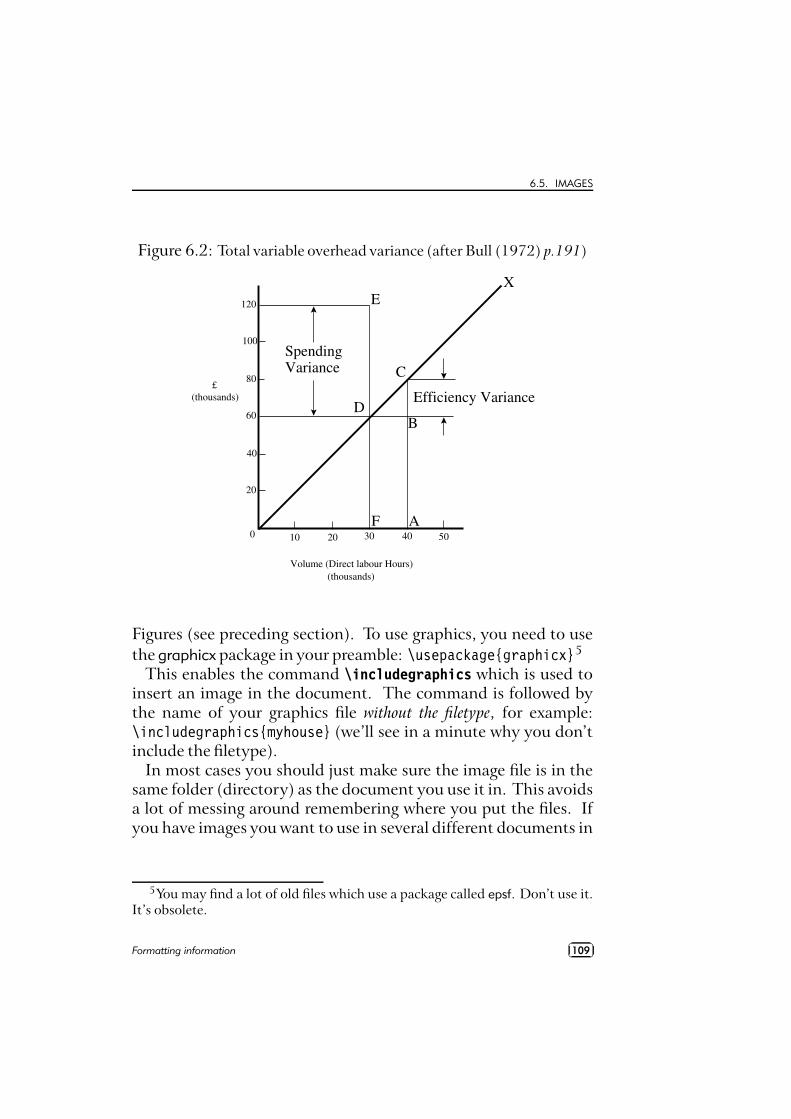
6.5. IMAGES
Figure 6.2: Total variable overhead variance (after Bull (1972) p.191)
SpendingVariance
E
D
C
B
X
F A
Efficiency Variance
120
100
80
60
40
20
0 10 20 30 40 50
Volume (Direct labour Hours)(thousands)
£(thousands)
Figures (see preceding section). To use graphics, you need to usethe graphicx package in your preamble: \usepackage{graphicx}5
This enables the command \includegraphics which is used toinsert an image in the document. The command is followed bythe name of your graphics file without the filetype, for example:\includegraphics{myhouse} (we’ll see in a minute why you don’tinclude the filetype).
In most cases you should just make sure the image file is in thesame folder (directory) as the document you use it in. This avoidsa lot of messing around remembering where you put the files. Ifyou have images you want to use in several different documents in
5You may find a lot of old files which use a package called epsf. Don’t use it.It’s obsolete.
Formatting information��
��109
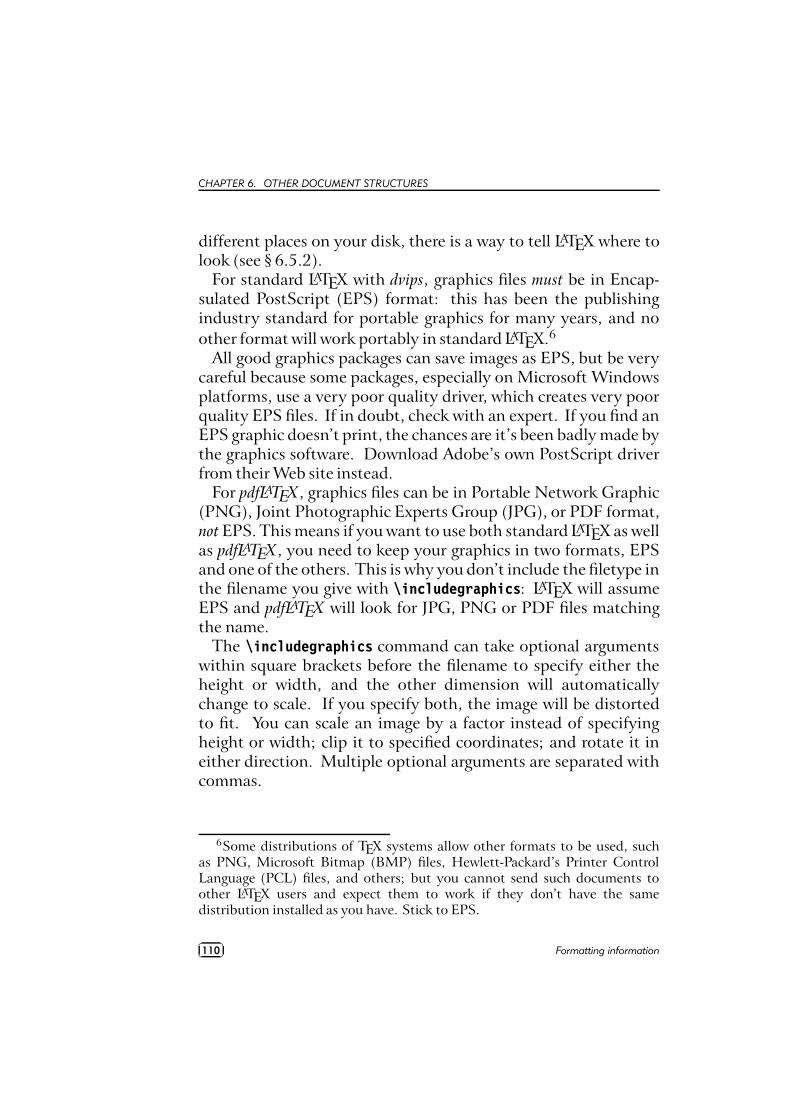
CHAPTER 6. OTHER DOCUMENT STRUCTURES
different places on your disk, there is a way to tell LATEX where tolook (see § 6.5.2).
For standard LATEX with dvips, graphics files must be in Encap-sulated PostScript (EPS) format: this has been the publishingindustry standard for portable graphics for many years, and noother format will work portably in standard LATEX.6
All good graphics packages can save images as EPS, but be verycareful because some packages, especially on Microsoft Windowsplatforms, use a very poor quality driver, which creates very poorquality EPS files. If in doubt, check with an expert. If you find anEPS graphic doesn’t print, the chances are it’s been badly made bythe graphics software. Download Adobe’s own PostScript driverfrom their Web site instead.
For pdfLATEX, graphics files can be in Portable Network Graphic(PNG), Joint Photographic Experts Group (JPG), or PDF format,not EPS. This means if you want to use both standard LATEX as wellas pdfLATEX, you need to keep your graphics in two formats, EPSand one of the others. This is why you don’t include the filetype inthe filename you give with \includegraphics: LATEX will assumeEPS and pdfLATEX will look for JPG, PNG or PDF files matchingthe name.
The \includegraphics command can take optional argumentswithin square brackets before the filename to specify either theheight or width, and the other dimension will automaticallychange to scale. If you specify both, the image will be distortedto fit. You can scale an image by a factor instead of specifyingheight or width; clip it to specified coordinates; and rotate it ineither direction. Multiple optional arguments are separated withcommas.
6Some distributions of TEX systems allow other formats to be used, suchas PNG, Microsoft Bitmap (BMP) files, Hewlett-Packard’s Printer ControlLanguage (PCL) files, and others; but you cannot send such documents toother LATEX users and expect them to work if they don’t have the samedistribution installed as you have. Stick to EPS.
��
��110 Formatting information
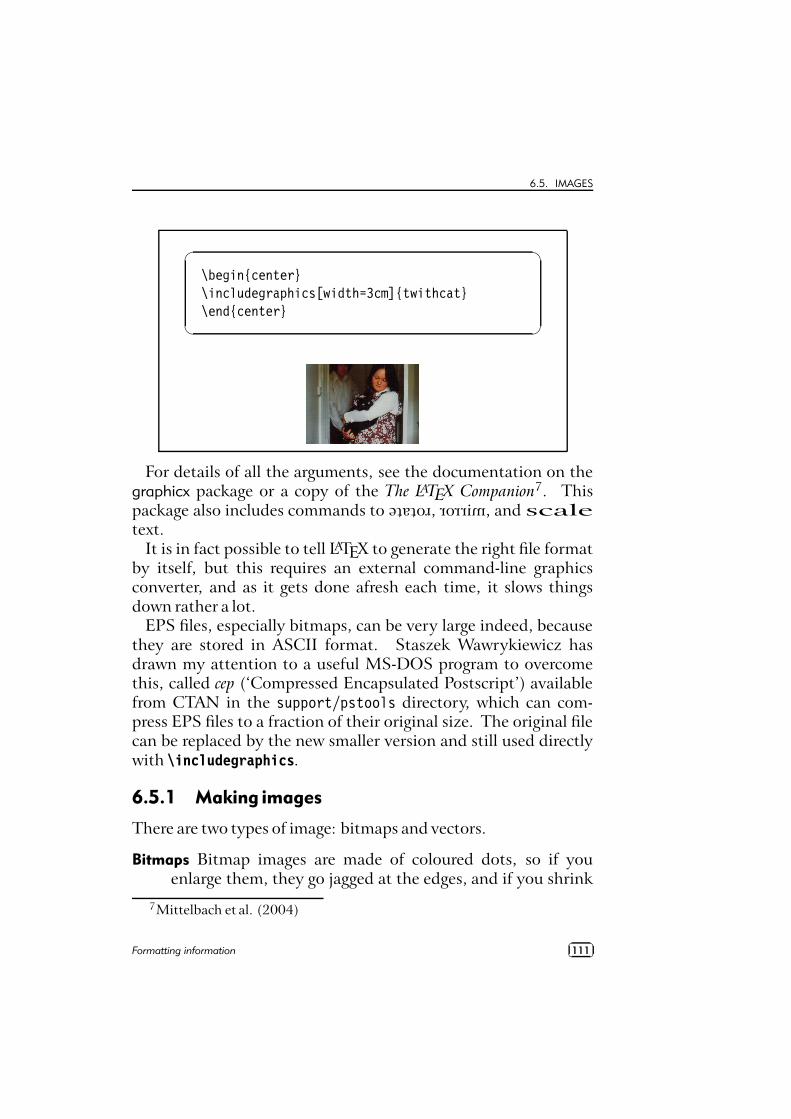
6.5. IMAGES
�
�
\begin{center}\includegraphics[width=3cm]{twithcat}\end{center}
For details of all the arguments, see the documentation on thegraphicx package or a copy of the The LATEX Companion7. Thispackage also includes commands to rotate , mirror , and scaletext.
It is in fact possible to tell LATEX to generate the right file formatby itself, but this requires an external command-line graphicsconverter, and as it gets done afresh each time, it slows thingsdown rather a lot.
EPS files, especially bitmaps, can be very large indeed, becausethey are stored in ASCII format. Staszek Wawrykiewicz hasdrawn my attention to a useful MS-DOS program to overcomethis, called cep (‘Compressed Encapsulated Postscript’) availablefrom CTAN in the support/pstools directory, which can com-press EPS files to a fraction of their original size. The original filecan be replaced by the new smaller version and still used directlywith \includegraphics.
6.5.1 Making images
There are two types of image: bitmaps and vectors.
Bitmaps Bitmap images are made of coloured dots, so if youenlarge them, they go jagged at the edges, and if you shrink
7Mittelbach et al. (2004)
Formatting information��
��111
CHAPTER 6. OTHER DOCUMENT STRUCTURES
them, they go blurry. Bitmaps are fine for photographs,where every dot is a different colour, and no-one will noticeif you don’t shrink or enlarge too much. Bitmaps fordiagrams and drawings, however, are almost always thewrong choice, and often disastrously bad.
Vectors Vector drawings are made from instructions (eg ‘drawthis from here to here, using a line this thick’). Theycan be enlarged or shrunk as much as you like, and neverlose accuracy, because they get redrawn automatically at anysize. You can’t do photographs as vectors, but it’s the onlyacceptable method for drawings or diagrams.
Vector graphic packages are also better suited for saving yourimage directly in EPS or PDF format (both of which use vectorsinternally). All the major graphics-generating packages in all dis-ciplines output vector formats: AutoCAD, ChemDraw, MathCAD,Maple, Mathematica, ArcInfo, and so on. EPS is the universally-accepted format for creating vector graphics for publication, withPDF a close second. Most of the major graphics (drawing) pack-ages can also save as EPS, such as PhotoShop, PaintShop Pro, AdobeIllustrator, Corel Draw, and GIMP. There are also some freevector plotting and diagramming packages available like tkPaintand GNUplot which do the same. Never, ever (except in the direstnecessity) save any diagram as a bitmap.
Bitmap formats like JPG and PNG are ideal for photographs,as they are also able to compress the data substantially withouttoo much loss of quality. However, compressed formats arebad for screenshots, if you are documenting computer tasks,because too much compression makes them blurry. The popularGraphics Interchange Format (GIF) is good for screenshots, butis not supported by TEX: use PNG instead, with the compressionturned down to minimum. Avoid uncompressible formats likeBMP as they produce enormous and unmanageable files. TheTagged Image File Format (TIFF), popular with graphic designers,should also be avoided because far too many companies have
��
��112 Formatting information
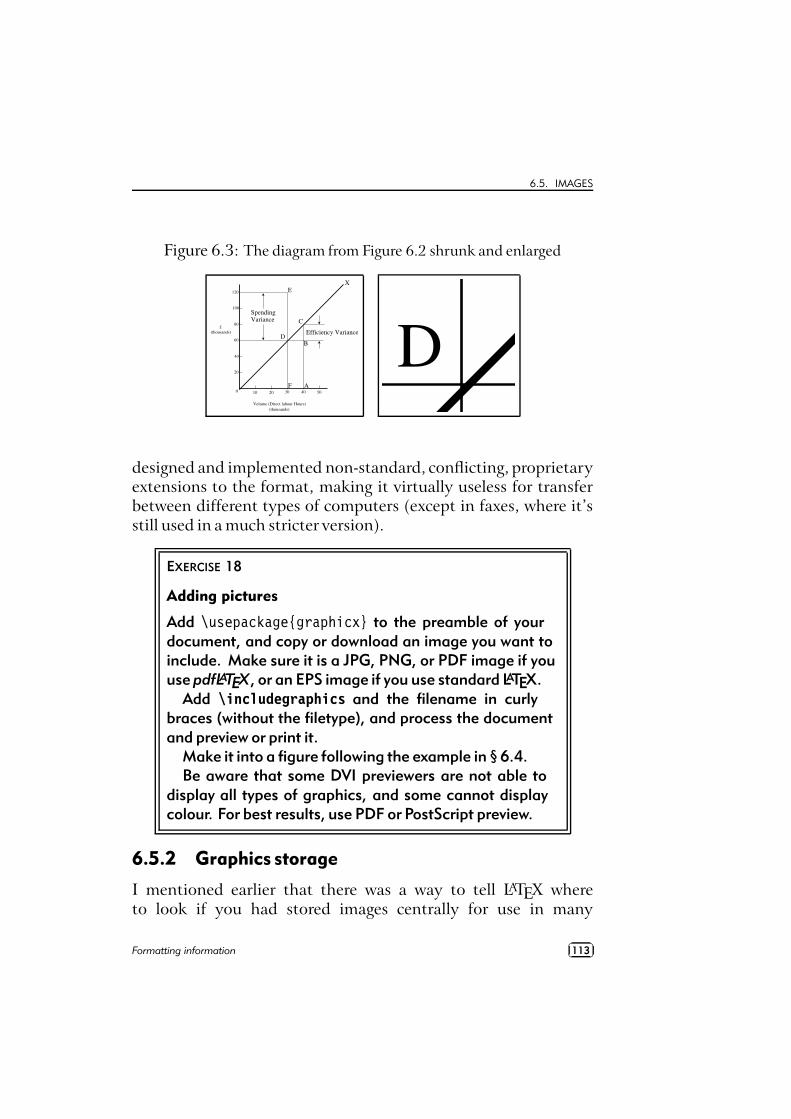
6.5. IMAGES
Figure 6.3: The diagram from Figure 6.2 shrunk and enlarged
SpendingVariance
E
D
C
B
X
F A
Efficiency Variance
120
100
80
60
40
20
0 10 20 30 40 50
Volume (Direct labour Hours)(thousands)
£(thousands)
SpendingVariance
E
D
C
B
X
F A
Efficiency Variance
120
100
80
60
40
20
0 10 20 30 40 50
Volume (Direct labour Hours)(thousands)
£(thousands)
designed and implemented non-standard, conflicting, proprietaryextensions to the format, making it virtually useless for transferbetween different types of computers (except in faxes, where it’sstill used in a much stricter version).
EXERCISE 18
Adding pictures
Add \usepackage{graphicx} to the preamble of yourdocument, and copy or download an image you want toinclude. Make sure it is a JPG, PNG, or PDF image if youuse pdfLATEX, or an EPS image if you use standard LATEX.
Add \includegraphics and the filename in curlybraces (without the filetype), and process the documentand preview or print it.
Make it into a figure following the example in § 6.4.Be aware that some DVI previewers are not able to
display all types of graphics, and some cannot displaycolour. For best results, use PDF or PostScript preview.
6.5.2 Graphics storage
I mentioned earlier that there was a way to tell LATEX whereto look if you had stored images centrally for use in many
Formatting information��
��113
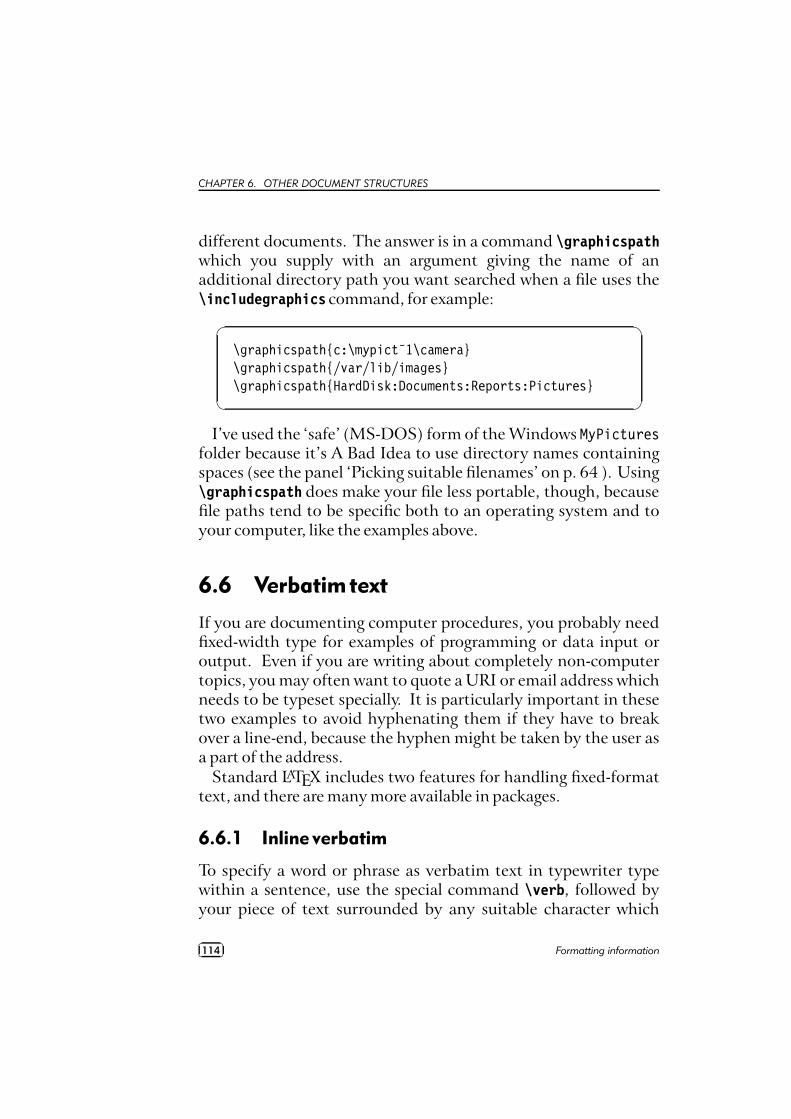
CHAPTER 6. OTHER DOCUMENT STRUCTURES
different documents. The answer is in a command \graphicspathwhich you supply with an argument giving the name of anadditional directory path you want searched when a file uses the\includegraphics command, for example:
�
�
\graphicspath{c:\mypict˜1\camera}\graphicspath{/var/lib/images}\graphicspath{HardDisk:Documents:Reports:Pictures}
I’ve used the ‘safe’ (MS-DOS) form of the Windows MyPicturesfolder because it’s A Bad Idea to use directory names containingspaces (see the panel ‘Picking suitable filenames’ on p. 64 ). Using\graphicspath does make your file less portable, though, becausefile paths tend to be specific both to an operating system and toyour computer, like the examples above.
6.6 Verbatimtext
If you are documenting computer procedures, you probably needfixed-width type for examples of programming or data input oroutput. Even if you are writing about completely non-computertopics, you may often want to quote a URI or email address whichneeds to be typeset specially. It is particularly important in thesetwo examples to avoid hyphenating them if they have to breakover a line-end, because the hyphen might be taken by the user asa part of the address.
Standard LATEX includes two features for handling fixed-formattext, and there are many more available in packages.
6.6.1 Inline verbatim
To specify a word or phrase as verbatim text in typewriter typewithin a sentence, use the special command \verb, followed byyour piece of text surrounded by any suitable character which
��
��114 Formatting information
6.6. VERBATIM TEXT
does not occur in the text itself. This is a very rare excep-tion to the rule that arguments go in curly braces. I often usethe plus sign for this, for example to show a LATEX command,I type \verb+\includegraphics[width=3in]{myhouse}+ in orderto display \includegraphics[width=3in]{myhouse}, but some-times I use the grave accent (backtick or open-quote) or thevertical bar when the phrase already has a plus sign in it,like \verb|\(y=a+2xˆ2\)| when illustrating the LATEX equation\(y=a+xˆ2\).
This command has the advantage that it turns off all specialcharacters (see § 2.5) except the one you use as the delimiter, soyou can easily quote sequences of characters in any computersyntax without problems. However, LATEX will never break theargument of \verb at a line-end when formatting a paragraph,even if it contains spaces, so if it happens to be long, and fallstowards the end of a line, it will stick out into the margin. See§ 2.8.2 for more information on line-ends and hyphenation.
The url package avoids this by providing the command \urlwhich works in the same way as \verb, with the argument en-closed in a pair of characters, but performs a hyphenless breakat punctuation characters, as in http://www.ucc.ie:8080/cocoon/cc/docs/siteowner.xml. It was designed for Web URIs,8 so itunderstands their syntax and will never break mid-way throughan unpunctuated word, only at slashes and full points. Bear inmind, however, that spaces are forbidden in URIs, so using spacesin \url arguments will fail, as will using other non-URI-validcharacters.
8The original term Uniform Resource Locator (URL) is now stronglydeprecated in the Web community in favour of the more accurate UniformResource Indicator (URI). For details see http://www.w3.org/Addressing/.Unfortunately the older term still persists, especially in LATEX and XMLmarkup.
Formatting information��
��115
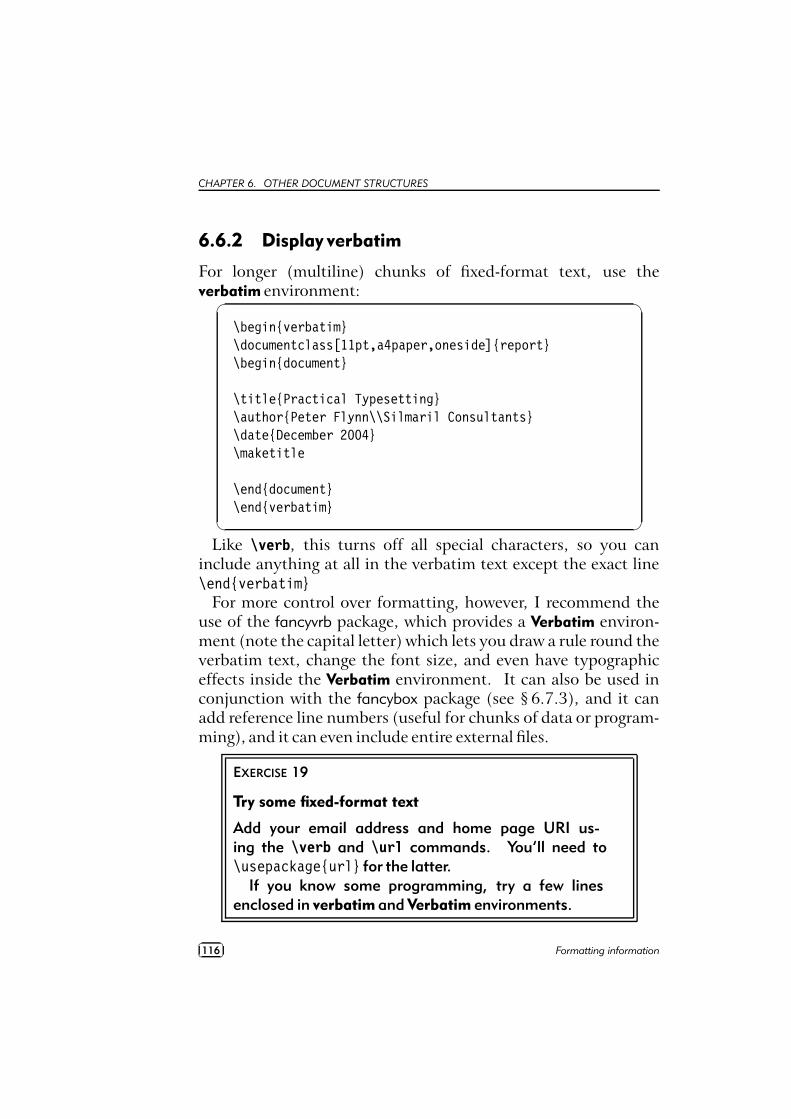
CHAPTER 6. OTHER DOCUMENT STRUCTURES
6.6.2 Display verbatim
For longer (multiline) chunks of fixed-format text, use theverbatim environment:
�
�
\begin{verbatim}\documentclass[11pt,a4paper,oneside]{report}\begin{document}
\title{Practical Typesetting}\author{Peter Flynn\\Silmaril Consultants}\date{December 2004}\maketitle
\end{document}\end{verbatim}
Like \verb, this turns off all special characters, so you caninclude anything at all in the verbatim text except the exact line\end{verbatim}
For more control over formatting, however, I recommend theuse of the fancyvrb package, which provides a Verbatim environ-ment (note the capital letter) which lets you draw a rule round theverbatim text, change the font size, and even have typographiceffects inside the Verbatim environment. It can also be used inconjunction with the fancybox package (see § 6.7.3), and it canadd reference line numbers (useful for chunks of data or program-ming), and it can even include entire external files.
EXERCISE 19
Try some fixed-format text
Add your email address and home page URI us-ing the \verb and \url commands. You’ll need to\usepackage{url} for the latter.
If you know some programming, try a few linesenclosed in verbatim and Verbatim environments.
��
��116 Formatting information
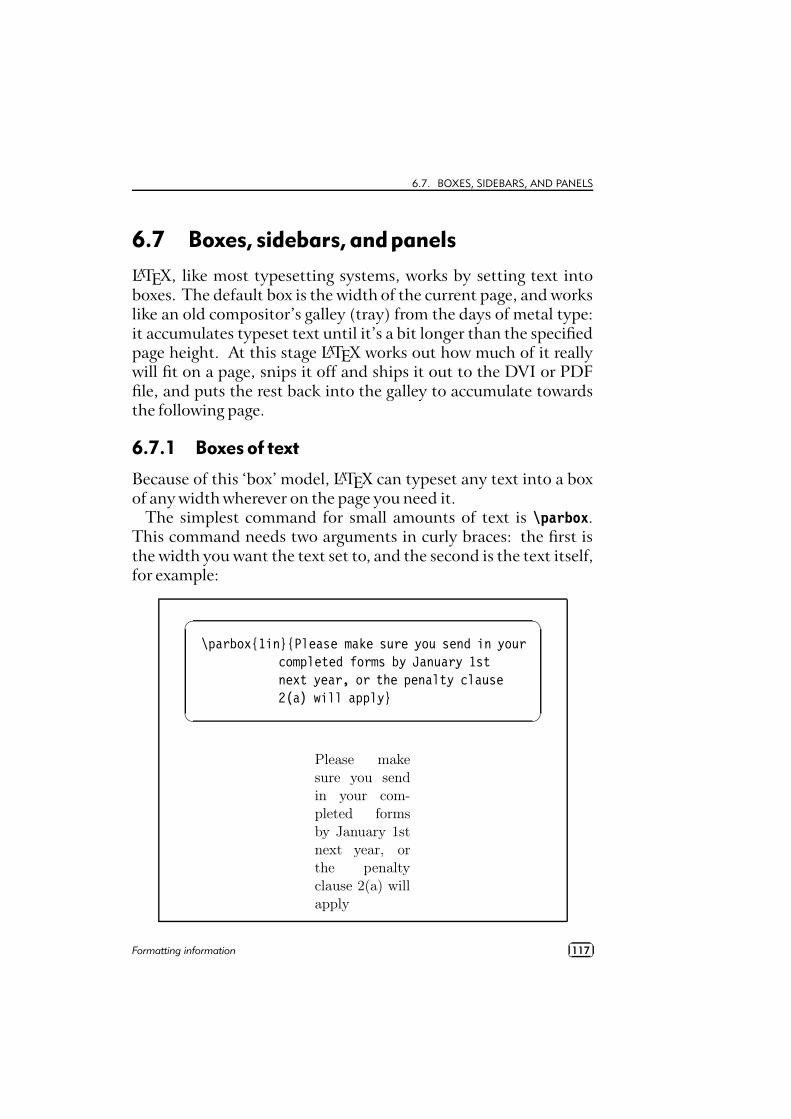
6.7. BOXES, SIDEBARS, AND PANELS
6.7 Boxes, sidebars,andpanels
LATEX, like most typesetting systems, works by setting text intoboxes. The default box is the width of the current page, and workslike an old compositor’s galley (tray) from the days of metal type:it accumulates typeset text until it’s a bit longer than the specifiedpage height. At this stage LATEX works out how much of it reallywill fit on a page, snips it off and ships it out to the DVI or PDFfile, and puts the rest back into the galley to accumulate towardsthe following page.
6.7.1 Boxes of text
Because of this ‘box’ model, LATEX can typeset any text into a boxof any width wherever on the page you need it.
The simplest command for small amounts of text is \parbox.This command needs two arguments in curly braces: the first isthe width you want the text set to, and the second is the text itself,for example:
�
�
\parbox{1in}{Please make sure you send in yourcompleted forms by January 1stnext year, or the penalty clause2(a) will apply}
Please makesure you sendin your com-pleted formsby January 1stnext year, orthe penaltyclause 2(a) willapply
Formatting information��
��117
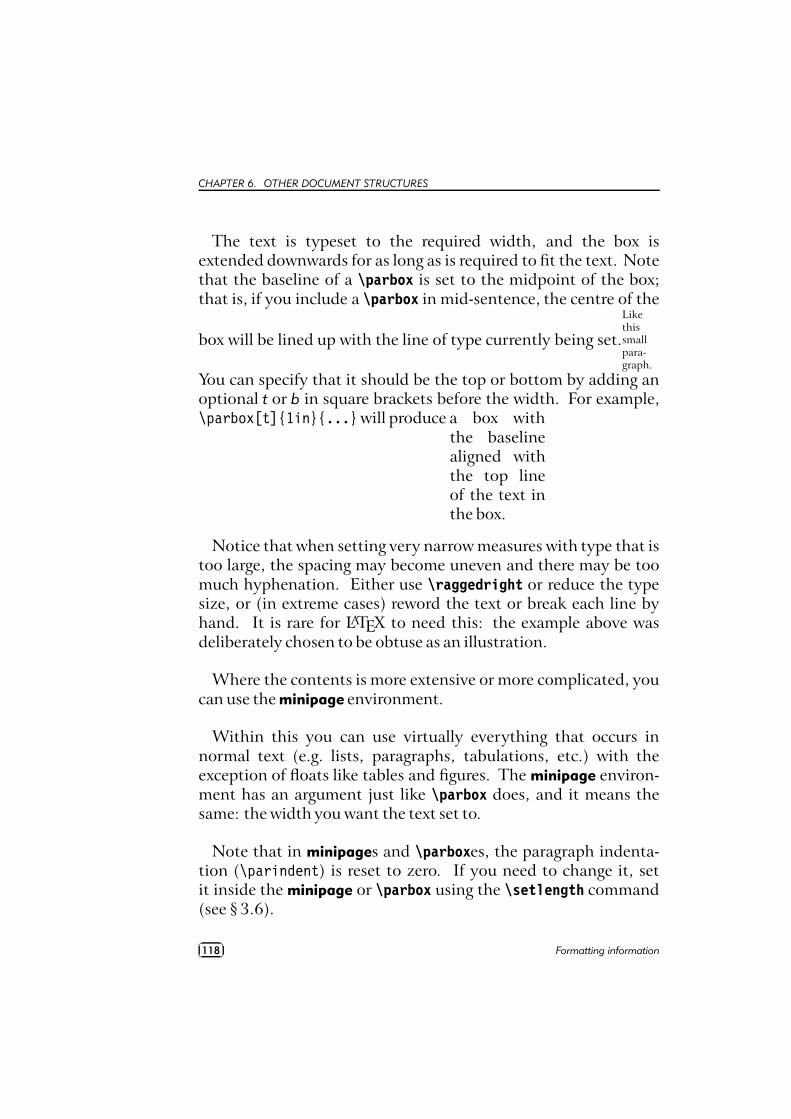
CHAPTER 6. OTHER DOCUMENT STRUCTURES
The text is typeset to the required width, and the box isextended downwards for as long as is required to fit the text. Notethat the baseline of a \parbox is set to the midpoint of the box;that is, if you include a \parbox in mid-sentence, the centre of the
box will be lined up with the line of type currently being set.
Likethissmallpara-graph.
You can specify that it should be the top or bottom by adding anoptional t or b in square brackets before the width. For example,\parbox[t]{1in}{...}will produce a box with
the baselinealigned withthe top lineof the text inthe box.
Notice that when setting very narrow measures with type that istoo large, the spacing may become uneven and there may be toomuch hyphenation. Either use \raggedright or reduce the typesize, or (in extreme cases) reword the text or break each line byhand. It is rare for LATEX to need this: the example above wasdeliberately chosen to be obtuse as an illustration.
Where the contents is more extensive or more complicated, youcan use the minipage environment.
Within this you can use virtually everything that occurs innormal text (e.g. lists, paragraphs, tabulations, etc.) with theexception of floats like tables and figures. The minipage environ-ment has an argument just like \parbox does, and it means thesame: the width you want the text set to.
Note that in minipages and \parboxes, the paragraph indenta-tion (\parindent) is reset to zero. If you need to change it, setit inside the minipage or \parbox using the \setlength command(see § 3.6).
��
��118 Formatting information
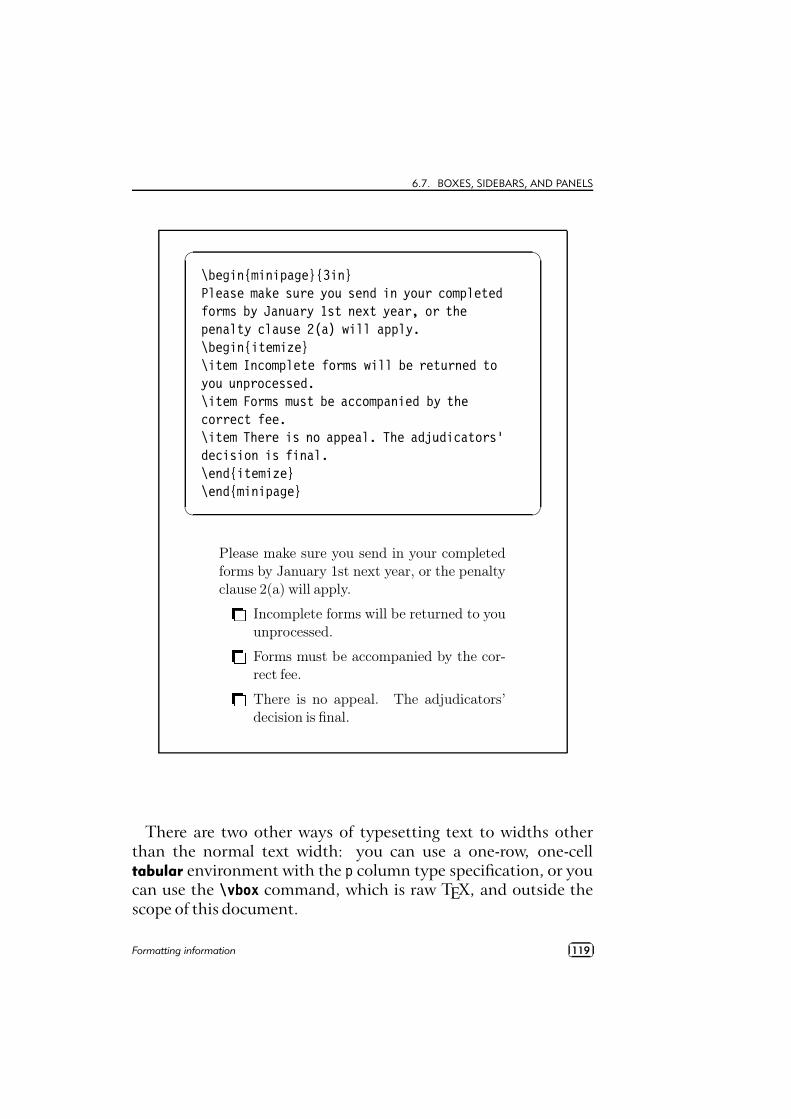
6.7. BOXES, SIDEBARS, AND PANELS
�
�
\begin{minipage}{3in}Please make sure you send in your completedforms by January 1st next year, or thepenalty clause 2(a) will apply.\begin{itemize}\item Incomplete forms will be returned toyou unprocessed.\item Forms must be accompanied by thecorrect fee.\item There is no appeal. The adjudicators’decision is final.\end{itemize}\end{minipage}
Please make sure you send in your completedforms by January 1st next year, or the penaltyclause 2(a) will apply.l
Incomplete forms will be returned to youunprocessed.lForms must be accompanied by the cor-rect fee.lThere is no appeal. The adjudicators’decision is final.
There are two other ways of typesetting text to widths otherthan the normal text width: you can use a one-row, one-celltabular environment with the p column type specification, or youcan use the \vbox command, which is raw TEX, and outside thescope of this document.
Formatting information��
��119
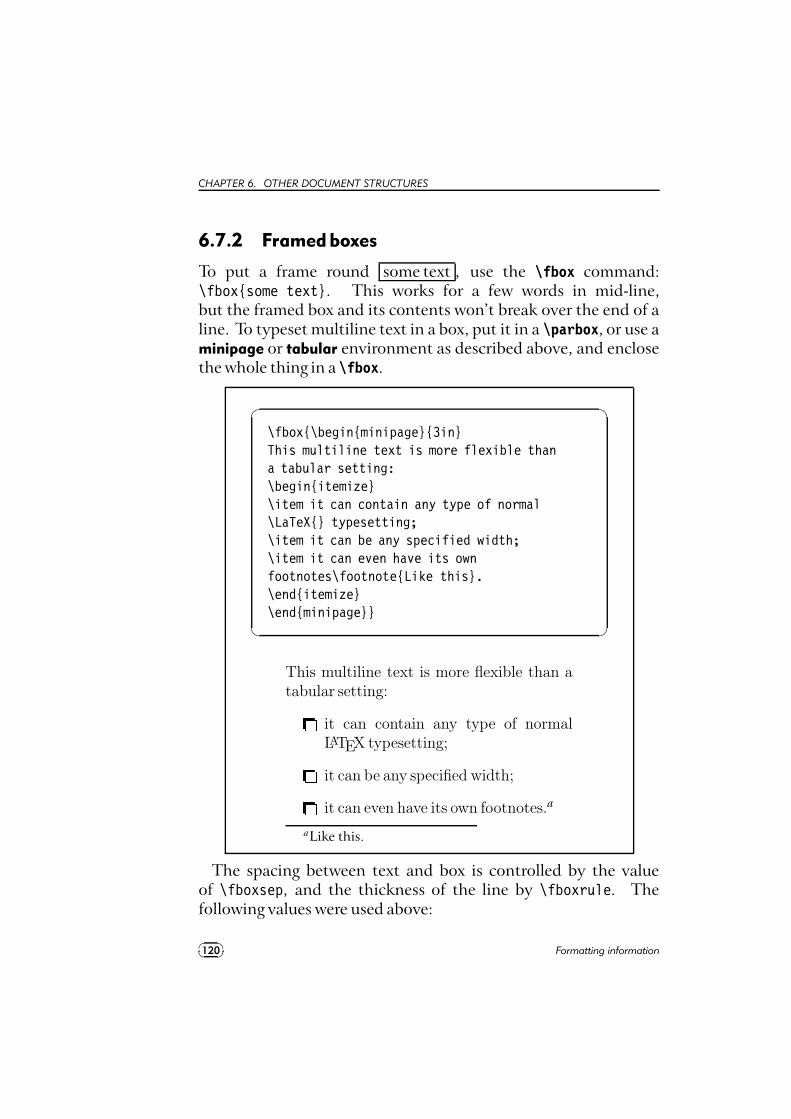
CHAPTER 6. OTHER DOCUMENT STRUCTURES
6.7.2 Framed boxes
To put a frame round some text , use the \fbox command:\fbox{some text}. This works for a few words in mid-line,but the framed box and its contents won’t break over the end of aline. To typeset multiline text in a box, put it in a \parbox, or use aminipage or tabular environment as described above, and enclosethe whole thing in a \fbox.
�
�
\fbox{\begin{minipage}{3in}This multiline text is more flexible thana tabular setting:\begin{itemize}\item it can contain any type of normal\LaTeX{} typesetting;\item it can be any specified width;\item it can even have its ownfootnotes\footnote{Like this}.\end{itemize}\end{minipage}}
This multiline text is more flexible than atabular setting:m
it can contain any type of normalLATEX typesetting;mit can be any specified width;mit can even have its own footnotes.a
aLike this.
The spacing between text and box is controlled by the valueof \fboxsep, and the thickness of the line by \fboxrule. Thefollowing values were used above:
��
��120 Formatting information
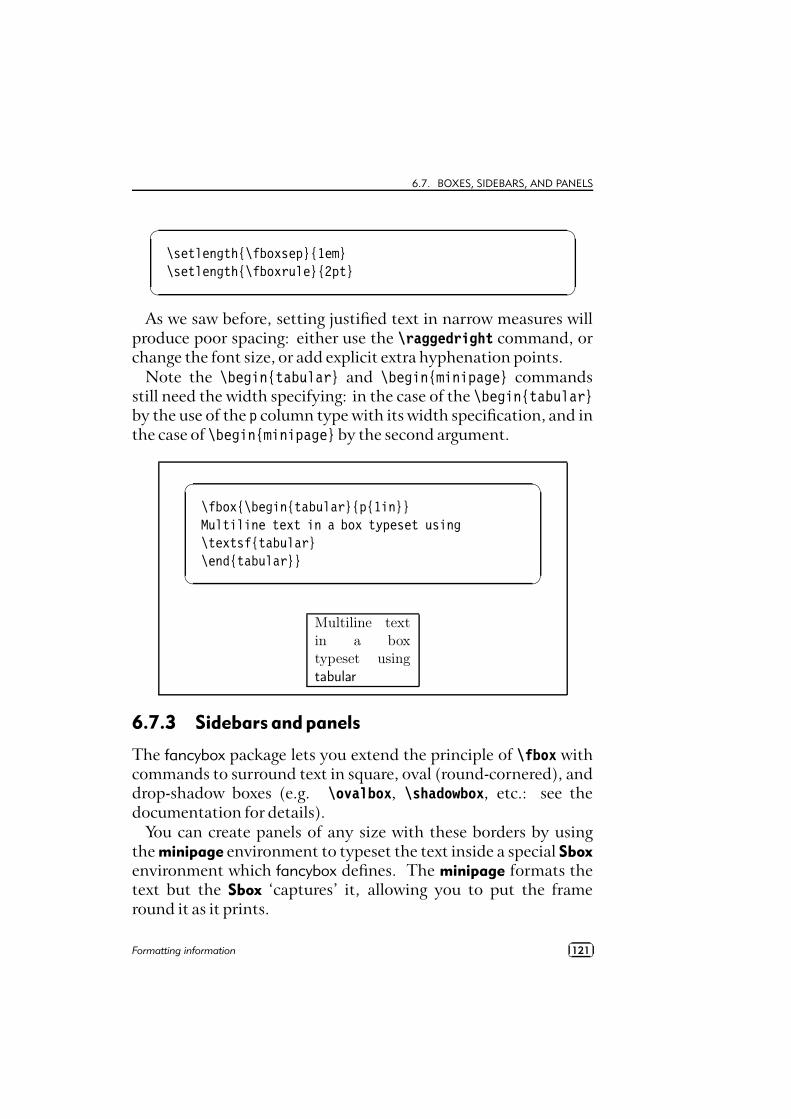
6.7. BOXES, SIDEBARS, AND PANELS
�
�
\setlength{\fboxsep}{1em}\setlength{\fboxrule}{2pt}
As we saw before, setting justified text in narrow measures willproduce poor spacing: either use the \raggedright command, orchange the font size, or add explicit extra hyphenation points.
Note the \begin{tabular} and \begin{minipage} commandsstill need the width specifying: in the case of the \begin{tabular}by the use of the p column type with its width specification, and inthe case of \begin{minipage}by the second argument.
�
�
\fbox{\begin{tabular}{p{1in}}Multiline text in a box typeset using\textsf{tabular}\end{tabular}}
Multiline textin a boxtypeset usingtabular
6.7.3 Sidebars and panels
The fancybox package lets you extend the principle of \fbox withcommands to surround text in square, oval (round-cornered), anddrop-shadow boxes (e.g. \ovalbox, \shadowbox, etc.: see thedocumentation for details).
You can create panels of any size with these borders by usingthe minipage environment to typeset the text inside a special Sboxenvironment which fancybox defines. The minipage formats thetext but the Sbox ‘captures’ it, allowing you to put the frameround it as it prints.
Formatting information��
��121

CHAPTER 6. OTHER DOCUMENT STRUCTURES
The printed version of this document uses this extensively andthere is a useful example shown in § 9.5.
��
��122 Formatting information
7Textual tools
Every text-handling system needs to support a repertoire of toolsfor doing things with text. LATEX implements many dozens, ofwhich a small selection of the most frequently used is given here:n
offset quotations (sometimes called ‘block quotes’);nfootnotes and end-notes;nmarginal notes;ncross-references, both normal ones and bibliographic cita-tions;nindexes and glossaries;ntypesetting in multiple columns.
7.1 Quotations
Direct speech and short quotes within a sentence ‘like this’are done with simple quotation marks as described in § 2.6.
Formatting information��
��123
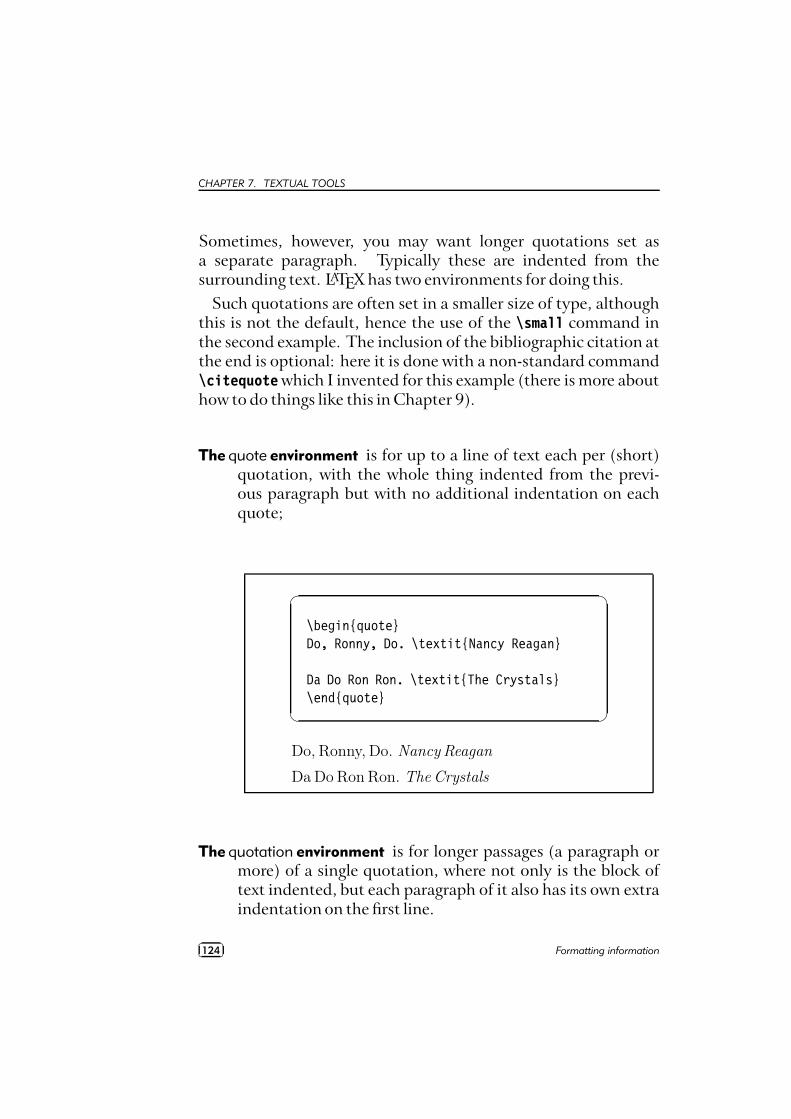
CHAPTER 7. TEXTUAL TOOLS
Sometimes, however, you may want longer quotations set asa separate paragraph. Typically these are indented from thesurrounding text. LATEX has two environments for doing this.
Such quotations are often set in a smaller size of type, althoughthis is not the default, hence the use of the \small command inthe second example. The inclusion of the bibliographic citation atthe end is optional: here it is done with a non-standard command\citequotewhich I invented for this example (there is more abouthow to do things like this in Chapter 9).
The quote environment is for up to a line of text each per (short)quotation, with the whole thing indented from the previ-ous paragraph but with no additional indentation on eachquote;
�
�
\begin{quote}Do, Ronny, Do. \textit{Nancy Reagan}
Da Do Ron Ron. \textit{The Crystals}\end{quote}
Do, Ronny, Do. Nancy Reagan
Da Do Ron Ron. The Crystals
The quotation environment is for longer passages (a paragraph ormore) of a single quotation, where not only is the block oftext indented, but each paragraph of it also has its own extraindentation on the first line.
��
��124 Formatting information
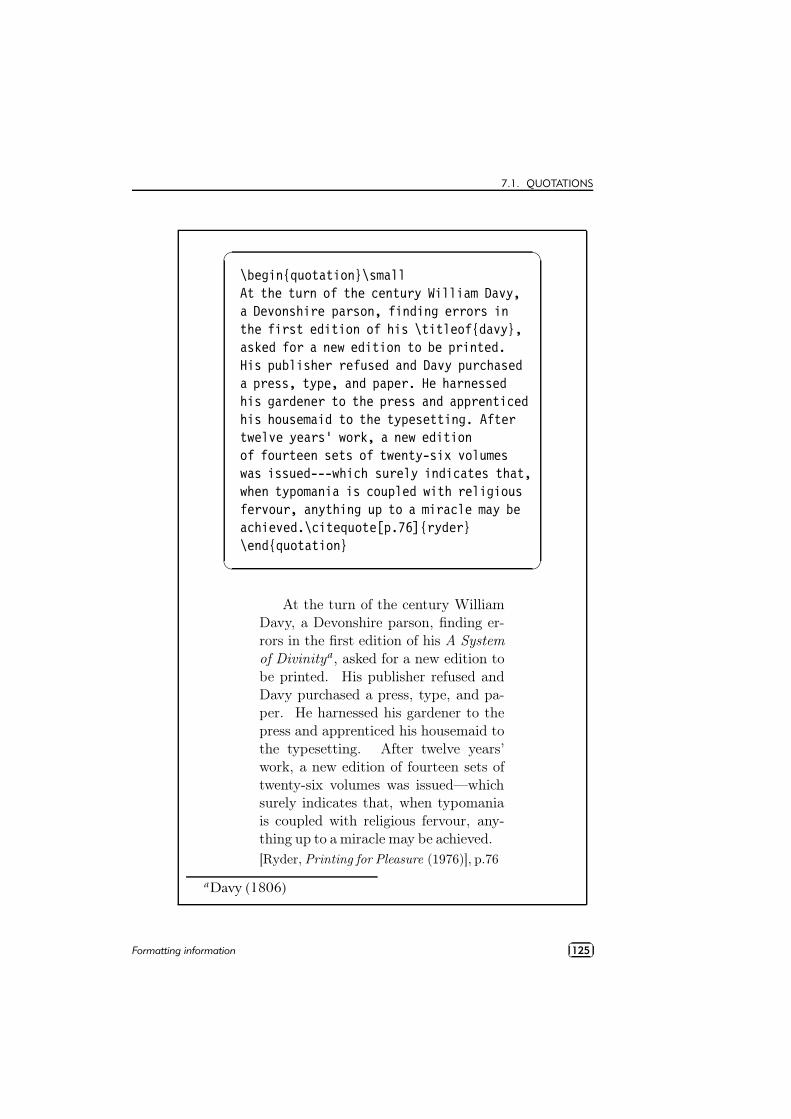
7.1. QUOTATIONS
�
�
\begin{quotation}\smallAt the turn of the century William Davy,a Devonshire parson, finding errors inthe first edition of his \titleof{davy},asked for a new edition to be printed.His publisher refused and Davy purchaseda press, type, and paper. He harnessedhis gardener to the press and apprenticedhis housemaid to the typesetting. Aftertwelve years’ work, a new editionof fourteen sets of twenty-six volumeswas issued---which surely indicates that,when typomania is coupled with religiousfervour, anything up to a miracle may beachieved.\citequote[p.76]{ryder}\end{quotation}
At the turn of the century WilliamDavy, a Devonshire parson, finding er-rors in the first edition of his A System
of Divinitya, asked for a new edition tobe printed. His publisher refused andDavy purchased a press, type, and pa-per. He harnessed his gardener to thepress and apprenticed his housemaid tothe typesetting. After twelve years’work, a new edition of fourteen sets oftwenty-six volumes was issued—whichsurely indicates that, when typomaniais coupled with religious fervour, any-thing up to a miracle may be achieved.
[Ryder, Printing for Pleasure (1976)], p.76
aDavy (1806)
Formatting information��
��125

CHAPTER 7. TEXTUAL TOOLS
7.2 Footnotesandend-notes
The command \footnote, followed by the text of the footnotein curly braces, will produce an auto-numbered footnote witha raised small number where you put the command, and thenumbered text automatically printed at the foot of the page.1 Thenumber is reset to 1 at the start of each chapter (but you canoverride that and make them run continuously throughout thedocument, or even restart at 1 on each page or section).
LATEX automatically creates room for the footnote, and auto-matically reformats it if you change your document in such a waythat the point of attachment and the footnote would move to thenext (or preceding) page.
Because of the way LATEX reads the whole footnote before doinganything with it, you can’t use \verb (§ 6.6.1) alone in footnotes:either precede it with \protect or use [abuse?] the \url commandinstead, which you should be using for Web and email addressesin any case).
Footnotes inside minipages (see § 6.7) produce lettered notesinstead of numbered ones, and they get printed at the bottom ofthe minipage, not the bottom of the physical page (but this too canbe changed).
There is a package to hold over your footnotes and make themprint at the end of the chapter instead (endnote) or at the end ofthe whole document, and there is a package to print many shortfootnotes in a single footnoted paragraph so they take up lessspace (fnpara). It is also possible to have several separate series offootnotes active simultaneously, which is useful in critical editionsor commentaries: a numbered series may be used to refer to anoriginal author’s notes; a lettered series can be used for notes bya commentator or authority; and a third series is available foryour own notes. It is also possible to format footnotes withinfootnotes.
1Like this.
��
��126 Formatting information
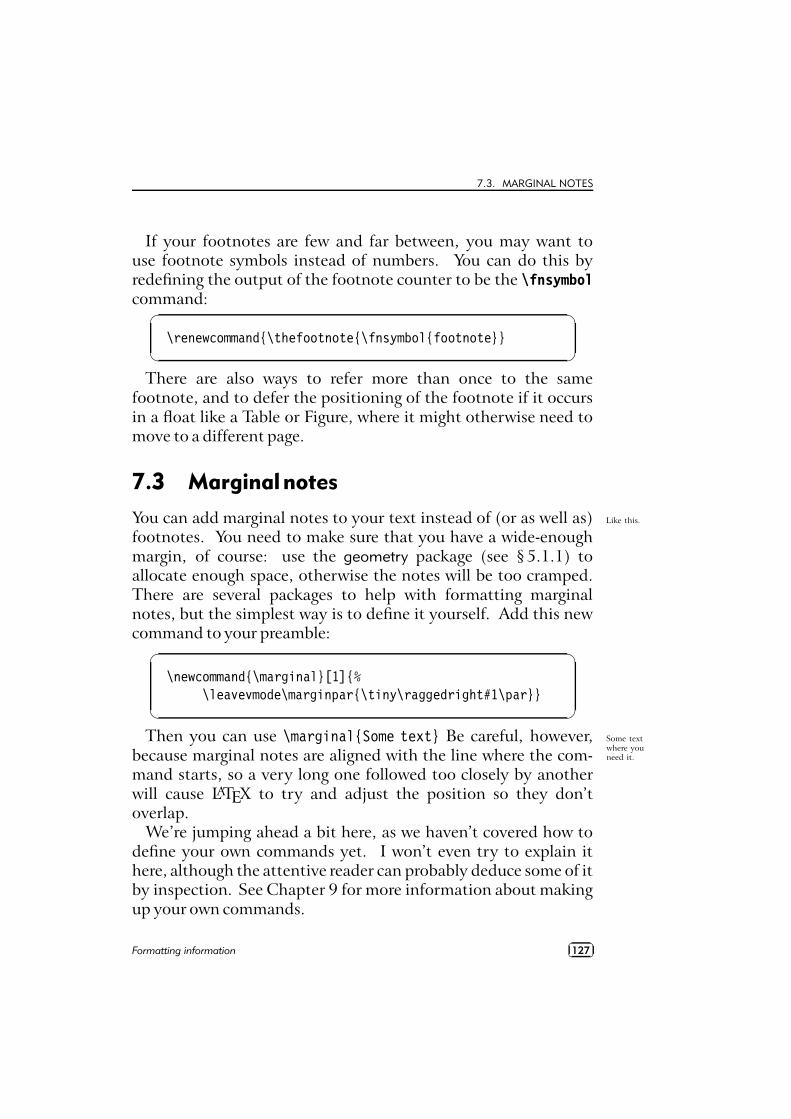
7.3. MARGINAL NOTES
If your footnotes are few and far between, you may want touse footnote symbols instead of numbers. You can do this byredefining the output of the footnote counter to be the \fnsymbolcommand:
�
�
\renewcommand{\thefootnote{\fnsymbol{footnote}}
There are also ways to refer more than once to the samefootnote, and to defer the positioning of the footnote if it occursin a float like a Table or Figure, where it might otherwise need tomove to a different page.
7.3 Marginalnotes
You can add marginal notes to your text instead of (or as well as) Like this.
footnotes. You need to make sure that you have a wide-enoughmargin, of course: use the geometry package (see § 5.1.1) toallocate enough space, otherwise the notes will be too cramped.There are several packages to help with formatting marginalnotes, but the simplest way is to define it yourself. Add this newcommand to your preamble:
�
�
\newcommand{\marginal}[1]{%\leavevmode\marginpar{\tiny\raggedright#1\par}}
Then you can use \marginal{Some text} Be careful, however, Some textwhere youneed it.because marginal notes are aligned with the line where the com-
mand starts, so a very long one followed too closely by anotherwill cause LATEX to try and adjust the position so they don’toverlap.
We’re jumping ahead a bit here, as we haven’t covered how todefine your own commands yet. I won’t even try to explain ithere, although the attentive reader can probably deduce some of itby inspection. See Chapter 9 for more information about makingup your own commands.
Formatting information��
��127
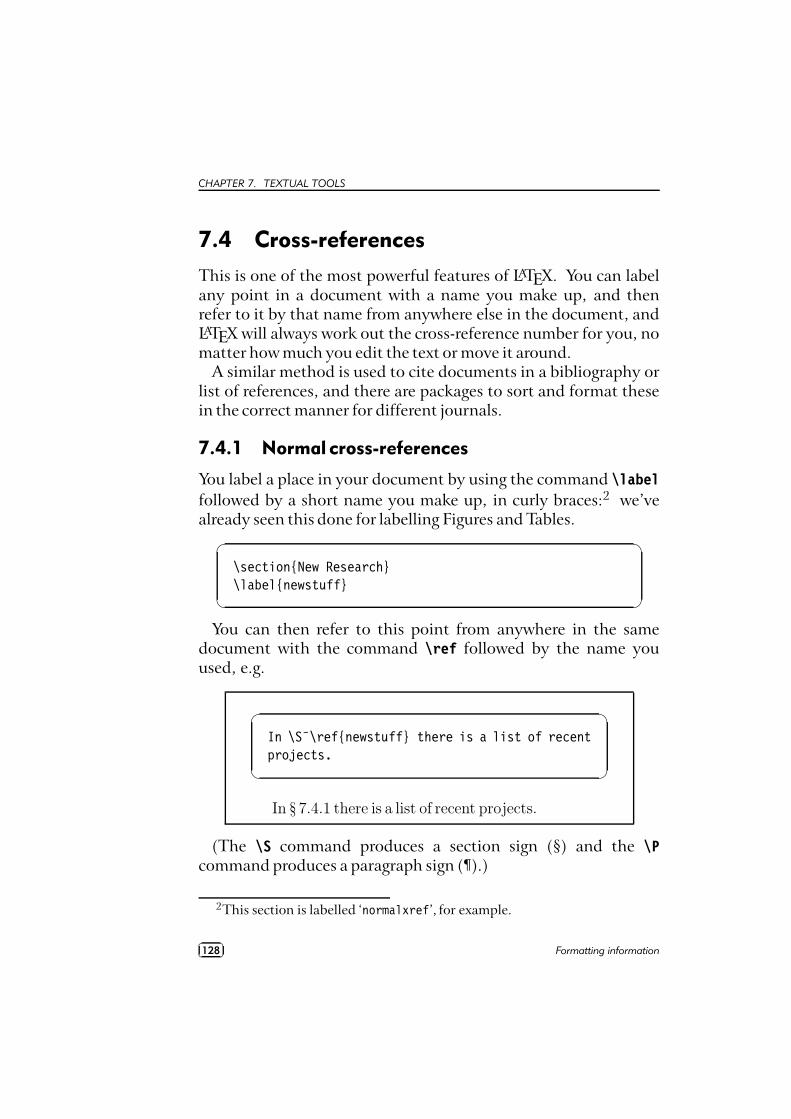
CHAPTER 7. TEXTUAL TOOLS
7.4 Cross-references
This is one of the most powerful features of LATEX. You can labelany point in a document with a name you make up, and thenrefer to it by that name from anywhere else in the document, andLATEX will always work out the cross-reference number for you, nomatter how much you edit the text or move it around.
A similar method is used to cite documents in a bibliography orlist of references, and there are packages to sort and format thesein the correct manner for different journals.
7.4.1 Normal cross-references
You label a place in your document by using the command \labelfollowed by a short name you make up, in curly braces:2 we’vealready seen this done for labelling Figures and Tables.
�
�
\section{New Research}\label{newstuff}
You can then refer to this point from anywhere in the samedocument with the command \ref followed by the name youused, e.g.
�
�
In \S˜\ref{newstuff} there is a list of recentprojects.
In § 7.4.1 there is a list of recent projects.
(The \S command produces a section sign (§) and the \Pcommand produces a paragraph sign (¶).)
2This section is labelled ‘normalxref’, for example.
��
��128 Formatting information
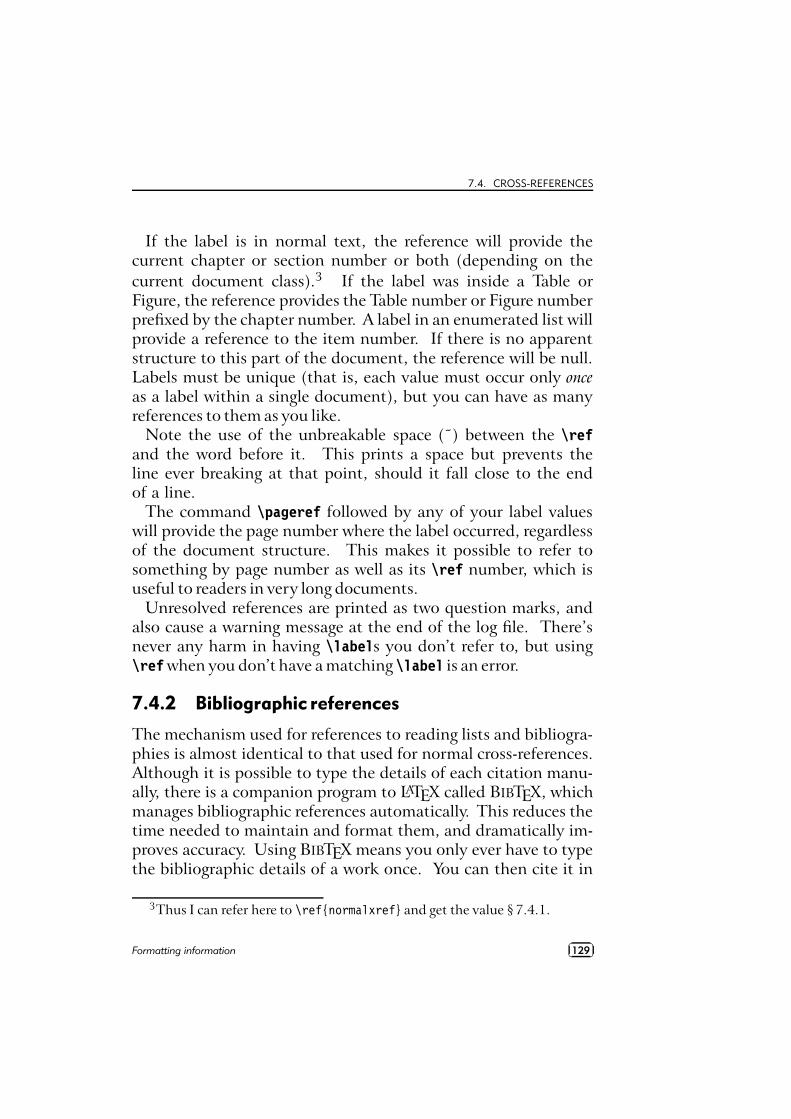
7.4. CROSS-REFERENCES
If the label is in normal text, the reference will provide thecurrent chapter or section number or both (depending on thecurrent document class).3 If the label was inside a Table orFigure, the reference provides the Table number or Figure numberprefixed by the chapter number. A label in an enumerated list willprovide a reference to the item number. If there is no apparentstructure to this part of the document, the reference will be null.Labels must be unique (that is, each value must occur only onceas a label within a single document), but you can have as manyreferences to them as you like.
Note the use of the unbreakable space (˜) between the \refand the word before it. This prints a space but prevents theline ever breaking at that point, should it fall close to the endof a line.
The command \pageref followed by any of your label valueswill provide the page number where the label occurred, regardlessof the document structure. This makes it possible to refer tosomething by page number as well as its \ref number, which isuseful to readers in very long documents.
Unresolved references are printed as two question marks, andalso cause a warning message at the end of the log file. There’snever any harm in having \labels you don’t refer to, but using\refwhen you don’t have a matching \label is an error.
7.4.2 Bibliographic references
The mechanism used for references to reading lists and bibliogra-phies is almost identical to that used for normal cross-references.Although it is possible to type the details of each citation manu-ally, there is a companion program to LATEX called BIBTEX, whichmanages bibliographic references automatically. This reduces thetime needed to maintain and format them, and dramatically im-proves accuracy. Using BIBTEX means you only ever have to typethe bibliographic details of a work once. You can then cite it in
3Thus I can refer here to \ref{normalxref} and get the value § 7.4.1.
Formatting information��
��129
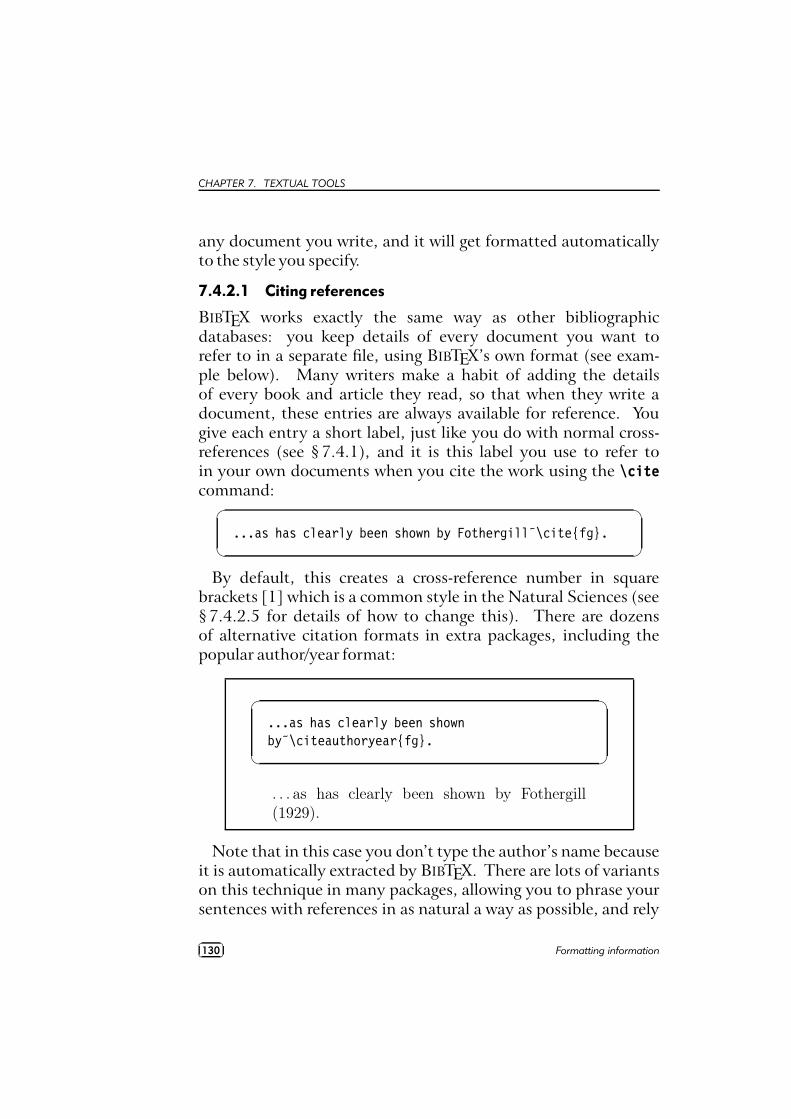
CHAPTER 7. TEXTUAL TOOLS
any document you write, and it will get formatted automaticallyto the style you specify.
7.4.2.1 Citing references
BIBTEX works exactly the same way as other bibliographicdatabases: you keep details of every document you want torefer to in a separate file, using BIBTEX’s own format (see exam-ple below). Many writers make a habit of adding the detailsof every book and article they read, so that when they write adocument, these entries are always available for reference. Yougive each entry a short label, just like you do with normal cross-references (see § 7.4.1), and it is this label you use to refer toin your own documents when you cite the work using the \citecommand:
�
�
...as has clearly been shown by Fothergill˜\cite{fg}.
By default, this creates a cross-reference number in squarebrackets [1] which is a common style in the Natural Sciences (see§ 7.4.2.5 for details of how to change this). There are dozensof alternative citation formats in extra packages, including thepopular author/year format:
�
�
...as has clearly been shownby˜\citeauthoryear{fg}.
. . . as has clearly been shown by Fothergill(1929).
Note that in this case you don’t type the author’s name becauseit is automatically extracted by BIBTEX. There are lots of variantson this technique in many packages, allowing you to phrase yoursentences with references in as natural a way as possible, and rely
��
��130 Formatting information
7.4. CROSS-REFERENCES
on BIBTEX to insert the right data. (If you examine the source ofthis document you’ll find I use some homebrew commands like\authorof and \titleofwhich I use for a similar purpose.)
To print the bibliographic listing (usually called ‘References’ inarticles and ‘Bibliography’ in books and reports), add these twolines towards the end of your document, or wherever you want itprinted, substituting the name of your own BIBTEX file and thename of your chosen bibliography style:
�
�
\bibliographystyle{ieeetr}\bibliography{mybib}
oThe \bibliography command is followed by the filename ofyour BIBTEX file without the .bib extension.oThe \bibliographystyle command is followed by the nameof any of LATEX’s supported bibliography styles, of whichthere are many dozens available from CTAN.4
The styles plain and alpha are two common generic styles usedfor drafts. The example above uses Transactions of the Institute ofElectrical and Electronics Engineers (IEEETR).
7.4.2.2 Running bibtex
When you run the bibtex program, the details of every documentyou have cited will be extracted from your database, formattedaccording to the style you specify, and stored in a temporarybibliographic (.bbl) file with a label corresponding to the oneyou used in your citation, ready for LATEX to use. This isentirely automatic: all you do is cite your references in your LATEXdocument using the labels you gave the entries in your BIBTEX file,and run the bibtex program.
After processing your file with LATEX, run BIBTEX on it byclicking on the BIBTEX toolbar icon (if your editor has one),
4The style shown in the example here provides formatting according to thespecifications for Transactions of the IEEE (revised).
Formatting information��
��131
CHAPTER 7. TEXTUAL TOOLS
or use the TeXBibTeX File p menu entry, or type the command
bibtex followed by the name of your document (without the .texextension). When you run LATEX again it will use the .bbl filewhich BIBTEX created, and subsequent runs of LATEX will formatthe correct citation numbers (or author/year, or whatever formatyou are using).
�
�
$ latex mybook$ bibtex mybook$ latex mybook$ latex mybook
Because of this three-stage process, you always get a warningmessage about an ‘unresolved reference’ the first time you add anew reference to a previously uncited work. This will disappearafter subsequent runs of bibtex and LATEX.
In practice, authors tend to run LATEX from time to time duringwriting anyway, so they can preview the document. Just runBIBTEX after adding a new \cite command, and subsequent runsof LATEX will incrementally incorporate all references without youhaving to worry about it. You only need to follow the fullformal sequence (LATEX, BIBTEX, LATEX, LATEX) when you havefinished writing and want to ensure that all references have beenresolved.
7.4.2.3 BIBTEX format
The format for the BIBTEX file is specified in the BIBTEX docu-mentation (see § 5.1.2 for how to find and print it). You createa file with a name ending in .bib, and add your entries, forexample:
��
��132 Formatting information
7.4. CROSS-REFERENCES
�
�
@book{fg,title = {{An Innkeeper’s Diary}},author = {John Fothergill},edition = {3rd},publisher = {Penguin},year = 1929,address = {London}
}
There is a prescribed set of fields for each of a dozen or so typesof document: book, article (in a journal), article (in a collection),chapter (in a book), thesis, report, paper (in a Proceedings),etc. Each entry identifies the document type after the ‘@’ sign,followed by the entry label that you make up, and then each field(in any order), using the format:
�
�
keyword = {value},
Most TEX-sensitive editors have a BIBTEX mode which under-stands these entries. Emacs automatically uses its bibtex-modewhenever you open a filename ending in .bib. When editingBIBTEX databases, the rules are simple:q
Omit the comma after the last field in the entry (only — egafter {London} in the example).qTitles may have their case changed in some styles: toprevent this, enclose the title in double curly braces as in theexample.qValues which are purely numeric (e.g. years) may omit thecurly braces.qFields can occur in any order but the format must otherwisebe strictly observed.
Formatting information��
��133
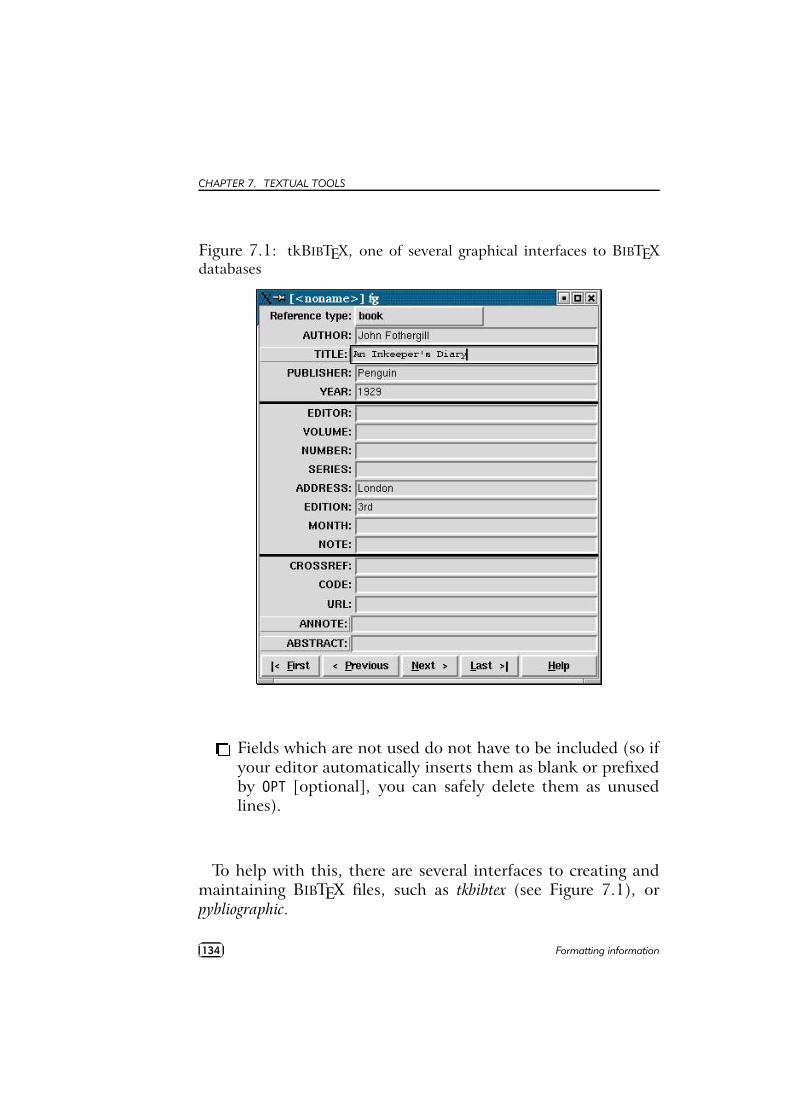
CHAPTER 7. TEXTUAL TOOLS
Figure 7.1: tkBIBTEX, one of several graphical interfaces to BIBTEXdatabases
rFields which are not used do not have to be included (so ifyour editor automatically inserts them as blank or prefixedby OPT [optional], you can safely delete them as unusedlines).
To help with this, there are several interfaces to creating andmaintaining BIBTEX files, such as tkbibtex (see Figure 7.1), orpybliographic.
��
��134 Formatting information
7.4. CROSS-REFERENCES
7.4.2.4 Changing the layout
To change the title printed over the reference listing, just changethe value of \refname (articles) or \bibname (books and reports) byadding a line like this in your preamble:
�
�
\renewcommand{\bibname}{Reading List}
The formatting specifications (BIBTEX styles) are based on stan-dard settings for journals and books from dozens of publishers:you just pick the one you want by name. The texmf/bib/bstsubdirectory of your installation contains the ones installed bydefault, and you can search on CTAN for others (look for .bstfiles). Many of them are named after university press styles (e.g.harvard, oxford) or the publisher or journal which specified them(e.g. elsevier, kluwer, etc.).
Some of them have an accompanying package (.sty) file whichyou need to include with the normal \usepackage command inyour preamble. In this case the format may be distributed as.dtx and .ins files and will need installing in the same way asany other package (see § 5.2). Always read the documentation,because most of the formats are very specific to the journal theywere designed for, and may have fairly absolute requirements.
If you are writing for a specific publisher, you should rememberthat the rules or formats are laid down by the typographicdesigner of that journal or publisher: you cannot arbitrarilychange the format just because you don’t happen to like it: it’snot your choice!
It is also possible to write your own BIBTEX (.bst) style files,although it uses a language of its own which really needs acomputer science background to understand. However, this isrendered unnecessary in most cases: there is an extensive program(actually written in LATEX) called makebst, which makes .bst filesby asking you a (long) series of questions about exactly how
Formatting information��
��135
CHAPTER 7. TEXTUAL TOOLS
you want your citations formatted. Just type latex makebstin a command window, but give it a dummy run first, becausesome of the questions are very detailed, so you need to havethought through how you want your citations to appear beforeyou start.
7.4.2.5 Other modes of citation
The method of citing a work by numeric reference is common inthe Natural Sciences but is not used in Law or the Humanities.In these fields, citations are usually done with short references(author/short-title/year) in a numbered footnote. Sometimesthey are actually called ‘footnotes’ to the exclusion of ordinaryfootnotes, although they are really citations which happen byconvention to be displayed as footnotes: an important distinctionrarely appreciated by authors until they come to need a normalfootnote.
For these fields, the bibliography at the back of the documentis printed unnumbered in alphabetic order of author, or perhapschronologically if the time-frame is very large. This unnumberedformat is why it is conventionally called ‘References’ rather than‘Bibliography’: a sufficient working citation has already beenprovided in the footnote, and the list at the back is for referencepurposes only; whereas in the Natural Sciences, the citation is justa number, or possibly an author and year only, so the full listing iscalled a Bibliography.
The jurabib package (originally intended for German law arti-cles but now extended to other fields in the Humanities, andto other languages) has extensive features for doing this style ofcitation and is strongly recommended.
7.5 Indexesandglossaries
LATEX has a powerful, automated indexing facility which uses thestandard makeindex program. To use indexing, use the package
��
��136 Formatting information
7.5. INDEXES AND GLOSSARIES
makeidx and include the \makeindex command in your pream-ble:
�
�
\usepackage{makeidx}\makeindex
When you want to index something, using the command \indexfollowed by the entry in curly braces, as you want it to appear inthe index, using one of the following formats:
Plain entry Typing \index{beer} will create an entry for ‘beer’with the current page number.
Subindex entry For an entry with a subentry use an exclamationmark to separate them: \index{beer!lite}. Subsuben-tries like \index{beer!lite!American}work to another leveldeep.
Cross-references ‘See’ entries are done with the vertical bar (oneof the rare times it does not get interpreted as a mathcharacter): \index{Microbrew|see{beer}}
Font changes To change the style of an entry, use the @-signfollowed by a font change command:
�
�
\index{beer!Rogue!ChocolateStout@\textit{Chocolate Stout}}
This example indexes ‘Chocolate Stout’ and italicises it atthe same time. Any of the standard \text... font-changecommands work here: see the table on p. 156 for details.You can also change the font of the index number on itsown, as for first-usage references, by using the vertical barin a similar way to the ‘see’ entries above, but substitutinga font-change command name (without a backslash) such astextbf for bold-face text (see the index):
Formatting information��
��137
CHAPTER 7. TEXTUAL TOOLS
�
�
\index{beer!Rogue!Chocolate Stout|textbf}
Out of sequence The same method can be used as for font chan-ges, but using the alternate index word instead of the fontcommand name, so \index{Oregon Brewing Company@Rogue}will add an entry for ‘Rogue’ in the ‘O’ section of the index,as if it was spelled ‘Oregon Brewing Company’.
When the document has been processed through LATEX it willhave created a .idx file, which you run through the makeindexprogram by typing (for example):
�
�
makeindex mythesis
Some editors may have a button or menu entry for this. Theprogram will look for the .idx file and output a .ind file. This getsused by the command \printindex which you put at the end ofyour document, where you want the index printed. The defaultindex format is two columns.
Glossaries are done in a similar manner using the command\makeglossary in the preamble and the command \glossary inthe same way as \index. There are some subtle differences in theway glossaries are handled: both the books by Lamport (1994)and by Mittelbach et al. (2004) duck the issue, but there is somedocumentation on glotex on CTAN.
7.6 Multiplecolumns
Use the multicol package: the environment is called multicols(note the plural form) and it takes the number of columns as aseparate argument in curly braces:
��
��138 Formatting information
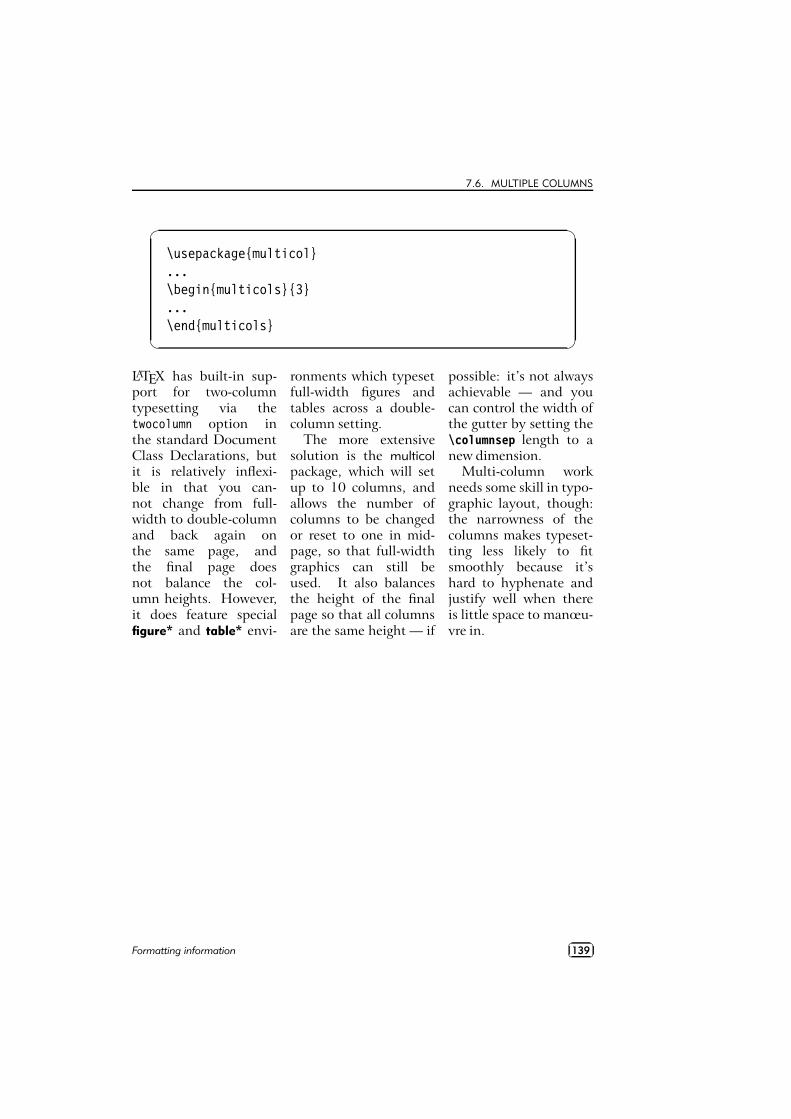
7.6. MULTIPLE COLUMNS
�
�
\usepackage{multicol}...\begin{multicols}{3}...\end{multicols}
LATEX has built-in sup-port for two-columntypesetting via thetwocolumn option inthe standard DocumentClass Declarations, butit is relatively inflexi-ble in that you can-not change from full-width to double-columnand back again onthe same page, andthe final page doesnot balance the col-umn heights. However,it does feature specialfigure* and table* envi-
ronments which typesetfull-width figures andtables across a double-column setting.
The more extensivesolution is the multicolpackage, which will setup to 10 columns, andallows the number ofcolumns to be changedor reset to one in mid-page, so that full-widthgraphics can still beused. It also balancesthe height of the finalpage so that all columnsare the same height — if
possible: it’s not alwaysachievable — and youcan control the width ofthe gutter by setting the\columnsep length to anew dimension.
Multi-column workneeds some skill in typo-graphic layout, though:the narrowness of thecolumns makes typeset-ting less likely to fitsmoothly because it’shard to hyphenate andjustify well when thereis little space to manœu-vre in.
Formatting information��
��139

8Fonts and layouts
This is the chapter that most users want first, because they cometo structured documents from a wordprocessing environmentwhere the only way to convey different types of information is tofiddle with the font and size drop-down menus.
As I hope you have seen, this is normally completely unnec-essary in LATEX, which does most of the hard work for youautomatically. However, there are occasions when you need tomake manual typographic changes, and this chapter is about howto do them.
8.1 Changing layout
The design of the page can be a very subjective matter, and alsorather a subtle one. Many organisations large and small payconsiderable sums to designers to come up with page layoutsto suit their purposes. Styles in page layouts change with theyears, as do fashions in everything else, so what may have lookedattractive in 1991 may look rather dated in 2011.
Formatting information��
��141
CHAPTER 8. FONTS AND LAYOUTS
As with most aspects of typography, making the document read-able involves making it consistent, so the reader is not interruptedor distracted too much by apparently random changes in margins,widths, or placement of objects. However, there are a number ofdifferent occasions where the layout usually does change, relatedto the frequency with which the format appears.s
The title page, the half-title, copyright page, dedication, andother one-page preliminaries (if you use them) are usuallydesigned individually, as the information on it only occursonce in that format anywhere in the document.sThe table of contents and other related lists like figures andtables all need to share one design.sThe prelims like Foreword, Introduction, and Preface shouldlikewise follow the same format between them.sChapter and Appendix start pages usually share a layout.sOther (normal) pages have a single layout, but it mayspecify individual variations to handle tables, lists, figures,sidebars, exercises, footnotes, etc.
If you are going to design a whole document, it’s probably agood idea to read a couple of books on layout design first, to geta feel for the conventions which contribute to making the readercomfortable reading.
While unusual or radical layouts have an important role inattention-grabbing, or in making a socio-political statement(WIRED1 magazine is an obvious recent example), they areusually out of place in business reports, white papers, books,theses, and journals. In ephemera, on the other hand, as inadvertising, they are probably critical.
1Anderson (1993–)
��
��142 Formatting information
8.1. CHANGING LAYOUT
8.1.1 Spacing
We mentioned in § 7.3 and elsewhere the existence of thegeometry package which lets you change margins. It also letsyou set the text-area height and width and a lot of other layoutsettings: read the documentation for details (see § 5.1.2 for howto read package documentation).
�
�
\usepackage[left=2cm,top=1cm,bottom=2cm,right=3cm,nohead,nofoot]{geometry}
The spacing around the individual textual components (head-ings, paragraphs, lists, footnotes, etc.) can also be changed ona document-wide basis, as we saw with paragraph spacing andindentation in § 3.6.
Changing the spacing of section headings for the whole docu-ment can be done with the sectsty package, designed to let youadjust section-head spacing without having to know about the in-ternal LATEX coding, which is quite complex.
The spacing for lists can be adjusted with the mdwlist package.In both cases the user with highly specific requirements such asa publisher’s Compositor’s Specification should read the relevantsections in the The LATEX Companion2 or ask for expert help, asthere are many internal settings which can also be changed tofine-tune your design, but which need some knowledge of LATEX’sinternals.
All the above are for automating changes so that they occurevery time in a consistent manner. You can also make manualchanges whenever you need:
Flexible vertical space There are three commands \smallskip,\medskip, and \bigskip. These output flexible (dynamic,or ‘rubber’) space, approximately 3pt, 6pt, and 12pt highrespectively, and they will automatically compress or expand
2Mittelbach et al. (2004)
Formatting information��
��143

CHAPTER 8. FONTS AND LAYOUTS
a little, depending on the demands of the rest of the page(for example to allow one extra line to fit, or a heading tobe moved to the next page without anyone except a typog-rapher noticing the change). These commands can only beused after a paragraph break (a blank line or the command\par).
Fixed vertical space For a fixed-height space which will not stretchor shrink, use the command \vspace followed by a length incurly braces, e.g. \vspace{18pt} (again, this has to be after aparagraph break). Bear in mind that extra space which endsup at a page-break when the document is formatted will getdiscarded entirely to make the bottom and top lines fall in thecorrect places. To force a vertical space to remain and betaken into account even after a page break (very rare), usethe starred variant \vspace*, e.g. \vspace*{19pt}.
Double spacing Double-spacing normal lines of text is usually abad idea, as it looks very ugly. It is still unfortunately arequirement in some universities for thesis submission, ahistorical relic from the days of typewriters. Nowadays, 11/3or 1½ line spacing is considered acceptable, according toyour font size. If your institution still thinks they shouldhave double line spacing, they are probably wrong, and justdon’t understand that the world has moved on since thetypewriter. Show them this paragraph and explain that theyneed to enter the 21st century and adapt to the features ofcomputer typesetting. If they still insist, use the setspacepackage,which has commands for double line-spacing andone-and-a-half line spacing, but be prepared for some veryugly output (so warn your supervisor and extern).
The space between lines is defined by the value of thelength variable \baselineskip multiplied by the value ofthe \baselinestretch command. In general, don’t med-dle with \baselineskip at all, and with \baselinestretchonly if you know what you are doing. (Both can, how-
��
��144 Formatting information
8.1. CHANGING LAYOUT
ever, safely be used as reference values in commands like\vspace{\baselineskip} to leave a whole line space.) Thevalue of \baselineskip changes with the font size (see§ 8.2.4) but is conventionally set to 1.2 times the currentnominal font size. This is a value derived from long experi-ence: only change it if you understand what it means andwhat effect it will have.
Quite separately, there are some perfectly genuine and nor-mal reasons for wanting wide line spacing, for example whentypesetting a proof of a critical or variorum edition, whereeditors and contributors are going to want to add notesmanually by writing between the lines, or where the text isgoing to be overprinted by something else like Braille, or inadvertising or display text for special effects.
Horizontal space There is a horizontal equivalent to the \vspacecommand: \hspace, which works in the same way, so Ican force a 1′′ space like this in mid-paragraph.There are also some predefined (shorter) spaces available:
t\thinspace (1/6 em), which we saw between single anddouble quotes in the last paragraph of § 2.6. It’s alsosometimes used between the full point after abbrevia-tions and a following number, as in page references likep. 199, where a word space would look too big, andsetting it solid would look too tight.t\enspace (½em). There is no direct equivalent prede-fined in LATEX for mid and thick spaces as used by metaltypesetters, although it would be possible to definethem. The en as a unit is often used as the width ofa single digit in some fonts, as a convenience so thattables of figures are easy to line up.t\quad (1em).t\qquad (2em).
Formatting information��
��145
CHAPTER 8. FONTS AND LAYOUTS
Beyond this, all horizontal space within paragraphs is au-tomatically flexible, as this is what LATEX uses to achievejustification. Never be tempted to try and change thespacing between letters unless you have some professionaltraining in typography. Some systems use letterspacing (in-correctly called ‘tracking’) as an aid to justification and itis almost always wrong to do so (and looks it). While it ispossible to change letterspacing (with the soul package), itshould only be done by a typographer, and then only veryrarely, as the settings are very subtle and beyond the scope ofthis book.
8.1.2 Headers and footers
LATEX has built-in settings to control the page style of its de-fault page layouts. These are implemented with the \pagestylecommand, which can take one of the following arguments.
plain for a page number centered at the bottom;
empty for nothing at all, not even a page number;
headings for running heads based on the current chapter andsection;
myheadings which lets you use your own reprogrammed defini-tions of how \markright and \markboth commands, whichcontrol how chapter and section titles get into page headers.
The command \thispagestyle (taking the same arguments)can be used to force a specific style for the current page only.
However, the easiest way is to use the fancyhdr package, whichlets you redefine the left-hand, centre, and right-hand page head-ers and footers for both odd and even pages (twelve objects inall). These areas can contain a page number, fixed text, variabletext (like the current chapter or section title, or the catch-wordsof a dictionary), or even a small image. They can also be used todo page backgrounds and frames, by making one of them the top
��
��146 Formatting information
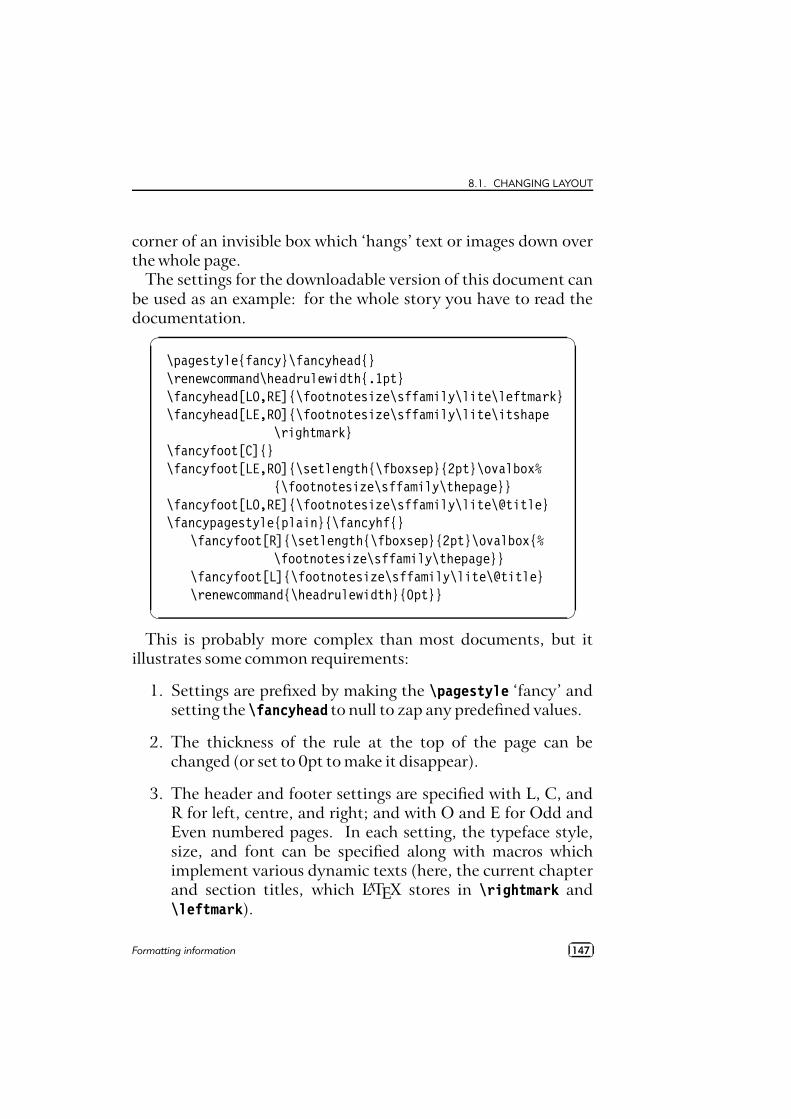
8.1. CHANGING LAYOUT
corner of an invisible box which ‘hangs’ text or images down overthe whole page.
The settings for the downloadable version of this document canbe used as an example: for the whole story you have to read thedocumentation.
�
�
\pagestyle{fancy}\fancyhead{}\renewcommand\headrulewidth{.1pt}\fancyhead[LO,RE]{\footnotesize\sffamily\lite\leftmark}\fancyhead[LE,RO]{\footnotesize\sffamily\lite\itshape
\rightmark}\fancyfoot[C]{}\fancyfoot[LE,RO]{\setlength{\fboxsep}{2pt}\ovalbox%
{\footnotesize\sffamily\thepage}}\fancyfoot[LO,RE]{\footnotesize\sffamily\lite\@title}\fancypagestyle{plain}{\fancyhf{}
\fancyfoot[R]{\setlength{\fboxsep}{2pt}\ovalbox{%\footnotesize\sffamily\thepage}}
\fancyfoot[L]{\footnotesize\sffamily\lite\@title}\renewcommand{\headrulewidth}{0pt}}
This is probably more complex than most documents, but itillustrates some common requirements:
1. Settings are prefixed by making the \pagestyle ‘fancy’ andsetting the \fancyhead to null to zap any predefined values.
2. The thickness of the rule at the top of the page can bechanged (or set to 0pt to make it disappear).
3. The header and footer settings are specified with L, C, andR for left, centre, and right; and with O and E for Odd andEven numbered pages. In each setting, the typeface style,size, and font can be specified along with macros whichimplement various dynamic texts (here, the current chapterand section titles, which LATEX stores in \rightmark and\leftmark).
Formatting information��
��147
CHAPTER 8. FONTS AND LAYOUTS
4. The ‘plain’ variant is used for chapter starts, and resets someof the parameters accordingly.
8.2 Using fonts
The default typeface in LATEX is Computer Modern (CM). Thistypeface was designed by Knuth for use with TEX because itis a book face, and he designed TEX originally for typesettingbooks. Because it is one of the very few book typefaces with acomprehensive set of fonts, including a full suite of mathematics,it has remained the default, rather than the Times you find inwordprocessors, because until recently the mathematical symbolsfor Times were a commercial product often unavailable to users offree software.
Computer Modern is based on a 19th-century book typeface from
Monotype, which is why it looks a little like an old-fashioned school
book. This paragraph is set in Computer Modern so you can see what
it looks like. The typeface was designed using METAFONT, the font-
drawing program made by Knuth to accompany TEX systems, but it is
now also available in Type 1 and TrueType formats.
If you are reading this in a web browser, the above paragraphis only a low-resolution copy because browsers don’t usuallyhave the Computer Modern font available. All the rest of thisdocument is set in Bitstream Arrus, with Geometric 415 for someof the headings and Courier Narrow for the fixed-width type.
In addition to CM, there are many other METAFONT fontswhich can be downloaded from CTAN, including a large collec-tion of historical, symbol, initial, and non-Latin fonts. LATEX alsocomes with the ‘Adobe 35’ typefaces which are built into laserprinters and other DTP systems, and some more fonts donated bythe X Consortium. Plus, of course, standard LATEX can use any ofthe thousands of Type 1 fonts available, and pdfLATEX can use anyof the thousands of TrueType fonts as well.
��
��148 Formatting information
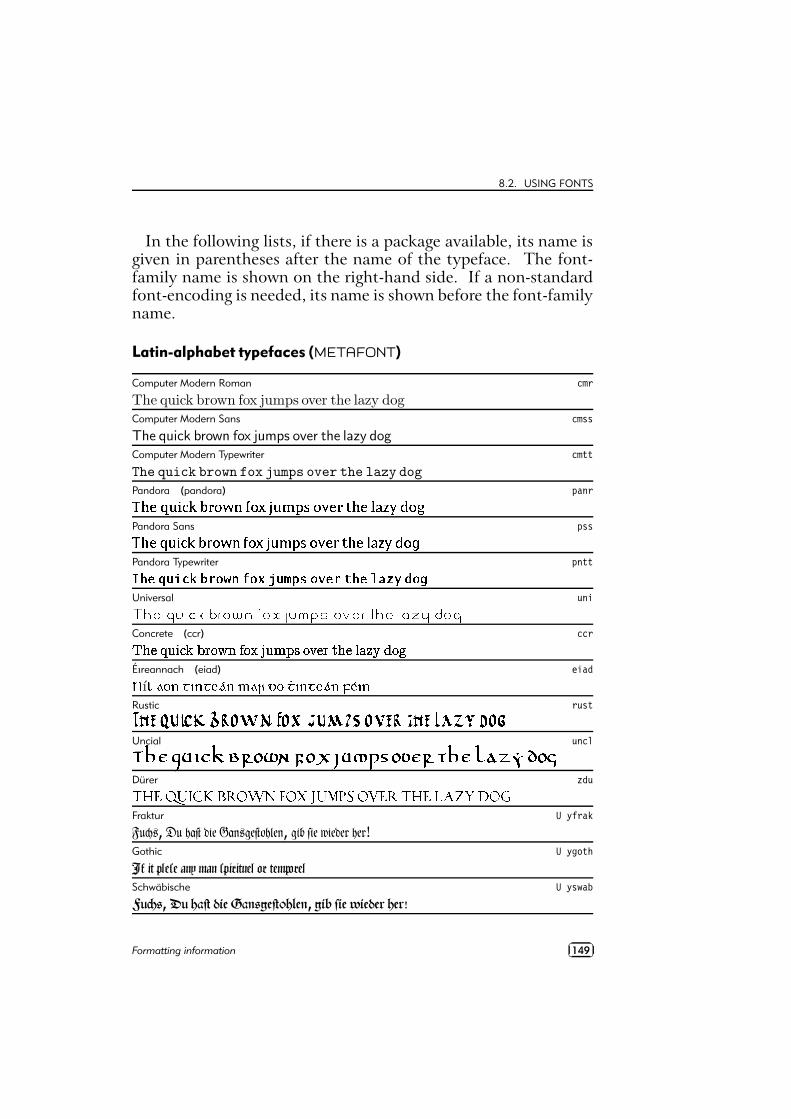
8.2. USING FONTS
In the following lists, if there is a package available, its name isgiven in parentheses after the name of the typeface. The font-family name is shown on the right-hand side. If a non-standardfont-encoding is needed, its name is shown before the font-familyname.
Latin-alphabet typefaces (METAFONT)
Computer Modern Roman cmr
The quick brown fox jumps over the lazy dogComputer Modern Sans cmss
The quick brown fox jumps over the lazy dog
Computer Modern Typewriter cmtt
The quick brown fox jumps over the lazy dog
Pandora (pandora) panruwvyx{z}|�~��+���y���������U������|����}������x�����v�x��D�¡ <¢¤£y��¥Pandora Sans pss¦¨§�©«ª¬�®^¯±°�²�³µ´�¶¸·º¹U´¼»¾½:¬y¿ÁÀ¡Â¨´�Ã�©�³�Äŧ�©ÇÆQȼÉPÊÌË�´ÎÍPandora Typewriter pnttÏ�ÐÒÑ«ÓÎÔ�Õ�Ö¡×�ØÙ�Ú¼ÛܤÝ+Ú�Þ�ß�Ôáà�â�ãäÚ�å�ÑæÙèç�ÐÒÑ�é�ê�ë¼ì�í�Ú�îUniversal uniïºðòñôóõ¨ö>÷ùøÇúyû�ü¨ýÿþ��Dü���� õ�����ôü��ñ�û �µð�ñ�� �������ü��Concrete (ccr) ccr�����������! #"%$�&#')(�*,+-'/.102��35476�'/89�:&<;=����>@?BADC,E�'GFÉıreannach (eiad) eiadH
ı IKJ�L9MON7PQMRN7SUTJ�MWVXJZYU[<L]\7PQMRN7SUTJZMO^�TS_PQMRustic rust`DaOb�cKdfehgjilknm�oKp qsrtoKuwv�d�xzy�{WoK|}b/m�~�aOb������O���Ko �Uncial uncl���������}�G�1�������������O� �s¡U�5¢¤£¦¥§��¨��©�«ª1���¬¦®�¯�°²±1�j³Dürer zdu´¶µ%·O¸f¹§º-»]¼�½�¾]¿©ÀÂÁ�Ã/¿©Ä�Å=¹fÆfÇÉȶ¿]Ê%·Ë¾�´nµ%·fÌRÍ5Î�Ï�Ðf¿§ÑFraktur U yfrak
FuĚŊ, Du haĆ die GanŊgeĆohlen, gib sie wieder her!
Gothic U ygoth
If it plese any man spirituel or tem–rel
Schwäbische U yswab
FuĚŊ, Du haĆ die GanŊgeĆohlen, gib sie wieder her!
Formatting information��
��149
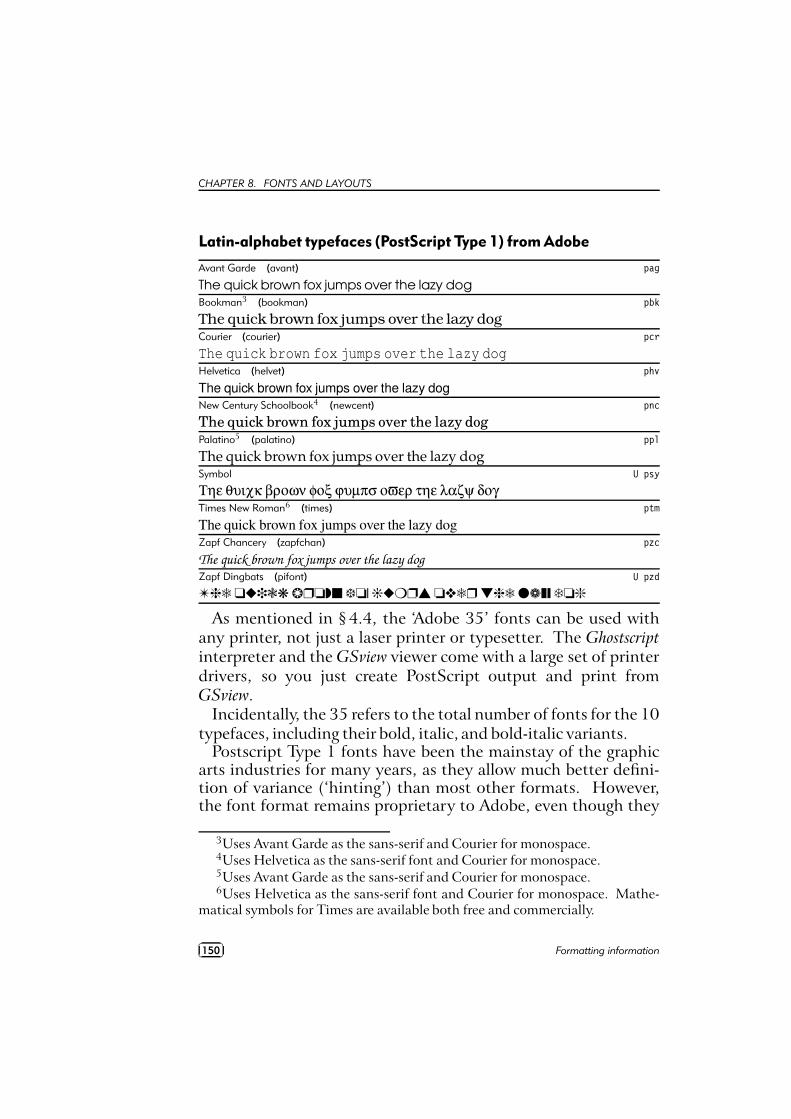
CHAPTER 8. FONTS AND LAYOUTS
Latin-alphabet typefaces (PostScript Type 1) from Adobe
Avant Garde (avant) pag
The quick brown fox jumps over the lazy dogBookman3 (bookman) pbk
The quick brown fox jumps over the lazy dogCourier (courier) pcr
The quick brown fox jumps over the lazy dogHelvetica (helvet) phv
The quick brown fox jumps over the lazy dogNew Century Schoolbook4 (newcent) pnc
The quick brown fox jumps over the lazy dogPalatino5 (palatino) ppl
The quick brown fox jumps over the lazy dogSymbol U psy
Τηε θυιχκ βροων φοξ ϕυµπσ οϖερ τηε λαζψ δογTimes New Roman6 (times) ptm
The quick brown fox jumps over the lazy dogZapf Chancery (zapfchan) pzc
The quick brown fox jumps over the lazy dogZapf Dingbats (pifont) U pzd
The quick brown fox jumps over the lazy dog
As mentioned in § 4.4, the ‘Adobe 35’ fonts can be used withany printer, not just a laser printer or typesetter. The Ghostscriptinterpreter and the GSview viewer come with a large set of printerdrivers, so you just create PostScript output and print fromGSview.
Incidentally, the 35 refers to the total number of fonts for the 10typefaces, including their bold, italic, and bold-italic variants.
Postscript Type 1 fonts have been the mainstay of the graphicarts industries for many years, as they allow much better defini-tion of variance (‘hinting’) than most other formats. However,the font format remains proprietary to Adobe, even though they
3Uses Avant Garde as the sans-serif and Courier for monospace.4Uses Helvetica as the sans-serif font and Courier for monospace.5Uses Avant Garde as the sans-serif and Courier for monospace.6Uses Helvetica as the sans-serif font and Courier for monospace. Mathe-
matical symbols for Times are available both free and commercially.
��
��150 Formatting information
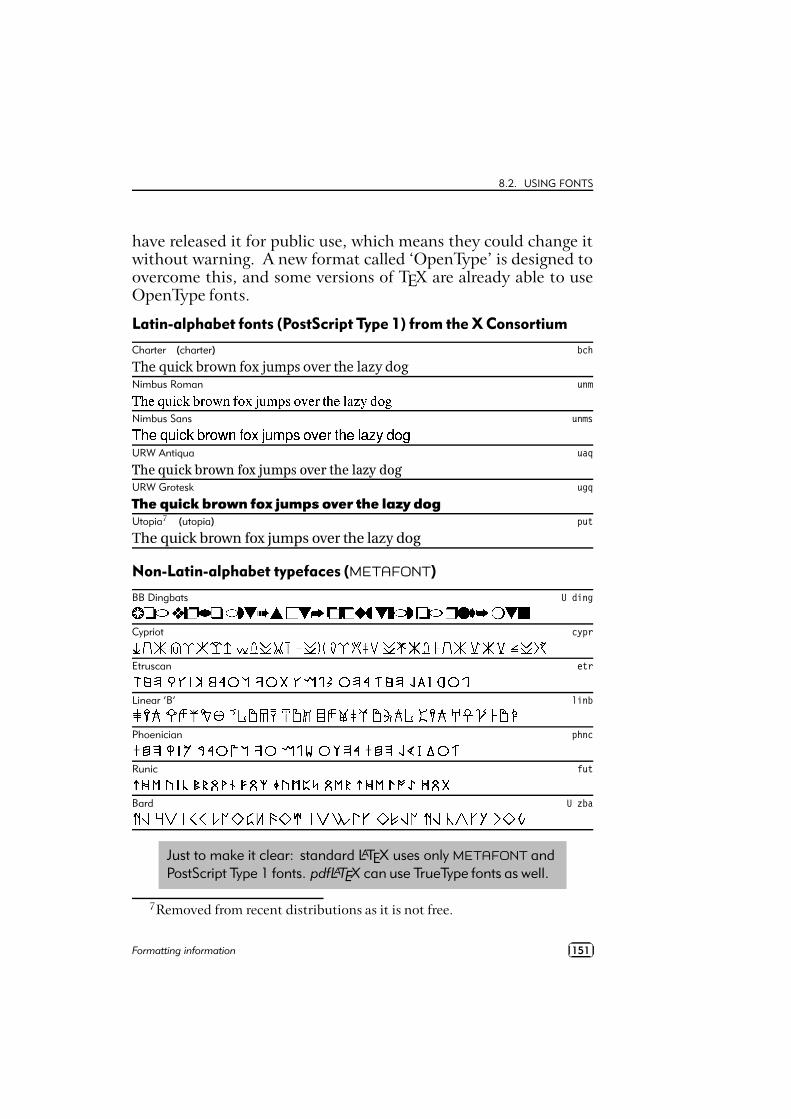
8.2. USING FONTS
have released it for public use, which means they could change itwithout warning. A new format called ‘OpenType’ is designed toovercome this, and some versions of TEX are already able to useOpenType fonts.
Latin-alphabet fonts (PostScript Type 1) from the X Consortium
Charter (charter) bch
The quick brown fox jumps over the lazy dogNimbus Roman unmÒ<ÓÕÔ�Ö_×ÕØQÙ:ÚUÛ_ÜÞÝ_ß]àUáâÝ_ã ät×9å%æ�ç7ÝGèÕÔDÜ�éQÓÕÔ�ê!ëDìDí�îÕÝ_ïNimbus Sans unmsð�ñÕò,óRô�õ öZ÷�ø7ùûúZüfý�þ@úÉÿ��@ô������]ú���òRù ñÕò�� �������ú��URW Antiqua uaq
The quick brown fox jumps over the lazy dogURW Grotesk ugq
The quick brown fox jumps over the lazy dogUtopia7 (utopia) put
The quick brown fox jumps over the lazy dog
Non-Latin-alphabet typefaces (METAFONT)
BB Dingbats U ding��������� ����� �"!$#&%&'�(�#&)+*�� ,�-�./#102�&!43 ����5�6�728+91#&:
Cypriot cypr;=<�>@?�ACBCDCEGFCH=IKJMLONPICQSRTACU�VTWGICX�>CHGYT<�>@ZM[K\^]=IC_
Etruscan etr`�a�bKc�dfehgjilknmporq�mpsrd�tpuPvwm^b�kwx�a�bzyP{�|/}lmp~
Linear ‘B’ linb�������&�l���&�����l���l�M�l�l�K�l�l�S�����l���l�K�����C���&�����M�
Phoenician phnc���� z¡f¢h£�¤¦¥P§p¨�©rª�§¬«pP®j§^¯� �¥w°��� z±n²�³�´�§pµ
Runic fut¶P·�¸z¹fºh»w¼P½P¾�¿nÀfÁP¾�ÂrÃn¹�Ä�Å�ÆM¾�¸�½M¶P·�¸rÇnÈ�ÉrÊ�¾�Ë
Bard U zbaÌÎÍzÏÎÐÒÑÔÓ=ÕzÖÎ×ÙØÛÚ=ÜzÝÎØßÞáà2Ðßâ ãÙäzØpå�Í=×CÌæÍCçæèßéÙêzëÎØÛì
Just to make it clear: standard LATEX uses only METAFONT andPostScript Type 1 fonts. pdfLATEX can use TrueType fonts as well.
7Removed from recent distributions as it is not free.
Formatting information��
��151
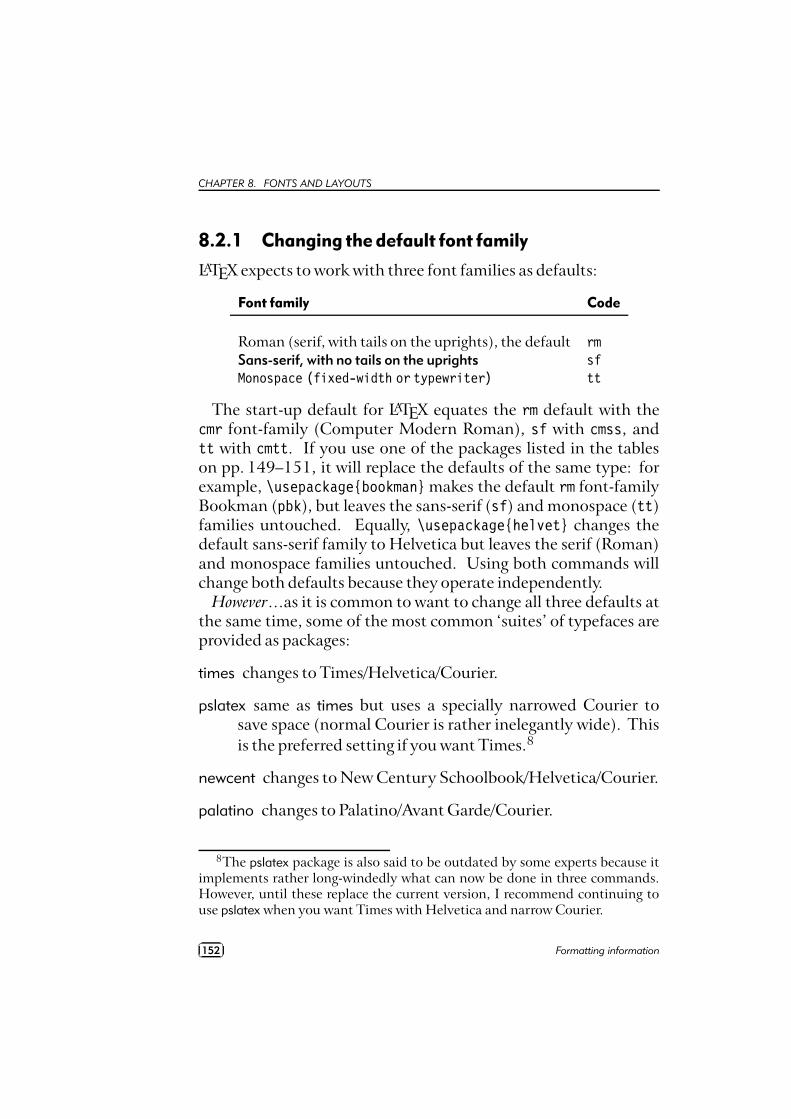
CHAPTER 8. FONTS AND LAYOUTS
8.2.1 Changing the default font family
LATEX expects to work with three font families as defaults:
Font family Code
Roman (serif, with tails on the uprights), the default rmSans-serif, with no tails on the uprights sfMonospace (fixed-width or typewriter) tt
The start-up default for LATEX equates the rm default with thecmr font-family (Computer Modern Roman), sf with cmss, andtt with cmtt. If you use one of the packages listed in the tableson pp. 149–151, it will replace the defaults of the same type: forexample, \usepackage{bookman} makes the default rm font-familyBookman (pbk), but leaves the sans-serif (sf) and monospace (tt)families untouched. Equally, \usepackage{helvet} changes thedefault sans-serif family to Helvetica but leaves the serif (Roman)and monospace families untouched. Using both commands willchange both defaults because they operate independently.
However…as it is common to want to change all three defaults atthe same time, some of the most common ‘suites’ of typefaces areprovided as packages:
times changes to Times/Helvetica/Courier.
pslatex same as times but uses a specially narrowed Courier tosave space (normal Courier is rather inelegantly wide). Thisis the preferred setting if you want Times.8
newcent changes to New Century Schoolbook/Helvetica/Courier.
palatino changes to Palatino/Avant Garde/Courier.
8The pslatex package is also said to be outdated by some experts because itimplements rather long-windedly what can now be done in three commands.However, until these replace the current version, I recommend continuing touse pslatex when you want Times with Helvetica and narrow Courier.
��
��152 Formatting information
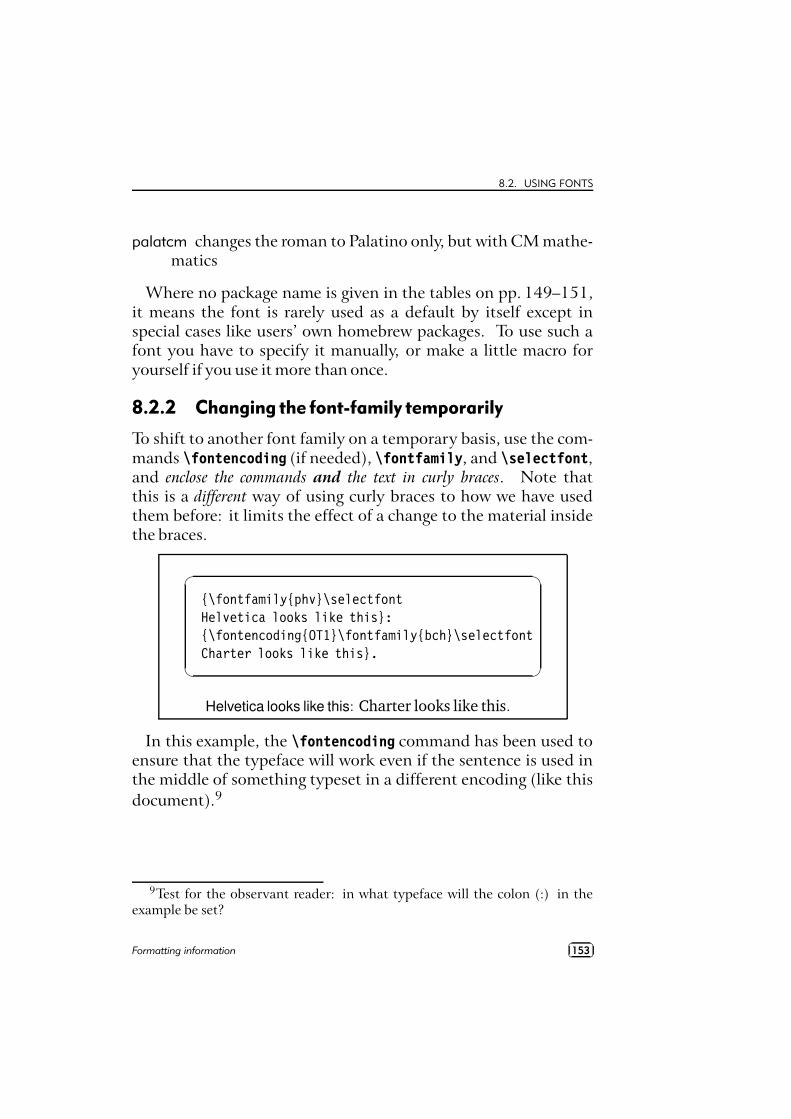
8.2. USING FONTS
palatcm changes the roman to Palatino only, but with CM mathe-matics
Where no package name is given in the tables on pp. 149–151,it means the font is rarely used as a default by itself except inspecial cases like users’ own homebrew packages. To use such afont you have to specify it manually, or make a little macro foryourself if you use it more than once.
8.2.2 Changing the font-family temporarily
To shift to another font family on a temporary basis, use the com-mands \fontencoding (if needed), \fontfamily, and \selectfont,and enclose the commands and the text in curly braces. Note thatthis is a different way of using curly braces to how we have usedthem before: it limits the effect of a change to the material insidethe braces.
�
�
{\fontfamily{phv}\selectfontHelvetica looks like this}:{\fontencoding{OT1}\fontfamily{bch}\selectfontCharter looks like this}.
Helvetica looks like this: Charter looks like this.
In this example, the \fontencoding command has been used toensure that the typeface will work even if the sentence is used inthe middle of something typeset in a different encoding (like thisdocument).9
9Test for the observant reader: in what typeface will the colon (:) in theexample be set?
Formatting information��
��153
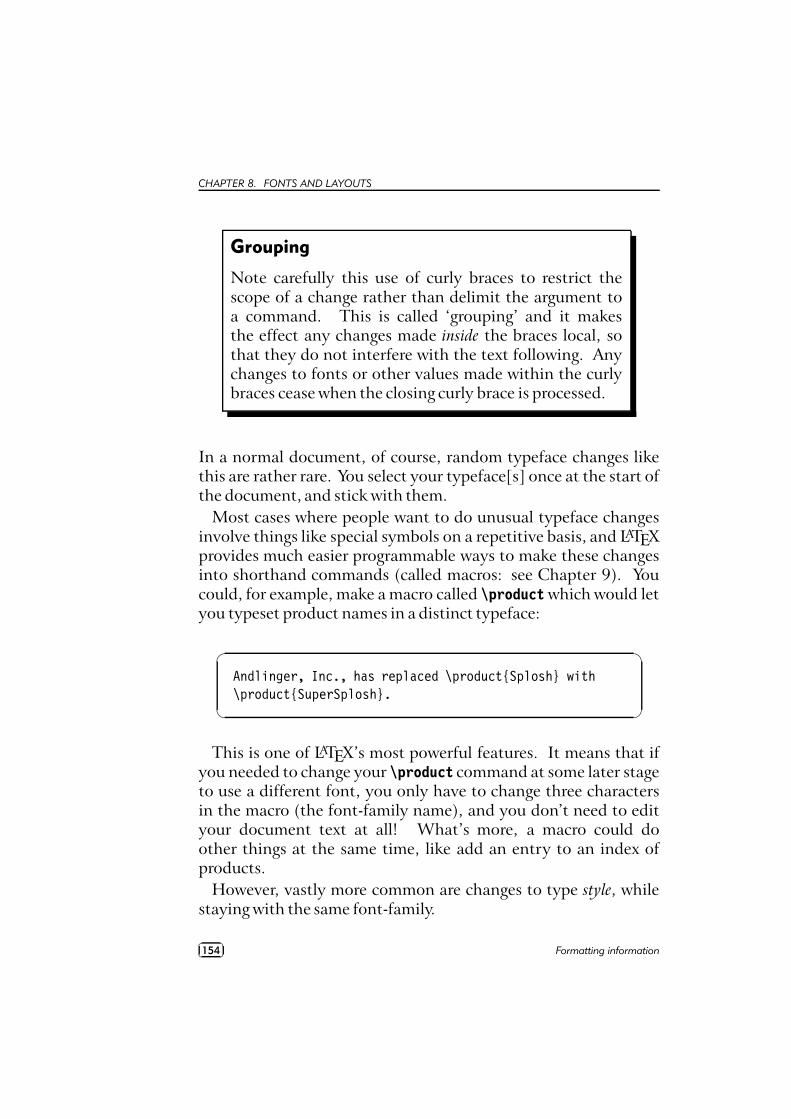
CHAPTER 8. FONTS AND LAYOUTS
Grouping
Note carefully this use of curly braces to restrict thescope of a change rather than delimit the argument toa command. This is called ‘grouping’ and it makesthe effect any changes made inside the braces local, sothat they do not interfere with the text following. Anychanges to fonts or other values made within the curlybraces cease when the closing curly brace is processed.
In a normal document, of course, random typeface changes likethis are rather rare. You select your typeface[s] once at the start ofthe document, and stick with them.
Most cases where people want to do unusual typeface changesinvolve things like special symbols on a repetitive basis, and LATEXprovides much easier programmable ways to make these changesinto shorthand commands (called macros: see Chapter 9). Youcould, for example, make a macro called \product which would letyou typeset product names in a distinct typeface:
�
�
Andlinger, Inc., has replaced \product{Splosh} with\product{SuperSplosh}.
This is one of LATEX’s most powerful features. It means that ifyou needed to change your \product command at some later stageto use a different font, you only have to change three charactersin the macro (the font-family name), and you don’t need to edityour document text at all! What’s more, a macro could doother things at the same time, like add an entry to an index ofproducts.
However, vastly more common are changes to type style, whilestaying with the same font-family.
��
��154 Formatting information
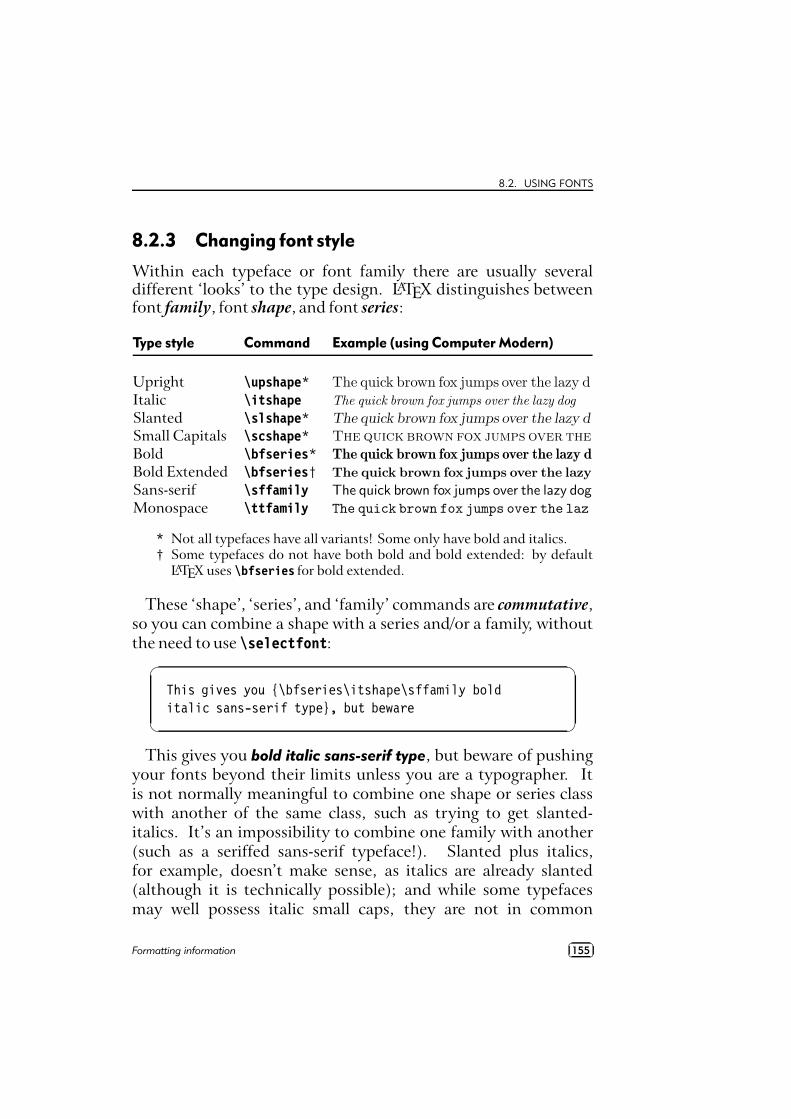
8.2. USING FONTS
8.2.3 Changing font style
Within each typeface or font family there are usually severaldifferent ‘looks’ to the type design. LATEX distinguishes betweenfont family, font shape, and font series:
Type style Command Example (using Computer Modern)
Upright \upshape* The quick brown fox jumps over the lazy dItalic \itshape The quick brown fox jumps over the lazy dog
Slanted \slshape* The quick brown fox jumps over the lazy d
Small Capitals \scshape* The quick brown fox jumps over the
Bold \bfseries* The quick brown fox jumps over the lazy d
Bold Extended \bfseries† The quick brown fox jumps over the lazy
Sans-serif \sffamily The quick brown fox jumps over the lazy dog
Monospace \ttfamily The quick brown fox jumps over the laz
* Not all typefaces have all variants! Some only have bold and italics.† Some typefaces do not have both bold and bold extended: by default
LATEX uses \bfseries for bold extended.
These ‘shape’, ‘series’, and ‘family’ commands are commutative,so you can combine a shape with a series and/or a family, withoutthe need to use \selectfont:
�
�
This gives you {\bfseries\itshape\sffamily bolditalic sans-serif type}, but beware
This gives you bold italic sans-serif type, but beware of pushingyour fonts beyond their limits unless you are a typographer. Itis not normally meaningful to combine one shape or series classwith another of the same class, such as trying to get slanted-italics. It’s an impossibility to combine one family with another(such as a seriffed sans-serif typeface!). Slanted plus italics,for example, doesn’t make sense, as italics are already slanted(although it is technically possible); and while some typefacesmay well possess italic small caps, they are not in common
Formatting information��
��155
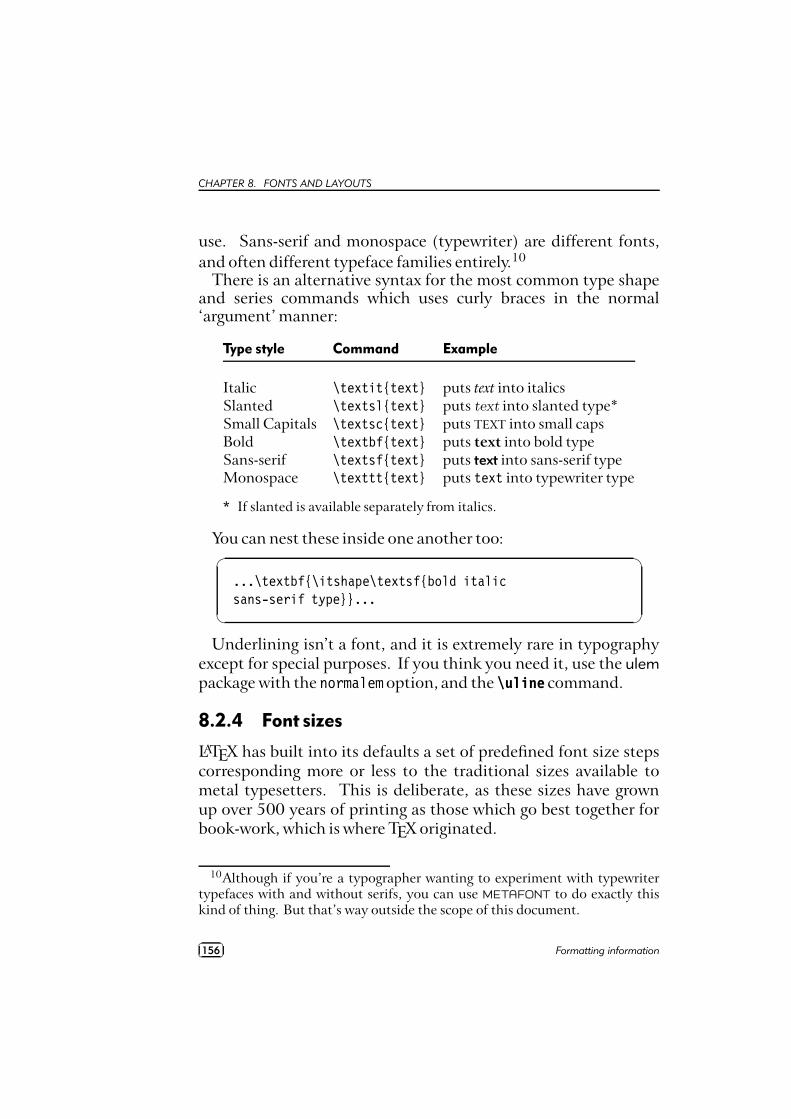
CHAPTER 8. FONTS AND LAYOUTS
use. Sans-serif and monospace (typewriter) are different fonts,and often different typeface families entirely.10
There is an alternative syntax for the most common type shapeand series commands which uses curly braces in the normal‘argument’ manner:
Type style Command Example
Italic \textit{text} puts text into italicsSlanted \textsl{text} puts text into slanted type*Small Capitals \textsc{text} puts TEXT into small capsBold \textbf{text} puts text into bold typeSans-serif \textsf{text} puts text into sans-serif typeMonospace \texttt{text} puts text into typewriter type
* If slanted is available separately from italics.
You can nest these inside one another too:�
�
...\textbf{\itshape\textsf{bold italicsans-serif type}}...
Underlining isn’t a font, and it is extremely rare in typographyexcept for special purposes. If you think you need it, use the ulempackage with the normalem option, and the \uline command.
8.2.4 Font sizes
LATEX has built into its defaults a set of predefined font size stepscorresponding more or less to the traditional sizes available tometal typesetters. This is deliberate, as these sizes have grownup over 500 years of printing as those which go best together forbook-work, which is where TEX originated.
10Although if you’re a typographer wanting to experiment with typewritertypefaces with and without serifs, you can use METAFONT to do exactly thiskind of thing. But that’s way outside the scope of this document.
��
��156 Formatting information
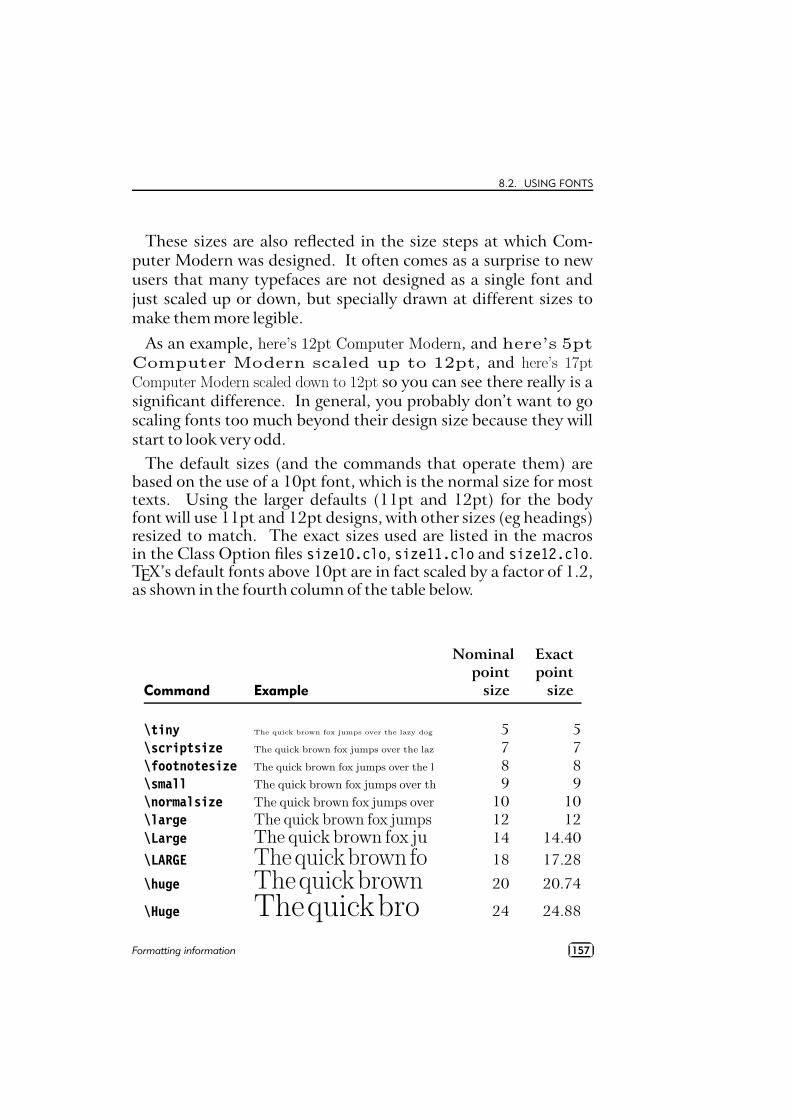
8.2. USING FONTS
These sizes are also reflected in the size steps at which Com-puter Modern was designed. It often comes as a surprise to newusers that many typefaces are not designed as a single font andjust scaled up or down, but specially drawn at different sizes tomake them more legible.
As an example, here’s 12pt Computer Modern, and here’s 5pt
Computer Modern scaled up to 12pt, and here’s 17pt
Computer Modern scaled down to 12pt so you can see there really is asignificant difference. In general, you probably don’t want to goscaling fonts too much beyond their design size because they willstart to look very odd.
The default sizes (and the commands that operate them) arebased on the use of a 10pt font, which is the normal size for mosttexts. Using the larger defaults (11pt and 12pt) for the bodyfont will use 11pt and 12pt designs, with other sizes (eg headings)resized to match. The exact sizes used are listed in the macrosin the Class Option files size10.clo, size11.clo and size12.clo.TEX’s default fonts above 10pt are in fact scaled by a factor of 1.2,as shown in the fourth column of the table below.
Command Example
Nominalpoint
size
Exactpoint
size
\tiny The quick brown fox jumps over the lazy dog 5 5\scriptsize The quick brown fox jumps over the laz 7 7\footnotesize The quick brown fox jumps over the l 8 8\small The quick brown fox jumps over th 9 9\normalsize The quick brown fox jumps over 10 10\large The quick brown fox jumps 12 12\Large The quick brown fox ju 14 14.40\LARGE Thequickbrown fo 18 17.28
\huge Thequickbrown 20 20.74
\Huge Thequickbro 24 24.88
Formatting information��
��157
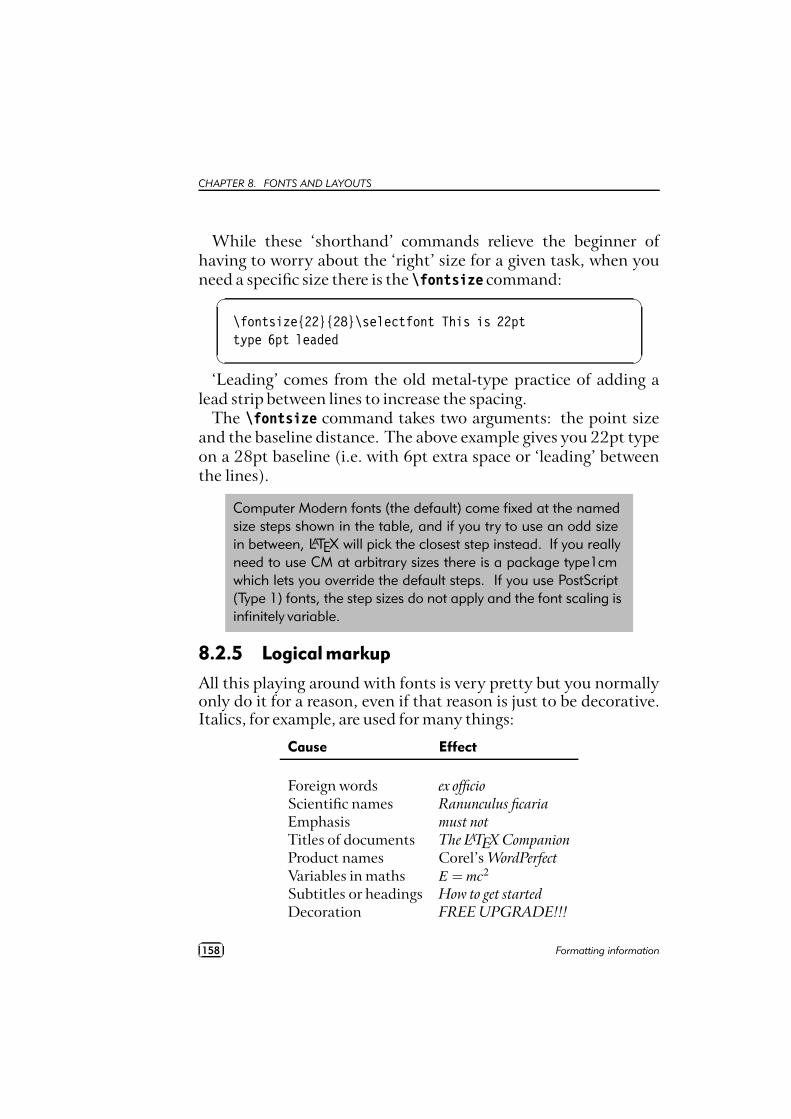
CHAPTER 8. FONTS AND LAYOUTS
While these ‘shorthand’ commands relieve the beginner ofhaving to worry about the ‘right’ size for a given task, when youneed a specific size there is the \fontsize command:
�
�
\fontsize{22}{28}\selectfont This is 22pttype 6pt leaded
‘Leading’ comes from the old metal-type practice of adding alead strip between lines to increase the spacing.
The \fontsize command takes two arguments: the point sizeand the baseline distance. The above example gives you 22pt typeon a 28pt baseline (i.e. with 6pt extra space or ‘leading’ betweenthe lines).
Computer Modern fonts (the default) come fixed at the namedsize steps shown in the table, and if you try to use an odd sizein between, LATEX will pick the closest step instead. If you reallyneed to use CM at arbitrary sizes there is a package type1cmwhich lets you override the default steps. If you use PostScript(Type 1) fonts, the step sizes do not apply and the font scaling isinfinitely variable.
8.2.5 Logical markup
All this playing around with fonts is very pretty but you normallyonly do it for a reason, even if that reason is just to be decorative.Italics, for example, are used for many things:
Cause Effect
Foreign words ex officioScientific names Ranunculus ficariaEmphasis must notTitles of documents The LATEX CompanionProduct names Corel’s WordPerfectVariables in maths E = mc2
Subtitles or headings How to get startedDecoration FREE UPGRADE!!!
��
��158 Formatting information
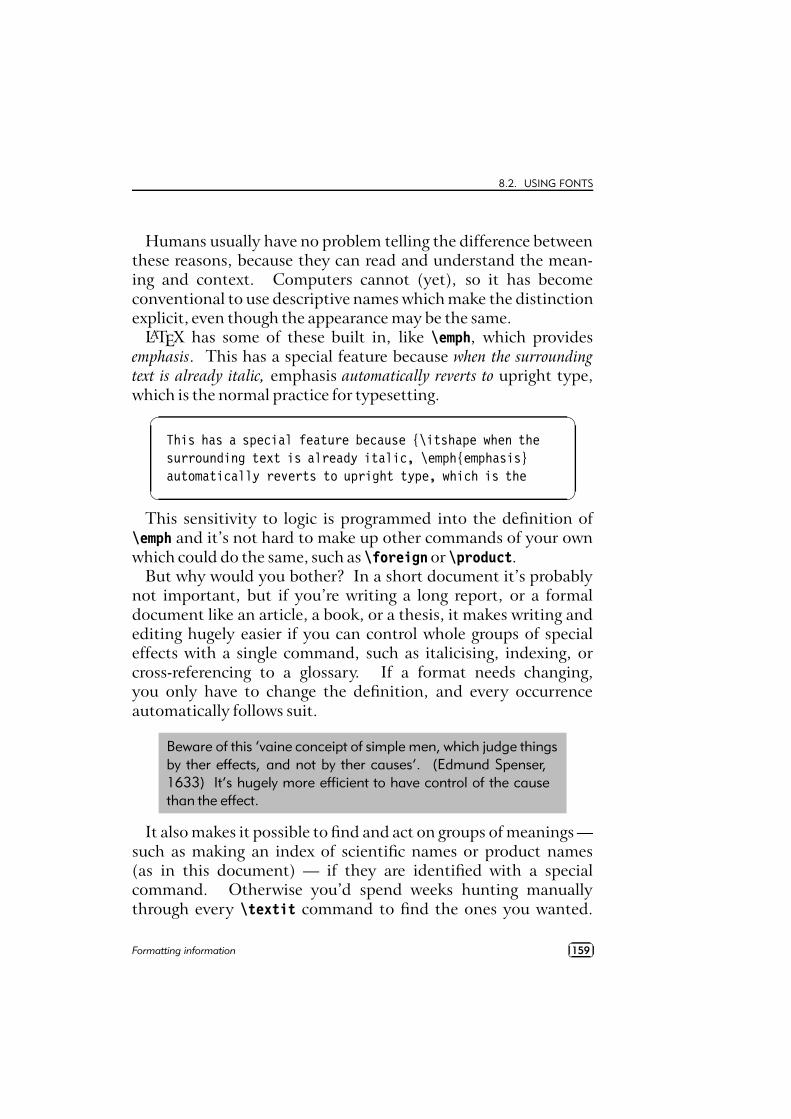
8.2. USING FONTS
Humans usually have no problem telling the difference betweenthese reasons, because they can read and understand the mean-ing and context. Computers cannot (yet), so it has becomeconventional to use descriptive names which make the distinctionexplicit, even though the appearance may be the same.
LATEX has some of these built in, like \emph, which providesemphasis. This has a special feature because when the surroundingtext is already italic, emphasis automatically reverts to upright type,which is the normal practice for typesetting.
�
�
This has a special feature because {\itshape when thesurrounding text is already italic, \emph{emphasis}automatically reverts to upright type, which is the
This sensitivity to logic is programmed into the definition of\emph and it’s not hard to make up other commands of your ownwhich could do the same, such as \foreign or \product.
But why would you bother? In a short document it’s probablynot important, but if you’re writing a long report, or a formaldocument like an article, a book, or a thesis, it makes writing andediting hugely easier if you can control whole groups of specialeffects with a single command, such as italicising, indexing, orcross-referencing to a glossary. If a format needs changing,you only have to change the definition, and every occurrenceautomatically follows suit.
Beware of this ‘vaine conceipt of simple men, which judge thingsby ther effects, and not by ther causes’. (Edmund Spenser,1633) It’s hugely more efficient to have control of the causethan the effect.
It also makes it possible to find and act on groups of meanings —such as making an index of scientific names or product names(as in this document) — if they are identified with a specialcommand. Otherwise you’d spend weeks hunting manuallythrough every \textit command to find the ones you wanted.
Formatting information��
��159

CHAPTER 8. FONTS AND LAYOUTS
This is the importance of automation: it can save you time andmoney.
In Chapter 9 we will see how to make your own simple com-mands like this.
8.2.6 Colour
You can typeset anything in LATEX in any colour you want us-ing the color package. First, you need to add the command\usepackage{color} to your preamble (note the US spelling ofcolor!). This makes available a default palette of primary colours:red, green, and blue for the RGB colour model used for emittedlight (television screens), and cyan, magenta, yellow, and blackfor the CMYK colour model used for reflected light (printing).
For the occasional word or phrase in colour, use the command\textcolor with two arguments, the colour name and the text:\textcolor{red}{like this}. There is a \color command as well,for use within groups:
�
�
...{\color{blue}some text in blue}...
If you have the PostScript printer driver dvips installed, youalso get a separate 64-colour palette of predefined color names.These represent approximately the colours in the big box ofCrayola colouring pencils much favoured by artists and designers.This adds a new colour model called ‘named’, so if you want theCrayola colour RubineRed, you can use the \color or \textcolorcommands with a preceding optional argument ‘named’:
�
�
\color[named]{RubineRed}\textcolor[named]{RubineRed}{some red text}
As some of the ‘named’ colour names are quite long, you cancreate a short name of your own for colours you use frequently,using the \definecolor command:
��
��160 Formatting information
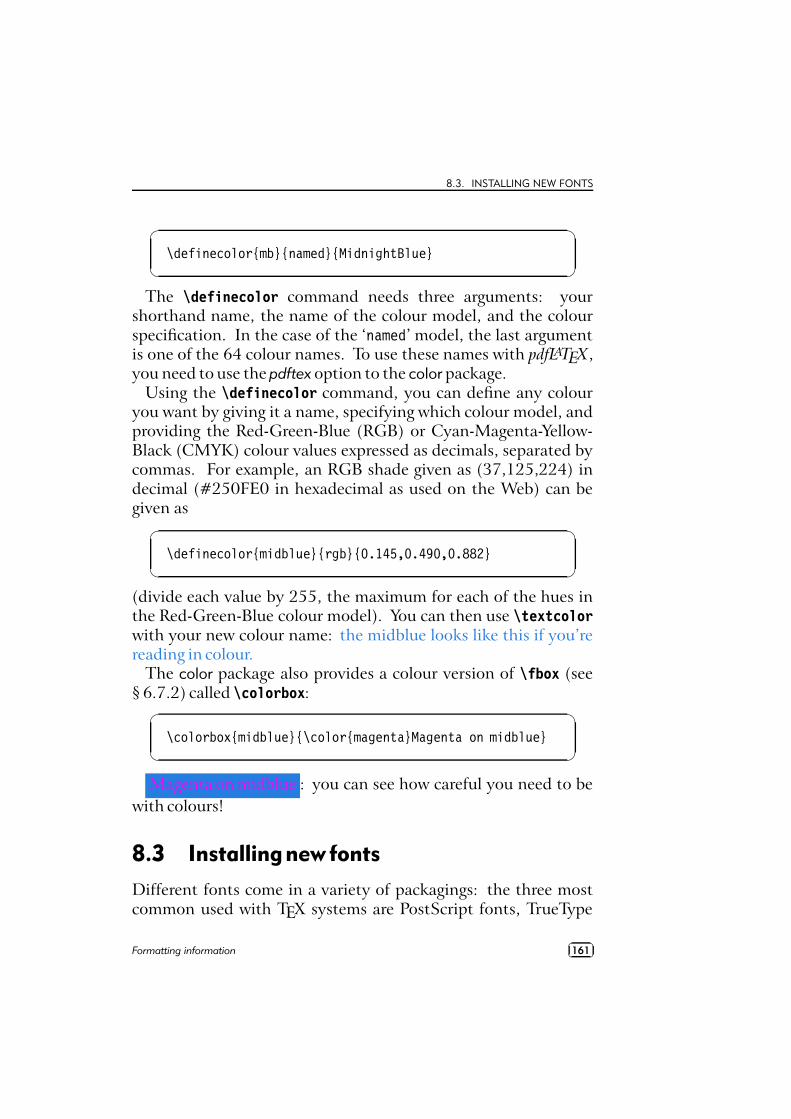
8.3. INSTALLING NEW FONTS
�
�
\definecolor{mb}{named}{MidnightBlue}
The \definecolor command needs three arguments: yourshorthand name, the name of the colour model, and the colourspecification. In the case of the ‘named’ model, the last argumentis one of the 64 colour names. To use these names with pdfLATEX,you need to use the pdftex option to the color package.
Using the \definecolor command, you can define any colouryou want by giving it a name, specifying which colour model, andproviding the Red-Green-Blue (RGB) or Cyan-Magenta-Yellow-Black (CMYK) colour values expressed as decimals, separated bycommas. For example, an RGB shade given as (37,125,224) indecimal (#250FE0 in hexadecimal as used on the Web) can begiven as
�
�
\definecolor{midblue}{rgb}{0.145,0.490,0.882}
(divide each value by 255, the maximum for each of the hues inthe Red-Green-Blue colour model). You can then use \textcolorwith your new colour name: the midblue looks like this if you’rereading in colour.
The color package also provides a colour version of \fbox (see§ 6.7.2) called \colorbox:
�
�
\colorbox{midblue}{\color{magenta}Magenta on midblue}
Magenta on midblue : you can see how careful you need to bewith colours!
8.3 Installingnewfonts
Different fonts come in a variety of packagings: the three mostcommon used with TEX systems are PostScript fonts, TrueType
Formatting information��
��161
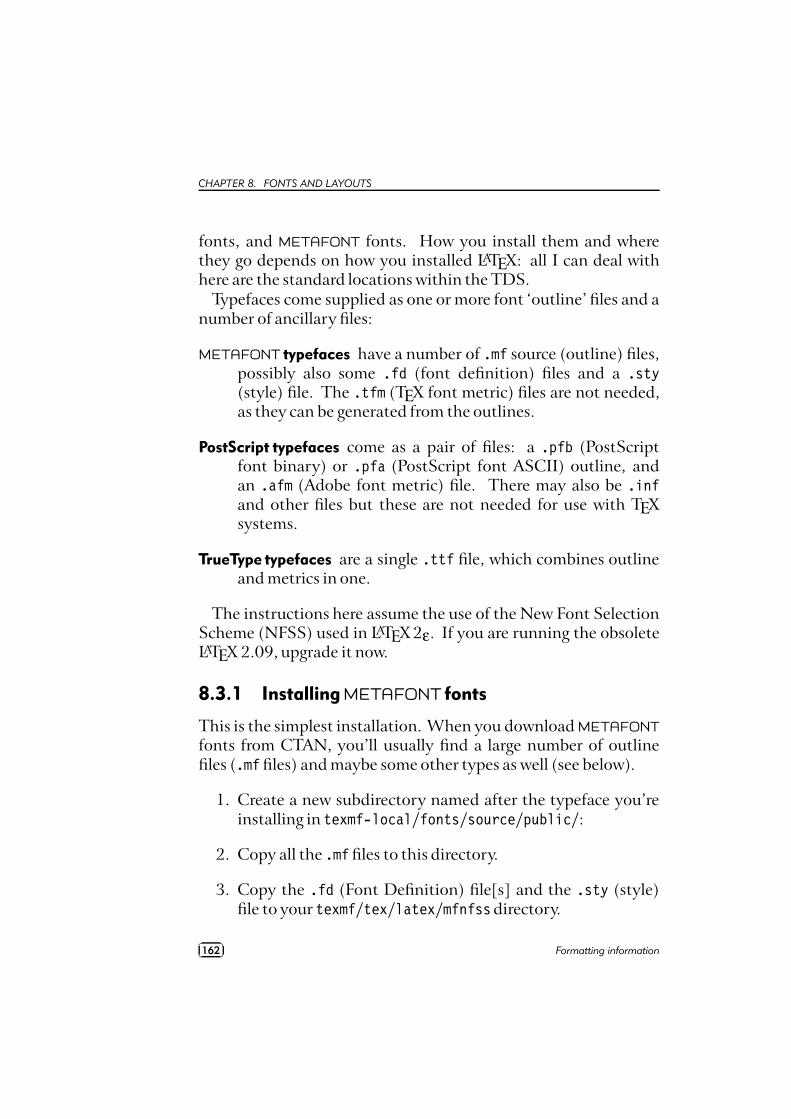
CHAPTER 8. FONTS AND LAYOUTS
fonts, and METAFONT fonts. How you install them and wherethey go depends on how you installed LATEX: all I can deal withhere are the standard locations within the TDS.
Typefaces come supplied as one or more font ‘outline’ files and anumber of ancillary files:
METAFONT typefaces have a number of .mf source (outline) files,possibly also some .fd (font definition) files and a .sty(style) file. The .tfm (TEX font metric) files are not needed,as they can be generated from the outlines.
PostScript typefaces come as a pair of files: a .pfb (PostScriptfont binary) or .pfa (PostScript font ASCII) outline, andan .afm (Adobe font metric) file. There may also be .infand other files but these are not needed for use with TEXsystems.
TrueType typefaces are a single .ttf file, which combines outlineand metrics in one.
The instructions here assume the use of the New Font SelectionScheme (NFSS) used in LATEX 2ε. If you are running the obsoleteLATEX 2.09, upgrade it now.
8.3.1 Installing METAFONT fonts
This is the simplest installation. When you download METAFONT
fonts from CTAN, you’ll usually find a large number of outlinefiles (.mf files) and maybe some other types as well (see below).
1. Create a new subdirectory named after the typeface you’reinstalling in texmf-local/fonts/source/public/:
2. Copy all the .mf files to this directory.
3. Copy the .fd (Font Definition) file[s] and the .sty (style)file to your texmf/tex/latex/mfnfssdirectory.
��
��162 Formatting information
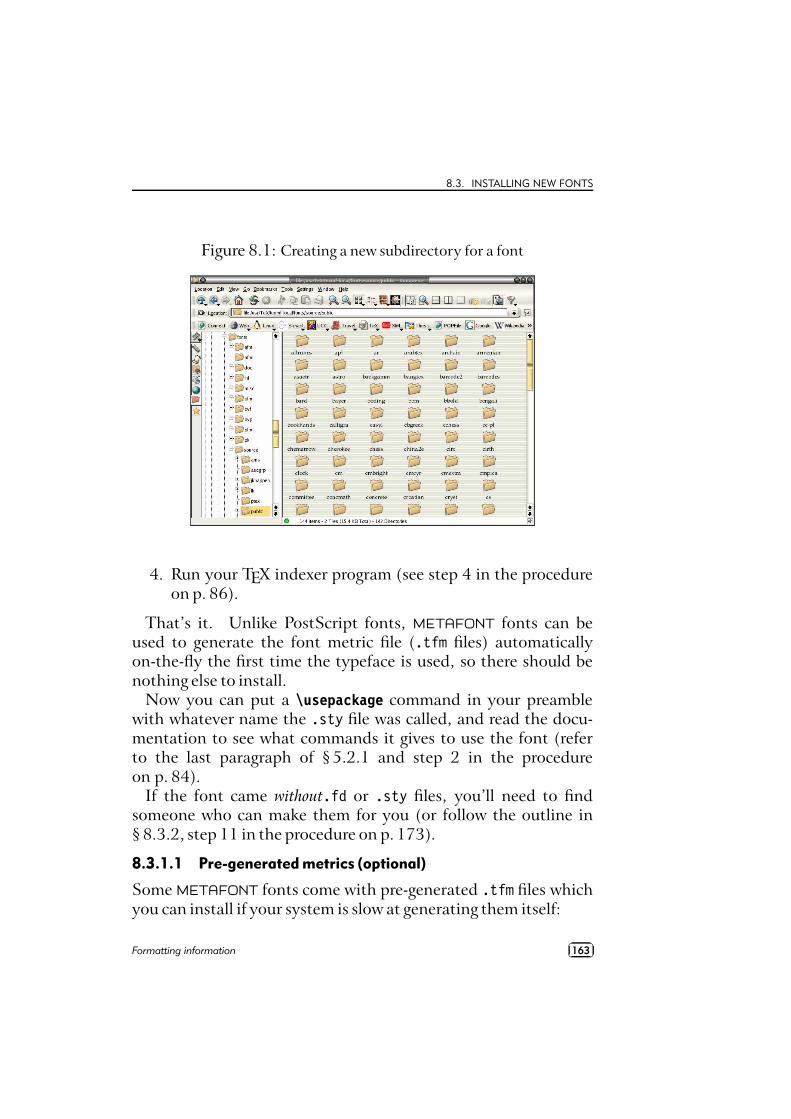
8.3. INSTALLING NEW FONTS
Figure 8.1: Creating a new subdirectory for a font
4. Run your TEX indexer program (see step 4 in the procedureon p. 86).
That’s it. Unlike PostScript fonts, METAFONT fonts can beused to generate the font metric file (.tfm files) automaticallyon-the-fly the first time the typeface is used, so there should benothing else to install.
Now you can put a \usepackage command in your preamblewith whatever name the .sty file was called, and read the docu-mentation to see what commands it gives to use the font (referto the last paragraph of § 5.2.1 and step 2 in the procedureon p. 84).
If the font came without.fd or .sty files, you’ll need to findsomeone who can make them for you (or follow the outline in§ 8.3.2, step 11 in the procedure on p. 173).
8.3.1.1 Pre-generated metrics (optional)
Some METAFONT fonts come with pre-generated .tfm files whichyou can install if your system is slow at generating them itself:
Formatting information��
��163
CHAPTER 8. FONTS AND LAYOUTS
1. Create a new subdirectory within texmf-local/fonts/tfm/public/ named the same as the one you created for the .mffiles above.
2. Copy all the .tfm files into this subdirectory.
3. Run your TEX indexer program (see step 4 in the procedureon p. 86).
8.3.1.2 Pre-generated bitmaps (optional)
In some rare cases, pre-generated packed bitmap fonts (.pk files)are also available from CTAN (normally your previewer andprint driver creates these automatically, but you can use the pre-generated ones if you have a very slow system). If you really wantto install these, it’s a similar procedure to the .tfm files:
4. Create a new subdirectory within texmf-local/fonts/pk/modeless/named the same as the one you created for the .mfand .tfm files above.
5. Copy all the .nnnpk files into this subdirectory (nnn is anumber reflecting the dot-density of the bitmap). OnMicrosoft systems the files may just end in .pk and be keptin subdirectories named after the dot-density, e.g. dpi360.
6. Run your TEX indexer program (see step 4 in the procedureon p. 86).
8.3.2 Installing PostScript fonts
Lots of people will tell you that PostScript fonts and PostScriptoutput are dead and that TrueType or OpenType fonts and PDFoutput are the way to go. While this is true for many cases,standard LATEX does not work with TrueType fonts and does notproduce PDF directly. Only pdfLATEX does that, and there arestill many printers whose typesetters and platemakers use Post-Script rather than PDF. In addition, operating system supportfor scalable fonts is still very poor on Unix systems (including
��
��164 Formatting information
8.3. INSTALLING NEW FONTS
Linux), despite the advances in recent years, so in many cases itstill makes sense to use TEX’s built-in support for PostScript.
Two files are needed for each font: the .afmAdobe Font Met-ric (AFM) and the .pfbPostScript Font Binary (PFB) files. Youmust have both for each font before you start. If you only have thenear-obsolete .pfaPostScript Font ASCII (PFA) files, it may bepossible to generate the .pfb files using the t1binary programfrom the t1utils suite (see http://gnuwin32.sourceforge.net/packages/t1utils.htm) or the excellent PFAedit font editor (fromhttp://pfaedit.sourceforge.net). There are unfortunately stillsome companies distributing Type 1 fonts in .pfa format (Mathe-matica is one reported recently).
The installation method I described in earlier editions hasworked perfectly for me for years, but I have updated it here touse the facilities of the updmap program (which comes with yourTEX installation). This removes the need for one of the steps Igave before, which required editing the psfonts.map file, as thisis now recreated by updmap. The procedure below is not theofficial way (that’s fontinst), but it is the basis for a script I amworking on called Gutta-Perchaa, which automates the wholeprocess.
aYes, as in rubber.
I’ll repeat this: before you start, make sure you have all the .afmand .pfb files for the typeface you want. In the example below,I’m going to use a single font from an imaginary typeface calledFoo, so I have foo.afm and foo.pfbfiles.
1. Put the files in your temporary directoryThis is /tmp on Linux, and should be C:\tmp or C:\temp oreven C:\Windows\tempon Microsoft Windows.
2. Decide on the short font name to use inside LATEX.This is not the full descriptive name (e.g. Baskerville ItalicBold Extended) but an encoded font name in the formatfnnsseec, devised by Karl Berry, which stores the same
Formatting information��
��165
CHAPTER 8. FONTS AND LAYOUTS
information in no more than eight characters for compat-ibility with systems which cannot handle long filenames.The letters in the format above have the following meanings(see the fontname documentation on your computer for moredetails):
Letter Meaning Examples
f foundry b=Bitstream, m=Monotype, p=Adobenn typeface ba=Baskerville, tm=Times, pl=Palatinoss series/shape r=roman, bi=bold italic, etc.ee encoding 8a=default 8-bit ANSI, ly=Y&Y’s TEX’n’ANSIc [small]caps (this is a literal ‘c’ character, used only if needed)
The texmf/fontname directory in your installation of LATEXhas files for several foundries giving fully-formed nameslike these for common fonts (e.g. ptmr8a is [Adobe] Post-Script Times Roman in an 8–bit ANSI encoding; bgslly isBitstream Gill Sans Light in Y&Y’s TEX’n’ANSI encoding[LY1]).11 Read the documentation in Fontname: Filenames
for TEX fonts12 to find out how to make up your own shortnames if the foundry and font you want is not shown in thefontnamedirectory.
In this example we’ll call our mythical example typeface‘zork’ (standing for Zfonts Ordinary Bookface, because kis the letter used for Book fonts, b being already the codefor bold) and we’ll assume the font comes in the two filesfoo.afm and foo.pfb that I mentioned above.
While the fontname directories have ready-made lists of thesenames for popular collections of typefaces, making them up
11Confusingly, Bitstream fonts (and others from similar sources) mostlyhave different names from the original fonts, so what they call Humanist521 is actually Gill Sans. Until recently, US law only allowed the namesof typefaces to be copyrighted, not the font designs themselves, leading towidespread piracy.
12Berry (June 2001)
��
��166 Formatting information
8.3. INSTALLING NEW FONTS
requires some knowledge of typographic terms and a carefulreading of the fontname documentation.
3. Decide on your encodingThis is what tripped me up the first few times until someonepointed me at Y&Y’s13TEX’n’ANSI encoding which (to me)seems to be the only one that includes the glyphs I wantwhere I want them.14 Your mileage may vary. This encodingis referred to as LY1 within LATEX and the encoding file isin texmf/dvips/base/texnansi.enc. Encoding is needed be-cause Adobe fonts store their characters in different placesto the TEX standard.
Copy this encoding file to the temporary directory whereyou’re doing all this stuff. If you’re using the 8a or 8rencoding (or some other encoding), then copy that fileinstead (8a.enc, 8r.enc).
4. Convert .afmfiles to .tfmThe afm2tfm program is a standard utility in the bin di-rectory of your TEX installation. If it’s not, update yourinstallation.
In a command window, type:
�
�
afm2tfm foo.afm -v zorkly.vpl -p texnansi.enc \rzorkly.tfm >zork.id
(Here and elsewhere I have sometimes had to break the lineto fit it on the printed page. It’s actually all typed as one longline if you omit the backslash.)
13Sadly, Y&Y, Inc has ceased trading and their TEX distribution is not longeravailable, although there is email support at http://lists.ucc.ie/lists/archives/yandytex.html, and their encoding files continue to be used.
14The only one I still have problems with is ‘ø’, which for some weird reasonisn’t catered for in this encoding.
Formatting information��
��167
CHAPTER 8. FONTS AND LAYOUTS
This creates a special ‘raw’TEX Font Metric file (hence thespecial r prefix) that LATEX can use, with a list of all itsproperties encoded with LY1 (the .vpl or Virtual PropertyList file). Many people will tell you that virtual fonts aredead and that this is the wrong way to do it, but no-one hasever shown me an alternative that works, so I stick with it.
5. Small caps (optional)If you want a small caps variant faked up (perhaps becausethe typeface family doesn’t have a special small-caps font),repeat the medicine like this:
�
�
afm2tfm foo.afm -V zorklyc.vpl -p texnansi.enc \rzorkly.tfm >>zork.id
Note the capital V option here. Yes, it does overwrite therzorkly.tfm created in the first command. Let it. Andthose are two of the ‘greater-than’ signs before the zork.idfilename because we want to append to it, not overwrite it.
6. Create the virtual fontTurn the .vpl files into .vf and .tfm pairs. LATEX uses theseto convert from Adobe’s encoding to its own.
�
�
vptovf zorkly.vpl zorkly.vf zorkly.tfmvptovf zorklyc.vpl zorklyc.vf zorklyc.tfm
Again, the vptovf program is a standard part of your TEXdistribution.
7. Make directories to hold the files
Under your texmf-local directory there should be a fontsdirectory, and in there there should be afm, tfm, type1, andvf directories. Create them if they do not already exist.
��
��168 Formatting information
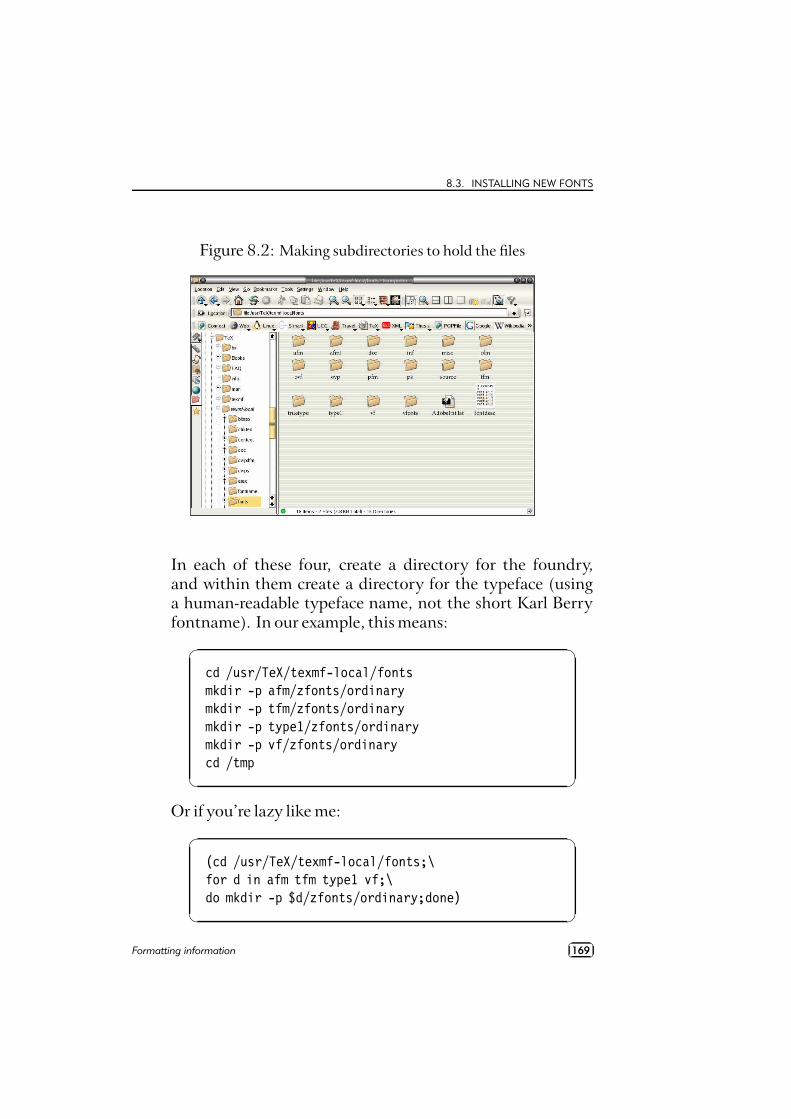
8.3. INSTALLING NEW FONTS
Figure 8.2: Making subdirectories to hold the files
In each of these four, create a directory for the foundry,and within them create a directory for the typeface (usinga human-readable typeface name, not the short Karl Berryfontname). In our example, this means:
�
�
cd /usr/TeX/texmf-local/fontsmkdir -p afm/zfonts/ordinarymkdir -p tfm/zfonts/ordinarymkdir -p type1/zfonts/ordinarymkdir -p vf/zfonts/ordinarycd /tmp
Or if you’re lazy like me:�
�
(cd /usr/TeX/texmf-local/fonts;\for d in afm tfm type1 vf;\do mkdir -p $d/zfonts/ordinary;done)
Formatting information��
��169
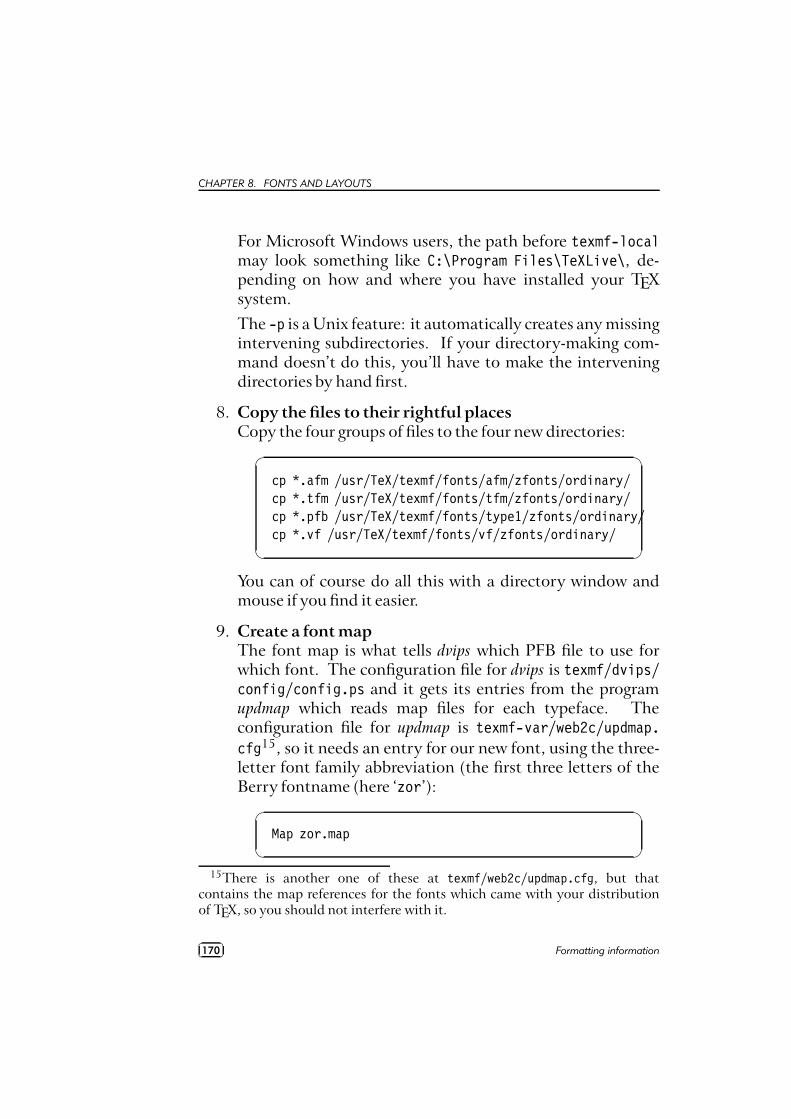
CHAPTER 8. FONTS AND LAYOUTS
For Microsoft Windows users, the path before texmf-localmay look something like C:\Program Files\TeXLive\, de-pending on how and where you have installed your TEXsystem.The -p is a Unix feature: it automatically creates any missingintervening subdirectories. If your directory-making com-mand doesn’t do this, you’ll have to make the interveningdirectories by hand first.
8. Copy the files to their rightful placesCopy the four groups of files to the four new directories:
�
�
cp *.afm /usr/TeX/texmf/fonts/afm/zfonts/ordinary/cp *.tfm /usr/TeX/texmf/fonts/tfm/zfonts/ordinary/cp *.pfb /usr/TeX/texmf/fonts/type1/zfonts/ordinary/cp *.vf /usr/TeX/texmf/fonts/vf/zfonts/ordinary/
You can of course do all this with a directory window andmouse if you find it easier.
9. Create a font mapThe font map is what tells dvips which PFB file to use forwhich font. The configuration file for dvips is texmf/dvips/config/config.ps and it gets its entries from the programupdmap which reads map files for each typeface. Theconfiguration file for updmap is texmf-var/web2c/updmap.cfg15, so it needs an entry for our new font, using the three-letter font family abbreviation (the first three letters of theBerry fontname (here ‘zor’):
�
�
Map zor.map
15There is another one of these at texmf/web2c/updmap.cfg, but thatcontains the map references for the fonts which came with your distributionof TEX, so you should not interfere with it.
��
��170 Formatting information
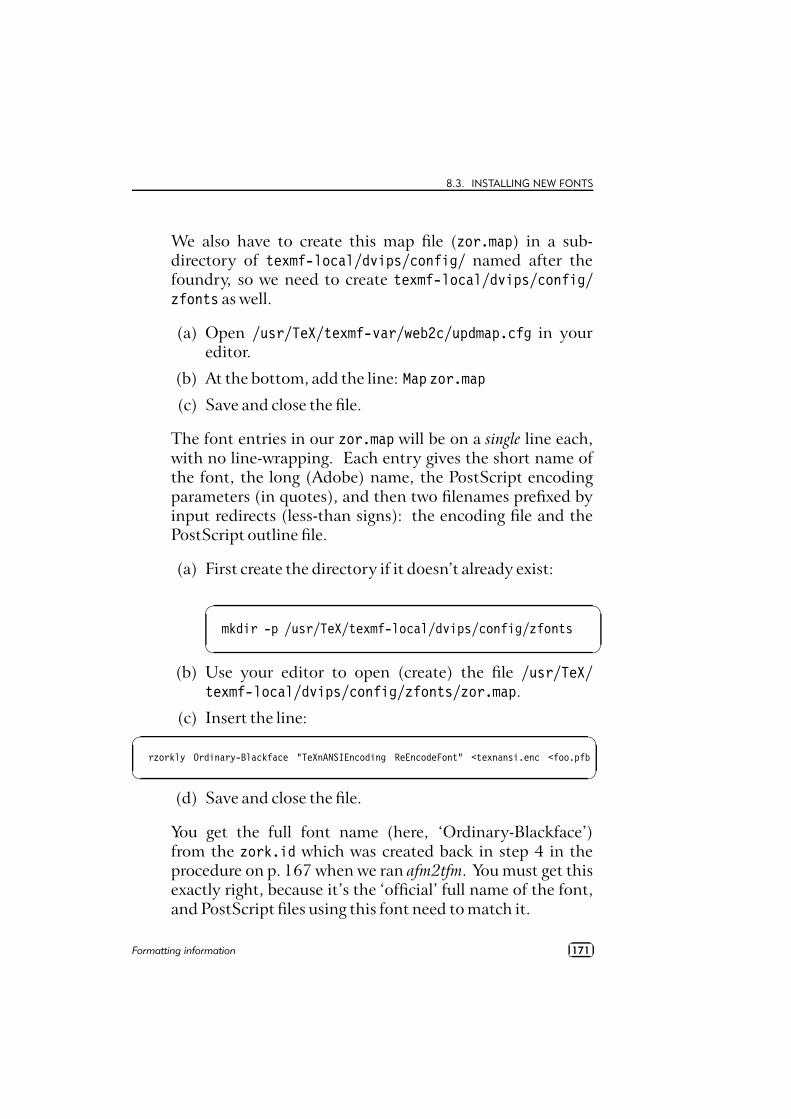
8.3. INSTALLING NEW FONTS
We also have to create this map file (zor.map) in a sub-directory of texmf-local/dvips/config/ named after thefoundry, so we need to create texmf-local/dvips/config/zfonts as well.
(a) Open /usr/TeX/texmf-var/web2c/updmap.cfg in youreditor.
(b) At the bottom, add the line: Map zor.map
(c) Save and close the file.
The font entries in our zor.map will be on a single line each,with no line-wrapping. Each entry gives the short name ofthe font, the long (Adobe) name, the PostScript encodingparameters (in quotes), and then two filenames prefixed byinput redirects (less-than signs): the encoding file and thePostScript outline file.
(a) First create the directory if it doesn’t already exist:
�
�
mkdir -p /usr/TeX/texmf-local/dvips/config/zfonts
(b) Use your editor to open (create) the file /usr/TeX/texmf-local/dvips/config/zfonts/zor.map.
(c) Insert the line:�
�
rzorkly Ordinary-Blackface "TeXnANSIEncoding ReEncodeFont" <texnansi.enc <foo.pfb
(d) Save and close the file.
You get the full font name (here, ‘Ordinary-Blackface’)from the zork.id which was created back in step 4 in theprocedure on p. 167 when we ran afm2tfm. You must get thisexactly right, because it’s the ‘official’ full name of the font,and PostScript files using this font need to match it.
Formatting information��
��171
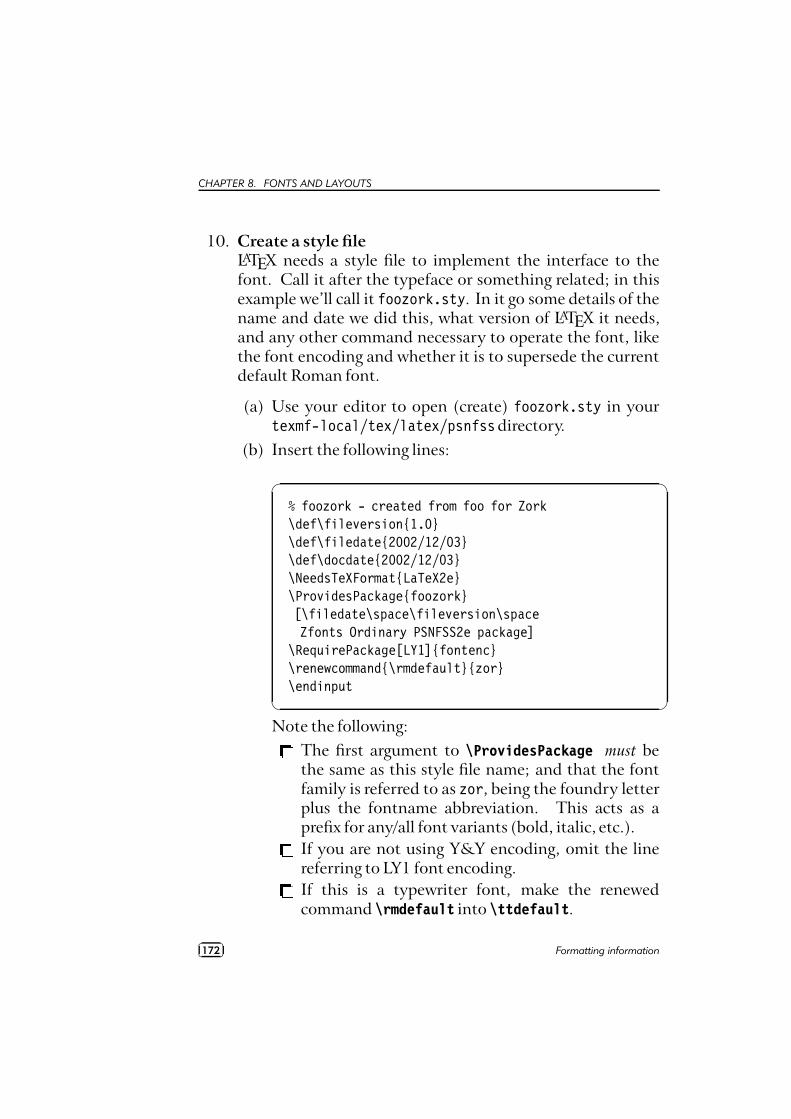
CHAPTER 8. FONTS AND LAYOUTS
10. Create a style fileLATEX needs a style file to implement the interface to thefont. Call it after the typeface or something related; in thisexample we’ll call it foozork.sty. In it go some details of thename and date we did this, what version of LATEX it needs,and any other command necessary to operate the font, likethe font encoding and whether it is to supersede the currentdefault Roman font.
(a) Use your editor to open (create) foozork.sty in yourtexmf-local/tex/latex/psnfssdirectory.
(b) Insert the following lines:
�
�
% foozork - created from foo for Zork\def\fileversion{1.0}\def\filedate{2002/12/03}\def\docdate{2002/12/03}\NeedsTeXFormat{LaTeX2e}\ProvidesPackage{foozork}[\filedate\space\fileversion\spaceZfonts Ordinary PSNFSS2e package]
\RequirePackage[LY1]{fontenc}\renewcommand{\rmdefault}{zor}\endinput
Note the following:í
The first argument to \ProvidesPackage must bethe same as this style file name; and that the fontfamily is referred to as zor, being the foundry letterplus the fontname abbreviation. This acts as aprefix for any/all font variants (bold, italic, etc.).
íIf you are not using Y&Y encoding, omit the linereferring to LY1 font encoding.
íIf this is a typewriter font, make the renewedcommand \rmdefault into \ttdefault.
��
��172 Formatting information
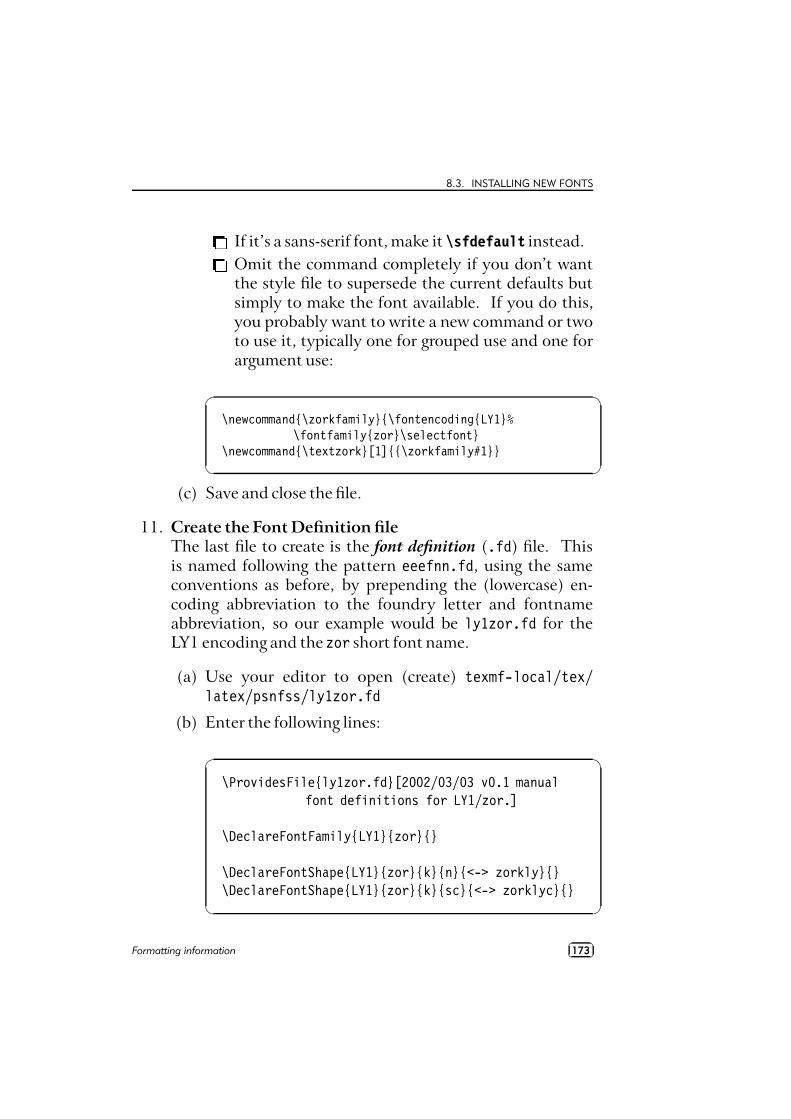
8.3. INSTALLING NEW FONTS
îIf it’s a sans-serif font, make it \sfdefault instead.
îOmit the command completely if you don’t wantthe style file to supersede the current defaults butsimply to make the font available. If you do this,you probably want to write a new command or twoto use it, typically one for grouped use and one forargument use:
�
�
\newcommand{\zorkfamily}{\fontencoding{LY1}%\fontfamily{zor}\selectfont}
\newcommand{\textzork}[1]{{\zorkfamily#1}}
(c) Save and close the file.
11. Create the Font Definition fileThe last file to create is the font definition (.fd) file. Thisis named following the pattern eeefnn.fd, using the sameconventions as before, by prepending the (lowercase) en-coding abbreviation to the foundry letter and fontnameabbreviation, so our example would be ly1zor.fd for theLY1 encoding and the zor short font name.
(a) Use your editor to open (create) texmf-local/tex/latex/psnfss/ly1zor.fd
(b) Enter the following lines:
�
�
\ProvidesFile{ly1zor.fd}[2002/03/03 v0.1 manualfont definitions for LY1/zor.]
\DeclareFontFamily{LY1}{zor}{}
\DeclareFontShape{LY1}{zor}{k}{n}{<-> zorkly}{}\DeclareFontShape{LY1}{zor}{k}{sc}{<-> zorklyc}{}
Formatting information��
��173
CHAPTER 8. FONTS AND LAYOUTS
(c) Save and close the file.
FD files typically use one \DeclareFontFamily commandwhich specifies the encoding and the short font name.Then as many pairs of \DeclareFontShape commands as youconverted fonts (assuming you did both normal and smallcaps for each font: see step 5 in the procedure on p. 168; ifyou didn’t, then only one such command per font is neededhere). The arguments to the \DeclareFontShape commandto watch are the 3rd (weight/width), 4th (shape), and 5th(font outline name): the rest are static for each .fd file andsimply identify the encoding and the font family.The codes to use are given on pages 414–15 of the TheLATEX Companion16 and should also be in your copies oftexmf/fontnames/weight.map and texmf/fontnames/width.map. The rules for combining weight and width need care:RTFM for fontname. There is no shape.map in fontnamebecause it’s not part of font file names, it’s purely a LATEXcreation, so here’s what the same book says:
Character Meaning
n normal (upright)it italicsl slantedsc small capsui upright italicol outline
Add your own for other oddities, but be consistent: I use cufor cursive (scripts), for example, and k for blackletter faces(not to be confused with k as a width for ‘book’).
The default fontspec <-> in the 5th argument in the\DeclareFontShape command means that all sizes are to
16Mittelbach et al. (2004)
��
��174 Formatting information
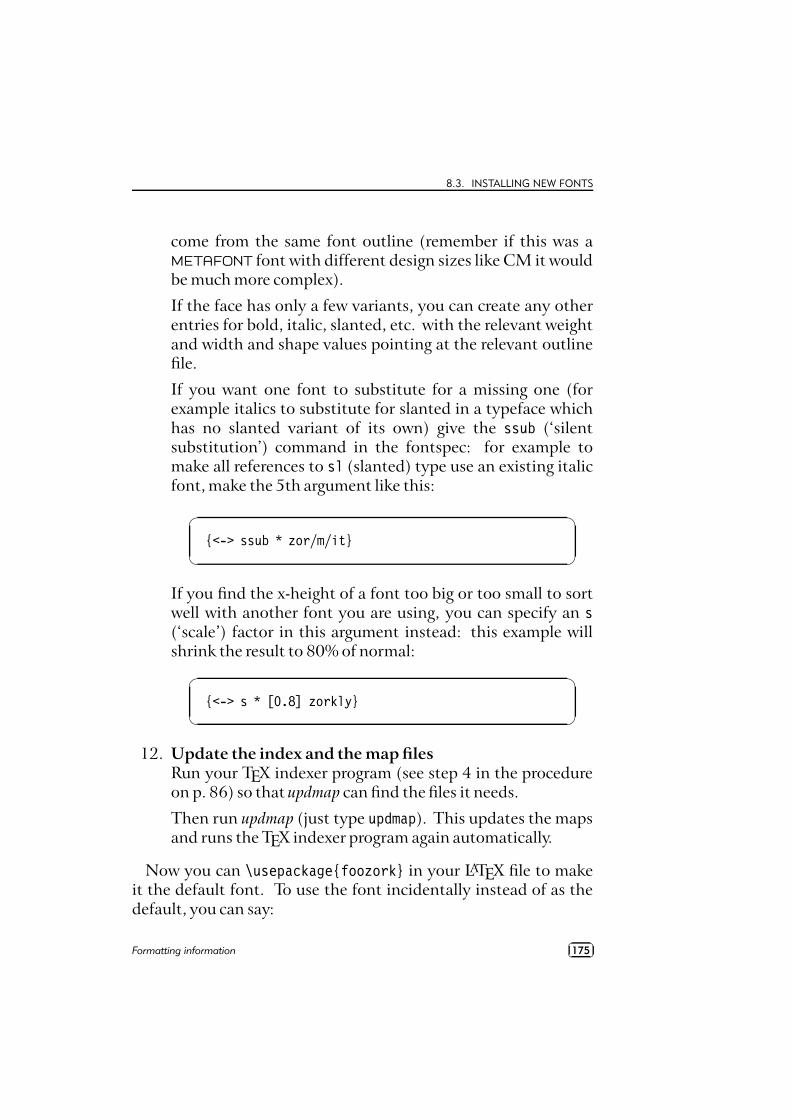
8.3. INSTALLING NEW FONTS
come from the same font outline (remember if this was aMETAFONT font with different design sizes like CM it wouldbe much more complex).
If the face has only a few variants, you can create any otherentries for bold, italic, slanted, etc. with the relevant weightand width and shape values pointing at the relevant outlinefile.
If you want one font to substitute for a missing one (forexample italics to substitute for slanted in a typeface whichhas no slanted variant of its own) give the ssub (‘silentsubstitution’) command in the fontspec: for example tomake all references to sl (slanted) type use an existing italicfont, make the 5th argument like this:
�
�
{<-> ssub * zor/m/it}
If you find the x-height of a font too big or too small to sortwell with another font you are using, you can specify an s(‘scale’) factor in this argument instead: this example willshrink the result to 80% of normal:
�
�
{<-> s * [0.8] zorkly}
12. Update the index and the map filesRun your TEX indexer program (see step 4 in the procedureon p. 86) so that updmap can find the files it needs.
Then run updmap (just type updmap). This updates the mapsand runs the TEX indexer program again automatically.
Now you can \usepackage{foozork} in your LATEX file to makeit the default font. To use the font incidentally instead of as thedefault, you can say:
Formatting information��
��175
CHAPTER 8. FONTS AND LAYOUTS
�
�
This is {\zorkfamily ZORK} or \textzork{ZORK}
8.3.3 Installing the Type 1 Computer Modern fonts
Most new distributions of LATEX use the PostScript Type 1 ver-sions of the Computer Modern fonts. If your LATEX installationuses the METAFONT (bitmap) versions of CM, you may want toswitch to the Type 1 version, especially if you are going to beusing pdfLATEX instead of standard LATEX, because Acrobat Readermakes such a hames of displaying Type3 fonts. GSview and pdfviewhandle them correctly.
To do this, install one of the sets of CM PostScript fonts. Thereare several available:ï
The fonts from BlueSky Research at http://www.ctan.org/tex-archive/fonts/cm/ps-type1/bluesky/
ïBasil K. Malyshev’s ‘BaKoMa’ fonts at http://www.ctan.org/tex-archive/fonts/cm/ps-type1/bakoma/
ïVladimir Volovich’s CM-Super at http://www.ctan.org/tex-archive/fonts/ps-type1/cm-super/
ïBogusław Jackowski’s Latin Modern at ftp://cam.ctan.org/tex-archive/fonts/ps-type1/lm.tar.gz
The BaKoMa fonts include the American Mathematical Society(AMS) fonts for extended mathematics, but are more complex toinstall because they come with a special set of TFM files.
The BlueSky fonts are just PFB and AFM files, and are a drop-inreplacement requiring no further changes, as they use the sameTFM files as the METAFONT version. Follow the README file in thedownloadable archive for installation instructions.
The Latin Modern and CM-Super fonts are new and I haven’ttested them but they are well spoken of. Feedback on this is verywelcome.
��
��176 Formatting information

8.3. INSTALLING NEW FONTS
The TEX Live and TEX Collection distributions use Type 1 ver-sions of Computer Modern by default. There are more details inthe FAQ at http://www.tex.ac.uk/cgi-bin/texfaq2html?label=uselmfonts .
Formatting information��
��177

9Programmability (macros)
We’ve touched several times on the ability of LATEX to be repro-grammed. This is one of its central features, and one that still,after nearly a quarter of a century, puts it well above many othertypesetting systems, even those with macro systems of their own.It’s also the one that needs most foreknowledge, which is why thischapter is in this position.
LATEX is in fact itself just a collection of macros — rather abig collection — written in TEX’s internal typesetting language.These macros are little program-like sets of instructions with aname which can be used as shorthand for an operation you wishto perform more than once.
Macros can be arbitrarily complex. Many of the ones used inthe standard LATEX packages are several pages long, but as we willsee, even short ones can very simply automate otherwise tediouschores and allow the author to concentrate on writing.
Formatting information��
��179
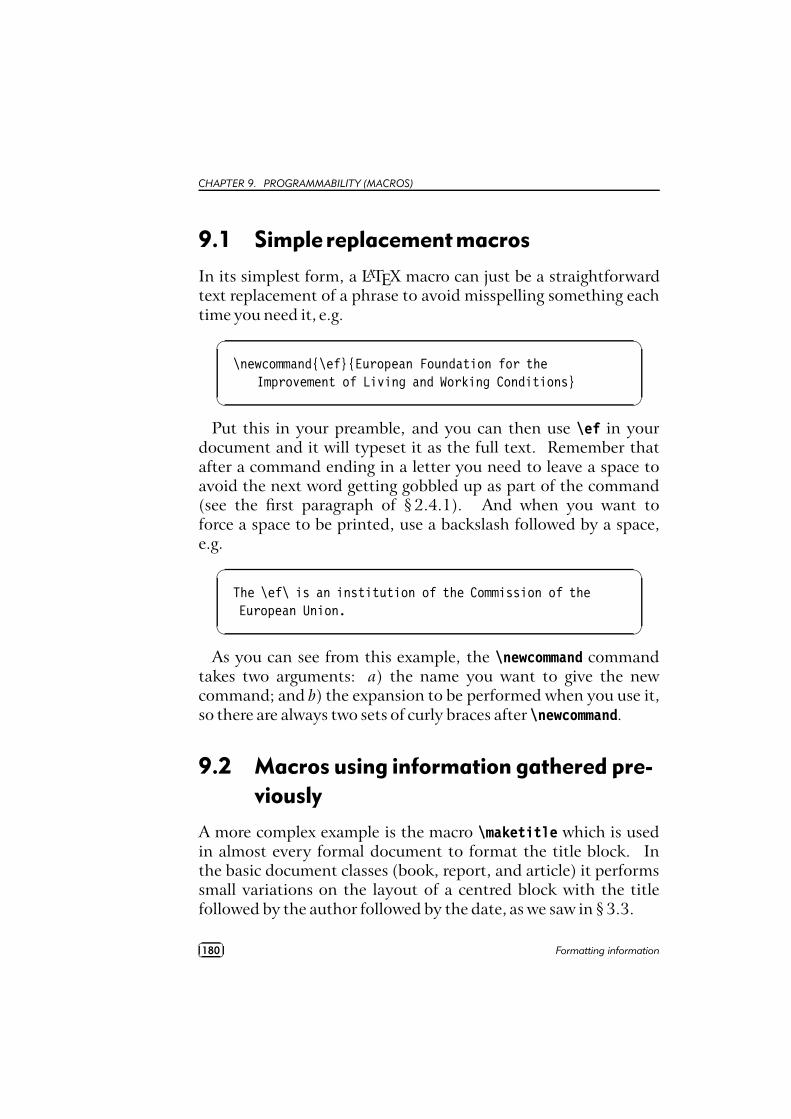
CHAPTER 9. PROGRAMMABILITY (MACROS)
9.1 Simple replacementmacros
In its simplest form, a LATEX macro can just be a straightforwardtext replacement of a phrase to avoid misspelling something eachtime you need it, e.g.
�
�
\newcommand{\ef}{European Foundation for theImprovement of Living and Working Conditions}
Put this in your preamble, and you can then use \ef in yourdocument and it will typeset it as the full text. Remember thatafter a command ending in a letter you need to leave a space toavoid the next word getting gobbled up as part of the command(see the first paragraph of § 2.4.1). And when you want toforce a space to be printed, use a backslash followed by a space,e.g.
�
�
The \ef\ is an institution of the Commission of theEuropean Union.
As you can see from this example, the \newcommand commandtakes two arguments: a) the name you want to give the newcommand; and b) the expansion to be performed when you use it,so there are always two sets of curly braces after \newcommand.
9.2 Macros using information gathered pre-viously
A more complex example is the macro \maketitle which is usedin almost every formal document to format the title block. Inthe basic document classes (book, report, and article) it performssmall variations on the layout of a centred block with the titlefollowed by the author followed by the date, as we saw in § 3.3.
��
��180 Formatting information
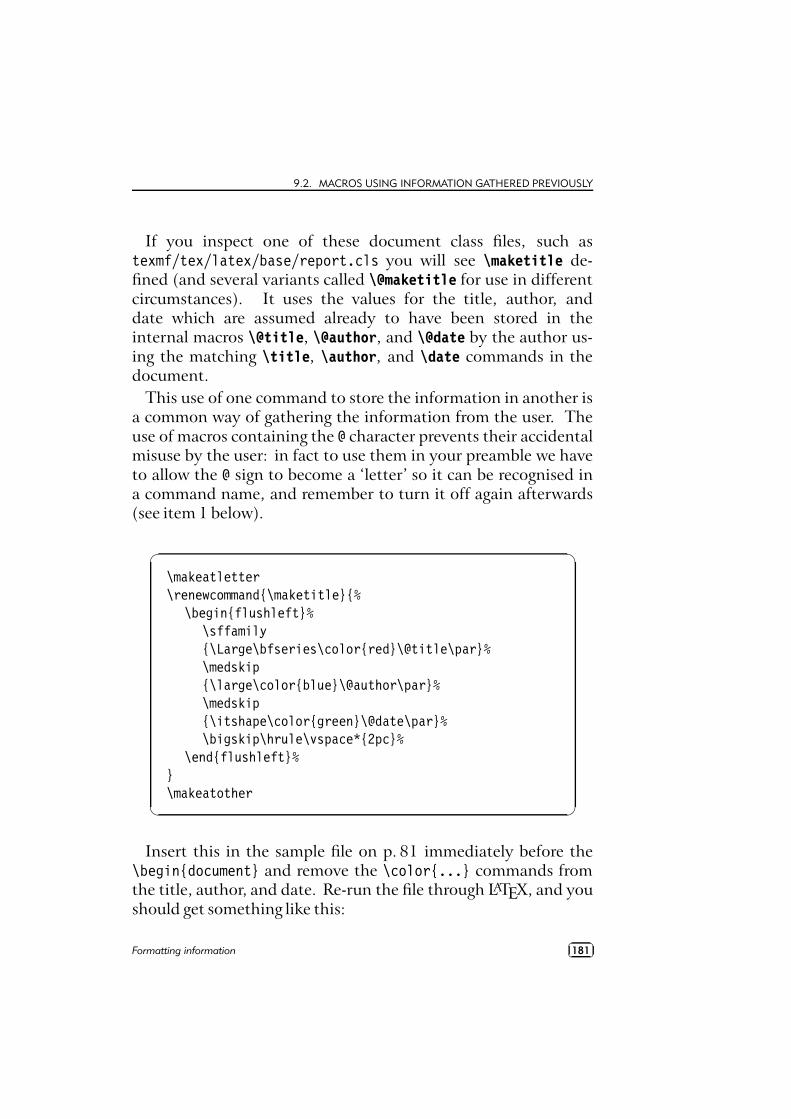
9.2. MACROS USING INFORMATION GATHERED PREVIOUSLY
If you inspect one of these document class files, such astexmf/tex/latex/base/report.cls you will see \maketitle de-fined (and several variants called \@maketitle for use in differentcircumstances). It uses the values for the title, author, anddate which are assumed already to have been stored in theinternal macros \@title, \@author, and \@date by the author us-ing the matching \title, \author, and \date commands in thedocument.
This use of one command to store the information in another isa common way of gathering the information from the user. Theuse of macros containing the @ character prevents their accidentalmisuse by the user: in fact to use them in your preamble we haveto allow the @ sign to become a ‘letter’ so it can be recognised ina command name, and remember to turn it off again afterwards(see item 1 below).
�
�
\makeatletter\renewcommand{\maketitle}{%
\begin{flushleft}%\sffamily{\Large\bfseries\color{red}\@title\par}%\medskip{\large\color{blue}\@author\par}%\medskip{\itshape\color{green}\@date\par}%\bigskip\hrule\vspace*{2pc}%
\end{flushleft}%}\makeatother
Insert this in the sample file on p. 81 immediately before the\begin{document} and remove the \color{...} commands fromthe title, author, and date. Re-run the file through LATEX, and youshould get something like this:
Formatting information��
��181
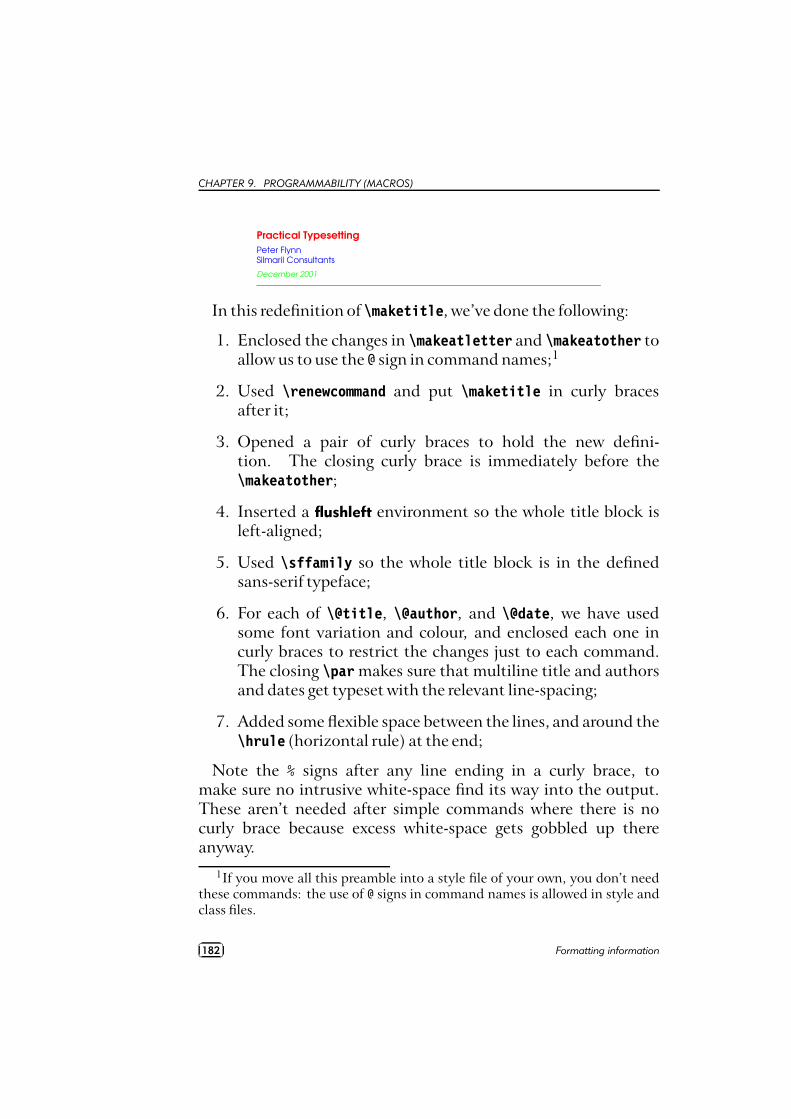
CHAPTER 9. PROGRAMMABILITY (MACROS)
Practical TypesettingPeter FlynnSilmaril Consultants
December 2001
In this redefinition of \maketitle, we’ve done the following:
1. Enclosed the changes in \makeatletter and \makeatother toallow us to use the @ sign in command names;1
2. Used \renewcommand and put \maketitle in curly bracesafter it;
3. Opened a pair of curly braces to hold the new defini-tion. The closing curly brace is immediately before the\makeatother;
4. Inserted a flushleft environment so the whole title block isleft-aligned;
5. Used \sffamily so the whole title block is in the definedsans-serif typeface;
6. For each of \@title, \@author, and \@date, we have usedsome font variation and colour, and enclosed each one incurly braces to restrict the changes just to each command.The closing \par makes sure that multiline title and authorsand dates get typeset with the relevant line-spacing;
7. Added some flexible space between the lines, and around the\hrule (horizontal rule) at the end;
Note the % signs after any line ending in a curly brace, tomake sure no intrusive white-space find its way into the output.These aren’t needed after simple commands where there is nocurly brace because excess white-space gets gobbled up thereanyway.
1If you move all this preamble into a style file of your own, you don’t needthese commands: the use of @ signs in command names is allowed in style andclass files.
��
��182 Formatting information
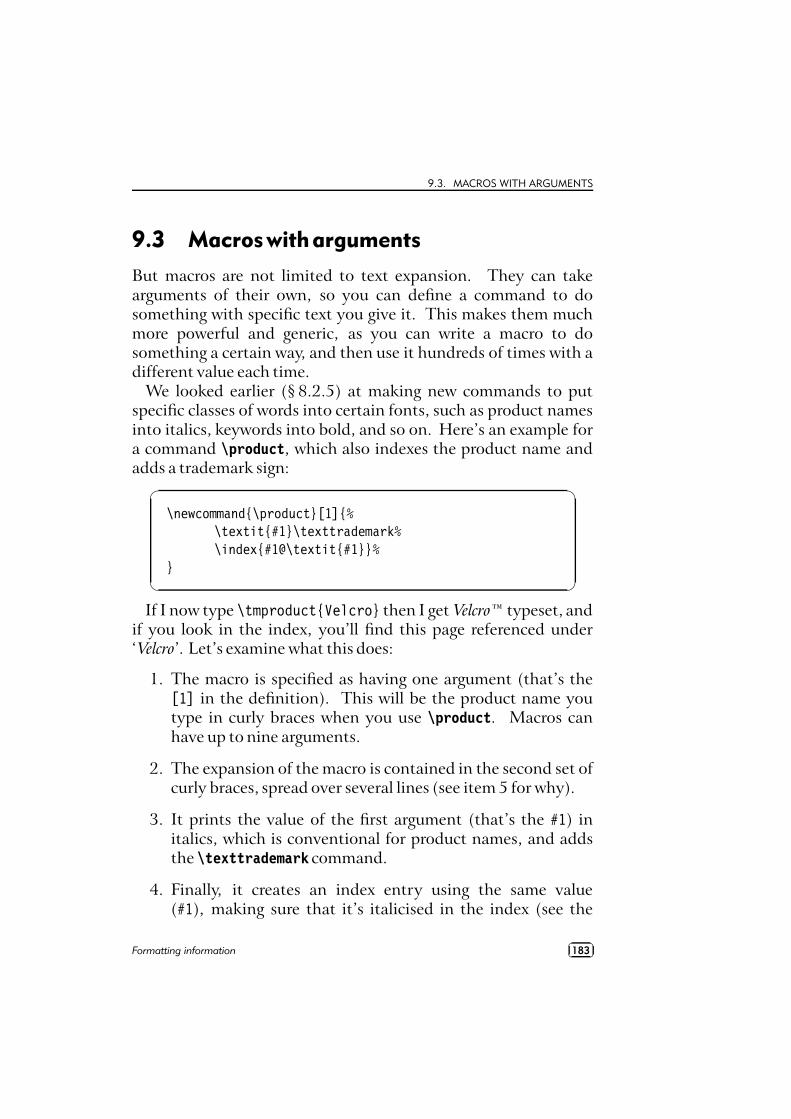
9.3. MACROS WITH ARGUMENTS
9.3 Macroswitharguments
But macros are not limited to text expansion. They can takearguments of their own, so you can define a command to dosomething with specific text you give it. This makes them muchmore powerful and generic, as you can write a macro to dosomething a certain way, and then use it hundreds of times with adifferent value each time.
We looked earlier (§ 8.2.5) at making new commands to putspecific classes of words into certain fonts, such as product namesinto italics, keywords into bold, and so on. Here’s an example fora command \product, which also indexes the product name andadds a trademark sign:
�
�
\newcommand{\product}[1]{%\textit{#1}\texttrademark%\index{#1@\textit{#1}}%
}
If I now type \tmproduct{Velcro} then I get Velcro™ typeset, andif you look in the index, you’ll find this page referenced under‘Velcro’. Let’s examine what this does:
1. The macro is specified as having one argument (that’s the[1] in the definition). This will be the product name youtype in curly braces when you use \product. Macros canhave up to nine arguments.
2. The expansion of the macro is contained in the second set ofcurly braces, spread over several lines (see item 5 for why).
3. It prints the value of the first argument (that’s the #1) initalics, which is conventional for product names, and addsthe \texttrademark command.
4. Finally, it creates an index entry using the same value(#1), making sure that it’s italicised in the index (see the
Formatting information��
��183
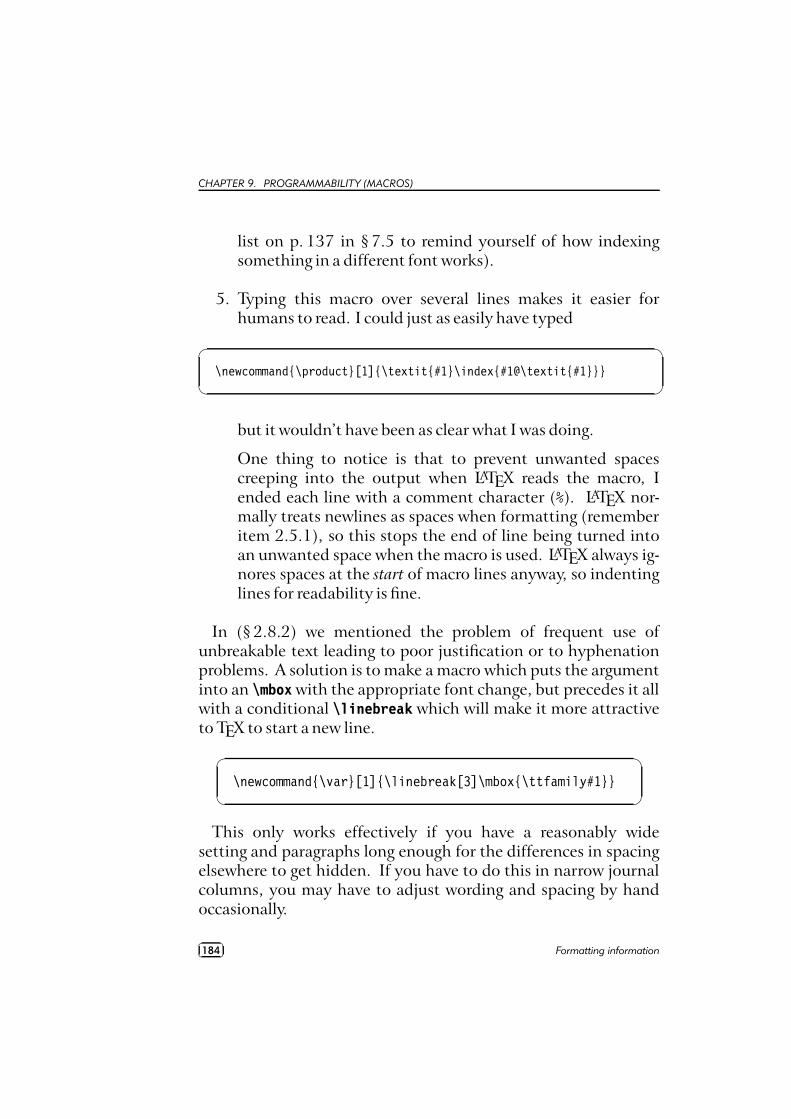
CHAPTER 9. PROGRAMMABILITY (MACROS)
list on p. 137 in § 7.5 to remind yourself of how indexingsomething in a different font works).
5. Typing this macro over several lines makes it easier forhumans to read. I could just as easily have typed
�
�
\newcommand{\product}[1]{\textit{#1}\index{#1@\textit{#1}}}
but it wouldn’t have been as clear what I was doing.
One thing to notice is that to prevent unwanted spacescreeping into the output when LATEX reads the macro, Iended each line with a comment character (%). LATEX nor-mally treats newlines as spaces when formatting (rememberitem 2.5.1), so this stops the end of line being turned intoan unwanted space when the macro is used. LATEX always ig-nores spaces at the start of macro lines anyway, so indentinglines for readability is fine.
In (§ 2.8.2) we mentioned the problem of frequent use ofunbreakable text leading to poor justification or to hyphenationproblems. A solution is to make a macro which puts the argumentinto an \mbox with the appropriate font change, but precedes it allwith a conditional \linebreak which will make it more attractiveto TEX to start a new line.
�
�
\newcommand{\var}[1]{\linebreak[3]\mbox{\ttfamily#1}}
This only works effectively if you have a reasonably widesetting and paragraphs long enough for the differences in spacingelsewhere to get hidden. If you have to do this in narrow journalcolumns, you may have to adjust wording and spacing by handoccasionally.
��
��184 Formatting information
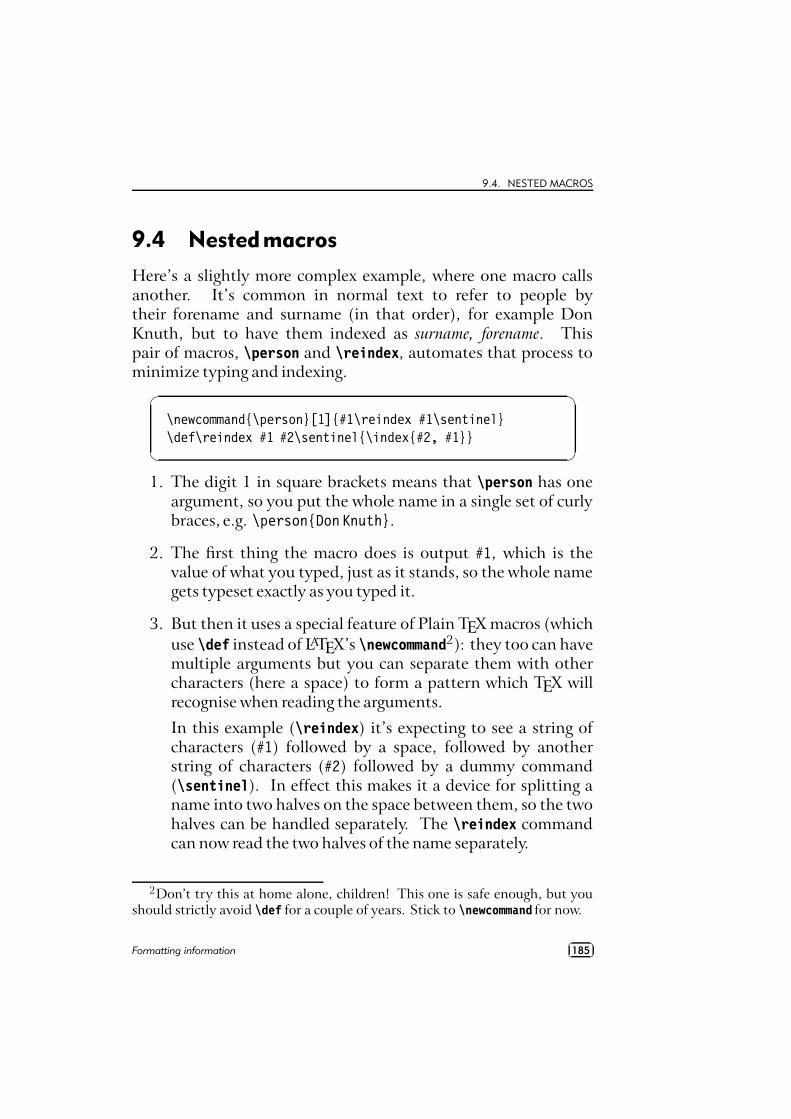
9.4. NESTED MACROS
9.4 Nestedmacros
Here’s a slightly more complex example, where one macro callsanother. It’s common in normal text to refer to people bytheir forename and surname (in that order), for example DonKnuth, but to have them indexed as surname, forename. Thispair of macros, \person and \reindex, automates that process tominimize typing and indexing.
�
�
\newcommand{\person}[1]{#1\reindex #1\sentinel}\def\reindex #1 #2\sentinel{\index{#2, #1}}
1. The digit 1 in square brackets means that \person has oneargument, so you put the whole name in a single set of curlybraces, e.g. \person{Don Knuth}.
2. The first thing the macro does is output #1, which is thevalue of what you typed, just as it stands, so the whole namegets typeset exactly as you typed it.
3. But then it uses a special feature of Plain TEX macros (whichuse \def instead of LATEX’s \newcommand2): they too can havemultiple arguments but you can separate them with othercharacters (here a space) to form a pattern which TEX willrecognise when reading the arguments.
In this example (\reindex) it’s expecting to see a string ofcharacters (#1) followed by a space, followed by anotherstring of characters (#2) followed by a dummy command(\sentinel). In effect this makes it a device for splitting aname into two halves on the space between them, so the twohalves can be handled separately. The \reindex commandcan now read the two halves of the name separately.
2Don’t try this at home alone, children! This one is safe enough, but youshould strictly avoid \def for a couple of years. Stick to \newcommand for now.
Formatting information��
��185
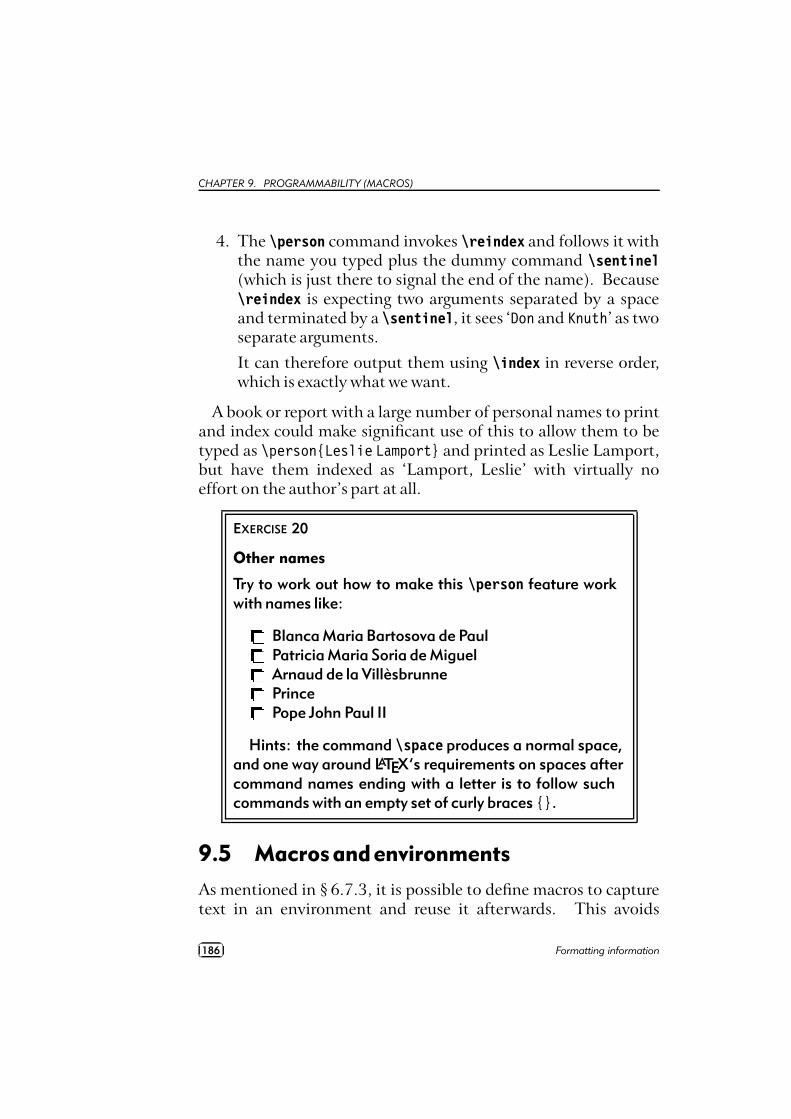
CHAPTER 9. PROGRAMMABILITY (MACROS)
4. The \person command invokes \reindex and follows it withthe name you typed plus the dummy command \sentinel(which is just there to signal the end of the name). Because\reindex is expecting two arguments separated by a spaceand terminated by a \sentinel, it sees ‘Don and Knuth’ as twoseparate arguments.
It can therefore output them using \index in reverse order,which is exactly what we want.
A book or report with a large number of personal names to printand index could make significant use of this to allow them to betyped as \person{Leslie Lamport} and printed as Leslie Lamport,but have them indexed as ‘Lamport, Leslie’ with virtually noeffort on the author’s part at all.
EXERCISE 20
Other names
Try to work out how to make this \person feature workwith names like:
ðBlanca Maria Bartosova de PaulðPatricia Maria Soria de MiguelðArnaud de la VillèsbrunneðPrinceðPope John Paul II
Hints: the command \space produces a normal space,and one way around LATEX’s requirements on spaces aftercommand names ending with a letter is to follow suchcommands with an empty set of curly braces {}.
9.5 Macrosandenvironments
As mentioned in § 6.7.3, it is possible to define macros to capturetext in an environment and reuse it afterwards. This avoids
��
��186 Formatting information
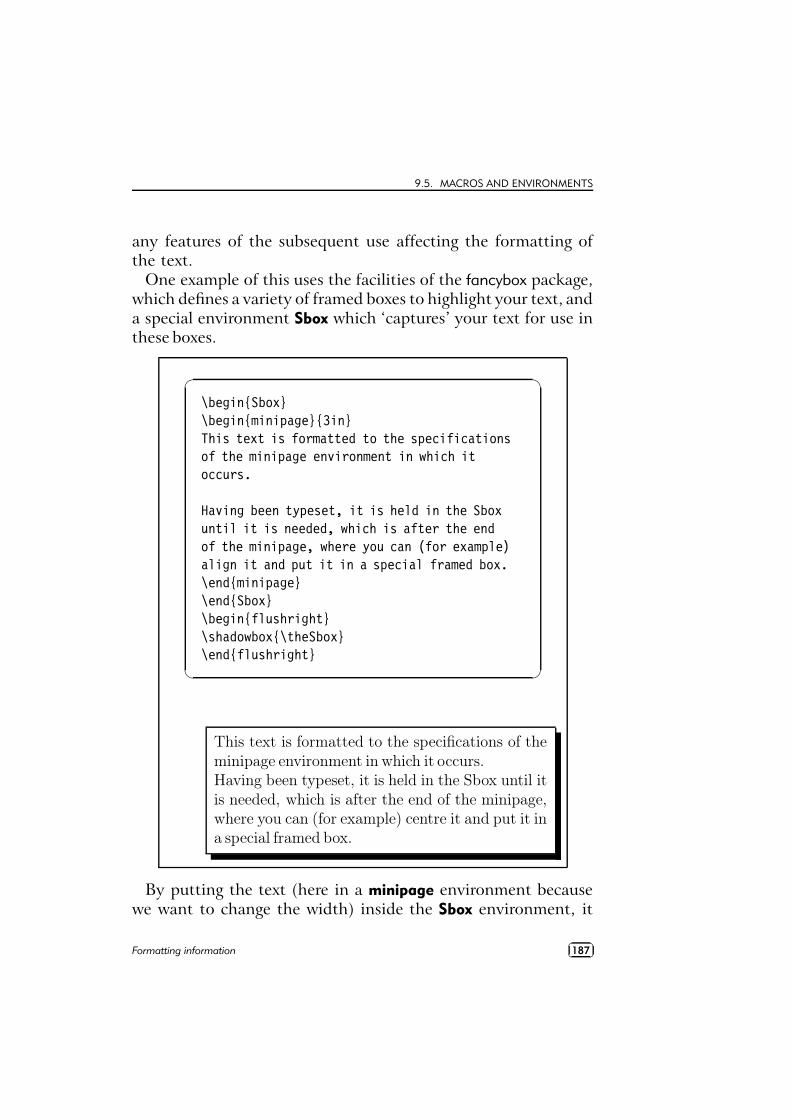
9.5. MACROS AND ENVIRONMENTS
any features of the subsequent use affecting the formatting ofthe text.
One example of this uses the facilities of the fancybox package,which defines a variety of framed boxes to highlight your text, anda special environment Sbox which ‘captures’ your text for use inthese boxes.
�
�
\begin{Sbox}\begin{minipage}{3in}This text is formatted to the specificationsof the minipage environment in which itoccurs.
Having been typeset, it is held in the Sboxuntil it is needed, which is after the endof the minipage, where you can (for example)align it and put it in a special framed box.\end{minipage}\end{Sbox}\begin{flushright}\shadowbox{\theSbox}\end{flushright}
This text is formatted to the specifications of theminipage environment in which it occurs.Having been typeset, it is held in the Sbox until itis needed, which is after the end of the minipage,where you can (for example) centre it and put it ina special framed box.
By putting the text (here in a minipage environment becausewe want to change the width) inside the Sbox environment, it
Formatting information��
��187
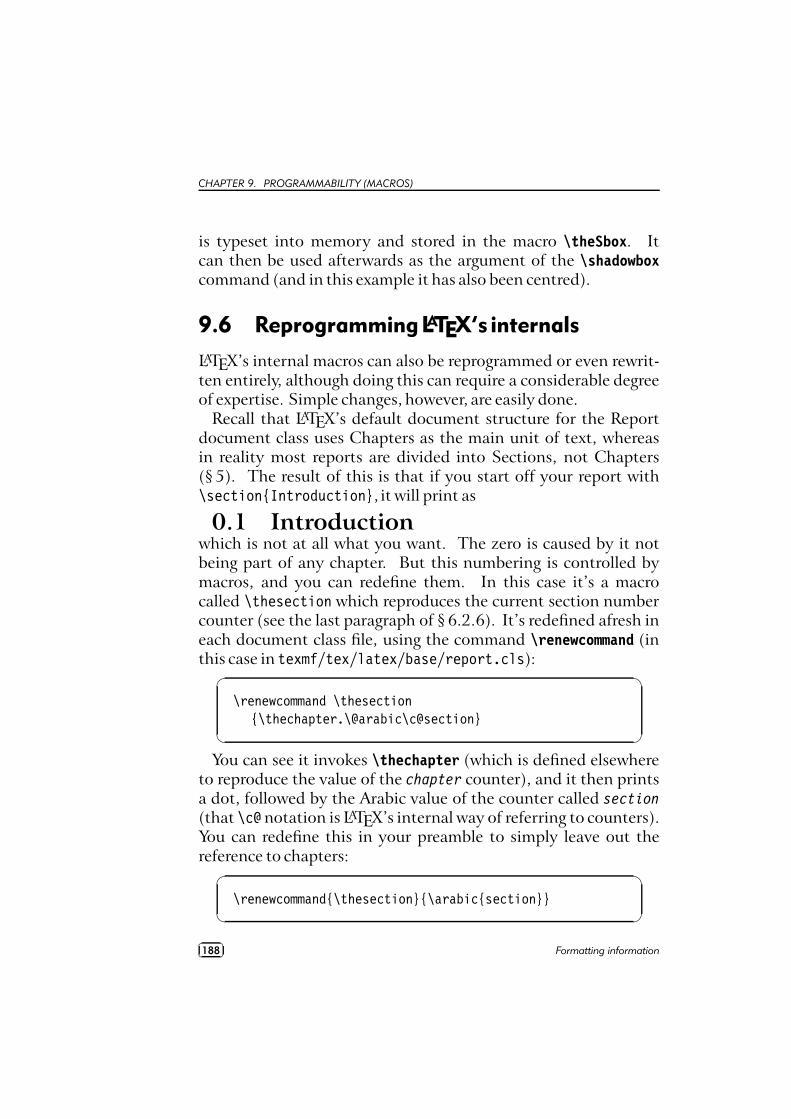
CHAPTER 9. PROGRAMMABILITY (MACROS)
is typeset into memory and stored in the macro \theSbox. Itcan then be used afterwards as the argument of the \shadowboxcommand (and in this example it has also been centred).
9.6 ReprogrammingLATEX’s internals
LATEX’s internal macros can also be reprogrammed or even rewrit-ten entirely, although doing this can require a considerable degreeof expertise. Simple changes, however, are easily done.
Recall that LATEX’s default document structure for the Reportdocument class uses Chapters as the main unit of text, whereasin reality most reports are divided into Sections, not Chapters(§ 5). The result of this is that if you start off your report with\section{Introduction}, it will print as
0.1 Introductionwhich is not at all what you want. The zero is caused by it notbeing part of any chapter. But this numbering is controlled bymacros, and you can redefine them. In this case it’s a macrocalled \thesection which reproduces the current section numbercounter (see the last paragraph of § 6.2.6). It’s redefined afresh ineach document class file, using the command \renewcommand (inthis case in texmf/tex/latex/base/report.cls):
�
�
\renewcommand \thesection{\thechapter.\@arabic\c@section}
You can see it invokes \thechapter (which is defined elsewhereto reproduce the value of the chapter counter), and it then printsa dot, followed by the Arabic value of the counter called section
(that \c@ notation is LATEX’s internal way of referring to counters).You can redefine this in your preamble to simply leave out thereference to chapters:
�
�
\renewcommand{\thesection}{\arabic{section}}
��
��188 Formatting information
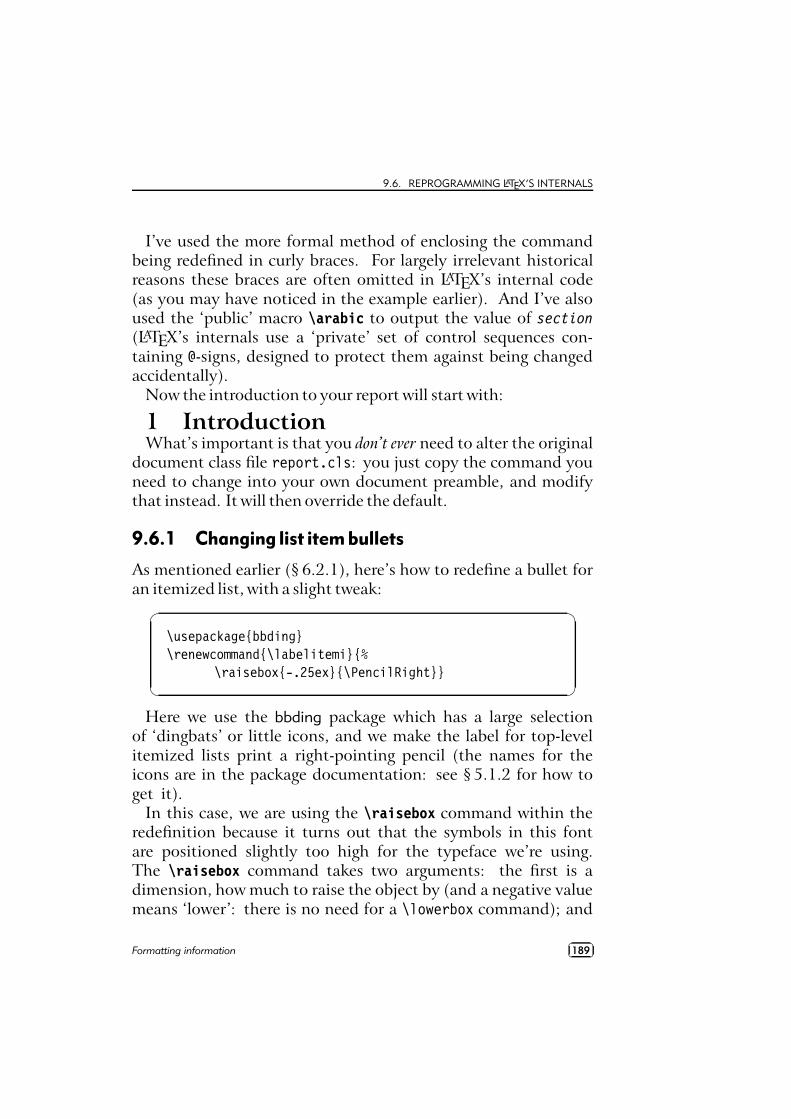
9.6. REPROGRAMMING LATEX’S INTERNALS
I’ve used the more formal method of enclosing the commandbeing redefined in curly braces. For largely irrelevant historicalreasons these braces are often omitted in LATEX’s internal code(as you may have noticed in the example earlier). And I’ve alsoused the ‘public’ macro \arabic to output the value of section
(LATEX’s internals use a ‘private’ set of control sequences con-taining @-signs, designed to protect them against being changedaccidentally).
Now the introduction to your report will start with:
1 IntroductionWhat’s important is that you don’t ever need to alter the original
document class file report.cls: you just copy the command youneed to change into your own document preamble, and modifythat instead. It will then override the default.
9.6.1 Changing list item bullets
As mentioned earlier (§ 6.2.1), here’s how to redefine a bullet foran itemized list, with a slight tweak:
�
�
\usepackage{bbding}\renewcommand{\labelitemi}{%
\raisebox{-.25ex}{\PencilRight}}
Here we use the bbding package which has a large selectionof ‘dingbats’ or little icons, and we make the label for top-levelitemized lists print a right-pointing pencil (the names for theicons are in the package documentation: see § 5.1.2 for how toget it).
In this case, we are using the \raisebox command within theredefinition because it turns out that the symbols in this fontare positioned slightly too high for the typeface we’re using.The \raisebox command takes two arguments: the first is adimension, how much to raise the object by (and a negative valuemeans ‘lower’: there is no need for a \lowerbox command); and
Formatting information��
��189
CHAPTER 9. PROGRAMMABILITY (MACROS)
the second is the text you want to affect. Here, we are shiftingthe symbol down by ¼ex (see § 2.8.1 for a list of dimensions LATEXcan use).
There is a vast number of symbols available: see A comprehensivelist of symbols in TEX3 for a comprehensive list.
3Pakin (2002)
��
��190 Formatting information
10Compatibility with othersystems
As we saw in Chapter 2, LATEX uses plain-text files, so they canbe read and written by any standard application that can opentext files. This helps preserve your information over time, asthe plain-text format cannot be obsoleted or hijacked by anymanufacturer or sectoral interest, and it will always be readableon any computer, from your handheld (yes, LATEX is available forsome PDAs, see Figure 10.1) to the biggest supercomputer.
However, LATEX is intended as the last stage of the editorialprocess: formatting for print or display. If you have a requirementto re-use the text in some other environment — a databaseperhaps, or on the Web or a CD-ROM or DVD, or in Brailleor voice output — then it should probably be edited, stored,and maintained in something neutral like the Extensible MarkupLanguage (XML), and only converted to LATEX when a typesetcopy is needed.
Although LATEX has many structured-document features incommon with SGML and XML, it can still only be processedby the LATEX and pdfLATEX programs. Because its macro fea-
Formatting information��
��191
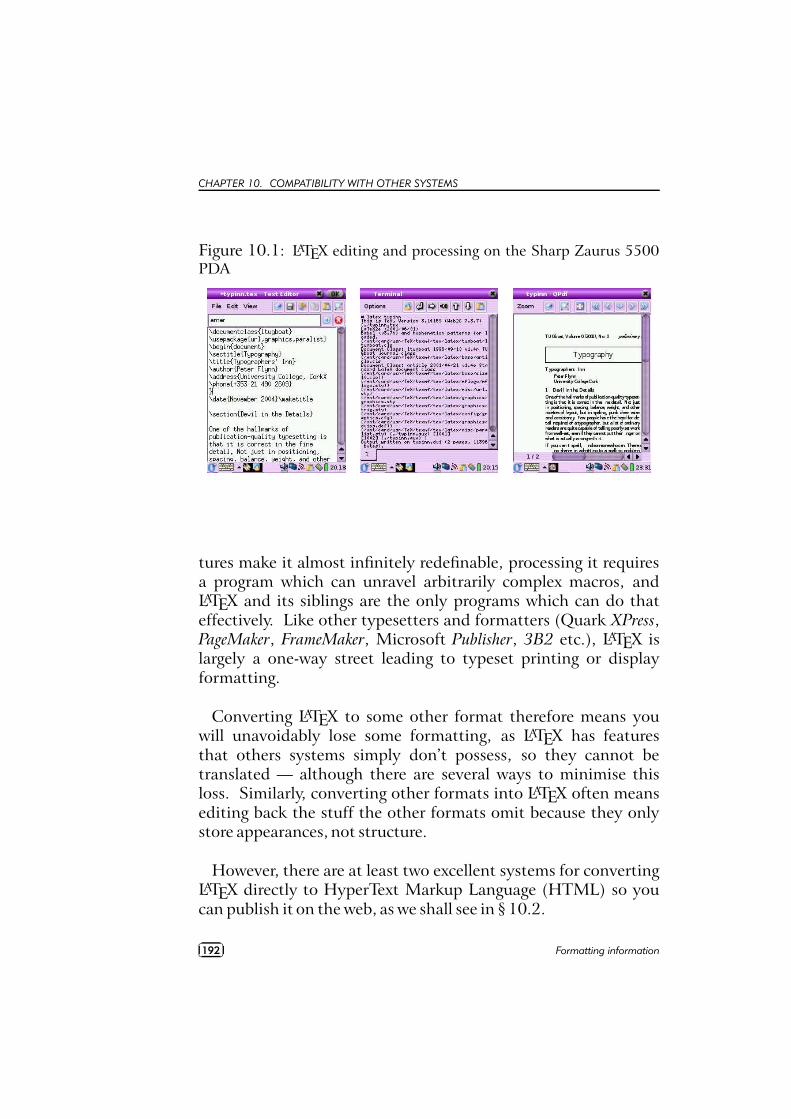
CHAPTER 10. COMPATIBILITY WITH OTHER SYSTEMS
Figure 10.1: LATEX editing and processing on the Sharp Zaurus 5500PDA
tures make it almost infinitely redefinable, processing it requiresa program which can unravel arbitrarily complex macros, andLATEX and its siblings are the only programs which can do thateffectively. Like other typesetters and formatters (Quark XPress,PageMaker, FrameMaker, Microsoft Publisher, 3B2 etc.), LATEX islargely a one-way street leading to typeset printing or displayformatting.
Converting LATEX to some other format therefore means youwill unavoidably lose some formatting, as LATEX has featuresthat others systems simply don’t possess, so they cannot betranslated — although there are several ways to minimise thisloss. Similarly, converting other formats into LATEX often meansediting back the stuff the other formats omit because they onlystore appearances, not structure.
However, there are at least two excellent systems for convertingLATEX directly to HyperText Markup Language (HTML) so youcan publish it on the web, as we shall see in § 10.2.
��
��192 Formatting information
10.1. CONVERTING INTO LATEX
10.1 Converting intoLATEX
There are several systems which will save their text in LATEX for-mat. The best known is probably the LYX editor (see Figure 2.2),which is a wordprocessor-like interface to LATEX for Windowsand Unix. Both the AbiWord and Kword wordprocessors onLinux systems have a very good Save As…LATEX output, so theycan be used to open Microsoft Word documents and convert toLATEX. Several maths packages like the EuroMath editor, and theMathematica and Maple analysis packages, can also save materialin LATEX format.
In general, most other wordprocessors and DTP systems eitherdon’t have the level of internal markup sophistication needed tocreate a LATEX file, or they lack a suitable filter to enable them tooutput what they do have. Often they are incapable of outputtingany kind of structured document, because they only store whatthe text looks like, not why it’s there or what role it fulfills. Thereare two ways out of this:ñ
Use the FileSave As… ò menu item to save the wordprocessor
file as HTML, rationalise the HTML using Dave Raggett’sHTML Tidy1, and convert the resulting Extensible Hyper-Text Markup Language (XHTML) to LATEX with any of thestandard XML tools (see below).
ñUse a specialist conversion tool like EBT’s DynaTag (suppos-edly available from Enigma, if you can persuade them theyhave a copy to sell you; or you may still be able to get itfrom Red Bridge Interactive2 in Providence, RI). It’s expen-sive and they don’t advertise it, but for bulk conversion ofconsistently-marked Word files into XML it beats everythingelse hands down. The Word files must be consistent, though,and must use named styles from a stylesheet, otherwise nosystem on earth is going to be able to guess what it means.
1http://tidy.sourceforge.net/2http://www.rbii.com/
Formatting information��
��193
CHAPTER 10. COMPATIBILITY WITH OTHER SYSTEMS
There is of course a third way, suitable for large volumes only:send it off to the Pacific Rim to be retyped into XML or LATEX.There are hundreds of companies from India to Polynesia who dothis at high speed and low cost with very high accuracy. It soundscrazy when the document is already in electronic form, but it’sa good example of the problem of low quality of wordprocessormarkup that this solution exists at all.
You will have noticed that most of the solutions lead to oneplace: SGML3 or XML. As explained above and elsewhere, theseformats are the only ones devised so far capable of storing suf-ficient information in machine-processable, publicly-accessibleform to enable your document to be recreated in multiple out-put formats. Once your document is in XML, there is a largerange of software available to turn it into other formats, includingLATEX. Processors in any of the common SGML/XML processinglanguages like the Document Style Semantics and SpecificationLanguage (DSSSL), the Extensible Stylesheet Language [Trans-formations] (XSLT), Omnimark, Metamorphosis, Balise, etc. caneasily be written to output LATEX, and this approach is extremelycommon.
Much of this will be simplified when wordprocessors supportnative, arbitrary XML/XSLT as a standard feature, because LATEXoutput will become much simpler to produce.ó
Sun’s Star Office and its Open Source sister, OpenOffice, haveused XML as their native file format for several years, andthere is a project at the Organisation for the Advancementof Structured Information Systems (OASIS) for developinga common XML office file format based on those usedby these two packages, which has been proposed to theInternational Organization for Standardization (ISO) inGeneva as a candidate for an International Standard.
3The Standard Generalized Markup Language (SGML) itself is little usednow for new projects, as the software support for its daughter XML is fargreater, but there are still hundreds of large document repositories in SGMLstill growing their collection by adding documents.
��
��194 Formatting information
10.1. CONVERTING INTO LATEX
ôWordPerfect has also had a native SGML (and now XML)editor for many years, which will work with any DocumentType Definition (DTD) (but not a Schema; and at thetime of writing (2005) it still used a proprietary stylesheetformat).
ôMicrosoft has had a half-hearted ‘Save As…XML’ for awhile, using an internal and formerly largely undocumentedSchema (recently published at last). The ‘Professional’versions of Word and Excel in Office 11 (Office 2003 for XP)now have full support for arbitrary Schemas and a real XMLeditor, albeit with a rather primitive interface, but there is noconversion to or from Word’s .doc format.4
However, help comes in the shape of Ruggero Dambra’sWordML2LATEX, which is an XSLT stylesheet to transforman XML document in this internal Schema (WordML) intoLATEX 2ε format. Download it from any CTAN server in/support/WordML2LaTeX.
ôAmong the conversion programs on CTAN is Ujwal Sath-yam’s rtf2latex2e, which converts Rich Text Format (RTF)files (output by many wordprocessors) to LATEX 2ε. Thepackage description says it has support for figures andtables, equations are read as figures, and it can the handlethe latest RTF versions from Microsoft Word 97/98/2000,StarOffice, and other wordprocessors. It runs on Macs,Linux, other Unix systems, and Windows.
When these efforts coalesce into generalised support for arbi-trary DTDs and Schemas, it will mean a wider choice of editinginterfaces, and when they achieve the ability to run XSLT conver-sion into LATEX from within these editors, such as is done at themoment with Emacs or XML Spy, we will have full convertability.
4Which is silly, given that Microsoft used to make one of the best Word-to-SGML converters ever, which was bi-directional (yes, it could round-trip Wordto SGML and back to Word and back into SGML). But they dropped it on thefloor when XML arrived.
Formatting information��
��195
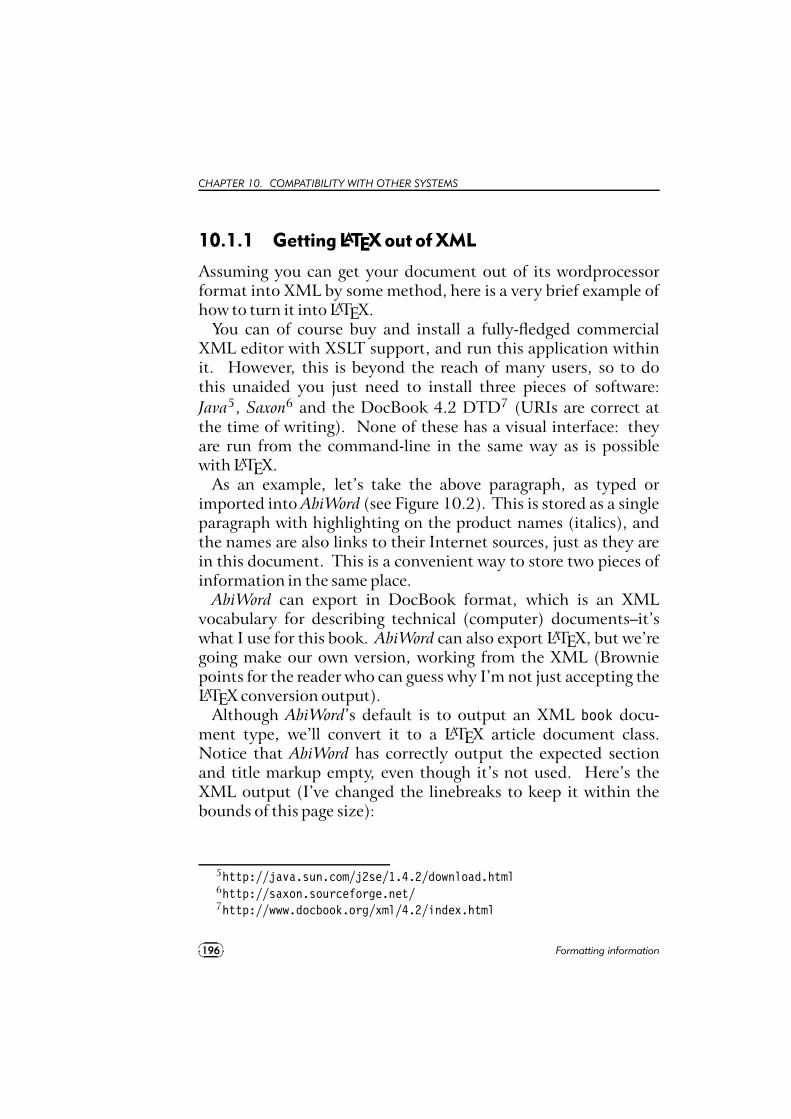
CHAPTER 10. COMPATIBILITY WITH OTHER SYSTEMS
10.1.1 Getting LATEX out of XML
Assuming you can get your document out of its wordprocessorformat into XML by some method, here is a very brief example ofhow to turn it into LATEX.
You can of course buy and install a fully-fledged commercialXML editor with XSLT support, and run this application withinit. However, this is beyond the reach of many users, so to dothis unaided you just need to install three pieces of software:Java5, Saxon6 and the DocBook 4.2 DTD7 (URIs are correct atthe time of writing). None of these has a visual interface: theyare run from the command-line in the same way as is possiblewith LATEX.
As an example, let’s take the above paragraph, as typed orimported into AbiWord (see Figure 10.2). This is stored as a singleparagraph with highlighting on the product names (italics), andthe names are also links to their Internet sources, just as they arein this document. This is a convenient way to store two pieces ofinformation in the same place.
AbiWord can export in DocBook format, which is an XMLvocabulary for describing technical (computer) documents–it’swhat I use for this book. AbiWord can also export LATEX, but we’regoing make our own version, working from the XML (Browniepoints for the reader who can guess why I’m not just accepting theLATEX conversion output).
Although AbiWord’s default is to output an XML book docu-ment type, we’ll convert it to a LATEX article document class.Notice that AbiWord has correctly output the expected sectionand title markup empty, even though it’s not used. Here’s theXML output (I’ve changed the linebreaks to keep it within thebounds of this page size):
5http://java.sun.com/j2se/1.4.2/download.html6http://saxon.sourceforge.net/7http://www.docbook.org/xml/4.2/index.html
��
��196 Formatting information
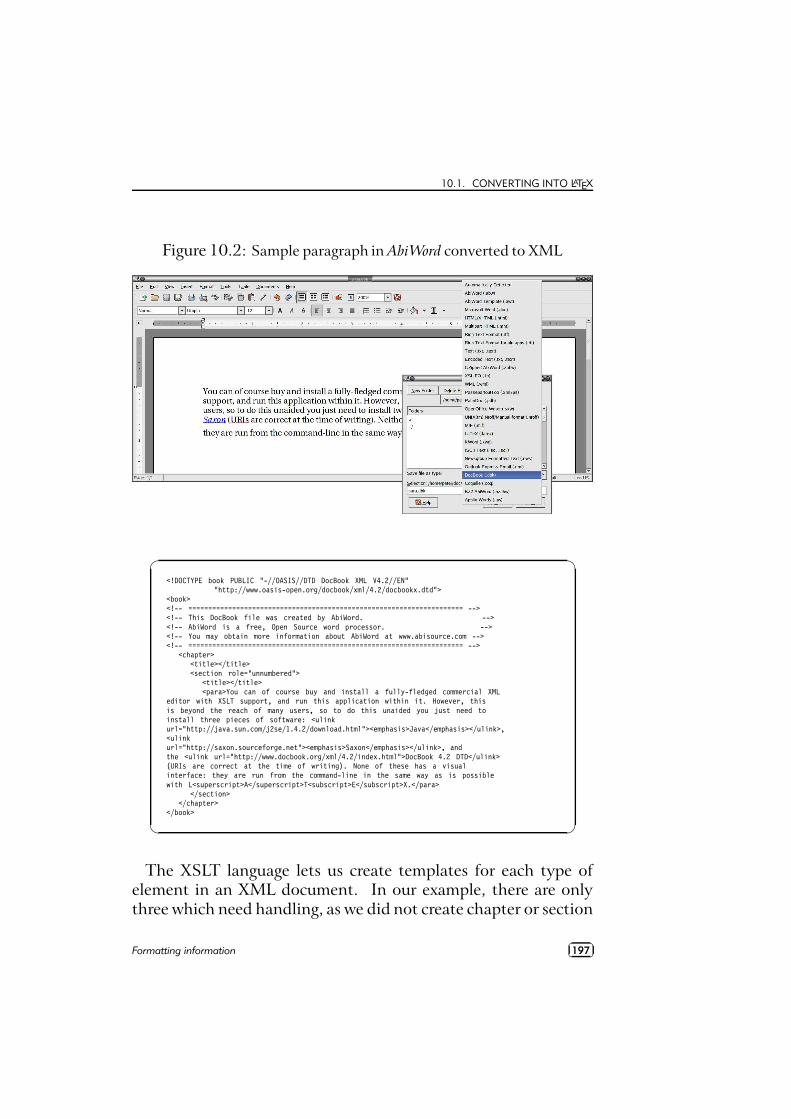
10.1. CONVERTING INTO LATEX
Figure 10.2: Sample paragraph in AbiWord converted to XML
�
�
<!DOCTYPE book PUBLIC "-//OASIS//DTD DocBook XML V4.2//EN""http://www.oasis-open.org/docbook/xml/4.2/docbookx.dtd">
<book><!-- ===================================================================== --><!-- This DocBook file was created by AbiWord. --><!-- AbiWord is a free, Open Source word processor. --><!-- You may obtain more information about AbiWord at www.abisource.com --><!-- ===================================================================== -->
<chapter><title></title><section role="unnumbered">
<title></title><para>You can of course buy and install a fully-fledged commercial XML
editor with XSLT support, and run this application within it. However, thisis beyond the reach of many users, so to do this unaided you just need toinstall three pieces of software: <ulinkurl="http://java.sun.com/j2se/1.4.2/download.html"><emphasis>Java</emphasis></ulink>,<ulinkurl="http://saxon.sourceforge.net"><emphasis>Saxon</emphasis></ulink>, andthe <ulink url="http://www.docbook.org/xml/4.2/index.html">DocBook 4.2 DTD</ulink>(URIs are correct at the time of writing). None of these has a visualinterface: they are run from the command-line in the same way as is possiblewith L<superscript>A</superscript>T<subscript>E</subscript>X.</para>
</section></chapter>
</book>
The XSLT language lets us create templates for each type ofelement in an XML document. In our example, there are onlythree which need handling, as we did not create chapter or section
Formatting information��
��197
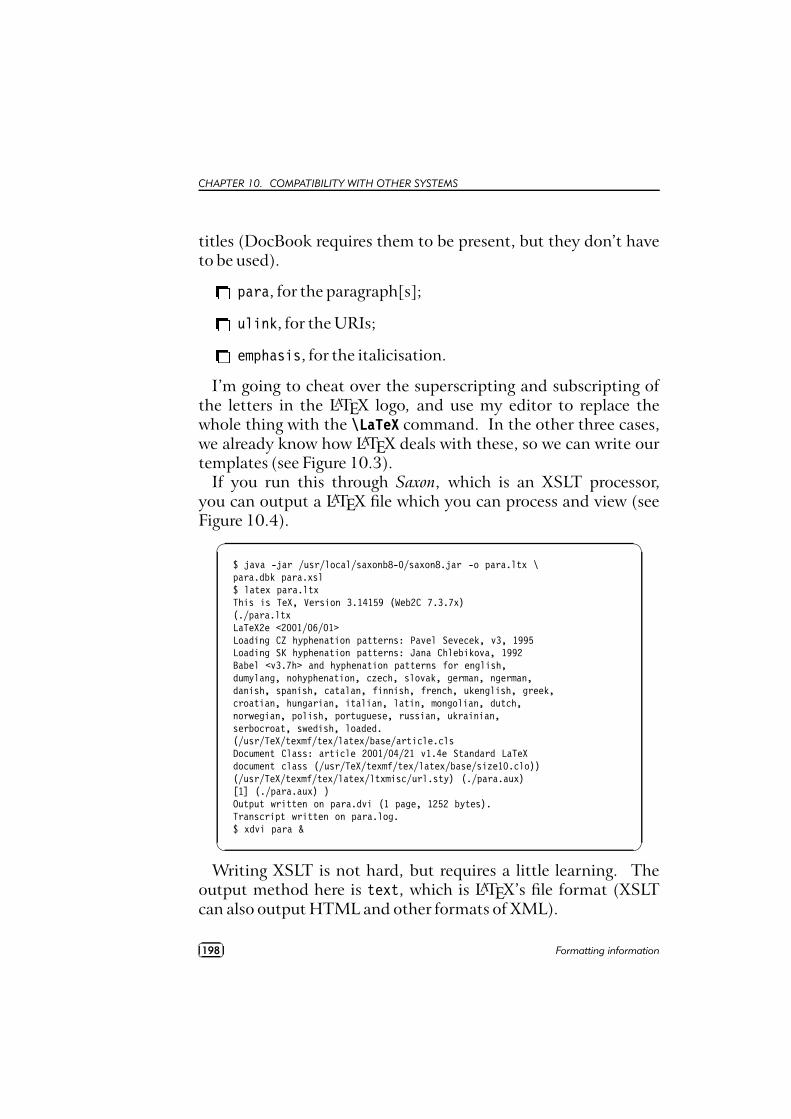
CHAPTER 10. COMPATIBILITY WITH OTHER SYSTEMS
titles (DocBook requires them to be present, but they don’t haveto be used).õ
para, for the paragraph[s];õ
ulink, for the URIs;õ
emphasis, for the italicisation.
I’m going to cheat over the superscripting and subscripting ofthe letters in the LATEX logo, and use my editor to replace thewhole thing with the \LaTeX command. In the other three cases,we already know how LATEX deals with these, so we can write ourtemplates (see Figure 10.3).
If you run this through Saxon, which is an XSLT processor,you can output a LATEX file which you can process and view (seeFigure 10.4).
�
�
$ java -jar /usr/local/saxonb8-0/saxon8.jar -o para.ltx \para.dbk para.xsl$ latex para.ltxThis is TeX, Version 3.14159 (Web2C 7.3.7x)(./para.ltxLaTeX2e <2001/06/01>Loading CZ hyphenation patterns: Pavel Sevecek, v3, 1995Loading SK hyphenation patterns: Jana Chlebikova, 1992Babel <v3.7h> and hyphenation patterns for english,dumylang, nohyphenation, czech, slovak, german, ngerman,danish, spanish, catalan, finnish, french, ukenglish, greek,croatian, hungarian, italian, latin, mongolian, dutch,norwegian, polish, portuguese, russian, ukrainian,serbocroat, swedish, loaded.(/usr/TeX/texmf/tex/latex/base/article.clsDocument Class: article 2001/04/21 v1.4e Standard LaTeXdocument class (/usr/TeX/texmf/tex/latex/base/size10.clo))(/usr/TeX/texmf/tex/latex/ltxmisc/url.sty) (./para.aux)[1] (./para.aux) )Output written on para.dvi (1 page, 1252 bytes).Transcript written on para.log.$ xdvi para &
Writing XSLT is not hard, but requires a little learning. Theoutput method here is text, which is LATEX’s file format (XSLTcan also output HTML and other formats of XML).
��
��198 Formatting information
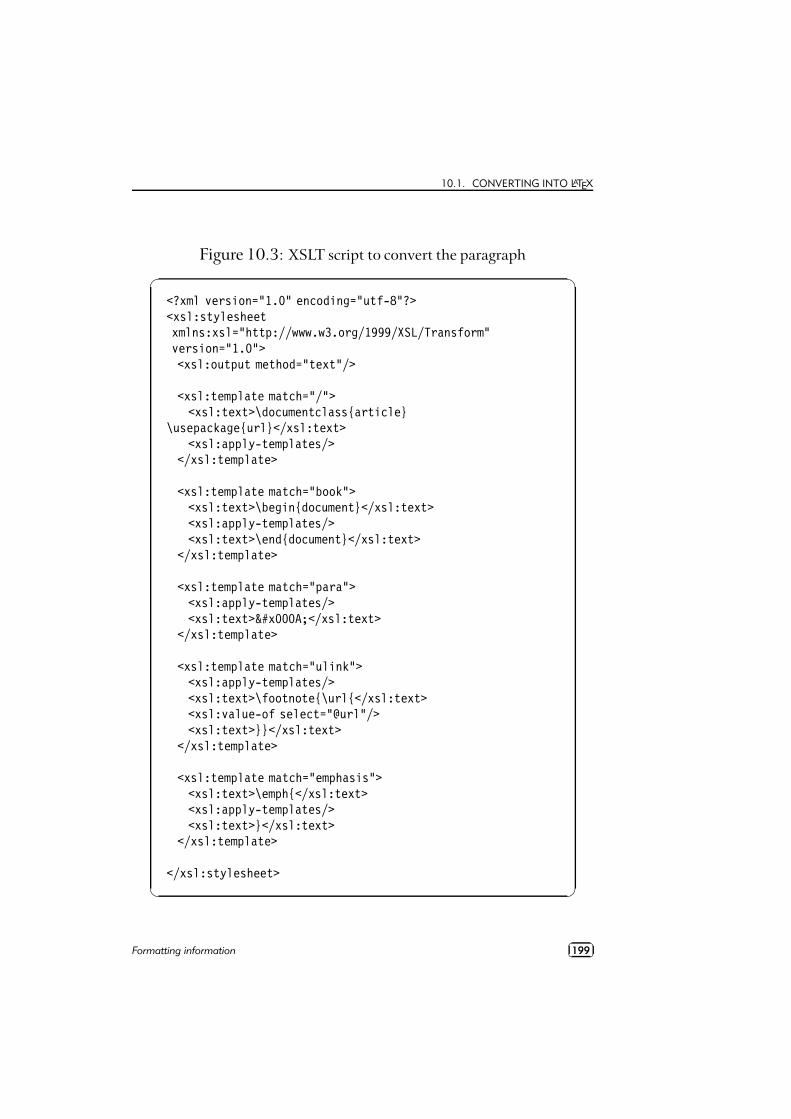
10.1. CONVERTING INTO LATEX
Figure 10.3: XSLT script to convert the paragraph�
�
<?xml version="1.0" encoding="utf-8"?><xsl:stylesheetxmlns:xsl="http://www.w3.org/1999/XSL/Transform"version="1.0"><xsl:output method="text"/>
<xsl:template match="/"><xsl:text>\documentclass{article}
\usepackage{url}</xsl:text><xsl:apply-templates/>
</xsl:template>
<xsl:template match="book"><xsl:text>\begin{document}</xsl:text><xsl:apply-templates/><xsl:text>\end{document}</xsl:text>
</xsl:template>
<xsl:template match="para"><xsl:apply-templates/><xsl:text>
</xsl:text>
</xsl:template>
<xsl:template match="ulink"><xsl:apply-templates/><xsl:text>\footnote{\url{</xsl:text><xsl:value-of select="@url"/><xsl:text>}}</xsl:text>
</xsl:template>
<xsl:template match="emphasis"><xsl:text>\emph{</xsl:text><xsl:apply-templates/><xsl:text>}</xsl:text>
</xsl:template>
</xsl:stylesheet>
Formatting information��
��199
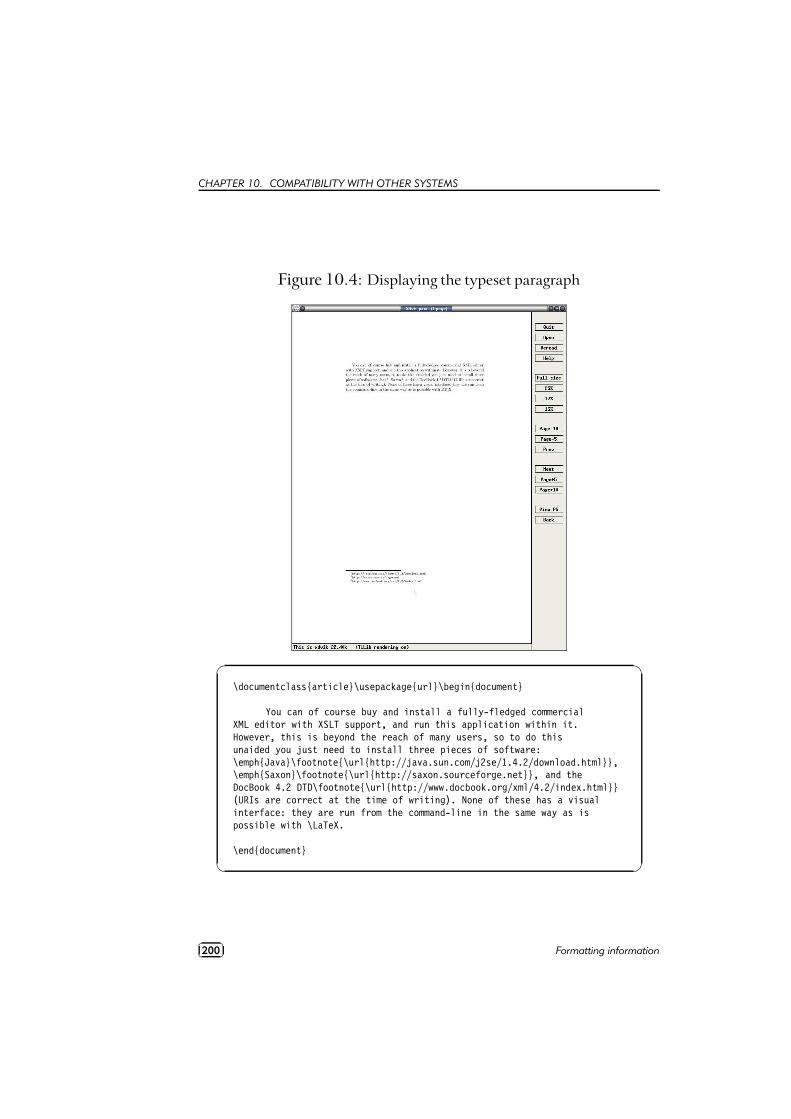
CHAPTER 10. COMPATIBILITY WITH OTHER SYSTEMS
Figure 10.4: Displaying the typeset paragraph
�
�
\documentclass{article}\usepackage{url}\begin{document}
You can of course buy and install a fully-fledged commercialXML editor with XSLT support, and run this application within it.However, this is beyond the reach of many users, so to do thisunaided you just need to install three pieces of software:\emph{Java}\footnote{\url{http://java.sun.com/j2se/1.4.2/download.html}},\emph{Saxon}\footnote{\url{http://saxon.sourceforge.net}}, and theDocBook 4.2 DTD\footnote{\url{http://www.docbook.org/xml/4.2/index.html}}(URIs are correct at the time of writing). None of these has a visualinterface: they are run from the command-line in the same way as ispossible with \LaTeX.
\end{document}
��
��200 Formatting information
10.2. CONVERTING OUT OF LATEX
1. The first template matches ‘/’, which is the document root(before the book start-tag). At this stage we output thetext \documentclass{article} and \usepackage{url}. The‘apply-templates’ instructions tells the processor to carryon processing, looking for more matches. XML commentsget ignored, and any elements which don’t match a templatesimply have their contents passed through until the nextmatch occurs.
2. The book template outputs the \begin{document} and the\end{document} commands, and between them to carry onprocessing.
3. The para template just outputs its content, but followsit with a linebreak (using the hexadecimal character codex000A (see the ASCII chart in Table C.1).
4. The ulink template outputs its content but follows it with afootnote using the \url command to output the value of theurl attribute.
5. The emphasis template surrounds its content with \emph{and }.
This is a relatively trivial example, but it serves to show thatit’s not hard to output LATEX from XML. In fact there is a set oftemplates already written to produce LATEX from a DocBook file athttp://www.dpawson.co.uk/docbook/tools.html#d4e2905
10.2 ConvertingoutofLATEX
This is much harder to do comprehensively. As noted earlier, theLATEX file format really requires the LATEX program itself in orderto process all the packages and macros, because there is no tellingwhat complexities authors have added themselves (what a lot ofthis book is about!).
Formatting information��
��201
CHAPTER 10. COMPATIBILITY WITH OTHER SYSTEMS
Many authors and editors rely on custom-designed or home-brew converters, often written in the standard shell scriptinglanguages (Unix shells, Perl, Python, Tcl, etc). Although someof the packages presented here are also written in the same lan-guages, they have some advantages and restrictions comparedwith private conversions:ö
Conversion done with the standard utilities (eg awk, tr, sed,grep, detex, etc) can be faster for ad hoc translations, butit is easier to obtain consistency and a more sophisticatedfinal product using LATEX2HTML or TEX4ht — or one of theother systems available.
öEmbedding additional non-standard control sequences inLATEX source code may make it harder to edit and maintain,and will definitely make it harder to port to another system.
öBoth the above methods (and others) provide a fast andreasonable reliable way to get documents authored in LATEXonto the Web in an acceptable — if not optimal — format.
öLATEX2HTML was written to solve the problem of gettingLATEX-with-mathematics onto the Web, in the days beforeMathML and math-capable browsers. TEX4ht was writtento turn LATEX documents into Web hypertext — mathemat-ics or not.
10.2.1 Conversion to Word
There are several programs on CTAN to do LATEX-to-Word andsimilar conversions, but they do not all handles everything LATEXcan throw at them, and some only handle a subset of the built-incommands of default LATEX. Two in particular, however, have agood reputation, although I haven’t used either of them (I stay asfar away from Word as possible):ö
latex2rtf by Wilfried Hennings, Fernando Dorner, and An-dreas Granzer translates LATEX into RTF — the opposite
��
��202 Formatting information
10.2. CONVERTING OUT OF LATEX
of the rtf2latex2e mentioned in item 10.1the list on p. 195.RTF can be read by most wordprocessors, and this programpreserves layout and formatting for most LATEX documentsusing standard built-in commands.
÷Kirill Chikrii’s TEX2Word for Microsoft Windows is a con-verter plug-in for Word to let it open TEX and LATEX docu-ments. The author’s company claims that ‘virtually anyexisting TEX/LATEX package can be supported by TEX2Word’because it is customisable.
One easy route into wordprocessing, however, is the reverse ofthe procedures suggested in the preceding section: convert LATEXto HTML, which many wordprocessors read easily. The followingsections cover two packages for this.
10.2.2 LATEX2HTML
As its name suggests, LATEX2HTML is a system to convert LATEXstructured documents to HTML. Its main task is to reproducethe document structure as a set of interconnected HTML files.Despite using Perl, LATEX2HTML relies very heavily on standardUnix facilities like the NetPBM graphics package and the pipesyntax. Microsoft Windows is not well suited to this kindof composite processing, although all the required facilities areavailable for download in various forms and should in theoryallow the package to run — but reports of problems are common.÷
The sectional structure is preserved, and navigational linksare generated for the standard Next, Previous, and Updirections.
÷Links are also used for the cross-references, citations, foot-notes, ToC, and lists of figures and tables.
÷Conversion is direct for common elements like lists, quotes,paragraph-breaks, type-styles, etc, where there is an obviousHTML equivalent.
Formatting information��
��203
CHAPTER 10. COMPATIBILITY WITH OTHER SYSTEMS
øHeavily formatted objects such as math and diagrams areconverted to images.
øThere is no support for homebrew macros.
There is, however, support for arbitrary hypertext links, sym-bolic cross-references between ‘evolving remote documents’, con-ditional text, and the inclusion of raw HTML. These are ex-tensions to LATEX, implemented as new commands and environ-ments.
LATEX2HTML outputs a directory named after the input file-name, and all the output files are put in that directory, so theoutput is self-contained and can be uploaded to a server as itstands.
10.2.3 TEX4ht
TEX4ht operates differently from LATEX2HTML: it uses the TEXprogram to process the file, and handles conversion in a set ofpostprocessors for the common LATEX packages. It can also outputto XML, including Text Encoding Initiative (TEI) and DocBook,and the OpenOffice and WordXML formats, and it can createTEXinfo format manuals.
By default, documents retain the single-file structure implied bythe original, but there is again a set of additional configurationdirectives to make use of the features of hypertext and navigation,and to split files for ease of use.
10.2.4 Extraction from PS and PDF
If you have the full version of Adobe Acrobat, you can opena PDF file created by pdfLATEX, select and copy all the text,and paste it into Word and some other wordprocessors, andretain some common formatting of headings, paragraphs, andlists. Both solutions still require the wordprocessor text to beedited into shape, but they preserve enough of the formattingto make it worthwhile for short documents. Otherwise, use the
��
��204 Formatting information
10.2. CONVERTING OUT OF LATEX
pdftotext program to extract everything from the PDF file as plain(paragraph-formatted) text.
10.2.5 Last resort: strip the markup
At worst, the detex program on CTAN will strip a LATEX file of allmarkup and leave just the raw unformatted text, which can thenbe re-edited. There are also programs to extract the raw text fromDVI and PostScript (PS) files.
Formatting information��
��205

AConfiguring TEX search paths
TEX systems run on a huge variety of platforms, and are typicallymade up of a large number of rather small files. Some computeroperating systems have problems with packages like this, as theirbuilt-in methods for searching for a file when needed are poor.
To get around this, TEX uses a technique borrowed from theUnix world, based on a simple hash index for each directory theyneed to look in. This is known as the ls-R database, from theUnix command (ls -R) which creates it. The program whichdoes this for TEX is actually called after this command: mktexlsr,although it may be renamed texhash or something else on yoursystem. This is the program referred to in step 4 in the procedureon p. 86.
However, to know where to make these indexes, and thus whereto search, TEX needs to be told about them. In a standardTEX installation this information is in texmf/web2c/texmf.cnf.The file is similar to a Unix shell script, but the only linesof significance for the search paths are the following (this ishow they appear in the default Unix installation, omitting thecomments):
Formatting information��
��207
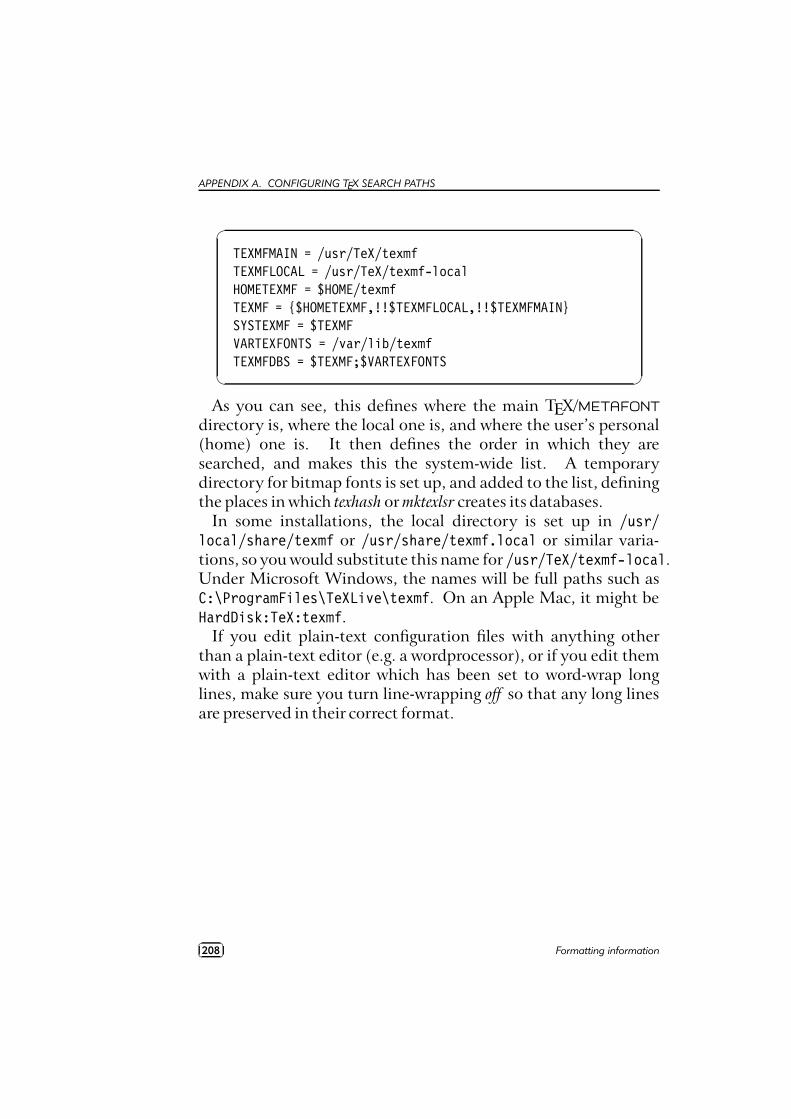
APPENDIX A. CONFIGURING TEX SEARCH PATHS
�
�
TEXMFMAIN = /usr/TeX/texmfTEXMFLOCAL = /usr/TeX/texmf-localHOMETEXMF = $HOME/texmfTEXMF = {$HOMETEXMF,!!$TEXMFLOCAL,!!$TEXMFMAIN}SYSTEXMF = $TEXMFVARTEXFONTS = /var/lib/texmfTEXMFDBS = $TEXMF;$VARTEXFONTS
As you can see, this defines where the main TEX/METAFONT
directory is, where the local one is, and where the user’s personal(home) one is. It then defines the order in which they aresearched, and makes this the system-wide list. A temporarydirectory for bitmap fonts is set up, and added to the list, definingthe places in which texhash or mktexlsr creates its databases.
In some installations, the local directory is set up in /usr/local/share/texmf or /usr/share/texmf.local or similar varia-tions, so you would substitute this name for /usr/TeX/texmf-local.Under Microsoft Windows, the names will be full paths such asC:\ProgramFiles\TeXLive\texmf. On an Apple Mac, it might beHardDisk:TeX:texmf.
If you edit plain-text configuration files with anything otherthan a plain-text editor (e.g. a wordprocessor), or if you edit themwith a plain-text editor which has been set to word-wrap longlines, make sure you turn line-wrapping off so that any long linesare preserved in their correct format.
��
��208 Formatting information
BTEX Users Group membership
The TEX Users Group (TUG) was founded in 1980 for educa-tional and scientific purposes: to provide an organization forthose who have an interest in typography and font design, and areusers of the TEX typesetting system invented by Donald Knuth.TUG is run by and for its members and represents the interests ofTEX users worldwide.
TUG membership benefits
Members of TUG help to support and promote the use of TEX,METAFONT, and related systems worldwide. All members receiveTUGboat1, the journal of the TEX Users Group, the TEX Livesoftware distribution (a runnable TEX system), and the CTANsoftware distribution (containing most of the CTAN archive).
In addition, TUG members vote in TUG elections, and receivediscounts on annual meeting fees, store purchases, and TUG-sponsored courses. TUG membership (less benefits) is tax-
1Beeton (Since 1980)
Formatting information��
��209
APPENDIX B. TEX USERS GROUP MEMBERSHIP
deductible, at least in the USA. See the TUG Web site fordetails.
Becoming a TUG member
Please see the forms and information at http://www.tug.org/join.html. You can join online, or by filling out a paper form.The NTG (Dutch) and UKTUG (United Kingdom) TEX usergroups have joint membership agreements with TUG wherebyyou can receive a discount for joining both user groups. Todo this, please join via http://www.ntg.nl/newmember.html (theNTG membership page) or http://uk.tug.org/Membership/ (theUKTUG page), respectively, and select the option for joint mem-bership.
Each year’s membership entitles you to the software and TUG-boat produced for that year (even if it is produced in a subsequentcalendar year, as is currently the case with TUGboat). You canorder older issues of TUGboat and TEX memorabilia through theTUG store (http://www.tug.org/store).
The current TUG membership fee is $65 (US) per year forindividuals and $35 for students and seniors. Add $10 to themembership fee after May 31 to cover additional shipping andprocessing costs. The current rate for non-voting subscriptionmemberships (for libraries, for example) is $85. The currentinstitutional rate is $500, which includes up to seven individualmemberships.
Privacy
TUG uses your personal information only to mail you products,publications, notices, and (for voting members) official ballots.Also, if you give explicit agreement, we may incorporate it into amembership directory which will be made available only to TUGmembers.
TUG neither sells its membership list nor provides it to anyoneoutside of its own membership.
��
��210 Formatting information

CThe ASCII character set
The American Standard Code for Information Interchange wasinvented in 1963, and after some redevelopment settled down in1984 as standard X3.4 of American National Standards Institute(ANSI). It represents the 95 basic codes for the unaccentedprintable characters and punctuation of the Latin alphabet, plus33 internal ‘control characters’ originally intended for the controlof computers, programs, and external devices like printers andscreens.
Many other character sets (strictly speaking, ‘character reper-toires’) have been standardised for accented Latin characters andfor all other non-Latin writing systems, but these are intended forrepresenting the symbols people use when writing text on com-puters. Most programs and computers use ASCII internally forall their coding, the exceptions being XML-based languages likeXSLT, which are inherently designed to be usable with any writingsystem, and a few specialist systems like APL.
Although the TEX and LATEX file formats can easily be used withmany other encoding systems (see the discussion of the inputencin § 2.7), they are based on ASCII. It is therefore important to
Formatting information��
��211
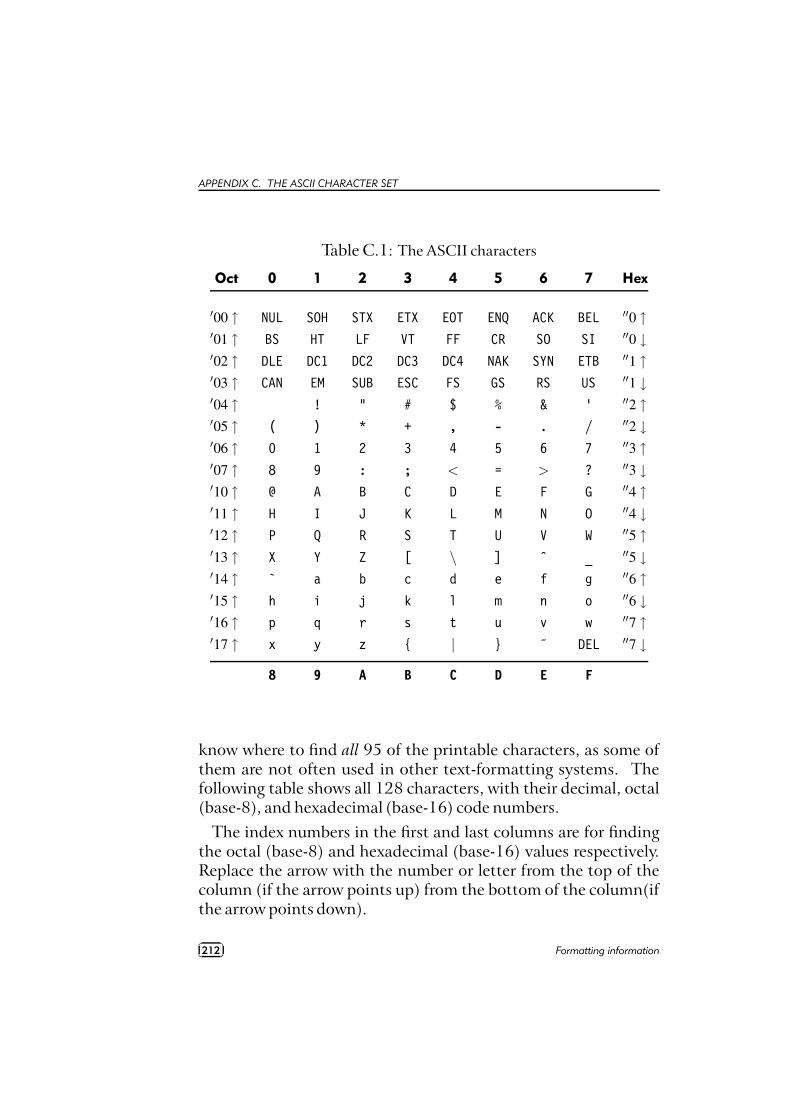
APPENDIX C. THE ASCII CHARACTER SET
Table C.1: The ASCII characters
Oct 0 1 2 3 4 5 6 7 Hex
′00 ↑ NUL SOH STX ETX EOT ENQ ACK BEL ′′0 ↑′01 ↑ BS HT LF VT FF CR SO SI ′′0 ↓′02 ↑ DLE DC1 DC2 DC3 DC4 NAK SYN ETB ′′1 ↑′03 ↑ CAN EM SUB ESC FS GS RS US ′′1 ↓′04 ↑ ! " # $ % & ’ ′′2 ↑′05 ↑ ( ) * + , - . / ′′2 ↓′06 ↑ 0 1 2 3 4 5 6 7 ′′3 ↑′07 ↑ 8 9 : ; < = > ? ′′3 ↓′10 ↑ @ A B C D E F G ′′4 ↑′11 ↑ H I J K L M N O ′′4 ↓′12 ↑ P Q R S T U V W ′′5 ↑′13 ↑ X Y Z [ \ ] ˆ _ ′′5 ↓′14 ↑ ` a b c d e f g ′′6 ↑′15 ↑ h i j k l m n o ′′6 ↓′16 ↑ p q r s t u v w ′′7 ↑′17 ↑ x y z { | } ˜ DEL ′′7 ↓
8 9 A B C D E F
know where to find all 95 of the printable characters, as some ofthem are not often used in other text-formatting systems. Thefollowing table shows all 128 characters, with their decimal, octal(base-8), and hexadecimal (base-16) code numbers.
The index numbers in the first and last columns are for findingthe octal (base-8) and hexadecimal (base-16) values respectively.Replace the arrow with the number or letter from the top of thecolumn (if the arrow points up) from the bottom of the column(ifthe arrow points down).
��
��212 Formatting information

Example: The Escape character (ESC) is octal ’033 (03 for therow, 3 for the number at the top of the column because the arrowpoints up) or hexadecimal "1B (1 for the row, B for the letter at thebottom of the column because the arrow points down).
For the decimal value, multiply the Octal row number by eightand add the column number from the top line (that makesESC 27).
Formatting information��
��213

DGNU Free DocumentationLicenseVersion1.2,November2002
Copyright (C)2000,2001,2002 FreeSoftware Foundation,Inc. 59 Temple Place,Suite 330, Boston,MA 02111-1307 USAEveryone is permittedto copy and distributeverbatim copies of thislicense document, butchanging it is not al-lowed.
D.0 PREAMBLE
The purpose of this License isto make a manual, textbook, or
other functional and useful docu-ment ‘free’ in the sense of freedom:to assure everyone the effectivefreedom to copy and redistributeit, with or without modifying it,either commercially or noncom-mercially. Secondarily, this Li-cense preserves for the author andpublisher a way to get credit fortheir work, while not being consid-ered responsible for modificationsmade by others.
This License is a kind of ‘copy-left’, which means that deriva-tive works of the document mustthemselves be free in the samesense. It complements the GNU
Formatting information��
��215
APPENDIX D. GNU FREE DOCUMENTATION LICENSE
General Public License, which isa copyleft license designed for freesoftware.
We have designed this License inorder to use it for manuals for freesoftware, because free softwareneeds free documentation: a freeprogram should come with man-uals providing the same freedomsthat the software does. But thisLicense is not limited to softwaremanuals; it can be used for anytextual work, regardless of subjectmatter or whether it is publishedas a printed book. We recommendthis License principally for workswhose purpose is instruction orreference.
D.1 APPLICABILITYAND DEFINITIONS
This License applies to any man-ual or other work, in any medium,that contains a notice placed bythe copyright holder saying it canbe distributed under the terms ofthis License. Such a notice grantsa world-wide, royalty-free license,unlimited in duration, to use thatwork under the conditions statedherein. The ‘Document’, below,refers to any such manual or work.Any member of the public is a li-censee, and is addressed as ‘you’.You accept the license if you copy,modify or distribute the work in
a way requiring permission undercopyright law.
A ‘Modified Version’ of theDocument means any work con-taining the Document or a por-tion of it, either copied verbatim,or with modifications and/or trans-lated into another language.
A ‘Secondary Section’ is anamed appendix or a front-mattersection of the Document thatdeals exclusively with the relation-ship of the publishers or authorsof the Document to the Docu-ment’s overall subject (or to re-lated matters) and contains noth-ing that could fall directly withinthat overall subject. (Thus, if theDocument is in part a textbook ofmathematics, a Secondary Sectionmay not explain any mathemat-ics.) The relationship could bea matter of historical connectionwith the subject or with relatedmatters, or of legal, commercial,philosophical, ethical or politicalposition regarding them.
The ‘Invariant Sections’ are cer-tain Secondary Sections whose ti-tles are designated, as being thoseof Invariant Sections, in the no-tice that says that the Documentis released under this License. Ifa section does not fit the abovedefinition of Secondary then it isnot allowed to be designated asInvariant. The Document maycontain zero Invariant Sections. If
��
��216 Formatting information
the Document does not identifyany Invariant Sections then thereare none.
The ‘Cover Texts’ are certainshort passages of text that arelisted, as Front-Cover Texts orBack-Cover Texts, in the noticethat says that the Document isreleased under this License. AFront-Cover Text may be at most 5words, and a Back-Cover Text maybe at most 25 words.
A ‘Transparent’ copy of theDocument means a machine-readable copy, represented in a for-mat whose specification is avail-able to the general public, that issuitable for revising the documentstraightforwardly with generic texteditors or (for images composed ofpixels) generic paint programs or(for drawings) some widely avail-able drawing editor, and that issuitable for input to text format-ters or for automatic translationto a variety of formats suitablefor input to text formatters. Acopy made in an otherwise Trans-parent file format whose markup,or absence of markup, has beenarranged to thwart or discouragesubsequent modification by read-ers is not Transparent. An imageformat is not Transparent if usedfor any substantial amount of text.A copy that is not ‘Transparent’ iscalled ‘Opaque’.
Examples of suitable formats forTransparent copies include plainASCII without markup, Texinfoinput format, LaTeX input for-mat, SGML or XML using a pub-licly available DTD, and standard-conforming simple HTML, Post-Script or PDF designed for hu-man modification. Examples oftransparent image formats includePNG, XCF and JPG. Opaque for-mats include proprietary formatsthat can be read and edited onlyby proprietary word processors,SGML or XML for which theDTD and/or processing tools arenot generally available, and themachine-generated HTML, Post-Script or PDF produced by someword processors for output pur-poses only.
The ‘Title Page’ means, for aprinted book, the title page itself,plus such following pages as areneeded to hold, legibly, the mate-rial this License requires to appearin the title page. For works in for-mats which do not have any titlepage as such, ‘Title Page’ meansthe text near the most prominentappearance of the work’s title, pre-ceding the beginning of the bodyof the text.
A section ‘Entitled XYZ’ meansa named subunit of the Docu-ment whose title either is preciselyXYZ or contains XYZ in parenthe-ses following text that translates
Formatting information��
��217
APPENDIX D. GNU FREE DOCUMENTATION LICENSE
XYZ in another language. (HereXYZ stands for a specific sec-tion name mentioned below, suchas ‘Acknowledgements’, ‘Dedica-tions’, ‘Endorsements’, or ‘His-tory’.) To ‘Preserve the Title’ ofsuch a section when you modifythe Document means that it re-mains a section ‘Entitled XYZ’ ac-cording to this definition.
The Document may includeWarranty Disclaimers next to thenotice which states that this Li-cense applies to the Document.These Warranty Disclaimers areconsidered to be included by refer-ence in this License, but only as re-gards disclaiming warranties: anyother implication that these War-ranty Disclaimers may have is voidand has no effect on the meaningof this License.
D.2 VERBATIM COPY-ING
You may copy and distribute theDocument in any medium, eithercommercially or noncommercially,provided that this License, thecopyright notices, and the licensenotice saying this License appliesto the Document are reproducedin all copies, and that you addno other conditions whatsoever tothose of this License. You may notuse technical measures to obstructor control the reading or further
copying of the copies you makeor distribute. However, you mayaccept compensation in exchangefor copies. If you distribute alarge enough number of copies youmust also follow the conditions insection 3.
You may also lend copies, un-der the same conditions statedabove, and you may publicly dis-play copies.
D.3 COPYING INQUANTITY
If you publish printed copies (orcopies in media that commonlyhave printed covers) of the Docu-ment, numbering more than 100,and the Document’s license no-tice requires Cover Texts, you mustenclose the copies in covers thatcarry, clearly and legibly, all theseCover Texts: Front-Cover Texts onthe front cover, and Back-CoverTexts on the back cover. Bothcovers must also clearly and legi-bly identify you as the publisher ofthese copies. The front cover mustpresent the full title with all wordsof the title equally prominent andvisible. You may add other ma-terial on the covers in addition.Copying with changes limited tothe covers, as long as they pre-serve the title of the Documentand satisfy these conditions, can
��
��218 Formatting information
be treated as verbatim copying inother respects.
If the required texts for eithercover are too voluminous to fit leg-ibly, you should put the first oneslisted (as many as fit reasonably)on the actual cover, and continuethe rest onto adjacent pages.
If you publish or distributeOpaque copies of the Documentnumbering more than 100, youmust either include a machine-readable Transparent copy alongwith each Opaque copy, or statein or with each Opaque copy acomputer-network location fromwhich the general network-usingpublic has access to download us-ing public-standard network pro-tocols a complete Transparentcopy of the Document, free ofadded material. If you use the lat-ter option, you must take reason-ably prudent steps, when you be-gin distribution of Opaque copiesin quantity, to ensure that thisTransparent copy will remain thusaccessible at the stated locationuntil at least one year after thelast time you distribute an Opaquecopy (directly or through youragents or retailers) of that editionto the public.
It is requested, but not required,that you contact the authors of theDocument well before redistribut-ing any large number of copies,to give them a chance to provide
you with an updated version of theDocument.
D.4 MODIFICATIONS
You may copy and distribute aModified Version of the Docu-ment under the conditions of sec-tions 2 and 3 above, provided thatyou release the Modified Versionunder precisely this License, withthe Modified Version filling therole of the Document, thus licens-ing distribution and modificationof the Modified Version to who-ever possesses a copy of it. Inaddition, you must do these thingsin the Modified Version:
A. Use in the Title Page (andon the covers, if any) a ti-tle distinct from that of theDocument, and from thoseof previous versions (whichshould, if there were any,be listed in the History sec-tion of the Document). Youmay use the same title as aprevious version if the origi-nal publisher of that versiongives permission.
B. List on the Title Page, asauthors, one or more per-sons or entities responsiblefor authorship of the modifi-cations in the Modified Ver-sion, together with at leastfive of the principal authors
Formatting information��
��219

APPENDIX D. GNU FREE DOCUMENTATION LICENSE
of the Document (all of itsprincipal authors, if it hasfewer than five), unless theyrelease you from this re-quirement.
C. State on the Title page thename of the publisher ofthe Modified Version, as thepublisher.
D. Preserve all the copyrightnotices of the Document.
E. Add an appropriate copy-right notice for your modifi-cations adjacent to the othercopyright notices.
F. Include, immediately afterthe copyright notices, a li-cense notice giving the pub-lic permission to use theModified Version under theterms of this License, in theform shown in the Adden-dum (§ D.11) below.
G. Preserve in that license no-tice the full lists of InvariantSections and required CoverTexts given in the Docu-ment’s license notice.
H. Include an unaltered copy ofthis License.
I. Preserve the section Entitled‘History’, Preserve its Title,and add to it an item stat-ing at least the title, year,
new authors, and publisherof the Modified Version asgiven on the Title Page. Ifthere is no section Entitled‘History’ in the Document,create one stating the title,year, authors, and publisherof the Document as givenon its Title Page, then addan item describing the Mod-ified Version as stated in theprevious sentence.
J. Preserve the network loca-tion, if any, given in theDocument for public accessto a Transparent copy of theDocument, and likewise thenetwork locations given inthe Document for previousversions it was based on.These may be placed in the‘History’ section. You mayomit a network location fora work that was publishedat least four years before theDocument itself, or if theoriginal publisher of the ver-sion it refers to gives permis-sion.
K. For any section Entitled ‘Ac-knowledgements’ or ‘Ded-ications’, Preserve the Ti-tle of the section, and pre-serve in the section all thesubstance and tone of each
��
��220 Formatting information
of the contributor acknowl-edgements and/or dedica-tions given therein.
L. Preserve all the InvariantSections of the Document,unaltered in their text andin their titles. Section num-bers or the equivalent arenot considered part of thesection titles.
M. Delete any section Entitled‘Endorsements’. Such a sec-tion may not be included inthe Modified Version.
N. Do not retitle any existingsection to be Entitled ‘En-dorsements’ or to conflict intitle with any Invariant Sec-tion.
O. Preserve any Warranty Dis-claimers.
If the Modified Version includesnew front-matter sections or ap-pendices that qualify as SecondarySections and contain no mate-rial copied from the Document,you may at your option designatesome or all of these sections as in-variant. To do this, add their titlesto the list of Invariant Sections inthe Modified Version’s license no-tice. These titles must be distinctfrom any other section titles.
You may add a section Entitled‘Endorsements’, provided it con-
tains nothing but endorsements ofyour Modified Version by variousparties–for example, statements ofpeer review or that the text hasbeen approved by an organizationas the authoritative definition of astandard.
You may add a passage of up tofive words as a Front-Cover Text,and a passage of up to 25 words asa Back-Cover Text, to the end ofthe list of Cover Texts in the Mod-ified Version. Only one passage ofFront-Cover Text and one of Back-Cover Text may be added by (orthrough arrangements made by)any one entity. If the Documentalready includes a cover text forthe same cover, previously addedby you or by arrangement madeby the same entity you are actingon behalf of, you may not add an-other; but you may replace the oldone, on explicit permission fromthe previous publisher that addedthe old one.
The author(s) and publisher(s)of the Document do not by this Li-cense give permission to use theirnames for publicity for or to as-sert or imply endorsement of anyModified Version.
D.5 COMBININGDOCUMENTS
You may combine the Documentwith other documents released un-
Formatting information��
��221
APPENDIX D. GNU FREE DOCUMENTATION LICENSE
der this License, under the termsdefined in section 4 (§ D.4) abovefor modified versions, providedthat you include in the combina-tion all of the Invariant Sectionsof all of the original documents,unmodified, and list them all as In-variant Sections of your combinedwork in its license notice, and thatyou preserve all their WarrantyDisclaimers.
The combined work need onlycontain one copy of this License,and multiple identical InvariantSections may be replaced with asingle copy. If there are mul-tiple Invariant Sections with thesame name but different contents,make the title of each such sectionunique by adding at the end of it,in parentheses, the name of theoriginal author or publisher of thatsection if known, or else a uniquenumber. Make the same adjust-ment to the section titles in the listof Invariant Sections in the licensenotice of the combined work.
In the combination, you mustcombine any sections Entitled‘History’ in the various originaldocuments, forming one sectionEntitled ‘History’; likewise com-bine any sections Entitled ‘Ac-knowledgements’, and any sec-tions Entitled ‘Dedications’. Youmust delete all sections Entitled‘Endorsements’.
D.6 COLLECTIONS OFDOCUMENTS
You may make a collection con-sisting of the Document and otherdocuments released under this Li-cense, and replace the individualcopies of this License in the vari-ous documents with a single copythat is included in the collection,provided that you follow the rulesof this License for verbatim copy-ing of each of the documents in allother respects.
You may extract a single docu-ment from such a collection, anddistribute it individually underthis License, provided you inserta copy of this License into the ex-tracted document, and follow thisLicense in all other respects regard-ing verbatim copying of that docu-ment.
D.7 AGGREGATIONWITH INDEPEN-DENT WORKS
A compilation of the Documentor its derivatives with other sepa-rate and independent documentsor works, in or on a volume of astorage or distribution medium, iscalled an ‘aggregate’ if the copy-right resulting from the compila-tion is not used to limit the legalrights of the compilation’s usersbeyond what the individual works
��
��222 Formatting information
permit. When the Documentis included an aggregate, this Li-cense does not apply to the otherworks in the aggregate which arenot themselves derivative works ofthe Document.
If the Cover Text requirementof section 3 is applicable to thesecopies of the Document, then ifthe Document is less than onehalf of the entire aggregate, theDocument’s Cover Texts may beplaced on covers that bracket theDocument within the aggregate, orthe electronic equivalent of coversif the Document is in electronicform. Otherwise they must appearon printed covers that bracket thewhole aggregate.
D.8 TRANSLATION
Translation is considered a kindof modification, so you may dis-tribute translations of the Docu-ment under the terms of section 4.Replacing Invariant Sections withtranslations requires special per-mission from their copyright hold-ers, but you may include trans-lations of some or all InvariantSections in addition to the origi-nal versions of these Invariant Sec-tions. You may include a trans-lation of this License, and all thelicense notices in the Document,and any Warranty Disclaimers,provided that you also include the
original English version of this Li-cense and the original versions ofthose notices and disclaimers. Incase of a disagreement betweenthe translation and the originalversion of this License or a noticeor disclaimer, the original versionwill prevail.
If a section in the Documentis Entitled ‘Acknowledgements’,‘Dedications’, or ‘History’, the re-quirement (section 4) to Preserveits Title (section 1) will typicallyrequire changing the actual title.
D.9 TERMINATION
You may not copy, modify, subli-cense, or distribute the Documentexcept as expressly provided forunder this License. Any otherattempt to copy, modify, subli-cense or distribute the Documentis void, and will automatically ter-minate your rights under this Li-cense. However, parties who havereceived copies, or rights, from youunder this License will not havetheir licenses terminated so long assuch parties remain in full compli-ance.
D.10 FUTURE REVI-SIONS OF THISLICENSE
The Free Software Foundationmay publish new, revised versions
Formatting information��
��223

APPENDIX D. GNU FREE DOCUMENTATION LICENSE
of the GNU Free DocumentationLicense from time to time. Suchnew versions will be similar inspirit to the present version, butmay differ in detail to addressnew problems or concerns. Seehttp://www.gnu.org/copyleft/.
Each version of the Licenseis given a distinguishing versionnumber. If the Document specifiesthat a particular numbered versionof this License ‘or any later ver-sion’ applies to it, you have theoption of following the terms andconditions either of that specifiedversion or of any later version thathas been published (not as a draft)by the Free Software Foundation.If the Document does not specifya version number of this License,you may choose any version everpublished (not as a draft) by theFree Software Foundation.
D.11 ADDENDUM: Howto use this Licensefor your documents
To use this License in a documentyou have written, include a copy ofthe License in the document andput the following copyright andlicense notices just after the titlepage:
Copyright (c)YEAR YOUR NAME.Permission is granted
to copy, distributeand/or modify thisdocument under theterms of the GNUFree DocumentationLicense, Version 1.2or any later versionpublished by the FreeSoftware Foundation;with no Invariant Sec-tions, no Front-CoverTexts, and no Back-Cover Texts. A copy ofthe license is includedin the section entitled‘GNU Free Documen-tation License’.
If you have Invariant Sections,Front-Cover Texts and Back-CoverTexts, replace the ‘with…Texts.’line with this:
with the InvariantSections being LISTTHEIR TITLES, withthe Front-Cover Textsbeing LIST, and withthe Back-Cover Textsbeing LIST.
If you have Invariant Sectionswithout Cover Texts, or someother combination of the three,merge those two alternatives tosuit the situation.
If your document contains non-trivial examples of program code,
��
��224 Formatting information

we recommend releasing these ex-amples in parallel under yourchoice of free software license,
such as the GNU General PublicLicense, to permit their use in freesoftware.
Formatting information��
��225
FORMATTING INFORMATION
References
1. : Táin bó Cúailnge. in: Leabhar na h-Uidhri. Dublin: RoyalIrish Academy, 1100 55
2. : Short Math Guide for LATEX. Providence, RI: AMS, 2001〈URL: http://www.ams.org/tex/short-math-guide.html〉
3. : The GNU Free Documentation License. Boston, MA,2003/02/10 23:42:49 – Technical report 〈URL: http://www.fsf.org/copyleft/fdl.html〉
4. : Getting Started with TEX, LATEX, and friends. Portland,OR, November 2003 – Technical report 〈URL: http://www.tug.org/begin.html〉
5. Anderson, Chris, editor: WIRED. San Francisco, CA:Condé Nast, 1993–, ISSN 1059–1028
6. Beeton, Barbara, editor: TUGboat. Portland, OR: TEXUsers Group, Since 1980, ISSN 0896–3207
7. Berry, Karl: Fontname: Filenames for TEX fonts. Portland,OR, June 2001 – Technical report 〈URL: http://www.ctan.org/tex-archive/info/fontname/〉
8. Bull, RJ: Accounting in Business. London: Butterworths,1972, ISBN 0–406–70651–4
9. Burnard, Lou/Sperberg-McQueen, Michael: Guidelinesfor the Text Encoding Initiative. Oxford, 1995 – Technical report
10. Carnes, Lance/Berry, Karl, editors: The PracTEX Journal.Portland, OR: TEX Users Group, 2004 〈URL: http://www.tug.org/pracjourn/〉
11. Davy, William: A System of Divinity. Lustleigh, Devon:Published by the author, 1806
��
��226 Formatting information
REFERENCES
12. Doob, Michael: A Gentle Introduction to TEX: A Manualfor Self-Study. Portland, OR, 2002 – Technical report 〈URL:http://www.ctan.org/tex-archive/info/gentle/〉
13. Flaubert, Gustave: Madame Bovary. Paris, 1857
14. Flynn, Peter: The HTML Handbook. London: Interna-tional Thompson Computer Press, 1995, ISBN 1–85032–205–8
15. Flynn, Peter: Understanding SGML and XML Tools.Boston: Kluwer, 1998, ISBN 0–7923–8169–6
16. Flynn, Peter: The XML FAQ. Cork, Ireland, January 2005– Technical report 〈URL: http://www.ucc.ie/xml/〉
17. Fothergill, John: An Innkeeper’s Diary. 3rd edition.London: Penguin, 1929
18. Goossens, Michel/Rahtz, Sebastian/Mittelbach,Frank: The LATEX Graphics Companion. Reading, MA:Addison-Wesley, 1997, ISBN 0–201–85469–4
19. Goossens, Michel et al.: The LATEX Web Companion.Reading, MA: Addison-Wesley, 1999, ISBN 0–201–43311–7
20. Heller, Robert: New To LATEX…UnlearningBad Habits. comp.text.tex 11 March 2003,Nr. [email protected] (allpages)
21. Knuth, Donald E/Larrabee, Tracey/Roberts, Paul M:Mathematical Writing. Washington, DC: Mathematical Associ-ation of America, 1989, MAA Notes 14, ISBN 0–88385–063–X
22. Knuth, Donald Ervin: The Art of Computer Program-ming. Volume 1, 2nd edition. Reading, MA: Addison-Wesley,1980, ISBN 0–201–89685–0
Formatting information��
��227
FORMATTING INFORMATION
23. Lamport, Leslie: LATEX: A Document Preparation System.2nd edition. Reading, MA: Addison-Wesley, 1994, ISBN0–201–52983–1
24. Mac Namara, Matthew: La Textualisation de MadameBovary. Amsterdam: Rodopi, 2003
25. Mittelbach, Frank et al.: The LATEX Companion. 2nd edi-tion. Boston, MA: Addison-Wesley/Pearson Education, 2004,ISBN 0–201–36299–6
26. Oetiker, Tobias et al.: The (Not So) Short Guide toLATEX 2ε: LATEX 2ε in 131 Minutes. 2001 – Technical report〈URL: http://www.ctan.org/tex-archive/info/lshort/〉
27. Pakin, Scott: A comprehensive list of symbols inTEX. 2002 – Technical report 〈URL: http://www.ctan.org/tex-archive/info/symbols/comprehensive/〉
28. Rawlings, Marjorie Kinnan: Varmints. Scribner’s Maga-zine 1936
29. Reckdahl, Keith: Using imported graphics in LATEX 2ε.1997 – Technical report 〈URL: http://www.ctan.org/tex-archive/info/epslatex.pdf/〉
30. Ryder, John: Printing for Pleasure. London: Bodley Head,1976, ISBN 0–370–10443–9
��
��228 Formatting information
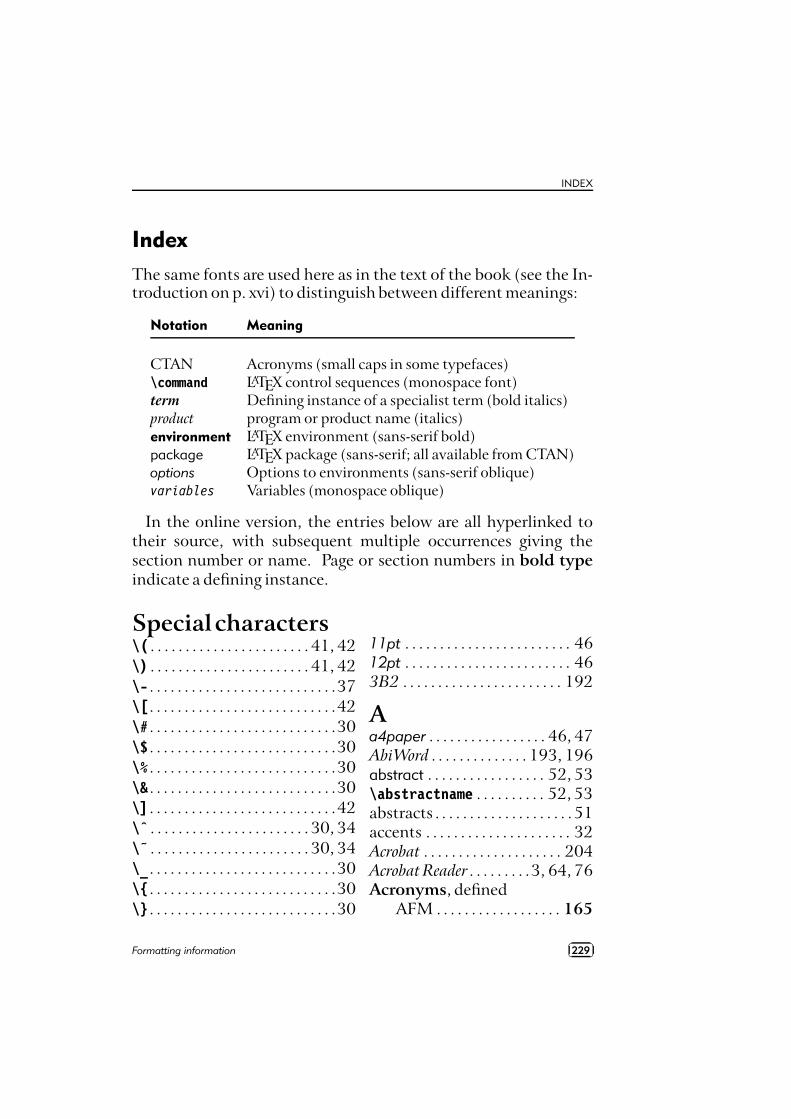
INDEX
Index
The same fonts are used here as in the text of the book (see the In-troduction on p. xvi) to distinguish between different meanings:
Notation Meaning
CTAN Acronyms (small caps in some typefaces)\command LATEX control sequences (monospace font)term Defining instance of a specialist term (bold italics)product program or product name (italics)environment LATEX environment (sans-serif bold)package LATEX package (sans-serif; all available from CTAN)options Options to environments (sans-serif oblique)variables Variables (monospace oblique)
In the online version, the entries below are all hyperlinked totheir source, with subsequent multiple occurrences giving thesection number or name. Page or section numbers in bold typeindicate a defining instance.
Specialcharacters\( . . . . . . . . . . . . . . . . . . . . . . . 41, 42\) . . . . . . . . . . . . . . . . . . . . . . . 41, 42\- . . . . . . . . . . . . . . . . . . . . . . . . . . .37\[ . . . . . . . . . . . . . . . . . . . . . . . . . . .42\# . . . . . . . . . . . . . . . . . . . . . . . . . . .30\$ . . . . . . . . . . . . . . . . . . . . . . . . . . .30\% . . . . . . . . . . . . . . . . . . . . . . . . . . .30\& . . . . . . . . . . . . . . . . . . . . . . . . . . .30\] . . . . . . . . . . . . . . . . . . . . . . . . . . .42\ˆ . . . . . . . . . . . . . . . . . . . . . . . 30, 34\˜ . . . . . . . . . . . . . . . . . . . . . . . 30, 34\_ . . . . . . . . . . . . . . . . . . . . . . . . . . .30\{ . . . . . . . . . . . . . . . . . . . . . . . . . . .30\} . . . . . . . . . . . . . . . . . . . . . . . . . . .30
11pt . . . . . . . . . . . . . . . . . . . . . . . . 4612pt . . . . . . . . . . . . . . . . . . . . . . . . 463B2 . . . . . . . . . . . . . . . . . . . . . . . 192
Aa4paper . . . . . . . . . . . . . . . . . 46, 47AbiWord . . . . . . . . . . . . . . 193, 196abstract . . . . . . . . . . . . . . . . . 52, 53\abstractname . . . . . . . . . . 52, 53abstracts . . . . . . . . . . . . . . . . . . . .51accents . . . . . . . . . . . . . . . . . . . . . 32Acrobat . . . . . . . . . . . . . . . . . . . . 204Acrobat Reader . . . . . . . . .3, 64, 76Acronyms, defined
AFM . . . . . . . . . . . . . . . . . . 165
Formatting information��
��229
FORMATTING INFORMATION
AMS . . . . . . . . . . . . . . . . . . 176ANSI. . . . . . . . . . . . . . . . . .211ASCII . . . . . . . . . . . . . . . . . . 15BMP . . . . . . . . . . . . . . . . . . 110CGI . . . . . . . . . . . . . . . . . . . .xiiiCLI . . . . . . . . . . . . . . . . . . . . xiiiCM . . . . . . . . . . . . . . . . . . . 148CMYK . . . . . . . . . . . . . . . . 161CTAN . . . . . . . . . . . . . . . . . . 79DEC . . . . . . . . . . . . . . . . . . . xxiDSSSL . . . . . . . . . . . . . . . . 194DTD . . . . . . . . . . . . . . . . . . 195DTP. . . . . . . . . . . . . . . . . . . .xxiDVI . . . . . . . . . . . . . . . . . . . . 64ECDL . . . . . . . . . . . . . . . . . . . ixEPS . . . . . . . . . . . . . . . . . . . 110FAQ . . . . . . . . . . . . . . . . . . . . 88FTP . . . . . . . . . . . . . . . . . . . . . ixGIF . . . . . . . . . . . . . . . . . . . 112GNU . . . . . . . . . . . . . . . . . . . 25GUI . . . . . . . . . . . . . . . . . . . . xiiHTML . . . . . . . . . . . . . . . . 192IDE. . . . . . . . . . . . . . . . . . . . .10IEEETR . . . . . . . . . . . . . . . 131ISO . . . . . . . . . . . . . . . . . . . 194JPG . . . . . . . . . . . . . . . . . . . 110NFSS . . . . . . . . . . . . . . . . . 162NTS. . . . . . . . . . . . . . . . . . . .xxiOASIS . . . . . . . . . . . . . . . . 194PCL . . . . . . . . . . . . . . . . . . . 110PDA . . . . . . . . . . . . . . . . . . . viiiPDF . . . . . . . . . . . . . . . . . . . . 75PFA . . . . . . . . . . . . . . . . . . . 165PFB . . . . . . . . . . . . . . . . . . . 165PNG . . . . . . . . . . . . . . . . . . 110
PS. . . . . . . . . . . . . . . . . . . . .205RGB . . . . . . . . . . . . . . . . . . 161RTF . . . . . . . . . . . . . . . . . . . 195RTFM. . . . . . . . . . . . . . . . . . . .4SGML . . . . . . . . . . . . . . . . 194TDS . . . . . . . . . . . . . . . . . . . . 87TEI. . . . . . . . . . . . . . . . . . . .204TIFF . . . . . . . . . . . . . . . . . . 112TUG . . . . . . . . . . . . . . . . . . 209URI . . . . . . . . . . . . . . . . . . . 115URL. . . . . . . . . . . . . . . . . . .115WYSIWYG. . . . . . . . . . . . .19WYSIWYM . . . . . . . . . . . . 19XHTML . . . . . . . . . . . . . . 193XML . . . . . . . . . . . . . . . . . . 191XSLT. . . . . . . . . . . . . . . . . .194
\addcontentsline . . . . . . . . . . .60\affiliation . . . . . . . . . . . . . . . 49AFM . . . . . . . . . . . . . . . . . . . . . . 165afm2tfm . . . . . . . . . . . . . . 167, 171alpha . . . . . . . . . . . . . . . . . . . . . . 131AMS . . . . . . . . . . . . . . . . . . . . . . 176ANSI . . . . . . . . . . . . . . . . . . . . . 211Apple Mac . . . . . . . . . . . . . . . . . . . 1apt-get . . . . . . . . . . . . . . . . . . . . . . . . 3\arabic. . . . . . . . . . . . . . . . . . . .189ArcInfo . . . . . . . . . . . . . . . . . . . . .112arguments . . . . . . . . . . . . . . . . . . 28array . . . . . . . . . . . . . . . . . . . . . . .104article . . . . . . . . . . . . . . . . . . . . . . . 44ASCII . . ix, 15, 34, 42, 74, 111,
162, 201, 211asynchronous typographic dis-
play . . . . . . . . . . . . . . . . xiii\author . . . . . . . . . . . . 49, 51, 181
��
��230 Formatting information
INDEX
\authorof . . . . . . . . . . . . . . . . . 131AutoCAD . . . . . . . . . . . . . . . . . . 112Autorun . . . . . . . . . . . . . . . . . . . . . . 7avant . . . . . . . . . . . . . . . . . . . . . . 150
Bb . . . . . . . . . . . . . . . . . . . . . . . . . . 118babel . . . . . . . . . . . . . . . . . . . .40, 58backslash . . . . . . . . . . . . . . . . . . . 27backtick . . . . . . . . . . . . . . . . . . . 115badness . . . . . . . . . . . . . . . . . . . . . 71Balise . . . . . . . . . . . . . . . . . . . . . . 194\baselineskip . . . . . . . .144, 145\baselinestretch . . . . . . . . . 144bash . . . . . . . . . . . . . . . . . . . . . . . . . . 6bbding . . . . . . . . . . . . . . . . . 95, 189beer . . . . . . . . . . . . . . . . . . . . . . . 137
lite . . . . . . . . . . . . . . . . . . . . 137American . . . . . . . . . . . . 137
\begin . . . . . . . . . . . . . . . . . . . . . . 48Berry, Karl . . . . . . . . . 1, 165, 169\bfseries . . . . . . . . . . . . . . . . . 155bibliographies . . . . . . . . . . . . . 129\bibliography . . . . . . . . . . . . .131\bibliographystyle . . . . . . . 131\bibname . . . . . . . . . . . . . . . . . . 135bibtex . . . . . . . . . . . . . . . . . 131, 132\bigskip . . . . . . . . . . . . . . . . . . 143BMP . . . . . . . . . . . . . . . . .110, 112book . . . . . . . . . . . . . . . . . . . . 44, 54bookman . . . . . . . . . . . . . . . . . . 150boxes . . . . . . . . . . . . . . . . . . . . . . 117bp (big points) . . . . . . . . . . . . . . 36braces . . . . . . . . . . see curly braces
C\caption . . . . . . . . . . . . . 102, 103cc (Ciceros) . . . . . . . . . . . . . . . . . 36ccr . . . . . . . . . . . . . . . . . . . . . . . . .149CD-ROM . . . . . . . . . . . . . . . . . 191center . . . . . . . . . . . . . . . . 105, 107\centering . . . . . . . . . . . . . . . . 105cep . . . . . . . . . . . . . . . . . . . . . . . . .111CGI. . . . . . . . . . . . . . . . . . . . . . . .xiii\chapter . . . . . . . . . . . . . . . . 55, 56chapter. . . . . . . . . . . . . . . . . . . .188charmap . . . . . . . . . . . . . . . . . . . . . 33charter . . . . . . . . . . . . . . . . . . . . .151ChemDraw . . . . . . . . . . . . . . . . .112Chikrii, Kirill . . . . . . . . . . . . . . 203Chocolate Stout . . . . . . . . . . .137Chocolate Stout . . . . . . . . . . . . . 137\cite . . . . . . . . . . . . . . . . .130, 132\citequote . . . . . . . . . . . . . . . . 124CLI . . . . . . . . . . . . . . . . . . . xiii, xxii\cline . . . . . . . . . . . . . . . . . . . . .105CM . . 148, 148, 153, 158, 175,
176cm (centimeters) . . . . . . . . . . . .36CMYK . . . . . . . . . . . 82, 160, 161color . . . . . . . . . . 81–83, 160, 161\color . . . . . . . . . . . . . . . . . . . . .160color names . . . . . . . . . . . . . . . . 160\colorbox . . . . . . . . . . . . . . . . . 161colour . . . . . . . . . . . . . . . . . . . . . 160columns . . . . . . . . . . . . . . . . . . . 138\columnsep . . . . . . . . . . . . . . . . 139\command . . . . . . . . . . . . . . xvi, 229Commands
\( . . . . . . . . . . . . . . . . . . . 41, 42
Formatting information��
��231
FORMATTING INFORMATION
\) . . . . . . . . . . . . . . . . . . . 41, 42\- . . . . . . . . . . . . . . . . . . . . . . .37\[ . . . . . . . . . . . . . . . . . . . . . . .42\# . . . . . . . . . . . . . . . . . . . . . . .30\$ . . . . . . . . . . . . . . . . . . . . . . .30\% . . . . . . . . . . . . . . . . . . . . . . .30\& . . . . . . . . . . . . . . . . . . . . . . .30\] . . . . . . . . . . . . . . . . . . . . . . .42\ˆ . . . . . . . . . . . . . . . . . . . 30, 34\˜ . . . . . . . . . . . . . . . . . . . 30, 34\_ . . . . . . . . . . . . . . . . . . . . . . .30\{ . . . . . . . . . . . . . . . . . . . . . . .30\} . . . . . . . . . . . . . . . . . . . . . . .30\abstractname . . . . . . 52, 53\addcontentsline . . . . . . . 60\affiliation . . . . . . . . . . . 49\arabic . . . . . . . . . . . . . . . .189\author . . . . . . . . 49, 51, 181\authorof . . . . . . . . . . . . . 131\baselinestretch . . . . . 144\begin . . . . . . . . . . . . . . . . . . 48\bfseries . . . . . . . . . . . . . 155\bibliography . . . . . . . . . 131\bibliographystyle . . . 131\bibname . . . . . . . . . . . . . . .135\bigskip . . . . . . . . . . . . . . .143\caption . . . . . . . . . 102, 103\centering . . . . . . . . . . . . 105\chapter . . . . . . . . . . . . 55, 56\cite . . . . . . . . . . . . . 130, 132\citequote . . . . . . . . . . . . 124\cline . . . . . . . . . . . . . . . . . 105\color . . . . . . . . . . . . . . . . . 160\colorbox . . . . . . . . . . . . . 161\columnsep . . . . . . . . . . . . 139
\command . . . . . . . . . . .xvi, 229\date . . . 49, 51, 70, 71, 181\DeclareFontFamily . . . 174\DeclareFontShape . . . . 174\def . . . . . . . . . . . . . . . . . . . 185\definecolor . . . . . 160, 161\documentclass . .44, 53, 54\ef . . . . . . . . . . . . . . . . . . . . 180\emph . . . . . . . . . . . . . . . . . . 159\end . . . . . . . . . . . . . . . . . . . . 48\enspace . . . . . . . . . . . . . . .145\EUR . . . . . . . . . . . . . . . . . . . . 31\fancyhead . . . . . . . . . . . . 147\fbox . . . . . . . . 120, 121, 161\fnsymbol . . . . . . . . . . . . . 127\fontencoding . . . . . . . . . 153\fontfamily . . . . . . . . . . . 153\fontsize . . . . . . . . . . . . . 158\footnote . . . . . . . . . . . . . 126\footnotesize . . . . . . . . . 157\foreign . . . . . . . . . . . . . . .159\glossary . . . . . . . . . . . . . 138\graphicspath . . . . . . . . . 114\hline . . . . . . . . . . . . . . . . . 105\hrule . . . . . . . . . . . . . . . . . 182\hspace . . . . . . . . . . . . . . . .145\Huge . . . . . . . . . . . . . . . . . . 157\huge . . . . . . . . . . . . . . . . . . 157\hyphenation . . . . . . . . . . . 38\i . . . . . . . . . . . . . . . . . . . . . . .34\includegraphics108–111,
113, 114\index . . . . . . .137, 138, 186\item . . . . . . . . . . . . . . . . . . . 93\itshape . . . . . . . . . . . . . . .155
��
��232 Formatting information

INDEX
\label . . 99, 102, 103, 128,129
\LARGE . . . . . . . . . . . . . . . . . 157\Large . . . . . . . . . . . . . . . . . 157\large . . . . . . . . . . . . . . . . . 157\LaTeX . . . . . . . . . . . . . . . . . 198\leftmark . . . . . . . . . . . . . 147\linebreak . . . . . . . . . . . . 184\listoffigures . . . . . . . . . 60\listoftables . . . . . . . . . . 60\makeatletter . . . . . . . . . 182\makeatother . . . . . . . . . . 182\makeglossary . . . . . . . . . 138\makeindex . . . . . . . . . . . . 137\maketitle . .49, 51–53, 71,
180–182\markboth . . . . . . . . . . . . . 146\markright . . . . . . . . . . . . 146\mbox . . . . . . . . . . . . . . 38, 184\medskip . . . . . . . . . . . . . . .143\multicolumn . . . . . . . . . . 106\newcommand . . . . . . 180, 185\newpage . . . . . . . . . . . . . . . . xvi\normalsize . . . . . . . . . . . 157\ovalbox . . . . . . . . . . . . . . .121\P . . . . . . . . . . . . . . . . . . . . . 128\pageref . . . . . . . . . . . . . . .129\pagestyle . . . . . . . 146, 147\par . . . . . . . . . 107, 144, 182\paragraph . . . . . . . . . . 55, 99\parbox. . . . . .117, 118, 120\part . . . . . . . . . . . . . . . . . . . 55\part* . . . . . . . . . . . . . . . . . . 57\person . . . . . . . . . . .185, 186\printindex . . . . . . . . . . . 138
\product . . . . 154, 159, 183\protect . . . . . . . . . . . . . . .126\ProvidesPackage . . . . . 172\qquad . . . . . . . . . . . . . . . . . 145\quad . . . . . . . . . . . . . . 36, 145\raggedleft . . . . . . . . . . . . .39\raggedright . 39, 118, 121\raisebox . . . . . . . . . . . . . 189\ref . . . . . . . . . . 99, 128, 129\refname . . . . . . . . . . . . . . .135\reindex . . . . . . . . . 185, 186\renewcommand .52, 53, 182,
188\rightmark . . . . . . . . . . . . 147\rmdefault . . . . . . . . . . . . 172\S . . . . . . . . . . . . . . . . . . . . . 128\scriptsize . . . . . . . . . . . 157\scshape . . . . . . . . . . . . . . .155\section . . . . . . . . . . . . 55, 59\selectfont . . . . . . 153, 155\sentinel . . . . . . . . 185, 186\setcounter . . . . . . . . . . . . .56\setlength . . . . .57–59, 118\sfdefault . . . . . . . . . . . . 173\sffamily . . . . . . . . 155, 182\shadowbox . . . . . . . 121, 188\slshape . . . . . . . . . . . . . . .155\small . . . . . . . . . . . . 124, 157\smallskip . . . . . . . . . . . . 143\space . . . . . . . . . . . . . . . . . 186\subparagraph . . . . . . 55, 99\subparagraph* . . . . . . . . . 57\subsection . . . . . . . . . . . . .55\subsubsection . . . . . . . . . 55
Formatting information��
��233
FORMATTING INFORMATION
\tableofcontents . . 27, 60,68
\textbackslash . . . . . . . . . 30\textbrokenbar . . . . . . . . . 41\textbullet . . . . . . . . . . . . .95\textcolor . . . . . . . 160, 161\textdegree . . . . . . . . . . . . .42\texteuro . . . . . . . . . . . . . . . 31\textit . . . . . . . . . . . . . . . .159\textlangle . . . . . . . . . . . . .41\textrangle . . . . . . . . . . . . .41\textsterling . . . . . . . . . . 31\texttrademark . . . . . . . .183\thechapter . . . . . . . . . . . 188\theenumi . . . . . . . . . . . . . 100\theenumii . . . . . . . . . . . . 100\theenumiii . . . . . . . . . . . 100\theenumiv . . . . . . . . . . . . 100\theSbox . . . . . . . . . . . . . . .188\thinspace . . . . . . . . .32, 145\thispagestyle . . . . . . . . 146\tiny . . . . . . . . . . . . . . . . . . 157\title . . . . . . . . . 49, 51, 181\titleof . . . . . . . . . . . . . . .131\ttdefault . . . . . . . . . . . . 172\ttfamily . . . . . . . . . . . . . 155\uline . . . . . . . . . . . . . . . . . 156\upshape . . . . . . . . . . . . . . .155\url . . . . 115, 116, 126, 201\usepackage . . . . 54, 72, 81,
135, 163\vbox . . . . . . . . . . . . . . . . . . 119\verb . . . . . . . .114–116, 126\vspace . . . . . . . . . . .144, 145\vspace* . . . . . . . . . . . . . . .144
comment character . . . . . . . . . . 30commercial implementations
xivcommutative . . . . . . . . . . . . . . .155configure . . . . . . . . . . . . . . . . . . . . . 86counter . . . . . . . . . . . . . . . . . . . . .xviCounters
chapter . . . . . . . . . . . . . . . .188counter . . . . . . . . . . . . . . . . . xvienumi . . . . . . . . . . . . . . . . . . 100enumii . . . . . . . . . . . . . . . . . 100enumiii . . . . . . . . . . . . . . . .100enumiv . . . . . . . . . . . . . . . . . 100example . . . . . . . . . . . . . . . .100secnumdepth . . . . . xvi, 56, 57section . . . . . . . . . . .188, 189tocdepth . . . . . . . . . . . . 57, 60variables . . . . . . . . . . . . . 229
courier . . . . . . . . . . . . . . . . . . . . . 150Crayola . . . . . . . . . . . . . . . . xix, 160cross-references. . . . . . . . . . . .128CTAN. . . . . . . . . . . . . . . . x–xii, xiv,
xvi, xxii, 1, 12, 21–24,78, 79, 79, 80, 82, 83,88, 111, 131, 135, 138,148, 162, 164, 195,202, 205, 209, 229
curly braces . . . . . . . . . . . . . . . . . 28Cygwin . . . . . . . . . . . . . . . . . . . . . . 88
DDambra, Ruggero . . . . . . . . . .195\date . . . . . . . 49, 51, 70, 71, 181dd (Didot points) . . . . . . . . . . . 36DEC . . . . . . . . . . . . . . . . . . . . . . . xxi\DeclareFontFamily . . . . . . . 174
��
��234 Formatting information
INDEX
\DeclareFontShape . . . . . . . . 174\def . . . . . . . . . . . . . . . . . . . . . . . 185\definecolor . . . . . . . . .160, 161description . . . . . . . . . . . . . . . . . . 97detex . . . . . . . . . . . . . . . . . . . . . . . 205dimension . . . . . . . . . . . . . . . . . . 36dimension . . . . . . . . . . . . . . . . . . .57dimensions . . . . . . . . . . . . . . . . . 35DOC . . . . . . . . . . . . . . . . . . . . . . . 83DocBook . . . . . . . . . . . . . . . . . . . . . xvdocument . . . . . . . . . . . . . . . 48, 54document class . . . . . . . . . . . . . 44document class . . . . . . . . . . . . . . 43\documentclass . . . . . 44, 53, 54Dorner, Fernando . . . . . . . . . 202double-spacing . . . . . . . . . . . . 144draft . . . . . . . . . . . . . . . . . . . . . . . . 46Draw . . . . . . . . . . . . . . . . . . . . . . 112DSSSL. . . . . . . . . . . . . . . . . . . .194DTD. . . . . . . . . . . . . .xv, 195, 195DTP . . . . . . . . xxi, xxii, 101, 148DVD . . . . . . . . . . . . . . . . . . . . . . 191DVI . . . . . . . . . xxii, 2, 19, 21, 64,
66, 73, 75, 76, 82, 113,117, 205
dvialw . . . . . . . . . . . . . . . . . . . . . . .78dvieps . . . . . . . . . . . . . . . . . . . . . . . 78dvihp . . . . . . . . . . . . . . . . . . . . . . . .78dvips . . . . . 75, 77, 110, 160, 170dviview . . . . . . . . . . . . . . . . . . . . . . 73DynaTag . . . . . . . . . . . . . . . . . . .193
EECDL . . . . . . . . . . . . . . . . . . . . ix, ixeditors . . . . . . . . . . . . . . . . . . . . . . 19
\ef . . . . . . . . . . . . . . . . . . . . . . . . 180eiad . . . . . . . . . . . . . . . . . . . . . . . 149element . . . . . . . . . . . . . . . . . . . . . 43elsevier . . . . . . . . . . . . . . . . . . . . . 135em (relative measure) . . . . . . . 36Emacs . . . . xiii, 6, 11, 17, 19, 25,
26, 32, 66, 68, 77, 105,133, 195
\emph . . . . . . . . . . . . . . . . . . . . . . 159empty . . . . . . . . . . . . . . . . . . . . . .146\end . . . . . . . . . . . . . . . . . . . . . . . . 48endnote. . . . . . . . . . . . . . . . . . . .126\enspace . . . . . . . . . . . . . . . . . . 145enumerate . . . . . . . . . . . . . . . . . . 96enumerate* . . . . . . . . . . . . . . . . . 96enumi . . . . . . . . . . . . . . . . . . . . . . 100enumii . . . . . . . . . . . . . . . . . . . . .100enumiii. . . . . . . . . . . . . . . . . . . .100enumiv . . . . . . . . . . . . . . . . . . . . .100environment . . . . . . . . . . . . . . . .93environment . . . . . . . . . . . . . . . . 48environment . . . . . . . . . . . xvi, 229Environments
abstract . . . . . . . . . . . . . 52, 53center . . . . . . . . . . . . 105, 107description . . . . . . . . . . . . . . 97document . . . . . . . . . . . 48, 54enumerate . . . . . . . . . . . . . . 96enumerate* . . . . . . . . . . . . . 96environment . . . . . . . xvi, 229equation . . . . . . . . . . . . . . . . 42figure . . . . . . . . . . . . . . . . . . 108figure* . . . . . . . . . . . . . . . . .139float . . . . . . . . . . . . . . . . . . . 102flushleft . . . . . . . . . . 107, 182
Formatting information��
��235
FORMATTING INFORMATION
flushright . . . . . . . . . . . . . . 107inparaenum . . . . . . . . . . . . . 98itemize . . . . . . . . . . . . . . . . . .95itemize* . . . . . . . . . . . . . . . . .96minipage. . . .118, 120, 121,
187multicols . . . . . . . . . . . . . . .138multirow . . . . . . . . . . . . . . . 106picture . . . . . . . . . . . . . . . . .108raggedleft . . . . . . . . . . . . . . .39raggedright . . . . . . . . . . . . . 39Sbox . . . . . . . . . . . . . .121, 187table . . . . . . . . . . . . . 102, 108table* . . . . . . . . . . . . . . . . . 139tabular . 103, 107, 119, 120textcomp . . . . . . . . . . . . . . . .41Verbatim . . . . . . . . . . . . . . .116verbatim . . . . . . . . . . . . . . . 116
EPS. . . . . . . .110, 110, 111–113epsf . . . . . . . . . . . . . . . . . . . . . . . 109equation . . . . . . . . . . . . . . . . . . . . 42Error messages
File not found . . . . . . . . . . . 72Overfull hbox . . . . . . . . . . . 72Runaway argument . . . . . 71Too many }’s . . . . . . . . . . . . 70Undefined control se-
quence . . . . . . . . . . . . . . 70Underfull hbox. . . . . . . . . .71
Esser, Thomas . . . . . . . . . . . . . . . .1\EUR . . . . . . . . . . . . . . . . . . . . . . . . 31€ . . . . . . . . . . . . . . . . . . . . . . . . . . . 31EuroMath . . . . . . . . . . . . . . . . . .193ex (relative measure) . . . . . . . . 36example. . . . . . . . . . . . . . . . . . . .100
Excel . . . . . . . . . . . . . . . . . . . . . . . 195
Ffamily . . . . . . . . . . . . . . . . . . . . . 155fancybox . . . . . . . . .116, 121, 187fancyhdr . . . . . . . . . . . . . . . . . . . 146\fancyhead . . . . . . . . . . . . . . . . 147fancyvrb . . . . . . . . . . . . . . . . . . . 116FAQ . . . . . . . . xvii, 80, 88, 88, 89\fbox . . . . . . . . . . . .120, 121, 161\fboxrule . . . . . . . . . . . . . . . . . 120\fboxsep . . . . . . . . . . . . . . . . . . 120Feuerstack, Thomas . . . . . . . . . . 1figure . . . . . . . . . . . . . . . . . . . . . . 108figure* . . . . . . . . . . . . . . . . . . . . .139figures . . . . . . . . . . . . . . . . . . . . . 108File not found. . . . . . . . . . . . . . .72filenames . . . . . . . . . . . . . . . . . . . 63Fine, Jonathan . . . . . . . . . . . . . . xivfloat . . . . . . . . . . . . . . . . . . . . . . . 102floats . . . . . . . . . . . . . . . . . 102, 108flushleft . . . . . . . . . . . . . . .107, 182flushright . . . . . . . . . . . . . . . . . . 107fnpara . . . . . . . . . . . . . . . . . . . . . 126\fnsymbol . . . . . . . . . . . . . . . . . 127font definition . . . . . . . . . . . . . 173\fontencoding . . . . . . . . . . . . .153\fontfamily . . . . . . . . . . . . . . . 153fontinst. . . . . . . . . . . . . . . . . . . . .165fontname . . . . . . . . . . . . . . 166, 167fontname . . . . . . . . . . . . . . . . . . 174fonts
METAFONT . . . . . . . . . . . . 148changing temporarily . . 153changing the default . . . 152colour . . . . . . . . . . . . . . . . . 160
��
��236 Formatting information
INDEX
Computer Modern . . . . 148encoding . . . . . . . . . . . . . . 167families . . . . . . . . . . . . . . . .152in general . . . . . . . . . . . . . . 148installing . . . . . . . . . . . . . . 161METAFONT . . . . . . . . . . . . 149PostScript . . . . . . . . 149, 164sizes . . . . . . . . . . . . . . . 46, 156styles . . . . . . . . . . . . . . . . . . 155TrueType . . . . . . . . . . . . . . 149Type 1 . . . . . . . . . . . . . . . . . 149
\fontsize . . . . . . . . . . . . . . . . . 158\footnote . . . . . . . . . . . . . . . . . 126footnotes . . . . . . . . . . . . . . . . . .126\footnotesize . . . . . . . . . . . . .157\foreign . . . . . . . . . . . . . . . . . . 159fp . . . . . . . . . . . . . . . . . . . . . . . . . . . . 1FrameMaker . . . . . . . . . . . . . . . .192FTP . . . . . . . . . . . . . . . . . . . . . ix, 79
Ggeometry . . . . . .81–83, 127, 143GhostScript . . . . . . . . . . . . . . . . . . . 8Ghostscript . . . . . . . . . 75, 78, 150GhostView . . . . . . . . . . . . . . . . . . . . 3GIF . . . . . . . . . . . . . . . . . . . . . . . 112GIMP . . . . . . . . . . . . . . . . . . . . . 112glossaries . . . . . . . . . . . . . . . . . . 136\glossary . . . . . . . . . . . . . . . . . 138GNU . . . . . . . . . . . . . . . . xv, 25, 25GNUplot . . . . . . . . . . . . . . . . . . 112Granzer, Andreas . . . . . . . . . . 202graphics . . . . . . . . . . . . . . . . . . . 108graphics . . . . . . . . . . . . . . . . . . . . .83\graphicspath . . . . . . . . . . . . .114graphicx . . . . . . . . . . . . . . 109, 111
grave accent . . . . . . . . . . . . . . . 115grouping . . . . . . . . . . . . . . . . . . 154GSView . . . . . . . . . . . . . . . . . . . . . 11GSview . . . 3, 8, 64, 75–77, 150,
176GUI . . . . . . . . . . . . .xii, xiv, xix, 65Gutta-Percha . . . . . . . . . . . . . . . 165gv . . . . . . . . . . . . . . . . . . . . . . . . . . . . 3
Hhard space . . . . . . . . . . . . . . . . . . 38harvard . . . . . . . . . . . . . . . . . . . . 135hash mark . . . . . . . . . . . . . . . . . . 31headings . . . . . . . . . . . . . . . . . . .146help . . . . . . . . . . . . . . . . . . . . . . . . 88helvet . . . . . . . . . . . . . . . . . . . . . .150Hennings, Wilfried . . . . . . . . 202H&J . . . . . . . . . . see hyphenation,
justification\hline . . . . . . . . . . . . . . . . . . . . .105\hrule . . . . . . . . . . . . . . . . . . . . .182\hspace. . . . . . . . . . . . . . . . . . . .145HTML. . . . . . . . . . . . ii, xv, 16, 44,
59, 101, 192, 193, 198,202–204, 217
HTML Tidy . . . . . . . . . . . . . . . .193\Huge . . . . . . . . . . . . . . . . . . . . . . 157\huge . . . . . . . . . . . . . . . . . . . . . . 157hyphenation . . . . . . . . . . . . . . . .35\hyphenation . . . . . . . . . . . . . . . 38hyphens
discretionary. . . . . . . . . . . .38soft . . . . . . . . . . . . . . . . . . . . . 37
I\i . . . . . . . . . . . . . . . . . . . . . . . . . . .34
Formatting information��
��237
FORMATTING INFORMATION
IBM . . . . . . . . . . . . . . . . . . . . . . . . xvIDE . . . . . . . . . . . . . . . . . . . . . . . . 10IEEETR. . . . . . . . . . . . . . . . . . .131Illustrator . . . . . . . . . . . . . . . . . . 112images. . . . . . . . . . . . . . . . . . . . .108in (inches) . . . . . . . . . . . . . . . . . . 36\includegraphics . . . 108–111,
113, 114\index . . . . . . . . . . 137, 138, 186indexes . . . . . . . . . . . . . . . . . . . . 136Inline lists . . . . . . . . . . . . . . . . . . 98inparaenum . . . . . . . . . . . . . . . . . 98inputenc . . . . . . . . 33, 34, 42, 211Instant Preview . . . . . . . . . . . . . . xivISO . . . . . . . . . . . . . . . . . . . . . . . 194ispell . . . . . . . . . . . . . . . . . . . . . . . . 21\item . . . . . . . . . . . . . . . . . . . . . . . 93itemize . . . . . . . . . . . . . . . . . . . . . . 95itemize* . . . . . . . . . . . . . . . . . . . . . 96\itshape . . . . . . . . . . . . . . . . . . 155
JJackowski, Bogusław . . . . . . 176Java . . . . . . . . . . . . . . . . . . . . xv, 196JPG . . . . . . . . 110, 110, 112, 113jurabib . . . . . . . . . . . . . . . . . . . . .136justification. . . . . . . . . . . . . . . . .35
KKastrup, David . . . . . . . . . . . . . xivKay, Michael . . . . . . . . . . . . . . . . xvKern, Uwe . . . . . . . . . . . . . . . . . . 82Kiffe, Tom. . . . . . . . . . . . . . . . . . . .1kluwer . . . . . . . . . . . . . . . . . . . . . 135Knuth, Don . . . . . . . . . . . . xx, 185komascript . . . . . . . . . . . . . . 44, 45
Kword . . . . . . . . . . . . . . . . . . . . . 193
LLYX . . . . . . . . . . . . . . . . . . . . . . . . . 19\label . .99, 102, 103, 128, 129Lamport, Leslie . . . . . . . . xxi, 186\LARGE . . . . . . . . . . . . . . . . . . . . .157\Large . . . . . . . . . . . . . . . . . . . . .157\large . . . . . . . . . . . . . . . . . . . . .157\LaTeX . . . . . . . . . . . . . . . . . . . . .198latex2rtf . . . . . . . . . . . . . . . . . . . 202\leftmark . . . . . . . . . . . . . . . . . 147length . . . . . . . . . . . . . . . . . . . . . . .57\length . . . . . . . . . . . . . . . . . . . . .xviLengths (Dimensions)
\baselineskip . . . . 144, 145\fboxrule . . . . . . . . . . . . . 120\fboxsep . . . . . . . . . . . . . . .120\length . . . . . . . . . . . . . . . . . xvi\parindent . . . . . . . . .58, 118\parskip . . . . . . . . xvi, 57–59\spaceskip . . . . . . . . . . . . . .38\tabcolsep . . . . . . . . . . . . 105
letter . . . . . . . . . . . . . . . . . . . . . . . . 44letterpaper . . . . . . . . . . . . . . .46, 47letterspacing . . . . . . . . . . . . . . 146\linebreak . . . . . . . . . . . . . . . . 184Linux . . . . . . . . . . . . . . . . . . . . . . . . 1\listoffigures . . . . . . . . . . . . . 60\listoftables . . . . . . . . . . . . . . 60lists . . . . . . . . . . . . . . . . . . . . . . . . . 93
bulleted . . . . . . . . . . . . . . . . .95description. . . . . . . . . . . . . .97discussion. . . . . . . . . . . . . . .97enumerated . . . . . . . . . . . . . 96inline . . . . . . . . . . . . . . . . . . . 98
��
��238 Formatting information
INDEX
itemized . . . . . . . . . . . . . . . . 95numbered. . . . . . . . . . . . . . .96
Lotz, Manfred . . . . . . . . . . . . . . . 1
MMac OS X . . . . . . . . . . . . . . . . . . . . 1macros . . . . . . . . . . . . . . . . . . . . 179macros . . . . . . . . . . . . . . . . . . . . 179\makeatletter . . . . . . . . . . . . .182\makeatother . . . . . . . . . . . . . . 182makebst . . . . . . . . . . . . . . . . . . . . 135\makeglossary . . . . . . . . . . . . .138makeidx . . . . . . . . . . . . . . . . . . . 137makeindex . . . . . . . . . xii, 136, 138\makeindex . . . . . . . . . . . . . . . . 137\maketitle . . . . . 49, 51–53, 71,
180–182Malyshev, Basil K. . . . . . . . . . 176Maple . . . . . . . . . . . . . . . . 112, 193marginal notes. . . . . . . . . . . . .127margins . . . . . . . . . . . . . . . . . . . 143\markboth . . . . . . . . . . . . . . . . . 146\markright . . . . . . . . . . . . . . . . 146markup . . . . . . . . . . . . . . . . . . . . . 16marvosym . . . . . . . . . . . . . . . . . . . 31math characters . . . . . . . . . . . . .41MathCAD . . . . . . . . . . . . . . . . . 112Mathematica . . . . . . . . . . 112, 193mathematics . . . . . . . . . . . . . xi, 41Matthes, Eberhard . . . . . . . . . . 11\mbox . . . . . . . . . . . . . . . . . . 38, 184mdwlist . . . . . . . . . . . . . . . . 96, 143\medskip . . . . . . . . . . . . . . . . . . 143memoir . . . . . . . . . . . . . . . . . .44, 45metacharacters . . . . . . . . . . . . . .30metadata . . . . . . . . . . . . . . . . . . . 49
METAFONT . . . . . . . . . . . . xxii, 19,85, 148, 149, 151, 156,162, 163, 175, 176,208, 209
metainformation . . . . . . . . . . . .49Metamorphosis . . . . . . . . . . . . . 194Microbrew . . . . . . . . . . . . . see beerMicrosoft Windows . . . . . . . . . . 1MiK . . . . . . . . . . . . . . . . . . . . . . . . . 1minipage . . . 118, 120, 121, 187mirror . . . . . . . . . . . . . . . . . . . . . 111mkfs . . . . . . . . . . . . . . . . . . . . . . . . . . 3mktexlsr . . . . . . . . . . . 86, 207, 208mm (millimeters) . . . . . . . . . . . 36Mozilla . . . . . . . . . . . . . . . . . . . . . .89multicol . . . . . . . . . . . . . . .138, 139multicols . . . . . . . . . . . . . . . . . . . 138\multicolumn . . . . . . . . . . . . . . 106multirow . . . . . . . . . . . . . . . . . . . 106My Computer . . . . . . . . . . . . . . . . . 7myheadings . . . . . . . . . . . . . . . . 146
Nnamed . . . . . . . . . . . . . . . . . . . . .160NetPBM . . . . . . . . . . . . . . . . . . .203newcent . . . . . . . . . . . . . . 150, 152\newcommand . . . . . . . . . . 180, 185\newpage . . . . . . . . . . . . . . . . . . . xviNFSS . . . . . . . . . . . . . . . . . . . . . 162\normalsize . . . . . . . . . . . . . . . 157Notepad . . . . . . . . . . . . . . . . . . ix, 25NTS . . . . . . . . . . . . . . . . . . . . . . . xxi
OOASIS . . . . . . . . . . . . . . . . . . . . 194octothorpe . . . . . . . . . . . . . . . . . . 31
Formatting information��
��239
FORMATTING INFORMATION
Office 11 . . . . . . . . . . . . . . . . . . . 195Omnimark . . . . . . . . . . . . . . . . . 194oneside . . . . . . . . . . . . . . . . . . . . . 46OpenOffice . . . . . . . . . . . . . . ix, 194Opera . . . . . . . . . . . . . . . . . . . . . . . 64Options
11pt . . . . . . . . . . . . . . . . . . . . .4612pt . . . . . . . . . . . . . . . . . . . . .46a4paper . . . . . . . . . . . . . 46, 47alpha . . . . . . . . . . . . . . . . . . 131b . . . . . . . . . . . . . . . . . . . . . . 118draft . . . . . . . . . . . . . . . . . . . . 46empty . . . . . . . . . . . . . . . . . . 146headings . . . . . . . . . . . . . . . 146letterpaper . . . . . . . . . . . 46, 47myheadings . . . . . . . . . . . . 146named . . . . . . . . . . . . . . . . . 160oneside . . . . . . . . . . . . . . . . . .46options . . . . . . . . . . . . . . . . .229pdftex . . . . . . . . . . . . . . . . . .161plain . . . . . . . . . . . . . . 131, 146t . . . . . . . . . . . . . . . . . . . . . . . 118titlepage . . . . . . . . . . . . . . . . .46twoside . . . . . . . . . . . . . . . . . . 46
options . . . . . . . see Class Optionsoptions. . . . . . . . . . . . . . . . . . . . .229Rogue . . . . . . . . . . . . . . . . . . . . . 138OS X . . . . . . . . . . . . . . . . . . . . . . . . . 1Ota, Takaaki. . . . . . . . . . . . . . .105\ovalbox . . . . . . . . . . . . . . . . . . 121Overfull hbox . . . . . . . . . . . . . . . 72oxford . . . . . . . . . . . . . . . . . . . . . . 135
P\P . . . . . . . . . . . . . . . . . . . . . . . . . 128
package . . . . . . . . . . . . . . . xvi, 229Packages
array . . . . . . . . . . . . . . . . . . .104article . . . . . . . . . . . . . . . . . . . 44avant . . . . . . . . . . . . . . . . . . 150babel . . . . . . . . . . . . . . . . 40, 58bbding . . . . . . . . . . . . . 95, 189book . . . . . . . . . . . . . . . . 44, 54bookman . . . . . . . . . . . . . . 150ccr . . . . . . . . . . . . . . . . . . . . . 149charter . . . . . . . . . . . . . . . . . 151color . . . . . . 81–83, 160, 161courier . . . . . . . . . . . . . . . . . 150eiad. . . . . . . . . . . . . . . . . . . .149endnote . . . . . . . . . . . . . . . .126epsf . . . . . . . . . . . . . . . . . . . .109fancybox . . . . . 116, 121, 187fancyhdr . . . . . . . . . . . . . . . 146fancyvrb . . . . . . . . . . . . . . . .116fnpara . . . . . . . . . . . . . . . . . 126fontname . . . . . . . . . . . . . . 174geometry . . 81–83, 127, 143graphics . . . . . . . . . . . . . . . . . 83graphicx . . . . . . . . . . 109, 111helvet . . . . . . . . . . . . . . . . . . 150inputenc . . . . 33, 34, 42, 211jurabib . . . . . . . . . . . . . . . . . 136komascript . . . . . . . . . . .44, 45letter . . . . . . . . . . . . . . . . . . . . 44makeidx . . . . . . . . . . . . . . . .137marvosym . . . . . . . . . . . . . . . 31mdwlist . . . . . . . . . . . . .96, 143memoir . . . . . . . . . . . . . . 44, 45multicol . . . . . . . . . . . 138, 139newcent . . . . . . . . . . 150, 152
��
��240 Formatting information
INDEX
package . . . . . . . . . . . xvi, 229palatcm . . . . . . . . . . . . . . . . 153palatino . . . . . . . . . . .150, 152pandora. . . . . . . . . . . . . . . .149paralist . . . . . . . . . . 72, 86, 98parskip . . . . . . . . . . . . . . . . . . 59pifont . . . . . . . . . . . . . . 95, 150preview-latex . . . . . . . . . . . . xivpslatex . . . . . . . . . . . . . . . . . 152quotation . . . . . . . . . . . . . . 124quote . . . . . . . . . . . . . . . . . . 124ragged2e . . . . . . . . . . . . . . . .40report . . . . . . . . . . . . . . . 44, 54sectsty . . . . . . . . . . . . . .55, 143setspace . . . . . . . . . . . . . . . 144so . . . . . . . . . . . . . . . . . . . . . . . 39soul . . . . . . . . . . . . . . . . . . . .146ssection . . . . . . . . . . . . . . . . . 55tabular . . . . . . . . . . . . . . . . .121tabularx . . . . . . . . . . . . . . . .104textcomp . . . . . . . . . . . . 31, 95times . . . . . . . . . . . . . 150, 152type1cm . . . . . . . . . . . . . . . 158ulem . . . . . . . . . . . . . . . . . . . 156url . . . . . . . . . . . . . . . . . . . . . 115utopia . . . . . . . . . . . . . . . . . .151xcolor . . . . . . . . . . . . . . . . . . . 82zapfchan . . . . . . . . . . . . . . . 150
packagesdocumentation . . . . . . . . . 82downloading . . . . . . . . . . . . 83installing . . . . . . . . . . . . 83, 84using. . . . . . . . . . . . . . . . . . . .80
packages . . . . . . . . . . . . . . . . . . . . 80page size
margins. . . . . . . . . . . . . . . .143scaling . . . . . . . . . . . . . . . . . . 77
PageMaker . . . . . . . . . . . . . . . . . 192\pageref . . . . . . . . . . . . . . . . . . 129\pagestyle . . . . . . . . . . . 146, 147PaintShop Pro . . . . . . . . . . . . . . 112palatcm . . . . . . . . . . . . . . . . . . . .153palatino . . . . . . . . . . . . . . 150, 152pandora . . . . . . . . . . . . . . . . . . . 149panels . . . . . . . . . . . . . . . . . . . . . 117paper sizes . . . . . . . . . . . . . . . . . . 45\par . . . . . . . . . . . . .107, 144, 182\paragraph . . . . . . . . . . . . . .55, 99paralist . . . . . . . . . . . . . . 72, 86, 98\parbox . . . . . . . . . 117, 118, 120\parindent . . . . . . . . . . . . 58, 118parskip . . . . . . . . . . . . . . . . . . . . . . 59\parskip . . . . . . . . . . . . xvi, 57–59\part . . . . . . . . . . . . . . . . . . . . . . . 55\part* . . . . . . . . . . . . . . . . . . . . . . 57pc (picas) . . . . . . . . . . . . . . . . . . . 36PCL. . . . . . . . . . . . . . . . . . . . . . .110PDA. . . . . . . . . . . . .viii, xxiii, 191PDF. . . . . . . . . . . . . . . . . . ii, xxii, 3,
21, 22, 25, 32, 45, 64,66, 73, 74, 75, 76, 77,84, 110, 112, 113, 117,164, 204, 205
pdfLATEX . . . . . . . . . . . . 22, 46, 64,66, 73, 84, 110, 113,148, 151, 161, 164,176, 191, 204
pdftex . . . . . . . . . . . . . . . . . . . . . 161pdftotext . . . . . . . . . . . . . . . . . . . .205PDFview . . . . . . . . . . . . . . . . . . . . 64
Formatting information��
��241
FORMATTING INFORMATION
pdfview . . . . . . . . . . . . . . . . . . . . .176\person . . . . . . . . . . . . . . 185, 186PFA . . . . . . . . . . . . . . . . . . . . . . . 165PFAedit . . . . . . . . . . . . . . . . . . . . 165PFB. . . . . . . . . . . . .165, 170, 176PhotoShop . . . . . . . . . . . . . . . . . .112picas . . . . . . . . . . . . . . . . . . . . . . . .36picture . . . . . . . . . . . . . . . . . . . . . 108pifont . . . . . . . . . . . . . . . . . . 95, 150plain . . . . . . . . . . . . . . . . . .131, 146plain-text . . . . . . . . . . . . . . . . . . . 15PNG. . . . . . .110, 110, 112, 113points . . . . . . . . . . . . . . . . . . . . . . 36Popineau, Fabrice . . . . . . . . . . . . 1PostScript . . . . ii, xxii, 3, 22, 25,
74–78, 113, 151, 158,160, 161, 163, 164,171, 176, 217
£ . . . . . . . . . . . . . . . . . . . . . . . . . . . 31preamble . . . . . . . . . . . . . . . . . . . .54preview . . . . . . . . . . . . . . . . . . . . . 73preview-latex . . . . . . . . . . . . . . . . xiv\printindex . . . . . . . . . . . . . . . 138printing . . . . . . . . . . . . . . . . . 63, 76
reverse order . . . . . . . . . . . . 77selected pages . . . . . . . . . . . 77
product . . . . . . . . . . . . . . . . .xvi, 229\product . . . . . . . . 154, 159, 183Products
3B2 . . . . . . . . . . . . . . . . . . . 192AbiWord . . . . . . . . . . 193, 196Acrobat . . . . . . . . . . . . . . . . 204Acrobat Reader . . . . . 3, 64, 76afm2tfm . . . . . . . . . . .167, 171apt-get . . . . . . . . . . . . . . . . . . . . 3
ArcInfo . . . . . . . . . . . . . . . . . 112AutoCAD . . . . . . . . . . . . . . 112Autorun . . . . . . . . . . . . . . . . . . .7Balise . . . . . . . . . . . . . . . . . . 194bash . . . . . . . . . . . . . . . . . . . . . . 6bibtex . . . . . . . . . . . . . 131, 132cep . . . . . . . . . . . . . . . . . . . . . 111charmap . . . . . . . . . . . . . . . . . 33ChemDraw . . . . . . . . . . . . . 112Chocolate Stout . . . . . . . . . 137configure . . . . . . . . . . . . . . . . . 86Crayola . . . . . . . . . . . . xix, 160Cygwin . . . . . . . . . . . . . . . . . . 88detex . . . . . . . . . . . . . . . . . . . 205DocBook . . . . . . . . . . . . . . . . . xvDraw . . . . . . . . . . . . . . . . . . 112dvialw . . . . . . . . . . . . . . . . . . . 78dvieps . . . . . . . . . . . . . . . . . . . 78dvihp . . . . . . . . . . . . . . . . . . . . 78dvips . 75, 77, 110, 160, 170dviview . . . . . . . . . . . . . . . . . . 73DynaTag . . . . . . . . . . . . . . . 193elsevier . . . . . . . . . . . . . . . . . 135Emacs . xiii, 6, 11, 17, 19, 25,
26, 32, 66, 68, 77, 105,133, 195
EuroMath . . . . . . . . . . . . . . 193Excel . . . . . . . . . . . . . . . . . . . 195fontinst . . . . . . . . . . . . . . . . .165fontname . . . . . . . . . . 166, 167FrameMaker . . . . . . . . . . . . 192GhostScript . . . . . . . . . . . . . . . 8Ghostscript . . . . . .75, 78, 150GhostView . . . . . . . . . . . . . . . . 3GIMP . . . . . . . . . . . . . . . . . 112
��
��242 Formatting information
INDEX
GNUplot . . . . . . . . . . . . . . .112GSView . . . . . . . . . . . . . . . . . 11GSview3, 8, 64, 75–77, 150,
176Gutta-Percha . . . . . . . . . . . 165gv . . . . . . . . . . . . . . . . . . . . . . . . 3harvard . . . . . . . . . . . . . . . . 135HTML Tidy . . . . . . . . . . . .193Illustrator . . . . . . . . . . . . . . 112Instant Preview . . . . . . . . . . .xivispell . . . . . . . . . . . . . . . . . . . . 21Java . . . . . . . . . . . . . . . . xv, 196kluwer . . . . . . . . . . . . . . . . . .135Kword . . . . . . . . . . . . . . . . . .193LYX . . . . . . . . . . . . . . . . . . . . . 19latex2rtf . . . . . . . . . . . . . . . 202makebst . . . . . . . . . . . . . . . . 135makeindex . . . . . .xii, 136, 138Maple . . . . . . . . . . . . .112, 193MathCAD . . . . . . . . . . . . . 112Mathematica . . . . . . 112, 193Metamorphosis . . . . . . . . . .194mkfs . . . . . . . . . . . . . . . . . . . . . . 3mktexlsr . . . . . . . 86, 207, 208Mozilla . . . . . . . . . . . . . . . . . . 89My Computer . . . . . . . . . . . . . 7NetPBM . . . . . . . . . . . . . . . 203Notepad . . . . . . . . . . . . . . ix, 25Office 11 . . . . . . . . . . . . . . . 195Omnimark . . . . . . . . . . . . . .194OpenOffice . . . . . . . . . . ix, 194Opera . . . . . . . . . . . . . . . . . . . 64oxford . . . . . . . . . . . . . . . . . . 135PageMaker . . . . . . . . . . . . . 192PaintShop Pro . . . . . . . . . . 112
pdfLATEX . . . . . . . . 22, 46, 64,66, 73, 84, 110, 113,148, 151, 161, 164,176, 191, 204
pdftotext . . . . . . . . . . . . . . . . 205PDFview . . . . . . . . . . . . . . . . 64pdfview . . . . . . . . . . . . . . . . .176PFAedit . . . . . . . . . . . . . . . . 165PhotoShop . . . . . . . . . . . . . .112product . . . . . . . . . . . . . xvi, 229psnup . . . . . . . . . . . . . . . . . . . .77pstops . . . . . . . . . . . . . . . . . . . 77Publisher . . . . . . . . . . . . . . . 192pybliographic . . . . . . . . . . . 134rtf2latex2e . . . . . . . . .195, 203Saxon . . . . . . . . . . xv, 196, 198ScanDisk . . . . . . . . . . . . . . . . . 7Scientific Word . . . . . . . . . . . xivStar Office . . . . . . . . . . . . . . 194t1binary . . . . . . . . . . . . . . . .165t1utils . . . . . . . . . . . . . . . . . .165texconfig . . . . . . . . . . . . . . . . . . . 6texhash . . . . . . . . 86, 207, 208Textures . . . . . . . . . . . . . . . . . xivtkbibtex . . . . . . . . . . . . . . . . .134tkPaint . . . . . . . . . . . . . . . . . 112tsconfig . . . . . . . . . . . . . . . . . . 22up2date . . . . . . . . . . . . . . . . . . . 3updmap . . . . . . 165, 170, 175Velcro . . . . . . . . . . . . . . . . . . 183vi . . . . . . . . . . . . . . . . . . . . . . . . .6Windows Update . . . . . . . . . . 7WinEdt xiii, 3, 8–11, 17, 19,
24Winedt . . . . . . . . . . . . . . . . . . 25
Formatting information��
��243
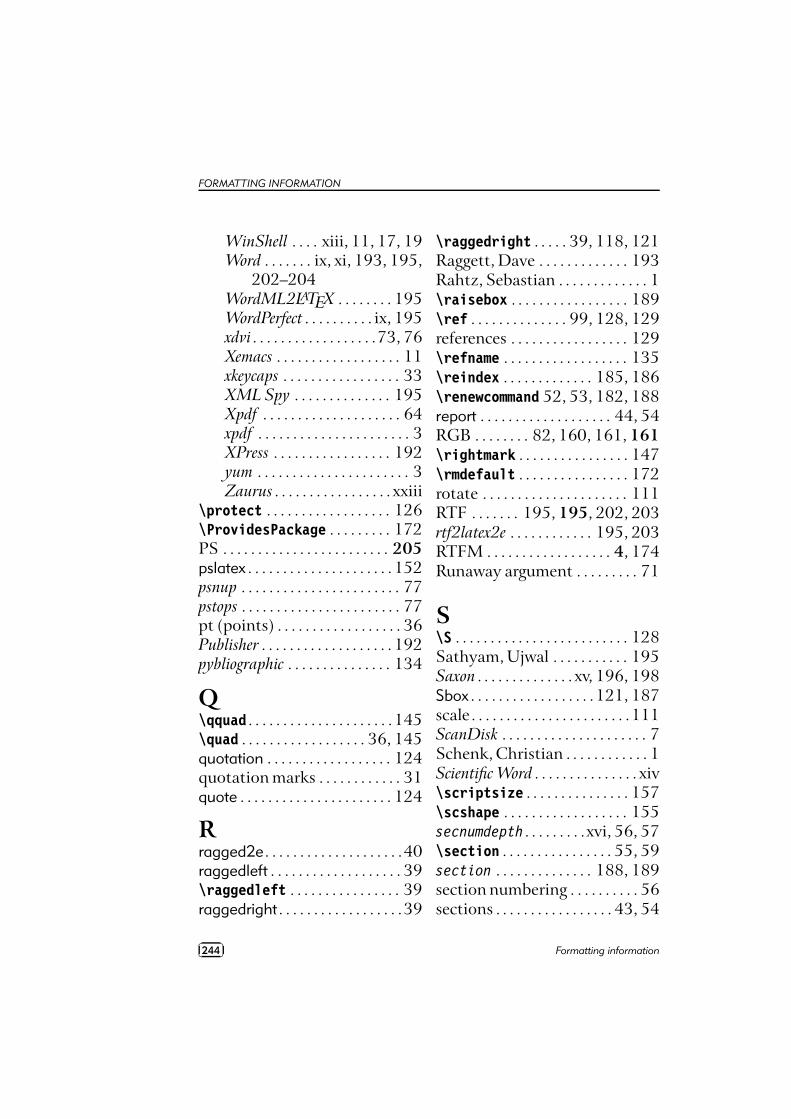
FORMATTING INFORMATION
WinShell . . . . xiii, 11, 17, 19Word . . . . . . . ix, xi, 193, 195,
202–204WordML2LATEX . . . . . . . . 195WordPerfect . . . . . . . . . . ix, 195xdvi . . . . . . . . . . . . . . . . . .73, 76Xemacs . . . . . . . . . . . . . . . . . . 11xkeycaps . . . . . . . . . . . . . . . . . 33XML Spy . . . . . . . . . . . . . . 195Xpdf . . . . . . . . . . . . . . . . . . . . 64xpdf . . . . . . . . . . . . . . . . . . . . . . 3XPress . . . . . . . . . . . . . . . . . 192yum . . . . . . . . . . . . . . . . . . . . . . 3Zaurus . . . . . . . . . . . . . . . . . xxiii
\protect . . . . . . . . . . . . . . . . . . 126\ProvidesPackage . . . . . . . . . 172PS . . . . . . . . . . . . . . . . . . . . . . . . 205pslatex . . . . . . . . . . . . . . . . . . . . .152psnup . . . . . . . . . . . . . . . . . . . . . . . 77pstops . . . . . . . . . . . . . . . . . . . . . . . 77pt (points) . . . . . . . . . . . . . . . . . . 36Publisher . . . . . . . . . . . . . . . . . . . 192pybliographic . . . . . . . . . . . . . . . 134
Q\qquad . . . . . . . . . . . . . . . . . . . . .145\quad . . . . . . . . . . . . . . . . . . 36, 145quotation . . . . . . . . . . . . . . . . . . 124quotation marks . . . . . . . . . . . . 31quote . . . . . . . . . . . . . . . . . . . . . . 124
Rragged2e. . . . . . . . . . . . . . . . . . . .40raggedleft . . . . . . . . . . . . . . . . . . . 39\raggedleft . . . . . . . . . . . . . . . . 39raggedright . . . . . . . . . . . . . . . . . .39
\raggedright . . . . . 39, 118, 121Raggett, Dave . . . . . . . . . . . . . 193Rahtz, Sebastian . . . . . . . . . . . . . 1\raisebox . . . . . . . . . . . . . . . . . 189\ref . . . . . . . . . . . . . . 99, 128, 129references . . . . . . . . . . . . . . . . . 129\refname . . . . . . . . . . . . . . . . . . 135\reindex . . . . . . . . . . . . . 185, 186\renewcommand 52, 53, 182, 188report . . . . . . . . . . . . . . . . . . . 44, 54RGB . . . . . . . . 82, 160, 161, 161\rightmark . . . . . . . . . . . . . . . . 147\rmdefault . . . . . . . . . . . . . . . . 172rotate . . . . . . . . . . . . . . . . . . . . . 111RTF . . . . . . . 195, 195, 202, 203rtf2latex2e . . . . . . . . . . . . 195, 203RTFM . . . . . . . . . . . . . . . . . . 4, 174Runaway argument . . . . . . . . . 71
S\S . . . . . . . . . . . . . . . . . . . . . . . . . 128Sathyam, Ujwal . . . . . . . . . . . 195Saxon . . . . . . . . . . . . . . xv, 196, 198Sbox . . . . . . . . . . . . . . . . . .121, 187scale. . . . . . . . . . . . . . . . . . . . . . .111ScanDisk . . . . . . . . . . . . . . . . . . . . . 7Schenk, Christian . . . . . . . . . . . . 1Scientific Word . . . . . . . . . . . . . . . xiv\scriptsize . . . . . . . . . . . . . . . 157\scshape . . . . . . . . . . . . . . . . . . 155secnumdepth . . . . . . . . .xvi, 56, 57\section . . . . . . . . . . . . . . . . 55, 59section . . . . . . . . . . . . . . 188, 189section numbering . . . . . . . . . . 56sections . . . . . . . . . . . . . . . . . 43, 54
��
��244 Formatting information
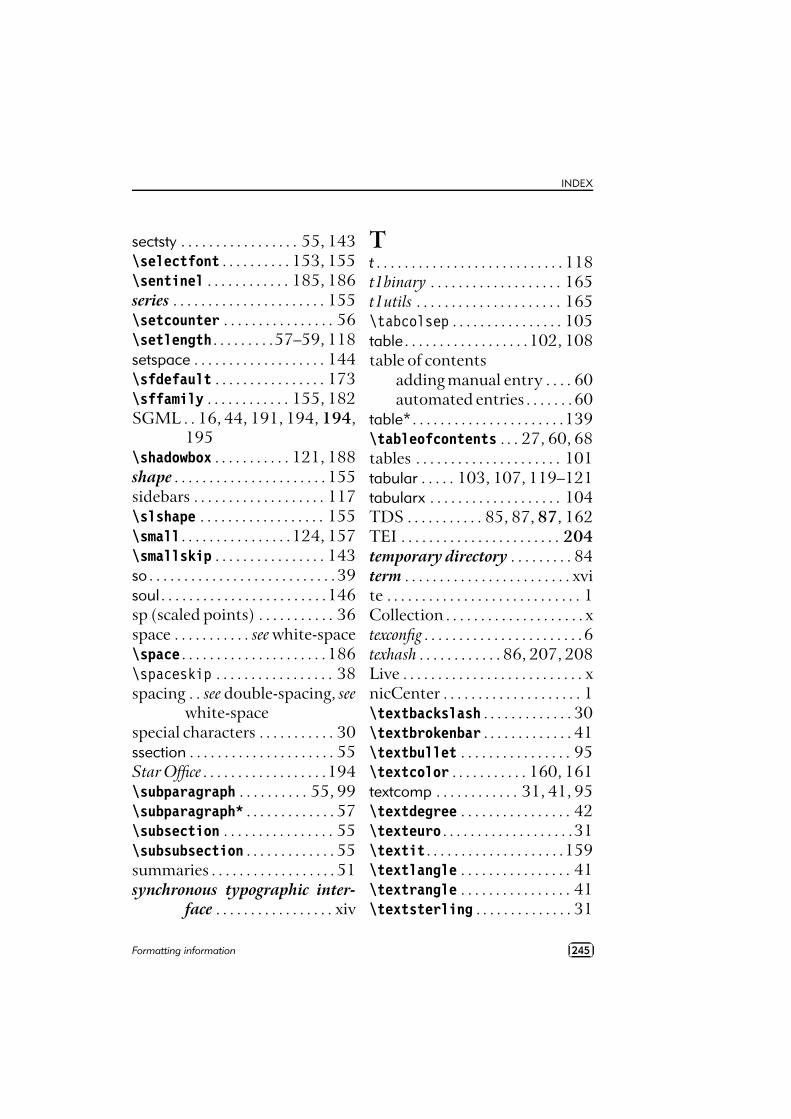
INDEX
sectsty . . . . . . . . . . . . . . . . . 55, 143\selectfont . . . . . . . . . . 153, 155\sentinel . . . . . . . . . . . . 185, 186series . . . . . . . . . . . . . . . . . . . . . . 155\setcounter . . . . . . . . . . . . . . . . 56\setlength. . . . . . . . .57–59, 118setspace . . . . . . . . . . . . . . . . . . . 144\sfdefault . . . . . . . . . . . . . . . . 173\sffamily . . . . . . . . . . . . 155, 182SGML . . 16, 44, 191, 194, 194,
195\shadowbox . . . . . . . . . . . 121, 188shape . . . . . . . . . . . . . . . . . . . . . .155sidebars . . . . . . . . . . . . . . . . . . . 117\slshape . . . . . . . . . . . . . . . . . . 155\small . . . . . . . . . . . . . . . .124, 157\smallskip . . . . . . . . . . . . . . . . 143so . . . . . . . . . . . . . . . . . . . . . . . . . . .39soul . . . . . . . . . . . . . . . . . . . . . . . .146sp (scaled points) . . . . . . . . . . . 36space . . . . . . . . . . . see white-space\space . . . . . . . . . . . . . . . . . . . . .186\spaceskip . . . . . . . . . . . . . . . . . 38spacing . . see double-spacing, see
white-spacespecial characters . . . . . . . . . . . 30ssection . . . . . . . . . . . . . . . . . . . . . 55Star Office . . . . . . . . . . . . . . . . . .194\subparagraph . . . . . . . . . . 55, 99\subparagraph* . . . . . . . . . . . . . 57\subsection . . . . . . . . . . . . . . . . 55\subsubsection . . . . . . . . . . . . . 55summaries . . . . . . . . . . . . . . . . . . 51synchronous typographic inter-
face . . . . . . . . . . . . . . . . . xiv
Tt . . . . . . . . . . . . . . . . . . . . . . . . . . . 118t1binary . . . . . . . . . . . . . . . . . . . 165t1utils . . . . . . . . . . . . . . . . . . . . . 165\tabcolsep . . . . . . . . . . . . . . . . 105table . . . . . . . . . . . . . . . . . .102, 108table of contents
adding manual entry . . . . 60automated entries . . . . . . .60
table*. . . . . . . . . . . . . . . . . . . . . .139\tableofcontents . . . 27, 60, 68tables . . . . . . . . . . . . . . . . . . . . . 101tabular . . . . . 103, 107, 119–121tabularx . . . . . . . . . . . . . . . . . . . 104TDS . . . . . . . . . . . 85, 87, 87, 162TEI . . . . . . . . . . . . . . . . . . . . . . . 204temporary directory . . . . . . . . . 84term . . . . . . . . . . . . . . . . . . . . . . . . xvite . . . . . . . . . . . . . . . . . . . . . . . . . . . . 1Collection . . . . . . . . . . . . . . . . . . . . xtexconfig . . . . . . . . . . . . . . . . . . . . . . .6texhash . . . . . . . . . . . . 86, 207, 208Live . . . . . . . . . . . . . . . . . . . . . . . . . . xnicCenter . . . . . . . . . . . . . . . . . . . . 1\textbackslash . . . . . . . . . . . . . 30\textbrokenbar . . . . . . . . . . . . . 41\textbullet . . . . . . . . . . . . . . . . 95\textcolor . . . . . . . . . . . 160, 161textcomp . . . . . . . . . . . . 31, 41, 95\textdegree . . . . . . . . . . . . . . . . 42\texteuro . . . . . . . . . . . . . . . . . . .31\textit. . . . . . . . . . . . . . . . . . . .159\textlangle . . . . . . . . . . . . . . . . 41\textrangle . . . . . . . . . . . . . . . . 41\textsterling . . . . . . . . . . . . . . 31
Formatting information��
��245
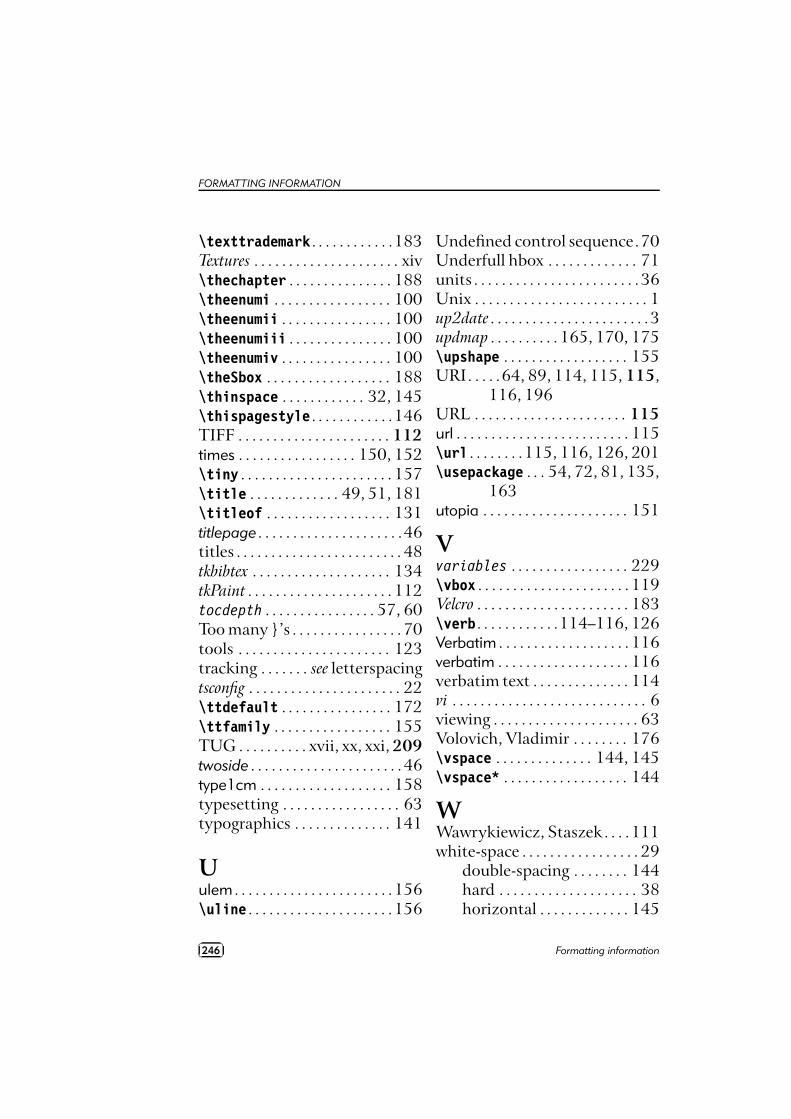
FORMATTING INFORMATION
\texttrademark . . . . . . . . . . . .183Textures . . . . . . . . . . . . . . . . . . . . . xiv\thechapter . . . . . . . . . . . . . . . 188\theenumi . . . . . . . . . . . . . . . . . 100\theenumii . . . . . . . . . . . . . . . . 100\theenumiii . . . . . . . . . . . . . . . 100\theenumiv . . . . . . . . . . . . . . . . 100\theSbox . . . . . . . . . . . . . . . . . . 188\thinspace . . . . . . . . . . . . 32, 145\thispagestyle . . . . . . . . . . . .146TIFF . . . . . . . . . . . . . . . . . . . . . . 112times . . . . . . . . . . . . . . . . . 150, 152\tiny . . . . . . . . . . . . . . . . . . . . . . 157\title . . . . . . . . . . . . . 49, 51, 181\titleof . . . . . . . . . . . . . . . . . . 131titlepage. . . . . . . . . . . . . . . . . . . . .46titles . . . . . . . . . . . . . . . . . . . . . . . . 48tkbibtex . . . . . . . . . . . . . . . . . . . . 134tkPaint . . . . . . . . . . . . . . . . . . . . . 112tocdepth . . . . . . . . . . . . . . . . 57, 60Too many }’s . . . . . . . . . . . . . . . .70tools . . . . . . . . . . . . . . . . . . . . . . 123tracking . . . . . . . see letterspacingtsconfig . . . . . . . . . . . . . . . . . . . . . . 22\ttdefault . . . . . . . . . . . . . . . . 172\ttfamily . . . . . . . . . . . . . . . . . 155TUG . . . . . . . . . . xvii, xx, xxi, 209twoside . . . . . . . . . . . . . . . . . . . . . .46type1cm . . . . . . . . . . . . . . . . . . . 158typesetting . . . . . . . . . . . . . . . . . 63typographics . . . . . . . . . . . . . . 141
Uulem . . . . . . . . . . . . . . . . . . . . . . .156\uline . . . . . . . . . . . . . . . . . . . . .156
Undefined control sequence.70Underfull hbox . . . . . . . . . . . . . 71units . . . . . . . . . . . . . . . . . . . . . . . .36Unix . . . . . . . . . . . . . . . . . . . . . . . . . 1up2date . . . . . . . . . . . . . . . . . . . . . . .3updmap . . . . . . . . . . 165, 170, 175\upshape . . . . . . . . . . . . . . . . . . 155URI. . . . .64, 89, 114, 115, 115,
116, 196URL . . . . . . . . . . . . . . . . . . . . . . 115url . . . . . . . . . . . . . . . . . . . . . . . . . 115\url . . . . . . . .115, 116, 126, 201\usepackage . . . 54, 72, 81, 135,
163utopia . . . . . . . . . . . . . . . . . . . . . 151
Vvariables . . . . . . . . . . . . . . . . . 229\vbox . . . . . . . . . . . . . . . . . . . . . . 119Velcro . . . . . . . . . . . . . . . . . . . . . . 183\verb. . . . . . . . . . . .114–116, 126Verbatim . . . . . . . . . . . . . . . . . . . 116verbatim . . . . . . . . . . . . . . . . . . . 116verbatim text . . . . . . . . . . . . . . 114vi . . . . . . . . . . . . . . . . . . . . . . . . . . . . 6viewing . . . . . . . . . . . . . . . . . . . . . 63Volovich, Vladimir . . . . . . . . 176\vspace . . . . . . . . . . . . . . 144, 145\vspace* . . . . . . . . . . . . . . . . . . 144
WWawrykiewicz, Staszek. . . .111white-space . . . . . . . . . . . . . . . . . 29
double-spacing . . . . . . . . 144hard . . . . . . . . . . . . . . . . . . . . 38horizontal . . . . . . . . . . . . . 145
��
��246 Formatting information
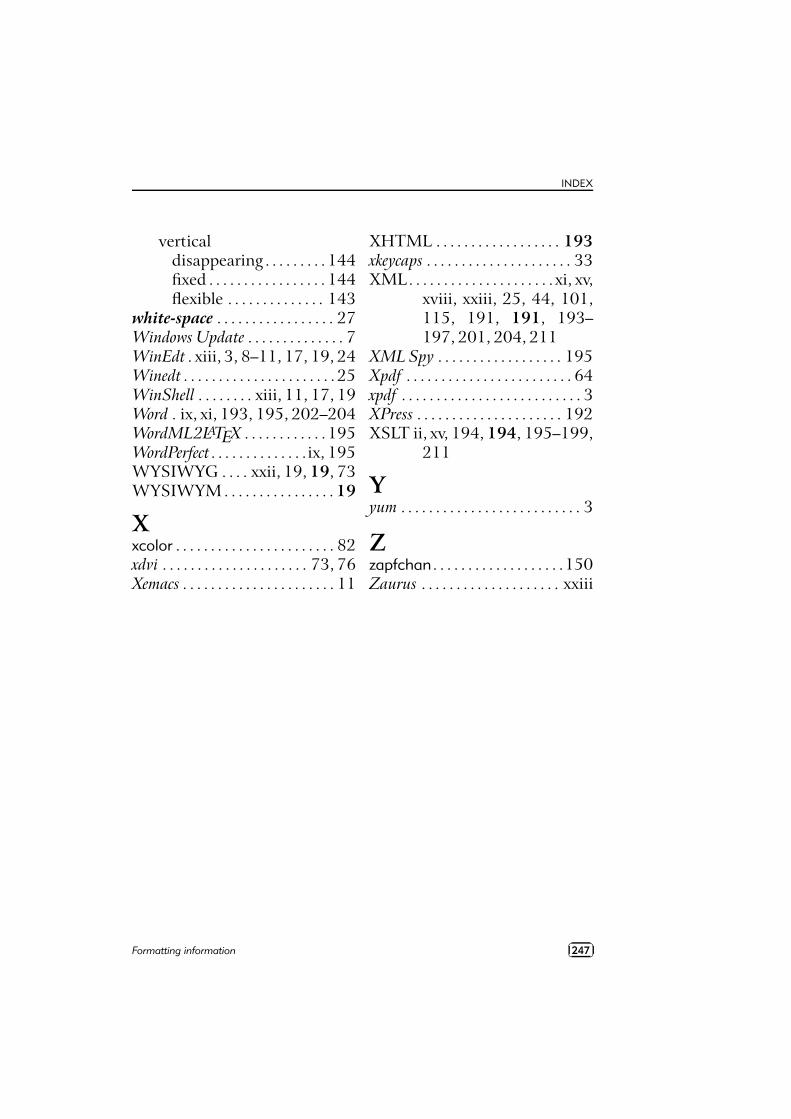
INDEX
verticaldisappearing . . . . . . . . . 144fixed . . . . . . . . . . . . . . . . . 144flexible . . . . . . . . . . . . . . 143
white-space . . . . . . . . . . . . . . . . . 27Windows Update . . . . . . . . . . . . . . 7WinEdt . xiii, 3, 8–11, 17, 19, 24Winedt . . . . . . . . . . . . . . . . . . . . . .25WinShell . . . . . . . . xiii, 11, 17, 19Word . ix, xi, 193, 195, 202–204WordML2LATEX . . . . . . . . . . . .195WordPerfect . . . . . . . . . . . . . .ix, 195WYSIWYG . . . . xxii, 19, 19, 73WYSIWYM . . . . . . . . . . . . . . . .19
Xxcolor . . . . . . . . . . . . . . . . . . . . . . . 82xdvi . . . . . . . . . . . . . . . . . . . . . 73, 76Xemacs . . . . . . . . . . . . . . . . . . . . . . 11
XHTML . . . . . . . . . . . . . . . . . . 193xkeycaps . . . . . . . . . . . . . . . . . . . . . 33XML. . . . . . . . . . . . . . . . . . . . .xi, xv,
xviii, xxiii, 25, 44, 101,115, 191, 191, 193–197, 201, 204, 211
XML Spy . . . . . . . . . . . . . . . . . . 195Xpdf . . . . . . . . . . . . . . . . . . . . . . . . 64xpdf . . . . . . . . . . . . . . . . . . . . . . . . . . 3XPress . . . . . . . . . . . . . . . . . . . . . 192XSLT ii, xv, 194, 194, 195–199,
211
Yyum . . . . . . . . . . . . . . . . . . . . . . . . . . 3
Zzapfchan . . . . . . . . . . . . . . . . . . .150Zaurus . . . . . . . . . . . . . . . . . . . . xxiii
Formatting information��
��247
Related Documents


