The Project Plan IT Project Management COSC 3500 1

The Project Plan IT Project Management COSC 3500 1.
Dec 30, 2015
Welcome message from author
This document is posted to help you gain knowledge. Please leave a comment to let me know what you think about it! Share it to your friends and learn new things together.
Transcript
The Project Plan
IT Project ManagementCOSC 3500
1
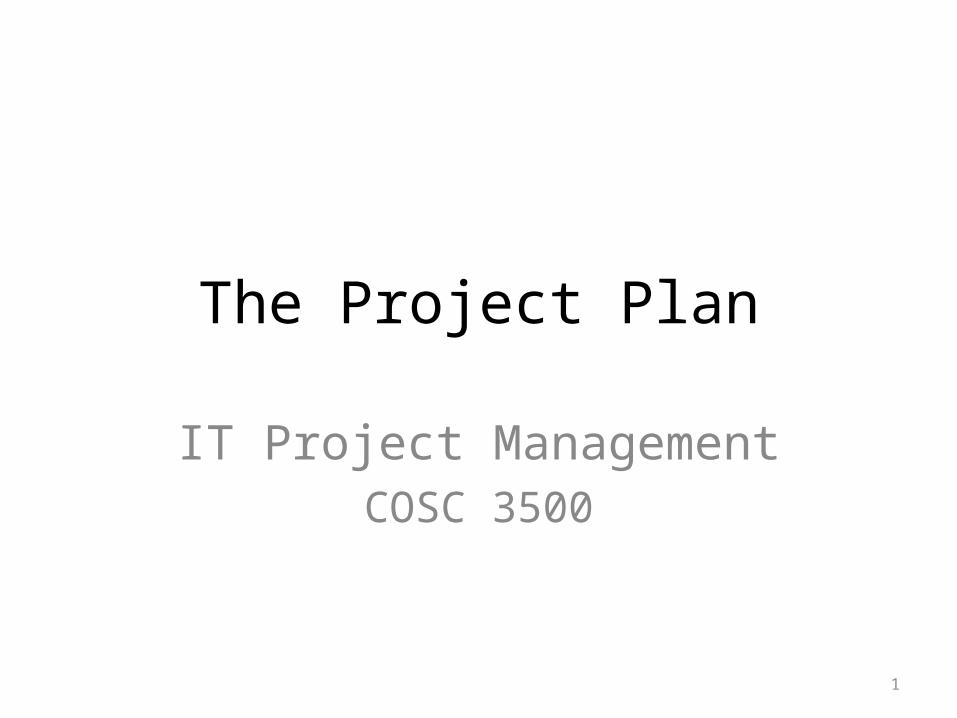
What is a Project?
“A temporary endeavor undertaken to create a unique product, service or result.”
•Series of Interrelated Tasks to Achieve a Goal.•Requires Resources to Complete.•Within a given timeframe.•Rolling Wave
2
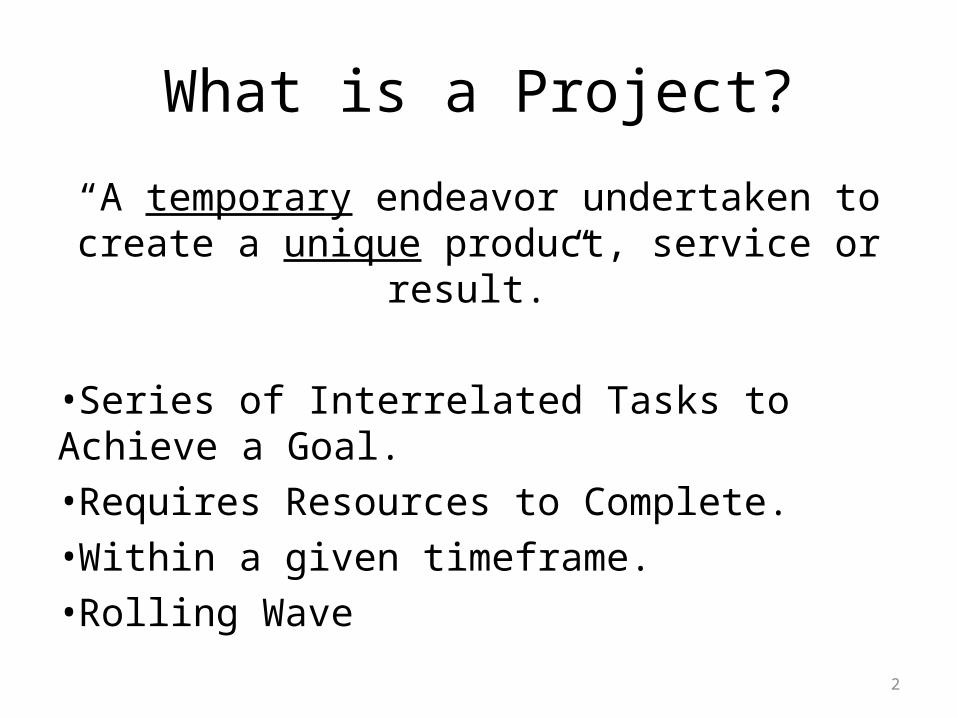
What is a Project Plan?
“The project plan is an Active Guide to Project Execution.”
The Project Plan is a tool used to measure, track, control & communicate:
• Scope• Time• Cost• Resources• (Quality)
3
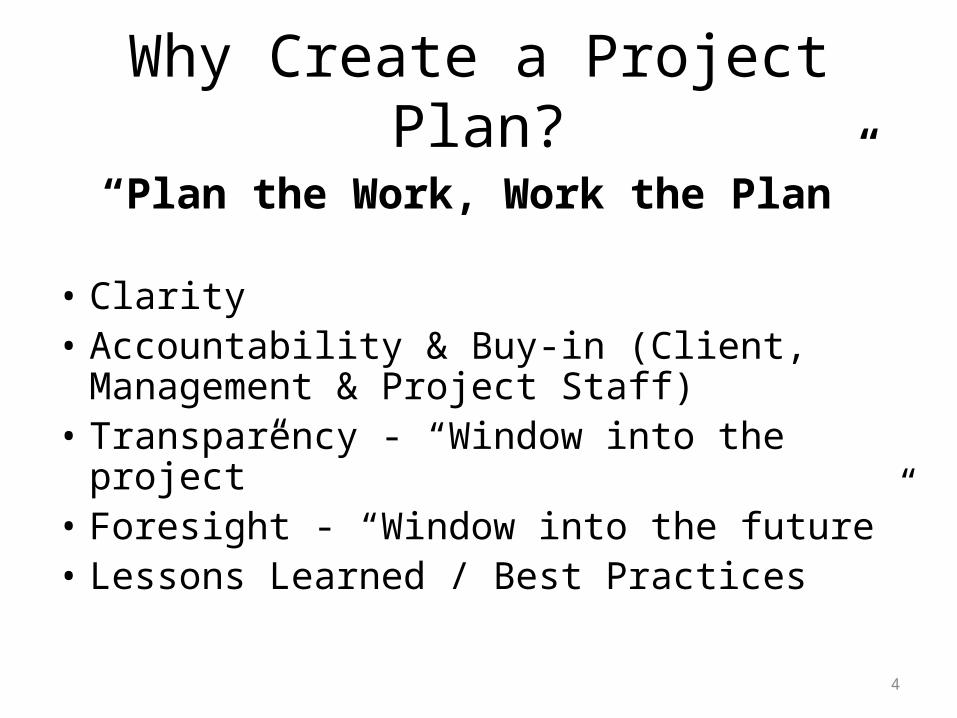
Why Create a Project Plan?
“Plan the Work, Work the Plan”
• Clarity• Accountability & Buy-in (Client, Management
& Project Staff)• Transparency - “Window into the project”• Foresight - “Window into the future”• Lessons Learned / Best Practices
4

The Project Plan?
• Who is responsible for generating / managing the Plan?– Project Manager, Management, Suppliers, SME’s, Client
• What is included / required in the project Plan?– Inputs: Business Processes – Internal & External,
Resources, Deliverables, Milestones, Deadlines, Costs• Where do you start?– Contract, Proposal, Requirements, Staff Roster, WBS
• When is the project plan developed?– After (in some cases before) the project has been
approved and/or contract has been signed
5

Project Processes/Phases
6

Project Processes/Phases• Initiating – the project is authorized– Business needs are Identified & Project is defined
• Planning – project objectives are determined as well as how to reach those objectives
• Execution – the project is executed utilizing acquired resources
• Monitoring & Controlling – project performance is monitored and measured
• Closing – the project, it’s phases, and contracts are brought to a formal end.
7

Case Study WEMBA Brochure
8

Important Terms• Milestone:– A milestone marks the completion of a work package or
phase.– E.g., a high level event such as completion, endorsement
or signing of a deliverable.• Work Breakdown Structure (WBS):– The WBS is a deliverable-oriented collection of project
components– Work that isn’t in the WBS isn’t in the project.– The point of the WBS is to organize and define the project
scope.– Decomposition: the process of breaking down
activities/deliverables into more manageable components.
9

WBS
10
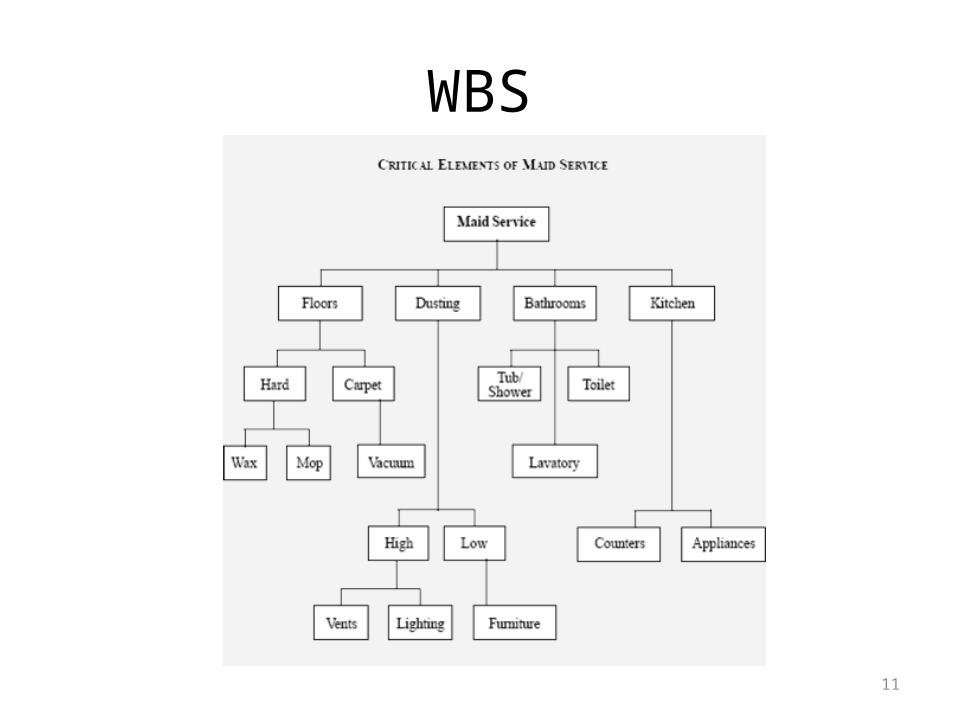
WBS
11

12
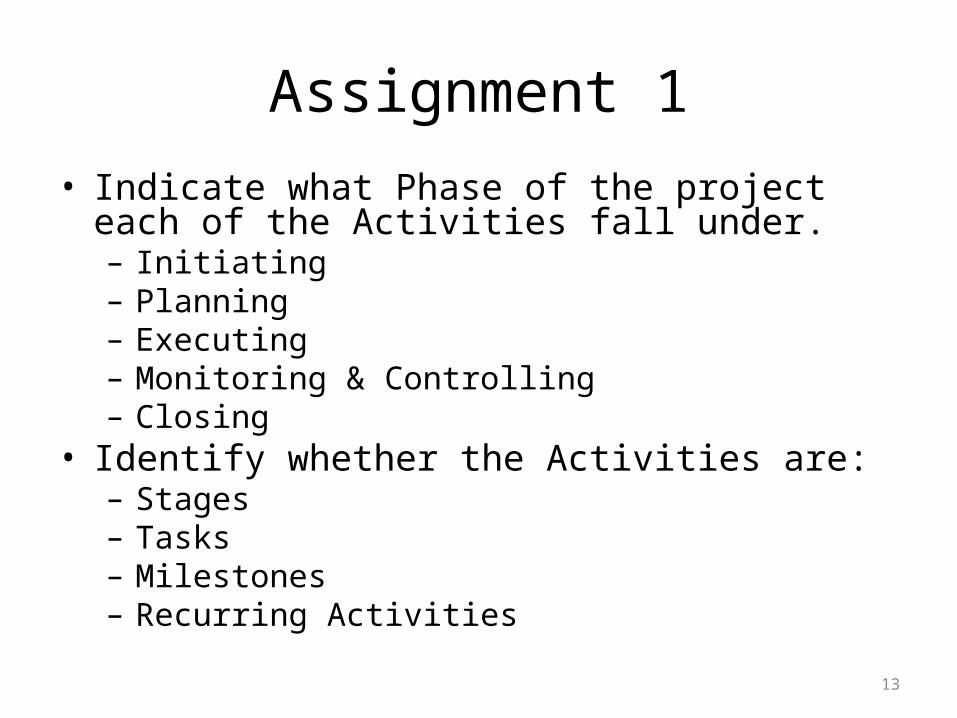
Assignment 1• Indicate what Phase of the project each of the
Activities fall under.– Initiating– Planning– Executing– Monitoring & Controlling– Closing
• Identify whether the Activities are:– Stages– Tasks– Milestones– Recurring Activities
13

MS Project
14
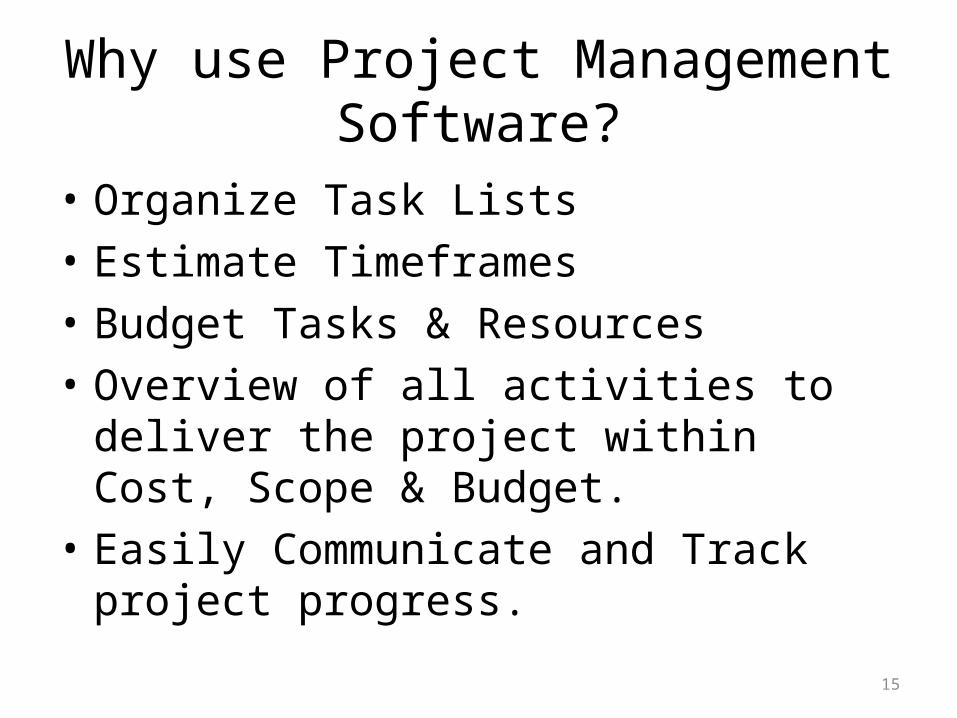
Why use Project Management Software?
• Organize Task Lists• Estimate Timeframes• Budget Tasks & Resources• Overview of all activities to deliver the project
within Cost, Scope & Budget.• Easily Communicate and Track project
progress.
15

Terms to Know
• Dependencies• Constraints: any influence on the project that
may limit the options of the project team in performing the project work.
16
What is MS Project?
• An application used to assist Project Managers in:– Sequencing Activities– Analyzing Task Dependencies– Attributing Resources to Tasks– Estimating Resource Requirements & Workloads– Tracking & Reporting Project Progress– Managing Budgets
17
MS Project Agenda
1. Before Starting2. Basics3. Setting Up the Project4. Entering Tasks5. Resources6. Costs8. Baselines9. Updating & Tracking the Plan10.Reporting
18

Before Starting
• Make sure to evaluate the following prior to entering tasks:– Project Documentation: e.g., Contract, Proposal, Brief,
Staff Roster, Budget, Deadlines– Project Management Plan: e.g., Risk, Change,
Communication plans– Deliverables– Requirements– Process Diagrams
• Create a Work Breakdown Structure (WBS):
19
Basics 1
• Title Bar• Menu Bar• Entry Bar: mirrors what is entered into the task
pane• Task Pane: input tasks, durations, start/end
dates, predecessors, resources• Gantt Chart• Indicator Column: placeholder for notes &
documents
20

Basics 2
• Project Guide Pane & Toolbar: MS Project Wizard step-by-step guide to develop the project plan.– “Tasks”: lists links related to setting up and
planning tasks.– “Resources”: define & build the project team.– “Track”: track project, compare baselines, check
progress of the project– “Report”: develop project reports (budget,
assignments)
21

Setting up the Project
• Set Start Date: “Define the Project”• Work Schedule: “Define General Work Times”• Close out Project Guide (learn independence)
22
Entering Tasks 1• Tasks:
1. Begin by entering tasks from “Task List” in Project Overview document.
2. Insert, Copy & Move Tasks• Subtasks:
1. Click on “Indent” icon (green arrow on tool bar)• Notice that the Tasks are now BOLD.• Collapse & Expand Tasks to view Task outline
• Durations:– Task Durations can be entered in manually or by using the
up/down arrows.– Note: Try not to Hard-code any dates – If you must, then do
not include dependencies for that task.
23
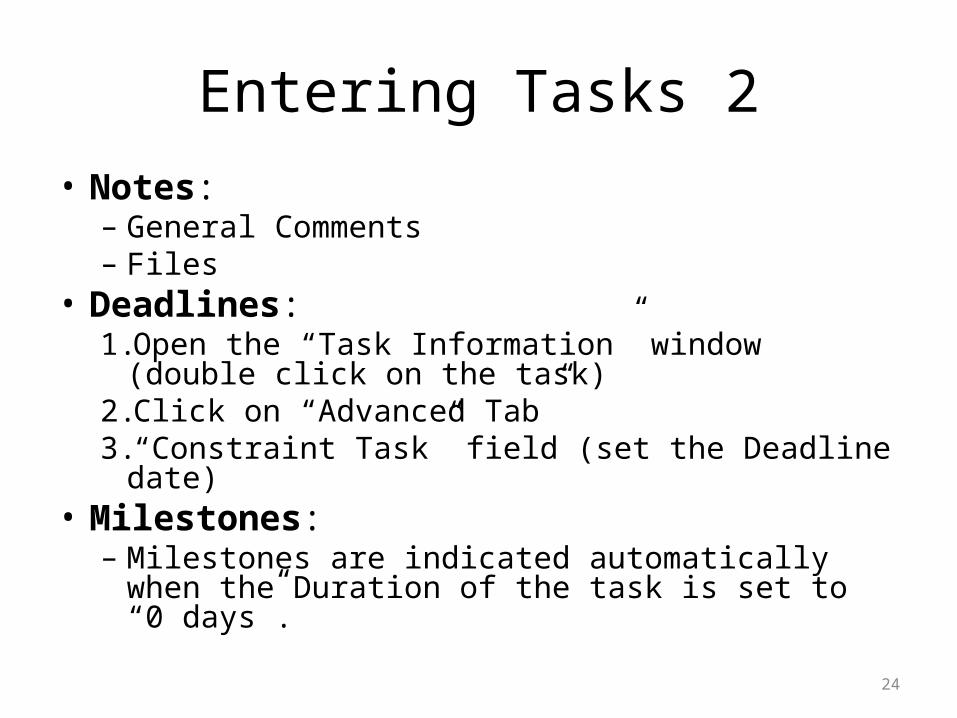
Entering Tasks 2• Notes:– General Comments– Files
• Deadlines:1.Open the “Task Information” window (double click on
the task)2.Click on “Advanced Tab”3.“Constraint Task” field (set the Deadline date)
• Milestones:– Milestones are indicated automatically when the
Duration of the task is set to “0 days”.
24
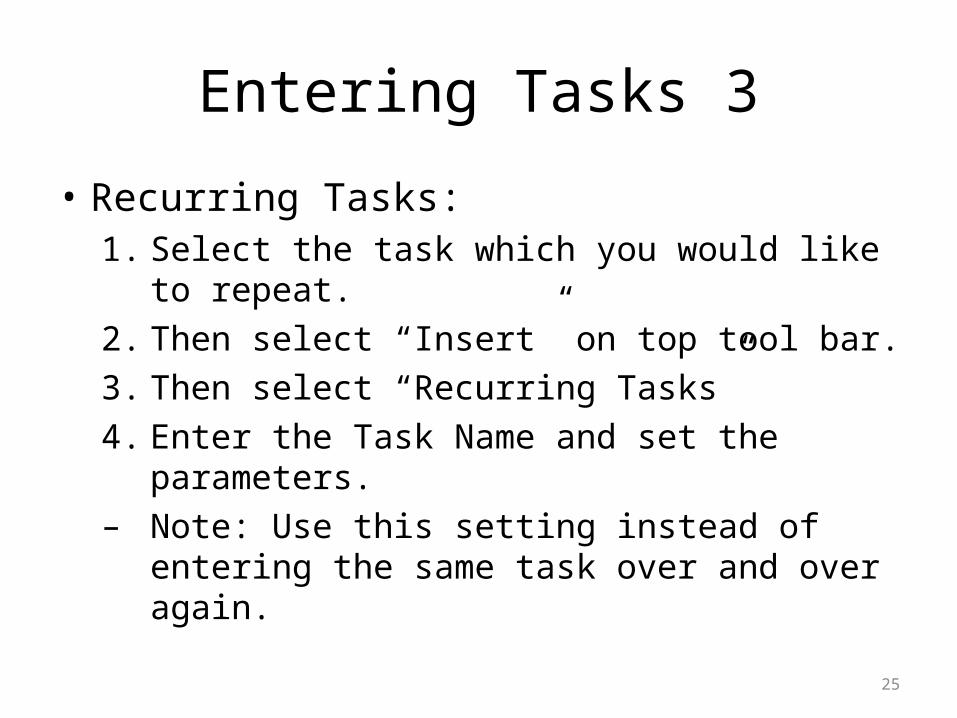
Entering Tasks 3
• Recurring Tasks:1. Select the task which you would like to repeat.2. Then select “Insert” on top tool bar.3. Then select “Recurring Tasks”4. Enter the Task Name and set the parameters.– Note: Use this setting instead of entering the
same task over and over again.
25

Entering Tasks 4
• Dependencies:1. Enter Dependencies in “Predecessors” column.• Based on task numbers on far left column.• Tip: MS Project allows you to maintain task related
dependencies after the predecessor has been identifies.
2. Types of Dependencies include:• FS – Finish-Start (Default)• SS – Start-Start• FF – Finish-Finish
26

Entering Tasks 5
• Constraints:– ASAP (As Soon As Possible): Default Constraint– ALAP (As Late As Possible: Prevents delaying the
start of successor tasks.
27

Resources 1• Select the “Resource Sheet “ Icon on the far left
column to input Resources.• Entering Resources:
1. Enter Resources Names into “Resource Column”2. Enter “Type” of Work
• Work: (Variable) People that spend time on a project (Hourly Rate)
• Material: (Variable) Units of Measure – E.g., Paper, Food for work crew
• Cost: All Fixed Costs– E.g., Print, Transportation
3. Enter Resource Initials (space saver on Gantt Chart)
28

Resources 2
• Enter Resource Costs (Rates )• Std. Rate: Standard Rate• Ovt. Rate: Overtime Rate
• Assigning Resources:1. Return to the “Gantt Chart” view.2. Click on “Assign Resources” Icon on tool bar.3. Select the Resource for that Particular Task.
29
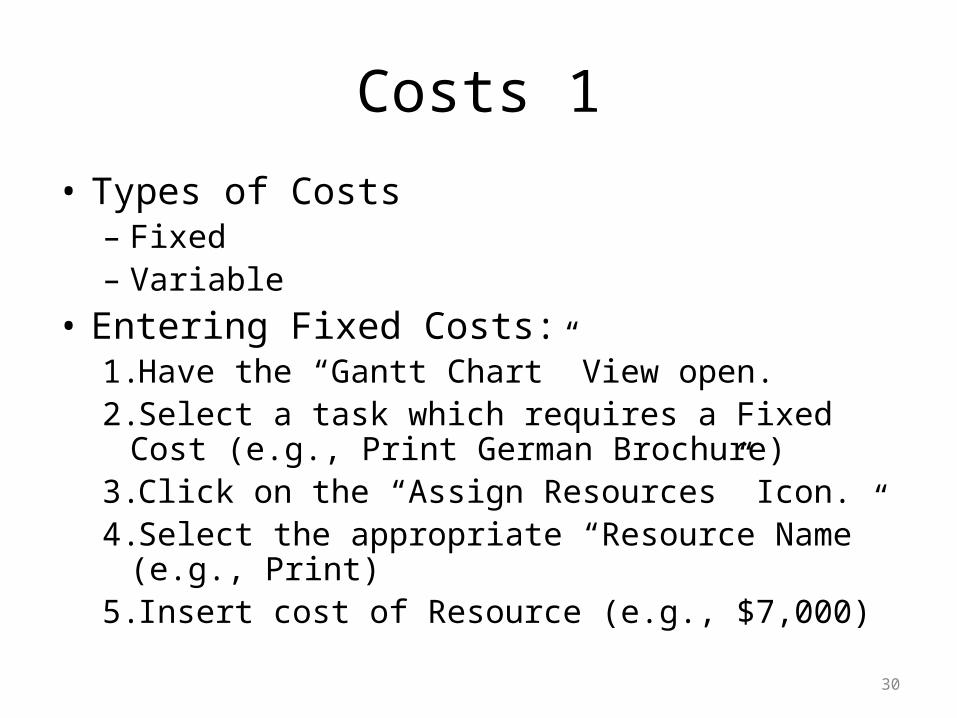
Costs 1
• Types of Costs– Fixed– Variable
• Entering Fixed Costs:1.Have the “Gantt Chart” View open.2.Select a task which requires a Fixed Cost (e.g., Print
German Brochure)3.Click on the “Assign Resources” Icon.4.Select the appropriate “Resource Name” (e.g., Print)5. Insert cost of Resource (e.g., $7,000)
30
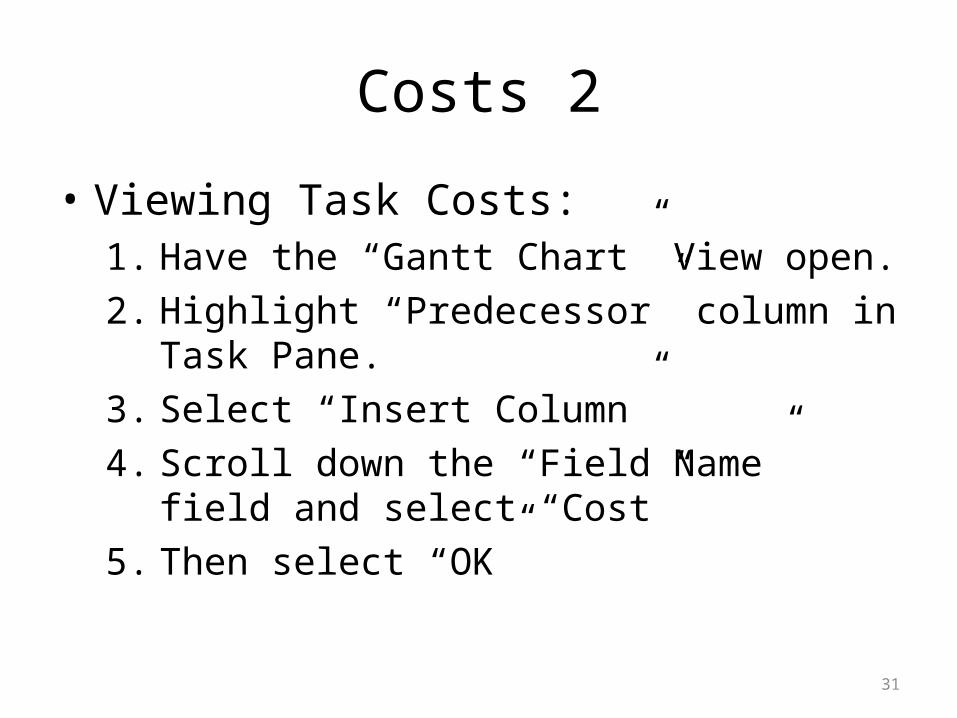
Costs 2
• Viewing Task Costs:1. Have the “Gantt Chart” View open.2. Highlight “Predecessor” column in Task Pane.3. Select “Insert Column”4. Scroll down the “Field Name” field and select
“Cost”5. Then select “OK”
31

Assignment 2
• Open MS Project File: “ASSIGNMENT_2”• Using the Project Task List Document and
enter the following information:– Recurring Tasks– Dependencies– Resources
• Using the Project Overview Document insert Fixed and Variable Costs.
32
Baselines• Baselining the project enables you to track what
actually happened against the plan – Actuals vs. Estimates.
• It is a snapshot of the project at a particular point in time.
• Baselines are set at the end of critical phases of the project.
• Includes:• Tasks• Resources• Costs
33
Baselines 2
• Setting the Baseline:1. Have the “Gantt Chart” View open.2. On the “Tools” menu, point to “Tracking”, and
then click “Set Baseline”. 3. Then select the baseline that you want to set.
34

Updating the Plan
• Updating the Current Status of the Plan:1. Right click on upper left-hand corner of Task Pane
(the “select all” function)..2. Select “Tracking”3. Select the particular task you would like to update.4. Update the task by either:
• Changing the “Actual Start Date” or “Actual Finish Date”• Change the “% Complete”• Change the “Actual Duration”• Change the “Actual Work”
35

Updating the Plan 2
• Why Track Progress?– Provides benchmarks– Shows progress– Improves Planning of Subsequent Projects
• Track Project Variance (forecast vs. actual):1.Right click on upper left-hand corner of Task Pane
(the “select all” function).2.Select “Variance”
36

Reporting
• Viewing Reports:• On the “Report” menu, point to “Reports”.
• Types of Reports:• Overview• Current Activities• Costs• Assignments• Workload
37
Assignment 3
• Open MS Project File: “ASSIGNMENT_2”• Baseline the project• Present the Variance Screen
38
Related Documents