Skyrim Wyrmstooth Official Strategy Guide
Apr 06, 2016
The official strategy guide for Wyrmstooth, an Elder Scrolls V: Skyrim new lands mod.
Welcome message from author
This document is posted to help you gain knowledge. Please leave a comment to let me know what you think about it! Share it to your friends and learn new things together.
Transcript

1

2
3
4
5
6
12
DRAGON HUNT 12
BARROW OF THE WYRM 14
RETRIEVING EMBERSUNDER 24
ROBBED BLIND 24
REPAYING A DEBT 25
WRAP ME UP 25
UNWANTED GUESTS 26
RECLAIMING THE PAST 26
SOMEONE WITH BACKBONE 27
A HOWL LOAD OF TROUBLE 29
A PRICELESS COMMODITY 30
ANIMAL BOUNTY 31
BANDIT BOUNTY 31
VAMPIRE BOUNTY 32
WARLOCK BOUNTY 32
BLIND ROBBER’S CACHE 33
34
CALL OF THE WILD 34
CALL OF THE DEAD 34
CURE DISEASE 34
CURE POISON 35
EASE BURDEN 35
FADE OTHER 35
ICE VOLLEY 36
NIGHT EYE 36
CONJURE DRAUGR WIGHT 36
CONJURE DRAUGR SCOURGE 37
CONJURE DRAUGR DEATHLORD 37
CONJURE DRAGON PRIEST 37
CONJURE MUDCRAB 37
TRANSMOGRIFY 38
39
FIIK LO SAH (PHANTOM FORM) 39
40

3
All you need to start Wyrmstooth is an installation of The
Elder Scrolls V: Skyrim with patch 1.8 or higher.
To ensure Wyrmstooth has been installed completely, make
sure these files have been copied to your
\Steam\steamapps\common\skyrim\data folder.
Wyrmstooth.esp
Wyrmstooth.bsa
WyrmstoothReadme.txt
Then run the Skyrim Launcher, go to Data Files and make
sure Wyrmstooth.esp is ticked. Click OK and you should be
good to go.
Once Wyrmstooth is installed, you’ll find two new NPCs in
The Bannered Mare in Whiterun: Theodyn Bienne and
Lurius Liore.
The main quest begins when you meet quest starting
requirements: you need to be at least level 10 and have
defeated your first dragon in the main quest.
Theodyn Bienne, an Imperial Courier, will track you down
starting from The Bannered Mare in Whiterun. He travels on
foot to your current location to deliver a message.
Note: If you fast travel it may take some time for him to catch
up to you. Waiting 24 hours in any of the major holds should
give him enough time to find you. Alternatively you may
randomly come across him from time to time walking the
roads of Skyrim.
Listening to his message starts Dragon Hunt, the first quest
in Wyrmstooth.

4
Even though the main quest is open to players level 10 and
up, Wyrmstooth can be a challenging place.
In Wyrmstooth you’ll be teaming up with a group of
mercenaries to battle through one of the largest dungeons in
Tamriel. This team dynamic will help you clear through the
hordes of enemies you’ll be facing along the way, but it can
also be a challenge in and of itself.
Don’t worry about accidentally striking your team mates in
combat, I’m sure they’ll forgive you, but you may find
yourself getting quickly overwhelmed by enemies should
your team mates end up getting knocked out. Ensuring they
stay in the fight is crucial!
Before travelling to Wyrmstooth during the quest Barrow Of
The Wyrm, visit a trader and stock up on the following:
Healing Potions
Resist Fire Potions
Resist Ice Potions
Resist Shock Potions
Resist Magic Potions
You’ll be fighting through hordes of the undead, so learning
some turn undead spells may also prove useful.
The weapons of choice are:
Dawnbreaker: Obtained through the Break Of Dawn side
quest. Useful for repelling the undead.
Dragonbane: Found in Skyhaven Temple. Useful in the
final fight against Vulthurkrah.
It may also be a good idea to do the side quest The Only
Cure to obtain the Spellbreaker shield. This will help you in
the final fight with the dragon Vulthurkrah as well as with
a powerful spell caster you’ll be facing in the side quest
Someone With Backbone.
Any apparel enchanted to resist magic will help immensely in
the above mentioned side quest. Even at level 70 you may
find this encounter challenging. You have been warned.
Tip: Make sure you’re fully equipped to take on any
challenge before travelling to Wyrmstooth. Don’t forget to
stock up on arrows.
Other then that, take it slow and don’t rush through the
dungeon. You may encounter powerful enemies well in
excess of your current level that will require the cooperation
of the entire team to take down.
If you come across a difficult encounter, let the mercenaries
draw the attention of the enemy, then use that opportunity to
strike. They can’t die, you on the other hand can.
And don’t forget to save. By all the gods, save often!
5
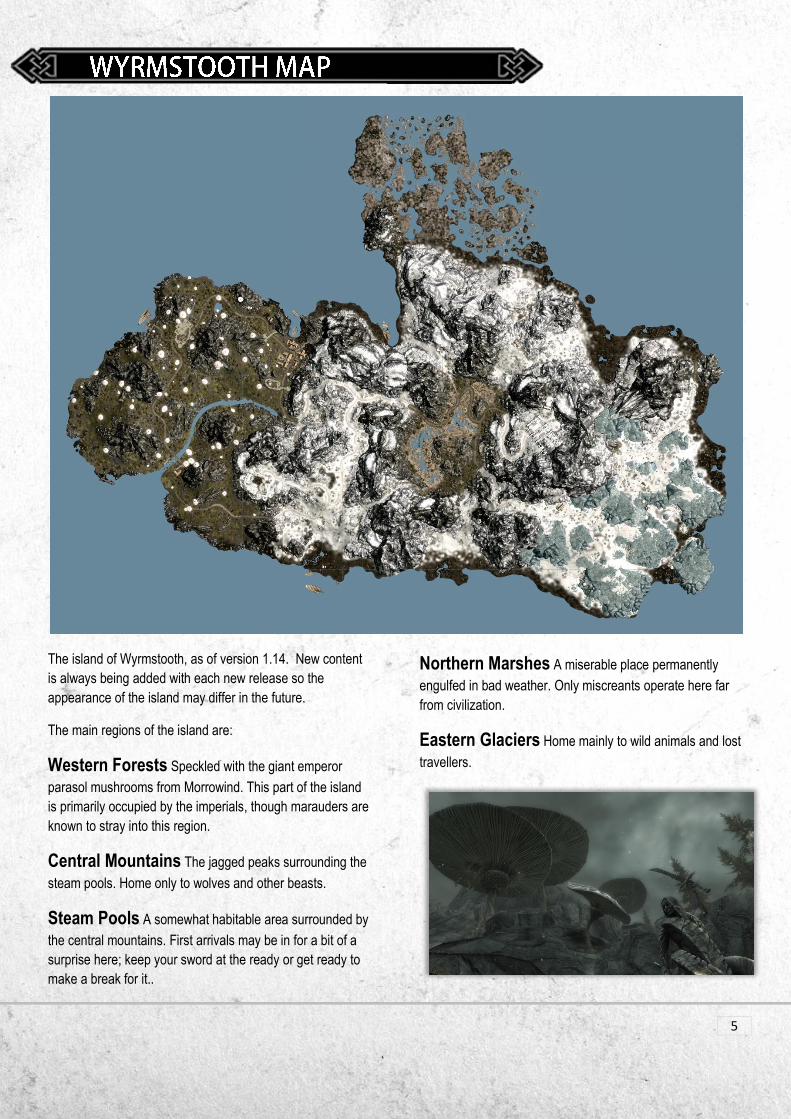
The island of Wyrmstooth, as of version 1.14. New content
is always being added with each new release so the
appearance of the island may differ in the future.
The main regions of the island are:
Western Forests Speckled with the giant emperor
parasol mushrooms from Morrowind. This part of the island
is primarily occupied by the imperials, though marauders are
known to stray into this region.
Central Mountains The jagged peaks surrounding the
steam pools. Home only to wolves and other beasts.
Steam Pools A somewhat habitable area surrounded by
the central mountains. First arrivals may be in for a bit of a
surprise here; keep your sword at the ready or get ready to
make a break for it..
Northern Marshes A miserable place permanently
engulfed in bad weather. Only miscreants operate here far
from civilization.
Eastern Glaciers Home mainly to wild animals and lost
travellers.
6
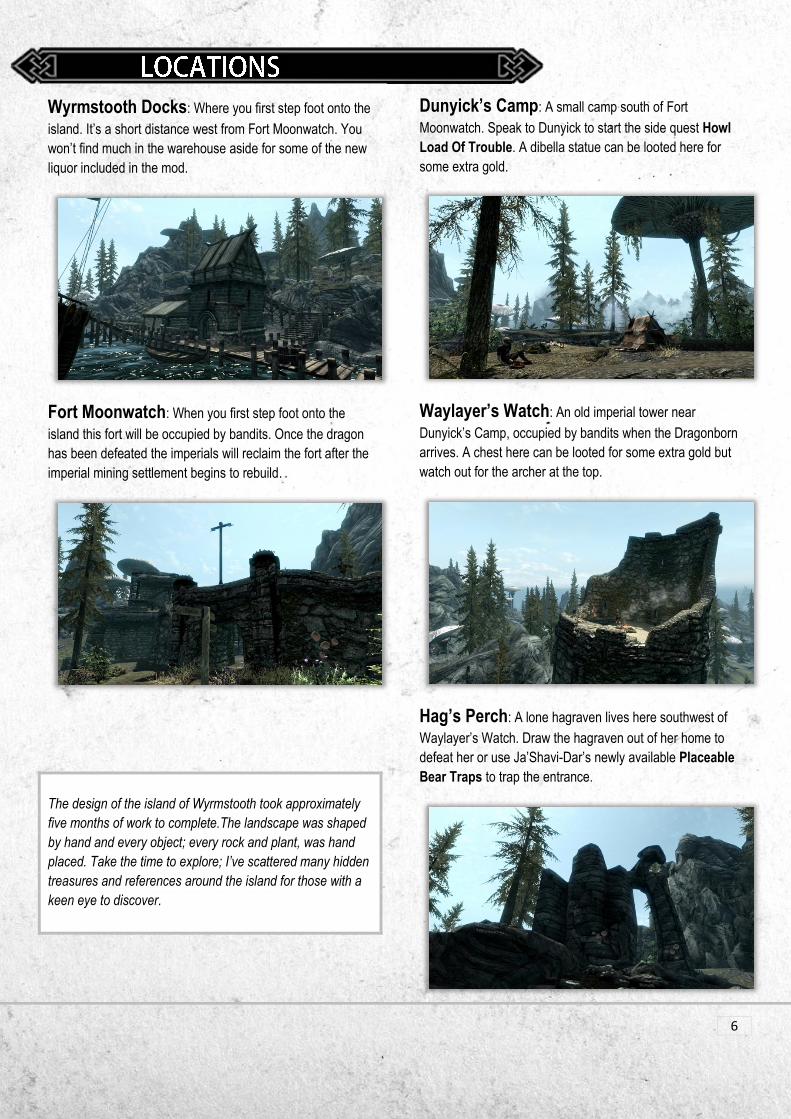
Wyrmstooth Docks: Where you first step foot onto the
island. It’s a short distance west from Fort Moonwatch. You
won’t find much in the warehouse aside for some of the new
liquor included in the mod.
Fort Moonwatch: When you first step foot onto the
island this fort will be occupied by bandits. Once the dragon
has been defeated the imperials will reclaim the fort after the
imperial mining settlement begins to rebuild.
The design of the island of Wyrmstooth took approximately
five months of work to complete.The landscape was shaped
by hand and every object; every rock and plant, was hand
placed. Take the time to explore; I’ve scattered many hidden
treasures and references around the island for those with a
keen eye to discover.
Dunyick’s Camp: A small camp south of Fort
Moonwatch. Speak to Dunyick to start the side quest Howl
Load Of Trouble. A dibella statue can be looted here for
some extra gold.
Waylayer’s Watch: An old imperial tower near
Dunyick’s Camp, occupied by bandits when the Dragonborn
arrives. A chest here can be looted for some extra gold but
watch out for the archer at the top.
Hag’s Perch: A lone hagraven lives here southwest of
Waylayer’s Watch. Draw the hagraven out of her home to
defeat her or use Ja’Shavi-Dar’s newly available Placeable
Bear Traps to trap the entrance.

7
Tomb Of Vulom: A cave west of Chillwater Mill. Speak
to Vulom’s skull to begin the side quest Someone With
Backbone. Search through the ruins for loot you may find
useful towards the end of this quest.
Chillwater Mill: A mill south of Waylayer’s Watch, home
to Yngfa and Balmir. Imperials also keep watch over the mill
to ensure bandits don’t overrun the southern roads and
encroach into the mining settlement.
Imperial Mining Settlement: Follow the road east
from Fort Moonwatch to reach the mining settlement. Once
the dragon has been defeated, the imperials will help the
surviving residents rebuild the town.
Wanderer’s Camp: A camp south east of Chillwater
Mill, occupied by random NPCs. A good place to find some
randomly spawned loot including healing potions and
cooking ingredients.
Fort Valus: An old imperial fort north east of Wanderer’s
Camp. Entering any buildings at Fort Valus will start the side
quest Reclaiming The Past. The fort will periodically be
targeted by marauders, witches and other hostile groups.
Wulfmere’s Watch: Follow the road south then east
from the Imperial Mining Settlement and you’ll come across
this abandoned nordic tower. You’ll find some randomly
spawned archery-related gear inside.

8
Dwemer Lift: You’ll find two dwemer elevators around
the island that can be used to travel to and from Dimfrost.
One on the road south of Wulfmere’s Watch and another in
the steam pools.
Wreck of the Salty Knave: An old shipwreck now
used by the marauders to store their haul from Wyrmstooth
Barrow. Keep your eyes and ears open after you enter; a
party of marauders just might be coming home...
Twinpeak Tower: A nordic tower overlooking the steam
pools, occupied by a group of marauders. Either draw them
out one by one or siege the tower with the mercenaries in
tow.
Hunter’s Shack: A small shack in the centre of the
steam pools. Two hunters live here which you can buy and
sell from. Check their shack for mostly cooking and
alchemical supplies.
Gronndal Grove: A spriggan sanctuary north of
Hunter’s Shack. Speak to Bolmar to start the side quest A
Priceless Commodity. The miners outside may be targeted
by the dragons that emerge from the steam pools.
Krakevisa: A nordic building north of the Wreck of the
Salty Knave, home to a large coven of warlocks. You’ll find
all manner of spell tomes here, many of which you won’t find
back on the mainland.

9
Stormcloak Camp: A camp east of Krakevisa. While
the civil war doesn’t reach as far north as Wyrmstooth, the
Stormcloaks have established a small presence here to keep
an eye on imperial operations.
Herman’s Holdout: An eery experience only for the
truly brave adventurer. North of the Stormcloak Camp you’ll
find a dungeon completely devoid of light, so bring lots of
torches or learn the Candlelight spell.
Coldwave Crescent: A small cave occupied either by
wild animals, trolls or ice wraiths. The equipment of
whomever they kill lays scattered here for the brave
adventurer to find.
Bloodstone Camp: A giant camp north of the steam
pools and southeast of Coldwave Crescent. Most aren’t
foolish enough to steal from the giants who graze their
mammoths here.
Ruined Homestead: Marauders currently occupy this
ruined homestead south of Bloodstone Camp in the central
mountains. You’ll find food, supplies, plus loot collected by
the marauders.
Dark Brotherhood Sanctuary: On the northeast tip
of the island you’ll find an abandoned Dark Brotherhood
Sanctuary you can use as a free player home. But you’re not
the only one who has their eyes on claiming this place...
10
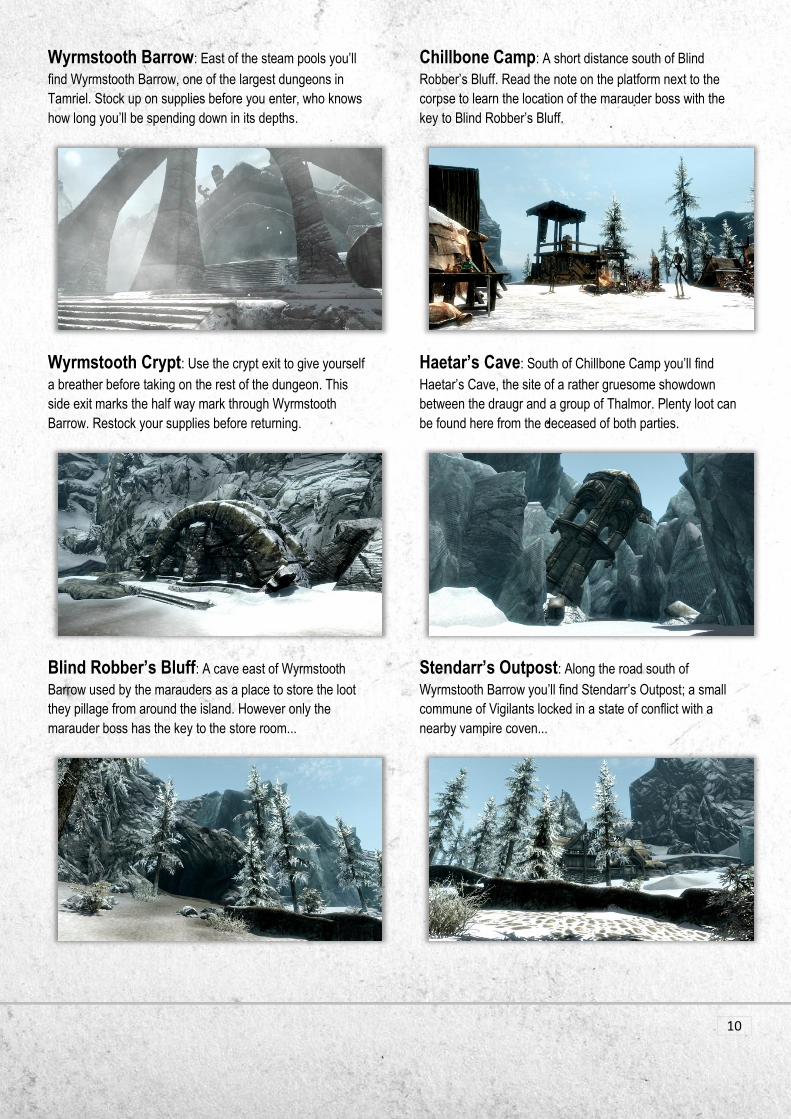
Wyrmstooth Barrow: East of the steam pools you’ll
find Wyrmstooth Barrow, one of the largest dungeons in
Tamriel. Stock up on supplies before you enter, who knows
how long you’ll be spending down in its depths.
Wyrmstooth Crypt: Use the crypt exit to give yourself
a breather before taking on the rest of the dungeon. This
side exit marks the half way mark through Wyrmstooth
Barrow. Restock your supplies before returning.
Blind Robber’s Bluff: A cave east of Wyrmstooth
Barrow used by the marauders as a place to store the loot
they pillage from around the island. However only the
marauder boss has the key to the store room...
Chillbone Camp: A short distance south of Blind
Robber’s Bluff. Read the note on the platform next to the
corpse to learn the location of the marauder boss with the
key to Blind Robber’s Bluff.
Haetar’s Cave: South of Chillbone Camp you’ll find
Haetar’s Cave, the site of a rather gruesome showdown
between the draugr and a group of Thalmor. Plenty loot can
be found here from the deceased of both parties.
Stendarr’s Outpost: Along the road south of
Wyrmstooth Barrow you’ll find Stendarr’s Outpost; a small
commune of Vigilants locked in a state of conflict with a
nearby vampire coven...
11
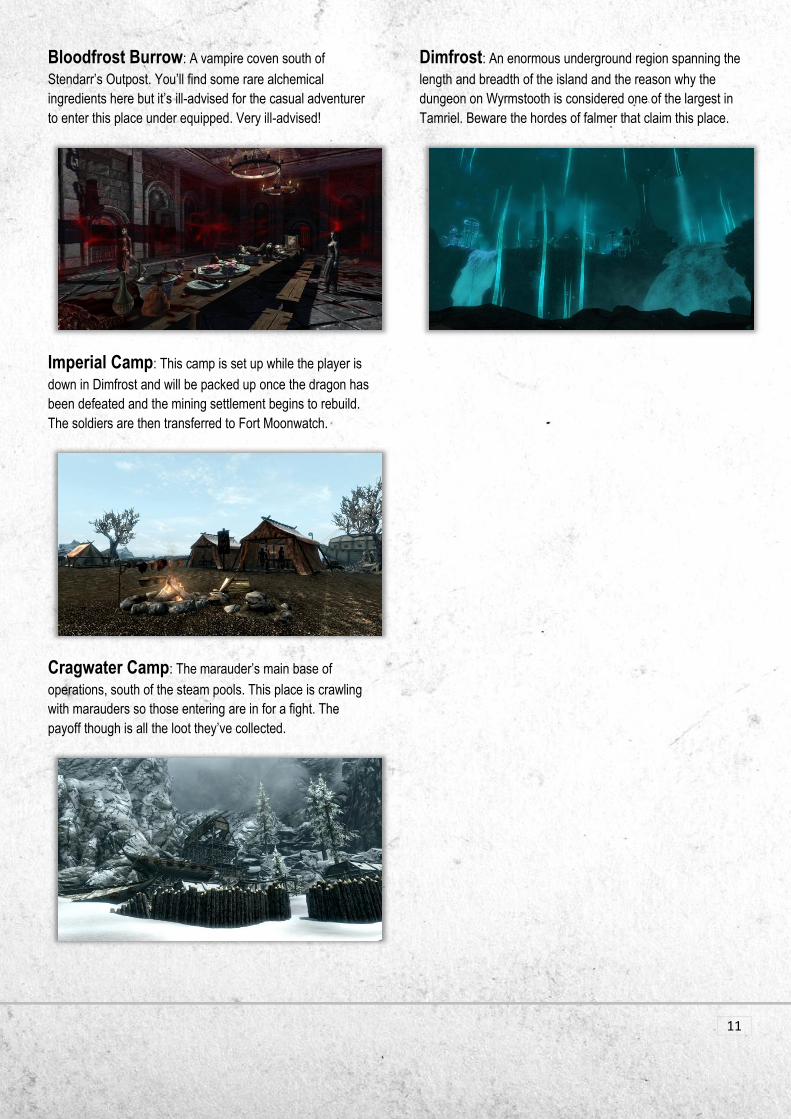
Bloodfrost Burrow: A vampire coven south of
Stendarr’s Outpost. You’ll find some rare alchemical
ingredients here but it’s ill-advised for the casual adventurer
to enter this place under equipped. Very ill-advised!
Imperial Camp: This camp is set up while the player is
down in Dimfrost and will be packed up once the dragon has
been defeated and the mining settlement begins to rebuild.
The soldiers are then transferred to Fort Moonwatch.
Cragwater Camp: The marauder’s main base of
operations, south of the steam pools. This place is crawling
with marauders so those entering are in for a fight. The
payoff though is all the loot they’ve collected.
Dimfrost: An enormous underground region spanning the
length and breadth of the island and the reason why the
dungeon on Wyrmstooth is considered one of the largest in
Tamriel. Beware the hordes of falmer that claim this place.
12
As of version Wyrmstooth 1.14 the mod consists of the
following 15 quests:
Main Quests:
Dragon Hunt
Barrow Of The Wyrm
Side Quests:
Retrieving Embersunder
Robbed Blind
Unwanted Guests
Reclaiming The Past
Repaying A Debt
Someone With Backbone
Howl Load Of Trouble
Wrap Me Up
Priceless Commodity
Miscellaneous Objectives:
Animal Bounty
Vampire Bounty
Warlock Bounty
Bandit Bounty
Tip: If you start Someone With Backbone before finishing
Barrow Of The Wyrm, you’ll have the mercenaries along for
the ride to help you with the final fight against Vulom.
The order in which you do the side quests and
miscellaneous objectives is up to you. Once you finish
Barrow Of The Wyrm you are free to explore the island as
the imperial mining settlement begins the process of
rebuilding.
The mining settlement will finish rebuilding after a week in-
game, after such time you will have access to an additional
trader and boarding services at the inn.
DRAGON HUNT
The first quest of the mod and the quest you will need to
complete before you can travel to the island of Wyrmstooth.
Dragon Hunt starts once the player reaches level 10 and
has defeated their first dragon at the Western Watchtower
in Whiterun. Once the Greybeards summon you to High
Hrothgar, an imperial courier named Theodyn Bienne will
track you down and deliver a message.
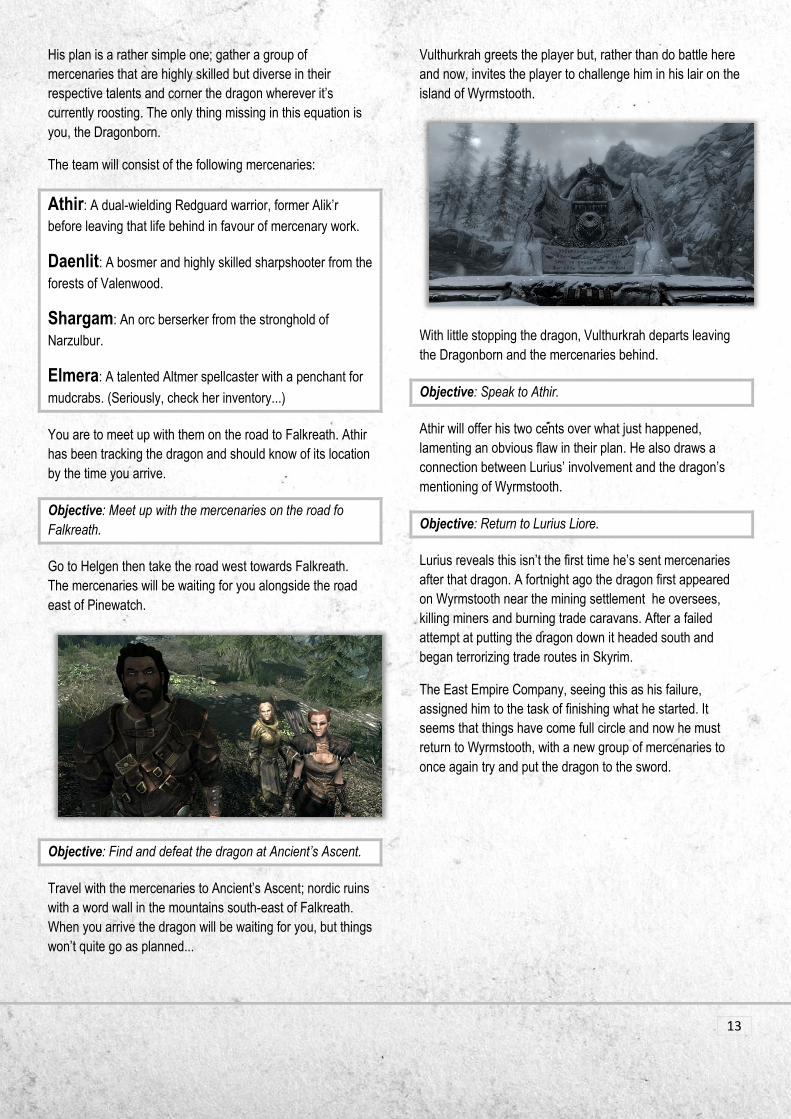
You are to speak to Lurius Liore of the East Empire
Company currently staying at the Bannered Mare in
Whiterun concerning some trouble with a dragon.
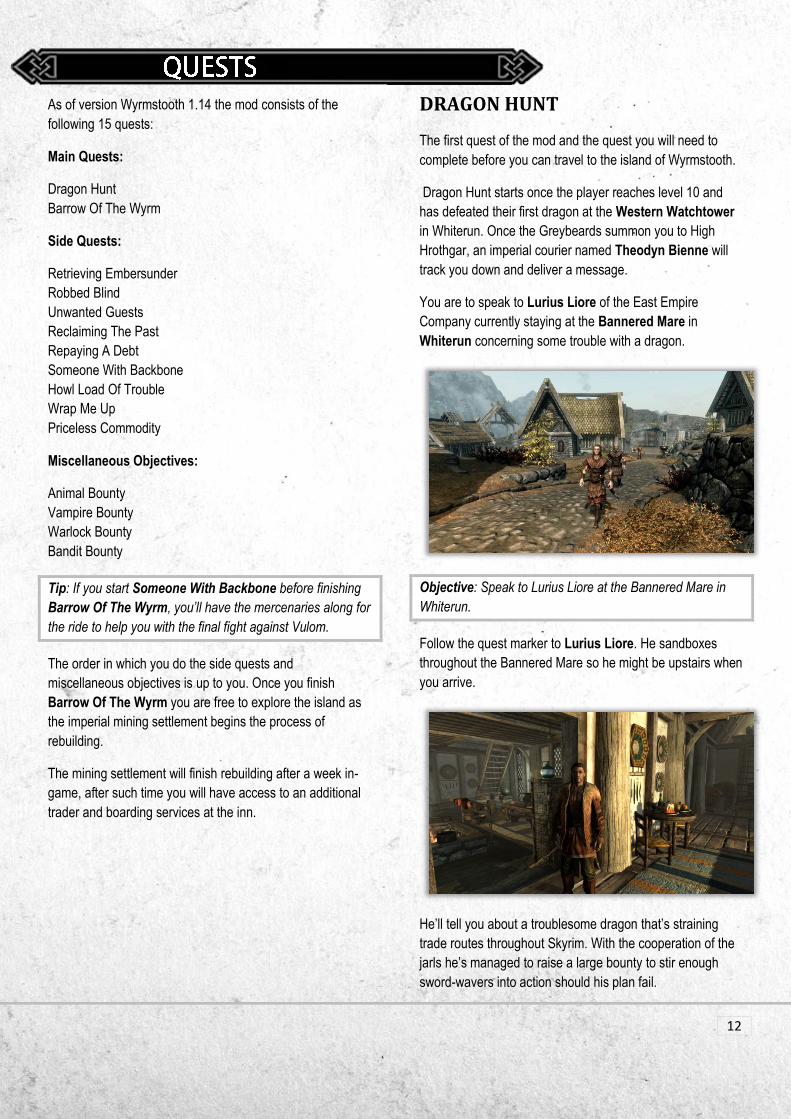
Objective: Speak to Lurius Liore at the Bannered Mare in
Whiterun.
Follow the quest marker to Lurius Liore. He sandboxes
throughout the Bannered Mare so he might be upstairs when
you arrive.
He’ll tell you about a troublesome dragon that’s straining
trade routes throughout Skyrim. With the cooperation of the
jarls he’s managed to raise a large bounty to stir enough
sword-wavers into action should his plan fail.
13
His plan is a rather simple one; gather a group of
mercenaries that are highly skilled but diverse in their
respective talents and corner the dragon wherever it’s
currently roosting. The only thing missing in this equation is
you, the Dragonborn.
The team will consist of the following mercenaries:
Athir: A dual-wielding Redguard warrior, former Alik’r
before leaving that life behind in favour of mercenary work.
Daenlit: A bosmer and highly skilled sharpshooter from the
forests of Valenwood.
Shargam: An orc berserker from the stronghold of
Narzulbur.
Elmera: A talented Altmer spellcaster with a penchant for
mudcrabs. (Seriously, check her inventory...)
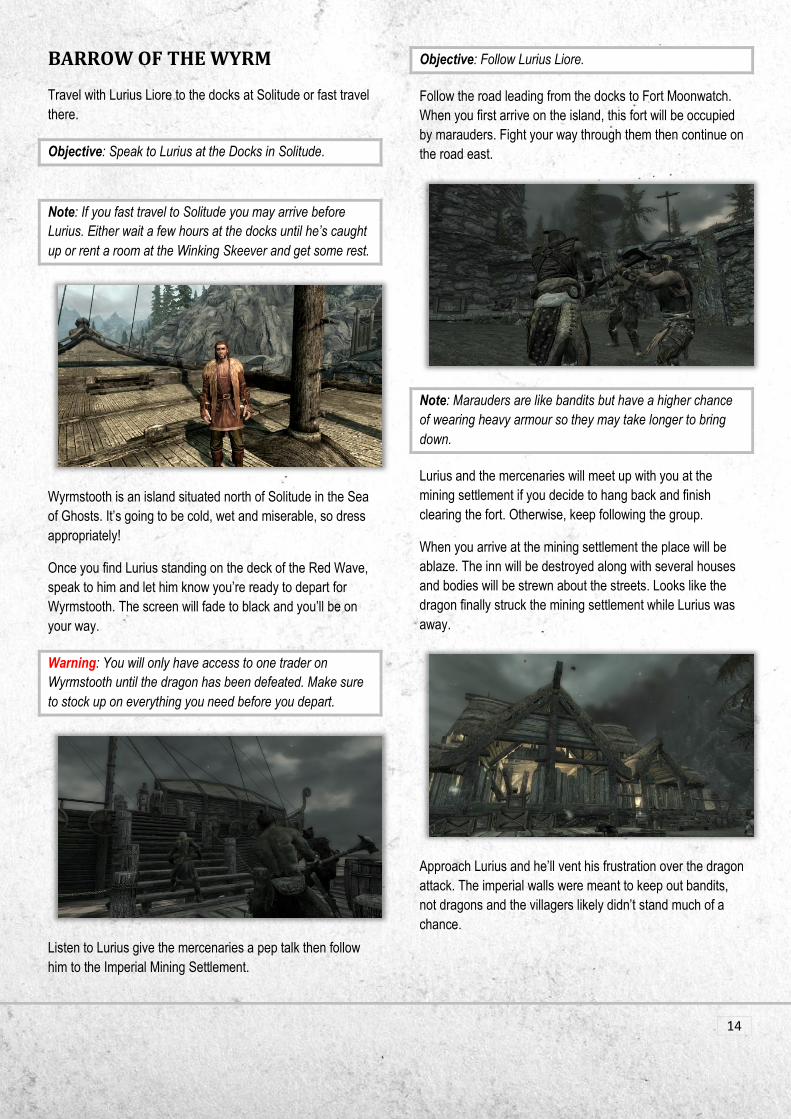
You are to meet up with them on the road to Falkreath. Athir
has been tracking the dragon and should know of its location
by the time you arrive.
Objective: Meet up with the mercenaries on the road fo
Falkreath.
Go to Helgen then take the road west towards Falkreath.
The mercenaries will be waiting for you alongside the road
east of Pinewatch.
Objective: Find and defeat the dragon at Ancient’s Ascent.
Travel with the mercenaries to Ancient’s Ascent; nordic ruins
with a word wall in the mountains south-east of Falkreath.
When you arrive the dragon will be waiting for you, but things
won’t quite go as planned...
Vulthurkrah greets the player but, rather than do battle here
and now, invites the player to challenge him in his lair on the
island of Wyrmstooth.
With little stopping the dragon, Vulthurkrah departs leaving
the Dragonborn and the mercenaries behind.
Objective: Speak to Athir.
Athir will offer his two cents over what just happened,
lamenting an obvious flaw in their plan. He also draws a
connection between Lurius’ involvement and the dragon’s
mentioning of Wyrmstooth.
Objective: Return to Lurius Liore.
Lurius reveals this isn’t the first time he’s sent mercenaries
after that dragon. A fortnight ago the dragon first appeared
on Wyrmstooth near the mining settlement he oversees,
killing miners and burning trade caravans. After a failed
attempt at putting the dragon down it headed south and
began terrorizing trade routes in Skyrim.
The East Empire Company, seeing this as his failure,
assigned him to the task of finishing what he started. It
seems that things have come full circle and now he must
return to Wyrmstooth, with a new group of mercenaries to
once again try and put the dragon to the sword.
14
BARROW OF THE WYRM
Travel with Lurius Liore to the docks at Solitude or fast travel
there.
Objective: Speak to Lurius at the Docks in Solitude.
Note: If you fast travel to Solitude you may arrive before
Lurius. Either wait a few hours at the docks until he’s caught
up or rent a room at the Winking Skeever and get some rest.
Wyrmstooth is an island situated north of Solitude in the Sea
of Ghosts. It’s going to be cold, wet and miserable, so dress
appropriately!
Once you find Lurius standing on the deck of the Red Wave,
speak to him and let him know you’re ready to depart for
Wyrmstooth. The screen will fade to black and you’ll be on
your way.
Warning: You will only have access to one trader on
Wyrmstooth until the dragon has been defeated. Make sure
to stock up on everything you need before you depart.
Listen to Lurius give the mercenaries a pep talk then follow
him to the Imperial Mining Settlement.
Objective: Follow Lurius Liore.
Follow the road leading from the docks to Fort Moonwatch.
When you first arrive on the island, this fort will be occupied
by marauders. Fight your way through them then continue on
the road east.
Note: Marauders are like bandits but have a higher chance
of wearing heavy armour so they may take longer to bring
down.
Lurius and the mercenaries will meet up with you at the
mining settlement if you decide to hang back and finish
clearing the fort. Otherwise, keep following the group.
When you arrive at the mining settlement the place will be
ablaze. The inn will be destroyed along with several houses
and bodies will be strewn about the streets. Looks like the
dragon finally struck the mining settlement while Lurius was
away.
Approach Lurius and he’ll vent his frustration over the dragon
attack. The imperial walls were meant to keep out bandits,
not dragons and the villagers likely didn’t stand much of a
chance.

15
Elmera and Theodyn will stay behind to take care of the
survivors, the others will head to Wyrmstooth Barrow on the
other side of the island to flush out the dragon.
If you follow along with Lurius he’ll talk about the island along
the way. Otherwise, if you want to explore the island on your
own first, you can meet up with the group inside the entrance
of Wyrmstooth Barrow when you’re ready to continue.
Speak to Ja’Shavi-Dar if you need to do some last minute
trading. He’ll be sitting outside the Tradehouse being healed
by Elmera. Despite his injuries he’s still happy to trade with
you.
Objective: Enter Wyrmstooth Barrow.
To get to Wyrmstooth Barrow, follow the road south from the
mining settlement, then east through the central mountains
toward the steam pools.
When you get to the steam pools, prepare for trouble. The
dragons Nehkrahqeth and Nehfrinqeth will burst out of the
water in a surprise attack.
Both of these dragons together can give low level players a
run for their money so fighting them alongside the
mercenaries is the best option.
Tip: Use the stone pillars as cover and let the mercenaries
draw their attention. If you’re a melee warrior, use a shield-
bash to stagger the dragons or a dual-casted destruction
spell if you’re a mage.
Even if you let the mercenaries travel ahead, you’re not
alone in this fight. A friendly giant wanders the steam pools
and will lend his assistance. The miners standing outside
Gronndal Grove are also useful for...keeping the dragons
distracted. The two hunters from Hunter’s Shack are also
likely to join in the fight as well, providing ranged support.
But if you’re really not confident about this fight there’s an
option open to you: find cover, wait until something or
someone is distracting the dragons, then run as fast as you
can to the barrow.
Bandits are occupying the entrance of Wyrmstooth Barrow
so you’ll need to fight your way in. The way forward past the
first room however is blocked by a closed gate. A pedestal
stands in front of it and will require a sword to open.
Objective: Search the barrow entrance for a clue.
Lurius will suggest searching around the entrance for clues.
Find and read the bandit journal on a barrel left of the
entrance to learn about the sword that slots into the gate and
its current location.
Tip: If Lurius isn’t here yet, you don’t need to wait for him to
tell you what to do. You can do your own investigating and
read the bandit journal to continue the quest.
Turns out the marauders are storing their loot in an old
shipwreck on the coast. That’s where you’ll find the sword
that opens the gate.
Objective: Retrieve Goreduster and enter the barrow.
16
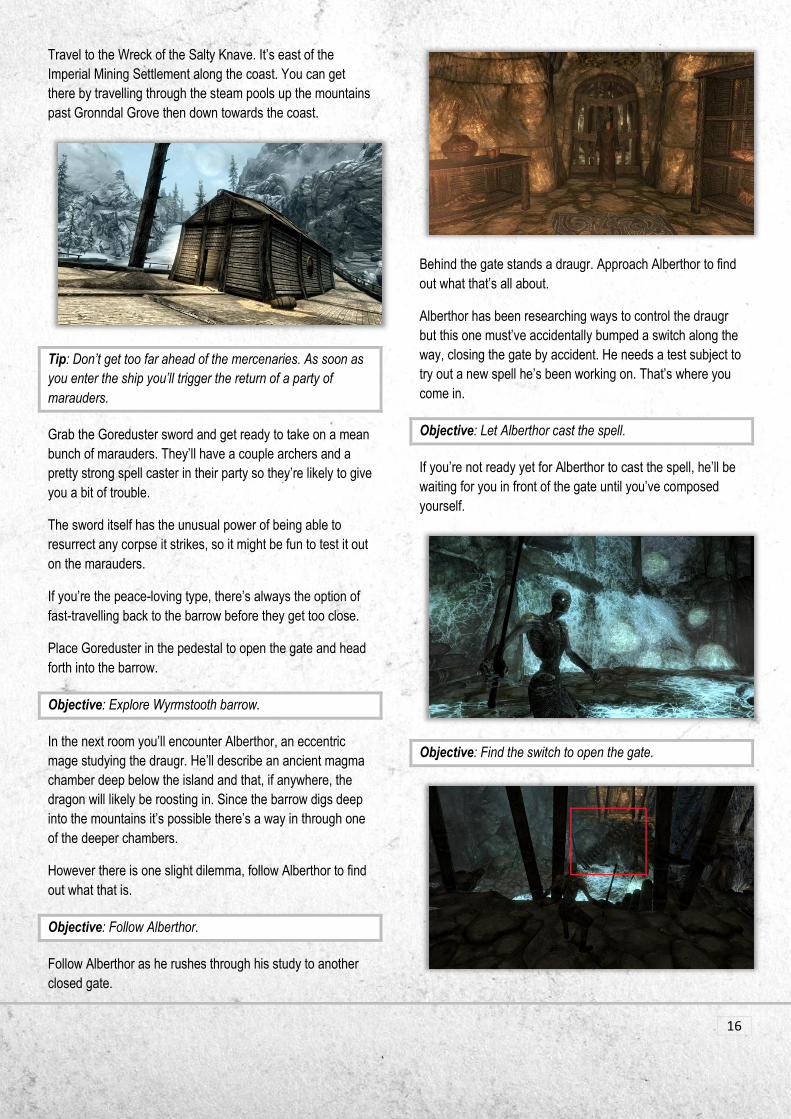
Travel to the Wreck of the Salty Knave. It’s east of the
Imperial Mining Settlement along the coast. You can get
there by travelling through the steam pools up the mountains
past Gronndal Grove then down towards the coast.
Tip: Don’t get too far ahead of the mercenaries. As soon as
you enter the ship you’ll trigger the return of a party of
marauders.
Grab the Goreduster sword and get ready to take on a mean
bunch of marauders. They’ll have a couple archers and a
pretty strong spell caster in their party so they’re likely to give
you a bit of trouble.
The sword itself has the unusual power of being able to
resurrect any corpse it strikes, so it might be fun to test it out
on the marauders.
If you’re the peace-loving type, there’s always the option of
fast-travelling back to the barrow before they get too close.
Place Goreduster in the pedestal to open the gate and head
forth into the barrow.
Objective: Explore Wyrmstooth barrow.
In the next room you’ll encounter Alberthor, an eccentric
mage studying the draugr. He’ll describe an ancient magma
chamber deep below the island and that, if anywhere, the
dragon will likely be roosting in. Since the barrow digs deep
into the mountains it’s possible there’s a way in through one
of the deeper chambers.
However there is one slight dilemma, follow Alberthor to find
out what that is.
Objective: Follow Alberthor.
Follow Alberthor as he rushes through his study to another
closed gate.
Behind the gate stands a draugr. Approach Alberthor to find
out what that’s all about.
Alberthor has been researching ways to control the draugr
but this one must’ve accidentally bumped a switch along the
way, closing the gate by accident. He needs a test subject to
try out a new spell he’s been working on. That’s where you
come in.
Objective: Let Alberthor cast the spell.
If you’re not ready yet for Alberthor to cast the spell, he’ll be
waiting for you in front of the gate until you’ve composed
yourself.
Objective: Find the switch to open the gate.
17
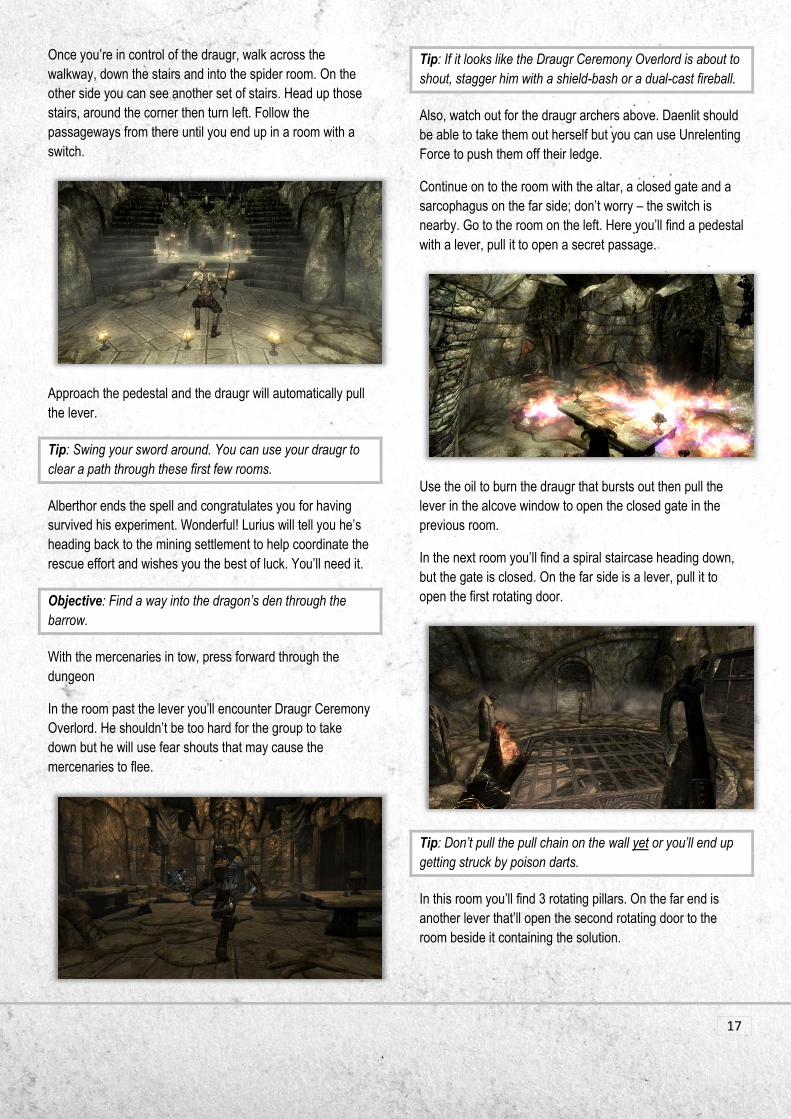
Once you’re in control of the draugr, walk across the
walkway, down the stairs and into the spider room. On the
other side you can see another set of stairs. Head up those
stairs, around the corner then turn left. Follow the
passageways from there until you end up in a room with a
switch.
Approach the pedestal and the draugr will automatically pull
the lever.
Tip: Swing your sword around. You can use your draugr to
clear a path through these first few rooms.
Alberthor ends the spell and congratulates you for having
survived his experiment. Wonderful! Lurius will tell you he’s
heading back to the mining settlement to help coordinate the
rescue effort and wishes you the best of luck. You’ll need it.
Objective: Find a way into the dragon’s den through the
barrow.
With the mercenaries in tow, press forward through the
dungeon
In the room past the lever you’ll encounter Draugr Ceremony
Overlord. He shouldn’t be too hard for the group to take
down but he will use fear shouts that may cause the
mercenaries to flee.
Tip: If it looks like the Draugr Ceremony Overlord is about to
shout, stagger him with a shield-bash or a dual-cast fireball.
Also, watch out for the draugr archers above. Daenlit should
be able to take them out herself but you can use Unrelenting
Force to push them off their ledge.
Continue on to the room with the altar, a closed gate and a
sarcophagus on the far side; don’t worry – the switch is
nearby. Go to the room on the left. Here you’ll find a pedestal
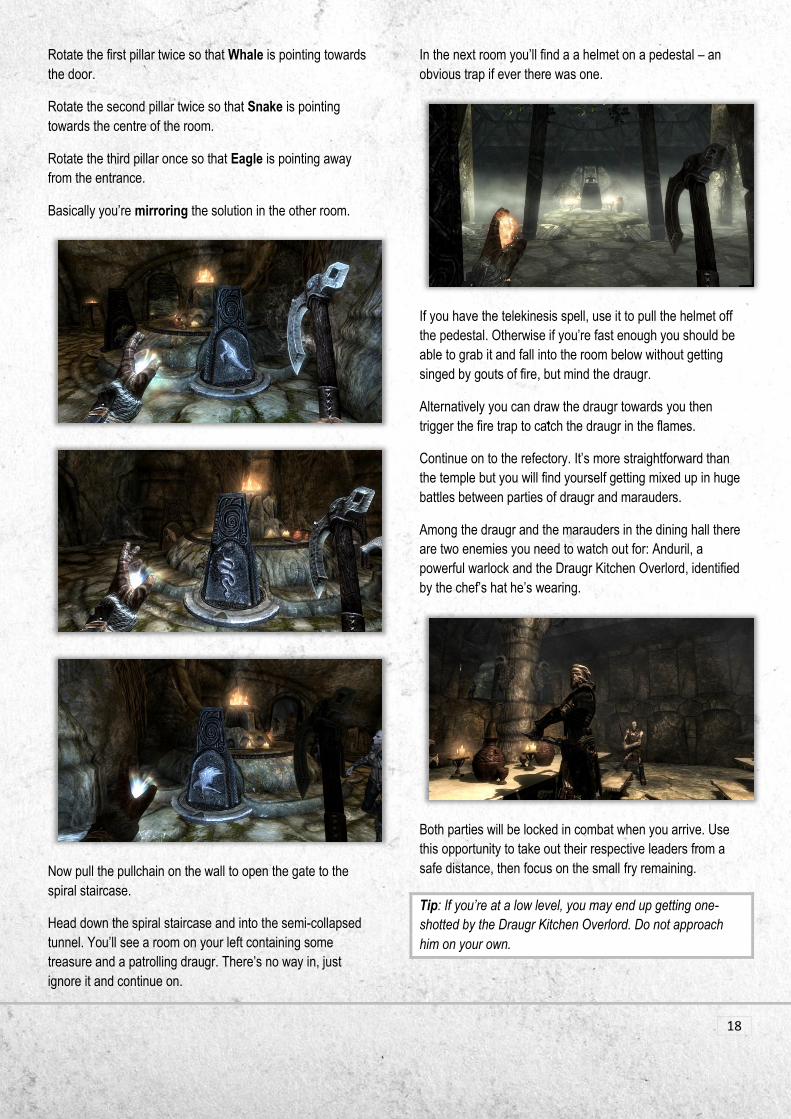
with a lever, pull it to open a secret passage.
Use the oil to burn the draugr that bursts out then pull the
lever in the alcove window to open the closed gate in the
previous room.
In the next room you’ll find a spiral staircase heading down,
but the gate is closed. On the far side is a lever, pull it to
open the first rotating door.
Tip: Don’t pull the pull chain on the wall yet or you’ll end up
getting struck by poison darts.
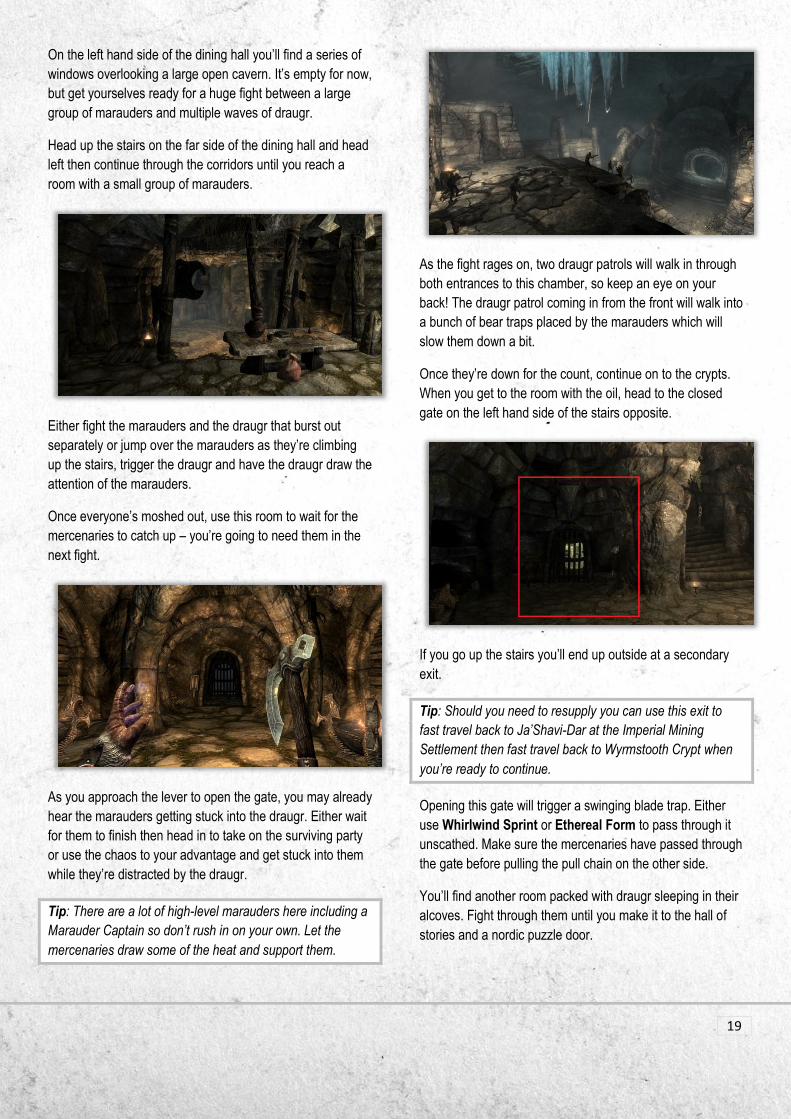
In this room you’ll find 3 rotating pillars. On the far end is
another lever that’ll open the second rotating door to the
room beside it containing the solution.
18
Rotate the first pillar twice so that Whale is pointing towards
the door.
Rotate the second pillar twice so that Snake is pointing
towards the centre of the room.
Rotate the third pillar once so that Eagle is pointing away
from the entrance.
Basically you’re mirroring the solution in the other room.
Now pull the pullchain on the wall to open the gate to the
spiral staircase.
Head down the spiral staircase and into the semi-collapsed
tunnel. You’ll see a room on your left containing some
treasure and a patrolling draugr. There’s no way in, just
ignore it and continue on.
In the next room you’ll find a a helmet on a pedestal – an
obvious trap if ever there was one.
If you have the telekinesis spell, use it to pull the helmet off
the pedestal. Otherwise if you’re fast enough you should be
able to grab it and fall into the room below without getting
singed by gouts of fire, but mind the draugr.
Alternatively you can draw the draugr towards you then
trigger the fire trap to catch the draugr in the flames.
Continue on to the refectory. It’s more straightforward than
the temple but you will find yourself getting mixed up in huge
battles between parties of draugr and marauders.
Among the draugr and the marauders in the dining hall there
are two enemies you need to watch out for: Anduril, a
powerful warlock and the Draugr Kitchen Overlord, identified
by the chef’s hat he’s wearing.
Both parties will be locked in combat when you arrive. Use
this opportunity to take out their respective leaders from a
safe distance, then focus on the small fry remaining.
Tip: If you’re at a low level, you may end up getting one-
shotted by the Draugr Kitchen Overlord. Do not approach
him on your own.
19
On the left hand side of the dining hall you’ll find a series of
windows overlooking a large open cavern. It’s empty for now,
but get yourselves ready for a huge fight between a large
group of marauders and multiple waves of draugr.
Head up the stairs on the far side of the dining hall and head
left then continue through the corridors until you reach a
room with a small group of marauders.
Either fight the marauders and the draugr that burst out
separately or jump over the marauders as they’re climbing
up the stairs, trigger the draugr and have the draugr draw the
attention of the marauders.
Once everyone’s moshed out, use this room to wait for the
mercenaries to catch up – you’re going to need them in the
next fight.
As you approach the lever to open the gate, you may already
hear the marauders getting stuck into the draugr. Either wait
for them to finish then head in to take on the surviving party
or use the chaos to your advantage and get stuck into them
while they’re distracted by the draugr.
Tip: There are a lot of high-level marauders here including a
Marauder Captain so don’t rush in on your own. Let the
mercenaries draw some of the heat and support them.
As the fight rages on, two draugr patrols will walk in through
both entrances to this chamber, so keep an eye on your
back! The draugr patrol coming in from the front will walk into
a bunch of bear traps placed by the marauders which will
slow them down a bit.
Once they’re down for the count, continue on to the crypts.
When you get to the room with the oil, head to the closed
gate on the left hand side of the stairs opposite.
If you go up the stairs you’ll end up outside at a secondary
exit.
Tip: Should you need to resupply you can use this exit to
fast travel back to Ja’Shavi-Dar at the Imperial Mining
Settlement then fast travel back to Wyrmstooth Crypt when
you’re ready to continue.
Opening this gate will trigger a swinging blade trap. Either
use Whirlwind Sprint or Ethereal Form to pass through it
unscathed. Make sure the mercenaries have passed through
the gate before pulling the pull chain on the other side.
You’ll find another room packed with draugr sleeping in their
alcoves. Fight through them until you make it to the hall of
stories and a nordic puzzle door.
20
Collapsed in front of the door is the corpse of a dead
adventurer. Beside him or her you’ll find the Rusted Dragon
Claw; check the claw for the solution which is: Eagle Whale
Snake. The solution is also written on a bloodied note beside
the adventurer.
You’ll find yourself fighting through another legion of draugr
on the other side. Draugr will burst out two by two until their
leader, Suleyk, bursts out of the boss’ sarcophagus at the
top of the stairs on the opposite side of the room.
Tip: Suleyk is a dangerous melee warrior with a wide range
of shouts which he can use far more frequently than a
regular draugr overlord. Make sure any remaining draugr are
taken care of first so your entire team can focus on him.
The most dangerous shout up his sleeve is Ice Form which
can freeze both the mercenaries and yourself. He will also
use Disarm so make sure you have a second weapon ready
just in case. He carries an Ebony Battleaxe with a Drain
Health enchantment so one on one combat with him is
dangerous.
Alberthor will join up with you once Suleyk has been
defeated. The gate in the center of the room should open
automatically. If it doesn’t, use the lever beside the boss’
sarcophagus.
Looks like this goes somewhere. Alberthor comments on the
waste disposal shaft in the boss’ chamber, saying it’s so
deep it likely breaks into Dimfrost – the large underground
magma chamber below the island. Only one way to find
out...
Note: Don’t worry if your regular follower doesn’t make the
plunge. They’ll meet up with you once you exit the dragon’s
den and return to the surface before the final battle.
Another Note: If you lost the other mercenaries along the
way, don’t fret, they’ll catch up with you here.
That wasn’t so bad, was it? Oh come on...
Don’t attack! It’s just Alberthor posessing a falmer.
21
Before you enter Dimfrost, use this cozy little abode to
prepare yourself for the onslaught of falmer you’ll soon be
facing.
Tip: There’s a thresher at the entrance. If you find yourself
getting overwhelmed by falmer you can always lead them
back to this place, activate the thresher at the entrance and
watch them fall victim to its spinning blades.
You’ll find most crafting tables here along with a bunch of
supplies so take the time to prepare yourself. There’s also a
bed here if you need time to recuperate after fighting the
draugr.
Once you’ve prepared yourself, step into Dimfrost.
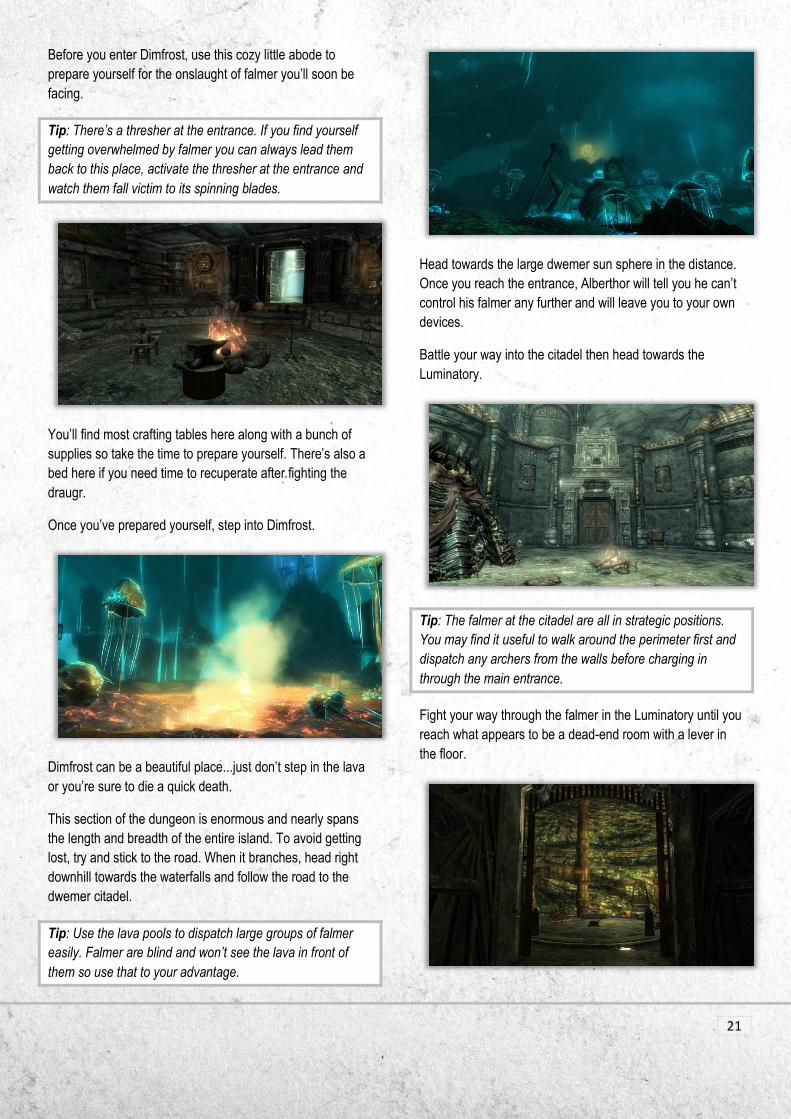
Dimfrost can be a beautiful place...just don’t step in the lava
or you’re sure to die a quick death.
This section of the dungeon is enormous and nearly spans
the length and breadth of the entire island. To avoid getting
lost, try and stick to the road. When it branches, head right
downhill towards the waterfalls and follow the road to the
dwemer citadel.
Tip: Use the lava pools to dispatch large groups of falmer
easily. Falmer are blind and won’t see the lava in front of
them so use that to your advantage.
Head towards the large dwemer sun sphere in the distance.
Once you reach the entrance, Alberthor will tell you he can’t
control his falmer any further and will leave you to your own
devices.
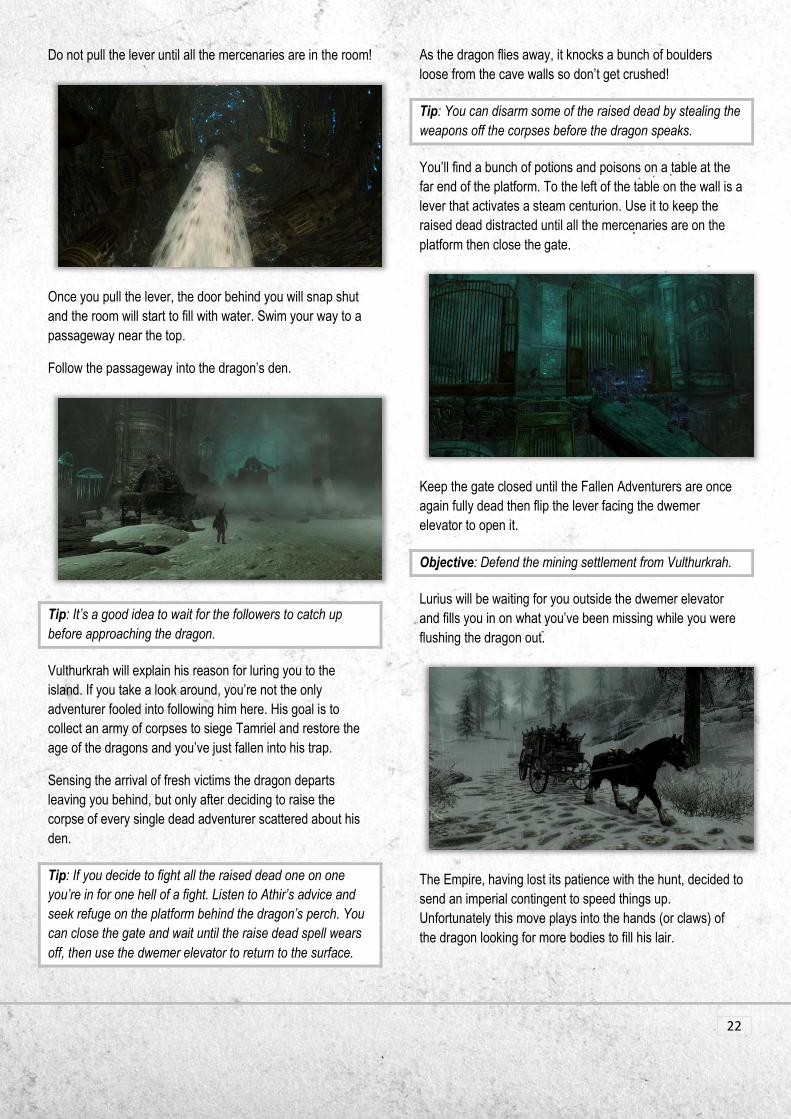
Battle your way into the citadel then head towards the
Luminatory.
Tip: The falmer at the citadel are all in strategic positions.
You may find it useful to walk around the perimeter first and
dispatch any archers from the walls before charging in
through the main entrance.
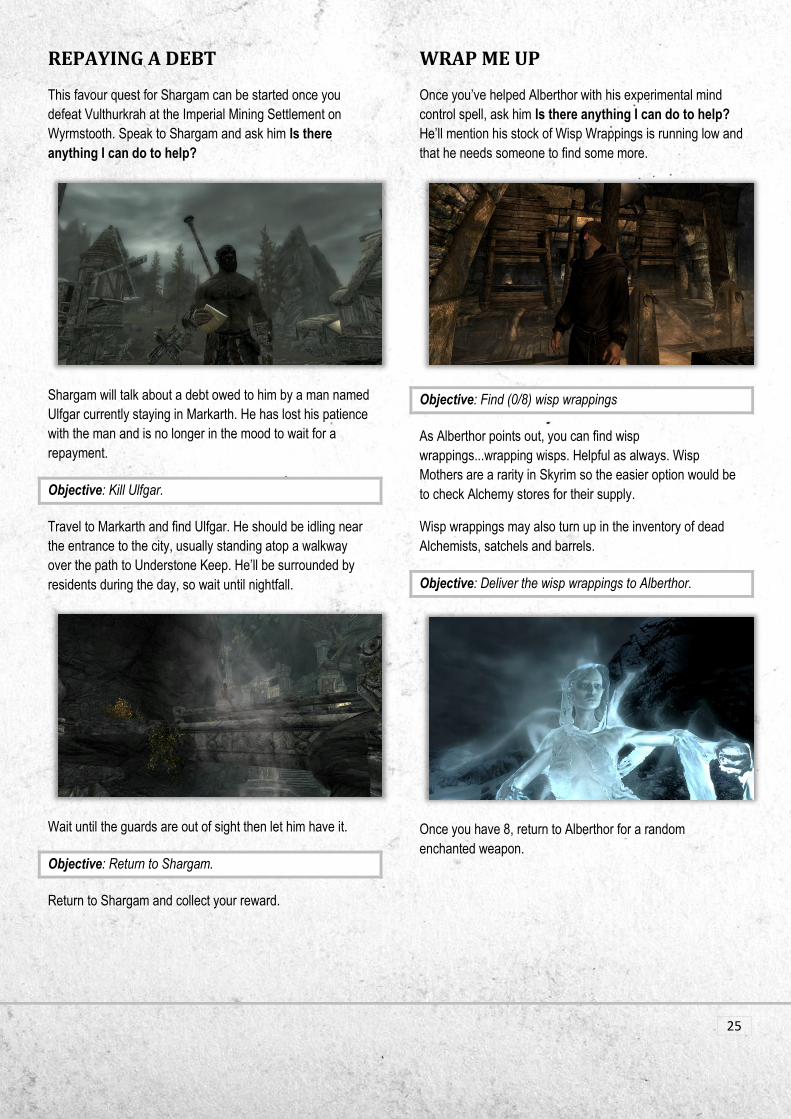
Fight your way through the falmer in the Luminatory until you
reach what appears to be a dead-end room with a lever in
the floor.
22
Do not pull the lever until all the mercenaries are in the room!
Once you pull the lever, the door behind you will snap shut
and the room will start to fill with water. Swim your way to a
passageway near the top.
Follow the passageway into the dragon’s den.
Tip: It’s a good idea to wait for the followers to catch up
before approaching the dragon.
Vulthurkrah will explain his reason for luring you to the
island. If you take a look around, you’re not the only
adventurer fooled into following him here. His goal is to
collect an army of corpses to siege Tamriel and restore the
age of the dragons and you’ve just fallen into his trap.
Sensing the arrival of fresh victims the dragon departs
leaving you behind, but only after deciding to raise the
corpse of every single dead adventurer scattered about his
den.
Tip: If you decide to fight all the raised dead one on one
you’re in for one hell of a fight. Listen to Athir’s advice and
seek refuge on the platform behind the dragon’s perch. You
can close the gate and wait until the raise dead spell wears
off, then use the dwemer elevator to return to the surface.
As the dragon flies away, it knocks a bunch of boulders
loose from the cave walls so don’t get crushed!
Tip: You can disarm some of the raised dead by stealing the
weapons off the corpses before the dragon speaks.
You’ll find a bunch of potions and poisons on a table at the
far end of the platform. To the left of the table on the wall is a
lever that activates a steam centurion. Use it to keep the
raised dead distracted until all the mercenaries are on the
platform then close the gate.
Keep the gate closed until the Fallen Adventurers are once
again fully dead then flip the lever facing the dwemer
elevator to open it.
Objective: Defend the mining settlement from Vulthurkrah.
Lurius will be waiting for you outside the dwemer elevator
and fills you in on what you’ve been missing while you were
flushing the dragon out.
The Empire, having lost its patience with the hunt, decided to
send an imperial contingent to speed things up.
Unfortunately this move plays into the hands (or claws) of
the dragon looking for more bodies to fill his lair.

23
Plan A: You rush ahead of the imperial carriages and take
on the dragon before the soldiers get the chance to jump into
the fight.
Pros: Cons:
Reduces the number of casualties.
No backup aside from the mercenaries.
Plan B: You travel with the imperial carriages, wait for
them to unload, then take on the dragon with a dozen legion
soldiers in tow.
Pros: Cons:
Lots of backup.
The dragon is likely to be put down quicker.
Any legion soldier that dies in combat is automatically raised from the dead by Vulthurkrah to fight against you.
Plan C: You return to Skyrim, go home, have a meal and
let the whole thing blow over. Yes. This is a legit option.
Pros: Cons:
Well, if all else fails... You’re not exactly living up to your reputation as Dragonborn...
Which ever plan you choose (with the exception of Plan C,
naturally), combat starts once you follow the dragon back to
the Imperial Mining Settlement.
Note: The dragon may not attack immediately once you’re
within the walls of the mining settlement. Just give it some
time; depending on how far away the dragon is it may take a
few seconds before the battle begins.
Vulthurkrah starts out with his Storm Call shout. This is the
same shout the player can learn and it’s just as devastating -
lightning bolts can wipe out the entire contingent of legion
soldiers plus the mercenaries in a short amount of time.
Tip: If you have any shock resistance potions, drink them.
Otherwise, seek shelter under a roof when the lightning bolts
start to come down as getting struck can drain a massive
amount of health from you very quickly.
Vulthurkrah will perch on the rooftops of buildings and uses a
combination of fire and frost breath attacks. If you know the
Dragonrend shout, use it to keep him grounded.
Tip: Use the Spellbreaker shield to block all damage from
his breath attacks, shield-bash him, then attack with a power
attack.
Once Vulthurkrah is down for the count, absorb his soul and
collect your bounty from Lurius Liore.
Objective: Receive your reward from Lurius Liore.
Lurius should be hanging back from combat. He’ll either be
hiding somewhere along the road to the mining settlement or
he’ll be outside the Tradehouse.
When the battle is over, he’ll seek you out to present your
reward.
Now that things have been concluded, the arduous process
of rebuilding the town begins. The repairs take time but it
should be complete in about a week in game time.
Stop by every now and then and see how its progressing as
you continue your exploration of Wyrmstooth.

24
RETRIEVING EMBERSUNDER
This favour quest for Athir can be started once you defeat
Vulthurkrah at the Imperial Mining Settlement on
Wyrmstooth. Speak to Athir and ask him Is there anything I
can do to help?
Athir will talk about an hierloom, a sword named
Embersunder, that he’s been searching for in The Reach.
The only place he hasn’t yet searched is Hag’s End, south-
west of Solitude.
Objective: Retrieve Embersunder.
The objective is simple enough, find the sword and return it
to Athir. Retrieving anything from Hag’s End, however, is no
simple task The place is filled to the brim with forsworn,
hagravens and witches so make sure you come prepared.
Once you’ve fought through the forsworn camp at Deepwood
Redoubt, enter the nordic ruins of Hag’s End. Fight your way
through the witches until you reach the balcony outside. The
sword should be next to boss’ chest.
Objective: Return to Athir.
Return the sword to Athir and collect your reward.
ROBBED BLIND
This favour quest for Daenlit can be started once you defeat
Vulthurkrah at the Imperial Mining Settlement on
Wyrmstooth. Speak to Daenlit and ask her Is there anything
I can do to help?
Daenlit will talk about a certain necklace she’d like procured
from the possession of a merchant in Solitude. Unluckily for
you this person is Erikur, a thane of Solitude with influence in
the court.
Objective: Steal the necklace.
During the day you’ll find Erikur in the Blue Palace by the
side of Jarl Elisif. There’ll be eyes everywhere so you may
find it difficult to slip out of sight even with a high sneak skill
to pickpocket the locket off his person.
Wait until he’s gone home and has gone to sleep before
breaking in. Sneak into his room and swipe it off him, then
return to Wyrmstooth.
Objective: Return to Daenlit.
Return the locket to Daenlit and collect your reward.
25
REPAYING A DEBT
This favour quest for Shargam can be started once you
defeat Vulthurkrah at the Imperial Mining Settlement on
Wyrmstooth. Speak to Shargam and ask him Is there
anything I can do to help?
Shargam will talk about a debt owed to him by a man named
Ulfgar currently staying in Markarth. He has lost his patience
with the man and is no longer in the mood to wait for a
repayment.
Objective: Kill Ulfgar.
Travel to Markarth and find Ulfgar. He should be idling near
the entrance to the city, usually standing atop a walkway
over the path to Understone Keep. He’ll be surrounded by
residents during the day, so wait until nightfall.
Wait until the guards are out of sight then let him have it.
Objective: Return to Shargam.
Return to Shargam and collect your reward.
WRAP ME UP
Once you’ve helped Alberthor with his experimental mind
control spell, ask him Is there anything I can do to help?
He’ll mention his stock of Wisp Wrappings is running low and
that he needs someone to find some more.
Objective: Find (0/8) wisp wrappings
As Alberthor points out, you can find wisp
wrappings...wrapping wisps. Helpful as always. Wisp
Mothers are a rarity in Skyrim so the easier option would be
to check Alchemy stores for their supply.
Wisp wrappings may also turn up in the inventory of dead
Alchemists, satchels and barrels.
Objective: Deliver the wisp wrappings to Alberthor.
Once you have 8, return to Alberthor for a random
enchanted weapon.

26
UNWANTED GUESTS
This quest can only be started once you finish Wrap Me Up
for Alberthor by collecting 8 wisp wrappings. Speak to him
once again and ask him Is there anything I can do to
help?
This time it’s slightly more serious. Alberthor has been
feuding with a group of Thalmor holed up in Haetar’s cave.
He’s been sending waves of draugr to stir them up, this time
he’s sending you.
Objective: Kill the Thalmor spies.
Travel to Haetar’s Cave on the eastern side of the island.
When you get there watch out for the bear traps and bone
chimes at the entrance that’ll alert the Thalmor to your
presence. There’ll be a melee warrior in the first chamber
and two wizards in the nordic ruins.
Objective: Return to Alberthor.
If you’re a good sneak, sneak past the two wizards and head
towards the word wall. A draugr overlord will burst out which
you can use to distract the Thalmor.
Return to Alberthor to collect your reward.
RECLAIMING THE PAST
Eventually you’ll come across the ruins of Fort Valus, an
imperial fort south of the mining settlement now seemingly
abandoned. This quest starts upon entering either the
Muster, Common House or Barracks.
Once Vulthurkrah has been defeated in the Barrow Of The
Wyrm quest you can talk to Lurius Liore about purchasing
the deed to the property.
Objective: Ask Lurius Liore about Fort Valus.
The base price of this player home is 30,000 gold. You’re
buying an entire fort, not a snobbish mansion.
Like other player homes in Skyrim, Fort Valus is fully
upgradable. Speak to Lurius about upgrade options once
you’ve purchased the fort.
Most upgrades come with staff associated with the section of
the fort you’re rennovating. The staff you hire will live in the
Common House.
Tip: Hire guards by upgrading the prison. You’re not the only
one who wants to claim Fort Valus. This is a player home
you’ll need to defend!

27
SOMEONE WITH BACKBONE
You can start this quest either by reading the book History
Of Wyrmstooth or by entering the Tomb Of Vulom.
As you delve deeper into the tomb you’ll hear a disembodied
voice speak to you. Approach the sarcophagus at the centre
of the cave and talk to the skull.
Objective: Follow the disembodied voice.
Vulom will tell you of his miserable fate. Beaten and torn
asunder, his final wish is to be made whole once more so
that he may find peace in the afterlife.
This will require finding his arms, legs and ribcage which
have been scattered around the island in nordic crypts.
Objective: Find Vulom’s bones.
The first location we need to travel to is Fort Valus. If you
already own the fort you’re going to like this little surprise.
Head right from the entrance and enter the blacksmith’s
chamber. At the far end of the room you’ll find a Wardrobe,
open it to reveal a secret stairway. Head down then pull the
pull chain to your left to open a passage into a witch’s lair.
Don’t worry: if you live in the fort they won’t come up in the
middle of the night and murder your staff or steal your gear.
You’ll find a word wall with the first word of the Phantom
Form shout – you’re likely going to need this shout later on
so don’t miss it. Collect Vulom’s arms from the table to the
right of the word wall.
Tip: You can use the magicka font here to help level up your
spell casting abilities. The font will restore your magicka to
full and you can use it an unlimited number of times.
If you’re a spell caster you may want to take the time to level
up your spell casting with the magicka font before continuing.
The second place we’re headed to is Haetar’s Cave. Head
past the corpses and into the nordic chamber. Approach the
word wall and learn the second word of the Phantom Form
shout. Just be aware that approaching the word wall will
trigger a draugr overlord.
Grab Vulom’s legs and head out of there.
The final place we need to visit is somewhere you’ve likely
already been to: Wyrmstooth Crypt. If you’ve already opened
the Wyrmstooth Crypt secondary entrance east of the barrow
enter through there. Otherwise you’re going to have to enter
through the barrow’s temple entrance and work your way
down into the crypts again.
28
Head back to the boss’ chamber but don’t fall down the hole
again. Head up the stairs and go straight ahead into the
treasure room.
Approach the word wall and learn the final word of the
Phantom Form shout. Grab Vulom’s ribcage and get out of
there.
Tip: If you’re a conjurer, take the Conjure Dragon Priest spell
tome from the altar, you may find it useful near the end of
this quest. Also, mind the flame trap!
Now that we have all the bones it’s just a simple matter of
returning them, right? Wrong! Before we return the bones we
need to do a little preparation. Spoilers: You’re in for one hell
of a fight.
Objective: Return the bones to Vulom.
First, stock up on resistance potions; Resist Fire, Resist
Shock, Resist Frost, Resist Magic. Preferably elixirs as
they’re the most effective. If you need to travel back to the
mainland and check each and every Alchemy store, do so.
Second, enchant your gear (if you can) with elemental
protections. Otherwise, bring whatever gear you’ve found in
your travels that have elemental protections. If you have the
Spellbreaker shield handy, don’t forget it.
Third, stock up on healing potions. You’ve likely amassed
quite a few during your travels already. Don’t sell them off
just yet.
Fourth, temper your weapons at a grindstone or level your
destruction skill as high as you can. If you need to spam
some iron daggers at a forge to improve your smithing skill,
do it. You’re going to need to hit as hard as a bus in the next
battle.
And lastly, bring the toughest follower you know.
When you’re ready, return to the Tomb Of Vulom and return
the bones.
Tip: Before speaking to him, drag the draugr corpses away
from the sarcophagus as far as you can. A little preparation
goes a long way.
On the bright side, he’ll be happy you found his bones. As for
your reward...
Vulom usually starts by resurrecting a draugr overlord
nearby (unless you moved it away). Now is the time to use
the Phantom Form shout. This shout creates an unstrikable
clone of the Dragonborn for 60 seconds that can be used to
draw Vulom’s attention while you retreat.
The second spell he casts is the master level destruction
spell Blizzard followed by Firestorm in quick succession. If
you’re standing nearby, both spells together are more than
enough to easily kill even level 80 players so as soon as he
flies out of his sarcophagus stand back until both spells have
been cast.
Next he starts casting Wall Of Storms which can quickly sap
your health if you’re standing still. By this time your follower
is likely down for the count so you may want to heal him/her.
Tip: When Vulom casts Blizzard, run back as fast as you can
or use the Whirlwind Sprint shout to get out of there as he’s
about to cast Firestorm which packs a hell of a punch. He
will always cast Blizzard before Firestorm so use that as your
warning.
If you see an orange spell in his hand it’s likely a healing
spell, so stagger him with a shield bash or a dual-cast
destruction spell. His healing spell can restore ¾ of his
health which can make this a very long fight if you’re not
hitting hard enough.
29
Another strategy is to start Someone With Backbone before
finishing Barrow Of The Wyrm so you can take him on with
all the mercenaries in tow plus a follower of your choosing.
Your reward for finishing him off is a staff that can be used to
summon his shade. This is an incredibly powerful staff so
recharging it will require more soulgems than normal.
The Shade of Vulom is capable of casting all the same spells
so use it wisely; otherwise you may end up killing off half of
Solitude by accident...wink.
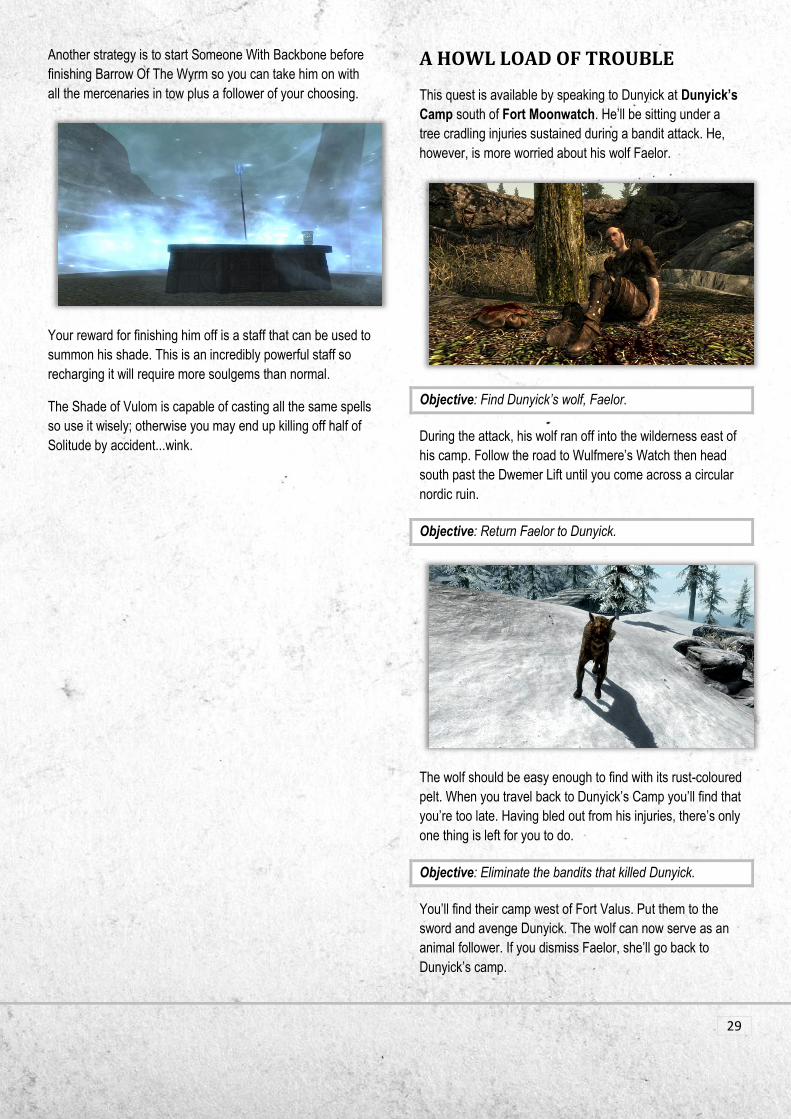
A HOWL LOAD OF TROUBLE
This quest is available by speaking to Dunyick at Dunyick’s
Camp south of Fort Moonwatch. He’ll be sitting under a
tree cradling injuries sustained during a bandit attack. He,
however, is more worried about his wolf Faelor.
Objective: Find Dunyick’s wolf, Faelor.
During the attack, his wolf ran off into the wilderness east of
his camp. Follow the road to Wulfmere’s Watch then head
south past the Dwemer Lift until you come across a circular
nordic ruin.
Objective: Return Faelor to Dunyick.
The wolf should be easy enough to find with its rust-coloured
pelt. When you travel back to Dunyick’s Camp you’ll find that
you’re too late. Having bled out from his injuries, there’s only
one thing is left for you to do.
Objective: Eliminate the bandits that killed Dunyick.
You’ll find their camp west of Fort Valus. Put them to the
sword and avenge Dunyick. The wolf can now serve as an
animal follower. If you dismiss Faelor, she’ll go back to
Dunyick’s camp.

30
A PRICELESS COMMODITY
Travel to the steam pools and speak to Bolmar. He’ll be
outside the entrance to Gronndal Grove with a group of
miners. Seems like they’ve discovered a rare ebony vein,
problem is it’s being guarded by spriggans.
Objective: Investigate the spriggans at Gronndal Grove.
Enter Gronndal Grove and approach the Spriggan Matriarch.
You’ll get to choose one of two options here: serve nature
and kill the miners, or serve the miners and kill the
spriggans. You can take either route to complete this quest.
Objective: Clear the spriggans from Gronndal Grove.
Choosing to side with the miners will make the spriggans
hostile. Chop them into firewood then return to Bolmar. Like
all spriggans they can make nearby animals hostile towards
you so watch out for angry rabbits.
Objective: Return to Bolmar
Speak to Bolmar and tell him the spriggans are dead to
complete the quest.
Otherwise if you sided with the spriggans you will need to kill
Bolmar and the miners at the entrance. Just keep in mind
that doing so is likely to give you a bounty on Wyrmstooth if
you leave any witnesses behind.
Objective: Kill Bolmar
Objective: Return to the Spriggan Matriarch.
Speak to the Spriggan Matriarch to finish the quest.
There is no right or wrong way to complete this quest; that’s
your own moral choice to make.

31
ANIMAL BOUNTY
Read a note labeled Animal Problem at the Imperial Mining
Settlement near Gashnag’s Longhouse to start this
Miscellaneous objective.
Objective: Kill the bear south of Fort Valus.
A bear has been interfering with miners travelling the
southern road. Lurius would like the orcs to do something
about it but you can spare them the effort and take care of
this problem on their behalf.
Find the bear along the roadside and show it who’s boss.
BANDIT BOUNTY
You’ll find a letter from Dunyick posted in the Tradehouse at
the Imperial Mining Settlement warning about the bandits
holed up at Cragwater Cavern.
Objective: Kill the bandit chief at Cragwater Cavern.
If left alone, the marauders are sure to become even more of
a menace than they already are. Steel up and head over to
Cragwater Camp. It’s not a permanent fix but taking out their
leader should curb their activities. For now.
Kill the Marauder Captain to clear this objective.

32
VAMPIRE BOUNTY
Travel to Stendarr’s Outpost on the eastern side of the island
and read Amon’s Note on the table. He writes about his
missing brother Amarth who went alone into a vampire lair.
Objective: Kill the master vampire at Bloodfrost Burrow
Head south from Stendarr’s Outpost to Bloodfrost Burrow.
Make sure you prepare for this one as you’ll be facing a
strong coven of vampires. Low level players may want to
wait until they’re more skilled at vampire hunting.
.Kill the vampire boss to complete this objective.
Tip: The Vigilants of Stendarr will routinely check this
vampire lair. Joining up with them on the road may make this
encounter slightly less painful.
WARLOCK BOUNTY
Northeast of the Wreck of the Salty Knave you’ll find a
hidden Stormcloak Camp. A note on the table speaks of the
warlocks abducting one of their fellow soldiers.
Objective: Kill the warlock leader at Krakevisa.
Krakevisa is a short distance south-west of the Stormcloak
Camp. If you’re a spell caster you’ll find plenty of new spells
in this location that you won’t find anywhere else in Skyrim
plus some rare alchemical ingredients.
.Kill the warlock boss to complete this objective.

33
BLIND ROBBER’S CACHE
If you’ve been to Blind Robber’s Bluff you’ve likely
encountered the locked dwemer storeroom. Only one person
has the key to the storeroom; Rolgar, a marauder captain.
By the sounds of it he’s on a bit of a quest of his own.
Travel to Chillbone camp on the eastern side of the island.
On the wooden platform is a bloodied corpse. Search around
the deck next to him for a bloody note. It may be hard to see
at first.
Objective: Retrieve the key from Rolgar’s corpse.
The note will mention Dimfrost. That’s where you’ll need to
start.
Warning: At first the map marker will point to an arbitrary
location far to the north of Wyrmstooth. Once you travel to
Dimfrost the quest marker will correct itself. This is not a bug
with the mod by the looks of it as it happens to radiant
quests assigned to Blackreach as well.
From where you first entered Dimfrost during Barrow of the
Wyrm, head left and follow the quest marker. Rolgar’s
corpse will be near some falmer tents on the other side of a
river.
Objective: Unlock the door to Blind Robber’s Cache.
Return to Blind Robber’s Bluff and use the key to open the
gate and claim the marauder’s loot.

34
CALL OF THE WILD
A spell maker at Krakevisa researching the spriggans
managed to transcribe their power to control animals while
researching a way to control the dead. Unlike the original
spriggan power, timid animals won’t directly attack your
opponents but will rather serve to draw their attention.
Spell School: Alteration
Spell Level: Expert
Charge Time: 2 seconds
Spell Type: Area Of Effect
Spell Radius: 1000
Spell Duration: 1 minute
Base Cost: 580
Only one spell tome is available in Krakevisa.
CALL OF THE DEAD
The finished result of the spell maker’s research into
controlling the undead. It’s similar to Call Of The Wild but
works on all forms of the undead for a limited amount of
time.
This spell takes three seconds to charge up and has a high
chance of being resisted by the undead. On the flip side this
spell is capable of swaying the minds of even the most
powerful undead if only for a minute.
Spell School: Alteration
Spell Level: Expert
Charge Time: 3 seconds
Spell Type: Area Of Effect
Spell Radius: 1000
Spell Duration: 1 minute
Base Cost: 620
Like Call Of The Wild only one spell tome is available in
Krakevisa.
CURE DISEASE
Cures any disease currently afflicting the player. A similar
effect to praying at an altar but without the burden of having
to find an altar.
Spell School: Restoration
Spell Level: Apprentice
Charge Time: 0.5 seconds
Spell Type: Self
Spell Radius: -
Spell Duration: -
Base Cost: 36
Spell tomes are available in several homes across
Wyrmstooth including the Tradehouse.
35
CURE POISON
Like the previous spell, Cure Disease, but works to cure the
ongoing effects of poison from the player.
It might be a good idea to learn this spell before taking on
Wyrmstooth Barrow to help with all the falmer and chaurus
you’ll be up against, unless you have poison immunity.
Spell School: Restoration
Spell Level: Apprentice
Charge Time: 0.5 seconds
Spell Type: Self
Spell Radius: -
Spell Duration: -
Base Cost: 14
Spell tomes availability similar to Cure Disease. The first one
you’re likely to come across can be found in the Tradehouse
at the Imperial Mining Settlement.
EASE BURDEN
A must for the compulsive horder. Like the Oblivion
equivalent of the spell it temporarily increases your carry
weight allowing you to haul more gear. This spell lasts for a
minute which should give you enough time to fast travel back
to a merchant if you find yourself over-encumbered.
Spell School: Alteration
Spell Level: Apprentice
Charge Time: 0.5 seconds
Spell Type: Self
Spell Radius: -
Spell Duration: 1 minute
Base Cost: 230
Spell tome availability similar to Cure Poison. Again, a copy
can be found in the Tradehouse as well as numerous copies
in Krakevisa.
FADE OTHER
Use this spell to turn a target of your choosing invisible. This
is more of a nuisance spell than anything you’ll useful in
combat.
The spell itself is actually cut content from the base game as
voice acting has been recorded to allow NPCs to verbally
respond to being turned invisible.
Spell School: Illusion
Spell Level: Expert
Charge Time: 0.5 seconds
Spell Type: Single Target
Spell Radius: Touch
Spell Duration: 1 minute
Base Cost: 215
Three spell tomes in Krakevisa, one in Wyrmstooth Barrow.
Tip: Using Fade Other on your followers will make them
harder to detect. If you’re a sneak you may actually find this
spell to be useful.
36
ICE VOLLEY
Fires a volley of ice shards with a wider spread than Icy
Spear or Ice Spike in case you’re an incredibly bad shot.
Each shard does a fair amount of damage, more so if you
cast this at point blank range and plant all 3 shards in your
foe.
Spell School: Destruction
Spell Level: Expert
Charge Time: 1 second
Spell Type: Single Target
Spell Radius: -
Spell Duration: -
Base Cost: 400
You’ll find a couple copies of this spell tome in Krakevisa,
three in Wyrmstooth Barrow and one in Haetar’s Cave.
NIGHT EYE
In case you’re not a Vampire or Khajiit, you can learn the
Night Eye spell to make seeing in the dark without a torch a
slight bit easier.
Unlike the Oblivion equivalent of this spell, it doesn’t turn the
entire screen an intense shade of blue.
Spell School: Illusion
Spell Level: Apprentice
Charge Time: 0.5 seconds
Spell Type: Self
Spell Radius: -
Spell Duration: 1 minute
Base Cost: 130
You’ll find a couple copies of this spell tome in Krakevisa,
two in Wyrmstooth Barrow, one in the Tradehouse and one
in Chalureel Farm.
CONJURE DRAUGR WIGHT
If you haven’t had enough draugr, now you can summon
them. The faithful draugr wight, good for any occasion.
Spell School: Conjuration
Spell Level: Apprentice
Charge Time: 0.5 seconds
Spell Type: Single Target
Spell Radius: -
Spell Duration: 1 minute
Base Cost: 75
You’ll find a couple copies of this spell tome in Wyrmstooth
Barrow.
Tip: Some conjured Draugr Deathlords may wield ebony
weapons. If your deathlord is carrying a regular nordic
weapon, conjure another one before heading into battle.
37
CONJURE DRAUGR SCOURGE
A draugr scourge can take more of a beating than a draugr
wight before giving up the ghost.
Spell School: Conjuration
Spell Level: Adept
Charge Time: 0.5 seconds
Spell Type: Single Target
Spell Radius: -
Spell Duration: 1 minute
Base Cost: 107
Spell tome availability same as Conjure Draugr Wight.
CONJURE DRAUGR DEATHLORD
Deathlords prove the most resilient in battle.
Spell School: Conjuration
Spell Level: Expert
Charge Time: 0.5 seconds
Spell Type: Single Target
Spell Radius: -
Spell Duration: 1 minute
Base Cost: 161
Spell tome availability same as Conjure Draugr Scourge.
CONJURE DRAGON PRIEST
Show your opponents you mean business by sending a
conjured dragon priest after them.
Spell School: Conjuration
Spell Level: Master
Charge Time: 0.5 seconds
Spell Type: Single Target
Spell Radius: -
Spell Duration: 1 minute
Base Cost: 358
One copy only in the treasure room of Wyrmstooth Crypt.
CONJURE MUDCRAB
...or show your opponents you have a sense of humour.
Spell School: Conjuration
Spell Level: Novice
Charge Time: 0.5 seconds
Spell Type: Single Target
Spell Radius: -
Spell Duration: 1 minute
Base Cost: 75
Who else but Elmera would carry a tome of this spell?
38
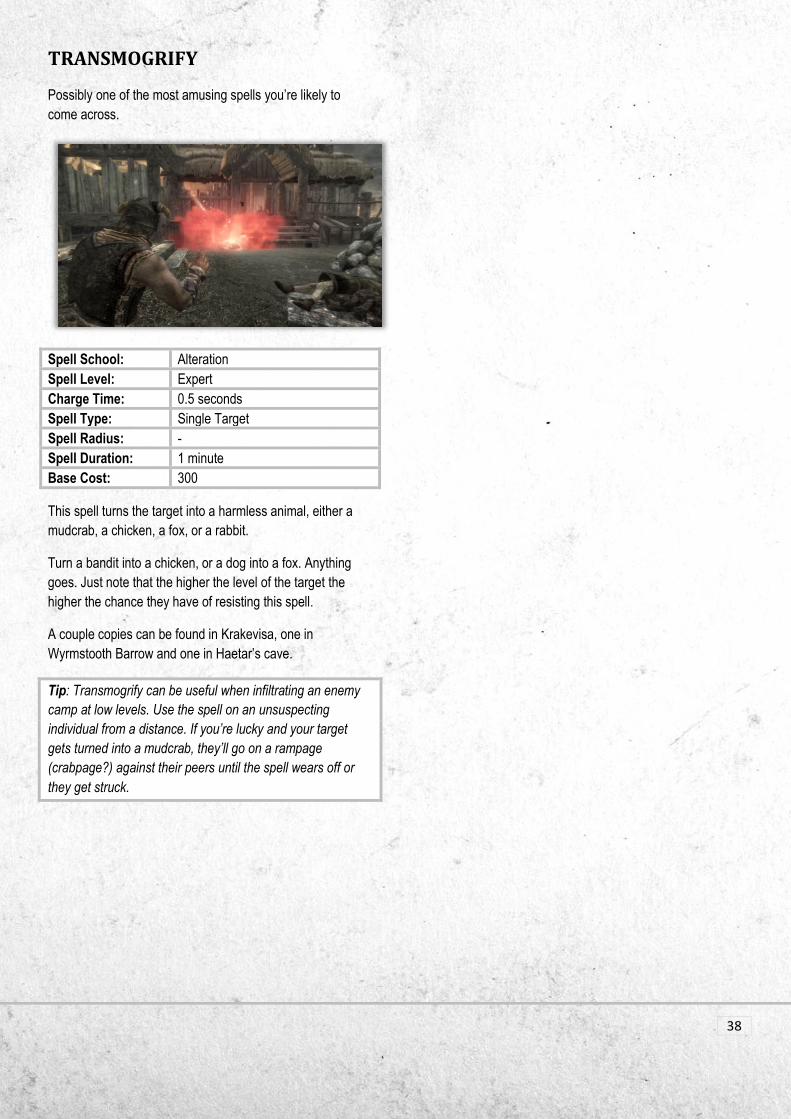
TRANSMOGRIFY
Possibly one of the most amusing spells you’re likely to
come across.
Spell School: Alteration
Spell Level: Expert
Charge Time: 0.5 seconds
Spell Type: Single Target
Spell Radius: -
Spell Duration: 1 minute
Base Cost: 300
This spell turns the target into a harmless animal, either a
mudcrab, a chicken, a fox, or a rabbit.
Turn a bandit into a chicken, or a dog into a fox. Anything
goes. Just note that the higher the level of the target the
higher the chance they have of resisting this spell.
A couple copies can be found in Krakevisa, one in
Wyrmstooth Barrow and one in Haetar’s cave.
Tip: Transmogrify can be useful when infiltrating an enemy
camp at low levels. Use the spell on an unsuspecting
individual from a distance. If you’re lucky and your target
gets turned into a mudcrab, they’ll go on a rampage
(crabpage?) against their peers until the spell wears off or
they get struck.
39
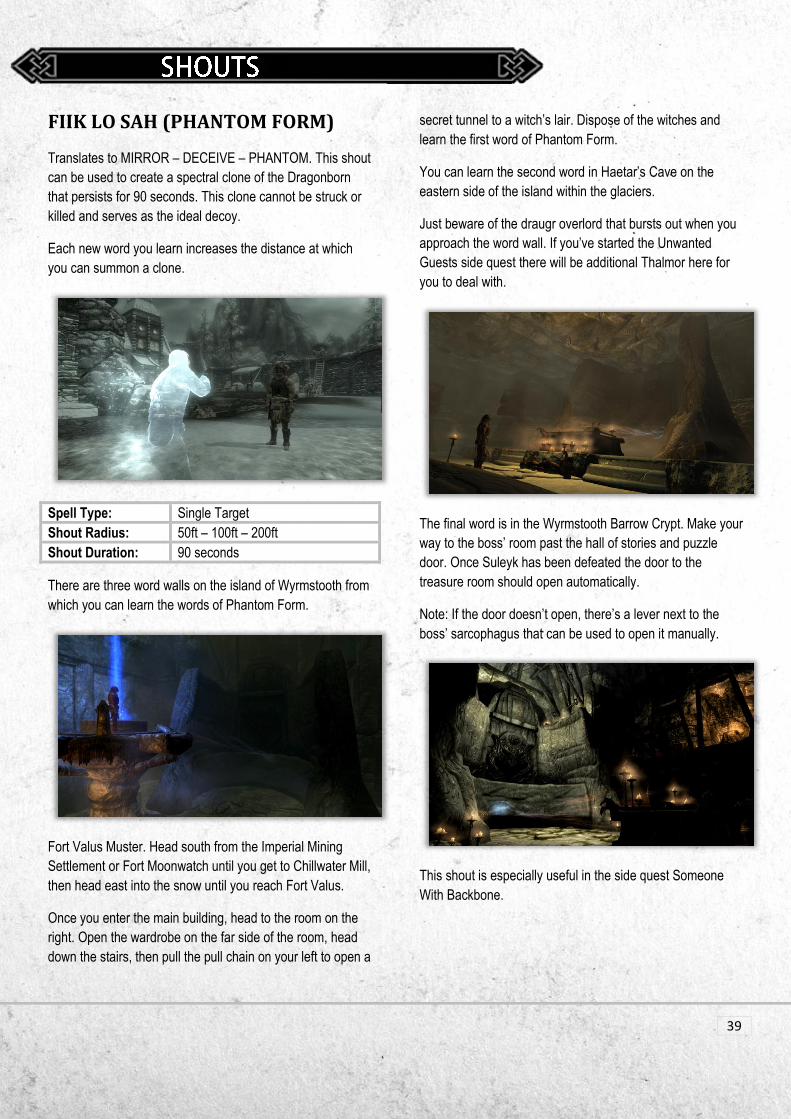
FIIK LO SAH (PHANTOM FORM)
Translates to MIRROR – DECEIVE – PHANTOM. This shout
can be used to create a spectral clone of the Dragonborn
that persists for 90 seconds. This clone cannot be struck or
killed and serves as the ideal decoy.
Each new word you learn increases the distance at which
you can summon a clone.
Spell Type: Single Target
Shout Radius: 50ft – 100ft – 200ft
Shout Duration: 90 seconds
There are three word walls on the island of Wyrmstooth from
which you can learn the words of Phantom Form.
Fort Valus Muster. Head south from the Imperial Mining
Settlement or Fort Moonwatch until you get to Chillwater Mill,
then head east into the snow until you reach Fort Valus.
Once you enter the main building, head to the room on the
right. Open the wardrobe on the far side of the room, head
down the stairs, then pull the pull chain on your left to open a
secret tunnel to a witch’s lair. Dispose of the witches and
learn the first word of Phantom Form.
You can learn the second word in Haetar’s Cave on the
eastern side of the island within the glaciers.
Just beware of the draugr overlord that bursts out when you
approach the word wall. If you’ve started the Unwanted
Guests side quest there will be additional Thalmor here for
you to deal with.
The final word is in the Wyrmstooth Barrow Crypt. Make your
way to the boss’ room past the hall of stories and puzzle
door. Once Suleyk has been defeated the door to the
treasure room should open automatically.
Note: If the door doesn’t open, there’s a lever next to the
boss’ sarcophagus that can be used to open it manually.
This shout is especially useful in the side quest Someone
With Backbone.

40
A HOWL LOAD OF TROUBLE, 29 A PRICELESS COMMODITY, 30 Alberthor, 16 ANIMAL BOUNTY, 31 Athir, 13 BANDIT BOUNTY, 31 BARROW OF THE WYRM, 14 Blind Robber’s Bluff, 10 BLIND ROBBER’S CACHE, 33 Bloodfrost Burrow, 11 Bloodstone Camp, 9 CALL OF THE DEAD, 34 CALL OF THE WILD, 34 Central Mountains, 5 Chillbone Camp, 10 Chillwater Mill, 7 Coldwave Crescent, 9 CONJURE DRAGON PRIEST, 37 CONJURE DRAUGR DEATHLORD, 37 CONJURE DRAUGR SCOURGE, 37 CONJURE DRAUGR WIGHT, 36 CONJURE MUDCRAB, 37 Cragwater Camp, 11 CURE DISEASE, 34 CURE POISON, 35 Daenlit, 13 Dark Brotherhood Sanctuary, 9 Dimfrost, 11 DRAGON HUNT, 12 Dunyick’s Camp, 6 Dwemer Lift, 8 EASE BURDEN, 35 Eastern Glaciers, 5 Elmera, 13 FADE OTHER, 35 Fallen Adventurers, 22 FIIK LO SAH, 39 Fort Moonwatch, 6 Fort Valus, 7 Goreduster, 16 Haetar’s Cave, 10 Hag’s Perch, 6 Herman’s Holdout, 9
Hunter’s Shack, 8 ICE VOLLEY, 36 Imperial Camp, 11 Imperial Mining Settlement, 7 Ja’Shavi-Dar, 15 Krakevisa, 8 Lurius Liore, 12 Marauders, 14 Nehfrinqeth, 15 Nehkrahqeth, 15 NIGHT EYE, 36 Northern Marshes, 5 RECLAIMING THE PAST, 26 REPAYING A DEBT, 25 RETRIEVING EMBERSUNDER, 24 ROBBED BLIND, 24 Ruined Homestead, 9 Rusted Dragon Claw, 20 Shargam, 13 SOMEONE WITH BACKBONE, 27 Steam pools, 5 Stendarr’s Outpost, 10 Stormcloak Camp, 9 Suleyk, 20 Theodyn Bienne, 12 Tomb Of Vulom, 7 TRANSMOGRIFY, 38 Twinpeak Tower, 8 Ulfgar, 25 UNWANTED GUESTS, 26 VAMPIRE BOUNTY, 32 Vulom, 27 Vulthurkrah, 13 Wanderer’s Camp, 7 WARLOCK BOUNTY, 32 Waylayer’s Watch, 6 Western Forests, 5 WRAP ME UP, 25 Wreck of the Salty Knave, 8 Wulfmere’s Watch, 7 Wyrmstooth Barrow, 10 Wyrmstooth Crypt, 10 Wyrmstooth Docks, 6
Related Documents


![Prom Week Meets Skyrim (Demonstration)Skyrim"[7]. 3.1 The Elder Scrolls V: Skyrim The Elder Scrolls V: Skyrim is an action role-playing open world video game developed by Bethesda](https://static.cupdf.com/doc/110x72/5f8623a173423b4670453271/prom-week-meets-skyrim-demonstration-skyrim7-31-the-elder-scrolls-v.jpg)