Setting up and creating a Local Area Network (LAN) within Windows XP by Buzzons Step 1) Open the start menu, navigate to control panel, and select your network card:

Welcome message from author
This document is posted to help you gain knowledge. Please leave a comment to let me know what you think about it! Share it to your friends and learn new things together.
Transcript
Setting up and creating a Local Area Network (LAN) within Windows XP by Buzzons
Step 1) Open the start menu, navigate to control panel, and select your network card:
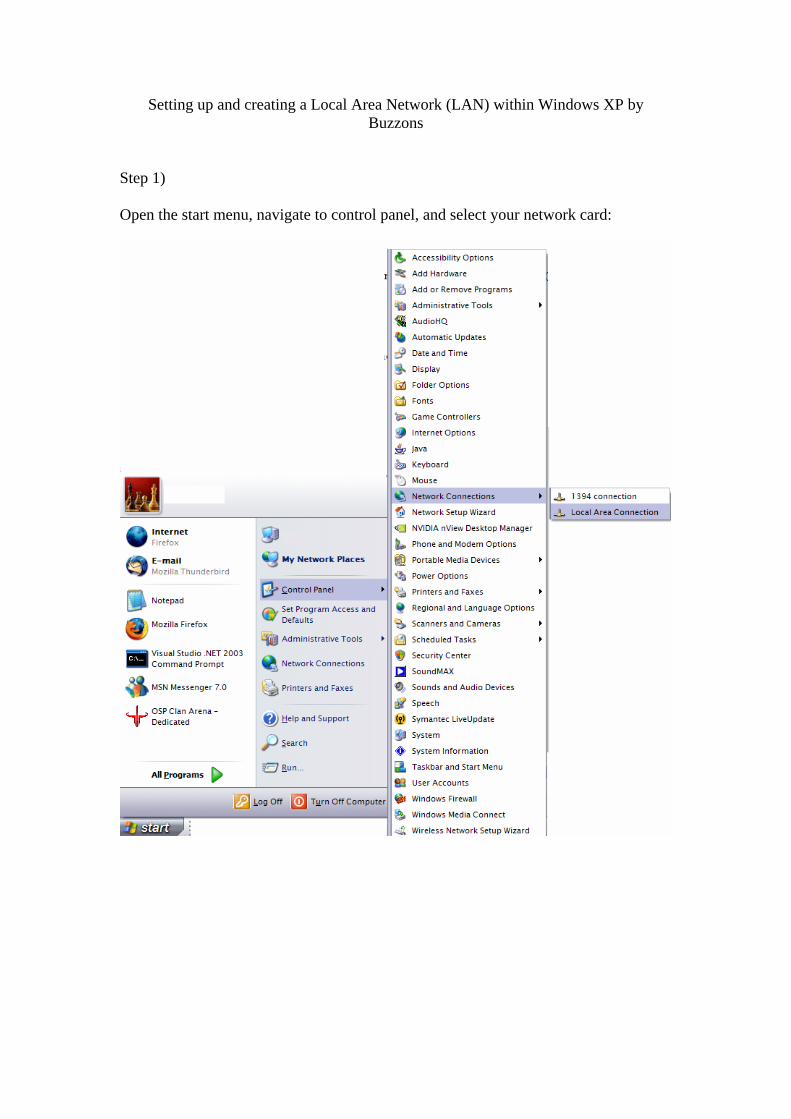
Step 2) Click the network card, to open this options box:
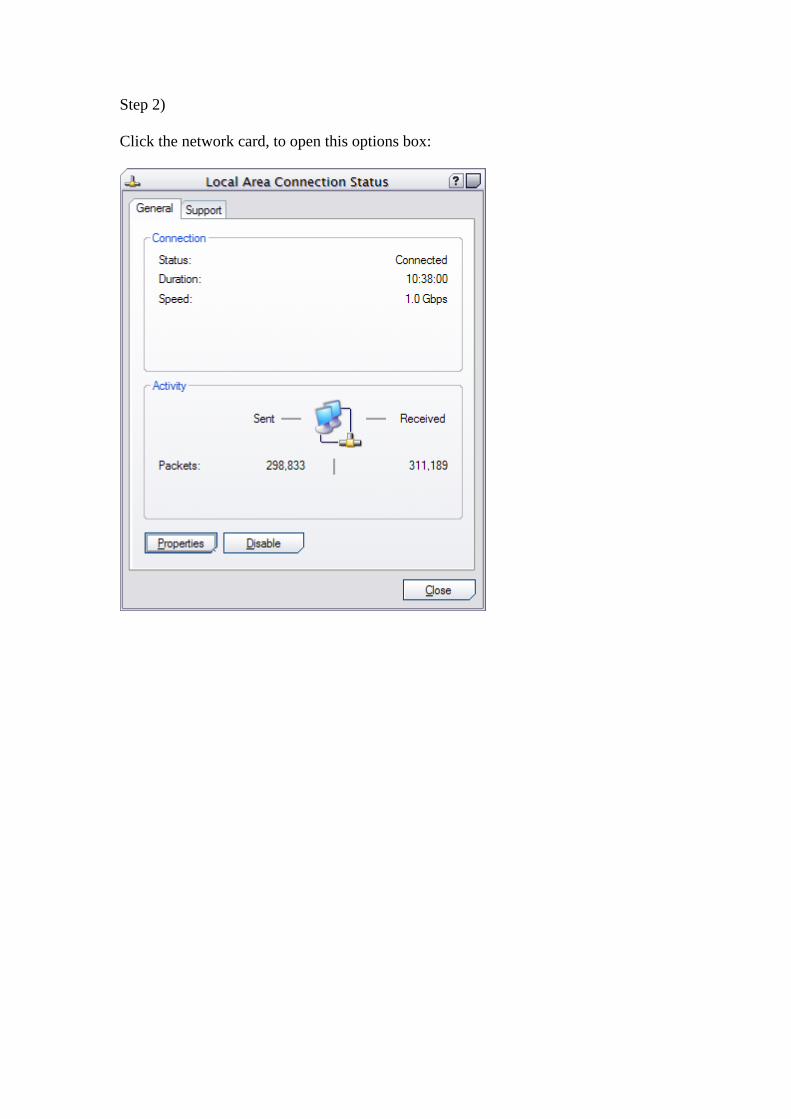
Click Properties to open this screen:

Scroll the bar until “Internet protocol (TCP/IP)” can be shown (This is located usually at the bottom of the list:
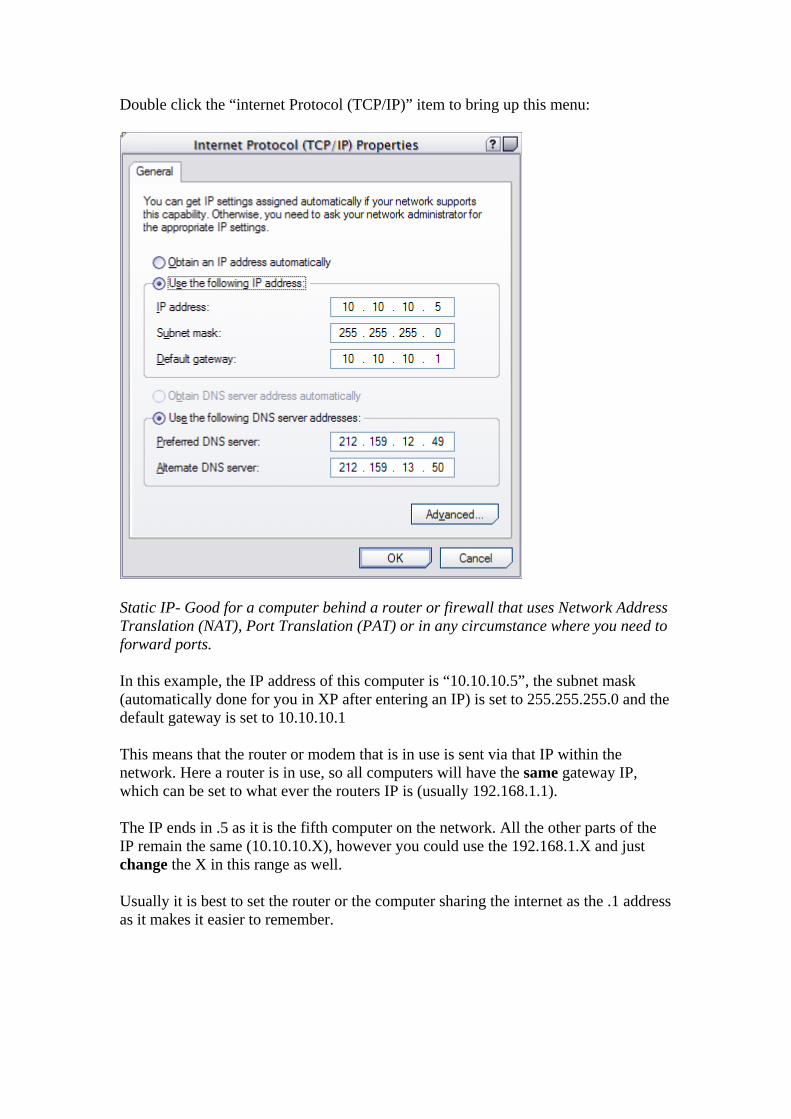
Double click the “internet Protocol (TCP/IP)” item to bring up this menu:
Static IP- Good for a computer behind a router or firewall that uses Network Address Translation (NAT), Port Translation (PAT) or in any circumstance where you need to forward ports. In this example, the IP address of this computer is “10.10.10.5”, the subnet mask (automatically done for you in XP after entering an IP) is set to 255.255.255.0 and the default gateway is set to 10.10.10.1 This means that the router or modem that is in use is sent via that IP within the network. Here a router is in use, so all computers will have the same gateway IP, which can be set to what ever the routers IP is (usually 192.168.1.1). The IP ends in .5 as it is the fifth computer on the network. All the other parts of the IP remain the same (10.10.10.X), however you could use the 192.168.1.X and just change the X in this range as well. Usually it is best to set the router or the computer sharing the internet as the .1 address as it makes it easier to remember.

Dynamic IP – Good for single computer or in a LAN where each box does not need to have ports forwarded to it (if it is not acting as a server) To use dynamic IP’s just select “obtain an IP address automatically” and the other options will grey out.
The DNS server setup allows you to use www.google.com instead of http:// 66.102.9.104, which is harder to remember, most ISPs tell you which two to use, there are however many free ones out there, all you have to do is Google for DNS servers. Alternatively, the ISP may ask you to tick “Obtain DNS Server address automatically” which means upon connecting to the ISP it will tell you which DNS servers to use without you having to set it up. After setting this page up, click the “OK” button to save the settings you have entered.

To improve your network performance, open this window once more:
And click “Configure…” Find the option for “link Speed” (will change depending on what network card you have)
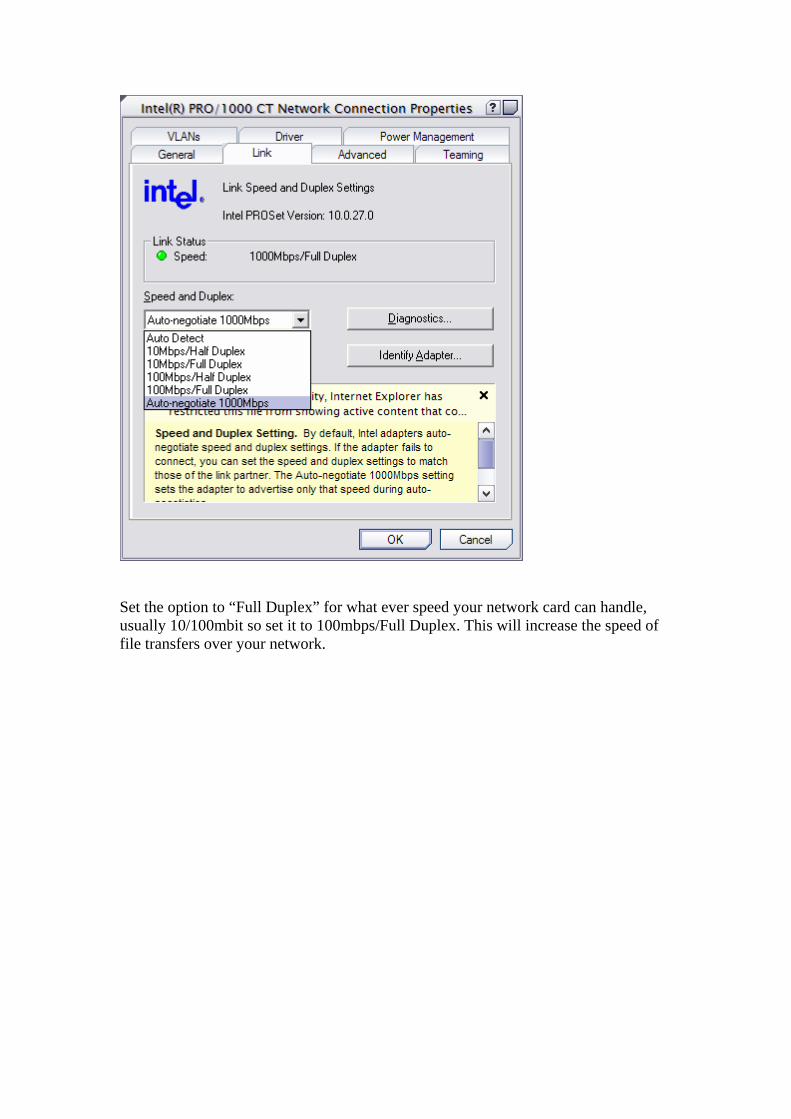
Set the option to “Full Duplex” for what ever speed your network card can handle, usually 10/100mbit so set it to 100mbps/Full Duplex. This will increase the speed of file transfers over your network.
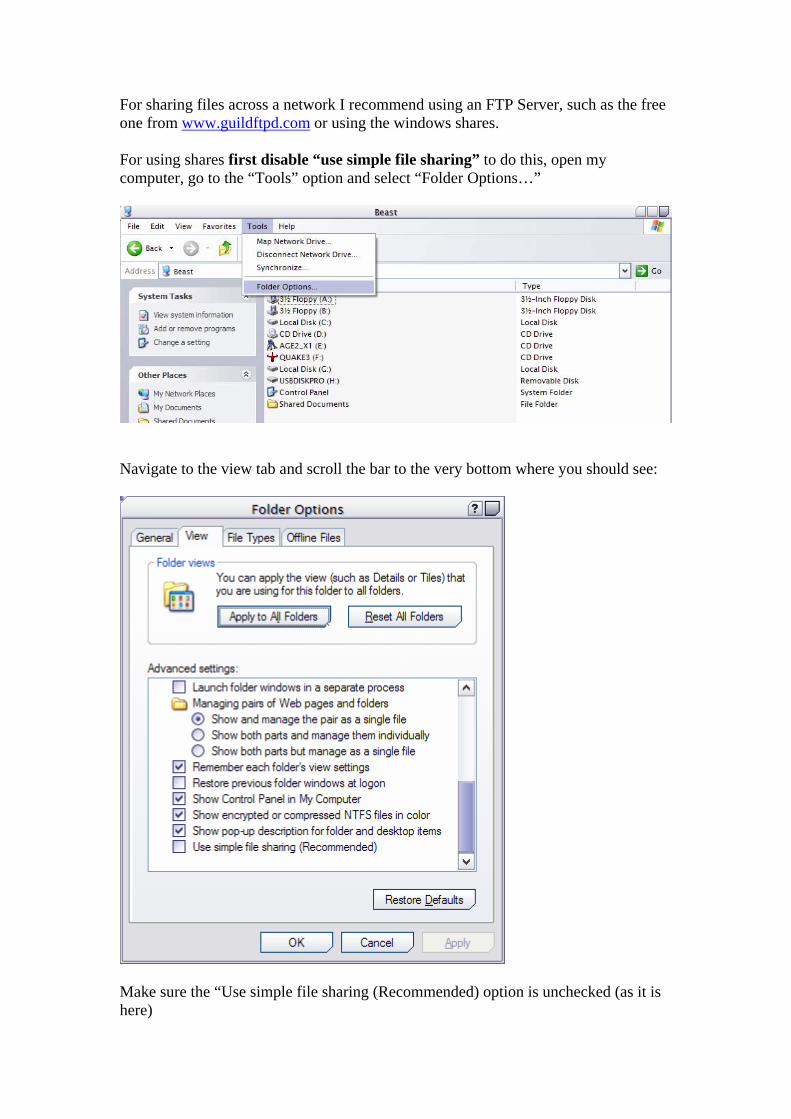
For sharing files across a network I recommend using an FTP Server, such as the free one from www.guildftpd.com or using the windows shares. For using shares first disable “use simple file sharing” to do this, open my computer, go to the “Tools” option and select “Folder Options…”
Navigate to the view tab and scroll the bar to the very bottom where you should see:
Make sure the “Use simple file sharing (Recommended) option is unchecked (as it is here)
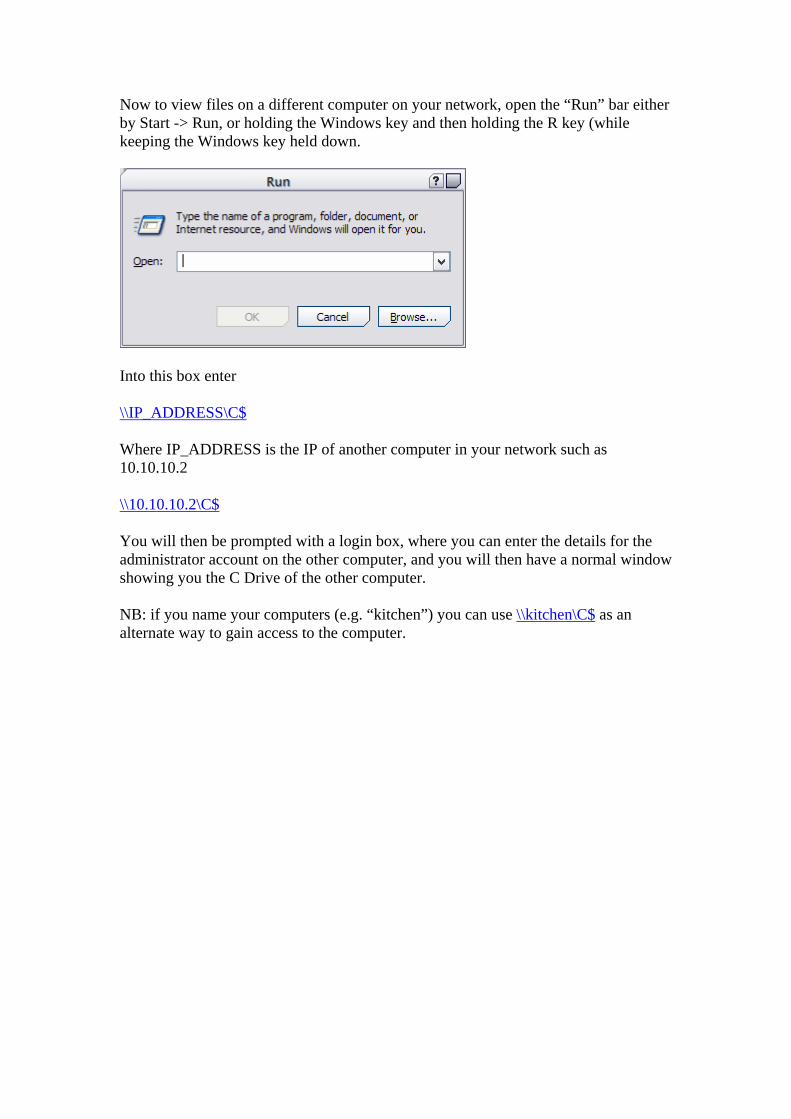
Now to view files on a different computer on your network, open the “Run” bar either by Start -> Run, or holding the Windows key and then holding the R key (while keeping the Windows key held down.
Into this box enter \\IP_ADDRESS\C$ Where IP_ADDRESS is the IP of another computer in your network such as 10.10.10.2 \\10.10.10.2\C$ You will then be prompted with a login box, where you can enter the details for the administrator account on the other computer, and you will then have a normal window showing you the C Drive of the other computer. NB: if you name your computers (e.g. “kitchen”) you can use \\kitchen\C$ as an alternate way to gain access to the computer.
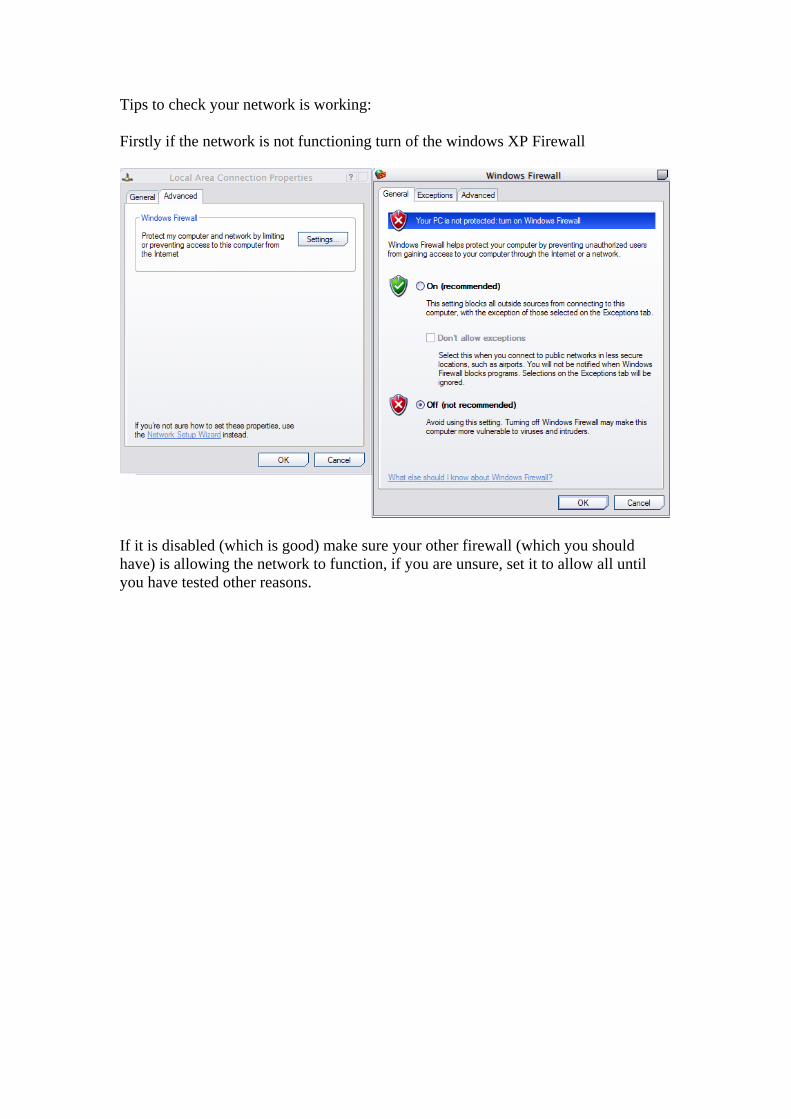
Tips to check your network is working: Firstly if the network is not functioning turn of the windows XP Firewall
If it is disabled (which is good) make sure your other firewall (which you should have) is allowing the network to function, if you are unsure, set it to allow all until you have tested other reasons.
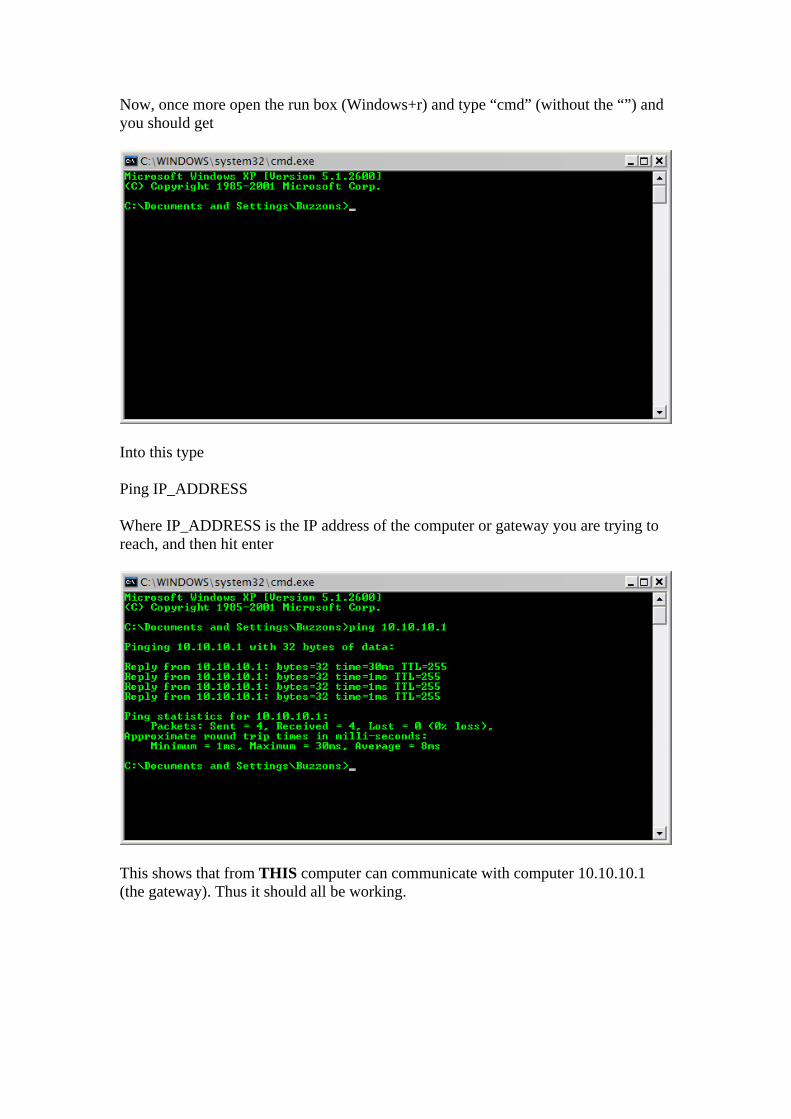
Now, once more open the run box (Windows+r) and type “cmd” (without the “”) and you should get
Into this type Ping IP_ADDRESS Where IP_ADDRESS is the IP address of the computer or gateway you are trying to reach, and then hit enter
This shows that from THIS computer can communicate with computer 10.10.10.1 (the gateway). Thus it should all be working.

I hope this tutorial has been of use to some of you, if it is at all confusing please check my flash tutorial as well as this takes you step by step through the setting up of the
network.
Thank you for reading and as ever all feedback is welcome good or bad. Please drop me a PM on the User
forums if you wish to comment.
Buzzons
Related Documents


![PRO DJ LINK Setup Guide · REMIX CDJ-2000nexus DJM-2000 CDJ-2000nexus Audio cable LAN cable (wired) Wireless Connection procedure Creating the [PLAYER No.] setting 1 Check that no](https://static.cupdf.com/doc/110x72/5f303754128c03088b1f6dad/pro-dj-link-setup-guide-remix-cdj-2000nexus-djm-2000-cdj-2000nexus-audio-cable-lan.jpg)