This document is prepared for MM Training. If interested for MM training in Pune, Please write to [email protected] with your contact details. SAP Installation Guide: On your hard disk, you will receive following folders • Virtual Sap-4.7 – This is the actual SAP Folder from where SAP will run • GUI640 – This is the software that installs SAP Logon Pad on your computer • VMware-player-1.0.5-56455 – This contains VMWare Player installation file Step 1: Install VMWare Player From the VMWare Player folder as mentioned above, run the executable setup file. Double click on the file and the installation will begin This is a very simple installation and just click on Next on every step and finally finishes the installation. Step 2: Install SAP Logon Pad From the GUI640 folder, go into the subsequent folders till the setup file as shown below Double Click on the setup file and it will run the installation

SAP Installation Guide
Dec 31, 2015
Welcome message from author
This document is posted to help you gain knowledge. Please leave a comment to let me know what you think about it! Share it to your friends and learn new things together.
Transcript

This document is prepared for MM Training. If interested for MM training in Pune, Please write to
[email protected] with your contact details.
SAP Installation Guide: � On your hard disk, you will receive following folders
• Virtual Sap-4.7 – This is the actual SAP Folder from where SAP will run
• GUI640 – This is the software that installs SAP Logon Pad on your computer
• VMware-player-1.0.5-56455 – This contains VMWare Player installation file
Step 1: Install VMWare Player � From the VMWare Player folder as mentioned above, run the executable setup file.
� Double click on the file and the installation will begin
� This is a very simple installation and just click on Next on every step and finally finishes the installation.
Step 2: Install SAP Logon Pad � From the GUI640 folder, go into the subsequent folders till the setup file as shown below
� Double Click on the setup file and it will run the installation

This document is prepared for MM Training. If interested for MM training in Pune, Please write to
[email protected] with your contact details.
� Click on next till you reach this screen and there you select only the first option SAP GUI as shown above
� Next to this is a very simple installation and just click Next, Install till you finish the installation
� Once the SAP Logon pad and VMWare Player are installed, you will see the two Icons on desktop
.
Step 3: Add server details to SAP Logon Pad � After installing these two software, we need to add server details to SAP logon pad
� Double click on SAP Logon pad. You will see a blank logon pad
� Click on New Item button
� This will show a pop and add the server details as given in below screen

This document is prepared for MM Training. If interested for MM training in Pune, Please write to
[email protected] with your contact details.
� Enter the server details as shown in above screen and click on Add Button.
� This will add the server to SAP Logon pad
Step 4: Logon to SAP � Connect the hard disk to computer
� We need to connect the Virtual Sap-4.7 folder on hard disk to computer through VMWare player. For this
double click on the VMWare player icon on desktop.
� This will open the browse folder screen in VMWare screen as shown below

This document is prepared for MM Training. If interested for MM training in Pune, Please write to
[email protected] with your contact details.
� Select the location of “Virtual Sap-4.7” folder on your hard disk by going through my computer and then
selecting the hard disk drive and then select the folder
� After entering into the folder you will see the screen as below
� Select the first option SAP 4.7 and click on open.

This document is prepared for MM Training. If interested for MM training in Pune, Please write to
[email protected] with your contact details.
� The VMWare will try to restore the virtual machine status as shown in below screen
� After this, system will show SAPMMC file as shown below.
� Once this window is open, just minimize this window. Don’t close this window, just minimize it.
� Before this screen, if you are using this for the first time, then you will get a pop up showing network
connection type to be used. On this window, choose “Create”. And this will create the connection
� Sometimes, there may be message that Virtual Machine status is different ETC. Click on OK
� This process will connect the computer to virtual sever on hard disk. Then you can log on to SAP.
� SAP Logon: Double click on SAP Logon pad icon on desktop

This document is prepared for MM Training. If interested for MM training in Pune, Please write to
[email protected] with your contact details.
� This will open the logon pad. Select the server which we added in the last step and click on Log On button
� This will open the sap logon window as shown below
� Enter the logon details as Client – 800, Username – sapuser and password – sapuser
� This will logon to SAP
Step 5: Close SAP
� For this always first close all SAP sessions and then close the VMWare window by close button.
� This will close the SAP application on your computer.

This document is prepared for MM Training. If interested for MM training in Pune, Please write to
[email protected] with your contact details.
Network Settings: For connecting the virtual machine through VMWare player, you need to do the following settings in network
Step1: Add Microsoft Loopback Adapter
� We need to add Microsoft Loopback adapter to the network connections list. For this go to control panel and
click on “Add Hardware”.
� One Pop up window will appear. Click on Next button and follow the steps as shown in screens given below
� Select the first option as shown above and click on next button.
� Next window will appear as below. This is the list of Hardware available. Scroll to the bottom of the list and
select “add a new hardware device” option and click on next as show in below screen.
This document is prepared for MM Training. If interested for MM training in Pune, Please write to
[email protected] with your contact details.
� After this, in the next window select the option as below
� In the next window, select option “network adapters” and click on next button
This document is prepared for MM Training. If interested for MM training in Pune, Please write to
[email protected] with your contact details.
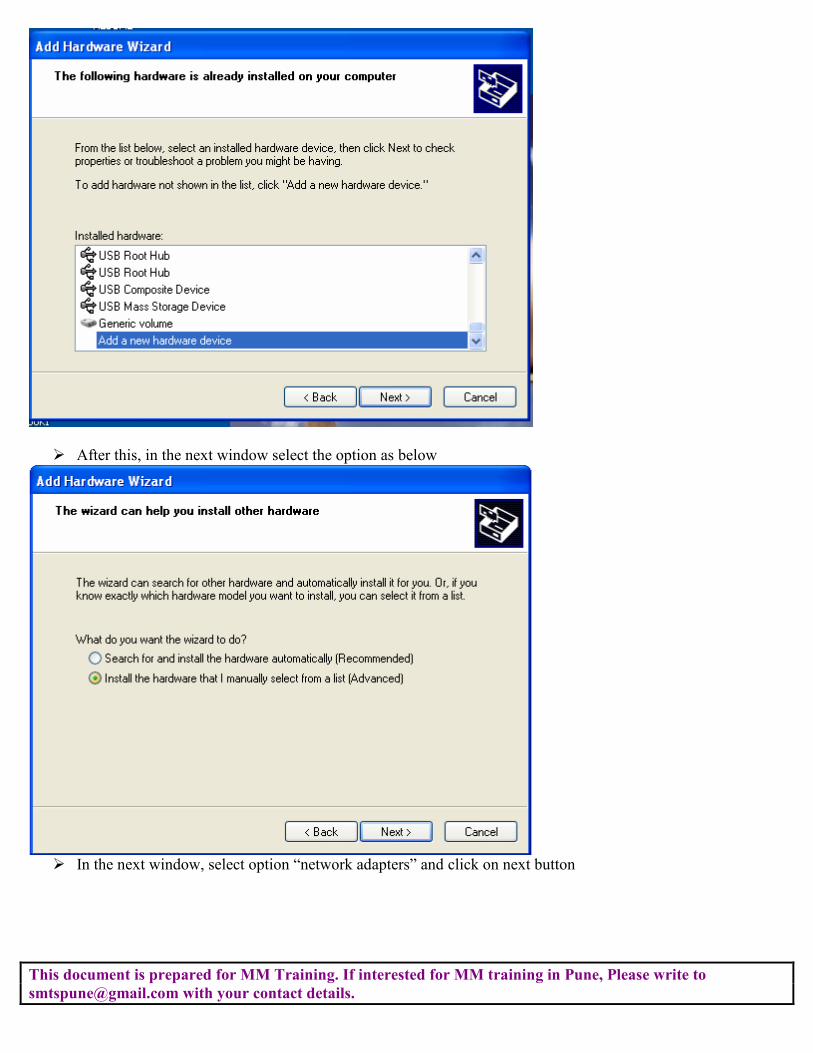
� In the next window as shown above, in the left side manufacturer column, select Microsoft and in the right
side column Network Adapters, select Microsoft Loopback Adapter
� Click on next.
This document is prepared for MM Training. If interested for MM training in Pune, Please write to
[email protected] with your contact details.
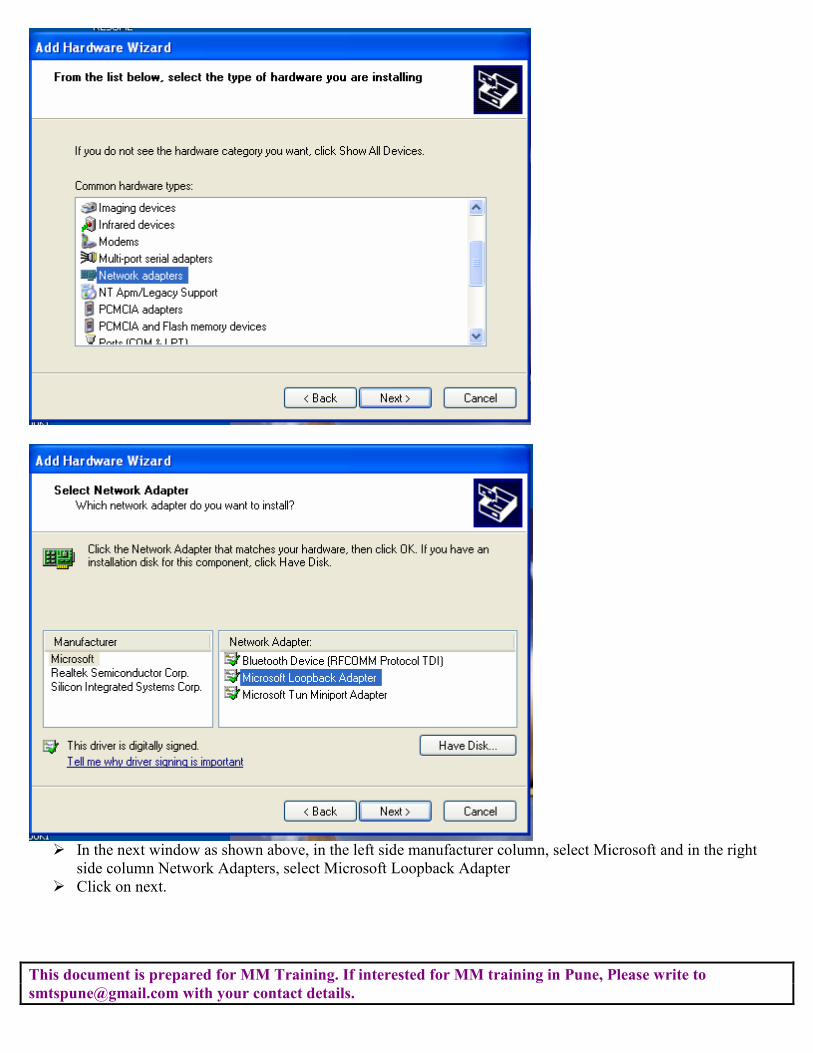
� Above screen will appear. To start installation click on next.
� Once the installation is complete, above window will appear. Click on finish.
Step 2: Maintain network IPs
� After Installing the loopback adapter, follow the procedure given below to configure network IP addresses.
� Go to control panel and select netwok connections as shown below
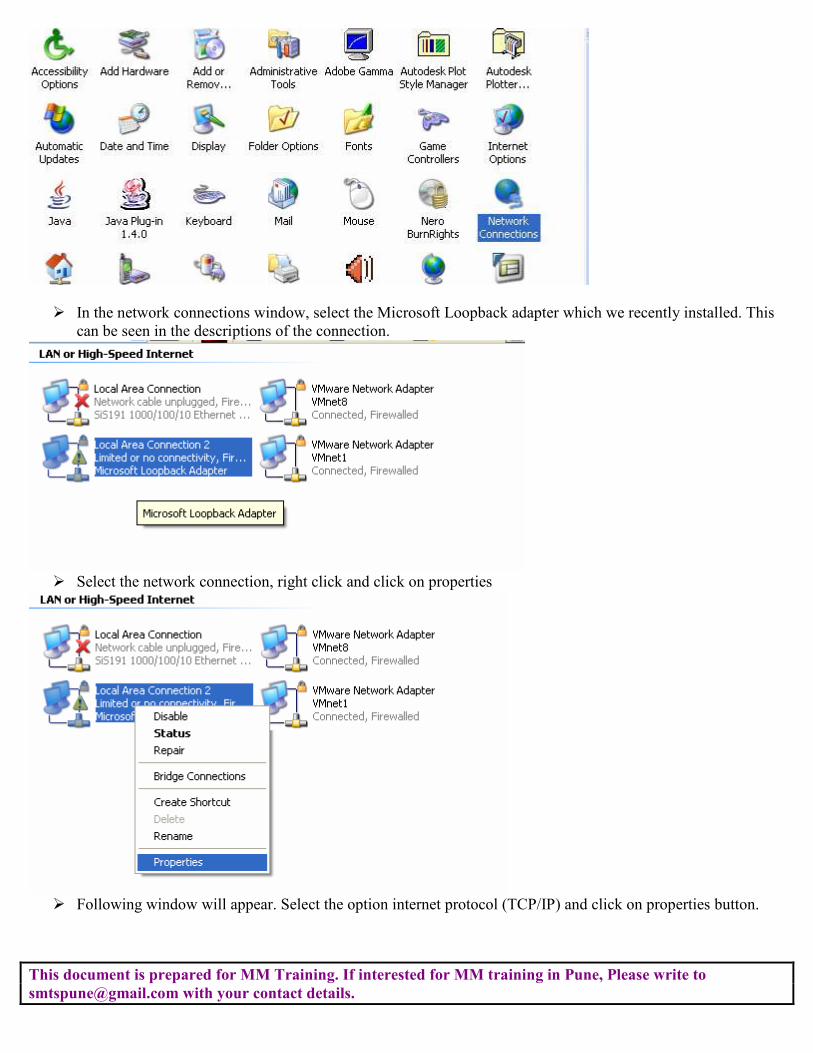
This document is prepared for MM Training. If interested for MM training in Pune, Please write to
[email protected] with your contact details.
� In the network connections window, select the Microsoft Loopback adapter which we recently installed. This
can be seen in the descriptions of the connection.
� Select the network connection, right click and click on properties
� Following window will appear. Select the option internet protocol (TCP/IP) and click on properties button.

This document is prepared for MM Training. If interested for MM training in Pune, Please write to
[email protected] with your contact details.
� Give the following IP address and click OK.

This document is prepared for MM Training. If interested for MM training in Pune, Please write to
[email protected] with your contact details.
� Simillarly there are other 2 network connection as VMNET1 & VMNET8. We need to maontain IP addresses
for both as follows.
� By following the same procedure of maintaining the IP addresses, give following IP address to VMNET1
adapter
� Maintain following IP address for VMNET8 adapter
Related Documents