Prinect Portal | USER’s manual

Welcome message from author
This document is posted to help you gain knowledge. Please leave a comment to let me know what you think about it! Share it to your friends and learn new things together.
Transcript
Prinect Portal | USER’s manual
prinect portal manual 2
Index1 Set up and log in with Prinect Portal 3
2 Home screen and jobs overview 5
3 Uploading files to a new job 5
4 Assigning pages 8
5 Booklet proof 9
6 Separate page proof 11
7 Adding contributors 12
3prinect portal manual
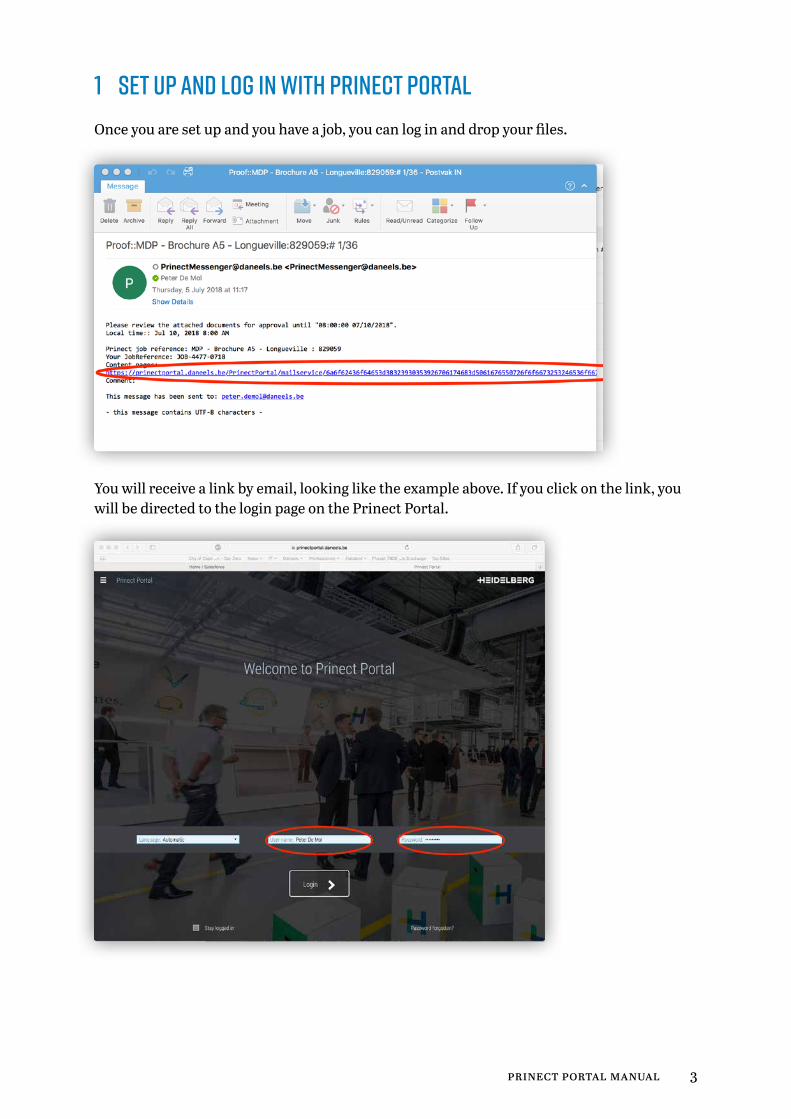
1 Set up and log in with Prinect PortalOnce you are set up and you have a job, you can log in and drop your files.
You will receive a link by email, looking like the example above. If you click on the link, you will be directed to the login page on the Prinect Portal.
prinect portal manual 4
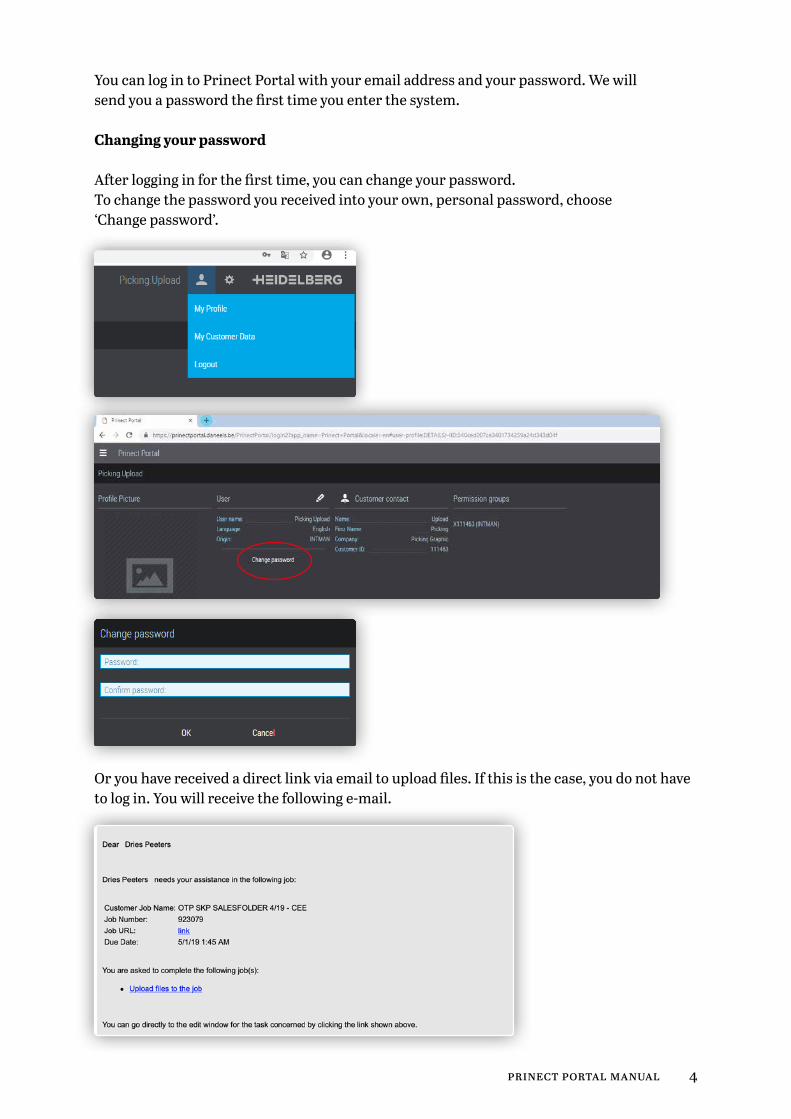
You can log in to Prinect Portal with your email address and your password. We will send you a password the first time you enter the system.
Changing your password
After logging in for the first time, you can change your password. To change the password you received into your own, personal password, choose ‘Change password’.
Or you have received a direct link via email to upload files. If this is the case, you do not have to log in. You will receive the following e-mail.
5prinect portal manual
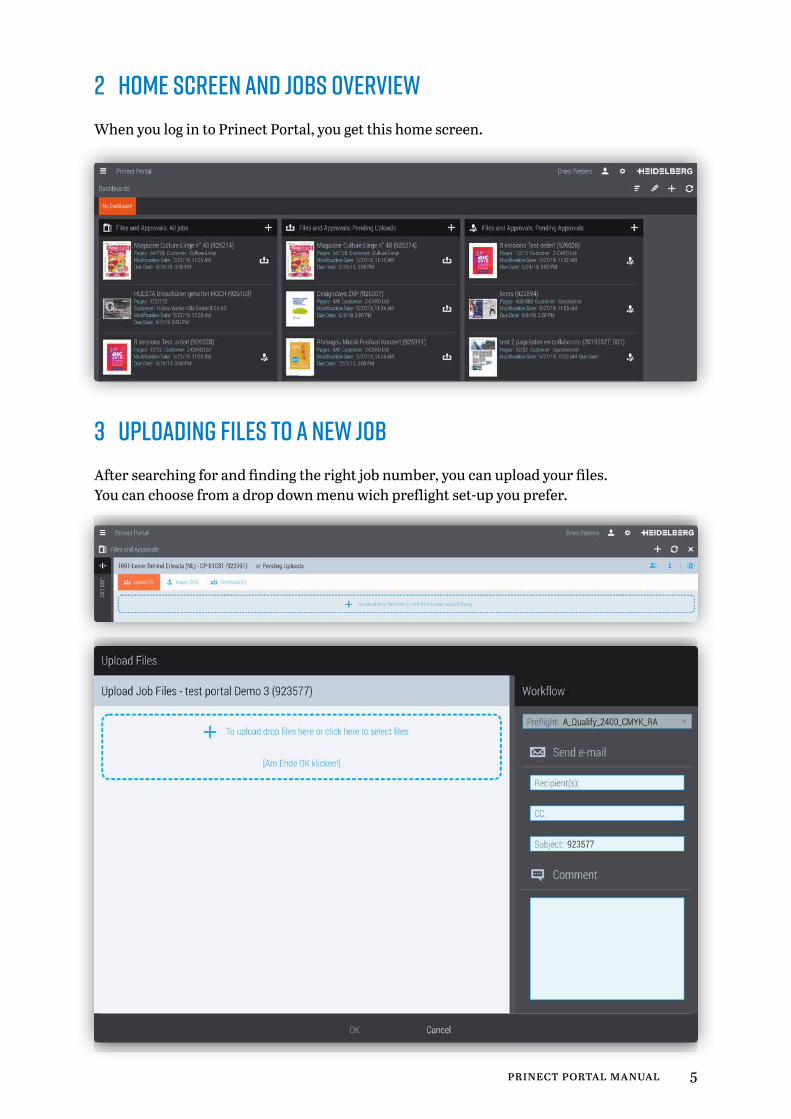
2 Home screen and jobs overviewWhen you log in to Prinect Portal, you get this home screen.
3 Uploading files to a new jobAfter searching for and finding the right job number, you can upload your files.You can choose from a drop down menu wich preflight set-up you prefer.
prinect portal manual 6
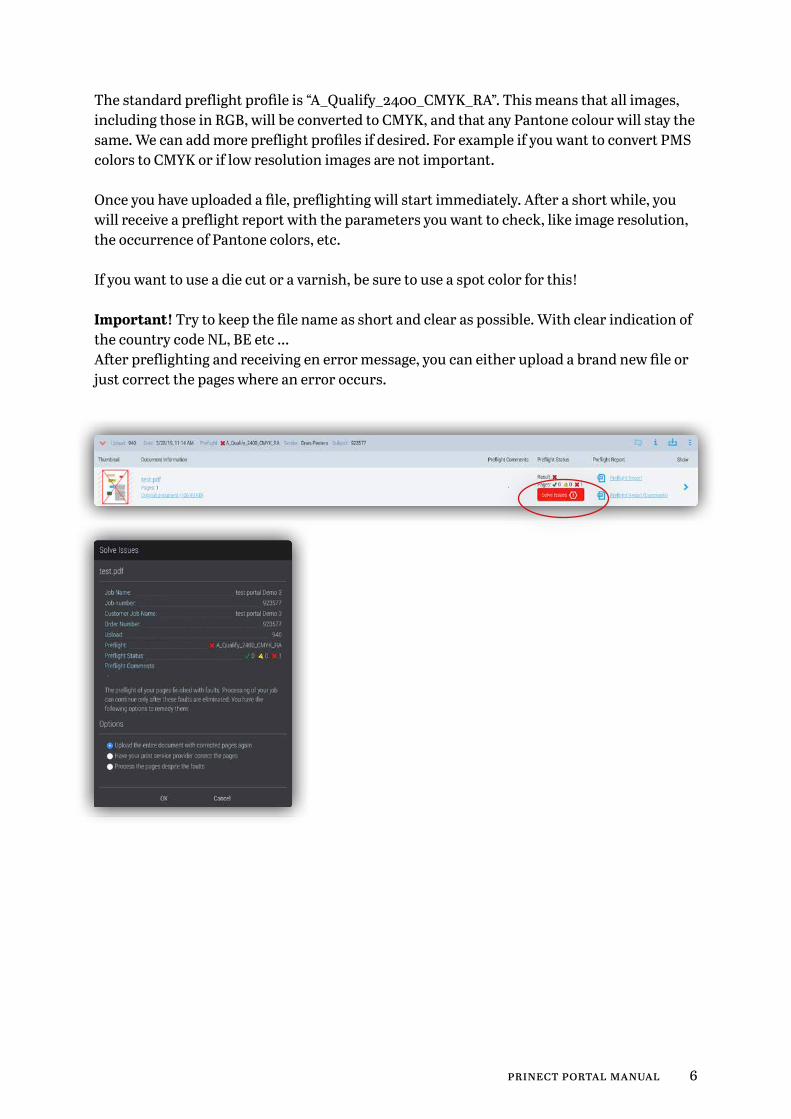
The standard preflight profile is “A_Qualify_2400_CMYK_RA”. This means that all images, including those in RGB, will be converted to CMYK, and that any Pantone colour will stay the same. We can add more preflight profiles if desired. For example if you want to convert PMS colors to CMYK or if low resolution images are not important.
Once you have uploaded a file, preflighting will start immediately. After a short while, you will receive a preflight report with the parameters you want to check, like image resolution, the occurrence of Pantone colors, etc.
If you want to use a die cut or a varnish, be sure to use a spot color for this!
Important! Try to keep the file name as short and clear as possible. With clear indication of the country code NL, BE etc ...After preflighting and receiving en error message, you can either upload a brand new file or just correct the pages where an error occurs.
7prinect portal manual
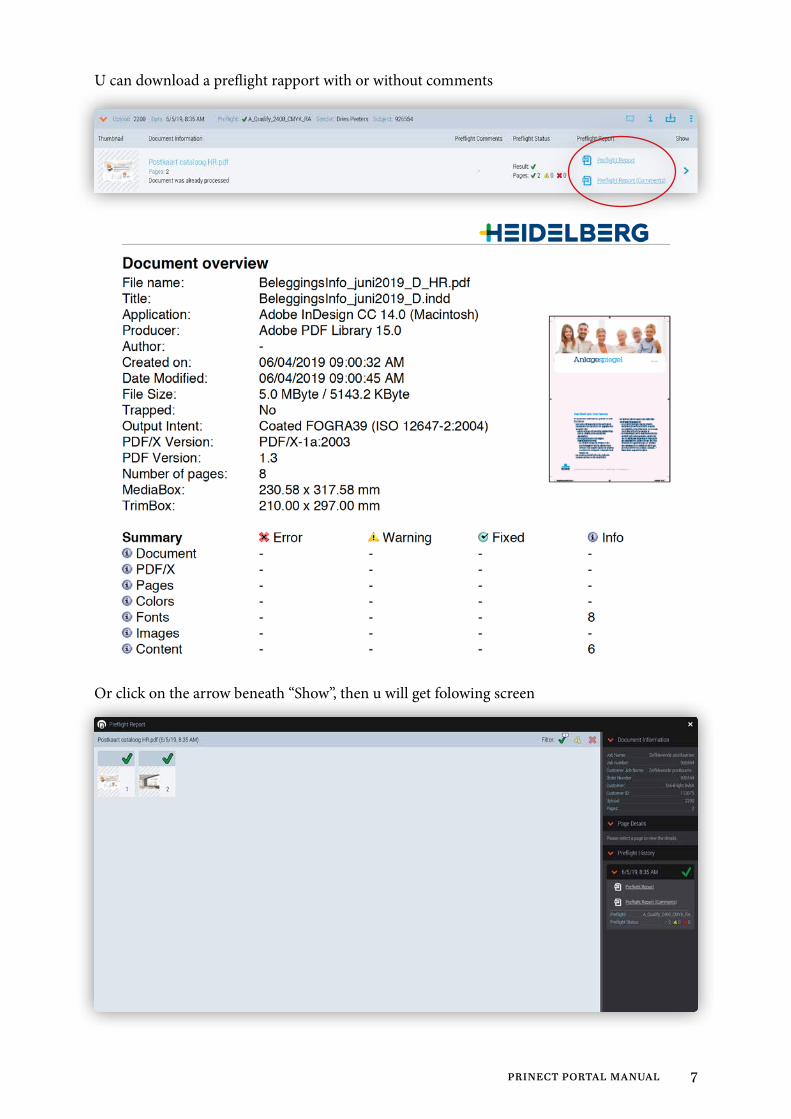
U can download a preflight rapport with or without comments
Or click on the arrow beneath “Show”, then u will get folowing screen
prinect portal manual 8
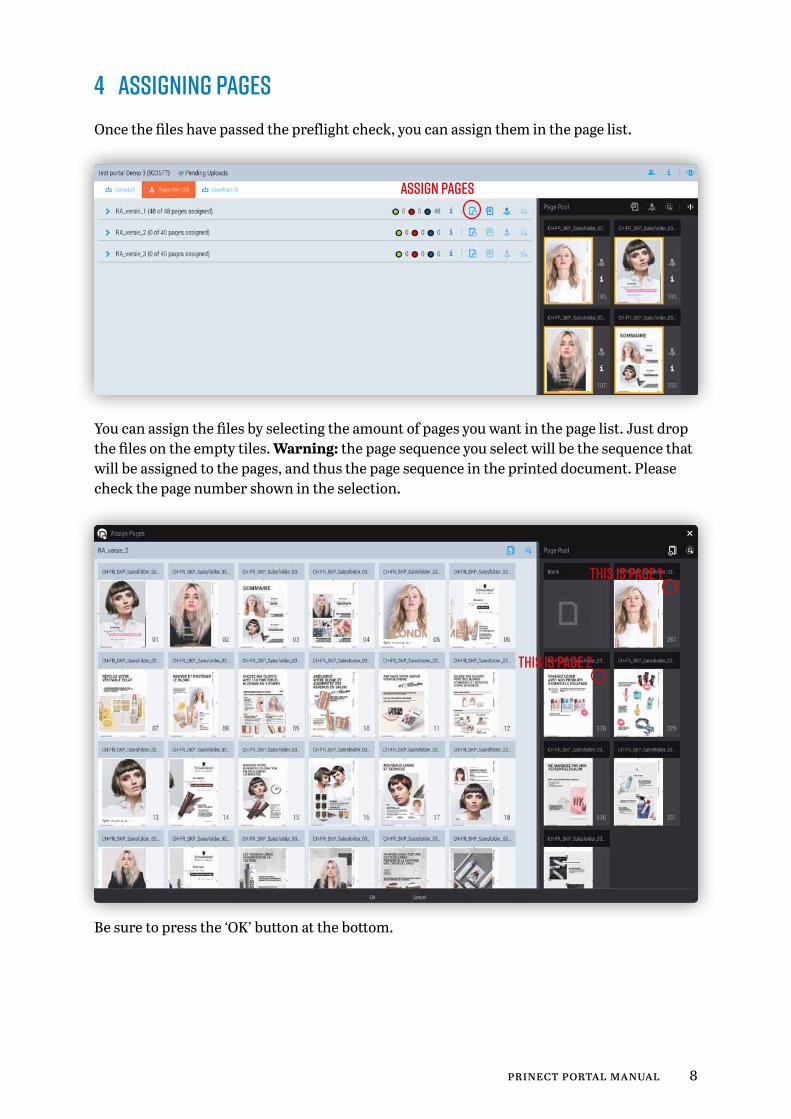
4 Assigning pagesOnce the files have passed the preflight check, you can assign them in the page list.
You can assign the files by selecting the amount of pages you want in the page list. Just drop the files on the empty tiles. Warning: the page sequence you select will be the sequence that will be assigned to the pages, and thus the page sequence in the printed document. Please check the page number shown in the selection.
Be sure to press the ‘OK’ button at the bottom.
This is page 1
This is page 2
ASSIGN PAGES

9prinect portal manual
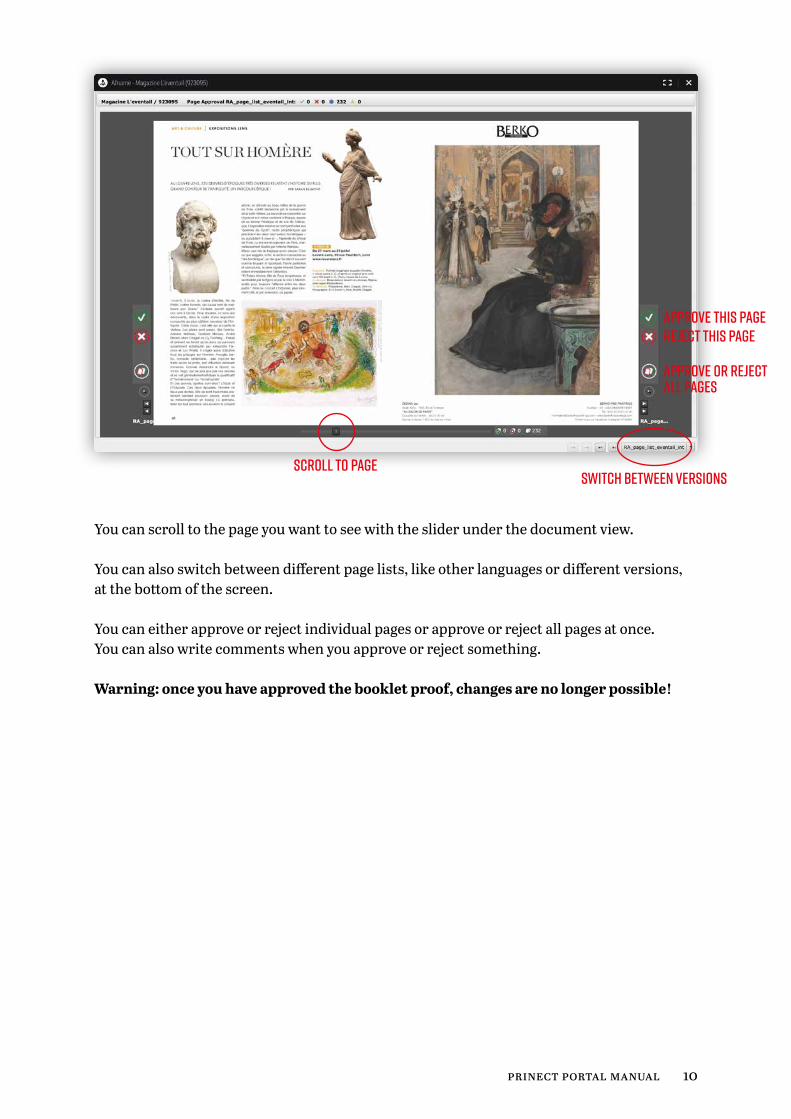
5 Booklet proofOnce the pages are assigned, you can open a booklet to be approved.
You will be asked to approve the pages and will see the following screen.
prinect portal manual 10
You can scroll to the page you want to see with the slider under the document view.
You can also switch between different page lists, like other languages or different versions, at the bottom of the screen.
You can either approve or reject individual pages or approve or reject all pages at once.You can also write comments when you approve or reject something.
Warning: once you have approved the booklet proof, changes are no longer possible!
SCROLL TO PAGE
approve this pagereject this page
approve or reject all pages
SWITCH BETWEEN VERSIONS
11prinect portal manual
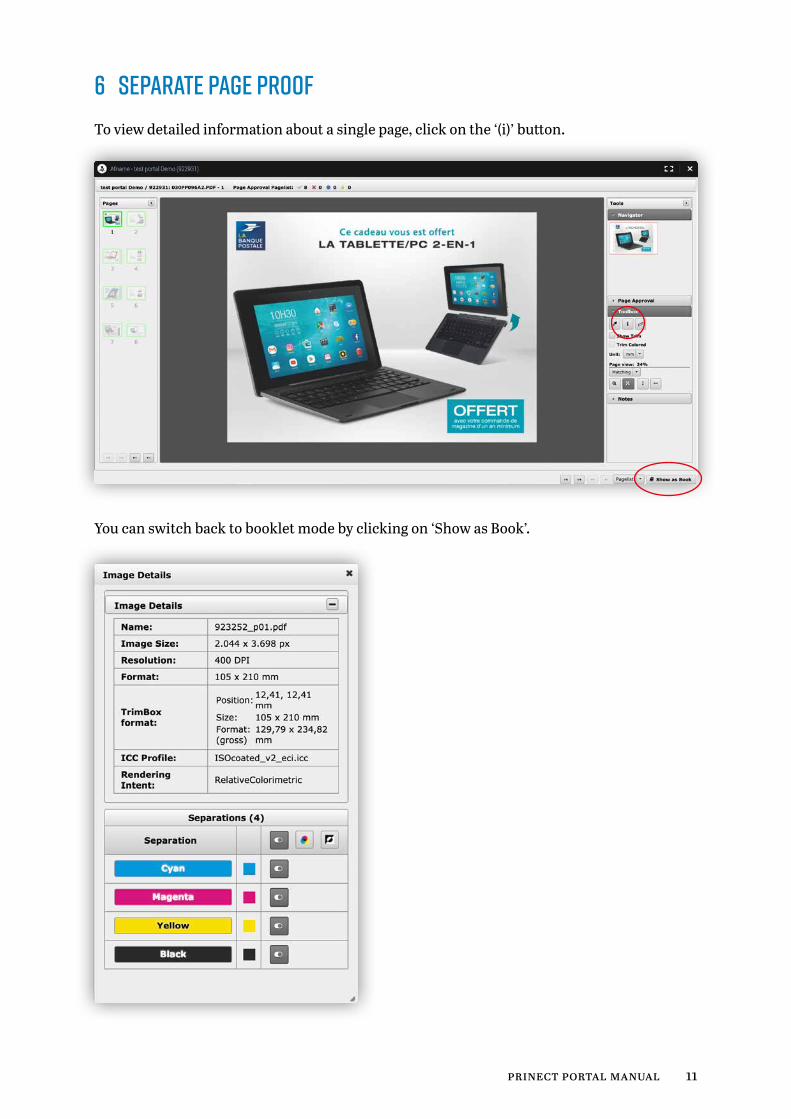
6 Separate page proofTo view detailed information about a single page, click on the ‘(i)’ button.
You can switch back to booklet mode by clicking on ‘Show as Book’.

prinect portal manual 12
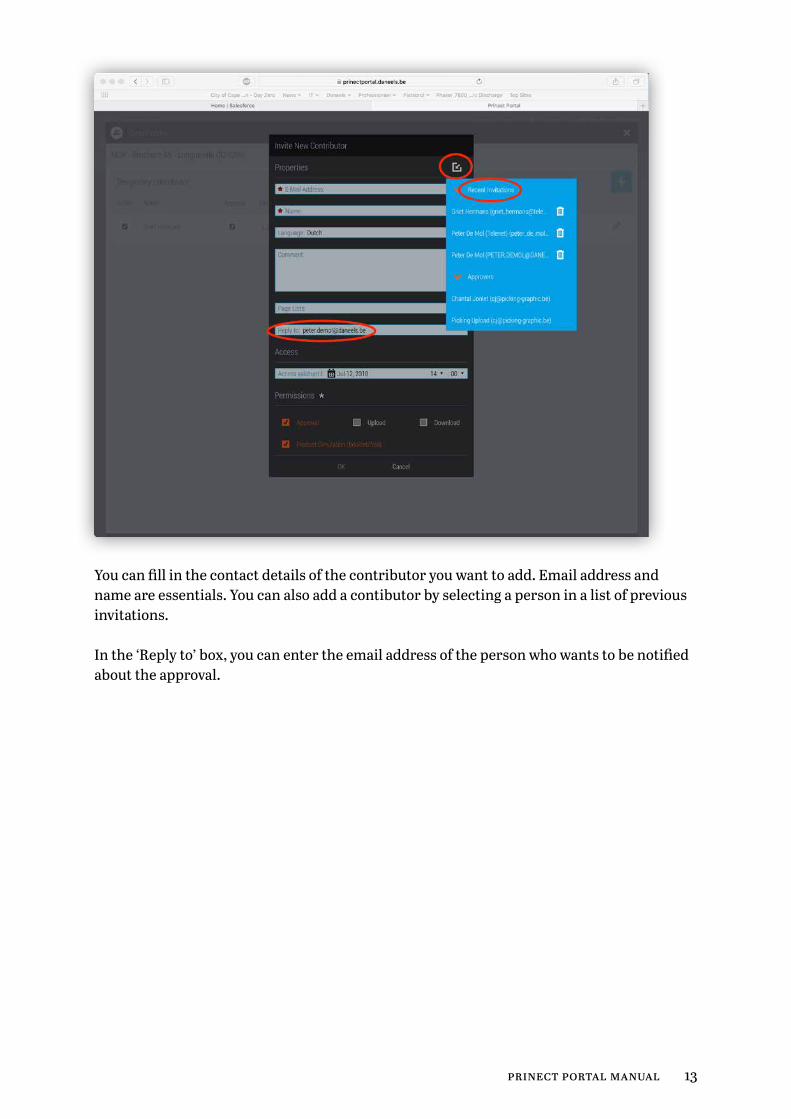
7 Adding contibutorsOnce you are logged into the Portal, the system shows you the pages for approval. You can add a contributor at the top right of the page.
After clicking the ‘+’-button, you can add contributors.
13prinect portal manual
You can fill in the contact details of the contributor you want to add. Email address and name are essentials. You can also add a contibutor by selecting a person in a list of previous invitations.
In the ‘Reply to’ box, you can enter the email address of the person who wants to be notified about the approval.
prinect portal manual 14
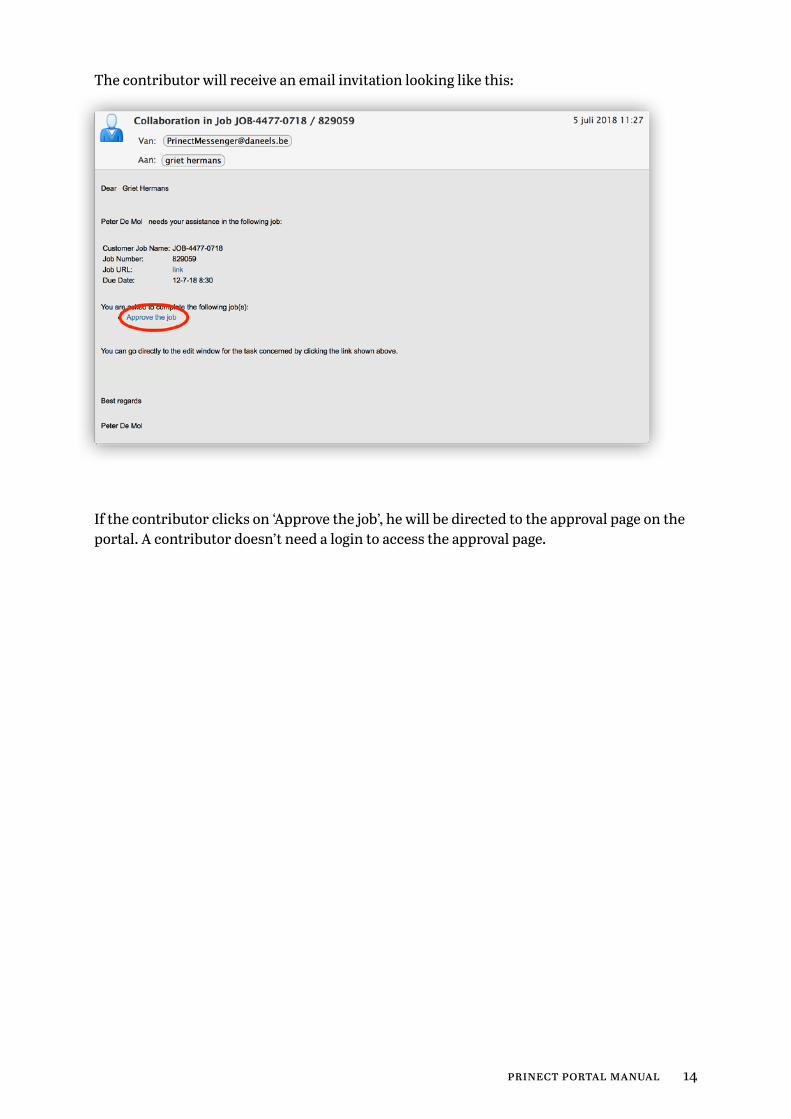
The contributor will receive an email invitation looking like this:
If the contributor clicks on ‘Approve the job’, he will be directed to the approval page on the portal. A contributor doesn’t need a login to access the approval page.
15prinect portal manual
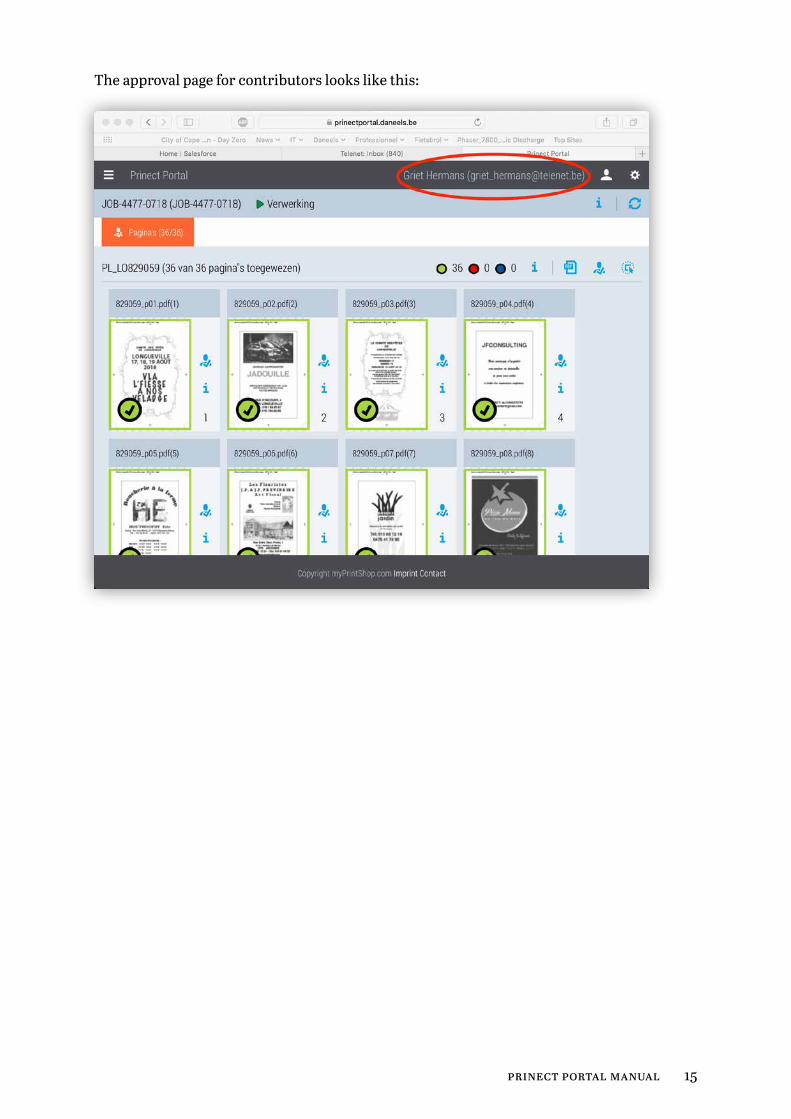
The approval page for contributors looks like this:
prinect portal manual 16
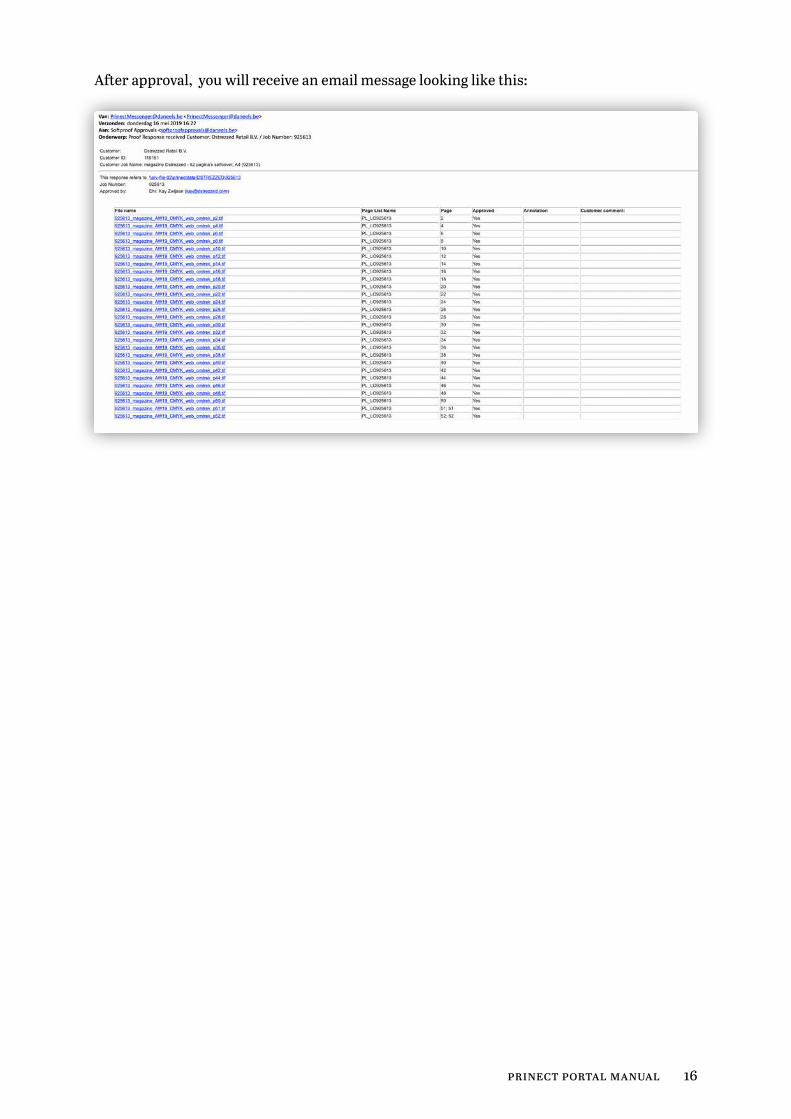
After approval, you will receive an email message looking like this:
Related Documents