PLATES PLATTERS & BOWLS Ceramic Arts Select Series Editor Sherman Hall

Welcome message from author
This document is posted to help you gain knowledge. Please leave a comment to let me know what you think about it! Share it to your friends and learn new things together.
Transcript

PLATESPLATTERS & BOWLS
Ceramic Arts Select Series
Editor Sherman Hall
The American Ceramic SocietyCeramicArtsDaily.org
Printed in China
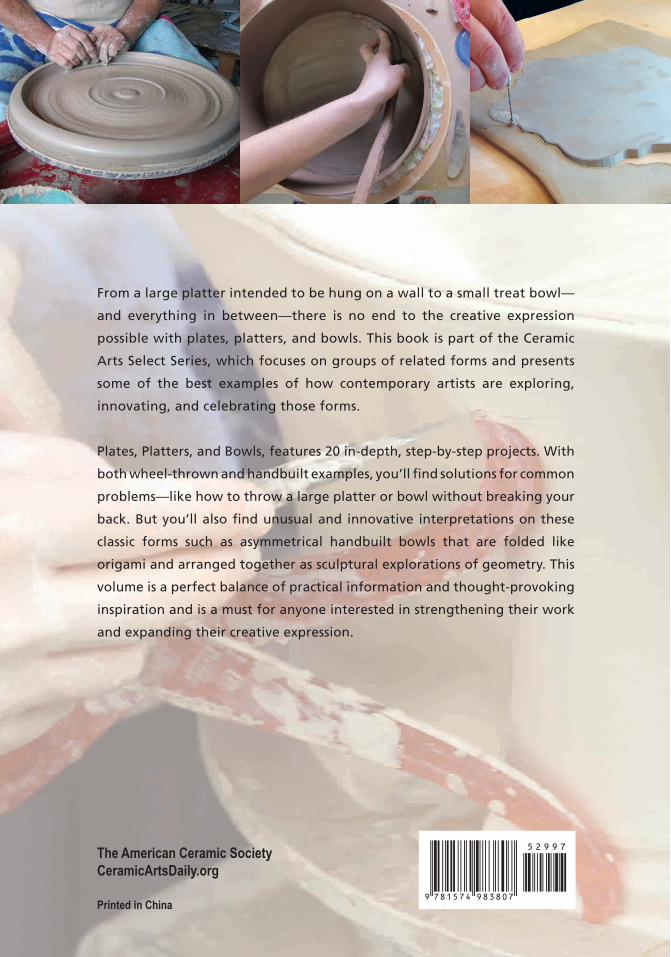
From a large platter intended to be hung on a wall to a small treat bowl—
and everything in between—there is no end to the creative expression
possible with plates, platters, and bowls. This book is part of the Ceramic
Arts Select Series, which focuses on groups of related forms and presents
some of the best examples of how contemporary artists are exploring,
innovating, and celebrating those forms.
Plates, Platters, and Bowls, features 20 in-depth, step-by-step projects. With
both wheel-thrown and handbuilt examples, you’ll find solutions for common
problems—like how to throw a large platter or bowl without breaking your
back. But you’ll also find unusual and innovative interpretations on these
classic forms such as asymmetrical handbuilt bowls that are folded like
origami and arranged together as sculptural explorations of geometry. This
volume is a perfect balance of practical information and thought-provoking
inspiration and is a must for anyone interested in strengthening their work
and expanding their creative expression.
PLA
TE
S,P
LA
TT
ER
S,A
ND
BO
WLS
Hall
CER
AM
IC A
RTS SELEC
T SERIES

ii
PLATESPLATTERS & BOWLS
BOOK1CA161Plates_i-29.indd 2 6/20/16 10:57 AM

iv
The American Ceramic Society 600 N. Cleveland Ave., Suite 210 Westerville, OH 43082
© 2016 by The American Ceramic Society, All rights reserved.
ISBN: 978-1-57498-380-7 (Paperback)
ISBN: 978-1-57498-589-4 (PDF)
No part of this book may be reproduced, stored in a retrieval system or transmitted in any form or by any means, electronic, mechanical, photocopying, microfilming, recording or otherwise, without written permission from the publisher, except by a reviewer, who may quote brief passages in review.
Authorization to photocopy for internal or personal use beyond the limits of Sections 107 and 108 of the U.S. Copyright Law is granted by The American Ceramic Society, provided that the appropriate fee is paid directly to the Copyright Clearance Center, Inc., 222 Rosewood Drive, Danvers, MA 01923 U.S.A., www.copyright.com. Prior to photocopying or downloading items for educational classroom use, please contact Copyright Clearance Center, Inc. This consent does not extend to copyright items for general distribution or for advertising or promotional purposes or to republishing items in whole or in part in any work in any format. Requests for special photocopying permission and reprint requests should be directed to Director, Publications, The American Ceramic Society, 600 N. Cleveland Ave., Westerville, Ohio 43082 USA.
Every effort has been made to ensure that all the information in this book is accurate. Due to differing conditions, equipment, tools, and individual skills, the publisher cannot be responsible for any injuries, losses, and other damages that may result from the use of the information in this book. Final determination of the suitability of any information, procedure or product for use contemplated by any user, and the manner of that use, is the sole responsibility of the user. This book is intended for informational purposes only.
The views, opinions and findings contained in this book are those of the authors. The publishers, editors, reviewers, and authors assume no responsibility or liability for errors or any consequences arising from the use of the information contained herein. Registered names and trademarks, etc., used in this publication, even without specific indication thereof, are not to be considered unprotected by the law. Mention of trade names of commercial products does not constitute endorsement or recommendation for use by the publishers, editors, or authors.
Publisher: Charles Spahr, Executive Director, The American Ceramic Society.
Series Design and Graphic Production: Paula John, Boismier John Design
Assistant Editor: Forrest Sincoff Gard
Cover images: top: Bowl by Jared Zehmer; right: teapot by Jeffrey Nichols, bottom: mug by Lauren Karle.
Frontispiece: Fruit of the Heart, 7½ (19 cm) in height, press-molded vessel, altered and attached to wheel-thrown foot, carved exterior with glazed interior, by Antoinette Badenhorst. Photo: Koos Badenhorst.
Printed in China
BOOK1CA161Plates_i-29.indd 4 6/20/16 10:57 AM

v
Table of Contents
1 FOOTED SLAB PLATES by Liz Zlot Summerfield
4 VOLUMINOUS HANDBUILT PLATTERby Ben Carter
7 THROWN HANDLED PLATTERSby Mike Guassardo
11 FULL-TEXTURE PLATTER by Annie Chrietzberg
17 LARGE PATTERNED PLATTERS by Christina Bryer
21 SLIP INLAID PLATES by Robert Strasser
25 MARBLED PLATTERSby Michelle Erickson and Robert Hunter
30 BIG PLATTERS THE EASY WAY by Yoko Sekino-Bové
36 LARGE PLATTERS WITH ALTERED RIMSby Samuel L. Hoffman
40 SPLIT-RIM BOWLby Emily Donahoe
BOOK1CA161Plates_i-29.indd 5 6/20/16 10:57 AM
vi
Table of Contents
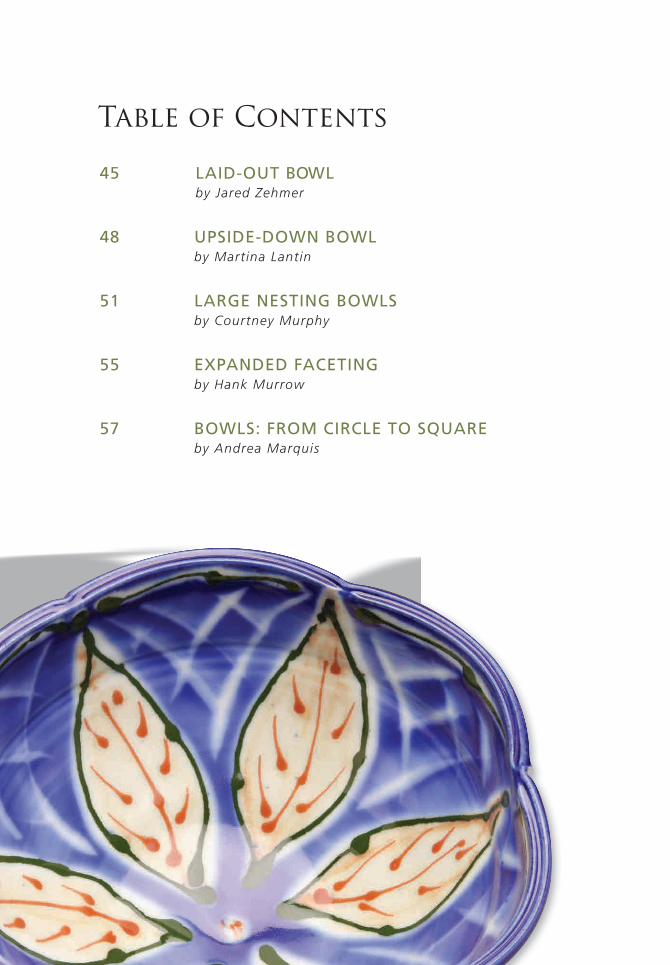
45 LAID-OUT BOWLby Jared Zehmer
48 UPSIDE-DOWN BOWLby Martina Lantin
51 LARGE NESTING BOWLSby Courtney Murphy
55 EXPANDED FACETINGby Hank Murrow
57 BOWLS: FROM CIRCLE TO SQUAREby Andrea Marquis
vi
BOOK1CA161Plates_i-29.indd 6 6/20/16 10:57 AM

vii
64 BLOCK MOLDED BOWLby Tom Quest
68 HUMP MOLDED OVAL BOWLby Elisa Helland-Hansen
74 CLOVER DISH WITH SLUMPED BOTTOM by Joe Singewald
79 ALTERED PORCELAIN BOWLby Antoinette Badenhorst
83 SPLASH BOWLSby Aysha Peltz
BOOK1CA161Plates_i-29.indd 7 6/20/16 10:57 AM
viii
BOOK1CA161Plates_i-29.indd 8 6/20/16 10:57 AM

1
FOOTED SLAB PLATESby Liz Zlot Summerfield
Footed plate with underglaze, slip-trailed, and sgraffito decoration.
Handbuilt slab plates are a lovely addition to any potter’s repertoire. �ey are versatile in use, and o�er an open canvas to play with a variety of sur-face treatments. Although they only consist of two components, a slab and a foot, they are o�en load-ed with pesky little problems. Here’s a technique that is sure to provide you with a proud product.
The Issues�e weakest link in a slab plate is the foot. It’s o�en uneven, o� center, and unconvincing. A common technique is to add a coil, place the plate on a potter’s wheel and throw it onto the slab. �is o�en leaves a bump where the coils are joined and it has a tendency to crack. �e �x to these issues is to create a foot ring and apply it as one cohesive piece.
Constructing the PlateStarting out, consider keeping the plate shape simple: try a square, circle, or rectangle. Draw and cut out the shape of your plate on paper and make two copies of this shape. Save one to cut out the plate shape, and on the other draw a foot ring—this may take some experimenting as the size of the foot ring will alter the look and stance of the plate.
Cut out the foot ring by folding the paper in half, then cutting along your drawn lines. Once the paper foot is cut out, you’ll be le� with a stencil to help center the foot ring on the slab (see 1).
Roll out a slab large enough to trace around one plate template and one foot ring template. For smaller plates, I roll to a thickness of about
BOOK1CA161Plates_i-29.indd 1 6/20/16 10:57 AM

2
3. Gently press down in the center of the slab to shape the plate. Rotate the plate and gently lift all four sides.
4. Use a slip from your clay body to create a raised line with a slip trailer. Allow the lines to dry before applying underglaze.
1. Create a pattern, stencil, and foot ring out of paper. Trace and cut the pattern and the stencil on a slab.
2. Attach the foot ring and refine its form to elimi-nate any unevenness and help connect the foot to the plate.
⅜–½ inch. �is thickness alleviates warping during the drying and �ring processes. A�er rolling your slabs, it’s important to run a rubber rib along the surface of both sides of the slab. �is compresses the clay particles and removes any canvas texture from the working surface. �roughout the rest of the process, work on untextured surfaces such as drywall boards or a smooth fabric.
Trace the patterns with a needle tool before cutting them out with a knife. Hold the knife perpendicular to the slab and cut in one even motion (1).
Applying the FootPlace the stencil onto the cut out slab and trace the interior ring with your needle tool. �is traced line will act as a guide as to where to place the foot ring and keep it centered (see 1). Since
both the clay slab and foot ring are the same consistency and very wet, you only need water to attach the foot ring to the slab. Brush water onto the slab and put the foot ring in place using the traced lines for guidance. Gently apply pres-sure with your thumb and index �nger to a�x the foot ring to the slab. Re�ne the �nished foot ring to follow your aesthetic. Avoid using any ad-ditional water as you re�ne it and smooth just with your �ngers. A rubber-tipped tool is use-ful in cleaning and blending the connection be-tween the slab and the foot ring. �e �nal step in applying the foot ring is to use a small roller to eliminate unevenness (2). Leave the plate upside down until it’s ready to be �ipped and formed.
Shaping the PlateSuccess in handbuilding functional forms is about knowing the correct timing to touch the
BOOK1CA161Plates_i-29.indd 2 6/20/16 10:57 AM

3
6. Carve subtractive lines into the plate using a sgraffito tool or sharp pointed tool.
7. Add accent colors by applying underglaze us-ing a slip trailer or brush.
5. Apply 1–2 coats of underglaze then gently scrape underglaze off the raised slip-trailed lines.
The completed plate illustrating how the foot ring becomes an essential element of the whole design.
clay. When the plate reaches so� leather hard, �ip it over onto its foot and place it onto a small board. Next, place the board on a banding wheel. Place your �ngers under the plate and your thumbs on top of the plate and gently press down in the center (3)—you’ll feel the foot ring under your thumbs. Press against the foot ring to cre-ate more depth in the plate. Use your �ngers to gently li� the sides of the plate. Slowly work your way around the plate by spinning the banding wheel. Finally, look at the edges of the plate from eye level and make sure there is an even curve on all four sides. Gently cover the plate with plastic until it becomes sti� leather hard and appropri-ate for surface decoration.
Slip-Trailing and Carving SurfacesWhen the plate reaches leather hard, it’s at the appropriate stage to slip trail, carve, and apply
underglaze, if desired. To create a raised sur-face, but not a change in color, use a slip with a yogurt-like consistency for slip trail application (4). Allow the lines to dry before brushing the entire plate with 1–2 coats of white underglaze. Once the underglaze is dry to the touch, take a metal rib and gently scrape it o� the raised slip-trailed surface (5). �is exposes the red clay and accentuates the slip-trailed drawing. To contrast the raised surface, carve accent lines using a sgra�to tool (6). Apply colored under-glaze using a slip trailer or a brush for a small amount of accent color (7). Allow the plate to slowly become bone dry under thin plastic to eliminate warping.
Once the plate is bisque �red, damp sponge to clean the surface before applying glaze. For brushing, apply 1–2 coats of glaze the consisten-cy of skim milk with a so� moppy brush and �re.
BOOK1CA161Plates_i-29.indd 3 6/20/16 10:57 AM
PLATESPLATTERS & BOWLS
Ceramic Arts Select Series
Editor Sherman Hall
The American Ceramic SocietyCeramicArtsDaily.org
Printed in China
From a large platter intended to be hung on a wall to a small treat bowl—
and everything in between—there is no end to the creative expression
possible with plates, platters, and bowls. This book is part of the Ceramic
Arts Select Series, which focuses on groups of related forms and presents
some of the best examples of how contemporary artists are exploring,
innovating, and celebrating those forms.
Plates, Platters, and Bowls, features 20 in-depth, step-by-step projects. With
both wheel-thrown and handbuilt examples, you’ll find solutions for common
problems—like how to throw a large platter or bowl without breaking your
back. But you’ll also find unusual and innovative interpretations on these
classic forms such as asymmetrical handbuilt bowls that are folded like
origami and arranged together as sculptural explorations of geometry. This
volume is a perfect balance of practical information and thought-provoking
inspiration and is a must for anyone interested in strengthening their work
and expanding their creative expression.
PLA
TE
S, PLA
TT
ER
S, AN
D B
OW
LS
Hall
CER
AM
IC A
RTS SELEC
T SERIES
Related Documents


![Welcome [] · Welcome Funxion Fusion’s ... Round Under Plates, Square Under Plates 99 - 101 ... Candelabra, Candle Holders, Champagne Bowls, Silverware Napkin Rings, Silverware](https://static.cupdf.com/doc/110x72/5ae095e27f8b9a5a668dc402/welcome-funxion-fusions-round-under-plates-square-under-plates-99-.jpg)