Oracle ® Hospitality RES 3700 Installation Guide Release 5.7 E95334-03 October 2018

Welcome message from author
This document is posted to help you gain knowledge. Please leave a comment to let me know what you think about it! Share it to your friends and learn new things together.
Transcript

Oracle® Hospitality RES 3700
Installation Guide Release 5.7 E95334-03
October 2018

2
Copyright © 1998, 2018, Oracle and/or its affiliates. All rights reserved.
This software and related documentation are provided under a license agreement containing restrictions on use and disclosure and are protected by intellectual property laws. Except as expressly permitted in your license agreement or allowed by law, you may not use, copy, reproduce, translate, broadcast, modify, license, transmit, distribute, exhibit, perform, publish, or display any part, in any form, or by any means. Reverse engineering, disassembly, or decompilation of this software, unless required by law for interoperability, is prohibited.
The information contained herein is subject to change without notice and is not warranted to be error-free. If you find any errors, please report them to us in writing.
If this software or related documentation is delivered to the U.S. Government or anyone licensing it on behalf of the U.S. Government, then the following notice is applicable:
U.S. GOVERNMENT END USERS: Oracle programs, including any operating system, integrated software, any programs installed on the hardware, and/or documentation, delivered to U.S. Government end users are "commercial computer software" pursuant to the applicable Federal Acquisition Regulation and agency-specific supplemental regulations. As such, use, duplication, disclosure, modification, and adaptation of the programs, including any operating system, integrated software, any programs installed on the hardware, and/or documentation, shall be subject to license terms and license restrictions applicable to the programs. No other rights are granted to the U.S. Government.
This software or hardware is developed for general use in a variety of information management applications. It is not developed or intended for use in any inherently dangerous applications, including applications that may create a risk of personal injury. If you use this software or hardware in dangerous applications, then you shall be responsible to take all appropriate fail-safe, backup, redundancy, and other measures to ensure its safe use. Oracle Corporation and its affiliates disclaim any liability for any damages caused by use of this software or hardware in dangerous applications.
Oracle and Java are registered trademarks of Oracle and/or its affiliates. Other names may be trademarks of their respective owners.
Intel and Intel Xeon are trademarks or registered trademarks of Intel Corporation. All SPARC trademarks are used under license and are trademarks or registered trademarks of SPARC International, Inc. AMD, Opteron, the AMD logo, and the AMD Opteron logo are trademarks or registered trademarks of Advanced Micro Devices. UNIX is a registered trademark of The Open Group.
This software or hardware and documentation may provide access to or information about content, products, and services from third parties. Oracle Corporation and its affiliates are not responsible for and expressly disclaim all warranties of any kind with respect to third-party content, products, and services unless otherwise set forth in an applicable agreement between you and Oracle. Oracle Corporation and its affiliates will not be responsible for any loss, costs, or damages incurred due to your access to or use of third-party content, products, or services, except as set forth in an applicable agreement between you and Oracle.
Contents 3
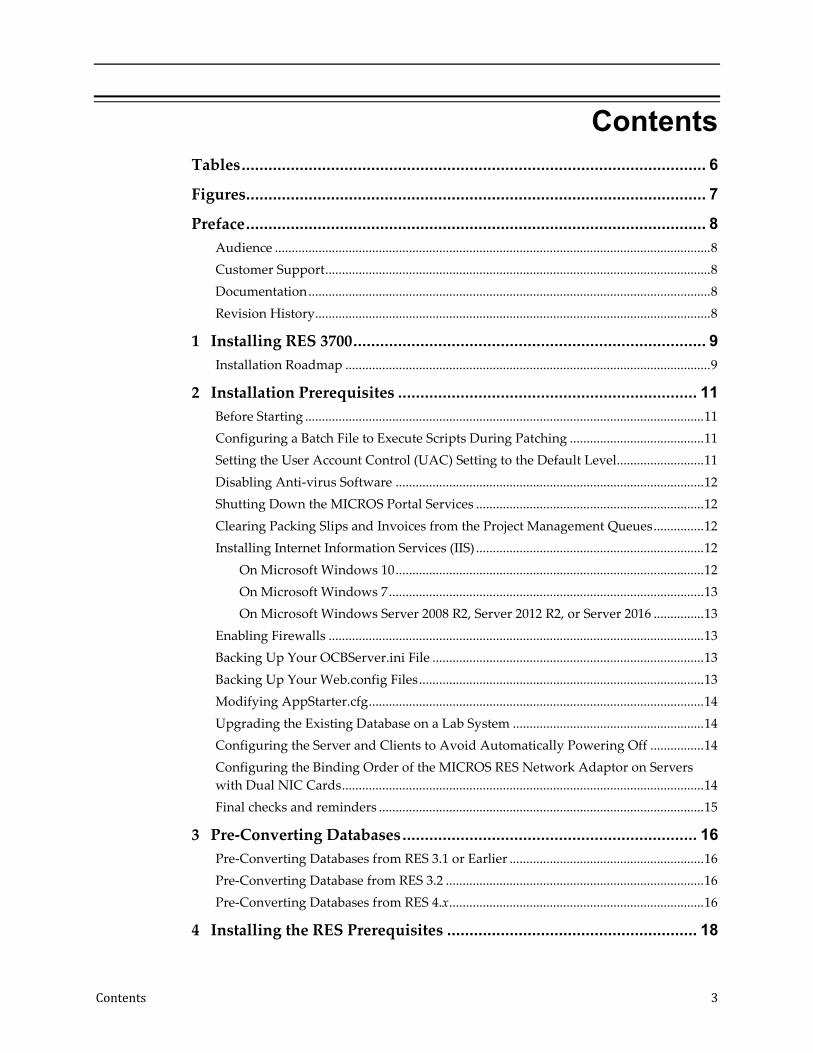
Contents Tables ........................................................................................................ 6
Figures ....................................................................................................... 7
Preface ....................................................................................................... 8 Audience .................................................................................................................................. 8 Customer Support ................................................................................................................... 8 Documentation ........................................................................................................................ 8 Revision History ...................................................................................................................... 8
1 Installing RES 3700 ............................................................................... 9 Installation Roadmap ............................................................................................................. 9
2 Installation Prerequisites ................................................................... 11 Before Starting ....................................................................................................................... 11 Configuring a Batch File to Execute Scripts During Patching ........................................ 11 Setting the User Account Control (UAC) Setting to the Default Level.......................... 11 Disabling Anti-virus Software ............................................................................................ 12 Shutting Down the MICROS Portal Services .................................................................... 12 Clearing Packing Slips and Invoices from the Project Management Queues ............... 12 Installing Internet Information Services (IIS) .................................................................... 12
On Microsoft Windows 10 ............................................................................................ 12 On Microsoft Windows 7 .............................................................................................. 13 On Microsoft Windows Server 2008 R2, Server 2012 R2, or Server 2016 ............... 13
Enabling Firewalls ................................................................................................................ 13 Backing Up Your OCBServer.ini File ................................................................................. 13 Backing Up Your Web.config Files ..................................................................................... 13 Modifying AppStarter.cfg .................................................................................................... 14 Upgrading the Existing Database on a Lab System ......................................................... 14 Configuring the Server and Clients to Avoid Automatically Powering Off ................ 14 Configuring the Binding Order of the MICROS RES Network Adaptor on Servers with Dual NIC Cards ............................................................................................................ 14 Final checks and reminders ................................................................................................. 15
3 Pre-Converting Databases .................................................................. 16 Pre-Converting Databases from RES 3.1 or Earlier .......................................................... 16 Pre-Converting Database from RES 3.2 ............................................................................. 16 Pre-Converting Databases from RES 4.x ............................................................................ 16
4 Installing the RES Prerequisites ........................................................ 18

4 Contents
5 Installing RES ..................................................................................... 19
6 Activating RES Features ..................................................................... 21
7 Restoring Pre-Converted Databases .................................................. 22 Restoring RES 3.2 Databases ............................................................................................... 22 Restoring 4.x Databases........................................................................................................ 22 Restoring 5.x Databases........................................................................................................ 22 Verifying Server Configurations After Restoring a Database ......................................... 23
8 Configuring Optional RES Settings ................................................... 24 Using Custom Logos ............................................................................................................ 24 Using Custom Icons .............................................................................................................. 24 Using Custom Display Configurations .............................................................................. 24 Using Custom Scripts ........................................................................................................... 24 Using SIM Scripts .................................................................................................................. 25
9 Installing Peripherals ......................................................................... 26 Installing the Rochelle Box................................................................................................... 26
Installing Rochelle Model 2045 .................................................................................... 26 Installing Rochelle Model 2050 .................................................................................... 26 Running a Rochelle Box in Demo Mode ..................................................................... 27
Installing Order Confirmation Boards (OCB) ................................................................... 27 Setting Up the OCB Server ........................................................................................... 27 Configuring the MICROS OCB Drive Thru Display Controller.............................. 31 Configuring an OCB After Updating a Database ...................................................... 31 Verifying an OCB installation ...................................................................................... 32 Deleting Interface Files for an Unused OCB Server .................................................. 32
Installing Fingerprint Scanners ........................................................................................... 32 Installing the DigitalPersona Driver ........................................................................... 32 Installing the DigitalPersona SDK on Win32 Workstations ..................................... 33 Troubleshooting a USB Device Error .......................................................................... 33 Deleting the Default Fingerprint Scanner Driver ...................................................... 33
Setting Up Encrypted Magnetic Card Mode (EMSR) using MagTek IPAD Reader .... 33 EMSR Compatibility ...................................................................................................... 34 Enabling EMSR .............................................................................................................. 34 Installing the MagTek IPAD Reader ........................................................................... 34 Manually Entering Credit Card Data in EMSR Mode .............................................. 35
10 Uninstalling RES ................................................................................ 36
11 Troubleshooting ................................................................................. 37 Updating the Firewall Exceptions List ............................................................................... 37

Contents 5
Cannot Start POS Operations After Changing Server Name or IP Address ................ 37 Cannot Update Database ..................................................................................................... 37 Fixing a Corrupted Compact Flash .................................................................................... 38 POS Operations says “System Closed” on Clients ........................................................... 38 Removing Unused Client Nodes from the Database ....................................................... 38 Printing Service Fails ............................................................................................................ 38 Finding the Delivery Dispatch File ..................................................................................... 38 Finding the Installation Log Files ....................................................................................... 38 Monitoring the Database in Real Time .............................................................................. 38
12 Client CAL Folders ............................................................................. 40

6 Tables
Tables Table 1 - Roadmap for Installing RES 3700 ................................................................................. 9 Table 2 - OCBServer.ini Parameters .......................................................................................... 27 Table 3 - OCBClient.ini Parameters ........................................................................................... 30 Table 4 - OCB network Node Configuration ............................................................................ 31 Table 5 - Client CAL Folders ...................................................................................................... 40

Figures 7
Figures Figure 9-1 - MagTek Reader Ports ............................................................................................. 35

8 Preface
Preface This Installation Guide describes the requirements and procedures to install this Oracle Hospitality RES 3700 (RES) release.
Audience This document is intended for:
• Deployment personnel • Database administrators • System administrators • Product support
Customer Support To contact Oracle Customer Support, access My Oracle Support at the following URL: https://support.oracle.com When contacting Customer Support, please provide the following:
• Product version and program/module name • Functional and technical description of the problem (include business impact) • Detailed step-by-step instructions to re-create • Exact error message received and any associated log files • Screen shots of each step you take
Documentation Oracle Hospitality product documentation is available on the Oracle Help Center at http://docs.oracle.com/en/industries/hospitality/
Revision History Date Description of Change
May 2018 • Initial publication
July 2018 • Updated Chapter 9 - Installing Peripherals, specifically the Installing Fingerprint Scanners section
October 2018 • Updated the Installing Internet Information Services (IIS) section to include Microsoft Windows Server 2008 R2, Server 2012 R2, and Server 2016.
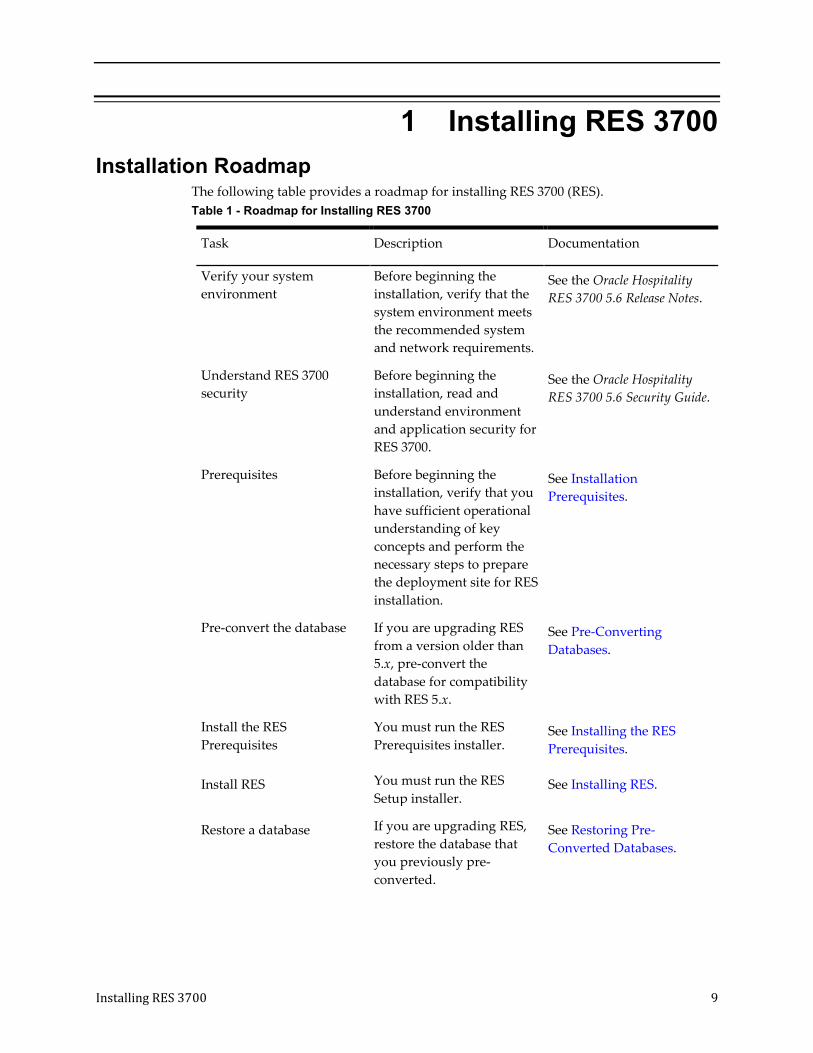
Installing RES 3700 9
1 Installing RES 3700 Installation Roadmap
The following table provides a roadmap for installing RES 3700 (RES). Table 1 - Roadmap for Installing RES 3700
Task Description Documentation
Verify your system environment
Before beginning the installation, verify that the system environment meets the recommended system and network requirements.
See the Oracle Hospitality RES 3700 5.6 Release Notes.
Understand RES 3700 security
Before beginning the installation, read and understand environment and application security for RES 3700.
See the Oracle Hospitality RES 3700 5.6 Security Guide.
Prerequisites Before beginning the installation, verify that you have sufficient operational understanding of key concepts and perform the necessary steps to prepare the deployment site for RES installation.
See Installation Prerequisites.
Pre-convert the database If you are upgrading RES from a version older than 5.x, pre-convert the database for compatibility with RES 5.x.
See Pre-Converting Databases.
Install the RES Prerequisites
You must run the RES Prerequisites installer.
See Installing the RES Prerequisites.
Install RES You must run the RES Setup installer.
See Installing RES.
Restore a database If you are upgrading RES, restore the database that you previously pre-converted.
See Restoring Pre-Converted Databases.

10 Preface
Verify server configurations
Make sure the server and database are configured to communicate after restoring a database.
See Verifying Server Configurations After Restoring a Database.
Install or update RES on client workstations
Make sure client CAL is updated and configured properly to communicate with the RES server. When the RES server restarts, the client CAL automatically downloads and installs or upgrades the RES client on each device. If the install or upgrade does not start, reboot the client.
Not applicable.
Configure optional RES settings
You can customize the settings on your system.
See Configuring Optional RES Settings.
Install peripherals To use peripheral devices with RES, follow the instructions specific to the peripheral you want to install, or refer to the hardware documentation for the peripheral you want to install.
See Installing Peripherals.

Installation Prerequisites 11
2 Installation Prerequisites This chapter describes the knowledge, actions, and preparation required before beginning RES installation.
Before Starting Make sure you have an:
• Operational understanding of PCs and a working knowledge of the Microsoft Windows interface.
• Operational understanding of the Client Application Loader (CAL) technology. • Understanding of POS terminology and concepts. • Understanding that:
o You cannot perform incremental database backup after installing a patch. You must first perform a full database backup under the new patch.
o You cannot repair or modify installation features due to changes in the setup process. If a problem occurs, you must reinstall RES.
o RES installation does not support installing to a mapped drive. Make sure to install RES to local drives.
Configuring a Batch File to Execute Scripts During Patching If you are installing a maintenance release, you can configure a batch file to execute scripts:
1. Add a registry key under HKLM\Software\Micros\ and name it Patch. 2. Create and set the following two String values for this key:
a. CustomPreUpdate: the installer runs the file linked through this key at the beginning of the process. You can use this key to shut down non-RES services.
b. CustomPostUpdate: the installer runs the file linked through this key after updating all files, but before updating the database.
Setting the User Account Control (UAC) Setting to the Default Level
RES installation requires permissions to add a new user to the Administrator Group. Use the existing administrator account only to create a new user and to add existing users to the Administrator Group.
1. Click Start, and then click Control Panel. 2. Click User Accounts. 3. Select Change User Account Control Settings. 4. Make sure the selected setting is Default. Otherwise, select Default, and then
restart the server.

12 Installation Prerequisites
Keep the server and Microsoft Windows clients at the Default UAC setting for daily POS operations.
Disabling Anti-virus Software Anti-virus software can obstruct RES installation due to a script locking feature. Disable the anti-virus software or disable the script locking feature.
Shutting Down the MICROS Portal Services • If you are performing a RES upgrade on a system with a MICROS Portal
installation, shut down the Micros Agent and Micros Watchdog services. If you do not shut down these services, the system may lock up during database conversion.
• If the end users modified Global.css to allow Manager Procedures to support double-byte characters, back up Global.css and then restore the original version of Global.css from the Micros\common\ManagerProcAsp\ folder. You can copy the modified file back to the directory after installation finishes.
Clearing Packing Slips and Invoices from the Project Management Queues
If the site uses Project Management (PM) software, reconcile and approve all packing slips and invoices. The system may not properly prevent users from selecting and modifying receipts during a closed period.
Installing Internet Information Services (IIS) On Microsoft Windows 10
1. Click Start, click Control Panel, and then click Programs and Features. 2. Select Turn Windows features on or off. 3. Click Internet Information Services. 4. Click Web Management Tools, and then select IIS 6 Management
Compatibility and IIS Management Console. 5. Click World Wide Web Services, and then:
a. Click Application Development Features, and then select ASP and ASP.NET.
b. Click Common HTTP Features, and then select Default Document, HTTP Errors, and Static Content.
c. Click Health and Diagnostic, and then select HTTP Logging and Request Monitor.
d. Click Performance Features, and then select Static Content Compression.
6. Click OK.

Installation Prerequisites 13
On Microsoft Windows 7 1. Click Start, click Control Panel, and then click Programs and Features. 2. Select Turn Windows features on or off. 3. Click Internet Information Services. 4. Click Web Management Tools, and then select IIS 6 Management
Compatibility and IIS Management Console. 5. Click World Wide Web Services, and then:
a. Click Application Development Features, and then select ASP and ASP.NET.
b. Click Common HTTP Features, and then select Default Document, HTTP Errors, and Static Content.
c. Click Health and Diagnostic, and then select HTTP Logging and Request Monitor.
d. Click Performance Features, and then select Static Content Compression.
6. Click OK.
On Microsoft Windows Server 2008 R2, Server 2012 R2, or Server 2016
1. Click Start, click Administrative Tools, and then click Server Manager. 2. In Server Manager, click Roles, and then click Role Summary. 3. Click Add Roles, and then click Next. 4. Click Web Server (IIS), click Next, and then click Next. 5. Select Asp.net and Asp. 6. Click Add required role services. 7. Under Health and Diagnostics, select HTTP Logging and Request Monitor. 8. Select IIS Management Console and IIS 6 Management compatibility. 9. Click Next, and then click Install.
Enabling Firewalls Enable firewalls before installing RES on a server or Win32 client. If you disable firewalls during installation, the installers do not recognize the firewalls and automatically create the necessary exceptions. See "Updating the exceptions list for firewalls" for adding exceptions after installation finishes.
Backing Up Your OCBServer.ini File The RES installer overwrites the existing \Scripts\OCBServer.ini file. Back up OCBServer.ini before upgrading or patching RES.
Backing Up Your Web.config Files The RES installer overwrites the Web.config files in the following folders:

14 Installation Prerequisites
• \MICROS\common\ManagerProcsASP\
• \MICROS\common\ManagerProcsFujitsu\
• \MICROS\common\ManagerProcsPPC\
• \MICROS\common\MenuBoard\
• \MICROS\common\ReportViewer\
• \MICROS\common\ResPosApiWeb\
Back up the Web.config files before upgrading or patching RES. You can replace the files with the modified versions after installation finishes.
Modifying AppStarter.cfg If you are upgrading and you had previously configured the AppStarter.cfg files, you must perform the following steps before beginning the upgrade to allow client initialization:
1. Open Installation Path\CAL\Files\AppStarter.cfg in an editor. 2. Look for the following lines:
//Wait for MDSHosts.xml
$(MICROS_DIR_COMMON_BIN)\WaitForHostsFile.exe,, Wait for MDSHosts File, -1
3. Add the following lines: // Run Client Trust Utility
$(MICROS_DIR_COMMON_BIN)\CTUtil.exe,, Client Trust Utility, -1
Upgrading the Existing Database on a Lab System Sybase 16 cannot handle certain conversions due to custom tables, triggers, stored procedures, and so on. Make sure to upgrade the existing database before performing installation at a live site to make sure the upgrade succeeds.
Configuring the Server and Clients to Avoid Automatically Powering Off
1. Click Start, click Control Panel, click System, and then click Device Manager. 2. Right-click the network card, and then select Properties. 3. On the Power Management tab, deselect Allow the computer to turn off this
device to save power. 4. Click Start, click Control Panel, and then click Power Options. 5. Select Change when the computer sleeps. 6. Set Put the computer to sleep to Never.
Configuring the Binding Order of the MICROS RES Network Adaptor on Servers with Dual NIC Cards
1. Click Start, click Control Panel, click Network and Sharing Center, and then click Change Adapter Settings.

Installation Prerequisites 15
2. Press ALT, click Advanced, and then click Advanced Settings. 3. On the Adapters and Bindings tab, select the MICROS RES Network Adaptor,
and then use the arrow buttons to move it to the top of the list.
Final checks and reminders • You cannot perform incremental database backup after installing a patch and
before performing a full database backup under the new patch. • You cannot repair or modify installation features due to changes in the setup
process. You must reinstall RES to repair problems.

16 Pre-Converting Databases
3 Pre-Converting Databases If you are upgrading from a RES version older than 5.0, you must pre-convert the database to be compatible with the RES 5.0 database. Note that a database that has been pre-converted to 5.x does not work with earlier versions of RES. Make sure to create a backup copy of the database before you pre-convert the database.
Pre-Converting Databases from RES 3.1 or Earlier You cannot pre-convert and upgrade databases from RES 3.1 or earlier directly to RES 5.x. Upgrade and convert older databases to RES 3.2 or a compatible version of RES 4.x, then pre-convert the database to RES 5.x.
Pre-Converting Database from RES 3.2 1. Copy PreConvert32DB.bat from \support\ to a temporary folder. 2. In the MICROS Control Panel, set Restaurant to OFF. 3. Double-click PreConvert32DB.bat. 4. Rename Micros.DB to PreConverted32.DB and copy it to the RES 3700 5.x
server.
Pre-Converting Databases from RES 4.x You can convert the following RES 4.x databases to RES 5.x. If you are using a version that is not on the following list, upgrade to a compatible version before pre-converting the database:
• 4.9 and 4.9 MR1 • 4.8 and 4.8 MR1 through MR5 • 4.7 and 4.7 MR1 through MR3 • 4.6 and 4.6 MR1 • 4.5 and 4.5 MR1 • 4.4 • 4.3 HF1 and HF2 (HF1 is the oldest hotfix database that can be upgraded. 4.3
MR3 cannot be upgraded to 5.x.) To pre-convert the database, follow these steps:
1. Make sure the 4.x database is running. 2. Copy 4xPreConvertTo5x.mcs from \support\ to a temporary folder. 3. Open Database Manager with a user count that has database rebuild privileges. 4. In Database Manager, navigate to Rebuild. 5. On the Update tab, click the folder icon below Apply Scripts. 6. Navigate to the temporary folder and select the copy of
4xPreConvertTo5x.mcs. 7. Click Apply Scripts. 8. On the Backup Database tab, select Backup Database.

Pre-Converting Databases 17
9. Click Run. 10. Rename \Database\Data\Backup\Archive\4x.MBZ to
PreConverted4x.MBZ and copy it to the RES 5.x server.
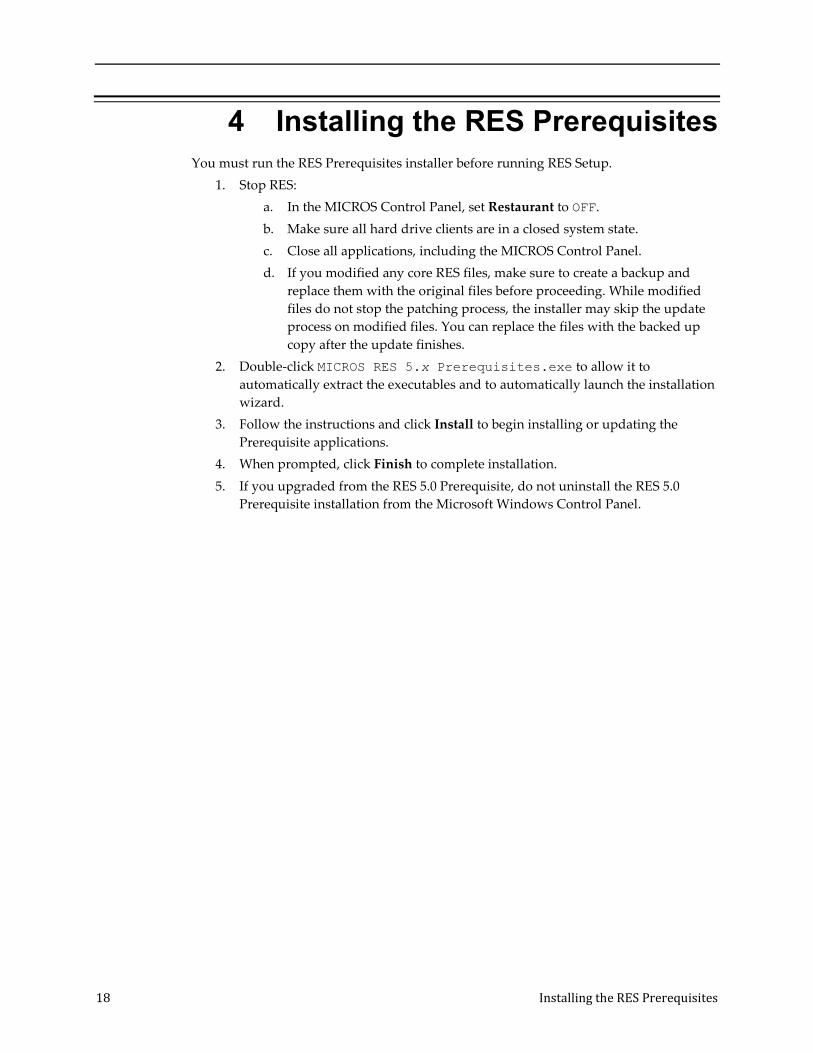
18 Installing the RES Prerequisites
4 Installing the RES Prerequisites You must run the RES Prerequisites installer before running RES Setup.
1. Stop RES: a. In the MICROS Control Panel, set Restaurant to OFF. b. Make sure all hard drive clients are in a closed system state. c. Close all applications, including the MICROS Control Panel. d. If you modified any core RES files, make sure to create a backup and
replace them with the original files before proceeding. While modified files do not stop the patching process, the installer may skip the update process on modified files. You can replace the files with the backed up copy after the update finishes.
2. Double-click MICROS RES 5.x Prerequisites.exe to allow it to automatically extract the executables and to automatically launch the installation wizard.
3. Follow the instructions and click Install to begin installing or updating the Prerequisite applications.
4. When prompted, click Finish to complete installation. 5. If you upgraded from the RES 5.0 Prerequisite, do not uninstall the RES 5.0
Prerequisite installation from the Microsoft Windows Control Panel.

Installing RES 19
5 Installing RES 1. Download and then double-click setup.exe. 2. If Microsoft Windows prompts you about allowing changes to the computer,
click Yes. 3. On the welcome page, click Next. 4. On the License Agreement page, read, accept or refuse the terms of the license
agreement, and then click Next. 5. On the install path page, click Browse to specify a different install location, and
then click Next. You must install the MICROS files in the root folder of a local drive.
6. On the setup type page, select whether you want to install a new database or whether you want to use an existing database, and then click Next.
a. If you select to install a shell database, select the type of shell depending on the currency being used. For example, the US dollar uses two decimal spaces and the Russian ruble uses three decimal spaces.
b. If you select to use an existing database, select whether you want to the installer to restore a pre-converted database or whether you will perform restoration after installation. Use the .MBZ5 file produced during pre-conversion.
7. Review the installation summary, and then click Next. 8. When beginning database upgrade, enter a Client Trust Passphrase when
prompted by the Database Manager. 9. Reboot the system when prompted by the installer. 10. When installing RES 5.5.2 or later, if there is no Client Trust Passphrase
configured, the installer creates and assigns a random passphrase. 11. When the Client Application Loader completes installing or upgrading RES on
the client workstations, the AppStarter prompts you to enter the Client Trust Passphrase. You can enter the Client Trust Passphrase at each client, or place the system in Discovery Mode to allow configured clients to automatically retrieve and use the Client Trust Passphrase. You can place the system in Discovery Mode using the following methods:
a. For RES 5.5.2 and later, you can set a duration for Discovery mode by entering the following in a command line prompt: DM –DS duration_minutes –UID username –PWD password You cannot set the duration of discovery mode to be longer than 60 minutes. Enter the credentials for a database DBA or for a RES user with sufficient privileges to change encryption keys.
b. Enter the Client Trust Passphrase for a client, and then reboot the client. After POS Operations starts, click Yes when it prompts, Do you want to put the system in auto discovery mode?.

20 Installing RES
c. Launch Database Manager, click Encryption Keys, click Activate Discovery Mode, and then click Yes when it prompts, This will activate discovery mode. Do you wish to continue?
12. Review the Oracle Hospitality RES 3700 Security Guide for information and instructions regarding post-installation security.
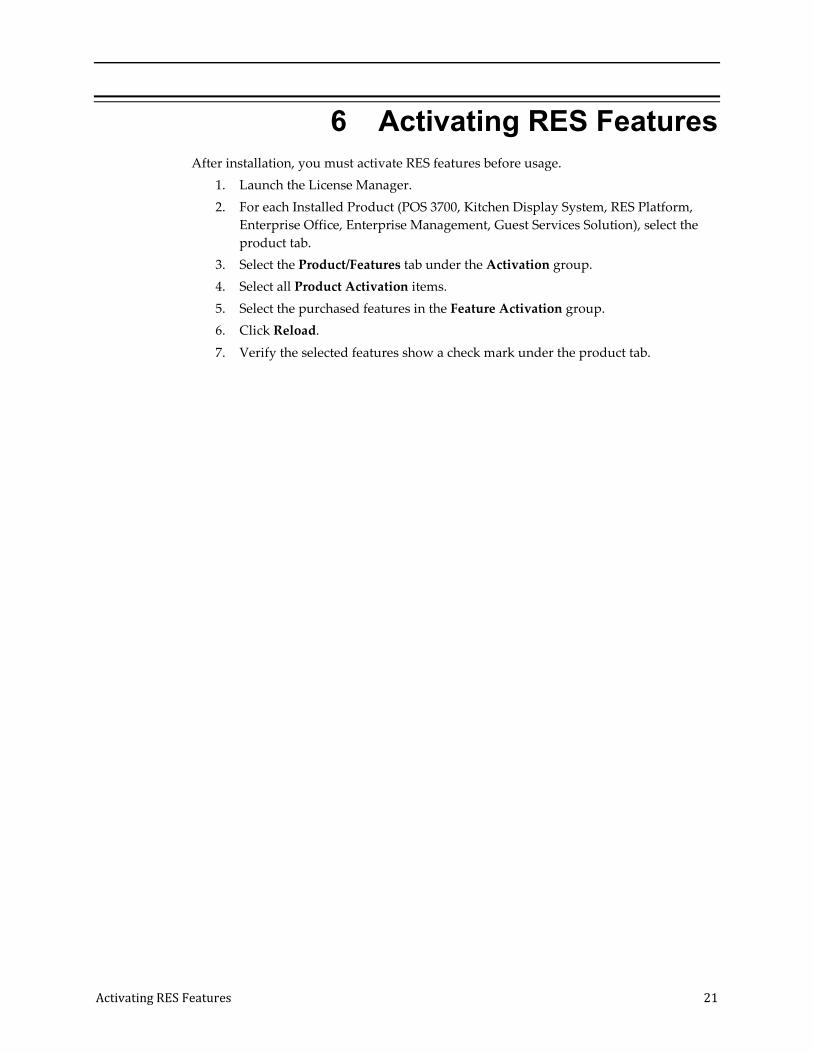
Activating RES Features 21
6 Activating RES Features After installation, you must activate RES features before usage.
1. Launch the License Manager. 2. For each Installed Product (POS 3700, Kitchen Display System, RES Platform,
Enterprise Office, Enterprise Management, Guest Services Solution), select the product tab.
3. Select the Product/Features tab under the Activation group. 4. Select all Product Activation items. 5. Select the purchased features in the Feature Activation group. 6. Click Reload. 7. Verify the selected features show a check mark under the product tab.
22 Restoring Pre-Converted Databases
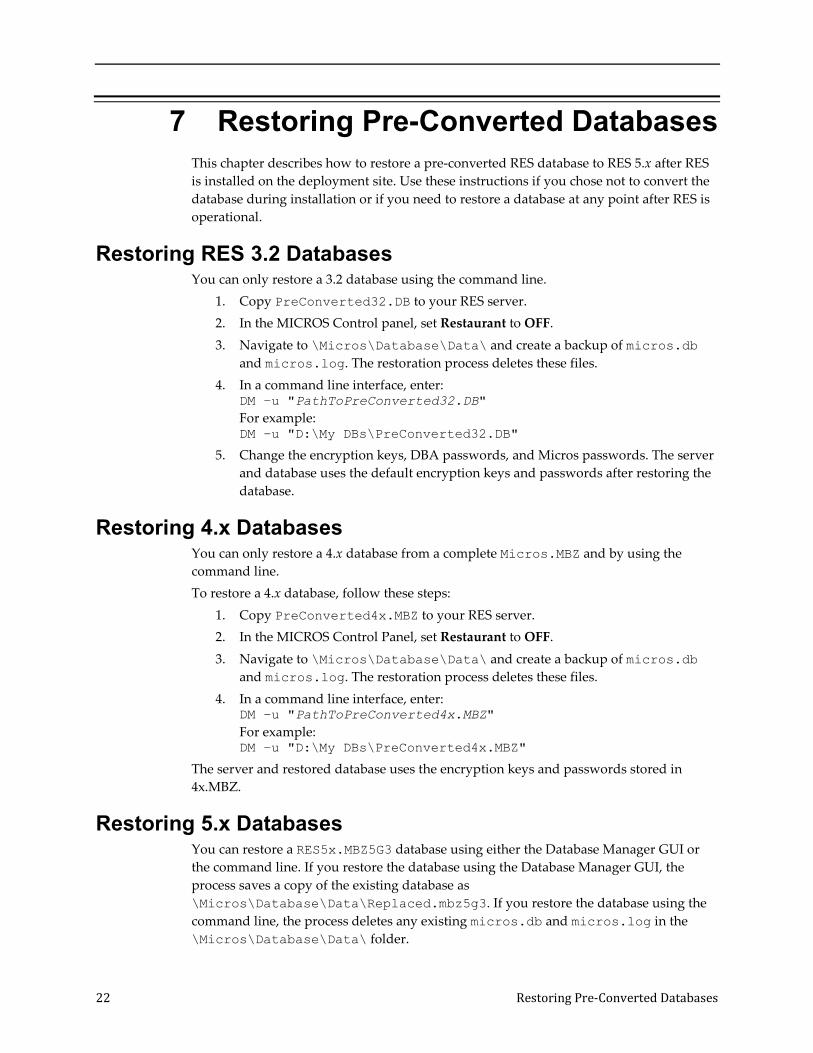
7 Restoring Pre-Converted Databases This chapter describes how to restore a pre-converted RES database to RES 5.x after RES is installed on the deployment site. Use these instructions if you chose not to convert the database during installation or if you need to restore a database at any point after RES is operational.
Restoring RES 3.2 Databases You can only restore a 3.2 database using the command line.
1. Copy PreConverted32.DB to your RES server. 2. In the MICROS Control panel, set Restaurant to OFF. 3. Navigate to \Micros\Database\Data\ and create a backup of micros.db
and micros.log. The restoration process deletes these files. 4. In a command line interface, enter:
DM –u "PathToPreConverted32.DB" For example: DM –u "D:\My DBs\PreConverted32.DB"
5. Change the encryption keys, DBA passwords, and Micros passwords. The server and database uses the default encryption keys and passwords after restoring the database.
Restoring 4.x Databases You can only restore a 4.x database from a complete Micros.MBZ and by using the command line. To restore a 4.x database, follow these steps:
1. Copy PreConverted4x.MBZ to your RES server. 2. In the MICROS Control Panel, set Restaurant to OFF. 3. Navigate to \Micros\Database\Data\ and create a backup of micros.db
and micros.log. The restoration process deletes these files. 4. In a command line interface, enter:
DM –u "PathToPreConverted4x.MBZ" For example: DM –u "D:\My DBs\PreConverted4x.MBZ"
The server and restored database uses the encryption keys and passwords stored in 4x.MBZ.
Restoring 5.x Databases You can restore a RES5x.MBZ5G3 database using either the Database Manager GUI or the command line. If you restore the database using the Database Manager GUI, the process saves a copy of the existing database as \Micros\Database\Data\Replaced.mbz5g3. If you restore the database using the command line, the process deletes any existing micros.db and micros.log in the \Micros\Database\Data\ folder.
Restoring Pre-Converted Databases 23
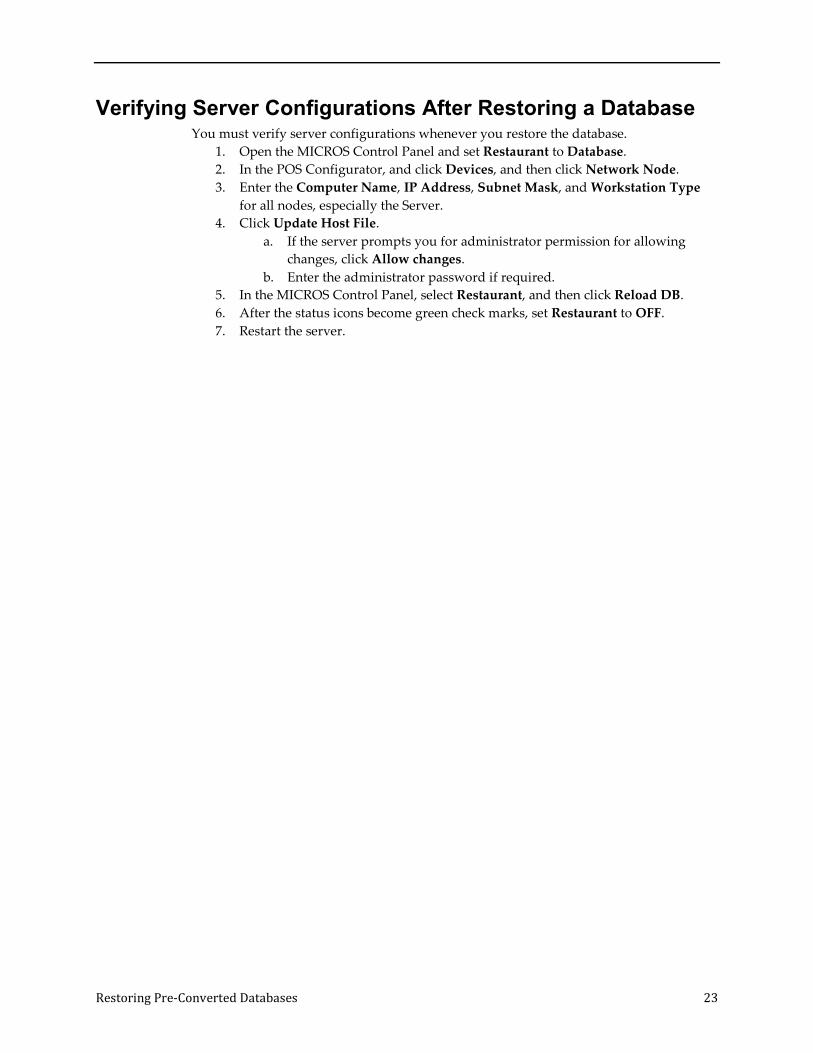
Verifying Server Configurations After Restoring a Database You must verify server configurations whenever you restore the database.
1. Open the MICROS Control Panel and set Restaurant to Database. 2. In the POS Configurator, and click Devices, and then click Network Node. 3. Enter the Computer Name, IP Address, Subnet Mask, and Workstation Type
for all nodes, especially the Server. 4. Click Update Host File.
a. If the server prompts you for administrator permission for allowing changes, click Allow changes.
b. Enter the administrator password if required. 5. In the MICROS Control Panel, select Restaurant, and then click Reload DB. 6. After the status icons become green check marks, set Restaurant to OFF. 7. Restart the server.

24 Configuring Optional RES Settings
8 Configuring Optional RES Settings Using Custom Logos
You can configure the logo shown in RES by changing res3700.bmp. 1. To change the logo on the RES Server, place the modified res3700.bmp file in
the \MICROS\Res\POS\Bitmaps\ folder. 2. To change the logo on the respective clients, place the modified res3700.bmp
file in the \Files\CF\MICROS\Bitmaps\ folder for each client. See Client CAL Folders for a list of the root folders for each client.
3. Wait 30 seconds for the file to transfer from the server to the client. 4. Reboot the client.
Using Custom Icons You can configure custom icons for hard drive clients by editing customicons.dll.
1. Place the modified customicons.dll file in the \Files\CF\MICROS\Bin\ folder for each client. See Client CAL Folders for a list of the root folders for each client.
2. Wait 30 seconds for the file to transfer from the server to the client. 3. Reboot the client.
Using Custom Display Configurations You can configure the OPS display by editing OPSDisplayUser.cfg.
1. To change the display on the RES Server, place the modified OPSDisplayUser.cfg file in the \MICROS\Res\POS\etc\ folder.
2. To change the display on the respective clients, place the modified OPSDisplayUser.cfg file in the \Files\CF\MICROS\etc\ folder for each client. See Client CAL Folders for a list of the root folders for each client.
3. Wait 30 seconds for the file to transfer from the server to the client. 4. Reboot the client.
Using Custom Scripts 1. To install the scripts on the RES Server, place the script files in the
\MICROS\Res\POS\Scripts\ folder. 2. To install the scripts on the respective clients, place the script files in the
\Files\CF\MICROS\Scripts\ folder for each client. See Client CAL Folders for a list of the root folders for each client.
3. Wait 30 seconds for the file to transfer from the server to the client. 4. Reboot the client.

Configuring Optional RES Settings 25
Using SIM Scripts 1. On the RES Server, place the script files in the \MICROS\Res\POS\etc\ folder. 2. In the POS Configurator, click the Devices tab, click ISL Files, and then click
Auto Load All ISL Files. 3. Verify that the POS Configurator imported all ISL files.
a. To import a single script, click New, and then click the Browse button to select the .ISL file.
b. To change the file for an existing database entry, select an entry, click the Browse button next to the File Name field, and then select the new script.
4. Wait 30 seconds for the file to transfer from the server to the client. 5. Reboot the client.

26 Installing Peripherals
9 Installing Peripherals Installing the Rochelle Box
Before beginning installation, make sure your phone line is split so that one part goes to the phone and one part goes to the Rochelle box.
Installing Rochelle Model 2045 1. Click Start, click Run, enter regedit, and then click Run. 2. Navigate to My
Computer\HKEY_LOCAL_MACHINE\Software\Micros\GSS\CallerID\Rochelle\Parameters\
3. Create a String key and name it ComPort. 4. Set the value of ComPort to the COM port number you want the box to use. 5. Attach the Rochelle box to the specified COM port on the server machine. 6. Click Start, click Control Panel, and then click Administrative Services. 7. Double-click Services, scroll to MICROS Caller ID Service, and then start the
service.
Installing Rochelle Model 2050 1. Click Start, click Run, enter regedit, and then click Run. 2. Navigate to My
Computer\HKEY_LOCAL_MACHINE\Software\Micros\GSS\CallerID\Rochelle\
3. Create a String key and name it NumDevices. 4. Set the value of NumDevices to 1. 5. Navigate to My
Computer\HKEY_LOCAL_MACHINE\Software\Micros\GSS\CallerID\Rochelle\Parameters\
6. Create and set the value of the following String keys: a. ComPort = COMPortNumber b. ComParameters = [2400 for baud | N for parity | 8 for
data | 1 for stop] c. IniString = A_F0\r\nAT_R0\0\r\n d. DeviceLines = 4
7. If you want to attach additional devices, use the registry path My Computer\HKEY_LOCAL_MACHINE\Software\Micros\GSS\CallerID\Rochelle\ParametersNumber For example, \Parameters2
8. Attach the Rochelle box to the specified COM port on the server machine. 9. Click Start, click Control Panel, and then click Administrative Services. 10. Double-click Services, scroll to MICROS Caller ID Service, and then start the
service.

Installing Peripherals 27
Running a Rochelle Box in Demo Mode 1. Click Start, click Run, enter regedit, and then click Run. 2. Navigate to My
Computer\HKEY_LOCAL_MACHINE\Software\Micros\GSS\CallerID\Rochelle\Parameters\
3. Create a String key and name it ComPort. 4. Set the value of ComPort to the COM port number you want to use. 5. Attach a null modem cable from the specified COM port to another COM port on
the server. 6. Start the Rochelle Emulator. 7. Click Start, click Control Panel, and then click Administrative Services. 8. Double-click Services, scroll to MICROS Caller ID Service, and then start the
service.
Installing Order Confirmation Boards (OCB) The 3700 POS Interface supports the following Order Confirmation Board (OCB) devices:
• Texas Digital AccuView OCB • Texas Digital Wenview OCB • MICROS OCB
Setting Up the OCB Server 1. Create a copy of \micros\res\pos\scripts\OCBServer.template.ini
and rename it to OCBServer.ini. 2. Configure the parameters in OCBServer.ini as described in the following
table: Table 2 - OCBServer.ini Parameters
Parameter Description
DeviceType 0 = None 1 = Texas Digital AccuVIEW 2 = Texas Digital WenVIEW 3 = Texas Digital AccuVIEW CE 4 = Everbrite SNS OCS 5 = MICROS OCB and Drive-Thru Display Controller
ConnectType 1 = COM Port 2 = TCP/IP (MICROS OCB only)
ComPort 1 = COM1 2 = COM2 Etc.

28 Installing Peripherals
BaudRate 1 = 1200 2 = 9600 3 = 19200 (suggested Baud Rate for AccuVIEW OCB) 4 = 38400 5 = 57600 6 = 115200 If the site encounters display issues, set the Baud Rate to 3.
IpAddress MICROS OCB only. Set the IP Address [ipaddr:port] of the OCB device. The port value can be found in the OCB.ini file as the value of the Listen Port parameter. By default, use 13001.
TotalLabel Label shown at the bottom of the OCB display immediately before the total due value.
TaxLabel Label shown at the bottom of the OCB display immediately before the tax value.
TotalScreenLine1 The first line of text shown on the total screen shown by the OCB after an order is complete and the after service totaling or final tendering the associated check on the POS.
TotalScreenLine2 The second line of text shown on the total screen.
Line1, Line2, etc. Each line of text of the default Message shown on WenView OCB devices. The devices show the text when the OCB is idle.
ScrollText1, ScrollText2, etc.
Each line of text of the scrolling message shown at the bottom of the OCB display. AccuVIEW devices show an unlimited amount of scroll messages, while WenVIEW devices show one scroll message.
DisplayMenuItems, DisplayDiscounts, DisplayTenders, DisplayServiceCharges
Determines whether to show the specified detailed type. 0 = Do not display. 1 = Display.
DisplayVoids OCBServer does not support this parameter. If the parameter is set to 1, OCB logs a message to indicate the option is not supported. OCB always shows direct voids.

Installing Peripherals 29
DisplayMenuLevelPrefix Determines whether to show the menu level prefix. You must configure a menu item to show a menu level prefix using the Menu level name class option to use this parameter. OCB selects the main or sub level prefix based on the Use sub menu level for pricing level class option.
DisplayMenuItemDefaults Determines whether to show default condiments in Conversational Ordering Mode. 0 = Do not display. 1 = Display.
DisplayTaxAndTotalLine Determines whether to show a running tax and total line at the bottom of the OCB while taking an order. 0 = Do not display. 1 = Display.
DisplayTotalScreen Determines whether to show the total screen after completing an order and service totaling or final tendering the associated check on the POS. If the value is set to 0, the OCB skips the total screen and shows the default menu screen (WenVIEW) or slide show (AccuVIEW). 0 = Do not display. 1 = Display.
DisplayAllCondimentQty Determines whether to show the condiment quantity even for single items. You must include this feature during installation. 0 = Do not display. 1 = Display.
CurrencySymbol Define the currency symbol shown with the total value due on the total screen. By default, the value is set to $.
3. Create a copy of \micros\res\pos\scripts\OCBClient.template.ini and rename it to OCBClient.ini.
4. Copy OCBClient.ini to the respective folder from the following list for client types that send information to the OCB:
• \micros\res\cal\win32\files\micros\res\pos\scripts\ • \micros\res\cal\ws4LX\files\cf\micros\scripts\ • \micros\res\cal\ws5\files\cf\micros\scripts\ • \micros\res\cal\ws5A\files\cf\micros\scripts\
5. Configure each copy of OCBClient.ini as described in the following table:

30 Installing Peripherals
Table 3 - OCBClient.ini Parameters
Parameter Description ServerIP Define the IP address of the server hosting the OCB
service. In most cases, set this parameter to the IP address of the 3700 RES server.
OCBToClaimOnStartup Define the OCB device to claim on startup. 0 = Do not claim any device on startup. 1 = Claim OCB device 1 on startup. 2 = Claim OCB device 2 on startup. When using the new MICROS OCB, use 0.
6. In the POS Configurator, click Devices, and then click Interfaces. 7. Add or change the name of a record to OCB.
a. Set the Outgoing message name to OCB. b. Select SIM Interface.
8. Create a copy of \micros\res\pos\scripts\OCBClient.isl and rename it to PMSNumber.isl. For example, if you changed record 3 to OCB in the POS Configurator, rename OCBClient.isl to PMS3.isl.
9. Copy PMSNumber.isl to the respective folder from the following list for client types that send information to the OCB:
• \micros\res\cal\win32\files\micros\res\pos\etc\ • \micros\res\cal\ws4LX\files\cf\micros\etc\ • \micros\res\cal\ws5\files\cf\micros\etc\ • \micros\res\cal\ws5A\files\cf\micros\etc\
You can add buttons for handling OCBs in POS Configurator touchscreen designer. 1. Set the Category to SIM/PMS Inquire. 2. Set the Interface to 1 OCB. 3. Set the Inquire Number to one of the following:
1 = Start the OCB. 2 = Stop the OCB. 3 = Claim OCB device 1. 4 = Claim OCB device 2. 5 = Temporarily claim OCB device 1. 6 = Temporarily claim OCB device 2. 7 = Release OCB device 1. 8 = Release OCB device 2. 9 = Set the send flag. 10 = Release the current OCB device. 99 = Receive OCB information.
You can verify OCB service installation and configuration: 1. Click to Start, click Control Panel, click Administrative Tools, and then double-
click Services. 2. Select MICROS OCB Server. 3. Set the Startup Type to Automatic. 4. Click Start Service. Restart the server if it is already running. 5. Fix the OCBServer.ini configurations if you see an error message. Two common
error messages are: a) The data is Invalid: Check the OCBServer.ini for invalid configurations.
Installing Peripherals 31
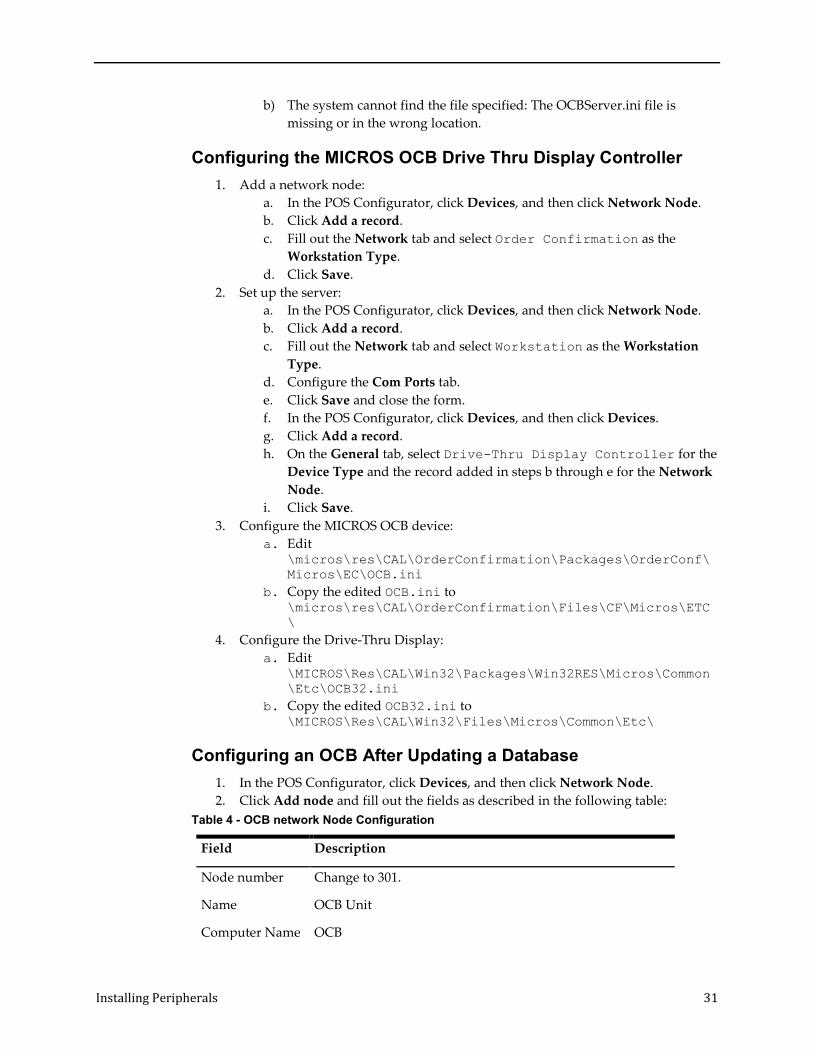
b) The system cannot find the file specified: The OCBServer.ini file is missing or in the wrong location.
Configuring the MICROS OCB Drive Thru Display Controller 1. Add a network node:
a. In the POS Configurator, click Devices, and then click Network Node. b. Click Add a record. c. Fill out the Network tab and select Order Confirmation as the
Workstation Type. d. Click Save.
2. Set up the server: a. In the POS Configurator, click Devices, and then click Network Node. b. Click Add a record. c. Fill out the Network tab and select Workstation as the Workstation
Type. d. Configure the Com Ports tab. e. Click Save and close the form. f. In the POS Configurator, click Devices, and then click Devices. g. Click Add a record. h. On the General tab, select Drive-Thru Display Controller for the
Device Type and the record added in steps b through e for the Network Node.
i. Click Save. 3. Configure the MICROS OCB device:
a. Edit \micros\res\CAL\OrderConfirmation\Packages\OrderConf\Micros\EC\OCB.ini
b. Copy the edited OCB.ini to \micros\res\CAL\OrderConfirmation\Files\CF\Micros\ETC\
4. Configure the Drive-Thru Display: a. Edit
\MICROS\Res\CAL\Win32\Packages\Win32RES\Micros\Common\Etc\OCB32.ini
b. Copy the edited OCB32.ini to \MICROS\Res\CAL\Win32\Files\Micros\Common\Etc\
Configuring an OCB After Updating a Database 1. In the POS Configurator, click Devices, and then click Network Node. 2. Click Add node and fill out the fields as described in the following table:
Table 4 - OCB network Node Configuration
Field Description
Node number Change to 301.
Name OCB Unit
Computer Name OCB

32 Installing Peripherals
IP Address 192.168.100.240
Subnet Mask 255.255.255.0
Workstation Type
zzz-Order Confirmation
3. Restart the OCB device and configure CAL. 4. Restart the Micros OCB Server service.
Verifying an OCB installation 1. Navigate to CAL\OrderConfirmation\Files\CF\Micros\Etc\OCB.ini 2. Find the following lines:
[Logging] ; Verbosity = 0
3. Remove the ; and change the value to 6. 4. In the OCB log you should see the following:
date and time | OCU | OCB | 0 | [TCP] Disconnecting | date and time | OCU | OCB | 0 | [TCP] Receive thread exits | date and time | OCU | OCB | 0 | [TCP] Listener thread starts | date and time | OCU | OCB | 0 | [TCP] Waiting for a connection... | date and time | OCU | OCB | 0 | [OCB] showTotalScreen begins | date and time | OCU | OCB | 0 | [OCB] showTotalScreen ends |
Deleting Interface Files for an Unused OCB Server RES shows errors when it tries to connect to an OCB device that is not connected to the system. You must delete the PMSNumber.isl files that you do not use from the \micros\res\pos\etc\ folder.
Installing Fingerprint Scanners RES supports finger print scanners as peripherals for the following workstation operating systems:
• Microsoft Windows POSReady 2009 • Microsoft Windows 7 (32-bit) • Microsoft Windows (64-bit) operating systems
Installing the DigitalPersona Driver Install the DigitalPersona driver before connecting the Finger Print Scanner. If you connected the finger print scanner prior to installing the driver, you must remove the default driver.
1. In the POS Configurator, click Devices, click User Workstations, click Peripherals, and then configure a finger print scanner.
2. In MICROS Control Panel, set Restaurant to OFF. 3. On your Microsoft Windows operating system, navigate to
\Micros\DigitalPersona\ • On Microsoft Windows 7 (32-bit), right-click Setup.exe and select Run as
administrator.

Installing Peripherals 33
• On a Win32 client or server, right-click InstallOnly.bat and select Run as administrator.
4. Follow the on-screen instructions. When prompted for a key, click Default Key. 5. Restart the server when prompted. 6. Connect the finger print scanner to the client. 7. Start RES.
Installing the DigitalPersona SDK on Win32 Workstations 1. On each Win32 workstation, install the DigitalPersona SDK package using the
included installer: C:\Micros\DigitalPersona\Win32 or Win64\U.are.U_RTE\Setup.exe.
2. If you are using the Eikon fingerprint reader, install the TouchChip add-on using the included installer: C:\Micros\DigitalPersona\Win32 or Win64\TouchChipAddOn\Setup.msi
The workstation prompts users to enroll their fingerprints before they can log in using the fingerprint reader.
Troubleshooting a USB Device Error The most common cause for this error is that the DigitalPersona driver has been loaded by both an earlier version of RES and by the platform.
1. Stop CAL on the client. 2. Delete Platform.dat from DOC. 3. Format the CF with CFW.exe. 4. Load the latest platform on the server. 5. Reconfigure CAL on the client to point to the server. 6. Start POS Operations on the client. 7. Plug in the finger print scanner.
Deleting the Default Fingerprint Scanner Driver 1. Disconnect the finger print scanner. 2. Click Start, click Control Panel, and then click Device Manager. 3. Right-click U.R.U. @4000B Finger Print reader, and then select Delete. 4. Install the DigitalPersona driver.
Setting Up Encrypted Magnetic Card Mode (EMSR) using MagTek IPAD Reader
Encrypted Magnetic Card Mode (EMSR) uses TransactionShield to eliminate cardholder data at the customer system level and to encrypt data as the card is swiped through the external MagTek IPAD device. EMSR stores the data in a secure, hosted location using a MerchantLink transmission. This feature uses cloud-based decryption and ensures that the merchant no longer has decrypted data on the site.

34 Installing Peripherals
EMSR Compatibility EMSR is compatible with Win32 and WinCE workstations. It is not compatible with Windows Mobile clients. If you are using a Windows 7 workstation with RES 5.4 MR1, you must manually reboot the client after changing the EMSR mode setting. EMSR does not support the following transactions:
• COM API • Web API • Debit
To determine whether a WS5A or 2015 client has an integrated magnetic stripe reader that supports encryption, make sure the client serial number is greater than or equal to the following:
• WS5a = 2167105845 • PCWS2015 = 2166004747
If you are enabling EMSR, make sure none of the following PINPad Payment devices are configured under any clients in the POS Configurator:
• PINpad • Mx870 Terminal • ViVOPay • ViVOPay 4800
You can configure Protégé to run on a client without IPAD, but you must configure Protégé to be a cash-only terminal, as it will not accept electronic payments with EMSR enabled.
Enabling EMSR Note that once you enable EMSR mode, you cannot disable it through POS Configurator. If you accidentally enable this mode, contact your product representative.
1. In the POS Configurator, click System, and then click Restaurant. 2. On the Security tab, select Encrypted MSR Mode. 3. Click Yes to confirm enabling EMSR mode. 4. Configure the Function: Non-Sales/Sign in PINpad swipe. This allows
operators to use the EMSR for swiping an employee ID card for signing into a client.
Installing the MagTek IPAD Reader You can install the MagTek IPAD Reader on a client to encrypt card data at the point of swipe. On the Workstation 4 LX and Workstation 5, you must connect the reader to the client using compatible USB ports as shown in the following image:

Installing Peripherals 35
Figure 9-1 - MagTek Reader Ports
1. On the client that will use the MagTek IPAD reader, stop POS Operations. 2. Connect the MagTek device to the client USB port. 3. Start POS Operations. 4. Test the reader by pressing the Clock-in key. The reader should make a sound
and prompt the user to swipe a card. 5. Close the Clock In dialog box.
Manually Entering Credit Card Data in EMSR Mode If the magnetic stripe reader cannot read a credit card, you can enter the account number using the ID Tech SecureKey device. You cannot use the POS Operations touchscreen to enter card data.

36 Uninstalling RES
10 Uninstalling RES Depending on your operating system, use the Microsoft Windows Programs and Features application or the Microsoft Windows 10 Apps setting to uninstall Micros RES and Micros RES Prerequisites.
Troubleshooting 37
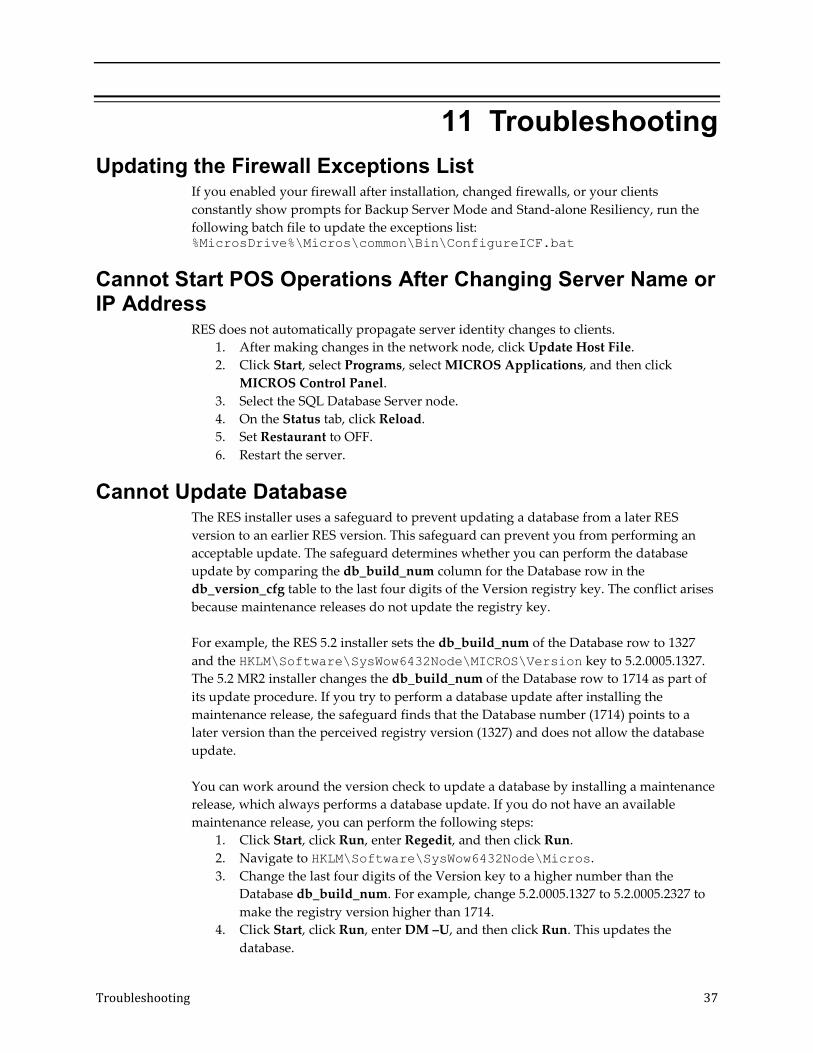
11 Troubleshooting Updating the Firewall Exceptions List
If you enabled your firewall after installation, changed firewalls, or your clients constantly show prompts for Backup Server Mode and Stand-alone Resiliency, run the following batch file to update the exceptions list: %MicrosDrive%\Micros\common\Bin\ConfigureICF.bat
Cannot Start POS Operations After Changing Server Name or IP Address
RES does not automatically propagate server identity changes to clients. 1. After making changes in the network node, click Update Host File. 2. Click Start, select Programs, select MICROS Applications, and then click
MICROS Control Panel. 3. Select the SQL Database Server node. 4. On the Status tab, click Reload. 5. Set Restaurant to OFF. 6. Restart the server.
Cannot Update Database The RES installer uses a safeguard to prevent updating a database from a later RES version to an earlier RES version. This safeguard can prevent you from performing an acceptable update. The safeguard determines whether you can perform the database update by comparing the db_build_num column for the Database row in the db_version_cfg table to the last four digits of the Version registry key. The conflict arises because maintenance releases do not update the registry key. For example, the RES 5.2 installer sets the db_build_num of the Database row to 1327 and the HKLM\Software\SysWow6432Node\MICROS\Version key to 5.2.0005.1327. The 5.2 MR2 installer changes the db_build_num of the Database row to 1714 as part of its update procedure. If you try to perform a database update after installing the maintenance release, the safeguard finds that the Database number (1714) points to a later version than the perceived registry version (1327) and does not allow the database update. You can work around the version check to update a database by installing a maintenance release, which always performs a database update. If you do not have an available maintenance release, you can perform the following steps:
1. Click Start, click Run, enter Regedit, and then click Run. 2. Navigate to HKLM\Software\SysWow6432Node\Micros. 3. Change the last four digits of the Version key to a higher number than the
Database db_build_num. For example, change 5.2.0005.1327 to 5.2.0005.2327 to make the registry version higher than 1714.
4. Click Start, click Run, enter DM –U, and then click Run. This updates the database.

38 Troubleshooting
5. Revert the last four digits of the Version key. If you do not revert the registry version, an incorrect database update can cause errors and future RES updates can fail.
6. Restart the server.
Fixing a Corrupted Compact Flash The Compact Flash can be corrupted if the server or client powers off during installation. Reformat the compact flash and restart the installation process on the client.
POS Operations says “System Closed” on Clients If you set the server (Restaurant) to Back of House in the MICROS Control Panel, all clients show the “System Closed” screen. To fix this issue, set Restaurant to Front of House.
Removing Unused Client Nodes from the Database RES continues attempting to connect to unused clients. Remove unused client nodes from the database to reduce the amount of bandwidth used to search for clients.
1. Click Start, select MICROS Applications, and then click MICROS Control Panel.
2. On the menu bar, click View, and then click Show All Clients. 3. Remove the unused client nodes.
Printing Service Fails Do not assign more than 8 print devices to a client. Restart the client.
Finding the Delivery Dispatch File RES installs DeliveryDispatch.Iog in MICROS\RES\POS\Etc
Finding the Installation Log Files If you are performing a full install, RES Setup creates the log file MicrosResSetup.log in the Windows folder of the RES server. If you are installing a maintenance release, RES Setup creates the log files MicrosResPatch.log and MicrosMainPatch.log in the Windows folder of the RES server.
Monitoring the Database in Real Time Use the SAP SQL Anywhere Cockpit to monitor the database and configure email alerts.
1. In SQL Central, connect to the database, right-click the database server, and then click Open SQL Anywhere Cockpit.
2. Follow the instructions until a web browser opens the login page for SQL Anywhere Cockpit.
3. Enter a dba username, password, and the name of the database.

Troubleshooting 39
4. Use the MESSAGES page to view and configure alerts. The SAP SQL Anywhere documentation contains more information about setting up and using the SQL Anywhere Cockpit.

40 Client CAL Folders
12 Client CAL Folders Each compatible client retrieves files from their respective folder in the \MICROS\Res\CAL\ directory. Table 5 - Client CAL Folders
Client Folder
DT Research WebDT 410 DT410
DT Research WebDT 415
DT Research WebDT 430 DT430
Workstation 4LX WS4LX
Workstation 5 WS5
Workstation 5A WS5A
PCWS 2015 Win32
Tablet R-Series mTablet
Tablet E-Series Win32
Order Confirmation Board (Peripheral) OrderConfirmation
Related Documents