MOZA Lite: http://www.gudsen.com/moza-lite.html Quick Start Guide V1.0 GUDSEN

Welcome message from author
This document is posted to help you gain knowledge. Please leave a comment to let me know what you think about it! Share it to your friends and learn new things together.
Transcript

MOZA Lite: http://www.gudsen.com/moza-lite.htmlQuick Start GuideV1.0
GUDSEN
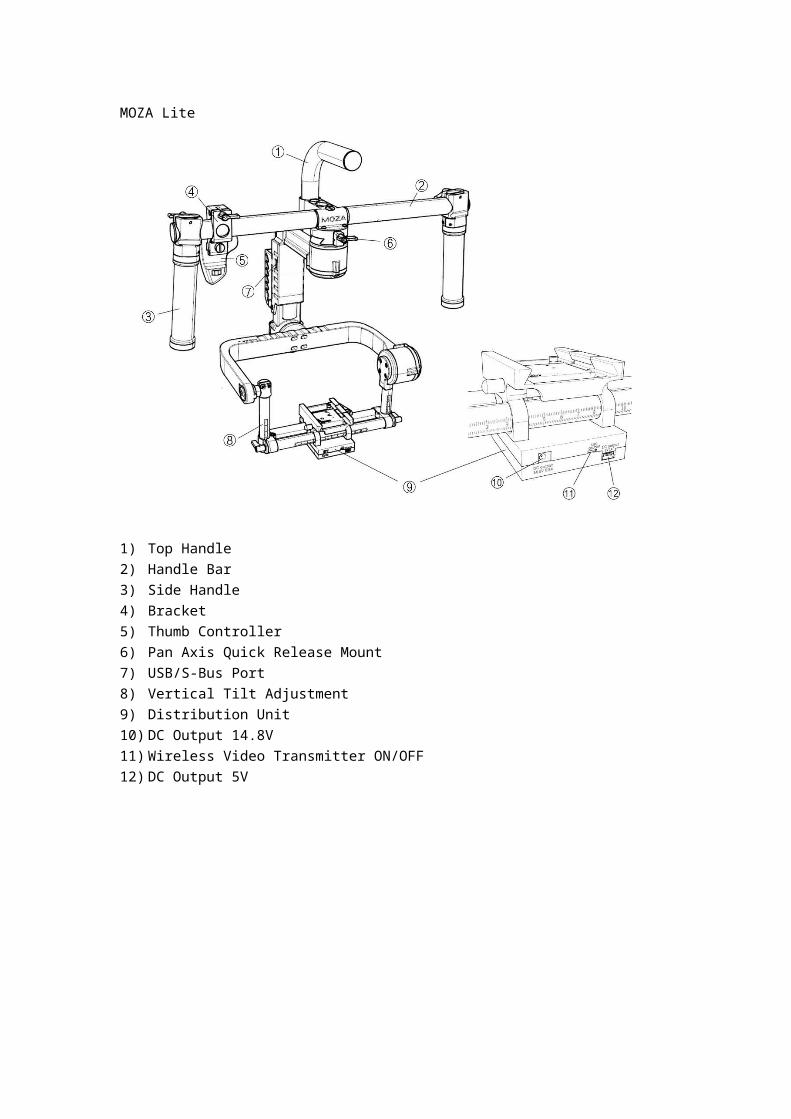
MOZA Lite
1) Top Handle2) Handle Bar3) Side Handle4) Bracket5) Thumb Controller6) Pan Axis Quick Release Mount7) USB/S-Bus Port8) Vertical Tilt Adjustment9) Distribution Unit10) DC Output 14.8V11) Wireless Video Transmitter ON/OFF12) DC Output 5V

1) Pan Axis Adjustment2) MOZA Intelligent Battery3) Tilt Axis Adjustment4) Roll Axis Adjustment5) HDMI Input Port6) USB Control Port7) AV Out Port
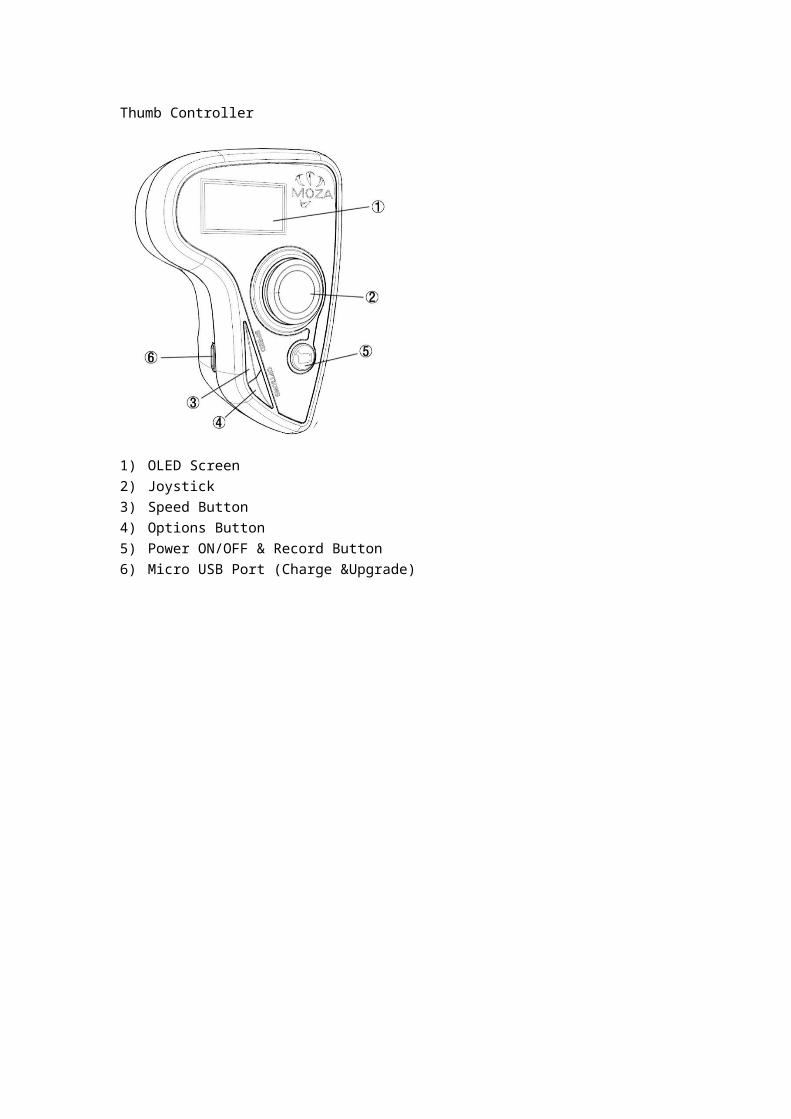
Thumb Controller
1) OLED Screen2) Joystick3) Speed Button4) Options Button5) Power ON/OFF & Record Button6) Micro USB Port (Charge &Upgrade)
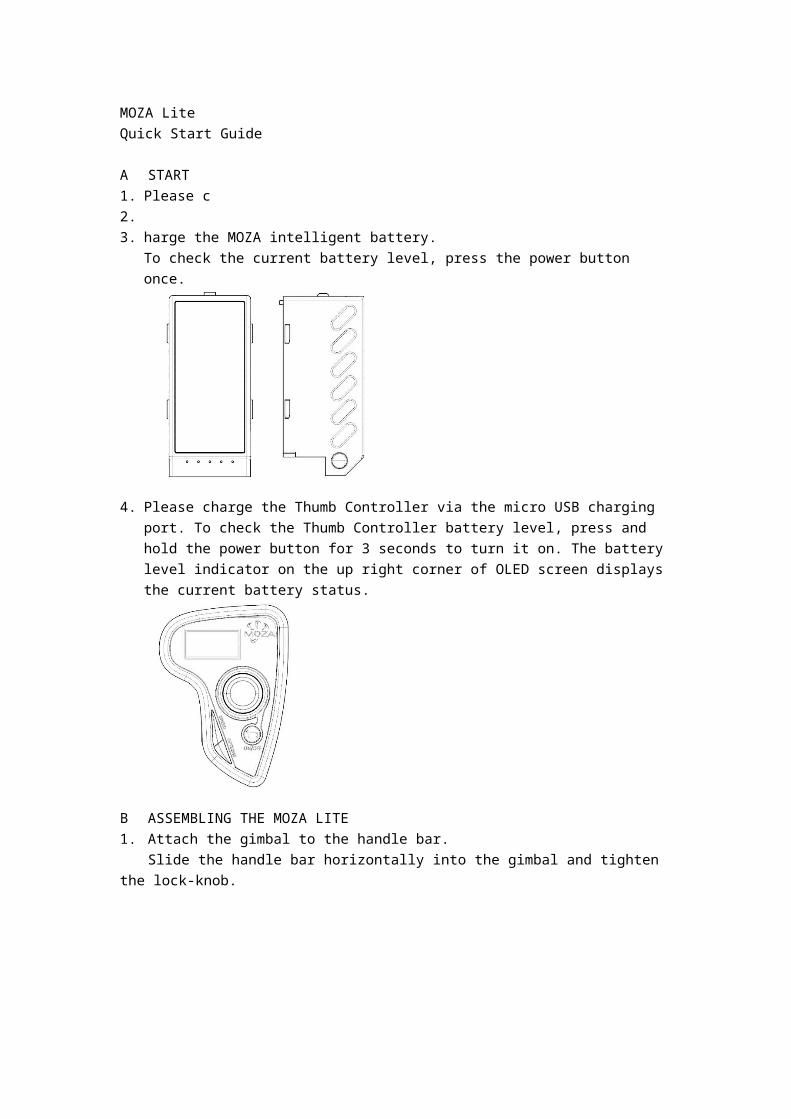
MOZA LiteQuick Start Guide
A START1. Please c2.3. harge the MOZA intelligent battery.
To check the current battery level, press the power button once.
4. Please charge the Thumb Controller via the micro USB charging port. To check the Thumb Controller battery level, press and hold the power button for 3 seconds to turn it on. The battery level indicator on the up right corner of OLED screen displays the current battery status.
B ASSEMBLING THE MOZA LITE1. Attach the gimbal to the handle bar.
Slide the handle bar horizontally into the gimbal and tighten the lock-knob.

2. To install the MOZA intelligent battery, slide it directly into the gimbal and then slide down until the lock-pin is secured.
C MOUNTING THE CAMERA1. Attach the camera to the mounting plate and tighten the screw.

2. Insert the camera until the safetylock engages. Then tighten the side clamp.
D BALANCING1. Place the gimbal upside down on a level surface.

2. Balancing the Tilt AxisLoosen the side clamp to slide the camera forwards or backwards until the tilt axis remains level, and then tighten the side clamp.
3. Balancing the Roll AxisLoosen the two lock-knobs to slide the camera left or right until the roll axis remains level, and then tighten the two lock-knobs.

4. Balancing the Vertical TiltLoosen the two lock-knobs to slide the camera upwards or downwards until the camera stays still when released, and then tighten the two lock-knobs.
5. Balancing the Pan AxisLoosen the lock-knob to slide the compartment forwards or backwards until the pan axis stays still when released

E CONNECTING THE THUMB CONTROLLER TO MOZA LITE1. Turn on the MOZA Lite by pressing the power button for 3 seconds.
2. Turn on the thumb controller by pressing the power button for 3 seconds. Check the signal indicator on the up right corner of the OLED screen. If the thumb controller is connected, the signal indicator will show the signal strength.

F THUMB CONTROLLER OPERATION1. Joystick
Horizontal movements control the pan axis.Vertical movements control the tilt axis.
2. Speed Button
Single press: Change speeds between Low/Medium/High.Long press: Change speed settings between gimbal movement speed and focus control speed.
3. Option Button
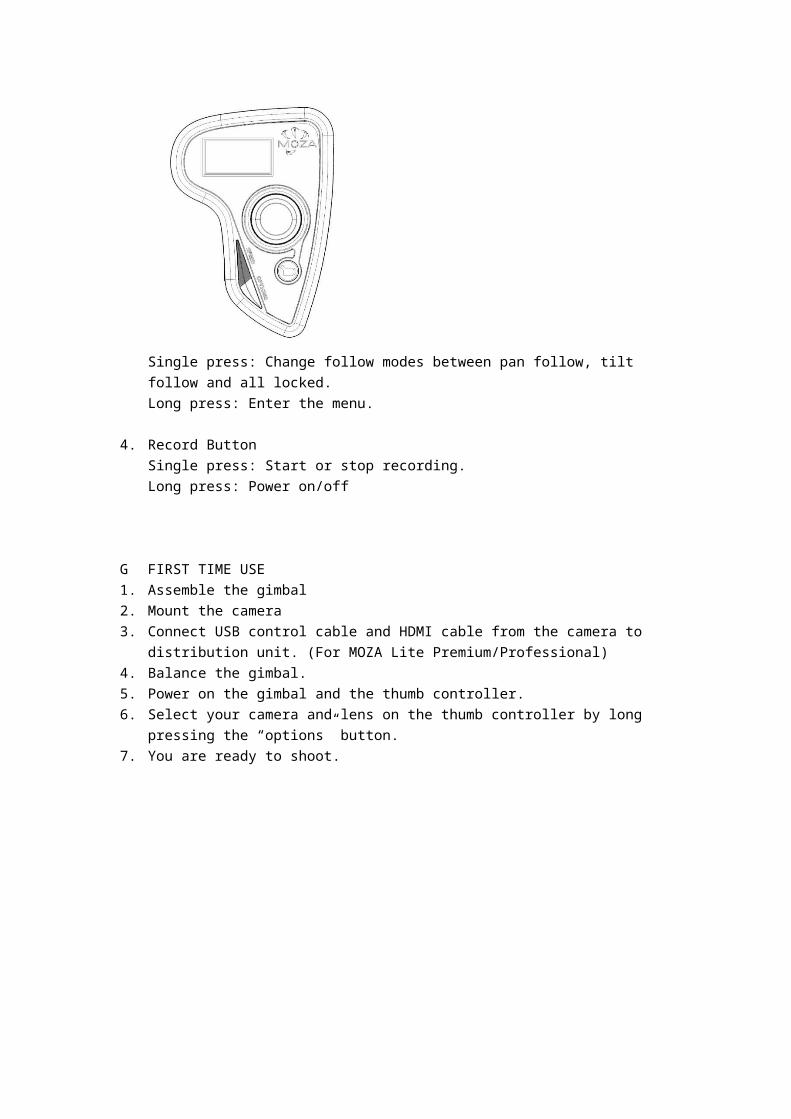
Single press: Change follow modes between pan follow, tilt follow and all locked.Long press: Enter the menu.
4. Record ButtonSingle press: Start or stop recording.Long press: Power on/off
G FIRST TIME USE1. Assemble the gimbal2. Mount the camera3. Connect USB control cable and HDMI cable from the camera to distribution unit. (For MOZA
Lite Premium/Professional)4. Balance the gimbal.5. Power on the gimbal and the thumb controller.6. Select your camera and lens on the thumb controller by long pressing the “options” button.7. You are ready to shoot.
Related Documents