Chapter 3 Managing NDSR Projects Page 3.1 Chapter 3 Managing NDSR Projects To enter data into NDSR, first create a project to organize the information in the form of records. Prior to creating a project, review your study protocol and methodology to determine the appropriate record type methodology to select. Once a record type is chosen for a project, it cannot be changed. Projects may contain records for only one of the twelve record types: Recalls, Records, Record-Assisted Recalls, Recalls with DSAM 24-hour intake, Recalls with DSAM 24-hour and past 30 days intake, Records with DSAM 24-hour intake, Records with DSAM 24-hour and past 30 days intake, Record-Assisted Recalls with DSAM 24-hour intake, Record-Assisted Recalls with DSAM 24-hour and past 30 days intake, User Recipes, DSAM User Products or Menus. Records with the same record type methodology may easily be copied or moved from one project to another. This option is also available for records with the same record type methodology from previous versions of NDSR, allowing the user to combine study records into one project for the generation of output files and/or averaged reports. There is no limitation to the number of projects in NDSR or the number of records in a project. However, project number and size may impact the speed of the initial loading of NDSR and the backup, restore and output utilities. NCC recommends limiting project size to approximately 500 records. NDSR projects may be organized into a system of folders with up to three sub-folder levels. The NDSR Main Folder is a default folder and may not be edited. Folders, unlike projects may contain all record type methodologies allowing the user to organize project data by study. This chapter describes: NDSR record types How to create a project in NDSR How to set project preferences How to sort projects and records How to copy records into a project How to edit project information How to delete a project from NDSR How to create a folder in NDSR How to move projects and folders into folders How to delete a folder from NDSR The NDSR Recycle Bin How to search for records in NDSR NOTE: Find information about additional project management activities such as backing up and restoring data and generating output files in “Chapter 9, NDSR Utilities” and “Chapter 8, Managing NDSR Output”.

Welcome message from author
This document is posted to help you gain knowledge. Please leave a comment to let me know what you think about it! Share it to your friends and learn new things together.
Transcript

Chapter 3 Managing NDSR Projects Page 3.1
Chapter 3
Managing NDSR Projects
To enter data into NDSR, first create a project to organize the information in the form of records.
Prior to creating a project, review your study protocol and methodology to determine the
appropriate record type methodology to select. Once a record type is chosen for a project, it cannot
be changed. Projects may contain records for only one of the twelve record types: Recalls, Records,
Record-Assisted Recalls, Recalls with DSAM 24-hour intake, Recalls with DSAM 24-hour and past
30 days intake, Records with DSAM 24-hour intake, Records with DSAM 24-hour and past 30 days
intake, Record-Assisted Recalls with DSAM 24-hour intake, Record-Assisted Recalls with DSAM
24-hour and past 30 days intake, User Recipes, DSAM User Products or Menus. Records with the
same record type methodology may easily be copied or moved from one project to another. This
option is also available for records with the same record type methodology from previous versions
of NDSR, allowing the user to combine study records into one project for the generation of output
files and/or averaged reports.
There is no limitation to the number of projects in NDSR or the number of records in a project.
However, project number and size may impact the speed of the initial loading of NDSR and the
backup, restore and output utilities. NCC recommends limiting project size to approximately 500
records.
NDSR projects may be organized into a system of folders with up to three sub-folder levels. The
NDSR Main Folder is a default folder and may not be edited. Folders, unlike projects may contain
all record type methodologies allowing the user to organize project data by study.
This chapter describes:
NDSR record types
How to create a project in NDSR
How to set project preferences
How to sort projects and records
How to copy records into a project
How to edit project information
How to delete a project from NDSR
How to create a folder in NDSR
How to move projects and folders into folders
How to delete a folder from NDSR
The NDSR Recycle Bin
How to search for records in NDSR
NOTE: Find information about additional project management activities such as backing up and
restoring data and generating output files in “Chapter 9, NDSR Utilities” and “Chapter 8,
Managing NDSR Output”.

Page 3.2 NDSR Manual
NDSR Record Types: Recalls The intake record type Recall is used for collection of dietary data via an in-person interview or
over the telephone. This record type allows the use of the multiple-pass approach with prompts
displayed throughout the interview to assist in data collection. Spanish prompts are also available.
The multiple-pass approach includes four passes (collect Quick List, review Quick List, collect
detailed record information, and review detailed information). An optional pass to review a list of
commonly Forgotten Foods can also be used when selected as a project-specific preference.
Records The intake record type Record is used when entering dietary data in NDSR from hard-copy dietary
intake forms. Prior knowledge of the NCC Food and Nutrient Database is beneficial when
designing an intake form that will capture the specificity featured in NDSR (e.g., variable
ingredients within recipes and preparation methods).
Record-Assisted Recalls The intake record type Record-Assisted Recall is used when 24-hour dietary data is
entered into NDSR using a hard-copy dietary intake form as an aid to the in-person or phone
interview. Spanish prompts are available.
Recalls, Records or Record-Assisted Recalls with DSAM The Dietary Supplement Assessment Module (DSAM) may be selected when your study protocol
includes the collection of dietary supplement data in addition to dietary intake records. Dietary
supplement intake may be collected for the 24-hour intake or for the 24-hour intake and the past 30-
day intake. Spanish prompts are available for Recalls with DSAM and Record-Assisted Recalls
with DSAM.
User Recipes The record type User Recipe is most commonly used for study-specific recipes, new-food
resolutions, and basic recipe analysis. Once created, User Recipes can later be selected from the
Food Search window and inserted into other record types (e.g., intake records). User Recipes
contain ingredient details, the number of servings made, and the number of servings eaten.
Menus The record type Menu is used to enter food records or menus that are offered to a certain population
group (e.g., school meal menus, menus for feeding studies, and menus for long- term care facilities).
DSAM User Products Similar in concept to the User Recipe record type, the User Product record type is used to
enter dietary supplements and antacids that are not found in the DSAM Database. After creating a
User Product record in DSAM, the user may then decide to make the User Product available in the
DSAM Database. Once the User Product is created and added to the DSAM Database, User
Products may be selected and inserted into the DSAM portion of an NDSR intake record.

Chapter 3 Managing NDSR Projects Page 3.3
Creating a Project
You must create a new project before you can set project preferences. Create a new project on the
Folder, Project and Record Selection window.
The following steps describe how to create a project in NDSR.
1. When you receive the Folder, Project and Record Selection window, either select
ProjectNew or select the NEW PROJECT button on the Project selection pane.
2. When you receive the Project Information window, you will note that the Folder: field
will indicate the folder highlighted on the Folder selection pane of the Folder, Project and
Record Selection window. The NDSR Main Folder is a default folder and may not be
edited. If you have previously created additional folders and want this new project to be
located in a specific folder, select the folder from the drop-down list. NDSR folders are
discussed further in a following section: “Creating a Folder”. Next enter a project name in
the Project Name: field (up to 50 characters).
NOTE: All project names must be unique.

Page 3.4 NDSR Manual
3. Move the cursor to the Project Abbreviation: field and enter an abbreviation for
this project (up to seven characters).
NOTE: All project abbreviations must be unique.
4. Move the cursor to the Record Type: field and select a record type from the drop-down
list.
NOTE: You cannot change a project’s record type once you have added a record to that project.
5. To add the Dietary Supplement Assessment Module (DSAM) to dietary intake recall,
record, or record-assisted recall methodologies, select the 24-HOUR INTAKE or 24-HOUR
AND PAST 30 DAYS INTAKE radio button.
6. Type any relevant notes in the Notes: field. All text entered here will appear on the
Project List Report.
7. Select the PREFERENCES button to view and edit the project specific Method,
Customizable Data Fields, Dietary Supplements, and Project tabs. Preferences selected
on these tabs apply to single projects. On the User tab view and specify preferences that
will apply to all projects in NDSR. Project preferences are discussed further in the
following section: “Setting Project Preferences”.
8. To add a project to the list in the Project selection pane, select the OK button.
Setting Project Preferences
To set project preferences select the PREFERENCES button on the Project Information window or
select FilePreferences from the menu bar. NDSR users may specify the following project
preferences:
Method Preferences define Header tab display, format and other requirements specific to
the project’s record type.
Customizable Data Fields Preferences allow you to set customized data field descriptors
and an optional character limit for data fields on the Header tabs of Intake Records, Menus,
and User Recipes, and for data fields on the Trailer tabs of Intake Records.
Dietary Supplements Preferences allow for the selection of additional supplement use
questions required for your protocol.
Project Preferences define the default directories for backup, export, output, and reports
folders, and the introduction script file name.
User Preferences define which NDSR window opens first, the shading during food search
and the option of including column headers when generating output files.
Setting Method Preferences The Method tab defines NDSR data collection and entry requirements. The method preferences that
may be set are dependent on the record type selected for the project. All records within a project
have the same preferences. A project’s method preferences may be changed after the project has
begun.

Chapter 3 Managing NDSR Projects Page 3.5
NOTE: If you change method preferences after records have been inserted in a project, be sure to
edit previously entered records according to the new preferences.
The following steps describe how to set method preferences.
1. To set project method preferences select the PREFERENCES button on the Project
Information window or select FilePreferences from the menu bar.
2. When you receive the Preferences window, select the Method tab.
NOTE: ID is required for all records and is not a preference. Date is required for intake and
menu records and is not a preference. Serving size description is required for User
Recipes and is not a preference.
Customize the Header tab by selecting the required fields on the Method tab.
The following fields can be set as Intake Record Header tab preferences:
Participant name Date of birth Gender Life Stage Group Interviewer ID Visit number Site ID

Page 3.6 NDSR Manual
The following display, food entry options, and record trailer questions can be set:
Show non-required fields in record header Show non-required fields in Meal Information window Meal time format Display Spanish prompts Use Introduction Script Use Quick List Require meal name Require meal location Require note if amount exceeds maximum Require note if amount is less than minimum Use Forgotten Food Pass Use Food Portion Visual (protocol specific)
Default food shape dimension unit
Use Trailer Questions
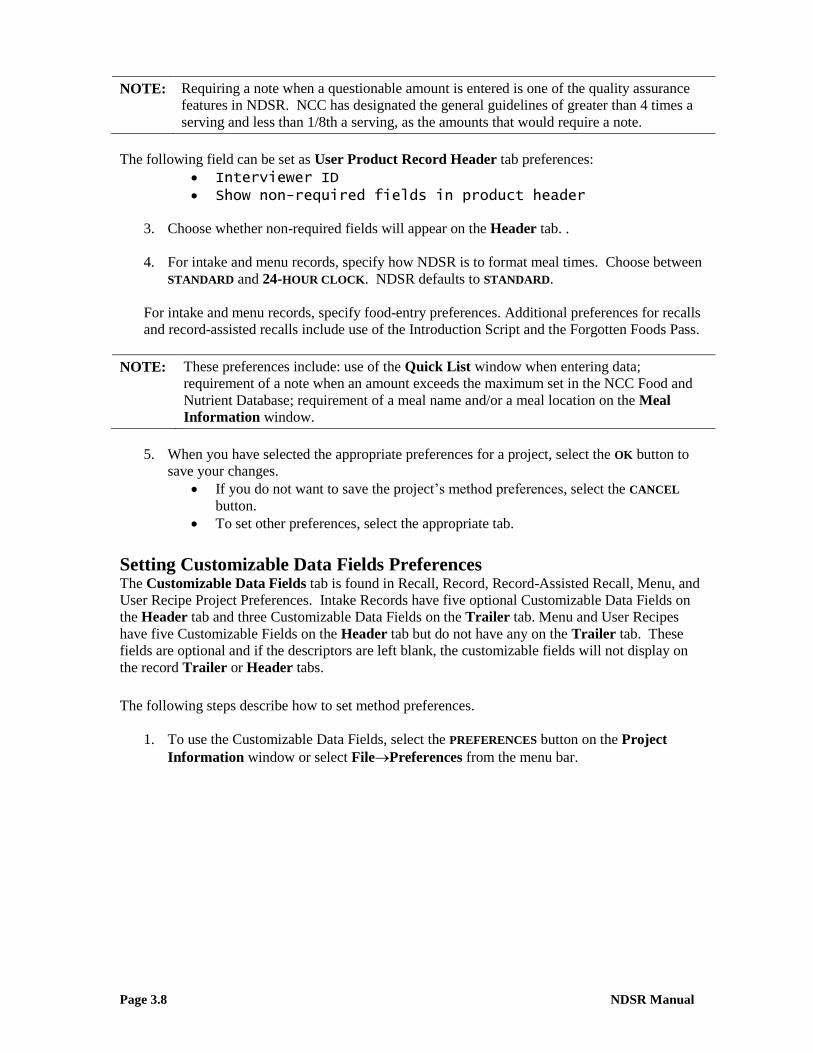
NOTE: Requiring a note when a questionable amount is entered is one of the quality assurance
features in NDSR. NCC has designated the general guidelines of greater than 4 times a
serving and less than 1/8th a serving, as the amounts that would require a note.
NOTE: The default food shape dimension unit can be selected as either inches or centimeters.
Regardless of which unit is selected as the default, the user has the option to change the
unit for when entering the amount of each food.
The following fields can be set as User Recipe Record Header tab preferences:
Recipe name Site ID Version Interviewer ID
The following display, food entry, and customized data fields requirements can be set:
Show non-required fields in recipe header Require note if amount exceeds maximum Require note if amount is less than minimum Use Food Portion Visual (protocol specific) Default food shape dimension unit
NOTE: The default food shape dimension unit can be selected as either inches or centimeters.
Regardless of which unit is selected as the default, the user has the option to change the
unit for when entering the amount of each food.

Chapter 3 Managing NDSR Projects Page 3.7
NOTE: Requiring a note when a questionable amount is entered is one of the quality assurance
features in NDSR. NCC has designated the general guidelines of greater than 4 times a
serving and less than 1/8th a serving, as the amounts that would require a note.
The following fields can be set as Menu Record Header tab preferences:
Menu name Version Interviewer ID Site ID
The following display, food entry, and customized data fields requirements can be set:
Show non-required fields in menu header Show non-required fields in Meal Information window Meal time format Use Quick List Require meal name Require meal location Require note if amount exceeds maximum Require note if amount is less than minimum Use Food Portion Visual (protocol specific) Default food shape dimension unit
NOTE: The default food shape dimension unit can be selected as either inches or centimeters.
Regardless of which unit is selected as the default, the user has the option to change the
unit for when entering the amount of each food.
Page 3.8 NDSR Manual
NOTE: Requiring a note when a questionable amount is entered is one of the quality assurance
features in NDSR. NCC has designated the general guidelines of greater than 4 times a
serving and less than 1/8th a serving, as the amounts that would require a note.
The following field can be set as User Product Record Header tab preferences:
Interviewer ID Show non-required fields in product header
3. Choose whether non-required fields will appear on the Header tab. .
4. For intake and menu records, specify how NDSR is to format meal times. Choose between
STANDARD and 24-HOUR CLOCK. NDSR defaults to STANDARD.
For intake and menu records, specify food-entry preferences. Additional preferences for recalls
and record-assisted recalls include use of the Introduction Script and the Forgotten Foods Pass.
NOTE: These preferences include: use of the Quick List window when entering data;
requirement of a note when an amount exceeds the maximum set in the NCC Food and
Nutrient Database; requirement of a meal name and/or a meal location on the Meal
Information window.
5. When you have selected the appropriate preferences for a project, select the OK button to
save your changes.
If you do not want to save the project’s method preferences, select the CANCEL
button.
To set other preferences, select the appropriate tab.
Setting Customizable Data Fields Preferences The Customizable Data Fields tab is found in Recall, Record, Record-Assisted Recall, Menu, and
User Recipe Project Preferences. Intake Records have five optional Customizable Data Fields on
the Header tab and three Customizable Data Fields on the Trailer tab. Menu and User Recipes
have five Customizable Fields on the Header tab but do not have any on the Trailer tab. These
fields are optional and if the descriptors are left blank, the customizable fields will not display on
the record Trailer or Header tabs.
The following steps describe how to set method preferences.
1. To use the Customizable Data Fields, select the PREFERENCES button on the Project
Information window or select FilePreferences from the menu bar.

Chapter 3 Managing NDSR Projects Page 3.9
2. When you receive the Preferences window, select the Customizable Data Fields tab.
3. Customize the fields by typing a descriptor into the Header or Trailer Data Field Descriptor:
Field. The custom descriptor can be up to 27 characters long.
NOTE: A customizable field must have a descriptor if it is to be displayed. Once a descriptor is
typed into the Data Field Descriptor: Field, the DISPLAY checkbox will become checked.
4. To limit the number of characters that can be entered into the Header Data Field or Trailer
Data Field, type a positive integer less than 100 into the Character Limit: Field.
NOTE: If no number is typed in to the Character Limit: Field, up to 100 characters can be entered
into the Data Field on the Header or Trailer tab.
5. To require that a response be entered for a customizable field in each record before
continuing to the next window, check the REQUIRED checkbox.
The following fields can be set as Intake Record Header tab and Trailer tab preferences:
Header Data Field 1 Descriptor
Header Data Field 1 Character Limit
Require Header Data Field 1
Header Data Field 2 Descriptor
Header Data Field 2 Character Limit
Require Header Data Field 2

Page 3.10 NDSR Manual
Header Data Field 3 Descriptor
Header Data Field 3 Character Limit
Require Header Data Field 3
Header Data Field 4 Descriptor
Header Data Field 4 Character Limit
Require Header Data Field 4
Header Data Field 5 Descriptor
Header Data Field 5 Character Limit
Require Header Data Field 5
Trailer Header Data Field 1 Descriptor
Trailer Header Data Field 1 Character Limit
Require Trailer Data Field 1
Trailer Header Data Field 2 Descriptor
Trailer Header Data Field 2 Character Limit
Require Trailer Data Field 2
Trailer Header Data Field 3 Descriptor
Trailer Header Data Field 3 Character Limit
Require Trailer Data Field 3
The following fields can be set as User Recipe Header tab preferences:
Header Data Field 1 Descriptor
Header Data Field 1 Character Limit
Require Header Data Field 1
Header Data Field 2 Descriptor
Header Data Field 2 Character Limit
Require Header Data Field 2
Header Data Field 3 Descriptor
Header Data Field 3 Character Limit
Require Header Data Field 3
Header Data Field 4 Descriptor
Header Data Field 4 Character Limit
Require Header Data Field 4
Header Data Field 5 Descriptor
Header Data Field 5 Character Limit
Require Header Data Field 5
The following fields can be set as Menu Header tab preferences:
Header Data Field 1 Descriptor
Header Data Field 1 Character Limit
Require Header Data Field 1
Header Data Field 2 Descriptor
Header Data Field 2 Character Limit
Require Header Data Field 2
Header Data Field 3 Descriptor
Header Data Field 3 Character Limit
Require Header Data Field 3
Header Data Field 4 Descriptor
Header Data Field 4 Character Limit

Chapter 3 Managing NDSR Projects Page 3.11
Require Header Data Field 4
Header Data Field 5 Descriptor
Header Data Field 5 Character Limit
Require Header Data Field 5
Setting Dietary Supplements Preferences The following steps describe how to set dietary supplement preferences.
1. To set project DSAM preferences select the PREFERENCES button on the Project
Information window or select FilePreferences from the menu bar.
2. When you receive the Preferences window, select the Dietary Supplements tab.
3. The following can be set as DSAM interview and data entry preferences:
Require Additional Supplement Use Questions
Reason for Use Recommended By Place of Purchase Perceived Effectiveness
4. When you have selected the DSAM preferences for a project, select the OK button to save
your changes.
If you do not want to save the dietary supplements preferences, select the CANCEL
button.
To set other preferences, select the appropriate tab.

Page 3.12 NDSR Manual
Setting User Preferences The Project Preferences tab specifies the project specific directories for output, backup, export,
report folders, the location of the Introduction Script and Spanish Introduction Script.
The following steps describe how to set Project Preferences.
1. To set project user preferences select the PREFERENCES button on the Project Information
window or select FilePreferences from the menu bar.
2. When you receive the Preferences window, select the Project tab.
3. Specify the directory for the Backup folder. This is where the backup files for all projects
will be stored.
4. Specify the directory for the Export folder. This is where exported record header files for
all projects will be stored.
5. Specify the directory for the Output folder. This is where the output files for all projects
will be stored.
6. Specify the directory for the Reports folder. This is where reports for all projects will be
stored.
NOTE: The BROWSE button allows the user to browse for a folder within their particular system
or network.

Chapter 3 Managing NDSR Projects Page 3.13
7. Specify the Introduction file name for the Introduction Script.
NOTE: The default script is found in the following location: C:\Users\Public\Public Documents\NCC\NDSR 2018\Additional Files\Scripts\Introduction Script.rtf. Go to the location of this file on your computer, select Save As and edit to
customize for your study, changing the Introduction file name to easily identify the study
where it will be used. See the following example where the Introduction Script has been
changed to Intro Kids Like to Eat.rtf
8. Specify the Spanish Introduction file name for the Introduction Script-Spanish. This will be
used for all projects.
NOTE: The default script is found in the following location: C:\Users\Public\Public Documents\NCC\NDSR 2018\Additional Files\Scripts\Introduction Script Spanish.rtf. Go to the location of this file on your computer, select Save As
and edit to customize for your study, changing the Introduction file name to easily identify
the study where it will be used. See the following example where the Introduction Script has
been changed to Introduction Script Spanish.rtf
9. When you have selected the appropriate project preferences, select the OK button to save
your changes.
If you do not want to save changes to a project’s preferences, select the CANCEL
button.
To set all other preferences, select the appropriate tab.

Page 3.14 NDSR Manual
The User tab specifies which window opens first when you access NDSR, the percentage shading
applied to the Food Search window and the option of including column headers when generating
output files. These preferences apply to all projects.
The following steps describe how to set User Preferences.
1. To set project user preferences select the PREFERENCES button on the Project Information
window or select FilePreferences from the menu bar.
2. When you receive the Preferences window, select the User tab.
3. Specify which screen you will see first when you start NDSR.
If you want the Record Information window to open first when you start NDSR,
select the checkbox.
If you want the Folder, Project and Record Selection window to open first when
you start NDSR, deselect the checkbox.
4. Select the INCLUDE COLUMN HEADERS IN OUTPUT FILES checkbox to have all the column
headers included when you generate output files.
5. When you have selected the appropriate user preferences, select the OK button to save your
changes.
If you do not want to save changes to a project’s user preferences, select the
CANCEL button.
To set other preferences, select the appropriate tab.

Chapter 3 Managing NDSR Projects Page 3.15
Sorting Projects and Records
The Folder, Project and Record Selection window includes the Folder selection pane, Project
selection pane and the Record selection pane. Within the Project selection pane and the Record
selection pane are columns. By selecting a column header with the mouse, you may sort your
projects or records alphabetically or numerically by the column header variable.
Copying and Moving Records into a Project
To copy records into a new or existing project, use the Save Record As function. A copy of the
chosen records will remain in the original project.
To move records into a new or existing project, use the Move function. The chosen records will
literally be moved from one project to another.
NOTE: If you attempt to move or copy a record to a project that already contains the record, you
will receive a Duplicate Record dialog box. You will need to decide if you want to
overwrite the duplicate.
Copying Records The following steps describe how to copy records into a new or existing project.
1. Create a new project in NDSR unless the project to which you want to copy records already
exists.
NOTE: You will only be allowed to copy records into a project that has the same record type.
2. Select the project that contains the record(s) you want to copy. Then highlight the record(s)
you want to copy. To highlight more than one record, press the SHIFT key or the CTRL key
and select with the mouse the records you want to select. To do this with the keyboard
only, hold the SHIFT or CTRL key + or . Use the SPACE BAR to select the record(s).
3. Select RecordSave As. When you receive the Save Record As dialog box, select the
project to which you want to copy the record from the drop-down list in the Project:
field. Only projects with the same record type will be listed.
4. To change the participant or record ID, type the new ID in the ID: field.
NOTE: Within a project, all record ID and date combinations must be unique. For a User Recipe,
the record ID must be unique across all projects.

Page 3.16 NDSR Manual
5. To change the date of intake or record date, type the new date in the Date: field.
6. To copy the selected record(s) to the new project, select the OK button. To cancel the copy
operation, select the CANCEL button.
NOTE: You may save a record to the same project if the ID or date is changed.
Moving Records The following steps describe how to move records into a new or existing project.
1. Create a new project in NDSR unless the project to which you want to move records
already exists.
NOTE: You will only be allowed to move records to a project that has the same record type.
2. Select the project that contains the record(s) you want to move. Then highlight the
record(s) you want to move. To highlight more than one record, press the SHIFT key or the
CTRL key and select with the mouse the records you want to move. To do this with the
keyboard only, hold the SHIFT or CTRL key + or . Use the SPACE BAR to select the
record(s).
3. Select RecordMove. When you receive the Move Record to Project dialog box, select
the project to which you want to move the record from the drop-down list. Only projects
with the same record type will be listed.
4. To move the selected record(s) to the new project, select the OK button. To cancel the
move operation, select the CANCEL button.
Editing a Project
Any time after creating a project, you may edit a project’s name, abbreviation, or notes using the
Project Information window.
NOTE: You cannot edit the record type once a project contains one or more records.

Chapter 3 Managing NDSR Projects Page 3.17
The following steps describe how to edit a project.
1. To change a project’s name, abbreviation, or associated notes, either select ProjectEdit
from the Folder, Project and Record Selection window, or select a project from the
Project selection: pane on the Folder, Project and Record Selection window.
2. When you receive the Project Information window, move the cursor to the field you want
to change.
3. After making changes in the Project Information window, select the OK button. NDSR
saves the changes and returns to the Folder, Project and Record Selection window.
4. To return to the Folder, Project and Record Selection window without saving your
changes, either select the CANCEL button or press the ESC key.
Deleting a Project
Before you delete a project, backup any data you may want to retrieve at a later date. For more
information about backing up NDSR data, refer to “Chapter 9, NDSR Utilities”.
The following steps describe how to delete a project from NDSR.
1. In the Project selection: pane on the Folder, Project and Record Selection window,
highlight the project you want to delete.
2. Either select ProjectDelete or select the DELETE key.
3. When you receive the Folder, Project and Record Management dialog box, select the
YES button.
Page 3.18 NDSR Manual
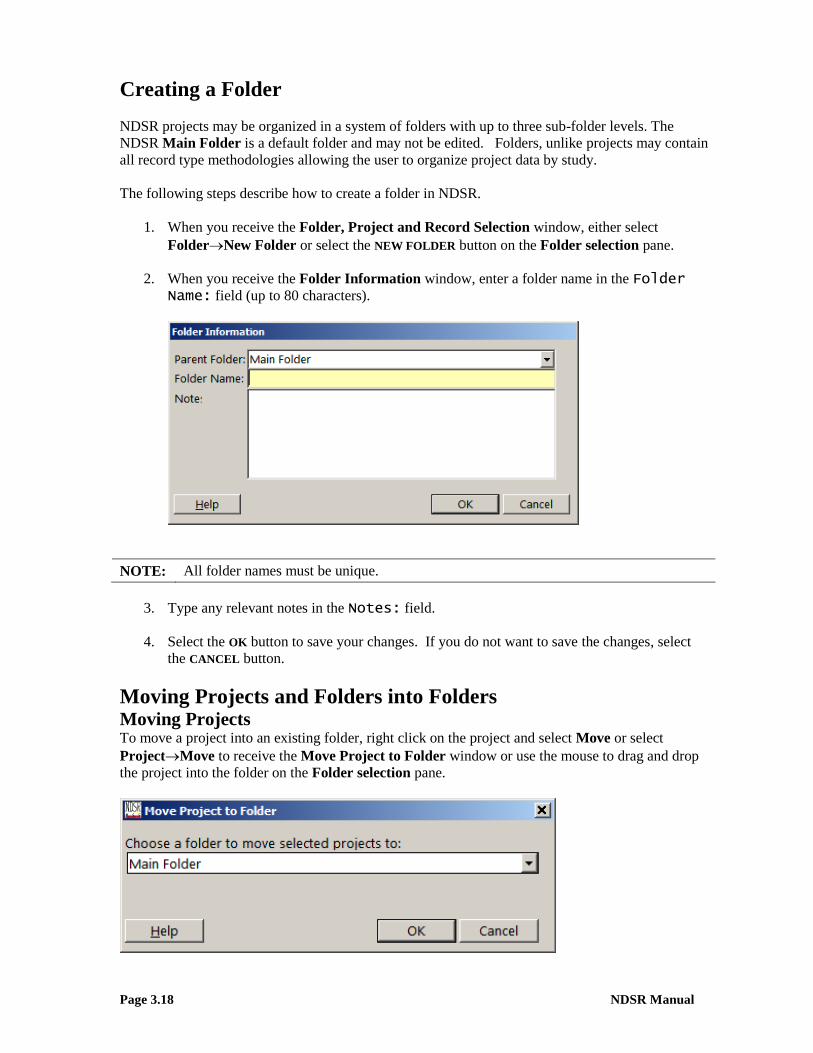
Creating a Folder
NDSR projects may be organized in a system of folders with up to three sub-folder levels. The
NDSR Main Folder is a default folder and may not be edited. Folders, unlike projects may contain
all record type methodologies allowing the user to organize project data by study.
The following steps describe how to create a folder in NDSR.
1. When you receive the Folder, Project and Record Selection window, either select
FolderNew Folder or select the NEW FOLDER button on the Folder selection pane.
2. When you receive the Folder Information window, enter a folder name in the Folder Name: field (up to 80 characters).
NOTE: All folder names must be unique.
3. Type any relevant notes in the Notes: field.
4. Select the OK button to save your changes. If you do not want to save the changes, select
the CANCEL button.
Moving Projects and Folders into Folders Moving Projects To move a project into an existing folder, right click on the project and select Move or select
ProjectMove to receive the Move Project to Folder window or use the mouse to drag and drop
the project into the folder on the Folder selection pane.

Chapter 3 Managing NDSR Projects Page 3.19
Moving Folders To move a folder into an existing folder, right click on the folder and select Move or select
FolderMove to receive the Move Folder window or use the mouse to drag and drop the project
into the folder on the Folder selection pane.
Deleting a Folder
Before you delete a folder, backup any data you may want to retrieve at a later date and empty the
folder that you want to delete. For more information about backing up NDSR data, refer to
“Chapter 9, NDSR Utilities”.
The following steps describe how to delete a folder from NDSR.
1. In the Folder selection: pane on the Folder, Project and Record Selection window,
highlight the project you want to delete.
2. Either select FolderDelete Folder or select the DELETE key.
3. When you receive the Folder, Project and Record Management dialog box, select the
YES button.
The NDSR Recycle Bin
The NDSR Recycle Bin is located on the Folder, Project and Record Selection window in the
Folder selection pane. The Recycle Bin contains all folders, projects and records that have been
deleted from NDSR. You may sort information in the Deleted Folders pane, Deleted Projects
pane and the Deleted Records pane by selecting a column header with the mouse.
To permanently delete all information in the Recycle Bin, select the EMPTY RECYCLE BIN button.
To permanently delete specific folders, projects or records, highlight them and select the DELETE
button.

Page 3.20 NDSR Manual
To undelete specific folders, projects or records, highlight them and select the UNDELETE button.
Searching for Records in NDSR
NDSR includes a search feature that allows you to search for projects and records in NDSR based
on a variety of criteria. You may also create a report based on your search results.
The following steps describe how to search for projects and records in NDSR and create a Record
Search Report.
1. To open the Record Search window, select ProjectSearch or RecordSearch from the
menu bar or select the search icon (flashlight) on the tool bar.

Chapter 3 Managing NDSR Projects Page 3.21
Enter in the Project pane any project search criteria.
The following fields can be set as project search criteria:
Abbreviation: (project abbreviation)
Record Type: (use the drop down list to select a record type)
Name Includes: (type in part of the name of the project)
Dietary Supplement Assessment Module: (use the drop down list to
select type of DSAM record)
2. Enter in the Record pane any record search criteria.
The following fields can be set as record search criteria:
Record ID: Date of Intake From: and To: (mm/dd/yyyy) Date of Entry From: and To: (mm/dd/yyyy) Status: (use the drop down list to select a record status)
Interviewer ID: Visit #: Site ID: Contains Food: Contains DSAM Product:
3. In the Recycle Bin pane, the NDSR record search defaults to EXCLUDE THE RECYCLE BIN
FROM RESULTS. If there are any records in the Recycle Bin that meet your search criteria,
there will be a blue message stating that “Items were found in the recycling bin.” To search
the Recycle Bin, select the radio button.
4. Once you have entered your criteria, select the SEARCH button.
5. To create an NDSR Record Search Report, select the REPORT button. The legends that
appear on the Record Search Report include: a blue ? for incomplete records, a red M
indicating a missing food or supplement, an orange PN indicating a priority note, and a
green √ that indicates the quality assurance status is complete.
6. To clear all search results, select the CLEAR button.
7. To view a specific record, highlight it and choose the SELECT button.
8. Select the CLOSE button to exit the Record Search window.
Reference Information
For information about creating output files, refer to “Chapter 8, Managing NDSR Output”.
For information about backing up and restoring NDSR data, or using other programs for
collecting record header information, refer to “Chapter 9, NDSR Utilities”.
For information about project protocol considerations, refer to “Appendix 12, Protocol
Considerations and Quality Assurance”.
Related Documents