Teacher Resources: Lesson 4: Watershed Lesson # 4: Watersheds Driving Question: Where does water come from and where does it go? Learning Goal: The water falling on the land either runs-off into the surface watershed or infiltrates into the groundwater system. (BM4B6-8#7; NSESD5-8SES#6; MEGOSE MS6, MS7, HS8; MCF (EAW) V.3MS3, (EH)V.2MS2, (EH) V.2MS3) Watersheds and the ground water system are interconnected. (MEGOSE HS8, MCF(EH) V.2MS3) Watersheds : A watershed is defined as all of the land area (hills, valleys, and flat land), including the lakes, rivers, and wetlands that drains water into a particular body of water. (MEGOSE HS8, MCF(EH) V.2MS3) Objectives: O3 - Use an understanding of watersheds to explain how water moves through river systems. (using) O5 - Develop/build models that explain how water moves through a groundwater system and watersheds (constructing). O6 - Explain how water cycles through the natural and engineered systems (telling the story) O8 - Evaluate land use scenarios for potential groundwater and surface water pollution sources and impacts. (reflecting) Assessment: A3 - Given a map of Michigan, explain how a pollutant would affect different locations. A5 - Build a model and explain the movement of water through a watershed and through a groundwater model. A6 - Explain how one community's wastewater (treated or untreated) could be the source of another community's drinking water. A8b - Given several land use proposals for a specific location, explain the impacts of the proposed action on runoff and infiltration. Lesson Purpose: The purpose of this lesson is to enable students to construct an understanding of watersheds and how water moves through the watershed system. The lesson also serves to show the connection between surface water and ground water systems, to offer a complete answer to the question, “where does water come from and where does it go.” It offers a beginning for students to apply both ground water and surface water to real environmental problems. Students will learn that in order to be able to fully explain the movement of water, they must consider both ground and surface level components. This purpose will be accomplished by model building, group work, and exploration of real events. Center for Curriculum Materials in Science 1

Welcome message from author
This document is posted to help you gain knowledge. Please leave a comment to let me know what you think about it! Share it to your friends and learn new things together.
Transcript
Teacher Resources: Lesson 4: Watershed
Lesson # 4: Watersheds
Driving Question: Where does water come from and where does it go? Learning Goal: The water falling on the land either runs-off into the surface watershed or infiltrates into the groundwater system. (BM4B6-8#7; NSESD5-8SES#6; MEGOSE MS6, MS7, HS8; MCF (EAW) V.3MS3, (EH)V.2MS2, (EH) V.2MS3) Watersheds and the ground water system are interconnected. (MEGOSE HS8, MCF(EH) V.2MS3) Watersheds: A watershed is defined as all of the land area (hills, valleys, and flat land), including the lakes, rivers, and wetlands that drains water into a particular body of water. (MEGOSE HS8, MCF(EH) V.2MS3) Objectives: O3 - Use an understanding of watersheds to explain how water moves through river systems. (using) O5 - Develop/build models that explain how water moves through a groundwater system and watersheds (constructing). O6 - Explain how water cycles through the natural and engineered systems (telling the story) O8 - Evaluate land use scenarios for potential groundwater and surface water pollution sources and impacts. (reflecting) Assessment: A3 - Given a map of Michigan, explain how a pollutant would affect different locations. A5 - Build a model and explain the movement of water through a watershed and through a groundwater model. A6 - Explain how one community's wastewater (treated or untreated) could be the source of another community's drinking water. A8b - Given several land use proposals for a specific location, explain the impacts of the proposed action on runoff and infiltration. Lesson Purpose: The purpose of this lesson is to enable students to construct an understanding of watersheds and how water moves through the watershed system. The lesson also serves to show the connection between surface water and ground water systems, to offer a complete answer to the question, “where does water come from and where does it go.” It offers a beginning for students to apply both ground water and surface water to real environmental problems. Students will learn that in order to be able to fully explain the movement of water, they must consider both ground and surface level components. This purpose will be accomplished by model building, group work, and exploration of real events.
Center for Curriculum Materials in Science 1
Teacher Resources: Lesson 4: Watershed
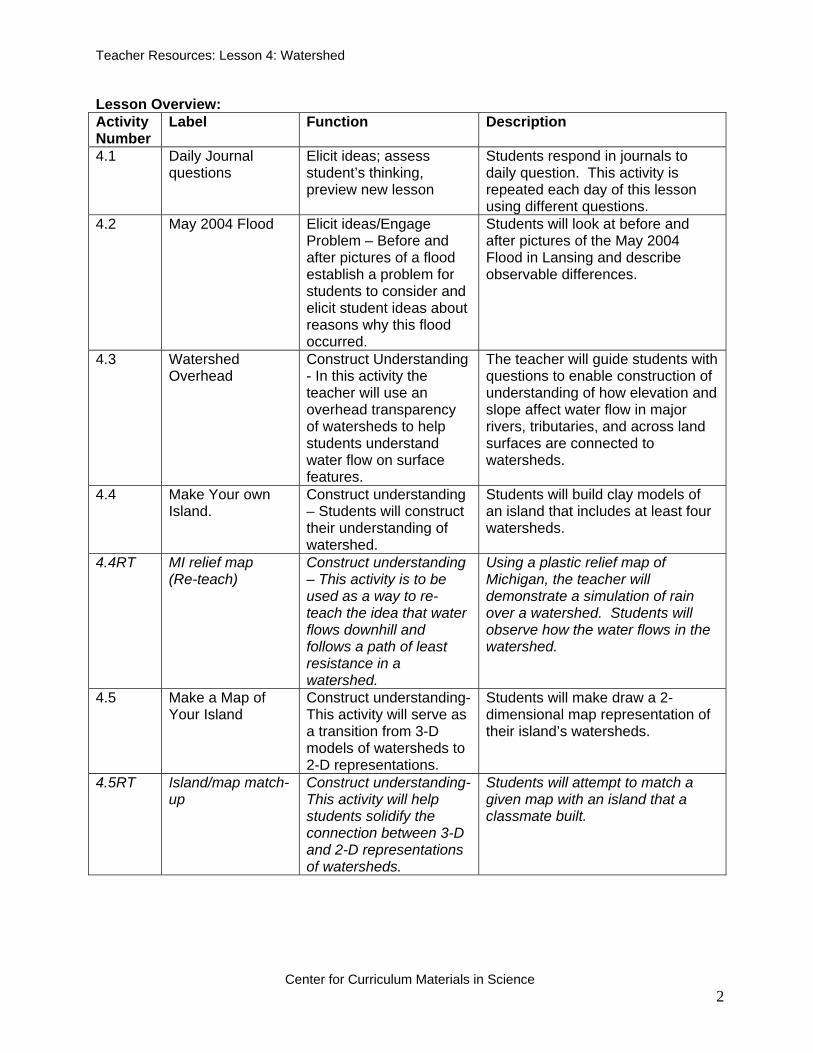
Lesson Overview: Activity Number
Label Function Description
4.1 Daily Journal questions
Elicit ideas; assess student’s thinking, preview new lesson
Students respond in journals to daily question. This activity is repeated each day of this lesson using different questions.
4.2 May 2004 Flood Elicit ideas/Engage Problem – Before and after pictures of a flood establish a problem for students to consider and elicit student ideas about reasons why this flood occurred.
Students will look at before and after pictures of the May 2004 Flood in Lansing and describe observable differences.
4.3 Watershed Overhead
Construct Understanding - In this activity the teacher will use an overhead transparency of watersheds to help students understand water flow on surface features.
The teacher will guide students with questions to enable construction of understanding of how elevation and slope affect water flow in major rivers, tributaries, and across land surfaces are connected to watersheds.
4.4 Make Your own Island.
Construct understanding – Students will construct their understanding of watershed.
Students will build clay models of an island that includes at least four watersheds.
4.4RT MI relief map (Re-teach)
Construct understanding – This activity is to be used as a way to re-teach the idea that water flows downhill and follows a path of least resistance in a watershed.
Using a plastic relief map of Michigan, the teacher will demonstrate a simulation of rain over a watershed. Students will observe how the water flows in the watershed.
4.5 Make a Map of Your Island
Construct understanding- This activity will serve as a transition from 3-D models of watersheds to 2-D representations.
Students will make draw a 2-dimensional map representation of their island’s watersheds.
4.5RT Island/map match-up
Construct understanding- This activity will help students solidify the connection between 3-D and 2-D representations of watersheds.
Students will attempt to match a given map with an island that a classmate built.
Center for Curriculum Materials in Science 2
Teacher Resources: Lesson 4: Watershed
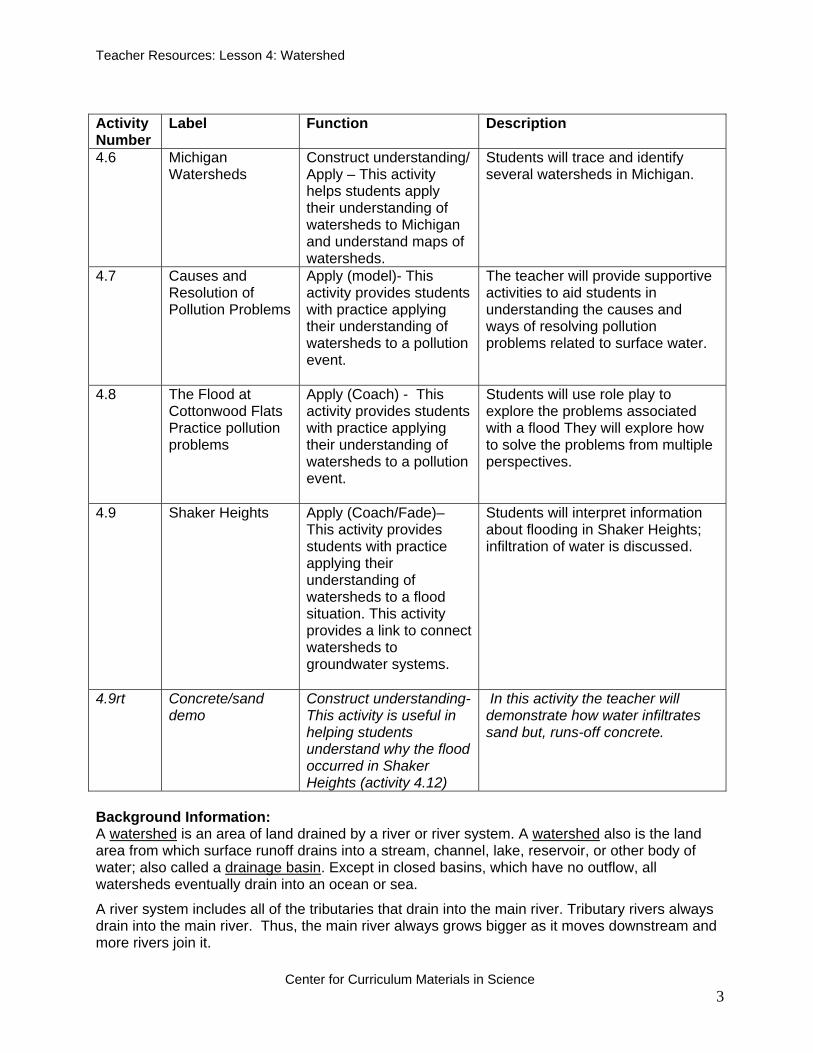
Activity Number
Label Function Description
4.6 Michigan Watersheds
Construct understanding/ Apply – This activity helps students apply their understanding of watersheds to Michigan and understand maps of watersheds.
Students will trace and identify several watersheds in Michigan.
4.7 Causes and Resolution of Pollution Problems
Apply (model)- This activity provides students with practice applying their understanding of watersheds to a pollution event.
The teacher will provide supportive activities to aid students in understanding the causes and ways of resolving pollution problems related to surface water.
4.8 The Flood at Cottonwood Flats Practice pollution problems
Apply (Coach) - This activity provides students with practice applying their understanding of watersheds to a pollution event.
Students will use role play to explore the problems associated with a flood They will explore how to solve the problems from multiple perspectives.
4.9 Shaker Heights Apply (Coach/Fade)– This activity provides students with practice applying their understanding of watersheds to a flood situation. This activity provides a link to connect watersheds to groundwater systems.
Students will interpret information about flooding in Shaker Heights; infiltration of water is discussed.
4.9rt Concrete/sand demo
Construct understanding- This activity is useful in helping students understand why the flood occurred in Shaker Heights (activity 4.12)
In this activity the teacher will demonstrate how water infiltrates sand but, runs-off concrete.
Background Information: A watershed is an area of land drained by a river or river system. A watershed also is the land area from which surface runoff drains into a stream, channel, lake, reservoir, or other body of water; also called a drainage basin. Except in closed basins, which have no outflow, all watersheds eventually drain into an ocean or sea.
A river system includes all of the tributaries that drain into the main river. Tributary rivers always drain into the main river. Thus, the main river always grows bigger as it moves downstream and more rivers join it.
Center for Curriculum Materials in Science 3

Teacher Resources: Lesson 4: Watershed
The main watershed for the river includes all of the land that drains water into the main river. However, there are smaller watersheds corresponding to each tributary of the river system nested within the larger watershed. For example, the Grand River Watershed includes all of the land that drains water into the tributaries of the Grand River, including the Red Cedar, Looking Glass, Maple, and Thornapple tributaries. Each of these tributaries has a watershed that is nested within the Grand River Watershed. Preconceptions: Some of the basic misconceptions relating to watersheds are as follows:
1) Students most likely realize that water flows downhill. However, they do not understand that water in a watershed eventually flows to one place. Water travels downhill in a tributary, the tributary flows into a major river; the river then flows downhill to a lake or the ocean.
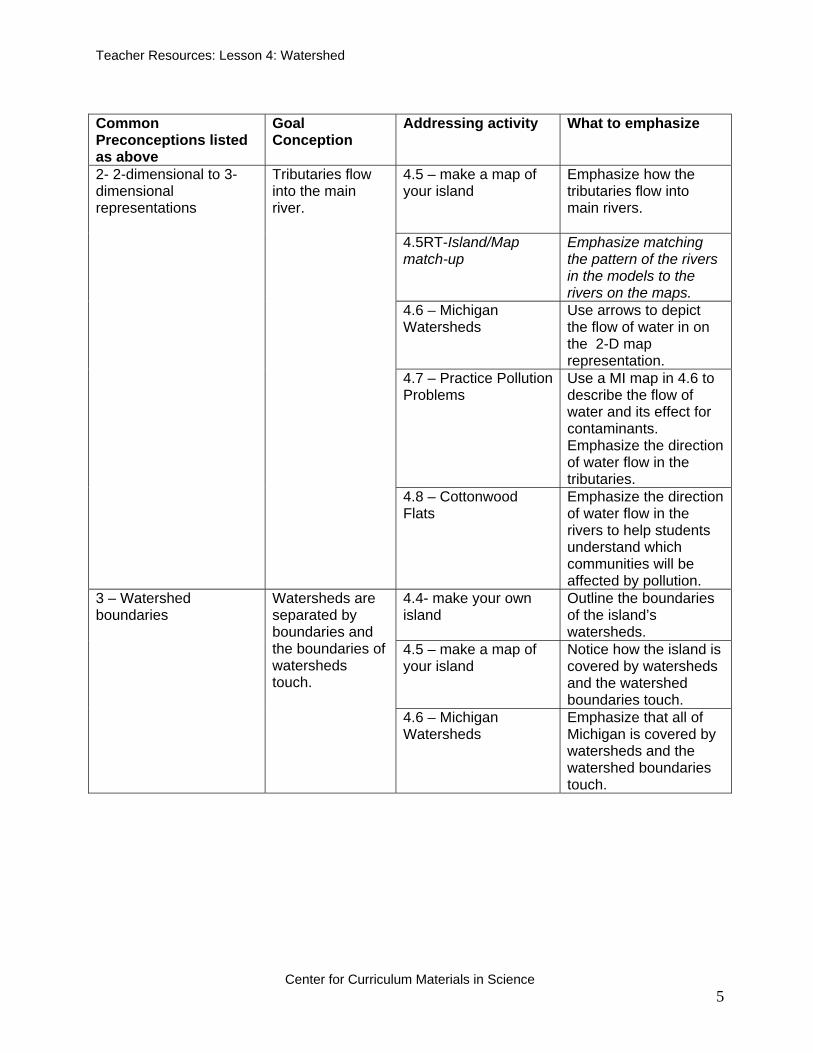
2) Maps are 2-dimensional representations of watersheds. Students do not realize that the map also represents hills and mountains. These representations may contribute to the misconception that tributaries flow out of rivers. It is important that students be reminded that water eventually travels to the ocean. Michigan is used in this activity so the water’s journey seems to end in the Great Lakes. Students may not recognize that it will eventually go to the ocean.
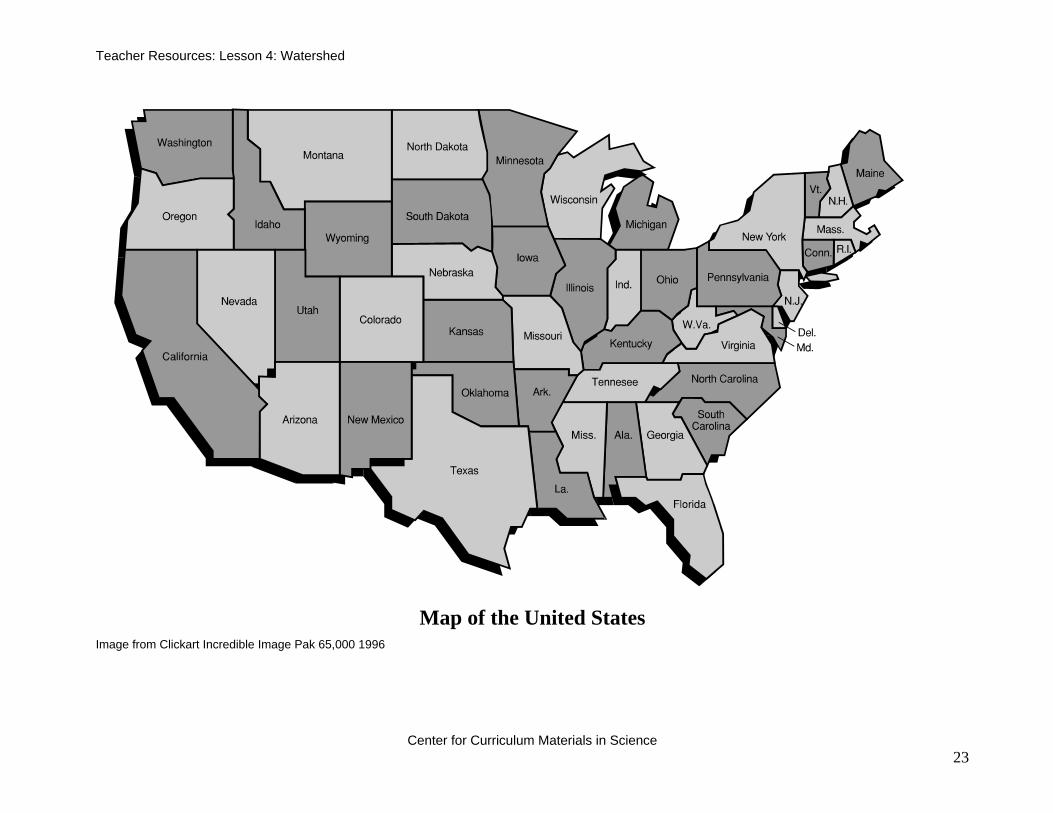
3) Watersheds are separated by boundaries and the boundaries of watersheds touch. Students tend to leave gaps of areas not in a watershed. Using an analogy such as the states in the United States can help. All areas are covered with watersheds just as all of the United States in covered with states. There is not a part of the U.S. that is not included within a state or not in a watershed.
Common Preconceptions listed as above
Goal Conception Addressing activity What to emphasize
4.3 – Watershed Overhead
Use arrows to emphasize the direction of water flow in rivers and tributaries. Label higher and lower elevations on an overhead.
4.4- make your own island
Students will watch the direction the water is flowing on the island due to elevation.
4.4RT- MI relief Map The teacher demonstrates the direction of water flow on a MI map.
1 – flow of water Water flows downhill and follows the path of least resistance. Tributaries flow together. Rivers can flow into and out of lakes. Rivers flow into oceans
4.8 – Cottonwood Flats Emphasize the direction of water flow in the rivers to help students understand which communities will be affected by pollution.
Center for Curriculum Materials in Science 4
Teacher Resources: Lesson 4: Watershed
Common Preconceptions listed as above
Goal Conception
Addressing activity What to emphasize
4.5 – make a map of your island
Emphasize how the tributaries flow into main rivers.
4.5RT-Island/Map match-up
Emphasize matching the pattern of the rivers in the models to the rivers on the maps.
4.6 – Michigan Watersheds
Use arrows to depict the flow of water in on the 2-D map representation.
4.7 – Practice Pollution Problems
Use a MI map in 4.6 to describe the flow of water and its effect for contaminants. Emphasize the direction of water flow in the tributaries.
2- 2-dimensional to 3-dimensional representations
Tributaries flow into the main river.
4.8 – Cottonwood Flats
Emphasize the direction of water flow in the rivers to help students understand which communities will be affected by pollution.
4.4- make your own island
Outline the boundaries of the island’s watersheds.
4.5 – make a map of your island
Notice how the island is covered by watersheds and the watershed boundaries touch.
3 – Watershed boundaries
Watersheds are separated by boundaries and the boundaries of watersheds touch.
4.6 – Michigan Watersheds
Emphasize that all of Michigan is covered by watersheds and the watershed boundaries touch.
Center for Curriculum Materials in Science 5
Teacher Resources: Lesson 4: Watershed
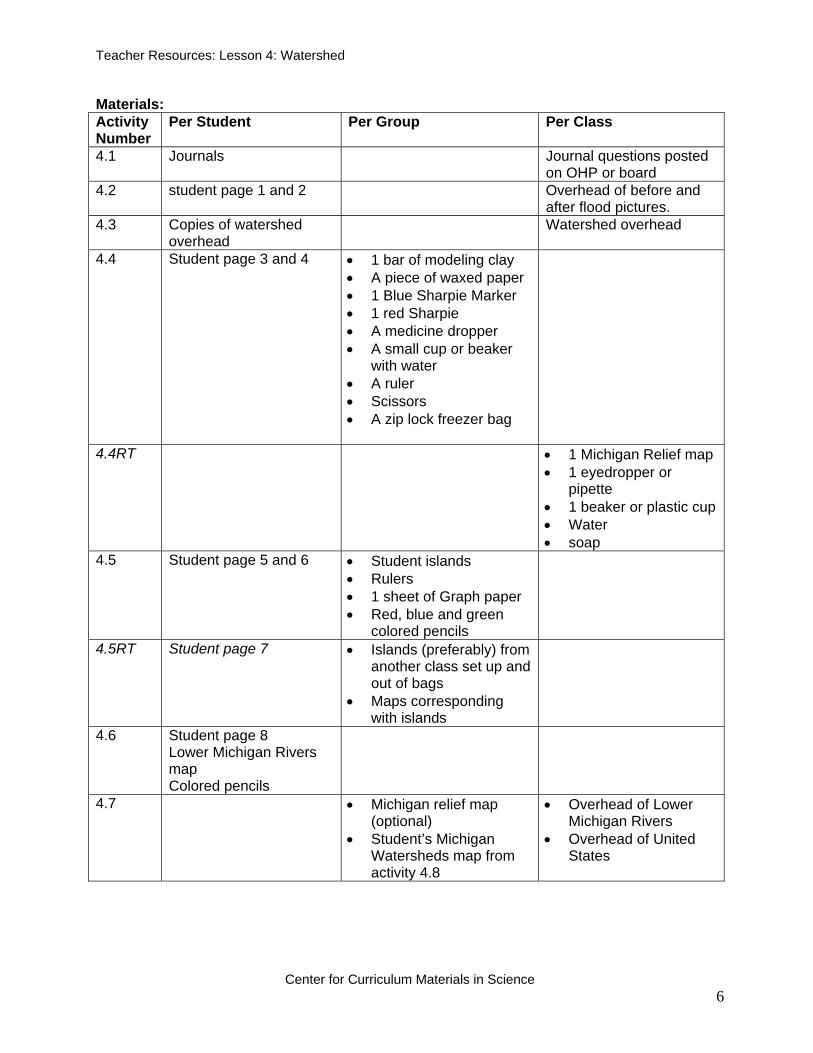
Materials: Activity Number
Per Student Per Group Per Class
4.1 Journals Journal questions posted on OHP or board
4.2 student page 1 and 2 Overhead of before and after flood pictures.
4.3 Copies of watershed overhead
Watershed overhead
4.4 Student page 3 and 4
• 1 bar of modeling clay • A piece of waxed paper • 1 Blue Sharpie Marker • 1 red Sharpie • A medicine dropper • A small cup or beaker
with water • A ruler • Scissors • A zip lock freezer bag
4.4RT • 1 Michigan Relief map • 1 eyedropper or
pipette • 1 beaker or plastic cup • Water • soap
4.5 Student page 5 and 6 • Student islands • Rulers • 1 sheet of Graph paper • Red, blue and green
colored pencils
4.5RT Student page 7 • Islands (preferably) from another class set up and out of bags
• Maps corresponding with islands
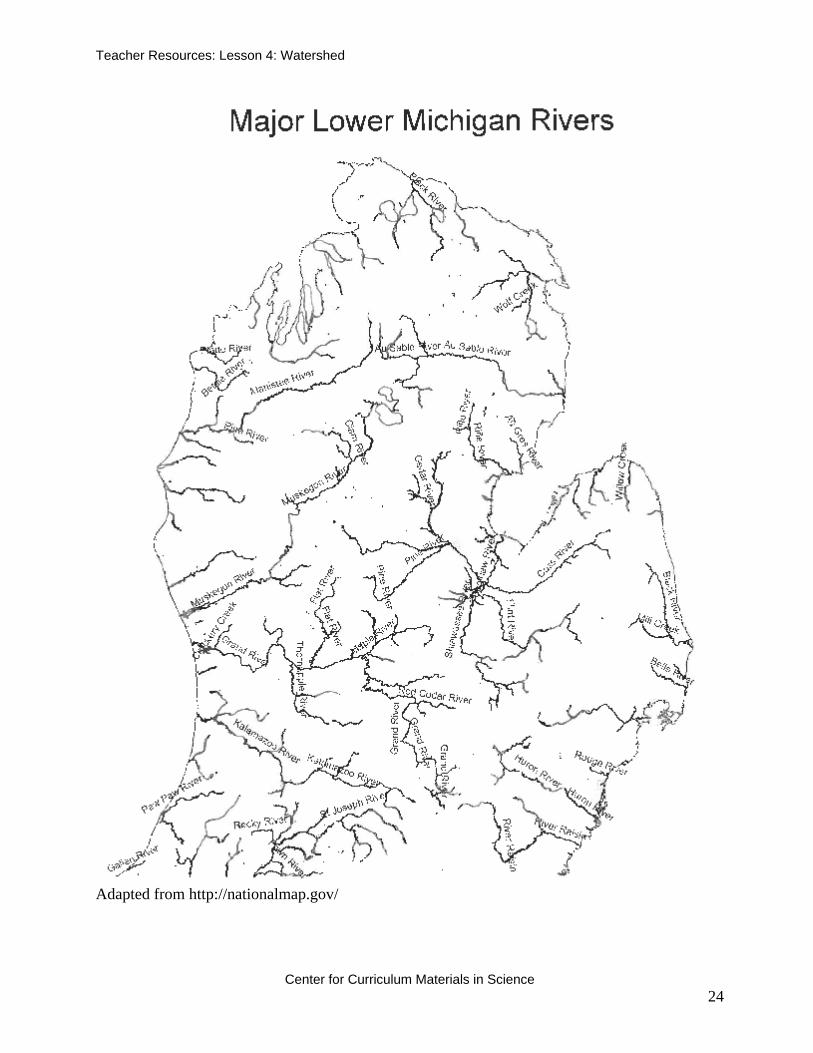
4.6 Student page 8 Lower Michigan Rivers map Colored pencils
4.7 • Michigan relief map (optional)
• Student’s Michigan Watersheds map from activity 4.8
• Overhead of Lower Michigan Rivers
• Overhead of United States
Center for Curriculum Materials in Science 6
Teacher Resources: Lesson 4: Watershed
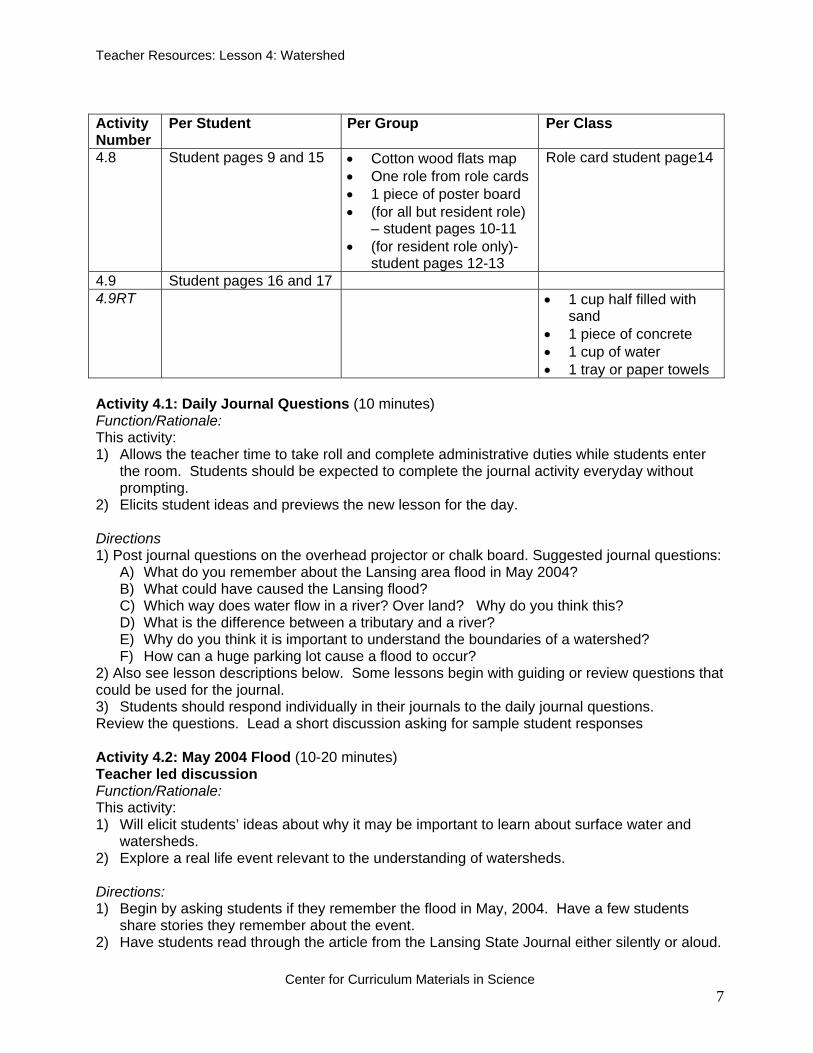
Activity Number
Per Student Per Group Per Class
4.8 Student pages 9 and 15
• Cotton wood flats map • One role from role cards • 1 piece of poster board • (for all but resident role)
– student pages 10-11 • (for resident role only)-
student pages 12-13
Role card student page14
4.9 Student pages 16 and 17 4.9RT • 1 cup half filled with
sand • 1 piece of concrete • 1 cup of water • 1 tray or paper towels
Activity 4.1: Daily Journal Questions (10 minutes) Function/Rationale: This activity: 1) Allows the teacher time to take roll and complete administrative duties while students enter
the room. Students should be expected to complete the journal activity everyday without prompting.
2) Elicits student ideas and previews the new lesson for the day. Directions 1) Post journal questions on the overhead projector or chalk board. Suggested journal questions:
A) What do you remember about the Lansing area flood in May 2004? B) What could have caused the Lansing flood? C) Which way does water flow in a river? Over land? Why do you think this? D) What is the difference between a tributary and a river? E) Why do you think it is important to understand the boundaries of a watershed? F) How can a huge parking lot cause a flood to occur?
2) Also see lesson descriptions below. Some lessons begin with guiding or review questions that could be used for the journal. 3) Students should respond individually in their journals to the daily journal questions. Review the questions. Lead a short discussion asking for sample student responses Activity 4.2: May 2004 Flood (10-20 minutes) Teacher led discussion Function/Rationale: This activity: 1) Will elicit students’ ideas about why it may be important to learn about surface water and
watersheds. 2) Explore a real life event relevant to the understanding of watersheds. Directions: 1) Begin by asking students if they remember the flood in May, 2004. Have a few students
share stories they remember about the event. 2) Have students read through the article from the Lansing State Journal either silently or aloud.
Center for Curriculum Materials in Science 7

Teacher Resources: Lesson 4: Watershed
3) Ask students some questions about the article that will help them with the picture comparison later in the activity. Some suggested questions are as follows, answers are in italics. Questions are written for students in student sheets 1 and 2. Allowing students time to write and think about questions before answering in a class discussion is a good way to ensure everyone has a chance to contemplate a response. A) What does the article say about the amount of rain fall in May? May 2004 received the
most rain on record since 1943 and more rain is predicted. B) Why do you think the area flooded so much? There was a lot of rain in a very small
amount of time. Further reasons will be explored in the next part of the activity (i.e. man-made features)
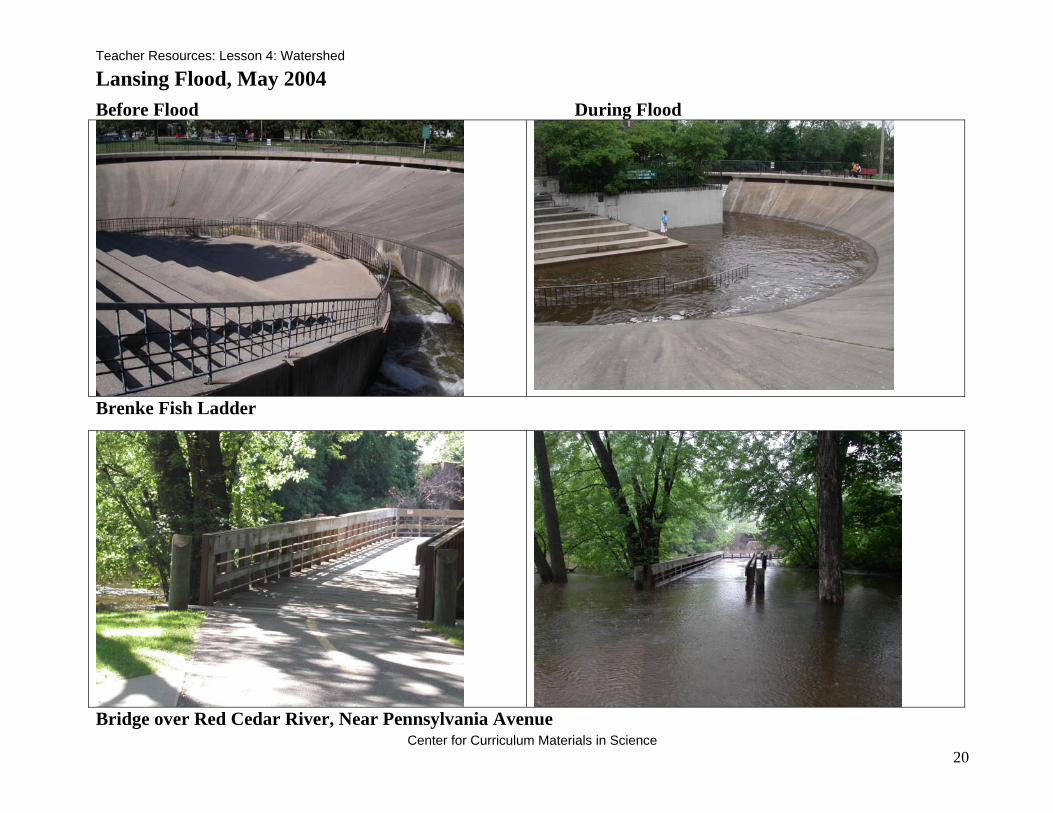
4) Show students the overhead of the before and after pictures of the Brenke Fish Ladder and the Bike Path by Pennsylvania, cover the golf course and Kalamazoo bike path pictures for now. A) Using these pictures ask students what they think is meant by “flood level” mentioned in
the article? The flood level is the amount of water the river can hold before flooding occurs. In the case of the Red Cedar the water was a foot higher than this particular level. The flood level for the Grand River is 11ft. In May the height was 12.87 ft. The Brenke Fish ladder demonstrates what this idea translates to in real life. FYI: This is only the fourth highest level on record for the river: 15.43 ft in 1975, 14.21 ft in 1985, 13.40 ft in 1982 top the list.
B) Point out to students that although a foot of water doesn’t seem like much, it can cause serious repercussions as seen in the pictures.
5) Uncover the before and after pictures of the bike path at Kalamazoo and golf course. Ask the following questions: A) Why didn’t the water cover the entire path or more of the golf course? Why was only the
one section of the path flooded? You can see from the picture that the river is just as close to the path at either section (flooded and not flooded). The most likely answer is that the flooded section of the path is at a lower elevation, like a small valley. Golf courses are often built on lower elevations.
B) Do you think the flooding would be worse if the golf course was a parking lot or basketball court? Why? Yes. Some of the water would not be able to infiltrate the ground. If the paved area was very large, it may take longer for the flood waters to recede from the area.
C) Do you think the effects of this flood to humans could have been prevented? We can be wise to our actions to prevent making the situation worse such as limiting the amounts of large, paved areas and not building in flood prone areas. Floods are a natural phenomena, it is difficult to tell if this flood was accentuated due to human intervention.
D) After a flood people often say, “the flood waters receded”, where does the water go? Eventually the water will penetrate into the ground. Ground water moves and allows for more “space”. The water can flow down the river as well to the Lake and eventually to the ocean. Here the body of water is much bigger and the level of water will not be noticed as much.
Discussion Suggestions: 1) Elicit comments from several students, do not allow one or two students to dominate the
discussion. 2) The questions to this section are partly open-ended in that some ask students their opinion or
hypotheses for what happened. However, others are meant to begin to construct understanding. The fact that the water flooded in lower lying areas will help students understand how water flow in watersheds.
Center for Curriculum Materials in Science 8
Teacher Resources: Lesson 4: Watershed
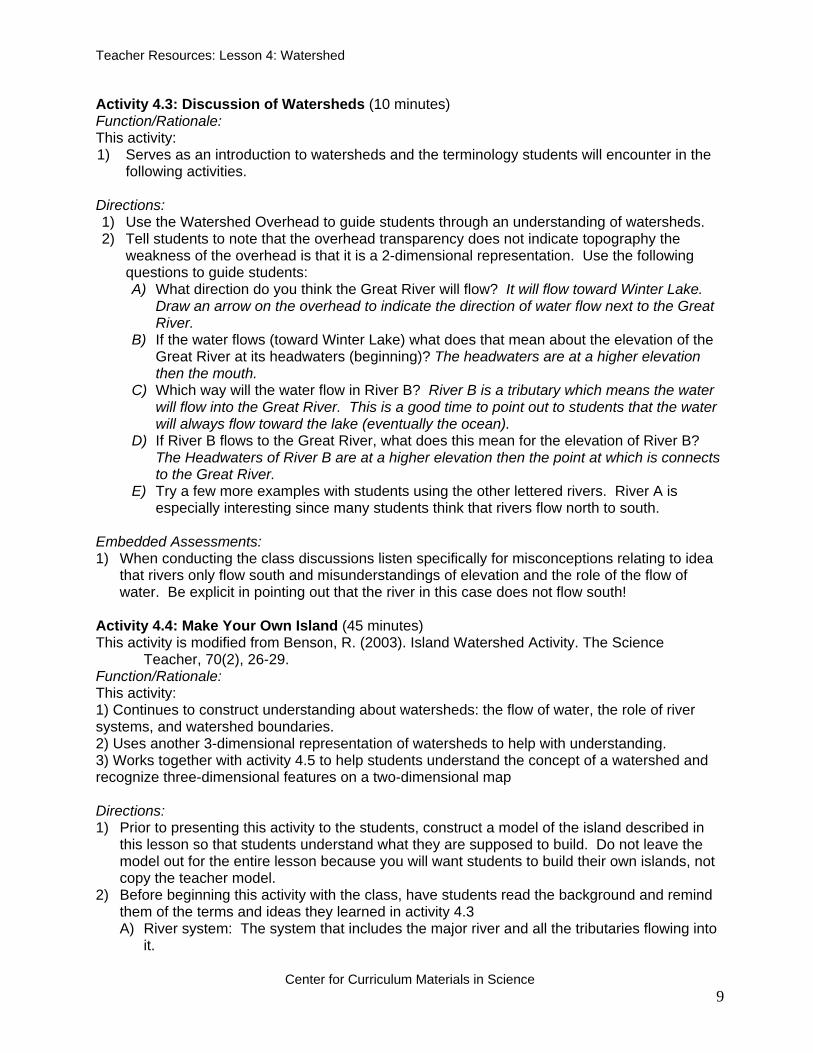
Activity 4.3: Discussion of Watersheds (10 minutes) Function/Rationale: This activity: 1) Serves as an introduction to watersheds and the terminology students will encounter in the
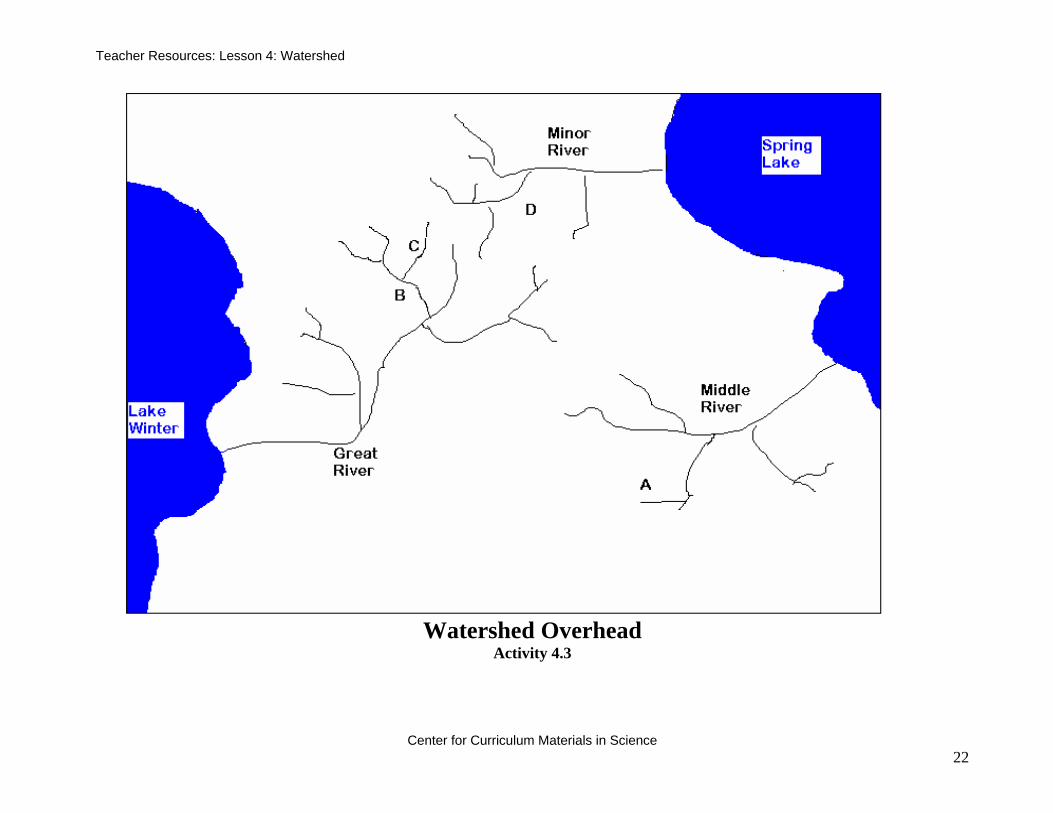
following activities. Directions: 1) Use the Watershed Overhead to guide students through an understanding of watersheds. 2) Tell students to note that the overhead transparency does not indicate topography the
weakness of the overhead is that it is a 2-dimensional representation. Use the following questions to guide students: A) What direction do you think the Great River will flow? It will flow toward Winter Lake.
Draw an arrow on the overhead to indicate the direction of water flow next to the Great River.
B) If the water flows (toward Winter Lake) what does that mean about the elevation of the Great River at its headwaters (beginning)? The headwaters are at a higher elevation then the mouth.
C) Which way will the water flow in River B? River B is a tributary which means the water will flow into the Great River. This is a good time to point out to students that the water will always flow toward the lake (eventually the ocean).
D) If River B flows to the Great River, what does this mean for the elevation of River B? The Headwaters of River B are at a higher elevation then the point at which is connects to the Great River.
E) Try a few more examples with students using the other lettered rivers. River A is especially interesting since many students think that rivers flow north to south.
Embedded Assessments: 1) When conducting the class discussions listen specifically for misconceptions relating to idea
that rivers only flow south and misunderstandings of elevation and the role of the flow of water. Be explicit in pointing out that the river in this case does not flow south!
Activity 4.4: Make Your Own Island (45 minutes) This activity is modified from Benson, R. (2003). Island Watershed Activity. The Science
Teacher, 70(2), 26-29. Function/Rationale: This activity: 1) Continues to construct understanding about watersheds: the flow of water, the role of river systems, and watershed boundaries. 2) Uses another 3-dimensional representation of watersheds to help with understanding. 3) Works together with activity 4.5 to help students understand the concept of a watershed and recognize three-dimensional features on a two-dimensional map Directions: 1) Prior to presenting this activity to the students, construct a model of the island described in
this lesson so that students understand what they are supposed to build. Do not leave the model out for the entire lesson because you will want students to build their own islands, not copy the teacher model.
2) Before beginning this activity with the class, have students read the background and remind them of the terms and ideas they learned in activity 4.3 A) River system: The system that includes the major river and all the tributaries flowing into
it.
Center for Curriculum Materials in Science 9
Teacher Resources: Lesson 4: Watershed
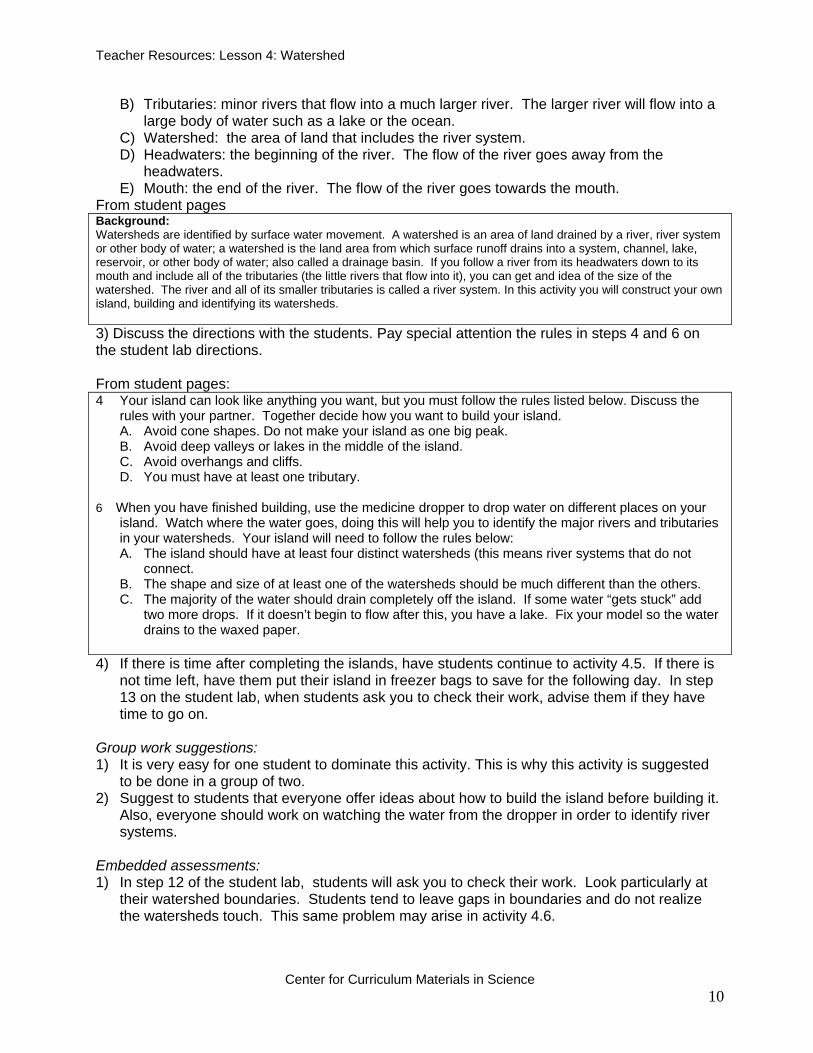
B) Tributaries: minor rivers that flow into a much larger river. The larger river will flow into a large body of water such as a lake or the ocean.
C) Watershed: the area of land that includes the river system. D) Headwaters: the beginning of the river. The flow of the river goes away from the
headwaters. E) Mouth: the end of the river. The flow of the river goes towards the mouth.
From student pages Background: Watersheds are identified by surface water movement. A watershed is an area of land drained by a river, river system or other body of water; a watershed is the land area from which surface runoff drains into a system, channel, lake, reservoir, or other body of water; also called a drainage basin. If you follow a river from its headwaters down to its mouth and include all of the tributaries (the little rivers that flow into it), you can get and idea of the size of the watershed. The river and all of its smaller tributaries is called a river system. In this activity you will construct your own island, building and identifying its watersheds.
3) Discuss the directions with the students. Pay special attention the rules in steps 4 and 6 on the student lab directions. From student pages: 4 Your island can look like anything you want, but you must follow the rules listed below. Discuss the
rules with your partner. Together decide how you want to build your island. A. Avoid cone shapes. Do not make your island as one big peak. B. Avoid deep valleys or lakes in the middle of the island. C. Avoid overhangs and cliffs. D. You must have at least one tributary.
6 When you have finished building, use the medicine dropper to drop water on different places on your
island. Watch where the water goes, doing this will help you to identify the major rivers and tributaries in your watersheds. Your island will need to follow the rules below: A. The island should have at least four distinct watersheds (this means river systems that do not
connect. B. The shape and size of at least one of the watersheds should be much different than the others. C. The majority of the water should drain completely off the island. If some water “gets stuck” add
two more drops. If it doesn’t begin to flow after this, you have a lake. Fix your model so the water drains to the waxed paper.
4) If there is time after completing the islands, have students continue to activity 4.5. If there is
not time left, have them put their island in freezer bags to save for the following day. In step 13 on the student lab, when students ask you to check their work, advise them if they have time to go on.
Group work suggestions: 1) It is very easy for one student to dominate this activity. This is why this activity is suggested
to be done in a group of two. 2) Suggest to students that everyone offer ideas about how to build the island before building it.
Also, everyone should work on watching the water from the dropper in order to identify river systems.
Embedded assessments: 1) In step 12 of the student lab, students will ask you to check their work. Look particularly at
their watershed boundaries. Students tend to leave gaps in boundaries and do not realize the watersheds touch. This same problem may arise in activity 4.6.
Center for Curriculum Materials in Science 10
Teacher Resources: Lesson 4: Watershed
From student pages: 13. When you think you have correctly identified the watershed boundaries ask your teacher to check your work. Also, ask your teacher if you have time to go on to activity 4.5. Teacher initials:______________
2) If the groups do not seem to be grasping the direction of water flow or the difference between tributaries and major rivers, you may want to use activity 4.4RT. In the activity the teacher will use a relief map of Michigan to help individual groups with these misunderstandings.
3) If you notice that students are having a difficult time with outlining the watershed boundaries, use the Watershed Overhead to help them. Outline the boundaries of the three rivers on the overhead. Take special care not to leave gaps.
Activity 4.4RT: Michigan Relief Map (re-teach) (5-10 minutes) Function/Rationale: This activity: 1) Is useful in helping to constructing knowledge about the flow of water in a watershed. Directions: Before class: 1) Prepare a small beaker of water with a same soap mixed in. The soap will break the surface
tension of the water and allow it to flow better on the map. During Class: 1) This activity is meant for the teacher to use with individual groups to further help their
understanding of the flow of watersheds. See embedded assessments (below and 4.4) for more information to help you decide when to use this activity.
2) Using and eye-dropper or pipette, drop some of the soapy water onto the relief map of Michigan. As you are doing this have the students in the group observe where the water flows.
3) Use the following questions to help guide the discussion with the group: A) Trace with your finger the direction the water is going. B) Is the water going up or downhill? How can you tell? C) Where will all the water eventually end up? D) What are the main rivers, what are the tributaries? E) Which way do the tributaries flow? F) What do you think will happen if I drop water (here, choose a new place to drop the
water)? Embedded assessments: 1) This activity is meant to be used as a way to re-teach the ideas of water flow in a watershed. 2) If students do not seem to be understanding the differences between tributaries and main
rivers or are not drawing arrows correctly for the direction of water flow in the watershed, you may want to use this activity.
3) This activity can also be useful in giving students and idea of what the topography of their island could look like. However, point out to students that the topography of their island should be more exaggerated then that on the Michigan map.
Activity 4.5: Make a Map of Your Island (20 minutes) This activity is adapted from Benson, R. (2003). Island Watershed Activity. The Science Teacher,
70(2), 26-29. Function/Rationale: This activity: 1) Helps students with translating 3-dimensional models to 2-dimensional maps. 2) Allows students to construct the relationship between watersheds on a map and in real life.
Center for Curriculum Materials in Science 11
Teacher Resources: Lesson 4: Watershed
Directions: 1) If this activity is done on a separate day than activity 4.4, then begin by reminding students
what they did the day before. You could use a journal question(s) like: A) What did you notice about the way the water flowed in the watersheds of your island?
The water flowed downhill and took the “path of least resistance” meaning going around hills and other features. It flowed from tributaries to the major river. All the water from the same watershed converged to one major river.
B) What helped you the most in determining the watersheds of the island? Answers will vary here. Dripping the water slowly in order to be able to watch exactly where it goes or dripping the water in several different locations to see that in converged in one river.
C) How is a tributary different from a major river? Tributaries flow into the main river. Students should note that they flow INTO the river not out of. Tributaries are also “uphill” from the major river. The major river is the lowest point in the watershed that the water flows into before going to the large body of water (lake, ocean, etc.)
2) Review the instructions with the students. Some of the instructions are written to help scaffold students’ group work. See group work suggestions below for more information.
3) Decide if you would like students to do the optional activity 4.5rt1 (see embedded assessments below). If so have them replace their island to the freezer bag for use in this activity.
Embedded Assessments: 1) One way to see if students are clear on the direction of flow of water in watersheds is to
have 4 –6 diagrams of watersheds on a single sheet of paper, each one oriented to show flow in a different direction – toward the top of the sheet, the sides, the bottom and at an toward the upper corners. Students should then show with an arrow the direction of water flow at any of several points, labeled A, B, C etc. on each map.
2) At this point you will need to decide if your students are grasping the relationship between the 3-dimensional and 2-dimensional representations of the watershed. If they seem to be drawing the arrows for the flow of water correctly and make a fairly accurate map of their island, the students may be ready to move on to activity 4.6. If not activity 4.5RT is designed to help solidify the 2-D/3-D watershed representations. Students rarely encounter a depiction of a watershed at a 3-D model in real life. It is imperative that they be able to decipher meaning from a map.
3) If your students have very little experience with map reading prior to this water unit, it would be wise to use 4.5RT to help them gain more experience with using maps.
Activity 4.5RT: Island/ Map Match up (re-teach) (20 minutes) Function/Rationale: This activity: 1) Will assess students understanding of a 2-dimensional representation of a 3-dimensional
watershed. 2) Gives further practice on map reading and interpretation. Directions: Before class: 1) Label the island maps with letters and the island models with numbers. 2) Spread the islands out on a vacant table for students to see. During Class: 3) Have students work in their groups of 2 or 3 in which they made their islands. Smaller
groups will allow for more discussion with this type of activity.
Center for Curriculum Materials in Science 12
Teacher Resources: Lesson 4: Watershed
4) Explain to students the task and that they will have to explain why they chose to match the map to the island. They should explain defining characteristics of the map that lead them to the match. For example, a turn in the map and on the island or a lake drawn on the map and a plateau on the island.
5) Give students a map drawn by a different group (preferably from a different class) of the watersheds of an island.
6) Students will then match the island map with its appropriate model. Helpful hints: 1) If possible the maps and islands should be from another class. This is help to ensure an
authentic assessment of students understanding of 2-D and 3-D representations. Activity 4.6: Michigan Watersheds (20 Minutes) Function/Rationale: This activity: 1) Illustrates that watersheds are not just rivers, but the land area surrounding them as well. 2) Helps students to understand why one river system does not directly affect another. Directions: 1) Students will do this activity on their own. 2) Begin with having students read the background. Ask questions relating to what a
watershed, river system, and tributary are to check for basic understanding of these terms. This should just be a review of material; at this point students should be fairly familiar with the words. Questions about these terms can be used as journal questions.
3) Go over the directions with students. Use an overhead of Lower Michigan to model how to draw watershed boundaries around one watershed. Be sure to emphasize that students are supposed to trace all of the rivers before drawing the watershed boundaries and coloring in the watershed.. Have students draw the same boundary. Students may have trouble understanding that watersheds touch and that Michigan is covered entirely with watersheds. Use the analogy of state or county lines from the directions to help students with this idea. An overhead of the United States in provided to help illustrate this point. Below are some questions you can use with the overhead: A) Is there any part of the U.S. that is not within a state? B) Draw a line on the boundary of Ohio and Michigan Ask: Is this line a boundary for
Michigan or for Ohio? The boundary is for both. Michigan and Ohio share one boundary line. Watersheds share one boundary line.
A portion of the student directions is provided below. From student pages: 4. You are now ready to identify the watersheds. Draw a line around each river system encircling it; use the same colored pencil as the color of the river system. There are two important rules to remember when doing this:
A. All of Michigan is covered with watersheds. None of the state should be blank, it will all be colored when you finish.
B. Watershed boundaries touch. Remember this analogy when doing this activity: Watershed boundaries are like state lines. All of the United States is covered by states; there isn’t any part of the U.S. that is not part of a state.
4) Remind students that each river system has a different color. Each river within the same
river system has the same color. Do not use black.
Center for Curriculum Materials in Science 13
Teacher Resources: Lesson 4: Watershed
Embedded Assessments 1) Ask questions of individual students to assess how and why they are drawing their
boundaries. Example questions include. A) Which way does this river flow? B) Why did you draw this boundary here? C) What happens to a drop of rain that falls here? Where does it flow?
2) If students are having trouble understanding which rivers are part of the same system, have them draw arrowheads on the rivers to help them remember which way the water flows in the rivers.
Activity 4.7: Causes and Resolution of Pollution Problems (10 minutes) Teacher led discussion Function/Rationale: 1) This activity will help to reinforce ideas about the flow of water in watersheds. It also helps to
guide students into activity 4.8. 2) This activity can be used after 4.8 as a re-teach of ideas as opposed to before as an activity
to construct knowledge. See embedded assessments below for further ideas. Directions: 1) This activity can be used as a journal question before the use of activity 4.8. 2) Use the major Lower Michigan Rivers overhead and ask students, “If a pollutant entered the
watershed Grand River watershed at Lansing, would Jackson be affected?” Allow students time to think about this question. Have them free-write an answer before opening it up to discussion. This activity could be used as the journal question for the day.
3) Students may want to have the plastic relief maps to look at. They may also want to have their Michigan watershed map from activity 4.6.
4) Open up the class to discussion. Students should answer: Jackson would not be affected because the river would flow toward Lake Michigan. Jackson is actually “uphill” in relation to Lansing for the Grand River watershed.
5) Ask students if the people in St Johns would be affected by the spill. Students should answer: The town of St Johns is on a tributary to the Grand River and therefore, pollution that enters the Grand River Watershed at Lansing would not be able to flow up the Looking Glass river to St Johns.
6) Ask the students if the people of Mt. Pleasant would be affected by the spill. Students should answer: The town of Mt. Pleasant is in a different watershed from the Grand River Watershed and therefore, the town would not be affected by a spill in Lansing.
7) Ask the students if the people in Grand Rapids would be affected by the chemical spill. Students should answer: Yes, the river flows downstream towards Grand Rapids and pollution that enters the watershed at Lansing would have the potential to affect Grand Rapids (depending on the size of the spill and the dilution that happens before the water reaches Grand Rapids).
Embedded assessment: 1) If the majority of your students are drawing the arrows for the direction of the water flow in the
watershed correctly (activities 4.4, 4.4RT, 4.5RT, and 4.6) you may wish to skip this activity and go directly to activity 4.8.
2) This activity could be used after or during activity 4.8 if students are having difficulty figuring out which communities will be affected by the flood and potential pollutants.
Center for Curriculum Materials in Science 14
Teacher Resources: Lesson 4: Watershed
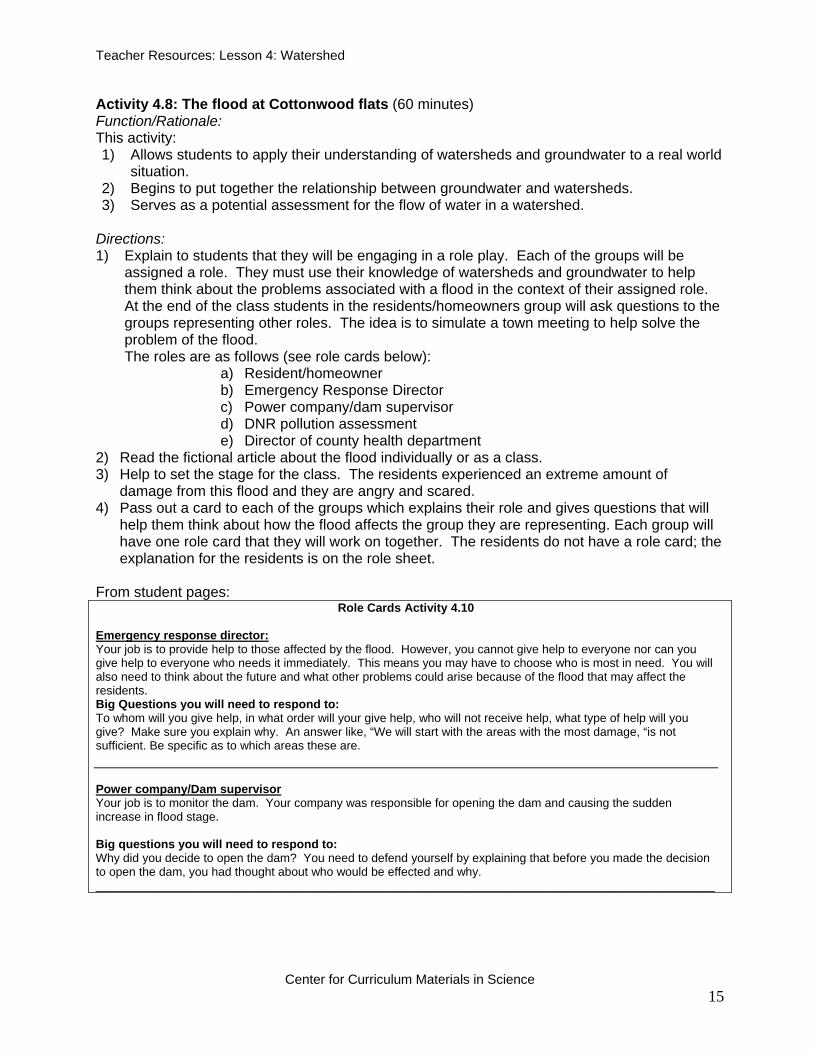
Activity 4.8: The flood at Cottonwood flats (60 minutes) Function/Rationale: This activity: 1) Allows students to apply their understanding of watersheds and groundwater to a real world
situation. 2) Begins to put together the relationship between groundwater and watersheds. 3) Serves as a potential assessment for the flow of water in a watershed.
Directions: 1) Explain to students that they will be engaging in a role play. Each of the groups will be
assigned a role. They must use their knowledge of watersheds and groundwater to help them think about the problems associated with a flood in the context of their assigned role. At the end of the class students in the residents/homeowners group will ask questions to the groups representing other roles. The idea is to simulate a town meeting to help solve the problem of the flood. The roles are as follows (see role cards below):
a) Resident/homeowner b) Emergency Response Director c) Power company/dam supervisor d) DNR pollution assessment e) Director of county health department
2) Read the fictional article about the flood individually or as a class. 3) Help to set the stage for the class. The residents experienced an extreme amount of
damage from this flood and they are angry and scared. 4) Pass out a card to each of the groups which explains their role and gives questions that will
help them think about how the flood affects the group they are representing. Each group will have one role card that they will work on together. The residents do not have a role card; the explanation for the residents is on the role sheet.
From student pages:
Role Cards Activity 4.10 Emergency response director: Your job is to provide help to those affected by the flood. However, you cannot give help to everyone nor can you give help to everyone who needs it immediately. This means you may have to choose who is most in need. You will also need to think about the future and what other problems could arise because of the flood that may affect the residents. Big Questions you will need to respond to: To whom will you give help, in what order will your give help, who will not receive help, what type of help will you give? Make sure you explain why. An answer like, “We will start with the areas with the most damage, “is not sufficient. Be specific as to which areas these are. Power company/Dam supervisor Your job is to monitor the dam. Your company was responsible for opening the dam and causing the sudden increase in flood stage. Big questions you will need to respond to: Why did you decide to open the dam? You need to defend yourself by explaining that before you made the decision to open the dam, you had thought about who would be effected and why. _____________________________________________________________________________________________
Center for Curriculum Materials in Science 15
Teacher Resources: Lesson 4: Watershed
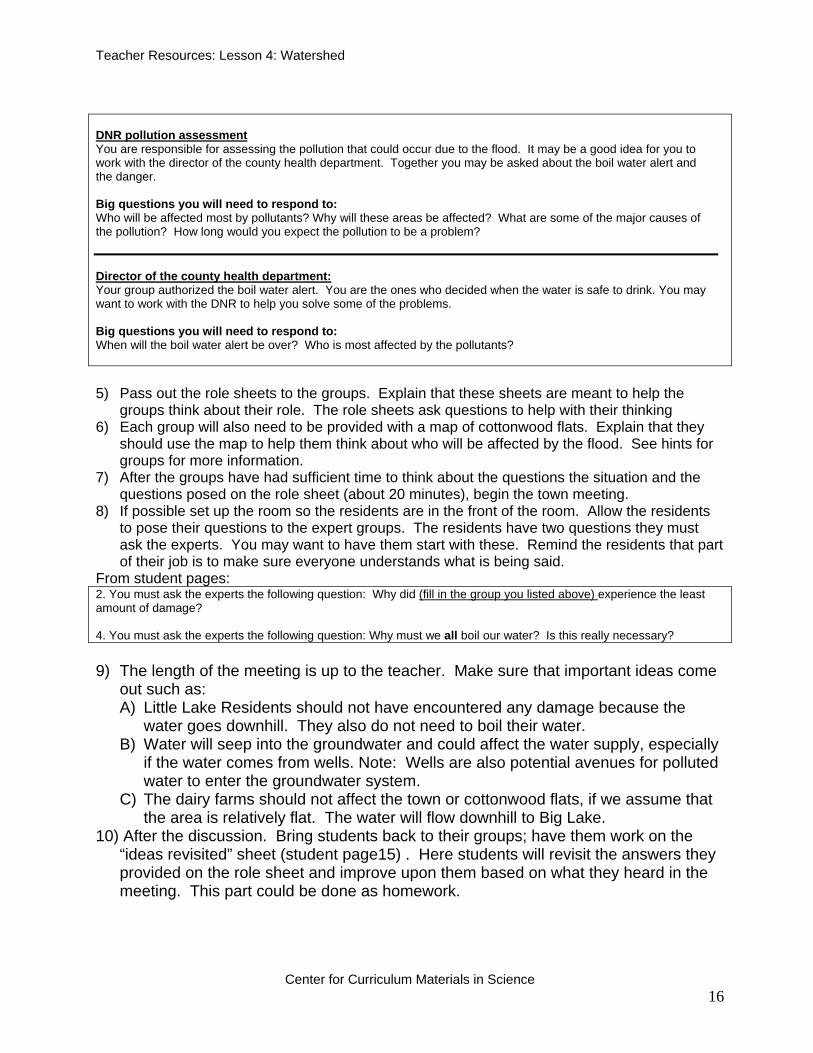
DNR pollution assessment You are responsible for assessing the pollution that could occur due to the flood. It may be a good idea for you to work with the director of the county health department. Together you may be asked about the boil water alert and the danger. Big questions you will need to respond to: Who will be affected most by pollutants? Why will these areas be affected? What are some of the major causes of the pollution? How long would you expect the pollution to be a problem? Director of the county health department: Your group authorized the boil water alert. You are the ones who decided when the water is safe to drink. You may want to work with the DNR to help you solve some of the problems. Big questions you will need to respond to: When will the boil water alert be over? Who is most affected by the pollutants?
5) Pass out the role sheets to the groups. Explain that these sheets are meant to help the
groups think about their role. The role sheets ask questions to help with their thinking 6) Each group will also need to be provided with a map of cottonwood flats. Explain that they
should use the map to help them think about who will be affected by the flood. See hints for groups for more information.
7) After the groups have had sufficient time to think about the questions the situation and the questions posed on the role sheet (about 20 minutes), begin the town meeting.
8) If possible set up the room so the residents are in the front of the room. Allow the residents to pose their questions to the expert groups. The residents have two questions they must ask the experts. You may want to have them start with these. Remind the residents that part of their job is to make sure everyone understands what is being said.
From student pages: 2. You must ask the experts the following question: Why did (fill in the group you listed above) experience the least amount of damage? 4. You must ask the experts the following question: Why must we all boil our water? Is this really necessary? 9) The length of the meeting is up to the teacher. Make sure that important ideas come
out such as: A) Little Lake Residents should not have encountered any damage because the
water goes downhill. They also do not need to boil their water. B) Water will seep into the groundwater and could affect the water supply, especially
if the water comes from wells. Note: Wells are also potential avenues for polluted water to enter the groundwater system.
C) The dairy farms should not affect the town or cottonwood flats, if we assume that the area is relatively flat. The water will flow downhill to Big Lake.
10) After the discussion. Bring students back to their groups; have them work on the “ideas revisited” sheet (student page15) . Here students will revisit the answers they provided on the role sheet and improve upon them based on what they heard in the meeting. This part could be done as homework.
Center for Curriculum Materials in Science 16
Teacher Resources: Lesson 4: Watershed
Group Work Suggestions: 1) Students will have to work together to come up with ideas for how to answer questions they
may be confronted with from the residents. These ideas should be constructed as a group. Some important questions are provided that the residents must answer.
2) Here are some suggestions for the town meeting: A) Rotate among residents to ask questions. B) In each of the other groups, have the group designate a spokesperson to speak for the
group. Then time should be given to any other member of that group to add something. The role of spokesperson can rotate for each question.
C) When a question is asked by the residents, each person in the other groups could be asked to say one thing to answer the question.
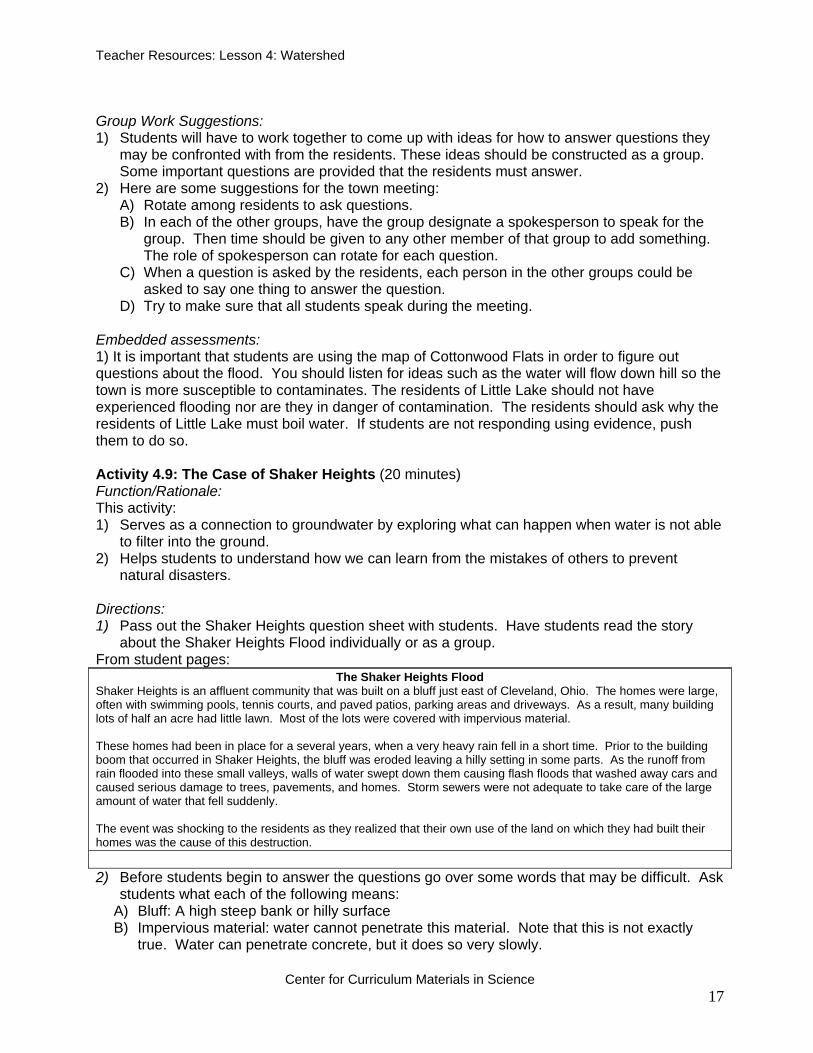
D) Try to make sure that all students speak during the meeting. Embedded assessments: 1) It is important that students are using the map of Cottonwood Flats in order to figure out questions about the flood. You should listen for ideas such as the water will flow down hill so the town is more susceptible to contaminates. The residents of Little Lake should not have experienced flooding nor are they in danger of contamination. The residents should ask why the residents of Little Lake must boil water. If students are not responding using evidence, push them to do so. Activity 4.9: The Case of Shaker Heights (20 minutes) Function/Rationale: This activity: 1) Serves as a connection to groundwater by exploring what can happen when water is not able
to filter into the ground. 2) Helps students to understand how we can learn from the mistakes of others to prevent
natural disasters. Directions: 1) Pass out the Shaker Heights question sheet with students. Have students read the story
about the Shaker Heights Flood individually or as a group. From student pages:
The Shaker Heights Flood Shaker Heights is an affluent community that was built on a bluff just east of Cleveland, Ohio. The homes were large, often with swimming pools, tennis courts, and paved patios, parking areas and driveways. As a result, many building lots of half an acre had little lawn. Most of the lots were covered with impervious material. These homes had been in place for a several years, when a very heavy rain fell in a short time. Prior to the building boom that occurred in Shaker Heights, the bluff was eroded leaving a hilly setting in some parts. As the runoff from rain flooded into these small valleys, walls of water swept down them causing flash floods that washed away cars and caused serious damage to trees, pavements, and homes. Storm sewers were not adequate to take care of the large amount of water that fell suddenly. The event was shocking to the residents as they realized that their own use of the land on which they had built their homes was the cause of this destruction. 2) Before students begin to answer the questions go over some words that may be difficult. Ask
students what each of the following means: A) Bluff: A high steep bank or hilly surface B) Impervious material: water cannot penetrate this material. Note that this is not exactly
true. Water can penetrate concrete, but it does so very slowly.
Center for Curriculum Materials in Science 17
Teacher Resources: Lesson 4: Watershed
C) Runoff: The water that does not seep into the ground stays on the surface until reaching a river, lake, or other body of water.
3) After the conversation, students will work on the questions in groups. 4) This activity as serves as a link between the Lansing Flood pictures in activity 4.2 and the
rest of the lesson. Put the Lansing Flood picture up on the overhead. Below is a copy of the last question: From Student pages: 1. Think back to the Lansing Flood pictures. What lesson could Lansing learn from Shaker Heights? Again list
the initials of everyone who contributed to this answer. 5) After students have completed the activity discuss with them the connection between Shaker
Heights and Lansing. The following questions can be used: A) What are some of the similarities between the Lansing Flood and the Shaker Heights
flood? Both places received a large amount of rain in a short period of time. Both are “cities” in that there is a lot of concrete and areas built with impermeable material.
B) What are some of the differences? Lansing may have more parks and areas where ground water can seep into the ground. Many of the areas surrounding the river are parks. Also, Lansing has chosen to keep the areas near the rivers free from buildings and paved roads. Therefore, when it does flood, the floodwaters do not affect people in buildings.
C) Could Lansing ever experience a flood like Shaker Heights experienced? Most likely the floods Lansing will experience will be like the flood in May, not nearly the caliber of the Shaker Heights flood. However, this may only be true if land management stays the same (parks near the river, etc).
D) What should Lansing residents be aware to prevent such an event from occurring? Residents need to be aware of where areas of large concrete surface are to be built such as shopping malls, parking lots, etc. These areas will not allow water in infiltrate the ground. Creating more areas like this could cause a flood similar to Shaker Heights.
E) What information have you learned so far that could help you with understanding how to prevent a flood like a Shaker Heights? Permeable and impermeable materials to allow water to go into the ground. The flow of water in a watershed.
Embedded Assessments: 1) If students seem to be having a difficult time understanding why Shaker Heights flooded as
opposed to the water penetrating the ground, use activity 4.9RT to help them distinguish the difference in permeability of sand and concrete. This extra activity may also help them to think of possible solutions.
Activity 4.9RT: Concrete/Sand Demo (re-teach) (10 minutes) Teacher demonstration Function/Rationale:
This activity: 1) Refreshes student’s ideas about groundwater by reintroducing the idea of permeability. 2) Provides a visual for students to help them gain a better understanding of flooding and the
consequences of some human intervention (building shopping malls and parking lots). Directions: 1) Obtain a large beaker and fill it with sand. Obtain a piece of concrete. Lay the piece of
concrete on a tray or on some paper towels. 2) Ask the students to make a prediction about what will happen to the water when it is poured
on the sand and concrete. 3) Perform the demonstration. Slowly pour some water over the sand and concrete. 4) Ask students the following questions:
A) What happened? The water will soak into the sand and run-off the piece of concrete. Center for Curriculum Materials in Science
18

Teacher Resources: Lesson 4: Watershed
B) What do you think the water concrete and sand would simulate in real life? The water simulates rain. The concrete would simulate a street, parking lot, basketball court, etc. The sand represents the ground.
C) What would happen if a heavy rain fell on a basketball court in the middle of a park? The rain would run-off the court and soak into the ground. However, some of the rain would remain on the court causing puddling and some mini-flooding especially if the rain is heavy. (Like the rain in May 2004). Use this idea to ask the next question.
D) What would happen if the same heavy rain fell on a large concrete area like a parking lot? This is the situation that flooding often occurs in. The water has nowhere to go and stays on the concrete.
Helpful Hints: 1) A similar demonstration was used in Lesson 3 where students examined the porosity of sand
and clay. You may want to remind students that water will go through concrete, but VERY slowly. Most of the water runs off.
Center for Curriculum Materials in Science 19
Teacher Resources: Lesson 4: Watershed
Lansing Flood, May 2004 Before Flood During Flood
Brenke Fish Ladder
Bridge over Red Cedar River, Near Pennsylvania Avenue
Center for Curriculum Materials in Science 20

Teacher Resources: Lesson 4: Watershed
Before Flood During Flood
Bike Path near Kalamazoo Avenue, Red Cedar River
Sycamore Golf Course
Center for Curriculum Materials in Science 21
Teacher Resources: Lesson 4: Watershed
Watershed Overhead
Activity 4.3
Center for Curriculum Materials in Science 22
Teacher Resources: Lesson 4: Watershed
Map of the United States
Image from Clickart Incredible Image Pak 65,000 1996
Center for Curriculum Materials in Science 23
Teacher Resources: Lesson 4: Watershed
Adapted from http://nationalmap.gov/
Center for Curriculum Materials in Science 24

Teacher Resources: Lesson 4: Watershed
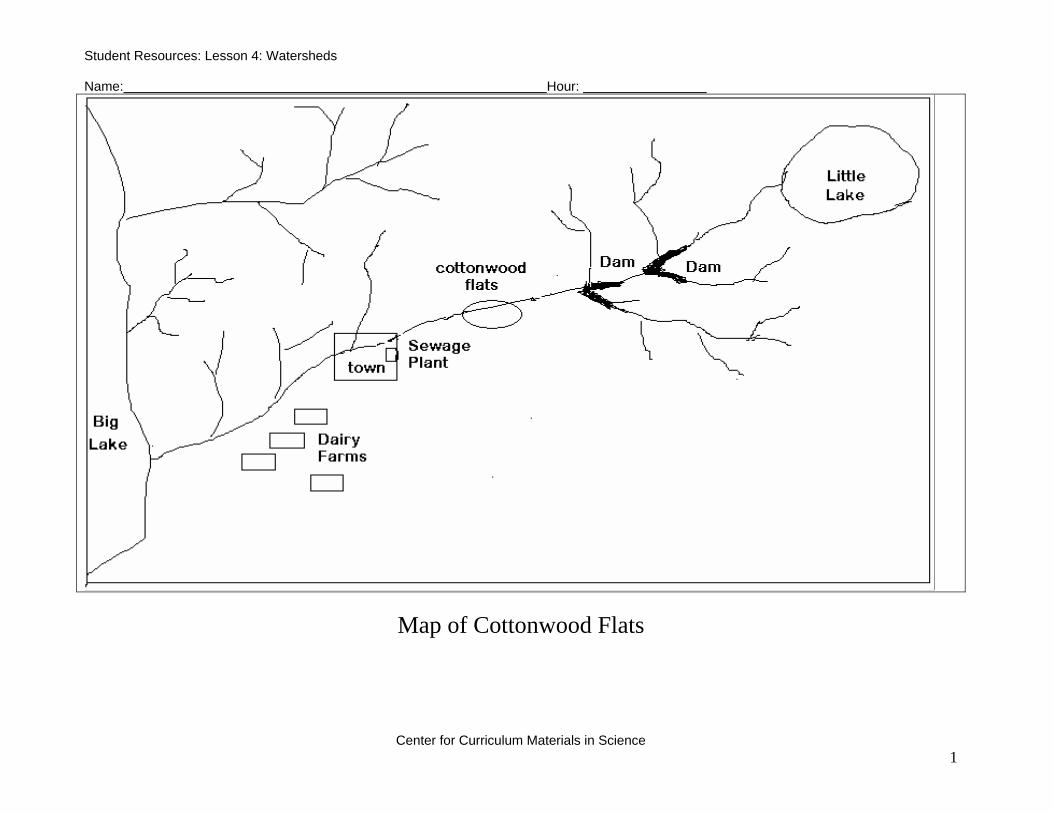
Map of Cottonwood Flats
Center for Curriculum Materials in Science 25
Student Resources: Lesson 4: Watersheds Name: Hour:
Center for Curriculum Materials in Science 1
Lesson # 4: Watersheds
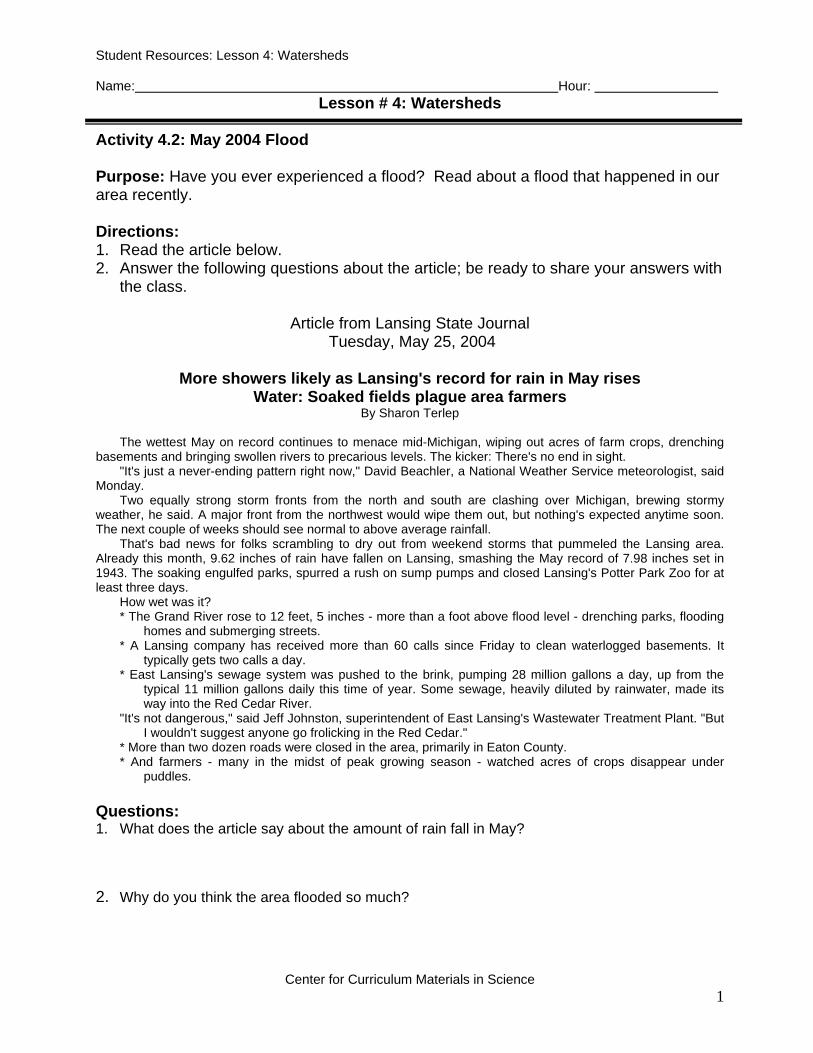
Activity 4.2: May 2004 Flood Purpose: Have you ever experienced a flood? Read about a flood that happened in our area recently.
Directions: 1. Read the article below. 2. Answer the following questions about the article; be ready to share your answers with
the class.
Article from Lansing State Journal Tuesday, May 25, 2004
More showers likely as Lansing's record for rain in May rises
Water: Soaked fields plague area farmers By Sharon Terlep
The wettest May on record continues to menace mid-Michigan, wiping out acres of farm crops, drenching
basements and bringing swollen rivers to precarious levels. The kicker: There's no end in sight. "It's just a never-ending pattern right now," David Beachler, a National Weather Service meteorologist, said
Monday. Two equally strong storm fronts from the north and south are clashing over Michigan, brewing stormy
weather, he said. A major front from the northwest would wipe them out, but nothing's expected anytime soon. The next couple of weeks should see normal to above average rainfall.
That's bad news for folks scrambling to dry out from weekend storms that pummeled the Lansing area. Already this month, 9.62 inches of rain have fallen on Lansing, smashing the May record of 7.98 inches set in 1943. The soaking engulfed parks, spurred a rush on sump pumps and closed Lansing's Potter Park Zoo for at least three days.
How wet was it? * The Grand River rose to 12 feet, 5 inches - more than a foot above flood level - drenching parks, flooding
homes and submerging streets. * A Lansing company has received more than 60 calls since Friday to clean waterlogged basements. It
typically gets two calls a day. * East Lansing's sewage system was pushed to the brink, pumping 28 million gallons a day, up from the
typical 11 million gallons daily this time of year. Some sewage, heavily diluted by rainwater, made its way into the Red Cedar River.
"It's not dangerous," said Jeff Johnston, superintendent of East Lansing's Wastewater Treatment Plant. "But I wouldn't suggest anyone go frolicking in the Red Cedar."
* More than two dozen roads were closed in the area, primarily in Eaton County. * And farmers - many in the midst of peak growing season - watched acres of crops disappear under
puddles. Questions: 1. What does the article say about the amount of rain fall in May? 2. Why do you think the area flooded so much?

Student Resources: Lesson 4: Watersheds Name: Hour:
Center for Curriculum Materials in Science 2
Questions for Activity 4.2 continued: Directions: Answer these questions as they relate to the pictures of the Brenke Fish Ladder and Bike Path at Pennsylvania Ave. Your teacher will show the pictures on the overhead. 1. What do you think is meant by Flood Level in the article? 2. How can the pictures help you to understand what is meant by flood level? Use the pictures of the Golf Course and the Kalamazoo bike path to answer the following questions: 1. Why didn’t the water cover the entire path or more of the golf course? Why was only
the one section of the path flooded? 2. Do you think the flooding would be worse if the golf course was a parking lot or
basketball court? 3. Do you think the affects of this flood to human could have been prevented? 4. After a flood people often say, “the flood waters receded”, where does the water go?
Student Resources: Lesson 4: Watersheds Name: Hour:
Center for Curriculum Materials in Science 3
Lesson # 4: Watersheds
Activity 4.4
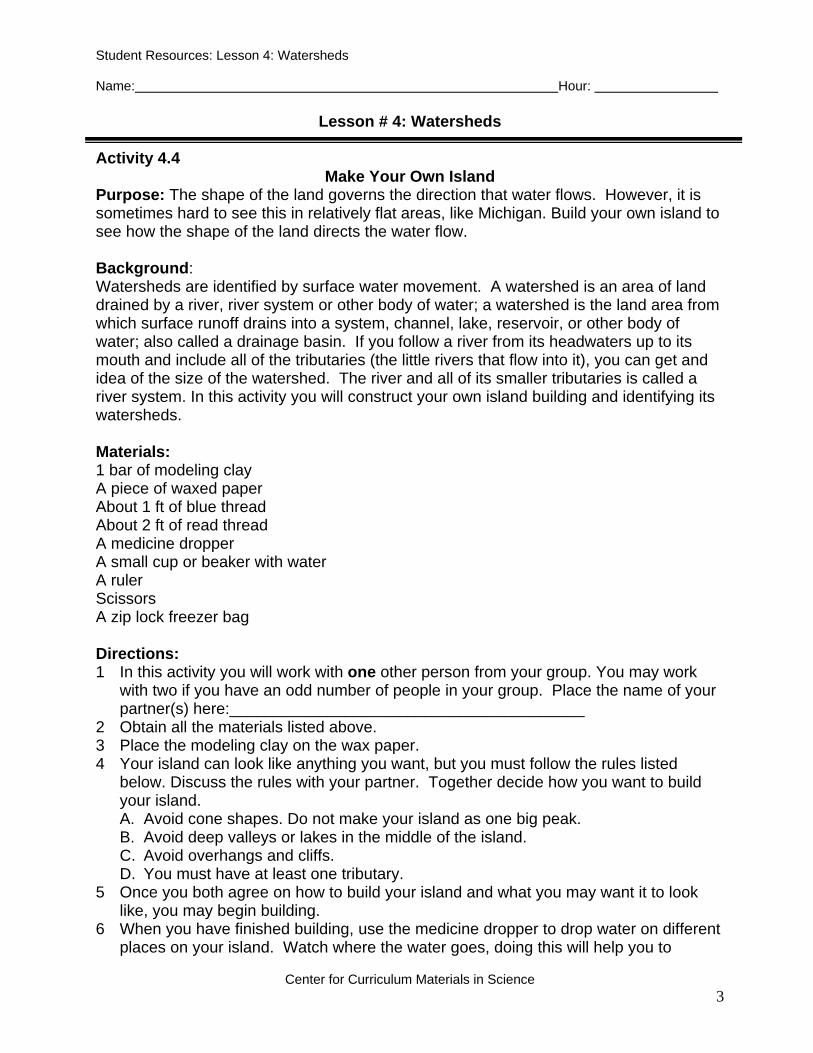
Make Your Own Island Purpose: The shape of the land governs the direction that water flows. However, it is sometimes hard to see this in relatively flat areas, like Michigan. Build your own island to see how the shape of the land directs the water flow. Background: Watersheds are identified by surface water movement. A watershed is an area of land drained by a river, river system or other body of water; a watershed is the land area from which surface runoff drains into a system, channel, lake, reservoir, or other body of water; also called a drainage basin. If you follow a river from its headwaters up to its mouth and include all of the tributaries (the little rivers that flow into it), you can get and idea of the size of the watershed. The river and all of its smaller tributaries is called a river system. In this activity you will construct your own island building and identifying its watersheds. Materials: 1 bar of modeling clay A piece of waxed paper About 1 ft of blue thread About 2 ft of read thread A medicine dropper A small cup or beaker with water A ruler Scissors A zip lock freezer bag Directions: 1 In this activity you will work with one other person from your group. You may work
with two if you have an odd number of people in your group. Place the name of your partner(s) here:________________________________________
2 Obtain all the materials listed above. 3 Place the modeling clay on the wax paper. 4 Your island can look like anything you want, but you must follow the rules listed
below. Discuss the rules with your partner. Together decide how you want to build your island. A. Avoid cone shapes. Do not make your island as one big peak. B. Avoid deep valleys or lakes in the middle of the island. C. Avoid overhangs and cliffs. D. You must have at least one tributary.
5 Once you both agree on how to build your island and what you may want it to look like, you may begin building.
6 When you have finished building, use the medicine dropper to drop water on different places on your island. Watch where the water goes, doing this will help you to
Student Resources: Lesson 4: Watersheds Name: Hour:
Center for Curriculum Materials in Science 4
identify the major rivers and tributaries in your watersheds. Your island will need to follow the rules below: A. The island should have at least four distinct watersheds (this means river systems
that do not connect. B. The shape and size of at least one of the watersheds should be much different
than the others. C. The majority of the water should drain completely off the island. If some water
“gets stuck” add two more drops. If it doesn’t begin to flow after this, you have a lake. Fix your model so the water drains to the waxed paper.
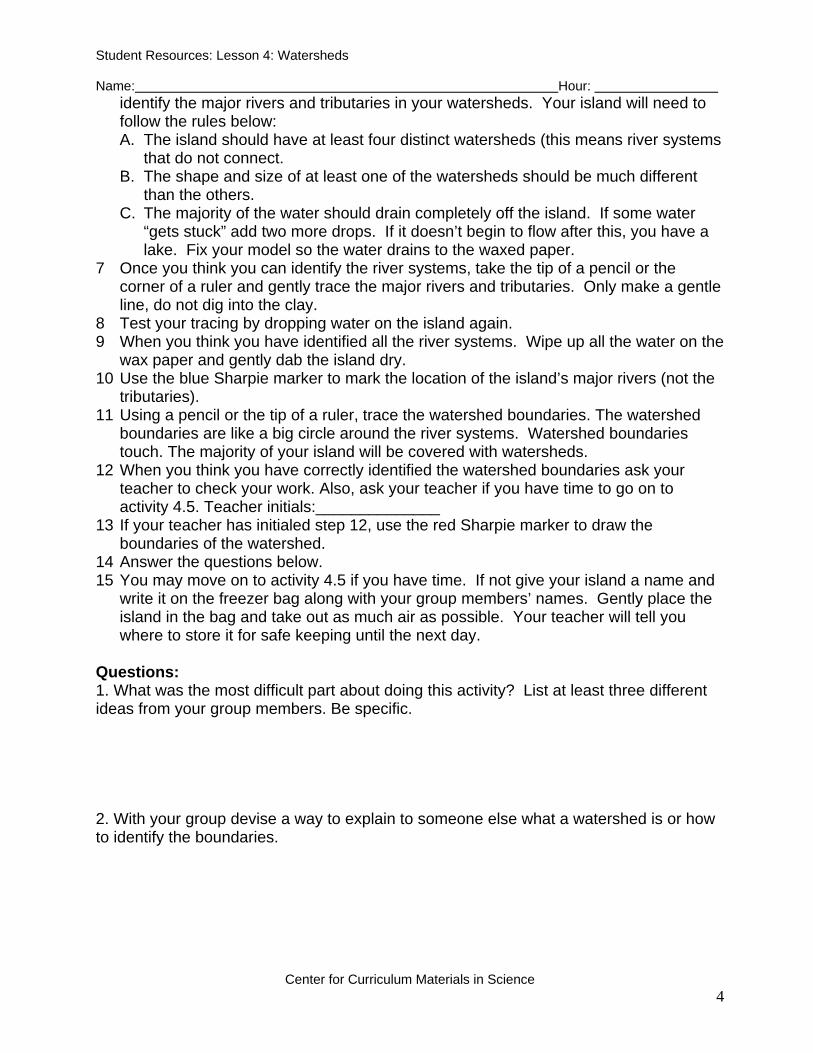
7 Once you think you can identify the river systems, take the tip of a pencil or the corner of a ruler and gently trace the major rivers and tributaries. Only make a gentle line, do not dig into the clay.
8 Test your tracing by dropping water on the island again. 9 When you think you have identified all the river systems. Wipe up all the water on the
wax paper and gently dab the island dry. 10 Use the blue Sharpie marker to mark the location of the island’s major rivers (not the
tributaries). 11 Using a pencil or the tip of a ruler, trace the watershed boundaries. The watershed
boundaries are like a big circle around the river systems. Watershed boundaries touch. The majority of your island will be covered with watersheds.
12 When you think you have correctly identified the watershed boundaries ask your teacher to check your work. Also, ask your teacher if you have time to go on to activity 4.5. Teacher initials:______________
13 If your teacher has initialed step 12, use the red Sharpie marker to draw the boundaries of the watershed.
14 Answer the questions below. 15 You may move on to activity 4.5 if you have time. If not give your island a name and
write it on the freezer bag along with your group members’ names. Gently place the island in the bag and take out as much air as possible. Your teacher will tell you where to store it for safe keeping until the next day.
Questions: 1. What was the most difficult part about doing this activity? List at least three different ideas from your group members. Be specific. 2. With your group devise a way to explain to someone else what a watershed is or how to identify the boundaries.
Student Resources: Lesson 4: Watersheds Name: Hour:
Center for Curriculum Materials in Science 5
Lesson # 4: Watersheds
Activity 4.5
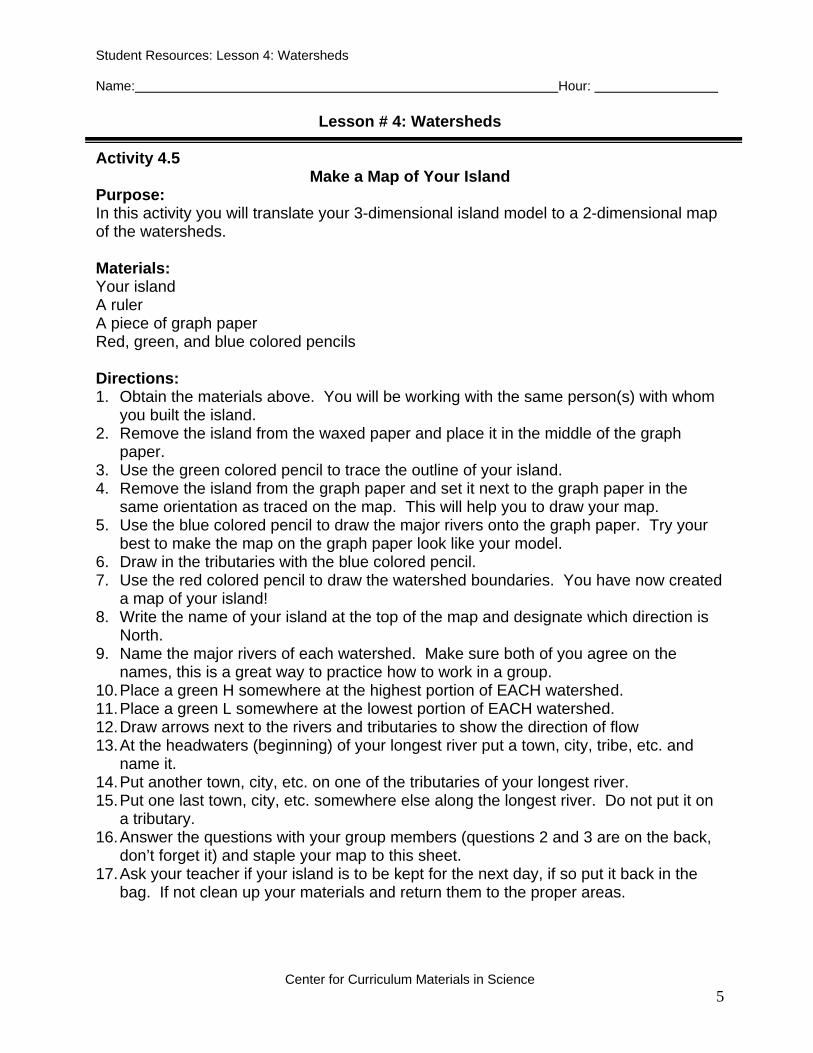
Make a Map of Your Island Purpose: In this activity you will translate your 3-dimensional island model to a 2-dimensional map of the watersheds. Materials: Your island A ruler A piece of graph paper Red, green, and blue colored pencils Directions: 1. Obtain the materials above. You will be working with the same person(s) with whom
you built the island. 2. Remove the island from the waxed paper and place it in the middle of the graph
paper. 3. Use the green colored pencil to trace the outline of your island. 4. Remove the island from the graph paper and set it next to the graph paper in the
same orientation as traced on the map. This will help you to draw your map. 5. Use the blue colored pencil to draw the major rivers onto the graph paper. Try your
best to make the map on the graph paper look like your model. 6. Draw in the tributaries with the blue colored pencil. 7. Use the red colored pencil to draw the watershed boundaries. You have now created
a map of your island! 8. Write the name of your island at the top of the map and designate which direction is
North. 9. Name the major rivers of each watershed. Make sure both of you agree on the
names, this is a great way to practice how to work in a group. 10. Place a green H somewhere at the highest portion of EACH watershed. 11. Place a green L somewhere at the lowest portion of EACH watershed. 12. Draw arrows next to the rivers and tributaries to show the direction of flow 13. At the headwaters (beginning) of your longest river put a town, city, tribe, etc. and
name it. 14. Put another town, city, etc. on one of the tributaries of your longest river. 15. Put one last town, city, etc. somewhere else along the longest river. Do not put it on
a tributary. 16. Answer the questions with your group members (questions 2 and 3 are on the back,
don’t forget it) and staple your map to this sheet. 17. Ask your teacher if your island is to be kept for the next day, if so put it back in the
bag. If not clean up your materials and return them to the proper areas.

Student Resources: Lesson 4: Watersheds Name: Hour:
Center for Curriculum Materials in Science 6
Questions: 1. If the town at the mouth of the river put a contaminant in the water, which of your other towns would be affected? Explain. 2. Write true or false next to each statement. Then explain how your island model helped you to answer the question. ___________ Rivers always flow North to South. ___________ Tributaries flow into the main river. ___________ A contaminant in a river system in one watershed can affect the rivers of a different watershed. 3. Grade your group work during both island activities. ___________ Explain why your group deserves this grade.

Student Resources: Lesson 4: Watersheds Name: Hour:
Center for Curriculum Materials in Science 7
Lesson # 4: Watersheds
Activity 4.5RT Island/Map Match Up
Purpose: In this activity you will demonstrate your understanding of 2-demensional representations of watersheds. Your job is to match a map of an island with the model of that island. Directions: 1. In this activity you will work with the same person(s) with whom you constructed your
island. 2. Your teacher will give you a map. Remember that the map is the work of one of your
classmates so be extra careful when using it. 3. Match the map with the islands located in the room. Use the data section below to
record your answers. 4. Give some explanations as to why you think the map matches the island. Use
specific descriptions in order to explain the match such as the bend in the river on the map matches with this island because a small hill blocks the path.
5. Repeat the process with a new map two more times. 6. Good Luck! Data Section: Map letter Island number Explanation for match up
Student Resources: Lesson 4: Watersheds Name: Hour:
Center for Curriculum Materials in Science 8
Lesson # 4: Watersheds
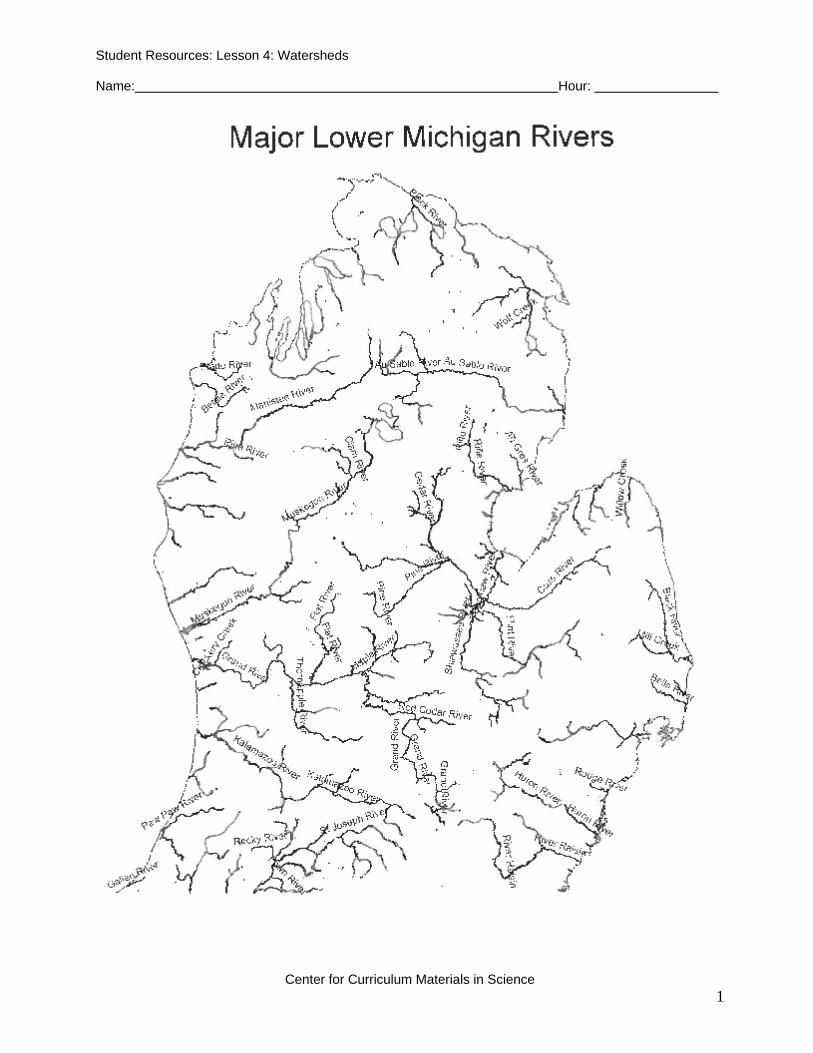
Activity 4.6 Michigan Watersheds
Purpose: In activity 4.4 and 4.5 you built and island and outlined its watersheds. In this activity you will be given a map of Michigan river systems, your task is to identify the watersheds associated with the Michigan river systems Remember that the watershed is actually all the area surrounding that river system. Directions: 1. You will work on this activity on your own. 2. Obtain a map of the Major Lower Michigan Rivers and a box of colored pencils. 3. Trace the river and its tributaries in one color. Continue to trace all the river systems
using a different color for each system DO NOT USE BLACK. 4. Lightly color the area of each watershed with the color of the river system it contains. 5. With a black colored pencil draw arrows in the direction that the water would flow for
the Grand River system and the Saginaw River system. 6. Answer the following question: If the Red Cedar River becomes polluted will the
pollutant affect the Au Sable River? Explain your answer.
Student Resources: Lesson 4: Watersheds Name: Hour:
Center for Curriculum Materials in Science 1
Student Resources: Lesson 4: Watersheds Name: Hour:
Center for Curriculum Materials in Science 1
Lesson # 4: Watersheds
Activity 4.8 The Flood at Cottonwood Flats
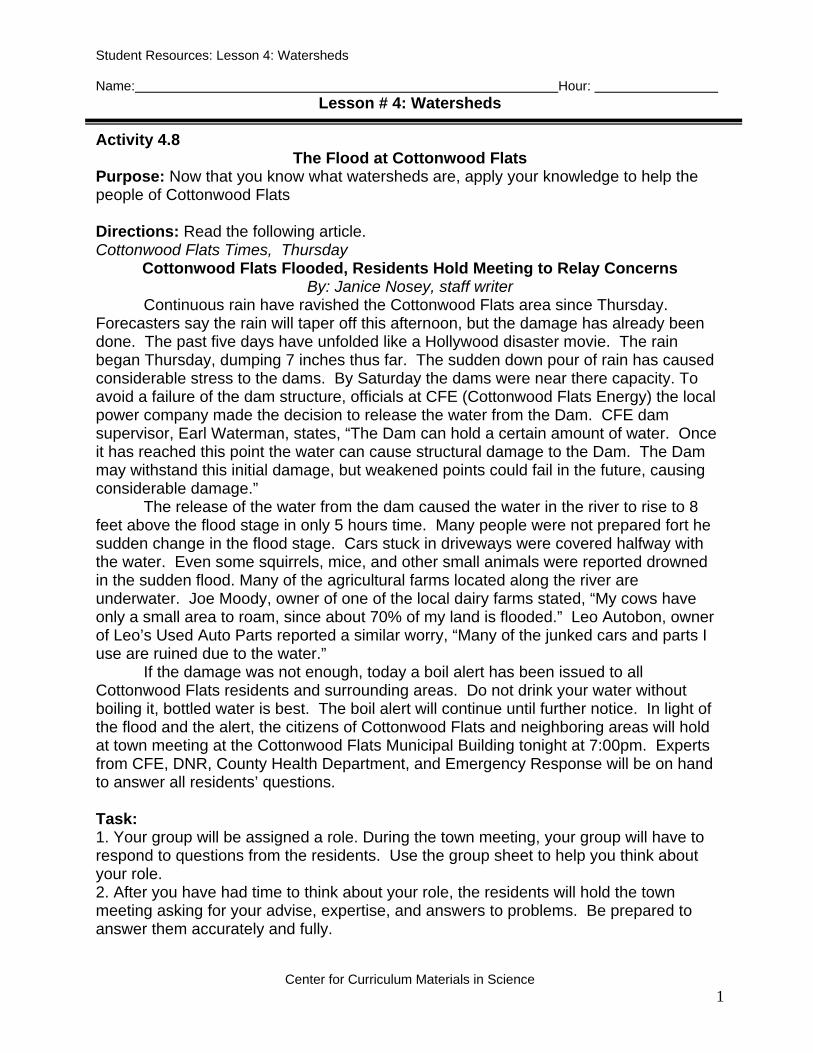
Purpose: Now that you know what watersheds are, apply your knowledge to help the people of Cottonwood Flats Directions: Read the following article. Cottonwood Flats Times, Thursday
Cottonwood Flats Flooded, Residents Hold Meeting to Relay Concerns By: Janice Nosey, staff writer
Continuous rain have ravished the Cottonwood Flats area since Thursday. Forecasters say the rain will taper off this afternoon, but the damage has already been done. The past five days have unfolded like a Hollywood disaster movie. The rain began Thursday, dumping 7 inches thus far. The sudden down pour of rain has caused considerable stress to the dams. By Saturday the dams were near there capacity. To avoid a failure of the dam structure, officials at CFE (Cottonwood Flats Energy) the local power company made the decision to release the water from the Dam. CFE dam supervisor, Earl Waterman, states, “The Dam can hold a certain amount of water. Once it has reached this point the water can cause structural damage to the Dam. The Dam may withstand this initial damage, but weakened points could fail in the future, causing considerable damage.” The release of the water from the dam caused the water in the river to rise to 8 feet above the flood stage in only 5 hours time. Many people were not prepared fort he sudden change in the flood stage. Cars stuck in driveways were covered halfway with the water. Even some squirrels, mice, and other small animals were reported drowned in the sudden flood. Many of the agricultural farms located along the river are underwater. Joe Moody, owner of one of the local dairy farms stated, “My cows have only a small area to roam, since about 70% of my land is flooded.” Leo Autobon, owner of Leo’s Used Auto Parts reported a similar worry, “Many of the junked cars and parts I use are ruined due to the water.” If the damage was not enough, today a boil alert has been issued to all Cottonwood Flats residents and surrounding areas. Do not drink your water without boiling it, bottled water is best. The boil alert will continue until further notice. In light of the flood and the alert, the citizens of Cottonwood Flats and neighboring areas will hold at town meeting at the Cottonwood Flats Municipal Building tonight at 7:00pm. Experts from CFE, DNR, County Health Department, and Emergency Response will be on hand to answer all residents’ questions. Task: 1. Your group will be assigned a role. During the town meeting, your group will have to respond to questions from the residents. Use the group sheet to help you think about your role. 2. After you have had time to think about your role, the residents will hold the town meeting asking for your advise, expertise, and answers to problems. Be prepared to answer them accurately and fully.
Student Resources: Lesson 4: Watersheds Name: Hour:
Center for Curriculum Materials in Science 2
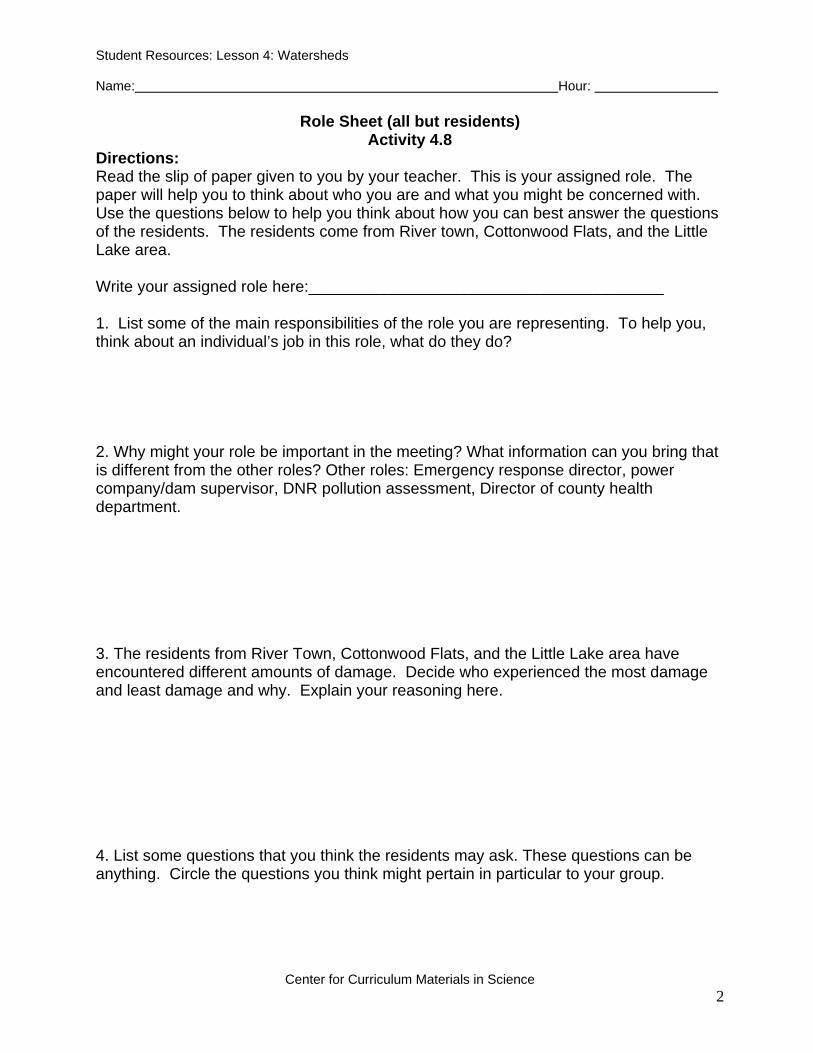
Role Sheet (all but residents)
Activity 4.8 Directions: Read the slip of paper given to you by your teacher. This is your assigned role. The paper will help you to think about who you are and what you might be concerned with. Use the questions below to help you think about how you can best answer the questions of the residents. The residents come from River town, Cottonwood Flats, and the Little Lake area. Write your assigned role here:________________________________________ 1. List some of the main responsibilities of the role you are representing. To help you, think about an individual’s job in this role, what do they do? 2. Why might your role be important in the meeting? What information can you bring that is different from the other roles? Other roles: Emergency response director, power company/dam supervisor, DNR pollution assessment, Director of county health department. 3. The residents from River Town, Cottonwood Flats, and the Little Lake area have encountered different amounts of damage. Decide who experienced the most damage and least damage and why. Explain your reasoning here. 4. List some questions that you think the residents may ask. These questions can be anything. Circle the questions you think might pertain in particular to your group.
Student Resources: Lesson 4: Watersheds Name: Hour:
Center for Curriculum Materials in Science 3
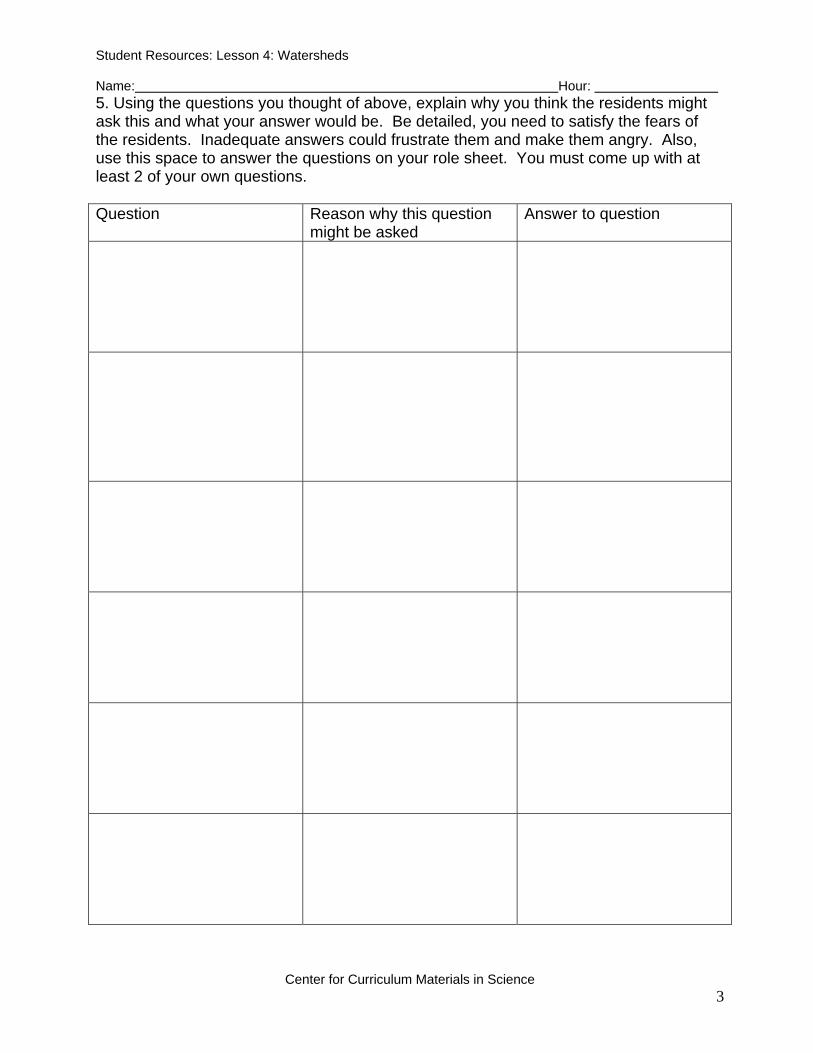
5. Using the questions you thought of above, explain why you think the residents might ask this and what your answer would be. Be detailed, you need to satisfy the fears of the residents. Inadequate answers could frustrate them and make them angry. Also, use this space to answer the questions on your role sheet. You must come up with at least 2 of your own questions. Question Reason why this question
might be asked Answer to question
Student Resources: Lesson 4: Watersheds Name: Hour:
Center for Curriculum Materials in Science 4
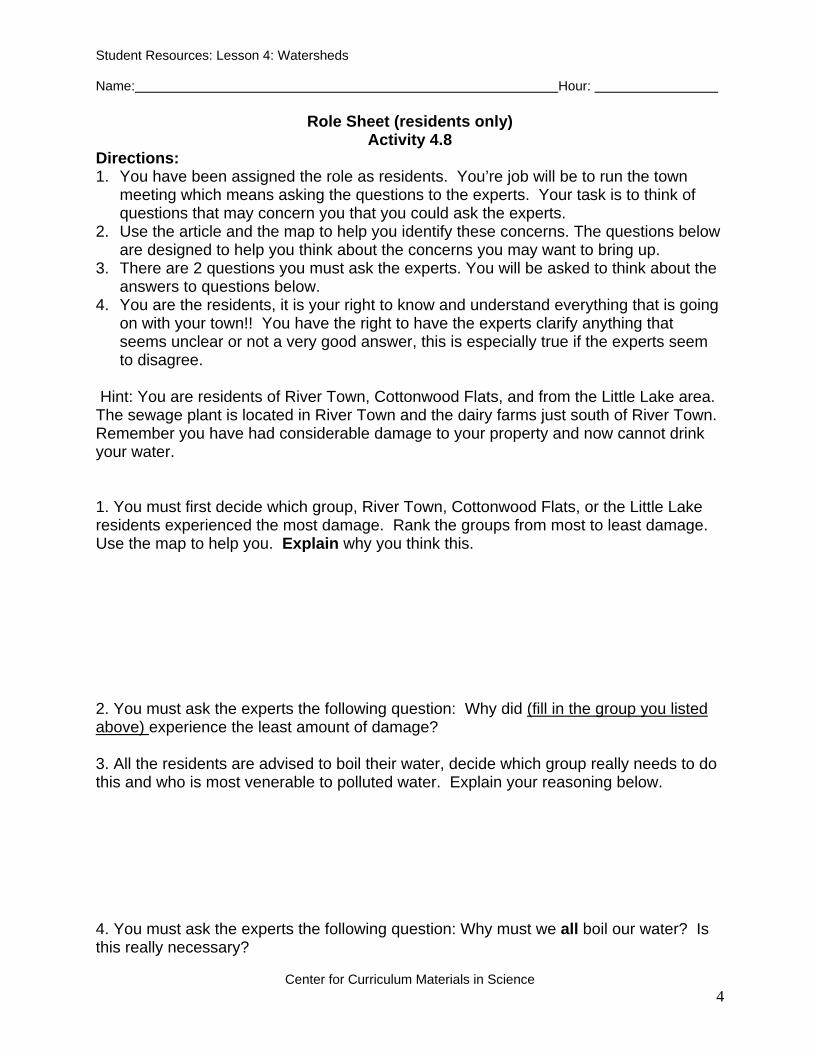
Role Sheet (residents only)
Activity 4.8 Directions: 1. You have been assigned the role as residents. You’re job will be to run the town
meeting which means asking the questions to the experts. Your task is to think of questions that may concern you that you could ask the experts.
2. Use the article and the map to help you identify these concerns. The questions below are designed to help you think about the concerns you may want to bring up.
3. There are 2 questions you must ask the experts. You will be asked to think about the answers to questions below.
4. You are the residents, it is your right to know and understand everything that is going on with your town!! You have the right to have the experts clarify anything that seems unclear or not a very good answer, this is especially true if the experts seem to disagree.
Hint: You are residents of River Town, Cottonwood Flats, and from the Little Lake area. The sewage plant is located in River Town and the dairy farms just south of River Town. Remember you have had considerable damage to your property and now cannot drink your water. 1. You must first decide which group, River Town, Cottonwood Flats, or the Little Lake residents experienced the most damage. Rank the groups from most to least damage. Use the map to help you. Explain why you think this. 2. You must ask the experts the following question: Why did (fill in the group you listed above) experience the least amount of damage? 3. All the residents are advised to boil their water, decide which group really needs to do this and who is most venerable to polluted water. Explain your reasoning below. 4. You must ask the experts the following question: Why must we all boil our water? Is this really necessary?
Student Resources: Lesson 4: Watersheds Name: Hour:
Center for Curriculum Materials in Science 5
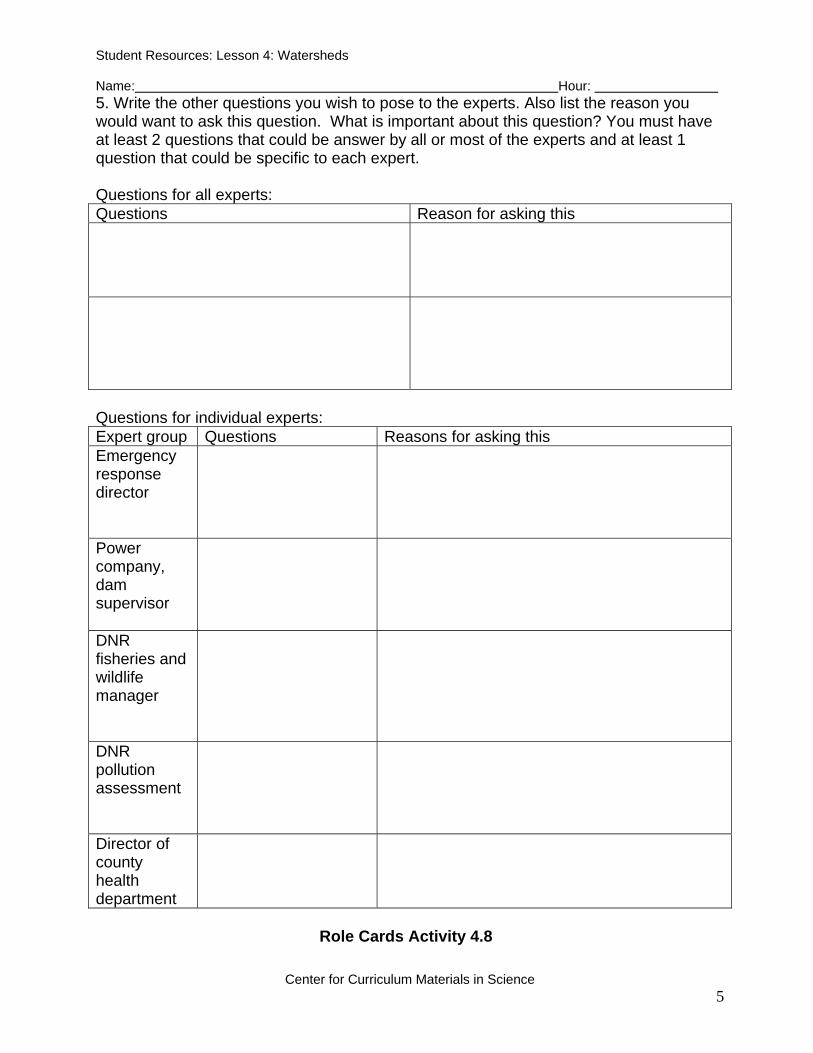
5. Write the other questions you wish to pose to the experts. Also list the reason you would want to ask this question. What is important about this question? You must have at least 2 questions that could be answer by all or most of the experts and at least 1 question that could be specific to each expert. Questions for all experts: Questions Reason for asking this
Questions for individual experts: Expert group Questions Reasons for asking this Emergency response director
Power company, dam supervisor
DNR fisheries and wildlife manager
DNR pollution assessment
Director of county health department
Role Cards Activity 4.8
Student Resources: Lesson 4: Watersheds Name: Hour:
Center for Curriculum Materials in Science 6
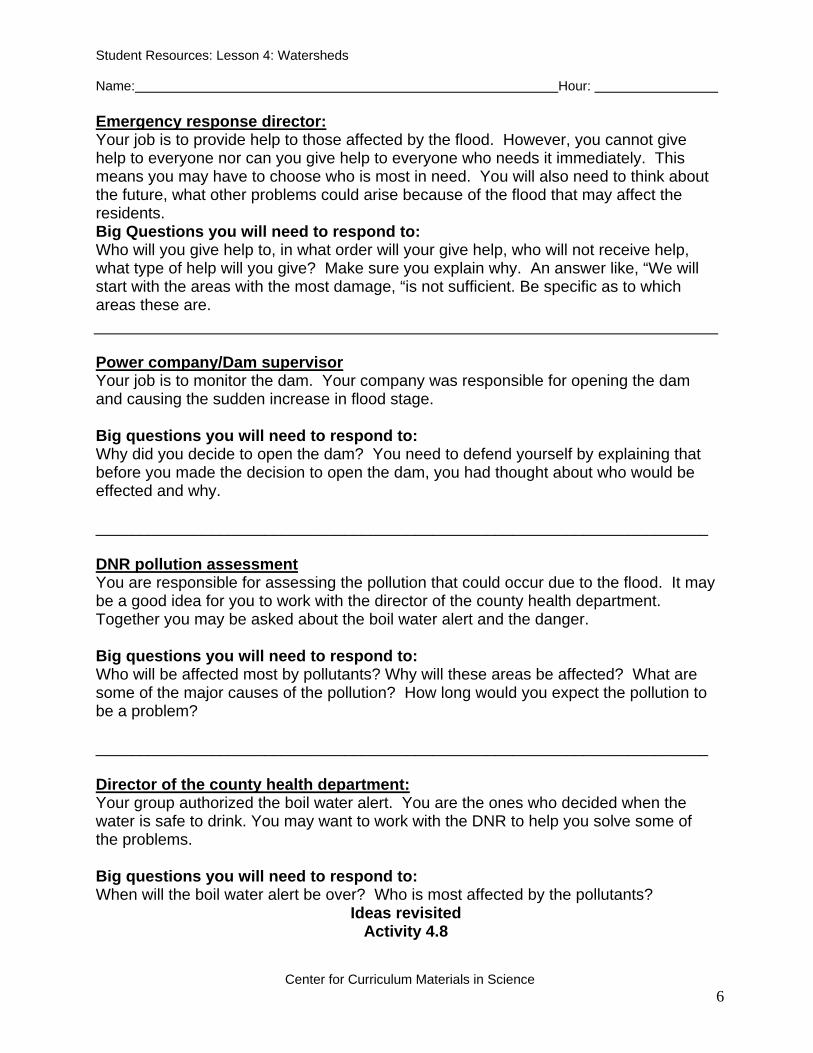
Emergency response director: Your job is to provide help to those affected by the flood. However, you cannot give help to everyone nor can you give help to everyone who needs it immediately. This means you may have to choose who is most in need. You will also need to think about the future, what other problems could arise because of the flood that may affect the residents. Big Questions you will need to respond to: Who will you give help to, in what order will your give help, who will not receive help, what type of help will you give? Make sure you explain why. An answer like, “We will start with the areas with the most damage, “is not sufficient. Be specific as to which areas these are. Power company/Dam supervisor Your job is to monitor the dam. Your company was responsible for opening the dam and causing the sudden increase in flood stage. Big questions you will need to respond to: Why did you decide to open the dam? You need to defend yourself by explaining that before you made the decision to open the dam, you had thought about who would be effected and why. _____________________________________________________________________ DNR pollution assessment You are responsible for assessing the pollution that could occur due to the flood. It may be a good idea for you to work with the director of the county health department. Together you may be asked about the boil water alert and the danger. Big questions you will need to respond to: Who will be affected most by pollutants? Why will these areas be affected? What are some of the major causes of the pollution? How long would you expect the pollution to be a problem? _____________________________________________________________________ Director of the county health department: Your group authorized the boil water alert. You are the ones who decided when the water is safe to drink. You may want to work with the DNR to help you solve some of the problems. Big questions you will need to respond to: When will the boil water alert be over? Who is most affected by the pollutants?
Ideas revisited Activity 4.8
Student Resources: Lesson 4: Watersheds Name: Hour:
Center for Curriculum Materials in Science 7
Directions: Now that you have heard all sides of the town meeting, go back to your own responses and make any necessary corrections or additions to make your answers better. 1. Pick two answers you gave in the role sheet, explain how you can change these
answers (correct or expand on them) based on what you learned from the town meeting.
2. Answer the following questions about your group work today: A. How many people in your group offered suggestions and ideas before the town
meeting?________ B. How many people in your group spoke during the town meeting?______ C. Name something you group did really well today?
D. Name something your group didn’t do so well today?
E. Make a suggestion for how to fix the problem you mentioned above?
Student Resources: Lesson 4: Watersheds Name: Hour:
Center for Curriculum Materials in Science 1
Map of Cottonwood Flats
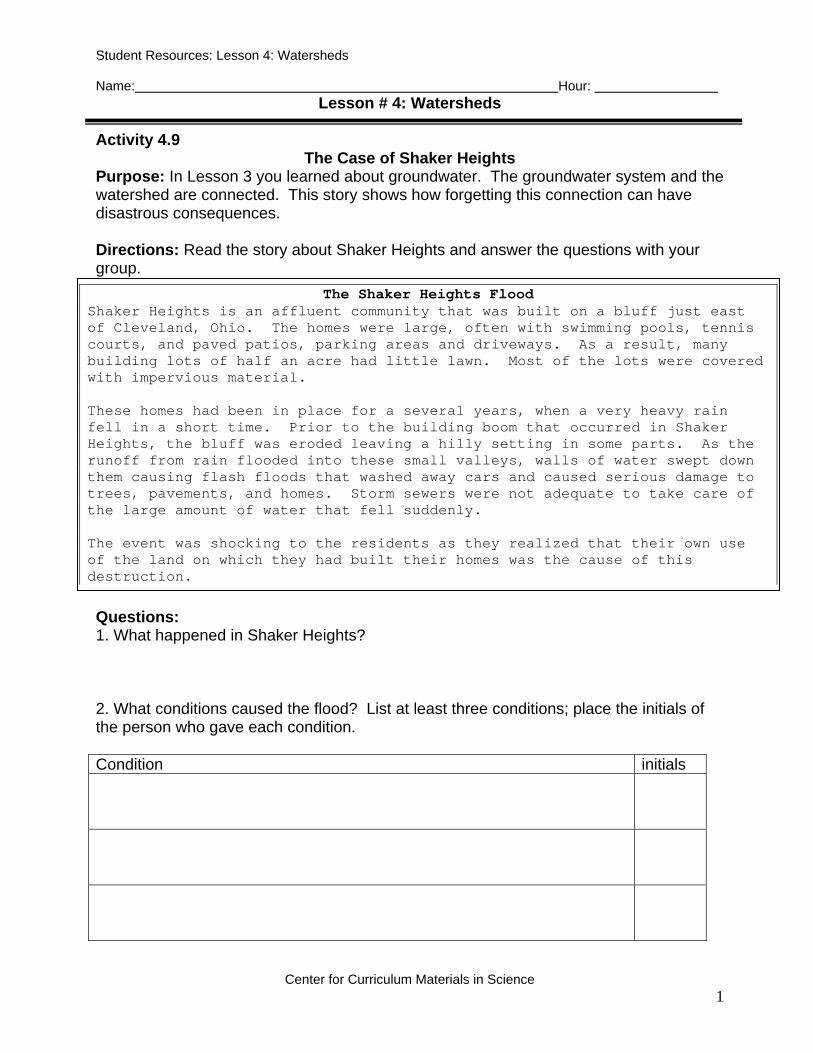
Student Resources: Lesson 4: Watersheds Name: Hour:
Center for Curriculum Materials in Science 1
Lesson # 4: Watersheds
Activity 4.9 The Case of Shaker Heights
Purpose: In Lesson 3 you learned about groundwater. The groundwater system and the watershed are connected. This story shows how forgetting this connection can have disastrous consequences. Directions: Read the story about Shaker Heights and answer the questions with your group. Questions: 1. What happened in Shaker Heights? 2. What conditions caused the flood? List at least three conditions; place the initials of the person who gave each condition.
Condition initials
The Shaker Heights Flood Shaker Heights is an affluent community that was built on a bluff just east of Cleveland, Ohio. The homes were large, often with swimming pools, tennis courts, and paved patios, parking areas and driveways. As a result, many building lots of half an acre had little lawn. Most of the lots were covered with impervious material. These homes had been in place for a several years, when a very heavy rain fell in a short time. Prior to the building boom that occurred in Shaker Heights, the bluff was eroded leaving a hilly setting in some parts. As the runoff from rain flooded into these small valleys, walls of water swept down them causing flash floods that washed away cars and caused serious damage to trees, pavements, and homes. Storm sewers were not adequate to take care of the large amount of water that fell suddenly. The event was shocking to the residents as they realized that their own use of the land on which they had built their homes was the cause of this destruction.
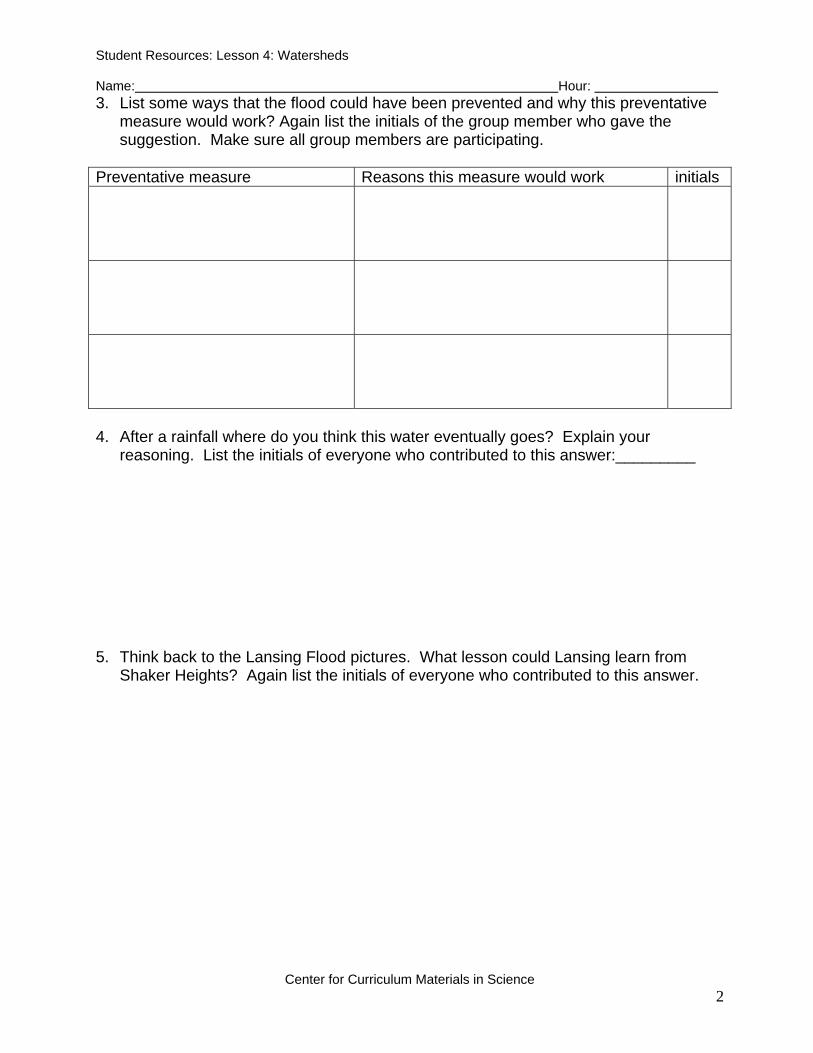
Student Resources: Lesson 4: Watersheds Name: Hour:
Center for Curriculum Materials in Science 2
3. List some ways that the flood could have been prevented and why this preventative measure would work? Again list the initials of the group member who gave the suggestion. Make sure all group members are participating.
Preventative measure Reasons this measure would work initials
4. After a rainfall where do you think this water eventually goes? Explain your
reasoning. List the initials of everyone who contributed to this answer:_________
5. Think back to the Lansing Flood pictures. What lesson could Lansing learn from Shaker Heights? Again list the initials of everyone who contributed to this answer.
Related Documents


