Laser Enclosure to Elevated Rail Assembly Wyman Gordon Forging Locator Original Revision: 2/14/2013

Laser Enclosure to Elevated Rail Assembly Wyman Gordon Forging Locator Original Revision: 2/14/2013.
Dec 14, 2015
Welcome message from author
This document is posted to help you gain knowledge. Please leave a comment to let me know what you think about it! Share it to your friends and learn new things together.
Transcript

Laser Enclosure to Elevated Rail AssemblyWyman Gordon Forging LocatorOriginal Revision: 2/14/2013

Before & After

Step 1: Attach Bolts to Rail Attachment
Loosely attach bolts on both sides of
elevated rail attachments.
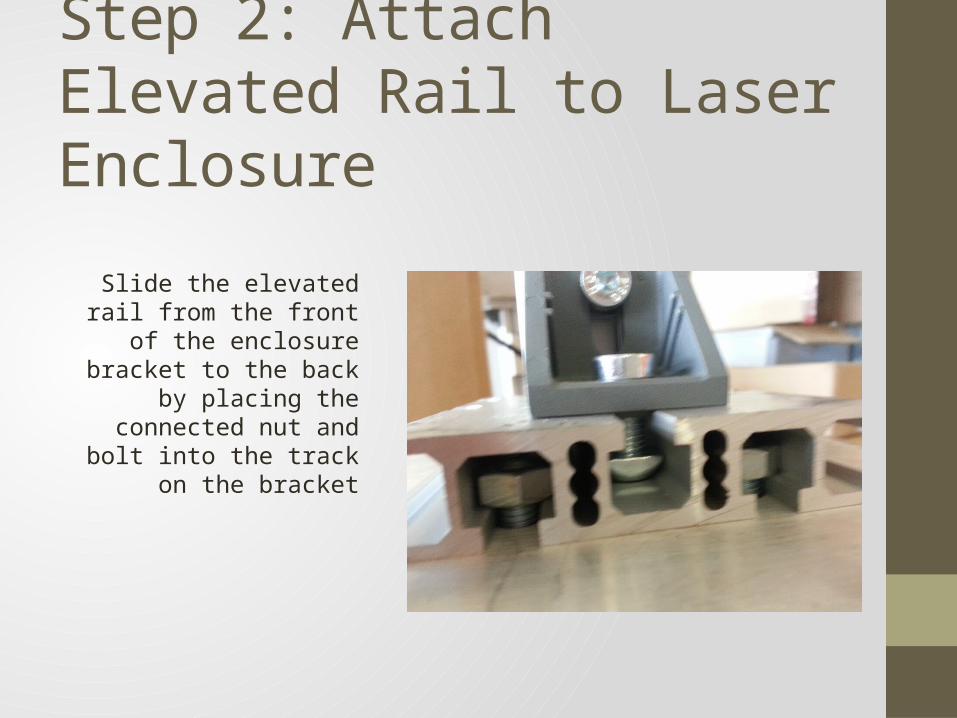
Step 2: Attach Elevated Rail to Laser Enclosure
Slide the elevated rail from the front of the enclosure bracket
to the back by placing the connected nut and bolt into
the track on the bracket

Step 3: Alignment
Align the elevated rail and bracket by positioning the
front rail attachment flush to the front of the enclosure
bracket

Final Step: Tighten Bolts
Tighten bolts in the rail attachment to
the enclosure bracket to finish
assembly
Related Documents