Engineering Design and Technology Series Instructor’s Guide to Teaching SolidWorks ® Software Dassault Systèmes - SolidWorks Corporation 300 Baker Avenue Concord, Massachusetts 01742 USA Phone: +1-800-693-9000 Outside the U.S.: +1-978-371-5011 Fax: +1-978-371-7303 Email: [email protected] Web: http://www.solidworks.com/education

Welcome message from author
This document is posted to help you gain knowledge. Please leave a comment to let me know what you think about it! Share it to your friends and learn new things together.
Transcript
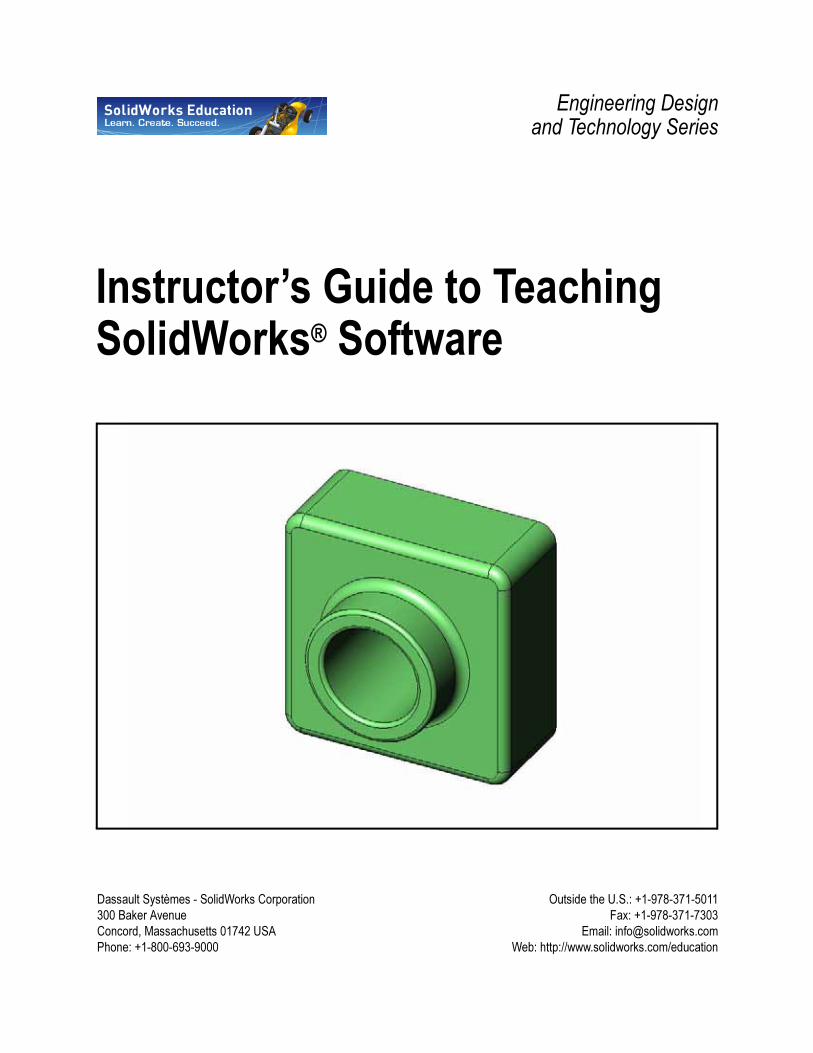
Engineering Designand Technology Series
Instructor’s Guide to Teaching SolidWorks® Software
Dassault Systèmes - SolidWorks Corporation
300 Baker Avenue
Concord, Massachusetts 01742 USA
Phone: +1-800-693-9000
Outside the U.S.: +1-978-371-5011
Fax: +1-978-371-7303
Email: [email protected]
Web: http://www.solidworks.com/education

© 1995-2010, Dassault Systèmes SolidWorks Corporation, a Dassault Systèmes S.A. company, 300 Baker Avenue, Concord, Mass. 01742 USA. All Rights Reserved.
The information and the software discussed in this document are subject to change without notice and are not commitments by Dassault Systèmes SolidWorks Corporation (DS SolidWorks).
No material may be reproduced or transmitted in any form or by any means, electronically or manually, for any purpose without the express written permission of DS SolidWorks.
The software discussed in this document is furnished under a license and may be used or copied only in accordance with the terms of the license. All warranties given by DS SolidWorks as to the software and documentation are set forth in the license agreement, and nothing stated in, or implied by, this document or its contents shall be considered or deemed a modification or amendment of any terms, including warranties, in the license agreement.
Patent Notices
SolidWorks® 3D mechanical CAD software is protected by U.S. Patents 5,815,154; 6,219,049; 6,219,055; 6,611,725; 6,844,877; 6,898,560; 6,906,712; 7,079,990; 7,477,262; 7,558,705; 7,571,079; 7,590,497; 7,643,027; 7,672,822; 7,688,318; 7,694,238; 7,853,940 ; and foreign patents, (e.g., EP 1,116,190 and JP 3,517,643).
eDrawings® software is protected by U.S. Patent 7,184,044; U.S. Patent 7,502,027; and Canadian Patent 2,318,706.
U.S. and foreign patents pending.
Trademarks and Product Names for SolidWorks Products and Services
SolidWorks, 3D PartStream.NET, 3D ContentCentral, eDrawings, and the eDrawings logo are registered trademarks and FeatureManager is a jointly owned registered trademark of DS SolidWorks.
CircuitWorks, Feature Palette, FloXpress, PhotoWorks, TolAnalyst, and XchangeWorks are trademarks of DS SolidWorks.
FeatureWorks is a registered trademark of Geometric Software Solutions Ltd.
SolidWorks 2011, SolidWorks Enterprise PDM, SolidWorks Simulation, SolidWorks Flow Simulation, and eDrawings Professional are product names of DS SolidWorks.
Other brand or product names are trademarks or registered trademarks of their respective holders.
Document Number: PME0119-ENG
COMMERCIAL COMPUTER SOFTWARE - PROPRIETARY
U.S. Government Restricted Rights. Use, duplication, or disclosure by the government is subject to restrictions as set forth in FAR 52.227-19 (Commercial Computer Software - Restricted Rights), DFARS 227.7202 (Commercial Computer Software and Commercial Computer Software Documentation), and in the license agreement, as applicable.
Contractor/Manufacturer:
Dassault Systèmes SolidWorks Corporation, 300 Baker Avenue, Concord, Massachusetts 01742 USA
Copyright Notices for SolidWorks Standard, Premium, Professional, and Education Products
Portions of this software © 1986-2010 Siemens Product Lifecycle Management Software Inc. All rights reserved.
Portions of this software © 1986-2010 Siemens Industry Software Limited. All rights reserved.
Portions of this software © 1998-2010 Geometric Ltd.
Portions of this software © 1996-2010 Microsoft Corporation. All rights reserved.
Portions of this software incorporate PhysX™ by NVIDIA 2006-2010.
Portions of this software © 2001 - 2010 Luxology, Inc. All rights reserved, Patents Pending.
Portions of this software © 2007 - 2010 DriveWorks Ltd.
Copyright 1984-2010 Adobe Systems Inc. and its licensors. All rights reserved. Protected by U.S. Patents 5,929,866; 5,943,063; 6,289,364; 6,563,502; 6,639,593; 6,754,382; Patents Pending.
Adobe, the Adobe logo, Acrobat, the Adobe PDF logo, Distiller and Reader are registered trademarks or trademarks of Adobe Systems Inc. in the U.S. and other countries.
For more copyright information, in SolidWorks see Help > About SolidWorks.
Copyright Notices for SolidWorks Simulation Products
Portions of this software © 2008 Solversoft Corporation.
PCGLSS © 1992-2007 Computational Applications and System Integration, Inc. All rights reserved.
Copyright Notices for Enterprise PDM Product
Outside In® Viewer Technology, © Copyright 1992-2010, Oracle
© Copyright 1995-2010, Oracle. All rights reserved.
Portions of this software © 1996-2010 Microsoft Corporation. All rights reserved.
Copyright Notices for eDrawings Products
Portions of this software © 2000-2010 Tech Soft 3D.
Portions of this software © 1995-1998 Jean-Loup Gailly and Mark Adler.
Portions of this software © 1998-2001 3Dconnexion.
Portions of this software © 1998-2010 Open Design Alliance. All rights reserved.
Portions of this software © 1995-2009 Spatial Corporation.
This software is based in part on the work of the Independent JPEG Group.
Instructor’s Guide to Teaching SolidWorks Software 17
2
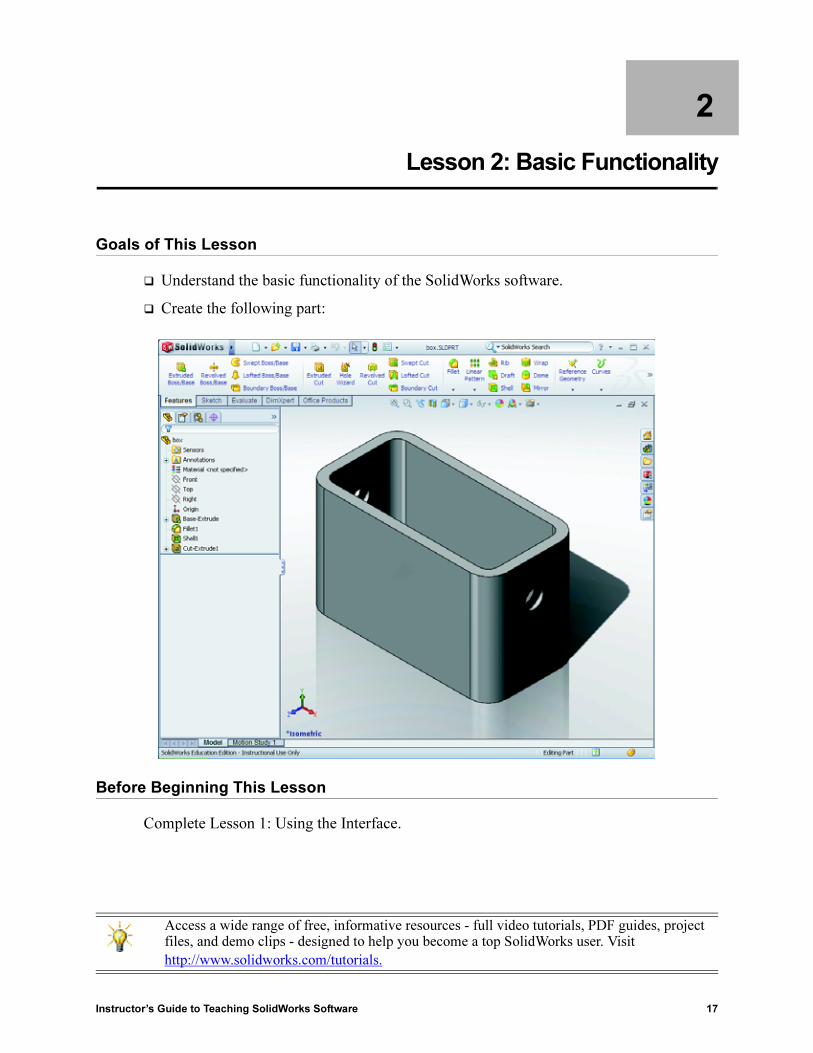
Lesson 2: Basic Functionality
Goals of This Lesson
� Understand the basic functionality of the SolidWorks software.
� Create the following part:
Before Beginning This Lesson
Complete Lesson 1: Using the Interface.
Access a wide range of free, informative resources - full video tutorials, PDF guides, project files, and demo clips - designed to help you become a top SolidWorks user. Visit
http://www.solidworks.com/tutorials.

Lesson 2: Basic Functionality
18 Instructor’s Guide to Teaching SolidWorks Software
Review of Lesson 1: Using the Interface
The interface is how you interact with the computer in the following ways:
� Use windows to view files.
� Use the mouse to select buttons, menus, and model elements.
� Run programs — like SolidWorks mechanical design software.
� Find, open, and work with files.
� Create, save, and copy files.
� SolidWorks runs on the Microsoft Windows graphical user interface.
� The mouse lets you move around the interface.
� The quickest way to open a file is to double-click on it.
� Saving a file preserves the changes that you have made to it.
� SolidWorks windows display graphic and non-graphic model data.
� Toolbars display frequently used commands.

Lesson 2: Basic Functionality
Instructor’s Guide to Teaching SolidWorks Software 19
Outline of Lesson 2
� In Class Discussion — The SolidWorks Model
� Active Learning Exercise — Creating a Basic Part
• Create a New Part Document
• Overview of the SolidWorks Window
• Sketch a Rectangle
• Add Dimensions
• Changing the Dimension Values
• Extrude the Base Feature
• View Display
• Save the Part
• Round the Corners of the Part
• Hollow Out the Part
• Extruded Cut Feature
• Open a Sketch
• Sketch the Circle
• Dimension the Circle
• Extrude the Sketch
• Rotate the View
• Save the Part
� In Class Discussion — Describing the Base Feature
� Exercises and Projects — Designing a Switch Plate
� More to Explore — Modifying a Part
� Lesson Summary
Competencies for Lesson 2
Students develop the following competencies in this lesson:
� Engineering: Develop a 3D part based on a selected plane, dimensions, and features. Apply the design process to develop the box or switch plate out of cardboard or other material. Develop manual sketching techniques by drawing the switch plate.
� Technology: Apply a windows based graphical user interface.
� Math: Understand units of measurement, adding and subtracting material, perpendicularity, and the x-y-z coordinate system.

Lesson 2: Basic Functionality
20 Instructor’s Guide to Teaching SolidWorks Software
In Class Discussion — The SolidWorks Model
SolidWorks is design automation software. In SolidWorks, you sketch ideas and experiment with different designs to create 3D models. SolidWorks is used by students, designers, engineers, and other professionals to produce simple and complex parts, assemblies, and drawings.
The SolidWorks model is made up of:
� Parts
� Assemblies
� Drawings
A part is a single 3D object made up of features. A part can become a component in an assembly, and it can be represented in 2D in a drawing. Examples of parts are bolt, pin, plate, and so on. The extension for a SolidWorks part file name is .SLDPRT. Features are the shapes and operations that construct the part. The Base feature is the first feature that is created.The Base feature is the foundation of the part.
An assembly is a document in which parts, features, and other assemblies (sub-assemblies) are mated together. The parts and sub-assemblies exist in documents separate from the assembly. For example, in an assembly, a piston can be mated to other parts, such as a connecting rod or cylinder. This new assembly can then be used as a sub-assembly in an assembly of an engine. The extension for a SolidWorks assembly file name is .SLDASM.
A drawing is a 2D representation of a 3D part or assembly. The extension for a SolidWorks drawing file name is .SLDDRW.

Lesson 2: Basic Functionality
Instructor’s Guide to Teaching SolidWorks Software 21
Active Learning Exercises — Creating a Basic Part
Use SolidWorks to create the box shown at the right.
The step-by-step instructions are given below.
Create a New Part Document
1 Create a new part. Click
New on the Standard toolbar.
The New SolidWorks
Document dialog box appears.
2 Click the Tutorial tab.
3 Select the Part icon.
4 Click OK.
A new part document window appears.
Base Feature
The Base feature requires:
� Sketch plane – Front (default plane)
� Sketch profile – 2D Rectangle
� Feature type – Extruded boss feature
Open a Sketch
1 Click to select the Front plane in the FeatureManager design tree.
2 Open a 2D sketch. Click Sketch on the Sketch toolbar.
Confirmation Corner
When many SolidWorks commands are active, a symbol or a set of symbols appears in the upper right corner of the graphics area. This area is called the Confirmation Corner.
Sketch Indicator
When a sketch is active, or open, a symbol appears in the confirmation corner that looks like the Sketch tool. It provides a visual reminder that you are active in a sketch. Clicking this symbol exits the sketch saving your changes. Clicking the red X exits the sketch discarding your changes.

Lesson 2: Basic Functionality
22 Instructor’s Guide to Teaching SolidWorks Software
When other commands are active, the confirmation corner displays two symbols: a check mark and an X. The check mark executes the current command. The X cancels the command.
Overview of the SolidWorks Window
� A sketch origin appears in the center of the graphics area.
� Editing Sketch1 appears in the status bar at the bottom of the screen.
� Sketch1 appears in the FeatureManager design tree.
� The status bar shows the position of the pointer, or sketch tool, in relation to the sketch origin.
Sketch a Rectangle
1 Click Corner Rectangle on the Sketch toolbar.
2 Click the sketch origin to start the rectangle.
3 Move the pointer up and to the right, to create a rectangle.
4 Click the mouse button again to complete the rectangle.
Status bar
Graphics area
Sketch origin
Menu bar
FeatureManager design tree
Confirmation Corner with sketch indicator
Reference Triad
CommandManager
Heads-up View Toolbar

Lesson 2: Basic Functionality
Instructor’s Guide to Teaching SolidWorks Software 23
Add Dimensions
1 Click Smart Dimension on the Dimensions/Relations toolbar.
The pointer shape changes to .
2 Click the top line of the rectangle.
3 Click the dimension text location above the top line.
The Modify dialog box is displayed.
4 Enter 100. Click or press Enter.
5 Click the right edge of the rectangle.
6 Click the dimension text location. Enter 65. Click .
The top segment and the remaining vertices are displayed in black. The status bar in the lower-right corner of the window indicates that the sketch is fully defined.
Changing the Dimension Values
The new dimensions for the box are 100mm x 60mm. Change the dimensions.
1 Double-click 65.
The Modify dialog box appears.
2 Enter 60 in the Modify dialog box.
3 Click .
Extrude the Base Feature.
The first feature in any part is called the Base Feature. In this exercise, the base feature is created by extruding the sketched rectangle.
1 Click Extruded Boss/Base on the Features toolbar.
The Extrude PropertyManager appears. The view of the sketch changes to trimetric.
TIP: If the Features toolbar is not visible (active), you may also access the feature commands from the CommandManager.

Lesson 2: Basic Functionality
24 Instructor’s Guide to Teaching SolidWorks Software
2 Preview graphics.
A preview of the feature is shown at the default depth.
Handles appear that can be used to drag the preview to the desired depth. The handles are colored magenta for the active direction and gray for inactive direction. A callout shows the current depth value.
The cursor changes to . If you want to create the feature now, click the right mouse button. Otherwise, you can make additional changes to the settings. For example, the depth of extrusion can be changed by dragging the dynamic handle with the mouse or by setting a value in the PropertyManager.
3 Extrude feature settings.
Change the settings as shown.
• End Condition = Blind
• (Depth) = 50
4 Create the extrusion. Click OK .
The new feature, Boss-Extrude1, is displayed in the FeatureManager design tree.
TIP:
The OK button on the PropertyManager is just one way to complete the command.
A second method is the set of OK/Cancel buttons in the confirmation corner of the graphics area.
A third method is the right-mouse shortcut menu that includes OK, among other options.
Sketch
Preview
Handle
On-screen Scale

Lesson 2: Basic Functionality
Instructor’s Guide to Teaching SolidWorks Software 25
5 Click the plus sign beside Extrude1 in the FeatureManager design tree. Notice that Sketch1 — which you used to extrude the feature — is now listed under the feature.
View Display
Change the display mode. Click Hidden Lines Visible
on the View toolbar.
Hidden Lines Visible enables you to select hidden back edges of the box.
Save the Part
1 Click Save on the Standard toolbar, or click File,
Save.
The Save As dialog box appears.
2 Type box for the filename. Click Save.
The .sldprt extension is added to the filename.
The file is saved to the current directory. You can use the Windows browse button to change to a different directory.
Round the Corners of the Part
Round the four corner edges of the box. All rounds have the same radius (10mm). Create them as a single feature.
1 Click Fillet on the Features toolbar.
The Fillet PropertyManager appears.
2 Enter 10 for the Radius.
3 Select Full preview.
Leave the remaining settings at their default values.
Click Here

Lesson 2: Basic Functionality
26 Instructor’s Guide to Teaching SolidWorks Software
4 Click the first corner edge.
The faces, edges, and vertices are highlighted as you move the pointer over them.
When you select the edge, a callout appears.
5 Identify selectable objects. Notice how the pointer changes shapes:
Edge: Face: Vertex:
6 Click the second, third and fourth corner edges.
7 Click OK .
Fillet1 appears in the FeatureManager design tree.
8 Click Shaded on the View toolbar
Hollow Out the Part
Remove the top face using the Shell feature.
1 Click Shell on the Features toolbar.
The Shell PropertyManager appears.
2 Enter 5 for Thickness.
Note: Normally, a callout only appears on the first edge you select. This illustration has been modified to show callouts on each of the four selected edges. This was done simply to better illustrate which edges you are supposed to select.

Lesson 2: Basic Functionality
Instructor’s Guide to Teaching SolidWorks Software 27
3 Click the top face.
4 Click .
Extruded Cut Feature
The Extruded Cut feature removes material. To make an extruded cut requires a:
� Sketch plane – In this exercise, the face on the right-hand side of the part.
� Sketch profile – 2D circle
Open a Sketch
1 To select the sketch plane, click the right-hand face of the box.
2 Click Right on the Standard Views toolbar.
The view of the box turns. The selected model face is facing you.
3 Open a 2D sketch. Click Sketch on the Sketch toolbar.
Top Face
Pick this face

Lesson 2: Basic Functionality
28 Instructor’s Guide to Teaching SolidWorks Software
Sketch the Circle
1 Click Circle on the Sketch Tools toolbar.
2 Position the pointer where you want the center of the circle. Click the left mouse button.
3 Drag the pointer to sketch a circle.
4 Click the left mouse button again to complete the circle.
Dimension the Circle
Dimension the circle to determine its size and location.
1 Click Smart Dimension on the Dimensions/Relations toolbar.
2 Dimension the diameter. Click on the circumference of the circle. Click a location for the dimension text in the upper right corner. Enter 10.
3 Create a horizontal dimension. Click the circumference of the circle. Click the left most vertical edge. Click a location for the dimension text below the bottom horizontal line. Enter 25.
4 Create a vertical dimension. Click the circumference of the circle. Click the bottom most horizontal edge. Click a location for the dimension text to the right of the sketch. Enter 40.
Extrude the Sketch
1 Click Extruded Cut on the Features toolbar.
The Extrude PropertyManager appears.
2 Select Through All for the end condition.
3 Click .
Lesson 2: Basic Functionality
Instructor’s Guide to Teaching SolidWorks Software 29
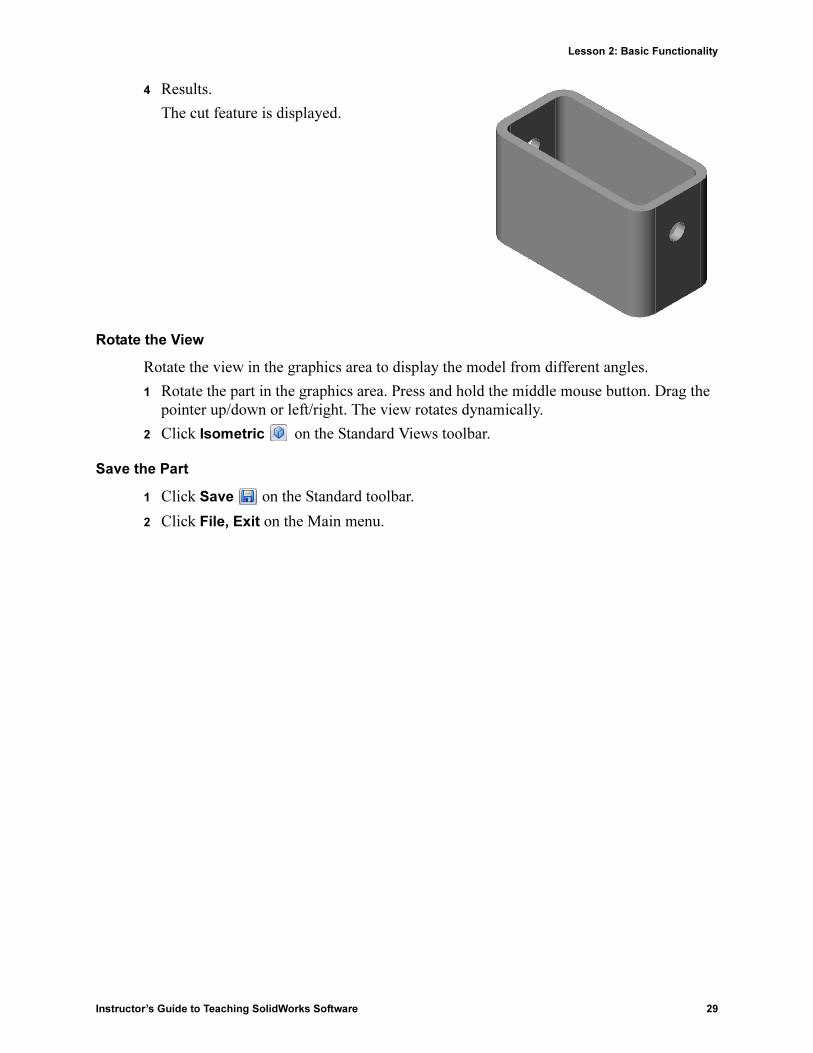
4 Results.
The cut feature is displayed.
Rotate the View
Rotate the view in the graphics area to display the model from different angles.
1 Rotate the part in the graphics area. Press and hold the middle mouse button. Drag the pointer up/down or left/right. The view rotates dynamically.
2 Click Isometric on the Standard Views toolbar.
Save the Part
1 Click Save on the Standard toolbar.
2 Click File, Exit on the Main menu.

Lesson 2: Basic Functionality
30 Instructor’s Guide to Teaching SolidWorks Software
Lesson 2 — 5 Minute Assessment — Answer Key
Name: _______________________________Class: _________ Date:_______________
Directions: Answer each question by writing the correct answer or answers in the space
provided or circle the answer as directed.
1 How do you start a SolidWorks session?
Answer: Click . Click All Programs. Click the SolidWorks folder. Click the SolidWorks application.
2 Why do you create and use Document Templates?
Answer: Document Templates contain the units, grid and text settings for the model. You can create Metric and English templates each with different settings.
3 How do you start a new Part Document?
Answer: Click the New icon. Select a part template.
4 What features did you use to create the box?
Answer: Extruded Boss, Fillet, Shell, and Extruded Cut.
5 True or False. SolidWorks is used by designers and engineers.
Answer: True.
6 A SolidWorks 3D model consists of _________ _________ ________.
Answer: Parts, assemblies and drawings.
7 How do you open a sketch?
Answer: Click the Sketch icon on the Sketch toolbar.
8 What does the Fillet feature do?
Answer: The Fillet feature rounds sharp edges.
9 What does the Shell feature do?
Answer: The Shell feature removes material from the selected face.
10 What does the Cut-Extrude feature do?
Answer: The Cut-Extrude feature removes material.
11 How do you change a dimension value?
Answer: Double-click on the dimension. Enter the new value in the Modify dialog box.

Lesson 2: Basic Functionality
Instructor’s Guide to Teaching SolidWorks Software 31
Lesson 2 — 5 Minute Assessment REPRODUCIBLE
Name: _______________________________Class: _________ Date:_______________
Directions: Answer each question by writing the correct answer or answers in the space
provided or circle the answer as directed.
1 How do you start a SolidWorks session?
_____________________________________________________________________
_____________________________________________________________________
2 Why do you create and use Document Templates?
_____________________________________________________________________
_____________________________________________________________________
3 How do you start a new Part Document?
_____________________________________________________________________
4 What features did you use to create the box?
_____________________________________________________________________
5 True or False. SolidWorks is used by designers and engineers.
_____________________________________________________________________
6 A SolidWorks 3D model consists of _________ _________ ________.
_____________________________________________________________________
7 How do you open a sketch?
_____________________________________________________________________
8 What does the Fillet feature do?
_____________________________________________________________________
9 What does the Shell feature do?
_____________________________________________________________________
10 What does the Cut-Extrude feature do?
_____________________________________________________________________
11 How do you change a dimension value?
_____________________________________________________________________

Lesson 2: Basic Functionality
32 Instructor’s Guide to Teaching SolidWorks Software
In Class Discussion — Describing the Base Feature
Pick up a pencil. Ask the students to describe the base feature of the pencil. How would you create the additional features for the pencil?
Answer
� Sketch a circular 2D profile.
� Extrude the 2D sketch. This creates the base feature which is named Extrude1.
� Select one circular edge on the base feature. Create a fillet feature. The fillet feature removes sharp edges. The fillet feature creates the eraser for the pencil.
� Select the other circular edge on the base feature. Create a chamfer feature. The chamfer feature creates the point for the pencil.
Exercises and Projects — Designing a Switch Plate
Switch plates are required for safety. They cover live electrical wires and protect people from electric shock. Switch plates are found in every home and school.
Caution: Do not use metal rulers near switch plates attached to a live wall outlet.
Tasks
1 Measure a single light plate switch cover.
Answer: Overall a single switch plate is approximately 70mm x 115mm x 10mm. The switch cut-out is approximately 10mm x 25mm.
2 Using paper and pencil, manually sketch the light plate switch cover.
3 Label the dimensions.
4 What is the base feature for the light plate switch cover?
Answer: It is an extruded boss feature.
Fillet Feature
Base Feature
Chamfer Feature

Lesson 2: Basic Functionality
Instructor’s Guide to Teaching SolidWorks Software 33
5 Create a simple single light switch cover using SolidWorks. The filename for the part is switchplate.
6 What features are used to develop the switchplate?
Answer: The extruded boss, chamfer, shell and extruded cut features are used to create the switchplate.
• The order in which the features are created is important.
First – create the base feature.
Second – create the chamfer feature.
Third – create the shell feature.
Fourth – create the cut feature for the switch hole.
Fifth – create the cut feature for the screw holes.
• The file switchplate.sldprt is found in Lessons\Lesson2 in the SolidWorks Teacher Tools folder.
7 Create a simplified duplex outlet cover plate. The filename for the part is outletplate.
Answer: The outletplate.sldprt file is found in Lessons\Lesson2 in the SolidWorks Teacher Tools folder.
8 Save the parts. They will be used in later lessons.

Lesson 2: Basic Functionality
34 Instructor’s Guide to Teaching SolidWorks Software
More to Explore — Modifying a Part
Many pencils have a longer, sharper point than the one shown earlier. How can this be accomplished?
Answer
Answers will vary. One possibility is:
� Double-click chamfer feature, either in the FeatureManager design tree or the graphics area.
� Change the angle to 10°.
� Change the distance to 25mm.
� Click Rebuild on the Standard toolbar to rebuild the part.
Another possibility is:
� Edit the definition of the chamfer feature.
� Change the Type option to Distance-Distance.
� Set the Distance1 value to 25mm.
� Set the Distance2 value to 4.5mm.
� Click OK to rebuild the chamfer feature.
Lesson 2: Basic Functionality
Instructor’s Guide to Teaching SolidWorks Software 35
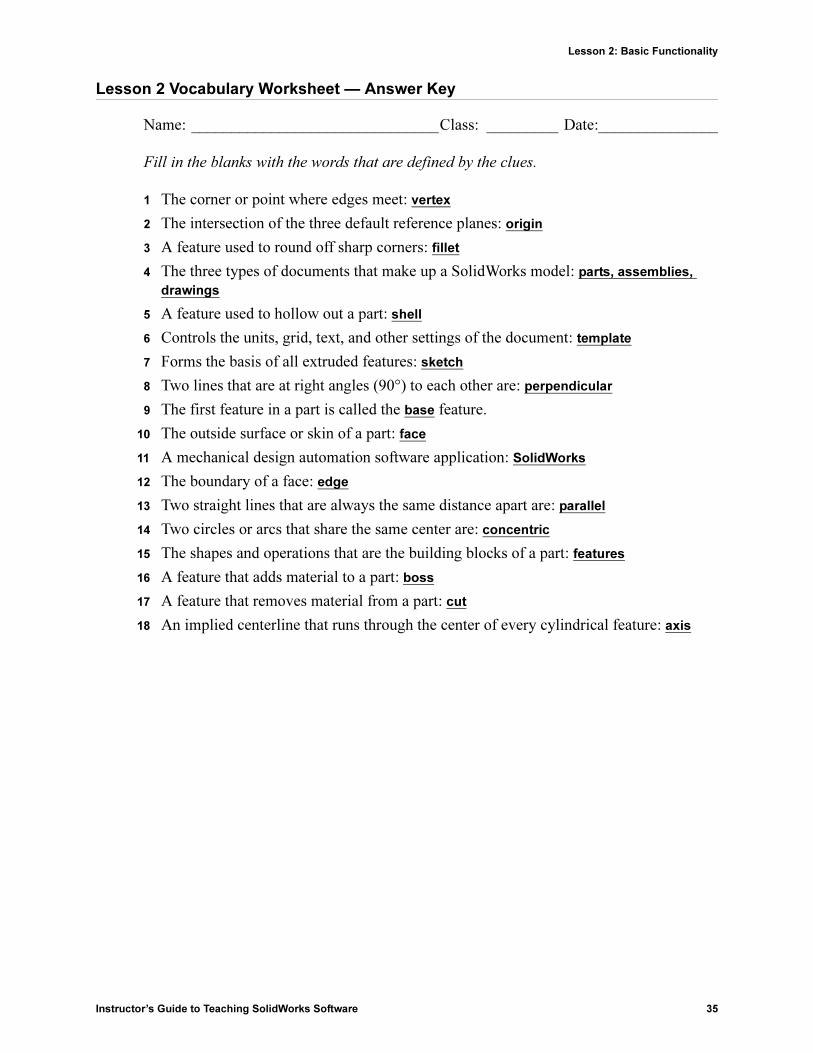
Lesson 2 Vocabulary Worksheet — Answer Key
Name: _______________________________Class: _________ Date:_______________
Fill in the blanks with the words that are defined by the clues.
1 The corner or point where edges meet: vertex
2 The intersection of the three default reference planes: origin
3 A feature used to round off sharp corners: fillet
4 The three types of documents that make up a SolidWorks model: parts, assemblies,
drawings
5 A feature used to hollow out a part: shell
6 Controls the units, grid, text, and other settings of the document: template
7 Forms the basis of all extruded features: sketch
8 Two lines that are at right angles (90°) to each other are: perpendicular
9 The first feature in a part is called the base feature.
10 The outside surface or skin of a part: face
11 A mechanical design automation software application: SolidWorks
12 The boundary of a face: edge
13 Two straight lines that are always the same distance apart are: parallel
14 Two circles or arcs that share the same center are: concentric
15 The shapes and operations that are the building blocks of a part: features
16 A feature that adds material to a part: boss
17 A feature that removes material from a part: cut
18 An implied centerline that runs through the center of every cylindrical feature: axis

Lesson 2: Basic Functionality
36 Instructor’s Guide to Teaching SolidWorks Software
Lesson 2 Vocabulary Worksheet REPRODUCIBLE
Name: _______________________________Class: _________ Date:_______________
Fill in the blanks with the words that are defined by the clues.
1 The corner or point where edges meet: ______________________________________
2 The intersection of the three default reference planes:___________________________
3 A feature used to round off sharp corners: ____________________________________
4 The three types of documents that make up a SolidWorks model: _________________
5 A feature used to hollow out a part: _________________________________________
6 Controls the units, grid, text, and other settings of the document:__________________
7 Forms the basis of all extruded features: _____________________________________
8 Two lines that are at right angles (90°) to each other are: ________________________
9 The first feature in a part is called the ____________ feature.
10 The outside surface or skin of a part: ________________________________________
11 A mechanical design automation software application:__________________________
12 The boundary of a face: __________________________________________________
13 Two straight lines that are always the same distance apart are: ____________________
14 Two circles or arcs that share the same center are:______________________________
15 The shapes and operations that are the building blocks of a part: __________________
16 A feature that adds material to a part: _______________________________________
17 A feature that removes material from a part: __________________________________
18 An implied centerline that runs through the center of every cylindrical feature:_______
Lesson 2: Basic Functionality
Instructor’s Guide to Teaching SolidWorks Software 37
Lesson 2 Quiz — Answer Key
Name: _______________________________Class: _________ Date:_______________
Directions: Answer each question by writing the correct answer or answers in the space
provided or circle the answer as directed.
1 You build parts from features. What are features?
Answer: Features are the shapes (bosses, cuts and holes) and the operations (fillets, chamfers and shells) that are use to build a part.
2 Name the features that are used to create the box in Lesson 2.
Answer: Extruded Boss, Fillet, Shell and Extruded Cut.
3 How do you begin a new part document?
Answer: Click the New tool or click File, New. Select a part template.
4 Give two examples of shape features that require a sketched profile.
Answer: Shape features are Extruded Boss, Extruded Cut, and Hole.
5 Give two examples of operation features that require a selected edge or face.
Answer: Operation features are Fillet, Chamfer and Shell.
6 Name the three documents that make up a SolidWorks model.
Answer: Parts, assemblies and drawings
7 What is the default sketch plane?
Answer: The default sketch plane is Front.
8 What is a plane?
Answer: A plane is a flat 2D surface.
9 How do you create an extruded boss feature?
Answer: Select a sketch plane. Open a new sketch. Sketch the profile. Extrude the profile perpendicular to the sketch plane.
10 Why do you create and use document templates?
Answer: Document templates contain the units, grid and text settings for the model. You can create Metric and English templates, each with different settings.

Lesson 2: Basic Functionality
38 Instructor’s Guide to Teaching SolidWorks Software
Lesson 2 Quiz REPRODUCIBLE
Name: _______________________________Class: _________ Date:_______________
Directions: Answer each question by writing the correct answer or answers in the space
provided or circle the answer as directed.
1 You build parts from features. What are features? ______________________________
_____________________________________________________________________
2 Name the features that are used to create the box in Lesson 2.____________________
_____________________________________________________________________
3 How do you begin a new part document? ____________________________________
_____________________________________________________________________
4 Give two examples of shape features that require a sketched profile. _______________
_____________________________________________________________________
5 Give two examples of operation features that require a selected edge or face. ________
_____________________________________________________________________
6 Name the three documents that make up a SolidWorks model. ____________________
_____________________________________________________________________
7 What is the default sketch plane? ___________________________________________
_____________________________________________________________________
8 What is a plane? ________________________________________________________
_____________________________________________________________________
9 How do you create an extruded boss feature? _________________________________
_____________________________________________________________________
10 Why do you create and use document templates? ______________________________
_____________________________________________________________________

Lesson 2: Basic Functionality
Instructor’s Guide to Teaching SolidWorks Software 39
Lesson Summary
� SolidWorks is design automation software.
� The SolidWorks model is made up of:
Parts
Assemblies
Drawings
� Features are the building blocks of a part.
Lesson 2: Basic Functionality
40 Instructor’s Guide to Teaching SolidWorks Software
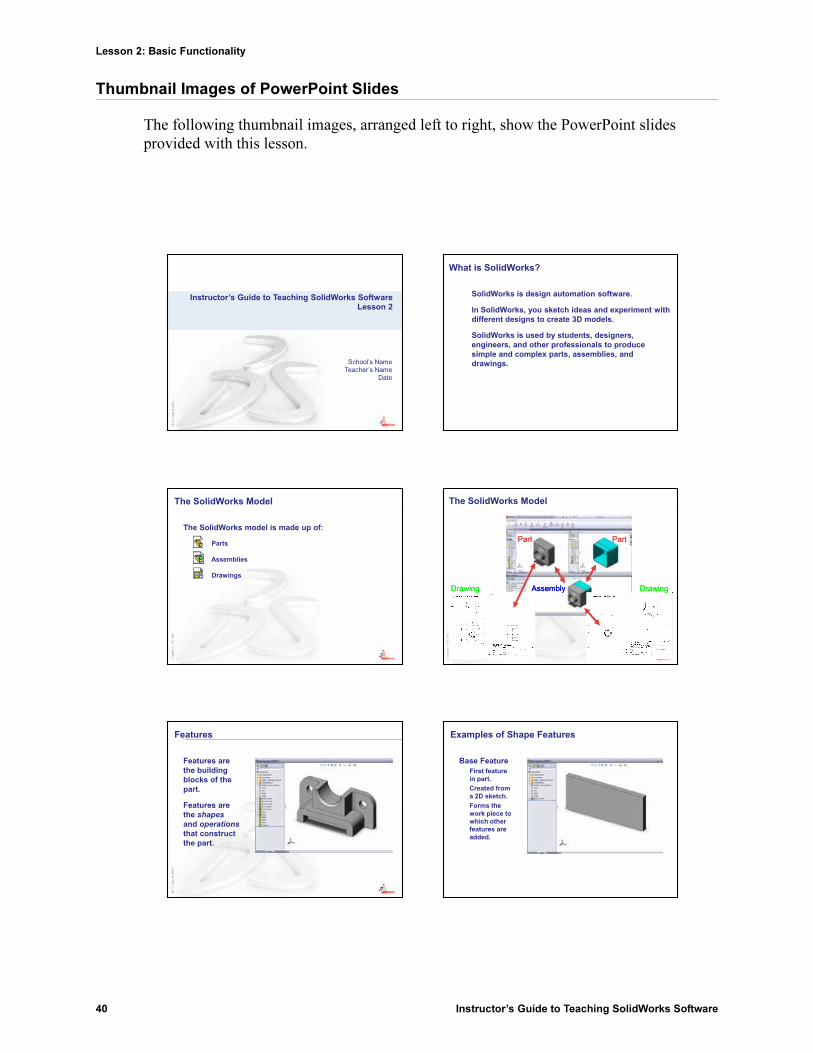
Thumbnail Images of PowerPoint Slides
The following thumbnail images, arranged left to right, show the PowerPoint slides provided with this lesson.
Instructor’s Guide to Teaching SolidWorks Software Lesson 2
School’s NameTeacher’s Name
Date
What is SolidWorks?
SolidWorks is design automation software.
In SolidWorks, you sketch ideas and experiment with different designs to create 3D models.
SolidWorks is used by students, designers, i d th f i l t dengineers, and other professionals to produce
simple and complex parts, assemblies, and drawings.
The SolidWorks Model
The SolidWorks model is made up of:
Parts
Assemblies
DrawingsDrawings
PartPart PartPart
The SolidWorks Model
AssemblyAssemblyDrawingDrawing DrawingDrawing
Features
Features are the building blocks of the part.
Features are the shapes
and operations
that construct the part.
Examples of Shape Features
Base FeatureFirst feature in part.Created from a 2D sketch.Forms the work piece to which other features are added.

Lesson 2: Basic Functionality
Instructor’s Guide to Teaching SolidWorks Software 41
Examples of Shape Features
Boss feature
Adds material to part.
Created from 2D sketch.
Examples of Shape Features
Cut featureRemoves material from part.Created from 2D sketch.
Examples of Shape Features
Hole featureRemoves material.Works like more intelligent
t f tcut feature.Correspondsto process such as counter-sink,thread, counter-bore.
Examples of Shape Features
Fillet featureUsed to round off sharp edges.Can remove or add
t i lmaterial.Outside edge (convex fillet) removes material.Inside edge (concave fillet) adds material.
Examples of Shape Features
Chamferfeature
Similar to a fillet.Bevels an edge rather than rounding it.Can remove or add material.
Sketched Features & Operation Features
Sketched FeaturesShape features have sketches.
Sketched features are built from 2D profiles.
Operation FeaturesOperation Features
Operation features do not have sketches.
Applied directly to the work piece by selecting edges or faces.

Lesson 2: Basic Functionality
42 Instructor’s Guide to Teaching SolidWorks Software
Sketch the 2D profile
To Create an Extruded Base Feature:
1. Select a sketch plane.
2. Sketch a 2D profile.
3 Extrude the sketchSelect the sketch plane
3. Extrude the sketchperpendicular to sketch plane.
Extrude the sketch Resulting base feature
To Create a Revolved Base Feature:
1. Select a sketch plane.
2. Sketch a 2D profile.
3. Sketch a centerline (optional).
4. Revolve the sketch aroundk t h li t li
Centerline (optional)
a sketch line or centerline.
Terminology: Document Window
Divided into two panels:Left panel contains the FeatureManager® design tree.
Lists the structure of the part, assembly or drawingdrawing.
Right panel contains the Graphics Area.
Location to display, create, and modify a part, assembly or drawing.
FeatureManager design tree
Graphics Area
Terminology: User Interface
ToolbarMenuBar
Task paneCommandManager
Drawing
Status bar
Drawingdocumentwindow
Partdocumentwindow
Terminology: PropertyManager
Confirmationcorner
Preview
PropertyManager Handle
Terminology: Basic Geometry
Axis - An implied centerline that runs through every cylindrical feature.
Plane - A flat 2D surface.
Origin - The point where the
AxisPlane
Origin The point where thethree default reference planes intersect. The coordinates of the origin are:
(x = 0, y = 0, z = 0). Origin

Lesson 2: Basic Functionality
Instructor’s Guide to Teaching SolidWorks Software 43
Terminology: Basic Geometry
Face –The surface or “skin” of a part. Faces can be flat or curved.Edge –The boundary of
f Ed
Vertex Edge
a face. Edges can be straight or curved.Vertex –The corner where edges meet. Edge
Faces
Features and Commands
Base feature
• The Base feature is the first feature that is created.
• The Base feature is the foundation of the part.
• The Base feature geometry for the box is an g yextrusion.
• The extrusion is named Extrude1.
Features and Commands
Features used to build the box are:
• Extruded Base feature
• Fillet feature
• Shell feature
• Extruded Cut feature
1.Base Feature 2.Fillet Feature
3.Shell Feature 4.Cut Feature
Features and Commands
To create the extruded base feature for the box:
• Sketch a rectangular profile on a 2D plane.
E t d th k t h• Extrude the sketch.
• By default extrusions are perpendicular to the sketch plane.
Features and Commands
Fillet feature
• The fillet feature rounds the edges or faces of a part.
• Select the edges to be d d S l ti frounded. Selecting a face
rounds all the edges of that face.
• Specify the fillet radius.
Fillet
Features and Commands
Shell feature
• The shell feature removes material from the selected face.
• Using the shell feature creates a h ll b f lid b
Wall Thicknesshollow box from a solid box.
• Specify the wall thicknessfor the shell feature.

Lesson 2: Basic Functionality
44 Instructor’s Guide to Teaching SolidWorks Software
Features and Commands
To create the extruded cut feature for the box:
• Sketch the 2D circular profile.
• Extrude the 2D Sketch profile perpendicular to the sketchperpendicular to the sketchplane.
• Enter Through All for the end condition.
• The cut penetrates through the entire part.
Dimensions and Geometric Relationships
Specify dimensions and geometric relationships between features and sketches.
Dimensions change the size and shape of the part.
Mathematical relationships between dimensions can be controlled by equations.
Geometric relationships are the rules that control the behavior of sketch geometry.
Geometric relationships help capture design intent.
Dimensions
Dimensions
Base depth = 50 mm
Boss depth = 25 mm
Mathematical relationship
Boss depth = Base depth ÷ 2
Geometric Relationships
HorizontalVertical
Confidential Information
Tangent
ParallelIntersection
Concentric Perpendicular
The SolidWorks Window Creating New Files Using Templates
Click New on the Standard toolbar.
Select a document template:PartAssemblyDrawing
Tutorial Tab
Lesson 2: Basic Functionality
Instructor’s Guide to Teaching SolidWorks Software 45
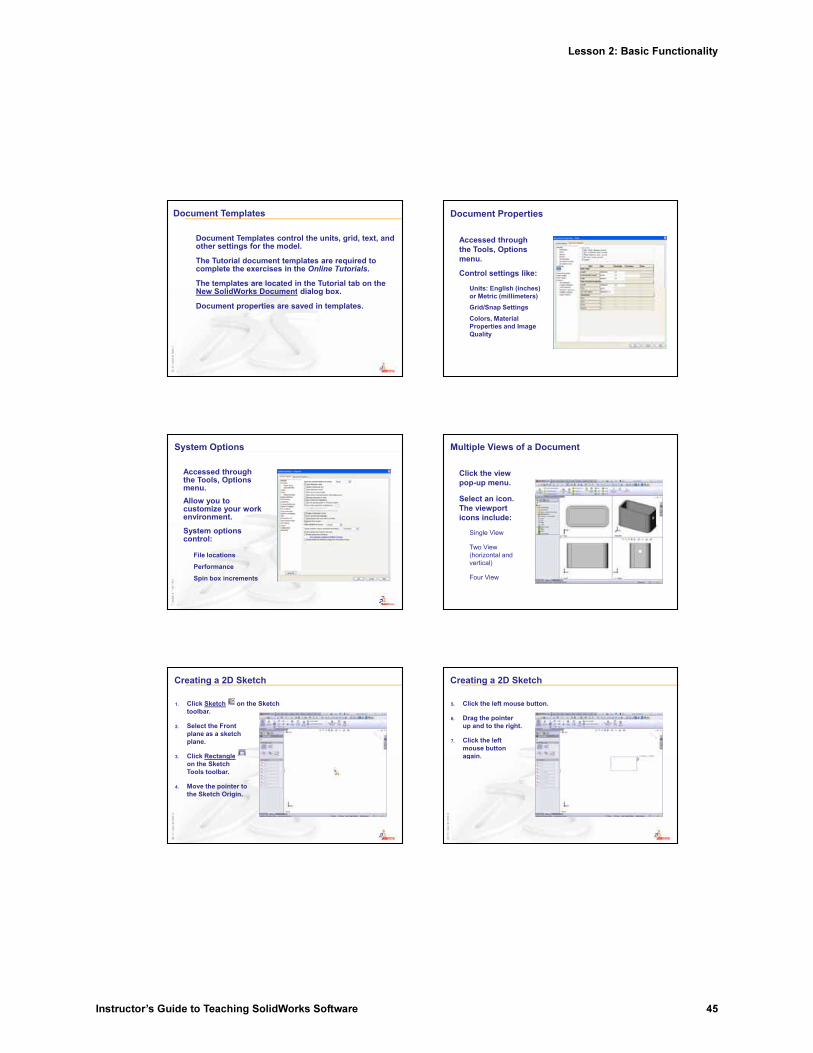
Document Templates
Document Templates control the units, grid, text, and other settings for the model.
The Tutorial document templates are required to complete the exercises in the Online Tutorials.
The templates are located in the Tutorial tab on the N S lidW k D t di l bNew SolidWorks Document dialog box.
Document properties are saved in templates.
Document Properties
Accessed through the Tools, Options menu.
Control settings like:
Units: English (inches)Units: English (inches)or Metric (millimeters)Grid/Snap SettingsColors, Material Properties and Image Quality
System Options
Accessed through the Tools, Options menu.Allow you to customize your work environment.
System options control:
File locations
Performance
Spin box increments
Multiple Views of a Document
Click the view pop-up menu.
Select an icon.The viewport icons include:
Single View
Two View (horizontal and vertical)
Four View
Creating a 2D Sketch
1. Click Sketch on the Sketch toolbar.
2. Select the Front plane as a sketch plane.
3 Click Rectangle3. Click Rectangleon the Sketch Tools toolbar.
4. Move the pointer to the Sketch Origin.
Creating a 2D Sketch
5. Click the left mouse button.
6. Drag the pointer up and to the right.
7. Click the left mouse button againagain.

Lesson 2: Basic Functionality
46 Instructor’s Guide to Teaching SolidWorks Software
Adding Dimensions
Dimensions specify the size of the model.
To create a dimension:
1. Click Smart Dimension on the Dimensions/Relations toolbar.
2. Click the 2D geometry. Text location
3. Click the text location.
4. Enter the dimension value.
2D geometry
Text location
Related Documents