1 INSTRUCTIONS TO USE THE KYOC PRINTING Print all: Selecting print all will print all th My Jobs: Select this option to see jobs rea Copy/Scan: Select these options to do cop On selecting My Jobs the screen below ap CERA PRINTERS he jobs in the print queue. ady to print, printed jobs and your favorites. pying or scanning. ppears.

Welcome message from author
This document is posted to help you gain knowledge. Please leave a comment to let me know what you think about it! Share it to your friends and learn new things together.
Transcript

1
INSTRUCTIONS TO USE THE KYOCERA
PRINTING
Print all : Selecting print all will print all the jobs in the print queue
My Jobs: Select this option to see jobs ready
Copy/Scan: Select these options to do copying or scanning.
On selecting My Jobs the screen below ap
INSTRUCTIONS TO USE THE KYOCERA PRINTERS
: Selecting print all will print all the jobs in the print queue.
jobs ready to print, printed jobs and your favorites.
o do copying or scanning.
ppears.

2
Ready tab: displays jobs ready for printing. You can selectively print jobs and delete unwanted jobs by pressing on the printer icon and the X icon respectively.
Favorite tab: Press on the star Icon and press Ok to store a job on favorites tab.To view your favorites press the favorites tab at the top of the screen.
Printed Tab: Displays already printed jobs. You can reprint an already printed job.
COPYING
Copy/scan: Select this option to do copying or scanning. The screen below will appear
3
Available options Simplex, duplex, enlarge, reduction, selecting different papers, increase/decrease density to copy, no. of copies to print, book copying, preview e.t.c. Press on the tabs below to view the different options e.g. “Image Quality” tab.
After selecting the required specifications press the large green button labeled start on your left to begin copying.
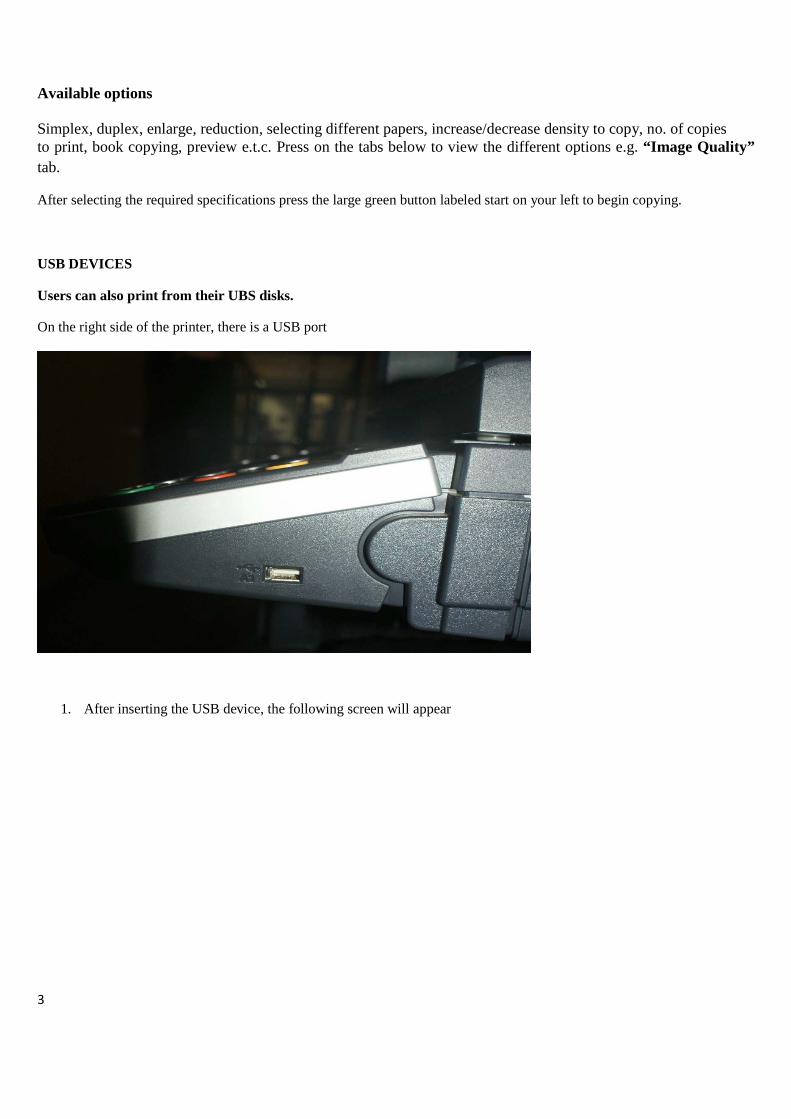
USB DEVICES
Users can also print from their UBS disks.
On the right side of the printer, there is a USB port
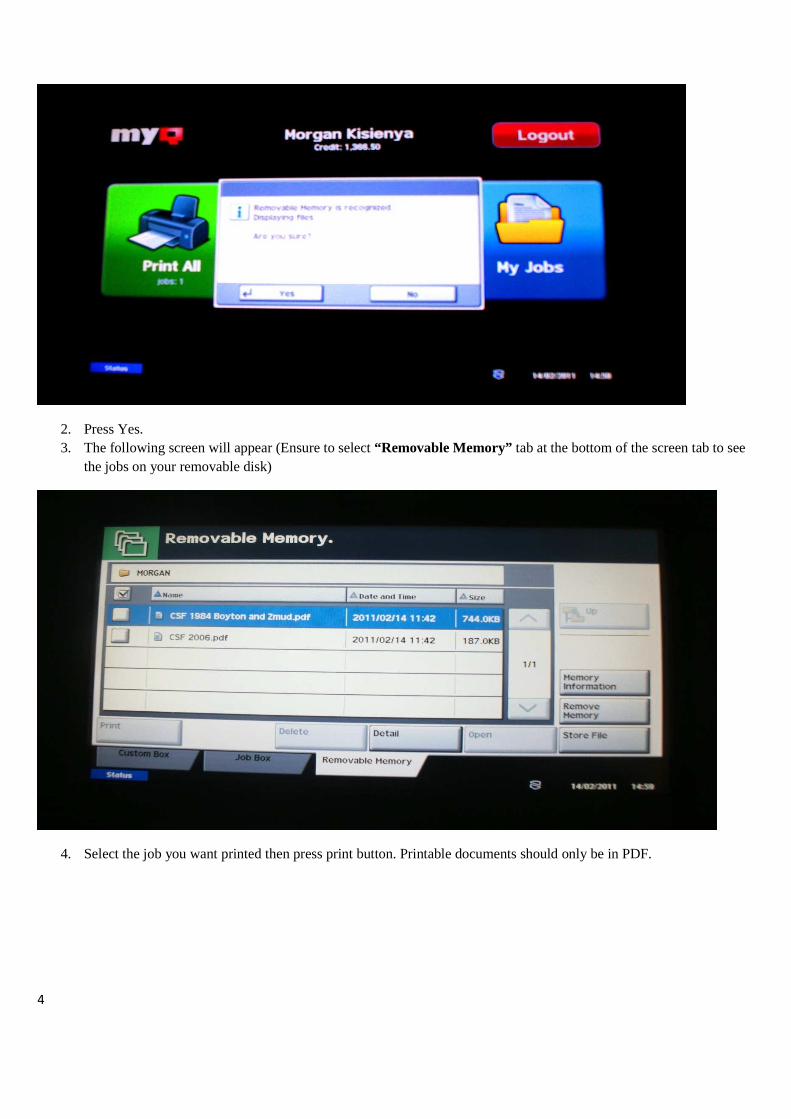
1. After inserting the USB device, the following screen will appear
4
2. Press Yes. 3. The following screen will appear (Ensure to select “Removable Memory” tab at the bottom of the screen tab to see
the jobs on your removable disk)
4. Select the job you want printed then press print button. Printable documents should only be in PDF.
5
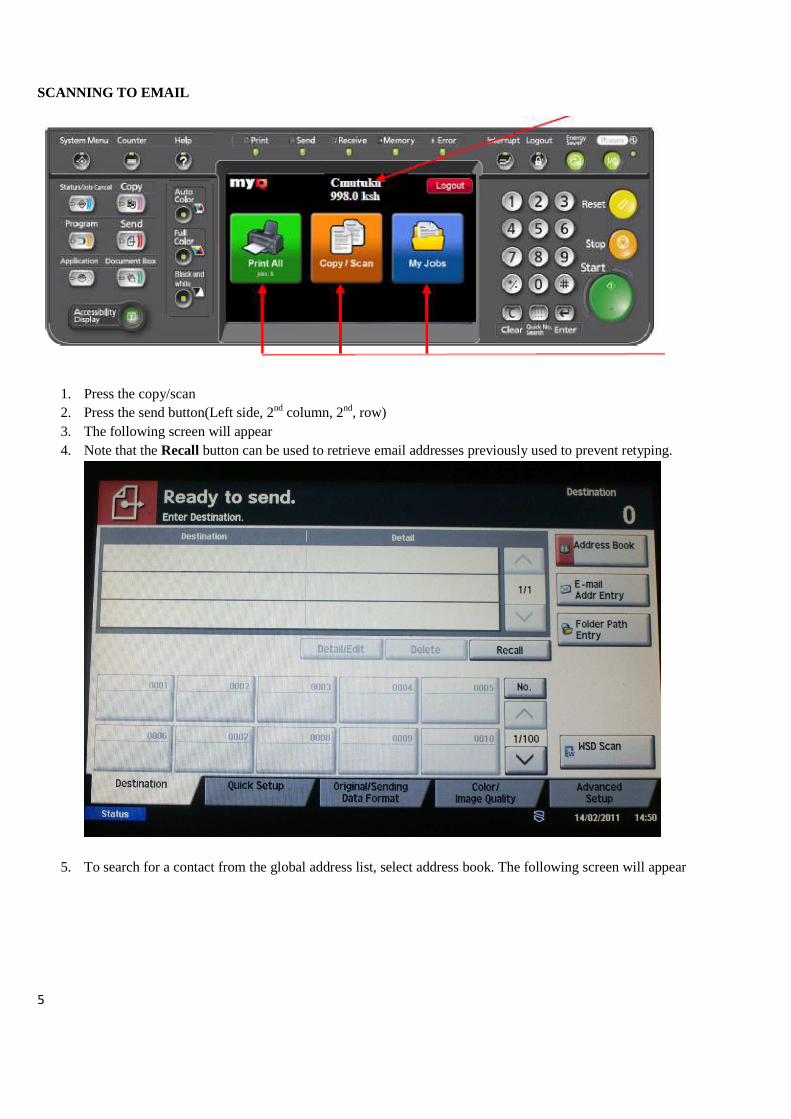
SCANNING TO EMAIL
1. Press the copy/scan 2. Press the send button(Left side, 2nd column, 2nd, row) 3. The following screen will appear 4. Note that the Recall button can be used to retrieve email addresses previously used to prevent retyping.
5. To search for a contact from the global address list, select address book. The following screen will appear
6
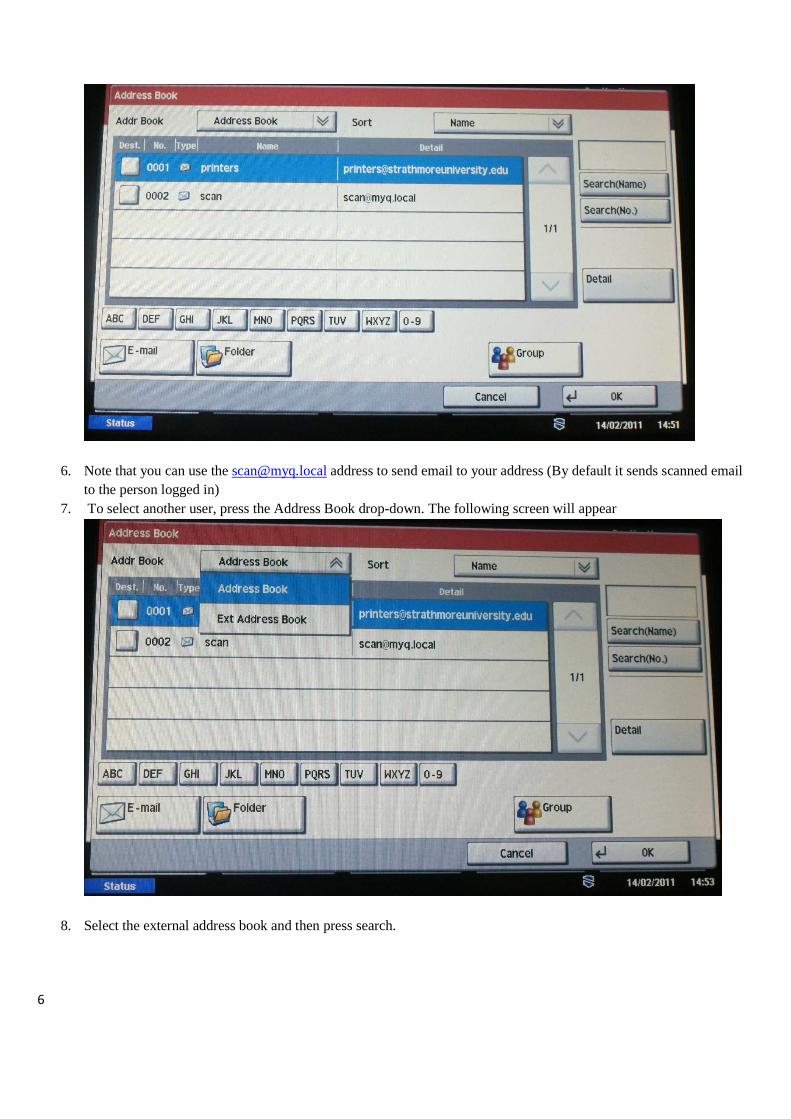
6. Note that you can use the [email protected] address to send email to your address (By default it sends scanned email to the person logged in)
7. To select another user, press the Address Book drop-down. The following screen will appear
8. Select the external address book and then press search.
7
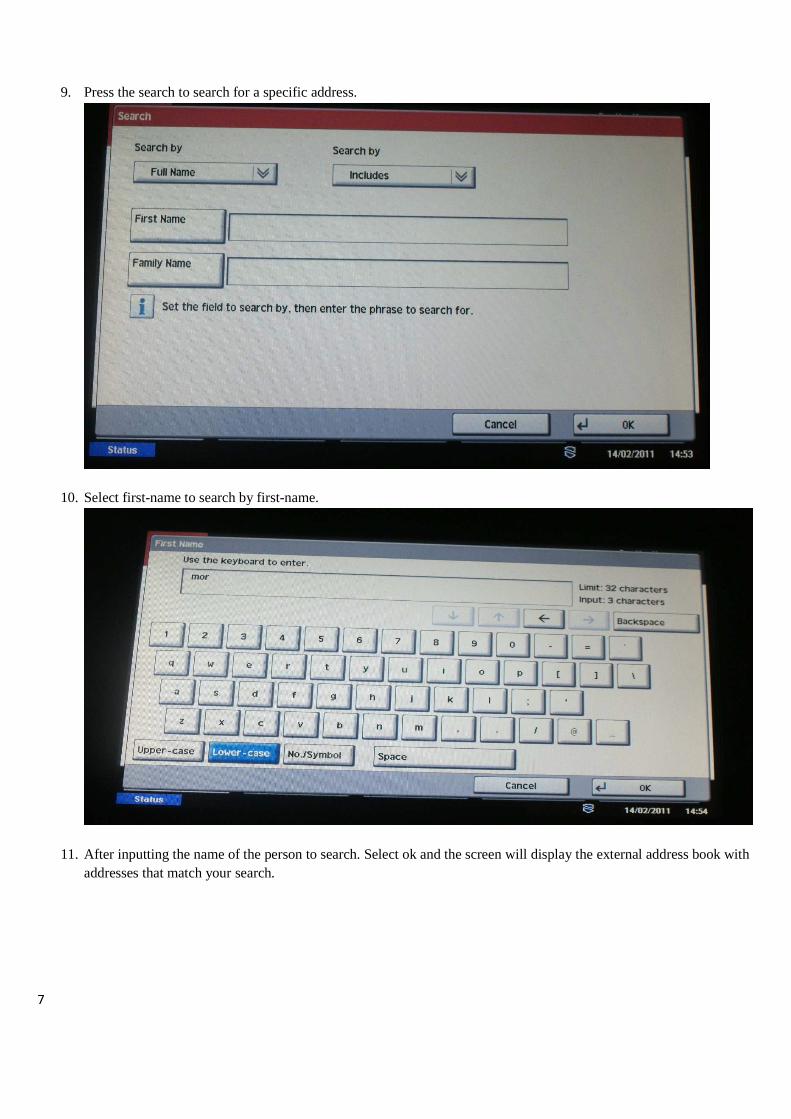
9. Press the search to search for a specific address.
10. Select first-name to search by first-name.
11. After inputting the name of the person to search. Select ok and the screen will display the external address book with addresses that match your search.

8
12. Select the address you want, and then press ok. 13. Press start button to start scanning. You should receive the scanned mail on your email address.
Related Documents


