How to Use A Sewing Machine

How to use a sewing machine
Jul 29, 2016
http://bit.ly/1RI5LPB ->How to repair sewing machines at home Buy at : http://bit.ly/1RI5LPB ----------------------------------------------- How to use a sewing machine ----------------------------------------------- how to use a sewing machine how to use a sewing machine singer how to use a sewing machine safely how to use a sewing machine pdf how to use a sewing machine book how to use a sewing machine to hem pants how to use a sewing machine janome how to use a sewing machine needle threader how to use a sewing machine kenmore how to use a sewing machine a beginner's manual how to use a sewing machine without a bobbin how to use a sewing machine amazon how to use a sewing a machine how to use a sewing machine as a serger how to use a sewing machine without a pedal how to use a sewing machine as an overlocker how to use a sewing machine on a sleeve how to use a sewing machine ruffler attachment how to use a sewing machine like a serger how to use a sewing machine beginners how to
Welcome message from author
This document is posted to help you gain knowledge. Please leave a comment to let me know what you think about it! Share it to your friends and learn new things together.
Transcript

How to Use a Sewing
Machine
Sewing machines can look frighteningly complex to those of
us who don't know how to use them. However, don't let the
fear of an unknown machine and skill set keep you from
creating glorious textile wonders! Use this step-by-step guide
through the anatomy, set-up, and use of a sewing machine so
that you can begin crafting your own hand-made items.
Learning the Parts of a Sewing Machine

1 Find the power switch. It may seem silly, but locating the
power switch is the most important step! This is located in
different places depending on the sewing machine you have,
but is normally on the right side of the body.

2 Locate the spool pin. This is a small plastic or metal pin that
sticks out of the top of the sewing machine, and holds your
spool of thread.

3 Look for the thread guide. The thread guide directs thread
from the spool on the top of the machine to the bobbin winder.
It is a geometric metal piece that sticks out of the top of the
sewing machine on the left side.

4 Find the bobbin-winder. To the right of the spool pin on top
of the sewing machine is another smaller plastic or metal pin,
next to a small horizontal wheel. This is the bobbin winder and
the bobbin winder stopper. These work together (with the
spool of thread) to wind thread onto your bobbin prior to
starting sewing.
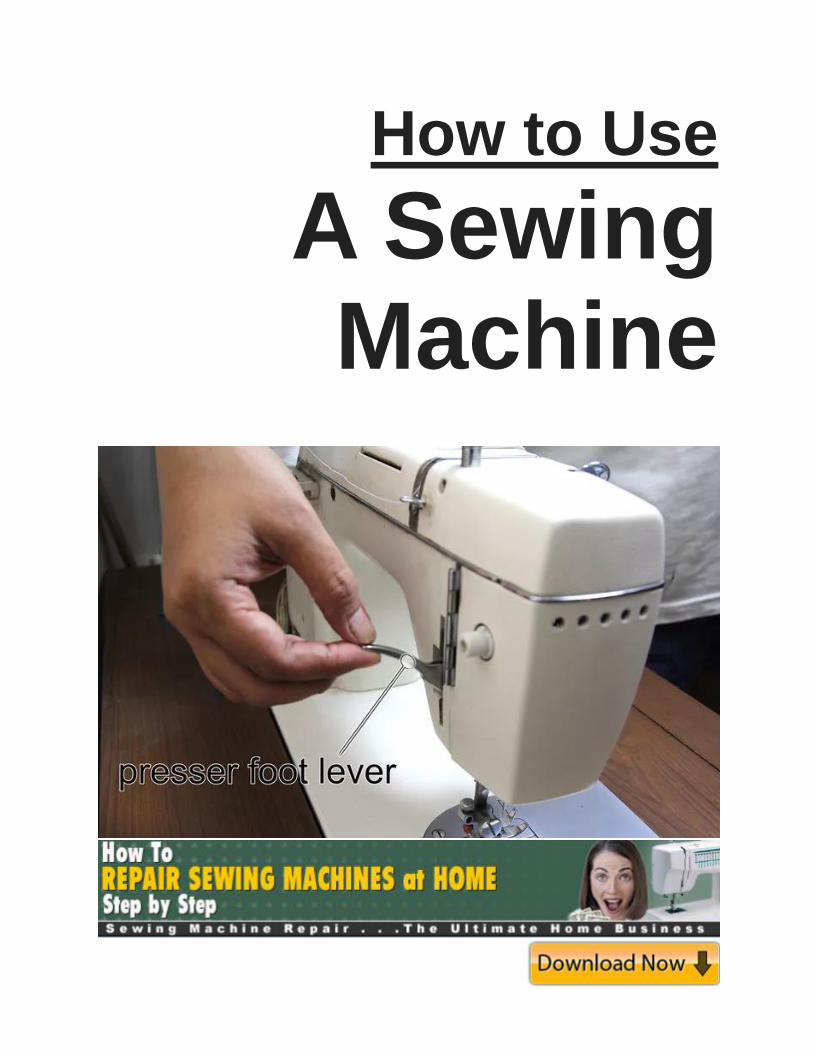
5 Look for the stitch adjustment buttons. These are in
different locations depending on the specific sewing machine
you have, but there is typically a small screen next to a few
physical buttons on the front side of the sewing machine.
These buttons select the type of stitch you create, the length
of the stitch, and the direction of the stitch (forward or in
reverse). Check the manual for your specific machine to
determine the functions for each of the buttons.

6 Locate the thread take-up lever. When you’re ready to
thread your sewing machine, you will wind the thread from the
spool on top, through the thread guide, and then around the
takeup lever. This is the lever (with two cut-in grooves)
located on the front left side of the sewing machine. There are
typically numbers and arrows printed next to it to clearly direct
you the way in which to thread the machine.
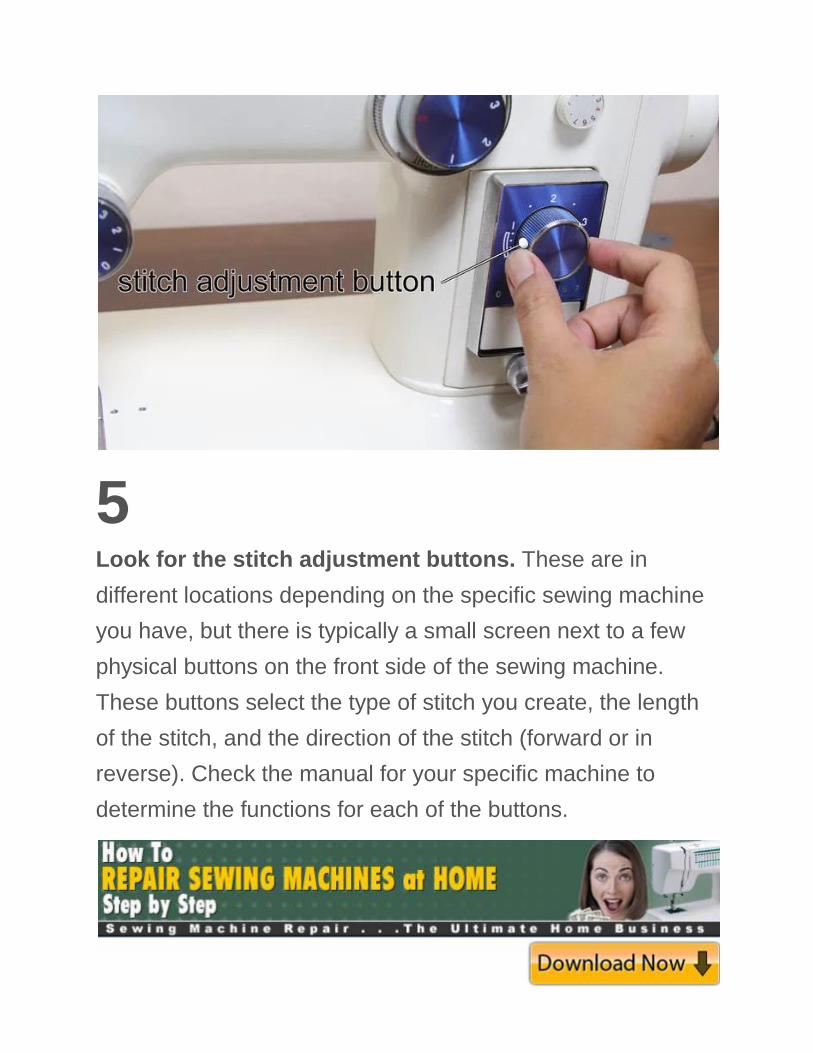
7 Look for the tension dial. The tension dial is a small
numbered wheel near the takeup lever. It controls the tension
of the thread as you sew; if the tension is too tight, the needle
will be pulled to the right. If the tension is too loose, the thread
will loop on the bottom of the fabric you are sewing.
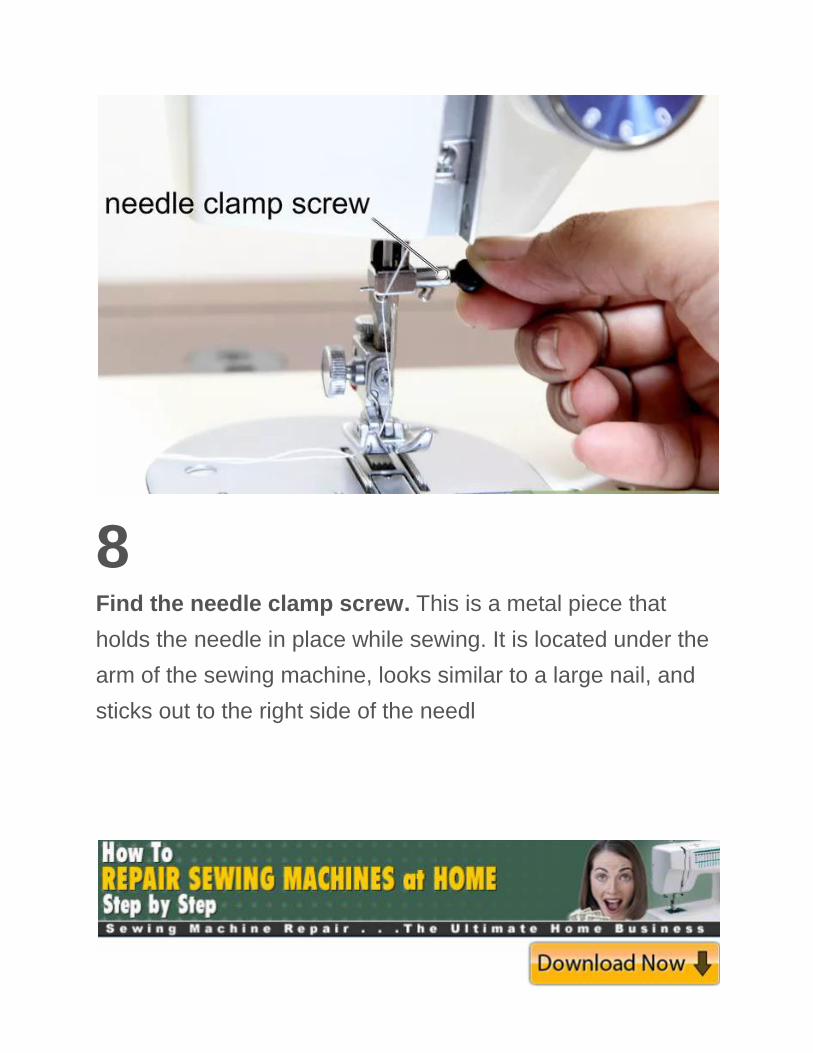
8 Find the needle clamp screw. This is a metal piece that
holds the needle in place while sewing. It is located under the
arm of the sewing machine, looks similar to a large nail, and
sticks out to the right side of the needl
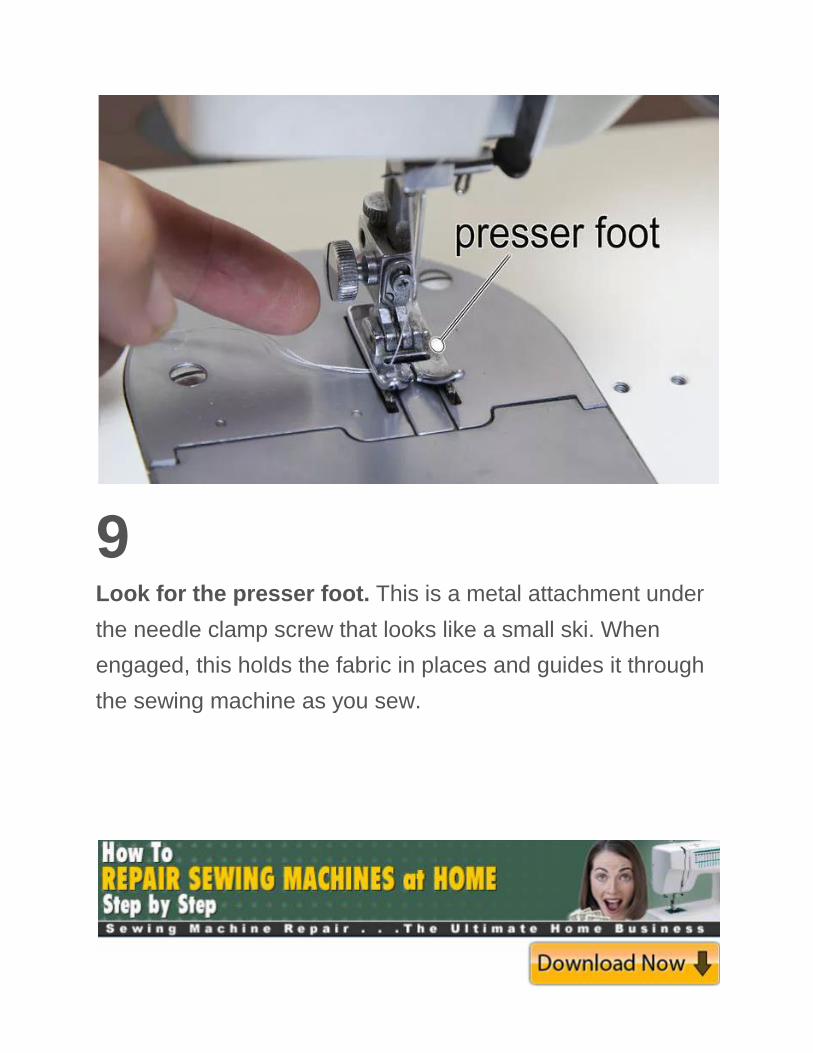
9 Look for the presser foot. This is a metal attachment under
the needle clamp screw that looks like a small ski. When
engaged, this holds the fabric in places and guides it through
the sewing machine as you sew.
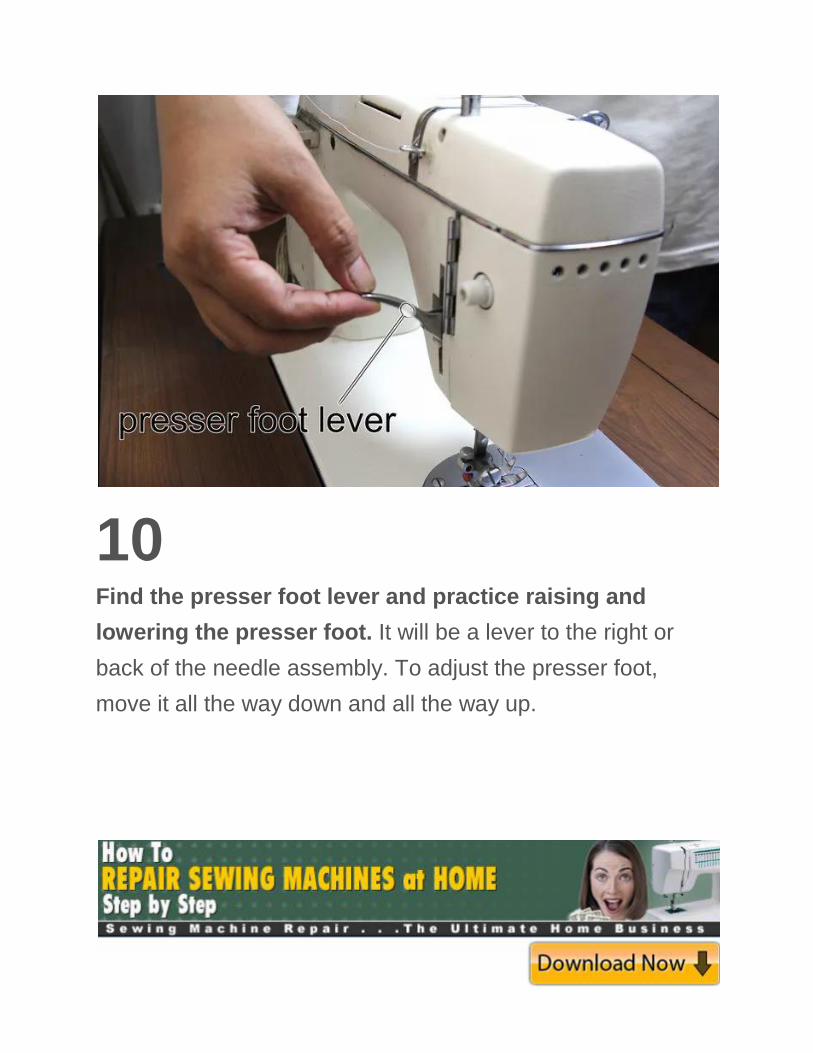
10 Find the presser foot lever and practice raising and
lowering the presser foot. It will be a lever to the right or
back of the needle assembly. To adjust the presser foot,
move it all the way down and all the way up.

11 Look for the needle plate. the needle plate is the silver plate
just below the needle. Simple enough, huh?

12 Find the feed dog. The feed dog (silly name, right?) is a
small metal guide under the presser foot on the needle plate
that moves the fabric through the machine as you sew. You
can find it by looking for the two small metal rows underneath
the presser foot.
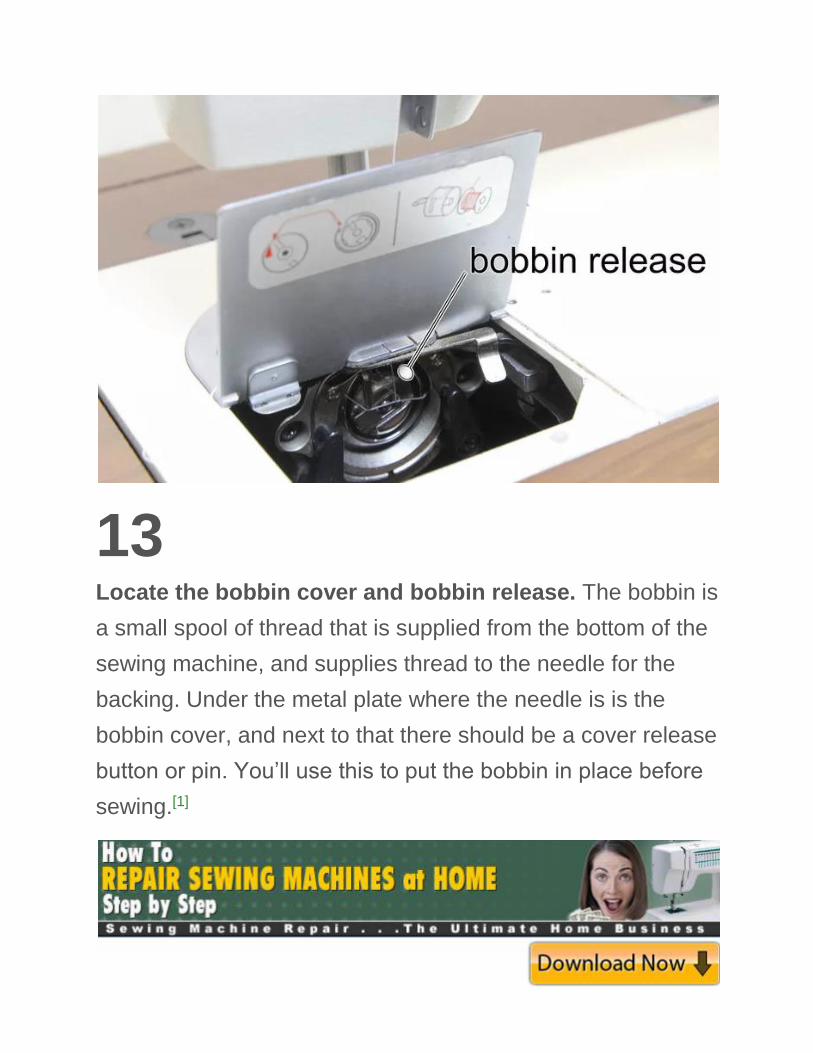
13 Locate the bobbin cover and bobbin release. The bobbin is
a small spool of thread that is supplied from the bottom of the
sewing machine, and supplies thread to the needle for the
backing. Under the metal plate where the needle is is the
bobbin cover, and next to that there should be a cover release
button or pin. You’ll use this to put the bobbin in place before
sewing.[1]
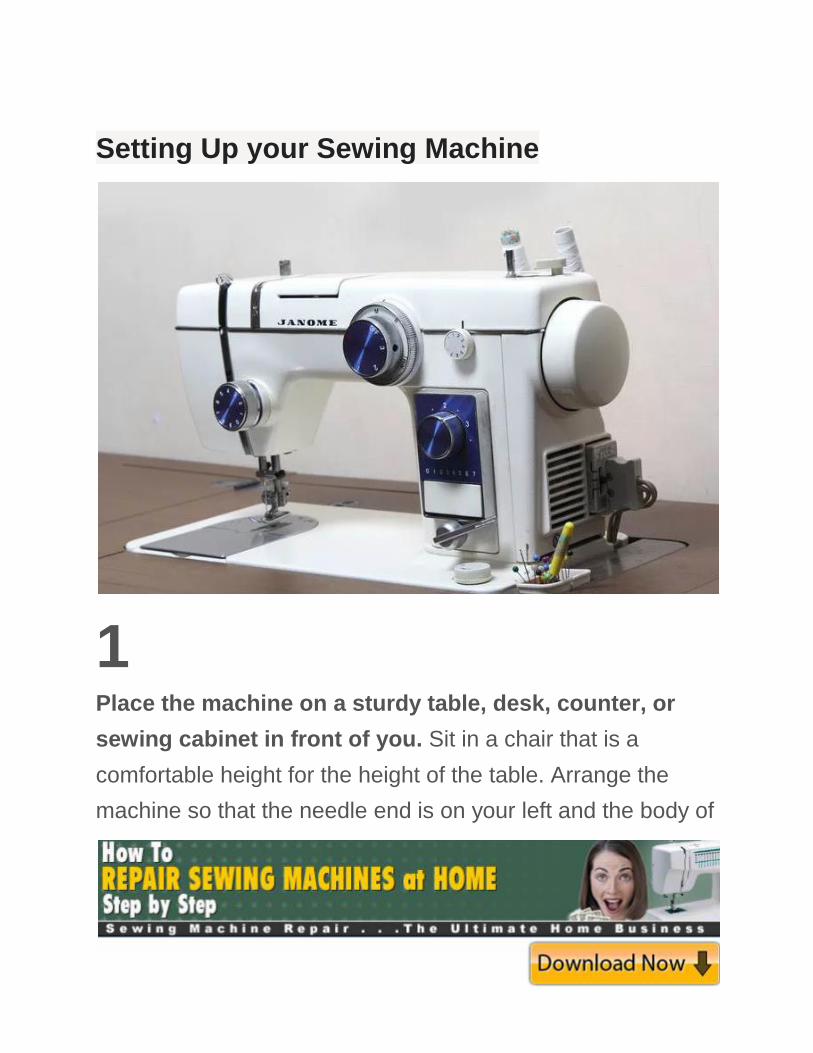
Setting Up your Sewing Machine
1 Place the machine on a sturdy table, desk, counter, or
sewing cabinet in front of you. Sit in a chair that is a
comfortable height for the height of the table. Arrange the
machine so that the needle end is on your left and the body of

the machine is on the right. You will be checking a couple of
things first and getting to know the machine a bit, so don't
plug it in just yet.
2 Install a needle securely. Needles have a flat side, so they
can only go one way, usually with the flat side toward the
back. There is a groove down one side of the needle,
generally opposite the flat side of the shank––this groove

must be facing the direction from which the needle is threaded
when installing the needle (the thread rides in this groove
while going up and down through the fabric.) Insert a needle
all the way into the post and tighten the thumbscrew
securely.If you are still having trouble, refer to your machines
manual.
3
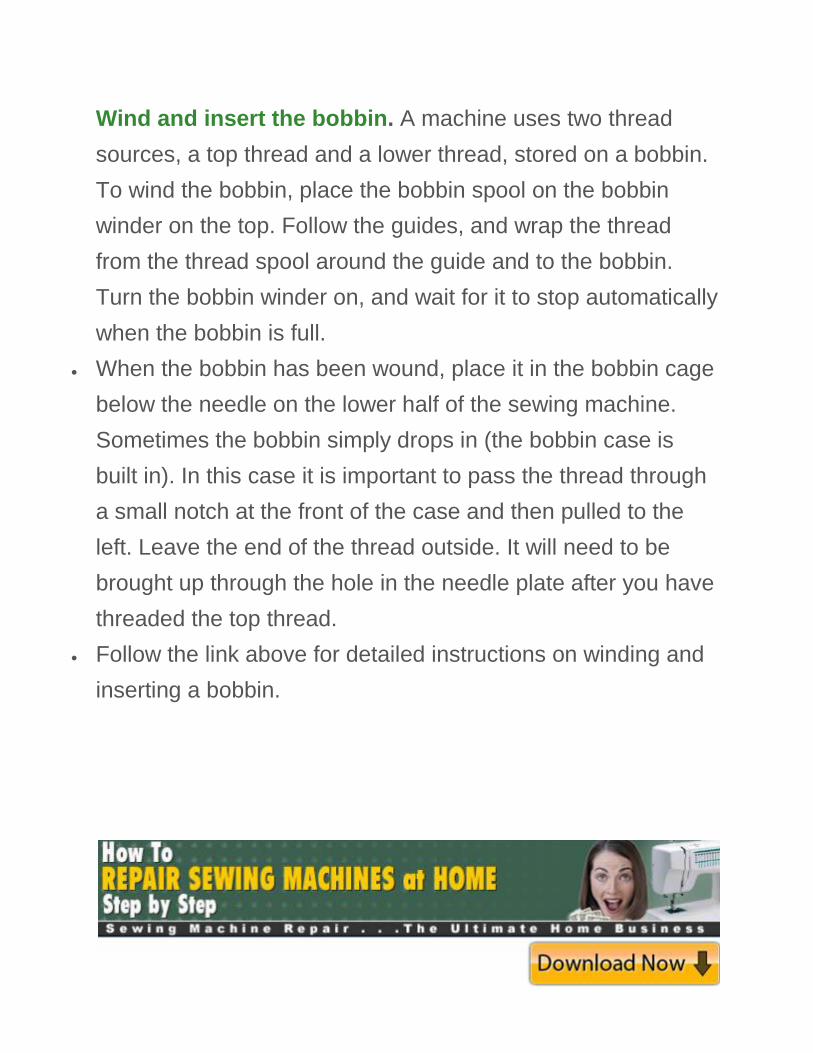
Wind and insert the bobbin. A machine uses two thread
sources, a top thread and a lower thread, stored on a bobbin.
To wind the bobbin, place the bobbin spool on the bobbin
winder on the top. Follow the guides, and wrap the thread
from the thread spool around the guide and to the bobbin.
Turn the bobbin winder on, and wait for it to stop automatically
when the bobbin is full.
When the bobbin has been wound, place it in the bobbin cage
below the needle on the lower half of the sewing machine.
Sometimes the bobbin simply drops in (the bobbin case is
built in). In this case it is important to pass the thread through
a small notch at the front of the case and then pulled to the
left. Leave the end of the thread outside. It will need to be
brought up through the hole in the needle plate after you have
threaded the top thread.
Follow the link above for detailed instructions on winding and
inserting a bobbin.
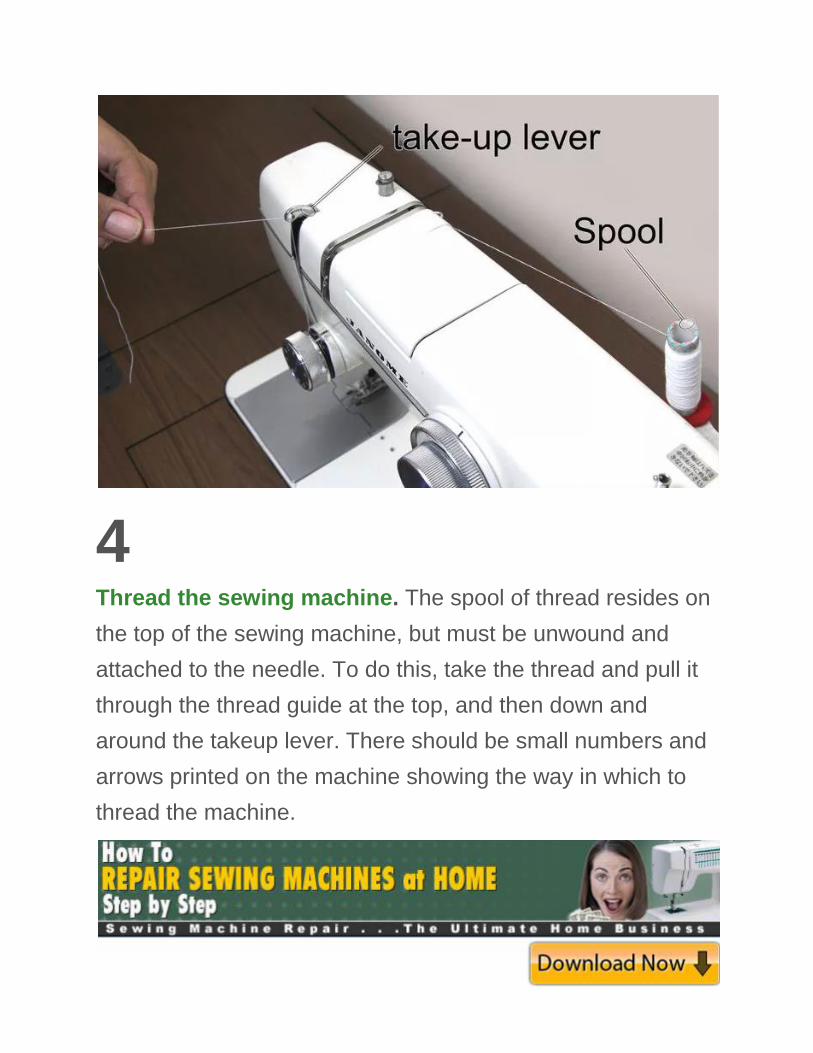
4 Thread the sewing machine. The spool of thread resides on
the top of the sewing machine, but must be unwound and
attached to the needle. To do this, take the thread and pull it
through the thread guide at the top, and then down and
around the takeup lever. There should be small numbers and
arrows printed on the machine showing the way in which to
thread the machine.

You may also be able to follow the guides printed on your
machine.
Usually, the thread follows this general pattern: "left, down,
up, down, into a hook, through the needle." Another way to
know how to thread the machine is "Spool pin, tension, take-
up lever, needle, using thread guides provided between these
parts".
The needle might be threaded from the left, the right, or from
front to back. If it is already threaded, that is a clue to the
direction; if not, the last thread guide before the needle, is
located nearest to the direction from which you must thread
the needle.
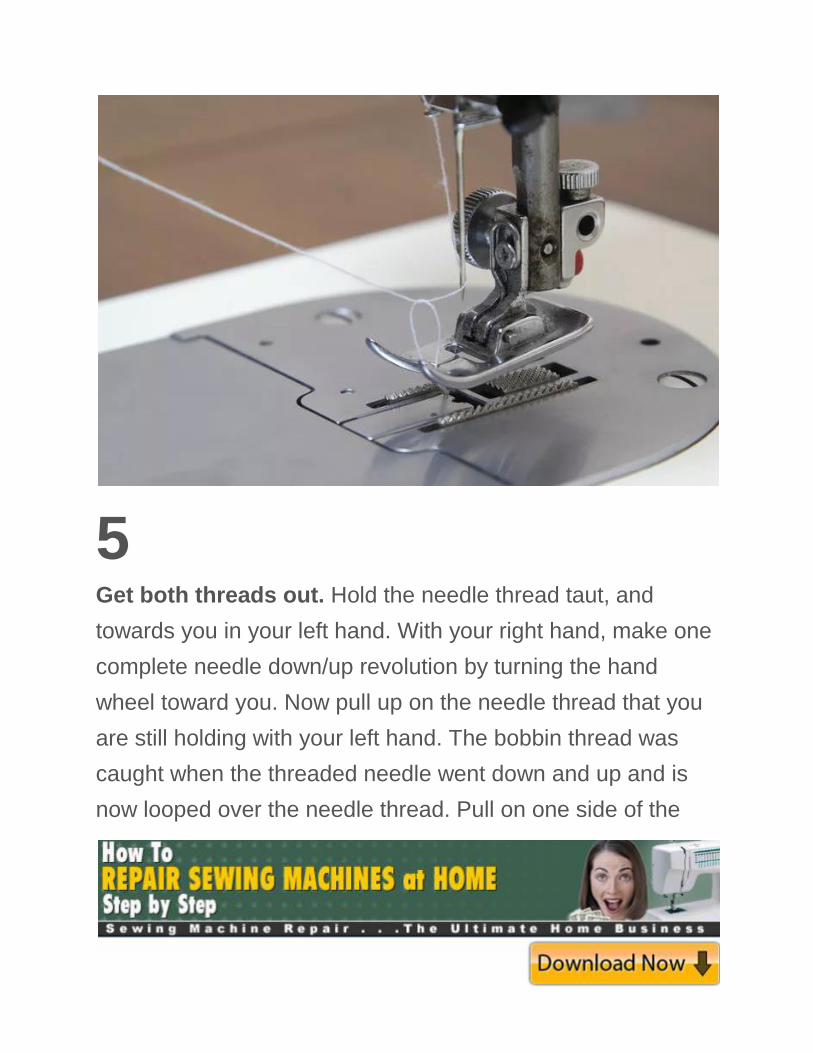
5 Get both threads out. Hold the needle thread taut, and
towards you in your left hand. With your right hand, make one
complete needle down/up revolution by turning the hand
wheel toward you. Now pull up on the needle thread that you
are still holding with your left hand. The bobbin thread was
caught when the threaded needle went down and up and is
now looped over the needle thread. Pull on one side of the
loop to bring up the bobbin thread tail, or just release the
needle thread and pass a pair of scissors between the
presser foot and plate to pull the looped bobbin thread out.
You should now have the ends of two threads, one from the
needle and one coming up from below from the bobbin.
6 Plug the machine in and turn it on. Many sewing machines
have a built-in light, which is often a good way to tell whether
there is power to the machine. The power switch will usually
be on the right side or back of the machine, if there is one.
Some machines don't have a separate switch, in which case
they're turned on as soon as they're plugged in.[2]
Plug the pedal into the machine, too. Place the pedal in a
comfortable spot under your feet.
Sewing With Your Machine
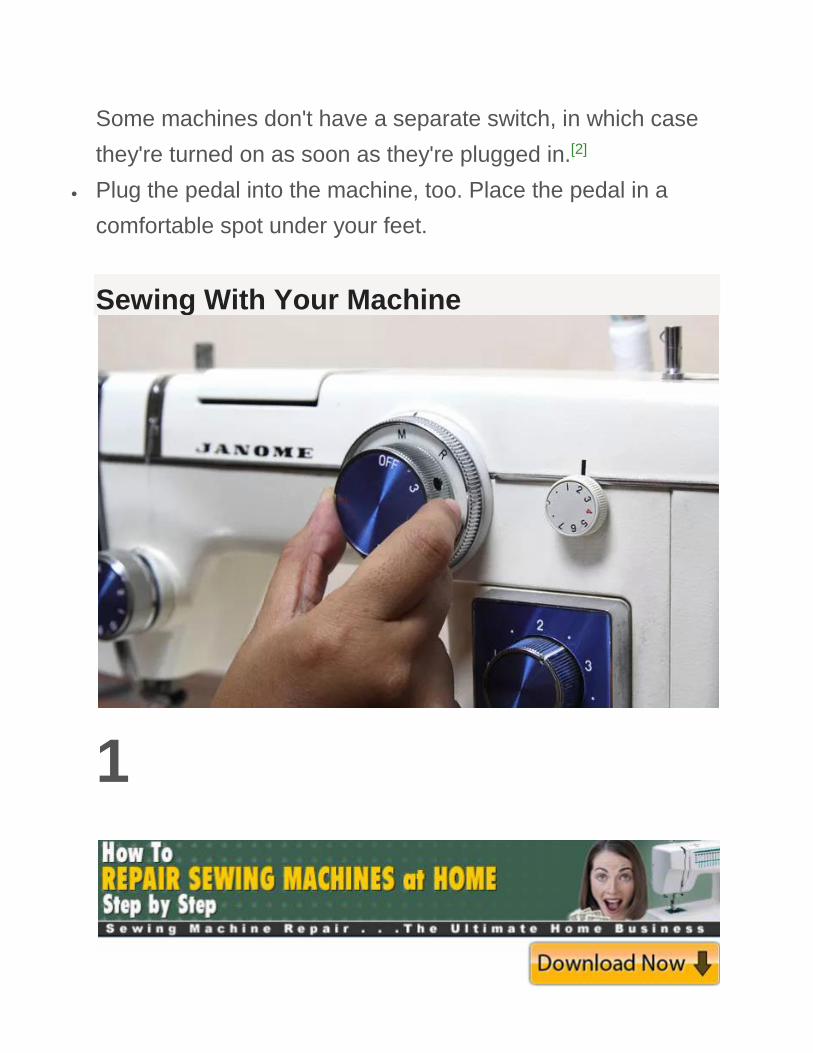
1

Select a straight stitch and a medium stitch
length. Consult your manual for how to do this on your
machine. On this machine, stitches are set by rotating the
lower knob on the right side of the machine until it clicks into
place. Always set the stitch with the needle up and out of the
fabric, since it may move the needle.
A straight stitch is used to sew most seams. The next most
common stitch is the zigzag, usually used to prevent edges
from fraying.
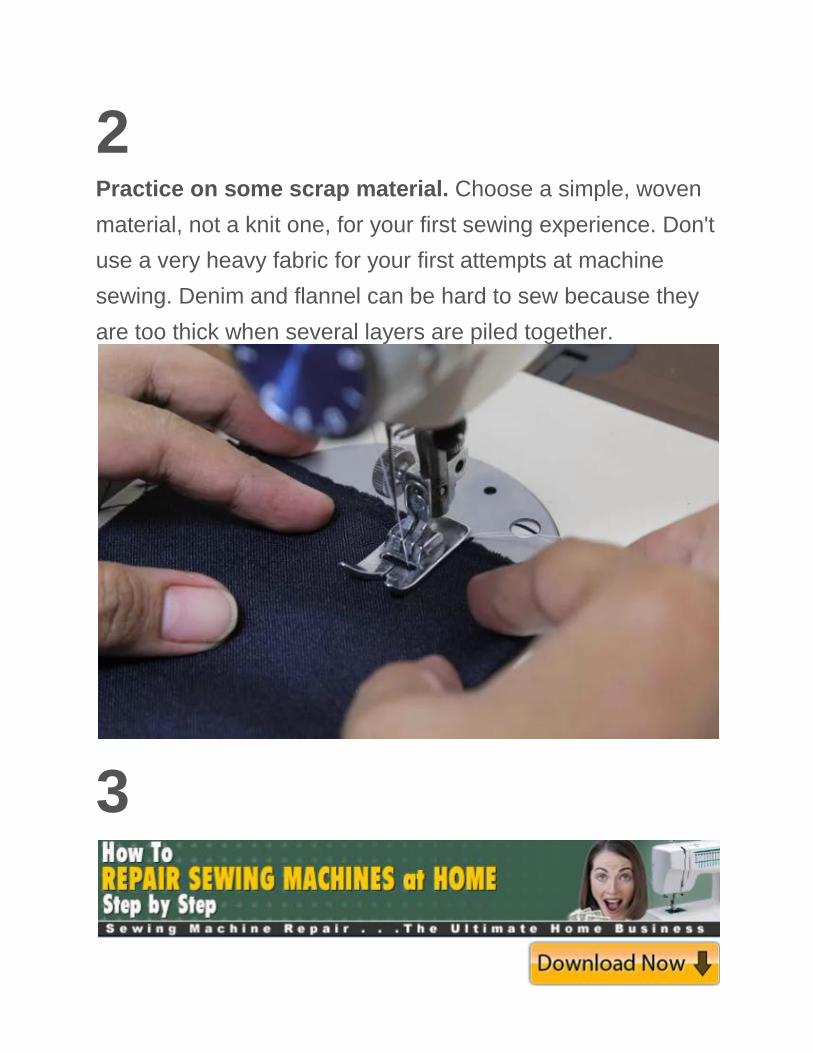
2 Practice on some scrap material. Choose a simple, woven
material, not a knit one, for your first sewing experience. Don't
use a very heavy fabric for your first attempts at machine
sewing. Denim and flannel can be hard to sew because they
are too thick when several layers are piled together.
3

Line up the fabric under the needle. Sew with the bulk of
the material to the left of the machine; crowding the bulk on
the right side can cause messy stitching.
4 Lower the presser foot onto the fabric. There is a lever
behind or to the side of the needle assembly that raises or
lowers the presser foot.
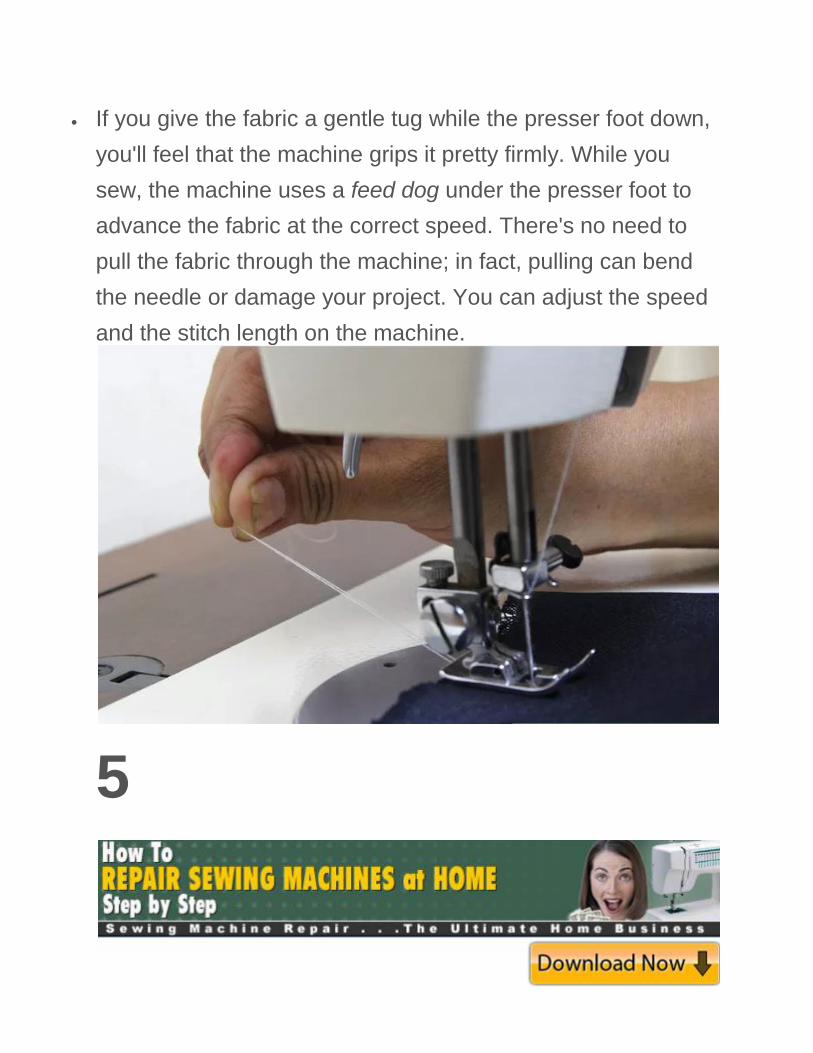
If you give the fabric a gentle tug while the presser foot down,
you'll feel that the machine grips it pretty firmly. While you
sew, the machine uses a feed dog under the presser foot to
advance the fabric at the correct speed. There's no need to
pull the fabric through the machine; in fact, pulling can bend
the needle or damage your project. You can adjust the speed
and the stitch length on the machine.
5

Hold the loose ends of both threads. For the first few
stitches, you'll need to hold these ends to keep them from
retreating into the fabric. After you've stitched for a short
distance, you can let go and use both hands to control the
fabric and the machine.
6 Press the foot pedal. The foot pedal is your speed control.
Just like the gas pedal in a car, the harder you push it, the

faster you will go. Push it slowly at first, just enough to get the
machine going.
Your machine may have a knee bar rather than a foot pedal. If
that's the case, use your knee to push it to the right.
You can use the balance wheel on the top, right side of the
machine to get the machine spinning or to move the needle
by hand.
The machine will advance the fabric automatically away from
you. You can "steer" the fabric in a straight line or a curve by
guiding it through the machine with your hands. Practice
sewing in a straight line and try sewing some curves. The only
difference is how you guide the fabric.
Do not force the material or pull the material while it is going
under the needle. This can cause the material to stretch or the
needle to break, or the stitches to clog up in the bobbin. If you
feel like the fabric is not moving fast enough, press the foot
pedal harder, adjust the stitch length, or (if you must) buy a
faster machine.
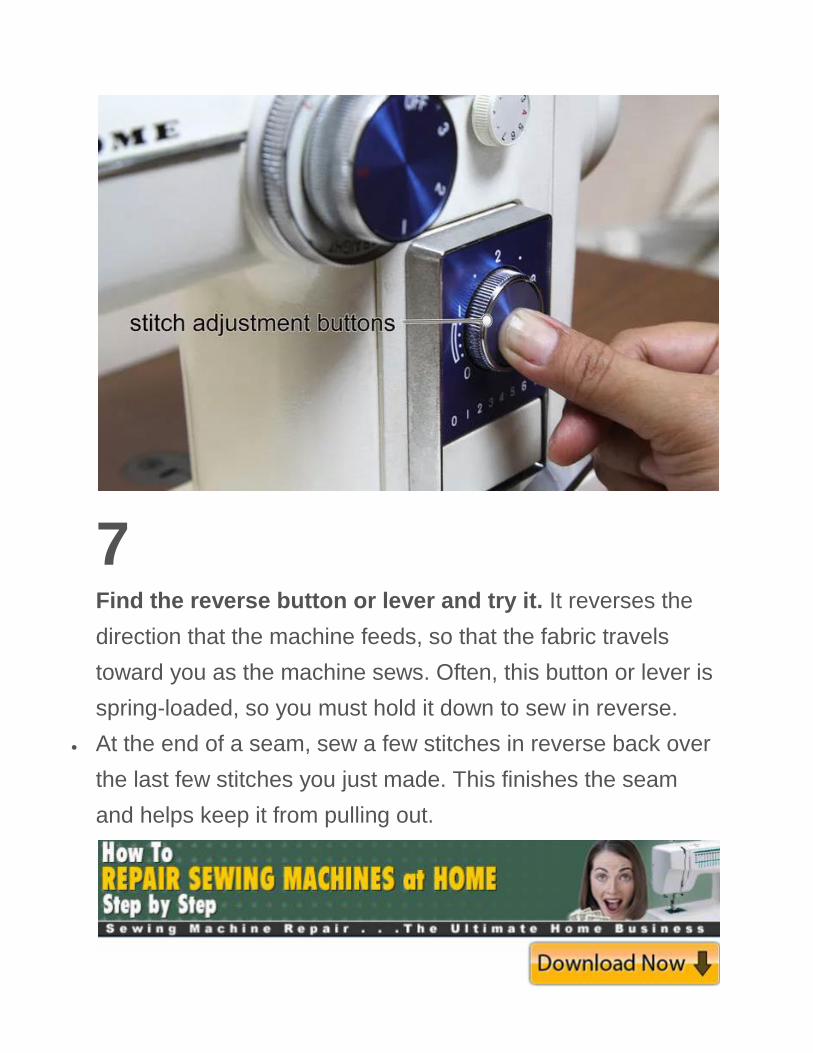
7 Find the reverse button or lever and try it. It reverses the
direction that the machine feeds, so that the fabric travels
toward you as the machine sews. Often, this button or lever is
spring-loaded, so you must hold it down to sew in reverse.
At the end of a seam, sew a few stitches in reverse back over
the last few stitches you just made. This finishes the seam
and helps keep it from pulling out.
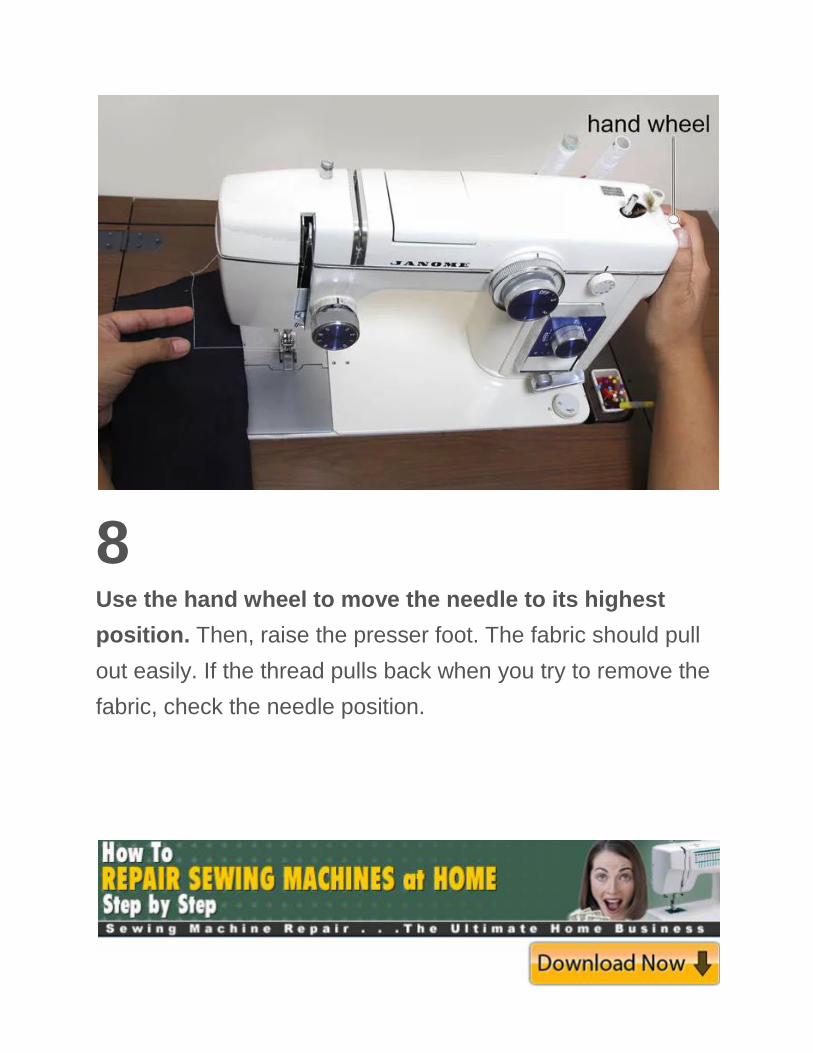
8 Use the hand wheel to move the needle to its highest
position. Then, raise the presser foot. The fabric should pull
out easily. If the thread pulls back when you try to remove the
fabric, check the needle position.
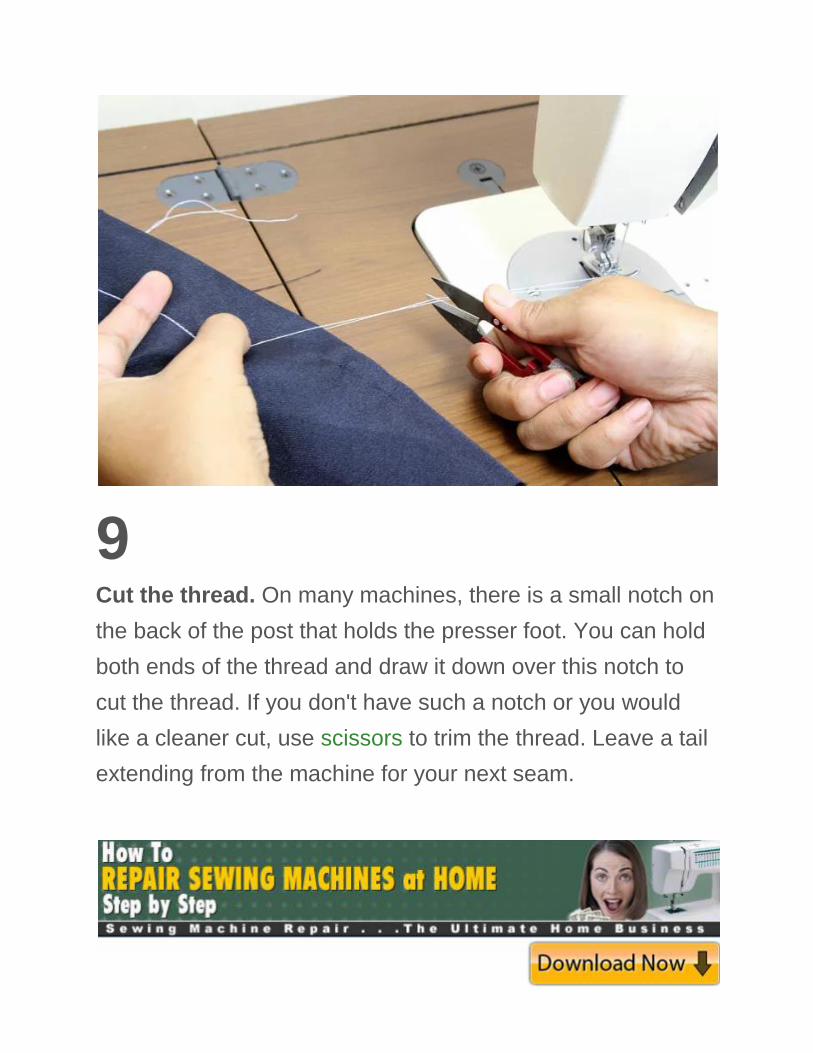
9 Cut the thread. On many machines, there is a small notch on
the back of the post that holds the presser foot. You can hold
both ends of the thread and draw it down over this notch to
cut the thread. If you don't have such a notch or you would
like a cleaner cut, use scissors to trim the thread. Leave a tail
extending from the machine for your next seam.

10 Practice sewing a seam. Pin two pieces of fabric, right sides
together, near the edge. The seam will go 1/2 inch (1.3cm) to
5/8 inch (1.5cm) from the edge. You can sew a single layer of
fabric (and might do so to stop an edge from fraying, say), but
since the goal of most machine sewing is to join two pieces of
fabric, you should get used to sewing with a couple of layers
and pins.
Fabric is pinned right sides together so that the seam
allowance will end up on the inside. The "right" side is
whichever side of the fabric you will want on the outside when
the piece is done. On printed fabric, it is generally the side
with brighter colors. Solids may not have an obvious right
side.
Place the pins perpendicular to the line where the seam will
go. You can sew right over straight pins, and still remove
them later with no damage to the machine, the fabric, or the
pins. It is safer to remove pins just before stitching reaches
them, as accidentally striking a pin will break, or at least dull
the needle. Avoid sewing over the heads of the pins, however.
While you're looking at the fabric, notice which way the fabric
itself goes. Seams may go any direction, but most sewing
projects are cut so that the main seams go parallel with the
lines of the weave. Also note the direction of the print if your
fabric has one, and arrange it so it will be "right side up" such
as with a floral or animal print or so that stripes or other
patterns run a certain direction.

11 Move to another part of the fabric. Use the hand wheel at
the top of the right side of the machine to move the needle to
the top of its travel before starting a seam and again to
remove the fabric from the machine at the end of a seam.
This lifts the needle, and allows you to move to another area
of the fabric you’re working on.

If the needle is not at the top of its travel, the thread may not
move when you pull on the ends.
Look for lines on your sewing machine indicating seam
allowance. This is the "normal" space between the edge of
the fabric and the stitching line. Generally, you should use the
line at 5/8" (1.5cm) or 1/2" (1.3cm). Use a ruler measure on
either side of the needle. This should already be marked on
your machine's "throat plate" (the flat metal piece that the
needle goes through). If not, mark it yourself with masking
tape.

12 Learn to sew a sharp corner. Where you want to turn the
corner, lower the needle all the way into the fabric. You can
use the hand wheel to lower the needle. Raise the presser
foot. Leave the needle down, in the fabric. Then, Rotate the
fabric to the new position, leaving the needle in it. Finally,
lower the presser foot with the fabric in the new position and
resume sewing.[3]
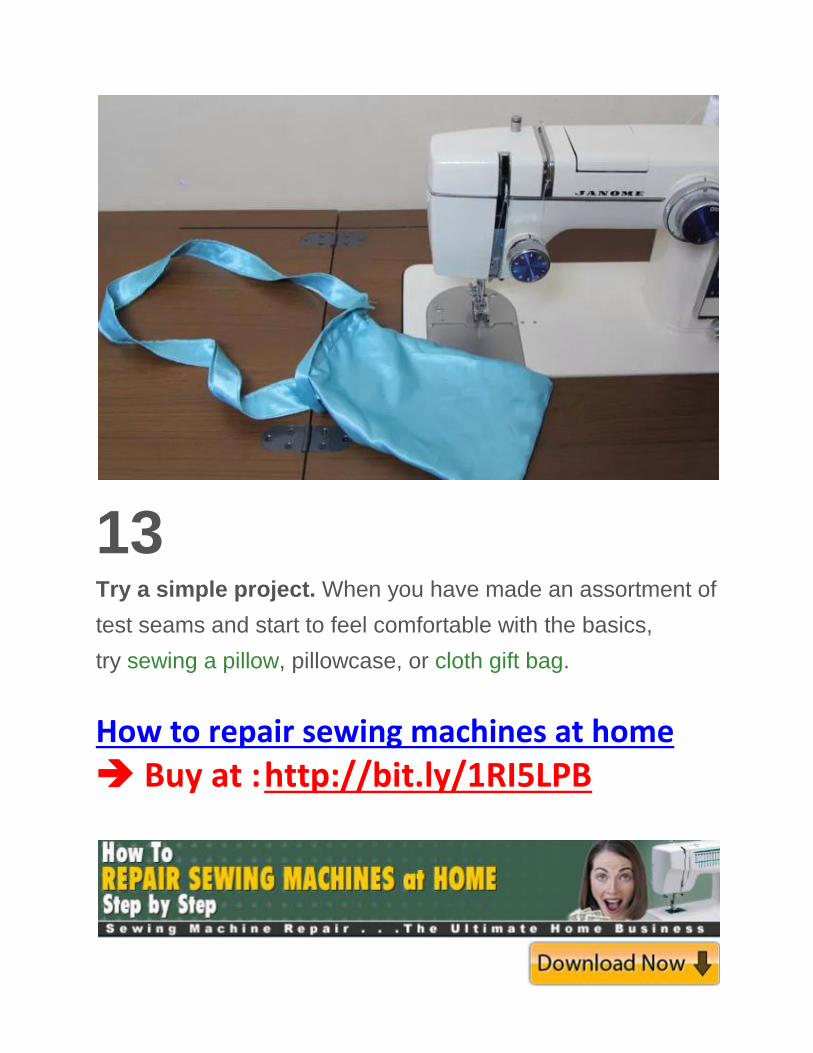
13 Try a simple project. When you have made an assortment of
test seams and start to feel comfortable with the basics,
try sewing a pillow, pillowcase, or cloth gift bag.
How to repair sewing machines at home
Buy at : http://bit.ly/1RI5LPB
Related Documents