HOW TO USE THINGLINK FREE FEATURES

How to ThingLink Free features
Aug 03, 2015
Welcome message from author
This document is posted to help you gain knowledge. Please leave a comment to let me know what you think about it! Share it to your friends and learn new things together.
Transcript
HOW TO USE
THINGLINK FREEFEATURES
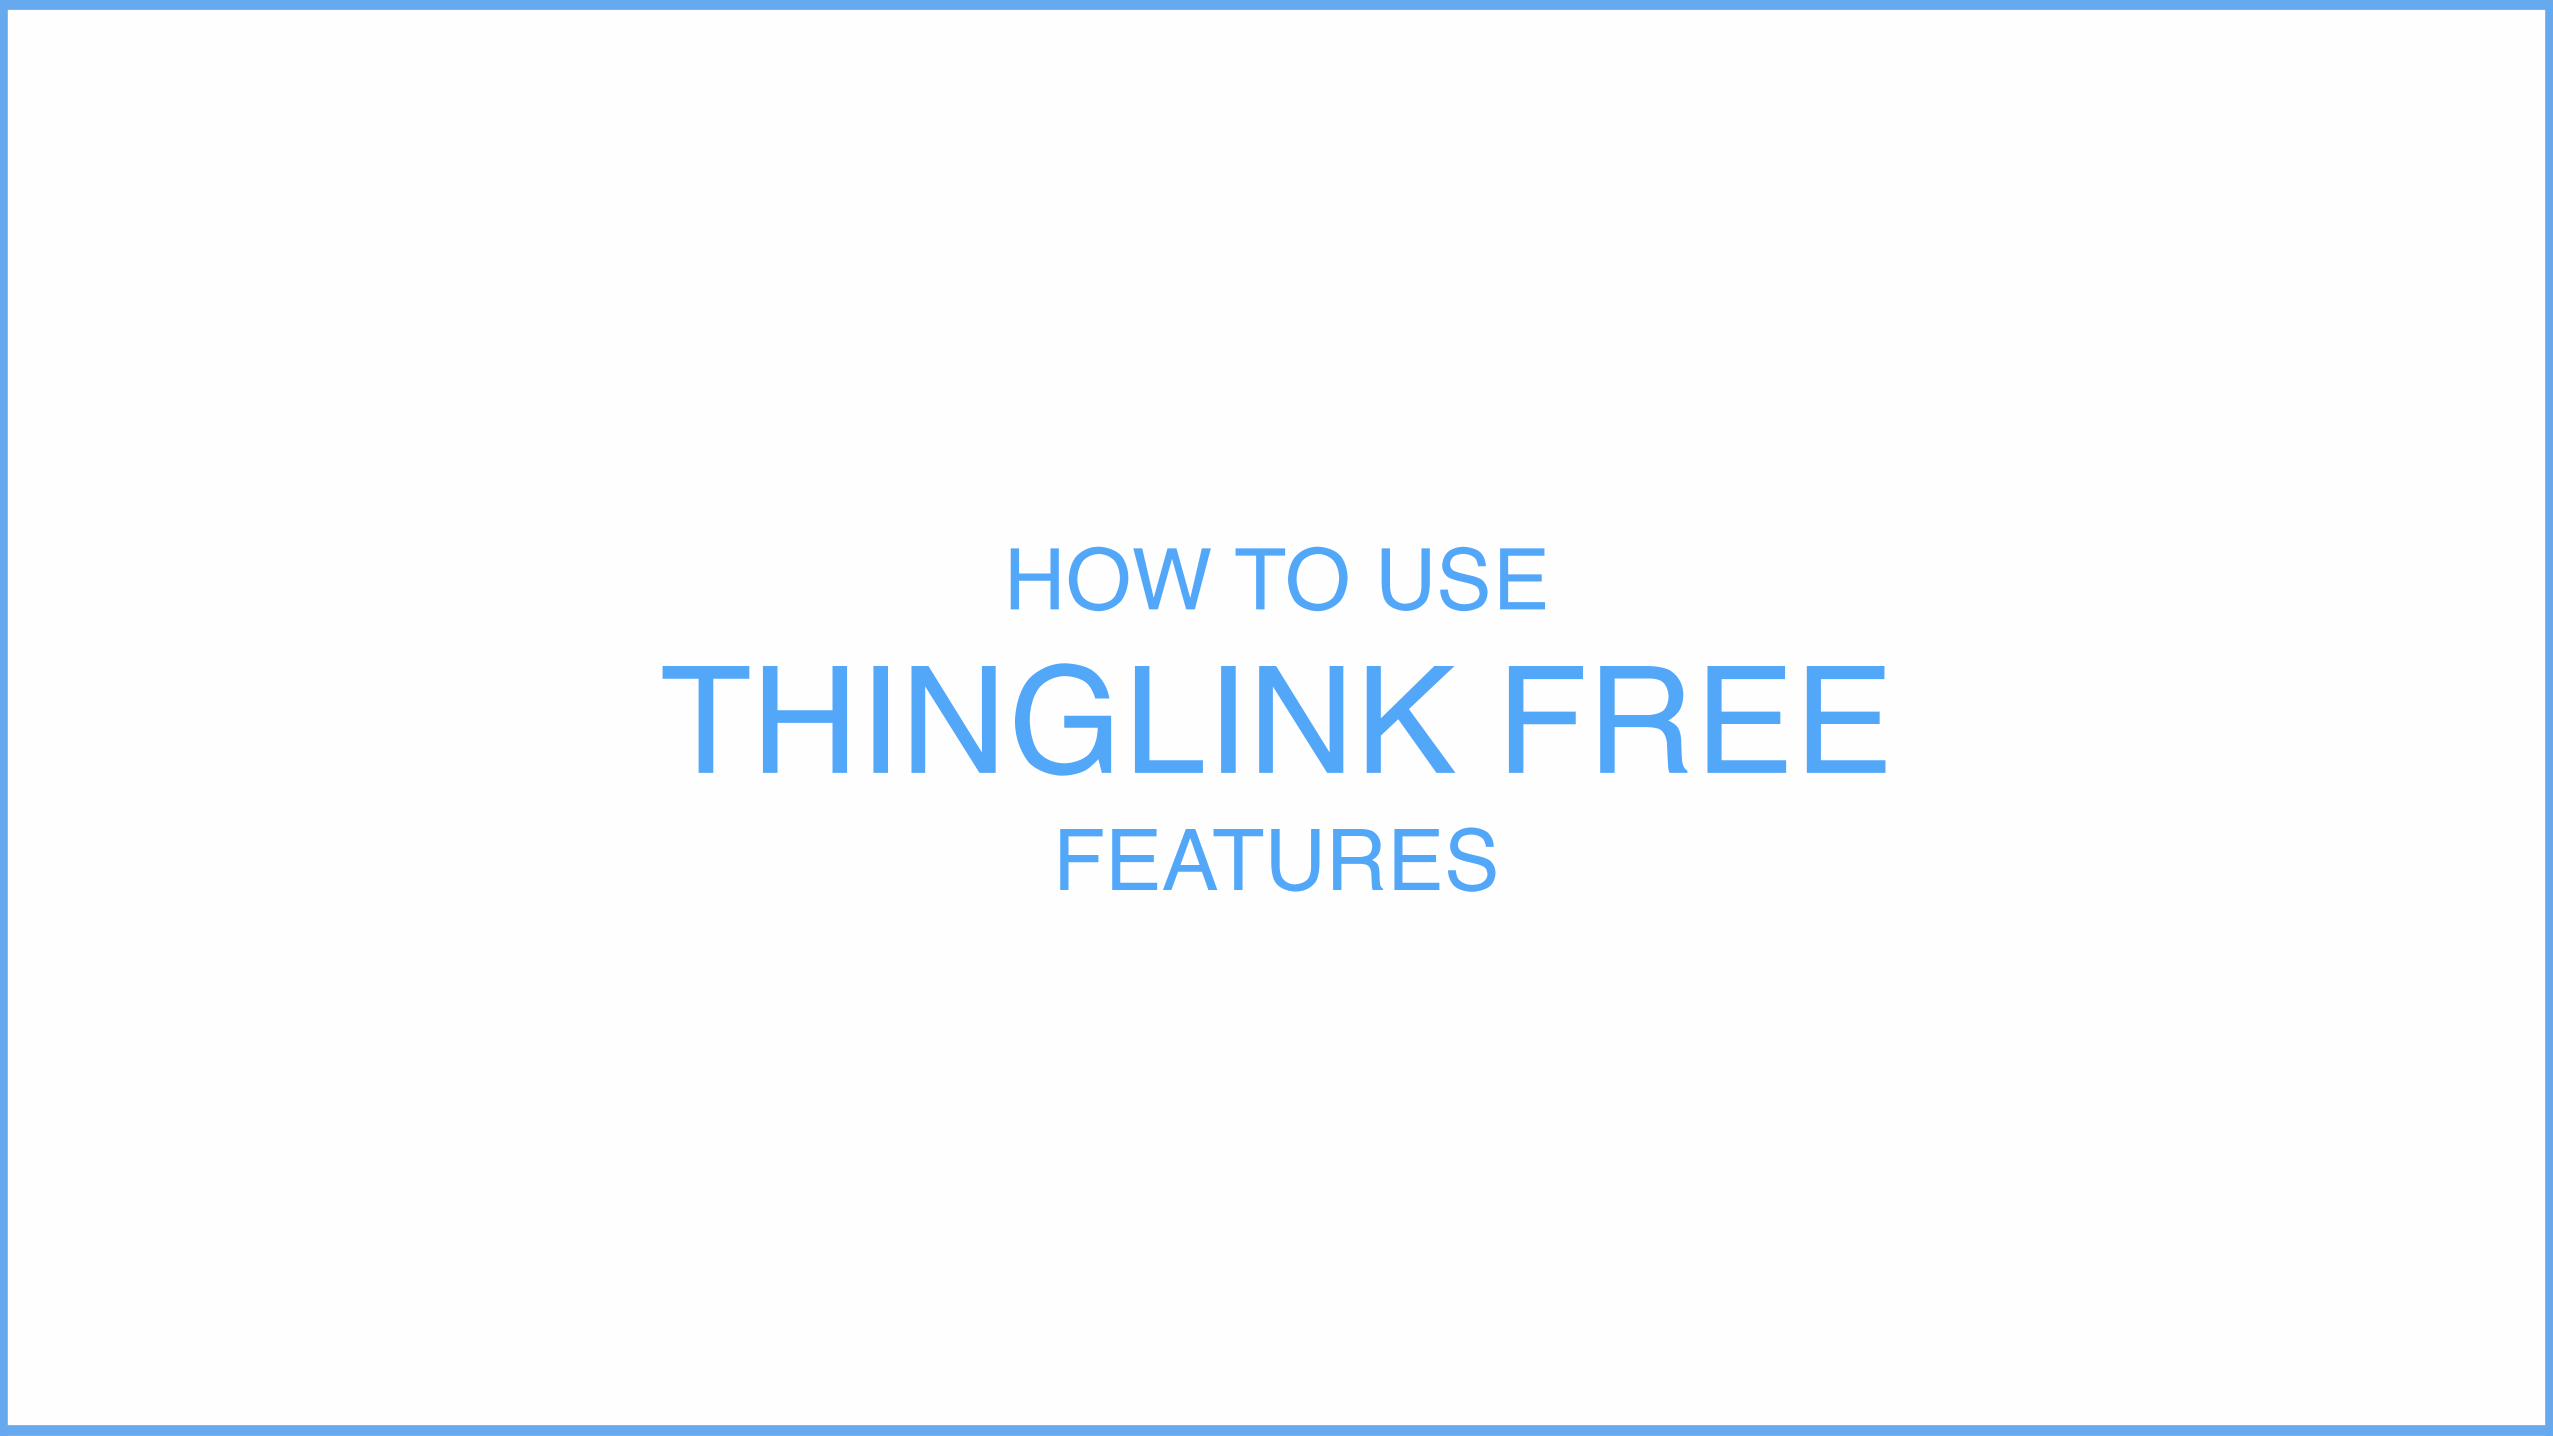
TABLE OF CONTENTS
1. Control Panel
2. Control Image Display
3. Image Creation
4. Create Interactive Channels
5. Use ThingLink Video
CONTROL PANELHOW TO
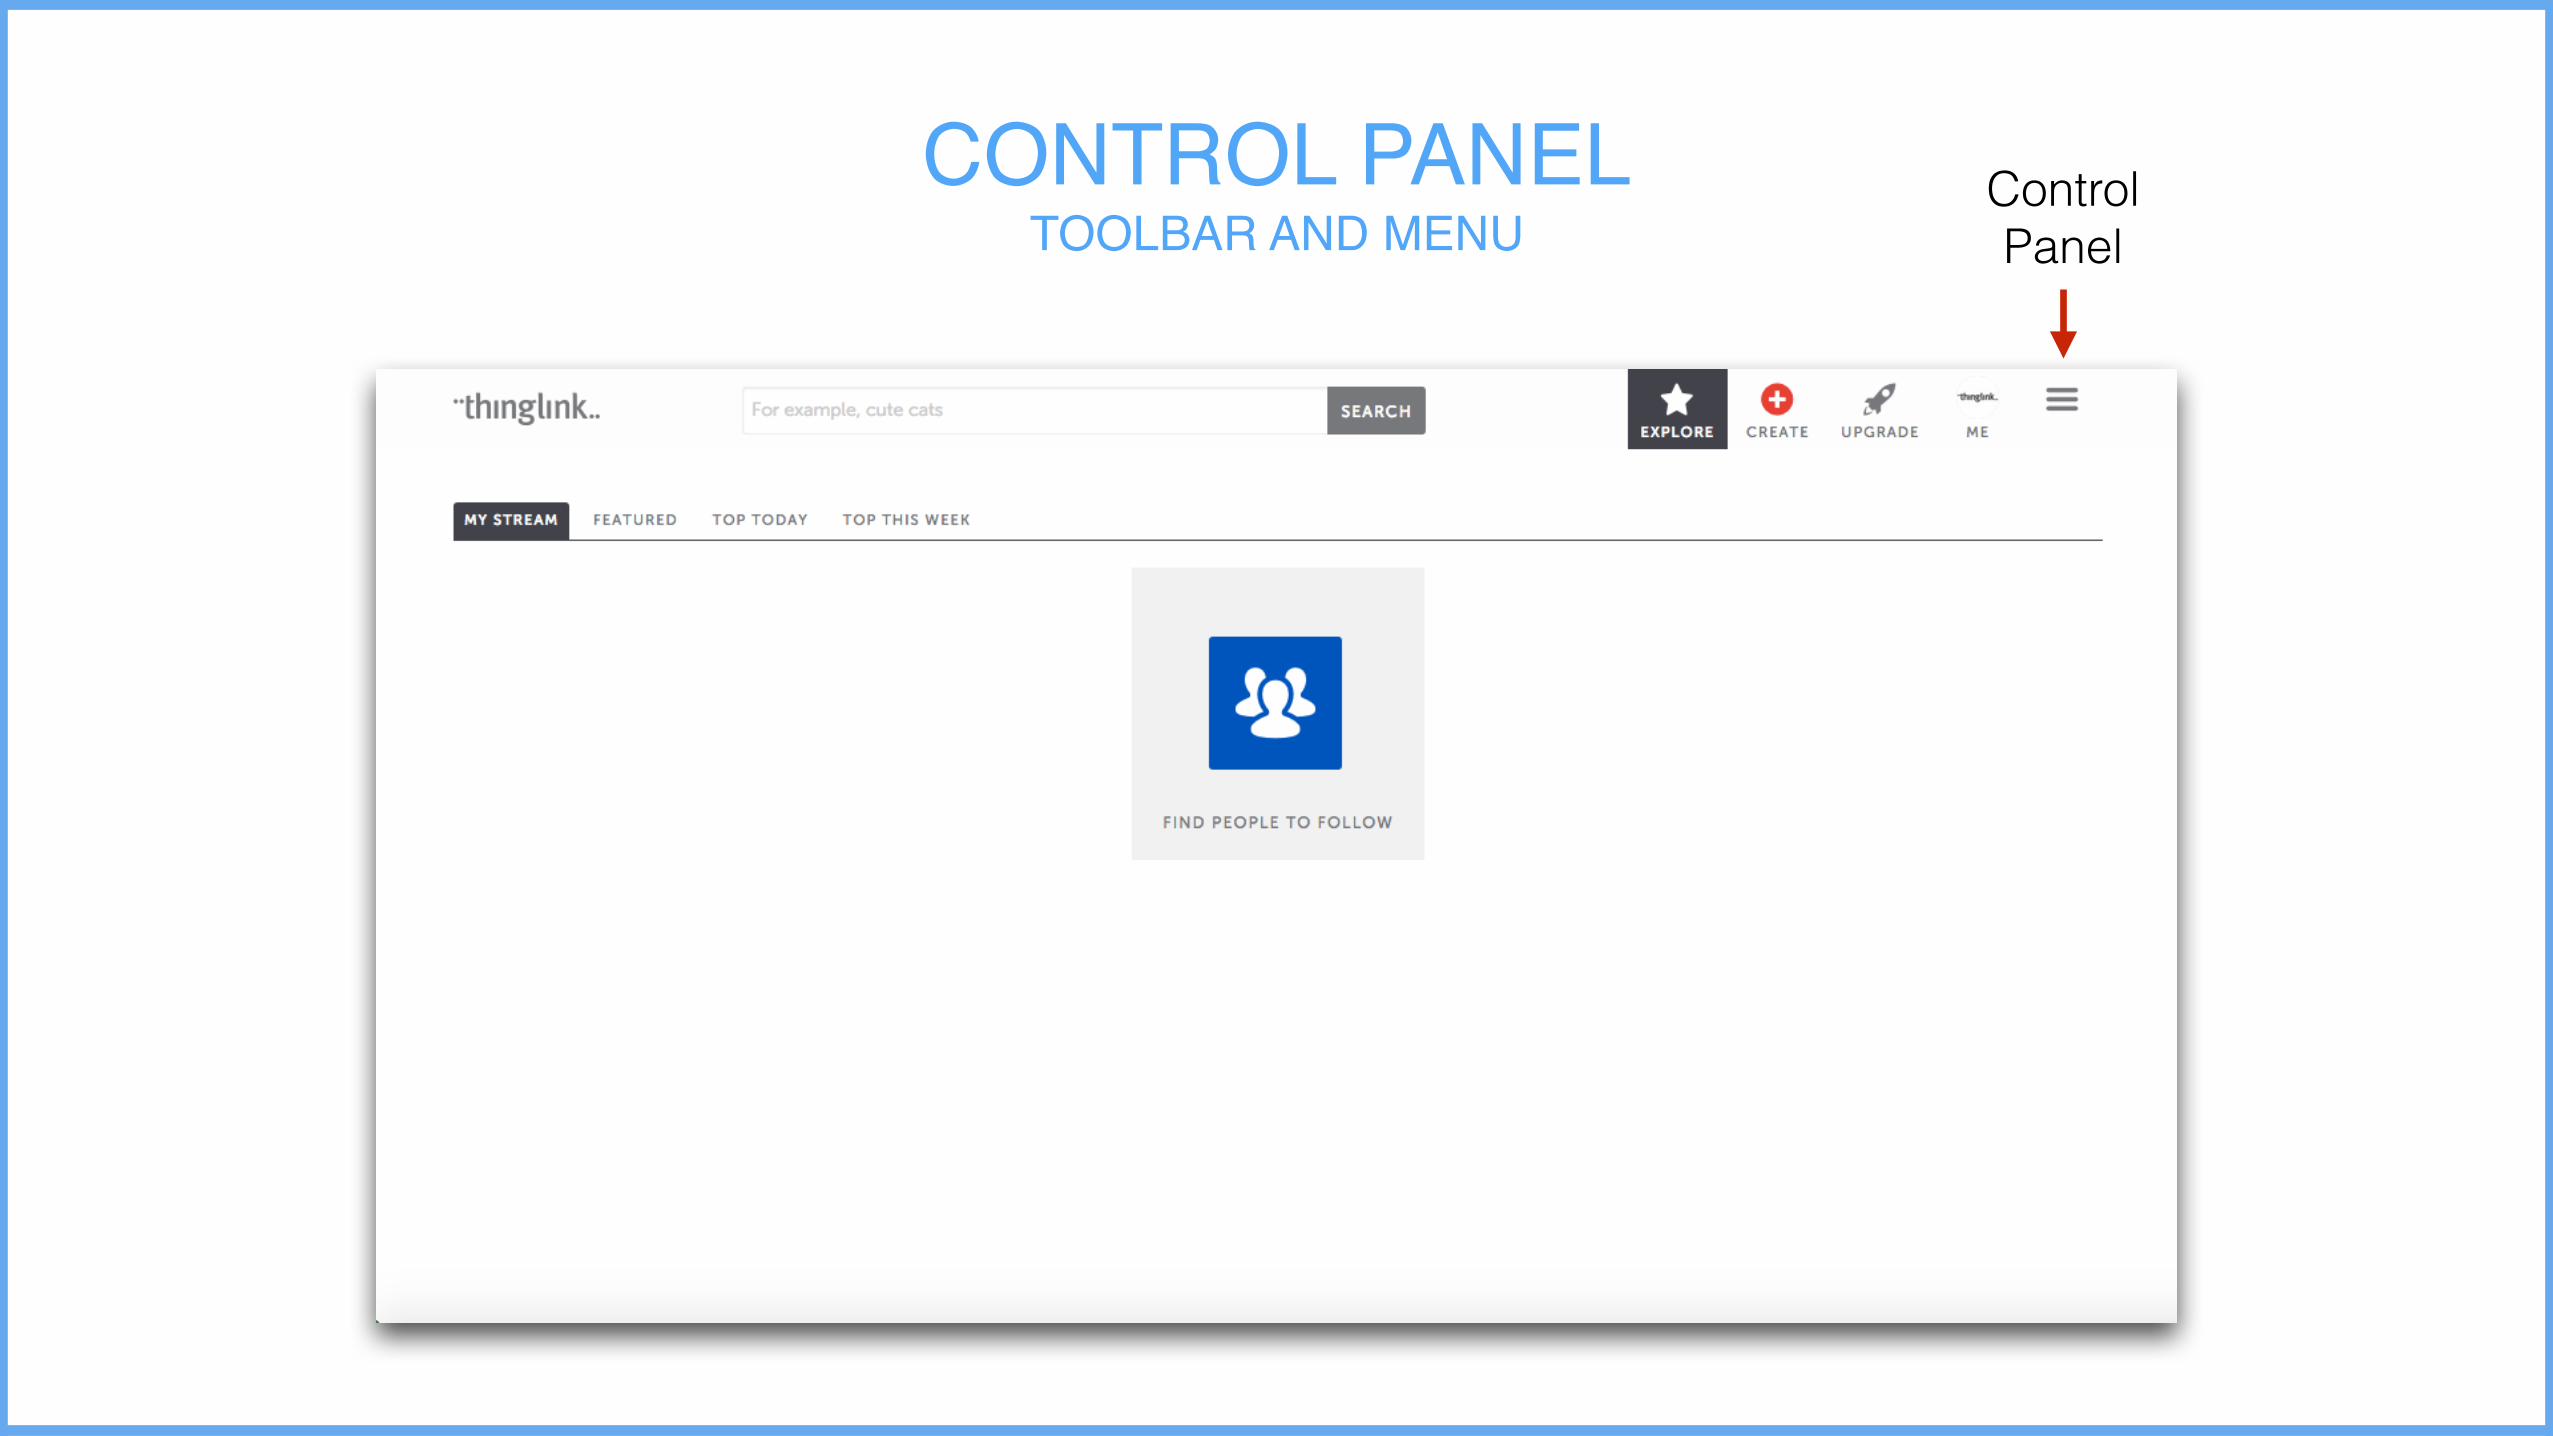
CONTROL PANELTOOLBAR AND MENU
Hosting (if needed)
Control Panel
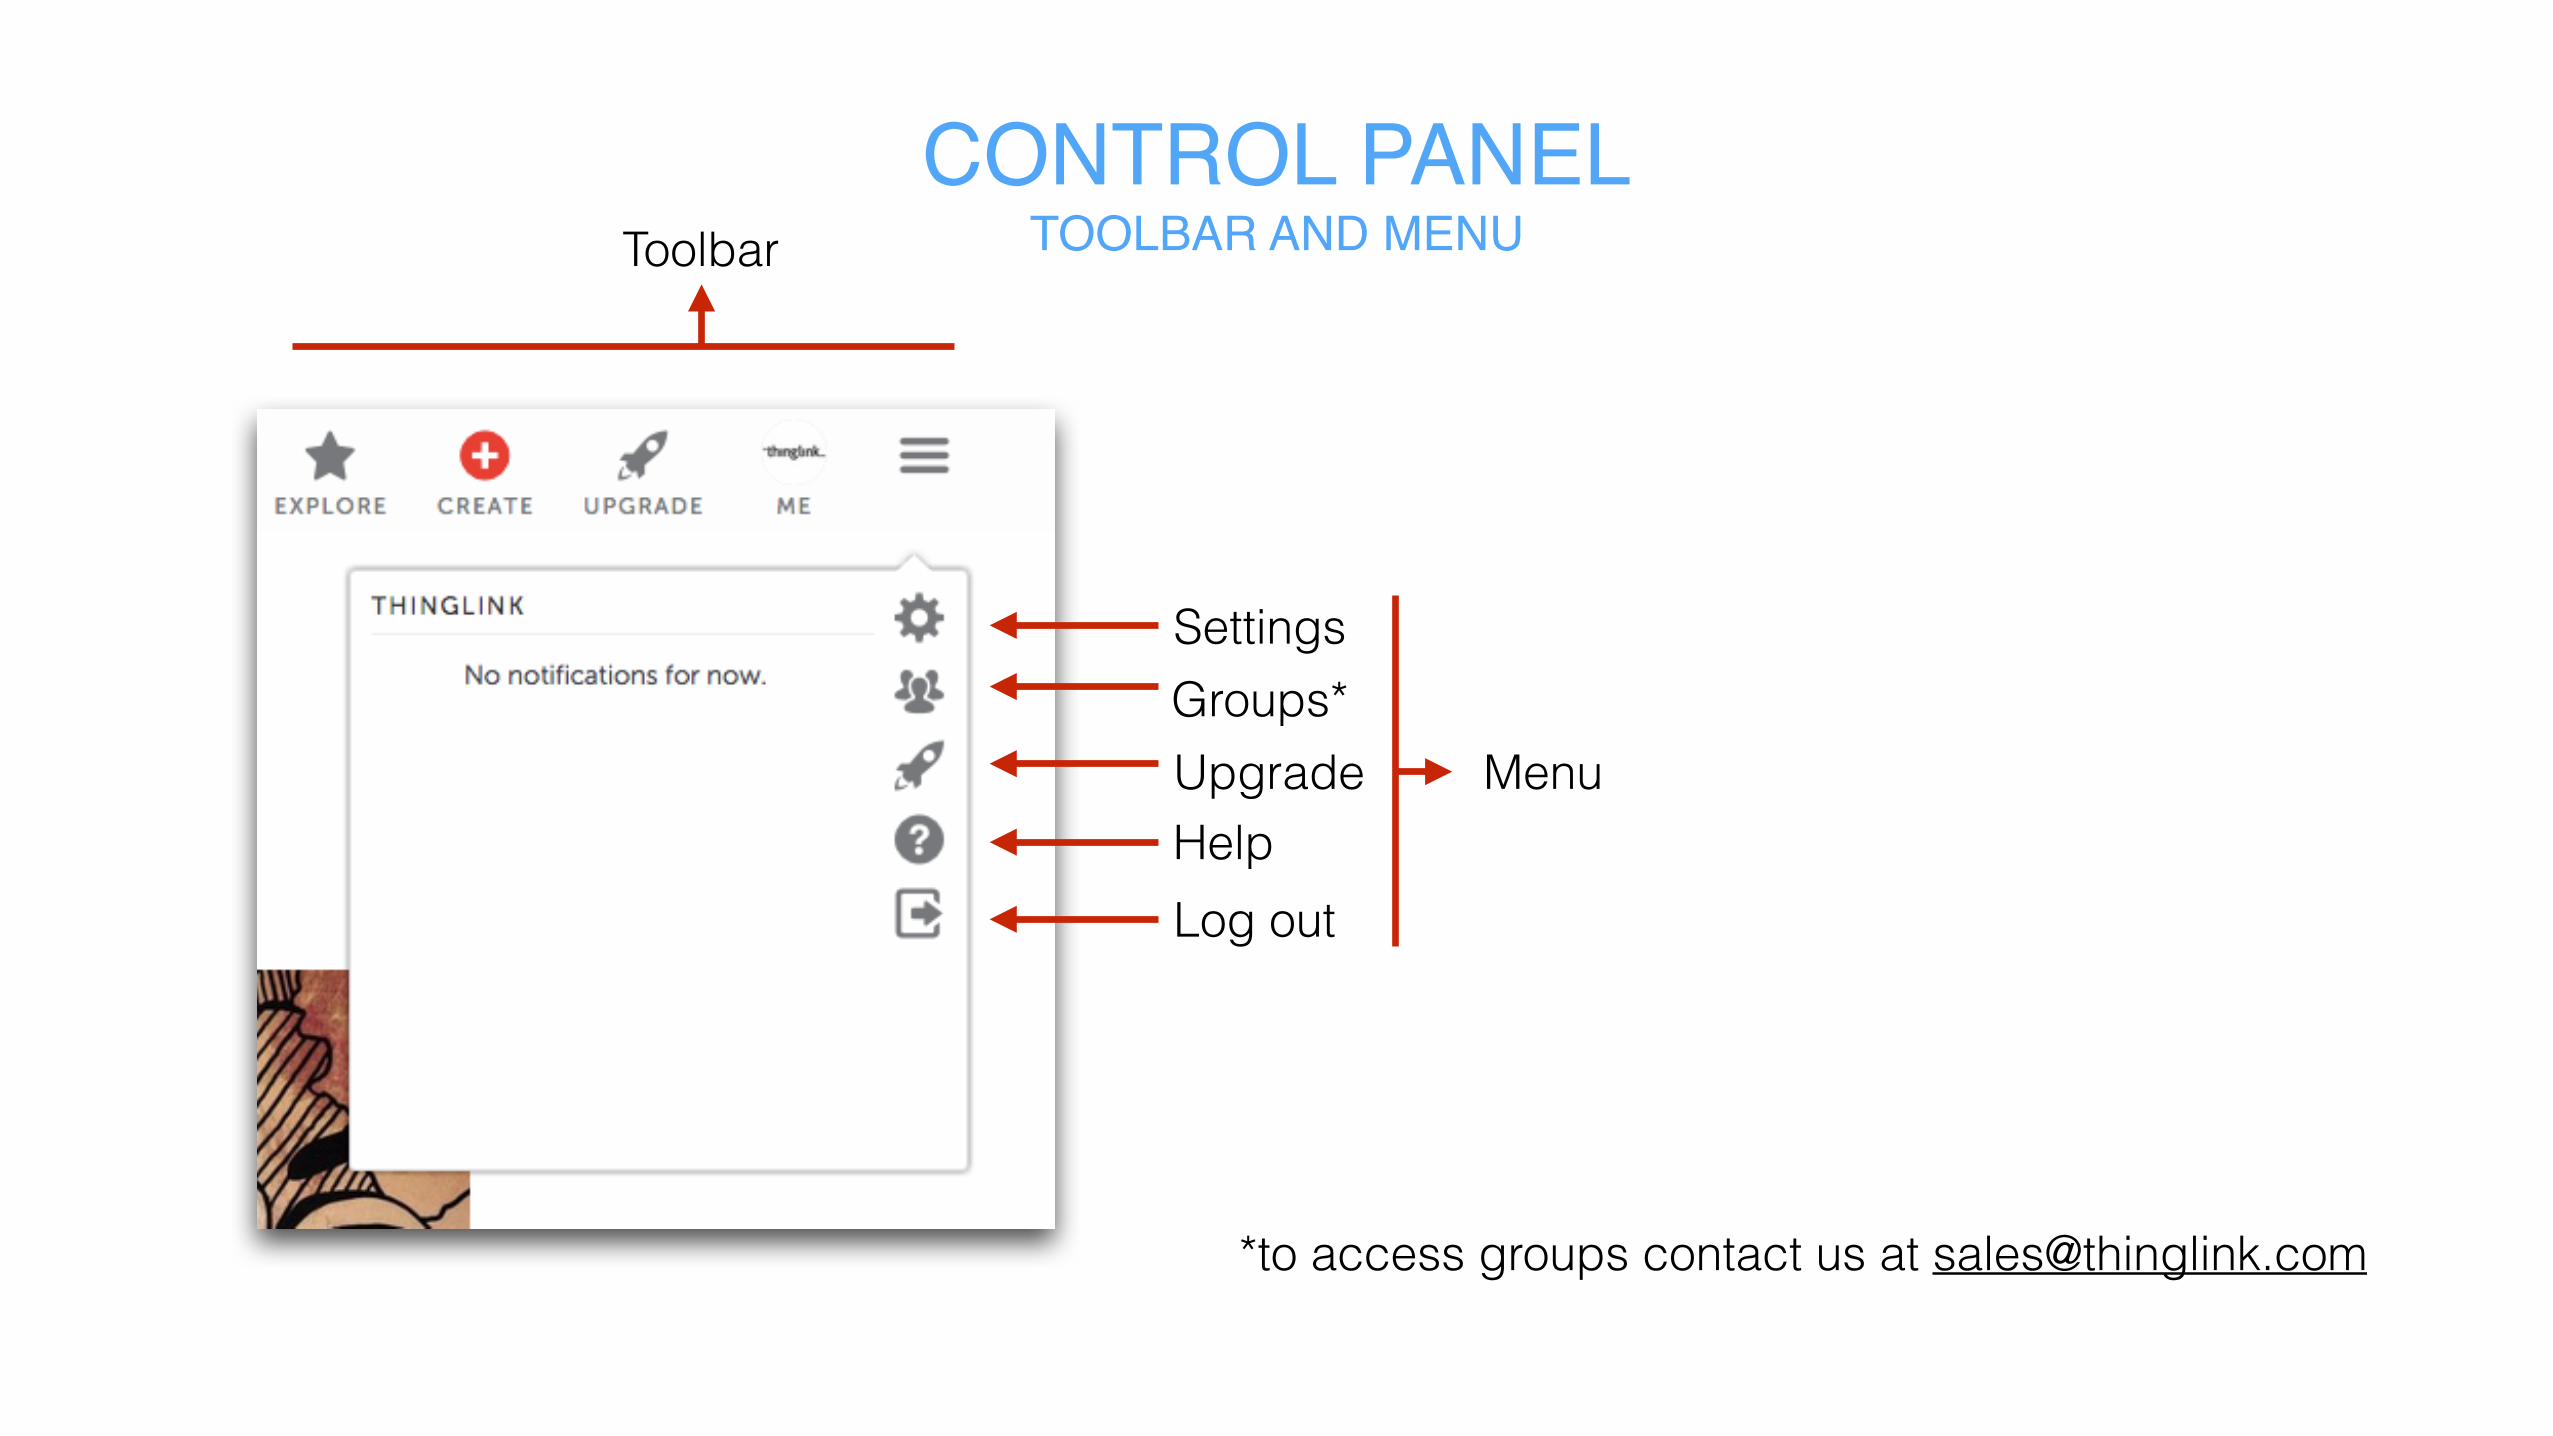
Toolbar
SettingsGroups*UpgradeHelpLog out
Menu
CONTROL PANELTOOLBAR AND MENU
*to access groups contact us at [email protected]

CONTROL IMAGE DISPLAYHOW TO
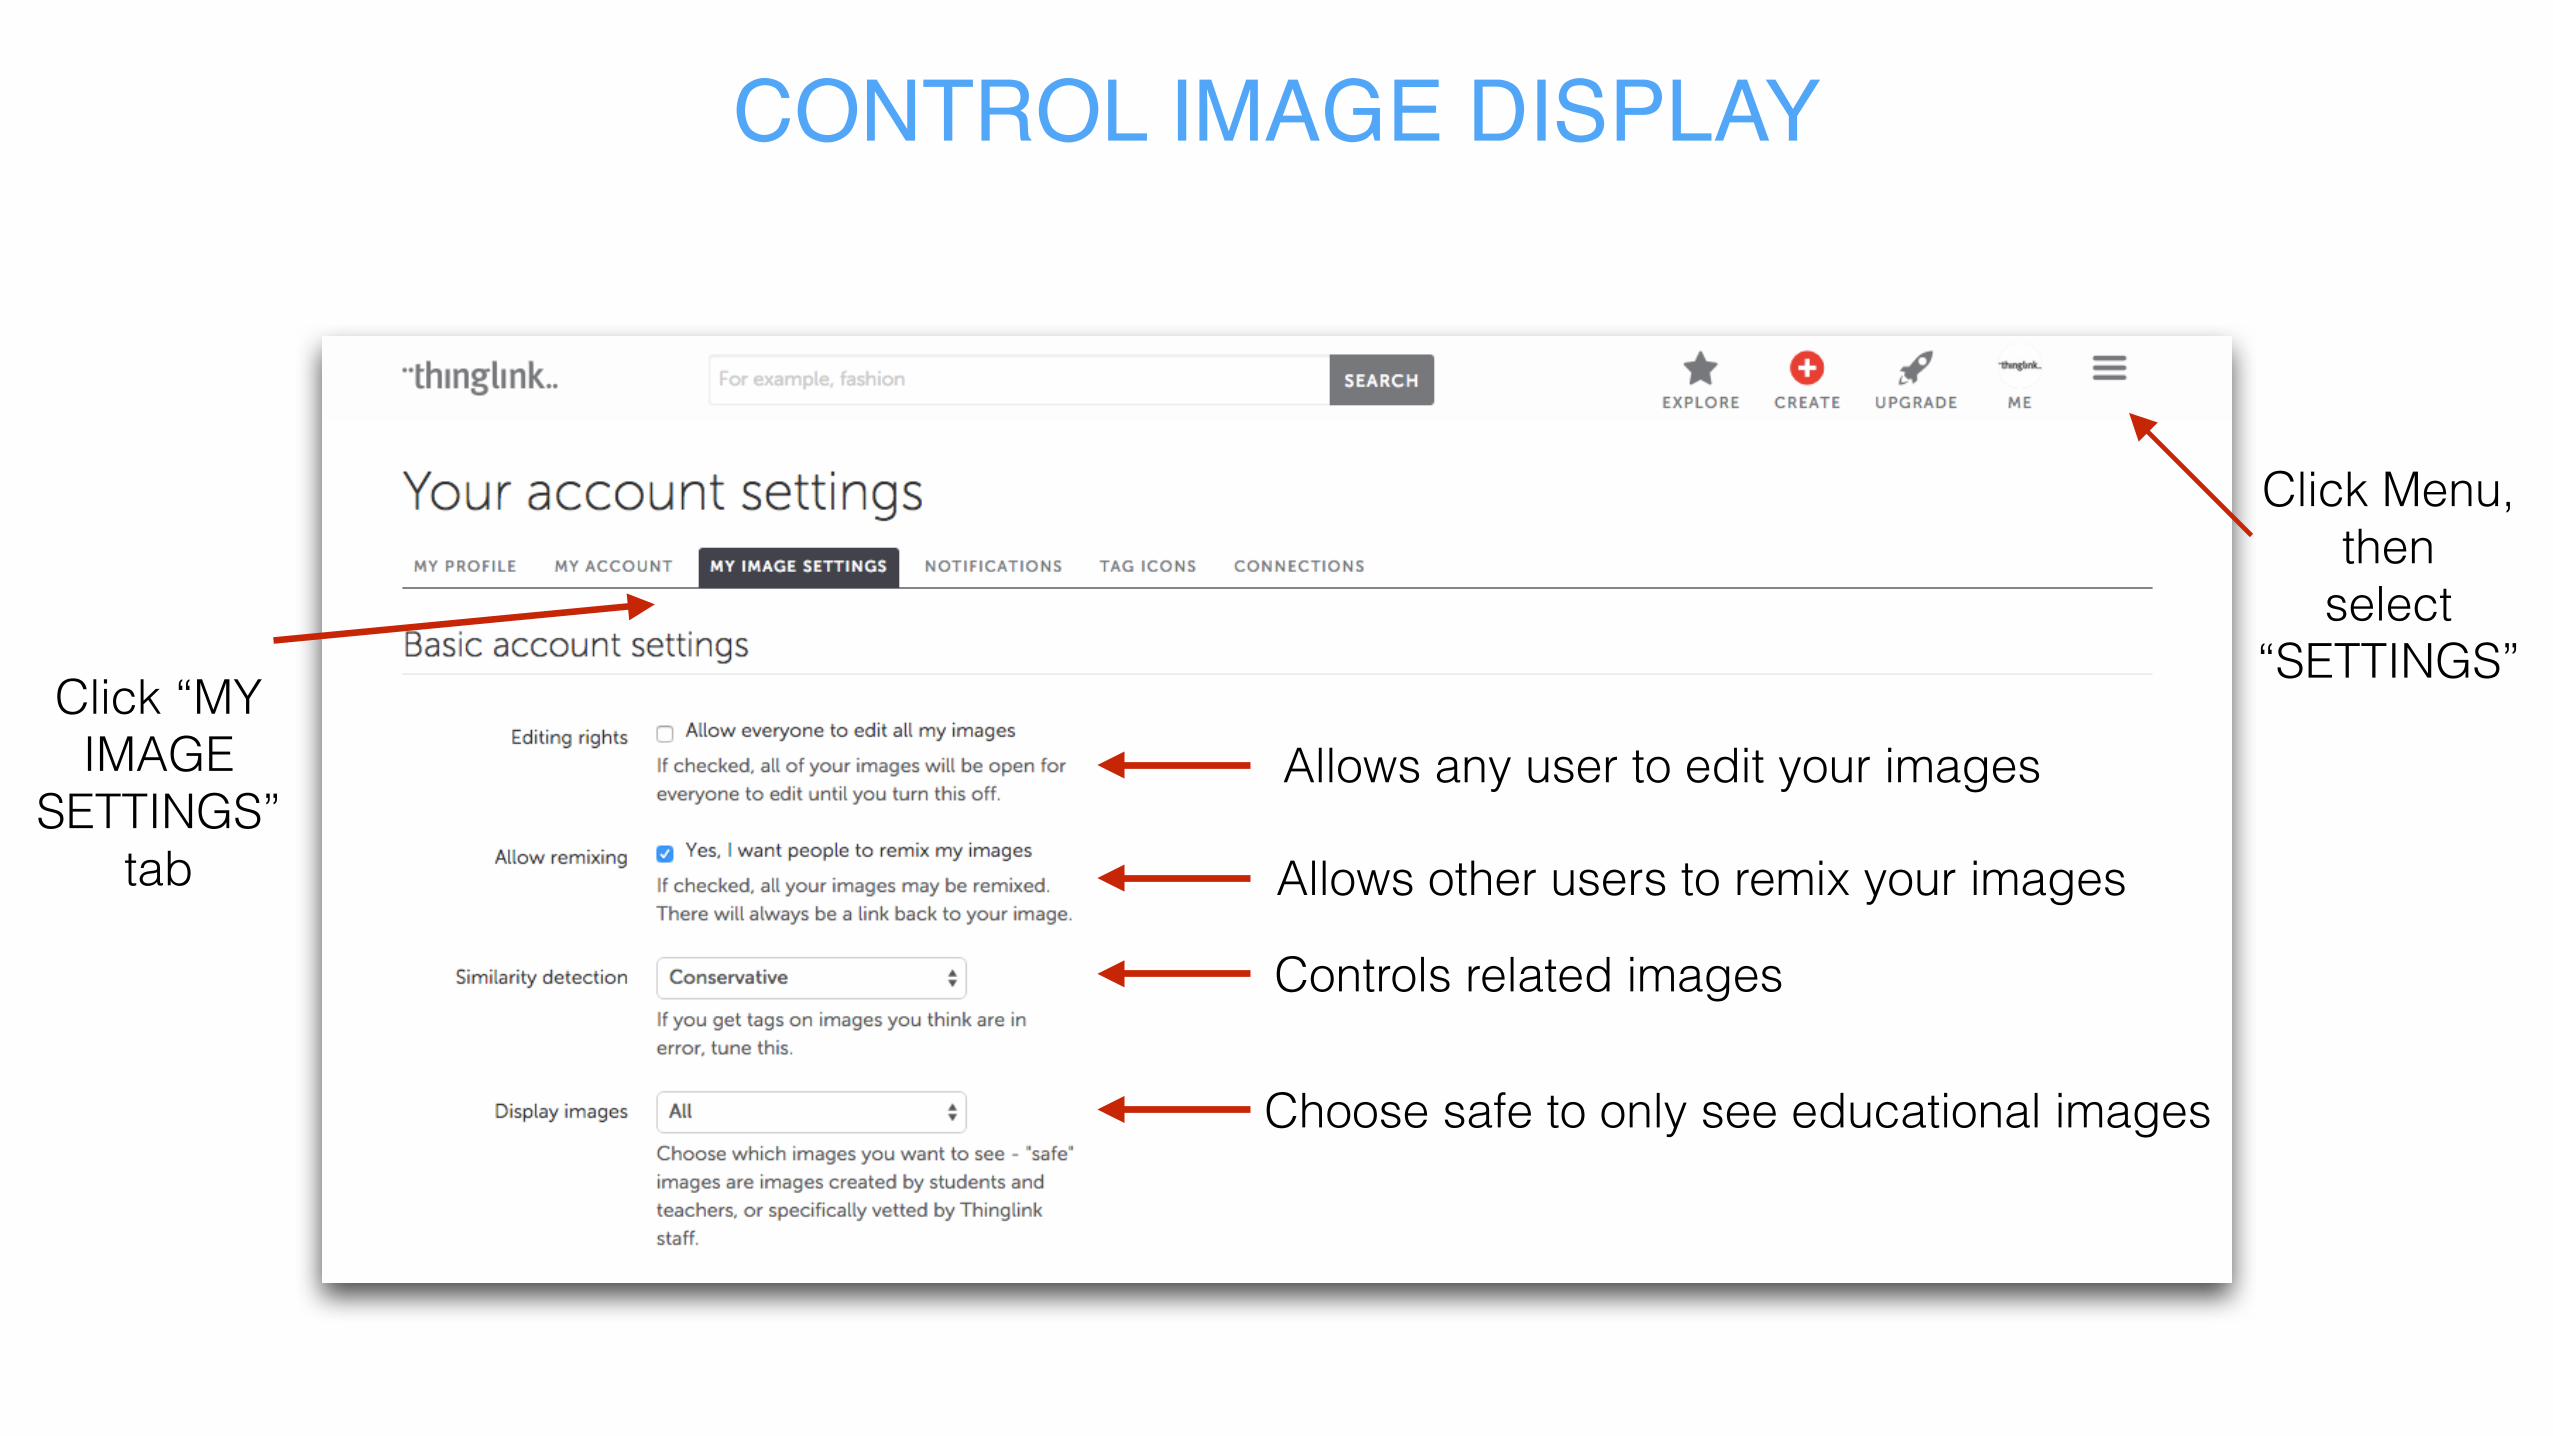
CONTROL IMAGE DISPLAY
Click “MY IMAGE
SETTINGS” tab
Click Menu, then
select “SETTINGS”
Allows any user to edit your images
Allows other users to remix your images
Controls related images
Choose safe to only see educational images

CONTROL IMAGE DISPLAYMANAGE PRIVACY
Select “Sharing settings” to manage
image privacy
Public: everybody can see it
Unlisted: image can only be accessed with the image URL
Allows other ThingLink users to
edit your image
Upgrade to Whitelabel to remove branding, share,
touch icons

IMAGE CREATIONHOW TO

CREATE A TAG
Enter a link for photo or click through
Click to choose icon
Add a captionThe Finished Product

CREATE A TAG
Copy & Paste video from YouTube
Click to choose icon
Add a captionThe Finished Product

BROWSE ALL TAG TYPES
HOW TO
CREATE IMAGE CHANNELS
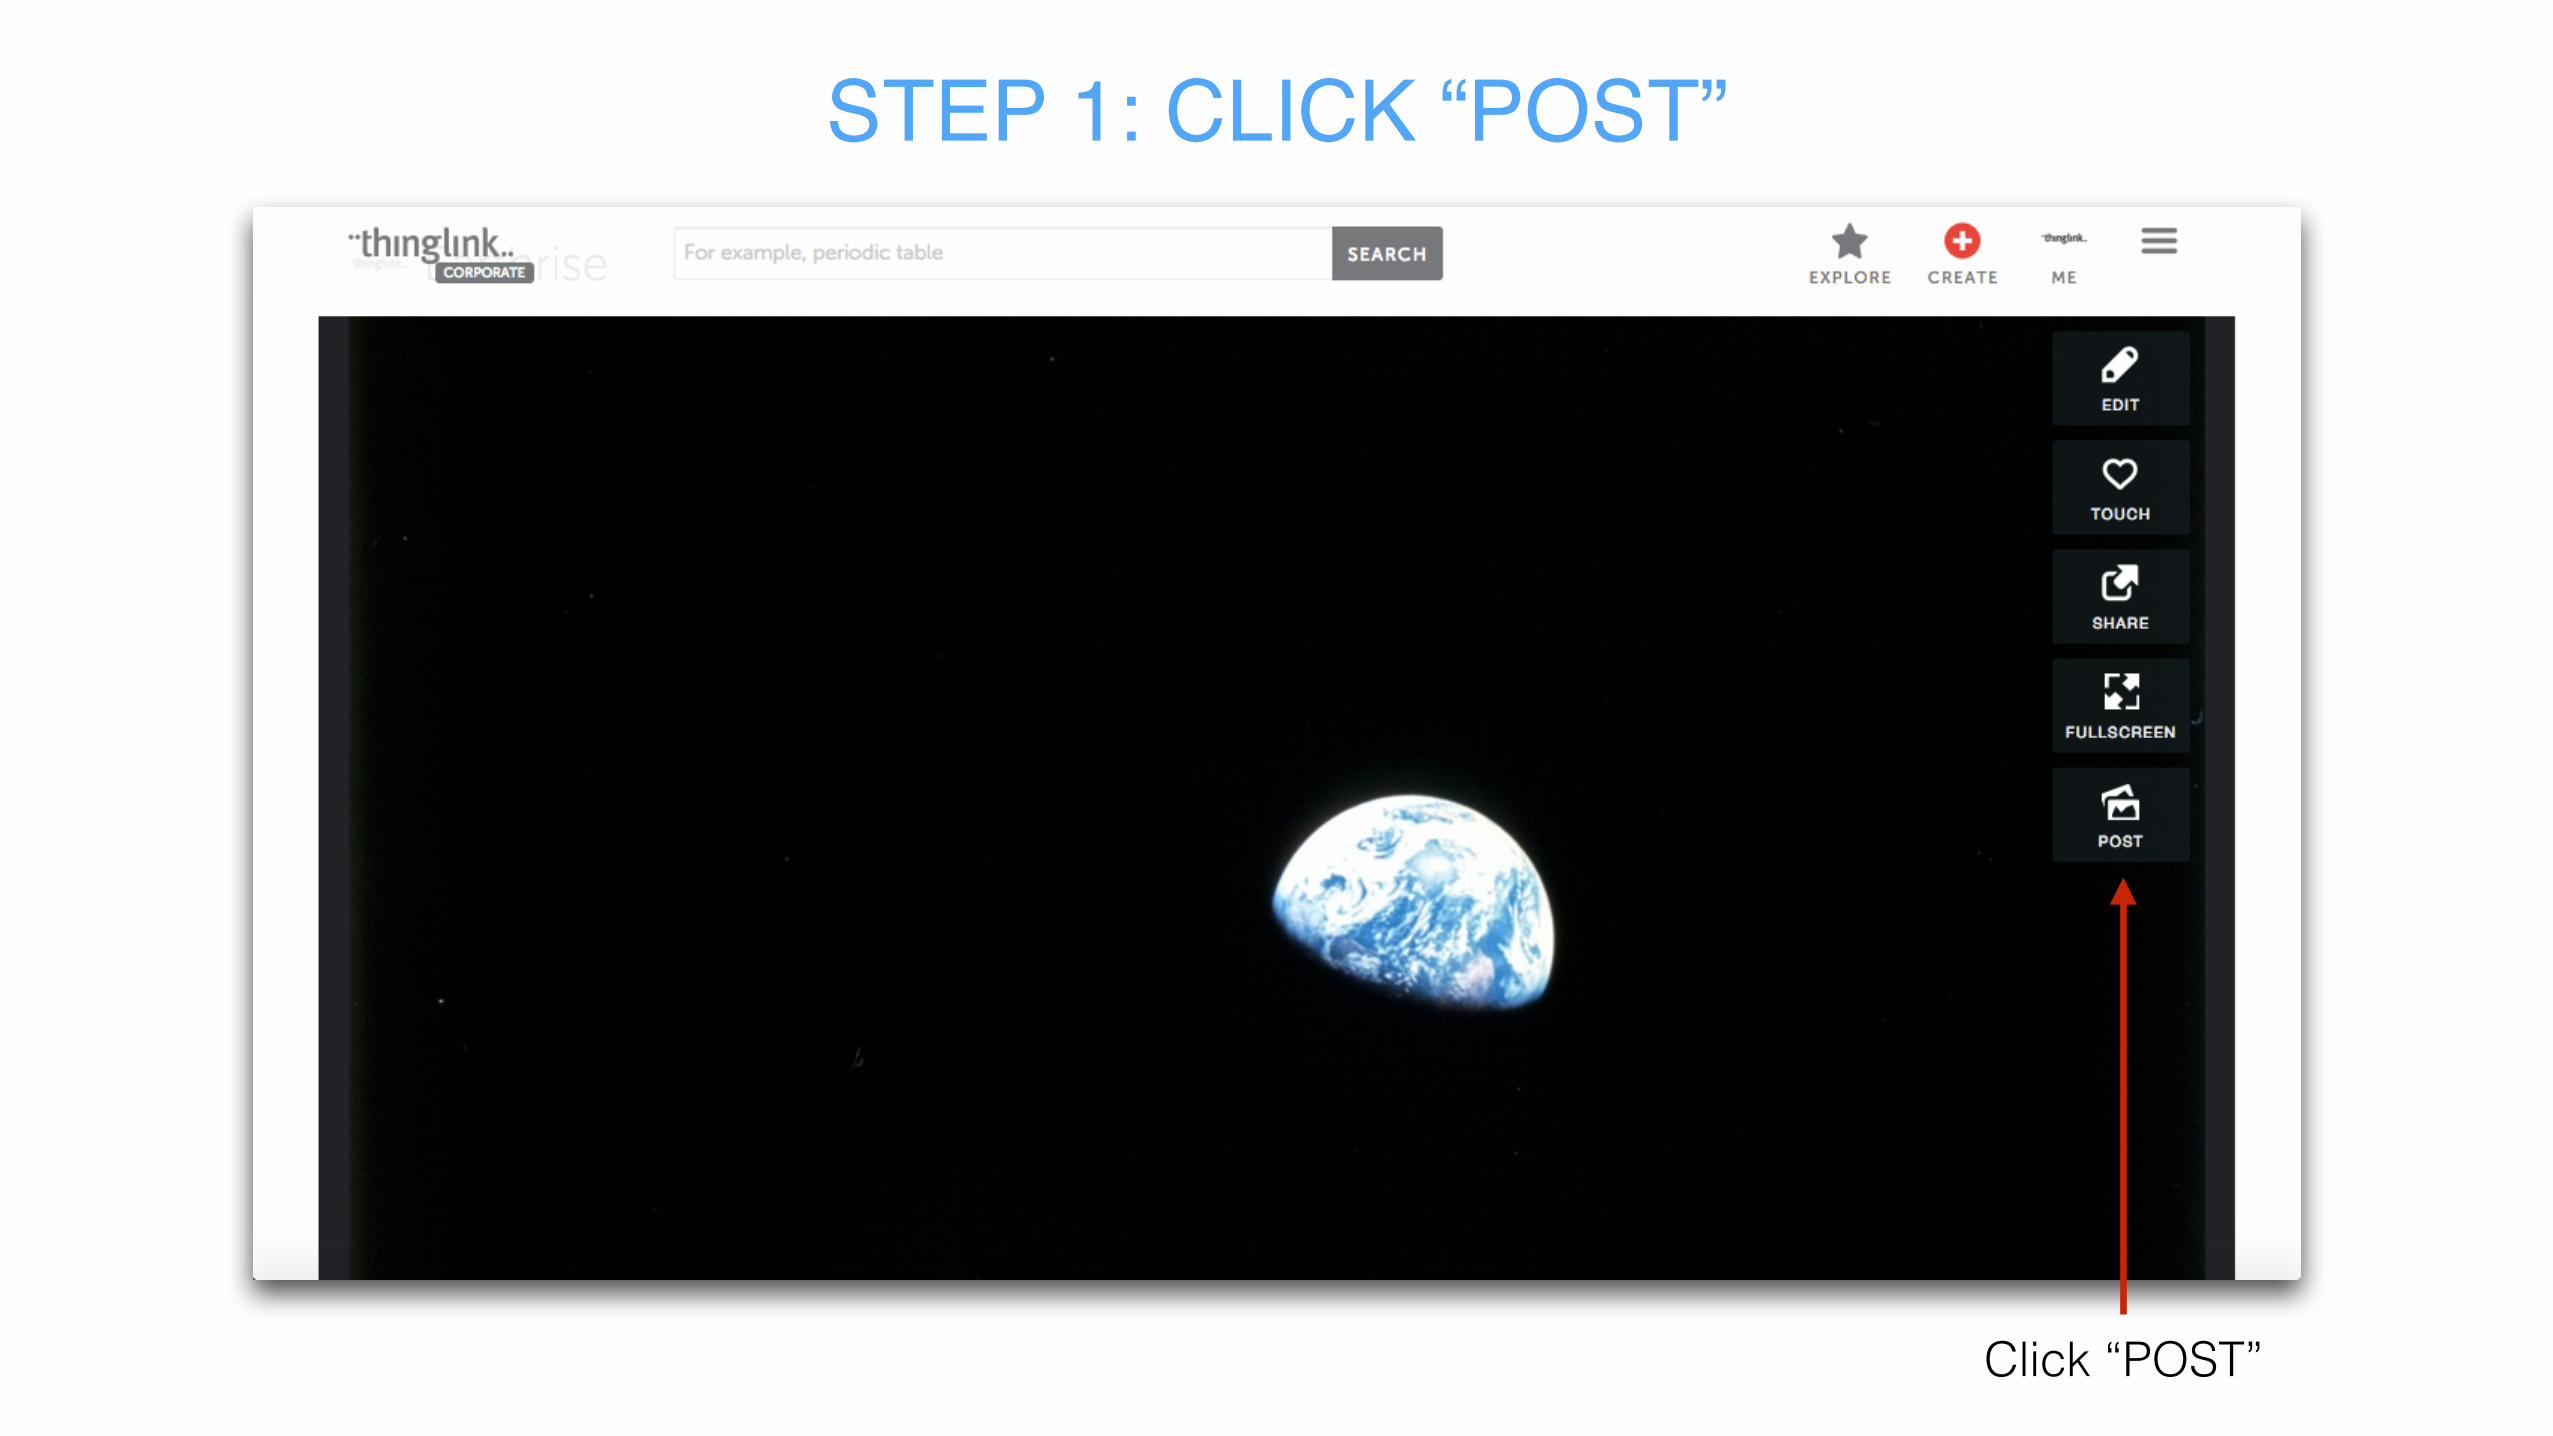
STEP 1: CLICK “POST”
Click “POST”

STEP 2: CREATE CHANNEL
Name your channel Click
“CREATE NEW CHANNEL”
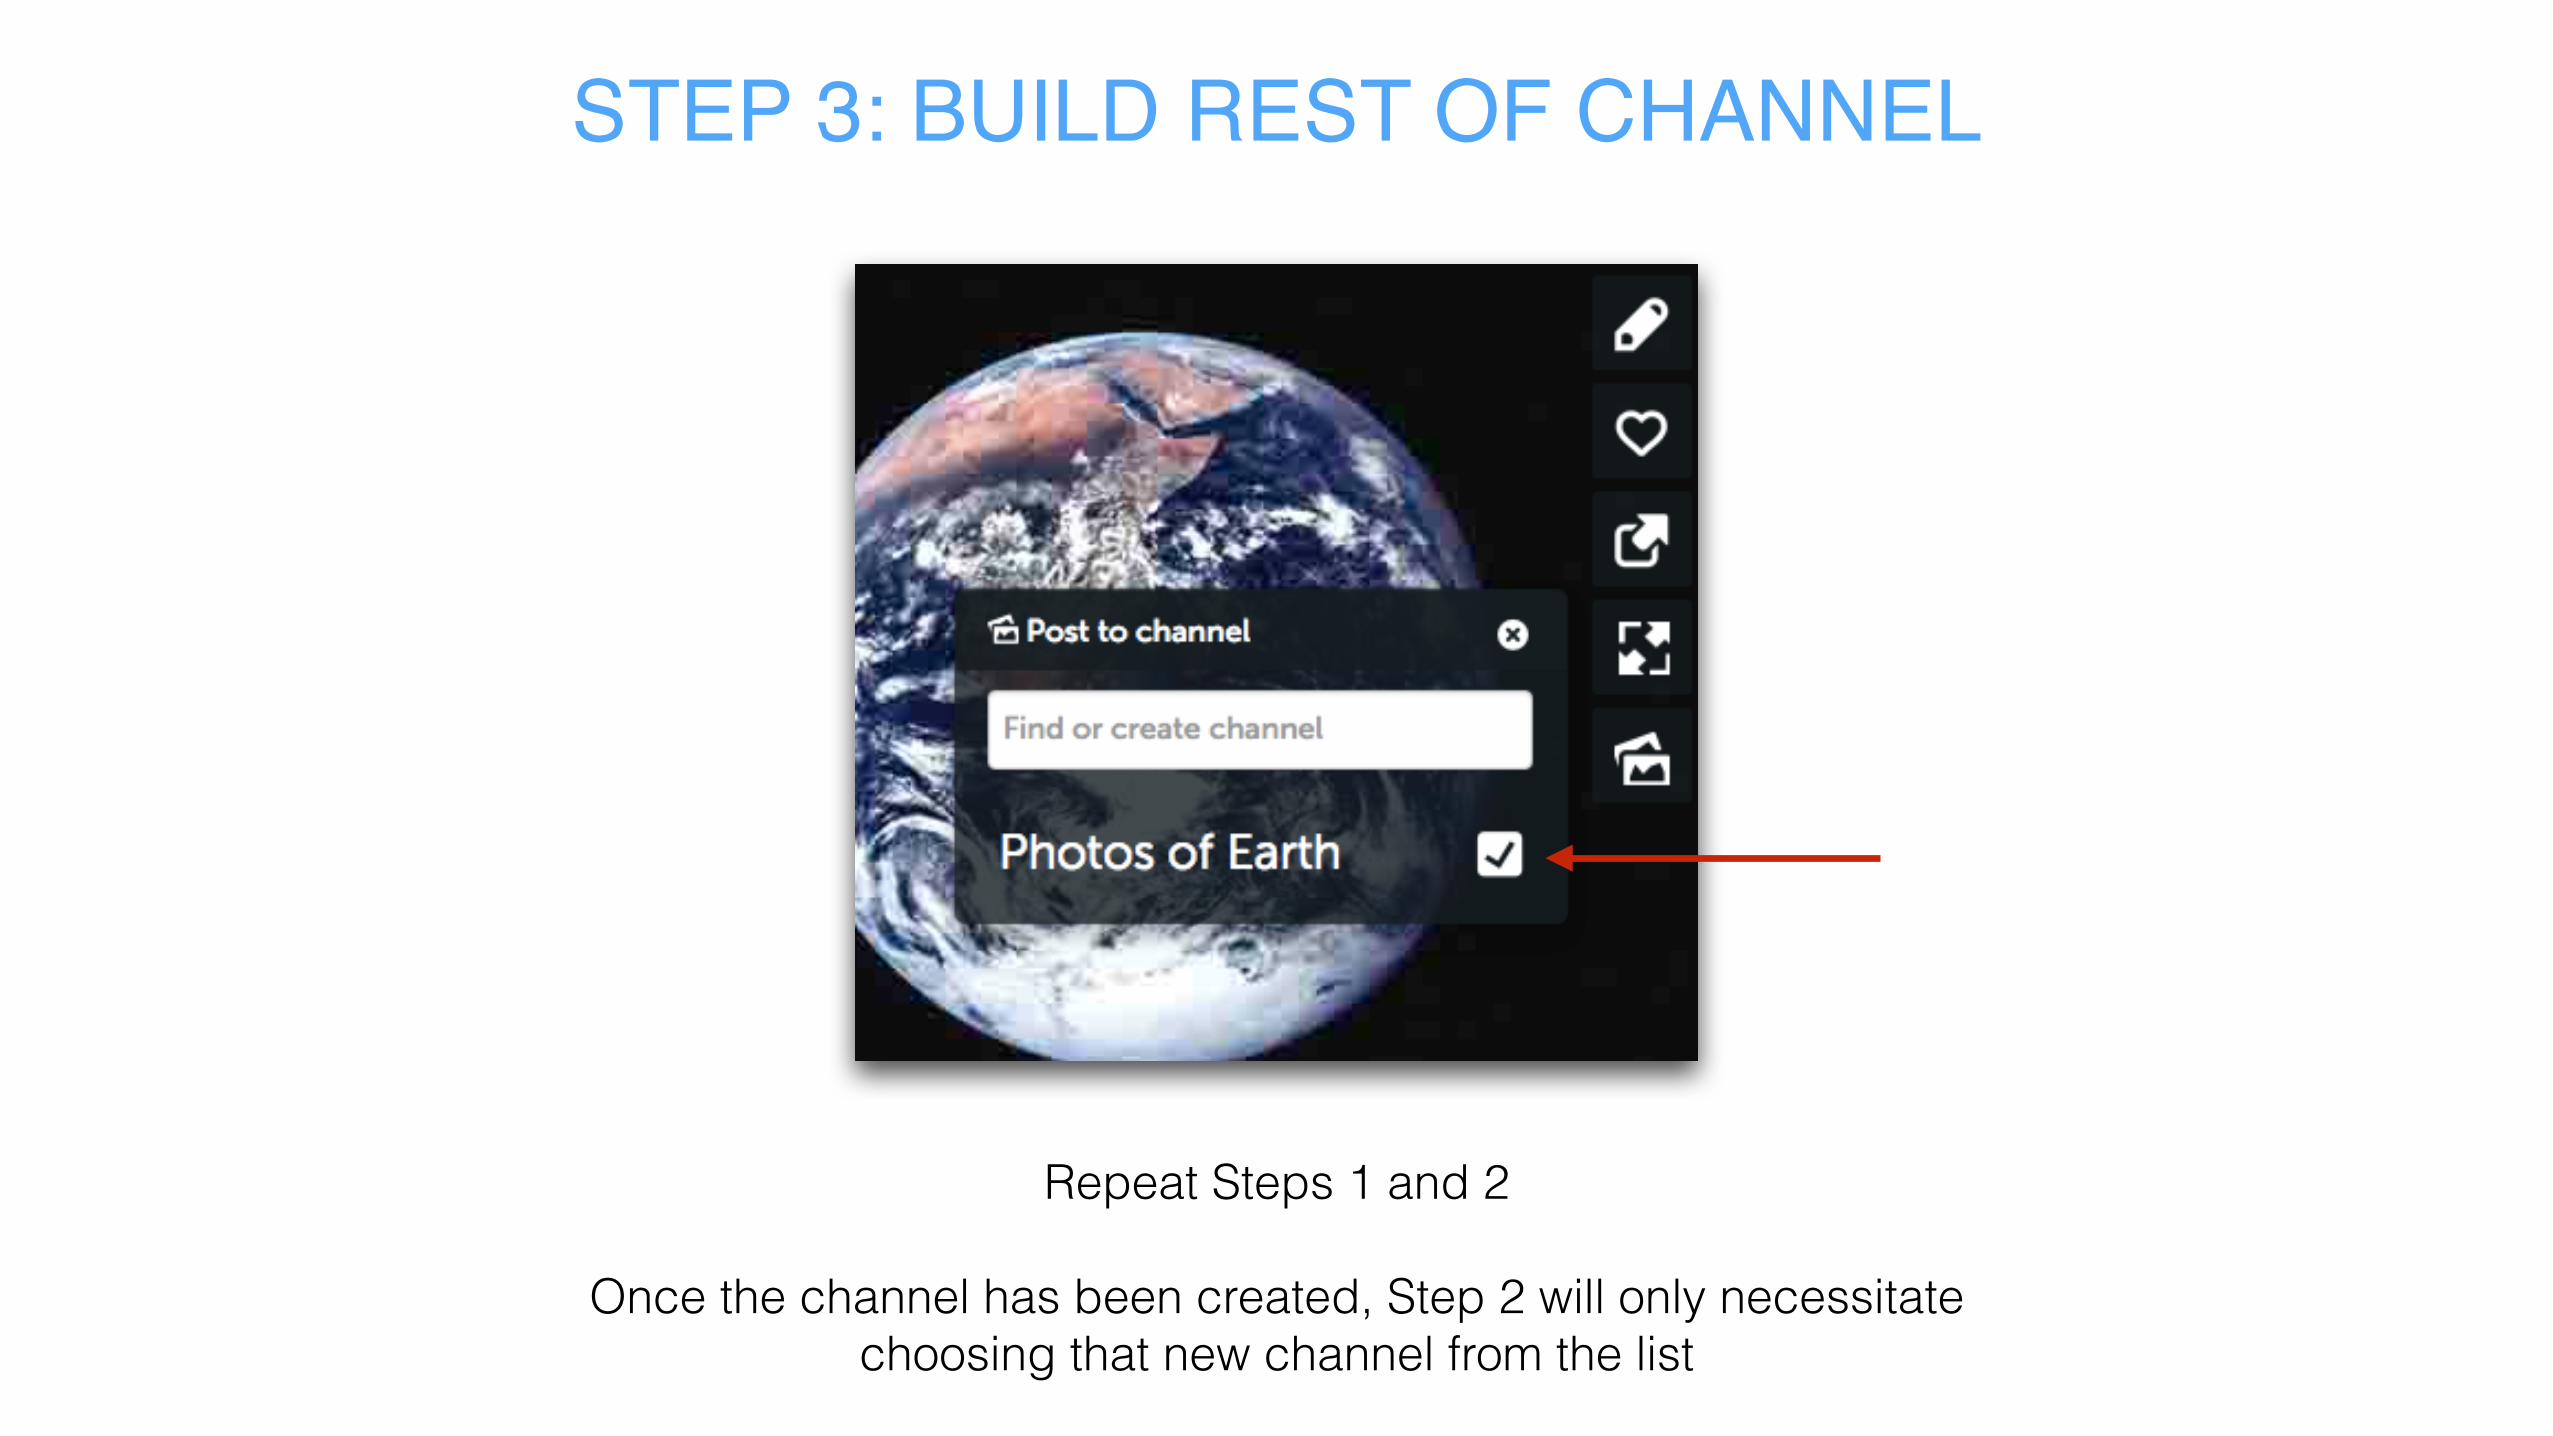
STEP 3: BUILD REST OF CHANNEL
Repeat Steps 1 and 2
Once the channel has been created, Step 2 will only necessitate choosing that new channel from the list

STEP 4: VIEW CHANNEL AS A SLIDESHOW
Click “VIEW AS SLIDESHOW”

HOW TO
USE THINGLINK VIDEO

THINGLINK VIDEOUPLOADING VIDEOS
Click “CREATE” on the top bar
Enter the URL of the video you want to tag and click
“TAG THIS MEDIA”
Or upload from hard drive
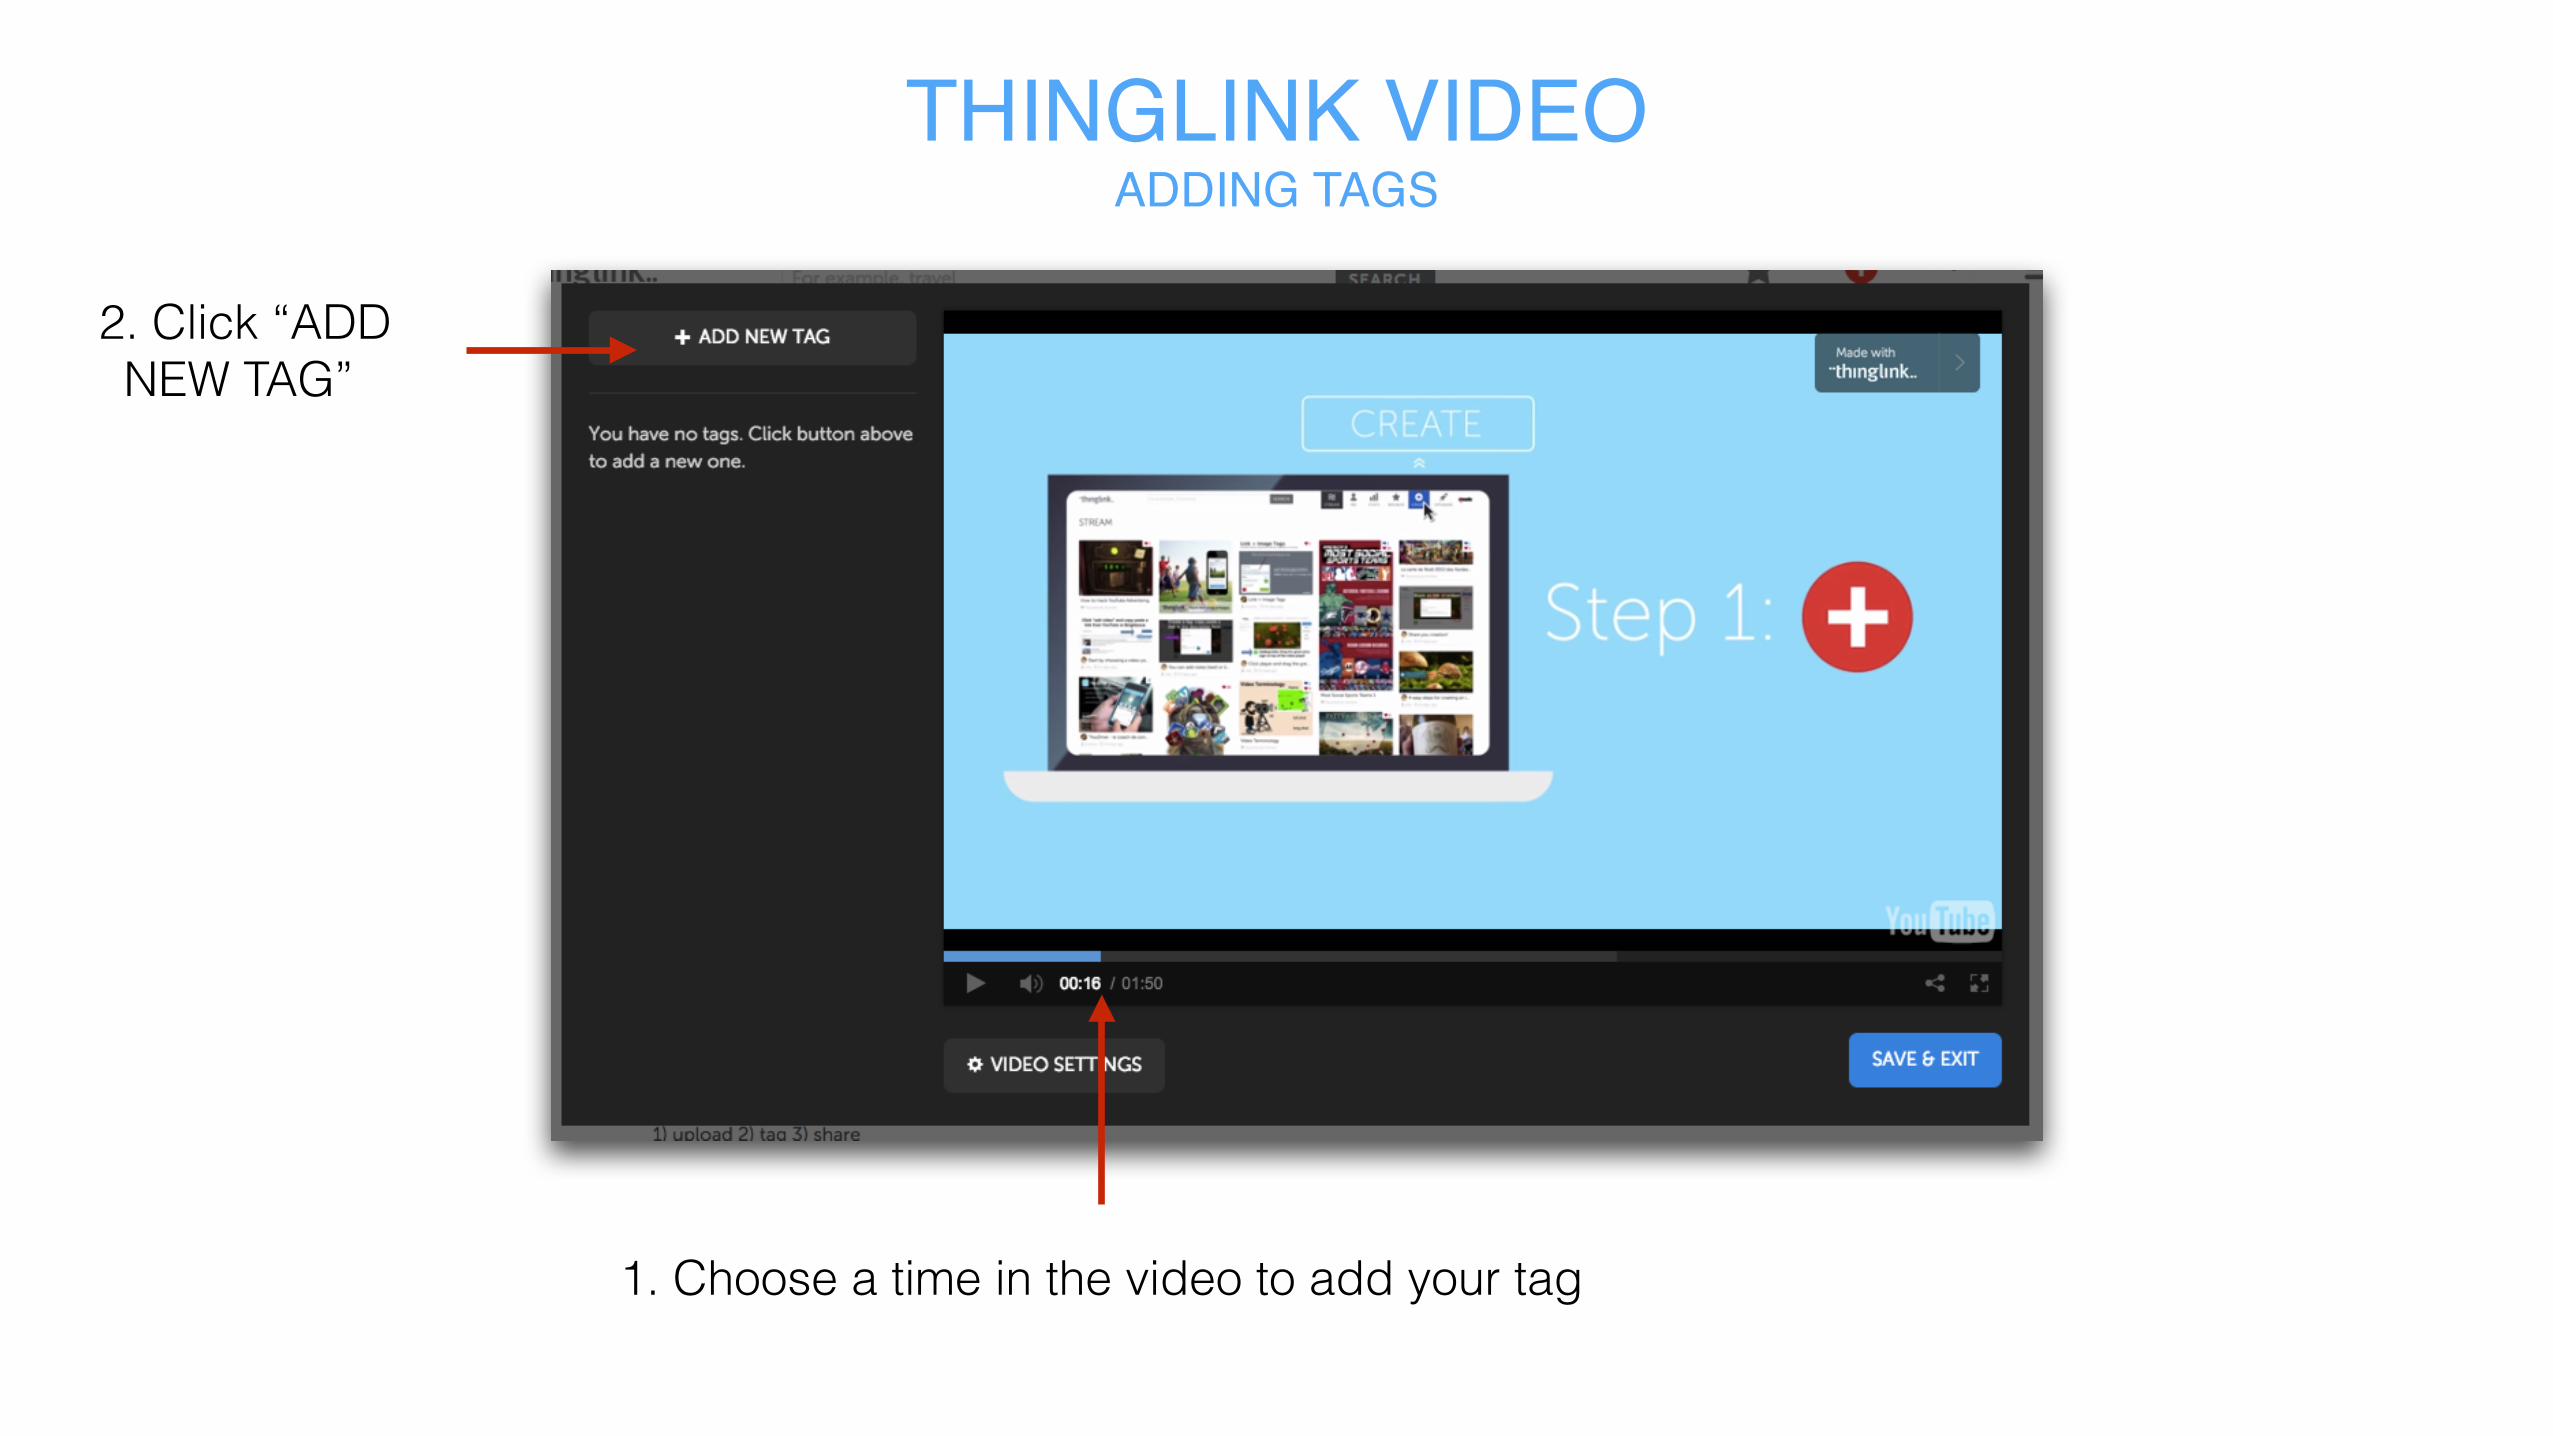
THINGLINK VIDEOADDING TAGS
1. Choose a time in the video to add your tag
2. Click “ADD NEW TAG”
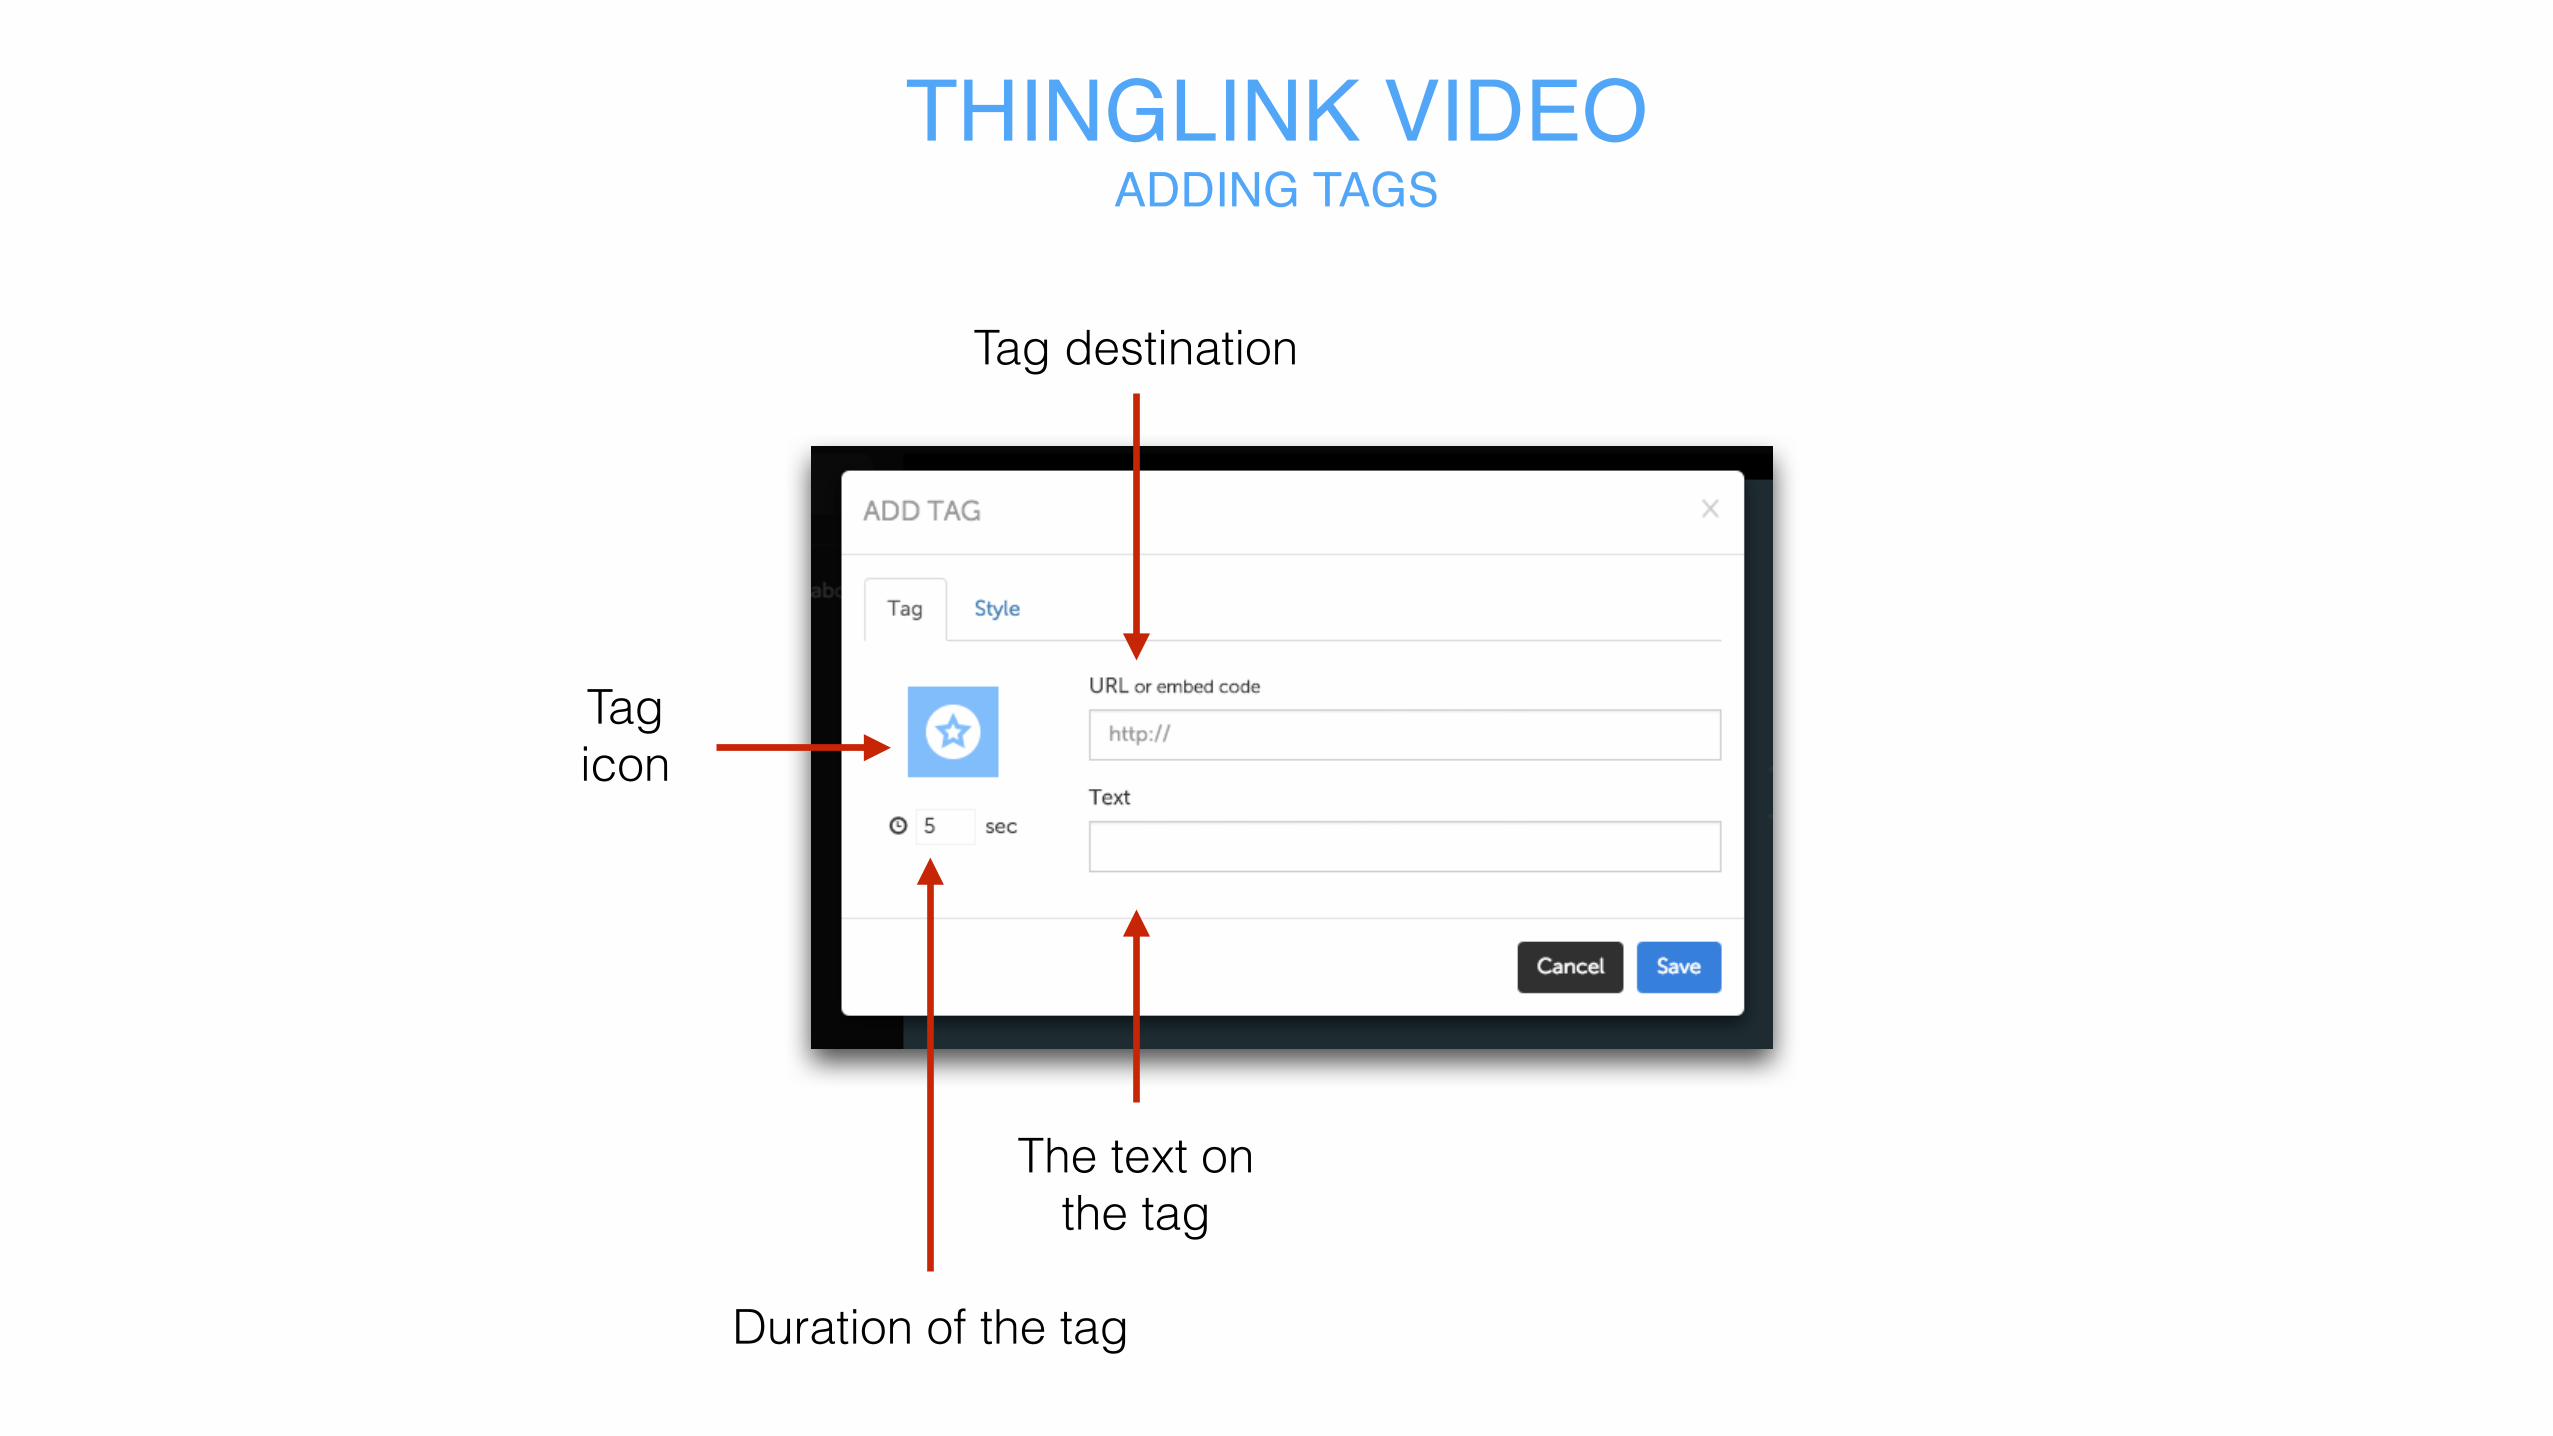
THINGLINK VIDEOADDING TAGS
The text on the tag
Duration of the tag
Tag icon
Tag destination

THINGLINK VIDEOADDING TAGS
Add extended content within
the popup
Select a photo within the popup
The inner title of the popup
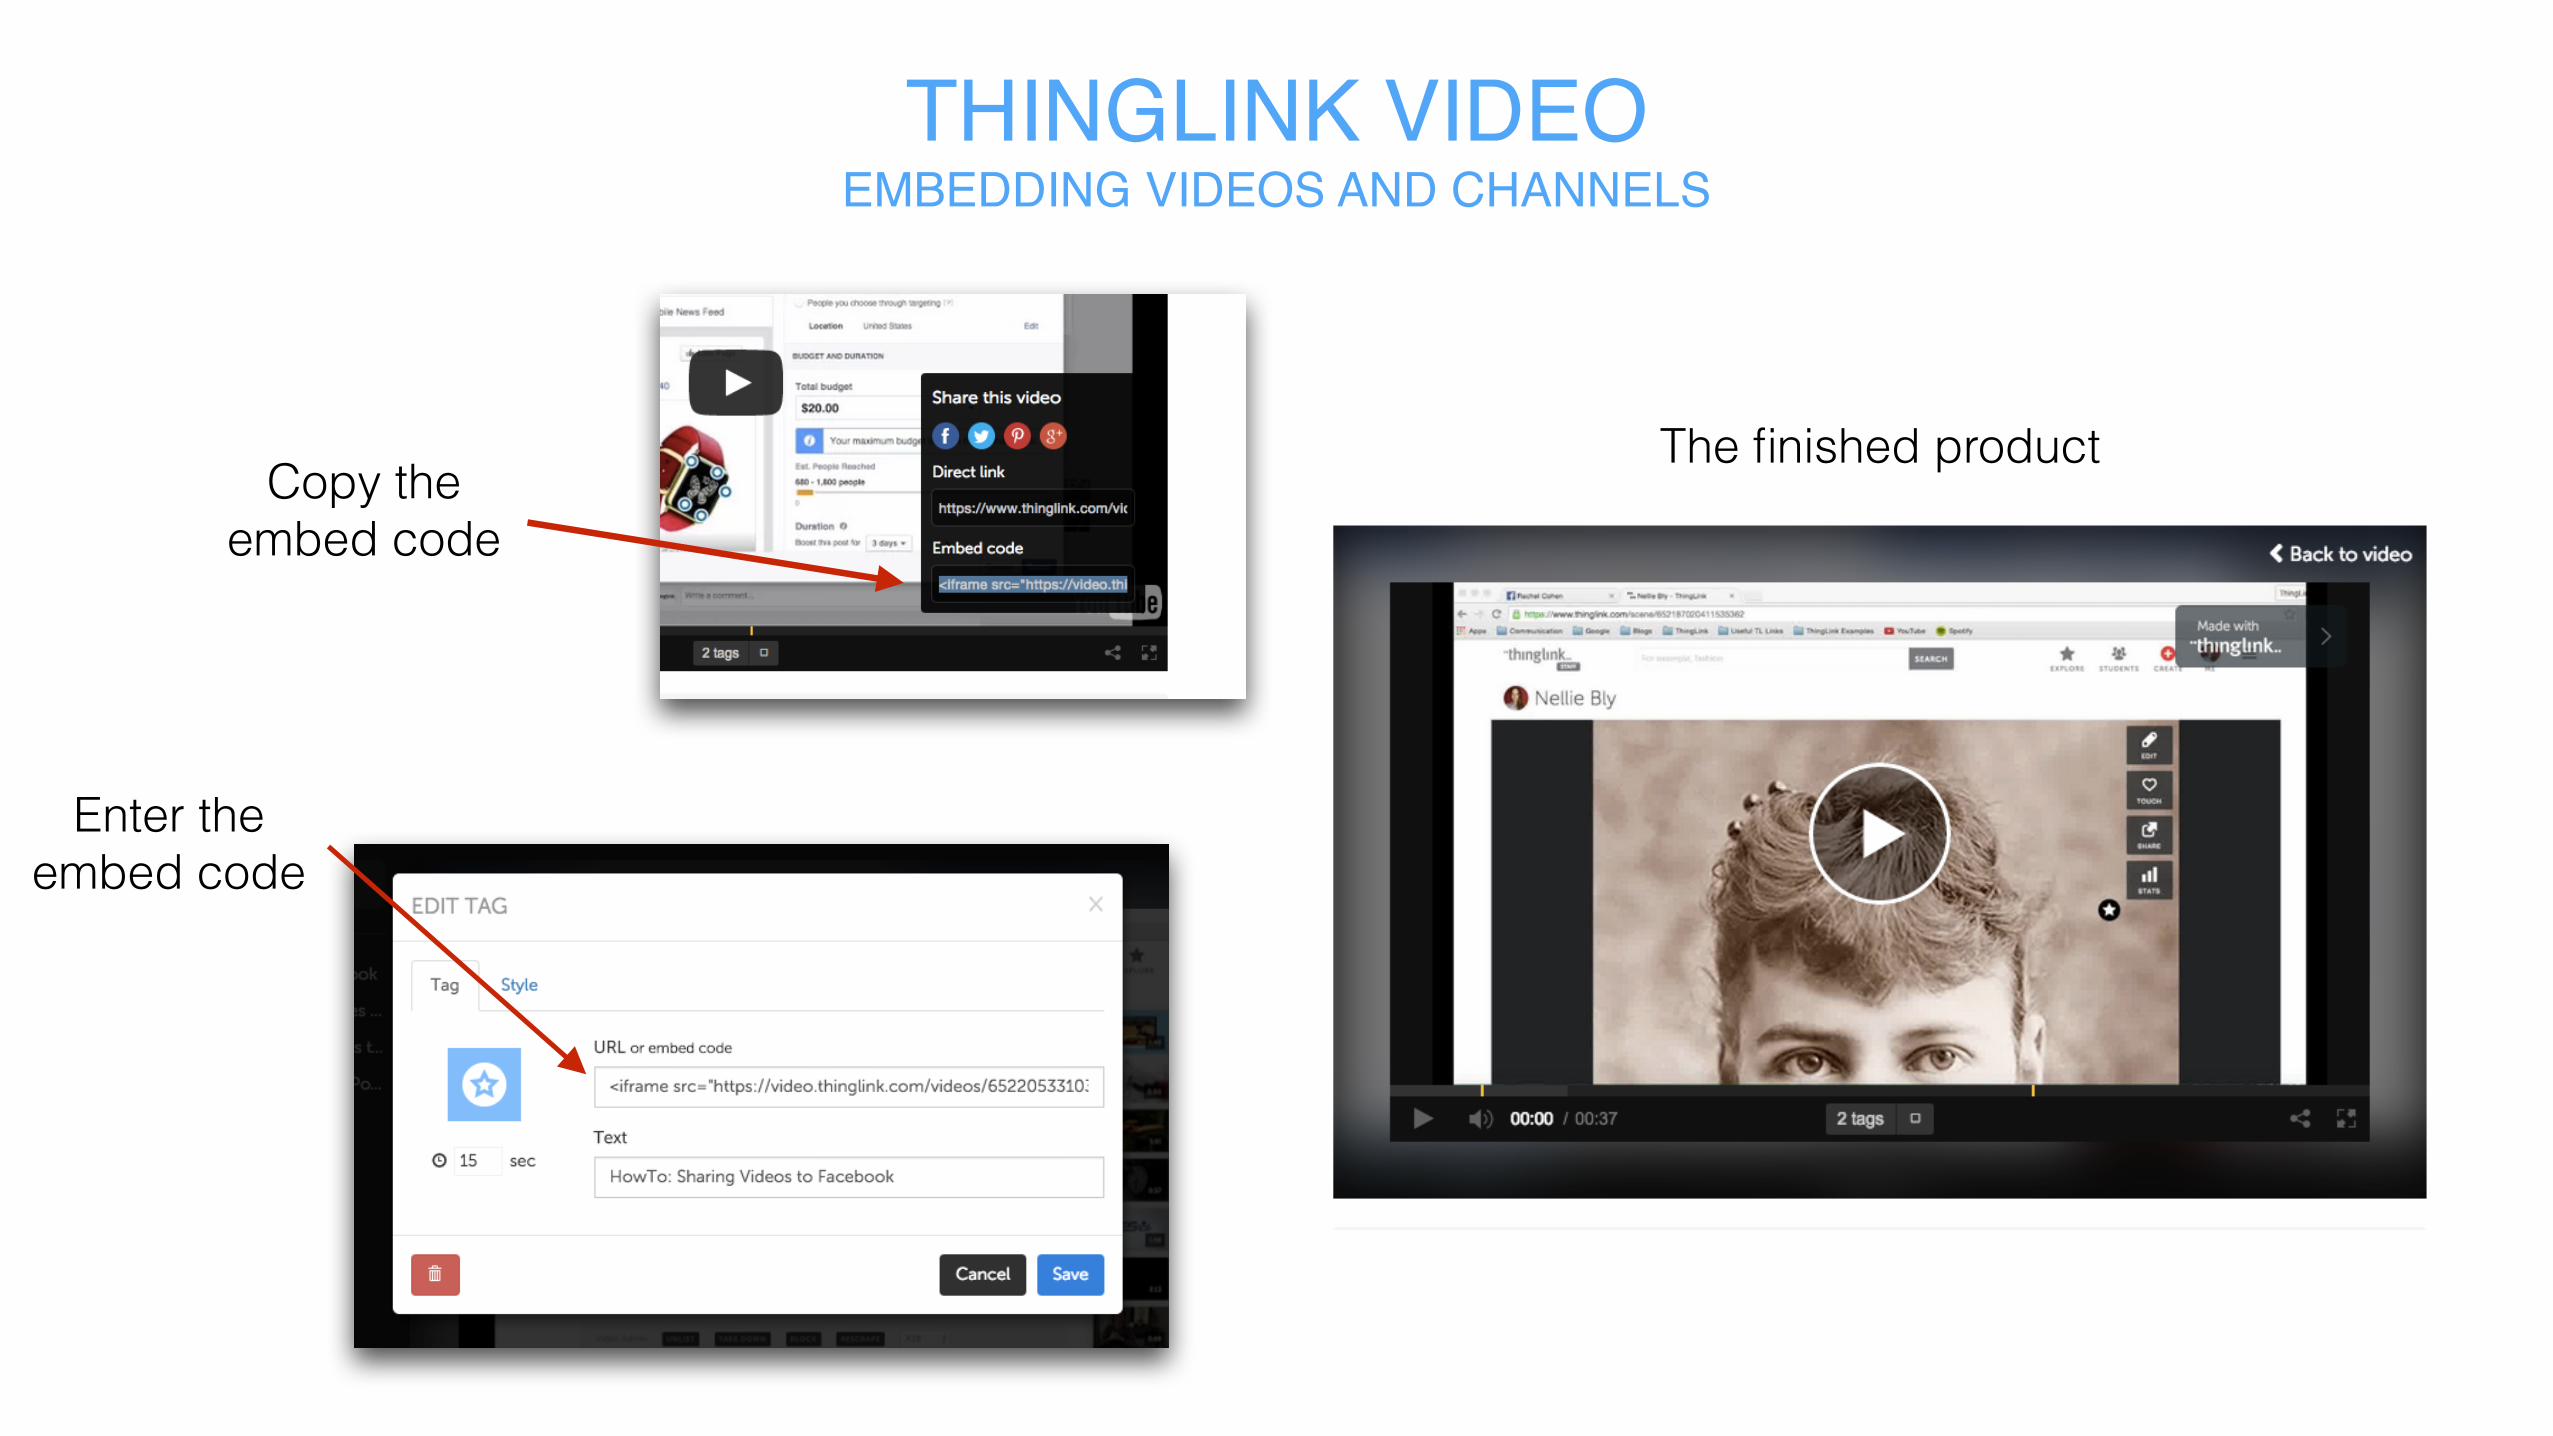
THINGLINK VIDEOEMBEDDING VIDEOS AND CHANNELS
Copy the embed code
Enter the embed code
The finished product
Related Documents