H A R V E S T — of the — M O N T H August & September Farm to ECE Toolkit Contents and Material List Peaches, Plums, & Pluots Please review the contents of your toolkit to confirm that you have all the necessary materials! Contents of the August & September toolkit include: Curriculum Parent Newsletters (to be distributed digitally) Materials provided: ___ A Fruit is A Suitcase for Seeds by Jean Richards ___ Harvest of the Month Photo Cards ___ Taste Test sheets ___ Bag(s) for mystery fruit activity ___ Question Card for Farmers Materials NOT provided in this kit: Plates, spoons, forks, napkins, etc. Art supplies (paint, paper, crayons, etc.) Speakers for playing music This publication was made possible by funding from the Idaho Department of Health and Welfare. Its contents are solely the responsibility of the authors and do not necessarily represent the official views of the IDHW.

Welcome message from author
This document is posted to help you gain knowledge. Please leave a comment to let me know what you think about it! Share it to your friends and learn new things together.
Transcript

H A R V E S T — of the — M O N T H
August & September Farm to ECE Toolkit Contents and Material
List Peaches, Plums, & Pluots
Please review the contents of your toolkit to confirm that you have all the necessary materials!
Contents of the August & September toolkit include: � Curriculum
� Parent Newsletters (to be distributed digitally)
Materials provided: � ___ A Fruit is A Suitcase for Seeds by Jean Richards
� ___ Harvest of the Month Photo Cards
� ___ Taste Test sheets
� ___ Bag(s) for mystery fruit activity
� ___ Question Card for Farmers
Materials NOT provided in this kit: � Plates, spoons, forks, napkins, etc.
� Art supplies (paint, paper, crayons, etc.)
� Speakers for playing music
This publication was made possible by funding from the Idaho Department of Health and Welfare. Its contents are solely the responsibility of the authors and do not necessarily represent the official views of the IDHW.

August/September Harvest: Peaches, Plums, Pluots (Week 1)
………………………………………………………………………………………………………………………………… Vocabulary: Fruit, seed, pit, plum, peach, pluot.
Introduction to Fruits1
1. Explain to the children that they will be
learning about fruits and how they grow. In the
springtime, people plant seeds in their gardens.
After the rain falls and the sun shines, the
seeds sprout. Soon, pretty flowers and
delicious, healthy fruits and vegetables begin to
grow.
2. Use the photo cards to show the students
some examples of seeds.
§ We eat the seeds of some foods such as
peas, cucumbers, and corn.
§ Strawberries have seeds on the outside,
and we eat those, too.
§ We do not eat the seeds in apples or melons.
§ What else can you think of that has seeds?
3. Read the book A Fruit is A Suitcase for Seeds. Ask discussion questions as the book is read:
§ Who has eaten a fruit before?
§ Which fruits are your favorite to eat?
§ Have you eaten a peach, plum, or pluot before? What did they taste like?
4. Can You Tell What’s Hiding? Make a Mystery Box or Bag: Put the one of each fruit in the bag and
ask the children to sit in a circle.
a. Send the bag around the circle and ask the children to feel inside the bag and describe what
they feel.
b. Give examples of description words such as sharp, soft, fuzzy, bumpy, heavy, light, etc., to
help them understand the kind of observations to share with you.
c. What shape is it? How does the outside of it feel? When everyone has had a turn, remove
the food and let them see it—then talk about the food—how it looks, feels, where it comes
from, etc. If possible, cut the fruit open and allow the children examine the insides. What
color is it? What does it smell like? What does it feel like? What does the seed look like?
d. Do not serve produce that has been handled. Instead, cut the fruits lengthwise to remove
the pits. The pits can be dried out on a sunny windowsill for Week 4’s activity.
1 Adapted from: Farm to Childcare (Institute for Agriculture and Trade Policy with New Horizons Academy), 89. Accessed July 2020. https://www.iatp.org/sites/default/files/2014_07_16_F2CC_Curriculum_f.pdf
Week 1 Learning Objectives: • Children are introduced to fruits.
• Children engage in group discussions and
activities and describe their experiences
with fruits.
• Children learn to recognize peaches,
plum, and plutos.
Materials: � Photo Cards
� A Fruit is A Suitcase for Seeds by Jean
Richards.
COVID-19 Adaptations: � Children should sit spaced apart from one
another.
� Have children wash hands before handling
the produce in the mystery bag.
� Provide children with their own individual
mystery bags.

August/September Harvest: Peaches, Plums, Pluots (Week 2)
……………………………………………………………………………………………………………………………………
Tasting Peaches, Plums, and Pluots2
1. Reserve 1-2 of each fruit for passing around the
classroom (do not serve the produce that has
been handled).
2. Before serving, wash the fruits thoroughly making
sure to remove any remaining leafy matter or
dirt.
3. Carefully cut the fruits along the edge of the pit,
making sure they do not roll as you begin cutting.
Cut the fruits into small, easily chewed cubes.
4. Give each child a tasting-size amount of each
fruit.
5. One at a time, lead the class in trying each variety
(all at once; you can say, “One, two, three, try it!”).
§ Which did the children enjoy trying the most?
§ Tally the vote. Which fruit was your classroom’s favorite?
§ Can they describe the taste (salty, sweet, spicy, etc.)?
6. When the children have finished their snack, prompt them to help clean up by putting their
paper products in the trash and/or wipe the table.
Students will rate how they felt about tasting the fruits on the Taste Test Sheets. Have students put
a sticker on either the “I Like This”, “I Don’t Like This Yet”, or “I Didn’t Try This Yet” columns of the
taste test sheet.
2 Adapted from: Growing Minds (ASAP Farm to Preschool), 182. Accessed April 2020. https://growing-minds.org/farm-to-preschool/
Week 2 Learning Objectives: • Children will work cooperatively to try
fruit.
• Children vote on which variety they
like better.
• Children taste and describe each fruit. Materials: � Plates, spoons, forks, napkins, etc.
� Taste test sheets and stickers.
COVID-19 Adaptations: � Children should sit spaced apart from
one another.
� Have children wash hands before and
after tasting the Harvest of the Month
food.

August/September Harvest: Plums, Peaches, Pluots (Week 3) ………………………………………………………………………………………………………………………………… Introduction to Farmers
1. Hang up pictures of this month’s farmers in a place visible to both children and parents.
2. Who are farmers? Farmers grow plants that we eat like apples, peppers, spinach, and beets and raise animals like chicken, cows, goats, and pigs. Explain that farmers grew the fruits the students tasted.
3. Sing the song “The Farmer Plants the Seeds” while moving your body. Adapted from Arlington VA Public Library: The Farmer Plants the Seeds. Follow along at: https://www.youtube.com/watch?v=g7OVWVR_R9Q. The Kiboomers have a slightly different version of the song as well: https://www.youtube.com/watch?v=cRhGOdqWIIo.
Verse 1
§ Lyric: The farmer plants the seeds. The farmer plants the seeds. High-ho a-cheerio, the farmer plants the seeds.
§ Movement: Hold out left hand in front of you with palm facing upwards. The right hand pinches as if grasping onto a small seed. Repeatedly “plant seeds” into your left palm as you sing. Verse 2
§ Lyric: The rain begins to fall. The rain begins to fall. High-ho a-cheerio, the rain begins to fall. § Movement: Raise both hands overhead to symbolize the rain. As the rain begins to fall, move your
hands downwards, fluttering your fingers. Verse 3
§ Lyric: The sun begins to shine. The sun begins to shine. High-ho a-cheerio, the sun begins to shine. § Movement: Form a “sun” by raising both arms, bent, overhead.
Verse 4
§ Lyric: The plants begin to grow. The plants begin to grow. High-ho a-cheerio, the plants begins to grow.
§ Movement: Lower both hands in front of you to symbolize growing plants. As the plants begin to grow, move your hands upwards, fluttering your fingers. Verse 5
§ Lyric: The buds all open up. The buds all open up. High-ho a-cheerio, the buds all open up. § Movement: Place hands in front of you, starting in pinched position. As the buds open up, open
hands. Verse 6
§ Lyric: The flowers smile at me. The flowers smile at me. High-ho a-cheerio, the flowers smile at me. § Movement: Wave both arms back and forth in front of you.
Students will rate how they felt about tasting the fruits on the Taste Test Sheets. Have students put
a sticker on either the “I Like This”, “I Don’t Like This Yet”, or “I Didn’t Try This Yet” columns of the
taste test sheet.
Week 3 Learning Objectives: • Children listen to and follow directions.
• Children learn about farmers.
• Children learn that movement and exercise
keep their bodies healthy and strong.
Materials: � Photo cards
� Speaker for music
COVID-19 Adaptations: � Sing the song in an open space or outdoors.
� Have children wear their masks while singing
indoors (like a superhero!)

August/September Harvest: Peaches, Plums, Pluots (Week 4)
……………………………………………………………………………………………………………………………………
Questions for Farmers3
1. Sit the children in a circle and show them
photos of the farmers again. Explain that
farmers grew the fruits we tasted this
month.
a. Use the saved pits to demonstrate how
peaches, plums, and pluots grow:
§ Pass around the peach and plum
pits
§ How are they different? How are
they the same?
b. Use the photo cards to describe how
peaches grow:
§ Pits protect the small seed inside.
Farmers plant the seeds in soil.
Soon, they sprout roots and leaves.
They grow into a large tree in a few
years. The peach tree blooms pink
flowers in the spring. Then peaches begin to grow on the branches.
§ Peaches grow larger and develop a soft fuzz on their skin.
§ Ask the students: Why do you think peaches have fuzz? The fuzz keeps the fruit dry when
it rains, like a raincoat, and protects the fruit from hungry bugs.
§ Soon, they are ripe enough to pick and eat!
2. Have the children create a list of 3 questions to ask their farmers. Save this list. Alleah will collect
the list from you to submit to our peach farmer!
3. Have the students taste test fruits following the activity.
Students will rate how they felt about tasting the fruits on the Taste Test Sheets. Have students put
a sticker on either the “I Like This”, “I Don’t Like This Yet”, or “I Didn’t Try This Yet” columns of the
taste test sheet.
3 Adapted from: Farm to Childcare (Institute for Agriculture and Trade Policy with New Horizons Academy), 89. Accessed July 2020. https://www.iatp.org/sites/default/files/2014_07_16_F2CC_Curriculum_f.pdf
Week 4 Learning Objectives: • Children compare and contrast the Harvest
of the Month fruits.
• Children learn how peaches, plums, and
pluots grow.
• Children develop questions to ask their local
farmer.
Materials: � Harvest of the Month Photo Cards
� Question Card for Farmers
COVID-19 Adaptations: � Children should sit spaced apart from one
another.
� Have children wash hands before and after
handling the pits and produce.
� Provide each child their own pit and fruit
instead of passing it around (if enough are
available).

August/September Harvest: Plums, Peaches, Pluots (Week 5) …………………………………………………………………………………………………………………………………… Mad (Plant) Scientist
1. Ask the students if they know what a pluot
is. Pluots are a cross between a plum and
an apricot.
§ They are 75% plum and 25% apricot
to be exact.
§ They have the smooth skin of a
plum but are sweeter than plums.
§ In Idaho, plums and pluots are
harvested in August and
September.
2. What are some other fruit hybrids? Here
are some fun examples:
§ Tangelos are a cross between tangerines and grapefruit.
§ Tangors are a cross between a mandarin and an orange.
§ Limequats are a cross between a lime and a kumquat.
3. Tell the children that they will become mad plant scientists today. Bring out a few paint colors
(preferably finger paints if you have them). Alternatively, construction paper, crayons, markers,
or other art supplies will be fine.
4. Demonstrate how pluots are combined using paint. Mix together purple (which can represent
the plum) and yellow and pink (which can represent the apricot) to create the color of a pluot.
5. Explain to the children: You are a mad plant scientist. Combine colors:
§ Red and yellow makes orange
§ Blue and yellow makes green
§ Red and blue makes violet
§ Create new colors/fruits, like the pluot. If paint is not available, use construction paper or
crayons to create new fruits (children can add a combination of stems, leaves, seeds,
flowers, etc.)
6. Have the children write their name on their new fruit painting/project to take home.
Week 5 Learning Objectives: • Children compare and contrast the Harvest
of the Month fruits.
• Children learn that pluots are a cross
between plums and apricots.
• Children learn about colors and how they are
combined to create new colors.
Materials: � Paint and paper.
COVID-19 Adaptations: � Children should sit spaced apart from one
another.
� Have children wash hands before and after
finger painting/crafting.

H A R V E S T
— of the — M O N T H
October Farm to ECE Toolkit Contents and Material List: Beets
Please review the contents of your toolkit to confirm that you have all the necessary materials.
Contents of the toolkit include: � Curriculum + materials (see material list below) � Parent Newsletters
Materials provided:
� ___ Copies of Tops & Bottoms by Janet Stevens � ___ Tops & Bottoms dice � ___ Harvest of the Month Photo Cards � ___ Taste Test sheets � ___“Colorful labels” stickers for taste testing
Materials NOT provided in this kit:
� Crayons or markers � Radio or speakers for playing music
This publication was made possible by HC198600 from the Idaho Department of Health and Welfare. Its contents are solely the responsibility of the authors and do not necessarily represent the official views of the IDHW.

October Harvest: Beets (Week 1) ………………………………………………………………………………………………………………………………… Vocabulary: Vegetables, plant, beet, healthy eating.
Introduction to Beets1 2
1. Tell children: this month we are learning about
beets. Show the students the Photo Cards of beets. Ask if anyone has tasted a beet. Ask children to describe how they ate it, and what it tasted like.
2. Read Tops and Bottoms.
a. Identify the vegetables that grow above the ground and those that grow below the ground.
b. Point out the beets. Talk about their color. Discuss about how beet roots grow underground, and beet leaves (or “greens”) grow above the ground. Did you know that beet greens are edible?
3. Using the Photo Cards, have children guess which
vegetables grow above ground and which vegetables grow below ground. Have them guess if we eat the top, middle, or bottom of the plant.
4. Talk to children about what makes fruits and vegetables part of a healthy diet. Talk about why it is
important to eat a “rainbow” of fruits and vegetables, because different colored fruits and vegetables have different vitamins and nutrients that make us strong.
§ Red/Orange – good for your heart § Purple/Blue – good for your brain § Green – good for your lungs § White – good for your bones § Yellow/Orange – good for your eyes
1 Grow Radish Grow (Georgia Organics, 2014), 2. Accessed September 2019. http://www.georgiaorganics.org/wp-content/uploads/2014/08/1-GO-PreK-Radish-Lesson-Plan.pdf 2 Beets Activity Plan (Portland: Harvest for Healthy Kids, Portland State University), 12. Accessed September 2019. https://www.harvestforhealthykids.org/
Week 1 Learning Objectives: • Children engage during the read-aloud
and book discussion. • Children learn that a vegetable is a type
of plant that we eat. • Children learn the importance of eating a
variety of fruits and vegetables. • Children learn that beets grow
underground. • Children learn that trying new foods can
be fun. Materials: � Tops and Bottoms by Janet Stevens � Harvest of the Month Photo Cards
COVID-19 Adaptations: � Children should sit spaced apart from one another. � Encourage children to wear their masks indoors.

October Harvest: Beets (Week 2) …………………………………………………………………………………………………………………………………… Tops & Bottoms Charades3 1. Before beginning this lesson, cut out, glue/tape, and
assemble the Tops & Bottoms dice. We recommend 1 set of dice for every 10 children.
2. Read Tops & Bottoms again by Janet Stevens. 3. Play the Tops & Bottoms Charade Game:
a. Separate children into 1 or 2 groups depending on the classroom size and preference.
b. Ask the children to raise their hands if they want to be a “farmer.” The farmer pantomimes a vegetable or the act of growing/harvesting/digging/eating that vegetable. The object of the game is for the other children to guess this vegetable correctly.
c. Have the children sit in a circle or semi-circle. The game begins with a “farmer” rolling all three dice. With help from an adult, the “farmer” chooses which of the vegetables to “harvest.” For example, he/she rolls all three dice and gets a Corn, a Beet, and a Carrot. He/she then decides which one they want to “harvest,” or in other words, pretend to pick.
d. The “farmer” pantomimes the action of growing, harvesting, digging, or eating that vegetable in front of the class.
e. The teacher will help the “farmer” and the audience by providing clues like “this vegetable grows underground” or “we eat the bottom part of this vegetable.”
f. On each dice there is a “Top,” “Bottom,” or “Middle” side. If a “farmer” rolls one of these, they can choose to make up a fruit or vegetable to act out. The teacher may help the student come up with ideas.
4. Incorporate beets into this day’s lunchtime or snack.
Students will rate how they felt about tasting the beets on the Taste Test Sheets. Have students put a sticker on either the “I Like This”, “I Don’t Like This Yet”, or “I Didn’t Try This Yet” columns of the taste test sheet.
3 Tops & Bottoms Dice Cutouts: Activity 26: Veggie Bunk (College Station: Vegetable in the Garden, Junior Master Gardener, Texas A&M Agrilife Extension), 127-129.
Week 2 Learning Objectives: • Children identify the different ways
vegetables grow and the different parts of the vegetables we eat.
• Students will learn how to express how vegetables are grown, harvested, and picked through dramatic play.
Materials: � Tops & Bottoms by Janet Stevens. � 1 or more sets of Tops & Bottoms dice.
COVID-19 Adaptations: � Children should sit spaced apart from one another. � Have children wash hands before and after handling the shared dice or have children make their own dice (the day before).

October Harvest: Beets (Week 3) ………………………………………………………………………………………………………………………………… Tasting Beets 1. Prepare beets in advance by washing carefully
and slicing raw beets into paper thin “chips.” Beets can also be roasted or microwaved. Beet greens are edible and can also be saved for the children to try.
2. Set aside 1 whole raw beet for later.
3. Review again with students how beets grow. Talk about how beet roots grow underground, and beet leaves (or "greens") grow above the ground. Explain that we eat the root. We can also eat the beet greens.
4. Pass around a whole raw beet so that children can touch, smell and feel the vegetable (do not serve this beet, we will use it again later).
5. Explain the children that a local farmer grew the beets they are about to try. What questions would they like to ask their local farmer about beet? Record children’s responses on the Question Card.
6. Have the class taste the beets. Sit family style and have students practice passing around plates and helping other students.
7. Depending on age and abilities, have students help set up the table and area for the taste test by wiping down the table with a cleaning and sanitizing solution, putting out the utensils, plates, and napkins.
Students will rate how they felt about tasting the beets on the Taste Test Sheets. Have students put a sticker on either the “I Like This”, “I Don’t Like This Yet”, or “I Didn’t Try This Yet” columns of the taste test sheet.
Week 3 Learning Objectives: • Taste beets together. • Continue to learn about how beets grow. • Solidify concept of “seed to table.” • Reinforce how vegetables are good for our
bodies. Materials: � Photo cards � Question Card for Farmers COVID-19 Adaptations: � Have children wash their hands before eating. � Children should sit spaced apart from one another.
Please note: Beets have natural
juices that may stain clothes and surfaces.

October Harvest: Beets (Week 4) ……………………………………………………………………………………………………………………………………
Dance to the Beet4 1. Warm up: To immediately engage children's
attention, have them begin by sitting crisscross in a circle. Have light relaxing music in the background that will add to the atmosphere of the classroom without being distracting.
2. Begin with small simple movements sitting
down: a. Have them sit very tall to straighten
their back. b. Have them take deep and slow breaths. c. Incorporate simple movements (turning their heads, looking up and down, blinking their
eyes, shrugging their shoulders, stretching to the ceiling, making funny faces, etc.). 3. The Itsy Bitsy Spider Dance:
a. Begin by sitting on the floor and do just the finger motions of the itsy-bitsy spider. Then have them stand and turn the song into larger movements.
b. "The itsy-bitsy spider went up the water spout (have them pretend to climb), c. Down came the rain (have them wiggle their fingers to make it rain), d. And washed the spider out (have them slide onto their belly on the floor), e. Out came the sun (have them put their arms up to make the sun), f. And dried up all the rain (fan face) g. And the itsy-bitsy spider crawled up the spout again (have them pretend to climb)
4. Repeat the dance faster and faster!
Students will rate how they felt about tasting the beets on the Taste Test Sheets. Have students put a sticker on either the “I Like This”, “I Don’t Like This Yet”, or “I Didn’t Try This Yet” columns of the taste test sheet.
4 Adapted from Creative Movement and Dance Lesson Ideas for Preschool Children. (Hobby Lark). Accessed September 2019. https://hobbylark.com/performing-arts/Creative-Movement-and-Dance-Lesson-Ideas-for-Preschool-children.
Week 4 Learning Objectives: • Children learn that movement and exercise
keep their bodies healthy and strong. • Develop listening skills. • Practice gross and fine motor skills. Materials: � Radio or speakers for playing music COVID-19 Adaptations: � Lead the movement activity outside if the weather permits.

H A R V E S T
— of the — M O N T H
November Farm to ECE Toolkit Contents and Material List: Winter Squash
Please review the contents of your toolkit to confirm that you have all the necessary materials.
Contents of the toolkit include: � Curriculum � Parent Newsletters (to be distributed digitally)
Materials provided:
� ___ Up, Down, and Around by Katherine Ayers � ___ Harvest of the Month Photo Cards � ___ Taste Test Sheets � ___ Farmer Question Card
Materials NOT provided in this kit:
� Bean bags or balls (optional) � Items of varying buoyancies (a rock, a ball, etc.) � Large bowl or bucket � Art supplies (paint, glue sticks, tape, etc.)

November Harvest: Winter Squash (Week 1)
………………………………………………………………………………………………………………………………… Vocabulary: The letter “S”, Squash, Seed, Vine.
Book and Discussion1
1. Tell children: “This month we will be learning
about winter squash.”
2. Ask if anyone has ever been to a pumpkin patch to pick out a pumpkin and take it home. Ask children what they did with the pumpkin. If they don’t mention eating the pumpkin, tell children that pumpkin is a type of winter squash, and we can eat pumpkin in soups, roasted, in pie and other ways. We can also roast and eat their seeds.
3. Read Up, Down and Around. Get the children
moving by putting the book to physical movements. When veggies grow “up” children reach arms high over heard. When veggies grow “down,” children reach down to the ground. When veggies grow around and around, children turn in a circle.
4. When you get to the pumpkin page, take some time to talk about how pumpkins are a type of winter squash (other types include acorn, spaghetti, butternut, hubbard, and more). All winter squash grow above ground on a vine, just like the pumpkins in the book. 5. Discuss the difference between summer and winter squash (summer squash, like zucchini, is picked in the summer and has a tender skin that we can eat. Winter squash is picked in the fall and has a thick, hard skin that we typically don’t eat). Ask children to try making a “thump” sound on the winter squash with their hands. 6. Point out other vegetables in the book that children have learned about so far (use Photo Cards from previous months as needed).
1 Winter Squash Activity Plan (Portland: Harvest for Healthy Kids, Portland State University), 4. Accessed October 2019. https://www.harvestforhealthykids.org/
Week 1 Learning Objectives: § Children learn how different vegetables
grow (e.g. above ground, under the soil, on a vine).
§ Children learn that winter squash (e.g. pumpkin) grows on a vine.
§ Children are able to name different kinds of squash (e.g. acorn, spaghetti, butternut)
§ Children learn that some squash are harvested in winter and some in summer.
Materials: � Photo Cards
COVID-19 Adaptations: � Children should sit spaced apart from one another.

November Harvest: Winter Squash (Week 2)
…………………………………………………………………………………………………………………………………… Tasting Experience2
1. Prepare by cutting in half lengthwise. Peel the outside skin if possible (see above for more details). Scoop out the seeds and fibrous material with a spoon. If the squash has been peeled, cube the flesh into 1 inch cubes. Squash can be roasted, microwaved, or boiled. Only the skin of a delicata squash can be eaten once cooked. Other squash skins are too tough to eat.
2. If baking, place in an oven safe dish or on baking
sheet, drizzle with olive oil, and bake at 400°F for 25 minutes or until tender.
3. If microwaving, place in a microwave safe dish with an inch of water. Cover the dish and microwave
on high for 5 to 10 minutes until tender.
4. If boiling, bring a large pot of water on the stove to a boil. Place the cut pieces of squash carefully into the pot, bring it back to a boil, and then lower it to a hard simmer. Cook the squash until fork-tender, about 7 to 10 minutes. Drain the water and let the squash cool.
5. Serve by either mashing it like mashed potatoes, cutting it into small cubes for the children to try, or
puréeing it with a little oil.
6. Review again with students how squash grow. Talk about how squash grow above ground on a vine. The rinds make a “thunk thunk” sound when we knock on them. We cut the squash from the vine and eat the inside.
7. Have the class taste the squash. Sit family style and have students practice passing around plates and
helping other students.
8. Depending on age and abilities, have students help set up the table and area for the taste test by wiping down the table with a cleaning and sanitizing solution, putting out the utensils, plates, and napkins.
Students will rate how they felt about tasting winter squash on the Taste Test Sheets. Have students put a sticker on either the “I Like This”, “I Don’t Like This Yet”, or “I Didn’t Try This Yet” columns of the taste test sheet.
2 Adapted from How Do Winter Squash Grow? (Portland: Harvest for Healthy Kids, Portland State University), 4. Accessed October 2019. https://www.harvestforhealthykids.org/
Week 2 Learning Objectives: § Taste winter squash. § Continue to learn about how squash
grow. § Solidify concept of “seed to table.” § Reinforce how vegetables are good for
our bodies. Materials: � Winter squash � Knife (for adult use only) � Potato peeler (if needed) � Baking or microwave dish � Plates, forks, napkins, etc. � Taste test sheets and stickers. COVID-19 Adaptations: � Children should sit spaced apart from one another. � Have children wash hands before handling objects that are passed around.
Please note: Winter squash has tough skin that is difficult to cut through. Use a pumpkin carving knife, if possible. Place on a damp dishtowel to reduce rolling. Cooking suggestions: Bake, microwave, or boil butternut squash, delicata squash, and kabocha squash. Halve lengthwise and bake/microwave acorn squash, pumpkins, and spaghetti squash (leave skin on). Bake hubbard squash (leave skin on).

November Harvest: Winter Squash (Week 3) ………………………………………………………………………………………………………………………………… Investigating Seeds3 1. Gather the children in circle time. Tell the
children: “Today we will be exploring winter squash!” Take out the 3-4 kinds of winter squash and name them for the children.
2. Have the children describe the squash and
guess the color of the seeds inside. Have children guess which squash will have the most seeds.
3. Wash winter squash and cut in half (children
can take turns washing squash; teachers cut squash in half, being careful to stabilize the squash so it doesn't roll. Placing it on a damp towel on top of a cutting board works nicely).
4. Show the children the inside of each squash.
Ask children to note the color of the seeds. Give the children a piece of the squash and have them take turns scooping out seeds. Ask children to describe the color, texture, and smell of the squash and seeds.
5. Rinse the seeds in a colander and return to table. Have children make piles of the seeds from each
squash. Which squash has the biggest pile of seeds?
6. Use other questions to direct children's explorations, like: § What colors are the squash? § Which squash is the biggest? The smallest? Which is the fattest? Which is the longest? § How does the squash feel? (Smooth, bumpy, hard...) § What does the squash look like inside? What does the squash feel like inside? What color are
the seeds? § Which squash has the most seeds? Which seeds are the biggest? § How are the squash seeds the same or different?
7. Bake, boil, or microwave squash (or have cooked squash prepared in advance)
Students will rate how they felt about tasting winter squash on the Taste Test Sheets. Have students put a sticker on either the “I Like This”, “I Don’t Like This Yet”, or “I Didn’t Try This Yet” columns of the taste test sheet.
3 Winter Squash Activity Plan (Portland: Harvest for Healthy Kids, Portland State University), 10. Accessed October 2019. https://www.harvestforhealthykids.org/.
Week 3 Learning Objectives: § Children explore seeds for different kinds of
squash and learn that seeds come in different shapes and sizes.
§ Practice fine motor skills. § Children describe the feel, smell, taste, color
of winter squash and squash seeds. § Children use scientific inquiry skills to
predict, observe, describe and compare. Materials: � Bin or bucket of water for washing squash. � Spoon and a pumpkin carving knife. � Magnifying glasses & measuring tape (if available). � Taste test sheets and stickers. COVID-19 Adaptations: � Have children wash their hands prior to touching shared materials.

November Harvest: Winter Squash (Week 4) …………………………………………………………………………………………………………………………………… This activity can be completed in the morning or as a mid-day break. Studies have shown that physical activity breaks increase student concentration and attentiveness throughout the day. Creative Movement4 5 1. Explain that as a class you will review the lifecycle of a squash. A lifecycle is the stages a plant or
animal goes though as they grow up. People begin as babies, then grow into children, and eventually become adults—that is our lifecycle.
2. Use Harvest of the Month Photo Cards to show the life stages of squash.
3. Name each of the stages in order—seeds,
seedlings, flowers, and squash. 4. If possible have at least one adult model the
movement: • Ask the students to crouch down into a ball
to become tiny “seeds.” • Pretend to spray them with water. • Have them begin to sprout by slowly stretching their legs. • Tell them to reach their face to the sun to grow strong. • Make their legs and feet firm to make strong roots. • Grow vines by wiggling their arms in front of them. • Slowly stretch their arms up with their fists closed. • Slowly open their “flowers” (hands) to create fruits. • The fruit drops its seed. • They plop back down and start the process over. • You can also incorporate a slide whistle as they “grow”
Students will rate how they felt about tasting winter squash on the Taste Test Sheets. Have students put a sticker on either the “I Like This”, “I Don’t Like This Yet”, or “I Didn’t Try This Yet” columns of the taste test sheet.
4 Adapted from Farm to Preschool Harvest of the Month Curriculum Week 2: Tomatoes Grow On A Vine. (Urban & Environmental Policy Institute), 7. Accessed October 2019. http://www.farmtopreschool.org/documents/Farm2PreschoolYear2.pdf 5 Adapted from Farm to Preschool Harvest of the Month Curriculum Optional Supplemental Lessons. (Urban & Environmental Policy Institute), 12. Accessed October 2019. http://www.farmtopreschool.org/documents/Farm2PreschoolYear2.pdf
Week 4 Learning Objectives: § Continue to learn about how squash grow. § Understand that a squash plant grows from a
squash seed. § Be able to describe the lifecycle of a squash. § Develop listening skills. § Practice gross and fine motor skills. Materials: � Harvest of the Month Photo Cards to illustrate squash lifecycle. COVID-19 Adaptations: � Have children wear masks when exercising indoors. � Have children exercise outdoors.

H A R V E S T
— of the — M O N T H
December Farm to ECE Toolkit Contents and Material List: Potatoes
Please review the contents of your toolkit to confirm that you have all the necessary materials.
Contents of the toolkit include: � Curriculum � Parent Newsletters (to be distributed digitally)
Materials provided:
� ___ Two Old Potatoes and Me by John Coy � ___ Harvest of the Month Photo Cards � ___ Taste Test Sheet(s) � ___ Poster paper for “Healthy Food Chart”
Materials NOT provided in this kit:
� Bean bags � Tasting experience supplies (plates, forks, baking sheet, etc.) � Cookie cutters � Arts and crafts supplies (crayons, paper, paint, etc.) � Clear cup, glass, or jar � Toothpicks or wooden craft sticks

December Harvest: Potatoes (Week 1)
………………………………………………………………………………………………………………………………… Vocabulary: The letter “P”, Potato, Sweet Potato, Sprout. Book and Discussion 1
1. Tell children that this month we will be learning
about potatoes.
2. Pass around potatoes before reading the story or while you are reading. Tell children to feel and smell the potatoes. Ask the children: How are they the same or different?
3. Read Two Old Potatoes and Me. Talk about how
potatoes are vegetables. Talk about how fruits and vegetables are healthy foods. These foods keep us healthy and strong. While you are reading, ask children questions like:
• Have you ever tried a potato or sweet potato? What
does it taste like? • How do sweet potatoes grow? How do potatoes
grow? (Both grow underground.)
4. Make a healthy foods chart with the children (see Figure 1). Ask children to name some healthy “Always” foods that they like to eat (e.g. fruits and vegetables). Ask the children to name some "Sometimes" foods - foods that are less healthy (e.g. french fries, pizza, etc.). Ask the children to name some “Special occasions” foods- foods that are the least healthy and an occasional treat (e.g. candy, cookies, etc.).
1 Adapted from: Potatoes and Sweet Potatoes Activity Plan (Portland: Harvest for Healthy Kids, Portland State University), 4. Accessed November 2019. https://www.harvestforhealthykids.org/
Week 1 Learning Objectives: § Children learn that fruits and vegetables
are part of a healthy diet. § Children learn that potatoes and sweet
potatoes are vegetables and healthy foods.
§ Children describe other different ways to stay strong and healthy (eat healthy foods, play outside).
Materials: � Two Old Potatoes and Me by John Coy � Harvest of the Month Photo Cards � Poster board for Healthy Food Chart COVID-19 Adaptations: � Children should sit spaced apart from one another.
Figure 1: Example of a Healthy Food Chart. Yours may look different.

December Harvest: Potatoes (Week 2)
…………………………………………………………………………………………………………………………………… Tasting Experience 2 1. Children may be more likely to try new fruits and
vegetables if they can touch and see the fruit or vegetable before it is cooked. When potatoes are served, try to have a few raw, whole sweet potatoes and potatoes on hand to pass around the tables. Talk with children about how whole potatoes like these were cut up/mashed/roasted by the cooks, so that children and teachers can have delicious, healthy food to eat!
2. Boil, roast, or bake a few potatoes for the children to
try. Cook potatoes until tender. 3. Give children spoons and forks to explore the texture of
cooked sweet potatoes and cooked potatoes, if desired. Children can mash potatoes, spoon potatoes out of skins, rake potatoes with a fork.
4. When children are trying potatoes during mealtime, ask them questions, like: § What do they taste like? Are they soft?
Crunchy? Sweet? Salty? § Does anyone have a garden? What do you
grow in your garden? § Has anyone tried to grow a sweet potato?
What about a potato plant? (Later in the month, you can try a potato growing activity in the classroom.)
§ How do sweet potatoes and potatoes grow? (They grow underground.)
§ What part of a plant are sweet potatoes and potatoes? (The roots.)
Students will rate how they felt about tasting potatoes on the Taste Test Sheets. Have students put a sticker on either the “I Like This”, “I Don’t Like This Yet”, or “I Didn’t Try This Yet” columns of the taste test sheet.
2 Adapted from: Meal Time Ideas (Portland: Harvest for Healthy Kids, Portland State University), 11. Accessed November 2019. https://www.harvestforhealthykids.org/
Week 2 Learning Objectives: § Taste potatoes. § Continue to learn about how potatoes
grow. § Reinforce the idea that vegetables are
good for our bodies. Materials: � Large saucepan or baking sheet � Plates, spoons, forks, napkins, etc. � Taste test sheets and stickers. COVID-19 Adaptations: � Children should sit spaced apart from one another. � Have children wash hands before handling objects that are passed around.
Ideas for Cooking Potatoes (Easy) Scrub potatoes clean. Cut into large, evenly sized cubes. Next, you have a few options: • Boil: Transfer the potatoes to a saucepan
and cover with water. Bring water to a boil. Once boiling, reduce to simmer. Most potatoes will be cooked in 10-20 minutes. Season and serve as is or mash into mashed potatoes.
• Roast: Preheat oven to 425°F. Toss
potatoes in olive oil (and seasonings if desired). Place on a baking sheet and bake for 30-35 minutes until tender.

December Harvest: Potatoes (Week 3)
………………………………………………………………………………………………………………………………… Potato Stamp Holiday Cards 3 1. “Potato Stamp” Preparation:
a. Day 1: Cut a few potatoes in half and set aside to dry overnight. Print results are better using air-dried potatoes rather than freshly cut ones.
b. Day 2: Press a small cookie cutter into half a potato. Cut out the shape around the cookie cutter to create a potato stamp. See Figure 1.
2. Tell the children that they will make holiday cards
for the people they love. 3. Mix together different color paints on paper
plates. 4. Have the children take turns selecting the shape
and color they want to use for their card. Help the children stamp the shape onto paper.
5. Children can use crayons, markers,
finger paint, pipe cleaners, cotton balls, glue and other materials to help create a colorful and special holiday card. Encourage them to draw some of the vegetables they have already learned about (peaches, beets, winter squash, and potatoes) or to draw their favorite holiday meal or memory.
6. Allow their artwork to dry before
taking home. 7. Have the students test taste
potatoes on this day.
Students will rate how they felt about tasting potatoes on the Taste Test Sheets. Have students put a sticker on either the “I Like This”, “I Don’t Like This Yet”, or “I Didn’t Try This Yet” columns of the taste test sheet.
3 Winter Squash Activity Plan (Portland: Harvest for Healthy Kids, Portland State University), 10. Accessed October 2019. https://www.harvestforhealthykids.org/.
Week 3 Learning Objectives: § Children learn the printing process by using
familiar objects in different ways. § Children learn to express themselves and
manage their feelings. § Children explore color, shape, pattern, and
variety. Materials: � Potatoes (1-3) � Cookie cutters— holiday shapes � Water soluble paints � Plates or paper plates � Construction paper or card stock � Arts and crafts materials � Taste test sheets and stickers COVID-19 Adaptations: � Have a grown up stamp the shapes to avoid sharing the potato stamp.
Figure 2: Creating Potato Stamps.

December Harvest: Potatoes (Week 4)
…………………………………………………………………………………………………………………………………… Hot Potato! 4 Remind children that potatoes come in all sizes, shapes, and colors. Use the Photo Cards to re-illustrate this point. Play Hot Potato!:
§ Designate an object like a ball or bean bag to be a “potato.”
§ Have the students sit in a large circle. § Play music while one of the “potatoes” is
passed around. § When the music is stopped, the student
with the potato tells the class what their favorite thing to do in the winter is.
§ Switch the potato being passed and continue the game until all children have had a turn to share their favorite activities.
Easy Activity: Grow a Potato In a Cup 5
1. Tell the children that they will be growing a potato plant in the classroom like the little girl in Two Old Potatoes and Me.
2. Stick four toothpicks into the sides of a potato/sweet potato,
arranging them so they stick out all around the middle.
3. Insert the wide end of the potato into the clear cup so the toothpicks rest on the rim of the cup (suspending the potato from the bottom of the cup). See Figure 2.
4. Add enough water to the cup to cover just the bottom of the
potato.
5. Place the cup with the water and potato in a dark, cool place. Leave it there for 1 – 2 weeks to allow the eyes and sprouts to grow.
6. Put the potato in the cup near a sunny window. You should see shoots and growing roots. Allow the
potato to continue growing, adding water when needed, or transplant to soil when you like. Students will rate how they felt about tasting potatoes on the Taste Test Sheets. Have students put a sticker on either the “I Like This”, “I Don’t Like This Yet”, or “I Didn’t Try This Yet” columns of the taste test sheet.
4 Adapted from Farm to Preschool Harvest of the Month Curriculum Year 2: Extending the Learning Experience. (Urban & Environmental Policy Institute), 24. Accessed November 2019. http://www.farmtopreschool.org/documents/Farm2PreschoolYear2.pdf 5 Adapted from How to Grow A Potato in Water for A Science Project. Pendleton, C. (Sciencing.com). Accessed November 2019. https://sciencing.com/grow-potato-water-science-project-6239373.html
Week 4 Learning Objectives: § Develop listening skills. § Practice gross and fine motor skills. § Children predict, observe, and discuss as
they watch how potatoes grow. Materials: � Harvest of the Month Photo Cards � Bean bags � Taste test sheets and stickers COVID-19 Adaptations: � Have children wear masks when exercising indoors. � Have children exercise outdoors.
Materials: � Clear cup, glass, or jar � Toothpicks or wooden craft sticks
Figure 3: Potato suspended with toothpicks.

H A R V E S T
— of the — M O N T H
January Farm to ECE Toolkit Contents and Material List: Dry Beans
Please review the contents of your toolkit to confirm that you have all the necessary materials.
Contents of the toolkit include: � Curriculum � Parent Newsletters (to be distributed digitally)
Materials provided:
� ___ Copies of One Bean by Anne Rockwell � ___ Pack(s) of “Lifecycle Cards” � ___ Taste Test sheets � Paper towels squares � Zip-up Sandwich Bags (for bean sprout activity and for sharing left-over beans with families)
Materials NOT provided in this kit:
� Plates or serving utensils
This publication was made possible by funding from the Idaho Department of Health and Welfare. Its contents are solely the responsibility of the authors and do not necessarily represent the official views of the IDHW.

January Harvest: Dry Beans (Week 1)
………………………………………………………………………………………………………………………………… Vocabulary: Vocabulary: Beans, stalk, sprout, bean pods. Read Aloud and Book Discussion1 1. Tell children: Today we are going to read a book
about planting beans. Does anyone have a garden at home or in their community? Has anyone planted or sprouted beans?
2. Read One Bean. While you are reading, ask
questions, like: a. Has anyone tasted beans? What do they
taste like? b. Has anyone ever seen a bean plant, or bean
sprouts? Has anyone ever taken beans out of pods?
c. How do beans grow? (beans are planted underground, and grow bean stalks that grow flowers and bean pods above ground)
d. You can break up the story over multiple days, or connect the story with your own classroom bean activities, like sensory exploration with dirt, or a bean sprouting activity!
3. Review with children the lifecycle of beans using the
Lifecycle Photo Cards: 1. Beans are planted on a farm. They sprout from a
single bean seed. 2. Bean plants grow throughout the summer,
growing flowers and bean pods where the bean seeds develop (Figure 1).
3. In the fall, hot weather dries out the pod and turns them brown. The seeds dry out and are ready to be picked.
4. Farmers use tractors to harvest the beans. The machines sort the bean seeds from the rest of the bean plant.
5. Beans are dried and cleaned. Beans are stored in large crates and storehouses until they are packaged. We can buy beans that are dried or canned.
6. Dry beans that are brought to a food processor or cannery are soaked in water and mixed with salt. They are cooked in cans which we buy at the grocery store.
1 Adapted from: Beans Activity Plan (Portland: Harvest for Healthy Kids, Portland State University), 4. Accessed December 2019. https://www.harvestforhealthykids.org/
Week 1 Learning Objectives: • Children learn that fruits and vegetables
are part of a healthy diet. • Children learn that beans are seeds and
are a healthy food. • Children describe other different ways to
stay strong and healthy (eat healthy foods, play outside).
Materials: � One Bean by Anne Rockwell � Lifecycle Photo Cards COVID-19 Adaptations: � Seat children spaced apart during book read aloud.
Figure 1. How Beans Grow: Beans can grow in two ways. On farms and in gardens, people grow pole beans or bush beans. Which do you think is the pole bean plant? Which do you think is the bush bean plant?

January Harvest: Dry Beans (Week 2)
…………………………………………………………………………………………………………………………………… Germinating Beans Experiment: Part 1 Vocabulary: Sprout, seed, predict, observe.
Germinating beans in a bag is a fun way for kids to observe how seeds transform into plants. Beans do not need soil to start germinating, so you can place them in a sunny window, and they will start sprouting right away. This allows children to watch how seeds sprout, which is a process normally hidden by dirt. There is a lot to learn in this experiment, yet it is so simple to do! 1. Before beginning the experiment, “wake up” the
beans by soaking them overnight and rinsing. Use about dry beans from each of the provided varieties (Red beans, Black beans, and Pinto).
2. The next day, tell the children that they will be sprouting bean seeds and watching them grow in the next few weeks. They will make a science notebook to record their observations. Ask the children: what do they predict will happen?
3. To begin the experiment, label 3 plastic bags: Pinto, Black, and Red. Have students dampen 3 paper
towels in water (they should be moist, not dripping) and fold each into 3 bags. 4. Ask the students to sort the beans by type (Red beans, Black beans, and Pinto). Students will place 5-
10 beans in each bag, making sure that they touch the moist towel. 5. Place the bags near a window, or tape to the glass (Figure 2). Make sure the bags are visible on the
side of the window that the children will be observing from. If paper towels seem dry after a day or two, re-moisten with a spray bottle, or take paper towels out and resoak.
6. The next activities should be conducted in the few days to follow as the seeds should begin sprouting in a day or two. Within 3 days to a week, the seeds will be fully sprouted. Leaves will start to emerge and then they will be ready to move to soil. Further lesson ideas are offered in Part 2 and Part 3.
Week 2 Learning Objectives: • Children will work cooperatively to
predict, observe, and discuss.
Materials: � Plastic bags � Dampened towel � 2-3 varieties of beans COVID-19 Adaptations: � Children should sit spaced apart from one another. � Have children wash their hands prior to handling shared items.
Figure 2. Place bags near window. Source: Life Over Cs.
Tip: Don’t forget to label the bags! Children will compare the seed types as they grow over time. Writing the date your class started may also be helpful.
Pinto Beans Jan 10

January Harvest: Dry Beans (Week 3) ………………………………………………………………………………………………………………………………… Germinating Beans Experiment: Part 2 1. For best results, conduct this activity in the day
or two following Part 1.
2. Make the Bean Observation Journals. a. Take a piece of colored construction
paper and fold it in half horizontally, hamburger-style. This will be the journal’s cover. Children can decorate their own journals after they are assembled.
b. Fold the Seed Observation Journal Sheet similarly, along the dotted line.
c. Place the colored paper outside the white paper to create the journal.
d. Staple twice along the fold to create a binding.
e. Repeat until each student has their own Seed Observation Journal. 3. Have children write their name on the front of the journal. They can choose to decorate the covers
as they would like.
4. Tell the children that they will be recording the bean seed’s growth in their Seed Observation Journal. They will observe the sprouting process.
5. On the space for Day 1, have the children draw the beans. Every day after, have the children record
each seeds’ germination. a. Write the date that the seeds were “planted”. b. Write the Day # in the provided space. c. Have children draw the growth of the sprout in the provided table on the Seed Observation
Sheet.
6. As the seeds begin to sprout, children should continue to record their growth in their Seed Observation Journals.
a. Questions to ask throughout the experiment: b. Compare how the different types of beans grow. How are they similar? How are they
different? c. What do seeds need to grow? They need sunshine, air, water, and eventually, soil. d. What happens if we did the same experiment but put one bag in the window and the other
in a dark closet?
Week 3 Learning Objectives: • Children will work cooperatively to predict,
observe, and discuss. • Children learn that removing water from
fruit changes how it looks, tastes, and feels. Materials: � Construction paper � Seed Observation Journal Sheet � Staples and stapler � OPTIONAL: Arts and crafts supplies for decorating the cover
COVID-19 Adaptations: � Have children wash their hands prior to handling shared items.

January Harvest: Dry Beans (Week 4)
…………………………………………………………………………………………………………………………………… Dried, Sprouted, Cooked, and More!2 1. OPTIONAL: Cook dry beans using the
instructions below. This step is optional.
2. Using remaining dry beans, put out the different beans for children (on the sensory table, or elsewhere) to explore and compare the different sizes and shapes.
3. Identify the different beans the children will
see today. Use the Photo Cards for reference.
4. Ask children to describe how the beans are the same or different. Are they all the same size? Are they the same color? Do they have different textures? 5. Have children compare the sprouted beans, the dry beans, and the (optional) cooked beans. 6. Ask children to describe how they are different. Where are the sprouts coming from? Describe how beans are seeds, and the sprouts come from watering the seeds to get them to grow. What else do seeds need to grow? (They need water, sunlight, air, and soil). 7. Offer tastes of the (optional) cooked beans. Explain that dry beans are not edible but sprouting them in water or cooking them makes them good to eat! Have children compare the look and feel of the cooked beans with the dried and sprouted beans. You can bring in hummus or a bean dip for additional exploration.
Students will rate how they felt about tasting beans on the Taste Test Sheets. Have students put a sticker on either the “I Like This”, “I Don’t Like This Yet”, or “I Didn’t Try This Yet” columns of the taste test sheet.
2 Adapted from: Beans Activity Plan (Portland: Harvest for Healthy Kids, Portland State University), 11. Accessed December 2019. https://www.harvestforhealthykids.org/
Week 4 Learning Objectives: • Children compare the feel, taste and color of
assorted beans. • Children compare bean sizes and shapes. • Children compare dried and cooked beans
and sprouts. Materials: � Harvest of the Month Photo Cards � Different varieties of beans (cooked and dried). � Sprouted beans from the previous week’s activity. COVID-19 Adaptations: � Have children wash their hands before handling shared items. Note: Cooking dry beans is optional as they
can be difficult to prepare. At the end of the month, children are welcome to take the unused beans home in the small bags provided with cooking instructions for families! Cooking Dried Beans: 1. Sift through dry beans to ensure no
debris ends up being cooked. 2. Soak all beans overnight by adding
water to cover beans by 2 inches. 3. The next day, drain the beans and
transfer to a large pot. 4. Cover soaked beans with 2 inches of
water. 5. Bring water to a boil and then simmer. 6. Cook beans thoroughly, until tender.
The cooking time could be anywhere from 30 minutes to 2 hours. For bean recipe ideas, explore the Idaho Bean Commission site under “Recipes”: https://bean.idaho.gov/recipes/

H A R V E S T
— of the — M O N T H
February Farm to ECE Toolkit Contents and Material List: Oats
Please review the contents of your toolkit to confirm that you have all the necessary materials.
Contents of the toolkit include: � Curriculum � Parent Newsletters (to be distributed digitally)
Materials provided:
� ___ Copies of Oats, Peas, Beans and Barley Grow by Tony Garbani � ___ Pack(s) of Harvest of the Month Photo Cards � ___ Taste Test sheets � ___ Metal faster(s) & paper clip(s) � Happy Day Brand Rolled Oats
Materials NOT provided in this kit:
� Mixing bowls, measuring cups, spoons, and jars � Ingredients not included: Peanut butter or sunflower seed butter, honey, dried fruit/chocolate chips, salt.
This publication was made possible by funding from the Idaho Department of Health and Welfare. Its contents are solely the responsibility of the authors and do not necessarily represent the official views of the IDHW.

February Harvest: Oats (Week 1)
………………………………………………………………………………………………………………………………… Vocabulary: Vocabulary: Rolled oats, dormant. Read Aloud and Book Discussion1 1. Tell children: Today we are going to read a book
about growing oats. Has anyone tasted oats or oatmeal before?
2. Pass around a bowl of oats for the children to see,
feel, and smell. Explain that oats are the seeds from tall grass-like plants. We flatten or roll the oat kernels to eat them. We are tasting rolled oats this month. Use the Lifecycle Photo Cards as an aid to help the children visualize oats.
3. Read Oats, Peas, Beans and Barley Grow. To enhance the reading experience do one or more of the
following:
• Ask the children to act out the actions of the story as you read it aloud. o If needed, model the action first. For example, stand up tall and proud to when the
farmer “stands erect and takes his ease.”
• Talk about farming. What does a person need to do to grow food from plants? o Farmers need land, seeds, soil, water, and tools like a hoe or a shovel.
• Remind the children of last month’s Harvest of the Month, beans. Do they remember tasting
beans? What did they taste like? 4. OPTIONAL: Sing and dance along to Oats, Peas, Beans and Barley Grow by Little Fox Animated Songs
for Kids. Youtube Video: https://www.youtube.com/watch?v=Rz4yLw4tvtQ
1 Adapted from: To the Teacher or Parent (Huntington Beach: Teacher Created Materials Publishing), 17. Accessed January 2020.
Week 1 Learning Objectives: • Children learn that oats, beans, peas and
barley are healthy foods. • Children describe other different ways to
stay strong and healthy (eat healthy foods, play outside).
Materials: � Oats, Peas, Beans and Barley Grow � Photo Cards COVID-19 Adaptations: � Seat children spaced apart during book read aloud.

February Harvest: Oats (Week 2)
………………………………………………………………………………………………………………………………… Oats: The Ultimate Breakfast Food 1. Tell the children that oats are healthy grains for
our bodies. They are good for our hearts and have lots of fiber that helps us to feel full and strong.
2. Ask the children if they have ever tasted oats before?
3. Where might we see oats in our food? Oats are generally eaten for breakfast because they give us the energy we need to start our day. They can be eaten as:
• Oatmeal • Cereal • Granola • Energy bars • Muffins • Overnight oat parfaits • Added to smoothies
4. Are there other ways to eat oats besides at breakfast? Yes! They can be:
• Ground into flour • Made into Oat Milk • Baked into cookies and desserts • Or cooked with meat and vegetables
5. What’s your favorite way to eat oats? Have the children draw their favorite oat dish! Oat Sensory Bin and Kitchen Tool Practice: 1. Before starting the no-bake Oat Energy Bites
recipe in Week 3, have students practice using kitchen tools like bowls and measuring cups.
2. Make an Oat Sensory Bin (place in a part of your classroom used for sensory explorations):
a. Put oats in a large bin for practice (do not serve these oats as food). Be sure to reserve enough oats for the recipe! Use beans, sand, etc. instead if needed.
b. Place kitchen utensils like bowls, jars, spoons and measuring cups into the bin. c. As children explore the bin, ask if them if they can identify the measuring cups, bowls,
spoons, and jars. d. Have the children practice scooping the oats and putting them into a bowl or larger cup.
Week 2 Learning Objectives: • Children learn about how oats can be eaten
and discuss their favorite oat dishes. • Children practice fine motor skills,
understanding volume and capacity, and scooping skills.
Materials: � Paper and arts and crafts supplies � Bin � Bowls, measuring cups, spoons, and jars � Oats COVID-19 Adaptations: � Have children wash their hands prior to handling shared items.
Figure 1. Oat sensory bin. Source: https://busytoddler.com/2019/12/oatmeal-sensory-bin/

February Harvest: Oats (Week 3)
……………………………………………………………………………………………………………………………………
Class Cooking Activity: No-Bake Oat Energy Bites
ALLERGY INFORMATION: Oats are often processed in the same facilities as gluten-containing grains and may be contaminated. Please ensure that children with gluten allergies have another option available.
1. Children wash their hands and sit or stand around the activity table. Announce, “Today we are going to make a recipe for Oatmeal Energy Bites.”
2. Introduce each ingredient as you place it on the activity
table. a. Children can help measure ingredients in measuring
spoons and cups. b. Children can take turns mixing the ingredients. c. Children can help roll the mixture into balls. d. Review Tips for Taste Testing before children try oats.
See recipe options below for Peanut and Peanut-free No Bake Oat Energy Bite Options:
Students will rate how they felt about tasting oats on the Taste Test Sheets. Have students put a sticker on either the “I Like This”, “I Don’t Like This Yet”, or “I Didn’t Try This Yet” columns of the taste test sheet.
Week 3 Learning Objectives: • Children will work cooperatively to
make energy bites and will be able to identify each ingredient.
Materials: � Mixing bowl, measuring cups, spoons � Rolled oats � Ingredients not included: Peanut butter or sunflower seed butter, honey, dried fruit/chocolate chips, salt. COVID-19 Adaptations: � Have one adult mix ingredients for the class batch. Children can roll on their own. � Alternatively, divide ingredients evenly among students and have them mix in their own bowl and roll on their own.
Peanut Butter/Sun Butter Oat Energy Bites: Prep time: 10 minutes Yield: 12 balls Ingredients 1 cup dry oats 1/4 cup peanut butter OR sunflower seed butter 1/4 cup honey 1/2 cup dried fruit (raisins, cranberries, blueberries, etc.) Dash of salt 1/2 teaspoon vanilla, optional Directions 1. Add the nut/seed butter and honey and stir to
combine well. Add all the other ingredients and stir to combine well.
2. Refrigerate the mixture for about 30 minutes. 3. Use a spoon to scoop about a tablespoon of the
cookie ball mixture into your hand. Roll into a ball.
4. Repeat with remaining mixture. This should make about 12 oatmeal energy balls.
5. Store the balls covered in the fridge for up to a week, or in the freezer for much longer.
Source: Griffiths, M. Accessed at https://www.blessthismessplease.com/8-no-bake-oatmeal-energy-balls/

February Harvest: Oats (Week 4) …………………………………………………………………………………………………………………………………… Oat Lifecyle Game:
1. Make the Oat Lifecycle Wheel: a. Locate the Oat Lifecycle Wheel in the
activity kit. b. Using the point a pair of scissors or a
knife, carefully pierce a hole in the center of the spinner.
c. Insert the ends of the brass metal fastener through a ring in the paperclip, and thread through the hole.
d. Fold the ends of the fastener on the back side of the wheel so the game is loose but lies flat.
e. Ensure the paper clip can spin freely (see Figure 2).
2. Review with students how oats begin their
lifecycle on the farm and end their lifecycle on our plate: a. First they are grown from oat seeds, which are planted in the ground in the fall. b. In the winter, the oats remain underground in a dormant state, meaning the seed has
paused its growth. c. When the warm spring weather arrives, the oat plant begins to grow again. d. The oats are harvested from the mid-summer onwards with large machines, like combine
harvesters. The combine separates the stem from the oats. e. Oats are milled, which means that they are cleaned, toasted, and then rolled!
3. Play the Oat Lifecyle Game!
a. Ensure the game wheel is assembled before playing.
b. Run through the lifecycle of oats together from the beginning with the children using the movements suggested on the game wheel. For example, when oats are rolled in the summer, have the children spin their bodies in a circle.
c. Play the game, with an adult available to model the movements:
• Children will take turns spinning the wheel.
• When the spinner lands on a wedge, ask: what season is it?
• Whatever it lands on, the class will act out together!
• Allow each child to take a turn spinning.
Week 4 Learning Objectives: • Children learn lifecycle of oats. • Children learn that movement and
exercise keep their bodies healthy and strong.
• Children develop strength, locomotor skills, and group cooperation.
Materials: � Oat Lifecycle Game � Paper clip and metal fastener
COVID-19 Adaptations: � Have children wash their hands prior to handling shared items. � Have children exercise outdoors.
Figure 2. Oat Lifecycle Game.

H A R V E S T
— of the — M O N T H
February Farm to ECE Toolkit Contents and Material List: Leafy Greens
Please review the contents of your toolkit to confirm that you have all the necessary materials.
Contents of the toolkit include: � Curriculum � Parent Newsletters (to be distributed digitally)
Materials provided:
� ___ Copies of The Vegetables We Eat by Gail Gibbons � ___ Taste Test sheets (with “I Didn’t Try This Yet” column) � ___ Craft sticks � ___“Colorful labels” stickers for taste testing
Materials NOT provided in this kit:
� Arts and crafts supplies � Potting soil � Clear plastic cups � Hula hoops, buckets, or partition areas to be “salad bowls” � An assortment of items to represent “salad ingredients” (scarves, small balls, beanbags, teddy bears, crumpled paper, etc.)
This publication was made possible by funding from the Idaho Department of Health and Welfare. Its contents are solely the responsibility of the authors and do not necessarily represent the official views of the IDHW.

March Harvest: Leafy Greens (Week 1) ………………………………………………………………………………………………………………………………… Vocabulary: Leafy greens, leaf/leaves, lettuce, spinach, arugula, and greenhouse. Read Aloud and Book Discussion1 1. Tell the children: Today we are going to read a
book about vegetables and leafy greens! Leafy greens are a type of vegetable that grow above ground. Types of leafy greens include lettuce, arugula, spinach, cabbage, and brussels sprouts. We eat the leaves of these vegetables. The green leaves contain lots of vitamins that are healthy for our bodies. The darker the green, the more vitamins it contains!
2. Use the following discussion questions during the read aloud: a. Explain that we eat the leaves of lettuce. They start out as tiny seeds that grow into a plant with
leaves that we eat. Point to the leafy greens on page 8 and 9 to show that lettuce and spinach are types of leaf vegetables. What other types of vegetables have we tried as a class?
Beets = Root
Winter Squash = Fruit Potato = Tuber Beans = Seeds
b. Farmers in Idaho grow leafy greens in a greenhouse when the weather is still too cold to grow
vegetables outdoors. Has anyone seen a greenhouse before?
c. Greenhouses are buildings or containers that protect plants from cold weather. They are warm and humid inside because greenhouses are made of see-through materials like plastic or glass. They are like a big window!
§ What do you see when you look out your window? Do you see the sun? § Why are greenhouses see-through? To let in sunlight. Plants, like leafy greens, need
sunlight to grow. d. Point out the pictures of lettuce in the book. Use the books illustrations and the Photo Cards to
demonstrate the parts of the plant that we eat.
e. Explain to the students that fresh vegetables, like lettuce, are the most nutritious when harvested fresh from the garden. Another place to get fresh vegetables is at the farmer’s market or grocery store. Do you see fresh, leafy greens at the store or market?
1 Adapted from: To the Teacher or Parent (Huntington Beach: Teacher Created Materials Publishing), 17. Accessed January 2020.
Week 1 Learning Objectives: • Children learn that leafy greens are
healthy foods that come from farms or gardens.
Materials: � The Vegetables We Eat by Gail Gibbons � Photo Cards COVID-19 Adaptations: � Seat children spaced apart during book read aloud.

March Harvest: Leafy Greens (Week 2) ………………………………………………………………………………………………………………………………… Greens in a Mini-Greenhouse
1. Ask the class: Is it still cold outside? It is still cold outside, but the weather is starting to get warmer. It is almost spring!
2. Because it is still cold outside, seeds have trouble sprouting into plants. Seeds like to grow in warm environments with lots of sunshine. Explain that when we build a greenhouse for our plants, they are protected from the cold. Who else likes living in a warm house when it is cold?
3. Ask the children if they have ever grown a plant
from a seed. Remind them of when they germinated bean seeds in February.
4. Explain to the students that they will help build a greenhouse for a seed. We will use clear plastic cups because they are see-through, like a window. Surrounding the seed in a greenhouse will protect the seed from the cold. It will keep the water we feed it from going outside and it will let sunlight inside.
5. Bring out 2 or more clear plastic cups for the class OR give each child 2 clear plastic cups. Tell the children that they will help come up with a name for the plant.
§ “Green” starts with the letter ‘G.’ What other words begin with the letter ‘G?’
§ Suggest words like “Garden,” “Gorilla,” “Grumpy”, “Goat,” “Giraffe,” or “Guitar.” Once a word is selected for each cup, have each child practice writing that word. Write “Green” and add a different ‘G’ word to follow. Write the ‘G’ name on each cup.
§ OPTIONAL: Decorate the cup with stickers, beads, glitter, etc. This will be the bottom of the “greenhouse.”
6. On separate, unnamed cups, label the cups towards the rim. This will be the top
of the “greenhouse” (see Figure 1). Growing Our Greens2
1. Fill each bottom cup with roughly ½ cup of soil. Dig a hole about ½ inch deep (eraser end of a pencil). This is the ideal depth for most vegetable seeds as they often are very small. Add a couple of seeds in each container.
2. Cover hole with soil. Add water so the soil is moist, but do not overwater. A spray bottle works well for this. Invite the children to spray their soil with a spray bottle.
3. When the plants grow to be about 3-4 inches tall, you can send children home with 1 of each plant or plant directly
into the ground on-site. Write “spinach” and “lettuce” on the craft sticks. Let family-members know that the plants are ready to be transplanted either into a larger container or placed directly into the ground. Spinach is a hardy plant and can generally tolerate cooler conditions once it has matured from its sprout stage.
4. Lettuce and spinach are ready to harvest 6 to 7 weeks after sowing. It is best to harvest by hand in the morning (or in cool weather) to prevent their leaves from wilting.
2 Adapted from Week 2 Growing Greens from Seeds (Los Angeles: Farm to Preschool, Occidental College), 60-61. Accessed February 2021.
http://www.farmtopreschool.org/documents/Farm2PreschoolYear2.pdf
Week 2 Learning Objectives: • Children follow directions and respond using
vocabulary words specific to gardening (e.g., plant, soil, grow, leaf, water).
• Children make predictions, observe, and discuss the growth of leafy greens.
Materials: � Clear plastic cups (4 per child or 4 for class) � Lettuce and spinach seeds � Potting soil � Craft sticks COVID-19 Adaptations: � Have children wash their hands prior to handling shared items.
Figure 1. Simple Greenhouse for Kids, The Handmade Home.

March Harvest: Leafy Greens (Week 3)
……………………………………………………………………………………………………………………………………
Who is Growing Faster?
1. As a class, observe the growth of the leafy greens.
2. Refer to each plant by the name the children gave it. Have the children order the plants from tallest to shortest each day. Bring out rulers and measuring tapes so the children can make more accurate comparisons.
3. As they grow, ask the children to use their observation skills:
a. Which one sprouted first? Which one started to leaf first? Which is taller?
b. What do the children notice about the spinach and lettuce sprouts?
c. What do they notice about greenhouse? Is there water on the sides of the cup? Why do they think that is?
Tasting Greens
1. Children may be more likely to try new fruits and vegetables if they can touch and see the fruit or vegetable before it is cooked. Have a few leaves out for the children to touch, see, and smell before tasting. Encourage children who aren’t willing to try the new food to hold it, smell it, or lick it during the tasting activity.
2. Rinse greens well before serving raw.
3. OPTIONAL: Add other fresh ingredients like oranges, grapes, tomatoes, bell peppers, carrots, and beets to the leafy greens to make a salad. Cut salad ingredients into small, easily chewed pieces. Other serving suggestions: Add lettuce to veggie wraps with whole wheat tortillas or make a bean salad. Add spinach to soups, pizza, or egg bakes. For more recipe ideas, visit USDA Child Nutrition Recipe Box for standardized recipes: https://theicn.org/cnrb/
4. When children are trying leafy greens during meal time, ask them questions, like: § What do they taste like? Are they soft? Crunchy? Sweet? Bitter? § Has anyone tried to grow a leafy green? § How do leafy greens grow? (They grow above the ground). § What parts of the plant do we eat? (We eat the leaves and stems).
Students will rate how they felt about tasting greens on the Taste Test Sheets. Have students put a sticker on either the “I Like This”, “I Don’t Like This Yet”, or “I Didn’t Try This Yet” columns of the taste test sheet.
Week 3 Learning Objectives: • Children will observe the growth of
leafy greens and use differences in attributes to make comparisons.
• Children will work cooperatively to try leafy greens and will be able to identify each ingredient.
• Children taste and describe leafy greens.
Materials: � Leafy Greens for tasting activity � Taste Test Sheets and stickers
COVID-19 Adaptations: � Seat the children spaced apart in small groups when tasting the new food. Have an adult move around the room to supervise all children as well as facilitate conversation and questions.

March Harvest: Leafy Greens (Week 4)
…………………………………………………………………………………………………………………………………… Play the Salad Bowl Game3 If the weather is nice, play outside!
1. Ask the children if they have ever eaten a salad. A salad is a meal or side dish made of various vegetables, fruits, nuts, seeds, cheeses, and meats. Salads usually include leafy greens like lettuce and spinach. We eat salads in round bowls. What kind of vegetables would you like to eat in your salad?
2. Scatter hula hoops throughout the activity area. The hula hoops are “salad bowls.” If you don’t have hula hoops, use buckets or partition areas of the classroom or playground to be “bowls.” Divide students into groups of three or four at each “bowl”. Divide items equally between all hoops.
2. Bring out a variety of items and have students decide what vegetable each item represents in the salad. For example, a scarf could represent spinach. A crumpled ball of paper could represent lettuce. A bean bag could represent a tomato.
3. Students simultaneously begin collecting “ingredients” from other “bowls”; students can only
take one ingredient at a time. 4. Items must be placed, not thrown, and students cannot guard their “bowl.” After several
minutes, stop play. 5. Begin by having students collect as many “salad ingredients” as they can in the allotted time.
Variations can include: “only collect the tomatoes” or “only collect the lettuce leaves.” 6. Have groups count their items (or skip this step to minimize competition), then redistribute items before starting play again.
3 Adapted from: Salad Greens Educator Newsletter (Network for a Healthy California, California Department of Public Health), 2011. Accessed February
2020. http://www.harvestofthemonth.cdph.ca.gov
Week 4 Learning Objectives: • Children learn about salads and
continue to learn that eating vegetables, like leafy greens, are healthy for their bodies.
• Children develop strength, locomotor skills, and group cooperation.
Materials: � Hula hoops, buckets, or partition areas to be “bowls” � An assortment of items to represent “salad ingredients” (scarves, small balls, beanbags, teddy bears, crumpled paper, etc.) COVID-19 Adaptations: � Have children wash their hands prior to and after handling shared items. � Have children exercise outdoors, if possible.

H A R V E S T
— of the — M O N T H
April Farm to ECE Toolkit Contents and Material List: Radishes
Please review the contents of your toolkit to confirm that you have all the necessary materials.
Contents of the toolkit include: � Curriculum � Parent Newsletters (to be distributed digitally)
Materials provided:
� Rah, Rah, Radishes by April Pulley Sayre � Harvest of the Month Photo Cards � Pipe cleaners and pom poms. � Taste Test sheets
Materials NOT provided in this kit:
� Kitchen tools: cutting board, plastic knives and bowls, grater, sharp knife, colander. � Arts and crafts supplies not provided (glue, feathers, leaves, popsicle sticks, cupcake papers, etc.) � Scientific tools such as: measuring tapes, rulers, a scale, magnifying glass, and/or tweezers
This publication was made possible by funding from the Idaho Department of
Health and Welfare. Its contents are solely the responsibility of the authors and do not necessarily represent the official views of the IDHW.

April Harvest: Radishes (Week 1)
………………………………………………………………………………………………………………………………… Vocabulary: Radish, root, microgreens.
Introduction to Radishes 1
1. Radishes are root vegetables that look like beets or
turnips but have a different flavor. They are the root of a plant classified in the mustard family and sometimes they can taste a little spicy!
2. Pass around a few radishes for the children to see and feel. Do not serve these radishes. As the children pass around the radishes, raise these discussion questions and remarks:
§ In the United States radishes are usually eaten raw, but they can be added to cooked dishes, served whole, grated onto of foods like tacos, or made into chips.
§ What part of the radish do we eat? We eat the root. Just like beets! We can also eat them when they’re seedlings or microgreens. Use the photo cards to demonstrate the parts we eat.
3. Show the children the life stage photos of radishes. They start out as seedings and soon grow long and
broad leaves. Beneath the ground, the roots extend downward. Soon a bright red bulb grows.
§ Remind the children that they tried radish microgreens. These microgreens, or seedlings, were radishes at an early stage in life.
4. Gather in a circle. Read Rah, Rah, Radishes by April Pulley Sayre. As you read the book aloud, mention the
vegetables the children have tried (winter squash, beets, etc.).
Radish Microgreens Fully Grown Radishes
1 Adapted from: Section 2 Farm to Childcare Classroom Activities (Institute for Agriculture and Trade Policy with New Horizons Academy), 65-68. Accessed April 2020. https://www.iatp.org/sites/default/files/2014_07_16_F2CC_Curriculum_f.pdf
Week 1 Learning Objectives: • Children learn that radishes are a healthy
food. • Children learn that we eat the root part
of the radish but that radishes can also be eaten when they are young microgreens.
Materials: � Photo Cards � Rah, Rah, Rah Radishes by April Pulley Sayre. COVID-19 Adaptations: � Seat children spaced apart during group discussions. � Have children wash their hands prior to and after handling shared items.

April Harvest: Radishes (Week 2)
………………………………………………………………………………………………………………………………… Tasting Radishes 2
1. Reserve 1-2 radishes for passing around the classroom. Do not serve these radishes. Can the children spot the differences between the different varieties?
2. Before serving, wash radishes thoroughly making sure to remove any remaining leafy matter or dirt.
3. Chop the leaves off the top. Carefully cut radishes into thin slices, making sure they don’t roll as you begin cutting. Radishes can also be grated.
4. Give each child a tasting-size amount of each of the different radishes.
5. One at a time, lead the class in trying one radish type at a time (all at once; say, “One, two, three, try it!”). • How do the different varieties differ? How are they the same? Which is their favorite? • Which words can they use to describe the taste (sweet, juicy, spicy, etc.)? • What part of radish do we eat? (We eat the root).
6. When the children have finished their snack, prompt them to help clean up by putting their paper products in
the trash and/or wipe the table. OPTIONAL: Roasted Radish Chips 3
Students will rate how they felt about tasting radishes on the Taste Test Sheets. Have students put a sticker on either the “I Like This”, “I Don’t Like This Yet”, or “I Didn’t Try This Yet” columns of the taste test sheet.
2 Adapted from: Growing Minds (ASAP Farm to Preschool), 182. Accessed April 2020. https://growing-minds.org/farm-to-preschool/ 3 Adapted from: Roasted Radish Chips, The Produce Moms. Accessed March 2021. https://theproducemoms.com/2018/09/25/roasted-radish-chips/
Week 2 Learning Objectives: • Children work cooperatively to taste
radishes, using language and communication skills with others.
• Children share their sensory experiences with the new food at meal or snack time.
Materials: � Radishes, knife, cutting board � Paper plates, napkins, etc.
COVID-19 Adaptations: � Have children wash their hands prior to and after tasting foods.
ROASTED RADISH CHIPS Prep time: 10 minutes Yield: 10 taste test servings Ingredients 5 radishes, cut into ¼ inch thick coins Cooking spray or olive oil ½ tsp salt ½ tsp black pepper Directions 1. Preheat oven to 425 degrees F. 2. Place radish coins on a baking sheet lined with parchment paper. Spray or coat the radish coins in oil and sprinkle with half
the seasonings. 3. Place the radishes in the oven and roast for 10 minutes. Remove from the oven, flip them, spray with additional oil, and
sprinkle remaining seasonings. Roast for another 10 minutes or until golden brown. Watch carefully as they can burn quickly! 4. Let them cool and serve family style. Enjoy!
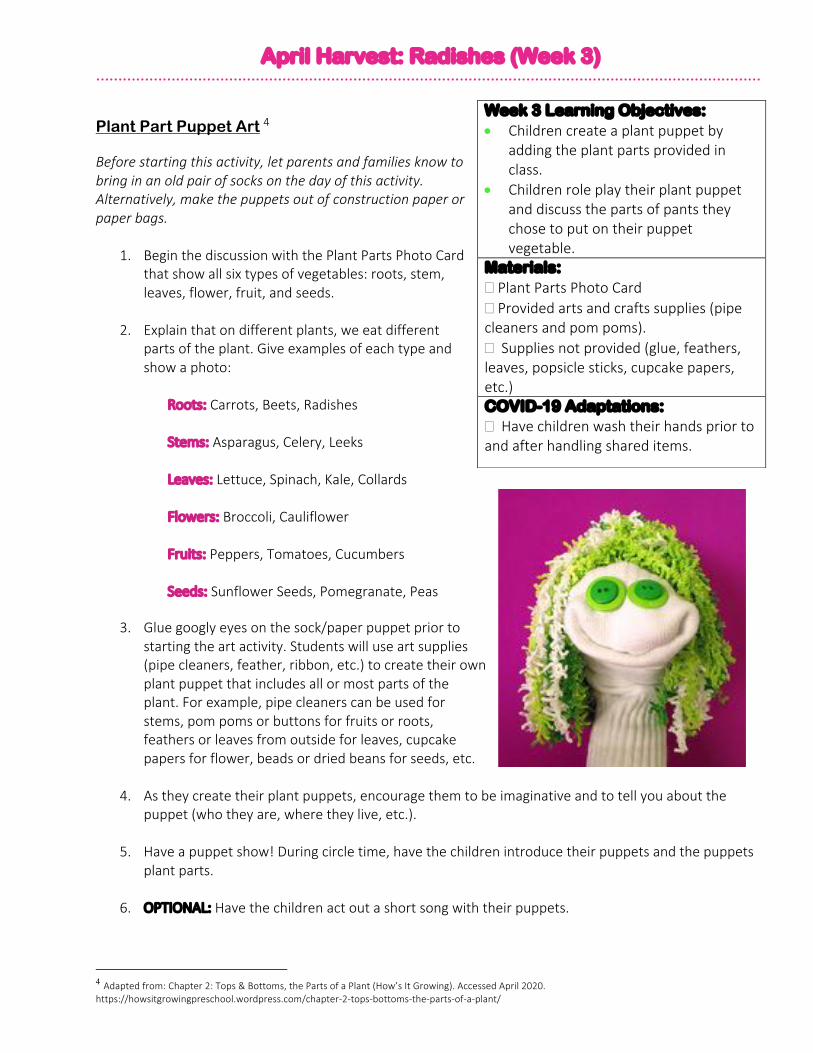
April Harvest: Radishes (Week 3)
……………………………………………………………………………………………………………………………………
Plant Part Puppet Art 4 Before starting this activity, let parents and families know to bring in an old pair of socks on the day of this activity. Alternatively, make the puppets out of construction paper or paper bags.
1. Begin the discussion with the Plant Parts Photo Card
that show all six types of vegetables: roots, stem, leaves, flower, fruit, and seeds.
2. Explain that on different plants, we eat different parts of the plant. Give examples of each type and show a photo:
Roots: Carrots, Beets, Radishes Stems: Asparagus, Celery, Leeks Leaves: Lettuce, Spinach, Kale, Collards Flowers: Broccoli, Cauliflower Fruits: Peppers, Tomatoes, Cucumbers Seeds: Sunflower Seeds, Pomegranate, Peas
3. Glue googly eyes on the sock/paper puppet prior to
starting the art activity. Students will use art supplies (pipe cleaners, feather, ribbon, etc.) to create their own plant puppet that includes all or most parts of the plant. For example, pipe cleaners can be used for stems, pom poms or buttons for fruits or roots, feathers or leaves from outside for leaves, cupcake papers for flower, beads or dried beans for seeds, etc.
4. As they create their plant puppets, encourage them to be imaginative and to tell you about the puppet (who they are, where they live, etc.).
5. Have a puppet show! During circle time, have the children introduce their puppets and the puppets plant parts.
6. OPTIONAL: Have the children act out a short song with their puppets.
4 Adapted from: Chapter 2: Tops & Bottoms, the Parts of a Plant (How’s It Growing). Accessed April 2020. https://howsitgrowingpreschool.wordpress.com/chapter-2-tops-bottoms-the-parts-of-a-plant/
Week 3 Learning Objectives: • Children create a plant puppet by
adding the plant parts provided in class.
• Children role play their plant puppet and discuss the parts of pants they chose to put on their puppet vegetable.
Materials: � Plant Parts Photo Card � Provided arts and crafts supplies (pipe cleaners and pom poms). � Supplies not provided (glue, feathers, leaves, popsicle sticks, cupcake papers, etc.) COVID-19 Adaptations: � Have children wash their hands prior to and after handling shared items.
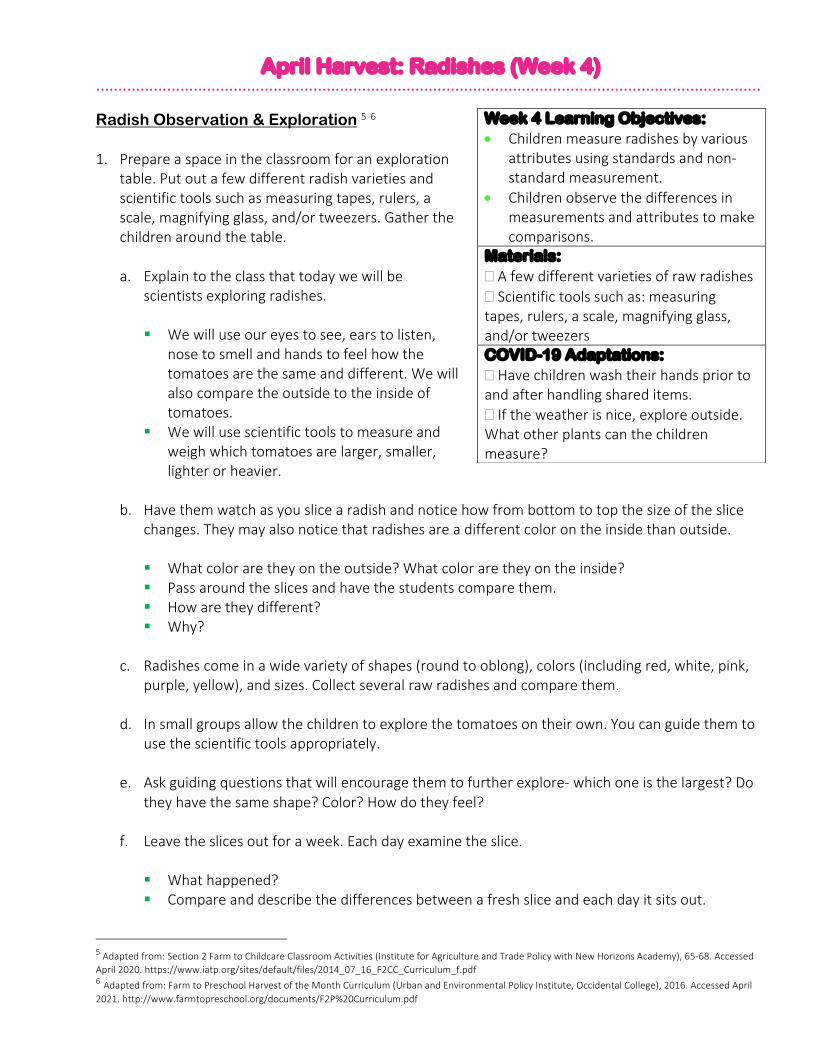
April Harvest: Radishes (Week 4) …………………………………………………………………………………………………………………………………… Radish Observation & Exploration 5 6 1. Prepare a space in the classroom for an exploration
table. Put out a few different radish varieties and scientific tools such as measuring tapes, rulers, a scale, magnifying glass, and/or tweezers. Gather the children around the table.
a. Explain to the class that today we will be
scientists exploring radishes. § We will use our eyes to see, ears to listen,
nose to smell and hands to feel how the tomatoes are the same and different. We will also compare the outside to the inside of tomatoes.
§ We will use scientific tools to measure and weigh which tomatoes are larger, smaller, lighter or heavier.
b. Have them watch as you slice a radish and notice how from bottom to top the size of the slice
changes. They may also notice that radishes are a different color on the inside than outside.
§ What color are they on the outside? What color are they on the inside? § Pass around the slices and have the students compare them. § How are they different? § Why?
c. Radishes come in a wide variety of shapes (round to oblong), colors (including red, white, pink,
purple, yellow), and sizes. Collect several raw radishes and compare them.
d. In small groups allow the children to explore the tomatoes on their own. You can guide them to use the scientific tools appropriately.
e. Ask guiding questions that will encourage them to further explore- which one is the largest? Do
they have the same shape? Color? How do they feel?
f. Leave the slices out for a week. Each day examine the slice.
§ What happened? § Compare and describe the differences between a fresh slice and each day it sits out.
5 Adapted from: Section 2 Farm to Childcare Classroom Activities (Institute for Agriculture and Trade Policy with New Horizons Academy), 65-68. Accessed April 2020. https://www.iatp.org/sites/default/files/2014_07_16_F2CC_Curriculum_f.pdf 6 Adapted from: Farm to Preschool Harvest of the Month Curriculum (Urban and Environmental Policy Institute, Occidental College), 2016. Accessed April 2021. http://www.farmtopreschool.org/documents/F2P%20Curriculum.pdf
Week 4 Learning Objectives: • Children measure radishes by various
attributes using standards and non-standard measurement.
• Children observe the differences in measurements and attributes to make comparisons.
Materials: � A few different varieties of raw radishes � Scientific tools such as: measuring tapes, rulers, a scale, magnifying glass, and/or tweezers COVID-19 Adaptations: � Have children wash their hands prior to and after handling shared items. � If the weather is nice, explore outside. What other plants can the children measure?

This publication was made possible by funding from the Idaho Department of Health and Welfare. Its contents are solely the responsibility of the authors and do not necessarily represent the official views of the IDHW.
H A R V E S T
— of the — M O N T H
May Farm to ECE Toolkit Contents and Material List: Carrots
Please review the contents of your toolkit to confirm that you have all the necessary materials.
Contents of the toolkit include: � Curriculum � Parent Newsletters
Materials provided:
� Eating the Alphabet by Lois Ehlert � Harvest of the Month Photo Cards � Taste Test sheets � Recipe Card
Materials NOT provided in this kit:
� Kitchen tools: cutting board, plates bowls, grater, sharp knife, peeler, colander � Small rocks, pebbles, or marbles � Saucer or bowl � Ruler or tape measure

May Harvest: Carrots (Week 1) ………………………………………………………………………………………………………………………………… Vocabulary: Carrot, garden, the letter “C”.
Introduction to Carrots 1
1. Carrots are root vegetables. Just like radishes, we eat
the root part of the vegetable. 2. Talk with children about how carrots start with the
letter “C .” Ask children to come up with other words that start with “C.” Can they think of other fruits or vegetables that start with the letter “C?”
3. Read Eating the Alphabet by Lois Ehlert. Pass around
the carrots before reading the story, or while you are reading. Invite the children to feel and smell the vegetables as they pass them along.
4. While you are reading, ask children questions, like:
• Has anyone tasted a carrot? What do they taste like? • Has anyone ever seen a carrot growing in a garden or on a farm? • Has anyone ever harvested a carrot? • How do carrots grow? (The roots grow underground; the leaves
grow above the ground.) 5. After reading the book, ask the children: “what fruits or vegetables would you like to grow in a garden?”
• Record their ideas on a large piece of butcher paper or construction paper. • Hang the chart in the classroom for the rest of the month.
Fruits and Vegetables in Eating the Alphabet: Apricot, artichoke, avocado, apple, asparagus, blueberry, brussel sprouts, bean, beet, broccoli, banana, currant, cucumber, corn, celery, cabbage, cherry, carrot, cauliflower, date, endive, eggplant, fig, gooseberry, grapefruit, grapes, huckleberry, Indian corn, jalapeno, jicama, kumquat, kiwi, kohlrabi, lemon, leek, lettuce, lime, melon, mango, nectarine, okra, orange, onion, pineapple, peach, pear, papaya, persimmon, pomegranate, plum, parsnip, potato, pea, pepper, pumpkin, quince, raspberry, radish, rutabaga, rhubarb, radicchio, swiss chard, spinach, star fruit, strawberry, tangerine, turnip, tomato, ugli fruit, vegetable marrow, watermelon, watercress, xigua, yam, zucchini.
1 Adapted from: Carrots Activity Plan (Portland: Harvest for Healthy Kids, Portland State University) 4, 10. Accessed May 2021. https://www.harvestforhealthykids.org/
Week 1 Learning Objectives: • Children learn that carrots grow
underground and the leaves grow above the ground.
• Children talk about what they would grow if they had a garden.
Materials: � Photo Cards � Eating the Alphabet by Lois Ehlert COVID-19 Adaptations: � Seat children spaced apart during group discussions. � Have children wash their hands prior to and after handling shared items.

May Harvest: Carrots (Week 2)
………………………………………………………………………………………………………………………………… Sprouting Carrots 2 1. Explain to children that the class will be doing an
experiment to see if leaves will grow from a carrot.
2. OPTIONAL: Have the children help by collecting
small rocks for this activity.
3. Teachers prepare the carrots by cutting off the tops (leaving about two inches of the carrot below the tops). You can save the rest of the carrots for a cooking or tasting activity! Remove the greens. Pass them around for the children to see. Explain that we will be re-growing the greens!
4. Children help fill the saucer or bowl with a layer of marbles or pebbles. 5. Children help place the carrot tops on top of the marbles/pebbles in the bowls or saucers.
6. Children help fill the bowls or saucers with a little water (fill to the top of the marbles/pebbles). 7. Place the bowls/saucers in a sunny window, and add water to keep the level at the top of the
marbles/pebbles. 8. Watch as green leaves grow from the carrots! Measure the leaves as they grow.
2 Adapted from: Farm to Preschool Toolkit (ASAP Growing Minds), 182. Accessed April 2020. https://growing-minds.org/farm-to-preschool/
Week 2 Learning Objectives: • Children are able to describe how carrots
grow (the roots grow underground, and the leaves grow aboveground).
• Children participate in an experiment to sprout carrot greens.
• Children measure the leaves as they grow. Materials: � Small rocks, pebbles, or marbles � Saucer or bowl � Tops of carrots � Ruler or tape measure COVID-19 Adaptations: � Have children wash their hands prior to and after handling shared items.
Did You Know?
Carrots are related to parsley, dill, and parsnips.
Carrots contain plant pigments called
carotenoids. These pigments were first identified in carrots
(giving them their orange color) and their name was
thus derived from the word carrot.

May Harvest: Carrots (Week 3)
……………………………………………………………………………………………………………………………………
Class Tasting 1. Reserve 1-2 carrots for passing around the classroom.
Do not serve these carrots. What parts of the carrot can the children identify (e.g. the root, the leaves)?
2. Before serving, wash carrots thoroughly making sure
to remove any remaining leafy matter or dirt.
3. Chop the leaves off the top if you haven’t already (from the previous activity). To keep raw vegetables like carrots from becoming a choking hazard, cut the carrots into thin slices before serving or serve as “ribbons” by using a peeler. Ensure that the students are seated at the table before eating together.
4. Give each child a tasting-size amount of carrots.
5. One at a time, lead the class in trying carrots (all at once; say, “One, two, three, try it!”).
• Which words can they use to describe the carrots (sweet, juicy, crunchy, etc.)? • What part of carrot do we eat? (We eat the root). • How do carrots grow? The part that we eat, the root, grows underground while the leaves of
the carrot grow above ground. 6. When the children have finished their snack, prompt them to help clean up by putting their paper
products in the trash and/or wipe the table.
Students will rate how they felt about tasting carrots on the Taste Test Sheets. Have students put a sticker on either the “I Like This”, “I Don’t Like This Yet”, or “I Didn’t Try This Yet” columns of the taste test sheet.
Week 3 Learning Objectives: • Children share their sensory
experiences with the new food at meal or snack time.
Materials: � Carrots with tops removed. � Plates, bowls for dips (optional), cutting board, and knife. COVID-19 Adaptations: � Have children wash their hands prior to and after eating.
Dip Ideas! A great way to get children excited about trying a new food is to let them pick out a few of their favorite dips to try it with. Carrots can be eaten with hummus, Greek yogurt, ranch dressing (plain Greek yogurt with a ranch seasoning packet), creamy pesto dip (blend together cottage cheese and pesto), or peanut butter honey dip (peanut butter and honey). Provide 2-3 options for the children to choose from.
Optional: Carrot Raisin Salad Ingredients (serves 4) 4 carrots (peeled and grated) ¼ cup raisins 2 teaspoons sugar 1 lemon, juiced
Directions 1. In a medium bowl, thoroughly mix carrots, raisins, sugar and lemon juice. 2. Serve chilled.
Source: University of Wyoming, Cooperative Extension, Cent$ible Nutrition Cook Book.

May Harvest: Carrots (Week 4) …………………………………………………………………………………………………………………………………… Do the Garden Wiggle! 3 4
Encourage students to move with this energizing activity!
1. Start by reviewing with the children their favorite
fruits and vegetables. See chart below for the foods they tried. Call out the name of each fruit/vegetable and have the children raise their hands if they liked it. Tally their votes and discuss with the class their favorite foods— what they liked about their favorite foods and what they remember learning about them (e.g. how it grows, color, letter it starts with, etc.).
2. Next, have the children help make a set of vegetable cards. On paper, have the students draw 5 of the class’s first favorite food, 5 of their second favorite food, and 5 of their third favorite food to create 15 cards total (or add 5 of their fourth favorite food if there’s not enough for everyone). For example, if the class voted for peaches in first, carrots in second, and apples in third, a set of 15 cards would have 5 peach, 5 carrot, and 5 apple cards.
3. Ask: “Who wants to draw the (first place food)? Who wants to draw the (second place
food)?” until the whole deck is made. Once the cards are created the game can be played.
4. Move to a place with lots of room and stand in a circle together. Tell the students that in this
activity, you will call out a food and the children with that food will make a movement. a. Whichever food was voted first will twist at the waist, second will march in place, third will
jump up, and fourth (optional) will stretch to the sky. b. Practice the activity several times, demonstrating each movement when you hold up a card. c. Next, have the students hold up their own cards. One at a time, have them raise their card
and call out the vegetable. Move with the children! d. After a few rounds, ask the children to swap cards and play again. e. Keep the fun going by adding more cards, featuring new foods, and trying new movement
rules (e.g. run in place, jumping jacks, pat their head, etc.)!
3 Adapted from: Farm to Preschool Toolkit (ASAP Growing Minds), 57. Accessed May 2021. https://growing-minds.org/farm-to-preschool/
Week 4 Learning Objectives: • Children use language to develop
reasoning skills by connecting what they learned about how food grows to the foods they tasted this year.
• Children draw pictures of their favorite foods and create a card game.
• During the game, children are encouraged to listen to the rules and move their bodies.
Materials: � Paper for drawing the vegetable cards. � Art supplies: crayons, markers, finger paint, etc. COVID-19 Adaptations: � If the weather is nice, play outside!
Month 1st Year Harvests 2nd Year Harvests
August/September Peaches & Plums Peaches & Plums
October Beets Tomatoes
November Winter Squash Apples
December Potatoes Dried Fruits
January Dried Beans Dried Beans & Lentils
February Oats Oats
March Microgreens Leafy Greens
April Radishes Radishes
May Carrots Carrots
Related Documents


![H F H v H ] v @ H ¡ H H ] ¢¤£n . £n ¥J M ]oveksler/Papers/thesis.pdf · H F H v H ] v @ H ¡ H H ] ¢¤£n . £n ¥J M ] t ¦£% M § t](https://static.cupdf.com/doc/110x72/5f7c8d25186ffd4dc076e1c0/h-f-h-v-h-v-h-h-h-n-n-j-m-ovekslerpapers-h-f-h-v-h-.jpg)


![7e&1,&$ ',*,7$/materias.fi.uba.ar/6601/practica08.pdf · h v ] À ] µ v } ] t & µ o / v P v ] _ t d v ] ] P ] o ~ ò ò X ì í t ô ò X ì í h v ] À ] µ v } ] t & µ o / v](https://static.cupdf.com/doc/110x72/5f871220031ed4268e6ef4f4/7e1-7-h-v-v-t-o-v-p-v-t-d-v-p.jpg)