1. Mount your ESI tronic image 2. Run Setup and you will see this: Sometimes it takes few seconds sometimes minutes till it become 100%, it depends on the computer or OS. 3. After it will become 100% you will see this: So choose your language and continue

Welcome message from author
This document is posted to help you gain knowledge. Please leave a comment to let me know what you think about it! Share it to your friends and learn new things together.
Transcript

1. Mount your ESI tronic image 2. Run Setup and you will see this:
Sometimes it takes few seconds sometimes minutes till it become 100%, it depends on the computer or OS. 3. After it will become 100% you will see this:
So choose your language and continue
4. Then you will see this:
I always use the user defined installation, I never put any I-key (As I remember if you put FFFF – you will install all the bases – I don’t need them all – so it depends on you). Even if you don’t put any I-key you will be also able to install full package – see next steps) 5. Then you will see this:
Change the installation directory if you wish then continue

6. Then this:
I always “tick” the: KTS 505-670 program CAS (you need to install the main program) and Data download (It will make possible to install needed bases ) If you need other options like screen saver or Fuel injection pump section – tick them. 7. Then this:
Now install the bases that you need using “drag and drop” method – to the drive that you wish. I use this bases:

It depends on what you need or how much disk space you have. If you wonna learn more about the bases read the attached: brochure_esi-tronic.pdf 8. Then this:
Just continue.

9. Then this:
And wait till the installation ends. Remember that it will ask you about DVD 2 and/or DVD3 – it depends on which bases you wonna install. As I remember the A and C bases are on DVD1 but if during the installation you will not have DVD2 or DVD3 the installator will omit the bases but the install will finish with success - you will just not be able to use the omitted informations. 10. Then this:
Just close.
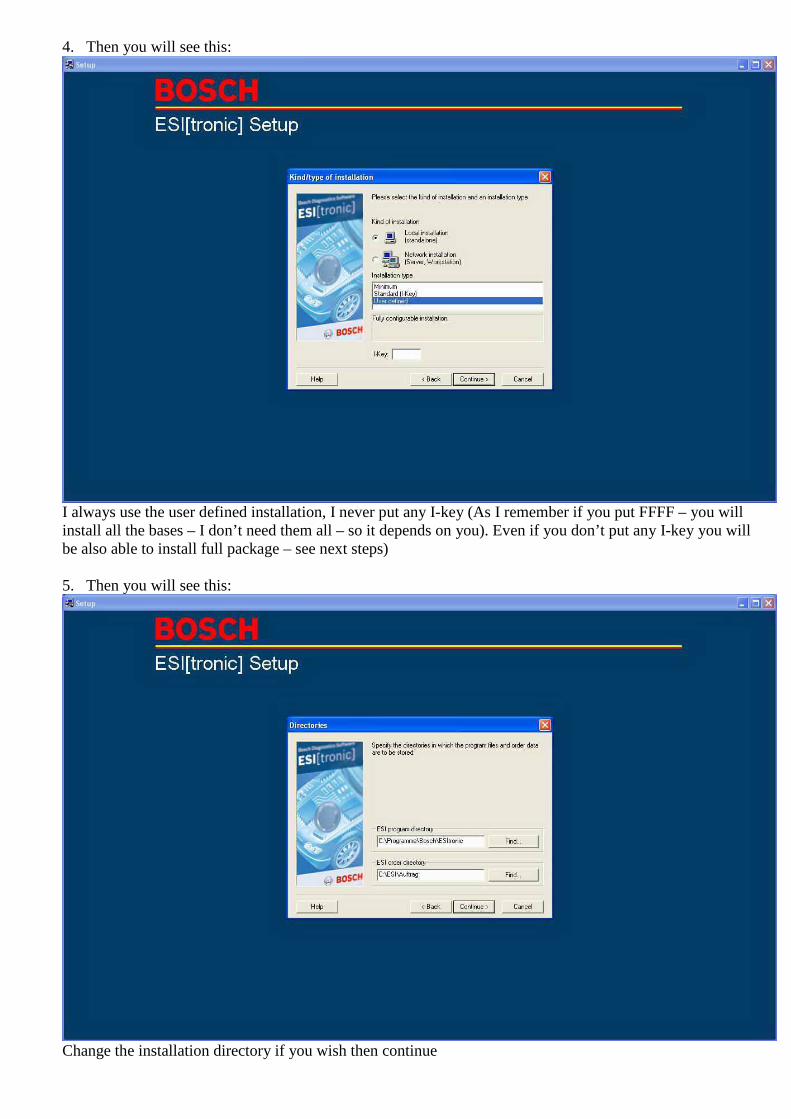
11. Then this
I always klick NO. I don’t know why ? Maybe because I am to lazy to get my KTS and connect it to my USB port - usually it is about 2 meters away from me ;) Anyway I will show later how to configure the KTS – So click NO. First we finish ESI install and activation. 12. Then this:
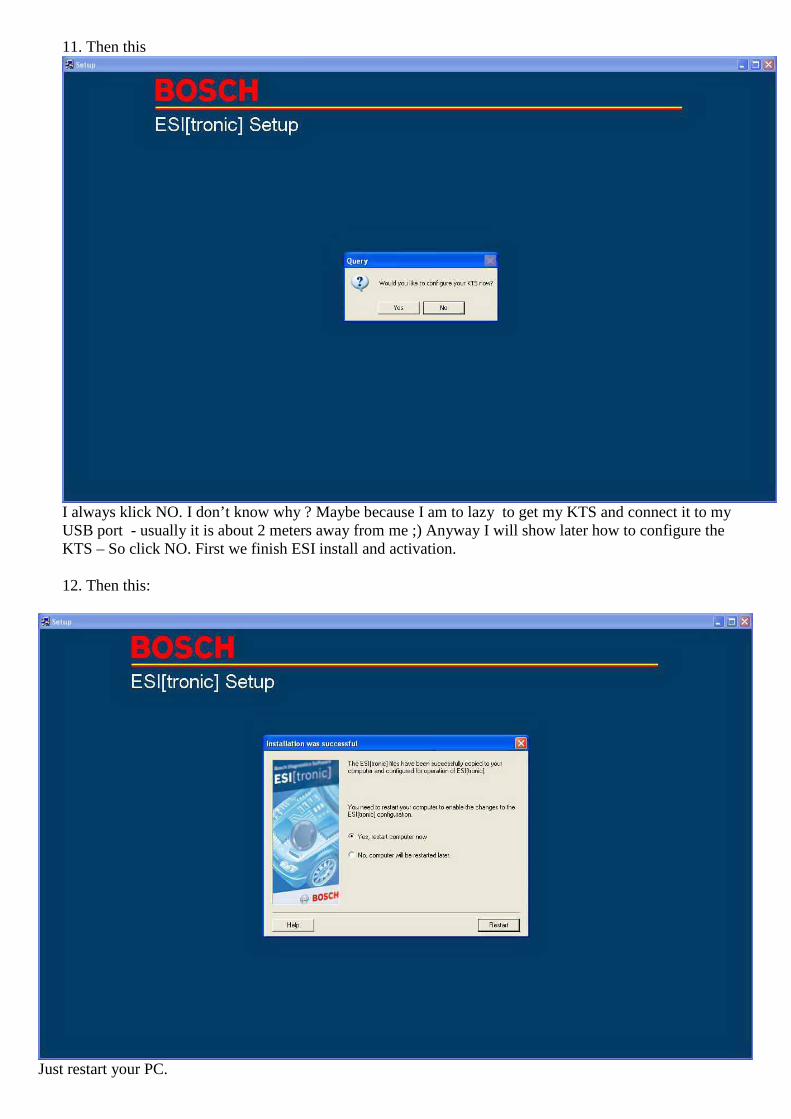
Just restart your PC.

13. Then this:
Click Execute, and this appears:
Just put any customer no (8 or 10 digits). Put 0123456789 (or your original Customer no.) and call Bosch to get your Release code or copy ID no. to keygen, generate it and paste to Release code window. After that you should see this:

Then close the Display release information window and close the ESItronic application. KTS CONFIGURATION 14. Then run DIAGNOSTIC DEVICE CONTROL application:
And this appear:
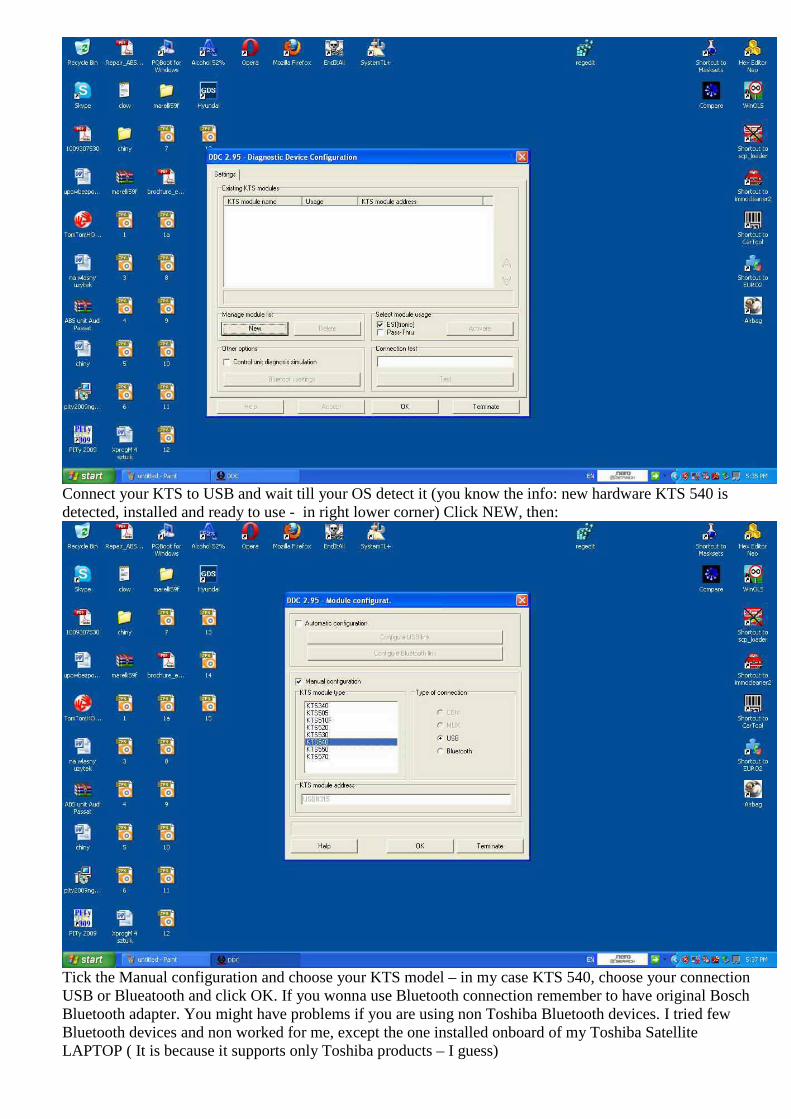
Connect your KTS to USB and wait till your OS detect it (you know the info: new hardware KTS 540 is detected, installed and ready to use - in right lower corner) Click NEW, then:
Tick the Manual configuration and choose your KTS model – in my case KTS 540, choose your connection USB or Blueatooth and click OK. If you wonna use Bluetooth connection remember to have original Bosch Bluetooth adapter. You might have problems if you are using non Toshiba Bluetooth devices. I tried few Bluetooth devices and non worked for me, except the one installed onboard of my Toshiba Satellite LAPTOP ( It is because it supports only Toshiba products – I guess)

15. Then this appear:
First of all don’t care about the warning DDC 2.95 Info (it is because I have not connected the KTS). If your KTS was detected by your OS earlier, everything should be ok and you will have an info in Connection test KTS 540 – USB#315 – “Connection OK”. Then click Accept and go to Firmware update tab, and you will see this:
You will not be able to use your newer version of ESI tronic to diagnose till you will not update your KTS firmware.!!! But also remember that after the update you will not be able to use earlier versions of ESITronic to

diagnose the car. During this process you need to connect the KTS to an external power adapter and remember not to disconnect the KTS !!! After finishing firmware click Accept and OK.
THE END
Related Documents