Editing Exercise Screenshots

Welcome message from author
This document is posted to help you gain knowledge. Please leave a comment to let me know what you think about it! Share it to your friends and learn new things together.
Transcript
Editing Exercise Screenshots

This is a screenshot of the beginning phase of creating a video on adobe premier pro. To import the clips, I clicked on file and then import, and selected the clips that I wanted.
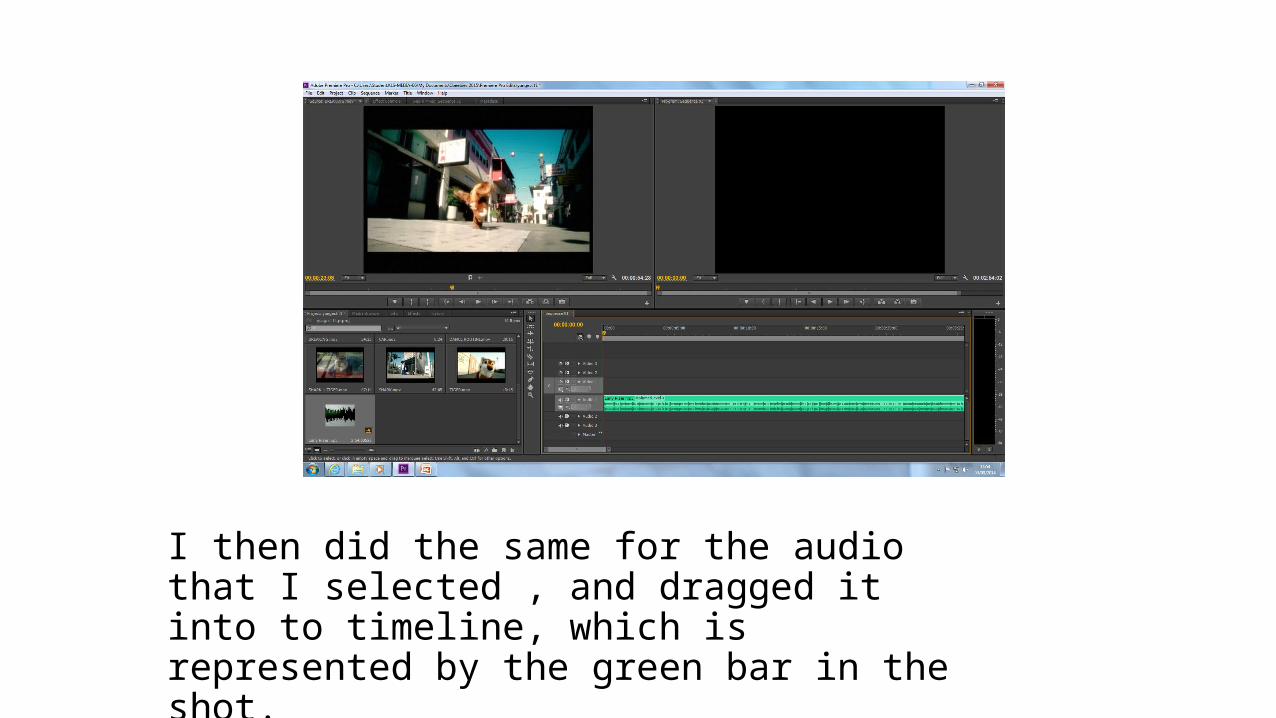
I then did the same for the audio that I selected , and dragged it into to timeline, which is represented by the green bar in the shot.
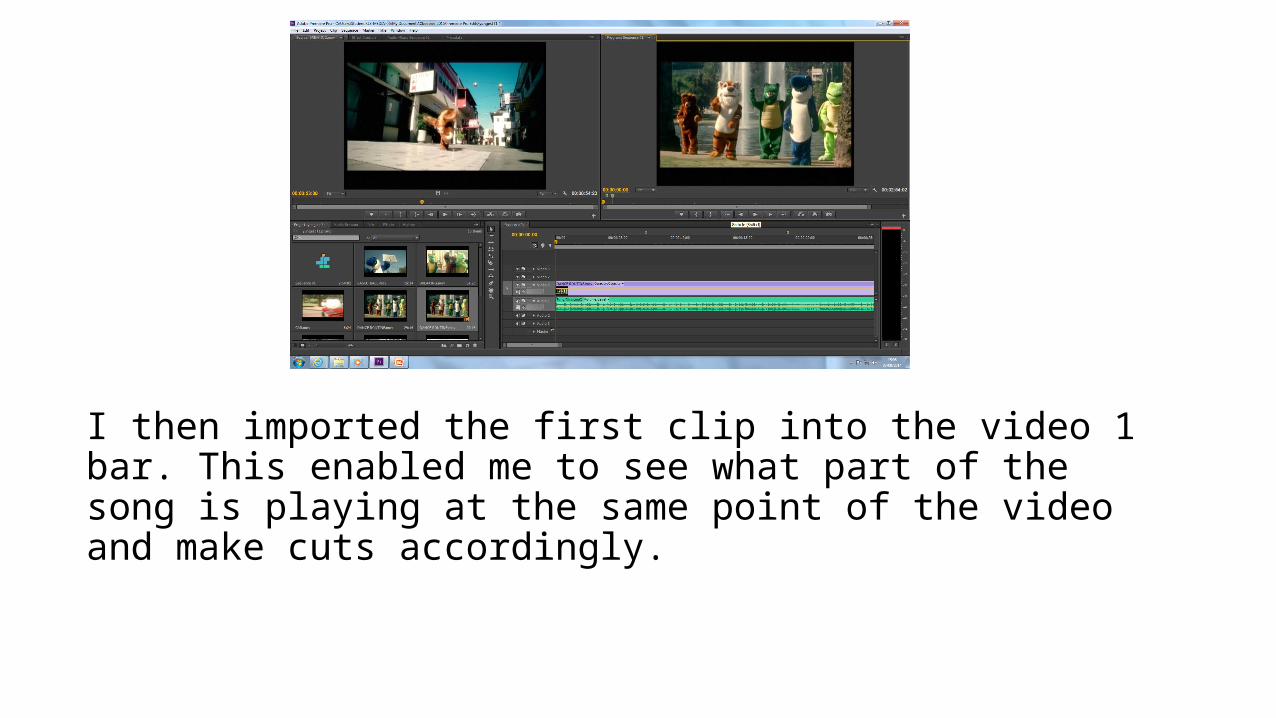
I then imported the first clip into the video 1 bar. This enabled me to see what part of the song is playing at the same point of the video and make cuts accordingly.
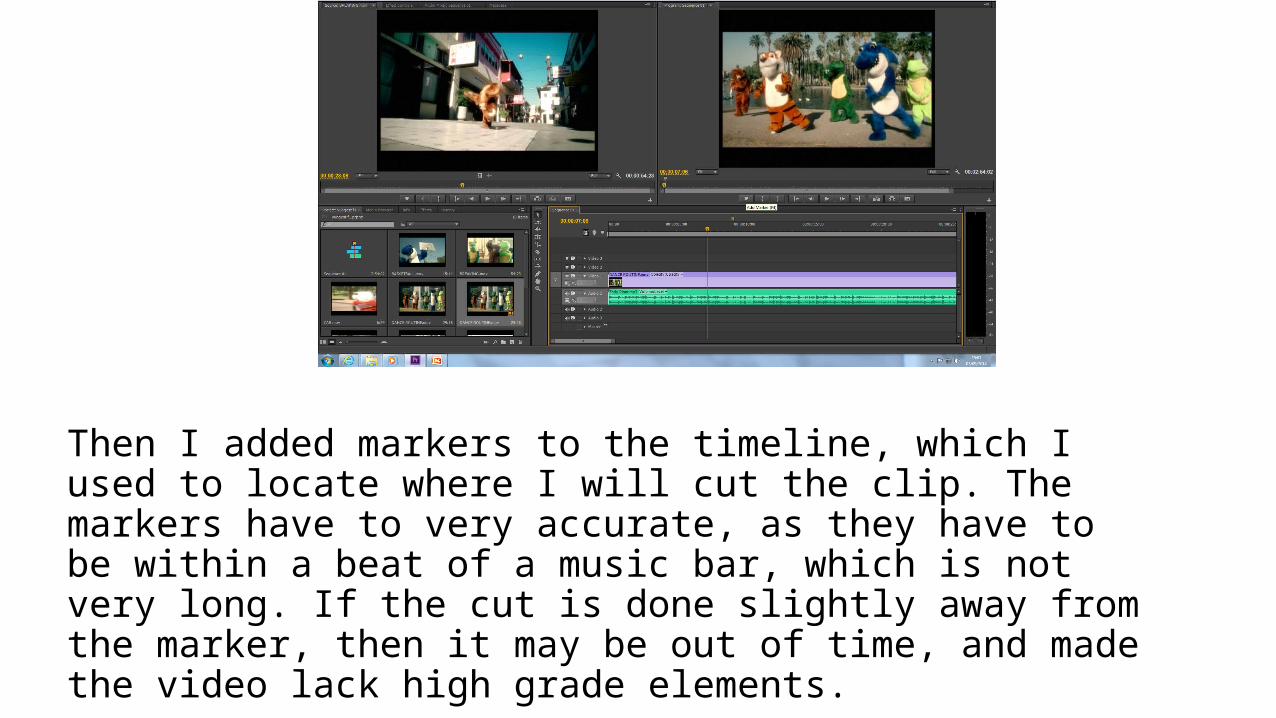
Then I added markers to the timeline, which I used to locate where I will cut the clip. The markers have to very accurate, as they have to be within a beat of a music bar, which is not very long. If the cut is done slightly away from the marker, then it may be out of time, and made the video lack high grade elements.
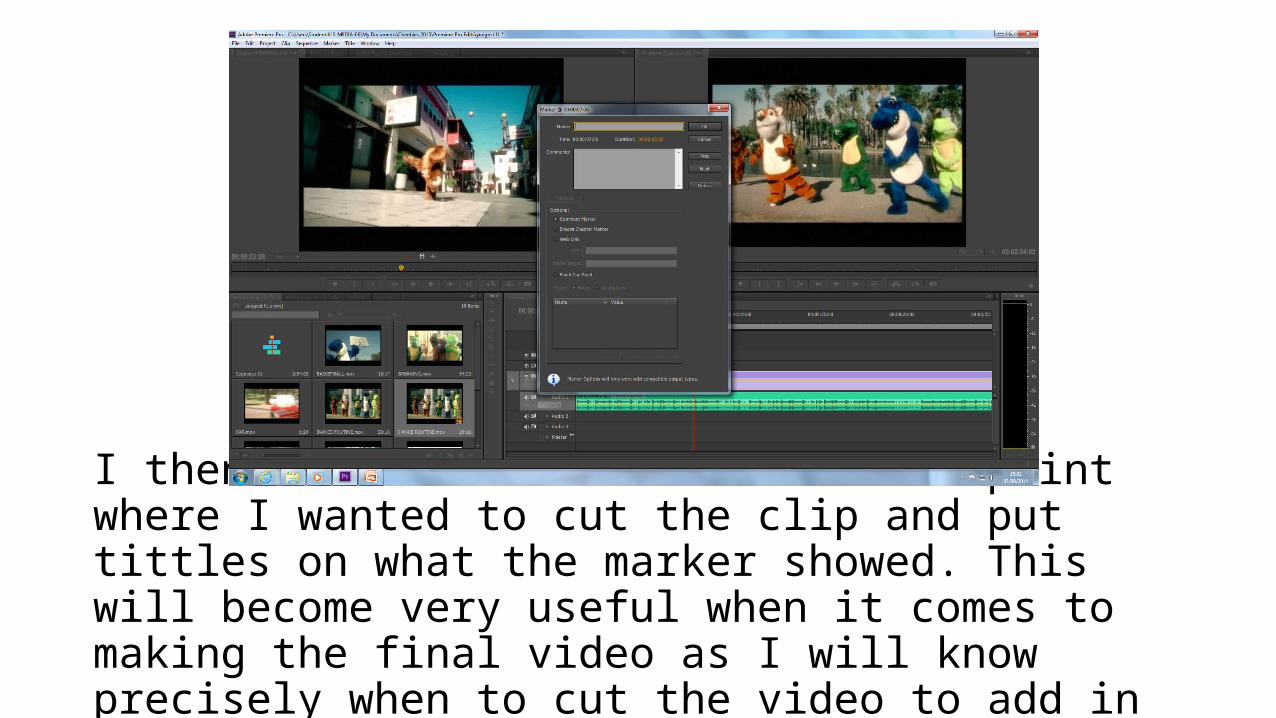
I then added a marker to the exact point where I wanted to cut the clip and put tittles on what the marker showed. This will become very useful when it comes to making the final video as I will know precisely when to cut the video to add in new clips
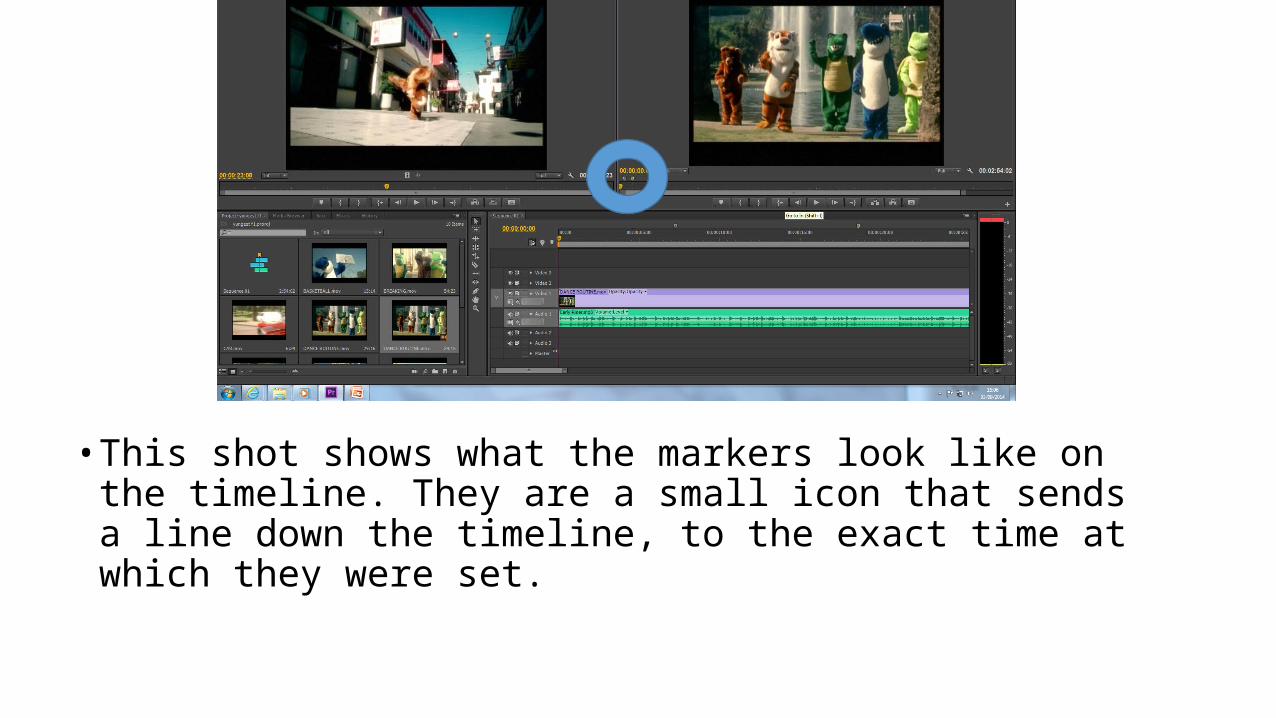
• This shot shows what the markers look like on the timeline. They are a small icon that sends a line down the timeline, to the exact time at which they were set.
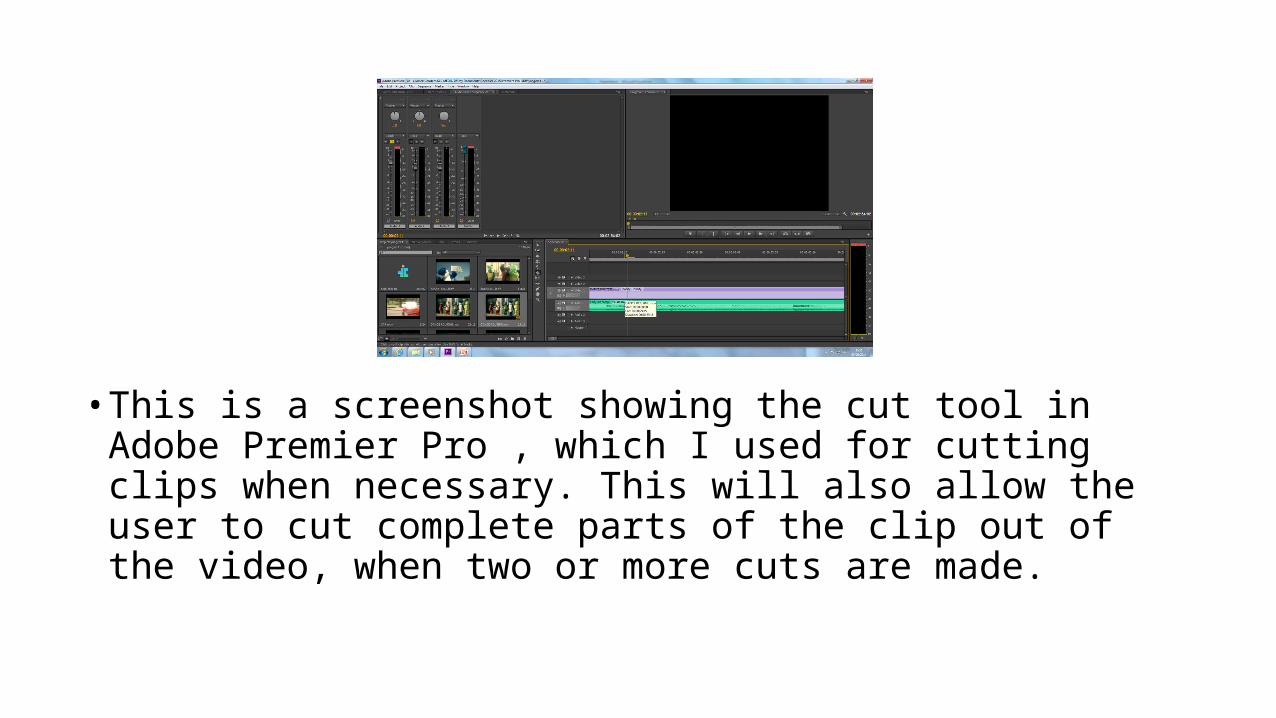
• This is a screenshot showing the cut tool in Adobe Premier Pro , which I used for cutting clips when necessary. This will also allow the user to cut complete parts of the clip out of the video, when two or more cuts are made.
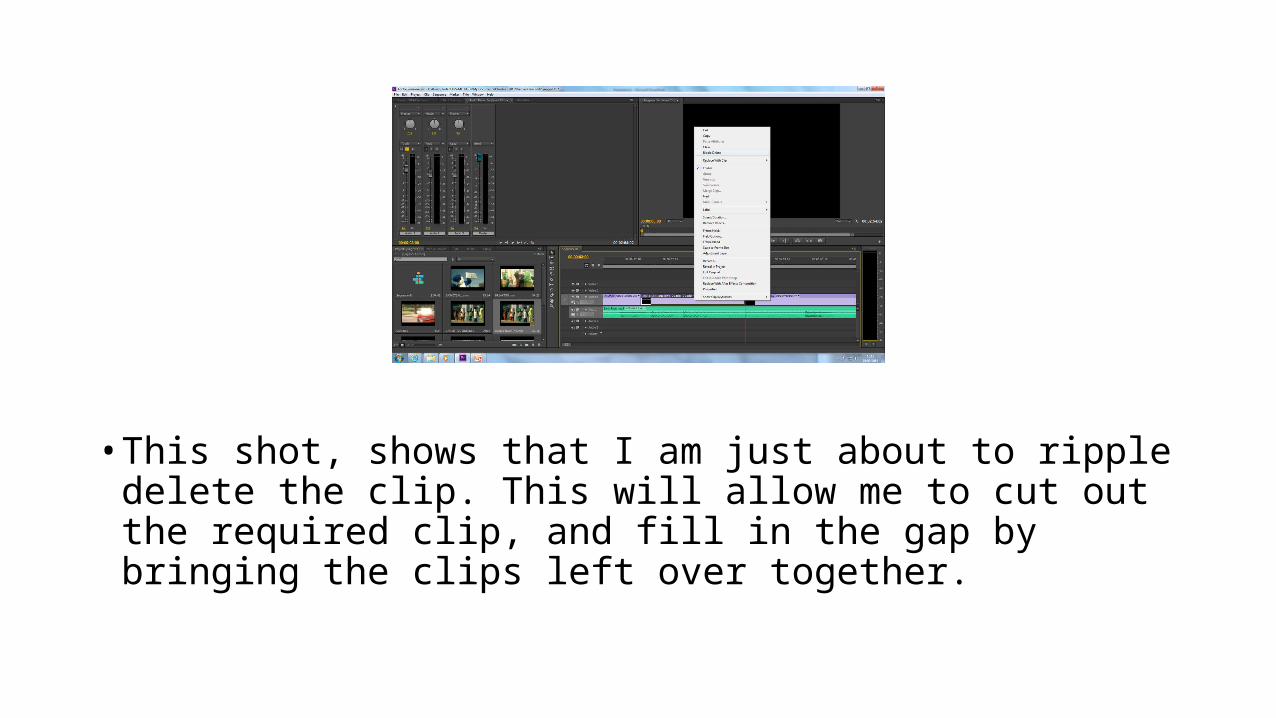
• This shot, shows that I am just about to ripple delete the clip. This will allow me to cut out the required clip, and fill in the gap by bringing the clips left over together.
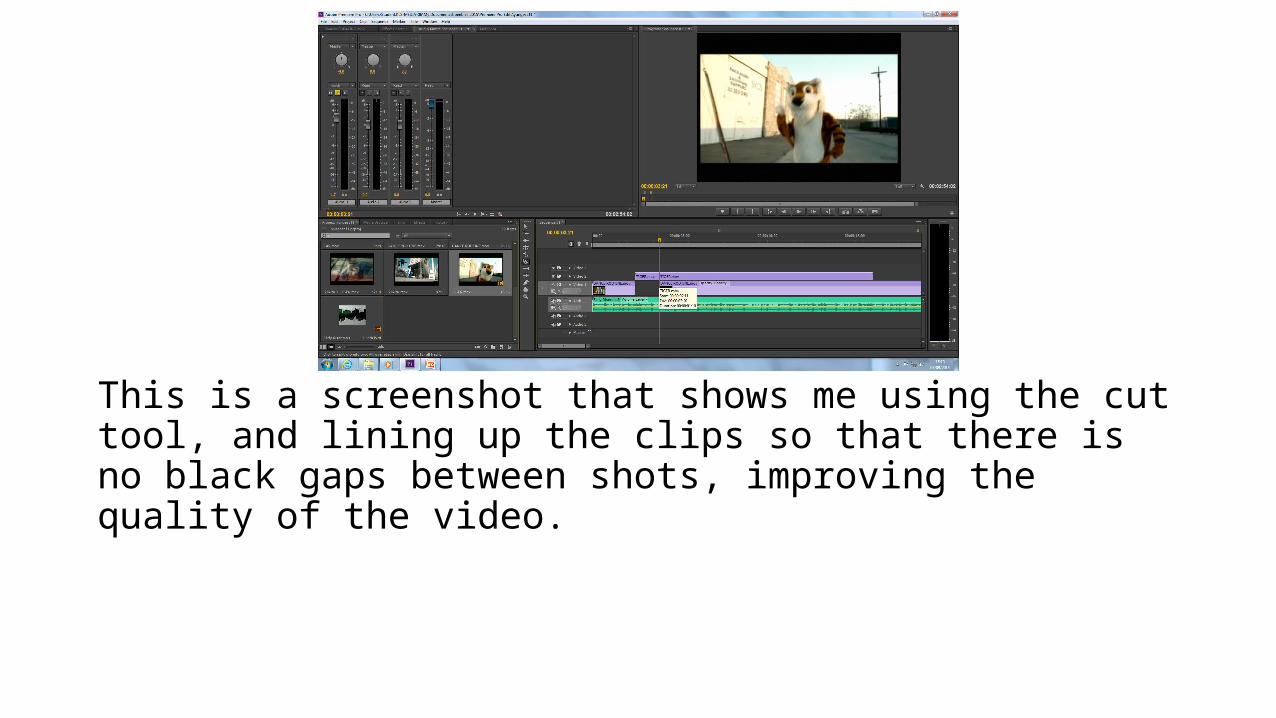
This is a screenshot that shows me using the cut tool, and lining up the clips so that there is no black gaps between shots, improving the quality of the video.
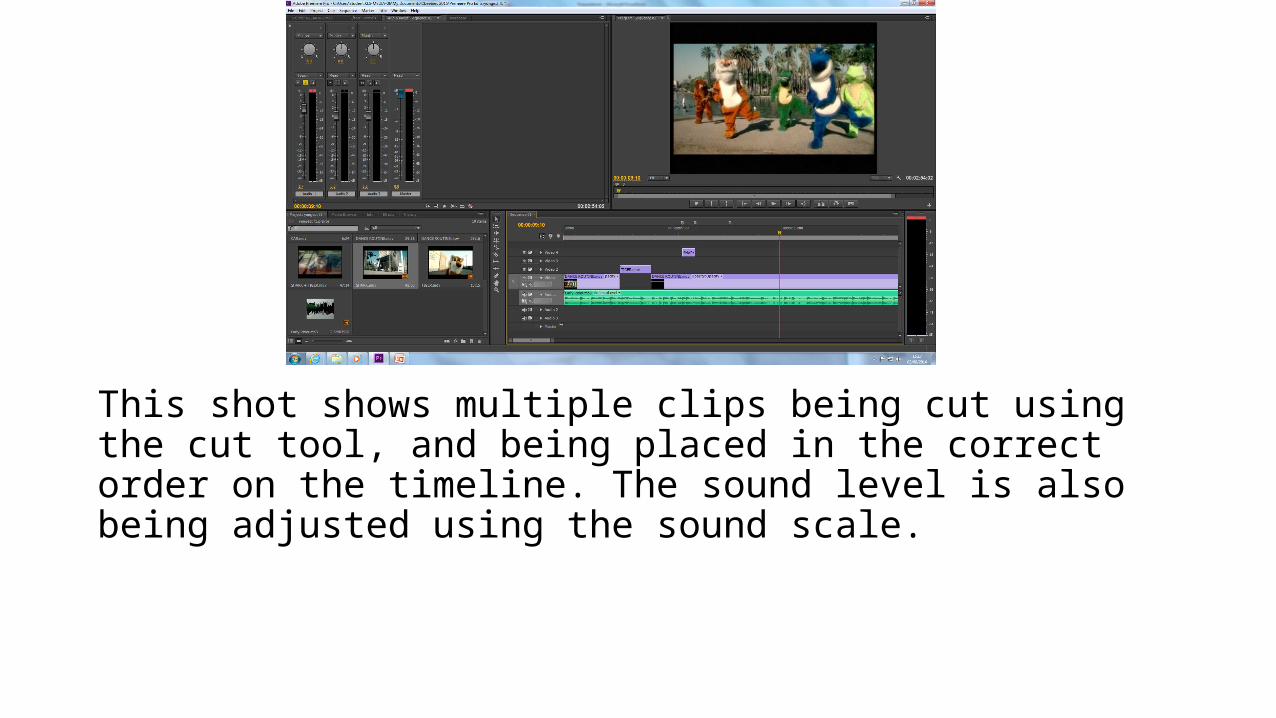
This shot shows multiple clips being cut using the cut tool, and being placed in the correct order on the timeline. The sound level is also being adjusted using the sound scale.
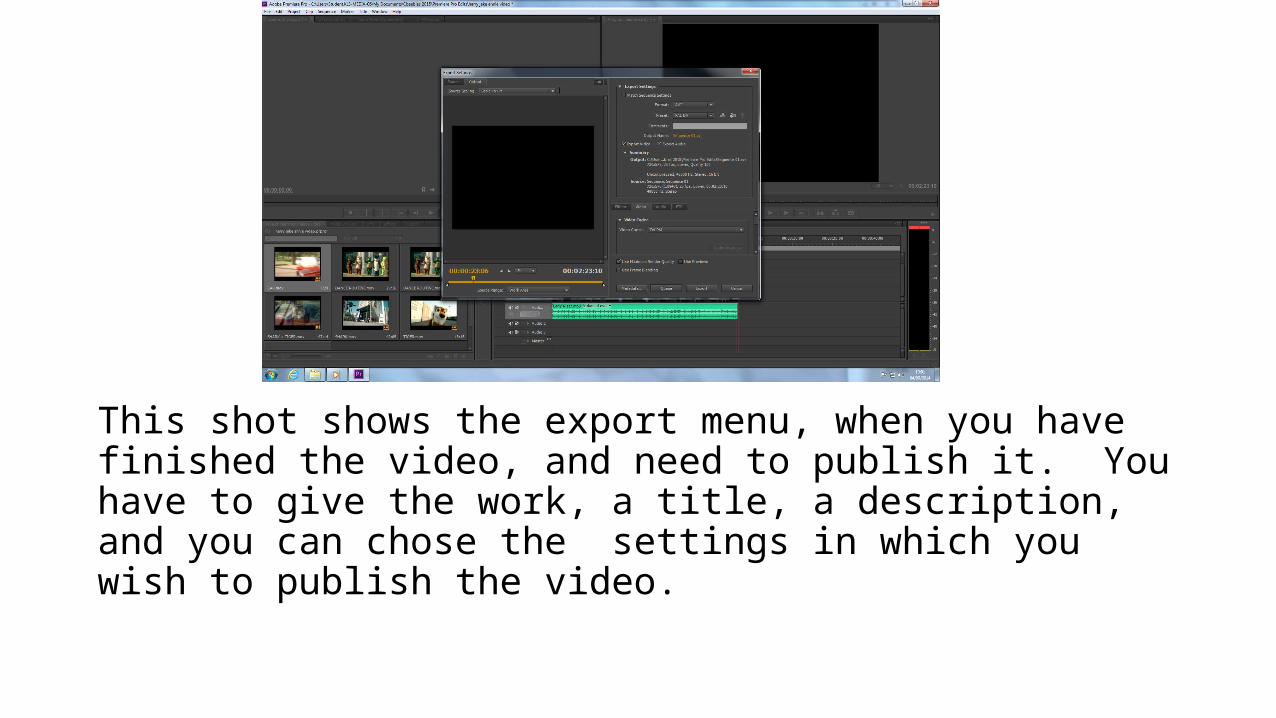
This shot shows the export menu, when you have finished the video, and need to publish it. You have to give the work, a title, a description, and you can chose the settings in which you wish to publish the video.
Related Documents