DAZLR ual Action Zamor Launching Robo Created by: Davis L. Brian Instructions prepared by: Guy Ziv Note: these instructions Only came to pass due to The work of Guy, and the NXTasy website.

DAZLR Dual Action Zamor Launching Robot Created by: Davis L. Brian Instructions prepared by: Guy Ziv Note: these instructions Only came to pass due to.
Dec 17, 2015
Welcome message from author
This document is posted to help you gain knowledge. Please leave a comment to let me know what you think about it! Share it to your friends and learn new things together.
Transcript

DAZLRDual Action Zamor Launching Robot
Created by:Davis L. Brian
Instructions prepared by:Guy Ziv
Note: these instructionsOnly came to pass due toThe work of Guy, and theNXTasy website. ThankYou! -- Brian Davis
OK, here’s some building instructions for building DAZLR (Dual Action Zamor Launching Robot) from one NXT kit and a handful of extra pieces. Besides a NXT kit, you will need also need 16 copies of Technic liftarm 1x3 (Peeron part # 6632), four of Technic liftarm 1x4 (Peeron part # 32449), and two of the Zamor sphere launchers (Peeron part # 54271). Now about the instructions… consider them a puzzle. Unlike LEGO official directions, I often combine several steps into one, or flip subassemblies over between steps without warning, or assemble several different subassemblies at once, and take pictures as I go. In places, you may have to watch carefully to see how things go together. Now, on the the “instructions”…
-- Brian L. Davis

Step 1: Assemble the bottom platform that supports the firing motor and launchers. The long grey beam is not part of DAZLR, but is only there to show the length of the front axles (8L) used to mount the ultrasound sensor later.

Step 2: Here it is partially put together.

Step 3: The completed undercarriage subassembly
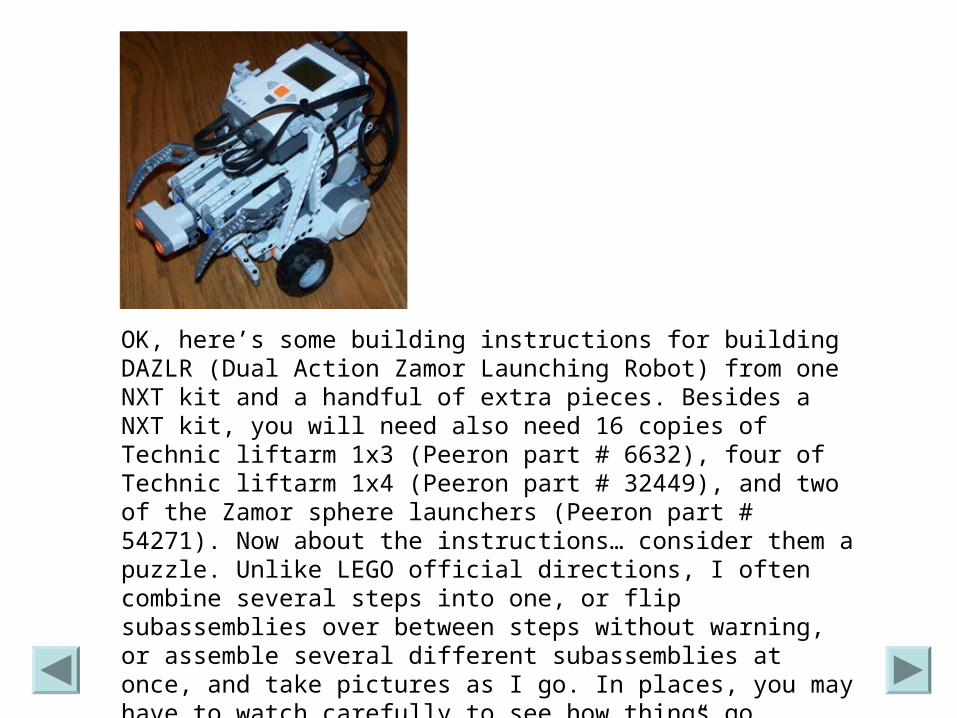
Step 4: Now we need the two pistons to push the spheres. If you don’t have those 1x3 liftarms, be creative. The ones nearest the black axles you can figure out a way to use 3L studless beams, but I’ve found the other ones (that ultimately pin to the motor) are more stable using the 1x3 liftarms.

Step 5: Don’t attach those axles yet...

Step 6: You need to partially dismantle the undercarriage to put the pistons in place, sliding the axles in through the sphere launchers at the end. Here one side is already finished, with the other side still “exploded” to show how it all fits together. The two pistons should be out of phase (when one is out, the other should be in).
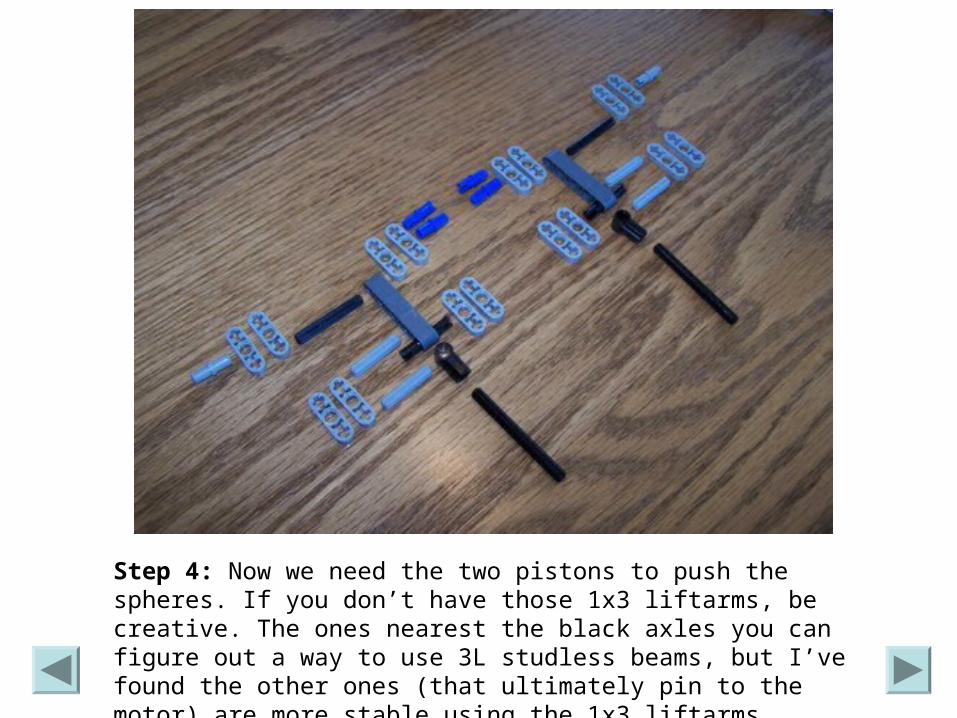
Step 7: The undercarriage with pistons in place, out of phase.

Step 8: Now build the wheel assemblies for either side. The half-bushing go on the axle between the motor and the wheel, to hold the wheel clear of the motor housing.

Step 9: Here are the left and right completed wheel assemblies.

Step 10: Now mount the wheel assemblies to the undercarriage (you have to carefully flex things to get the white beam into place). Note the undercarriage has been flipped over here (you’re looking at the bottom).

Step 11: The undercarriage with the wheel assemblies attached.
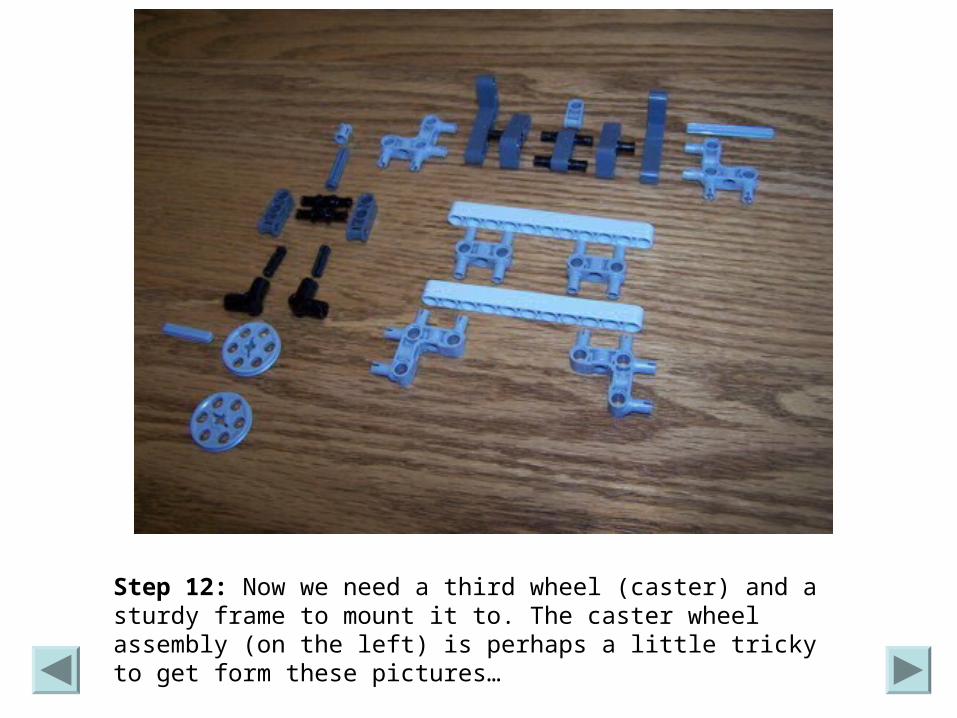
Step 12: Now we need a third wheel (caster) and a sturdy frame to mount it to. The caster wheel assembly (on the left) is perhaps a little tricky to get form these pictures…

Step 13: Here’s the rear support assembly completed, and the rear caster almost done to the left…

Step 14: Here’s the rear assembly, with the caster wheel installed. You can smooth out the motion of the caster wheel by using longer smooth beams to build up a place for it to pivot against, if you like.
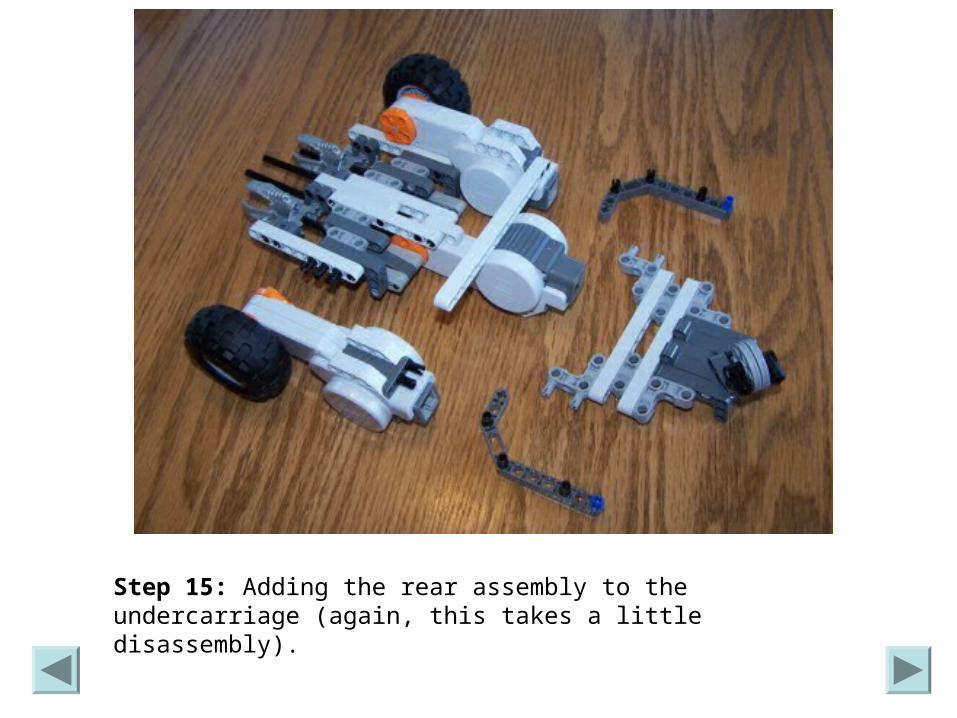
Step 15: Adding the rear assembly to the undercarriage (again, this takes a little disassembly).

Step 16: The rear assembly pinned into the undercarriage, sandwiched between the wheel assemblies, with the double-bent liftarms waiting to cross-brace the whole tail together.

Step 17: Those holes on the sides of the Hassenpins are very useful here…

Step 18: Ultimately, the NXT just hangs off very simple supports on the top (to allow it to pivot up for reloading).
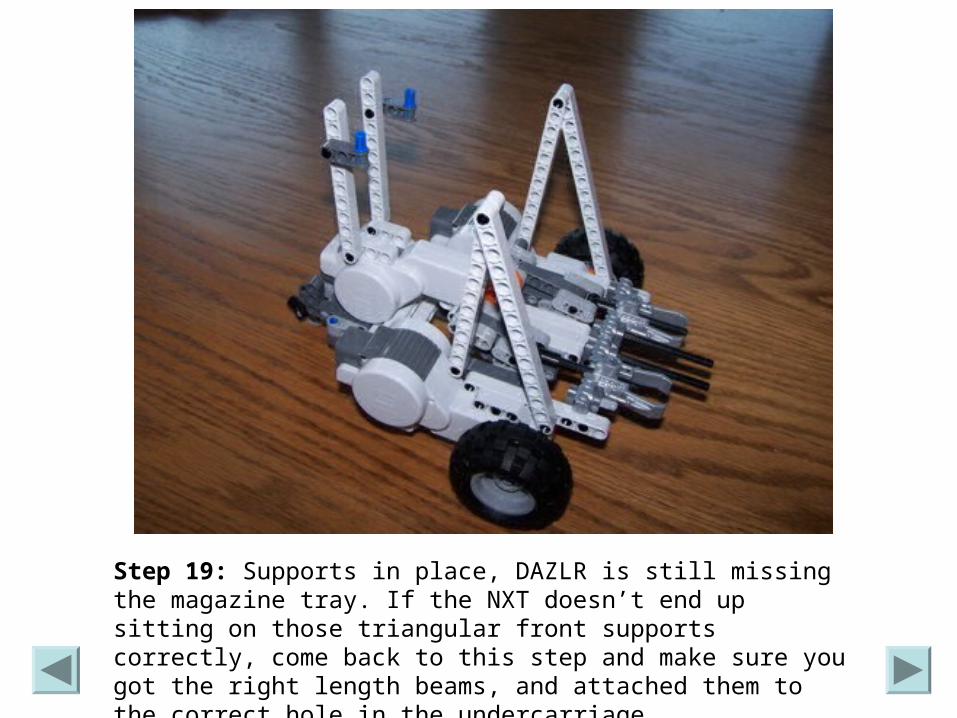
Step 19: Supports in place, DAZLR is still missing the magazine tray. If the NXT doesn’t end up sitting on those triangular front supports correctly, come back to this step and make sure you got the right length beams, and attached them to the correct hole in the undercarriage.
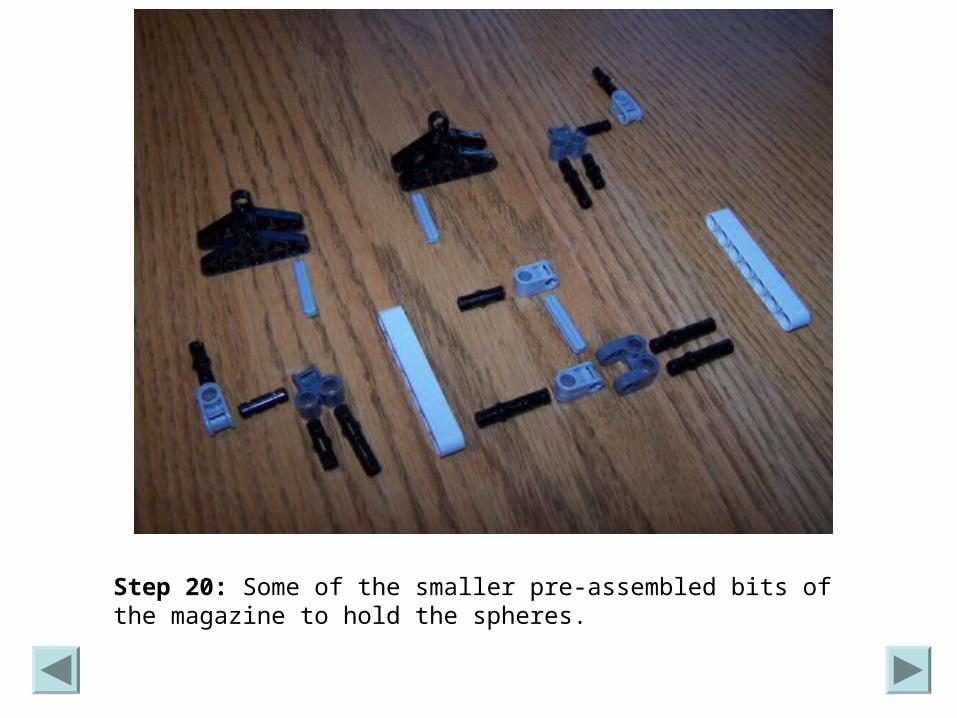
Step 20: Some of the smaller pre-assembled bits of the magazine to hold the spheres.

Step 21: Yes, the small centerpiece here is asymmetric, but it will still work.

Step 22: The middle assembly will form the center front of the magazine, while the black triangles form agitators (to reduce jams) driven by the pistons below the tray.

Step 23: The sphere magazine, the most complicated part to assemble. Note where the pins are in all the various beams, and where the subassemblies from step 22 appear. This is by far the toughest section to construct using these instructions, so take you time. (See also Note)

Step 24: The centerbeam assembled, with the (identical) left and right sides in different stages of completion. Note that you are looking at the bottom of the sphere tray.

Step 25: One half done, with the other half partially completed…
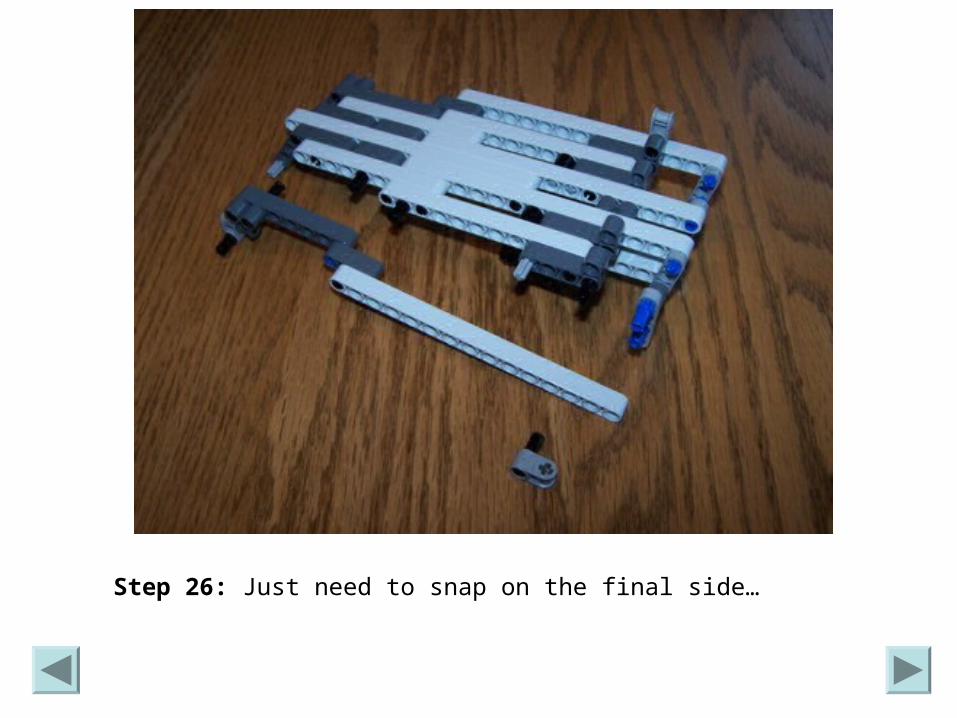
Step 26: Just need to snap on the final side…

Step 27: The completed magazine, or sphere tray, still upside down. You may have to look at other pictures to make sure you got the front correct. It will attach to the undercarriage by sliding the two cross-blocks (also called perpendicular axle connectors) onto protruding axles on the undercarriage.

Step 28: Making the sidewalls of the tray.
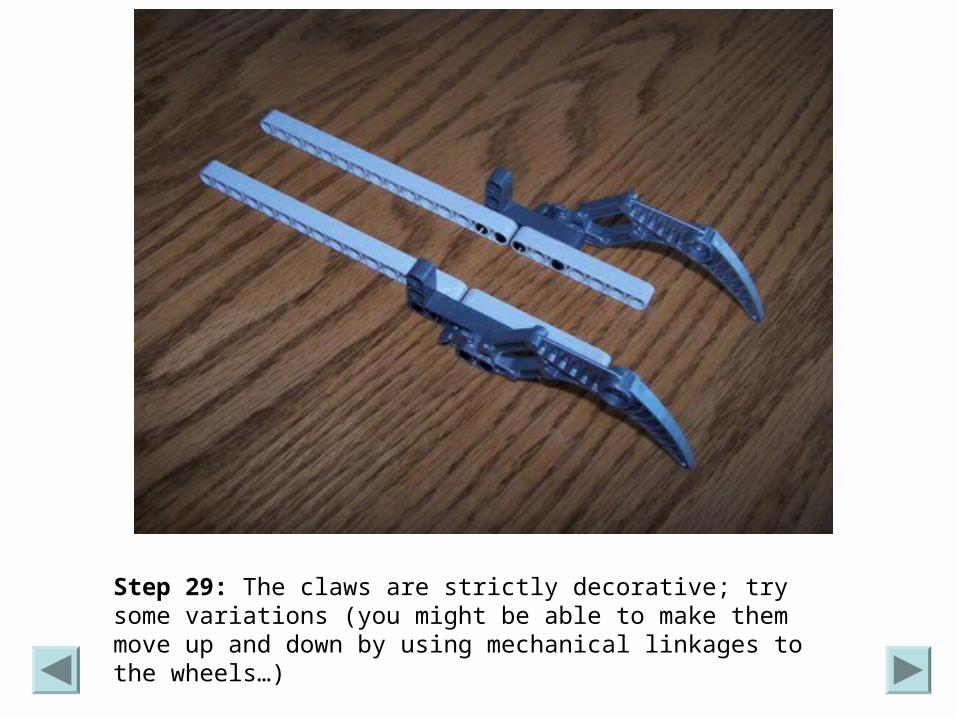
Step 29: The claws are strictly decorative; try some variations (you might be able to make them move up and down by using mechanical linkages to the wheels…)

Step 30: Turning the magazine right side up, the two sidewalls pin on.

Step 31: The completed magazine tray, with the black triangle cams shown that will help break up ball jams.
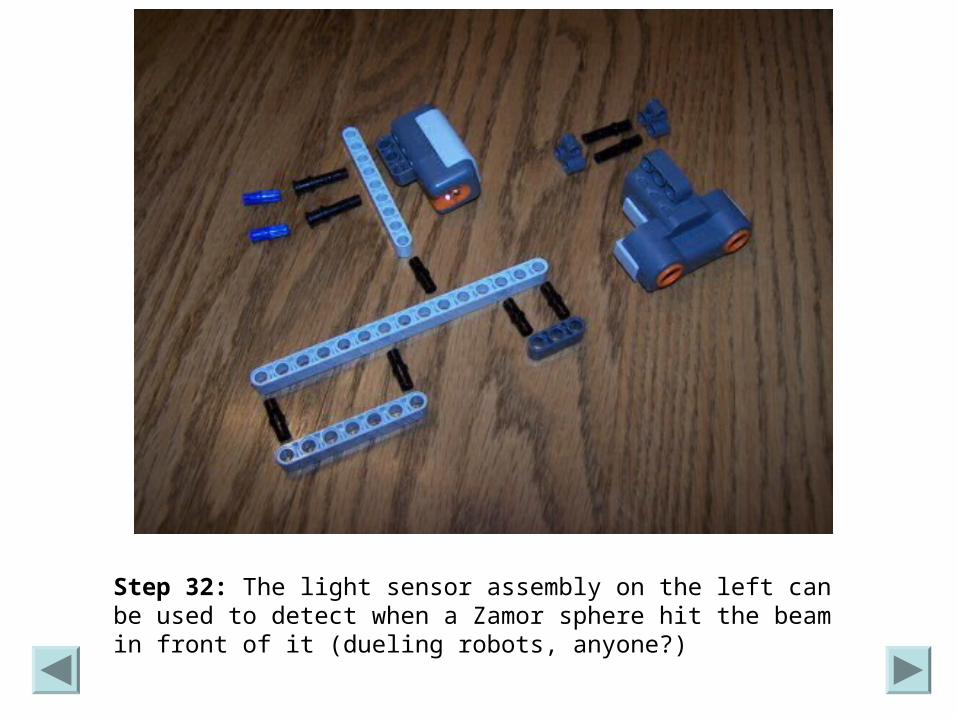
Step 32: The light sensor assembly on the left can be used to detect when a Zamor sphere hit the beam in front of it (dueling robots, anyone?)
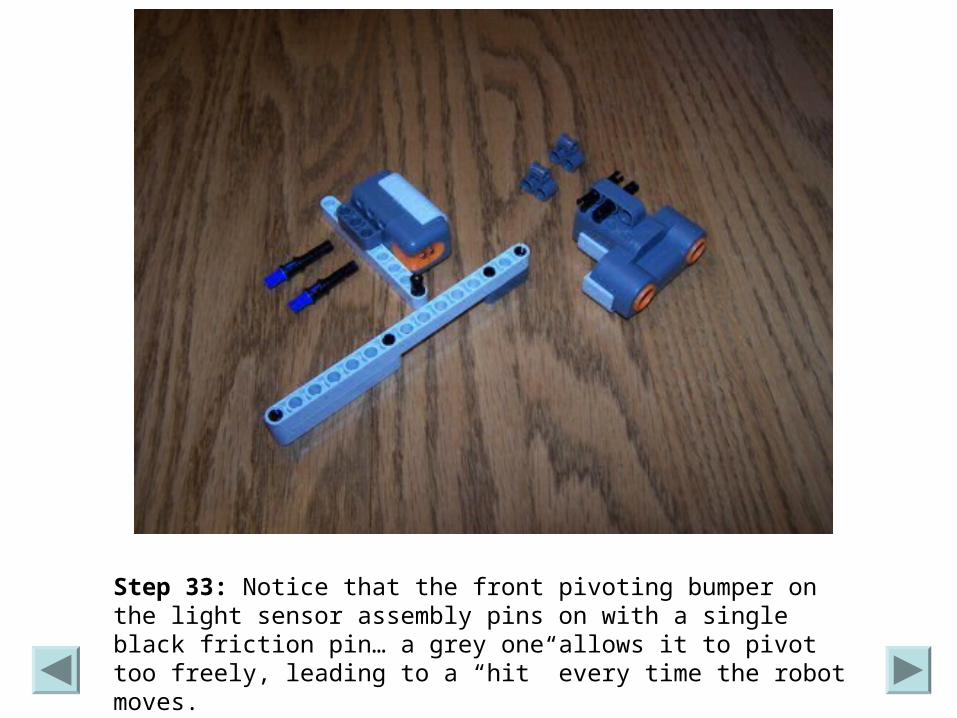
Step 33: Notice that the front pivoting bumper on the light sensor assembly pins on with a single black friction pin… a grey one allows it to pivot too freely, leading to a “hit” every time the robot moves.

Step 34: The completed sensor assemblies

Step 35: The US sensor slides onto the two long axles protruding forward, while the light sensor “bumper” assembly pins to the bottom of the undercarriage. When you attach the US sensor, you may want to run the wires through the undercarriage.

Step 36: Now mount the tray or magazine onto the undercarriage (note the US sensor already wired here, so the wire runs under the tray but free of the pistons). Notice how the black triangles sit (ultimately, as the pistons move, they will bump these up and down).
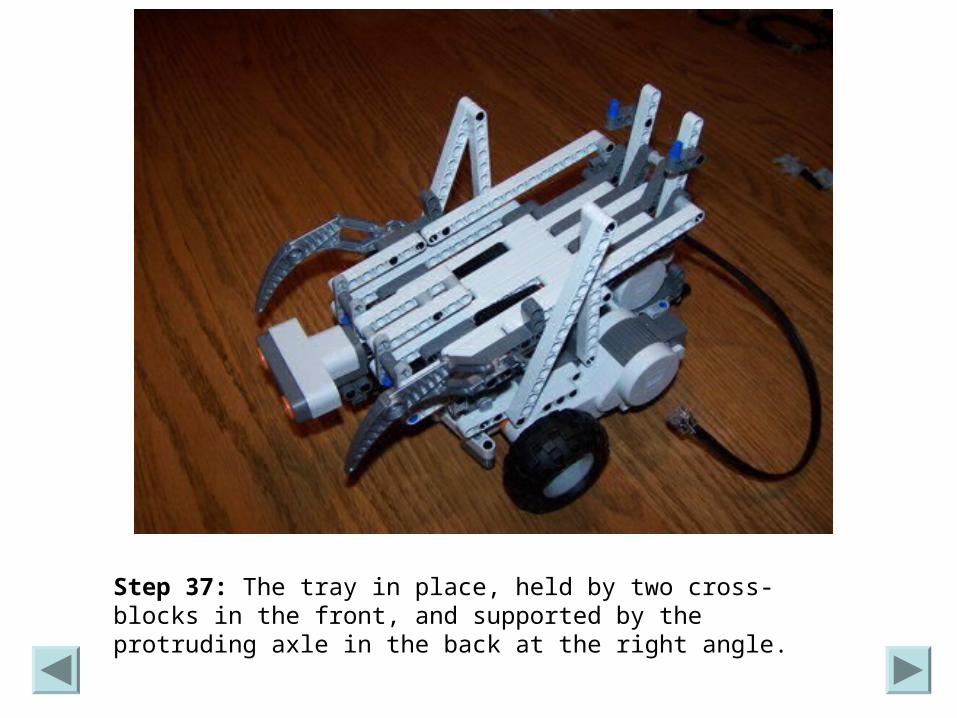
Step 37: The tray in place, held by two cross-blocks in the front, and supported by the protruding axle in the back at the right angle.

Step 37a: Here’s a close up of the rear attachment.

Step 37b: And a close up of the front attachment point (use the Zamor sphere launcher to orient where these parts are).
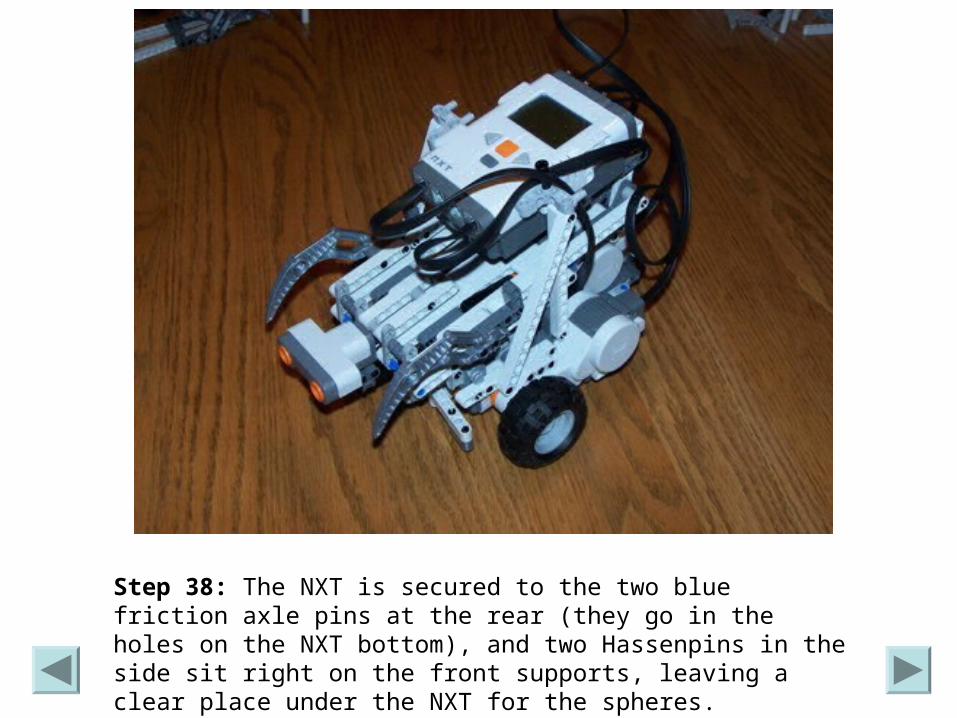
Step 38: The NXT is secured to the two blue friction axle pins at the rear (they go in the holes on the NXT bottom), and two Hassenpins in the side sit right on the front supports, leaving a clear place under the NXT for the spheres.

That’s it! You now have a simple robot, where driving the third motor will rapidly launch Zamor spheres. DO NOT put your face in front of the shooters! Seriously, these will fires the spheres hard enough to hurt you if you are not careful.
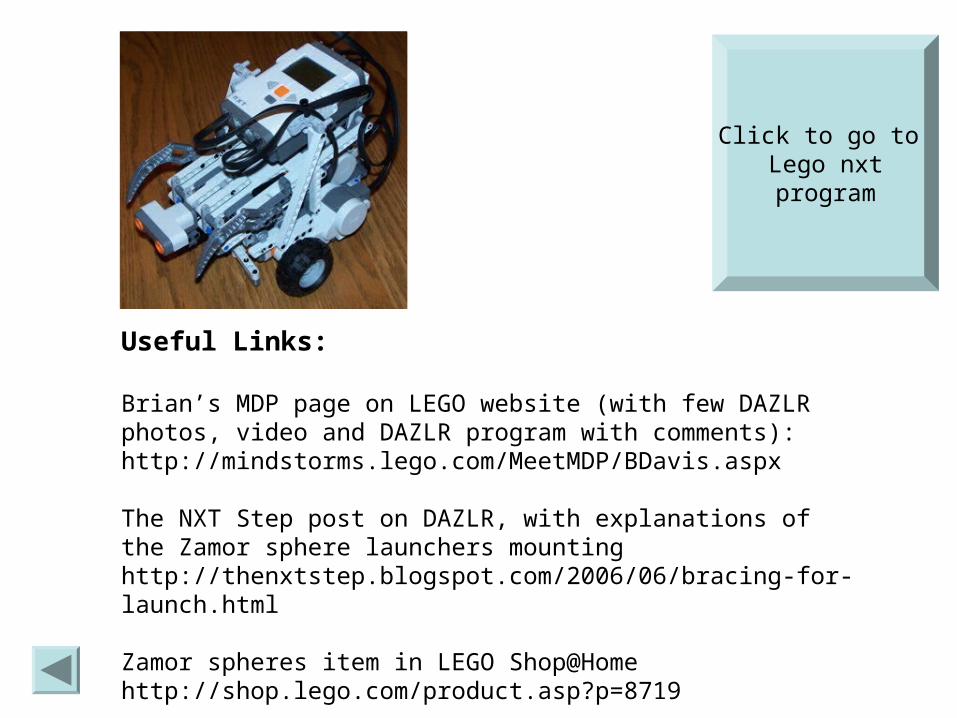
Useful Links:
Brian’s MDP page on LEGO website (with few DAZLR photos, video and DAZLR program with comments):http://mindstorms.lego.com/MeetMDP/BDavis.aspx
The NXT Step post on DAZLR, with explanations of the Zamor sphere launchers mountinghttp://thenxtstep.blogspot.com/2006/06/bracing-for-launch.html
Zamor spheres item in LEGO Shop@Homehttp://shop.lego.com/product.asp?p=8719
Click to go to Lego nxtprogram
Related Documents