CTN 2018 CTN Member Service Guide

Welcome message from author
This document is posted to help you gain knowledge. Please leave a comment to let me know what you think about it! Share it to your friends and learn new things together.
Transcript

CTN 2018
CTN Member Service Guide
Copyright 2018 CenturyLink – All rights reserved Page 1
Welcome! Welcome to the 2018 CTN Member Service Guide. This guide provides the process and information
needed to obtain repair service for your Colorado Telehealth Network, information on how to use your
Solarwinds Portal and a contact list of personnel at CenturyLink who are devoted to your customer
service.
We thank you for your business.
Sincerely,
The CenturyLink CTN Team

Copyright 2018 CenturyLink – All rights reserved Page 2
Contents
WELCOME! .................................................................................................................... 1
TROUBLE REPORTING AND PROBLEM RESOLUTION ....................................................... 4
CENTURY LINK MANAGED ENTERPRISE SERVICE (MES) NETWORK OPERATIONS CENTER (NOC) ................................................ 4
ALARM, EVENT AND TICKET HANDLING ......................................................................... 6
Alarm & Event Handling ........................................................................................................................................ 6
Ticket Handling ...................................................................................................................................................... 6
TROUBLE REPORTING AND PROBLEM RESOLUTION ESCALATION ............................................................................................ 6
TROUBLE REPORT .......................................................................................................................................................... 6
TROUBLE ESCALATION PROCESS ....................................................................................................................................... 7
CenturyLink Escalations & Time-Lines ................................................................................................................... 7
PLANNED MAINTENANCE WINDOWS / CHANGE MANAGEMENT ............................................................................................ 9
UNPLANNED NETWORK OUTAGES AND ACTS OF NATURE (FORCE MAJEURE) ........................................................................... 9
SOLARWINDS PORTAL CUSTOMER USER GUIDE ............................................................ 10
SUPPORTED BROWSERS ................................................................................................................................................ 10
ACCESSING THE CENTURYLINK SOLARWINDS PORTAL .................................................. 11
DEFAULT VIEW.............................................................................................................. 12
HELP DESK TAB ............................................................................................................. 14
CREATING TICKETS VIA THE PORTAL ............................................................................. 15
VIEWING & UPDATING TICKETS VIA THE PORTAL .......................................................... 18
UPDATING YOUR PROFILE............................................................................................. 19
CREATING & UPDATING TICKETS VIA E-MAIL ................................................................ 20
CONTROL CENTER TAB .................................................................................................. 22
REPORTS TAB ................................................................................................................ 22

Copyright 2018 CenturyLink – All rights reserved Page 3
MAPS TAB..................................................................................................................... 23
CHANGE/RESET YOUR PORTAL PASSWORD .................................................................. 23
COLORADO TELEHEALTH SUPPORT STRUCTURE – FOR CTN MEMBERS ......................... 24

Copyright 2018 CenturyLink – All rights reserved Page 4
Trouble Reporting and Problem Resolution
Century Link Managed Enterprise Service (MES) Network Operations Center (NOC)
The CenturyLink Managed Enterprise Service (MES) Network Operations Center (NOC) provides 24
hours, seven days a week, 365 days a year repair reporting and resolution. All CTN repair issues are
reported through CenturyLink’s MES NOC Surveillance Center Help Desk.
CenturyLink MES NOC Surveillance Center Help Desk
1 844 246-2347
Be prepared to provide the following information to the IM support center.
Identify as Colorado Telehealth Network (CTN) rather than site specific member name
o This is important as it will avoid confusion and lost time searching for information.
Provide specific member name and site address of the trouble, i.e. The Hospital, 1234 Anywhere St, Everywhere, CO
o if there is a specific floor and/or suite or room number provide that as well, i.e. 10th floor, server room
Your name and phone number
Description of the trouble
Access hours
Site contact person and working telephone number, cellular, pager.
See next page for information to open a trouble ticket online using the Web Help Desk.
Please Note: Trouble tickets can also be opened online (provided connectivity is available) via the link:
https://me-help.centurylink.com

Copyright 2018 CenturyLink – All rights reserved Page 5
In order to open a ticket through CenturyLink Web Help Desk, please use the credentials provided to you
via email on June 1, 2015.
CenturyLink Web Help Desk link: https://me-help.centurylink.com
Username:
Password:
Your Site Information
You can check your site information at:
SolarWinds Portal Login:
IP: https://67.230.223.19
Username:
Password:
NETWORK:
Circuit ID’s:
Location:

Copyright 2018 CenturyLink – All rights reserved Page 6
Alarm, Event and Ticket Handling
Alarm & Event Handling
ME NOC Ticket Generated for events marked as Critical or Major
Initial Event triage performed by ME NOC
Event Escalation to follow normal CenturyLink internal process flows.
Customer notification during business hours
Critical Alarms: Customer Site Email
Major Alarms: Customer Site Email
Customer notification after business hours
Critical Alarms: Customer Site Email
Major Alarms: Customer Site Email
Ticket Handling
In the event Customer contact is required, call site contact for the location reporting the event
Yes - Customer notified when Alarm Ticket is Open/Closed:
Yes - Customer notified when MACD ticket is Open/Closed:
Yes - Customer notified when sending tech to site.
Trouble Reporting and Problem Resolution Escalation
Trouble Report
1. Contact the CenturyLink MES with your trouble report. Request a commitment time frame and
keep record of the ticket number as well as the support technician’s name.
2. If the commitment time is not met, or the original time frame is unreasonable given the urgent
state of the request, ask the technician to escalate the ticket to the Manager on duty.
3. If you are not receiving a response from the manager on duty or you are unsuccessful in
negotiating an acceptable time frame, call the CTN MES Service Manager, Carrie Holt (321) 203 -

Copyright 2018 CenturyLink – All rights reserved Page 7
7023. If you are unable to reach Carrie, contact Andrew Frevert, CTN Service Manager, office
phone (303) 992-8990 or mobile (720) 205-1692.
4. Carrie or Andrew will continue the escalation process from that point forward and will give you
status until resolved.
Trouble Escalation Process
CenturyLink Escalations & Time-Lines
CenturyLink’s ME includes a multi-tier support & escalation model which is designed to guarantee that each
service request is given the proper attention. The MES management team has established escalation policies
which require a periodic review for each reported issue to guarantee service is restored within the shortest
timeframe possible.
The Escalation Times by Event Severity table shown on the next page provides CenturyLink’s escalation time-line
for management response objectives. CenturyLink management will engage with the ME support team, along
with the manufacturer, and Customer to ensure each escalation receives the proper focus until resolution and
customer acceptance has been reached.
Escalation Times by Event Severity / Priority
Escalation Tier Critical / P1 Major / P2 Minor / P3-
P4
NOC Supervisors / Service Manager 15 min. 15 min. 4 Hours
ME Manager 30 min. 1 Hour 8 Hours
Manager / Technology Management 1 Hour 2 Hours 12 Hours
Director 1.5 Hours 3 Hours 16 Hours
VP 2 Hours 4 Hours 24 Hours
The ME escalation process includes 6 tiers beginning with our NOC through VP of Operations as
shown on the next page. The escalation clock begins with the first call to our NOC or when a repair
request ticket is generated.

Copyright 2018 CenturyLink – All rights reserved Page 8
Level 1 Phone Number
Manged Enterprise NOC (844) 246-2347
Level 2 Escalation Contact Phone Number
Service Manager Carrie Holt
[email protected] (321) 203-7023

Copyright 2018 CenturyLink – All rights reserved Page 9
Planned Maintenance Windows / Change Management
The ME NOC follows ITIL best practices with regard to change management & change control. Change
planning and timely communication between the customer and the ME NOC is critical to ensure changes
are fully understood by all parties and to limit service disruptions during change activities. Each change
will be reviewed by the ME NOC engineering team and a change implementation plan will be drafted.
It will be the customer’s responsibility to communicate any planned service impacting change that may
affect contracted devices or services forty-eight hours prior to work being performed. Only emergency
changes are exempt from this notification requirement. This will ensure that the ME NOC is properly
prepared to react to alarms which are received during planned maintenance events. Once the planned
maintenance activity has been completed, the CenturyLink ME NOC should once again be notified so
normal alarm monitoring and response levels can resume.
As an alternative, the customer may provide a known maintenance window start-time and stop-time
during a single notification and prior to any work commencing. In the event that the provided
maintenance window stop-time is exceeded, a call to report the needed time extension is required.
Important Note: Alarms from the impacted contracted equipment reporting between the maintenance
window start and stop times will not be acted upon.
Unplanned Network Outages and Acts of Nature (Force majeure)
The ME NOC team understands that events can occur that are unplanned and, at times unexpected. In
the event that the Customer becomes aware of any outages due to hardware failures for network
components or during natural events such as power outages resulting from electrical storms, please
notify the CenturyLink ME NOC where practical. It is likely we will already be aware of the event and
working to understand and resolve the issue; however, rapid, notification of such events by Customer is
most helpful and aids in quickly understanding site conditions while reducing diagnostics efforts.

Copyright 2018 CenturyLink – All rights reserved Page 10
Solarwinds Portal Customer User Guide
Supported Browsers The following web browsers are supported on the Solarwinds portal:
Chrome latest version Firefox 14 and above Internet Explorer 9, 10 and 11
You may have to add the following sites to your browser Trusted Sites settings in order for the pages to
display properly. These settings can generally be found in your Settings/Options/Security section of your
browser. Please see your system support group for help with your browser settings.
Sites to add to Trusted Sites:
ME-help.centurylink.com

Copyright 2018 CenturyLink – All rights reserved Page 11
Accessing the CenturyLink Solarwinds Portal
The (CTN) CenturyLink Solarwinds Portal can be accessed at https://67.230.223.19 /. The following logon screen
will display:
Enter the username and password you were provided for this access, and click LOGIN to enter the
CenturyLink Solarwinds portal.
Note: If you would prefer a Help Desk only view of the Solarwinds portal, you can access the Help Desk
directly at https://me-help.centurylink.com. Refer to the Help Desk Tab section of this document for
instructions on using the Help Desk.
Copyright 2018 CenturyLink – All rights reserved Page 12
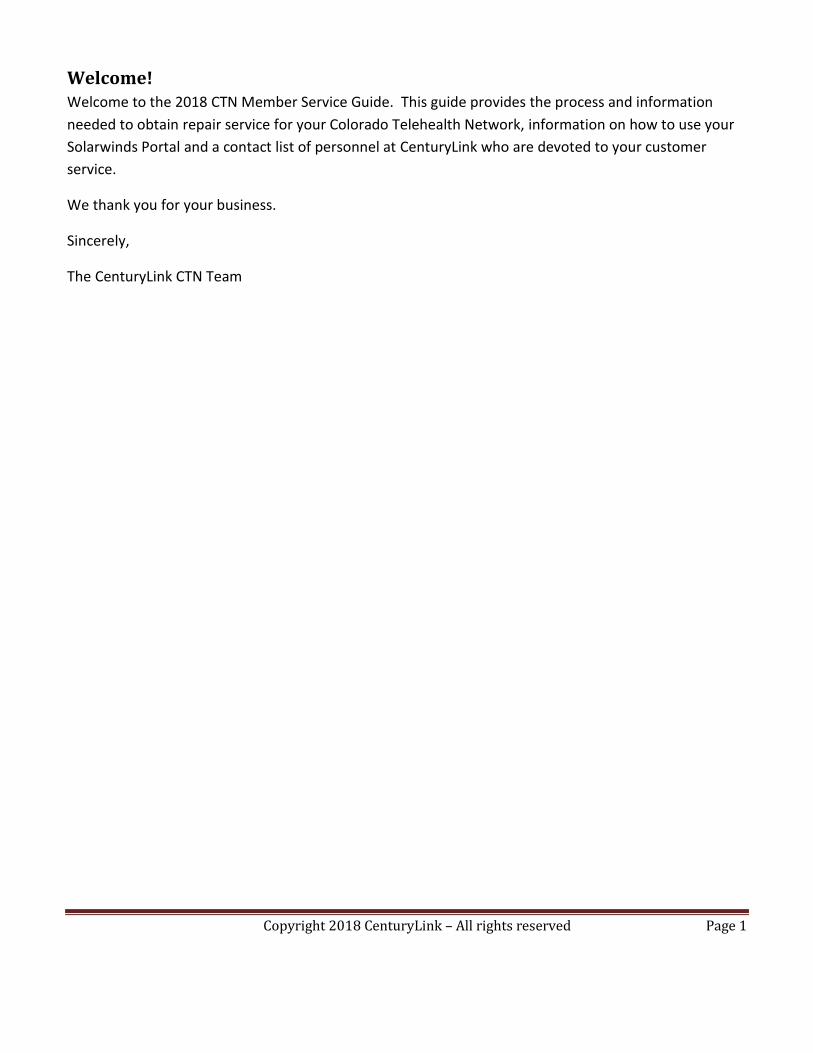
Default View
Default View (Summary Tab)
The following shows the default Summary Tab view that will open each time you log on to the portal. You
will see up to five different tabs on the left hand side to choose from, depending on the managed services
that you receive from CenturyLink as a part of your contract.
The Summary tab provides a variety of information regarding your managed components, including a
Hardware Health Overview, Network Availability graph, Top 10 traffic, utilization and response time
charts, and the ability to search for specific Nodes or Interfaces. You can use your mouse to hover over
many of the components shown on this page for more detailed information, or double-click on a
component to drill down to an even more detailed level:

Copyright 2018 CenturyLink – All rights reserved Page 13
(Mouse hover view) (Double-click view – Interface details)

Copyright 2018 CenturyLink – All rights reserved Page 14
Help Desk Tab Select the Help Desk tab on the left to access the CenturyLink Web Help Desk. Enter the username and
password you were given to log on to the Help Desk.
Note: In some cases, you may be able to bypass the logon screen in the future by allowing your system to store
your password for future logons:
When using IE v8, v9, or v10, select “Yes” to store your password for the Help Desk system if you receive this
prompt:
When using Chrome, select the ‘Save Password’ button at the top left of your screen.

Copyright 2018 CenturyLink – All rights reserved Page 15
When using Firefox, select the ‘Save this Password’ option at the top left of your screen.
Once logged in, the following default Help Request screen will display:
Creating Tickets via the Portal Use the Help Request screen to create a ticket by entering your information into the fields provided:
1) Request Type: Select the type of ticket you would like to create by using the dropdown options: a. Incident. Use this option to report an outage or request a repair.

Copyright 2018 CenturyLink – All rights reserved Page 16
b. Question/RFI. Use this option to ask a question or request information about your managed service.
c. Service Request (MACD). Use this option to initiate a move, add, change or delete ticket. d. System Admin. Use this option for issues/requests regarding the portal.
Once you’ve entered a request type, several additional fields will display on the Help Request screen:
2) Sub-Request Type: This field is displayed next to the Request Type field. Use the drop downs to select the most appropriate category for your request.
3) Subject. Enter a brief summary of your request.

Copyright 2018 CenturyLink – All rights reserved Page 17
4) Request Detail. Enter the details of your request. If you need this request to be a higher priority than standard (Medium-3), please indicate that first in the Request Detail field.
5) Customer Ticket Number: Enter a ticket number from another ticketing system that you’d like to reference.
6) Site Contact Name: Enter the name of the on-site contact for this request.
7) Site Contact Phone: Enter the phone number for the on-site contact for request.
8) Alternate Contact Name: Enter an alternate contact name, if applicable. This field is only available on Incident tickets.
9) Alternate Contact Phone: Enter the phone # for the alternate contact. This field is only available on Incident tickets.
10) Attachments: Use the attachment button to attach documents to your ticket. Documents can be up to 1MB in size. If you have documents larger than 1MB that you need included for reference on your ticket, you can email the attachment to the ME NOC and reference the assigned ticket number (received after saving the ticket here) in the email subject line.
11) Location – select the location related to the request from the drop down menu.
Use the Save button to complete your ticket creation. You will receive the following on-screen
notification with your ticket number. Please jot this down and use this number on any further inquiries
regarding this ticket.
Copyright 2018 CenturyLink – All rights reserved Page 18
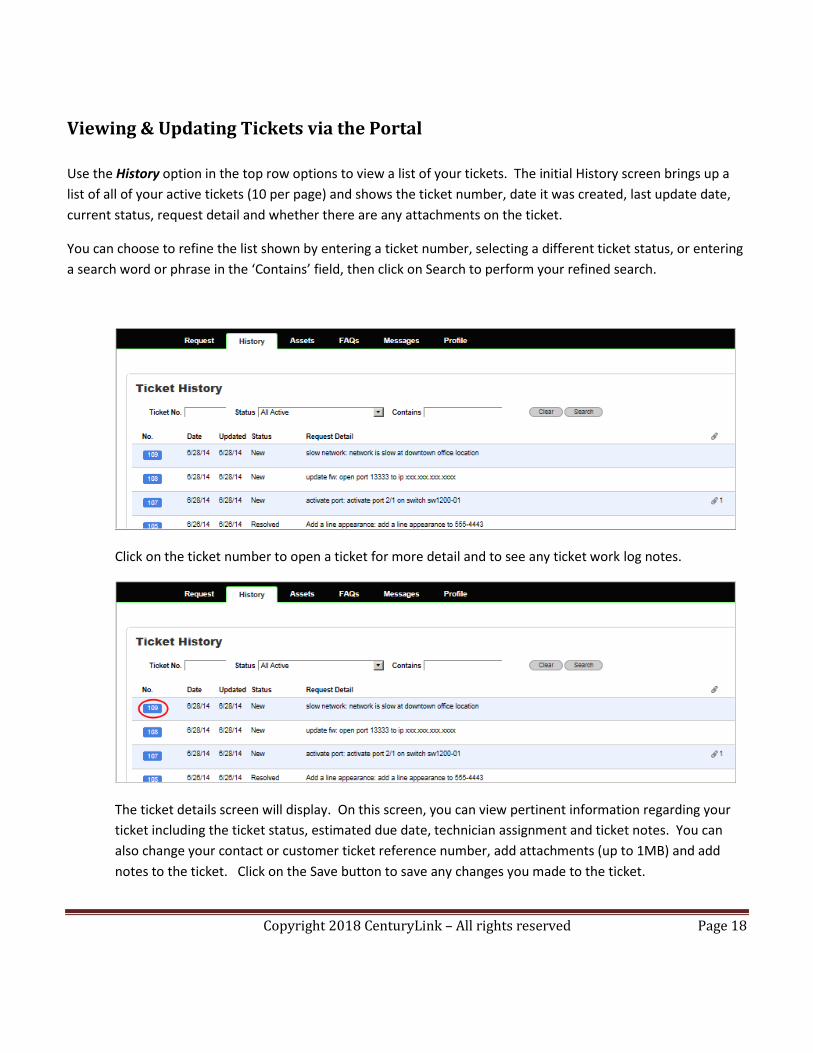
Viewing & Updating Tickets via the Portal
Use the History option in the top row options to view a list of your tickets. The initial History screen brings up a
list of all of your active tickets (10 per page) and shows the ticket number, date it was created, last update date,
current status, request detail and whether there are any attachments on the ticket.
You can choose to refine the list shown by entering a ticket number, selecting a different ticket status, or entering
a search word or phrase in the ‘Contains’ field, then click on Search to perform your refined search.
Click on the ticket number to open a ticket for more detail and to see any ticket work log notes.
The ticket details screen will display. On this screen, you can view pertinent information regarding your
ticket including the ticket status, estimated due date, technician assignment and ticket notes. You can
also change your contact or customer ticket reference number, add attachments (up to 1MB) and add
notes to the ticket. Click on the Save button to save any changes you made to the ticket.

Copyright 2018 CenturyLink – All rights reserved Page 19
Updating Your Profile
Use the Profile option in the top row of options to view and update your current profile information.
Click on the Save button to save any information you updated.
Copyright 2018 CenturyLink – All rights reserved Page 20
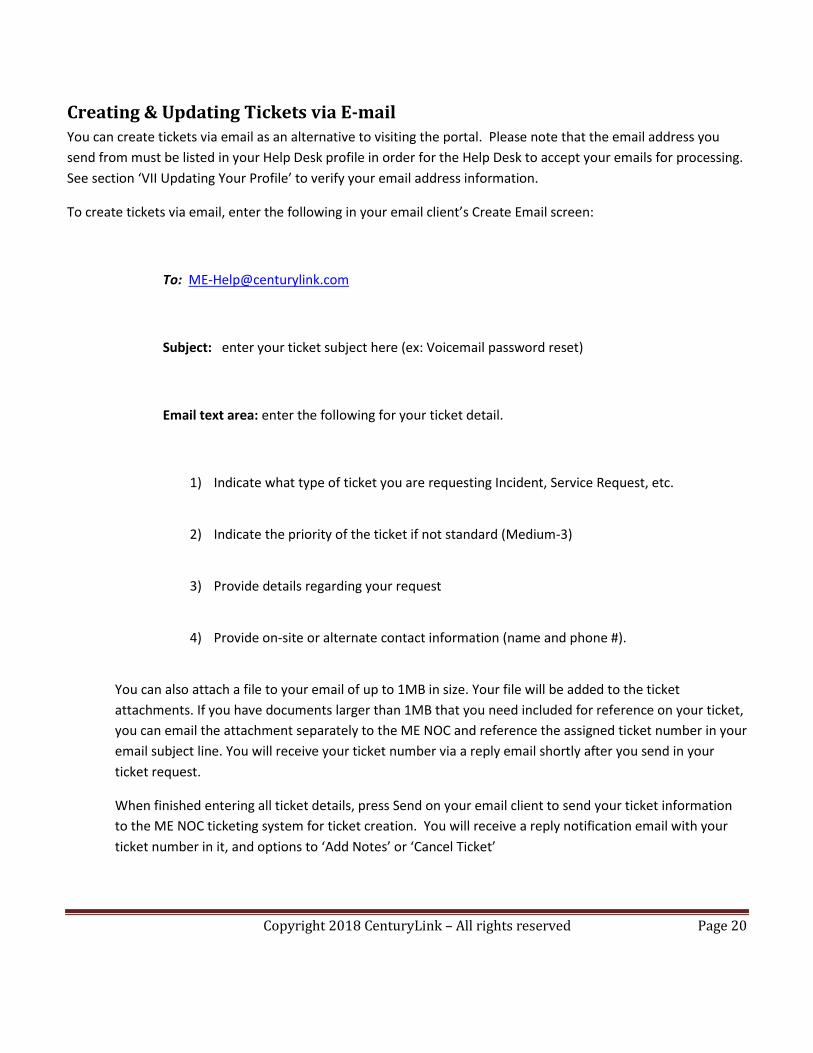
Creating & Updating Tickets via E-mail You can create tickets via email as an alternative to visiting the portal. Please note that the email address you
send from must be listed in your Help Desk profile in order for the Help Desk to accept your emails for processing.
See section ‘VII Updating Your Profile’ to verify your email address information.
To create tickets via email, enter the following in your email client’s Create Email screen:
Subject: enter your ticket subject here (ex: Voicemail password reset)
Email text area: enter the following for your ticket detail.
1) Indicate what type of ticket you are requesting Incident, Service Request, etc.
2) Indicate the priority of the ticket if not standard (Medium-3)
3) Provide details regarding your request
4) Provide on-site or alternate contact information (name and phone #).
You can also attach a file to your email of up to 1MB in size. Your file will be added to the ticket
attachments. If you have documents larger than 1MB that you need included for reference on your ticket,
you can email the attachment separately to the ME NOC and reference the assigned ticket number in your
email subject line. You will receive your ticket number via a reply email shortly after you send in your
ticket request.
When finished entering all ticket details, press Send on your email client to send your ticket information
to the ME NOC ticketing system for ticket creation. You will receive a reply notification email with your
ticket number in it, and options to ‘Add Notes’ or ‘Cancel Ticket’

Copyright 2018 CenturyLink – All rights reserved Page 21
Use the links in the email if you’d like to add notes to your ticket or cancel it. The links will create an
email using your default email client for you to send to the ticketing system. If you used the Add Note
option, add your information into the email text area prior to sending.
Note: Do not alter the subject line, or the functionality might be affected and the update may fail.

Copyright 2018 CenturyLink – All rights reserved Page 22
Control Center Tab
The Control Center tab can be used by customers that have contracted for other CenturyLink services and that
currently have Control Center accounts. Your CenturyLink Account Team can assist you with any questions you
have regarding CenturyLink Control Center.
Reports Tab
_______________________________________
The Reports tab provides a list of Network reports available for your viewing. Click on the report name of
any report listed to run and view the report. All reports can be displayed in a printable version or
downloaded in PDF format.

Copyright 2018 CenturyLink – All rights reserved Page 23
Maps Tab The Maps tab will provide a scalable map showing the location and status of your managed devices. You can use
your mouse to hover over each node for more detailed information, or double-click on a node to drill down to an
even more detailed level.
Change/Reset Your Portal Password
Change/Reset Your Portal Password
To reset or change your password, send an email requesting a Solarwinds Portal Password Change to ME-
[email protected] or call the Managed Enterprise NOC at 844 246-2347 with this request.
Copyright 2018 CenturyLink – All rights reserved Page 24
Colorado Telehealth Support Structure – for CTN Members
CenturyLink Global Account Manager
Corey DeLizza – [email protected]
Ofc: 303-992-3769
Fax: 303-244-1677
Cell: 720-618-9745
CenturyLink Sales Director (Colorado)
Jackie Slate – [email protected]
Ofc: 303-992-5565
Fax: 303-244-1677
Cell: 303-946-5254
CenturyLink MES Service Manager
Carrie Holt - [email protected]
Ofc: 321-203-7023 (also rings to cell phone)
CenturyLink CTN Service Manager
Andrew Frevert – andrew frevert@ centurylink.com
Ofc: 303-992-8990
Cell: 720-205-1692
Back Up CenturyLink CTN Service Manager
Roy Mann – roy.mann@ centurylink.com
Office: 303-992-8979
Cell: 720-260-8335

Copyright 2018 CenturyLink – All rights reserved Page 25
CenturyLink Systems Engineer
Raleigh Whetsel – raleigh.whetsel@ centurylink.com
Ofc: 303-992-5564
Fax: 303-244-1677
Cell: 303-437-9662
DNS Migration/Change Requests
Account Consultant & Billing Contact supporting CTN
Janet Colberg – janet.colberg@ centurylink.com
Ofc: 303-992-5556
Fax: 303-244-1677
CTN CenturyLink Program Manager
Linda Kunzweiler – [email protected]
Ofc: 303-992-3731
Cell: 303-895-8881
New CTN Orders or Pricing Questions
CTN Director of Broadband Programs - FCC Administrator Inquiries
Tracy Hines – [email protected]
Ofc: 720-330-6069
Related Documents