© Lanz Singbeil Character Modeling IAT 343 – Lab 6

Welcome message from author
This document is posted to help you gain knowledge. Please leave a comment to let me know what you think about it! Share it to your friends and learn new things together.
Transcript

© Lanz Singbeil
Character Modeling IAT 343 – Lab 6
Modeling Using Reference Sketches
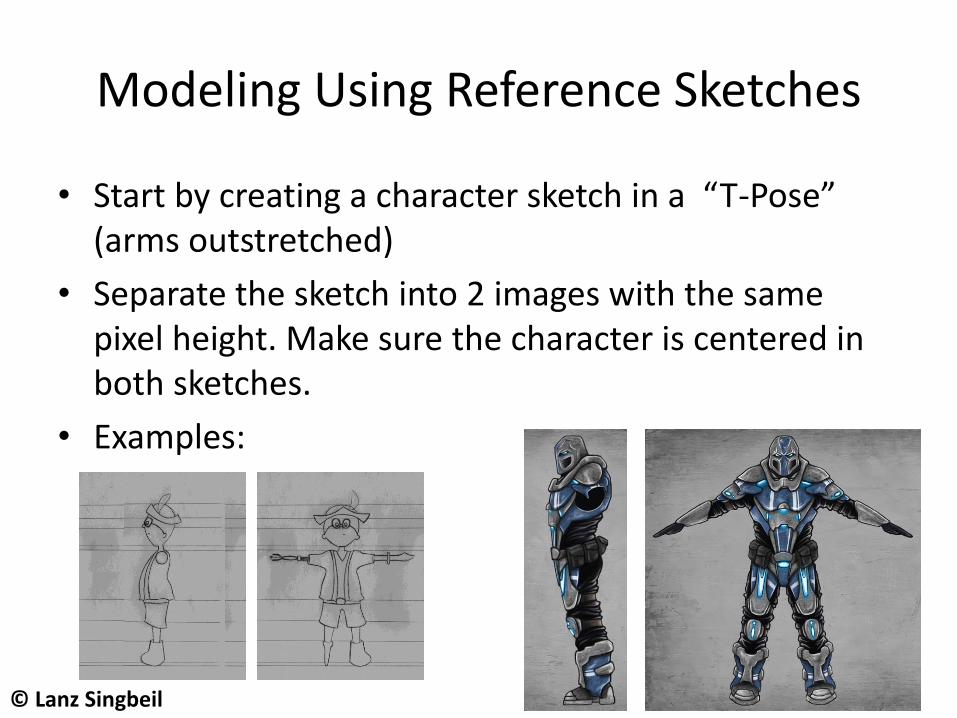
• Start by creating a character sketch in a “T-Pose” (arms outstretched)
• Separate the sketch into 2 images with the same pixel height. Make sure the character is centered in both sketches.
• Examples:
© Lanz Singbeil
Modeling Using Reference Sketches
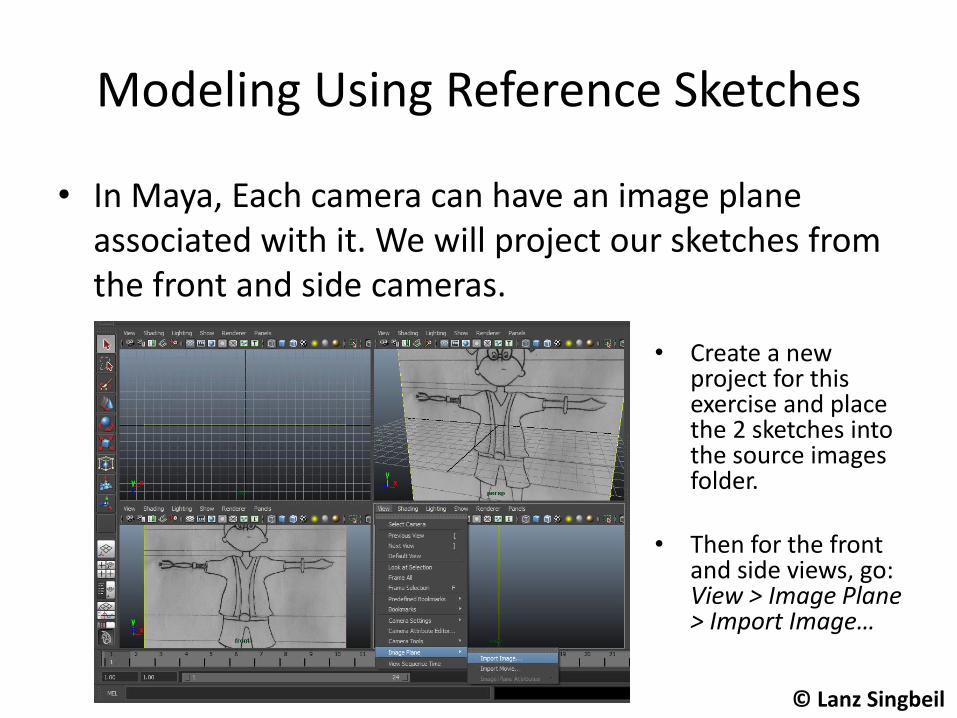
• In Maya, Each camera can have an image plane associated with it. We will project our sketches from the front and side cameras.
• Create a new project for this exercise and place the 2 sketches into the source images folder.
• Then for the front and side views, go: View > Image Plane > Import Image…
© Lanz Singbeil
Modeling Using Reference Sketches
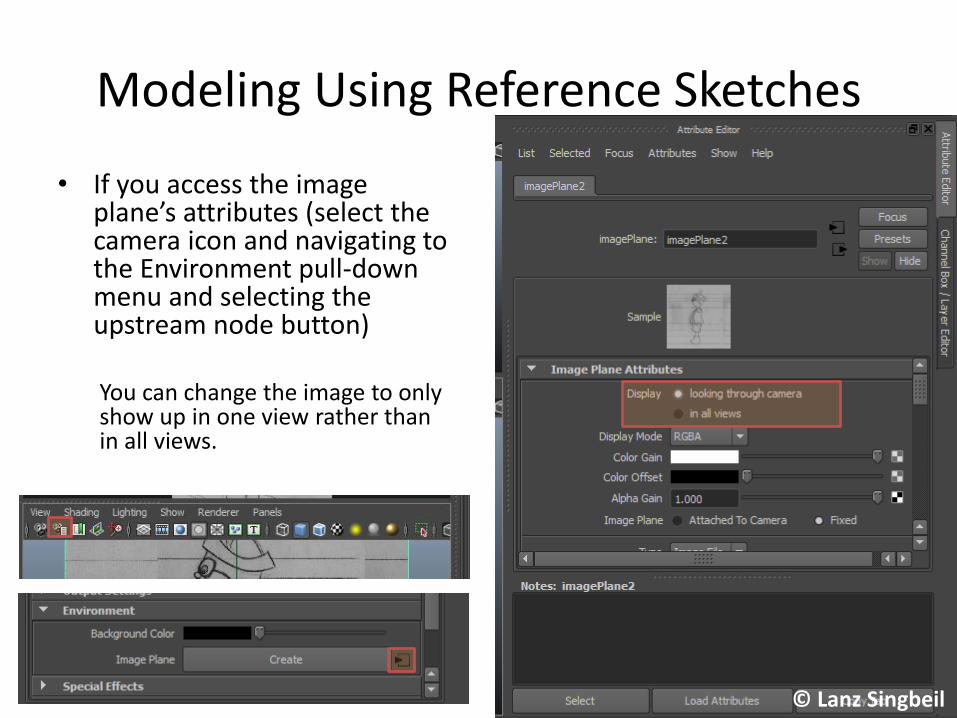
• If you access the image plane’s attributes (select the camera icon and navigating to the Environment pull-down menu and selecting the upstream node button) You can change the image to only show up in one view rather than in all views.
© Lanz Singbeil

Setting Up Mirrored Geometry
• Because most characters are symmetrical, it is best to model one side and mirror it rather than model both sides.
• One approach for doing this is to create one hollow side of your geometry, making sure to have the center of the object aligned with the middle of the scene.
• Then use Edit > Duplicate Special [Option Box] and provide the above settings. (Geometry Type = Instance, Scale X = -1)
© Lanz Singbeil

Setting Up Mirrored Geometry
• An Alternative approach is to use a single object and turn “Reflection” on: – Double click the move tool on the left side.
– Scroll down to “Reflection Settings”
– Check the Reflection Box
– Adjust what axis to reflect based on the orientation of your object.
This approach is better later on for minor symmetry modifications rather than for creating the starting shape and details.
© Lanz Singbeil
Starting to model
• To start the rounded head for my character I used a poly-sphere with: – Subdivisions Axis: [ 7 ]
– Subdivisions Height: [ 8 ]
– I also rotated it 90 degrees on the Z Axis.
• I deleted half the sphere and used the duplicate special approach to mirror it.
• From this point on make sure you are in the Polygon shelf tab and that you have the Polygon menu-set turned on.
© Lanz Singbeil

Starting to model
• I like to start by adding edge loops in areas that clearly need more detail or where I will need to cut away parts of the mesh.
• I use the “Insert Edge Loop Tool” which can be found in: – Edit Mesh > Insert Edge Loop Tool
1. Insert edge loop by dragging 2. Grab the newly created vertices and pull them outwards © Lanz Singbeil
Adding Detail
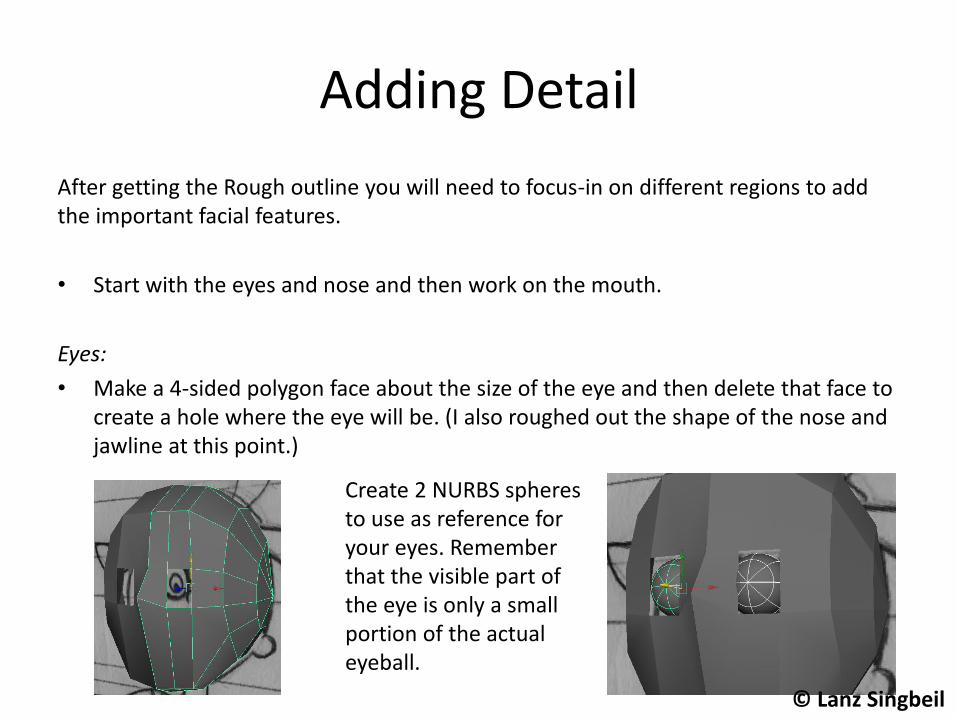
After getting the Rough outline you will need to focus-in on different regions to add the important facial features.
• Start with the eyes and nose and then work on the mouth.
Eyes:
• Make a 4-sided polygon face about the size of the eye and then delete that face to create a hole where the eye will be. (I also roughed out the shape of the nose and jawline at this point.)
Create 2 NURBS spheres to use as reference for your eyes. Remember that the visible part of the eye is only a small portion of the actual eyeball.
© Lanz Singbeil

Adding Detail
Eyes:
• You can select the edges around the eye and extrude them inwards to add inner detail. I also chose to add more edge loops around the eye to give it a more rounded shape.
Nose: • I used the Split Polygon Tool to draw edges
in natural paths. I used the extrude tool to add the nostril holes
© Lanz Singbeil

Adding Detail
Mouth:
• Similar to Eyes but extrude forwards if you want to create any substance to the lips.
Ears:
• Typically quite a challenging thing to model to look realistic.
• Usually a simple extrusion technique is fine. More detail can be added with the split polygon tool.
• Doing a realistic ear requires a variety of polygon tools and a lot of patience.
© Lanz Singbeil

Combining 2 Sides of Head
• Once you are sure you won’t be making any massive changes to the head geometry, you can combine the two sides into a single mesh and use the other reflection editing option to edit from then on.
– You may want to save a back-up version of the scene that has the 2 sides separate.
• Select Both sides and go to Mesh > Combine
After combining, the only problem is that vertices at the seam aren’t merged together. You can usually solve this by box-selecting all the vertices then pressing the “Merge” tool.
© Lanz Singbeil
Smooth Preview and Smooth Render
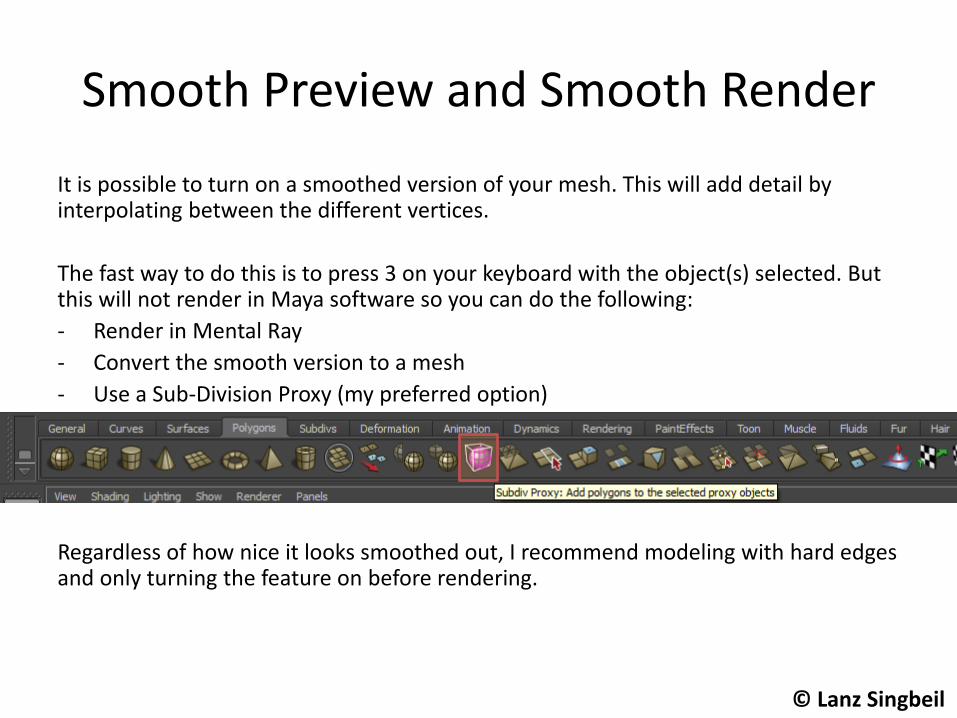
It is possible to turn on a smoothed version of your mesh. This will add detail by interpolating between the different vertices.
The fast way to do this is to press 3 on your keyboard with the object(s) selected. But this will not render in Maya software so you can do the following:
- Render in Mental Ray
- Convert the smooth version to a mesh
- Use a Sub-Division Proxy (my preferred option)
Regardless of how nice it looks smoothed out, I recommend modeling with hard edges and only turning the feature on before rendering.
© Lanz Singbeil

Modeling The Body
After Modeling a head, modeling the body is pretty straight-forward in comparison. We can use the same mirroring technique we used for the head to produce the 2 sides of the body.
Torso:
• I created a simple box and added edge loops for a bit more shape, following the reference drawing.
• It is important to consider where you will start extruding your arms and legs from.
© Lanz Singbeil

Modeling The Body
Arms and Legs:
• Modeling simple arms and legs requires little more than repeated operations of the extrude tool and transform/scale tools.
Combining 2 Sides of Body:
• Same approach as for head.
We won’t have time to cover hands but you can just do simple mitten hands or box fists.
© Lanz Singbeil

Combining Head and Body
Once the Body and the head are both done, we should go Mesh > Combine to combine the 2 meshes together.
But we still need to create a neck that connects with the head.
There are a few ways to do this. Typically we would either bridge the gap between the two regions or extrude and merge the vertices one-by-one.
The Bridge Tool:
• Make sure the top and bottom regions have the same number of edges.
• Select pairs of edges and bridge them.
© Lanz Singbeil

Combining Head and Body The Bridge Tool:
Use merge tool to reduce number of edges by merging vertices
Top has more edges than bottom
Make Inside hollow then select edge pairs Press the Bridge button
1 2
3 4
© Lanz Singbeil

Combining Head and Body
Once the whole neck is joined then you can insert edge loops and clean it up.
© Lanz Singbeil
Related Documents