Welcome message from author
This document is posted to help you gain knowledge. Please leave a comment to let me know what you think about it! Share it to your friends and learn new things together.
Transcript


Dear Customer,
Congratulations !
You are now a proud owner of BP-2100/ 2100 JOY/ 2100 Emerge. Billing has never been more of a pleasure, designed at the cutting edge of technology BP-2100/2100 Joy/ 2100 Emerge is easy to operate,effortless to maintain with low running costs.
Enjoy our fantastic service spread across the country through wellnetworked Authorised Service Providers. To unlock the techfantasy inside your BP-2100/2100 JOY / 2100 Emerge, use this guide andharness the maximum your personal product has to offer.
Should you need usage clarification, or perhaps have a suggestionfor us,do e-mail us at [email protected]
Note : Product visual shown on this User Manual is forgeneral reference only. Product may vary in some of its details.

WARNING:
1. Shut down your equipment immediately if it produces smoke, a strange odor, or unusual noise. Continued use may lead to fire or electric shock. Immediately unplug the equipment. 2. Get serviced from authorized and qualified service personal. Do not make modifications to the unit. Tampering with this product may result in injury, fire, or electric shock. 3. To avoid risk of electric shock, do not set up this product or handle cables during a thunderstorm in order. 4. Be sure to use the specified power source. Connection to an improper power source may cause fire or shock. 5. Never insert or disconnect the power plug with wet hands. Doing so may result in severe shock. 6. Do not allow foreign matter to fall into the equipment. Penetration by foreign objects may lead to fire or electric shock. 7. If water or other liquid spills into this equipment, turn off the power supply switch and unplug the power cable immediately. Continued usage may lead to fire or electric shock. 8. Do not place multiple loads on power outlet. Overloading the outlet may lead to fire. Always supply power directly from a standard 240VAC domestic power outlet. 9. Handle the power cable with care. Improper handling may lead to fire or electric shock. 10. Do not modify or attempt to repair the cable. 11. Do not place any heavy object on top of the cable. 12. Do not place the cable near heating equipment. 13. Check that the plug is clean before plugging it in.
CAUTION: 1. Be sure to set this equipment on a firm, stable horizontal surface. Product may break or cause injury if it falls. 2. Do not use in locations subject to high humidity or dust levels. Excessive humidity and dust may cause equipment damage, fire or shock. 3. Do not place heavy objects on top of this equipment. Never stand or lean on this equipment. Equipment may fall or collapse, causing breakage and possible injury. 4. To ensure safety, unplug this equipment prior to leaving it unused for an extended period. 5. Parts on the circuit board may become hot during operation. Wait approximately 10 minutes after turning the power off before touching them. 6. To avoid injury, take care not to insert fingers or any part of the hand in the roll paper opening where the manual cutter is installed. When using compressed air products; such as air dusters, for cleaning during repair and maintenance, the use of such products containing flammable gas is prohibited

CONTENTS 1.0 Your BP-2100/2100 Joy/ 2100 Emerge at a glance 1.1 Features 1.2 Product highlights
2.0 Let's get started2.1 Unpacking your BP-2100/2100 Joy 2.2 Site selection and site preparation2.3 Power conditioning equipment 2.3.1 Product with direct power supply 2.3.2 Product used with battery pack 2.3.3 Operation of product in battery mode 2.3.4 Safety precautions for lithium ion battery pack 2.3.5 Li-ion battery specification2.4 Installing paper roll3.0 Safety precautions4.0 Keyboard and Functions
5.0 Operations5.1 Download database/header-footer/settings/stock/ department database from utility from computer5.2 User login mode5.3 How to operate? 5.3.1 Billing options # Return Merchandise # Item Search # Browse/Edit Through # Kot printing # Kot Bill Printing
6.0 Menu Options6.1 Department database*6.2 Item database6.3 Customer database*6.4 Description database*
6.7 Bill settings6.8 Machine settings
Page No12
3-4
44
4-555555566
7-9
10-11
12
1314
14-15 16
16-1717-1818-20 20
21-2424-2626-3131-3232-35
37-6565-74
4.1 List of peripherals compatible with our printer 94.2 How to install Driver/Utility & User manual from
wepmyshop
12-13
6.5 Owner Details^ 35-366.6 Supplier Database 36
6.9 Configuring Header/Footer through panel 74-756.10 Configure User Information 75-766.11 Firmware information 766.12 Upload to USB 76-776.13 Self Test 77-786.14 Battery Status(only in BP-2100) 78

CONTENTS Page No
6.15 WIFI Settings 78-80
6.15.1 Billing with Wi-Fi 807. How to generate Device ID 81-82
8.0 Report option
10.0 Shortcut Keys11.0 Product specification12.0 Do's and Dont’s
92-9393-94
9413.0 Limitations 94
83-89
9.0 Bill Modes 89-91
14.0 Troubleshooting 95

1.0 YOUR BP-2100/2100 Joy/ 2100 Emerge AT A GLANCE
TOP VIEW
INTERFACES
THERMAL PAPER ROLL LCD KEYPAD
59 Keys
8 Line
AC Inlet Cash Drawer USB host Ethernet Interface* Interface Interface*
2 Serial Port Interface
1
“*” - Only in BP-2100 and BP-2100 Emerge & “$” - Only in BP-2100 Joy & “^”- Only in BP-2100 Emerge

CUSTOMER DISPLAY*1.1 FEATURES
LCD Module :Displays all transactional entries & data keyed in.Key Pad :It contains alphanumeric (Language) and function keys required for item entries, modification and search items in data base.Customer Display* :It is used to display the final transactions after the billing for customers.ON / OFF Switch :To power ON/OFF the unit.Serial Interface :This interface is used normally during data download / data upload.Cable from this interface has to be connected to Computer serial port.USB Interface :This interface is used normally for standard Pen drive during data download / data upload.Ethernet Interface* : This interface is used to connect with another printer for KOT/Bill printingCash Drawer Connectivity* : Cash drawer can be connect with the printer.AC Power Inlet :Used for AC supply to the printer.
8 Digits
2
“*” - Only in BP-2100 and BP-2100 Emerge & “$” - Only in BP-2100 Joy & “^”- Only in BP-2100 Emerge
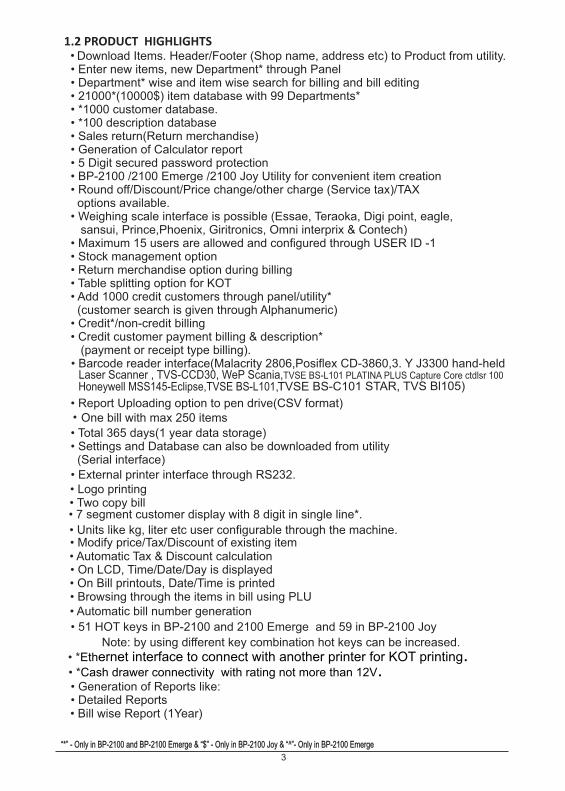
1.2 PRODUCT HIGHLIGHTS Download Items. Header/Footer (Shop name, address etc) to Product from utility. • Enter new items, new Department* through Panel • Department* wise and item wise search for billing and bill editing • 21000*(10000$) item database with 99 Departments* • *1000 customer database. • *100 description database • Sales return(Return merchandise) • Generation of Calculator report • 5 Digit secured password protection • BP-2100 /2100 Emerge /2100 Joy Utility for convenient item creation • Round off/Discount/Price change/other charge (Service tax)/TAX options available. • Weighing scale interface is possible (Essae, Teraoka, Digi point, eagle, sansui, Prince,Phoenix, Giritronics, Omni interprix & Contech) • Maximum 15 users are allowed and configured through USER ID -1 • Stock management option • Return merchandise option during billing • Table splitting option for KOT • Add 1000 credit customers through panel/utility* (customer search is given through Alphanumeric) • Credit*/non-credit billing • Credit customer payment billing & description* (payment or receipt type billing). • Barcode reader interface(Malacrity 2806,Posiflex CD-3860,3. Y J3300 hand-held
• Report Uploading option to pen drive(CSV format)
• Total 365 days(1 year data storage) • Settings and Database can also be downloaded from utility (Serial interface)
• External printer interface through RS232. • Logo printing • Two copy bill • 7 segment customer display with 8 digit in single line*.
• Units like kg, liter etc user configurable through the machine. • Modify price/Tax/Discount of existing item • Automatic Tax & Discount calculation • On LCD, Time/Date/Day is displayed • On Bill printouts, Date/Time is printed • Browsing through the items in bill using PLU • Automatic bill number generation
• 51 HOT keys in BP-2100 and 2100 Emerge and 59 in BP-2100 Joy
Note: by using different key combination hot keys can be increased. • *Ethernet interface to connect with another printer for KOT printing.
• Generation of Reports like: • Detailed Reports • Bill wise Report (1Year)
•
Honeywell MSS145-Eclipse,TVSE BS-L101 TVSE BS-C101 STAR, TVS Bl105),
One bill with max 250 items•
• *Cash drawer connectivity with rating not more than 12V.
3
Laser Scanner , TVS-CCD30, WeP Scania,TVSE BS-L101 PLATINA PLUS Capture Core ctdlsr 100
“*” - Only in BP-2100 and BP-2100 Emerge & “$” - Only in BP-2100 Joy & “^”- Only in BP-2100 Emerge

• Item wise Report (1Year) • Void bill Report ( 1 Year) • User billed Report (1Year) • Item Bill Report (1Year)*
• Duplicate bill Report (1Year) • UDF item wise Report (1Year) • Department Report (1Year)* • KOT pending Report (Present day) • Delete KOT Report (Present day) • Return item Report (1Year) • Customer Wise Report(1 year)* • Customer bill Report(1 year)* • Customer Payment Report(1 year)*
• Desc Bill Report(1 year)* • Tax wise day Report(1 year)
Summary Reports like • Day wise Report (500 Days) • Monthly Report (100 Months) • Yearly Report (8 Years) • UDF wise Report • User wise Report • Rate wise Report • Customer Wise Monthly*
2.0 LET'S GET STARTED
2.1 Unpacking your BP-2100/ BP-2100 Joy/ BP-2100 Emerge As you unpack the BP-2100/2100 Joy/ 2100 Emerge, check that you have all the parts mentioned below that none have been damaged during transportation. 1. BP-2100/2100 Joy/ 2100 Emerge Product 2. Paper roll 3 inch and roll paper holder (Stationary) 3. AC power cord 4. User Guide 5. Serial Interface Cable 6. Warranty Manual
After removing the parts, save the packing materials in case you need to transport your product.
2.2 Site selection and Site preparation While selecting a place to set up your product, keep the following in mind. • Place the product on a flat surface. • Leave adequate space around the product for easy operation, maintenance, and proper ventilation.
• Profit Report(1 Year) (in BP-2100 Joy/ 2100 Emerge) • Calculator Bill Report(1 Year) (in BP-2100 Joy/ 2100 Emerge)
• Tax Report
• Bill Data
7. Installation Report
“*” - Only in BP-2100 and BP-2100 Emerge & “$” - Only in BP-2100 Joy & “^”- Only in BP-2100 Emerge
4
• Hourly Report (1Year)
• Payment& Receipt Report(1 year)^
• Payment Report(1 Year)^ • Customerwise Item Report(1 Year)^ • Inward Billwise Report(1 Year)^ • Inward Item wise Report(1 Year)^
• Userwise Payment Report^ • Inward Daywise Report^ • Inward Monthly Report^
• ^ SMS facility • ^Owner details facility
• ^Service facility
• ^Supplier Details facility
• ^TOKEN print facility
• ^TAX2 upto 3 digits

• Avoid outlets on the same circuit with large motors, A/c's or other appliances that might cause fluctuations in line voltage. • It is advised to place the product where the dust level is minimum.
2.3 Power Conditioning Equipment • Product can be used with the direct power supply or • Product can be used with WeP Battery pack.
2.3.1 Product with Direct power supply: • Product comes with AC cable which can be plugged into the AC mains and switched ON. • Ensure that the input supply to product is within the specified limits as given below a. Voltage range : 150 to 270VAC b. Ground to Neutral Voltage: Less than 3VAC. c. Frequency: 47 – 53 Hz. d. Use of Voltage stabilizer/CVT UPS to ensure regulated supply of Voltage to your product.
2.3.2 Product used with Battery Pack: • Product can be used with the battery Pack alone, • When mains off automatically control will switch to battery mode. • Battery backup time: 90 Minutes with 100% duty cycle approx*.
2.3.3 Operation of product in Battery Mode : When battery voltage is dropped to 60% then buzzer will start beeping at regular interval of 5 minutes. If battery voltage drops below 50% then machine will go to power saving mode and stop working till power is retained or battery is charged.
2.3.4 Safety Precautions for Lithium Ion Battery Pack 1. Replace the batteries with the same rating as present in the unit. The Battery type and rating is mentioned on the Battery Cover under the unit. 2. Do not remove the battery from the Machine. 3. Do not remove the battery seal. 4. Never dispose the batteries in a fire,they may explode. Never short-circuit the Battery 5. In the event battery fluid leaks and get in to eye, do not rub the eye. Rinse well with water and immediately seek medical care. If left untreated otherwise the battery fluid can cause
2.3.5 Li-Ion Battery Specification: Comes with shrink-wrapped re-chargeable battery pack Capacity: 2 cells 7.4V, 2200mAh. Dimension: 69.5 x 37.5 x 19.5 (W x H x T) in mm with protection.
damage to eye.
• Battery backup time: 4hrs 30 Minutes(with 50 bills in 1 hr). $
5
“*” - Only in BP-2100 and BP-2100 Emerge & “$” - Only in BP-2100 Joy & “^”- Only in BP-2100 Emerge

2.4 Installing Paper Roll · Open the paper cover as shown in below figure.
· Remove the Groove shaft · Hold the paper roll in hand and place it into shaft holder using groove shaft. · Drag the paper little and insert it into Paper cover slot. · Close the paper cover firmly and ensure that it has locked properly. · Now your Product is ready to print.Note: Ensure coated side of paper is facing you (Refer picture shown above)
3.0 SAFETY PRECAUTIONS 1 Please read the manual before using the product. 2 Ensure that the protective materials are removed before installation. 3 Do not expose to direct sunlight, excessive heat, moisture or dust. 4 In case of printing abnormality, do not dismantle any part from product. Call your nearest Authorised Service Provider listed in Warranty Booklet. 5 Keep Key Pad Module intact to avoid dust collection.
6 Do not insert or remove the interface cable when the product is in ON condition during program download.
6
“*” - Only in BP-2100 and BP-2100 Emerge & “$” - Only in BP-2100 Joy & “^”- Only in BP-2100 Emerge

4.0 Key Board & Function LCD MODULE : Displays all transactional entries & data keyed in.
KEY BOARD : It contains alphanumeric (Lang) & function keys required for item/ customer entries, modification and other special functions.
KEY Functionality# Use to print bill or report# Hold PRINT BUTTON and switch on the printer for self test printing (Till 2 beeps).# In Billing window press print to make duplicate bill.
To confirm entry and go to next mode
Input Numeric :
To enter numbers like rate etc.
Input Alphabets and SpecialFunction LikeNOTE:After login first Press SHIFT key, then Press SHORT CUT keys.*A: To Add Item database*B: To Add Department databaseC: To go to Bill wise reportD: To go to Item wise reportE: To go to Void bill reportF: To go to User bill reportG: To go to Item bill reportH: To go to Hourly reportI: To go to Duplicate reportJ: To go to UDF item wise report*K: To go to Department reportL: To go to KOT pending reportM: To go to Deleted KOT reportN: To go to Returned Item reportO: To go to Day wise report P: To go to Monthly reportQ: To go to Yearly reportR: To go to UDF wise report and InItem no entry mode Press SHIFT then Rfor Return merchandiseS: To go to User wise reportT: To go to Rate wise reportU: To go to Tax report/Upload Daily Data^
.
ENTER
A B D
C
E
F
K
J
I
HG L
M N O
P
Q
R
S T U
V
W
X
Y Z
7 8
9
4 5
6
1 2
3
0 00 .
V: Tax slab Enable/Disable W: POS Enable/Disable X: HSN Enable/Disable
7
“*” - Only in BP-2100 and BP-2100 Emerge & “$” - Only in BP-2100 Joy & “^”- Only in BP-2100 Emerge

Press Cash Drawer to open the drawer afterbilling. And Press SHIFT + total key when printeris in credit/retail billing mode for view the total transaction.
Feed is to provide one line feed of Paper advance. At the time of printing if PAUSEis pressed, it will pause the printing.
HOT KEYS (For Fast billing)
Keys from A-Z can be configured and used as HOT keys for an item selection during billing
Provides a blank character used to separate successive words or characters only
2. During billing Press F1 key after items entry for KOT Print
1. Press SHIFT then F2 for Data Downloading from Utility in Login mode2. During billing Press F2 key after items entry for KOT SAVE Press F3 key after UDF1 entry for Delete KOT ITEM
1. For calculator rechecking in Calculator mode
Space
F1
F2
F3
F4
Cancel\Clear
FEED / PAUSE%
Void
/
Report X
To erase the character one by one
To exit from the present mode
To clear the alphanumeric (Lang) entry
1. To void the Bills
2. To do the division operation in the Calculator mode
1. To get detailed and summary reports
2. To do the multiplication operation in the Calculator mode
To go back to previous mode screen
BackSpace
Back
CASH DRAWER / TOTAL
NOTE: Above shortcuts only for manager login
NOTE: Hot key configuration mode provided in the Machine settings.
1. Press Shift+F4 in the login mode for Firmware Upgrade mode[For Service Personal Only]2. Press F4 key after UDF1 entry to merge KOT.
Shift+F1 - Module testing serially
Shift+F3 - Diagnosis mode(Login window)
8
“*” - Only in BP-2100 and BP-2100 Emerge & “$” - Only in BP-2100 Joy & “^”- Only in BP-2100 Emerge

To go to item search mode while billing/
To select addition in calculator mode
To switch to Menu selection mode from
To select subtraction in calculator mode
To enable/disable selection of
multiple function of other keys
To scroll down
To go to price change while billing
To scroll up
To go to item browsing while billing
PLU
+
Menu
-
Shift
Down
UP
To switch to User login mode from billing mode User/Calc
billing mode
To save a bill without printing Save
To enter into calculator mode.(When shift pressed in Billing mode)
Editing
4.1 List of peripherals compatible with our printer
9
Supported Weighing scale makes for BP-Emerge Basic
1. Point digi (Bench type and Platform type)2. Contech (CT series, CJ series and CP series)3. Essae Teraoka4. Sansui
5. Eagle6. Prince7. Phoenix8. Giritronics
Supported Barcode Scanners for BP-Emerge Basic1. MALACRITY 28062. POSIFELX CD-38603. Y J3300 hand-held Laser scanner4. TVSE BS-L1015. TVSE BS-C101 STAR6. TVS BL 105
7. TVS-CCD308. Wep Scania9. Honeywell-MS5145
10. TVSE BS-L101 PLATINA PLUS11. Capture Core ctdlsr 100
“*” - Only in BP-2100 and BP-2100 Emerge & “$” - Only in BP-2100 Joy & “^”- Only in BP-2100 Emerge

10
SOFTWARE UTILITIES
Step 1: Open browser & search for www.wepmyshop.com
Step 2: Below screen will be displayed, scroll to Retail Business Solution
further to Retail Billing Solution select Thermal.
4.2 How to install Drivers/Utiltiy/user manuals from wepmyshop
“*” - Only in BP-2100 and BP-2100 Emerge & “$” - Only in BP-2100 Joy & “^”- Only in BP-2100 Emerge
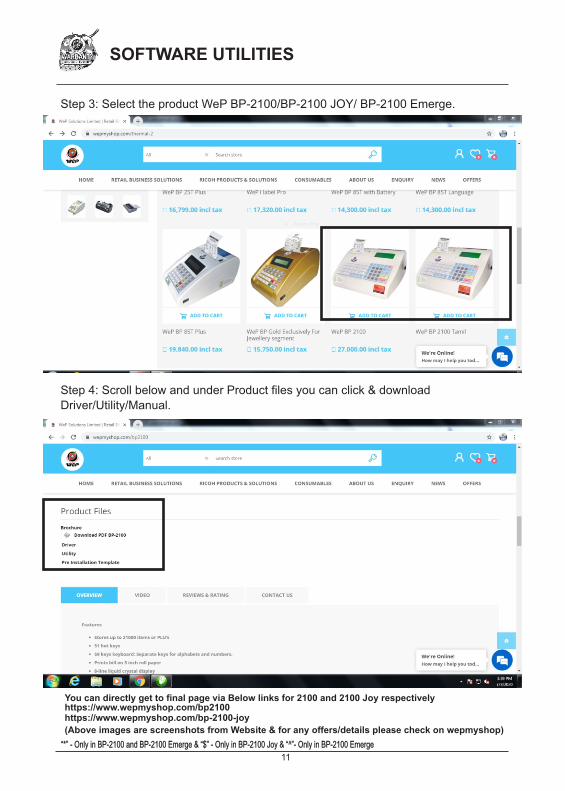
(Above images are screenshots from Website & for any offers/details please check on wepmyshop)
11
SOFTWARE UTILITIES
Step 3: Select the product WeP BP-2100/BP-2100 JOY/ BP-2100 Emerge.
Step 4: Scroll below and under Product files you can click & download
Driver/Utility/Manual.
https://www.wepmyshop.com/bp2100https://www.wepmyshop.com/bp-2100-joy
You can directly get to final page via Below links for 2100 and 2100 Joy respectively
“*” - Only in BP-2100 and BP-2100 Emerge & “$” - Only in BP-2100 Joy & “^”- Only in BP-2100 Emerge

12
WAITING FOR DATA
RESTART MACHINE TO STOP
SHIFT
5.1 DOWNLOAD DATABASE/HEADER-FOOTER/SETTINGS/STOCK *DEPARTMENT DATABASE from utility from computer: • Connect Serial interface cable. •When control is at User login Mode press SHIFT and F2 LCD will display like
• Press ENTER control will shift to password entry
• Enter password and press ENTER LCD will display like
5.0 Operations
• Ensure BPSeries printer driver have been installed and should be selected as default. • Create an item database and download it using BP-2100 Lang utility* and for Font use
• Now Product is ready to use. •Repeat above steps for downloading Department Database*, Header\footer, Bill settings,
NOTE 1 : The serial interface cable should be removed from printer after the data transfer only. NOTE 2 : Before any data is downloaded to Product, the following settings are requiredin PC.
1. Default printer driver port : Serial port 2. Baud rate: 2400 / 9600 / 19200 / 38400 / 57600 / 115200 select anyone 3. Data bits: 8 4. Parity: None 5. Stop bits : 1 6. Flow control : NoneNOTE 3 : Before starting the billing settings like Item database, Department*database should be downloaded from the PC (Utility).Instruction to use the USB to SERIAL Port Converter in BP-2100/2100 Joy/2100 Emerge 1. Comport Configuration: Automatically it will select some com port. But we need to change it to com1 & the following settings are required in PC: i. The default printer driver port: Serial port (com1) ii. Baud Rate: 2400/9600/19200/38400/57600/115200 Bits per second (Any one) iii. Data bits: 8 iv. Parity: None v. Stop bits: 1 vi. Flow control: NoneNOTE: Works only with Win XP (only 32bit), Vista, 2000, 2003, Windows 7/8/10 Caution : Do not switch off the printer while Firmware downloading
and Font.
Wep Retail Font Utility.
5.1.1 DOWNLOAD FONT-(Only in BP-2100) 1. Open Font Utility 3 options will come- -Select Language
PROGRAM DOWNLOAD MODEENTER:CONT CANCEL:EXIT
SHIFT
“*” - Only in BP-2100 and BP-2100 Emerge & “$” - Only in BP-2100 Joy & “^”- Only in BP-2100 Emerge

•User need to enter user ID (1 to 15) and press ENTER Cursor will shift to Password entry.
•After power ON, LCD will display LOGIN ID :NAME :PASSWORD : ENTER LOGIN ID
5.2 User login mode
-Select Baudrate-Select PortAnd the window will look like this
SEND
1. Eight languages are present namely- Devnagri,Bangali,Tamil,Telgu, Kannada,Mallayali,Gujrati and Punjabi but you can use currently Devanagri (Hindi) and Tamil.2. Port name is the COM port on which printer is connected, while selecting the port just check that particular port has to be free.3. In Baudrate you can choose 2 types- 19200 and 115200. It should match with the machine baudrate selected. NOTE: 1. Click on send when machine is in the programming mode. 2. If other than Tamil and Hindi language is selected and downloaded then machine will print in English only. 3. For language printing you need to enable Language printing option in Bill settings once you have downloaded the CG.
WeP Retail Font Utility
Select Language Dev
Port Name COM2Baudrate 115200
SEND
o 1 Managero 2 -15 Clerks (Common users)
•Type the password(Default password is 00000) and press ENTER LCD will display
•To Enter billing mode select REGISTER and press ENTER button LCD will display like
14/106/10 THU 19:24
REGISTERCALCULATOR
NOTE: In default billing mode press User\Calc Button to switch over different users.
•To Enter billing mode select Credit*/Retail Bill and pr ess ENTER button
UDFI NO :ITEM NO :
QUANTITY :PRICE :
14/10/10 THU 19:24
Bill Modes *1. CUSTOMER PAYMENTS2. CREDIT/RETAIL BILL3. PAYMENT AND RECEIPTS
Bill Modes $1. RETAIL BILL2. CALCULATOR BILL
13
“*” - Only in BP-2100 and BP-2100 Emerge & “$” - Only in BP-2100 Joy & “^”- Only in BP-2100 Emerge

5.3 HOW TO OPERATE? 5.3.1 Billing options Billing option 1: Billing by quantity option
14/10/10 THU 19:24
ITEM NO : 1
QUANTITY : 1 K. GRAM
PRICE : 25
UDFI NO : 1
RICE
• Enter the UDF1 number and press ENTER Cursor will shift to Item no entry mode.• Enter Item no. Item name will be displayed in next line and press ENTER Cursor will shift to Quantity entry mode. NOTE1: If Bar code reader is connected and scanned for an item then item number and name will be displayed.NOTE 2: If HOT keys are configured then in item no press HOT key for item selection.
• If you want to modify the item number before pressing ENTER Use Backspace and if already ENTER Is pressed use CANCEL\CLEAR to cancel the entry.
• When control is at Quantity entry (Max 9999.999), Enter the Quantity.NOTE 2: If weighing scale interfaced with the BP-2100/ 2100 joy/2100 Emerge machine then the Quantity is read from weighing machine. • To change the price press Down arrow key or else press ENTER to proceed further• Cursor will be blinking at first position, it is ready to accept the next item.NOTE 3: Changing the price in bill/cash reception/other tax/ options can be enabled or disabled through MENU Different type of Round off/Discount options can be selected through MENU. For Quantity 1, 2, 3 digits can be configured through user utility.NOTE 4: If in Database, discount is entered, while printing Bill it prints real value on the bill & shows discount separately, also TAX will be after discount.
Billing option 2: Rupee billing option:
1Enter the UDF1 number and press ENTER Cursor will shift to Item no entry mode. 2Enter Item no, Item name will be displayed in next line and press ENTER Cursor will shift to Quantity entry mode.3Now press SHIFT button for Rupee Billing, on pressing shift button Quantity changes to amount like
14/10/10 THU 19:24
ITEM NO : 1
QUANTITY : __ K.GRAM
PRICE :
UDFI NO : 1
RICE
14/10/10 THU 19:24
ITEM NO : 1
AMOUNT : __ PRICE : 20
UDFI NO : 1
RICE
In billing it will show the real value. For item with price 10Rs, Discount 10%, and TAX 10%, if we billed for 1 Qty it will display amount 10 Rupee only but TOTAL amount it will show value including TAX and discount.
14
“*” - Only in BP-2100 and BP-2100 Emerge & “$” - Only in BP-2100 Joy & “^”- Only in BP-2100 Emerge

4 Enter amount in Rupee at cursor & Press ENTER On entering the amount, it is ready to accept the next item or the cursor moves to 'Price' Field (If price change is enabled) or Press Down arrow key .
5 Now you can edit the price if required or just press ENTER .
6 Repeat the above steps for required number of items.
7 Press PRINT to take Print out of the bill.
Billing option 3. Billing with Unit 1 and Unit 2
14/10/10 THU 19:24
ITEM NO : 1 QUANTITY: 1 Bag PRICE : 2000
UDFI NO : 1
RICE
• When Unit relation is enabled and you have added UNIT 1 as Bag and UNIT 2 as K.Gram and U1U2R as 500 in the Item Database then billing window will look like above.To change the Unit from Bag to K.Gram i.e. Unit 1 to Unit 2 Press UP arrow in theQuantity mode. And it will become K.Gram. Also rate of Unit 2 will be calculated according to Unit 1 by Unitary method.
•
14/10/10 THU 19:24
ITEM NO : 1 QUANTITY: 1 K.Gram PRICE : 4
UDFI NO : 1
RICE
*Billing option 4. Billing with Two quantity
14/10/10 THU 19:24
ITEM NO : 1 QUANTITY: 1.000 Mt * 1_ Pc PRICE : 3000
UDFI NO : 1
SILK CLOTH
When Two quantity option enabled which will happen when Unit relation option is also enabled then Billing window will look like above.In this case Unit 1 is Meter &Unit 2 is Piece and U1U2R is 1 by default which can be configurable in the DB..This option can be used in Textiles segment where a particular type of cloth can be billed with its quantity and number. In the quantity mode it will ask first to enter Unit 1 qty then Unit 2 qty. If Up arrow ispressed after Unit 2 entry then it will again goto Unit1 qty, if one more time Up arrowis pressed then it will show only Unit 2.
•
•
•
15
“*” - Only in BP-2100 and BP-2100 Emerge & “$” - Only in BP-2100 Joy & “^”- Only in BP-2100 Emerge

14/10/10 THU 19:24
ITEM NO : 1 RET QUANTITY : 1 PRICE : 100
UDFI NO : 1
SHIRT
2 Enter required item to be returned and press ENTER cursor will shift to Quantity mode.3 Enter Quantity to be returned and press ENTER and then press PRINT for Bill printing.
# RETURN MERCHANDISE:
1 In billing mode when cursor is at Item number entry press SHIFT button then R LCD will display like
º When cursor is at Item no entry press PLU button LCD will display all the items.
# Search an Item by Item name (Alphabets):
14/10/10 THU 19:24
ITEM NO : _ QUANTITY : PRICE :
UDFI NO : 1
NOTE1: In bill returns Returned item detail will be printed with Negative sign NOTE2: If purchasing of a new items and return merchandise is done in the single bill, then total bill amount will be Total bill amount = Billed amount – returned amount
To search for an item starting with a specific alphabet or enter the specific string through key board
º
SEARCH BY ITEM NAME
S_SOAPSUGARSALT
º The first item starting with that particular alphabets/string would be displayed in LCD which can be scrolled down or up using arrow keys
º Select required item for billing and press ENTER
16
“*” - Only in BP-2100 and BP-2100 Emerge & “$” - Only in BP-2100 Joy & “^”- Only in BP-2100 Emerge

*Search an Item by Department wise :
º When cursor is at Item no entry press SHIFT+ PLU button LCD will display like
¨ Enter required department number (max 99), below that department items will be displayed. ¨ Select required item for billing and press ENTER
# Browse/Edit through Bill :
¨ Browsing and editing the item in bill is possible only after adding item to bill and
before printing the bill.
¨ Press Up arrow key when cursor is on Item number entry mode, LCD will display
like
¨ Press Up and Down arrow key to browse through all items entered in the bill.
14/10/10 THU 19:24
ITEM NO : RICE QUANTITY : 50PRICE : 20
UDFI NO : 11
SEARCH BY DEPARTMENT
DEPARTMENT NO;:1_RICEDHALSUGAR
# *Bill edit using item no.- If in your bill you want to edit a item using its Item code then press PLU key after UP arrow, display will look like
BILL ITEM EDIT MODE
ENTER ITEM NUMBER:
Enter any item no. which is present in the bill. It will directly go to that item otherwise it will show “ITEM NOT PRESENT”.
# *Bill Edit using Item name- If you want to choose item using its name then after UP arrow press MENU key, it will show display like
BILL ITEM EDIT MODE
ENTER NAME:
17
“*” - Only in BP-2100 and BP-2100 Emerge & “$” - Only in BP-2100 Joy & “^”- Only in BP-2100 Emerge

NOTE 1: It is possible to browse through the items only before the bill is printed. The cursor will not be seen during browsing.
¨ Select requried item to be edited by arrow key + PLU/MENU and press ENTER
¨ As soon as Enter is presses cursor will appear in Quantity entry.
14/10/10 THU 19:24
ITEM NO : RICE QUANTITY : 50_ K.GRAMPRICE : 20
UDFI NO : 11
¨ Edit the Qty and press ENTER cursor will sift to Price entry if price change option
is enabled or Press Down arrow key.
¨Edit the Price and press ENTER , Cursor will shift to Item number entry.
¨ Press BACK button to come back to billing mode.
¨ And Press PRINT button to print the bill.
NOTE1: Item name can not be edited.
NOTE2: To change the Quantity/rate/discount, move the cursor correspondingly then follow the same steps as billing mode.
Enter any item name or its starting letter which is present in the bill. It will directly go to that item otherwise it will show “ITEM NOT PRESENT”. When language printing is enabled then it will take language Characters as input.
to enter bill edit mode.l
NOTE 3: After the modification of a complete item i.e. after entering the Quantity/
price/discount,it goes back to browsing mode (cursor will disappear again)NOTE 4: To delete an item completely, keep the item name position and press
CANCEL/CLEAR Warning message appears like
¨ Press ENTER button to delete the item. or Cancel button to abort deleting.
# KOT (Kitchen order token)/Restaurant Billing and PRINTING:¨When KOT and UDF is enabled (UDF name eg. Table no.) LCD will display like
14/10/10 THU 19:24
UDFI NO : 1ITEM NO : 1
RICE QUANTITY : 50 K.GRAMPRICE : 20ARE U SURE ENTER/CANCEL
18
“*” - Only in BP-2100 and BP-2100 Emerge & “$” - Only in BP-2100 Joy & “^”- Only in BP-2100 Emerge

14/10/10 THU 19:24
ITEM NO : 1 IDLI QUANTITY : 1 NOPRICE : 20
TABLE NO : 1
¨ Enter the table number you want to give kitchen order token (KOT) (eg.1).
¨ Press ENTER and type item number you want to give KOT(eg 1-IDLI)
¨ Press ENTER to choose quantity and type quantity and press ENTER to add different item.
¨ After adding item to bill and when cursor is at Item number entry press F1 to print KOT
NOTE 1: After adding an item to bill, when cursor is at item number entry press F2 to save KOT. (Message will appear like KOT saved)
NOTE 2: If you want to split the single table (eg 1 table can be split into 4 chairs), During billing, after entering UDF press Down arrow key that time below
LCD will display like Sub UDF(table 1,2,3,4 like below).
14/10/10 THU 19:24
ITEM NO : QUANTITY : PRICE : SUB TABLE NO : 2
UDFI NO : 1
NOTE3: Delete KOT possible only after printing KOT or after saving the KOT.
DELETE KOT: · Type the UDF(Table) no, for which KOT is printed or saved and press F3 LCD will display like
· Select required item to be deleted by arrow keys and Press CANCEL/CLEAR and ENTER button to delete the item (message will display item deleted) or BACK button to exit from the mode.
NOTE : When you are doing KOT billing if bill is not printed and power is lost, after power comes, if you switch ON the printer and after log in LCD will display like.
1
14/10/10 THU 19:24
UDFI NO : 1ITEM NO :
IDLIQUANTITY : 1 PLATEPRICE : 15
CANCEL:DEL BACK:EXIT
1
19
“*” - Only in BP-2100 and BP-2100 Emerge & “$” - Only in BP-2100 Joy & “^”- Only in BP-2100 Emerge

SOME KOT BILLS AREPENDING
KOT OPTION
SELECT YOUR OPTION
1.PRINT KOT DETAIL2.KEEP KOT3.CLEAR KOT
· Select 1st option to print detail of UDF nos. for which KOT details are pending.
· Select 2nd option for retain KOT for particular UDF No.
· Select 3rd option for clearing all pending KOT for particular UDF No.
· Enter Required UDF and press ENTER cursor will shift to Item no entry mode.· Press F4 LCD will display like
# KOT BILL PRINTING:
NOTE: KOT billing possible only if KOT printed or saved.
· Select “NO” and press ENTER for KOT bill printing.
Enter Required UDF and press PRINT key, automatically bill will get generated
MERGE KOT OPTION YES NO
·
NOTE: If you want to merge different UDF's KOT in a single bill then select YES and press ENTER LCD will display like
Enter Table Number (UDF) from and Table number (UDF) TO and press ENTER for Bill printing.
NOTE: 1. All selected different UDF items will be printed in a single bill.
MERGE KOT OPTION
TABLE NO FROM :TABLE NO TO :
2. Press F3 key in the billing window, it will print the Engaged UDF report.
3. Enter the UDF no. on which KOT is billed then press F1 key, it will go to the check KOT mode.In that particular mode if Print key is pressed then it will again print the KOT details.
14/10/10 THU 19:24
TABLE NO : 1ITEM NO :
QUANTITY : PRICE :
14/10/10 THU 19:24
20
“*” - Only in BP-2100 and BP-2100 Emerge & “$” - Only in BP-2100 Joy & “^”- Only in BP-2100 Emerge

Ø Add DepartmentØ Edit Ø Print Data base
ITEM DATABASE
Ø Add ItemØ Edit ItemØ Stock Management
DEPARTMENT DATABASE*
DepartmentDepartment
o New Stocko Add Stocko Delete Stocko Print Stock Reporto View Stock
Ø Print Item Data base
6.0 Menu Option are given below:
v CUSTOMER DATABASE* Ø Add Customer Ø Edit Customer Ø Print Customer Databasev DESCRIPTION DATABASE* Ø Add Description Ø Edit Description Ø Print Description Database
v
v
21
v OWNER DETAILS^ Ø Add Owner Details Ø Print Owner Details
v SUPPLIER DATABASE^ Ø Add Supplier Ø Edit Supplier Ø Print Supplier Database
v BILL SETTINGSØ Round Off.
No Round Off.Round Off To 0.25Round Off To 0.50Round Off To 1
Ø Discount Option§ No Discount§ Item wise Discount %§ Pre Tax Disc %§ Post Tax Disc %§§
Post Tax Discount AmountPost Tax Item Disc %
§§
§§
Ø Price Change§ Enable Price Change§§
Disable Price ChangeDynamic Price Change
§
Cash Reception
Other Charge § Enable (Name & %age) § Disable. Item Name Print Option Print Partial Item Name Print Full Item Name
§ Enable§ Disable
Ø
Ø §
Ø
KOT Option Enable Disable
Stock Option Bill with Stock Bill without Stock
Rate Slabs Enable Disable
Bill Number Type Continuous Daily reset
UDF2 OptionEnable (Name/Range) Disable
Rupee Symbol Option Enable
Disable
Ø
Ø
Ø
Ø
Ø
Ø
Reports for Clerks
Print Customer Name
UDF1 Option Enable (Name & Range)
Disable
§ Enable§ Disable
§ Enable§ Disable
Ø
Ø
Ø
Tax Type Option Forward Tax Reverse Tax
Time Print Option Enable
Disable
Ø
Ø
Ø Base Price OptionEnable
Disable Ø Sub UDF option
Enable
DisableØ Cumulate Item option*
Enable Disable
“*” - Only in BP-2100 and BP-2100 Emerge & “$” - Only in BP-2100 Joy & “^”- Only in BP-2100 Emerge

Ø Bill type option* Sales bill Service Bill Both.
Ø View Total Option Enable Disable
Ø Logo Print Option Enable
Disable
Two quantity mode* Enable/Disable Language Printing(in Bp2100 only) Enable/Disable
Unit Relation option* Enable/Disable
Font size option Big font Small font
Ø
Ø
Ø
Ø
Ø
Total D/H print* Enable/Disable
Ø Two copy bill Option Enable/Disable
ØEnable/Disable
HSN Enable
POS Enable/DisableEnable/Disable
Payment mode OptionDisableDirect PaymentSplit Payment
Calculator Bill OptionQty and Rate
Ø
Ø
Ø
Rate and Qty
UTGST OptionEnable/Disable
Ø
*Print customer address ØEnable/Disable
*Print invoice type Ø
Enable/Disable(in Bp2100 only)
Coupon PrintØ
Enable/Disable
Tax Slab IndicationEnable/Disable
Ø
Print tax table
Bill itemwise tax
Minimum stock option
Ø
Enable/Disable
Ø
Enable/Disable
Ø
Enable/Disable
(in Bp2100 only)
(in Bp2100 only)
(in Bp2100 only)
(in Bp2100 & 2100 Joy only)
ØCALCULATOR Option^EnableDisable
§§
ØOwner Details Print^EnableDisable
§§
ØEXT Printer Type^80 Column60 Column
§§
40 Column§
ØCESS in Rupees^EnableDisable
§§
ØAuto Upload Option^EnableDisable
§§
ØOnline Mode Option^EnableDisable
§§
® MACHINE SETTINGS¨ Set Time & Date
¨ Machine ID¨ Machine Baud Rate
· 2400 Baud Rate· 9600 Baud Rate
· 19200 Baud Rate · 38400 Baud Rate · 57600 Baud Rate
· 115200 Baud Rate
§ 2400 Baud RateØ Weighing Machine Baud Rate
§ 19200 Baud Rate§ 38400 Baud Rate§ 57600 Baud Rate§ 115200 Baud Rate
§ 9600 Baud Rate
ØBuzzer SettingBuzzer ONBuzzer OFF
Ø Factory Setting
Ø Restore Defaults
Ø HOT Key Configuration
§§
External Print option Disable
KOT on External(Etnt/Ser) KOT on both(Serial) All print on EXTERNAL(Ser) All print on Both(Serial)
* External Printer Interface 1 Ethernet 2 Serial
Ø
Ø
3 Thermal(Wifi)^ 4 Laser (Wifi)^
“*” - Only in BP-2100 and BP-2100 Emerge & “$” - Only in BP-2100 Joy & “^”- Only in BP-2100 Emerge
23

¨
¨
Upload To Usb
Self Test
¨
HEADER/FOOTER
§ Edit Header
§ Edit Footer
¨ Firmware Information
¨ User Configuration
Battery Status( Only in BP-2100)
¨
NOTE: USER ID-1 will have full rights and USER ID 2 to 15 will have access for billing & reports.
6.1 Department Database* ¨When control is at billing mode press Menu Button, LCD will display like
MENU
2. ITEM DATABASE
3. BILL SETTINGS
4. MACHINE SETTINGS
5. HEADER/FOOTER
1. DEPARTMENT DATABASE*
¨Select Department database and Press ENTER LCD will display like
DEPARTMENT DATABASE
2. EDIT DEPARTMENT3. PRINT DATABASE
SELECT YOUR OPTION
1. ADD DEPARTMENT
Ethernet Settings* · Machine IP · Subnet · Gateway · External Printer
External Auto Cutter 1 Enable 2 Disable
Ø
Ø
Ex. Printer Emulation*Ø · Esc/POS · Esc/P
Set Ex. Printer IPØ
¨ WIFI Settings^ · Connection Settings · Wifi Reset · Upload Daily Data · Message Settings · SMS Services · SMS Day Summary · Subscription
“*” - Only in BP-2100 and BP-2100 Emerge & “$” - Only in BP-2100 Joy & “^”- Only in BP-2100 Emerge
24

¨ Select Add Department database option and press ENTER LCD will display like
¨ Configure department name (Max 20 alphanumeric) and press ENTER LCD will display like
¨Select to configure more name.
¨Select to save present Department Name and to come out of that mode.
NOTE: Maximum 99 Departments can configured.
Edit Department Database Through Panel:
¨When control is at billing mode press Menu Button, LCD will display like
¨Select Department database and Press ENTER LCD will display like
Save & Cont
Save & Exit
MENU
2. ITEM DATABASE
3. BILL SETTINGS
4. MACHINE SETTINGS
5. HEADER/FOOTER
1. DEPARTMENT DATA BASE
DEPARTMENT DATABASE
NAME : _
NAME : 1 FLOOR
SAVE&EXITSAVE & CONT
DEPARTMENT DATABASE
DEPARTMENT DATABASE
3. PRINT DATABASE
SELECT YOUR OPTION
1. ADD DEPARTMENT2. EDIT DEPARTMENT
¨Select Edit Department database option and press ENTER LCD will displaye
¨ Type required Department no and press ENTER control will shift to NAME entery mode .
DEPARTMENT DATABASENO : 1NAME : 1 FLOOR
¨ Edit required department name and press ENTER LCD will display like
NO : 1NAME : 2 FLOOR
SAVE&EXIT
DEPARTMENT DATABASE
SAVE & CONT
25
“*” - Only in BP-2100 and BP-2100 Emerge & “$” - Only in BP-2100 Joy & “^”- Only in BP-2100 Emerge

DEPARTMENT DATABASE1. ADD DEPARTMENT2. EDIT DEPARTMENT
SELECT YOUR OPTION
3. PRINT DATABASE
¨ Select to Edit mode department name.
¨ Select to save present Department Name and to come out of that mode.
NOTE: Maximum 99 Departments can be configured.
Save & Cont
Save & Exit
Print Department Database through Panel:¨ When control is at billing mode press Menu Button, LCD will display like
¨ Select Department database and Press ENTER LCD will display like
¨ Select Print Department database option and press ENTER for Department database print
MENU
2. ITEM DATABASE
3. CUSTOMER DATABASE*
4. DESCRIPTION DATABASE*
5. BILL SETTINGS
1. DEPARTMENT DATA BASE*
6.2 Item Database :¨ When control is at billing mode press Menu Button, LCD will display like
¨Select Item data base and Press ENTER LCD will display like
¨ Select ADD ITEM option and Press ENTER LCD will display like
ITEM DATABASE
2. EDIT ITEM3. STOCK MANAGEMENT4. PRINT ITEM DATABASE SELECT YOUR OPTION
1. ADD ITEM
NOTE1: If bar code reader is connected, then when cursor is at Name entry mode read the bar code and configures required item name and other details as below.
ITEM DATABASE MODE$ No : NAME : UNIT : RATE 1 : RATE 2 : RATE 3 :
MENU
3. CUSTOMER DATABASE*
4. DESCRIPTION DATABASE*
5. BILL SETTINGS
2. ITEM DATABASE
26
“*” - Only in BP-2100 and BP-2100 Emerge & “$” - Only in BP-2100 Joy & “^”- Only in BP-2100 Emerge

¨Type Item rate3 (Max: 999999.99) and press ENTER Cursor will shift Tax entry mode.
¨Type Item TAX (Max: 99.99) and press ENTER Cursor will shift to Cess entry mode.
¨Type Item Discount (Max: 99.99) and press ENTER Cursor will shift to Dept. selection mode.¨*Select Required department (Max 99) and press ENTER LCD will display like
¨ Select to add more items.
¨ Select to save present item and to come out of database mode.
NOTE: Maximum 21000* and 10000$ items can be added in the item database.
Save & Cont
Save & Exit
¨Type Item name (Max16/ 20 char) and press ENTER Cursor will shift to unit type mode.
¨Select required unit type by up and down arrow keys and press ENTER Cursor will
shift to ITEM RATE mode (Unit types are : Liter, M.liter, K.Gram, Gram and Packet,
Bag, Box, Number, Jar, Dozen, Sachet, Sheet, Bottle, Plate, Piece)
¨Type Item rate1 (Max:999999.99) and press ENTER Cursor will shift Item rate2 entry mode
¨Type Item rate2 (Max:999999.99) and press ENTER Cursor will shift Item rate3 entry mode
*Unit relation option and Language printing Enabled-Then Add item display will look like
ADD ITEM DB MODENO. : NAME : LNAME:UNIT1 :UNIT2 :U1U2R :
Here LNAME is the language name which you can enter through keyboard. Unit 1 and Unit 2 are the Major and minor unit. E.g. Unit 1 can be configured as Bag and Unit 2 can be as K.Gram also U1U2R is the Relation between them like 1 Bag= 500 K.Gram.
¨ When control is at billing mode press Menu Button, LCD will display like
Edit Item Database through Panel :
ITEM DATABASE MODE
SAVE&EXITSAVE & CONT
IGST % : DISC % : DEPT* :
SGST % : COST :
MENU
3. CUSTOMER DATABASE*
4. DESCRIPTION DATABASE*
2. ITEM DATABASE
27
(16 in BP-2100 & 20 in BP-2100 Joy and 2100 Emerge)
it will ask to Enter Rate 4 to rate 10 if we select Rate slab set option as greater than 3
¨Type Item Cess (Max: 999.99) and press ENTER Cursor will shift to Item Discount mode.
“*” - Only in BP-2100 and BP-2100 Emerge & “$” - Only in BP-2100 Joy & “^”- Only in BP-2100 Emerge

¨Select Item data base and Press ENTER LCD will display like
¨Select EDIT ITEM option and Press ENTER LCD will display like
ITEM DATABASE MODEITEM NO :NAME : RICEUNIT : K.GRAMRATE 1 : 26.00RATE 2 : 28.00RATE 3 : 30.00
ITEM DATABASE1. ADD ITEM
3. STOCK MANAGEMENT3. PRINT ITEM DATABASE
2. EDIT ITEM
SELECT YOUR OPTION
¨ Type Item No and press ENTER Cursor will shift to unit type entry mode.
¨ Select to Edit next items.
¨ Select to save present item and to come out of Edit database mode.
Save & Cont
Save & Exit
NOTE: Item name can not edit.
STOCK MANAGEMENT:
Replace stock\Add stock\Delete stock through Panel:
¨ When control is at Billing mode press Menu Button, LCD will display like
*NOTE: Similarly here also if Unit relation option and Language printing option is enabled then you will be able to Edit the Language name, Unit 2 and U1U2R also.
ITEM DATABASE MODE
SAVE&EXITSAVE & CONT
IGST % : DISC % : DEPT* :
SGST % : COST :
28
¨Type Item rate3 (Max: 999999.99) and press ENTER Cursor will shift Tax entry mode.
¨Type Item TAX (Max: 99.99) and press ENTER Cursor will shift to Cess entry mode.
¨Type Item Discount (Max: 99.99) and press ENTER Cursor will shift to Dept. selection mode.¨*Select Required department (Max 99) and press ENTER LCD will display like
¨Select required unit type by up and down arrow keys and press ENTER Cursor will
shift to ITEM RATE mode (Unit types are : Liter, M.liter, K.Gram, Gram and Packet,
Bag, Box, Number, Jar, Dozen, Sachet, Sheet, Bottle, Plate, Piece)
¨Type Item rate1 (Max:999999.99) and press ENTER Cursor will shift Item rate2 entry mode
¨Type Item rate2 (Max:999999.99) and press ENTER Cursor will shift Item rate3 entry mode
it will ask to Enter Rate 4 to rate 10 if we select Rate slab set option as greater than 3
¨Type Item Cess (Max: 999.99) and press ENTER Cursor will shift to Item Discount mode.
“*” - Only in BP-2100 and BP-2100 Emerge & “$” - Only in BP-2100 Joy & “^”- Only in BP-2100 Emerge

¨ Select Item data base and Press ENTER LCD will display like
¨Select Stock management option and Press ENTER LCD will display like
ITEM DATABASE1. ADD ITEM2. EDIT ITEM
4. PRINT ITEM DATABASE SELECT YOUR OPTION
3. STOCK MANAGEMENT
¨Select required stock option and Press ENTER LCD will display like
¨Enter item no, item name will be displayed and press ENTER cursor will shift to
New stock entry mode.
¨ Enter Required stock and press ENTER LCD will display below messages;
¨Select to add more items.
¨Select to save present item and to come out of item database mode.Save & Exit
NOTE: Replace Stock: Use to replace from old stock to new stock.
Add stock : Use to add the stock for Existing stocks.
Delete Stock: Use to reset the stock to Zero.
Save & Cont
ITEM NO :1 ITEM NAME :RICEAVAIL STOCK :10KGNEW STOCK :100_
SAVE&EXITSAVE & CONT
STOCK MANAGEMENT
STOCK MANAGEMENT
1. NEW STOCK
2. ADD STOCK
3. DELETE STOCK4. PRINT STOCK RPT
5. VIEW STOCK
SELECT YOUR OPTION
MENU
3. CUSTOMER DATABASE*
4. DESCRIPTION DATABASE*
2. ITEM DATABASE
29
“*” - Only in BP-2100 and BP-2100 Emerge & “$” - Only in BP-2100 Joy & “^”- Only in BP-2100 Emerge

¨ Select Item data base and Press ENTER LCD will display like
ITEM DATABASE1. ADD ITEM2. EDIT ITEM
4. PRINT ITEM DATABASE SELECT YOUR OPTION
3. STOCK MANAGEMENT
Stock View/Print through Panel¨When control is at Billing mode press Menu Button, LCD will display like
¨Select Stock management option and Press ENTER LCD will display like
¨Select Print Stock report option and press ENTER for Stock report printing Or ¨Select view Stock option and Press ENTER LCD will display like
¨Type FROM to TO item number and press ENTER LCD will display like
STOCK MANAGEMENT
STOCK FROM :
STOCK TO :
ITEM FROM: ITEM TO :
1
STOCK MANAGEMENT
¨Press Up/Down Keys to see the Next/prev item stocks. ¨Press CANCEL/CLEAR to come out of that mode.
NOTE1: Selection of item number is valid only for the available numbers in the database and also can be printed by pressing PRINT button.
STOCK MANAGEMENT
SELECT YOUR OPTION
3. DELETE STOCK4. PRINT STOCK RPT
1. NEW STOCK2. ADD STOCK
5. VIEW STOCK
MENU
3. CUSTOMER DATABASE*
4. DESCRIPTION DATABASE*
2. ITEM DATABASE
30
Only in BP-2100 & 2100 Joy
“*” - Only in BP-2100 and BP-2100 Emerge & “$” - Only in BP-2100 Joy & “^”- Only in BP-2100 Emerge

Print Database through Panel:¨ When control is at billing mode press Menu Button, LCD will display like
¨Select Item database and Press ENTER LCD will display like
¨ Select Print database option and Press ENTER for database print. 6.3 *CUSTOMER DATA BASE:
*ADD CUSTOMER
¨¨¨¨
to A CREDIT.
MENU1.DEPARTMENT DATA BASE*2.ITEM DATA BASE3.CUSTOMER DATA BASE4.DESCRIPTION DATA BASE
CUSTOMER DATA BASE1.ADD CUSTOMER2.EDIT CUSTOMER3.PRINT CUST DATABASE
ADD CUSTOMER DATA BASE NO :NAME :ADDR :PHONE :A LIMIT :D LIMIT :
CUST DB MODEBALANCE :A CREDIT :
ITEM DATABASE1. ADD ITEM2. EDIT ITEM
4. PRINT ITEM DATABASE
SELECT YOUR OPTION
3. STOCK MANAGEMENT
MENU
3. CUSTOMER DATABASE*
4. DESCRIPTION DATABASE*
5. BILL SETTINGS
2. ITEM DATABASE
31
When control is in Billing mode press the ENTER LCD will display like
¨Select the Customer data base and press the ENTER LCD will display like
Select the “Add customer “ option and press the ENTER LCD will display like
¨Enter the Customer no(ID) and press the ENTER. Cursor will move to Name enter mode.Enter the Customer name and press the ENTER. Then cursor will move to Address field entry.Enter the Address and press the ENTER. Cursor will move to A LIMIT (Allow limit) entry.Enter the A limit and press the ENTER. Cursor will move to the D LIMIT(Days limit). D Limit is not usable. So press the ENTER. LCD will display like
¨Enter the balance of the credit customer and press the ENTER button. Cursor will move
“*” - Only in BP-2100 and BP-2100 Emerge & “$” - Only in BP-2100 Joy & “^”- Only in BP-2100 Emerge

Select the A CREDIT as 'YES' or 'NO' and press the ENTER. LCD will Display like¨
Note:1. Max customer entry is 10002. Max character for customer name is 203. Max character for address is 100 4. Max digit for Phone is 10/155. Max amount for A limit is 9999999999.99
¨Select the SAVE & CONT option to go to the next customer entry or select the SAVE & EXIT option to save.
*EDIT CUSTOMER DATABASE:When control is in customer data base mode select the “Edit Customer” option.(Refer menu¨
structure to know this path)LCD will display like
CUST DB MODEBALANCE :A CREDIT : YES
SAVE & EXIT :SAVE & CONT
EDIT CUST DB MODE NO :NAME :ADDR :PHONE :A LIMIT :
EDIT CUST DB MODE NO : 1NAME : RAMUADDR : ERODEPHONE : 08892377708A LIMIT : 7500.00
CUST DB MODEBALANCE :A CREDIT : YES
SAVE & EXIT :SAVE & CONT
¨Enter the customer No(ID) which you want to edit and press the ENTER. LCD will display like
¨Edit the Name (Max 20char)Edit the Address (Max 100 char)¨Edit the Phone no (Max 10/15 digit)¨Edit the A LIMIT (Max 9999999999.99)¨Edit the balance and Allow credit then press the ENTER. LCD will display like¨
¨Select the SAVE & CONT option to go to the next customer edit entry or select the SAVE & EXIT option to save.*PRINT CUST DATA BASE :
Select the “Print cust data base” option in Customer data base(Refer menu structure) and ¨press the Enter Machine will start to print the customer data base
MENU1.DEPARTMENT DATA BASE*2.ITEM DATA BASE3.CUSTOMER DATA BASE4.DESCRIPTION DATA BASE
6.4 *DESCRIPTION DATA BASE When control is in Billing mode press the ENTER. LCD will display like¨
32
“*” - Only in BP-2100 and BP-2100 Emerge & “$” - Only in BP-2100 Joy & “^”- Only in BP-2100 Emerge

DESCRIPTION DATA BASE1. ADD DESCRIPTION*2. EDIT DESCRIPTION*3. PRINT DESC DATA BASE*
ADD DESC DB MODENAME : __TYPE : ENTER DESCRIPTION
¨ Select the Description data base and press the ENTER. LCD will display like
*ADD DESCRIPTIONSelect the Add description option (Refer menu structure)from the description data base and¨
press the ENTER. LCD will display like
¨Enter description (Payment or Receipt) name and press the ENTER. LCD will display like
ADD DESC DB MODENAME : VIMAL TRADERSTYPE : PAYMENT
¨Select the Payment or Receipt Type by pressing the UP and DOWN key and press the ENTER.LCD will display like
¨Select the SAVE & CONT option to go to the next description entry or select the SAVE & EXIT option to save description
ADD DESC DB MODENAME : VIMAL TRADERSTYPE : RECEIPT
SAVE & EXIT SAVE & CONT
Note:1. Max Description entry is 100(including Payment & Receipt)2. Description name max character is 30
*EDIT DESCRIPTION : Select the Edit description option from the Description data base(Refer the menu structure)
EDIT DESC DB MODENO :__NAME : TYPE :
LCD will display like
NO : 1NAME : VIMAL TRADERSTYPE :
EDIT DESC DB MODE
ENTER DESCRIPTION
NO : 1NAME : VIMAL TRADERS
EDIT DESC DB MODE
33
and press the ENTER. LCD will display like
¨Enter the description no which you want to edit and press the ENTER . LCD will display like
¨ Edit the description name and press the ENTER . LCD will display like
¨Select the Payment or Receipt type by using the UP OR DOWN key and press the ENTER.
TYPE : PAYMENT
“*” - Only in BP-2100 and BP-2100 Emerge & “$” - Only in BP-2100 Joy & “^”- Only in BP-2100 Emerge

EXIT option to save description
*PRINT DESC DATA BASE
¨Select the “Print desc data base” option(Refer menu structure) from the description data base
· BILLING FOR CUST PAYMENT/CREDIT /PAYMENT AND DESCRIPTION
CREDIT BILLING :
For credit billing select the “Credit/Retail billing from the Bill mode (login �Register�Bill ·
·
·
·
UDF NO : : __ITEM NO :
QUANTITY : PRICE :
TOTAL : 0.00 0
E16/10/12 THU 19:20
¨Select the SAVE & CONT option to go to the next Edit description entry or select the SAVE &
NO : 1NAME : VIMAL TRADERS
EDIT DESC DB MODE
E16/10/12 THU 19:20
UDF NO : : 1 ITEM NO : 1 RICE QUANTITY : 50.00__ KgPRICE : 20
TOTAL : 20.00 0
¨After entering the Price before giving the print press the DOWN key to go to the Credit billing mode. Display will be like
CUST NO : __
CUST NO : 1 RAMUTOTAL : 100.00CASH : __
¨Enter the customer no (when pressing the customer no, it will show the customer current limit balance also) and press the ENTER to go to the CASH entry mode. Display will be like
¨Enter the Cash and press the ENTER to print the Credit bill. Before printing the bill display will be like
CUST NO : 1 RAMUTOTAL : 100.00CASH : 10BALANCE : 90.00
34
and press the ENTER . Machine will start to print the description data base.
mode�Credit/Retail) and press the ENTER. LCD will display like
Enter the UDF NO and press the ENTER to go to the Item no entry mode.
Enter the Item no and press the ENTER to go to the Quantity mode.
· Enter the Quantity and press the ENTER to go to the Price entry mode
Enter the Price and press the ENTER . Now Display will like
TYPE : PAYMENT
SAVE & EXIT SAVE & CONT
“*” - Only in BP-2100 and BP-2100 Emerge & “$” - Only in BP-2100 Joy & “^”- Only in BP-2100 Emerge

18/10/12 THU 09 : 12 CUST ID :
BALANCE : AMOUNT :
18/10/12 THU 09 : 12CUST ID : 1 RAMUBALANCE : 2570.00AMOUNT : __
*CUST PAYMENT BILLING :¨Select the Customer payment option from the bill mode (login �Register�Bill mode�CUSTOMER PAYMENT) and press the ENTER. Display will be like
¨Enter the customer ID and press the ENTER. Cursor will move to the Amount column. Display will be like
¨Enter the amount and press the ENTER to print the customer payment bill.Note :
18/10/12 THU 09 : 12DESC NO :__
AMOUNT :DATE :
¨Enter the Description (Payment or Receipt) no and press the ENTER. It will show the description name and cursor will be in the Amount entry.
Enter the Amount and press the ENTER. Cursor will move to Date entry field. Display will be like¨
1. When cursor is in Cust ID entry press the PLU button for Customer search PAYMENT AND RECEIPTS BILLING : Select the Payment and Receipts option from the bill mode (login �Register�Bill mode�¨ Payment and Receipts) and press the ENTER. Display will be like
18/10/12 THU 09 : 12DESC NO : 1 VIMAL TRADERSAMOUNT : 1500.00DATE : 18/10/12
18/10/12 THU 09 : 12DESC NO :
AMOUNT : DATE : TOTAL : 1500.00
To print the Description bill(Payment & receipt bill) Note :
1. When cursor is in Description no entry press the PLU button for Description search
¨ Enter the date (default date will be present date) which you want to bill and press the ENTER. Display will be like
¨ Enter the description No to go to the next description no entry or Press the PRINT button.
35
OWNER DETAILS
1. ADD OWNER DETAILS
6.5 ^Owner Details Press MENU key When control is in Billing mode & select Owner Detail Option ¨
LCD will display like
2. PRINT OWNER DETAILS
Select Add Owner Deatils Option, LCD will display like;¨
“*” - Only in BP-2100 and BP-2100 Emerge & “$” - Only in BP-2100 Joy & “^”- Only in BP-2100 Emerge

ADD OWNER DB MODE GSTIN :NAME :MOB1 NO :MOB2 NO :DEV ID :
¨Enter all details i.e, GSTIN, Name, Mob1 No, Mob2 No & Device Id.
Note :1. Mob 1 will be the default mobile number2. Device Id will be geenrated from Server & the steps for generating the device ID are mentioned on Page number 81.
SUPPLIER DATABASE
1. ADD SUPPLIER
6.6 ^Supplier Database Press MENU key When control is in Billing mode & select Supplier Database Option ¨
LCD will display like
2. EDIT SUPPLIER
Select Add Supplier Option, LCD will display like;¨
2. PRINT SUP DATABASE
ADD SUPPLIER DB MODE SUP NO :NAME :GSTIN :POS :ADDR :
Fill all details and press ENTER Key.¨
Note : 1. Please ensure to Enter GSTIN number in right format. 2. Maximum 1000 supplier only can be added in Database.
ADD Supplier
Select Edit Supplier Option, LCD will display like;¨
EDIT SUPPLIER DB MODE SUP NO :NAME :GSTIN :POS :ADDR :
Enter a valid supplier number and press ENTER Key.Do the changes as required¨
EDIT Supplier
and press SAVE & EXT Option.
PRINT Supplier Database
Select Print Supplier databsase & press ENTER to print Supplier Database.¨
“*” - Only in BP-2100 and BP-2100 Emerge & “$” - Only in BP-2100 Joy & “^”- Only in BP-2100 Emerge
36

6.7 BILL SETTINGS¨ When control is at billing mode press Menu Button ,LCD will display like
MENU
3. CUSTOMER DATABASE*
4. DESCRIPTION DATABASE*
2. ITEM DATABASE
5. BILL SETTING
the settingNOTE:No Round Off: Total amount in the bill will be printed without any round off. Round Off to0.25 Paise: This option allows rounding off the total amount to the nearest 25 paise.e.g., if the Total Amount is 12.30, on selecting this option, Total amount will be rounded to 12.25. Round Off to 0.50Paise: This option allows rounding off the total amount to the nearest 50 paise. e.g., if the will be rounded to 12.50 Round Off to 1: This option allows rounding off the total amountto the nearest 1 Rupee. e.g.,if the Total Amount is 12.30, on selecting this option, Totalamount will be rounded to 12.00.
Total Amount is 12.30, on selecting this option, Total amount
ROUND OFF SETTING
2. ROUND OFF TO 0.25
3. ROUND OFF TO 0.50
4. ROUND OFF TO 1
SELECT YOUR OPTION
1. NO ROUND OFF
Configure DISCOUNT through Panel:¨When control is at billing mode press Menu Button, LCD will display like
2. DISCOUNT OPTION
3. PRICE CHANGE OPTION
4. OTHER CHARGES
5. ITEM NAME PRINT OPTION
7. REPORTS FOR CLERKS
1. ROUND OFF OPTION
BILL SETTING
6. CASH RECEPTION
MENU
3. CUSTOMER DATABASE*
4. DESCRIPTION DATABASE*
2. ITEM DATABASE
5. BILL SETTING
¨ Select Round off setting and press ENTER LCD will display like.
¨ Select required round off option by up and down arrow key and press ENTER to activate
¨ Select Bill setting and Press ENTER LCD will display like.
“*” - Only in BP-2100 and BP-2100 Emerge & “$” - Only in BP-2100 Joy & “^”- Only in BP-2100 Emerge
37

38
¨Select Bill setting and Press ENTER LCD will display like
¨Select Discount setting and press ENTER LCD will display like
3. PRICE CHANGE OPTION
4. OTHER CHARGES
5. ITEM NAME PRINT OPTION
7. REPORTS FOR CLERKS
1. ROUND OFF OPTION
BILL SETTING
6. CASH RECEPTION
2. DISCOUNT OPTION
Select the required option by using the UP and DOWN key and press the ENTER key to ¨ enable that particular settings.
¨Select required Discount option by up and down arrow key and press ENTER to activate the setting
NOTE: If the DATABASE discount is entered and if the machine any of the DISCOUNT is enabledthen double discounting will not happen. If pre/post discount in% or RS enabled RS billing mode will not work.
Enable / Disable Price change through Panel :¨When control is at billing mode press the MENU button LCD will display like
MENU1. DEPARTMENT DATABASE*2. ITEM DATA BASE3. CUSTOMER DATA BASE*4. DESCRIPTION DATA BASE*5. BILL SETTINGS
¨Select the Bill settings and press the ENTER LCD will display like
BILL SETTINGS1. ROUND OFF OPTION2. DISCOUNT OPTION
3. PRICE CHANGE OPTION4. ITEM NAME PRINT OPTION
¨Select the Price change option and press the ENTER LCD will display like
PRICE CHANGE SETTINGS1. DISABLE2. ENABLE3. DYNAMIC
Item name Print option through panel :
DISCOUNT SETTING
2. ITEM WISE DICOUNT %3. PRE TAX DICOUNT %4. POST TAX DICOUNT %5. POST TAX DICOUNT AMOUNT
1. NO DISCOUNT
6. POST TAX ITEM DICOUNT %
When control is at billing mode press the MENU button LCD will display like
“*” - Only in BP-2100 and BP-2100 Emerge & “$” - Only in BP-2100 Joy & “^”- Only in BP-2100 Emerge

¨
· ¨
1. ROUND OFF OPTION2. DISCOUNT OPTION3. PRICE CHANGE OPTION
5. ITEM NAME PRINT OPTION
BILL SETTINGS
4. OTHER CHARGES
39
Select the Bill settings and press the ENTER LCD will display like
Select the Item name print option and press the ENTER. LCD will display like
1. DEPARTMENT DATABASE*2. ITEM DATA BASE3. CUSTOMER DATA BASE*4. DESCRIPTION DATA BASE*5. BILL SETTINGS
MENU
Configure OTHER CHARGE through Panel:
ITEM NAME OPTIONS1. PRINT PARTIAL ITEM NAME2. PRINT FULL ITEM NAME
SELECT YOUR OPTION
enable that particular option.
PERCENT
OPTION :NAME :
:
SELECT YOUR OPTION
ENABLE
OTHER CHARGE SETTING
3. PRICE CHANGE OPTION
5. ITEM NAME PRINT OPTION
7. REPORTS FOR CLERKS
1. ROUND OFF OPTION
BILL SETTING
6. CASH RECEPTION
2. DISCOUNT OPTION
4. OTHER CHARGES
MENU
3. CUSTOMER DATABASE*
4. DESCRIPTION DATABASE*
2. ITEM DATABASE
5. BILL SETTING
¨When control is at billing mode press Menu Button, LCD will display like
¨Select the required option by using the UP and DOWN key and press the ENTER key to
¨Select Bill setting and Press ENTER LCD will display like
¨Select Other charge option and Press ENTER LCD will display like
“*” - Only in BP-2100 and BP-2100 Emerge & “$” - Only in BP-2100 Joy & “^”- Only in BP-2100 Emerge

40
¨After selecting Enable options press ENTER Control will shift to Name entry mode.¨Configure the required name (Max 20 alpha numeric characters) and press ENTER
Cursor will shift to percentage entry mode.
¨Enter required other charge value (Max 99.99) and press ENTER to save the setting.
Enable/Disable CASH RECEPTION through Panel:
¨ When control is at billing mode press Menu Button, LCD will display like
MENU
3. CUSTOMER DATABASE*
4. DESCRIPTION DATABASE*
2. ITEM DATABASE
5. BILL SETTING
¨Enable or Disable the option by up and down arrow key and press ENTER to activate the setting.
¨Select Bill setting and Press ENTER LCD will display like
¨Select Cash reception option and press ENTER LCD will display like
Enable/Disable REPORTS FOR CLERKS through Panel:
¨ When control is at billing mode press Menu Button, LCD will display like
¨ Select Bill setting and Press ENTER LCD will display like
OPTION : ENABLE
SELECT YOUR OPTION
CASH RECEPTION OPTION
3. PRICE CHANGE OPTION
5. ITEM NAME PRINT OPTION
7. REPORTS FOR CLERKS
1. ROUND OFF OPTION
BILL SETTING
2. DISCOUNT OPTION
4. OTHER CHARGES
6. CASH RECEPTION
MENU
3. CUSTOMER DATABASE*
4. DESCRIPTION DATABASE*
2. ITEM DATABASE
5. BILL SETTING
“*” - Only in BP-2100 and BP-2100 Emerge & “$” - Only in BP-2100 Joy & “^”- Only in BP-2100 Emerge

¨ Select Reports for clerks option and press LCD will display like ENTER
SELECT YOUR OPTION
REPORTS FOR CLERKS OPTION
ENABLE OPTION :
41
1. ROUND OFF OPTION
2. DISCOUNT OPTION
3. PRICE CHANGE OPTION
4. OTHER CHARGES
5. ITEM NAME PRINT
7. REPORTS FOR CLERKS
BILL SETTING
6. CASH RECEPTION
Enable/Disable PRINT CUSTOMER NAME through Panel:
¨ the setting.NOTE: 1. Customer name supports up to 20 characters.
2. Customer name can be both alphanumeric and special characters are not allowed
3. PRICE CHANGE OPTION
5. ITEM NAME PRINT OPTION
BILL SETTING
2. DISCOUNT OPTION
4. OTHER CHARGES
6. CASH RECEPTION
8. CUSTOMER NAME PRINT
7. REPORTS FOR CLERKS
MENU
3. CUSTOMER DATABASE*
4. DESCRIPTION DATABASE*
2. ITEM DATABASE
5. BILL SETTING
SELECT YOUR OPTION
CUSTOMER NAME PRINT OPTION
OPTION : ENABLE
¨Enable or Disable the option by up and down arrow key and press ENTER to activate the setting.
¨When control is at billing mode press Menu Button, LCD will display like
¨Select Bill setting and Press ENTER LCD will display like
¨Select Print Customer name option and press ENTER LCD will display like
Enable or Disable the option by up and down arrow key and press ENTER to activate
“*” - Only in BP-2100 and BP-2100 Emerge & “$” - Only in BP-2100 Joy & “^”- Only in BP-2100 Emerge

42
Configure UDF1 through Panel:¨When control is at billing mode press Menu Button, LCD will display like
¨ Select Bill setting and Press ENTER LCD will display like
MENU
3. CUSTOMER DATABASE*
4. DESCRIPTION DATABASE*
2. ITEM DATABASE
5. BILL SETTING
¨ Select UDF1 option and press ENTER LCD will display like
OPTION : ENABLE NAME : _RANGE-1 TO:
SELECT YOUR OPTION
UDF1 MODE
¨After selecting Enable options press ENTER Control will shift to Name entry mode.
¨Configure the required name and press ENTER Cursor will shift to UDF range entry mode.
¨Enter required Range in numbers (Range: 1-250) and press ENTER to save the setting.
NOTE1: If UDF1 is disabled KOT will be disabled automatically.
NOTE2: Latest UDF string will be taken for all the transaction.
Configure RATE SLABS through Panel:¨When control is at billing mode press Menu Button, LCD will display like
3. PRICE CHANGE OPTION
5. ITEM NAME PRINT OPTION
BILL SETTING
4. OTHER CHARGES
6. CASH RECEPTION
9. UDF 1 OPTION
7. REPORTS FOR CLERKS
8. CUSTOMER NAME PRINT
MENU
3. CUSTOMER DATABASE*
4. DESCRIPTION DATABASE*
2. ITEM DATABASE
5. BILL SETTING
“*” - Only in BP-2100 and BP-2100 Emerge & “$” - Only in BP-2100 Joy & “^”- Only in BP-2100 Emerge

43
¨Select Bill setting and Press ENTER LCD will display like
9. RATE SLABS
5. ITEM NAME PRINT OPTION
BILL SETTING
4. OTHER CHARGES
6. CASH RECEPTION
10. RATE SLABS
7. REPORTS FOR CLERKS
8. CUSTOMER NAME PRINT
9. UDF 1 OPTION
¨
¨
¨
¨ Select
¨Select
configuration mode.Enable/Disable KOT through Panel:¨
UDF1 FROM :1_ UDF1 TO :10
SELECT YOUR OPTION
RATE SLAB :1
RATE SLAB CONFIGURATION
to save and continue.
to save present UDF and Rate slab and to come out of Rate slab
Save & Cont
Save & Exit
9. RATE SLABS
5. ITEM NAME PRINT OPTION
BILL SETTING
6. CASH RECEPTION
11. KOT OPTION
7. REPORTS FOR CLERKS
8. CUSTOMER NAME PRINT
9. UDF 1 OPTION
10 .RATE SLABS
MENU
3. CUSTOMER DATABASE*
4. DESCRIPTION DATABASE*
2. ITEM DATABASE
5. BILL SETTING
Select Rate slabs option and press ENTER LCD will display like
Enter UDF FROM number and press ENTER cursor will shift to UDF to entry mode.
¨Enter UDF TO number and press ENTER Cursor will shift to Rate slab entry mode
Rate slabs can be entered like 1,2,3 and press ENTER LCD will display like
When control is at billing mode press Menu Button, LCD will display like
¨Select Bill setting and Press ENTER LCD will display like
“*” - Only in BP-2100 and BP-2100 Emerge & “$” - Only in BP-2100 Joy & “^”- Only in BP-2100 Emerge

44
¨Select KOT option and press ENTER LCD will display like.
OPTION : ENABLE
SELECT YOUR OPTION
KOT OPTION
¨Enable or Disable the option by up and down arrow key and press ENTER to activate the setting.
NOTE: 1. KOT can be enabled only if UDF is enabled. 2. KOT(Kitchen order token) option is for restaurant billing.
Enable/Disable STOCK OPTION through Panel:
¨When control is at billing mode press Menu Button, LCD will display like
¨Select Bill setting and Press ENTER LCD will display like
¨Select Stock option and press ENTER LCD will display like
¨Enable Bill with stock or Bill without stock option by up and down arrow key and press
ENTER to activate the setting.
STOCK OPTION
OPTION :
SELECT YOUR OPTION
BILL WITH STOCK
Select BILL NUMBER TYPE OPTION through Panel:
¨When control is at billing mode press Menu Button, LCD will display like
BILL SETTING $6. CASH RECEPTION
12. STOCK OPTION
7. REPORTS FOR CLERKS
8. CUSTOMER NAME PRINT
9. UDF 1 OPTION
10 .RATE SLABS 11. KOT OPTION
MENU
3. CUSTOMER DATABASE*
4. DESCRIPTION DATABASE*
2. ITEM DATABASE
5. BILL SETTING
“*” - Only in BP-2100 and BP-2100 Emerge & “$” - Only in BP-2100 Joy & “^”- Only in BP-2100 Emerge

MENU
3. CUSTOMER DATABASE*
4. DESCRIPTION DATABASE*
2. ITEM DATABASE
5. BILL SETTING
45
¨Select Bill setting and Press ENTER LCD will display like
¨Select Bill number type option and press ENTER LCD will display like
¨Select Continuous or Daily reset option by up and down arrow key and press ENTER to activate the setting.
NOTE: New bill number can not be set, if any bill been made in that particular day.
STOCK OPTION
OPTION :
SELECT YOUR OPTION
CONTINUOUS
Configure UDF2 through Panel:¨ When control is at billing mode press Menu Button, LCD will display like
¨ Select Bill setting and Press ENTER LCD will display like
BILL SETTING
12. STOCK OPTION
7. REPORTS FOR CLERKS 8. CUSTOMER NAME PRINT
9. UDF 1 OPTION
10 .RATE SLABS
11. KOT OPTION
13. BILL NUMBER TYPE
MENU
3. CUSTOMER DATABASE*
4. DESCRIPTION DATABASE*
2. ITEM DATABASE
5. BILL SETTING
“*” - Only in BP-2100 and BP-2100 Emerge & “$” - Only in BP-2100 Joy & “^”- Only in BP-2100 Emerge

8. CUSTOMER NAME PRINT 9. UDF 1 OPTION
10 .RATE SLABS
11. KOT OPTION
12. STOCK OPTION
13. BILL NUMBER TYPE
BILL SETTING
14. UDF 2 OPTION
46
¨Select UDF2 option and press ENTER LCD will display like
¨After selecting Enable options press ENTER Control will shift to Name entry mode.
¨Configure the required name and press ENTER Cursor will shift to UDF range entry mode.
¨ Enter required Range in numbers (Range: 1-250) and press ENTER to save the setting.
OPTION : NAME : _RANGE-1 TO:
SELECT YOUR OPTION
UDF2 MODE
ENABLE
NOTE1: If UDF2 is disabled KOT will be disabled automatically.
NOTE2: Latest UDF string will be taken for all the transaction.
Select RUPEE SYMBOL through Panel:
BILL SETTING
15. RUPEE SYMBOL OPTION
9. UDF 1 OPTION 10 .RATE SLABS
11. KOT OPTION
12. STOCK OPTION
13. BILL NUMBER TYPE
14. UDF 2 OPTION
MENU
3. CUSTOMER DATABASE*
4. DESCRIPTION DATABASE*
2. ITEM DATABASE
5. BILL SETTING
¨Select Bill setting and Press ENTER LCD will display like
¨When control is at billing mode press Menu Button, LCD will display like
“*” - Only in BP-2100 and BP-2100 Emerge & “$” - Only in BP-2100 Joy & “^”- Only in BP-2100 Emerge

setting.
RUPEE SYMBOL OPTION
OPTION : ENABLE
SELECT YOUR OPTION
47
¨Select Rupee symbol option and press ENTER LCD will display like.
¨Enable or Disable the option by up and down arrow key and press ENTER to activate the
Select TAX TYPE through Panel:
¨
¨ Select Tax Type Option and press ENTER LCD will display like
¨Select Forward or Reverse Tax option by up and down arrow key and press ENTER to activate the setting.
TIME PRINT on bill option through Panel:
¨When control is at billing mode press Menu Button, LCD will display like
RUPEE SYMBOL OPTION
OPTION :
SELECT YOUR OPTION
FORWARD TAX
BILL SETTING
16. TAX TYPE OPTION
10 .RATE SLABS
11. KOT OPTION
12. STOCK OPTION
13. BILL NUMBER TYPE
14. UDF 2 OPTION 15. RUPEE SYMBOL OPTION
MENU
3. CUSTOMER DATABASE*
4. DESCRIPTION DATABASE*
2. ITEM DATABASE
5. BILL SETTING
MENU
3. CUSTOMER DATABASE*
4. DESCRIPTION DATABASE*
2. ITEM DATABASE
5. BILL SETTING
¨When control is at billing mode press Menu Button, LCD will display like
Select Bill setting and Press ENTER LCD will display like
“*” - Only in BP-2100 and BP-2100 Emerge & “$” - Only in BP-2100 Joy & “^”- Only in BP-2100 Emerge

48
¨Select Bill setting and Press ENTER LCD will display like
BILL SETTING 11. KOT OPTION 12. STOCK OPTION 13. BILL NUMBER TYPE 14. UDF 2 OPTION 15. RUPEE SYMBOL OPTION 16. TAX TYPE OPTION 17. TIME PRINT OPTION
¨Select Time On bill option and press ENTER LCD will display like TIME ON BILL OPTION
OPTION :
SELECT YOUR OPTION
ENABLE
¨Enable or Disable the option by up and down arrow key and press ENTER to activate the setting.
Select BASE PRICE option through Panel:¨When control is at billing mode press Menu Button, LCD will display like
Select the Sub UDF option through Panel:
BASE PRICE OPTION
OPTION : ENABLE
SELECT YOUR OPTION
BILL SETTING 12. STOCK OPTION 13. BILL NUMBER TYPE 14. UDF 2 OPTION 15. RUPEE SYMBOL OPTION 16. TAX TYPE OPTION
18. BASE PRICE OPTION 17. TIME PRINT OPTION
MENU
3. CUSTOMER DATABASE*
4. DESCRIPTION DATABASE*
2. ITEM DATABASE
5. BILL SETTING
¨Select Bill setting and Press ENTER LCD will display like
¨Select Base price option and press ENTER LCD will display like
¨Enable or Disable the option by up and down arrow key and press ENTER to activate the setting.
When control is at billing mode press the MENU button LCD will display like
“*” - Only in BP-2100 and BP-2100 Emerge & “$” - Only in BP-2100 Joy & “^”- Only in BP-2100 Emerge

BILL SETTING 13. BILL NUMBER TYPE 14. UDF 2 OPTION 15. RUPEE SYMBOL OPTION 16. TAX TYPE OPTION
19. SUB UDF OPTION
17. TIME PRINT OPTION 18. BASE PRICE OPTION
MENU
3. CUSTOMER DATABASE*
4. DESCRIPTION DATABASE*
2. ITEM DATABASE
5. BILL SETTING
49
¨Select the Bill settings option and press the ENTER LCD will display like
*Select the Cumulate Item option through panel :
SUB UDF OPTION
OPTION : ENABLE SELECT YOUR OPTION
¨Select the Bill settings option and press the ENTER LCD will display like
¨Select the Cumulate option and press the ENTER LCD will display like
CUMULATE ITEM OPTION
OPTION : ENABLESELECT YOUR OPTION
BILL SETTINGS*17. TIME PRINT OPTION18. BASE PRICE OPTION19. SUB UDF OPTION20. CUMULATE ITEM OPTION*21. BILL TYPE OPTION*
MENU
3. CUSTOMER DATABASE*
4. DESCRIPTION DATABASE*
2. ITEM DATABASE
5. BILL SETTING
¨Select the Sub UDF option and press the ENTER LCD will display like
¨ Select the Enable or Disable option by using the Down or UP key and press the ENTER.
¨When control is at billing mode press the MENU button LCD will display like
“*” - Only in BP-2100 and BP-2100 Emerge & “$” - Only in BP-2100 Joy & “^”- Only in BP-2100 Emerge

BILL SETTINGS17. TIME PRINT OPTION18. BASE PRICE OPTION19. SUB UDF OPTION20. CUMULATE ITEM OPTION*21. BILL TYPE OPTION*
¨Select the Bill settings option and press the ENTER LCD will display like
MENU
3. CUSTOMER DATABASE*
4. DESCRIPTION DATABASE*
2. ITEM DATABASE
5. BILL SETTING
50
*Select the Bill Type Option through panel : ¨
¨ Select the Enable or Disable option by using the Down or UP key and press the ENTER
· When control is at billing mode press the MENU button LCD will display like
¨ Select the Bill type option and press the ENTER LCD will display like
BILL TYPE SETTINGS1.SALES BILL2.SERVICE BILL3.BOTH
¨ Select any one type(sales/Service/Both) by using the Down or UP key and press
the ENTER to enable the particular type.
Select the View Total Option through Panel : When control is at Billing mode press the MENU button LCD will display like
¨
¨Select the Bill settings option and press the ENTER LCD will display like
¨Select the View Total option and press the ENTER LCD will display like
BILL SETTINGS
18. BASE PRICE OPTION19. SUB UDF OPTION20. CUMULATE ITEM OPTION*21. BILL TYPE OPTION*22. VIEW TOTAL OPTION
MENU
3. CUSTOMER DATABASE*
4. DESCRIPTION DATABASE*
2. ITEM DATABASE
5. BILL SETTING
“*” - Only in BP-2100 and BP-2100 Emerge & “$” - Only in BP-2100 Joy & “^”- Only in BP-2100 Emerge

¨Select the Enable or Disable option by using UP or DOWN key & press the ENTER.¨ View Total option will show all the transactional details of the current day when pressed in billing mode after SHIFT KEY
Select the Logo Print option through Panel :
When control is at Billing mode press the MENU button LCD will display like¨
¨Select the Bill settings option and press the ENTER LCD will display like
MENU
3. CUSTOMER DATABASE*
4. DESCRIPTION DATABASE*
2. ITEM DATABASE
5. BILL SETTING
51
VIEW TOTAL OPTION
SELECT YOUR OPTION
OPTION : ENABLE
LOGO PRINT OPTION
OPTION : ENABLE
SELECT YOUR OPTION
BILL SETTINGS19. SUB UDF OPTION20. CUMULATE ITEM OPTION*21. BILL TYPE OPTION*22. VIEW TOTAL OPTION23. LOGO PRINT OPTION
Select the Two copy bill printing Option through panel :
¨ When control is at billing mode press the MENU button LCD will display like
MENU
3. CUSTOMER DATABASE*
4. DESCRIPTION DATABASE*
2. ITEM DATABASE
5. BILL SETTING
¨Enable or Disable the option by up and down arrow key and press ENTER to activate the setting.
¨Select the Logo Print option and press the ENTER LCD will display like
“*” - Only in BP-2100 and BP-2100 Emerge & “$” - Only in BP-2100 Joy & “^”- Only in BP-2100 Emerge

¨*Select the Total D/H Print option through Panel :
When control is at Billing mode press the MENU button LCD will display like¨
BILL SETTINGS17. TIME PRINT OPTION18. BASE PRICE OPTION19. SUB UDF OPTION20. CUMULATE ITEM OPTION*21. BILL TYPE OPTION*24. TWO-COPY BILL PRINTING
¨Select the Bill settings option and press the ENTER LCD will display like
¨Select the Two copy bill printing option and press the ENTER LCD will display like
¨Select any one type(ENABLE/DISABLE) by using the Down or UP key and press the ENTER to enable the particular type.
TWO-COPY BILL PRINTING1. ENABLED
2. DISABLE
52
MENU1. DEPARTMENT DATABASE*2. ITEM DATA BASE3. CUSTOMER DATA BASE*4. DESCRIPTION DATA BASE*5. BILL SETTINGS
¨Select the Bill settings option and press the ENTER LCD will display like
BILL SETTINGS21. BILL TYPE OPTION*22. VIEW TOTAL OPTION23. LOGO PRINT OPTION24. TWO COPY BILL OPTION25. TOTAL D/H PRINT OPTION*
¨Select the Total D/H print option and press the ENTER LCD will
TOTAL D/H PRINT*
OPTION : ENABLE SELECT YOUR OPTION
¨ Total D/H print will make the size of “total” in the bill double height
¨Enable or Disable the option by up and down arrow key and press ENTER to activate the setting.
Select the HSN option through Panel:
¨ When control is at billing mode press the MENU button LCD will display like
display like
“*” - Only in BP-2100 and BP-2100 Emerge & “$” - Only in BP-2100 Joy & “^”- Only in BP-2100 Emerge

¨Select the HSN Enable option printing option and press ENTER LCD will display like
HSN OPTION
1. ENABLE
1. DISABLE
53
MENU1. DEPARTMENT DATABASE*2. ITEM DATA BASE3. CUSTOMER DATA BASE*4. DESCRIPTION DATA BASE*5. BILL SETTINGS
¨Select the Bill settings option and press the ENTER LCD will display like
BILL SETTINGS22. VIEW TOTAL OPTION23. LOGO PRINT OPTION24. TWO COPY BILL OPTION25. TOTAL D/H PRINT OPTION*26. HSN Enable
¨ When control is at billing mode press the MENU button LCD will display like
¨Select the Bill settings option and press the ENTER LCD will display like
¨Select the POS ENABLE OPTION printing option and press ENTER
Select the POS OPTION option through Panel:
¨You can Enable/Disable POS option from here.
SETTINGS23. LOGO PRINT OPTION24. TWO COPY BILL OPTION25. TOTAL D/H PRINT OPTION*26. HSN ENABLE27. POS ENABLE
BILL
5.
MENU1. DEPARTMENT DATABASE*2. ITEM DATABASE3. CUSTOMER DATABASE*4. DESCRIPTION DATABASE*
5. BILL SETTINGS
LCD will display like
POS OPTION
1. ENABLE 2. DISABLE
“*” - Only in BP-2100 and BP-2100 Emerge & “$” - Only in BP-2100 Joy & “^”- Only in BP-2100 Emerge

¨Select the Bill settings option and press the ENTER LCD will display like
¨Select the TWO QUANTITY option , press ENTER LCD will display like
TWO QUANTITY MODE* OPTION : ENABLE
SELECT YOUR OPTION
¨Enable or Disable the option by up and down arrow key and press ENTER to activate the setting. ¨ Two Quantity Mode will work while billing only if Unit Relation option is enabled, otherwiseit will show ”ENABLE UNIT RELATION OPTION TO ENABLE THE TWO QUANTITY MODE ”
5. BILL
MENU1. DEPARTMENT DATABASE*2. ITEM DATABASE3. CUSTOMER DATABASE*4. DESCRIPTION DATABASE* 5. BILL SETTINGS
BILL SETTINGS
24. TWO COPY BILL OPTION25. TOTAL D/H PRINT OPTION*26. HSN ENABLE27. POS ENABLE28. TWO QUANTITY MODE*
54
*Select the TWO QUANTITY MODE option through Panel:
¨ When control is at billing mode press the MENU button LCD will display like
¨ When control is at billing mode press the MENU button LCD will display like
¨Select the Bill settings option and press the ENTER LCD will display like
¨Select the LANGUAGE PRINTING/Payment Mode option , press ENTER LCD will
Select the LANGUAGE PRINTING/ Payment Mode option through Panel:
5.
5.
MENU1. DEARTMENT DATABASE*2. ITEM DATA BASE3. CUSTOMER DATABASE*4. DESCRIPTION DATABASE*5. BILL SETTINGS
display like
BILL SETTINGS
25. TOTAL D/H PRINT OPTION*26. HSN ENABLE27. POS ENABLE28. TWO QUANTITY MODE*29. LANGUAGE PRINTING
BILL SETTING
31. CALC BILL OPTION30. UNIT RELATION OPTION
32. PRINT CUSTOMER NAME
34. UTGST OPTION
33. FONT SIZE OPTION
29. PAYMENT MODE OPTION
Only in Bp2100
“*” - Only in BP-2100 and BP-2100 Emerge & “$” - Only in BP-2100 Joy & “^”- Only in BP-2100 Emerge

*Select the UNIT RELATION option through Panel:
¨ When control is at billing mode press the MENU button LCD will display like
¨Select the Bill settings option and press the ENTER LCD will display like
¨Select the Unit relation option ,press ENTER LCD will display like
MENU1. DEPARTMENT DATABASE2. ITEM DATABASE3. CUSTOMER DATABASE4. DESCRIPTION DATABASE5. BILL SETTINGS
BILL SETTING
31. CALC BILL OPTION
32. PRINT CUSTOMER NAME
34. UTGST OPTION
33. FONT SIZE OPTION
30. UNIT RELATION OPTION
35. TAX SLAB INDICATION
¨Enable or Disable the option by up and down arrow key and press ENTER to activate the setting. ¨To print the bill in desired language, the FONT CG must be first downloaded to the machine through
the FONT UTILITY and then this option should be enabled, otherwise the priter will show an error message “DOWNLOAD CG”.
LANGUAGE PRINTING
OPTION : ENABLE
SELECT YOUR OPTION
PAYMENT MODE OPTION
1. DISABLE2. DIRECT PAYMENT3. SPLIT PAYMENT
entering the items in the item database.
Select the CALC BILL OPTION option through Panel:
¨ When control is at billing mode press the MENU button LCD will display like
¨Select the Bill settings option and press the ENTER LCD will display like
: ENABLE
SELECT YOUR OPTION
UNIT RELATION OPTION
OPTION
¨Enable or Disable the option by up and down arrow key and press ENTER to activate the setting. ¨You have to enable this option,only then you can be able to enter the UNIT 2 and U1U2R while
5. BILL
5.
MENU1. DEPARTMENT DATABASE*2. ITEM DATABSE3. CUSTOMER DATABASE*4. DESCRIPTION DATABASE*5. BILL SETTINGS
“*” - Only in BP-2100 and BP-2100 Emerge & “$” - Only in BP-2100 Joy & “^”- Only in BP-2100 Emerge
55

¨Select the Calc Bill option , press ENTER LCD will display like
¨Select the option you want by pressing ENTER on it.
CALC BILL OPTION
1.QTY & RATE2. RATE & QTY
*Select the Print Cust Add option through Panel:
¨ When control is at billing mode press the MENU button LCD will display like
¨Select the Bill settings option and press the ENTER LCD will display like
5. BILL
5.
MENU1. DEPARTMENT DATABASE*2. ITEM DATABSE3. CUSTOMER DATABASE*4. DESCRIPTION DATABASE*5. BILL SETTINGS
30. UNIT RELATION OPTION*
32. PRINT CUSTOMER ADDR*
BILL SETTING
31. CALC BILL OPTION
33. FONT SIZE OPTION
35. TAX SLAB INDICATION34. UTGST OPTION
51
BILL SETTING
31. CALC BILL OPTION
25. TOTAL D/H PRINT* 26. HSN ENABLE27. POS ENABLE28. TWO QUANTITY MODE*
30. UNIT RELATION OPTION*29. PAYMENT MODE OPTION
CUSTOMER ADDR OPTION
OPTION
OPTION: ENABLE
YOUR
SELECT
¨Select the PRINT CUSTOMER ADDR option , press ENTER LCD will display like
¨Select the option you want by pressing ENTER on it.
*Select the FONT SIZE OPTION option through Panel: ¨ When control is at billing mode press the MENU button LCD will display like
“*” - Only in BP-2100 and BP-2100 Emerge & “$” - Only in BP-2100 Joy & “^”- Only in BP-2100 Emerge
56

Select the UTGST MODE option through Panel:
1. DEPARTMENT DATABASE*
3. CUSTOMER DATABASE*4. DESCRIPTION DATABASE*
2. ITEM DATABASE
5. BILL SETTINGS
MENU
¨ When control is at billing mode press the MENU button LCD will display like
30. UNIT RELATION OPTION*29. PAYMENT MODE OPTION
32. PRINT CUSTOMER ADD*
BILL SETTING
31. CALC BILL OPTION
28. TWO QUANTITY MODE
34. UTGST OPTION$
33. FONT SIZE OPTION*
¨Select the Bill settings option and press the ENTER LCD will display like
57
¨Select the FONT SIZE OPTION printing option and press ENTER
¨Select the Bill settings option and press the ENTER LCD will display like
30. UNIT RELATION OPTION*29. PAYMENT MODE OPTION
32. PRINT CUSTOMER ADD*
BILL SETTING
31. CALC BILL OPTION
28. TWO QUANTITY MODE*
33. FONT SIZE OPTION*
27. POS ENABLE
¨You can choose between BIG/SMALL fonts.
FONT SIZE OPTION$
1. BIG FONT
2. SMALL FONT
LCD will display like
1. DEPARTMENT DATABASE*
4. DESCRIPTION DATABASE*3. CUSTOMER DATABASE*2. ITEM DATABASE
MENU
5. BILL SETTINGS
UTGST OPTION$
OPTION
: ENABLE
YOUR SELECT
OPTION
¨Select the UTGST MODE option , press ENTER LCD will display like
¨Enable or Disable the option by up and down arrow key and press ENTER to activate the setting.
Not available in Bp2100
“*” - Only in BP-2100 and BP-2100 Emerge & “$” - Only in BP-2100 Joy & “^”- Only in BP-2100 Emerge

Select the TAX Slab Indication OPTION option through Panel: ¨ When control is at billing mode press the MENU button LCD will display like
¨Select the Bill settings option and press the ENTER LCD will display like
¨You can choose between Enable/Disable option.
LCD will display like
1. DEPARTMENT DATABASE*
4. DESCRIPTION DATABASE*3. CUSTOMER DATABASE*2. ITEM DATABASE
5. BILL SETTINGS
MENU
OPTION: ENABLE
SELECT YOUR OPTION
TAX SLAB INDICATION
BILL SETTING
31. CALC BILL OPTION
34. UTGST OPTION$
33. FONT SIZE OPTION*
32. PRINT CUSTOMER ADDR*
36. PRINT INVOICE TYPE*
35. TAX SLAB INDICATION
¨Select the Tax Slab Indication OPTION printing option and press ENTER
Select the PRINT Invoice Type option through Panel:
¨ When control is at billing mode press the MENU button LCD will display like
¨Select the Bill settings option and press the ENTER LCD will display like
5. BILL5. 5. BILL SETTINGS
3. CUSTOMER DATABASE*4. DESCRIPTION DATABASE*
MENU1. DEPARTMENT DATABASE*2. ITEM DATABSE
58
¨Select the Bill settings option and press the ENTER LCD will display like
34. UTGST OPTION$35. TAX SLAB INDICATION
36. PRINT INVOICE TYPE*
BILL SETTING
31. CALC BILL OPTION
33. FONT SIZE OPTION*32. PRINT CUSTOMER ADDR*
Only in Bp2100
“*” - Only in BP-2100 and BP-2100 Emerge & “$” - Only in BP-2100 Joy & “^”- Only in BP-2100 Emerge

¨Select the option you want by pressing ENTER on it.
¨Select the PRINT INVOICE TYPE option , press ENTER LCD will display like
YOUR OPTION SELECT
OPTION: ENABLE
INVOICE TYPE PRINT
Select the PRINT TAX TABLE option through Panel:
¨ When control is at billing mode press the MENU button LCD will display like
¨Select the Bill settings option and press the ENTER LCD will display like
5. BILL
5.
1. DEPARTMENT DATABASE*2. ITEM DATABSE3. CUSTOMER DATABASE*4. DESCRIPTION DATABASE*5. BILL SETTINGS
MENU
34. UTGST OPTION$
33. FONT SIZE OPTION*
32. PRINT CUSTOMER ADDR*
35. TAX SLAB INDICATION
36. PRINT INVOICE TYPE*
37. PRINT TAX TABLE*
BILL SETTING
¨Select the PRINT TAX TABLE option , press ENTER LCD will display like
¨Select the option you want by pressing ENTER on it.
OPTION: ENABLE
PRINT TAX TABLE
SELECT YOUR OPTION
59
5. 5. 5. BILL SETTINGS
2. ITEM DATABSE3. CUSTOMER DATABASE*4. DESCRIPTION DATABASE*
1. DEPARTMENT DATABASE*
BILL
MENU
¨ When control is at billing mode press the MENU button LCD will display like
Select the Coupon Print option through Panel:
Only in Bp2100
Not in BP-2100 Emerge
“*” - Only in BP-2100 and BP-2100 Emerge & “$” - Only in BP-2100 Joy & “^”- Only in BP-2100 Emerge

¨Select the Coupon Print option , press ENTER LCD will display like
OPTION: ENABLE
YOUR OPTION
COUPON PRINT
SELECT
¨Select the option you want by pressing ENTER on it.
Select the BILL ITEMWISE TAX option through Panel:
¨ When control is at billing mode press the MENU button LCD will display like
¨Select the Bill settings option and press the ENTER LCD will display like
MENU1. DEPARTMENT DATABASE*2. ITEM DATABSE3. CUSTOMER DATABASE*4. DESCRIPTION DATABASE*5. BILL5. 5. BILL SETTINGS
BILL SETTING
34. UTGST OPTION35. TAX SLAB INDICATION
36. PRINT INVOICE TYPE*
BILL SETTING
34. UTGST OPTION$35. TAX SLAB INDICATION
36. PRINT INVOICE TYPE*
37. PRINT TAX TABLE*
38. COUPON PRINT
39. BILL ITEMWISE TAX*
37. PRINT TAX TABLE*
38. COUPON PRINT
39. BILL ITEMWISE TAX*
40. MINIMUM STOCK OPTION40. MINIMUM STOCK OPTION*
BILL SETTING
34. UTGST OPTION$
33. FONT SIZE OPTION*
35. TAX SLAB INDICATION
36. PRINT INVOICE TYPE*
37. PRINT TAX TABLE*
38. COUPON PRINT
¨Select the Bill settings option and press the ENTER LCD will display like
60
¨Select the BILL ITEMWISE OPTION option , press ENTER LCD will display like
OPTION: ENABLE YOUR OPTION
ITEMWISE TAX IN BILL
SELECT
¨Select the option you want by pressing ENTER on it.
Only in Bp2100
“*” - Only in BP-2100 and BP-2100 Emerge & “$” - Only in BP-2100 Joy & “^”- Only in BP-2100 Emerge

¨ When control is at billing mode press the MENU button LCD will display like
¨Select the Bill settings option and press the ENTER LCD will display like
¨Select the Minimum Stock option , press ENTER LCD will display like
¨Select the option you want by pressing ENTER on it.
*Select the MINIMUM STOCK option through Panel:
1. DEPARTMENT DATABASE*
3. CUSTOMER DATABASE*4. DESCRIPTION DATABASE*
2. ITEM DATABSE
5. BILL SETTINGS
5. 5. BILL
MENU
40. MINIMUM STOCK OPTION40. MINIMUM STOCK OPTION*
34. UTGST OPTION35. TAX SLAB INDICATION
36. PRINT INVOICE TYPE*
37. PRINT TAX TABLE*
34. UTGST OPTION$35. TAX SLAB INDICATION
36. PRINT INVOICE TYPE*
37. PRINT TAX TABLE*
38. COUPON PRINT
39. BILL ITEMWISE TAX*
38. COUPON PRINT
39. BILL ITEMWISE TAX*
BILL SETTING BILL SETTING
MIN STOCK OPTION
OPTION: ENABLE
SELECT
YOUR
OPTION
61
Only in Bp2100
¨ When control is at billing mode press the MENU button LCD will display like
¨Select the Bill settings option and press the ENTER LCD will display like
^Select the CALCULATOR option through Panel:
1. DEPARTMENT DATABASE*
3. CUSTOMER DATABASE*4. DESCRIPTION DATABASE*
2. ITEM DATABSE
5. BILL SETTINGS
5. 5. BILL
MENU
40. MINIMUM STOCK OPTION36. CALCULATOR OPTION
30. UNIT RELATION OPTION31. CALC BILL OPTION
32. PRINT CUSTOMER ADDR
33. FONT SIZE OPTION
34. UTGST OPTION
35. TAX SLAB INDICATION
BILL SETTING BILL SETTING
“*” - Only in BP-2100 and BP-2100 Emerge & “$” - Only in BP-2100 Joy & “^”- Only in BP-2100 Emerge

¨Select the CALCULATOR option , press ENTER LCD will display like
¨Select the option you want by pressing ENTER on it.
CALCULATOR OPTION
OPTION: ENABLE
SELECT
YOUR
OPTION
¨ When control is at billing mode press the MENU button LCD will display like
¨Select the Bill settings option and press the ENTER LCD will display like
^Select the OWNER DETAILS PRINT option through Panel:
1. DEPARTMENT DATABASE*
3. CUSTOMER DATABASE*4. DESCRIPTION DATABASE*
2. ITEM DATABSE
5. BILL SETTINGS
5. 5. BILL
MENU
40. MINIMUM STOCK OPTION37. OWNER DETAILS PRINT
31. CALC BILL OPTION
32. PRINT CUSTOMER ADDR
33. FONT SIZE OPTION
34. UTGST OPTION
35. TAX SLAB INDICATION
BILL SETTING BILL SETTING
36. CALCULATOR OPTION
¨Select the OWNER DETAILS PRINT option press ENTER LCD will display like
¨Select the option you want by pressing ENTER on it.
OWNER DETAILS OPTION
OPTION: ENABLE
SELECT
YOUR
OPTION
¨ When control is at billing mode press the MENU button LCD will display like
^Select the EXT. PRINTER TYPE option through Panel:
1. DEPARTMENT DATABASE*
3. CUSTOMER DATABASE*4. DESCRIPTION DATABASE*
2. ITEM DATABSE
5. BILL SETTINGS
5. 5. BILL
MENU
NOTE: Owner Details i.e, Owner GSTIN name & Mobile number will be printed on billif we Enable “Owner Details Print” Option.
“*” - Only in BP-2100 and BP-2100 Emerge & “$” - Only in BP-2100 Joy & “^”- Only in BP-2100 Emerge
62

¨Select the Bill settings option and press the ENTER LCD will display like
40. MINIMUM STOCK OPTION
37. OWNER DETAILS PRINT
32. PRINT CUSTOMER ADDR
33. FONT SIZE OPTION
34. UTGST OPTION
35. TAX SLAB INDICATION
BILL SETTING BILL SETTING
36. CALCULATOR OPTION
¨Select the EXT. PRINTER TYPE option press ENTER LCD will display like
EXTERNAL PRINTER1. 80 COLUMN
¨Select the option you want by pressing ENTER on it.
38. EXT. PRINTER TYPE
2. 60 COLUMN3. 40 COLUMN
¨ When control is at billing mode press the MENU button LCD will display like
^Select the CESS IN RUPEES option through Panel:
1. DEPARTMENT DATABASE*
3. CUSTOMER DATABASE*4. DESCRIPTION DATABASE*
2. ITEM DATABSE
5. BILL SETTINGS
5. 5. BILL
MENU
¨Select the Bill settings option and press the ENTER LCD will display like
40. MINIMUM STOCK OPTION
37. OWNER DETAILS PRINT
33. FONT SIZE OPTION
34. UTGST OPTION
35. TAX SLAB INDICATION
BILL SETTING BILL SETTING
36. CALCULATOR OPTION
¨Select the CESS IN RUPEES option press ENTER LCD will display like
38. EXT. PRINTER TYPE
39. CESS IN RUPEES
¨Select the option you want by pressing ENTER on it.
CESS IN RUPEES OPTION
OPTION: ENABLE
SELECT YOUR OPTION
“*” - Only in BP-2100 and BP-2100 Emerge & “$” - Only in BP-2100 Joy & “^”- Only in BP-2100 Emerge
63

¨ When control is at billing mode press the MENU button LCD will display like
^Select the AUTO UPLOAD option through Panel:
1. DEPARTMENT DATABASE*
3. CUSTOMER DATABASE*4. DESCRIPTION DATABASE*
2. ITEM DATABSE
5. BILL SETTINGS
5. 5. BILL
MENU
¨Select the Bill settings option and press the ENTER LCD will display like
40. MINIMUM STOCK OPTION
37. OWNER DETAILS PRINT
34. UTGST OPTION
35. TAX SLAB INDICATION
BILL SETTING BILL SETTING
36. CALCULATOR OPTION
¨Select the AUTO UPLOAD option press ENTER LCD will display like
38. EXT. PRINTER TYPE
39. CESS IN RUPEES
¨Select the option you want by pressing ENTER on it.
AUTO UPLOAD OPTION
OPTION: ENABLE
SELECT YOUR OPTION
40. AUTO UPLOAD OPTION
¨ When control is at billing mode press the MENU button LCD will display like
^Select the ONLINE MODE option through Panel:
1. DEPARTMENT DATABASE*
3. CUSTOMER DATABASE*4. DESCRIPTION DATABASE*
2. ITEM DATABSE
5. BILL SETTINGS
5. 5. BILL
MENU
¨Select the Bill settings option and press the ENTER LCD will display like
40. MINIMUM STOCK OPTION
37. OWNER DETAILS PRINT
35. TAX SLAB INDICATION
BILL SETTING BILL SETTING
36. CALCULATOR OPTION
38. EXT. PRINTER TYPE
39. CESS IN RUPEES
40. AUTO UPLOAD OPTION
41. ONLINE MODE OPTION
NOTE: Data will be uploaded to Server Automatically after every Bill if we EnableAuto Upload Option.
“*” - Only in BP-2100 and BP-2100 Emerge & “$” - Only in BP-2100 Joy & “^”- Only in BP-2100 Emerge
64

¨Select the ONLINE MODE option press ENTER LCD will display like
¨Select the option you want by pressing ENTER on it.
ONLINE MODE OPTION
OPTION: ENABLE
SELECT YOUR OPTION
NOTE: Online mode option is to Enable or Disable WiFi.NOTE: Data will not upload to server unless we Enable Online mode option.
¨ When control is at billing mode press the MENU button LCD will display like
^Select the TOKEN PRINT OPTION option through Panel:
“*” - Only in BP-2100 and BP-2100 Emerge & “$” - Only in BP-2100 Joy & “^”- Only in BP-2100 Emerge
65
6.8 MACHINE SETTINGS
When control is at billing mode press Menu Button, LCD will display like
1. DEPARTMENT DATABASE*
3. CUSTOMER DATABASE*4. DESCRIPTION DATABASE*
2. ITEM DATABSE
5. BILL SETTINGS
5. 5. BILL
MENU
¨Select the Bill settings option and press the ENTER LCD will display like
40. MINIMUM STOCK OPTION
37. OWNER DETAILS PRINT
BILL SETTING BILL SETTING
38. EXT. PRINTER TYPE
39. CESS IN RUPEES
40. AUTO UPLOAD OPTION
41. ONLINE MODE OPTION
42. RATE SLAB SET OPTION
¨Select the TOKEN PRINT option press ENTER LCD will display like
¨Select the option you want by pressing ENTER on it.
43. TOKEN PRINT OPTION
TOKEN PRINT OPTION
OPTION: ENABLE
SELECT YOUR OPTION
Configure TIME AND DATE through Panel

“*” - Only in BP-2100 and BP-2100 Emerge & “$” - Only in BP-2100 Joy & “^”- Only in BP-2100 Emerge
66
¨ Select Machine setting and Press ENTER LCD will display like
1. DEPARTMENT DATABASE*
4. DESCRIPTION DATABASE*3. CUSTOMER DATABASE*
6. MACHINE SETTINGS
2. ITEM DATABSE
5. BILL SETTINGS
MENU
¨Change the required time (24Hr format) and press ENTER Cursor will shift to Date entry mode.
¨Enter the date in DD\MM\YY format and press ENTER Cursor will shift to Day selection mode.
¨ Select the required date and press ENTER to save the settings.
Configure MACHINE ID through Panel:
¨ Select Machine setting and Press ENTER LCD will display like
¨ When control is at Retail billing mode press Menu Button, LCD will display like
¨Select TIME AND DATE option and Press ENTER LCD will display like
TIME : 16:36
DAY : MONDAY
SELECT YOUR OPTION
DATE : DD/MM/YY
TIME DATE SETTING
MACHINE
2. MACHINE ID
3. MACHINE BAUDRATE
4. WEIGH SCALE BAUDRATE
5. BUZZER6. FACTORY SETTINGS
7. RESTORE DEFAULTS
SETTINGS
1. TIME & DATE
5. BILL
5.
MENU1. DEPARTMENT DATABASE*2. ITEM DATABSE3. CUSTOMER DATABASE*4. DESCRIPTION DATABASE*
6. MACHINE SETTINGS 5. BILL SETTINGS

MACHINE1. TIME & DATE
3. MACHINE BAUDRATE4. WEIGH SCALE BAUDRATE5. BUZZER
6. FACTORY SETTINGS
7. RESTORE DEFAULTS
SETTINGS
2. MACHINE ID
67
“*” - Only in BP-2100 and BP-2100 Emerge & “$” - Only in BP-2100 Joy & “^”- Only in BP-2100 Emerge
¨Select MACHINE ID option and Press ENTER LCD will display like
¨ Enter required MACHINE ID (Max: 999) and press ENTER to save the setting.
NOTE:
2. If user using more than one BP-2000/2100 Joy/2100 Emerge machine, then configuration of machine ID is must for downloading reports to Pen drive for proper identification.
ID NUMBER :
MACHINE ID SETTINGS
Configure MACHINE BAUDRATE through Panel:¨ When control is at billing mode press Menu Button, LCD will display like
¨ Select Machine setting and Press ENTER LCD will display like
MACHINE
1. TIME & DATE
2. MACHINE ID
4. WEIGH SCALE BAUDRATE
5. BUZZER
6. FACTORY SETTINGS
7. RESTORE DEFAULTS
SETTINGS
3. MACHINE BAUDRATE
MENU1. DEPARTMENT DATABASE*2. ITEM DATABSE3. CUSTOMER DATABASE*4. DESCRIPTION DATABASE*
6. MACHINE SETTINGS 5. BILL SETTINGS
1. If user don't want to print machine ID, set machine ID as 000

¨ Select MACHINE BAUD RATE option and Press ENTER LCD will display like
¨Select required BAUDRATE by up and down arrow keys and press ENTER to save the setting.NOTE: While downloading the settings from PC, machine baud rate and PC baud rate should be same.
MC BAUD RATE
1. 2400
2. 9600
3. 19200
4. 38400
5. 57600
6. 115200
SETTING
Configure WEIGHING MACHINE BAUDRATE through Panel:
¨When control is at Retail billing mode press Menu Button, LCD will display like
68
“*” - Only in BP-2100 and BP-2100 Emerge & “$” - Only in BP-2100 Joy & “^”- Only in BP-2100 Emerge
¨Select Machine setting and Press ENTER LCD will display like
¨Select WEIGHING MACHINE BAUD RATE option and Press ENTER LCD will display like
MACHINE
1. TIME & DATE
2. MACHINE ID
3. MACHINE BAUDRATE
5. BUZZER
6. FACTORY SETTINGS
7. RESTORE DEFAULTS
SETTINGS
4. WEIGH SCALE BAUDRATE
4. 38400
5. 57600
6. 115200
MC BAUD RATE
1. 2400
2. 9600
3. 19200
SETTING
5. BILL
5.
MENU1. DEPARTMENT DATABASE*2. ITEM DATABSE3. CUSTOMER DATABASE*4. DESCRIPTION DATABASE*
6. MACHINE SETTINGS 5. BILL SETTINGS

¨ Select required BAUDRATE by up and down arrow keys and press ENTER to save the setting.NOTE1 : When any weighing machine is used with printer, baud rate of weighing machine should be same as in Printer “weighing machine baud rate” setting.NOTE2 : Following makes of the weighing scales are supported. Essae teraoka, Digi point, Eagle, Sansui, Prince, Phoenix & Giri tronics.
Configure BUZZER setting through Panel:¨When control is at Retail billing mode press Menu Button, LCD will display like
¨Select Machine setting and Press ENTER LCD will display like
5. BILL
5.
MENU1. DEPARTMENT DATABASE*2. ITEM DATABSE3. CUSTOMER DATABASE*4. DESCRIPTION DATABASE*
6. MACHINE SETTINGS 5. BILL SETTINGS
69
“*” - Only in BP-2100 and BP-2100 Emerge & “$” - Only in BP-2100 Joy & “^”- Only in BP-2100 Emerge
¨Select BUZZER option and Press ENTER LCD will display like
¨Select required setting by up and down arrow keys and press ENTER to save the setting.
MACHINE
1. TIME & DATE
2. MACHINE ID
3. MACHINE BAUDRATE
4. WEIGH SCALE BAUDRATE
6. FACTORY SETTINGS
7. RESTORE DEFAULTS
SETTINGS
5. BUZZER
BUZZER
1.BUZZER ON
2.BUZZER OFF
SETTING
FACTORY SETTINGS¨When control is at billing mode press Menu Button, LCD will display like
5. BILL
5.
MENU1. DEPARTMENT DATABASE*2. ITEM DATABSE3. CUSTOMER DATABASE*4. DESCRIPTION DATABASE*
6. MACHINE SETTINGS 5. BILL SETTINGS
SELECT YOUR OPTION

¨Select Machine setting and Press ENTER LCD will display like
¨ Select FACTORY settings option and Press ENTER LCD will display like
¨Press ENTER LCD will display like
¨ENTER Proper password and press ENTER For Factory defaults
MACHINE SETTINGS2. MACHINE ID3. MACHINE BAUDRATE4. WEIGH SCALE BAUDRATE5. BUZZER6. FACTORY SETTINGS7. RESTORE DEFAULTS
WARNINGTHIS WILL ERASE DATABASESETTING, BILLS & REPORT.
PASSWORD:
$THIS WILL ERASE DATABASESETTING, BILLS & REPORT.
WARNING
70
“*” - Only in BP-2100 and BP-2100 Emerge & “$” - Only in BP-2100 Joy & “^”- Only in BP-2100 Emerge
NOTE: After doing the Factory defaults all bills, reports, item database, *Department database & Header\footer will be erased and setting will be changed to default.
MACHINE SETTINGS2. MACHINE ID3. MACHINE BAUDRATE4. WEIGH SCALE BAUDRATE5. BUZZER6. FACTORY SETTINGS7. RESTORE DEFAULTS
RESTORE DEFAULTS:¨When control is at Retail billing mode press Menu Button, LCD will display like
¨Select Machine setting and Press ENTER LCD will display like.
¨ Select RESTORE DEFAULTS settings option and Press ENTER LCD will display like
5. BILL
5.
MENU1. DEPARTMENT DATABASE*2. ITEM DATABSE3. CUSTOMER DATABASE*4. DESCRIPTION DATABASE*
6. MACHINE SETTINGS 5. BILL SETTINGS

¨ ENTER Proper password (Admin password) and press ENTER For restore defaults.
NOTE: After doing the Restore defaults all bills and reports will be erased. And setting, item database, Department database*, Header\footer will remain same.(first option)
¨ Select reset Bills and Reports and Press ENTER LCD will display like
HOT Key configuration:¨When control is at Retail billing mode press Menu Button, LCD will display like
¨Select Machine setting and Press ENTER LCD will display like.
MENU
4. DESCRIPTION DATA BASE*
2. ITEM DATABASE
3. CUSTOMER DATABASE*
5. BILL SETTINGS
6. MACHINE SETTINGS
1. RESET BILLS AND REPORTS
2. RESET ALL SETTINGS
WARNINGTHIS WILL RESET ALLSETTINGS TO DEFAULT
PASSWORD:
71
“*” - Only in BP-2100 and BP-2100 Emerge & “$” - Only in BP-2100 Joy & “^”- Only in BP-2100 Emerge
Alphabet : A
Item no : 1
HOT KEYS CONFIGURATIONS
SAVE & CONT. SAVE & EXIT
¨Select Hot keys configuration option and Press ENTER LCD will display like.
MACHINE
4. WEIGH SCALE BAUDRATE
5. BUZZER
6. FACTORY SETTINGS
7. RESTORE DEFAULTS
SETTINGS
8. HOT KEY CONFIGURATION

¨ Type required alphabet (A-Z) to be configured as Hot key & press ENTER or Shift +alphabet (A-Z)can be configured as Hot key. Cursor will shift to item no. entry mode. ¨Select SAVE & CONT. option to configure more HOT keys.
¨ Select SAVE & EXIT option to save & exit from HOT keys config.
MACHINE SETTINGS
5. BUZZER6. FACTORY SETTINGS7. RESTORE DEFAULTS8. HOT KEY CONFIG.9. EXT. PRINT OPTION
¨When control is at Retail billing mode press Menu Button, LCD will display like
¨Select Machine setting and Press ENTER LCD will display like.
¨Select the External Print option and Press ENTER LCD will display like.
¨Disable option will not connect the External Printer.¨ Kot on External is to print Kot only on External Printer.*Note: Kot on Ext and All print on Ext option are only enabled for Ethernet. All other option will be enabled for Serial.¨ Kot on both is to print Kot on both the printers.¨ All print on EXT. will print everything on the EXT. printer.¨ All print on Both will print everything on the Both the printers.
*Select EXT. Printer option through panel :
MENU2. ITEM DATABASE
3. CUSTOMER DATABASE*
5. BILL SETTINGS
6. MACHINE SETTINGS
4. DESCRIPTION DATABASE*
External Printer Option
1. Disable2. Kot On Ext(Ethernet*/Serial)3. Kot On BOTH(Serial)4. All Print on Ext.(Serial)/Ethernet*5. All Print On Both(Serial)
72
“*” - Only in BP-2100 and BP-2100 Emerge & “$” - Only in BP-2100 Joy & “^”- Only in BP-2100 Emerge
*Select External Printer Interface option through panel :Note : Connect the EXT. Printer to 1st Serial Port of the printer.

¨When control is at Retail billing mode press Menu Button, LCD will display like
¨Select Machine setting and Press ENTER LCD will display like.
MENU2. ITEM DATABASE
3. CUSTOMER DATABASE*
5. BILL SETTINGS
6. MACHINE SETTINGS
4. DESCRIPTION DATABASE*
MACHINE SETTINGS7. RESTORE DEFAULTS8. HOT KEY CONFIG.9. EXT. PRINT OPTION
11. EXT. AUTO CUTTER10. EXT. PRINTER INTERFACE
MACHINE SETTINGS6. FACTORY SETTINGS7. RESTORE DEFAULTS8. HOT KEYS CONFIG.9. EXT. PRINT OPTION10. EXT. PRINTER INTERFACE*
¨When control is at Retail billing mode press Menu Button, LCD will display like
¨Select Machine setting and Press ENTER LCD will display like.
¨Select the External Print option and Press ENTER LCD will display like.
¨ Select Ethernet option to connect external printer through LAN cable.¨ Select Serial option to connect external printer through Serial Cable.*Note : By default Ethernet option will be enabled as external printer interface.
Select External Auto Cutter option through panel :
MENU2. ITEM DATABASE
3. CUSTOMER DATABASE
5. BILL SETTINGS
6. MACHINE SETTINGS
4. DESCRIPTION DATABASE
External Printer Interface
1. Ethernet2. Serial
¨Select the External Print option and Press ENTER LCD will display like.
EXT. PRINTER AUTO CUTTER
SELECT YOUR OPTION
OPTION : ENABLE
73
“*” - Only in BP-2100 and BP-2100 Emerge & “$” - Only in BP-2100 Joy & “^”- Only in BP-2100 Emerge

¨When control is at Retail billing mode press Menu Button, LCD will display like
¨External Printer Auto Cutter enable will enable the auto cutter feature if present in the
*Select Ethernet Settings option through panel :
MENU2. ITEM DATABASE
3. CUSTOMER DATABASE*
5. BILL SETTINGS
6. MACHINE SETTINGS
4. DESCRIPTION DATABASE*
IP SETTINGS
Machine IP : 192.168.000.100Subnet : 255.255.255.000Gateway : 192.168.000.001External Printer : 192.168.000.002 Set IP Address
¨ By default it will show 192.168.000.100 Machine IP, if pressed ENTER for each option these values it will show by default.
Machine IP is the Printer’s IP which will be present if you are using internet & connecting through LAN Cable.
Subnet & Gateway will be according to the Machine IP. External Printer option will be having external printer’s IP which you want to connect.
NOTE 1 : Ethernet option is available only for KOT on EXT. printer and All print on Ext.NOTE 2 : Ethernet option will work if you have internet connection &all the IP settings are done accordingly.Directly if LAN is connected then also it can be used.
MACHINE SETTINGS8. HOT KEY CONFIG.9. EXT. PRINT OPTION10. EXT. PRINTER INTERFACE11. EXT. PRINTER INTERFACE12. ETHERNET SETTINGS
¨Select Machine setting and Press ENTER LCD will display like.
¨Select the Ethernet Settings option and Press ENTER LCD will display like.
6.9 Configuring HEADER/FOOTER through panel:¨When control is at Retail billing mode press Menu Button, LCD will display like
Select HEADER\FOOTER option and Press ENTER LCD will display like
MENU
3. CUSTOMER DATA BASE*
4. DESCRIPTION DATABASE*
5. BILL SETTINGS
6. MACHINE SETTINGS
7. HEADER/FOOTER
NOTE : Max 51 Hot keys can be configured for different 51 Items
74
“*” - Only in BP-2100 and BP-2100 Emerge & “$” - Only in BP-2100 Joy & “^”- Only in BP-2100 Emerge

¨Select EDIT HEADER option and Press ENTER LCD will display like
2.EDIT FOOTER SELECT YOUR OPTION
HEADER FOOTER SELECTION
1.EDIT HEADER
EDIT LINE NO :JUSTIFICATION:LEFTFONT :NORMALTEXT :WEP SOLUTIONS LTD
ENTER: CONT CANCEL:EXIT
HEADER
1
¨Select line (from 1 to 10) by up and down arrow key and press ENTER Cursor will shift to
Justification selection mode.¨Select required justification (Left, Right, Center justification) by up and down arrow key and
press ENTER Cursor will shift to FONT selection mode.
¨Select required font (Normal, BOLD, DH, DW, B+DH, B+DW, DW+DH, B+DW+DH) and
press ENTER Cursor will shift to TEXT entry mode.
¨Enter required header text and press ENTER to Continue and Press CANCEL to save and exit present line.¨Continue above 4 steps to configure remaining 9 header lines.¨Follow same above steps to configure FOOTER also.
NOTE: 1. Maximum 10 lines of text can be entered for Header and footer 2. Maximum of 40 characters per line can be entered when font is small font
3. Maximum of 20 characters per line can be entered when font is large font 6.10 Configure User Information ¨When control is at billing mode press Menu Button, LCD will display like
¨ Select Configure user setting and Press ENTER LCD will display like.
¨UserName to be modified and press ENTER cursor will shift to Name Entry.
¨New Password for user press ENTER Cursor will shift to New password Entry.
¨Enter Confirm password and press ENTER Cursor will shift to confirm Password Entry.
1. ADD USER2. EDIT USER
USER CONFIGURATION
SELECT YOUR OPTION
Add User and Edit User will ask 3 details-
MENU4. DESCRIPTION DATABASE*
5. BILL SETTINGS
6. MACHINE SETTINGS
7. HEADER/FOOTER
8. USER CONFIGURATION
75
“*” - Only in BP-2100 and BP-2100 Emerge & “$” - Only in BP-2100 Joy & “^”- Only in BP-2100 Emerge

¨Enter same password as new password and press ENTER LCD will ask like
and select required setting and press enter.
NOTE: Max 15 user ID only can be configurable.
SAVE & CONT SAVE & EXIT
6.11 Firmware Information¨ When control is at Retail billing mode press Menu Button, LCD will display like
6.12 Upload to USB
¨ When control is at Retail billing mode press Menu Button, LCD will display like
¨Select Firmware info option and Press ENTER LCD will display like
.
VERSION: 1.0.1DOR : DD/MM/YYYY
BP-2100 /2100 JOY/2100 Emerge
¨Select Pen drive option and Press ENTER LCD will display like
USB DEVICE FOUNDDO YOU WANT TO CONTINUE
NO YES
¨ Select Yes and press ENTER LCD will display like
.
¨Select BP-2100/2100 JOY/Emerge to Pen drive and press ENTER LCD will display like
DATA TRANSFER
2. PENDRIVE TO BP-2100/2100 JOY/2100 Emerge
1. BP-2100/2100 JOY/2100 Emerge TO PENDRIVE
DATA TRANSFER TO DRIVE
1.SEND REPORT* 2. SEND DATABASE/STOCK*
3. SEND CSV REPORT 4. SEND CSV DATABASE/STOCK
MENU
5. BILL SETTINGS6. MACHINE SETTINGS7. HEADER/FOOTER8. USER CONFIGURATION
9. FIRMWARE INFO
MENU6. MACHINE SETTINGS7. HEADER/FOOTER8. USER CONFIGURATION9. FIRMWARE INFO10. UPLOAD TO USB
76
“*” - Only in BP-2100 and BP-2100 Emerge & “$” - Only in BP-2100 Joy & “^”- Only in BP-2100 Emerge

¨Select Send report and press ENTER LCD will display like
1. DETAILED REPORT2. SUMMARY REPORT
DATA TRANSFER
NEW FOLDER CREATED
DATA TRANSFER
¨ After selecting any type of report, give required inputs (Eg, Date, User id etc) and press
ENTER LCD will display like
¨ Follow the same steps for Send CSV report option also .
¨When Send database/stock and send CSV database/stock options are selected above
message will be displayed.
¨ Press Cancel\clear to come out of pen drive option mode.
PEN DRIVE to BP-2100/2100 JOY/ 2100 Emerge:
¨Select Pen drive to BP 2100/2100 JOY/Emerge option and press ENTER LCD will display like
1. BP-2100/2100 JOY/ 2100 Emerge TO PENDRIVE 2. PENDRIVE BP-2100/2100 JOY/ 2100 Emerge
DATA TRANSFER
• Select required option and press ENTER LCD will display like
• After few seconds Database\stock will be updated to machine.• To come out of that mode press Cancel\clear button.
DATABASE/STOCK...........
DOWNLOADING
6.13 Self test Select the self test option through panel : when control is at billing mode press the menu button LCD will display like :
3. UPDATE CUSTOMER DB*
UPGRADE BP-2100/2100 JOY/2100 Emerge
1. UPDATE STOCK 2. UPDATE ITEM DB
4. UPDATE DESC DATABASE*
77
1. Transcend2. Moserbear3. Sony4. Kingston 8. Sandisk
5. Apacer6. HP7. Imation
4. UPDATE SUP DATABASE^
“*” - Only in BP-2100 and BP-2100 Emerge & “$” - Only in BP-2100 Joy & “^”- Only in BP-2100 Emerge

6.14 Battery StatusSelect the Battery Status option through panel : 1 when control is at billing mode press the Menu button LCD will display like :
¨ As soon as ENTER is pressed, printer will print the selftest.
¨Select the Self Test option and Press ENTER LCD will display like
¨Select the Battery Status option and Press ENTER LCD will display like
Battery ON
Battery Charge : 86%
MENU8. USER CONFIGURATION9. FIRMWARE INFO
10. UPLOAD TO USB
11. SELF TEST
MENU9. FIRMWARE INFO
10. UPLOAD TO PC
11. UPLOAD TO USB
12. SELF TEST
13. BATTERY STATUS
78
(Only in BP-2100)
“*” - Only in BP-2100 and BP-2100 Emerge & “$” - Only in BP-2100 Joy & “^”- Only in BP-2100 Emerge
6.15 ^WIFI SETTINGS
WI-FI SETTINGS
2. Wi-Fi RESET
Press MENU key and toggle with UP and Down arrow to go to Wifi Settings as below;
1. CONNECTION SETTINGS
3. UPLAOD DAILY DATA4. MESSAGE SETTINGS5. SMS SERVICES6. SMS DAY SUMMARY7. SUBSCRIPTION
ENTER Mobile Number1 and Press ENTER key, control will move to Contact options mode.
CONNECTION SETTINGS
WI-FI SETTINGS
Press ENTER key on CONN. SETTINGS, display will show as below.
SSID : _
PASSWORD :
NOTE2: SSID is the network ID/Hotspot name to which your device will be connected.
NOTE3: Enter the network/Hotspot Password to which you want to connect the device.
Enter 8 digit SSID and press ENTER key. Control will shift to password entry mode;
Enter password & press ENTER key. Control will move to WI-FI settings mode.

WIFI-RESET
WIFI connected Device & user can connect to new Hotspot. Press ENTER key on WI-FI RESET option to Reboot WI-FI settings, it will delete current
UPLOAD DAILY DATA
Press ENTER key on Upload Daily Data option, display will look like;
UPLOAD DAILY DATA
DATE : 15-08-20_
TO :
Then Bill Data for selected period will be uploaded to Server. Enter From-To Date & press ENTER key.
NOTE: For uploading daily data to server, machine should be connected to Wi-Finetwork.
Press ENTER key on MSG SETTINGS, display will show as below.
MESSAGE OPTIONS
to All). Use UP or DOWN arrow to toggle between the options and select any option then Press ENTER key on type of MSG SETTINGS(Disable/Cust Only/ Customer and Owner1/SMS
1. DISABLE
Screen will redirect back to WIFI setting.
MSG SETTINGS
2.CUST ONLY3.CUST & OWNER14.SMS TO ALL
NOTE 1: If Disable option is set no message will be sent.
NOTE 2: If Customer only option is set message will be sent to customer contaning bill details.
NOTE 3: If Customer& Owner1 option is set message will be sent to both customer & Owner. Customer will receive Bill details while Owner1 will recive as per Note 1.
NOTE 4: If SMS to all option is set message will be sent to customer & both Owners.
SMS SERVICES
2. HOURLY
SMS SETTINGS
Press ENTER key on SMS services option, display will look like;
It will display 2 options i.e, Disable/Hourly.NOTE : While selecting sms settings as Hourly, Bill summary will be automatically sent to
owner mobile number1 on Hourly basis.
1. DISABLE
NOTE: For automatically Hourly report machine should be connected to Wi-Fi network.
SEND DAY SUMMARY
Press ENTER key on SMS Day summary option, bill report will be sent to registered
Owner 1 mobile number.
NOTE: For Day Summary report machine should be connected to Wi-Fi network.
79
“*” - Only in BP-2100 and BP-2100 Emerge & “$” - Only in BP-2100 Joy & “^”- Only in BP-2100 Emerge

SUBSCRIPTION
6.15.1 Billing with WI-FI
Quantity entry mode.
NOTE1: If Bar code reader is connected and scanned for an item then item number and
•
name will be displayed.
When control is at Quantity entry (Max 9999.999), Enter the Quantity.
UDF NO : 1
ITEM No: _
TOTAL: 0.00
• Enter the UDF number and press ENTER Cursor will shift to Item no entry mode.
• Enter Item no. Item name will be displayed in next line and press ENTER Cursor will shift to
already ENTER Is pressed use CANCEL to cancel the entry.
NOTE 2: If you want to modify the item number before pressing ENTER Use Backspace and if .
subsription from www.wepmyshop.com
NOTE 10: After purchasing subsription a key will be generated & same has to be entered in subscription key under Wifi settings in machine.
NOTE 11: After entering subsription key message facility will be resumed. No of messages will be as per subsription package selected at time of purchasing.
NOTE 12: If we select message option in Wifi settings as “SMS to All”. Then message will be sent to customer and both Owners & messages will be deducted as 3 instead of 1.
Press ENTER key on Subscription key& enter the Subscription key generated from wepmyshop.
NOTE 9: First few messages will be free while for further use of SMS feature one has to purchase
• Press PRINT key, display will look like below;
CUSTOMER No: _
entered mobile number.• Enter 10 digit customer number and press ENTER & following details will sent to
1. Transaction Amt 3. TAX details2. Discount amt 4. Total items in Bill 5. Bill number
NOTE 3: If weighing scale interfaced with the machine, then the Quantity
is read from weighing machine.
• Cursor will be blinking at first position, it is ready to accept the next item.
• To change the price press Print key & press ENTER to proceed further(if price change: Dynamic)(if price change: Dynamic)
NOTE 3: * Changing the price in bill/cash reception/Tax 2/ options can be enabled or
disabled through MENU
* Different type of Round off/Discount options can be selected through MENU.
NOTE 4: * If in Database, discount is entered, while printing Bill it prints real value on the
bill & shows discount separately, also Tax will be after discount.
* In billing it will show the real value.
* For item with price 10Rs, Discount 10%, and Tax 10%, if we billed for 1 Qty it will
display amount 10 Rupee only but TOTAL amount it will show value including
Tax and discount.
QUANTITY:
PRICE:
TOTAL: 100.20
80
“*” - Only in BP-2100 and BP-2100 Emerge & “$” - Only in BP-2100 Joy & “^”- Only in BP-2100 Emerge

7.0 How to generate Device ID
Open Web browser & type: http://posdev.wepgst.com
Click on Register Now option;
Enter all the details and click Register after agreeing to Terms & conditions.
NOTE: Please make sure to remember your ID & Password while registering.
Enter user name & password to Login.
Click on store management-> Store Group.
81
“*” - Only in BP-2100 and BP-2100 Emerge & “$” - Only in BP-2100 Joy & “^”- Only in BP-2100 Emerge

Enter all necessary details & click on create button.
Stock group will be created then click on Register store option in Store Management. Enter all necessary details & click on create button.
Store will be created then click on Register device option in Store Management.
Enter all necessary details & click on create button. After sucessefull registery of device, Device ID will be generated. Note that Device ID & go to Owner details in MENU option in machine. After Entering details i.e, GSTIN, Name, MOBILE1 no,MOBILE2 No, enter device ID here that was generated from Server.
After Entering device ID in machine, the machine will be sucessfully linked to Server.
82
“*” - Only in BP-2100 and BP-2100 Emerge & “$” - Only in BP-2100 Joy & “^”- Only in BP-2100 Emerge

¨ Bill Wise Report(1Year)
¨ Item wise Report(1Year)
¨ Void Bill Report( 1 year)
¨ User billed Report(1Year)
¨ Hourly Report(1Year)
¨ Duplicate bill Report (1Year)
¨ UDF item wise Report (1Year)
¨ *Department Report (1Year)
¨ KOT pending Report (Present day)
8.0 REPORTS
¨ Delete KOT Report(Present day)¨ Return item Report(1Year)
¨ *Customer Wise Report(1 year)¨ *Customer bill Report(1 year)
¨ *Customer Payment Report(1 year)
¨ *Disc Bill Report(1 year)¨ Tax wise day Report(1 year)
Summary Report¨ Day wise Report(500 Days)
Monthly Report(100 Months)¨
Yearly Report(8 Years)¨
UDF wise Report¨
User wise Report¨
Rate wise Report¨
Tax Report¨
*Customer wise ¨ monthly Bill date report
Detailed Report
¨ Calculator Bill Report( 1 year)¨ *Customer Wise Item Report(1 year)¨ Minimum stock report
¨ item Billed report(1year)
¨ *Pay & Rct rpt(1 year)
¨ Profit Report(1 year)¨ *Payment Report(1 year)
*User wise Payment report ¨
Bill Data ¨
Only in Bp2100¨ ^Inward Billwise Report¨ ^Inward Itemwise Report
¨ ^Inward Daywise Report¨ ^Inward Monthly Report
83
“*” - Only in BP-2100 and BP-2100 Emerge & “$” - Only in BP-2100 Joy & “^”- Only in BP-2100 Emerge

¨ When Control is at billing mode press REPORT LCD will display like
¨ Select detailed report and press ENTER LCD Will display like
¨ Select required report and press ENTER LCD Will display like
¨ Type "date" and press ENTER (Initially "date" will be present date).
REPORT SELETION MODE
2. SUMMARY REPORT
SELECT YOUR OPTION
1. DETAILED REPORT
REPORT
DATE: DD/MM/YY
DETAILED REPORTS
2.ITEM WISE REPORT
3.VOID BILL REPORT
4.USER BILLED REPORT
1.BILL WISE REPORT
NOTE 1: Billwise,Item wise, Item billed,Duplicate, Department*, Return item
Reports available for 365 days (At a time 1 day report only can be taken).
NOTE 2: KOT pending and Deleted KOT reports are for only present day.
Bill wise,Void Bill,Item Bill,Department*,Duplicate, Return item,Customer wise report,Tax wise day, Payment, Calcualtor Bill Kot Pending , KOT deleted
Printing User Billed Report :
REPORT
¨ Select detailed report and press ENTER LCD Will display like
¨ When Control is at billing mode press LCD will display like
REPORT SELECTION MODE
2. SUMMARY REPORT
SELECT YOUR OPTION
1. DETAILED REPORT
DETAILED REPORTS 1.BILL WISE REPORT2.ITEM WISE REPORT3,VOID BILL REPORT
5.ITEM BILL REPORT4.USER BILLED REPORT
NOTE: Select above mentioned report via same method
and ^Inward Billwise
84
“*” - Only in BP-2100 and BP-2100 Emerge & “$” - Only in BP-2100 Joy & “^”- Only in BP-2100 Emerge

Printing Hourly Report :
¨ When Control is at billing mode press REPORT LCD will display like
¨ Select detailed report and press ENTER LCD Will display like
REPORT SELECTION MODE
2. SUMMARY REPORT
SELECT YOUR OPTION
1. DETAILED REPORT
DETAILED REPORTS 1.BILL WISE REPORT2.ITEM WISE REPORT3,VOID BILL REPORT4.USER BILLED REPORT5.ITEM BILL REPORT6.HOURLY REPORT
¨
¨
¨
¨
¨
¨ Select User billed report and press ENTER LCD Will display like
¨ Type “ date ” and press ENTER (Initially “ date ” will be present date) Cursor will
shift to USER ID entry mode.
¨ Type required User ID (1-15) and press ENTER ( At a time 1 day report only can be taken).
REPORT MODE
DATE : DD/MM/YY
USER ID :
85
“*” - Only in BP-2100 and BP-2100 Emerge & “$” - Only in BP-2100 Joy & “^”- Only in BP-2100 Emerge

¨
¨
¨
¨
Printing Item wise Report, *PAY and REC(Payment and Receipt) Report, *Cust Payment Report, Profit Report , ^Inward Itemwise rpt & *Customer wise Item report :
Select the Customer Payment report/Item wise report/Pay and Rec report from the• Details report menu(Login�Register�Bill mode�Credit/Retail�Report�Detail report�Customer Payment report). Display will be like
DETAIL REPORTS14. CUSTOMER BILL RPT*15. CUST PAYMENT RPT*16. PAY AND REC RPT*17. DESC BILL RPT18. TAX WISE DAY RPT
• Press the ENTER when cursor is in Customer payment. Display will be like
CUST PAYMENT REPORTFROM :18/10/12TO :
• Enter From Date(DD/MM/YY) and press the ENTER
Enter the To date (DD/MM/YY) and press the ENTER button to print the report.•
NOTE: In customerwise Item rpt it will not ask “to date” and in Profit rpt it will also ask from- to item no.
86
“*” - Only in BP-2100 and BP-2100 Emerge & “$” - Only in BP-2100 Joy & “^”- Only in BP-2100 Emerge

Note: 1. Item wise Report, PAY and REC(Payment and Receipt) Report, Cust Payment Report is for one year 2. In From and To entry default will be present date. By using the Cancel/Backspace key you can delete that default date.
Customer Bill R epor t :
· Select the Customer Bill Rpt report from the Details report menu(Login�•
Register�Bill mode�Credit/Retail�Report�Detail report�Customer Bill RPT report). Display will be like
· Enter the From Date(DD/MM/YY) and press the ENTER.•
· Enter the To date(DD/MM/YY) and press the ENTER•
· Enter the Cust ID and press the ENTER to print the Customer Bill report.•
Description Bill Report* :
· Select the Desc Bill Rpt report from the Details report menu(Login�Register�•
Bill mode�Credit/Retail�Report�Detail report�Disc Bill RPT report). Display will be like
Enter the From Date(DD/MM/YY) and press the ENTER.•
Enter the To date(DD/MM/YY) and press the ENTER•
Enter the Desc No and press the ENTER to print the Description Bill report•
CUSTOMER BILL REPORTFROM :18/10/12TO :CUST ID :
DESC BILL REPORTFROM :18/10/12TO :DESC NO :
SUMMARY REPORTSPrinting Day wise Report &^ Inward Daywise Report :¨ When Control is at billing mode press REPORT LCD will display like
¨Select Summary report and press ENTER LCD Will display like
¨Select Day Wise Report press ENTER LCD will display like
REPORT SELECTION MODE
1. DETAILED REPORT
2. SUMMARY REPORT
SUMMARY REPORTS
2. MONTHLY REPORT
3. YEARLY REPORT
1. DAY WISE REPORT
87
“*” - Only in BP-2100 and BP-2100 Emerge & “$” - Only in BP-2100 Joy & “^”- Only in BP-2100 Emerge

¨ Type “From date” and press ENTER (Initially present month and year will be displayed).
¨ Type “TO date” and press ENTER (Initially present month and year will be displayed)
NOTE 1: * Month wise report available for 100 Months. * Monthly report will print excluding current day.
NOTE 2: * Year wise report available for 8 Years. * Yearly report will print excluding current day.
NOTE 3: While taking year wise report only year should be entered.
NOTE 4: After 365 days' Detailed Report Data will be erased.
REPORT FROM : DD/MM/YYTO : DD/MM/YY
Printing UDF Wise, User wise, Rate, Userwise Payment,Monthly , Yearly
¨ When Control is at billing mode press REPORT LCD will display like
REPORT SELECTION MODE
1. DETAILED REPORT
2. SUMMARY REPORT
SUMMARY REPORTS
5.USER WISE REPORT
6.RATE WISE REPORT
7.VAT REPORT
4.UDF WISE REPORT
¨Select Summary report and press ENTER LCD Will display like
¨Select Required report and press ENTER LCD will display like
REPORT DATE : DD/MM/YY
¨Type “Date” and press ENTER (Initially present date will displayed) for the report printing.
NOTE 1: UDF wise, Rate wise and User wise report available for 1 year.
NOTE 2: TAX report available for 1 year.
NOTE 3: For TAX report input will be month and Year (MM/YY).*Customerwise Monthly report :Select the Custwise Monthly report from the Summary report menu(Login�Register�Bill
mode�Credit/Retail�Report�Summary report�Custwise monthly report). Display will be like
,Tax Report and Inward Monthly report.Note: In Monthly it will ask “from-to” month and in Yearly it will ask for year
88
“*” - Only in BP-2100 and BP-2100 Emerge & “$” - Only in BP-2100 Joy & “^”- Only in BP-2100 Emerge

SUMMARY REPORTS2.MONTHLY REPORT3.YEARLY REPORT4.UDFWISE REPORT5.USERWISE REPORT6.RATE WISE REPORT7. TAX REPORT 8. CUSTWISE MONTHLY RPT*
Press the ENTER when cursor is in Custwise Monthly Report. Display will be like
MONTHLY REPORTFROM :10/12TO :
Enter the Month(MM/YY) for from entry and press the ENTER. Cursor will move to TO entry modeEnter the Month(MM/YY) for To entry mode and press the ENTER to print the Report
Note:1.Custwise monthly report is for 60months.
*Department Database (DDR000.WEP)NOTE: If files sent in CSV format then filename will be “ .CSV” .
To update item database, Stock to machine following file should present in pen drive.
89
18/10/12 THU 09 : 12 CUST ID :
BALANCE : AMOUNT :
18/10/12 THU 09 : 12CUST ID : 1 RAMUBALANCE : 2570.00AMOUNT : __
9.1 *CUST PAYMENT BILLING :
¨ Select the Customer payment option from the bill mode (login �Register�Bill mode�CUSTOMER
PAYMENT) and press the ENTER. Display will be like
¨Enter the customer ID and press the ENTER. Cursor will move to the Amount column. Display will be like
¨Enter the amount and press the ENTER to print the customer payment bill.
Note :
1. When cursor is in Cust ID entry press the PLU button for Customer search
9.0 BILL MODES :
9.2 BILLING FOR CUST PAYMENT/CREDIT /PAYMENT AND DESCRIPTION CREDIT BILLING :
For credit billing select the “Credit/Retail billing from the Bill mode (login �Register�Bill ·
mode�Credit/Retail) and press the ENTER. LCD will display like
“*” - Only in BP-2100 and BP-2100 Emerge & “$” - Only in BP-2100 Joy & “^”- Only in BP-2100 Emerge

·
·
·
UDF NO : : __ITEM NO :
QUANTITY : PRICE :
TOTAL : 0.00 0
E16/10/12 THU 19:20
E16/10/12 THU 19:20
UDF NO : : 1 ITEM NO : 1 RICE QUANTITY : 50.00__ KgPRICE : 20
TOTAL : 20.00 0
Enter the UDF NO and press the ENTER to go to the Item no entry mode.
Enter the Item no and press the ENTER to go to the Quantity mode.
· Enter the Quantity and press the ENTER to go to the Price entry mode
Enter the Price and press the ENTER . Now Display will like
¨After entering the Price before giving the print press the DOWN key to go to the Credit billing
mode. Display will be like
CUST NO : __
CUST NO : 1 RAMUTOTAL : 100.00CASH : __
¨Enter the customer no (when pressing the customer no, it will show the customer current
limit balance also) and press the ENTER to go to the CASH entry mode. Display will be like
¨Enter the Cash and press the ENTER to print the Credit bill. Before printing the bill display will be like
CUST NO : 1 RAMUTOTAL : 100.00CASH : 10BALANCE : 90.00
18/10/12 THU 09 : 12DESC NO :__
AMOUNT :DATE :
9.3* PAYMENT AND RECEIPTS BILLING:
Select the Payment and Receipts option from the bill mode (login �Register�Bill mode�¨
Payment and Receipts) and press the ENTER. Display will be like
“*” - Only in BP-2100 and BP-2100 Emerge & “$” - Only in BP-2100 Joy & “^”- Only in BP-2100 Emerge
90

¨Enter the Description (Payment or Receipt) no and press the ENTER. It will show the description
name and cursor will be in the Amount entry.
Enter the Amount and press the ENTER. Cursor will move to Date entry field. Display will be like¨
18/10/12 THU 09 : 12DESC NO : 1 VIMAL TRADERSAMOUNT : 1500.00DATE : 18/10/12
18/10/12 THU 09 : 12DESC NO :
AMOUNT : DATE : TOTAL : 1500.00
¨ Enter the date (default date will be present date) which you want to bill and press the ENTER. Display will be like
¨ Enter the description No to go to the next description no entry or Press the PRINT button.
To print the Description bill(Payment & receipt bill)
Note : 1. When cursor is in Description no entry press the PLU button for Description search
9.4 CALCULATOR BILL :
QUANTITY : RATE :
¨ Select the Calculator Bill option and press ENTER
QUANTITY : 2570.00 RATE : __
¨ Enter the QUANTITY and press the ENTER Cursor will move to the RATE column. Display will be like
QUANTITY : 2570.00
¨ Go to --> BILL MODES --> CALCULATOR BILL
¨ Enter the rate, display will show the total. In case you want to print , press PRINT
16-10-12 THU 19:20
16-10-12 THU 19:20
“*” - Only in BP-2100 and BP-2100 Emerge & “$” - Only in BP-2100 Joy & “^”- Only in BP-2100 Emerge
91

10.0 Shortcut Keys :
Calculator Mode : In billing mode, Press Shift key and then User/Calc key.
Calculator Rechecking : In calculator mode, Press F1 key, then Up & down for scrolling.
Data Downloading : In Login Mode, Press Shift Key and then F2 key, Press Enter key
Duplicate Bill : In billing mode, press Print key
Bill Voiding : In billing mode, press Void key
Save bill without printing : Press Save key after Items entry .
Print KOT : Press F1 key after items entry
Save KOT : Press F2 key after items entry
Delete KOT item : Press F3 key after UDF1 entry
Print KOT bill : Press F4 key after UDF1 entry
Rupee Billing : In billing mode Press Shift key after item entry.
Return Merchandise : In billing mode press Shift and R key after UDF1 entry
*Add ITEM : In idle mode, Press Shift key and then A key
*Add Department : In idle mode, Press Shift key and then B key
Above two shortcuts works only for Manager Login
Billwise Report : In idle mode, Press Shift key and then C key
Itemwise Report : In idle mode, Press Shift key and then D key
Void Bill Report : In idle mode, Press Shift key and then E key
User Bill Report : In idle mode, Press Shift key and then F key
Item Bill Report : In idle mode, Press Shift key and then G key
“*” - Only in BP-2100 and BP-2100 Emerge & “$” - Only in BP-2100 Joy & “^”- Only in BP-2100 Emerge
92
Hourly Report : In idle mode, Press Shift key and then H key
Duplicate Bill Report : In idle mode, Press Shift key and then I key
UDF itemwise report : In idle mode, Press Shift key and then J key
*Department Report : In idle mode, Press Shift key and then K key
KOT Pending Report : In idle mode, Press Shift key and then L key
Deleted KOT report : In idle mode, Press Shift key and then M key
Returned Item report : In idle mode, Press Shift key and then N key
Daywise Report : In idle mode, Press Shift key and then O key
Monthly Report : In idle mode, Press Shift key and then P key
Yearly Report : In idle mode, Press Shift key and then Q key
UDFwise Report : In idle mode, Press Shift key and then R key
Userwise report : In idle mode, Press Shift key and then S key
Ratewise Report : In idle mode, Press Shift key and then T key

11.0 PRODUCT SPECIFICATION Printing Method: Thermal line dot method Printing speed : 50 mm/s at 7.2V drive or 10 bills/min Dot Density : 203 dpi × 203 dpi Resolution : 8 dots/mm Character size : 12 * 28 Printing direction : Bi- directional in both text and graphics Reliability of print head : 50 km Sensors : Paper sensor, Platen sensor, Hot mode sensor.
Mechanical: 1. Sheetmetal lowercase and top case to hold ECR main Pcb, other pcb's, keyboard LCD. 2. Integrated keyboard with 59 no. of active keys 3. *Fixed LCD and 7 segment display Dimensions and weigh L*W*H : 322*263*145 mm Weigh: 3.8 kg(BP-2100/2100 Emerge) and 3 Kg(BP-2100 Joy)
ELECTRICAL: 1. Voltage : 150V to 270 V AC 2. Rated current:2.6 amp 3. Frequency: 50 Hz +/- 3 Hz. 4. Power consumption: Standby mode < 4W consumption 5. Interfaces: Serial 2 no., USB no., LCD, *Cash drawer ,*Ethernet 6. 2 no of Db9, USB host, *RJ-11 are the different types of connector mounting provided.
Technology: 1. 3 inch thermal mechanism 2. ARM 32 bit controller 3. USB host interface 4. 2 Serial interface
Above shortcuts works only for manager login or Report option should be enabled. This is after login, machine will be in idle mode.
*HSN/ $Tax slab Indication : In idle mode, Press Shift key and then V key
$HSN/ *Tax slab Indication : In idle mode, Press Shift key and then X key
POS Enable/Disable : In idle mode, Press Shift key and then W key
93
“*” - Only in BP-2100 and BP-2100 Emerge & “$” - Only in BP-2100 Joy & “^”- Only in BP-2100 Emerge
5. Keyboard with 59 long travel keys and 51*/59$ hot keys 6. Graphics LCD with 192*64 resolution 7. *7 segment display with 8 digits in one line 8. *Cash drawer, *Ethernet, External printer, Barcode scanner connectivity
Paper path : curved paper path Paper type : thermal roll paper Paper width : 72 mm Max. Paper thickness: 0.06 ± 5 microns Paper entry: rear in and top out. Paper roll size : Max Dia 75 mm
PAPER HANDLING :
^Upload Daily Data: In idle mode, Press Shift key and then U key
TAX Report : In idle mode, Press Shift key and then U key

Environment Condition: Temperature – Operation 5 degree to 45 degree Storage 0 degree to +60 degree Humidity-
Operation: 20% to 80% non-condensation Storage: 3% to 85% non-condensation
12.0 DO'S & DON'TSDO's
¨¨ Ensure that the Neutral-Earth voltage is less than 3 Volts AC, Improper grounding
may lead to power Adaptor & Logic Card failure.DON'Ts
¨ Don't keep the product near source of electrical interference like loud speakers, cordless phones, etc, which might induce noise on your equipment.
¨ Don't connect your product to the same outlets of those of large motors.¨ Don't connect your Product to output power in case of power fluctuation, use a
Voltage Stablizer to connect your Product.¨ Don't keep serial interface cable connected, once download operation is complete.¨ Don't touch the LCD screen with the bare hands; it may lead stains on LCD.¨ Don't subject the keypad to any kind of oil or liquid.¨ Don't use alcohol or thinner to clean product/parts. Alcohol and thinner reacts with
plastic parts and damages them.¨ Don't spill any liquid or foreign material inside the product .¨ Don't install a product next to an Air conditioner. Move it to the other side as far
possible because it may lead to condensation of water which in turn leads to rusting of mechanical components.
¨ Don't touch the head of Printer with anything.¨ Don't touch the Paper cutter blade.¨ Don't bend the power cord excessively or place any heavy objects onto it.
Please read the user manual before using the product.
13.0 LIMITATION:
In item name, Other Charges, Header Footer and *Department name field it should not take character more than its max limit but it will take special character(but will not Print them)
¨
94
“*” - Only in BP-2100 and BP-2100 Emerge & “$” - Only in BP-2100 Joy & “^”- Only in BP-2100 Emerge

Problem Cause Remedy
1. The Product does not print
2. The product is operatingproperly but paper is getting folded
14.0 TROUBLE SHOOTINGUse the following table below to diagnose simple problems that may occur. If you cannot solve the problem, consult your Authorised Service Provider.
3. The print quality is light
4. LCD back light not glowing
5. Improper database or header/footer
6. Downloading of item DB, header, footer etc not happening from PC to BP-2100/2100 Joy/Emerge
7. Platen open error on LCD
8. No printing is happening and paper end error on LCD
9. Over Temperature error on LCD
10. Printing is not uniformacross width
1. Power is not ON
2. PAUSE key may have been pressed
1. Due to poor quality thermal paper.2. Printer is in Battery mode with low battery%
Thermal print head mayhave clogged with burnparticles
Loose connection
Due to power failure/noiseDuring downloading Database or header/footer
Port setting is not proper
Paper cover may not be Closed properly
Paper roll may be exhausted
Print head is heated up after Continuous printing for longtime
1. Check whether the Power cable isconnected properlyand power switch is inON condition2. Press Pause key again and start printing
The paper is misaligned while closing paper cover
Centralize the paper and fix the Papercover properly
1. Use good quality thermal paper,fed paper reversely.2. Connect the mains for battery charging
Check power chord isconnected to socketproperly or check thekey pad module connected properly.
Retry downloading database or header/footer
Check the serial portsettings in PC
Close the paper coverproperly
Load new paper roll and start printingWait for some time Printer will Again printing normally
Use diluted Alcohol withcotton and wipe gently on thermal head (Don't clean thermal head in power on condition).
95
only in BP-2100.
“*” - Only in BP-2100 and BP-2100 Emerge & “$” - Only in BP-2100 Joy & “^”- Only in BP-2100 Emerge

Related Documents
![Aplikasi Pendataan Penduduk [population 2.0.6].pdf](https://static.cupdf.com/doc/110x72/55cf9b33550346d033a51e15/aplikasi-pendataan-penduduk-population-206pdf.jpg)