BMW F10 BimmerTech OEM Integration Rear View Camera Installation (NBT) Open trunk and remove 12 fasteners holding upper liner and tool kit compartment from trunk lid. Remove manual pull handle from cable. First aid/tool kit lower hinges are held in place by two very well hidden screws just below cover. (Look closely). Screw heads match liner fabric.

Welcome message from author
This document is posted to help you gain knowledge. Please leave a comment to let me know what you think about it! Share it to your friends and learn new things together.
Transcript
BMW F10 BimmerTech OEM Integration Rear View Camera Installation (NBT)
Open trunk and remove 12 fasteners holding upper liner and tool kit compartment from trunk lid. Remove manual pull handle from cable.
First aid/tool kit lower hinges are held in place by two very well hidden screws just below cover.
(Look closely). Screw heads match liner fabric.
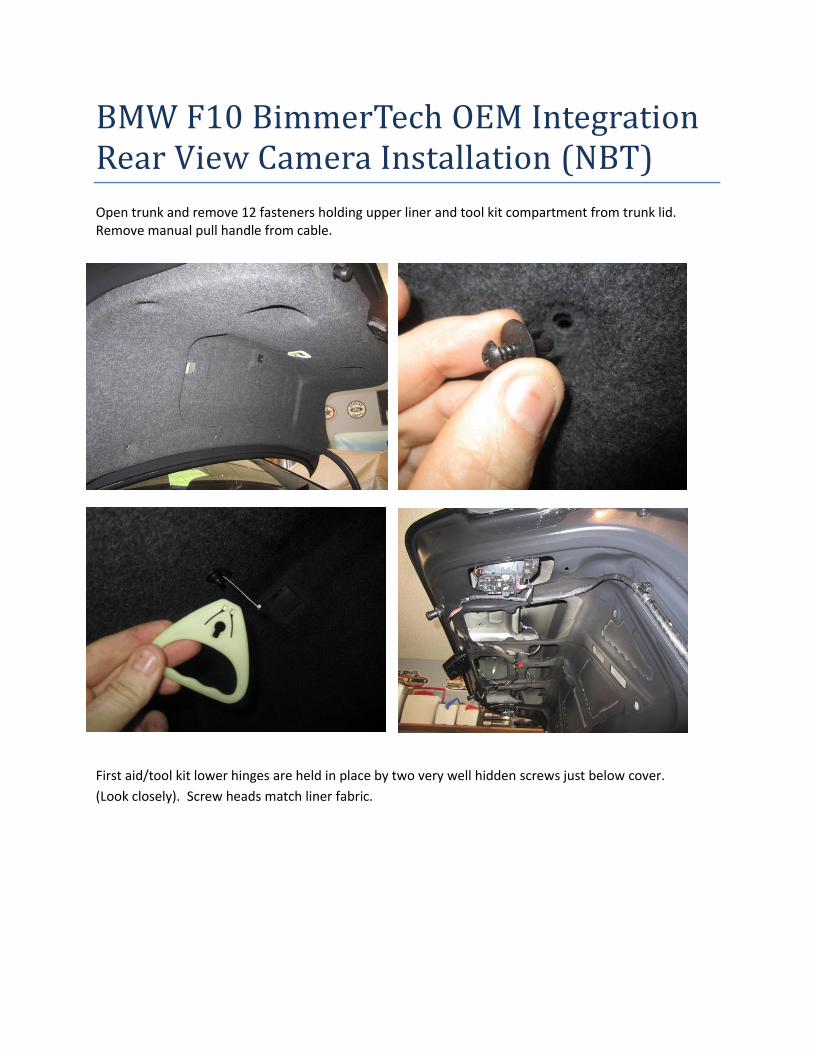
Remove existing trunk open handle and install new camera handle. You may want to remove license
plate lights to make it easier to remove the trunk open handle.
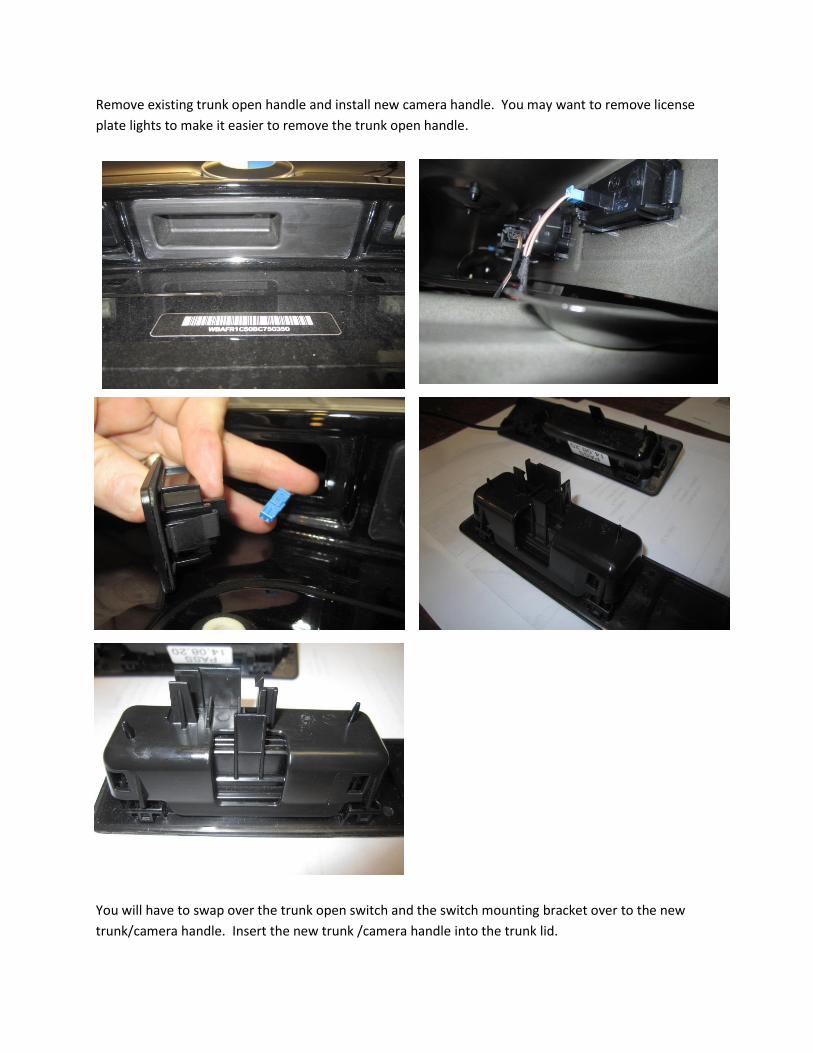
You will have to swap over the trunk open switch and the switch mounting bracket over to the new
trunk/camera handle. Insert the new trunk /camera handle into the trunk lid.
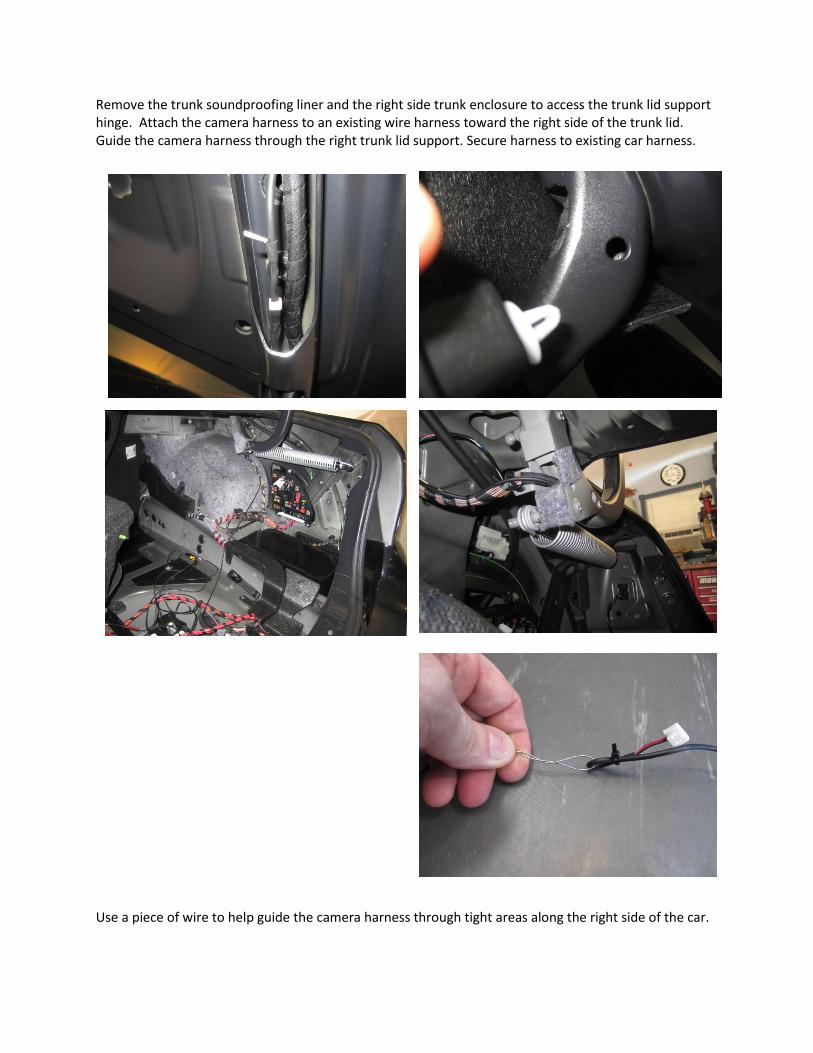
Remove the trunk soundproofing liner and the right side trunk enclosure to access the trunk lid support hinge. Attach the camera harness to an existing wire harness toward the right side of the trunk lid. Guide the camera harness through the right trunk lid support. Secure harness to existing car harness.
Use a piece of wire to help guide the camera harness through tight areas along the right side of the car.
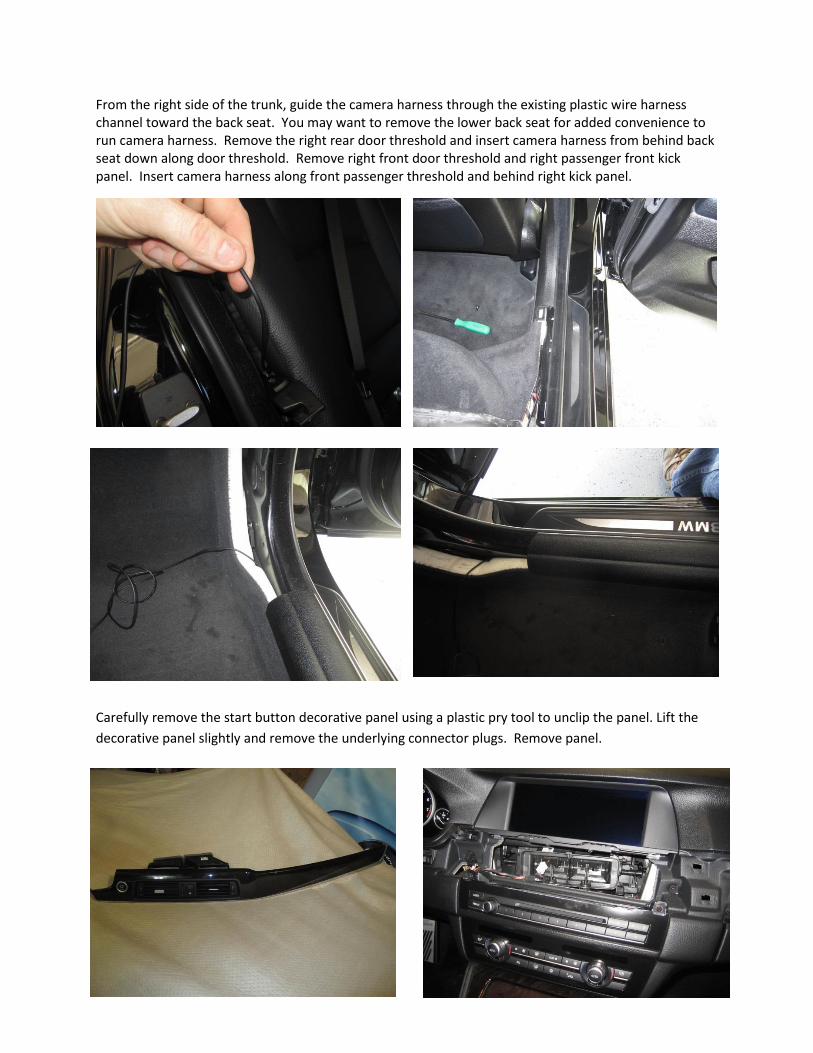
From the right side of the trunk, guide the camera harness through the existing plastic wire harness channel toward the back seat. You may want to remove the lower back seat for added convenience to run camera harness. Remove the right rear door threshold and insert camera harness from behind back seat down along door threshold. Remove right front door threshold and right passenger front kick panel. Insert camera harness along front passenger threshold and behind right kick panel.
Carefully remove the start button decorative panel using a plastic pry tool to unclip the panel. Lift the
decorative panel slightly and remove the underlying connector plugs. Remove panel.
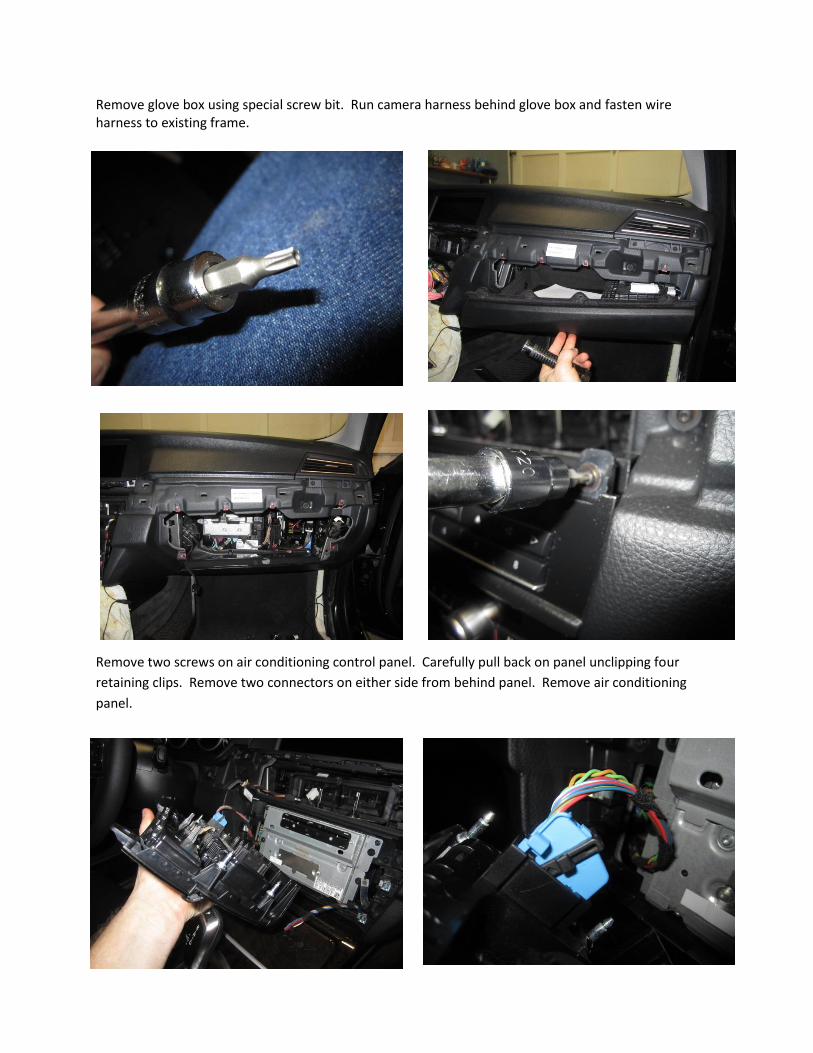
Remove glove box using special screw bit. Run camera harness behind glove box and fasten wire harness to existing frame.
Remove two screws on air conditioning control panel. Carefully pull back on panel unclipping four
retaining clips. Remove two connectors on either side from behind panel. Remove air conditioning
panel.
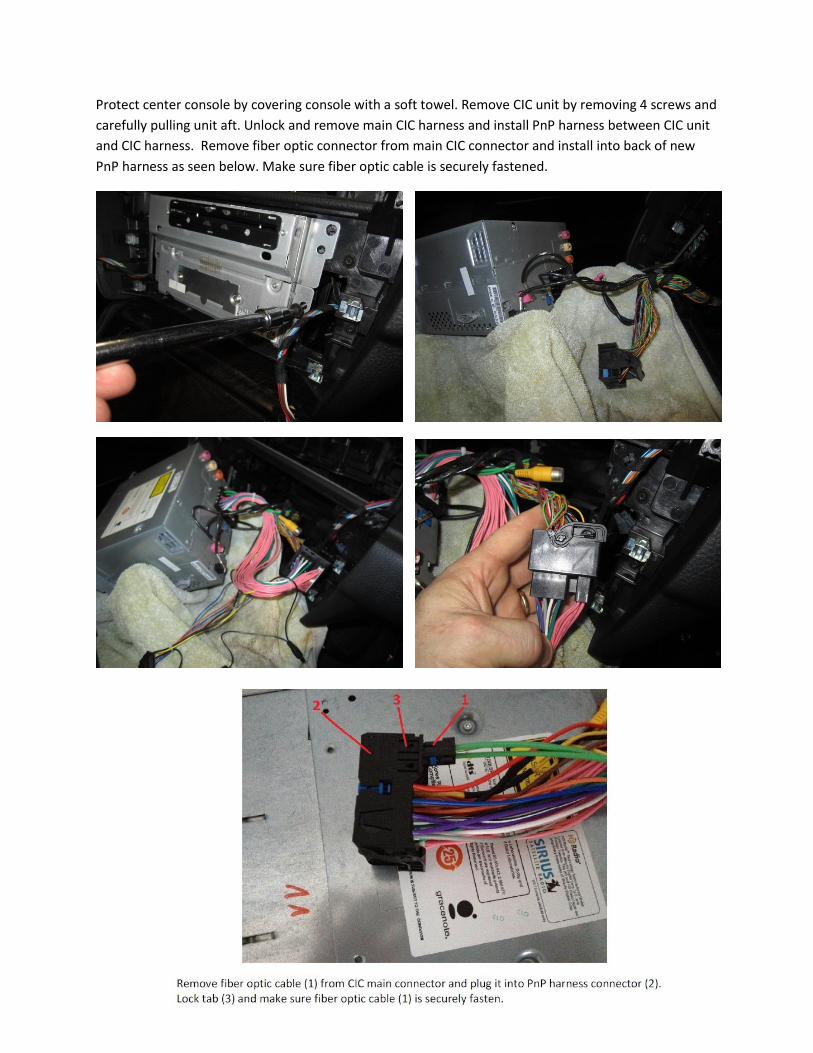
Protect center console by covering console with a soft towel. Remove CIC unit by removing 4 screws and
carefully pulling unit aft. Unlock and remove main CIC harness and install PnP harness between CIC unit
and CIC harness. Remove fiber optic connector from main CIC connector and install into back of new
PnP harness as seen below. Make sure fiber optic cable is securely fastened.
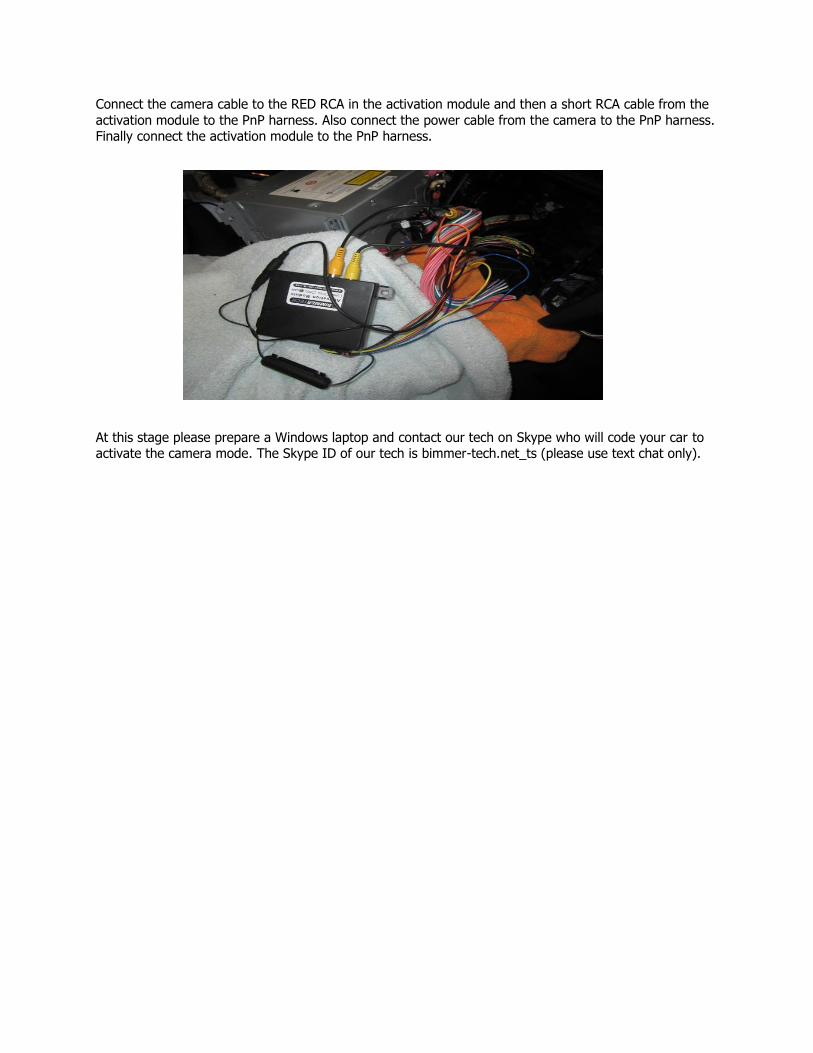
Connect the camera cable to the RED RCA in the activation module and then a short RCA cable from the
activation module to the PnP harness. Also connect the power cable from the camera to the PnP harness. Finally connect the activation module to the PnP harness.
At this stage please prepare a Windows laptop and contact our tech on Skype who will code your car to activate the camera mode. The Skype ID of our tech is bimmer-tech.net_ts (please use text chat only).
Related Documents