0099001445-01 Model / Modelo: 28.71328 Sears Brands Management Corporation, Hoffman Estates, IL 60179 U.S.A. 6V/12V Battery Charger & Engine Starter Cargador de baterías 6V / 12V y arrancador OPERATOR’S MANUAL / MANUAL DEL USUARIO CAUTION: Read and follow all safety rules and operating instructions before every use of this product. SAVE THESE INSTRUCTIONS. ATENCIÓN: Lea y siga todas las reglas de seguridad e instrucciones de uso antes de cada uso de este producto. GUARDE ESTAS INSTRUCCIONES.

Welcome message from author
This document is posted to help you gain knowledge. Please leave a comment to let me know what you think about it! Share it to your friends and learn new things together.
Transcript
0099001445-01
Model / Modelo: 28.71328
Sears Brands Management Corporation, Hoffman Estates, IL 60179 U.S.A.
6V/12V Battery Charger & Engine StarterCargador de baterías 6V / 12V y arrancador
OPERATOR’S MANUAL / MANUAL DEL USUARIO
CAUTION:Read and follow all safety rules and operating instructions before every use of this product.
SAVE THESE INSTRUCTIONS.
ATENCIÓN:Lea y siga todas las reglas
de seguridad e instrucciones de uso antes de cada uso de este producto.
GUARDE ESTAS INSTRUCCIONES.

DIEHARD® LIMITED WARRANTYFOR THREE YEARS from the date of sale, this product is warranted against defects in material or workmanship when it is operated according to all supplied instructions.
WITH PROOF OF SALE, return a defective product to the retailer from which it was purchased for free replacement.
This warranty gives you specific legal rights, and you may also have other rights which vary from state to state.
Sears Brands Management Corporation, Hoffman Estates, IL 60179
FOR CUSTOMER ASSISTANCE OR REPLACEMENT PARTS, CALL 1-800-SEARS-64 (1-800-732-7764) TOLL-FREE FROM 7 AM TO 5 PM CT, MONDAY-FRIDAY.
GARANTÍA LIMITADA DIEHARD®
DURANTE TRES AÑOS desde la fecha de venta, este producto está garantizado contra defectos de materiales o mano de obra cuando se opera de acuerdo a las instrucciones provistas.
CON EL COMPROBANTE DE VENTA, devolver un producto defectuoso a la tienda donde fue comprado para el reemplazo gratuito.
Esta garantía le otorga derechos legales específicos, así como otros derechos, que varían de estado a estado.
Sears Brands Management Corporation, Hoffman Estates, IL 60179
PARA ASISTENCIA AL CLIENTE O REPUESTOS, LLAME GRATIS AL 7 AM-5 PM CT LUNES A VIERNES: 1-800-SEARS-64 (1-800-732-7764)
CONTENTS
IMPORTANT SAFETY INSTRUCTIONS ...................................................................................... 4
PERSONAL SAFETY PRECAUTIONS ......................................................................................... 4
PREPARING TO CHARGE ........................................................................................................... 5
CHARGER LOCATION ................................................................................................................. 5
DC CONNECTION PRECAUTIONS ............................................................................................. 5
FOLLOW THESE STEPS WHEN BATTERY IS INSTALLED IN VEHICLE ................................... 5
FOLLOW THESE STEPS WHEN BATTERY IS OUTSIDE VEHICLE ........................................... 6
GROUNDING AND AC POWER CORD CONNECTIONS ........................................................... 6
ASSEMBLY INSTRUCTIONS ....................................................................................................... 6
CONTROL PANEL ......................................................................................................................... 6
OPERATING INSTRUCTIONS ...................................................................................................... 7
DISPLAY MESSAGES ................................................................................................................ 10
MAINTENANCE AND CARE ........................................................................................................11
TROUBLESHOOTING .................................................................................................................11
BEFORE RETURNING FOR REPAIRS ...................................................................................... 13
CONTENIDOS
INSTRUCCIONES IMPORTANTES DE SEGURIDAD ................................................................ 14
PRECAUCIONES DE SEGURIDAD PERSONAL ....................................................................... 14
PREPARACIÓN PARA LA CARGA ............................................................................................ 15
UBICACIÓN DEL CARGADOR ................................................................................................... 15
PRECAUCIONES DE CONEXIÓN EN CC ................................................................................. 15
SIGA ESTOS PASOS CUANDO LA BATERÍA ESTÉ COLOCADA EN EL VEHÍCULO .............. 16
SIGA ESTOS PASOS CUANDO LA BATERÍA SE ENCUENTRE FUERA DEL VEHÍCULO ....... 16
CONEXIONES A TIERRA Y ENERGÍA DE CA ........................................................................... 17
INSTRUCCIONES DE MONTAJE ............................................................................................... 17
PANEL DE CONTROL ................................................................................................................. 17
INSTRUCCIONES DE OPERACIÓN .......................................................................................... 18
MUESTRA DE MENSAJES ......................................................................................................... 21
MANTENIMIENTO Y CUIDADO ................................................................................................. 22
LOCALIZACIÓN Y RESOLUCIÓN DE PROBLEMAS ................................................................. 22
ANTES DE DEVOLVER A REPARACIONES .............................................................................. 24
• 4 •
1. IMPORTANT SAFETY INSTRUCTIONS
SAVE THESE INSTRUCTIONS.1.1 SAVE THESE INSTRUCTIONS –
This manual contains important safety and operating instructions.
1.2 Do not expose the charger to rain or snow.1.3 Use of an attachment not recommended
or sold by the battery charger manufacturer may result in a risk of fire, electric shock or injury to persons.
1.4 To reduce the risk of damage to electric plug and cord, pull by the plug rather than the cord when disconnecting charger.
1.5 An extension cord should not be used unless absolutely necessary. Use of improper extension cord could result in a risk of fire and electric shock. If an extension cord must be used, make sure:• That the pins on plug of extension cord
are the same number, size and shape as those of plug on charger.
• That extension cord is properly wired and in good electrical condition; and
• That wire size is large enough for AC ampere rating of charger as specified in section 8.
1.6 Do not operate charger with damaged cord or plug – replace the cord or plug immediately.
1.7 Do not operate charger if it has received a sharp blow, been dropped, or otherwise damaged in any way; take it to a qualified serviceman.
1.8 Do not disassemble charger; take it to a qualified serviceman when service or repair is required. Incorrect reassembly may result in a risk of electric shock or fire.
1.9 To reduce risk of electric shock, unplug charger from outlet before attempting any maintenance or cleaning. Turning off controls will not reduce this risk.
1.10 WARNING: RISK OF EXPLOSIVE GASES.a. WORKING IN VICINITY OF A LEAD-
ACID BATTERY IS DANGEROUS. BATTERIES GENERATE EXPLOSIVE GASES DURING NORMAL BATTERY OPERATION. FOR THIS REASON, IT IS OF UTMOST IMPORTANCE THAT YOU FOLLOW THE INSTRUCTIONS EACH TIME YOU USE THE CHARGER.
b. To reduce risk of battery explosion, follow these instructions and those published by battery manufacturer and manufacturer of any equipment you intend to use in vicinity of battery. Review cautionary markings on these products and on engine.
1.11 Pursuant to California Proposition 65, this product contains chemicals known to the State of California to cause cancer and birth defects or other reproductive harm. Wash hands after handling.
1.12 Keep out of reach of children.
2. PERSONAL SAFETY PRECAUTIONS2.1 Consider having someone close enough
by to come to your aid when you work near a lead-acid battery.
2.2 Have plenty of fresh water and soap nearby in case battery acid contacts skin, clothing, or eyes.
2.3 Wear complete eye protection and clothing protection. Avoid touching eyes while working near battery.
2.4 If battery acid contacts skin or clothing, wash immediately with soap and water. If acid enters eye, immediately flood eye with running cold water for at least 10 minutes and get medical attention immediately.
2.5 NEVER smoke or allow a spark or flame in vicinity of battery or engine.
2.6 Be extra cautious to reduce risk of dropping a metal tool onto battery. It might
spark or short-circuit battery or other electrical part that may cause explosion.
2.7 Remove personal metal items such as rings, bracelets, necklaces, and watches when working with a lead-acid battery. A lead-acid battery can produce a short-circuit current high enough to weld a ring or the like to metal, causing a severe burn.
2.8 Use charger for charging only LEAD-ACID, AGM and GEL-type rechargeable batteries with rated capacities of 24Ah (6V) and 44-75Ah (12V). It is not intended to supply power to a low voltage electrical system other than in a starter-motor application. Do not use battery charger for charging dry-cell batteries that are commonly used with home appliances. These batteries may burst and cause injury to persons and damage to property.
2.9 NEVER charge a frozen battery.
• 5 •
3. PREPARING TO CHARGE3.1 If necessary to remove battery from
vehicle to charge, always remove grounded terminal from battery first. Make sure all accessories in the vehicle are off, so as not to cause an arc.
3.2 Be sure area around battery is well ventilated while battery is being charged.
3.3 Clean battery terminals. Be careful to keep corrosion from coming in contact with eyes.
3.4 Add distilled water in each cell until battery acid reaches level specified by battery manufacturer. Do not overfill. For a
battery without removable cell caps, such as valve regulated lead acid batteries, carefully follow manufacturer’s recharging instructions.
3.5 Study all battery manufacturer’s specific precautions while charging and recommended rates of charge.
3.6 Determine voltage of battery by referring to car owner’s manual and make sure that output voltage selector switch is set at correct voltage. If charger has adjustable charge rate, charge battery initially at lowest rate.
4. CHARGER LOCATION4.1 Locate charger as far away from battery
as DC cables permit.4.2 Never place charger directly above
battery being charged; gases from battery will corrode and damage charger.
4.3 Never allow battery acid to drip on charger when reading electrolyte specific gravity or filling battery.
4.4 Do not operate charger in a closed-in area or restrict ventilation in any way.
4.5 Do not set a battery on top of charger.
5. DC CONNECTION PRECAUTIONS5.1 Connect and disconnect DC output clips
only after setting any charger switches to “off” position and removing AC cord from electric outlet. Never allow clips to touch each other.
5.2 Attach clips to battery and chassis, as indicated in sections 6 and 7.
6. FOLLOW THESE STEPS WHEN BATTERY IS INSTALLED IN VEHICLEA SPARK NEAR THE BATTERY MAY CAUSE A BATTERY EXPLOSION. TO REDUCE THE RISK OF A SPARK NEAR THE BATTERY:
6.1 Position AC and DC cords to reduce risk of damage by hood, door, or moving engine part.
6.2 Stay clear of fan blades, belts, pulleys, and other parts that can cause injury to persons.
6.3 Check polarity of battery posts. POSITIVE (POS, P, +) battery post usually has larger diameter than NEGATIVE (NEG, N,–) post.
6.4 Determine which post of battery is grounded (connected) to the chassis. If negative post is grounded to chassis (as in most vehicles), see (6.5). If positive post is grounded to the chassis, see (6.6).
6.5 For negative-grounded vehicle, connect POSITIVE (RED) clip from battery charger to POSITIVE (POS, P, +) ungrounded post of battery. Connect NEGATIVE (BLACK)
clip to vehicle chassis or engine block away from battery. Do not connect clip to carburetor, fuel lines, or sheet-metal body parts. Connect to a heavy gauge metal part of the frame or engine block.
6.6 For positive-grounded vehicle, connect NEGATIVE (BLACK) clip from battery charger to NEGATIVE (NEG, N, –) ungrounded post of battery. Connect POSITIVE (RED) clip to vehicle chassis or engine block away from battery. Do not connect clip to carburetor, fuel lines, or sheet-metal body parts. Connect to a heavy gauge metal part of the frame or engine block.
6.7 When disconnecting charger, turn switches to off, disconnect AC cord, remove clip from vehicle chassis, and then remove clip from battery terminal.
6.8 See Operating Instructions for length of charge information.
• 6 •
7. FOLLOW THESE STEPS WHEN BATTERY IS OUTSIDE VEHICLEA SPARK NEAR THE BATTERY MAY CAUSE A BATTERY EXPLOSION. TO REDUCE THE RISK OF A SPARK NEAR THE BATTERY:
7.1 Check polarity of battery posts. POSITIVE (POS, P, +) battery post usually has a larger diameter than NEGATIVE (NEG, N, –) post.
7.2 Attach at least a 24-inch-long 6-gauge (AWG) insulated battery cable to NEGATIVE (NEG, N, –) battery post.
7.3 Connect POSITIVE (RED) charger clip to POSITIVE (POS, P, +) post of battery.
7.4 Position yourself and free end of cable as far away from battery as possible – then
connect NEGATIVE (BLACK) charger clip to free end of cable.
7.5 Do not face battery when making final connection.
7.6 When disconnecting charger, always do so in reverse sequence of connecting procedure and break first connection while as far away from battery as practical.
7.7 A marine (boat) battery must be removed and charged on shore. To charge it on board requires equipment specially designed for marine use.
8. GROUNDING AND AC POWER CORD CONNECTIONS This battery charger is for use on a nominal 120 volt circuit. The plug must be plugged into an outlet that is properly installed and grounded in accordance with all local codes and ordinances. The plug pins must fit the receptacle (outlet). Do not use with an ungrounded system.DANGER: Never alter the AC cord or plug provided – if it does not fit the outlet, have a proper grounded outlet installed by a qualified electrician. An improper connection can result in a risk of an electric shock or electrocution. NOTE: Pursuant to Canadian Regulations, use of an adapter plug is not allowed in Canada. Use of an adapter plug in the United States is not recommended and should not be used.
USING AN EXTENSION CORDThe use of an extension cord is not recommended. If you must use an extension cord, follow these guidelines:• Pins on plug of extension cord must be
the same number, size, and shape as those of plug on charger.
• Ensure that the extension cord is properly wired and in good electrical condition.
• Wire size must be large enough for the AC ampere rating of charger, as specified:
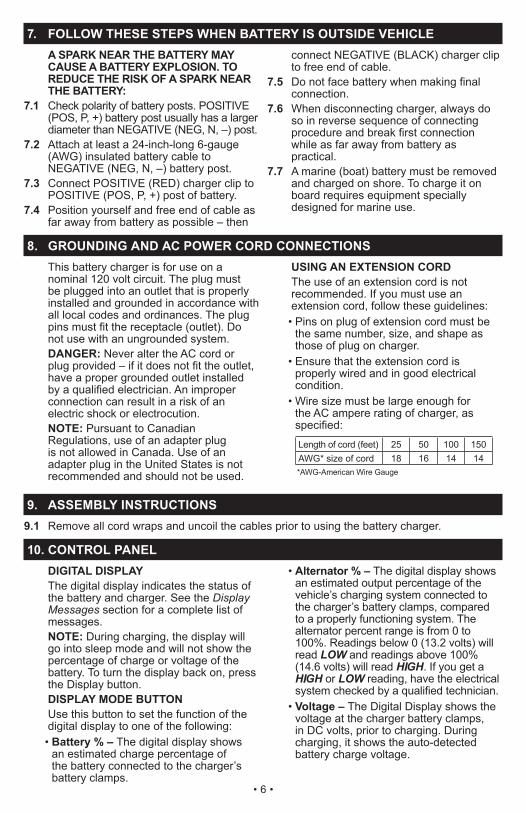
Length of cord (feet) 25 50 100 150AWG* size of cord 18 16 14 14*AWG-American Wire Gauge
9. ASSEMBLY INSTRUCTIONS9.1 Remove all cord wraps and uncoil the cables prior to using the battery charger.
10. CONTROL PANELDIGITAL DISPLAYThe digital display indicates the status of the battery and charger. See the Display Messages section for a complete list of messages.NOTE: During charging, the display will go into sleep mode and will not show the percentage of charge or voltage of the battery. To turn the display back on, press the Display button.DISPLAY MODE BUTTONUse this button to set the function of the digital display to one of the following:• Battery % – The digital display shows
an estimated charge percentage of the battery connected to the charger’s battery clamps.
• Alternator % – The digital display shows an estimated output percentage of the vehicle’s charging system connected to the charger’s battery clamps, compared to a properly functioning system. The alternator percent range is from 0 to 100%. Readings below 0 (13.2 volts) will read LOW and readings above 100% (14.6 volts) will read HI.GH. If you get a HI.GH or LOW reading, have the electrical system checked by a qualified technician.
• Voltage – The Digital Display shows the voltage at the charger battery clamps, in DC volts, prior to charging. During charging, it shows the auto-detected battery charge voltage.
• 7 •
RATE SELECTION BUTTONUse this button to select one of the following:• 6<>2A CHARGE/MAINTAIN –
For charging small and large batteries. Not recommended for industrial applications.
• 40<>15A BOOST – For quickly adding energy to a severely discharged or large capacity battery prior to ENGINE START. The unit will automatically switch to 6<>2A CHARGE/MAINTAIN after the BOOST operation has completed.
• 125A ENGINE START – Provides additional amps for cranking an engine with a weak or run-down battery. Always use in combination with a battery.
NOTE: Once the charger has started charging the battery, if you press the Rate Selection button once, the output current is shut off and the display will show OFF and then the battery voltage. If you press the Rate Selection button again, the current will go back on at the same setting it was when it was turned off. LED INDICATORSREVERSED (red) LED flashing: The connections are reversed.CHARGING (yellow/orange) LED lit: The charger is charging the battery.CHARGING (yellow/orange) LED flashing: The charger is in abort mode.CHARGED/MAINTAINING (green) LED pulsing: The battery is fully charged and the charger is in maintain mode.NOTE: See Operating Instructions for a complete description of the charger modes.
BATTERY TYPE BUTTON Use this button to set the type of battery.• Standard – Used in cars, trucks and
motorcycles, these batteries have vent caps and are often marked “low maintenance” or “maintenance-free”. This type of battery is designed to deliver quick bursts of energy (such as starting engines) and has a greater plate count. The plates are thinner and have somewhat different material composition. Standard batteries should not be used for deep-cycle applications.
• AGM – The Absorbed Glass Mat construction allows the electrolyte to be suspended in close proximity with the plate’s active material. In theory, this enhances both the discharge and recharge efficiency. The AGM batteries are a variant of Sealed VRLA (valve regulated lead-acid) batteries. Popular uses include high-performance engine starting, power sports, deep-cycle, solar and storage batteries.
• GEL – The electrolyte in a Gel cell has a silica additive that causes it to set up or stiffen. The recharge voltages on this type of cell are lower than those for other styles of lead-acid battery. This is probably the most sensitive cell in terms of adverse reactions to overvoltage charging. Gel batteries are best used in VERY DEEP cycle application and may last a bit longer in hot weather applications. If the wrong battery charger is used on a gel cell battery, poor performance and premature failure will result.
• DieHard Platinum – Select this option only if your battery is a DieHard Platinum battery.
11. OPERATING INSTRUCTIONSWARNING: A spark near battery may cause an explosion. IMPORTANT: Do not start the vehicle with the charger connected to the AC outlet, or it could damage the charger.NOTE: This charger is equipped with an auto-start feature. Current will not be supplied to the battery clamps until a battery is properly connected. The clamps will not spark if touched together.
CHARGING A BATTERY IN THE VEHICLE1. Turn off all the vehicle’s accessories.2. Keep the hood open.3. Clean the battery terminals.4. Place the charger on a dry, non-
flammable surface.5. Lay the AC/DC cables away from any
fan blades, belts, pulleys and other moving parts.
6. Connect the battery, following the precautions listed in sections 6 and 7.
7. Connect the charger to an electrical outlet.
• 8 •
8. When the charger starts, the display will show DIEHARD.
9. Select the battery type and the desired rate. Charging will then begin automatically. See section 12 for CHARGING message details.
10. The yellow/orange LED will light, and the display will show ANALYZING BATTERY while the charger determines that the battery is properly connected and the condition of the battery.
11. When charging is complete, disconnect the charger from the AC power, remove the clamps from the vehicle’s chassis, and then remove the clamp from the battery terminal.
CHARGING A BATTERY OUTSIDE OF THE VEHICLE1. Place battery in a well-ventilated area.2. Clean the battery terminals.3. Connect the battery, following the
precautions listed in sections 6 and 7.4. Connect the charger to the electrical
outlet.5. When the charger starts, the display
will show DIEHARD.6. Select the battery type and the
desired rate. Charging will then begin automatically. See section 12 for CHARGING message details.
7. The yellow/orange LED will light, and and the display will show ANALYZING BATTERY while the charger determines that the battery is properly connected and the condition of the battery.
8. When charging is complete, disconnect the charger from the AC power, disconnect the negative clamp, and finally the positive clamp.
9. A marine (boat) battery must be removed and charged on shore.
AUTOMATIC CHARGING MODEWhen an Automatic Charge is performed, the charger switches to the maintain mode automatically after the battery is charged. BATTERY CONNECTION INDICATORIf the charger does not detect a properly connected battery, charging will not start and the digital display will show one of two messages. If the display shows CONNECT CLAMPS, make sure the charger is connected to the battery and the connection points are clean and making a good connection. If the display shows WARNING CLAMPS REVERSED,
unplug the charger from the AC outlet and reverse the connections at the battery.CHARGE COMPLETION AND MAINTAIN MODE (FLOAT MODE MONITORING)Charge completion is indicated by the pulsing green LED and the digital display showing FULLY CHARGED AUTO MAINTAINING. This means that the charger has stopped charging and has switched to the Maintain Mode of operation. NOTE: If the charger has to provide its maximum maintain current for a continuous 12 hour period, it will go into Abort Mode (see Aborted Charge section). This is usually caused by a drain on the battery, or the battery could be bad. Make sure there are no loads on the battery. If there are, remove them. If there are none, have the battery checked or replaced.MAINTAINING A BATTERYThe 28.71328 maintains 6 and 12 volt batteries, keeping them at full charge. It is not recommended for industrial applications.NOTE: The maintain mode technology allows you to safely charge and maintain a healthy battery for extended periods of time. However, problems with the battery, electrical problems in the vehicle, improper connections or other unanticipated conditions could cause excessive current draws. As such, occasionally monitoring your battery and the charging process is required.DESULFATION MODEIf the battery is left discharged for an extended period of time, it could become sulfated and not accept a normal charge. If the charger detects a sulfated battery, the charger will switch to a special mode of operation designed for such batteries. If successful, normal charging will resume after the battery is desulfated. Desulfation could take up to 8 hours. If desulfation fails, charging will abort, the yellow/orange LED will flash, and the display will show CHARGING ABORTED BAD BATTERY.ABORTED CHARGEIf charging cannot be completed normally, charging will abort. When charging aborts, the charger’s output is shut off, the yellow/orange LED will flash, and the display will show CHARGING ABORTED BAD BATTERY. To reset after an aborted charge, unplug the charger from the outlet, wait a few moments and plug it back in.
• 9 •
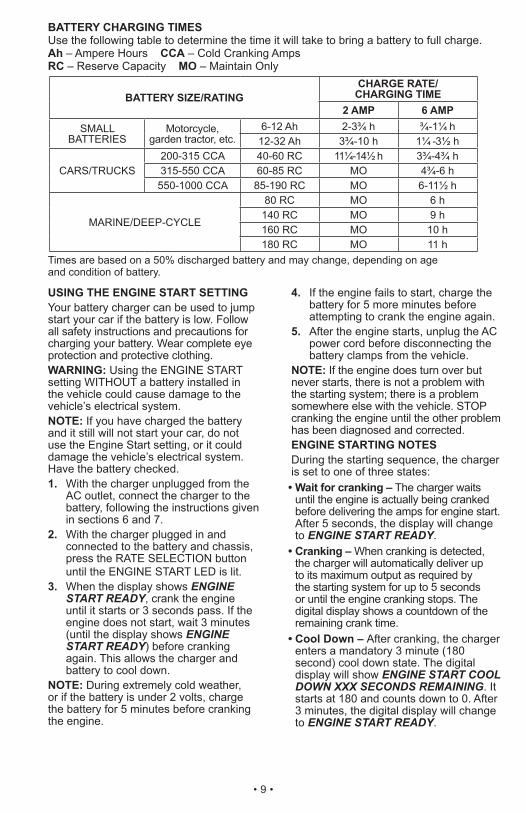
BATTERY CHARGING TIMESUse the following table to determine the time it will take to bring a battery to full charge. Ah – Ampere Hours CCA – Cold Cranking AmpsRC – Reserve Capacity MO – Maintain Only
BATTERY SIZE/RATINGCHARGE RATE/
CHARGING TIME2 AMP 6 AMP
SMALL BATTERIES
Motorcycle,garden tractor, etc.
6-12 Ah 2-3¾ h ¾-1¼ h12-32 Ah 3¾-10 h 1¼ -3½ h
CARS/TRUCKS200-315 CCA 40-60 RC 11¼-14½ h 3¾-4¾ h315-550 CCA 60-85 RC MO 4¾-6 h
550-1000 CCA 85-190 RC MO 6-11½ h
MARINE/DEEP-CYCLE
80 RC MO 6 h140 RC MO 9 h160 RC MO 10 h180 RC MO 11 h
Times are based on a 50% discharged battery and may change, depending on age and condition of battery.
USING THE ENGINE START SETTINGYour battery charger can be used to jump start your car if the battery is low. Follow all safety instructions and precautions for charging your battery. Wear complete eye protection and protective clothing. WARNING: Using the ENGINE START setting WITHOUT a battery installed in the vehicle could cause damage to the vehicle’s electrical system. NOTE: If you have charged the battery and it still will not start your car, do not use the Engine Start setting, or it could damage the vehicle’s electrical system. Have the battery checked.1. With the charger unplugged from the
AC outlet, connect the charger to the battery, following the instructions given in sections 6 and 7.
2. With the charger plugged in and connected to the battery and chassis, press the RATE SELECTION button until the ENGINE START LED is lit.
3. When the display shows ENGINE START READY, crank the engine until it starts or 3 seconds pass. If the engine does not start, wait 3 minutes (until the display shows ENGINE START READY) before cranking again. This allows the charger and battery to cool down.
NOTE: During extremely cold weather, or if the battery is under 2 volts, charge the battery for 5 minutes before cranking the engine.
4. If the engine fails to start, charge the battery for 5 more minutes before attempting to crank the engine again.
5. After the engine starts, unplug the AC power cord before disconnecting the battery clamps from the vehicle.
NOTE: If the engine does turn over but never starts, there is not a problem with the starting system; there is a problem somewhere else with the vehicle. STOP cranking the engine until the other problem has been diagnosed and corrected.ENGINE STARTING NOTESDuring the starting sequence, the charger is set to one of three states:• Wait for cranking – The charger waits
until the engine is actually being cranked before delivering the amps for engine start. After 5 seconds, the display will change to ENGINE START READY.
• Cranking – When cranking is detected, the charger will automatically deliver up to its maximum output as required by the starting system for up to 5 seconds or until the engine cranking stops. The digital display shows a countdown of the remaining crank time.
• Cool Down – After cranking, the charger enters a mandatory 3 minute (180 second) cool down state. The digital display will show ENGINE START COOL DOWN XXX SECONDS REMAINING. It starts at 180 and counts down to 0. After 3 minutes, the digital display will change to ENGINE START READY.
• 10 •
USING THE BATTERY VOLTAGE TESTER 1. With the charger unplugged from the
AC outlet, connect the charger to the battery following the instructions given in previous sections.
2. Plug the charger AC power cord into the AC outlet.
3. If necessary, press the BATTERY TYPE button until the correct type is indicated.
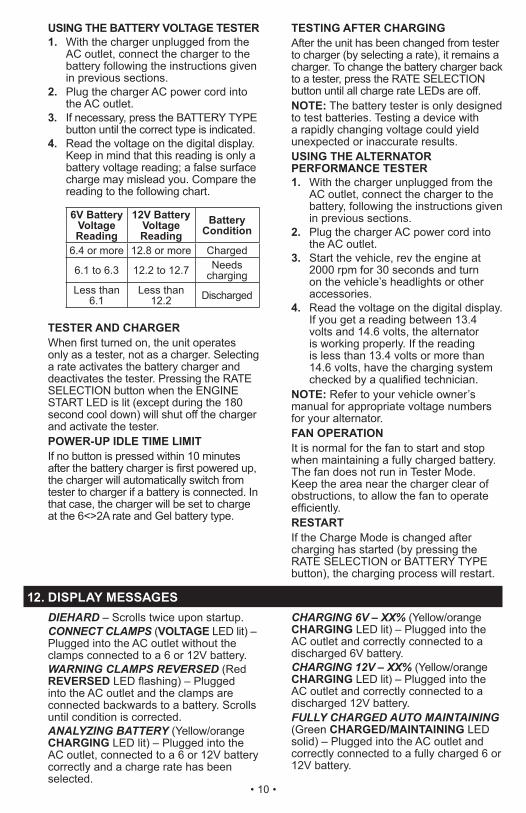
4. Read the voltage on the digital display. Keep in mind that this reading is only a battery voltage reading; a false surface charge may mislead you. Compare the reading to the following chart.
6V Battery Voltage Reading
12V Battery Voltage Reading
Battery Condition
6.4 or more 12.8 or more Charged
6.1 to 6.3 12.2 to 12.7 Needs charging
Less than 6.1
Less than 12.2 Discharged
TESTER AND CHARGER When first turned on, the unit operates only as a tester, not as a charger. Selecting a rate activates the battery charger and deactivates the tester. Pressing the RATE SELECTION button when the ENGINE START LED is lit (except during the 180 second cool down) will shut off the charger and activate the tester.POWER-UP IDLE TIME LIMITIf no button is pressed within 10 minutes after the battery charger is first powered up, the charger will automatically switch from tester to charger if a battery is connected. In that case, the charger will be set to charge at the 6<>2A rate and Gel battery type.
TESTING AFTER CHARGINGAfter the unit has been changed from tester to charger (by selecting a rate), it remains a charger. To change the battery charger back to a tester, press the RATE SELECTION button until all charge rate LEDs are off.NOTE: The battery tester is only designed to test batteries. Testing a device with a rapidly changing voltage could yield unexpected or inaccurate results.USING THE ALTERNATOR PERFORMANCE TESTER1. With the charger unplugged from the
AC outlet, connect the charger to the battery, following the instructions given in previous sections.
2. Plug the charger AC power cord into the AC outlet.
3. Start the vehicle, rev the engine at 2000 rpm for 30 seconds and turn on the vehicle’s headlights or other accessories.
4. Read the voltage on the digital display. If you get a reading between 13.4 volts and 14.6 volts, the alternator is working properly. If the reading is less than 13.4 volts or more than 14.6 volts, have the charging system checked by a qualified technician.
NOTE: Refer to your vehicle owner’s manual for appropriate voltage numbers for your alternator.FAN OPERATION It is normal for the fan to start and stop when maintaining a fully charged battery. The fan does not run in Tester Mode. Keep the area near the charger clear of obstructions, to allow the fan to operate efficiently.RESTARTIf the Charge Mode is changed after charging has started (by pressing the RATE SELECTION or BATTERY TYPE button), the charging process will restart.
12. DISPLAY MESSAGESDIEHARD – Scrolls twice upon startup.CONNECT CLAMPS (VOLTAGE LED lit) – Plugged into the AC outlet without the clamps connected to a 6 or 12V battery.WARNING CLAMPS REVERSED (Red REVERSED LED flashing) – Plugged into the AC outlet and the clamps are connected backwards to a battery. Scrolls until condition is corrected.ANALYZING BATTERY (Yellow/orange CHARGING LED lit) – Plugged into the AC outlet, connected to a 6 or 12V battery correctly and a charge rate has been selected.
CHARGING 6V – XX% (Yellow/orange CHARGING LED lit) – Plugged into the AC outlet and correctly connected to a discharged 6V battery.CHARGING 12V – XX% (Yellow/orange CHARGING LED lit) – Plugged into the AC outlet and correctly connected to a discharged 12V battery.FULLY CHARGED AUTO MAINTAINING (Green CHARGED/MAINTAINING LED solid) – Plugged into the AC outlet and correctly connected to a fully charged 6 or 12V battery.
• 11 •
CHARGING ABORTED BAD BATTERY (Yellow/orange CHARGING LED flashing) – Circumstances that could cause an Abort situation during charging: • The battery is severely sulfated or has a
shorted cell and can’t reach a full charge.• The battery is too large or there is a bank
of batteries and it doesn’t reach full charge within a set time period.
Circumstances that could cause an Abort situation during maintaining: • The battery is severely sulfated or has a
weak cell and will not hold a charge.• There is a large draw on the battery and
the charger has to supply its maximum
maintain current for a 12 hour period to keep the battery at full charge.
LIFE DEMANDS DIEHARD – Charging is complete and clamps have been disconnected.ENGINE START READY (BATTERY TYPE LED lit) – The charger is ready for engine start.ENGINE START COOL DOWN XXX SECONDS REMAINING (BATTERY TYPE LED lit) – The charger is in a mandatory 3 minute (180 second) cool down state.
13. MAINTENANCE AND CAREA minimal amount of care can keep your battery charger working properly for years.• Clean the clamps each time you are
finished charging. Wipe off any battery fluid that may have come in contact with the clamps to prevent corrosion.
• Occasionally cleaning the case of the charger with a soft cloth will keep the finish shiny and help prevent corrosion.
• Coil the input and output cords neatly when storing the charger. This will help prevent accidental damage to the cords and charger.
• Store the charger unplugged from the AC power outlet in an upright position.
• Store inside, in a cool, dry place. Do not store the clamps on the handle, clipped together, on or around metal, or clipped to the cables.
14. TROUBLESHOOTING
PROBLEM POSSIBLE CAUSE REASON/SOLUTIONThree LEDs come on for 2 seconds, then turn off.
The charger is plugged into an AC outlet.
No problem; this is normal.
The charger will not turn on when properly connected.
AC outlet is dead.
Poor electrical connection.
Battery is defective.
Check for open fuse or circuit breaker supplying AC outlet.
Check power cord and extension cord for loose fitting plug.
Have battery checked.Battery clamps do not spark when touched together.
The charger is equipped with an auto-start feature. It will not supply current to the battery clamps until a battery is properly connected. The clamps will not spark if touched together.
No problem; this is a normal condition.
The battery is connected and the charger is on, but is not charging.
The charger is in tester mode, not charge mode.
Press the RATE SELECTION button to activate the charge mode and select a rate.
No reading on the digital display.
Charger is not plugged in.
No power at the receptacle.
The display is in sleep mode, during charging.
Plug the charger into an AC outlet.
Check for open fuse or circuit breaker supplying AC outlet.
Press the Display button to turn the display back on.
• 12 •
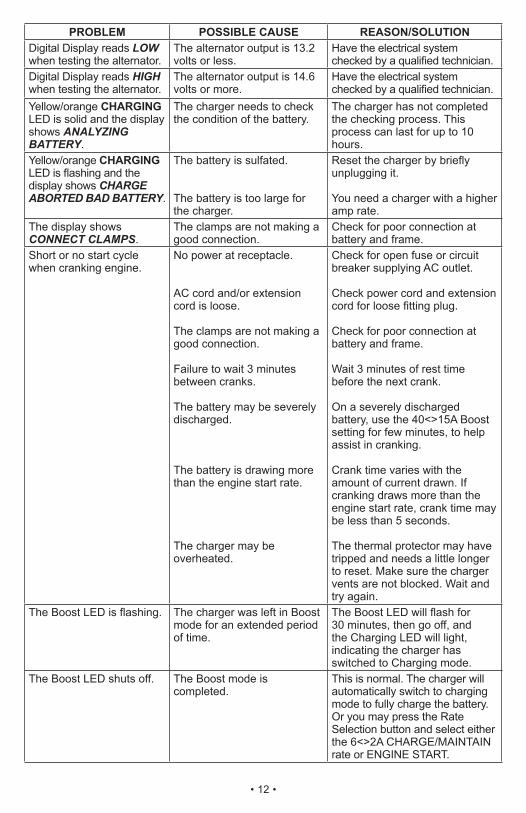
PROBLEM POSSIBLE CAUSE REASON/SOLUTIONDigital Display reads LOW when testing the alternator.
The alternator output is 13.2 volts or less.
Have the electrical system checked by a qualified technician.
Digital Display reads HIGH when testing the alternator.
The alternator output is 14.6 volts or more.
Have the electrical system checked by a qualified technician.
Yellow/orange CHARGING LED is solid and the display shows ANALYZING BATTERY.
The charger needs to check the condition of the battery.
The charger has not completed the checking process. This process can last for up to 10 hours.
Yellow/orange CHARGING LED is flashing and the display shows CHARGE ABORTED BAD BATTERY.
The battery is sulfated.
The battery is too large for the charger.
Reset the charger by briefly unplugging it.
You need a charger with a higher amp rate.
The display shows CONNECT CLAMPS.
The clamps are not making a good connection.
Check for poor connection at battery and frame.
Short or no start cycle when cranking engine.
No power at receptacle.
AC cord and/or extension cord is loose.
The clamps are not making a good connection.
Failure to wait 3 minutes between cranks.
The battery may be severely discharged.
The battery is drawing more than the engine start rate.
The charger may be overheated.
Check for open fuse or circuit breaker supplying AC outlet.
Check power cord and extension cord for loose fitting plug.
Check for poor connection at battery and frame.
Wait 3 minutes of rest time before the next crank.
On a severely discharged battery, use the 40<>15A Boost setting for few minutes, to help assist in cranking.
Crank time varies with the amount of current drawn. If cranking draws more than the engine start rate, crank time may be less than 5 seconds. The thermal protector may have tripped and needs a little longer to reset. Make sure the charger vents are not blocked. Wait and try again.
The Boost LED is flashing. The charger was left in Boost mode for an extended period of time.
The Boost LED will flash for 30 minutes, then go off, and the Charging LED will light, indicating the charger has switched to Charging mode.
The Boost LED shuts off. The Boost mode is completed.
This is normal. The charger will automatically switch to charging mode to fully charge the battery. Or you may press the Rate Selection button and select either the 6<>2A CHARGE/MAINTAIN rate or ENGINE START.

• 13 •
15. BEFORE RETURNING FOR REPAIRS
• When a charging problem arises, make certain that the battery is capable of accepting a normal charge. Double check all connections, the AC outlet for a full 120 volts, the charger clamps for correct polarity and the quality of the connections from the cables to the clamps and from the clamps to the battery system. The clamps must be clean.
• When an UNKNOWN OPERATING PROBLEM arises, please read the complete manual and call the customer service number for information. This will usually eliminate the need for return.
If the above solutions do not eliminate the problem, or for information about troubleshooting or replacement parts,
call toll-free from anywhere in the U.S.A. 1-800-732-7764
7:00 am to 5:00 pm CT, Monday through Friday
• 14 •
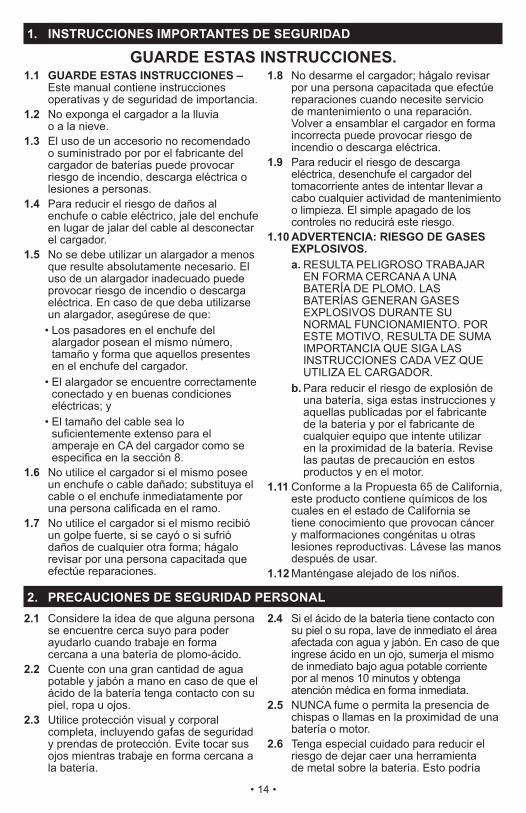
1. INSTRUCCIONES IMPORTANTES DE SEGURIDAD
GUARDE ESTAS INSTRUCCIONES.1.1 GUARDE ESTAS INSTRUCCIONES –
Este manual contiene instrucciones operativas y de seguridad de importancia.
1.2 No exponga el cargador a la lluvia o a la nieve.
1.3 El uso de un accesorio no recomendado o suministrado por por el fabricante del cargador de baterías puede provocar riesgo de incendio, descarga eléctrica o lesiones a personas.
1.4 Para reducir el riesgo de daños al enchufe o cable eléctrico, jale del enchufe en lugar de jalar del cable al desconectar el cargador.
1.5 No se debe utilizar un alargador a menos que resulte absolutamente necesario. El uso de un alargador inadecuado puede provocar riesgo de incendio o descarga eléctrica. En caso de que deba utilizarse un alargador, asegúrese de que:• Los pasadores en el enchufe del
alargador posean el mismo número, tamaño y forma que aquellos presentes en el enchufe del cargador.
• El alargador se encuentre correctamente conectado y en buenas condiciones eléctricas; y
• El tamaño del cable sea lo suficientemente extenso para el amperaje en CA del cargador como se especifica en la sección 8.
1.6 No utilice el cargador si el mismo posee un enchufe o cable dañado; substituya el cable o el enchufe inmediatamente por una persona calificada en el ramo.
1.7 No utilice el cargador si el mismo recibió un golpe fuerte, si se cayó o si sufrió daños de cualquier otra forma; hágalo revisar por una persona capacitada que efectúe reparaciones.
1.8 No desarme el cargador; hágalo revisar por una persona capacitada que efectúe reparaciones cuando necesite servicio de mantenimiento o una reparación. Volver a ensamblar el cargador en forma incorrecta puede provocar riesgo de incendio o descarga eléctrica.
1.9 Para reducir el riesgo de descarga eléctrica, desenchufe el cargador del tomacorriente antes de intentar llevar a cabo cualquier actividad de mantenimiento o limpieza. El simple apagado de los controles no reducirá este riesgo.
1.10 ADVERTENCIA: RIESGO DE GASES EXPLOSIVOS.a. RESULTA PELIGROSO TRABAJAR
EN FORMA CERCANA A UNA BATERÍA DE PLOMO. LAS BATERÍAS GENERAN GASES EXPLOSIVOS DURANTE SU NORMAL FUNCIONAMIENTO. POR ESTE MOTIVO, RESULTA DE SUMA IMPORTANCIA QUE SIGA LAS INSTRUCCIONES CADA VEZ QUE UTILIZA EL CARGADOR.
b. Para reducir el riesgo de explosión de una batería, siga estas instrucciones y aquellas publicadas por el fabricante de la batería y por el fabricante de cualquier equipo que intente utilizar en la proximidad de la batería. Revise las pautas de precaución en estos productos y en el motor.
1.11 Conforme a la Propuesta 65 de California, este producto contiene químicos de los cuales en el estado de California se tiene conocimiento que provocan cáncer y malformaciones congénitas u otras lesiones reproductivas. Lávese las manos después de usar.
1.12 Manténgase alejado de los niños.
2. PRECAUCIONES DE SEGURIDAD PERSONAL2.1 Considere la idea de que alguna persona
se encuentre cerca suyo para poder ayudarlo cuando trabaje en forma cercana a una batería de plomo-ácido.
2.2 Cuente con una gran cantidad de agua potable y jabón a mano en caso de que el ácido de la batería tenga contacto con su piel, ropa u ojos.
2.3 Utilice protección visual y corporal completa, incluyendo gafas de seguridad y prendas de protección. Evite tocar sus ojos mientras trabaje en forma cercana a la batería.
2.4 Si el ácido de la batería tiene contacto con su piel o su ropa, lave de inmediato el área afectada con agua y jabón. En caso de que ingrese ácido en un ojo, sumerja el mismo de inmediato bajo agua potable corriente por al menos 10 minutos y obtenga atención médica en forma inmediata.
2.5 NUNCA fume o permita la presencia de chispas o llamas en la proximidad de una batería o motor.
2.6 Tenga especial cuidado para reducir el riesgo de dejar caer una herramienta de metal sobre la batería. Esto podría
• 15 •
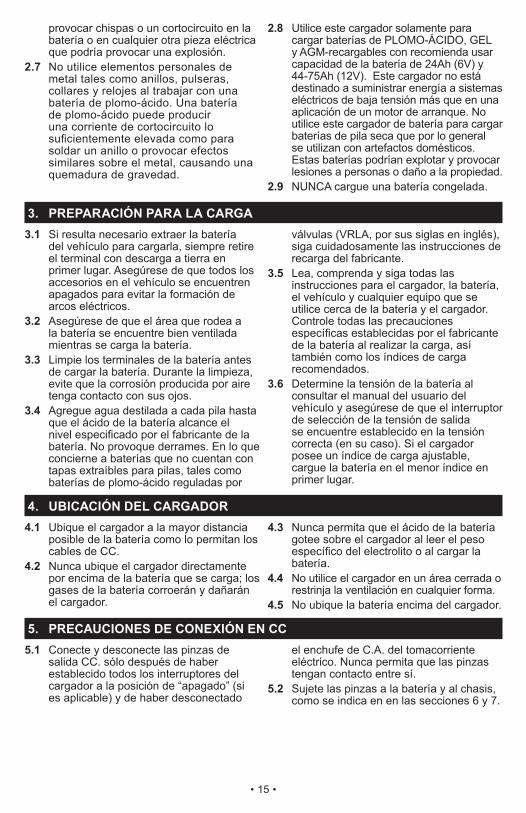
provocar chispas o un cortocircuito en la batería o en cualquier otra pieza eléctrica que podría provocar una explosión.
2.7 No utilice elementos personales de metal tales como anillos, pulseras, collares y relojes al trabajar con una batería de plomo-ácido. Una batería de plomo-ácido puede producir una corriente de cortocircuito lo suficientemente elevada como para soldar un anillo o provocar efectos similares sobre el metal, causando una quemadura de gravedad.
2.8 Utilice este cargador solamente para cargar baterías de PLOMO-ÁCIDO, GEL y AGM-recargables con recomienda usar capacidad de la batería de 24Ah (6V) y 44-75Ah (12V). Este cargador no está destinado a suministrar energía a sistemas eléctricos de baja tensión más que en una aplicación de un motor de arranque. No utilice este cargador de batería para cargar baterías de pila seca que por lo general se utilizan con artefactos domésticos. Estas baterías podrían explotar y provocar lesiones a personas o daño a la propiedad.
2.9 NUNCA cargue una batería congelada.
3. PREPARACIÓN PARA LA CARGA 3.1 Si resulta necesario extraer la batería
del vehículo para cargarla, siempre retire el terminal con descarga a tierra en primer lugar. Asegúrese de que todos los accesorios en el vehículo se encuentren apagados para evitar la formación de arcos eléctricos.
3.2 Asegúrese de que el área que rodea a la batería se encuentre bien ventilada mientras se carga la batería.
3.3 Limpie los terminales de la batería antes de cargar la batería. Durante la limpieza, evite que la corrosión producida por aire tenga contacto con sus ojos.
3.4 Agregue agua destilada a cada pila hasta que el ácido de la batería alcance el nivel especificado por el fabricante de la batería. No provoque derrames. En lo que concierne a baterías que no cuentan con tapas extraíbles para pilas, tales como baterías de plomo-ácido reguladas por
válvulas (VRLA, por sus siglas en inglés), siga cuidadosamente las instrucciones de recarga del fabricante.
3.5 Lea, comprenda y siga todas las instrucciones para el cargador, la batería, el vehículo y cualquier equipo que se utilice cerca de la batería y el cargador. Controle todas las precauciones específicas establecidas por el fabricante de la batería al realizar la carga, así también como los índices de carga recomendados.
3.6 Determine la tensión de la batería al consultar el manual del usuario del vehículo y asegúrese de que el interruptor de selección de la tensión de salida se encuentre establecido en la tensión correcta (en su caso). Si el cargador posee un índice de carga ajustable, cargue la batería en el menor índice en primer lugar.
4. UBICACIÓN DEL CARGADOR4.1 Ubique el cargador a la mayor distancia
posible de la batería como lo permitan los cables de CC.
4.2 Nunca ubique el cargador directamente por encima de la batería que se carga; los gases de la batería corroerán y dañarán el cargador.
4.3 Nunca permita que el ácido de la batería gotee sobre el cargador al leer el peso específico del electrolito o al cargar la batería.
4.4 No utilice el cargador en un área cerrada o restrinja la ventilación en cualquier forma.
4.5 No ubique la batería encima del cargador.
5. PRECAUCIONES DE CONEXIÓN EN CC5.1 Conecte y desconecte las pinzas de
salida CC. sólo después de haber establecido todos los interruptores del cargador a la posición de “apagado” (si es aplicable) y de haber desconectado
el enchufe de C.A. del tomacorriente eléctrico. Nunca permita que las pinzas tengan contacto entre sí.
5.2 Sujete las pinzas a la batería y al chasis, como se indica en en las secciones 6 y 7.
• 16 •
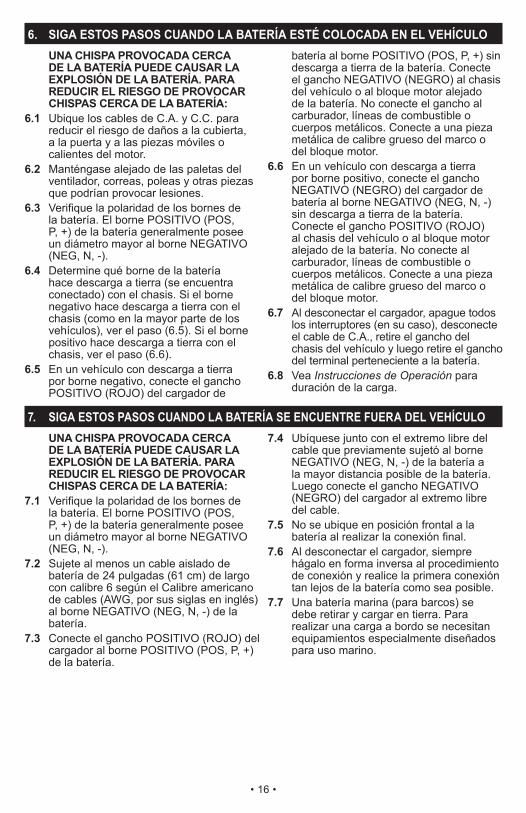
6. SIGA ESTOS PASOS CUANDO LA BATERÍA ESTÉ COLOCADA EN EL VEHÍCULOUNA CHISPA PROVOCADA CERCA DE LA BATERÍA PUEDE CAUSAR LA EXPLOSIÓN DE LA BATERÍA. PARA REDUCIR EL RIESGO DE PROVOCAR CHISPAS CERCA DE LA BATERÍA:
6.1 Ubique los cables de C.A. y C.C. para reducir el riesgo de daños a la cubierta, a la puerta y a las piezas móviles o calientes del motor.
6.2 Manténgase alejado de las paletas del ventilador, correas, poleas y otras piezas que podrían provocar lesiones.
6.3 Verifique la polaridad de los bornes de la batería. El borne POSITIVO (POS, P, +) de la batería generalmente posee un diámetro mayor al borne NEGATIVO (NEG, N, -).
6.4 Determine qué borne de la batería hace descarga a tierra (se encuentra conectado) con el chasis. Si el borne negativo hace descarga a tierra con el chasis (como en la mayor parte de los vehículos), ver el paso (6.5). Si el borne positivo hace descarga a tierra con el chasis, ver el paso (6.6).
6.5 En un vehículo con descarga a tierra por borne negativo, conecte el gancho POSITIVO (ROJO) del cargador de
batería al borne POSITIVO (POS, P, +) sin descarga a tierra de la batería. Conecte el gancho NEGATIVO (NEGRO) al chasis del vehículo o al bloque motor alejado de la batería. No conecte el gancho al carburador, líneas de combustible o cuerpos metálicos. Conecte a una pieza metálica de calibre grueso del marco o del bloque motor.
6.6 En un vehículo con descarga a tierra por borne positivo, conecte el gancho NEGATIVO (NEGRO) del cargador de batería al borne NEGATIVO (NEG, N, -) sin descarga a tierra de la batería. Conecte el gancho POSITIVO (ROJO) al chasis del vehículo o al bloque motor alejado de la batería. No conecte al carburador, líneas de combustible o cuerpos metálicos. Conecte a una pieza metálica de calibre grueso del marco o del bloque motor.
6.7 Al desconectar el cargador, apague todos los interruptores (en su caso), desconecte el cable de C.A., retire el gancho del chasis del vehículo y luego retire el gancho del terminal perteneciente a la batería.
6.8 Vea Instrucciones de Operación para duración de la carga.
7. SIGA ESTOS PASOS CUANDO LA BATERÍA SE ENCUENTRE FUERA DEL VEHÍCULOUNA CHISPA PROVOCADA CERCA DE LA BATERÍA PUEDE CAUSAR LA EXPLOSIÓN DE LA BATERÍA. PARA REDUCIR EL RIESGO DE PROVOCAR CHISPAS CERCA DE LA BATERÍA:
7.1 Verifique la polaridad de los bornes de la batería. El borne POSITIVO (POS, P, +) de la batería generalmente posee un diámetro mayor al borne NEGATIVO (NEG, N, -).
7.2 Sujete al menos un cable aislado de batería de 24 pulgadas (61 cm) de largo con calibre 6 según el Calibre americano de cables (AWG, por sus siglas en inglés) al borne NEGATIVO (NEG, N, -) de la batería.
7.3 Conecte el gancho POSITIVO (ROJO) del cargador al borne POSITIVO (POS, P, +) de la batería.
7.4 Ubíquese junto con el extremo libre del cable que previamente sujetó al borne NEGATIVO (NEG, N, -) de la batería a la mayor distancia posible de la batería. Luego conecte el gancho NEGATIVO (NEGRO) del cargador al extremo libre del cable.
7.5 No se ubique en posición frontal a la batería al realizar la conexión final.
7.6 Al desconectar el cargador, siempre hágalo en forma inversa al procedimiento de conexión y realice la primera conexión tan lejos de la batería como sea posible.
7.7 Una batería marina (para barcos) se debe retirar y cargar en tierra. Para realizar una carga a bordo se necesitan equipamientos especialmente diseñados para uso marino.
• 17 •
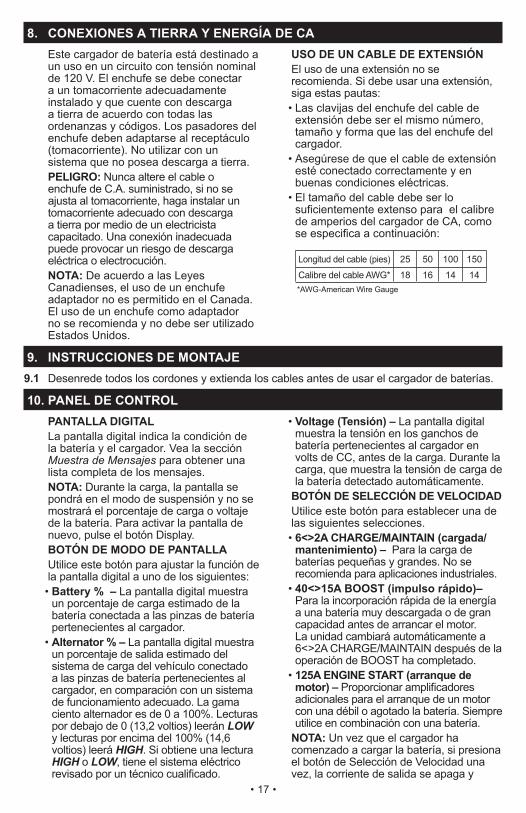
8. CONEXIONES A TIERRA Y ENERGÍA DE CAEste cargador de batería está destinado a un uso en un circuito con tensión nominal de 120 V. El enchufe se debe conectar a un tomacorriente adecuadamente instalado y que cuente con descarga a tierra de acuerdo con todas las ordenanzas y códigos. Los pasadores del enchufe deben adaptarse al receptáculo (tomacorriente). No utilizar con un sistema que no posea descarga a tierra.PELIGRO: Nunca altere el cable o enchufe de C.A. suministrado, si no se ajusta al tomacorriente, haga instalar un tomacorriente adecuado con descarga a tierra por medio de un electricista capacitado. Una conexión inadecuada puede provocar un riesgo de descarga eléctrica o electrocución. NOTA: De acuerdo a las Leyes Canadienses, el uso de un enchufe adaptador no es permitido en el Canada. El uso de un enchufe como adaptador no se recomienda y no debe ser utilizado Estados Unidos.
USO DE UN CABLE DE EXTENSIÓNEl uso de una extensión no se recomienda. Si debe usar una extensión, siga estas pautas:• Las clavijas del enchufe del cable de
extensión debe ser el mismo número, tamaño y forma que las del enchufe del cargador.
• Asegúrese de que el cable de extensión esté conectado correctamente y en buenas condiciones eléctricas.
• El tamaño del cable debe ser lo suficientemente extenso para el calibre de amperios del cargador de CA, como se especifica a continuación:
Longitud del cable (pies) 25 50 100 150
Calibre del cable AWG* 18 16 14 14*AWG-American Wire Gauge
9. INSTRUCCIONES DE MONTAJE9.1 Desenrede todos los cordones y extienda los cables antes de usar el cargador de baterías.
10. PANEL DE CONTROLPANTALLA DIGITALLa pantalla digital indica la condición de la batería y el cargador. Vea la sección Muestra de Mensajes para obtener una lista completa de los mensajes.NOTA: Durante la carga, la pantalla se pondrá en el modo de suspensión y no se mostrará el porcentaje de carga o voltaje de la batería. Para activar la pantalla de nuevo, pulse el botón Display.BOTÓN DE MODO DE PANTALLAUtilice este botón para ajustar la función de la pantalla digital a uno de los siguientes:• Battery % – La pantalla digital muestra
un porcentaje de carga estimado de la batería conectada a las pinzas de batería pertenecientes al cargador.
• Alternator % – La pantalla digital muestra un porcentaje de salida estimado del sistema de carga del vehículo conectado a las pinzas de batería pertenecientes al cargador, en comparación con un sistema de funcionamiento adecuado. La gama ciento alternador es de 0 a 100%. Lecturas por debajo de 0 (13,2 voltios) leerán LOW y lecturas por encima del 100% (14,6 voltios) leerá HI.GH. Si obtiene una lectura HI.GH o LOW, tiene el sistema eléctrico revisado por un técnico cualificado.
• Voltage (Tensión) – La pantalla digital muestra la tensión en los ganchos de batería pertenecientes al cargador en volts de CC, antes de la carga. Durante la carga, que muestra la tensión de carga de la batería detectado automáticamente.
BOTÓN DE SELECCIÓN DE VELOCIDADUtilice este botón para establecer una de las siguientes selecciones.• 6<>2A CHARGE/MAINTAIN (cargada/
mantenimiento) – Para la carga de baterías pequeñas y grandes. No se recomienda para aplicaciones industriales.
• 40<>15A BOOST (impulso rápido)– Para la incorporación rápida de la energía a una batería muy descargada o de gran capacidad antes de arrancar el motor. La unidad cambiará automáticamente a 6<>2A CHARGE/MAINTAIN después de la operación de BOOST ha completado.
• 125A ENGINE START (arranque de motor) – Proporcionar amplificadores adicionales para el arranque de un motor con una débil o agotado la batería. Siempre utilice en combinación con una batería.
NOTA: Un vez que el cargador ha comenzado a cargar la batería, si presiona el botón de Selección de Velocidad una vez, la corriente de salida se apaga y
• 18 •
la pantalla mostrará OFF (Apagado) y después el voltaje de la batería. Si pulsa el botón de Rate Selection (selección de velocidad) de nuevo, la corriente pasará de nuevo en el mismo ajuste que estaba cuando se apagó.INDICADORES LEDSLED REVERSED (pinzas invertido) [rojo] parpadea: Las conexiones están inversas.LED CHARGING (carga) [amarillo / naranja] encendido: El cargador está cargando la batería.LED CHARGING (carga) [amarillo / naranja] parpadea: El cargador está en modo anulada.LED CHARGED/MAINTAINING (cargado/mantenimiento) [verde] pulsante: La carga de la bateria está completa y que el cargador cambió a modo mantener.NOTA: Consulte la sección Instrucciones de Operación para obtener una descripción completa de los modos del cargador.BOTÓN DE TIPO DE BATERÍAUtilice este botón para establecer el tipo de batería.
• Standard – Se utiliza en automóviles, camiones y motocicletas, este tipo de baterías cuentan con tapas de ventilación y a menudo se las clasifica como de “bajo mantenimiento” o “libre de mantenimiento”. Este tipo de baterías está diseñado para suministrar rápidas ráfagas de energía (tales como los arranques de motores) y poseen un mayor recuento en placa. Las placas
asimismo serán más delgadas y poseerán una composición de materiales algo diferente. Las baterías regulares no se deben utilizar en aplicaciones de ciclo profundo.
• AGM – La construcción de la malla de fibra de vidrio absorbente permite la suspensión del electrolito en extrema proximidad con el material activo de la placa. En teoría, esto aumenta tanto la eficiencia de la descarga como de la recarga. Las baterías AGM constituyen una variedad de las baterías Selladas VRLA (de plomo-ácido reguladas por válvula). Entre sus usos más comunes se encuentran baterías con arranque de motor de alto rendimiento, para deportes intensos, de ciclo profundo, solares y de acumuladores.
• GEL – El electrolito en una celda de gel de sílice tiene un aditivo que hace que se configura o endurecer. Los voltajes de recarga de este tipo de células son más bajos que los de los otros estilos de la batería de plomo-ácido. Ésta es probablemente la célula más sensible en términos de las reacciones adversas a la carga de sobretensión. Las baterías de gel son los más utilizados en aplicaciones de ciclos MUY PROFUNDOS y puede durar un poco más en aplicaciones en clima caliente. Si el cargador de baterías incorrecto se utiliza con una batería de celda de gel, bajo rendimiento y el fracaso prematuro como resultado.
• DieHard Platinum – Seleccione esta opción sólo si la batería es una batería Platinum DieHard.
11. INSTRUCCIONES DE OPERACIÓNADVERTENCIA: Una chispa provocada cerca de la batería puede causar una explosión.IMPORTANTE: No arranque el vehículo con el cargador conectado a la toma de CA, o puede resultar en daños al cargador.NOTA: Este cargador está equipado con un auto-rectificador. La corriente no llegará a las pinzas de la batería hasta que la batería Las pinzas no harán corto si se juntan una con otra. CARGA DE LA BATERÍA EN EL VEHÍCULO1. Apague todos los accesorios del
vehículo.2. Mantenga el cofre abierto.3. Limpie las terminales de la batería.4. Coloque el cargador sobre una
superficie seca y no inflamable.5. Coloque los cables de CA / CC lejos
de las aspas del ventilador, bandas, poleas y otras partes móviles.
6. Conectar la batería según las instrucciones que indicadas en las secciones 6 y 7.
7. Conecte el cargador a la toma de corriente.
8. Cuando se inicia el cargador, la pantalla mostrará DIEHARD.
9. Seleccione el tipo de batería y la velocidad deseada. Carga comenzará automáticamente. Vea la sección 12 para los detalles del mensaje CHARGING.
10. El LED amarillo / naranja se iluminará, y la pantalla mostrará ANALYZING BATTERY mientras el cargador determina que la batería esté conectada correctamente y el estado de la batería.
11. Cuando la carga está completa, desconecte el cargador de la alimentación de CA, retire la pinza del chasis del vehículo y quite la pinza de la terminal de la batería.
• 19 •
CARGA DE LA BATERÍA FUERA DEL VEHÍCULO1. Coloque la batería un área bien
ventilada.2. Limpie las terminales de la batería.3. Conectar la batería según las
instrucciones que indicadas en las secciones 6 y 7.
4. Conecte el cargador a la toma de corriente.
5. Cuando se inicia el cargador, la pantalla mostrará DIEHARD.
6. Seleccione el tipo de batería y la velocidad deseada. Carga comenzará automáticamente. Vea la sección 12 para los detalles del mensaje CHARGING.
7. El LED amarillo / naranja se iluminará, y la pantalla mostrará ANALYZING BATTERY mientras el cargador determina que la batería esté conectada correctamente y el estado de la batería.
8. Cuando la carga está completa, desconecte el cargador de la corriente AC, desconecte la pinza negativa, y por último la pinza positiva.
9. Una batería marina (de barco) se debe retirar y cargar en tierra.
MODO DE CARGA AUTOMÁTICACuando se realiza una carga automática, el cargador cambia del maintain mode [modo de mantenimiento] automáticamente después que la batería se cargue.
INDICADOR DE CONEXIÓN DE LA BATERÍASi el cargador no detecta una batería conectada correctamente, la carga no se iniciará y la pantalla digital mostrará uno de los dos mensajes. Si la pantalla muestra CONNECT CLAMPS, asegúrese de que el cargador está conectado a la batería y las puntas de conexión están limpias y hacen una buena conexión. Si la pantalla muestra WARNING CLAMPS REVERSED, desenchufe el cargador de la toma de corriente, invierta las conexiones de la batería y luego conecte el cargador de nuevo.FINALIZACIÓN DE LA CARGA Y MODO DE MANTENIMIENTO (MONITOREO A MODO DE FLOTE)La carga completa se señala mediante el LED verde pulsante y la pantalla digital que muestra FULLY CHARGED AUTO MAINTAINING. Esto significa que el cargador ha dejado de cargar y ha cambiado el funcionamiento al Modo de Mantener. NOTA: Si el cargador tiene que funcionar al máximo en corriente continua de mantenimiento a un periodo de 12 horas, se transladará al Modo de Anulada (véase la sección Carga Anulada). Esto es ocacionalmente causado por una pérdida de energía en la batería o la batería está dañada. Asegúrese que no escape de carga en la batería y si la hay evítela, en caso contrario, verifique o reémplace la batería.
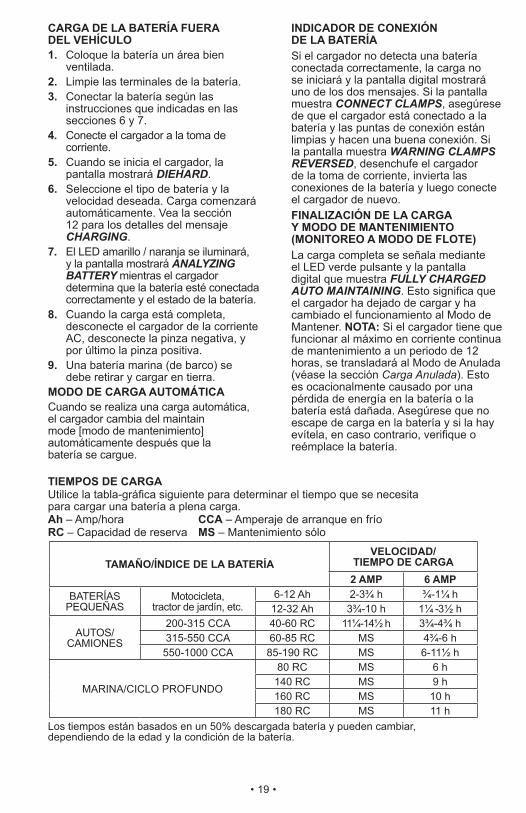
TIEMPOS DE CARGAUtilice la tabla-gráfica siguiente para determinar el tiempo que se necesita para cargar una batería a plena carga.Ah – Amp/hora CCA – Amperaje de arranque en fríoRC – Capacidad de reserva MS – Mantenimiento sólo
TAMAÑO/ÍNDICE DE LA BATERÍAVELOCIDAD/
TIEMPO DE CARGA2 AMP 6 AMP
BATERÍASPEQUEÑAS
Motocicleta,tractor de jardín, etc.
6-12 Ah 2-3¾ h ¾-1¼ h12-32 Ah 3¾-10 h 1¼ -3½ h
AUTOS/CAMIONES
200-315 CCA 40-60 RC 11¼-14½ h 3¾-4¾ h315-550 CCA 60-85 RC MS 4¾-6 h
550-1000 CCA 85-190 RC MS 6-11½ h
MARINA/CICLO PROFUNDO
80 RC MS 6 h140 RC MS 9 h160 RC MS 10 h180 RC MS 11 h
Los tiempos están basados en un 50% descargada batería y pueden cambiar, dependiendo de la edad y la condición de la batería.
• 20 •
MANTENIENDO UNA BATERÍA El 28.71328 carga y mantiene las baterías de 6 y 12 voltios, mantenerlos a carga completa.NOTA: La tecnología de modo de mantenimiento le permite cargar de forma segura y mantener una batería en buen estado durante largos períodos de tiempo. Ahora, los problemas con la batería, problemas eléctricos del vehículo, conexiones equivocadas u otras condiciones que surgan, podrías causar absorsión de corriente excesiva. De modo que, ocasionalmente seguimiento de su batería y el proceso de carga se requiere.MODO DE DESULFATACIÓNSi la batería está descargada por un periodo de tiempo prolongado, podría sulfatarse y no aceptar una carga normal. Si el cargador detecta una batería sulfatada, el cargador se cambiará a un modo especial de operación diseñado para este tipo de baterías. Si tiene éxito, la carga normal se reanudará después de que la batería está desulfatada. La desulfuración puede durar hasta 8 horas. Si la desulfuración falla, la carga se abortará, el LED amarillo / naranja parpadeará y la pantalla mostrará CHARGING ABORTED BAD BATTERY.CARGA ANULADASi no se puede completar la carga normalmente, la carga se anulará. Cuando la carga se interrumpe, la salida del cargador se apaga, la luz LED amarillo / naranja parpadeará y la pantalla mostrará CHARGING ABORTED BAD BATTERY. Para reajustar después de una carga rechazada, desenchufe el cargador del contacto de la CA, espere algunos minutos y luego conecte el cargador de nuevo.UTILIZAR LA FUNCIÓN DE ENCENDIDO DE MOTOR El cargador de batería se puede utilizar para impulsar el auto si la batería está baja. Siga todas las instrucciones y precauciones de seguridad en la carga de la batería. Use protección completo de los ojos y la ropa de protección.¡ADVERTENCIA: Utilizando la FUNCIÓN DE ARRANQUE DEL MOTOR SIN la batería instalada en el vehículo, dañará el sistema eléctrico!NOTA: Si usted ya ha cargado la batería y aún no arranca el auto, no utilice la opción de arranque, porque esto podría dañar el sistema eléctrico del vehículo. Haga revisar la batería.1. Con el cargador desenchufado
del tomacorriente de CA, conecte el cargador a la batería siguiendo
las instrucciones que figuran en la secciónes 6 y 7.
2. Con el cargador enchufado y conectado a la batería y chasis, pulse el botón de RATE SELECTION hasta que se encienda el LED ENGINE START.
3. Quando la pantalla muestra ENGINE START READY, déle arranque al motor hasta que se ponga en marcha o que pasen 3 segundos. Si el motor no arranca espere 3 minutos (hasta la pantalla muestre ENGINE START READY ) antes de intentarlo de nuevo. Esto permite al cargador y la batería que se enfríen.
NOTA: Bajo clima frío extremo o si la batería es inferior a 2 volts, cargue la batería por 5 minutos antes de poner en marcha el motor. 4. Si el motor no arranca, cargue la
batería por 5 minutos más antes de darle arranque nuevamente.
5. Después de que el motor se puso en marcha desenchufe el cable de alimentación de CA antes de desconectar las pinzas de la batería del vehículo.
NOTA: Si el motor gira, pero no enciende, no existe un problema con el sistema de arranque, sino en cualquier otra parte del vehículo. DEJE de darle arranque al motor hasta que el otro problema se diagnostique y se corrija.NOTAS SOBRE EL ARRANQUE DEL MOTOREn la secuencia de arranque que figura anteriormente el cargador se configura en uno de estos tres estados:• Esperar para dar arranque – El cargador
espera hasta que se le de arranque al motor antes de suministrarle amperes para que arranque. Después de 5 segundos, la pantalla cambiará a ENGINE START READY. Mientras espera que se ponga en marcha, la pantalla digital muestra ENGINE START READY.
• Dar arranque – Cuando el cargador detecta que se está dando arranque automáticamente dará la potencia máxima que se requiere para el sistema de arranque hasta 5 segundos o hasta que el intento de arranque se detenga. La pantalla digital muestra una cuenta regresiva del tiempo de arranque restante.
• Enfriar – Después de la puesta en marcha, el cargador entra en un estado de enfriamiento obligatorio de 3 minutos (180 segundos). La pantalla digital mostrará ENGINE START COOL DOWN XXX SECONDS REMAINING. La cuenta regresiva comienza en 180 y llega hasta
• 21 •
0. Después de 3 minutos, la pantalla digital cambiará de mostrar la cuenta a mostrar ENGINE START READY.
UTILIZAR EL PROBADOR DE TENSIÓN DE BATERÍA 1. Con el cargador desenchufado del
tomacorriente de CA, conecte el cargador a la batería siguiendo las instrucciones que figuran en las secciones anteriores.
2. Enchufe el cable de alimentación de CA del cargador al tomacorriente de CA.
3. Si fuera necesario, presione el botón TIPO DE BATERÍA hasta que el tipo correcto se indique.
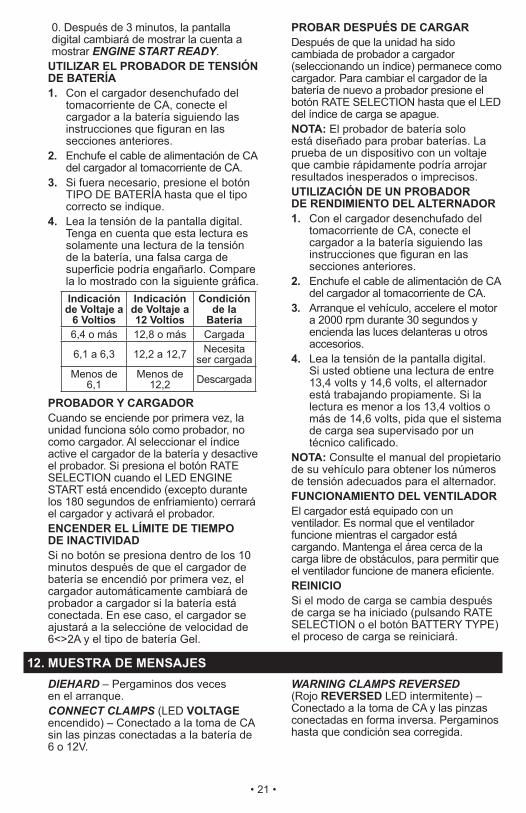
4. Lea la tensión de la pantalla digital. Tenga en cuenta que esta lectura es solamente una lectura de la tensión de la batería, una falsa carga de superficie podría engañarlo. Compare la lo mostrado con la siguiente gráfica.Indicación de Voltaje a
6 Voltios
Indicación de Voltaje a 12 Voltios
Condición de la
Batería6,4 o más 12,8 o más Cargada
6,1 a 6,3 12,2 a 12,7 Necesita ser cargada
Menos de 6,1
Menos de 12,2 Descargada
PROBADOR Y CARGADOR Cuando se enciende por primera vez, la unidad funciona sólo como probador, no como cargador. Al seleccionar el índice active el cargador de la batería y desactive el probador. Si presiona el botón RATE SELECTION cuando el LED ENGINE START está encendido (excepto durante los 180 segundos de enfriamiento) cerrará el cargador y activará el probador.ENCENDER EL LÍMITE DE TIEMPO DE INACTIVIDADSi no botón se presiona dentro de los 10 minutos después de que el cargador de batería se encendió por primera vez, el cargador automáticamente cambiará de probador a cargador si la batería está conectada. En ese caso, el cargador se ajustará a la seleccióne de velocidad de 6<>2A y el tipo de batería Gel.
PROBAR DESPUÉS DE CARGARDespués de que la unidad ha sido cambiada de probador a cargador (seleccionando un índice) permanece como cargador. Para cambiar el cargador de la batería de nuevo a probador presione el botón RATE SELECTION hasta que el LED del índice de carga se apague.NOTA: El probador de batería solo está diseñado para probar baterías. La prueba de un dispositivo con un voltaje que cambie rápidamente podría arrojar resultados inesperados o imprecisos.UTILIZACIÓN DE UN PROBADOR DE RENDIMIENTO DEL ALTERNADOR1. Con el cargador desenchufado del
tomacorriente de CA, conecte el cargador a la batería siguiendo las instrucciones que figuran en las secciones anteriores.
2. Enchufe el cable de alimentación de CA del cargador al tomacorriente de CA.
3. Arranque el vehículo, accelere el motor a 2000 rpm durante 30 segundos y encienda las luces delanteras u otros accesorios.
4. Lea la tensión de la pantalla digital. Si usted obtiene una lectura de entre 13,4 volts y 14,6 volts, el alternador está trabajando propiamente. Si la lectura es menor a los 13,4 voltios o más de 14,6 volts, pida que el sistema de carga sea supervisado por un técnico calificado.
NOTA: Consulte el manual del propietario de su vehículo para obtener los números de tensión adecuados para el alternador.FUNCIONAMIENTO DEL VENTILADOREl cargador está equipado con un ventilador. Es normal que el ventilador funcione mientras el cargador está cargando. Mantenga el área cerca de la carga libre de obstáculos, para permitir que el ventilador funcione de manera eficiente.REINICIOSi el modo de carga se cambia después de carga se ha iniciado (pulsando RATE SELECTION o el botón BATTERY TYPE) el proceso de carga se reiniciará.
12. MUESTRA DE MENSAJESDIEHARD – Pergaminos dos veces en el arranque.CONNECT CLAMPS (LED VOLTAGE encendido) – Conectado a la toma de CA sin las pinzas conectadas a la batería de 6 o 12V.
WARNING CLAMPS REVERSED (Rojo REVERSED LED intermitente) – Conectado a la toma de CA y las pinzas conectadas en forma inversa. Pergaminos hasta que condición sea corregida.
• 22 •
ANALYZING BATTERY (Amarillo / naranja CHARGING LED encendido) – Conectado a la toma de CA, conectado a una batería 6 o 12V correctamente y una velocidad de carga ha sido seleccionado.CHARGING 6V – XX% (Amarillo / naranja CHARGING LED encendido) – Conectado a la toma de CA y correctamente conectado a una batería de 6V descargada.CHARGING 12V – XX% (Amarillo / naranja CHARGING LED encendido) – Conectado a la toma de CA y correctamente conectado a una batería de 12V descargada.FULLY CHARGED AUTO MAINTAINING (Verde CHARGED / MAINTAINING LED sólido) – Conectada a la toma de CA y correctamente conectado a una batería completamente cargada 6 o 12V.CHARGING ABORTED BAD BATTERY (Amarillo / naranja LED intermitente) – Las circunstancias que pueden causar una situación de abortar durante la carga:• La batería está muy sulfatada o tiene
una celda en corto y no se puede alcanzar una carga completa.
• La batería es demasiado grande o hay un banco de baterías y no alcanza la carga completa en un período de tiempo establecido.
Las circunstancias que pueden causar una situación de abortar durante mantienen:• La batería está muy sulfatada o tiene una
célula débil y no mantener la carga.• Hay un gran sorteo de la batería y
el cargador tiene que suministrar su máximo mantener vigente durante un período de 12 horas para mantener la batería a plena carga.
LIFE DEMANDS DIEHARD – La carga se completa y las pinzas que se haya desconectado.ENGINE START READY (LED BATTERY TYPE encendido) – El cargador está listo para arrancar el motor.ENGINE START COOL DOWN XXX SECONDS REMAINING (LED BATTERY TYPE encendido) – El cargador ha entrado en un 3 minutos obligatoria (180 segundos) estado de enfriamiento.
13. MANTENIMIENTO Y CUIDADOCon cuidados mínimos puede mantener el cargador de baterías funcionando correctamente durante años.• Limpie las pinzas cada vez que termine
de usar el cargador. Limpie el fluido de la batería que podría haber estado en contacto con las pinzas para evitar la corrosión.
• De vez en cuando, limpie la carcasa del cargador con un paño suave para conservar el acabado brillante y evitar la corrosión.
• Enrolle los cables de entrada y salida cuidadosamente cuando almacene el cargador. Esto ayudará a evitar daños accidentales a los cables y el cargador.
• Guarde el cargador desenchufado de la toma de alimentación de CA en posición vertical.
• Debe conservarse en un lugar fresco y seco. No guarde las pinzas en el mango, unidas con un clip, en o alrededor del metal, o sujeta a los cables.
14. LOCALIZACIÓN Y RESOLUCIÓN DE PROBLEMAS
PROBLEMA CAUSA POSIBLE SOLUCIÓNTres luces LED encienden por 2 segundos, después se apagan.
El cargador se conecta al tomacorriente de CA.
No hay problema; es una condición normal.
El cargador no se enciende incluso al estar bien conectado.
Tomacorriente de CA fuera de funcionamiento.
Mala conexión eléctrica.
Batería defectuosa.
Controle la posible presencia de fusibles abiertos o disyuntores que suministren energía al tomacorriente de CA.
Controle la posible pérdida del enchufe perteneciente a los cables de alimentación o al alargador.
Haga revisar la batería.
• 23 •
PROBLEMA CAUSA POSIBLE SOLUCIÓNLas pinzas de la batería no hacen corto al juntarse una con otra.
Este cargador está equipado con un auto-rectificador. Este no permitirá paso de corriente si las pinzas de la batería no están conectadas en forma correcta. Significado, las pinzas no harán corto si se juntan una con otra.
No hay problema; es una condición normal.
La batería se encuentra conectada y el cargador encendido, pero no carga.
El cargador está en el modo probador, no el de carga.
Presione el botón RATE SELECTION para activar el modo de carga y seleccione la velocidad.
No hay lectura en la pantalla digital.
El cargador no está enchufado.
No hay corriente en el receptáculo.
La pantalla está en modo de suspensión, durante la carga.
Enchufe el cargador a una toma de CA.
Verifique que el fusible o interruptor de circuito abierto suministrando toma de CA.
Pulse el botón Display para encender la pantalla de nuevo.
Pantalla Digital lea LOW al probar el alternador.
La salida del alternador es de 13,2 voltios o menos.
Tener el sistema eléctrico revisado por un técnico cualificado.
Pantalla Digital lea HIGH al probar el alternador.
La salida del alternador es de 14,6 voltios o más.
Tener el sistema eléctrico revisado por un técnico cualificado.
El amarillo / naranja LED CHARGING es sólida y la pantalla muestra ANALYZING BATTERY.
El cargador tiene que comprobar el estado de la batería.
El cargador no ha completado el proceso de verificación. Este proceso puede durar hasta 10 horas.
El amarillo / naranja LED CHARGING parpadea y en la pantalla muestra CHARGE ABORTED BAD BATTERY.
La batería está sulfatada.
La batería es demasiado grande para el cargador.
Brevemente desenchufe el cargador para restablecer.
Usted necesita un cargador con una velocidad amperios más alta.
La pantalla muestra CONNECT CLAMPS.
Las pinzas no hacen buena conexión.
Revise la conexión falsa a la batería y la carrocería.
El LED Boost parpadea.
El cargador se deja en el modo Boost durante un período prolongado de tiempo.
El LED Boost parpadeará durante 30 minutos y luego se apaga, y el LED Charging se iluminará, indicando que el cargador ha cambiado al modo de carga.
La luz LED Boost apaga.
Se ha completado el modo Boost.
Esto es normal. El cargador cambiará automáticamente al modo de carga para cargar completamente la batería. También puede presionar el botón RATE SELECTION y seleccione la velocidad de 6<>2A CHARGE/MAINTAIN o ENGINE START.
• 24 •
PROBLEMA CAUSA POSIBLE SOLUCIÓNCiclo reducido o sin inicio al arrancar el motor.
No hay electricidad en el tomacorriente.
Cable de CA o alargador suelto.
Las pinzas no se encuentran bien conectados.
No espera 3 minutos (180 segundos) entre los arranques.
La batería podría encontrarse severamente descargada.
Consumo mayor a el índice de arranque del motor.
El cargador podría encontrarse en estado de recalentamiento.
Verifique la posible presencia de fusibles abiertos o disyuntores que suministren energía al tomacorriente de CA.
Verifique la posible pérdida del enchufe perteneciente a los cables de alimentación o al alargador.
Verifique la posible presencia de una conexión defectuosa en la batería y en el bastidor.
Aguarde 3 minutos en tiempo de descanso antes del próximo arranque.
Con batería muy descargada, utilice 40<>15A ajuste de Boost durante unos pocos minutos, para contribuir al arranque.
El tiempo de arranque varía según la cantidad de corriente consumida. Si el arranque consume más el índice de arranque del motor, el tiempo de arranque podría ser menor a 3 segundos. El protector térmico podría encontrarse desconectado y necesitar un mayor tiempo de descanso. Asegúrese de que los ventiladores del cargador no se encuentren bloqueados. Aguarde un momento y pruebe nuevamente.
15. ANTES DE DEVOLVER A REPARACIONES
• Cuando surja un problema de carga, asegúrese de que la batería puede recibir una carga normal. Verificar dos veces todas las conexiones, el toma de CA para obtener 120 voltios completos, las pinzas del cargador para lograr una polaridad correcta y la calidad de las conexiones de los cables a las pinzas y de las pinzas al sistema de la batería. Las pinzas deben estar limpios.
• Cuando surja un PROBLEMA DE FUNCIONAMIENTO DESCONOCIDO, por favor lea todo el manual y comuníquese con el número de atención al cliente para más información que no haga falta la devolución.
Si estas soluciones no eliminan el problema o si desea obtener más información
sobre la solución de problemas o repuestos, llame gratis al desde cualquier parte del U.S.A.
1-800-732-7764 Lunes-viernes 7:00am-5:00pm CT
Related Documents


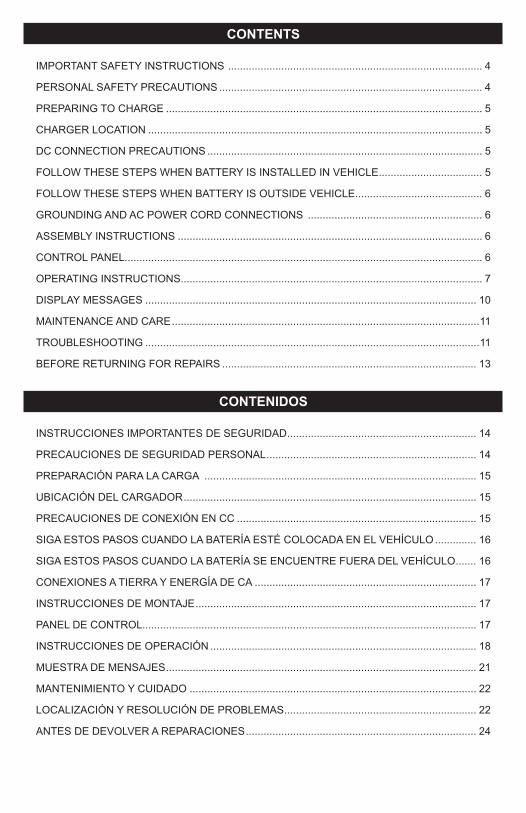
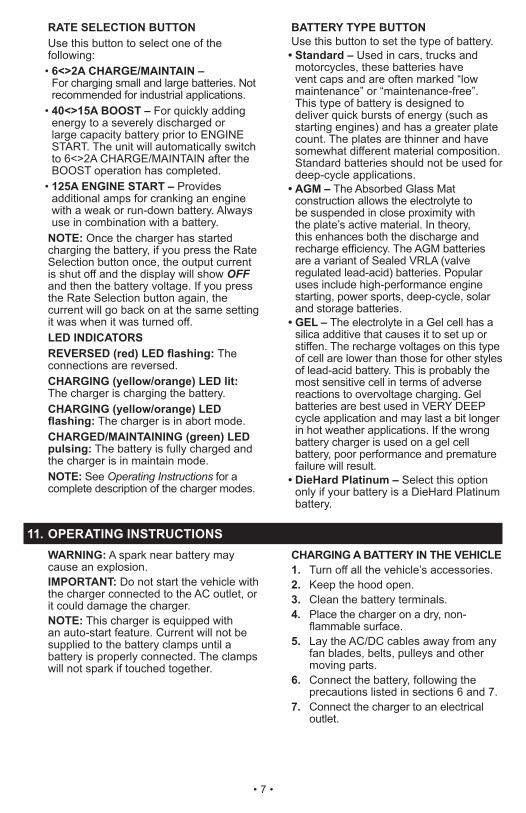
![Untitled-1 []CapacityFactorsWithDifferentTemperature BatteryType-20oC-10oC 0oC 5oC 10oC 20oC 25oC 30oC 40oC 45oC GEL Battery AGM Battery 6V&12V 2V 6V&12V 2V 55% 65% 46% 55% 70% 66](https://static.cupdf.com/doc/110x72/5e673ce2b6510f3ea235caca/untitled-1-capacityfactorswithdifferenttemperature-batterytype-20oc-10oc-0oc.jpg)