2.1 Channel Sound Bar with Wireless Subwoofer Instruction Manual L21WSB17 12 Month Manufacturer’s Warranty

Welcome message from author
This document is posted to help you gain knowledge. Please leave a comment to let me know what you think about it! Share it to your friends and learn new things together.
Transcript
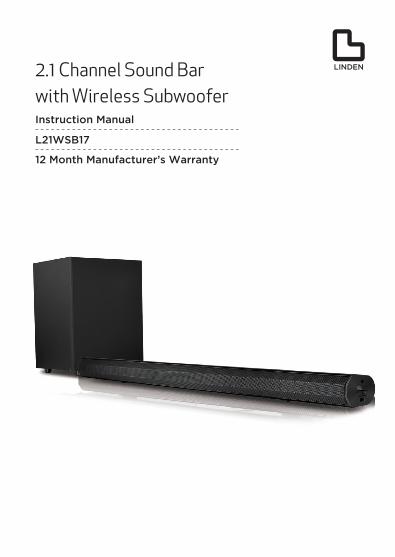
2.1 Channel Sound Bar with Wireless SubwooferInstruction Manual
L21WSB17
12 Month Manufacturer’s Warranty
1
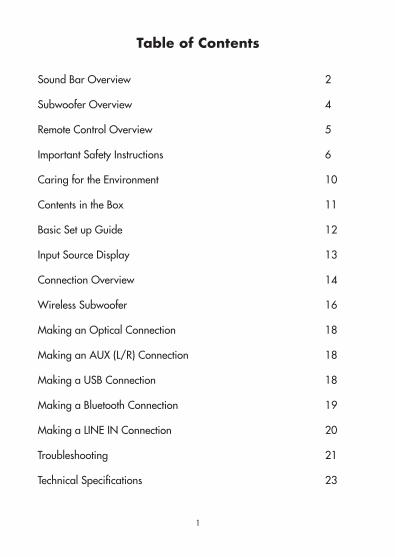
Sound Bar Overview 2
Subwoofer Overview 4
Remote Control Overview 5
Important Safety Instructions 6
Caring for the Environment 10
Contents in the Box 11
Basic Set up Guide 12
Input Source Display 13
Connection Overview 14
Wireless Subwoofer 16
Making an Optical Connection 18
Making an AUX (L/R) Connection 18
Making a USB Connection 18
Making a Bluetooth Connection 19
Making a LINE IN Connection 20
Troubleshooting 21
Technical Specifications 23
Table of Contents
2
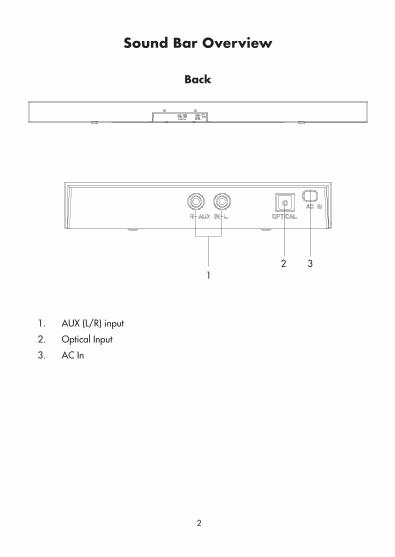
Sound Bar Overview
Back
1. AUX (L/R) input
2. Optical Input
3. AC In
12 3

3
5
6
7
8
9
4
Side
Sound Bar Overview
4. Power Button
5. Line in (3.5mm) input
6. Volume Control Up
7. Volume Control Down
8. USB input
9. Source: USB, Bluetooth, Optical, AUX, Line In,
4
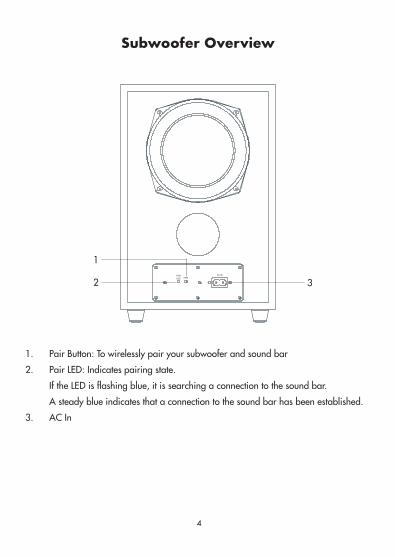
Subwoofer Overview
1. Pair Button: To wirelessly pair your subwoofer and sound bar
2. Pair LED: Indicates pairing state.
If the LED is flashing blue, it is searching a connection to the sound bar.
A steady blue indicates that a connection to the sound bar has been established.
3. AC In
2 3
1
5
BT
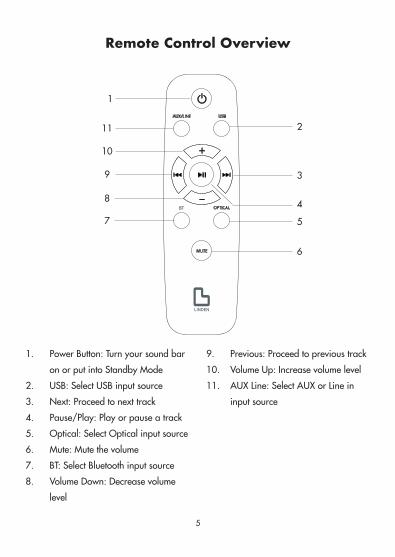
Remote Control Overview
1
6
10
11
9
8
3
4
57
2
1. Power Button: Turn your sound bar
on or put into Standby Mode
2. USB: Select USB input source
3. Next: Proceed to next track
4. Pause/Play: Play or pause a track
5. Optical: Select Optical input source
6. Mute: Mute the volume
7. BT: Select Bluetooth input source
8. Volume Down: Decrease volume
level
9. Previous: Proceed to previous track
10. Volume Up: Increase volume level
11. AUX Line: Select AUX or Line in
input source
6
1. Read, keep and follow this Instruction Manual, ensuring to heed all warnings.
2. Keep out of reach of young children. This sound bar is not suitable for use by
young children or infirm persons without supervision. Young children must be
supervised to ensure that they do not play with the sound bar.
3. This sound bar with subwoofer is not intended for use by persons (including
young children) with reduced physical, sensory or mental capabilities, or lack
of experience and knowledge, unless they are supervised or have been given
instructions concerning the use of the sound bar by a person who is responsible
for their safety.
4. Ensure that the sound bar and subwoofer is positioned in a stable location
to avoid the risk of the Sound bar or subwoofer falling or falling over. Many
injuries, particularly to children, can be avoided by taking simple precautions
such as:
- Using a stable and appropriately size table or cabinet to place your
sound bar and /or subwoofer
- Ensuring your sound bar is positioned well away from the edge of your
table or cabinet.
5. WARNING! Do not insert any objects into any openings of the Sound Bar or
Subwoofer.
6. WARNING! Do not use this sound bar or subwoofer near water, or in an area
exposed to water splashes or dripping. To avoid the risk of fire or electric shock,
do not expose this sound bar or subwoofer to rain and/or moisture.
Important Safety Instructions
7
7. WARNING! Do not place objects filled with liquid, such as vases, on or
above the sound bar or subwoofer.
8. WARNING! This sound bar and subwoofer can produce sound that may
damage your hearing at excessive volumes. Please ensure you distance
others and yourself when using.
9. DO NOT immerse in any liquid whilst in use or whilst cleaning. Clean only
with a damp cloth and dry with a dry towel. Do not use harsh abrasives as
these may damage plastic parts.
10. DO NOT block ventilation openings. Keep away from curtains, newspa-
pers and restricted areas. Install in accordance with specific manufacturer
instructions. Always allow sufficient space around the sound bar to avoid
overheating.
11. DO NOT install near heat sources such as radiators, gas heaters, stoves or
other apparatus (including amplifiers) that produce heat. Do not place the
sound bar in direct sunlight.
12. WARNING! Do not place naked flame sources, such as lit candles, on the
sound bar and/or subwoofer.
13. WARNING! Connect to a suitable 100-240V ~ 50/60 Hz power supply
only.
14. Use the power cord with care - do not damage the power cord in any way.
If the power cord is damaged, it must be replaced by either the manufac-
turer, the manufacturer’s service agent or qualified service personnel. The
power cord must be replaced only with an authorised replacement from an
authorised service agent.
8
15. Only use attachments/accessories specified by the manufacturer.
16. Unplug this sound bar and subwoofer during lightning storms or when unused
for long periods of time.
17. Please consider the environment when disposing of any batteries.
18. Refer all servicing to qualified personnel. Servicing is required when the
apparatus has been damaged in any way, such as when the power supply cord
or plug is damaged, liquid has been spilled or objects have fallen into the ap-
paratus, the apparatus has been exposed to rain or moisture, does not operate
normally, or has been dropped.
19. WARNING! Do not use the sound bar and/or subwoofer outdoors.
20. For household use only; this sound bar and subwoofer is not intended for
commercial use.
21. This sound bar is intended to be used in household and similar applications
such as;
- offices and other working environments;
- by clients in hotels, motels, bed and breakfast and other residential type
environments.
22. If this apparatus is to be used by a third party, please supply these instructions
with it.
23. No liability will be accepted for any personal injury or damage caused by
failure to follow these instructions.
9
24. Danger of explosion if battery is incorrectly replaced. Replace only with the
same or equivalent type.
25. Batteries (battery pack or batteries installed) shall not be exposed to exces-
sive heat such as sunshine, fire or the like.
26. The mains plug is used as the disconnect device, the disconnect device shall
remain readily operable.
10
Caring for the Environment
Responsible Disposal of Packaging
The packaging of your Sound Bar has been selected from environmentally friendly
materials and can usually be recycled. Please ensure the packaging is disposed of
correctly. Plastic wrap can be a suffocation hazard for babies and young children,
so please ensure packaging materials are out of reach and are safely disposed of,
and are recycled where possible.
Responsible Disposal of Appliances
At the end of its working life, do not throw out this Sound bar with your household
rubbish. An environmentally friendly method of disposal will ensure that valuable
raw materials can be recovered and used again. Electrical and electronic applianc-
es contain materials and substances which, if handled or disposed of incorrectly,
could be potentially hazardous on the environment and human health.
Observe any local regulations regarding the disposal of electrical consumer goods
and dispose of it appropriately for recycling. Contact your local authorities for
advice on recycling facilities in your area. The plug must be rendered useless and
the cable cut off directly behind the sound bar to prevent misuse.
11
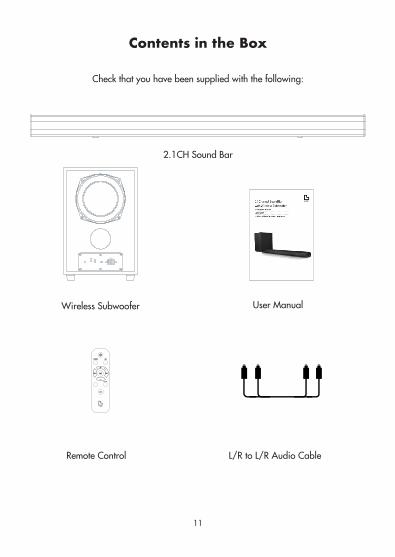
Contents in the Box
Check that you have been supplied with the following:
2.1CH Sound Bar
BT
Remote Control
User Manual
L/R to L/R Audio Cable
Wireless Subwoofer
12
Basic Setup Guide
Position and Placement
Make sure that you place your sound bar on supporting furniture that can bear its
weight. Please ensure the furniture underneath the sound bar fully supports its size.
Please ensure the sound bar is not over hanging or close to edges of furniture. Do
not expose the sound bar near water, fire places and/or heating apparatuses such
as heaters, candles, lighting etc.
Connecting the Power
Plug the power lead into your nearest power outlet. For your safety, we recommend
using a power outlet with a power surge protector.
Turning your Sound Bar On
Press the power button on the remote control or power button on the end cap of the
sound bar to turn your sound bar on.
13
Input Source Display
Press the appropriate source button on your remote control or repeatedly press
the source button on the sound bars end cap to select your desired source. Your
desired sources will be displayed as below:
A.IN AUX (L / R ) Input ( Rear Panel)
LINE 3.5mm Line input (End Cap)
USB USB Input ( End Cap)
BT Bluetooth Mode
OPT Optical input
14
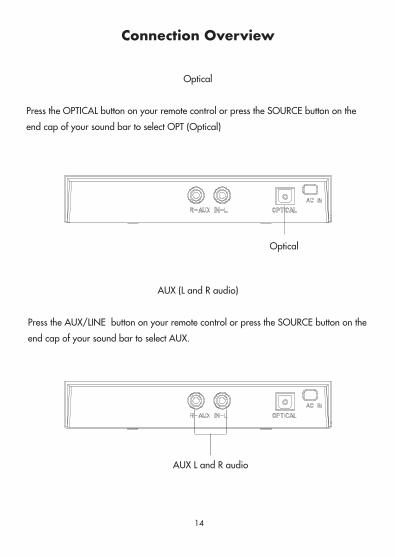
Optical
Press the OPTICAL button on your remote control or press the SOURCE button on the
end cap of your sound bar to select OPT (Optical)
Connection Overview
Optical
AUX (L and R audio)
Press the AUX/LINE button on your remote control or press the SOURCE button on the
end cap of your sound bar to select AUX.
AUX L and R audio
15
Connection Overview
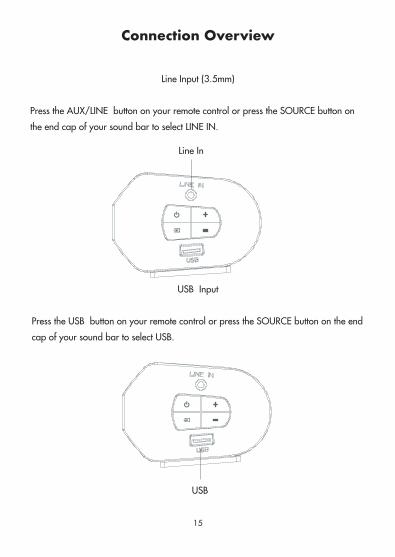
Line Input (3.5mm)
Press the AUX/LINE button on your remote control or press the SOURCE button on
the end cap of your sound bar to select LINE IN.
USB Input
Press the USB button on your remote control or press the SOURCE button on the end
cap of your sound bar to select USB.
USB
Line In
16
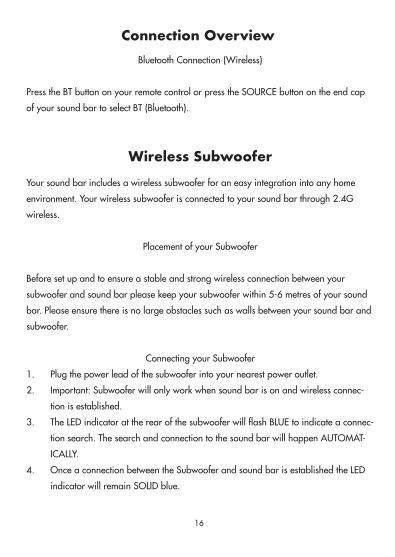
Bluetooth Connection (Wireless)
Press the BT button on your remote control or press the SOURCE button on the end cap
of your sound bar to select BT (Bluetooth).
Wireless Subwoofer
Your sound bar includes a wireless subwoofer for an easy integration into any home
environment. Your wireless subwoofer is connected to your sound bar through 2.4G
wireless.
Placement of your Subwoofer
Before set up and to ensure a stable and strong wireless connection between your
subwoofer and sound bar please keep your subwoofer within 5-6 metres of your sound
bar. Please ensure there is no large obstacles such as walls between your sound bar and
subwoofer.
Connecting your Subwoofer
1. Plug the power lead of the subwoofer into your nearest power outlet.
2. Important: Subwoofer will only work when sound bar is on and wireless connec-
tion is established.
3. The LED indicator at the rear of the subwoofer will flash BLUE to indicate a connec-
tion search. The search and connection to the sound bar will happen AUTOMAT-
ICALLY.
4. Once a connection between the Subwoofer and sound bar is established the LED
indicator will remain SOLID blue.
Connection Overview
17
5. To disconnect the subwoofer from the sound bar press and hold the pair
button.
Note: The subwoofer enters standby mode automatically when sound bar is
turned off. The subwoofer turns on automatically when the sound bar is turned on
and wireless transmission is activated.
18
Making an Optical Connection
To make an OPTICAL connection between your Linden Sound bar and selected device
please follow the below instructions:
1. Using an OPTICAL to OPTICAL cable, insert one end into the Optical input on
the rear panel of the sound bar. Insert the other end of the optical cable to your
selected optical audio output on your television.
2. Press the OPTICAL button on your remote control or repeatedly press the Source
button on the end cap of sound bar to find and select ‘OPT’.
Making an AUX (L/R) Connection
To make an AUX (L/R) connection between your Linden Sound Bar and selected device
please follow the below instructions:
1. Using an AUX L/R cable insert a one end into the AUX L/R cable input on the
rear panel of the sound bar. Insert the other end of the AUX L/R cable to your
selected audio output on your television.
2. Press the AUX/LINE button on your remote control or repeatedly press the
source button on the end cap of sound bar to find and select ‘A.IN’
Making a USB Connection
The Linden sound bar is equipped with a USB input for Media Playback. Your selected
USB device must have media stored and accessible to enable playback.
IMPORTANT: This port is NOT intended for charging.
19
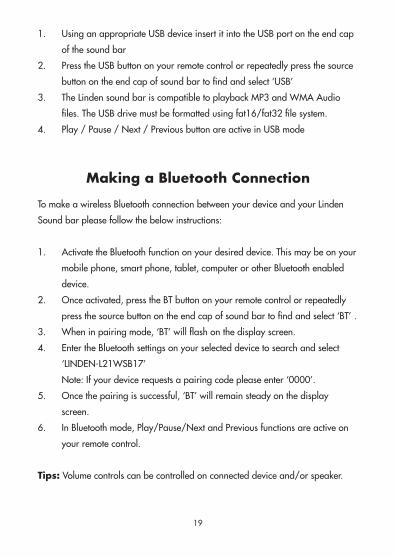
1. Using an appropriate USB device insert it into the USB port on the end cap
of the sound bar
2. Press the USB button on your remote control or repeatedly press the source
button on the end cap of sound bar to find and select ‘USB’
3. The Linden sound bar is compatible to playback MP3 and WMA Audio
files. The USB drive must be formatted using fat16/fat32 file system.
4. Play / Pause / Next / Previous button are active in USB mode
Making a Bluetooth Connection
To make a wireless Bluetooth connection between your device and your Linden
Sound bar please follow the below instructions:
1. Activate the Bluetooth function on your desired device. This may be on your
mobile phone, smart phone, tablet, computer or other Bluetooth enabled
device.
2. Once activated, press the BT button on your remote control or repeatedly
press the source button on the end cap of sound bar to find and select ‘BT’ .
3. When in pairing mode, ‘BT’ will flash on the display screen.
4. Enter the Bluetooth settings on your selected device to search and select
‘LINDEN-L21WSB17’
Note: If your device requests a pairing code please enter ‘0000’.
5. Once the pairing is successful, ‘BT’ will remain steady on the display
screen.
6. In Bluetooth mode, Play/Pause/Next and Previous functions are active on
your remote control.
Tips: Volume controls can be controlled on connected device and/or speaker.

20
Ensure volume is at a suitable volume on either device and/or speaker.
Note: Pairing time is varied between different devices. If you have paired to a
device; it will automatically pair again when turned on and off.
Making a LINE IN Connection
To make an LINE IN (3.5mm) connection between your device and your Linden
Sound Bar follow the below instructions:
1. Using a 3.5mm to 3.5mm cable insert one end into the ‘LINE IN’ input. Insert
the other end of the 3.5mm AUX cable to your selected audio output 3.5mm
jack.
Note: The alternative 3.5mm LINE IN must be an audio output socket
2. Press the AUX/LINE IN button on your remote control or repeatedly press the
source button on the end cap of sound bar to find and select ‘LINE’
21
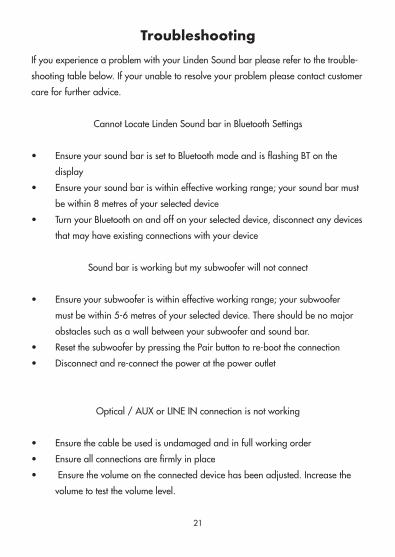
If you experience a problem with your Linden Sound bar please refer to the trouble-
shooting table below. If your unable to resolve your problem please contact customer
care for further advice.
Cannot Locate Linden Sound bar in Bluetooth Settings
• Ensure your sound bar is set to Bluetooth mode and is flashing BT on the
display
• Ensure your sound bar is within effective working range; your sound bar must
be within 8 metres of your selected device
• Turn your Bluetooth on and off on your selected device, disconnect any devices
that may have existing connections with your device
Sound bar is working but my subwoofer will not connect
• Ensure your subwoofer is within effective working range; your subwoofer
must be within 5-6 metres of your selected device. There should be no major
obstacles such as a wall between your subwoofer and sound bar.
• Reset the subwoofer by pressing the Pair button to re-boot the connection
• Disconnect and re-connect the power at the power outlet
Optical / AUX or LINE IN connection is not working
• Ensure the cable be used is undamaged and in full working order
• Ensure all connections are firmly in place
• Ensure the volume on the connected device has been adjusted. Increase the
volume to test the volume level.
Troubleshooting
22
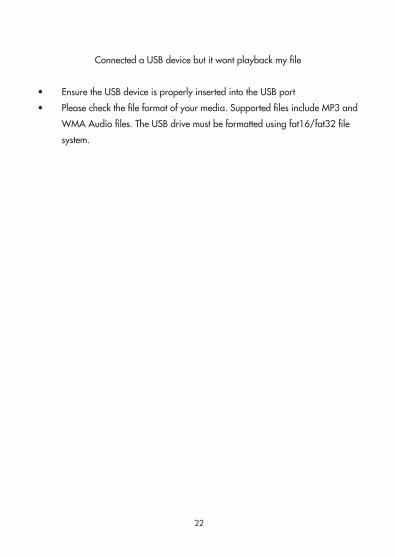
Connected a USB device but it wont playback my file
• Ensure the USB device is properly inserted into the USB port
• Please check the file format of your media. Supported files include MP3 and
WMA Audio files. The USB drive must be formatted using fat16/fat32 file
system.
23
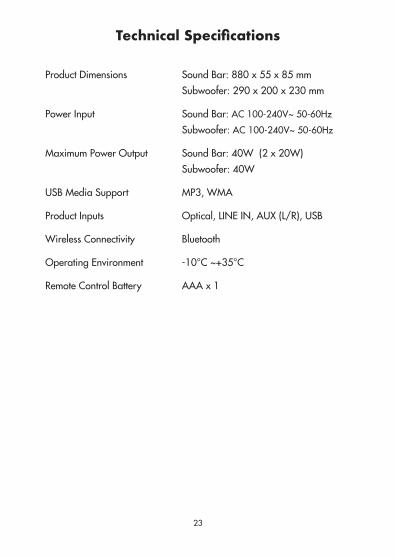
Technical Specifications
Product Dimensions Sound Bar: 880 x 55 x 85 mm
Subwoofer: 290 x 200 x 230 mm
Power Input Sound Bar: AC 100-240V~ 50-60Hz
Subwoofer: AC 100-240V~ 50-60Hz
Maximum Power Output Sound Bar: 40W (2 x 20W)
Subwoofer: 40W
USB Media Support MP3, WMA
Product Inputs Optical, LINE IN, AUX (L/R), USB
Wireless Connectivity Bluetooth
Operating Environment -10°C ~+35°C
Remote Control Battery AAA x 1
Distributed by:
M.E.W. (Australia) Pty Ltd,
15 Vaughan St, Essendon Fields, VIC 3041
ACN 152 719 036
Customer care: Aus-1300 530 800
lindenproducts.com.au
While every effort has been made in the preparation of this instruction
manual, the publishers cannot be held responsible for the accuracy of the
information contained herein or any
consequences arising from it.
Related Documents