Appointed Staff Instructor: ________________________________________________________ Staff: (1)_____________________________________________________ (2)_____________________________________________________

Welcome message from author
This document is posted to help you gain knowledge. Please leave a comment to let me know what you think about it! Share it to your friends and learn new things together.
Transcript
Appointed Staff Instructor:
________________________________________________________
Staff:
(1)_____________________________________________________
(2)_____________________________________________________

2
Purpose
The Wilderness Survival track engages youth, grades 4th
-6th
, in various outdoor activities that strengthen the
bond between the self, others, and nature. Throughout the week, campers will be engaged in experiential
learning activities such as Dutch oven cooking, orienteering, shelter construction, safety skills and more. The
track teaches youth the skills necessary to deal with situations which may occur while outdoors. It also gives
young people a greater sensitivity, understanding and appreciation for both themselves and the outdoors.
Objectives
Youth development is the primary goal of the Wilderness Survival educational track. Specific track objectives
are the following:
1. Engage youth in meaningful and fun outdoor activities that promote a healthy, active lifestyle while
attending 4-H Camp Grant Walker.
2. Create a positive attitude towards teamwork.
3. Increase self-confidence and leadership development in youth enrolled in the track.
4. To acquire a better understanding of wilderness preparedness and safety.
5. Inspire youth to engage in outdoor activities after camp within their home communities.
Evaluation Procedures
The Grant Walker 4-H Educational Center’s Associate Program Coordinator, Ashley Powell, developed
evaluation procedures that accurately capture the following details:
Whether campers enjoyed the track
What was the campers favorite activity of the track
Whether the track should be offered next year
Evaluations will be gathered from campers at various stations throughout the week and collected by the Camp
Grant Walker Summer Staff working in the track.
Locating the Stations The location of each station is marked on the campground map provided you by the CGW Summer Staff. It is
best to take the adult volunteers and agents on these routes on Monday after the afternoon agent/volunteer
meeting.
Format
The Wilderness Survival track has a maximum capacity of 100 campers that can enroll each week. The track is
made up of 1 Summer Staff “instructor”, 2 Summer Staff members, 6 adult volunteers, and 6 junior counselors.
Campers are divided into three groups—A, B, and C—and will rotate through the track’s activities in their
groups throughout their week at camp. Each staff member will be responsible for various activities each day in
the track. Track times are from Tuesdays-Thursdays 8:30am-11:55am each week. In order to adequately prepare

3
for track each morning, Summer Staffers are recommended to either get up early each morning to set-up or set-
up track area at night after vespers. In order to shorten time spent on track space cleaning Friday mornings, staff
members are recommended to clean up the area on Thursdays after track time or at night after vespers.
Stations and Track Schedule
Station 1- Ten Essentials & First Aid (50 min)
Station 2- Navigating Through the Wild (50min)
Station 3- Healthy Eating on the Trail (50min)
Station 4- Building a Fire (50 min)
Station 5- Shelter Construction (50min)
Station 6- Outdoor Dutch Oven Cooking (50min)
Time Tuesday Wednesday Thursday
7:00am Coolers Coolers Coolers
7:30am Area set-up Area set-up Area set-up
8:00am Staff Meeting Staff Meeting Staff Meeting
8:30am Group Activity Group Activity Field Competition with Outdoor
Adventures track 8:40am Rotation 1 Rotation 4
9:30am Travel Travel
9:40am Rotation 2 Rotation 5
10:30am Travel Travel
10:40am Rotation 3 Rotation 6
11:40am Let out for lunch Let out for lunch
Groups
Each group may contain up to 26 campers
Group Rotation 1:
Station Number
Rotation 2:
Station Number
Rotation 3:
Station Number
Group A 1/4 2/5 3/6
Group B 2/5 3/6 1/4
Group C 3/6 1/4 2/5
Recommendation: Allow campers to name their groups something fun. If time and monetary resources allow,
have campers make flags for their groups or give them group-specific colored bandanas.
4
Preparing to Teach- Models, Methods, & Tips
General Tips for Leading a Group
Scheder, C.M. (2002) Outdoor Living Skills Field Guide. American Camping Association.
o Be prepared
o Create a short outline
o Practice teaching
o Check out the area before starting
o Have all equipment and teaching materials ready and in working condition
o Have a backup plan
o Take a look at CGW’s risk management/safety plan
Experiential Learning & SIP Method
Experiential Learning
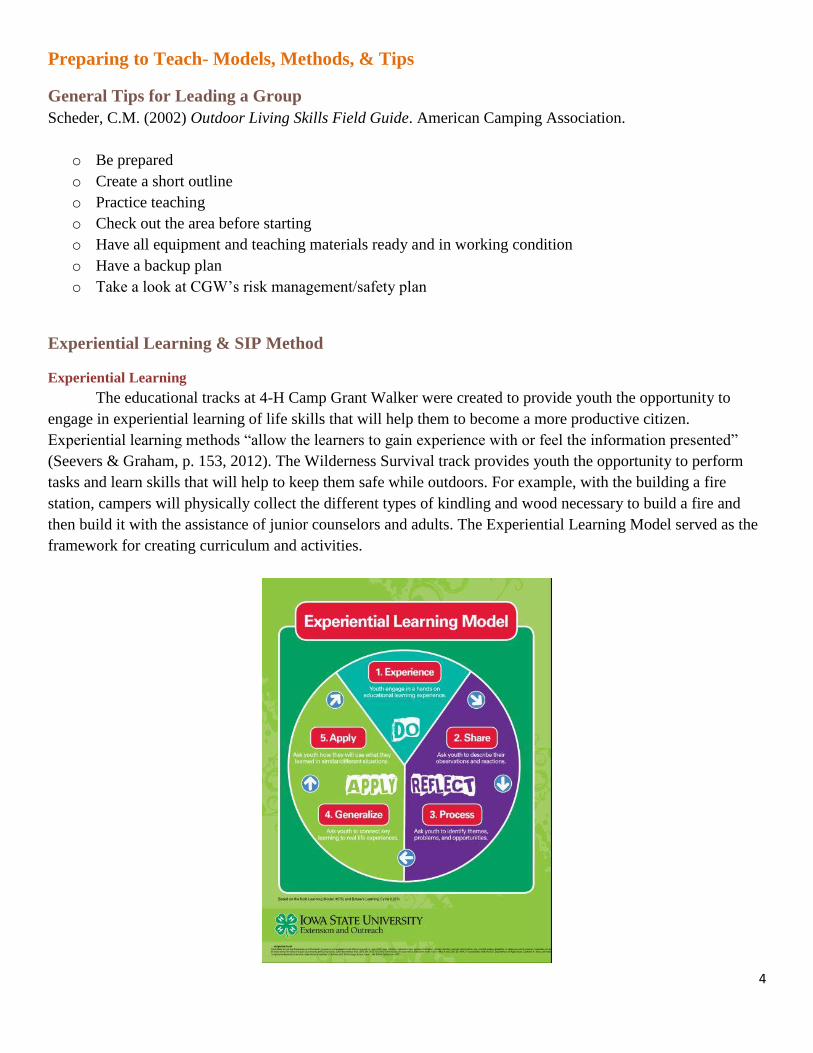
The educational tracks at 4-H Camp Grant Walker were created to provide youth the opportunity to
engage in experiential learning of life skills that will help them to become a more productive citizen.
Experiential learning methods “allow the learners to gain experience with or feel the information presented”
(Seevers & Graham, p. 153, 2012). The Wilderness Survival track provides youth the opportunity to perform
tasks and learn skills that will help to keep them safe while outdoors. For example, with the building a fire
station, campers will physically collect the different types of kindling and wood necessary to build a fire and
then build it with the assistance of junior counselors and adults. The Experiential Learning Model served as the
framework for creating curriculum and activities.
5
SIP Method
“The SIP method (Show, Instruct, and Practice) is a helpful tool to teach many of these skills. Remember to
show the skill first, then tell the participants how to do the skill, and finally have them practice that skill until
they are proficient” (Scheder, 2002, p. 7).
Tips for Camper Involvement
Seat campers so that they can see one another.
Join the group versus standing in the middle of the circle, square, or horseshoe.
When you perform a demonstration have the campers gather around you.
Place the sun in your face, not in the face of the campers so that they can fully see you or what you are
doing.
Let campers answer other camper’s questions.
Avoid asking questions that have “yes” or “no” answers; ask for explanations, suggestions, and
alternatives.
Acknowledge campers responses, and invite discussion of those responses whenever possible.
Ask for ideas instead of saying a response is right or wrong.
Share several answers and discuss why some are appropriate than others.

6
Station Information with Lesson Plans
Every morning before the campers break up into their groups, have them say the Outdoor Living Skills pledge.
I. Introduction (5 minutes)
Materials Needed:
Outdoor Living Skills Pledge Poster (staff members make)
Outdoor Living Skills Pledge Instructor sheet
Activity
1. Say to campers:
Just like 4-H has a pledge, there is also an Outdoor Living Skills Pledge. I will say the parts of the pledge
and you will repeat it back to me. We will also say the pledge at the end of the rotation. I hope you
commit it to memory and say it every time you go outdoors to explore or hunt. Okay, repeat after me:
“I Pledge: To be among the plants and animals (wait for them to repeat it back) and in providing for my
comfort and safety, (wait for them to repeat it back) to respect my natural neighbors and their homes; (wait
for them to repeat it back) to step carefully and travel gently (wait for them to repeat it back) finding
friendships and beauty in the natural world (wait for them to repeat it back).
2. Reveal to campers the pledge poster, and have everyone say it together.
II. Divide & Conquer
Make sure there are 3 groups of campers. If we are maxed out at 80 campers total, then each group should have
26-27 campers. Once campers are divided, look at the rotation sheet and send the staff members to their stations
with the group that is going there first. Be sure to hand out track agendas to all agents and adults in the track so
they know where to go next. Once each group has been given an assignment and an agent/volunteer an agenda
card, dismiss campers to their stations.

7
Station 1: Trip Prep & First Aid
Length: 50 minutes
Location: New Dance Pavilion
At the Trip Prep & First Aid station, campers will learn what the ten essentials are when planning for camping,
and a variety of techniques and treatments to care for themselves and/or others in an emergency situation when
outdoors. Topics and activities were determined by the Program Coordinator from a needs assessment
administered to state 4-H Staff and Regional Coordinators. Educational resources were obtained by the Program
Coordinator from the American Red Cross. Specifically, the American Red Cross Wilderness and Remote First
Aid Emergency Reference Guide provided the educational content.
Instructional Procedures
I. Introduction (3 minutes)
What YOU Say What CAMPERS
Say
What CAMPERS Do
Hello Campers! My name is _______ and today we will be
learning about habitats shelter construction in the wilderness.
“Hello” Campers are to be sitting on
the benches that surround
the campfire.
All forms of life, from humans to cows to bears to flowers,
need certain things to live. Survival depends on getting enough
food, water, cover and places to raise young. Animals, plants,
fungi and microbes share these same survival needs, though it
is a little more challenging to think about how plants and
microbes meet these needs. This activity focuses exclusively on
animals.
Listening
Animals must have a place to live where they can get food,
water, cover and places to raise young. Cover may mean
protection from sun or other elements as well as protection
from other animals (called predators) that may eat the animal.
Places to raise young can also mean a protected spot, like a
bird’s nest, or an area with specific qualities that enable
offspring to survive. For example, monarch butterflies lay their
eggs on milkweed plants, which provide some cover as well as
a food source for growing monarch larvae. Therefore, a
monarch habitat must include milkweed plants for the butterfly
to raise young.
Listening
Do humans have the same requirements as animals? They do.
Humans build houses for cover and places to raise young. Other
animals may build nests or burrows for protection or cover.
Still others take cover where they find it, under trees or in a
large herd. But for all animals (including humans), home is
much bigger than a house. It’s the entire neighborhood where
an animal gets the food, water and cover it needs to survive.
Scientists call this home or place its habitat. For humans,
habitat may mean
the neighborhood or city in which they live.
Ask students, What do all humans need to survive? Which of
these do plants and animals also require?
Focus on the four basic
survival needs true for
Raise their hand and give an
answer. Do not let them talk

8
all living things. Guide
class to generate a list
with these needs: food,
water, cover and
places to raise young.
all at once.
Ask, Where do humans get the food, water, cover and
places to raise young they need to survive? Where do they
store and cook food?
A variety of answers-
home, neighborhood,
or city.
Supermarket; garden.
Raise their hand and give an
answer. Do not let them talk
all at once.
Ask, Whose habitat are we in right now? Where do you
think the animals at Camp Grant Walker get their food,
water, and shelter?
Animals.
In the woods, creek,
etc.
Raise their hand and give an
answer. Do not let them talk
all at once.
You are correct. Animals at Camp Grant Walker have all
of their basic needs met. If we were to camp here in this
habitat, would we have our basic needs met? Ask why “yes”
and why “no”.
Some “yes” some “no”
The basic need I am going to teach you how to provide in
this station is shelter construction. Who here has ever built
a tent?
Say things like “me!”
“I have!”
Raise their hands up high
II. Ten Essentials Family Feud (30 minutes)
Materials Needed:
Track binder
1 backpack with camping supplies
Family Feud Poster
Ten essentials page
Ten essentials Instructor sheet
Paper, clipboard, and pen to keep score
Activity:
1. Welcome campers to your station. Tell campers what they will be learning about at your station.
2. Divide campers up into two groups.*Have a Junior Counselor count them off as 1 and 2’s.
3. Give them two minutes to come up with a name for their teams.
4. Tell: Today you will be learning what the Ten Essentials for hiking and camping in the wilderness
by playing a game of Family Feud.
5. Ask the campers: How many of you have ever seen or played the game Family Feud? Wait for
responses. If one of the campers or junior counselors have seen the show, let them explain it and you fill
in the rest. Make sure you divide the junior counselors and adults evenly across the teams. They are not
allowed to give an answer in the game, but they can give hints as to what they think the answer may be.
6. Explain the rules of the game:
a. Family Feud is a game where two families, or in our case two groups, compete against one
another to guess the top ten responses to a survey questions posed to 100 people. In our
game, your teams will be guessing the top ten essentials you need to take while camping
and hiking in the wilderness. Whatever team wins will get a Leave No Trace sticker and
Outdoor Ethics card donated by the Leave No Trace organization.

9
b. First, I need one member of each team to walk up to table and face one another in a “face-
off” round to determine which group gets control of the board first to guess the top ten
essentials. If no campers volunteer themselves, then ask the camper that is closest to you on each
side to come up. The team that buzzes in with the correct answer receives control of the
board and has the option of playing or passing control to the other team.
c. The team that has the control of the board tries to reveal all of the correct answers to the
question before receiving three strikes. If the team receives three strikes without clearing
the board, control is passed to the other team. You have three sheets of paper with red X’s
on them. When you get an answer wrong, a Junior Counselor on your team will turn the
page over to reveal the X.
d. The team that now has the control is able to give one answer in the hopes that it is found on
the board. If it is, points are added to the team’s score. If not, the other team gets the
points.
e. Points are collected as each team finds its answers to the question on the board. Each team
tries to collect the most points. The team with the most points wins the game!
7. Ask an adult to keep score on a clipboard and piece of paper. Have a Junior Counselor be a light judge
to help you discern who “buzzed” in first.
8. Instruct the campers on the first “Face Off” round.
a. This first “Face Off” round will determine who will get to first chance to guess the top ten
essentials.
b. Ask the camper to your left: What is your name and what team are you playing for?
c. Ask the camper to your right: What is your name and what team are you playing for?
d. Tell the contestants: The first person to press the light gets to share their answer. Once their
answer is shared, we will reveal if their answer is on the board and the points given for that
answer. Then the second person gets to share their answer. Whoever gives the answer with
the highest score, their team gets to play first for our coveted prize.
e. Read the question out loud to the campers from the Family Feud Question sheet. The camper that
guesses the answer with the highest point, their team gets to go first.
9. Have the campers go back to their team. The next person in line gets the first chance to guess the top ten
essentials. Continue through the campers on that one team until all ten answers have been revealed or
they get three strikes and the board goes to the other team
10. Review with the whole group what the ten essentials are (10 minutes). As you go through the list, ask
campers why each item is needed and their importance. Having them tell you why is more important
than you reading from the Ten Essentials Instructor sheet.
11. Ask for questions and pass out the prizes to the winning team
You can find the Ten Essentials Instructor sheet in the appendix of this document.
III. Seven Basic Needs (10 minutes)
Source: University of Wisconsin Extension. Backpacking and Hiking: Survival Skills.
Materials Needed:
Seven basic needs cards
Seven basic needs instructor sheet

10
What YOU Say What CAMPERS Say What Campers DO
Learning how to survive in an
emergency is important for
everyone. Although wilderness-
based survival situations are most
common, survival situations can
occur in urban and rural
environments too.
Listening Sitting in a group
Ask campers to name a survival
situation. Then ask them to
describe a situation that could
happen to them.
Typically, they will identify
situations like a plane crash or
hurricane that has a remote chance
of happening to them.
Raise their hands to give answers
Ask campers, what events could
quickly turn into survival
situations?
Getting lost, hunting, fishing and
boating, driving, weather, etc.
Raise their hands and give answers
Explain to campers that they will
work together to learn about
survival skills and decide what
basic needs our bodies need to
survive and what items can help
us meet these needs.
Activity:
What YOU Say What CAMPERS Say What Campers DO
First, ask campers, what are the
seven basic survival needs are for
humans?
Campers will say things like food,
water, shelter, etc.
When a small group correctly
names one of these needs, hand
them the sign for the need and have
them stand in front, holding the
sign so everyone can see it.
As each need is said, briefly define
this need for the group and
highlight why it is important.
Ask the campers to give examples
of when they have gone without
each need for any extended period
of time.
Campers will have multiple
answers and stories. Let campers
tell the stories to the group.
A camper will move to the front of
their group with all of the needs
signs. Continue until campers have
identified each need.
Now, ask campers to arrange the
needs from “most” to “least”
important.
Group discussion Campers will be holding their signs
and moving the persons the signs to
either the left or right to indicate
importance.
Allow the campers to try multiple
times to get the order correct. After
each attempt, tell when which
needs are correct and what needs
have to be rearranged.
Once they have the correct order,
ask campers, guess how long a
Campers will have an array of
answers. Allow for multiple
guesses.
Raise their hands and give an
answer.
As campers correctly come up with
the answers, give the “needs” their
corresponding “length of time”
sign.

11
person can go without that need.
When all is done, ask if there are
any questions and clarify any
points that the campers do not
understand.
An array of questions Campers will be in their groups
asking questions.
IV. Gilligan’s Island (10-15min)
Materials Needed:
1 ream of paper
1 box of pens
10 copies of the scenario cards
9-12 backpacks
Activity:
(1) Have a Junior Counselors divide the campers into small groups of five.
(2) Have another Junior Counselor pass out a sheet of paper and a pen to each group.
What YOU Say What CAMPERS Say What Campers DO
Present the following scenario to
the groups: You have been ship
wrecked on an island that is
exactly like where you are right
now. It has the same climate,
vegetation, and weather. You
must survive on this island for
seven days. Unfortunately, the
wreckage of the airplane has
disappeared. You only had time
to take three things out of the
airplane to help you survive.
Your group may take any three
items you can think of, but all of
the items must fit into a small
backpack. Tell campers,
electronic devices used to contact
others for help do not work on
this island. What three items did
you take? You have 10 minutes.
Listen and read the scenario cards.
Discuss amongst themselves
Before they start, campers will pick
up a small backpack from the front
to help them visualize how much
space they have in the backpack to
fit everything they need.
Campers will write down their
three items on the sheet of paper.
Now that you are done, I want
each group to present their three
items to everyone.
The groups should list their three
items and give reasons why they
choose each item.
Other groups are welcome to ask
them questions.
Discuss the merits of each group’s
answers and the pro and cons of
their selections.

12
V. First Aid (13 minutes)
Materials Needed
5 first aid kits
Emergency and Non-emergency PDF
Poster with marker- junior counselor/volunteer does the writing
Activity
(3 minutes)
1. Ask campers the question: “Have you ever been hurt before? Like a skinned knee, cut, sprain,
broken bone?” Pick one camper to call on.
2. Ask the selected camper this question: “What happened when you got hurt? Where did you go?
Who took care of you?”
3. Ask: Where should you go if you get hurt here at camp? Allow campers to give a few answers such
as agent, adult, or camp nurse. Ask: Where or who should go to if you get hurt when outdoors?
Answers can be any of the following: to their leader, camp nurse, first-aid, counselor, hospital, etc).
4. Ask campers the question: “What is first aid?” Get up to 3 answers, and discuss.
5. Ask campers the question: “What kind of injuries or illnesses might require first aid in the
outdoors?”
6. Ask campers the following question: “What should be in a first aid kit?” Write their answers down on
the poster.
7. Once they have mentioned all of the contents listed in our first aid kits, or most of them, have the
campers open their kits to see if they mentioned everything. Ask campers if they have anything in their
kits that they didn’t mention.
(10 minutes)
8. Transition to emergency and non-emergency moves by saying: “Sometimes when a person gets
injured in the outdoors we have to move them to a safe location in order to administer first aid.
One of the most dangerous threats to a seriously injured person is unnecessary movement. Moving
a seriously injured person can cause additional injury and pain and make the recovery more
difficult. To avoid hurting yourself and the injured person, you can perform the following moves
to get the person to safety: walking assist, and two-person seat carry”.
9. You will now demonstrate the different moves. Ask for a junior counselor or adult volunteer to assist
you in the demonstration of each move.
10. For a step-by-step of how to perform each move, see the Emergency and Non-Emergency Instructor
sheet in the appendix of this document.
11. After each move demonstrated, ask the campers to perform the same move with each other. Have
campers carry the person at least 20ft for each move.
VI. Talk It Over (Reflection & Application) 5-10min
Reflect:
What is the most important thing to remember in a survival situation?
What piece of information will you most likely remember?

13
If your group was really stranded on an island, what would have been the most helpful thing to remember?
How did your small team perform during this station? Were you an effective team?
Apply:
What, from this station, could you apply to your life?
What are some ways that you could be more effective team member in the future?
What new teamwork behaviors did you learn during this station? Where else could you use them in your
life?

Station 2: Navigating Through the Wild
Length: 50 minutes
Location: Trailhead at Old Rifle Range
At this station, campers will learn how to use a compass to navigate through the wilderness. By the end of the
rotation, campers will be able to do the following:
Demonstrate knowledge of orienting.
Ability to read compass bearings to designated objects
Explain how a compass works. Describe the features of an orienteering compass.
In the field, show how to take a compass bearing and follow it.
Instructional Procedure
I. Interest Approach (15 minutes)
Materials Needed:
Multi colored beanbags
2 Start cones
15 blindfolds/bandanas
This game is called Trust Walkabout communication, navigation, and teamwork. Adults and junior counselors
will distribute a bandana/blindfold to eat pair of campers. The staff member will place bean bags around the
area of the station.
Explanation of Game to Campers Directions to Campers
1. One of you will be blindfolded and led
by your partner, at first across a level
grass area, filled with obstacles, to pick
up a red bean bag.
2. Navigators will “lead” their partner by
their voice only.
3. The sighted person must stay close to
their partner to support the person and
to watch out for their safety. Have
campers swap roles about half way
through.
Tell campers to pair up
One partner must be the navigator, and
the other be blindfolded.
When the blindfolded partner is ready,
slowly spin your partner around a few
times so that they do not know which
direction they are headed.
From this point on, the Navigator will
not touch your partner at all, but rely
solely on verbal cues.
The Navigator is solely responsible for
their partner’s safety.
Debriefing questions to ask campers:
What do you think was the purpose of this activity?
What was it like to be the Navigator, responsible for the safety of your partner?
Why is trust in your partners’ navigation important in the outdoors?

15
II. Parts of a Compass (5min)
Materials Needed:
Compass for each camper
Parts of a Compass Poster
Compass Description Instructor sheet
Activity:
1. Ask campers: “How do you get from one place to another?” Get up to 5 responses.
2. Ask campers: “What do you do when you don’t know how to get somewhere?” Get up to 5
responses.
3. Explain to campers that when they are in the outdoors, they may need to use tools to help them get
where they need to go. Tell: The orienteering compass is a critical piece of equipment for outdoor
travel. A good orienteering compass has (1) clear base plate that allows you to see the map
underneath, (2) straight sides for aligning two points, (3) liquid-filled needle housing that keeps
the magnetic needle relatively steady when taking readings, and lastly (4) two arrows: a direction
arrow painted on the base plate and an orienting arrow.
4. Have the junior counselors hand out the compasses. Ask the campers if the compass’ have each of the
features you just mentioned.
5. Ask campers: “What does a compass do?” Get 3 responses.
6. Using the Parts of a Compass PDF and the Compass Description document, explain what the different
parts of the compass are. As you call out the parts, have the campers find it on their compass and repeat
the name after you.
7. Ask for questions.
*You can draw the compass with the parts labeled on a poster board to show to campers as you discuss
the parts

III. Holding a Compass (10 min)
Materials Needed:
One compass per camper
One metal object per camper
o Metal ring (wedding ring)
o Soda cans
o Necklace chain
Activity:
1. Say to campers: “There are correct and incorrect ways to hold a compass. If a compass is not held
correctly it might not read accurately.”
2. Ask campers: “What would happen is a compass did not read the correct direction?” Answer: you
won’t get to your destination or you could get lost.
3. Using the SIP method, demonstrate how to properly hold a compass. Have campers practice how to hold
the compass correctly.
a. Instruct campers to do the following:
i. Hold the compass in the palm of your hand with the direction arrow pointing out
between your thumb and index finger.
ii. Turn your body instead of the compass so that the direction of travel is always
pointing in the direction you want to walk.
iii. Any time you read a compass it should remain flat, tilting it or holding it on an
angle can give you an incorrect compass bearing.
4. Ask campers: “What might prevent a compass from working properly?” Answer: not holding the
compass level.
5. Explain that because compasses read the magnetic field, metal will make a compass not work
properly.
6. Use some of the examples you brought to demonstrate how they can affect compass reading.
a. Instruct campers to hold a metal object in their hand. Place the compass over or close to the
metal object. Watch the needle jump.
b. Ask for any questions.
c. Remind the campers: anything metal can prevent a compass from working correctly (e.g. a
knife in your pocket, metal snaps on your clothing, a whistle hanging on a lanyard around
your neck, or not holding the compass at level.
IV. Finding Direction (20 min)
Materials Needed:
o One compass for every two campers or one for every camper
o An outdoor area, such as a field or other open area large enough for participants to walk around.
o Rope that makes a large circle- about 10ft in diameter (78ft)
Activity:
1. Ask the campers: “What are the four main directions on a compass?”. Answer: N,S, E, & W.

17
2. Explain that it is important to know how to find direction if you are going to get where you are
going when traveling in the outdoors.
3. Explain that even though we use the terms north, south, east, and west, direction is also referred to
in degree.
4. Instruct campers to stand in a line. Instruct the campers to stand in a horizontal line.
5. Tell the campers that taking a bearing will help you determine your direction of travel expressed in
degrees. To help you remember how to take a bearing, think on the phrase “Put Red in the Shed
with Fred”. For example…
a. First face north. Turn the compass housing so that 360 is lined up with the orienting lines.
Holding the compass correctly, turn your body (not the compass) until the magnetic needle
(“Red”) is framed by the orienteering arrow (“Shed”). You are facing magnetic north. Sight over
the direction of travel arrow (“Fred”) and locate a stationary point or landmark in that direction.
Have campers point to the stationary object to ensure they understand.
b. Repeat the preceding steps for finding east (90°), south (180°), and west (270°).
6. Ask campers, “What are the four main directions?”. Explain that these points are called cardinal
points.
7. Ask campers, “What it called when you are traveling halfway between north and west? What
about south and east? 8. Explain that these are called inner cardinal points.
9. Ask campers “What are the other two inner cardinal points?” Answer: northeast and southwest.
10. Practice the following exercise with the campers in an open area or field.
a. Tell the campers to line up around the rope circle, but face outward.
b. Instruct campers to take 5 steps at 90°. Travel 5 more steps at 180°. Next, travel 5 steps at
270°. Finally, travel 5 steps at 360°. Everyone should end up at the spot they began in. If time
allows, increase steps to 10 and/or 20 depending upon skill level of campers.
Review & Reflection 5-10 min
1. Why would you need a compass in the wilderness?
2. What is a pace?
3. What does the following phrase mean: “Put Red in the Shed and follow Fred”?
4. What are some of the things that you may carry with you could affect the accuracy of your compass?
5. What would you do if you were lost in the wilderness with a compass?

Station 3: Healthy Eating on the Trail
Length: 1hr 5 min
Location: Snack Room
At this station, campers will learn keep them full and fueled while in the wilderness. While time spent outdoors
can improve health in several ways, the lack of healthy eating while outdoors can set you up for an energy
crash, hunger pains, or muscle cramping. Luckily, campers will be taught to avoid nutritional pitfalls on the trail
through the implementation of a few common-sense strategies compiled from outdoor education experts.
Instructional Procedures
I. Bear Salmon Mosquito” Interest Approach Game (10 min)
Materials Needed:
None
You will want to meet the campers in the field next to the snack room to begin by playing a game called “Bear
Salmon Mosquito”. You will want to establish a safety zone where the kids cannot go beyond- like the road, the
large tree in the back, and past the chain link fence. Have adults stand at each safety zone (if enough). You can
play the game twice if need be to kill time.
What YOU Say What CAMPERS
Say
What CAMPERS Do
Hello Campers! My name is _______ and
today we will be talking about healthy eating
in the wilderness. But first, we are going to
play a little game called Bear, Salmon,
Mosquito.
“Hello” Stand in a group and wait for your
instruction on the game
I need the Junior Counselors to count each of
you off by 1 and 2. That way we have two
groups.
Once the campers receive their numbers
from the Junior Counselors, they are
supposed to stand in a group with other
campers assigned that number,
Group 1 will be the bears; Group 2 will be the
salmon, and Group 3 will be the mosquitos.
Group 1, I want to see your hands up high and
growl for me like a bear.
Campers growl
and hold their
hands up like bear
claws.
Campers growl and hold their hands up
like bear claws.
Group 2, I want to see your hands in front at
waste height palms and fingers flat together
making swimming motion.
Campers put their hands in front at waste
height palms and fingers flat together
making swimming motion.
Group 3, I want each of you to have one hand
in front of nose with index finger pointing out
and making buzzing noise
buzzzzzzzzzzzzz One hand in front of nose with index
finger pointing out and making buzzing
noise
This game is like a food cycle. Bears eat
(chase and tag) salmon, salmon eat (chase and
tag) mosquitoes, and mosquitoes eat (chase
and tag) bears.

19
The Junior Counselors will divide you in half-
forming two groups
Move to group 1 or group 2 after the
Junior Counselors have given them their
number
Each group must decide which one of the 3
animals the entire group will be. Once your
group settles on an animal, the group is to line
up facing the other group lined up about 2 feet
from the center line.
The goal is for each group to win members
from the other group. Campers that are tagged
before reaching the end line behind them must
join the opposing team. You say 1, 2, 3, GO!
Make animal
noses
The campers make their respective
animals while looking at the opposing
group. When they see the other group,
they determine whether they are to eat
(chase and tag) the other group or if the
other group is to eat (chase and tag)
them.
*Bring campers inside the snack room after the game. Ask them what we were supposed to learn about. The
answer is the food chain.
II. Introduction (10 minutes)
Materials List
Track binder
8 “Get in Gear” Laminated posters
3 dry erase markers & erasers
Activity:
Bring campers back inside the Snack Room and have them sit at the tables.
Ask Campers: What food and drinks do you typically eat while camping or hiking outdoors? Wait
for responses like s’mores, granola bars, candy bars, hot dogs, etc.
Say: Hot dogs and s’mores over the open fire. Sport drinks, candy bars, chips, and Frito pie—all
foods people have been eating in the great outdoors since the dawn of recreational camping. These
foods are pretty tasty, but they also tend to be packed with sugar, sodium, and preservatives,
which can fall short on fueling physical activity. In the case of sugars, like candy bars and other
refined sugars, might give you a sugar rush for a few minutes but will eventually lead to an energy
crash later on.
The food we eat is literally the energy source that makes our body function. Can anyone tell me
what a calorie is? A calorie is how we measure the amount of energy in food and drinks. Calories
are literally energy. Your body will be working hard as you hike and will need energy from good
food sources.
Activity: “Get in Gear”
Say: Hiking requires a lot of food energy to fuel you on the trail. What will you take on your next
hike? To see what you know about the food your body needs for hiking we are going to do the
“Get in Gear” activity. Have Junior Counselors or Adults pass out the activity sheets

20
Say: At your table, you have a sheet called “Get in Gear”. In your group at your table, elect
someone to write on the poster with the dry erase marker. I want each group to draw a line
between the question in Column A and the answer in Column B. Once you are done, each group
will explain their answers. You have 3 minutes! Go!
To see the answers to the activity, look in your Appendix for the Get in Gear Answer Sheet
Say: Okay, time is up! We will go around to each of the groups and discuss their answers. The
correct answers to the activity were the following (read from the answer sheet). Good job campers!
III. Wilderness Survival Snack Packs (30minutes)
Materials List
Poster with six main nutrients written on them
Sunflower seeds
Dried
o Apple rings
o Banana chips
o Pineapple
o Cranberries
o Kiwi
Pumpkin Seeds
Wheat Montana whole-grain cereals
Dark chocolate
Activity:
Say: Foods are categorized into the different food groups based upon the nutrients they contain
and also how we normally eat them. Eating different foods from all five food groups helps us get
all of the nutrients we need to grow, play hard, and be healthy.
Say: There are six main categories of nutrients. Write the names of the following six main nutrients
on the board: carbohydrates, proteins, fats, vitamins, minerals, water.
Next, hand out the Nutrient Knowledge reproducible to all campers.
Explain that this chart is a good way to help you remember the six main nutrients, along with
important vitamins and minerals, and understand what they can do to help you look and you’re
your best, and in what food groups these nutrients can be found. Campers will use this chart as a
reference throughout the lesson.
Say: To make sure you stay fueled and full while in the Camp Grant Walker wilderness, we are
going to make our own snack packs with food rich in nutrients that give us energy.
Say: As you will notice we have 8 different kinds of snacks up here. All provide us with the
necessary nutrients to stay energized and healthy in the outdoors. We have fresh fruit that provide
you with the necessary vitamins to stay alert. See next page for ingredients and how they help you
and the campers stay full and fueled.
*Note: you may want to print these out as little signs or displays to put in front of each food on our trail mix
bar.

21
Name Vitamin, Mineral,
Carb, or Fat
Purpose
Apple Vitamin A Vitamin A helps protect your eyes and skin. It plays an important
role in helping you see at night. Vitamin A also helps you fight off
infections you may get along the trail so you stay feeling your best.
Sunflower
Seeds
Vitamin B & Fats Helps your body tap into the energy from food so you can hike
longer and harder trails. Fats help your body absorb, or take in,
certain vitamins and have healthy skin. The body also uses fats for
energy.
Kiwi &
Pineapple
Vitamin C Helps your body heal cuts and scratches you may get on the trail. Be
sure to smile! It also helps keep your teeth and gums healthy.
Bananas Mineral: Potassium Helps keep your muscles from cramping and your nervous system
working right. It may also play a role in helping your heart pump
blood easily through your body
Pumpkin
Seeds
Mineral: Iron &
Protein
Helps you have healthy blood. Your body uses iron to carry oxygen
from your lungs to the rest of your body. Protein is used by the body
to build muscle, skin, bone, and more. Also used as a source of
energy.
Whole
Grain
Cereal
Carb: Fiber Carbohydrates give you energy to run, jump, and even blink your
eyes. Fiber is a type of carbohydrate that helps move food through
your digestive tract and helps you feel full
Cranberries Vitamin C & Fiber Vitamin C.In this way, the fruit can help to prevent dental plaque
which is one of the causes of gum disease. High fiber intakes are
associated with significantly lower risks for developing coronary
heart disease, stroke, hypertension, diabetes, obesity, and certain
gastrointestinal diseases.
Dark
chocolate
morsels
Fats Fats help your body absorb, or take in, certain vitamins and have
healthy skin. The body also uses fats for energy and insulation.
22
Station 4: Building a Fire
Length: 50 minutes
Location: Trail behind boys cabin 19
At this station, campers will learn how to build a fire. Specifically, they will learn about charcoal, tin-can,
cubes, newspaper, and tea light fire starters. Campers will be building a wood open fire and roasting themselves
a snack. After their snack, campers will learn how to safely extinguish an open fire to prevent forest fires and
other accidents.
Instructional Procedures
I. Predator Prey Game (15minutes)
Source: http://www.exploringnature.org/graphics/foodwebs/pred-prey%20game.pdf
Objectives:
Campers will understand that prey population will change and thus affect the predators population and
vice versa.
Campers will know what kind of predators and prey they may encounter in Louisiana’s wilderness
Instructions
1. Laminate your game tags so they can be reused many times.
3. Explain that they can chase their prey and tag them, saying I EAT YOU! Emphasize here that they are not to
hit, bite or push. Just tag.
4. When they are all ready, say: GO EAT! After about 10 - 15 minutes they can report how many prey they
“caught.”
5. Then they should switch tags with another student. If they were a predator, they should play a prey to see
how
it feels to be the other side of the hunt.
This activity is meant to familiarize kids with what animals eat and how they are interdependent in a food web.
It has the added benefit of getting the kids outside and moving.
2. Assign each camper an animal from the list in the game to learn about. They can draw them and find
out what they eat.
3. Each child takes on an animal identity when they put on their tag. Have campers stand in a circle and each
tell who they are and what they eat. The “what do I eat?” list below can help campers.
4. Plant tags are for agents, junior counselors, and volunteers to wear so they can supervise and still take part in
the game (and be eaten).
What Do I Eat?
bear — mushrooms, fish, berries, nuts, mouse, grasshopper, rabbit, chipmunk, squirrel
bobcat — mouse, rabbit, chipmunk, squirrel, young raccoon, weasel
chipmunk — grass, plants, mushrooms, berries, nuts and cones
coyote — bird eggs, berries, nuts, mouse, grasshopper, rabbit, chipmunk, squirrel, deer
crow — mushrooms, grasshopper, berries, nuts and cones
deer — grass, plants, mushrooms, berries

23
eagle — mouse, rabbit, chipmunk, squirrel, snake, small raccoon, baby weasel
falcon — crow (small birds), mice, grasshopper
fox — bird eggs, berries, nuts, mouse, grasshopper, rabbit, chipmunk, squirrel
grasshopper — grass, plants, berries
hawk — mouse, rabbit, chipmunk, squirrel, snake, small raccoon, baby weasel
mosquito — they can tag anyone, because mosquitoes feed on the blood of any animal!
mouse — grass, plants, mushrooms, berries
owl — mouse, rabbit, chipmunk, squirrel, snake, small raccoon, baby weasel
rabbit — grass, plants, mushrooms, berries, tree buds
raccoon — mushrooms, fish, mouse, bird eggs, berries, nuts and cones
snake — mouse, grasshopper
squirrel — grass, plants, mushrooms, berries, nuts and cones
weasel — mouse, grasshopper, rabbit, chipmunk. squirrel
Debriefing:
Which prey was easier or more difficult to find and why?
Did your predator find enough prey to survive and others of their kind ?
How does this relate to humans finding food when hiking and camping in the wilderness?
What happens to predators when there is not enough prey?
What happens to prey when there is not enough predators?
What kinds of predators and prey might you run into in Louisiana’s wilderness areas?
Can you give an example of how an animal can be both predator and prey? Does this principle apply to
humans when we enter wilderness areas?
II. Identifying Tinder, Kindling, and Small Fuel (10 minutes)
Materials Needed:
o Charcoal (just an empty bag)
o 3 pkg Fire starter cubes
o (1) Newspaper
o Examples of kindling, tinder, and fuelwood
o Fuel- wood from tree & empty lighter fluid bottle
o Wood for two fires
o Matches or lighter
Activity:
1. Ask campers, “How many of you have made a fire before? Raise your hands.”
2. Pick a camper who had their hand up, and ask them “Where did you build this fire? Who helped
build the fire? What was the purpose of the fire?”
3. Ask campers “What are the two types of heat sources for fires?” Answer: Charcoal & wood
4. Ask campers, “Does anyone know what charcoal is?” Answer: Charcoal is wood that has been
partially burned so that only the hard fuel remains. It is made from wood that was grown and cut
specifically for this purpose.
5. Explain to campers that charcoal can be treated with material so that it is easier to light. Charcoal
that is not treated is more difficult to light and requires a fire starter.
24
6. Ask campers “Does anyone know what are the types of fire starters you can make or buy?”
Answer: tin-can, starter cubes, newspaper, and tea lights. Show pre-made examples to the campers.
7. Explain to the campers that we will be making a wood fire because wood is the ultimate cooking
fuel. Wood can be regulated, are relatively safe, can be used for virtually any type of cooking, and
usually can be collected near the campsite. Collecting wood, however, is trickier than it may seem.
8. Ask campers, “What are the three types of wood needed to start a fire?” Answer: tinder, kindling,
and small fuel.
9. Explain to campers and show examples of the following:
a. Tinder is small material that may be birch bark, wild grapevines, small sticks, dried spruce,
tamarack, pine branches, or other wood you find lying on the ground.
b. Kindling is larger than tinder between the size of a pencil and your index finger.
c. Small Fuel consists of pieces larger than your finger up to the size of your wrist.
10. Remind campers that they should gather fallen wood from the ground only. Pieces should be no
thicker than your wrist and should be breakable by hand. They should not break wood off trees
even if the trees are no longer living. Only gather enough wood for the group’s use and include
different sizes.
11. Have campers search the area around the station for all three types for their fire with a buddy and with
the supervision and aid of junior counselors and adults volunteers. Do not let them go farther than
100yds from the station.
12. Once campers have sufficient tinder, kindling, and small fuel, have them gather around their fire mound
to move on to actually building the fire.
13. Remind campers that the fuel is what actually produces enough heat to cook on.
14. Explain to campers that wood that is “green” or recently fallen or wet will not burn effectively if at
all. Choose wood that is dry. If wet wood is your only choice, use a fire starter to assist you in
lighting an open fire.
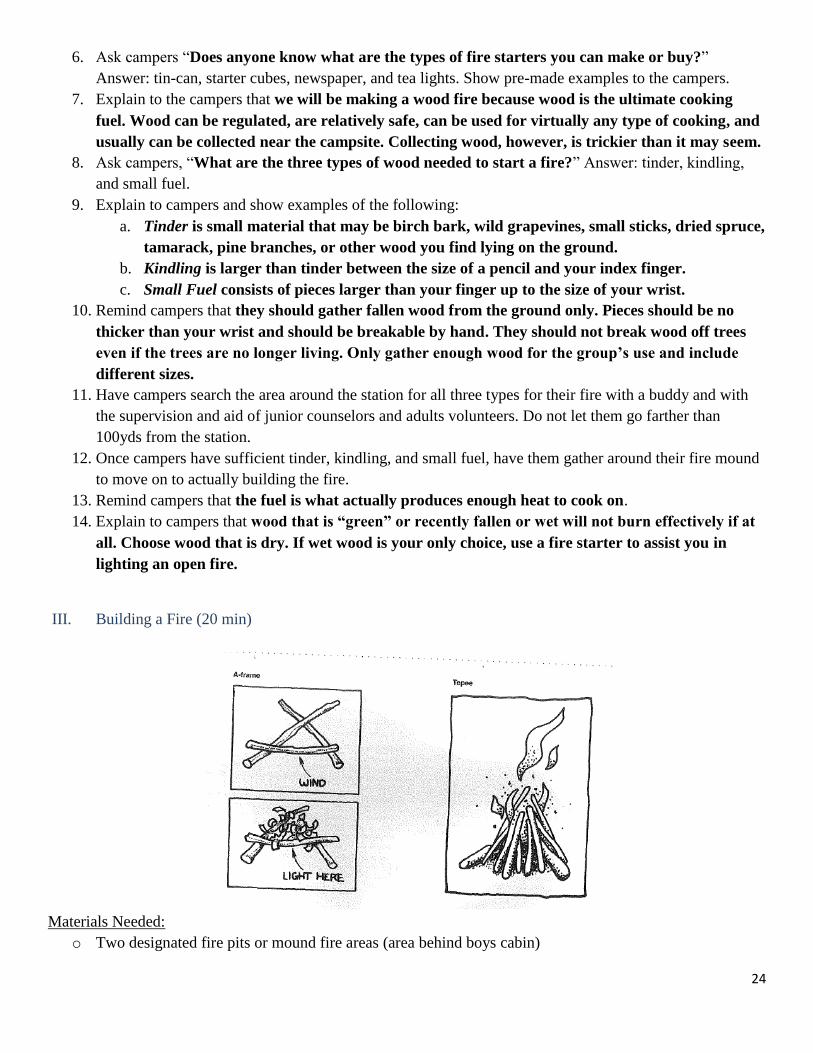
III. Building a Fire (20 min)
Materials Needed:
o Two designated fire pits or mound fire areas (area behind boys cabin)

25
o Tinder, kindling, and fuel for the two fires (should have gathered from last section)
o Matches and lighter for the two fires (should have from last section)
Activity:
1. Ask campers, “What are the three essential elements to building a fire?” Answer: oxygen, fuel, and
heat source. If any of these are missing, the fire will not burn
2. Explain to campers that there are a variety of methods to building a fire including charcoal and
wood. The two methods we will demonstrate are the A-frame and the tepee. One group will build
an A-frame and the other group will build a tepee. Flip a coin to designate which group will build
what fire.
3. Building an A-frame fire:
a. Put down a base of three fuel-size sticks, arranged like the letter “A”, with the crossbar
placed on top of the others.
b. Put the tinder in the middle of the “A” and the kindling on top.
c. Add small pieces of kindling wood. Leave small spaces through which air can move in and
out.
d. Put eight to fifteen pieces of kindling on at the beginning so that the heat from the tinder
lights the kindling.
e. Light your fire by striking a match and insert the frame under the crossbar of the A where
there is air space.
f. When the kindling is burning add small fuel.
g. Add fuel and let the fire burn down a bit.
4. Building a tepee fire:
a. Place two handfuls of tinder in the center of the fire ring in a tepee fashion.
b. Place kindling around the tinder and then small fuel around the kindling.
c. Be sure to leave space between the wood in order to light the tinder.
5. Explain to campers that products such as aluminum, steel, and plastic should not be burned at any
time.
IV. Extinguishing a Fire (5 min)
Materials Needed:
o Two buckets of water
Activity:
1. Ask campers “What are some ways to put out a fire?” Answer: Water and sand
2. Explain to campers that the best way to put out a fire is to let it burn out or use water. Sand only
smothers the flame but the coals can still be hot. A fire is completely extinguished when the coals
are cool. Pouring water on a fire creates steam, which can burn people. Be sure to stir the coals so
that are parts are sufficiently cooled.
3. Demonstrated to campers how to sprinkle water over the fire. Have them practice.
4. Once the two fires are out, explain to them how the remaining ashes should be scattered throughout
a broad area.

26

27
Station 5: Shelter Construction
Length: 50 min
Locations: Along trail behind staff cabin at American Beech tree.
At this station, campers will learn how to construct different types of shelters when outdoors. Shelter can
protect you from a number of things- from rain to blistering heat. The campers will be learning how to build a
tarp tent secured to a tree by a clove hitch. To save money, Staff can teach campers how to setup tents located in
the Maintenance Building. If money is available, teach campers the lesson in this section.
Instructional Procedures
I. Introduction (5 minutes)
What YOU Say What CAMPERS
Say
What CAMPERS Do
Hello Campers! My name is _______ and today we will
be learning about habitats shelter construction in the
wilderness.
“Hello” Campers are to be sitting
on the benches that
surround the campfire.
All forms of life, from humans to cows to bears to
flowers, need certain things to live. Survival depends on
getting enough food, water, cover and places to raise
young. Animals, plants, fungi and microbes share these
same survival needs, though it is a little more challenging
to think about how plants and microbes meet these needs.
This activity focuses exclusively on animals.
Animals must have a place to live where they can get
food, water, cover and places to raise young. Cover may
mean protection from sun or other elements as well as
protection from other animals (called predators) that may
eat the animal. Places to raise young can also mean a
protected spot, like a bird’s nest, or an area with specific
qualities that enable offspring to survive. For example,
monarch butterflies lay their eggs on milkweed plants,
which provide some cover as well as a food source for
growing monarch larvae. Therefore, a monarch habitat
must include milkweed plants for the butterfly to raise
young.
Do humans have the same requirements as animals? They
do. Humans build houses for cover and places to raise
young. Other animals may build nests or burrows for
protection or cover. Still others take cover where they find
it, under trees or in a large herd. But for all animals
(including humans), home is much bigger than a house.
It’s the entire neighborhood where an animal gets the
food, water and cover it needs to survive. Scientists call
Listening

28
this home or place its habitat. For humans, habitat may
mean
the neighborhood or city in which they live.
Ask students, What do all humans need to survive?
Which of these do plants and animals also require?
Focus on the four
basic survival needs
true for all living
things. Guide class to
generate a list with
these needs: food,
water, cover and
places to raise young.
Raise their hand and give
an answer. Do not let
them talk all at once.
Ask, Where do humans get the food, water, cover and
places to raise young they need to survive? Where do
they store and cook food?
A variety of answers-
home, neighborhood,
or city.
Supermarket;
garden.
Raise their hand and give
an answer. Do not let
them talk all at once.
Ask, Whose habitat are we in right now? Where do
you think the animals at Camp Grant Walker get their
food, water, and shelter?
Animals.
In the woods, creek,
etc.
Raise their hand and give
an answer. Do not let
them talk all at once.
You are correct. Animals at Camp Grant Walker have
all of their basic needs met. If we were to camp here in
this habitat, would we have our basic needs met? Ask
why “yes” and why “no”.
Some “yes” some
“no”
The basic need I am going to teach you how to provide
in this station is shelter construction. Who here has
ever built a tent?
Say things like “me!”
“I have!”
Raise their hands up high
II. Setting Up a Tarp Tent (45 minutes)
Source: American Camping Association Outdoor Living Skills Manual
Materials Needed:
o 5 tarps with grommets (4 for kids; 1 instructor)
o 5 sets of tent stakes (6 stakes in a pkg). (4 for kids; 1 instructor)
o 15 ft. of nylon rope. Cut every 3ft. From the 3 ft., cut into 7 individual cords for each group
o Stopwatch
o 1 roll of duct tape
*Practice setting up tarp tent before teaching this lesson*
Activity:

29
1. Instruct the campers to get into four groups. Count them off if you have to. Distribute the materials to
each group of campers. Make sure that each group of campers has at least one junior counselor to help
them.
2. Instruct campers, and model at the same time, how to set up the tarp tent.
3. Stretch the material out on the ground and mark the tie down spots on the tarp with duct tape.
4. Attach tie downs to the seven appropriately marked spots using small round pinecones or stones.
To make a tie-down, put a pinecone or stone under a tie-down spot and wrap part of one nylon
cord around the tie-down spot so that it looks like you are holding the pinecone inside (like you
are wrapping a piece of candy in cellophane).
5. Secure it with a clove hitch. To make a clove hitch, do the following:
a. Tell the campers, “A clove hitch is used to fasten a rope to a tree, post, or similar object
when there will be a steady pull on the rope (i.e. a clothesline).”
b. Instruct and demonstrate: Pass the free end of the rope behind the tree (the end that will be
loose after you tie the knot). Wrap it halfway around the tree.
c. Bring the free end around the front of the tree and cross the standing end, making an “X”.
d. Pass the free end behind the post again, below the “X”.
e. As you bring the free end around to the front of the post again, pass it under the “X” so
that it comes out between the previous two turns around the post.
f. Pull both ends tight. Be sure to pull the free end directly opposite to the standing end.

30
6. Tie the center of the front to a tree or point above five feet from the ground (about chin level for
an adult.
7. Attach the loose end of the remaining cords to a tent stake.
8. Stretch the back out to meet the ground, and secure it to the tent stake at the tie-down spots.
9. Adjust the front corners as desired, and stake them down.
10. Adjust the sides to tighten the tent, and stake them down.
11. Tuck the back corners under.
12. *If time allows* Have campers race to see who can put up their tent the fastest. Hand out ribbons to first,
second, and third place groups.

31
Station 6: Outdoor Cooking
Length: 50 minutes
Location: Fire pit by Archery range
Station Setup
Materials Needed:
2 fire rings
2 bags of charcoal
2 Dutch ovens
2 cooking racks
1 Lid lifter
2 sets of nonflammable gloves
1 lighters
2 Safety Officer Badges
2 Safety Rules sheets
1 box of cardboard
You will want to get to the Snack Room to gather
up your materials by 7:30am. Start the two fires no
later than 7:45/7:50am.

How to Start an Outdoor Charcoal Fire
1. Place the charcoal in the metal canister. Fill the canister up to the top with charcoal.
2. Set the canister on the cooking rack.
3. Tear up pieces of cardboard and place the strips in the holes below the charcoal on the metal canister.
4. Light, with a lighter, the pieces of cardboard in each of the holes.
5. The fire is ready when all of the coals are grey
Instructional Procedures
I. Getting Started & Safety Rules (20 min)
What YOU Say What CAMPERS Say What CAMPERS Do
Hello Campers! My name is _______ and today we will
be talking about outdoor cooking in the wilderness.
“Hello” Have campers sit in a half
circle or two straight rows
on the ground
There is a common misconception that wilderness
cooking is limited to hot dogs, space food, and ramen
noodles. There’s no right way to do wilderness cooking,
but if good food is a priority to you around the dinner
table, there’s no reason you should sacrifice that around
the campfire.
Listening Listening
Dutch oven cooking is more than just dumping food in a
black pot and putting it on the hot coals, hoping that it will
be good to eat. The biggest mistake people make, is not
realizing the possibilities available to them with a Dutch
oven. You can cook anything in your Dutch oven that you
would normally cook in your home oven; just a few
examples include bread, rolls, homemade pies, pizza,
roast, and meatloaf. Remember, anything that can be
fried, stewed, boiled, baked, steamed or poached can be
cooked in a Dutch oven. Low-fat, low sodium and low-
sugar recipes can also be cooked in the Dutch oven very
successfully.
Listening Listening
Another important advantage to the Dutch oven is its
versatility in times of emergency.
Imagine, if the power or gas were off for a prolonged
period of time, great meals could still be prepared using
the Dutch oven.
Today, you all will be making a charcoal fire to cook our
s’mores pie on. Ask, How many of you know what the
terms, “briquettes”, and “coals” mean?
“Briquette” means
the cold charcoal
right out of the bag.
“Coals” are the hot
charcoal (with a
grayish cast) that is
ready to use.
Have campers raise their
hands to answer.
Ask, A Dutch oven can be made out of two types of
materials. Do any of you know what those two types are?
Cast Iron and
aluminum
Have campers raise their
hands to answer.
Dutch oven can be made of cast iron or aluminum. It is a
pot with a flat bottom, 3 legs and a lid with a flange
around the outside of it which helps hold the coals while
cooking. The Dutch oven is designed to heat evenly. The

33
most popular Dutch oven is the cast iron, however many
serious hikers and campers will use the aluminum oven
because it is light weight. We will be referring to the cast
iron Dutch oven.
When Dutch oven cooking, there are a few accessories
that you need to make cooking easier, more comfortable,
and safer. Ask, Can anyone tell me what they are?
1. Leather gloves or welding gloves- Heavy duty
ranch style work gloves or welding gloves are
great for handling hot lids and ovens. We are using
welding gloves.
2. Charcoal chimney starter - Using a charcoal
starter shortens the time to wait for the charcoal to
get hot enough to use. Many Dutch oven
cookbooks have pictures of different styles of
charcoal starters.
3. Cooking stand - A cooking stand can be as simple
as a cinder block with a barrel lid on top. Anything
will do that is fireproof and up off the grass at least
10 inches.
4. Lid lifters - Lid lifters are available with either
short or long handles. They can be purchased at
any outdoor supply store.
5. Cooking Utensils- these can be long handled
tongs, heat resistant spoons, and forks.
The most important thing to remember, campers, is safety
first. To make sure that we are cooking safely, each group
will have a safety officer. I need two volunteers. Our
safety officers will monitor our cooking and read to your
group what the safety rules are for Dutch oven cooking.
*Hand to safety officers the badge and the rules.
Campers that are given
the safety officer title
need to wear the badge
and have a copy of the
rules. The safety officer
will now read out loud to
each of their group the
safety rules.
Ask, Can someone from each group tell me what two
safety techniques you feel are the most important?
Can be a variety of
any of the seven
safety rules.
Campers raise their hands
and say their answers.
II. Cooking the S’mores Pie (20/25min)
Materials Needed:
12 cups total of Graham Cracker Crumbs
6 cups of sugar total
24 tbsp total of butter
6 bags total of marshmallows
6 cups of semi-sweet chocolate chips
100 plates
100 spoons

34
Have one adult and one junior counselor at each fire ring to help with safety and to make sure everything gets
measured out correctly.
Camper Duties (for each group)
1- in charge of calling the recipe
1- measuring the graham cracker crumbs
1- measuring the cups of sugar
1- measuring the butter
1- emptying 1 whole bag of marshmallows
1- measuring the chocolate
1- handing out plates
1- handing our spoons
Recipe (for each Dutch oven)
2 cups of Graham Cracker crumbs
1 cup of sugar (3 scoops of 1/3cup)
3 tbsp of butter
1 bag of marshmallows
1 cup of semisweet chocolate
Plates & spoons for each camper
What You Say/Do What Campers Do
Have a Junior Counselor count off the campers into
groups of two.
After campers receive their number, they go stand by
the respective number fire ring.
When you are cooking in the outdoors with fire, safety
is the first priority. Therefore I would like to have one
camper for each group serve as a safety officer. Hand
the two safety officers their badge and safety rules.
Now, I would like for my safety officers to read the
safety rules. Have each officer alternate reading the
safety rules.
Campers wear the Safety Officer badge and be in
charge of making sure everyone stays safe while
cooking. One officer reads rule one; the other reads
rule two; the first officer reads rule three; and so on.
Designate one camper for each of the ingredients listed
in the recipe.
Designate one camper to be the stirrer of the
ingredients.
Have one camper be in charge of the recipe for each
Dutch oven.
The camper holding the recipe should tell the other
campers with ingredients how much to measure out
and put in their Dutch oven.
The Dutch oven that the cooking on the grate will be
the slowest to cook. The Dutch oven that is cooking on
top of the hot coals will be the fastest to cook.
Once the S’mores pies are done, designate one camper
for passing out plates and one camper to pass out
spoons.
The two helpers will pass out the plates and spoons
to each camper.

35
III. Food Survey & Eating (5-10 min)
Materials Needed:
100 copies of the Food Choice Survey
100 box of pens
Have junior counselors pass out the Food Choice Survey and the box of pens to each of the campers who were
cooking with the Dutch oven on the grate. Have the same junior counselors picking up the surveys and the pens.
During this time, the campers cooking with the Dutch oven on the ground will be eating their S’mores pie.
Once the first group of campers are done with their surveys, have a Junior Counselor or yourself serve the group
their S’mores pie. While this group is eating, have the other group complete the surveys
Related Documents