Animation – Evaluation Jay Smith S0045090 Intro For this project we first looked at what animation is all about, and look at all the different types of animation such as stop motion animation, CGI animation and many more. Then from that we took these skills that we had learnt and applied then to a test that we did. Then from that moment on we then had to design and produce short animation using the skills we had learned over the class sections. Originally myself, mike and liz were working together to make a final animation piece, we had the idea of combining pixal animation with real time footage and add effects using After Effects. But as we dint really have a story board to follow when editing the footage. So there for this is were the downfall was we was really free stylizing what we gad and adding effects to it, and even if we really did have a final piece the whole animation wouldn’t make sense. So therefore I dint r eally have time to come up with a whole new animation in the last couple of days before the deadline. And even though if I did make a whole new animation, it wouldn’t be that great as it would have been rushed. So therefore I have handed in my 3D animation project. The main concept for my own animation is that I wanted to have something to with action, it was the genre “action” that I wanted to focus souly on, and somehow relating it with zombies. I mean when I say zombies something that a child could watch without it being too scary to watch. To start of this animation I first had to think of how my characters would look like in their shape form. My first antioanal idea that I came up with is that I wanted to have the characters as simple as they can be. Even though the form and shape of the character looks allot like a lego person, I dint even think of that until I actually finished modelling it. As you can clearly see it is very basic with a cube head, cube body that I extended and reformed two spheres on either side of the body which are to be portrayed as the shoulder joints, and then finally the arms that were originally cubes that I remodelled and created fingers. The steps that I performed to model this character is first placing a simple cube and just adding a “hyperNURBS” the hyperNURBS object uses an algorithm to subdivide and round the object interactively, which the then i added the cube to it. i used the same technique for the cube as the body, but as you can see for the legs all that was that made the cube “editable” so from that point I could

Welcome message from author
This document is posted to help you gain knowledge. Please leave a comment to let me know what you think about it! Share it to your friends and learn new things together.
Transcript

8/3/2019 Zombie Takedown Evalutation (PDF)
http://slidepdf.com/reader/full/zombie-takedown-evalutation-pdf 1/6
Animation – Evaluation
Jay Smith S0045090
Intro
For this project we first looked at what animation is all about, and look at all the different types of
animation such as stop motion animation, CGI animation and many more. Then from that we took these
skills that we had learnt and applied then to a test that we did. Then from that moment on we then had
to design and produce short animation using the skills we had learned over the class sections.
Originally myself, mike and liz were working together to make a final animation piece, we had the
idea of combining pixal animation with real time footage and add effects using After Effects. But as
we dint really have a story board to follow when editing the footage. So there for this is were the
downfall was we was really free stylizing what we gad and adding effects to it, and even if we really
did have a final piece the whole animation wouldn’t make sense.
So therefore I dint really have time to come up with a whole new animation in the last couple of days
before the deadline. And even though if I did make a whole new animation, it wouldn’t be that great
as it would have been rushed. So therefore I have handed in my 3D animation project.
The main concept for my own animation is that I wanted to have something to with action, it was the
genre “action” that I wanted to focus souly on, and somehow relating it with zombies. I mean when I
say zombies something that a child could watch without it being too scary to watch.
To start of this animation I first had to think of how my characters would look like in their shape form.
My first antioanal idea that I came up with is that I wanted to have the characters as simple as they
can be. Even though the form and shape of the character looks allot like a lego person, I dint even
think of that until I actually finished modelling it. As you can clearly see it is very basic with a cube
head, cube body that I extended and reformed two spheres on either side of the body which are to
be portrayed as the shoulder joints, and then finally the arms that were originally cubes that I
remodelled and created fingers.
The steps that I performed to model this character is first placing a simple cube and just adding a
“hyperNURBS” the hyperNURBS object uses an algorithm to subdivide and round the object
interactively, which the then i added the cube to it. i used the same technique for the cube as the body,
but as you can see for the legs all that was that made the cube “editable” so from that point I could

8/3/2019 Zombie Takedown Evalutation (PDF)
http://slidepdf.com/reader/full/zombie-takedown-evalutation-pdf 2/6
Animation – Evaluation
Jay Smith S0045090
change how the cube would look like, so I selected the “Polygon tool” so then I could actually select the
which polygons that I wanted to edit, then I simply used the extrude tool so that gave the crotch effect.
Now with the modelling set a side, I then went on to create the faces for the characters, the process
that I went through to create the faces were through Photoshop. What I did was just simply created a
new pallet, any size, then from that I just used the paint bucket tool selected the lime green colour,
painted the background in the lime green. As for the eyes you can clearly see that it is and oval
shape within that another oval shape, this was done by a brush effect that I downloaded from the site
Brushezzy, and so just applied that as for the eyes, as for the mouth I used the rectangle tool to form
the shape of the mouth, then applied the same technique for the teeth. As for the human I used exactlythe same method, but for the eyes I drew them out with the brush tool, and then used the paint tool to
colour out the gaps.
One both of the faces were done for the zombie and the human, I then loaded the textures into
Cinema 4D. Once I had loaded the texture loaded into C4D that I had created in Photoshop I then had
to apply it to the model that I had previously made. To apply the texture I first had to select the head
of the model, and then use the polygon tool so then could select the polygons that I wanted the texture
to appear on, to select more than one polygon I had to hold down the “shift key” and that would allow
me to high light more polygons. Then once I selected the polygons I wanted I then just dragged the
texture on.
8/3/2019 Zombie Takedown Evalutation (PDF)
http://slidepdf.com/reader/full/zombie-takedown-evalutation-pdf 3/6
Animation – Evaluation
Jay Smith S0045090
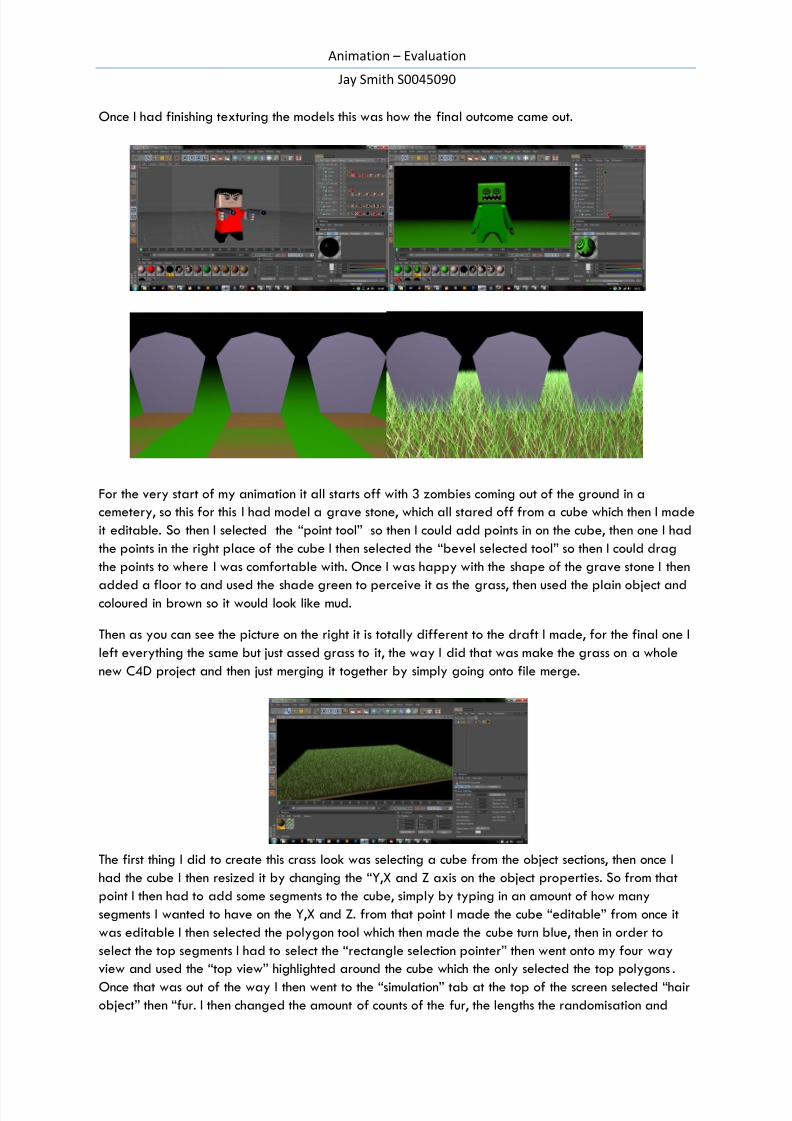
Once I had finishing texturing the models this was how the final outcome came out.
For the very start of my animation it all starts off with 3 zombies coming out of the ground in a
cemetery, so this for this I had model a grave stone, which all stared off from a cube which then I made
it editable. So then I selected the “point tool” so then I could add points in on the cube, then one I had
the points in the right place of the cube I then selected the “bevel selected tool” so then I could drag
the points to where I was comfortable with. Once I was happy with the shape of the grave stone I then
added a floor to and used the shade green to perceive it as the grass, then used the plain object andcoloured in brown so it would look like mud.
Then as you can see the picture on the right it is totally different to the draft I made, for the final one I
left everything the same but just assed grass to it, the way I did that was make the grass on a whole
new C4D project and then just merging it together by simply going onto file merge.
The first thing I did to create this crass look was selecting a cube from the object sections, then once I
had the cube I then resized it by changing the “Y,X and Z axis on the object properties. So from that
point I then had to add some segments to the cube, simply by typing in an amount of how many
segments I wanted to have on the Y,X and Z. from that point I made the cube “editable” from once it
was editable I then selected the polygon tool which then made the cube turn blue, then in order to
select the top segments I had to select the “rectangle selection pointer” then went onto my four way
view and used the “top view” highlighted around the cube which the only selected the top polygons .
Once that was out of the way I then went to the “simulation” tab at the top of the screen selected “hair
object” then “fur. I then changed the amount of counts of the fur, the lengths the randomisation and

8/3/2019 Zombie Takedown Evalutation (PDF)
http://slidepdf.com/reader/full/zombie-takedown-evalutation-pdf 4/6
Animation – Evaluation
Jay Smith S0045090
finally the variation. Then to get the texture of the grass I had to edit the way that the texture looked,
once I had the texture looking like grass I then had to texture the cube in brown to give it the mud look.
The way that I made the models move or have some sort of motion was very simple, step one was to
be one frame 0 select the model and place then I placed the model were wanted it to start walking
from then by pressing the “key frame” button it allowed me to start my motion from that point and the
on the timeline selecting 90 then pressing the “key frame” button again that would give me the end of
the motion. That was just the basic moving from one point to another I then had to make the modelmove from left to right and side to side, it is pretty much the same technique I used the model to move
from one point to another, but for this one yet again starting at frame 0, then going to frame 15 then
changing the rotation by selecting the “rotate tool” which will change the “H axis” which then allows
you model to be rotated, then key framing that, then going to frame 30, rotating the opposite way
key framing that and repeating that process till I was at the end of the motion.
I then did the same technique for the “B axis” then once all of the walking cycle was done I had myself
a walking model, so in every motion I did in this animation I primarily stuck to this technique.
8/3/2019 Zombie Takedown Evalutation (PDF)
http://slidepdf.com/reader/full/zombie-takedown-evalutation-pdf 5/6
Animation – Evaluation
Jay Smith S0045090
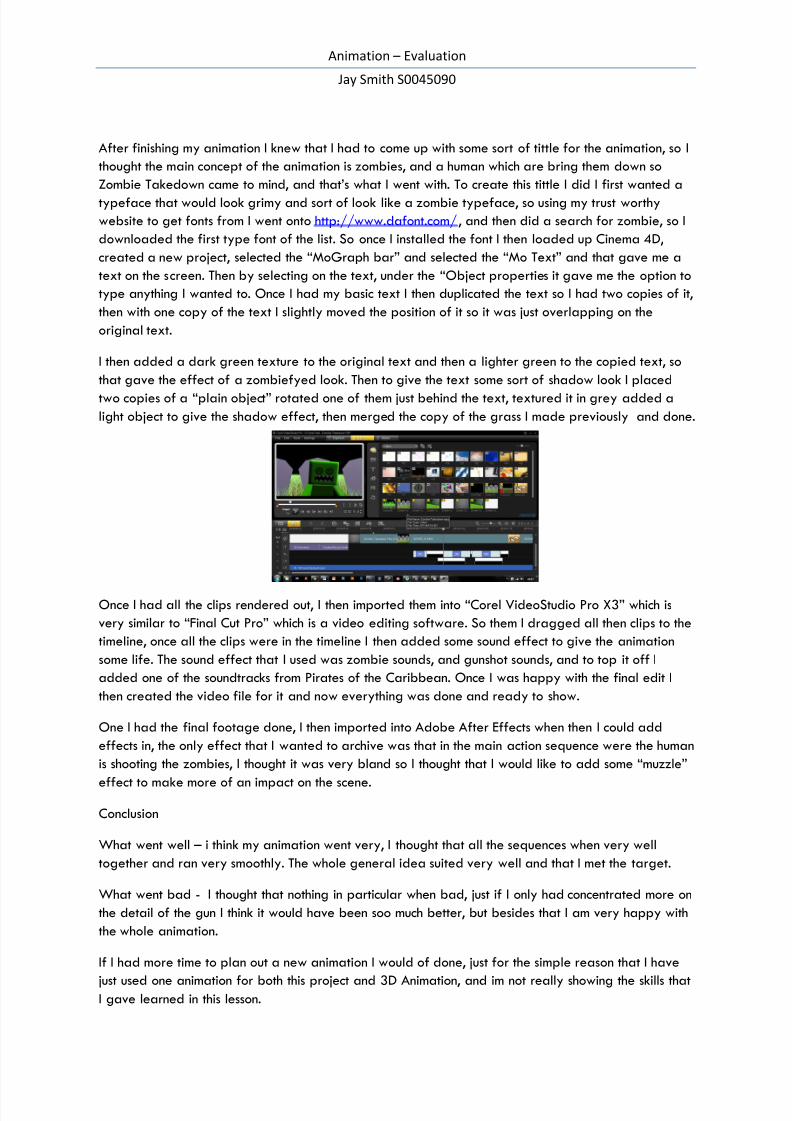
After finishing my animation I knew that I had to come up with some sort of tittle for the animation, so I
thought the main concept of the animation is zombies, and a human which are bring them down so
Zombie Takedown came to mind, and that’s what I went with. To create this tittle I did I first wanted a
typeface that would look grimy and sort of look like a zombie typeface, so using my trust worthy
website to get fonts from I went onto http://www.dafont.com/, and then did a search for zombie, so I
downloaded the first type font of the list. So once I installed the font I then loaded up Cinema 4D,
created a new project, selected the “MoGraph bar” and selected the “Mo Text” and that gave me a
text on the screen. Then by selecting on the text, under the “Object properties it gave me the option to
type anything I wanted to. Once I had my basic text I then duplicated the text so I had two copies of it,
then with one copy of the text I slightly moved the position of it so it was just overlapping on the
original text.
I then added a dark green texture to the original text and then a lighter green to the copied text, so
that gave the effect of a zombiefyed look. Then to give the text some sort of shadow look I placed
two copies of a “plain object” rotated one of them just behind the text, textured it in grey added a
light object to give the shadow effect, then merged the copy of the grass I made previously and done.
Once I had all the clips rendered out, I then imported them into “Corel VideoStudio Pro X3” which is
very similar to “Final Cut Pro” which is a video editing software. So them I dragged all then clips to the
timeline, once all the clips were in the timeline I then added some sound effect to give the animation
some life. The sound effect that I used was zombie sounds, and gunshot sounds, and to top it off I
added one of the soundtracks from Pirates of the Caribbean. Once I was happy with the final edit I
then created the video file for it and now everything was done and ready to show.
One I had the final footage done, I then imported into Adobe After Effects when then I could add
effects in, the only effect that I wanted to archive was that in the main action sequence were the human
is shooting the zombies, I thought it was very bland so I thought that I would like to add some “muzzle”
effect to make more of an impact on the scene.
Conclusion
What went well – i think my animation went very, I thought that all the sequences when very well
together and ran very smoothly. The whole general idea suited very well and that I met the target.
What went bad - I thought that nothing in particular when bad, just if I only had concentrated more on
the detail of the gun I think it would have been soo much better, but besides that I am very happy with
the whole animation.
If I had more time to plan out a new animation I would of done, just for the simple reason that I have
just used one animation for both this project and 3D Animation, and im not really showing the skills thatI gave learned in this lesson.

8/3/2019 Zombie Takedown Evalutation (PDF)
http://slidepdf.com/reader/full/zombie-takedown-evalutation-pdf 6/6
Animation – Evaluation
Jay Smith S0045090
Related Documents
![arXiv:1709.07102v1 [cs.CR] 20 Sep 2017 · using domain-generation algorithms (DGAs) to circumvent such takedown attempts. ... (zombie machines). These seeds may include numerical](https://static.cupdf.com/doc/110x72/5b033edf7f8b9ab9598f090d/arxiv170907102v1-cscr-20-sep-2017-domain-generation-algorithms-dgas-to-circumvent.jpg)


