Amalfi Woodfired Pizza Ovens DIY Kit Assembly Instructions Page 1 of 16 You have purchased the most advanced Woodfired Pizza Oven Kit available on the market today. No other oven compares to the Amalfi’s superior quality and performance. Now that you have your own Mediterranean Woodfired Oven, we hope you enjoy cooking in it as much as we have in producing the finished product. Our User Guide and Recipe Book is available to download: http://woodfiredovens.com.au/pdf/UserGuideManualV4.pdf Video including recipes and ‘how to’ segments can be found at: http://woodfiredovens.com.au Enjoy and Taste the Lifestyle! Health & Safety – Page 2 What you need – Page 2 Before you start – Page 2 Base details – Page 3 Construction – Pages 4–13 Troubleshooting – Page 14 Finished Products – Page 15

Welcome message from author
This document is posted to help you gain knowledge. Please leave a comment to let me know what you think about it! Share it to your friends and learn new things together.
Transcript

Amalfi Woodfired Pizza Ovens DIY Kit Assembly Instructions
Page 1 of 16
You have purchased the most advanced Woodfired Pizza Oven Kit available on the market today. No other
oven compares to the Amalfi’s superior quality and performance.
Now that you have your own Mediterranean Woodfired Oven, we hope you enjoy cooking in it as much as we
have in producing the finished product.
Our User Guide and Recipe Book is available to download:
http://woodfiredovens.com.au/pdf/UserGuideManualV4.pdf
Video including recipes and ‘how to’ segments can be found at:
http://woodfiredovens.com.au
Enjoy and Taste the Lifestyle!
Health & Safety – Page 2
What you need – Page 2
Before you start – Page 2
Base details – Page 3
Construction – Pages 4–13
Troubleshooting – Page 14
Finished Products – Page 15

Amalfi Woodfired Pizza Ovens DIY Kit Assembly Instructions
Page 2 of 16
We recommend that before you commence building your oven that you take a few precautions to avoid any
injury. The oven chambers are heavy and will need assistance when lifting into position.
The following items are highly recommended to wear during construction.
Protective footwear
Safety glasses
Breathing mask
Protective Gloves
Kitchen Tin-foil, measuring tape, sponge, tin snipes, sharp knife, trowel, spirit level, and a float for
rendering.
For Family/Medium Oven
5 x 20kg buckets sand,
1 x 20kg Lite or White Cement Premix containing lime (if no premix add 5 kgs of Lime)
Add 800ml to 1 Litre of ‘ Bondcrete’
Add 800ml of “Lanco” Cement Accelerator
OPTIONAL: 1 x 20 kg bag of Crushed Granite 2-7 ml (this is for a rough texture)
Rollers or Crow bar for assistance in placing chambers
NOTE: For Entertainer large: You will need 2 extra 20KG bags of sand and one extra 10kg bag of
cement. Increase Bondcrete and Accelerator to 1 litre each.
Keep all oven parts dry before rendering. We suggest you use a mask, safety glasses and gloves when
handling the insulation blanket and the mortar powder. These products may cause irritation to eyes and skin (see note).
Read through the instructions completely before you start, and keep the instructions handy during the
construction process. Before you begin, familiarise yourself with the installation steps and have everything ready.

Amalfi Woodfired Pizza Ovens DIY Kit Assembly Instructions
Page 3 of 16
(Note: The insulation is a natural wool product, which is fully soluble and non-toxic, though contact with skin may cause irritation. A
material safety data sheet is available on request.)
Amalfi Woodfired Pizza Ovens DIY Kit Assembly Instructions
Page 4 of 16
The expected size of a completed medium oven is 1,300mm long by 900mm wide. We recommend
constructing a base of about 1400-1500mm long by 1200mm wide as a minimum, able to support an oven
weight of 500Kg. A work surface around the oven (for pizza boards, roasting trays etc.) is also advantageous.
The concrete slab (top of base) must be dry, level and clean before commencing oven construction. A
concrete sealant is recommended to prevent the oven drawing moisture from the base.

Amalfi Woodfired Pizza Ovens DIY Kit Assembly Instructions
Page 5 of 16
Completely cover base in tin foil and mark the centre of the oven on the base.
Find centre line of the front floor slab (362mm), and then place on the marked centre line of the oven base.
Install ovens floor insulation blanket and flatten down tightly.
Amalfi Woodfired Pizza Ovens DIY Kit Assembly Instructions
Page 6 of 16
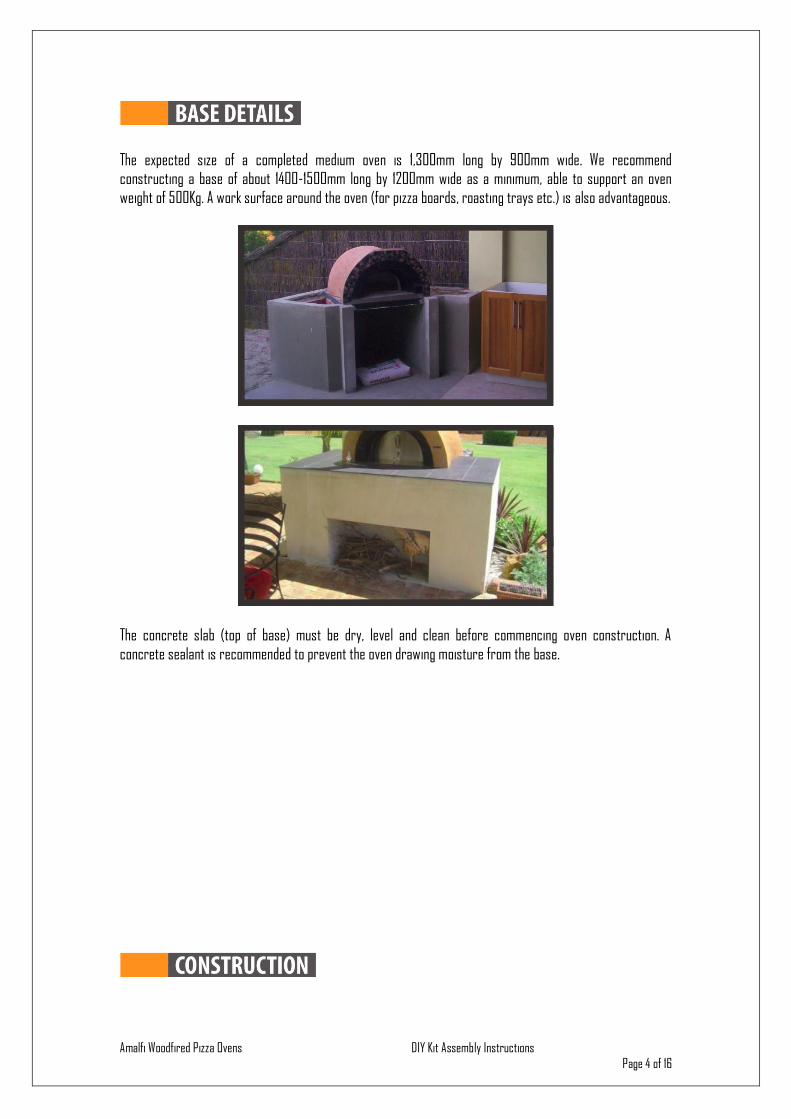
Install floor tiles, starting by placing one tile to the right of the floor slab centre line and one tile to the left of
the floor slab centre line.

Amalfi Woodfired Pizza Ovens DIY Kit Assembly Instructions
Page 7 of 16
Install the numbered floor tiles. Trim insulation as tight to the tiles as possible. All cuts to be used under side tiles.
Measure back from front floor piece 655mm. Mark foils both sides of slab.
Amalfi Woodfired Pizza Ovens DIY Kit Assembly Instructions
Page 8 of 16
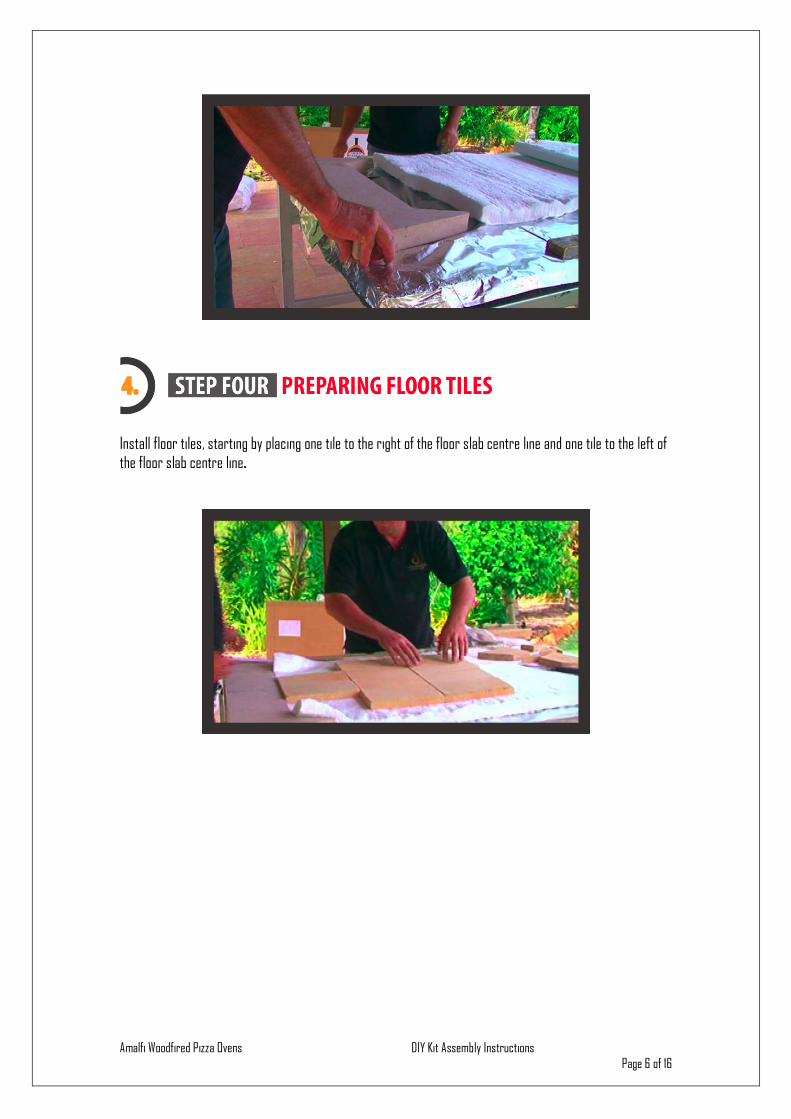
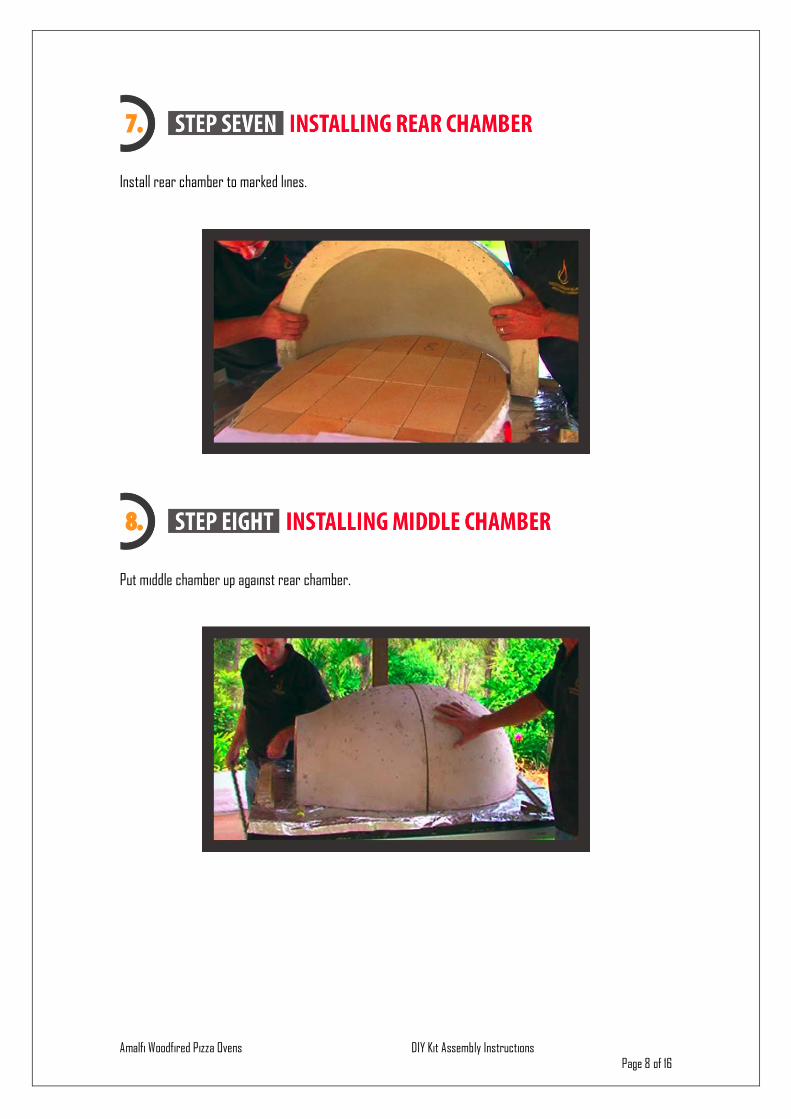
Install rear chamber to marked lines.
Put middle chamber up against rear chamber.
Amalfi Woodfired Pizza Ovens DIY Kit Assembly Instructions
Page 9 of 16
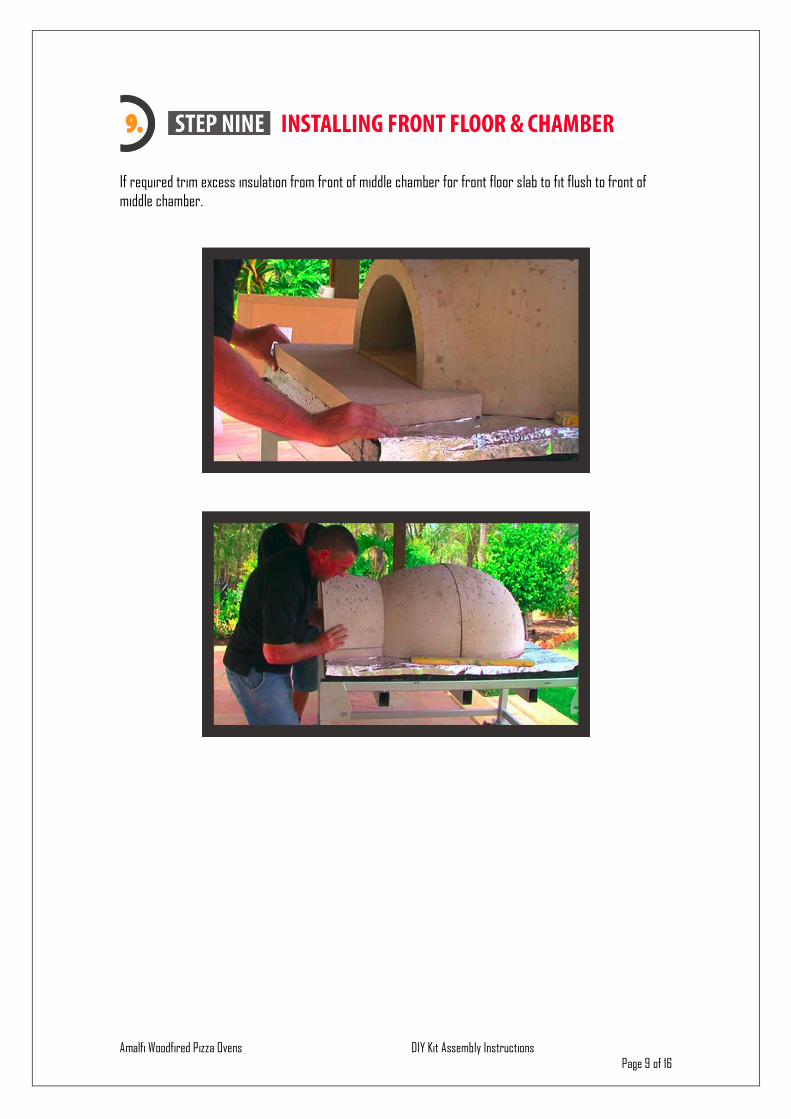
If required trim excess insulation from front of middle chamber for front floor slab to fit flush to front of
middle chamber.
Amalfi Woodfired Pizza Ovens DIY Kit Assembly Instructions
Page 10 of 16
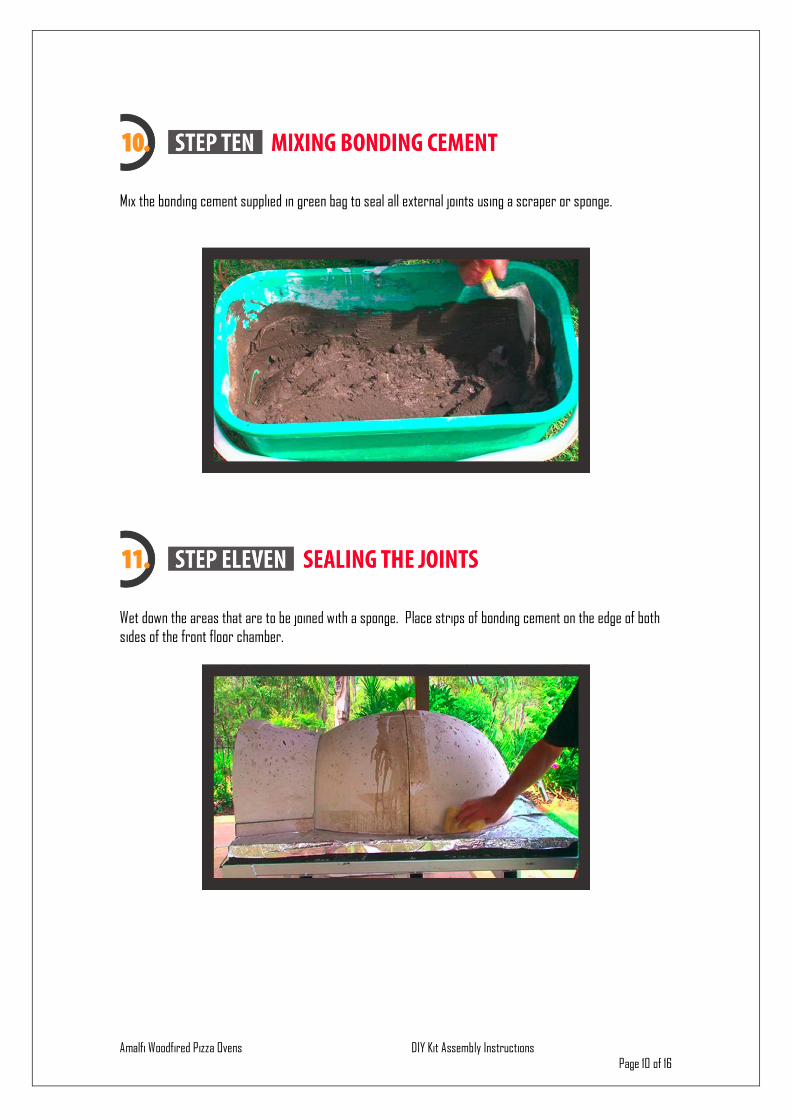
Mix the bonding cement supplied in green bag to seal all external joints using a scraper or sponge.
Wet down the areas that are to be joined with a sponge. Place strips of bonding cement on the edge of both
sides of the front floor chamber.
Amalfi Woodfired Pizza Ovens DIY Kit Assembly Instructions
Page 11 of 16
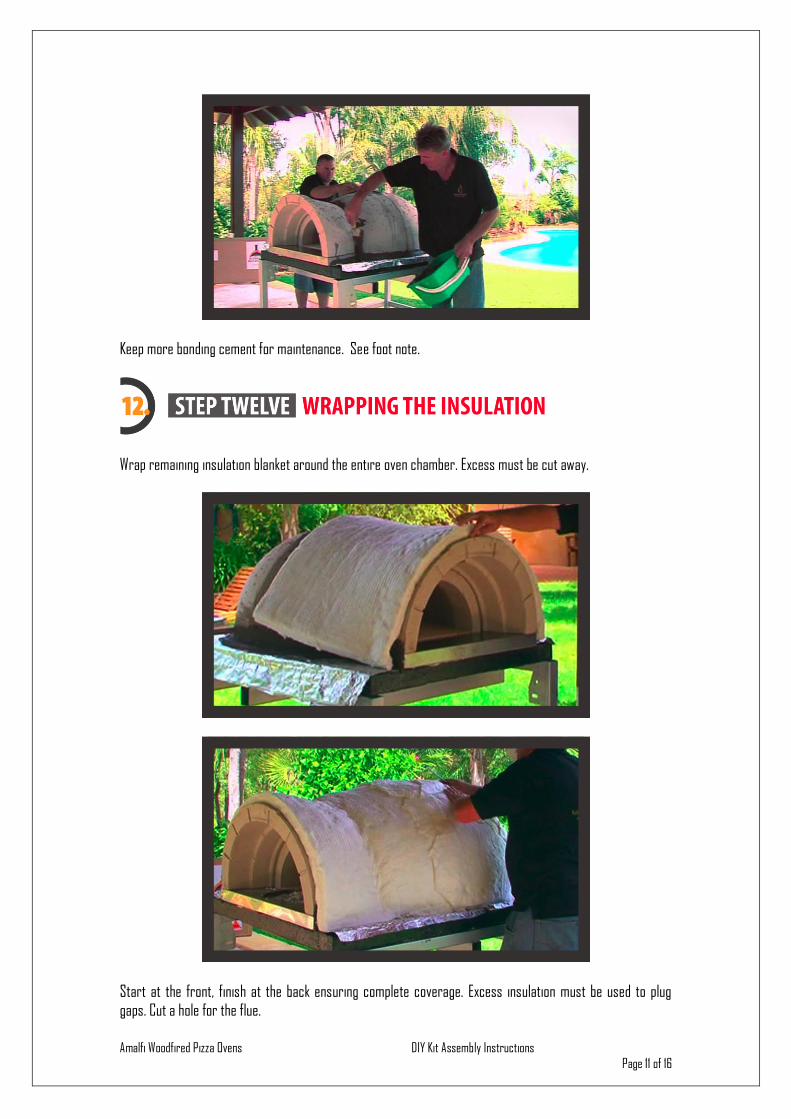
Keep more bonding cement for maintenance. See foot note.
Wrap remaining insulation blanket around the entire oven chamber. Excess must be cut away.
Start at the front, finish at the back ensuring complete coverage. Excess insulation must be used to plug gaps. Cut a hole for the flue.
Amalfi Woodfired Pizza Ovens DIY Kit Assembly Instructions
Page 12 of 16
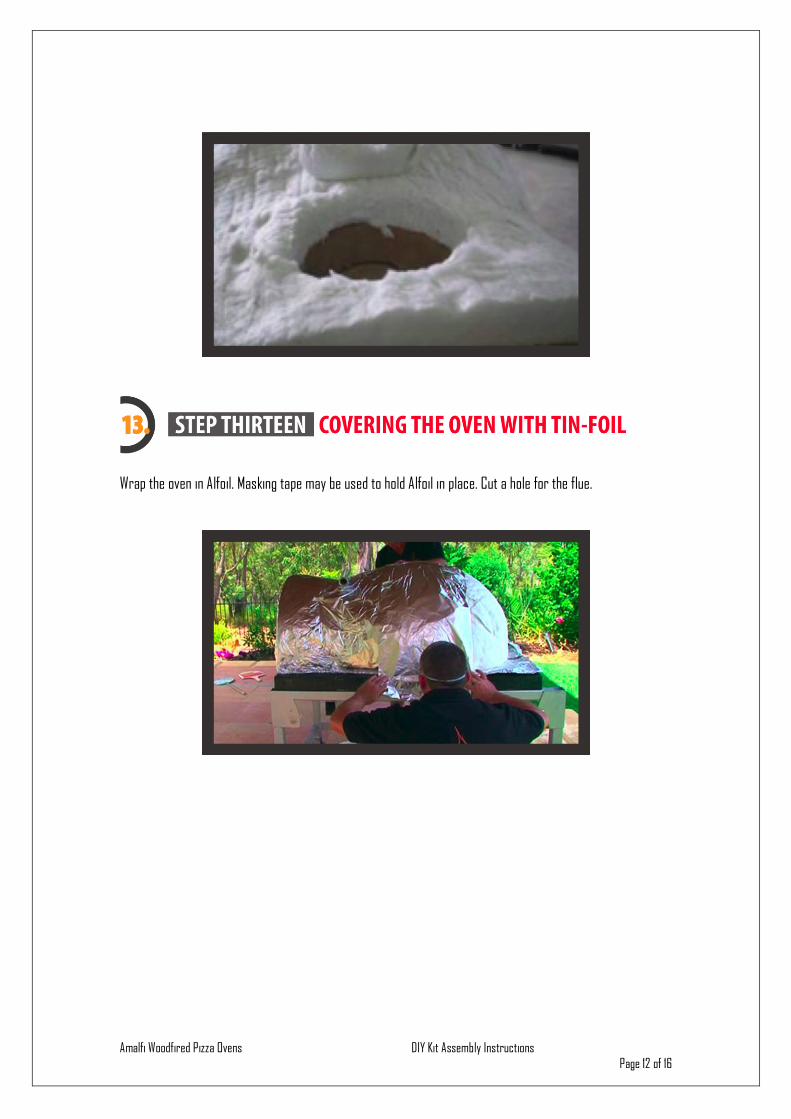
Wrap the oven in Alfoil. Masking tape may be used to hold Alfoil in place. Cut a hole for the flue.
Amalfi Woodfired Pizza Ovens DIY Kit Assembly Instructions
Page 13 of 16
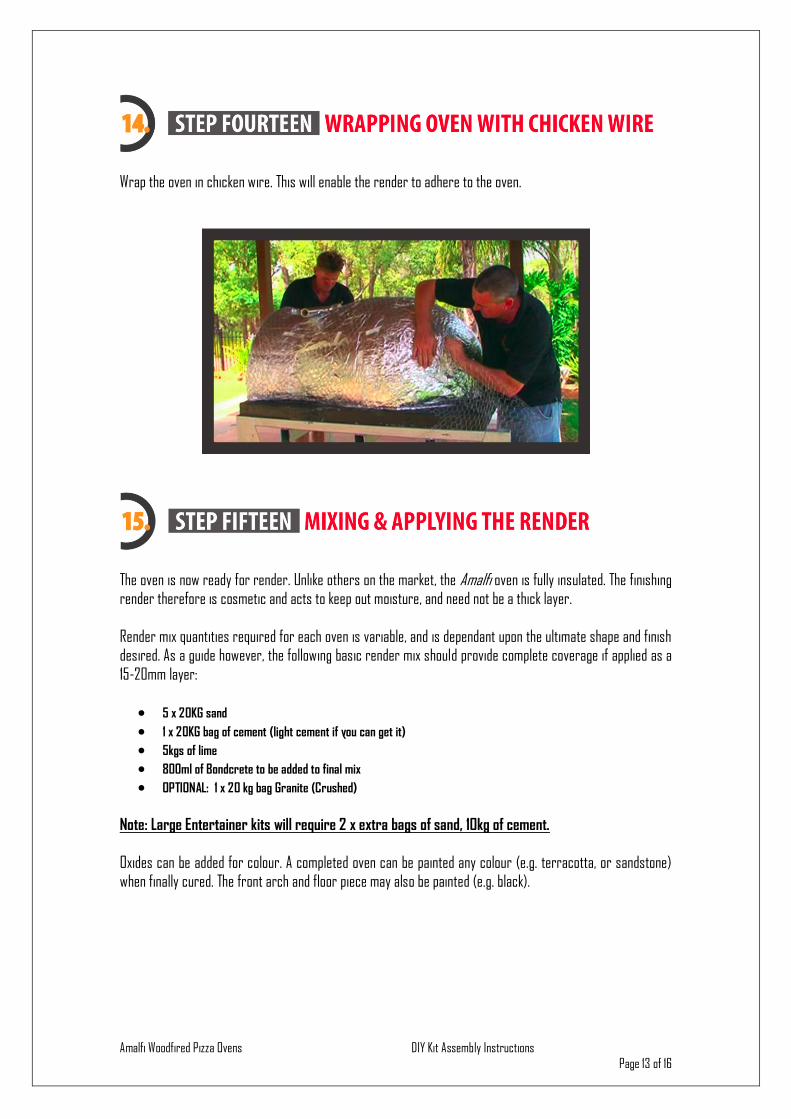
Wrap the oven in chicken wire. This will enable the render to adhere to the oven.
The oven is now ready for render. Unlike others on the market, the Amalfi oven is fully insulated. The finishing
render therefore is cosmetic and acts to keep out moisture, and need not be a thick layer.
Render mix quantities required for each oven is variable, and is dependant upon the ultimate shape and finish
desired. As a guide however, the following basic render mix should provide complete coverage if applied as a
15-20mm layer:
5 x 20KG sand 1 x 20KG bag of cement (light cement if you can get it) 5kgs of lime 800ml of Bondcrete to be added to final mix OPTIONAL: 1 x 20 kg bag Granite (Crushed)
Note: Large Entertainer kits will require 2 x extra bags of sand, 10kg of cement.
Oxides can be added for colour. A completed oven can be painted any colour (e.g. terracotta, or sandstone)
when finally cured. The front arch and floor piece may also be painted (e.g. black).
Amalfi Woodfired Pizza Ovens DIY Kit Assembly Instructions
Page 14 of 16
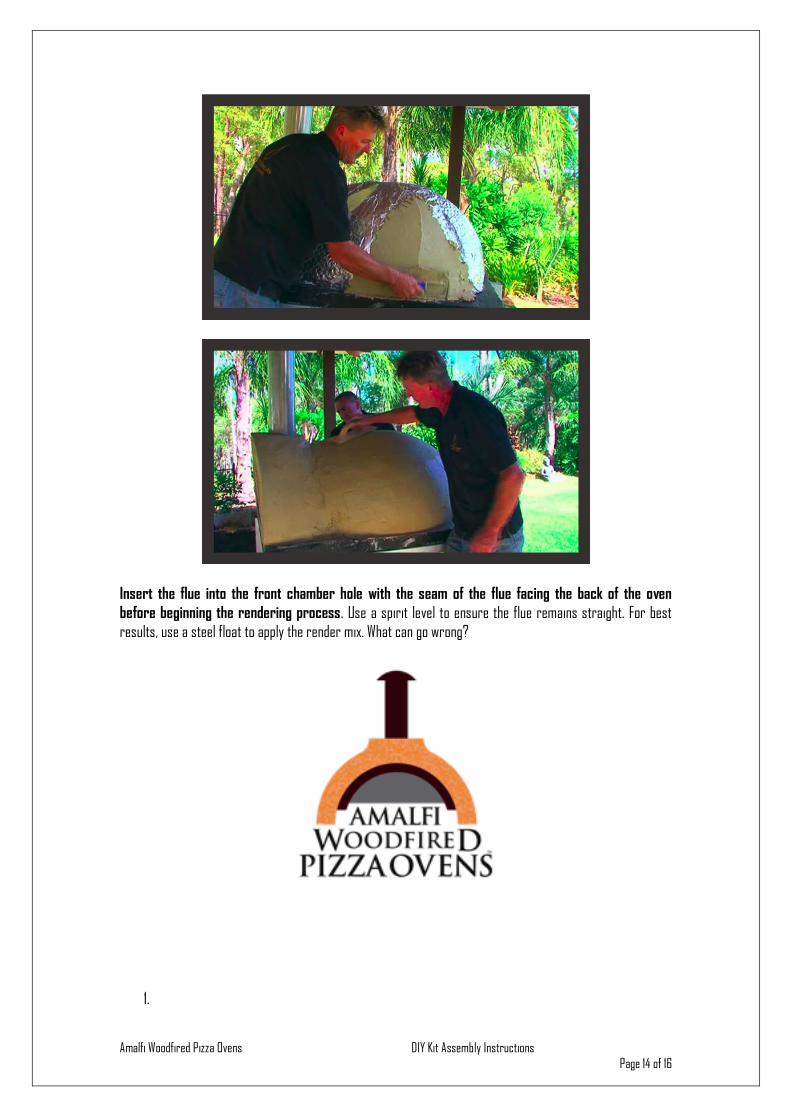
Insert the flue into the front chamber hole with the seam of the flue facing the back of the oven
before beginning the rendering process. Use a spirit level to ensure the flue remains straight. For best
results, use a steel float to apply the render mix. What can go wrong?
1.

Amalfi Woodfired Pizza Ovens DIY Kit Assembly Instructions
Page 15 of 16
o Water/moisture will damage and seriously affect the efficiency of the oven (i.e. the oven won’t
quickly reach full operating temperature when lit), so keep the oven dry until it is rendered and
sealed. The front arch must also be protected from water until painted.
o ‘Cure’ the oven (to remove moisture) by first allowing the oven to dry naturally for a few days, and
by then lighting a small fire. Keep the fire lit for as long as possible everyday until cured. A cured
oven will emit very little smoke, and the black carbon (which will initially appear inside the chambers) will disappear (the inside chambers turning white). During the Amalfi kit manufacturing
process, as much air as possible is released from the chambers (unlike other kits!) ensuring a high
quality. However, small hairline cracking can appear due to the intense heat of a wood fire – particularly if an oven is not cured properly. This is normal, and no problems generally result;
however large cracks may easily be repaired with the mortar supplied. Congratulations you have successfully built your own Woodfired ovens and will have many pleasurable experiences ahead!
o Cracks: The type of cracking that you see in your oven is common and quite normal. With the
extremely high temperatures that can be reached and the intensity of a natural heat source such as fire, your oven goes through a “settling in stage” where some expansion will take place. During this
‘settling in stage’ it is not uncommon for these expansion cracks to appear. These cracks are under no circumstance structural defects and will not affect the performance or durability of the oven. If
the crack is quite significant i.e.: 5mm thickness then use your mortar to fix.

Amalfi Woodfired Pizza Ovens DIY Kit Assembly Instructions
Page 16 of 16
Related Documents