XT-CMS + XARA Guide & Tutorial The purpose of this guide and tutorial is to show how to use XT-CMS with web pages exported from Xara. Both Xara Web Designer and Xara Designer Pro can be used as they are effectively the same when it comes to exporting websites. Requirements • XT-CMS installed and running on your host/server • Xara Web Designer or Xara Designer Pro Content Management System

Welcome message from author
This document is posted to help you gain knowledge. Please leave a comment to let me know what you think about it! Share it to your friends and learn new things together.
Transcript
XT-CMS + XARA Guide & Tutorial The purpose of this guide and tutorial is to show how to use XT-CMS with web pages exported from Xara. Both Xara Web Designer and Xara Designer Pro can be used as they are effectively the same when it comes to exporting websites. Requirements
• XT-CMS installed and running on your host/server• Xara Web Designer or Xara Designer Pro
Content Management System
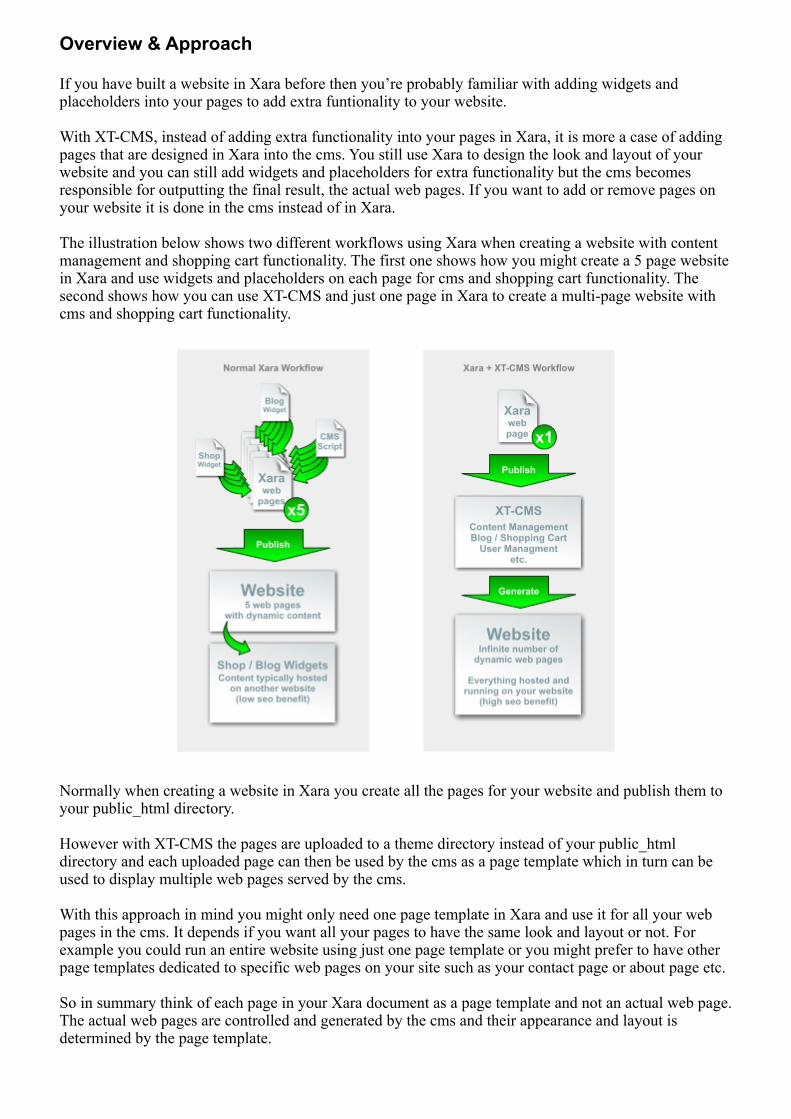
Overview & Approach If you have built a website in Xara before then you’re probably familiar with adding widgets and placeholders into your pages to add extra funtionality to your website. With XT-CMS, instead of adding extra functionality into your pages in Xara, it is more a case of adding pages that are designed in Xara into the cms. You still use Xara to design the look and layout of your website and you can still add widgets and placeholders for extra functionality but the cms becomes responsible for outputting the final result, the actual web pages. If you want to add or remove pages on your website it is done in the cms instead of in Xara. The illustration below shows two different workflows using Xara when creating a website with content management and shopping cart functionality. The first one shows how you might create a 5 page website in Xara and use widgets and placeholders on each page for cms and shopping cart functionality. The second shows how you can use XT-CMS and just one page in Xara to create a multi-page website with cms and shopping cart functionality. Normally when creating a website in Xara you create all the pages for your website and publish them to your public_html directory. However with XT-CMS the pages are uploaded to a theme directory instead of your public_html directory and each uploaded page can then be used by the cms as a page template which in turn can be used to display multiple web pages served by the cms. With this approach in mind you might only need one page template in Xara and use it for all your web pages in the cms. It depends if you want all your pages to have the same look and layout or not. For example you could run an entire website using just one page template or you might prefer to have other page templates dedicated to specific web pages on your site such as your contact page or about page etc. So in summary think of each page in your Xara document as a page template and not an actual web page. The actual web pages are controlled and generated by the cms and their appearance and layout is determined by the page template.
WebsiteInfinite number of
dynamic web pages
Everything hosted andrunning on your website
(high seo benefit)
XT-CMS
Content ManagementBlog / Shopping Cart
User Managmentetc.
Xarawebpage
Publish
Generate
Xara + XT-CMS Workflow
x1
Shop / Blog WidgetsContent typically hosted
on another website(low seo benefit)
Publish
Website5 web pages
with dynamic content
Normal Xara Workflow
x5
ShopWidget
CMSScript
BlogWidget
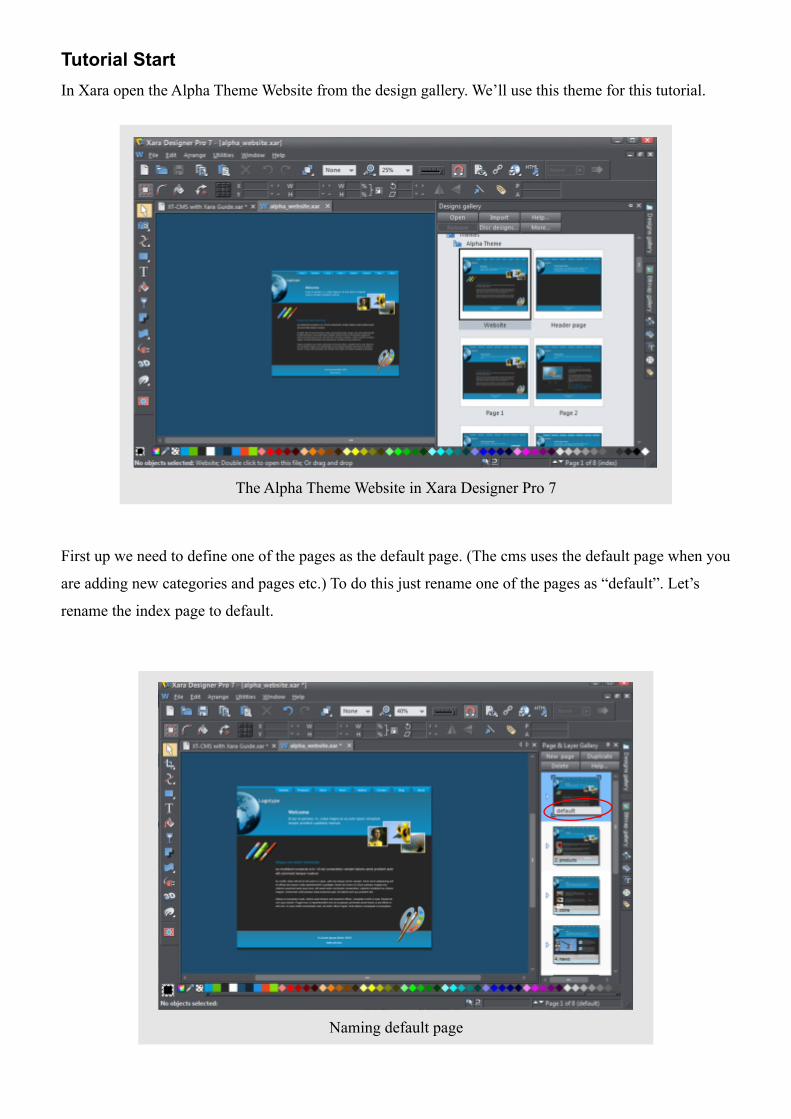
The Alpha Theme Website in Xara Designer Pro 7
Tutorial StartIn Xara open the Alpha Theme Website from the design gallery. We’ll use this theme for this tutorial.
First up we need to define one of the pages as the default page. (The cms uses the default page when you
are adding new categories and pages etc.) To do this just rename one of the pages as “default”. Let’s
rename the index page to default.
Naming default page
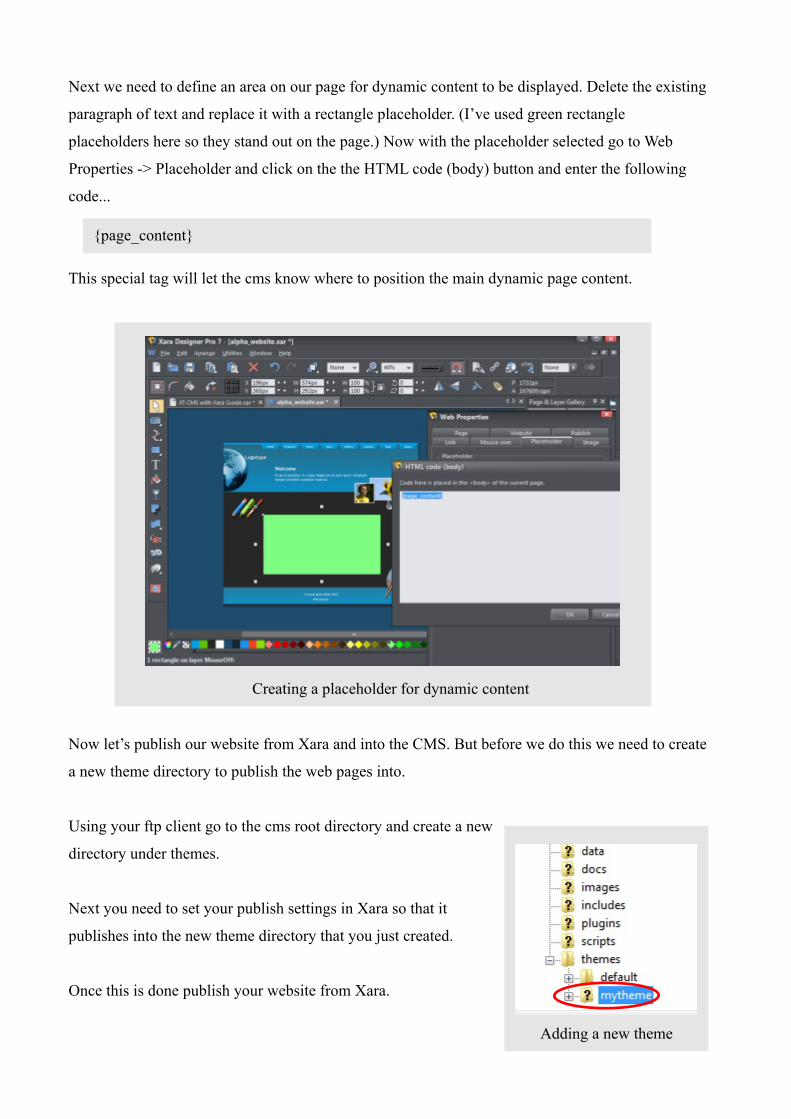
Creating a placeholder for dynamic content
Next we need to define an area on our page for dynamic content to be displayed. Delete the existing
paragraph of text and replace it with a rectangle placeholder. (I’ve used green rectangle
placeholders here so they stand out on the page.) Now with the placeholder selected go to Web
Properties -> Placeholder and click on the the HTML code (body) button and enter the following
code...
This special tag will let the cms know where to position the main dynamic page content.
Now let’s publish our website from Xara and into the CMS. But before we do this we need to create
a new theme directory to publish the web pages into.
Using your ftp client go to the cms root directory and create a new
directory under themes.
Next you need to set your publish settings in Xara so that it
publishes into the new theme directory that you just created.
Once this is done publish your website from Xara.
{page_content}
Adding a new theme
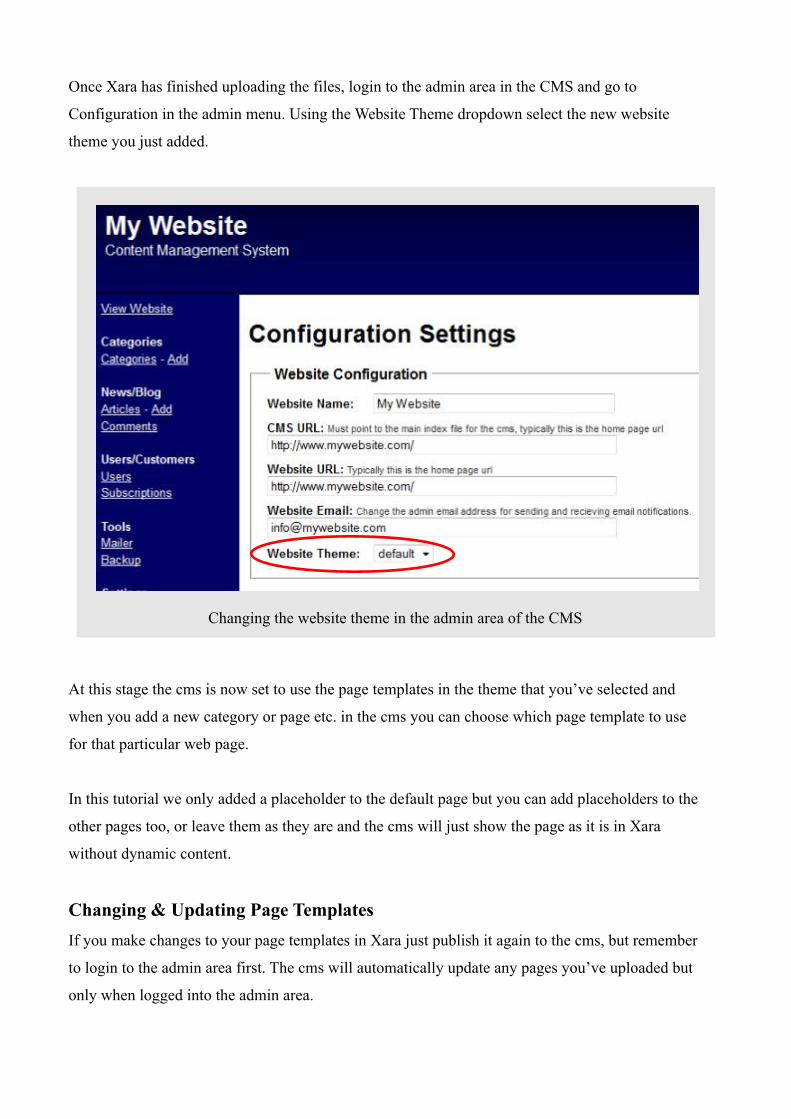
Once Xara has finished uploading the files, login to the admin area in the CMS and go to
Configuration in the admin menu. Using the Website Theme dropdown select the new website
theme you just added.
At this stage the cms is now set to use the page templates in the theme that you’ve selected and
when you add a new category or page etc. in the cms you can choose which page template to use
for that particular web page.
In this tutorial we only added a placeholder to the default page but you can add placeholders to the
other pages too, or leave them as they are and the cms will just show the page as it is in Xara
without dynamic content.
Changing & Updating Page TemplatesIf you make changes to your page templates in Xara just publish it again to the cms, but remember
to login to the admin area first. The cms will automatically update any pages you’ve uploaded but
only when logged into the admin area.
Changing the website theme in the admin area of the CMS
Related Documents