Xp installation screenshots
Jul 13, 2015
Welcome message from author
This document is posted to help you gain knowledge. Please leave a comment to let me know what you think about it! Share it to your friends and learn new things together.
Transcript

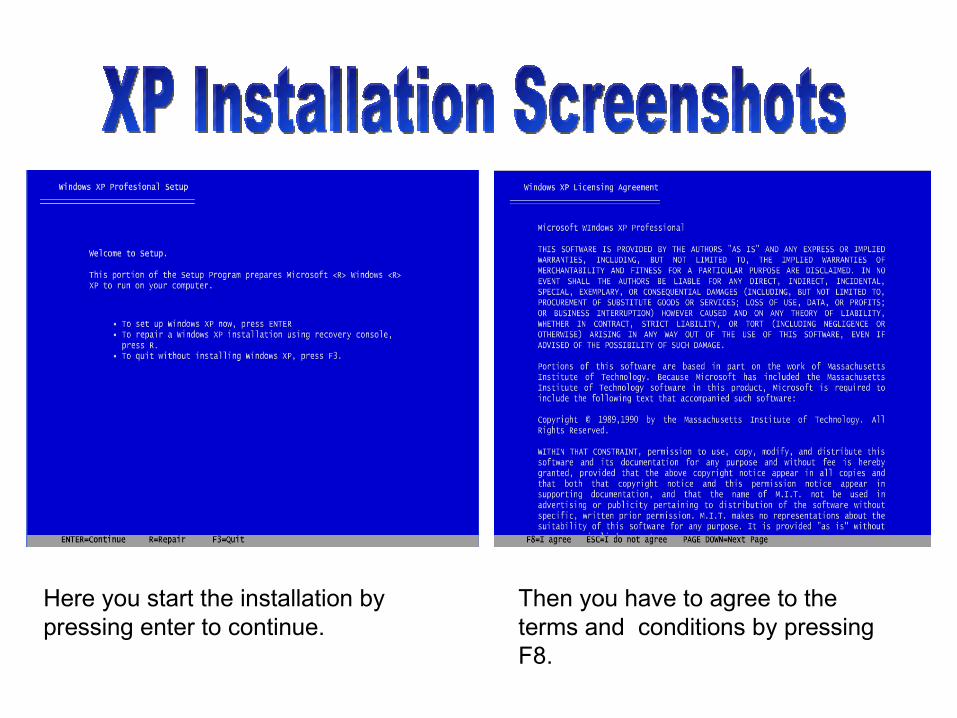
Here you start the installation by pressing enter to continue.
Then you have to agree to the terms and conditions by pressing F8.

Then choose the partition where the instalment is going to go. I chose partition 2.
Then click onto the system ‘Format the partition using the NTFS File System.
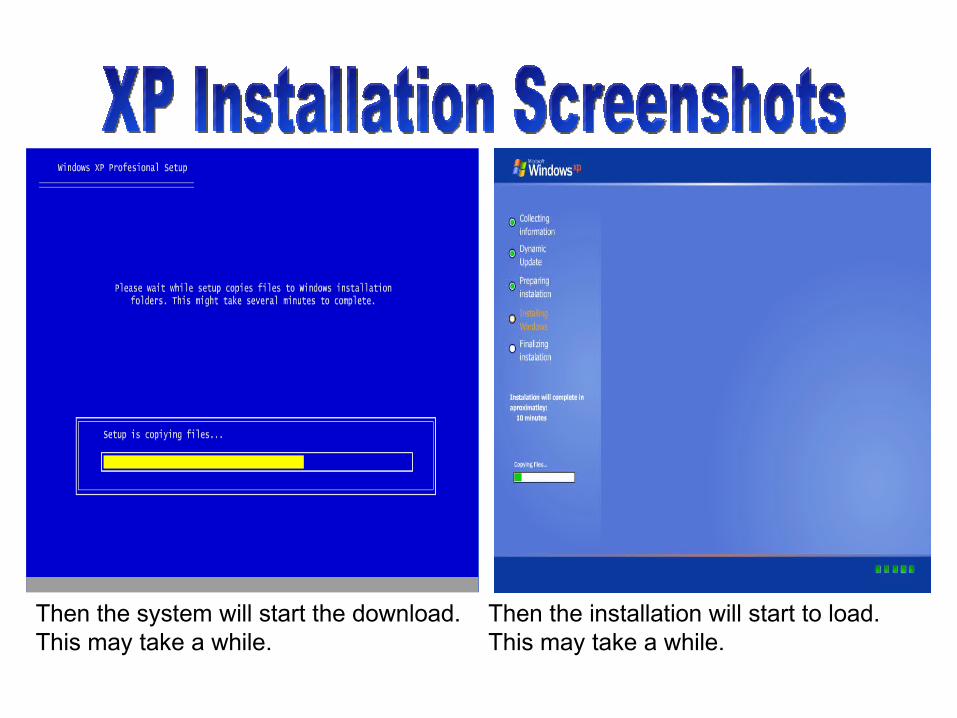
Then the system will start the download. This may take a while.
Then the installation will start to load. This may take a while.
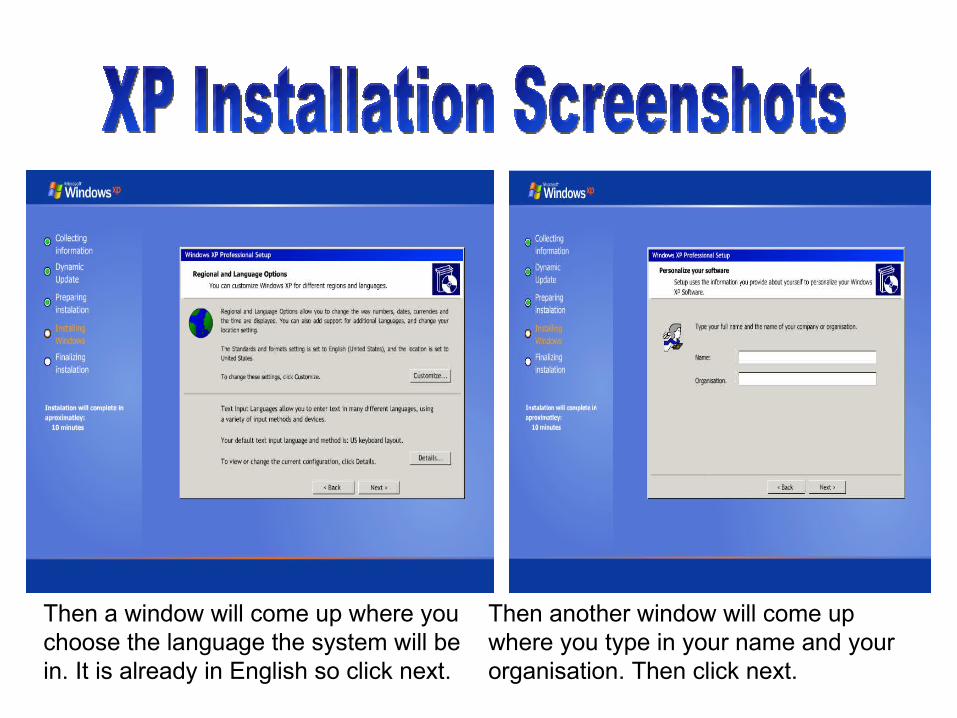
Then a window will come up where you choose the language the system will be in. It is already in English so click next.
Then another window will come up where you type in your name and your organisation. Then click next.

Then another window will come up where you have to insert the IP Address. Then click next.
Then another window will come up where you have to create a password that you would remember.
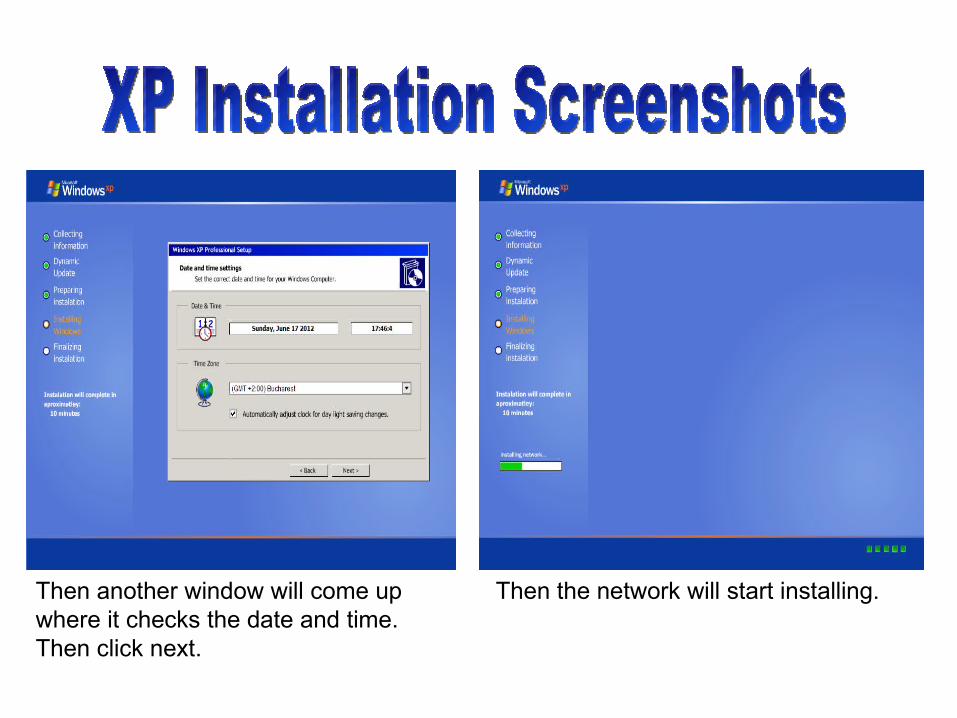
Then another window will come up where it checks the date and time. Then click next.
Then the network will start installing.

Then a window will come up which allows you to confirm which settings the system will use. Then click next.
Then another window will come up which allows you to choose if the system will be a network or not. Then click next.
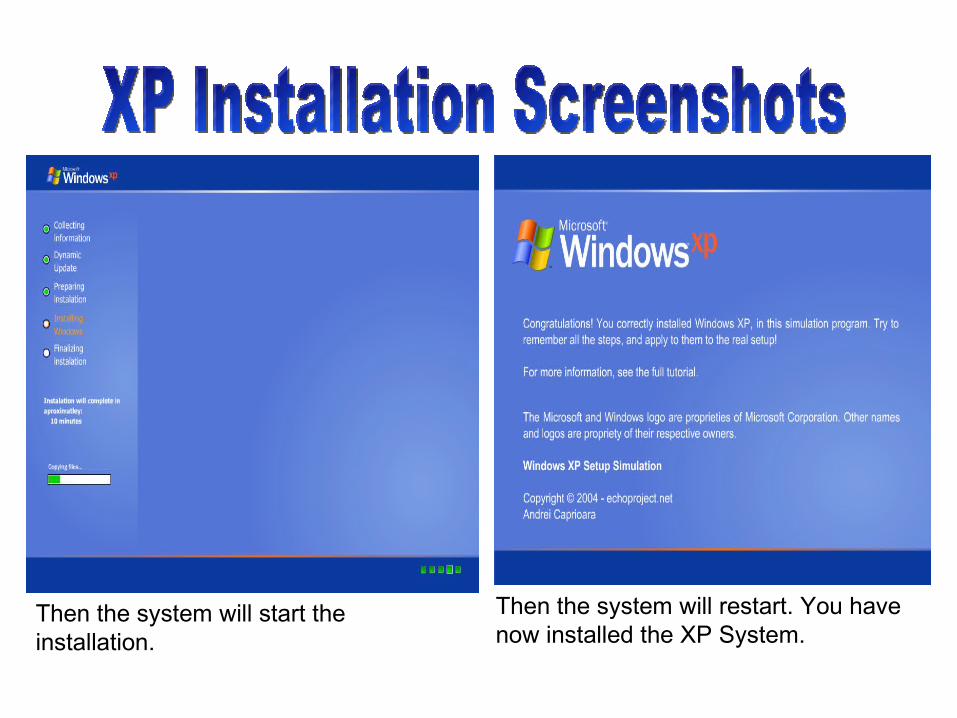
Then the system will start the installation.
Then the system will restart. You have now installed the XP System.
Related Documents