Xbox 360 Teardown Written By: Chris Green Xbox 360 Teardown Draft: 2018-10-17 Guide ID: 1203 - This document was generated on 2019-09-17 09:38:57 AM (MST). © iFixit — CC BY-NC-SA www.iFixit.com Page 1 of 20

Welcome message from author
This document is posted to help you gain knowledge. Please leave a comment to let me know what you think about it! Share it to your friends and learn new things together.
Transcript

Xbox 360 TeardownWritten By: Chris Green
Xbox 360 Teardown Draft: 2018-10-17Guide ID: 1203 -
This document was generated on 2019-09-17 09:38:57 AM (MST).
© iFixit — CC BY-NC-SA www.iFixit.com Page 1 of 20
INTRODUCTION
The Microsoft Xbox 360 released in 2005, is one of the most powerful gaming consoles on themarket. This console has taken a lot of heat over the years because of the red ring of death, But I'llshow you what's inside of this beast.
TOOLS:Heavy-Duty Spudger (1)Flathead 3/32" or 2.5 mm Screwdriver (1)Spudger (1)T10 Torx Screwdriver (1)T8 Torx Screwdriver (1)
Xbox 360 Teardown Draft: 2018-10-17Guide ID: 1203 -
This document was generated on 2019-09-17 09:38:57 AM (MST).
© iFixit — CC BY-NC-SA www.iFixit.com Page 2 of 20
Step 1 — Xbox 360 Teardown
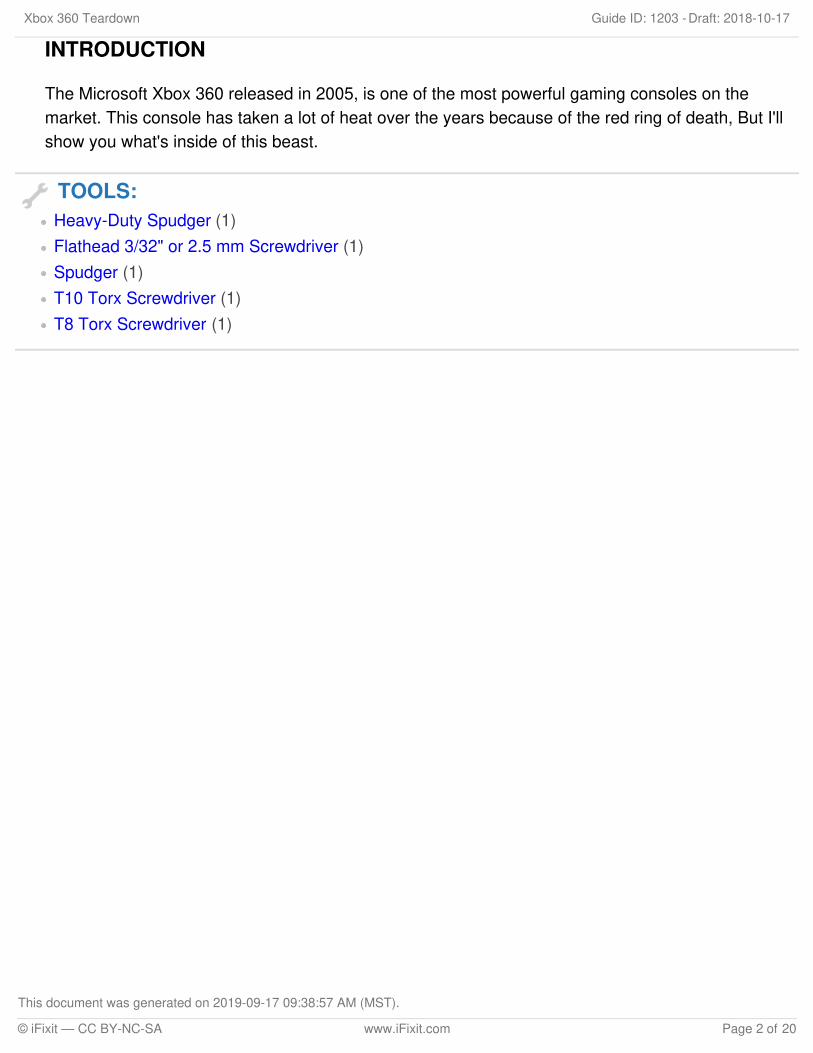
The Xbox 360 is one of the most powerful gaming consoles on the market. I may have the Halo 3Edition, but the dissasembly for all models is the same.
The disassembly of this console is not easy, but with some patience you can do it.
This Disassembly also works with HDMI models, and Non-HDMI models
Step 2
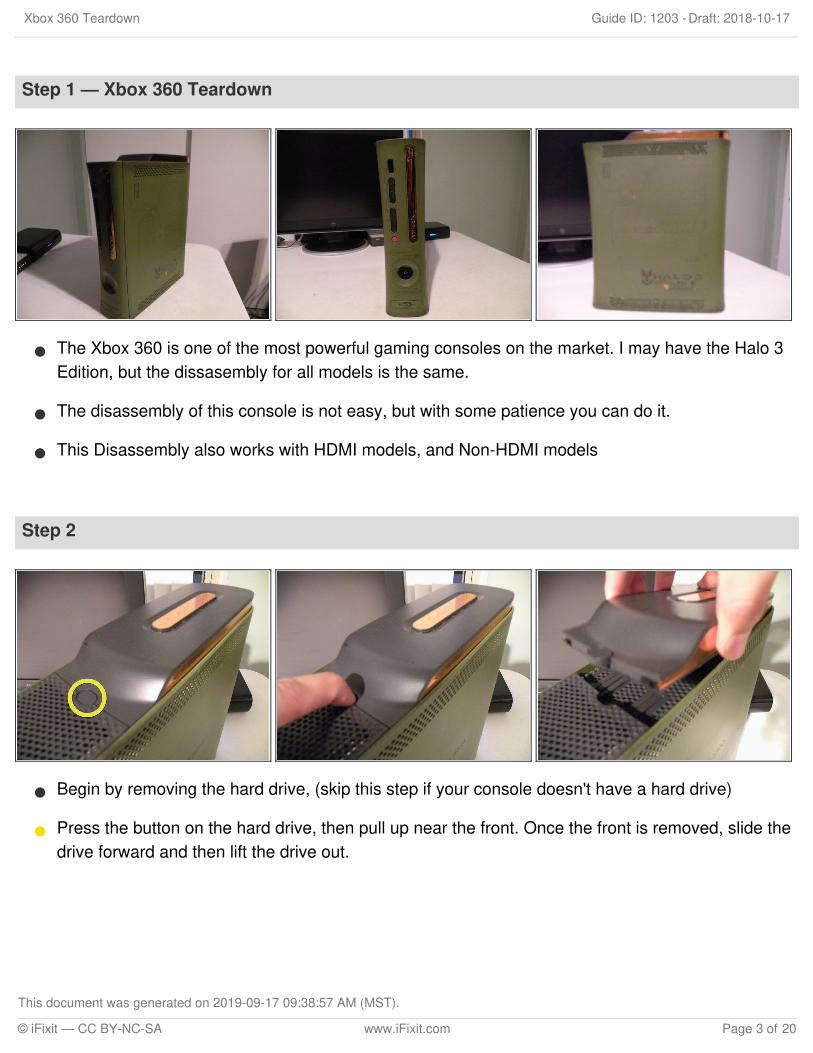
Begin by removing the hard drive, (skip this step if your console doesn't have a hard drive)
Press the button on the hard drive, then pull up near the front. Once the front is removed, slide thedrive forward and then lift the drive out.
Xbox 360 Teardown Draft: 2018-10-17Guide ID: 1203 -
This document was generated on 2019-09-17 09:38:57 AM (MST).
© iFixit — CC BY-NC-SA www.iFixit.com Page 3 of 20

Step 3
Removing the Face-Plate
Put two fingers into the USB port area, then push down, while pulling the face-plate towards you.
Step 4
Not so pretty anymore!
Xbox 360 Teardown Draft: 2018-10-17Guide ID: 1203 -
This document was generated on 2019-09-17 09:38:57 AM (MST).
© iFixit — CC BY-NC-SA www.iFixit.com Page 4 of 20
Step 5
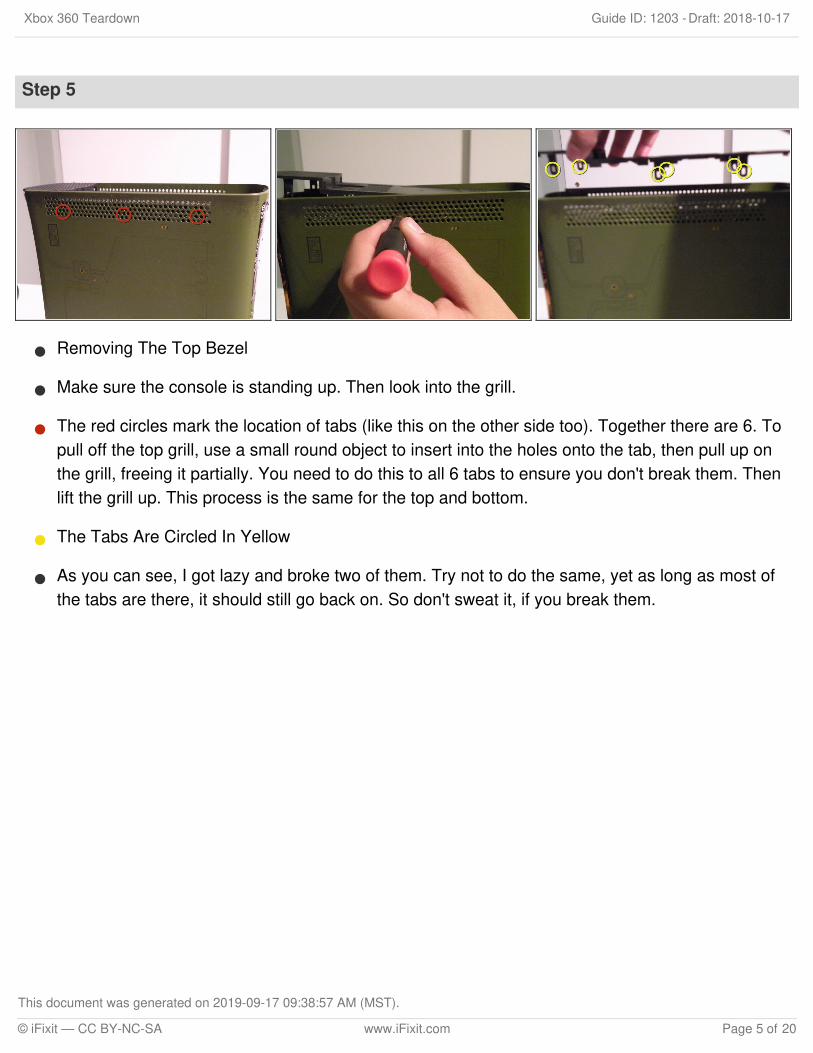
Removing The Top Bezel
Make sure the console is standing up. Then look into the grill.
The red circles mark the location of tabs (like this on the other side too). Together there are 6. Topull off the top grill, use a small round object to insert into the holes onto the tab, then pull up onthe grill, freeing it partially. You need to do this to all 6 tabs to ensure you don't break them. Thenlift the grill up. This process is the same for the top and bottom.
The Tabs Are Circled In Yellow
As you can see, I got lazy and broke two of them. Try not to do the same, yet as long as most ofthe tabs are there, it should still go back on. So don't sweat it, if you break them.
Xbox 360 Teardown Draft: 2018-10-17Guide ID: 1203 -
This document was generated on 2019-09-17 09:38:57 AM (MST).
© iFixit — CC BY-NC-SA www.iFixit.com Page 5 of 20
Step 6
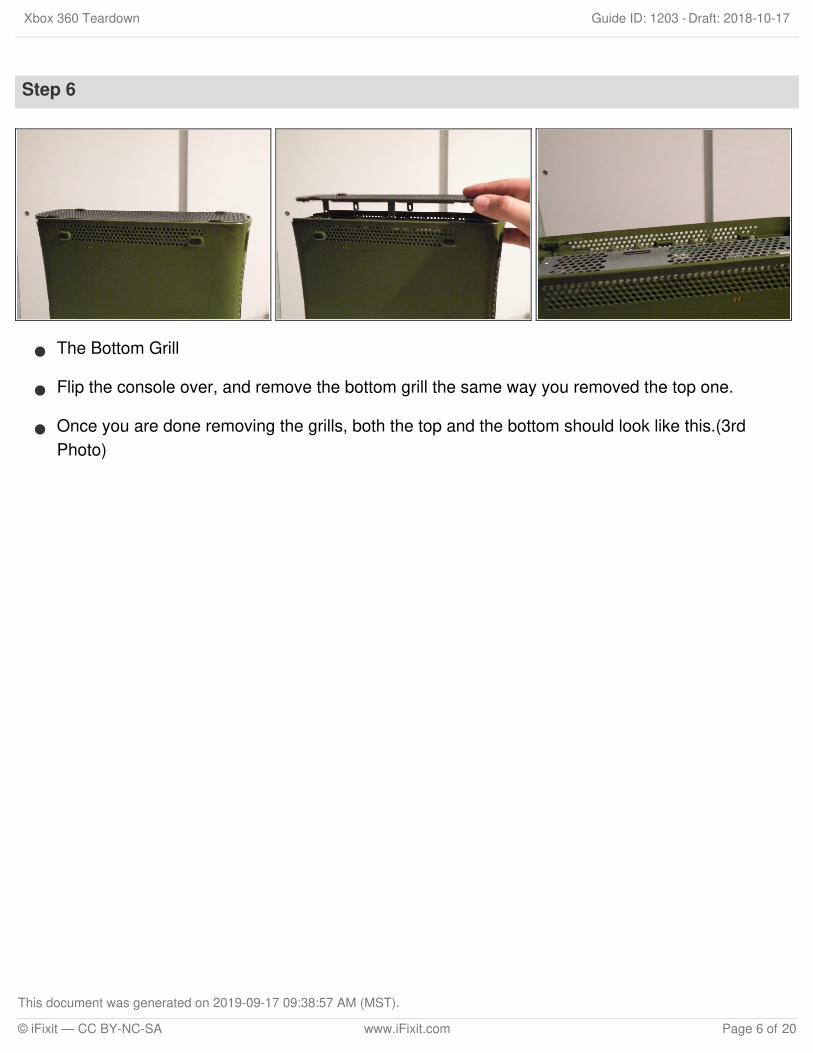
The Bottom Grill
Flip the console over, and remove the bottom grill the same way you removed the top one.
Once you are done removing the grills, both the top and the bottom should look like this.(3rdPhoto)
Xbox 360 Teardown Draft: 2018-10-17Guide ID: 1203 -
This document was generated on 2019-09-17 09:38:57 AM (MST).
© iFixit — CC BY-NC-SA www.iFixit.com Page 6 of 20

Step 7
The Point of No Return
That little thing that I am pointing at, with a screwdriver, is the "Microsoft Seal". It is a sticker thatyou must remove to continue. It is the warranty sticker. Mine has already been removed, and onceyou remove it, you will see why you can't put it back on. This is the point of no return, but if youheat it up a little, you can certainly reduce this
Xbox 360 Teardown Draft: 2018-10-17Guide ID: 1203 -
This document was generated on 2019-09-17 09:38:57 AM (MST).
© iFixit — CC BY-NC-SA www.iFixit.com Page 7 of 20

Step 8
Once you break the Microsoft seal, we can continue. Start by taking multiple flathead screwdriverbits or 4 spudgers (The most common spudger is a black or yellow nylon stick with a metal hook atone end.) and put them in these 4 latches to hold them open.
After all 4 tabs are held open, pull up on the top half of the case. The bits should pop out(don't losethem!). Lift the case up and make sure the tabs don't reconnect.
Step 9
Lift the half up and then flip the console upright, and make sure that you don't let the tabs close.
Xbox 360 Teardown Draft: 2018-10-17Guide ID: 1203 -
This document was generated on 2019-09-17 09:38:57 AM (MST).
© iFixit — CC BY-NC-SA www.iFixit.com Page 8 of 20
Step 10
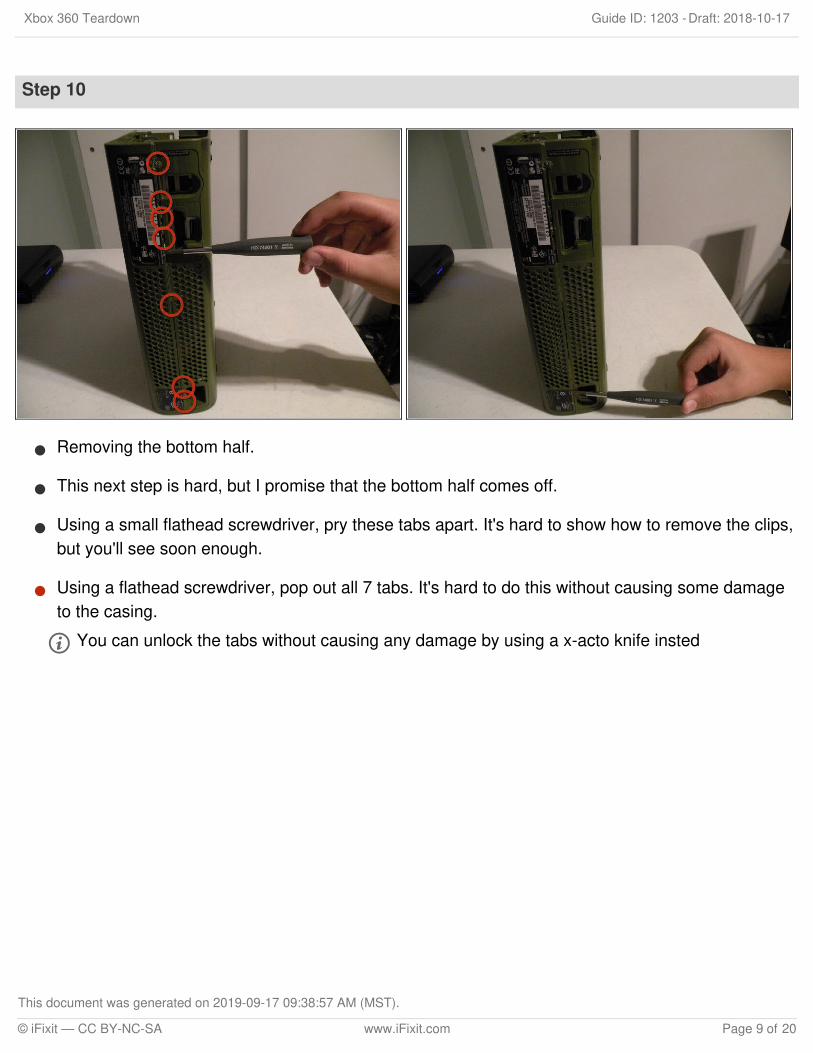
Removing the bottom half.
This next step is hard, but I promise that the bottom half comes off.
Using a small flathead screwdriver, pry these tabs apart. It's hard to show how to remove the clips,but you'll see soon enough.
Using a flathead screwdriver, pop out all 7 tabs. It's hard to do this without causing some damageto the casing.
You can unlock the tabs without causing any damage by using a x-acto knife insted
Xbox 360 Teardown Draft: 2018-10-17Guide ID: 1203 -
This document was generated on 2019-09-17 09:38:57 AM (MST).
© iFixit — CC BY-NC-SA www.iFixit.com Page 9 of 20
Step 11
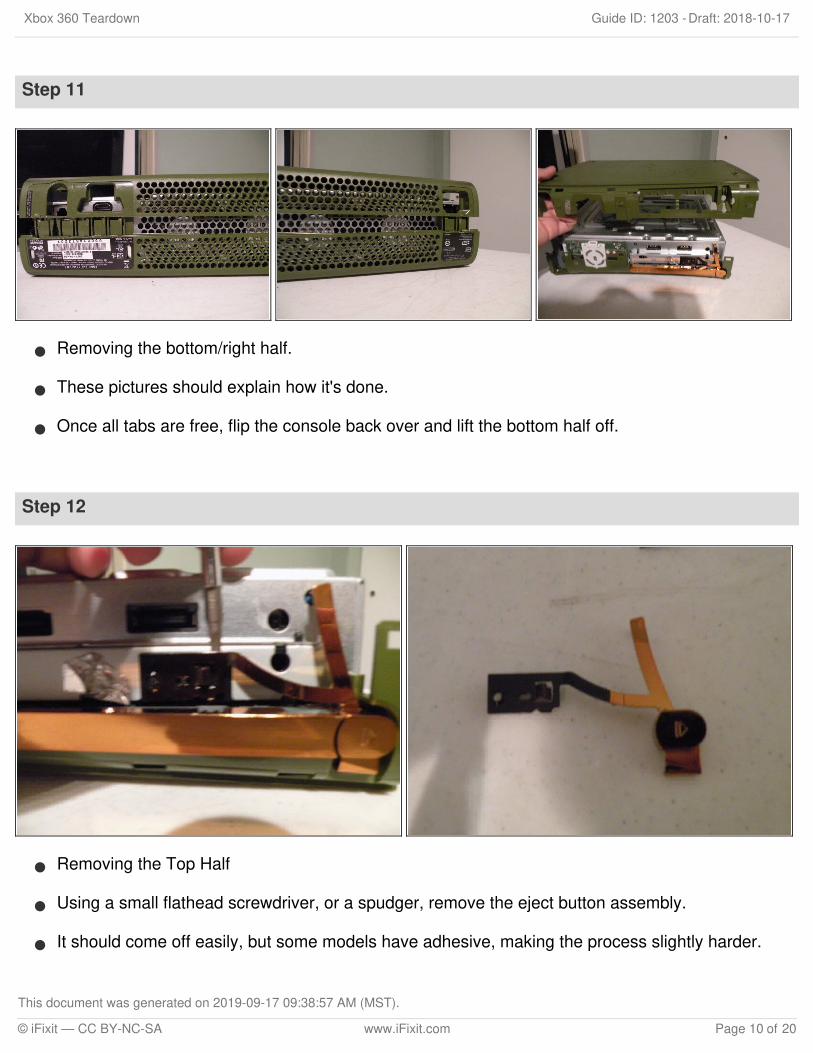
Removing the bottom/right half.
These pictures should explain how it's done.
Once all tabs are free, flip the console back over and lift the bottom half off.
Step 12
Removing the Top Half
Using a small flathead screwdriver, or a spudger, remove the eject button assembly.
It should come off easily, but some models have adhesive, making the process slightly harder.
Xbox 360 Teardown Draft: 2018-10-17Guide ID: 1203 -
This document was generated on 2019-09-17 09:38:57 AM (MST).
© iFixit — CC BY-NC-SA www.iFixit.com Page 10 of 20

Step 13
Removing the top half.
Flip the console over and remove the 6 T10 Screws. They should each be 2.5" long, if not, youremoved the wrong screws.
Then flip the console back over, holding it by both the plastic and the metal.
Xbox 360 Teardown Draft: 2018-10-17Guide ID: 1203 -
This document was generated on 2019-09-17 09:38:57 AM (MST).
© iFixit — CC BY-NC-SA www.iFixit.com Page 11 of 20

Step 14
Now lift the top half off, and Voila! You now have access to the guts.
Xbox 360 Teardown Draft: 2018-10-17Guide ID: 1203 -
This document was generated on 2019-09-17 09:38:57 AM (MST).
© iFixit — CC BY-NC-SA www.iFixit.com Page 12 of 20
Step 15
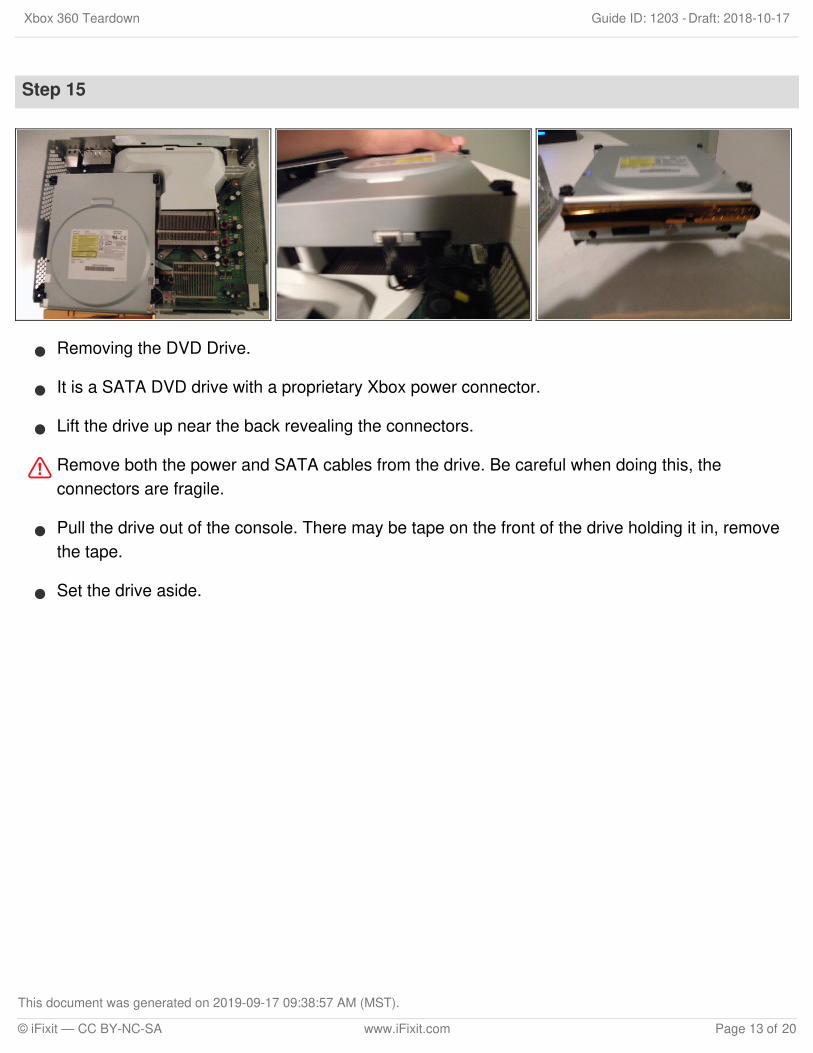
Removing the DVD Drive.
It is a SATA DVD drive with a proprietary Xbox power connector.
Lift the drive up near the back revealing the connectors.
Remove both the power and SATA cables from the drive. Be careful when doing this, theconnectors are fragile.
Pull the drive out of the console. There may be tape on the front of the drive holding it in, removethe tape.
Set the drive aside.
Xbox 360 Teardown Draft: 2018-10-17Guide ID: 1203 -
This document was generated on 2019-09-17 09:38:57 AM (MST).
© iFixit — CC BY-NC-SA www.iFixit.com Page 13 of 20

Step 16
Removing the Fan Shroud.
Using a flathead screwdriver, pry out the tab connecting it to the fans.
Lift the shroud out.
Xbox 360 Teardown Draft: 2018-10-17Guide ID: 1203 -
This document was generated on 2019-09-17 09:38:57 AM (MST).
© iFixit — CC BY-NC-SA www.iFixit.com Page 14 of 20
Step 17
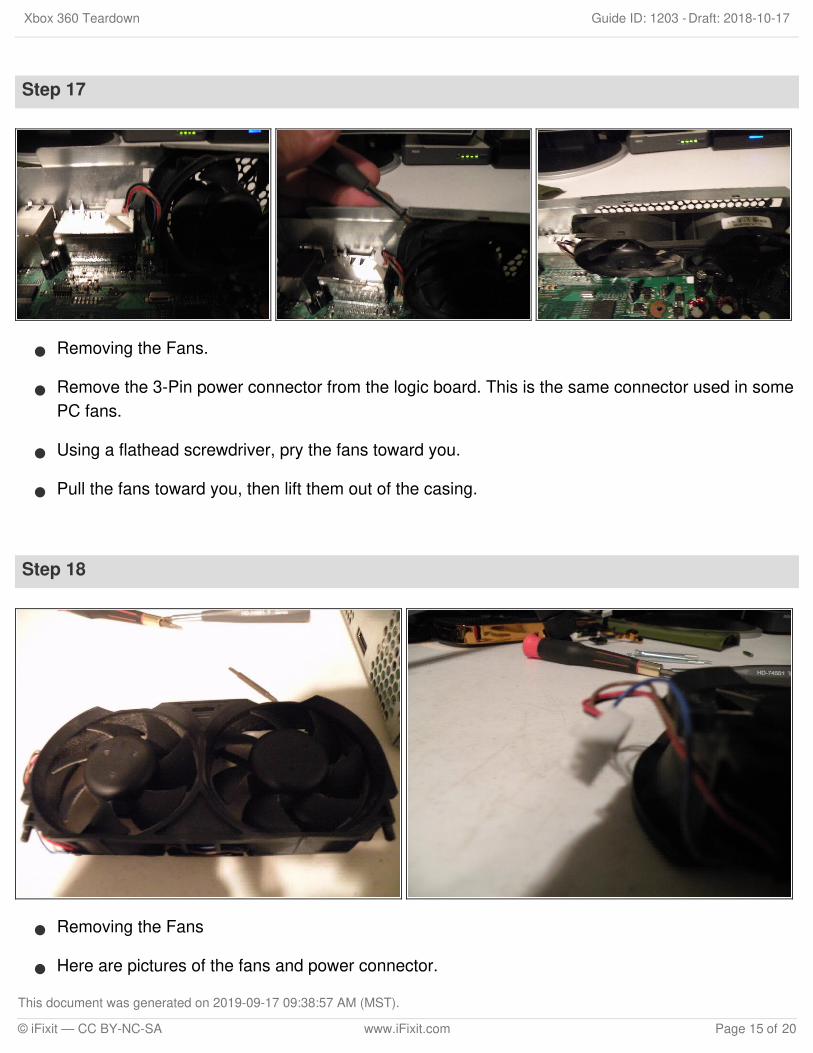
Removing the Fans.
Remove the 3-Pin power connector from the logic board. This is the same connector used in somePC fans.
Using a flathead screwdriver, pry the fans toward you.
Pull the fans toward you, then lift them out of the casing.
Step 18
Removing the Fans
Here are pictures of the fans and power connector.
Xbox 360 Teardown Draft: 2018-10-17Guide ID: 1203 -
This document was generated on 2019-09-17 09:38:57 AM (MST).
© iFixit — CC BY-NC-SA www.iFixit.com Page 15 of 20

Step 19
Removing the "Ring Of Light"/RF board.
Pop off the plastic LED cover.
Remove these 3 T8 Screws
Pull the board toward you. Than set it aside.
Xbox 360 Teardown Draft: 2018-10-17Guide ID: 1203 -
This document was generated on 2019-09-17 09:38:57 AM (MST).
© iFixit — CC BY-NC-SA www.iFixit.com Page 16 of 20
Step 20
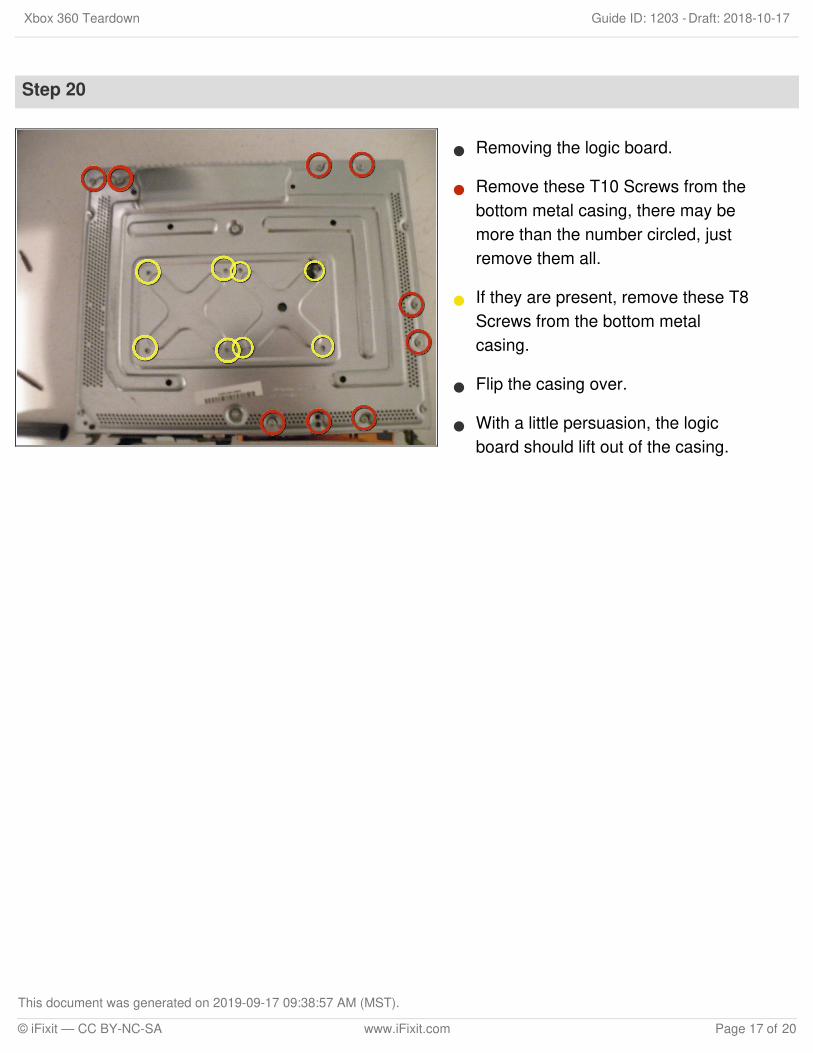
Removing the logic board.
Remove these T10 Screws from thebottom metal casing, there may bemore than the number circled, justremove them all.
If they are present, remove these T8Screws from the bottom metalcasing.
Flip the casing over.
With a little persuasion, the logicboard should lift out of the casing.
Xbox 360 Teardown Draft: 2018-10-17Guide ID: 1203 -
This document was generated on 2019-09-17 09:38:57 AM (MST).
© iFixit — CC BY-NC-SA www.iFixit.com Page 17 of 20

Step 21 — Logic Board
This board has advanced cooling for the Graphics Processor Unit (GPU). This is the truemothership of your Xbox 360.
Custom ATi GPU with up to 512MB of GDDR3 VRAM, memory shared with the CPU via SharedMemory Architecture
IBM PowerPC CPU with 3 Cores, each running at 3.20GHz with up to 512 MB of GDDR3 SDRAM,shared with GPU via Shared Memory Architecture
Memory Card Ports
Hard Drive Port
HDMI and Video Ports
Power Port
Xbox 360 Teardown Draft: 2018-10-17Guide ID: 1203 -
This document was generated on 2019-09-17 09:38:57 AM (MST).
© iFixit — CC BY-NC-SA www.iFixit.com Page 18 of 20

Step 22 — Integrated Circuits
There's also a bunch of integrated circuits on here. What I've noticed:
Microsoft X02014-007
6 x Samsung K4J52324QC-BC14 512MB GDDR3 SDRAM
Microsoft X0247-012 BGA IC
Numerous x NTD60N02R Power MOSFETs
ADP3188 Synchronous Buck Controller(?? See datasheet)
Xbox 360 Teardown Draft: 2018-10-17Guide ID: 1203 -
This document was generated on 2019-09-17 09:38:57 AM (MST).
© iFixit — CC BY-NC-SA www.iFixit.com Page 19 of 20

To reassemble your device, follow these instructions in reverse order.
Step 23
The Guts!
Xbox 360 Teardown Draft: 2018-10-17Guide ID: 1203 -
This document was generated on 2019-09-17 09:38:57 AM (MST).
© iFixit — CC BY-NC-SA www.iFixit.com Page 20 of 20
Related Documents