INFORMATION TECHNOLOGY SERVICES ITS TRAINING DIVISION – [5/02/2013] Page 1 of 34 Working Smarter Outlook 2010 Hardcopies of this document are considered uncontrolled. Please refer to UOW website or intranet for latest version. Working Smarter with MS Outlook 2010 Useful Website: https://intranet.uow.edu.au/myit/services/email/ Contents What’s new and working smarter with Office 2010..................................................................... 4 What’s new in Office 2010 ............................................................................................................................ 6 Tips ............................................................................................................................................ 7 Full Screen View ............................................................................................................................................ 7 Desktop.......................................................................................................................................................... 7 Transparency of Folders ................................................................................................................................ 7 Snipping Tool ................................................................................................................................................. 7 Pin programs to the Task Bar ........................................................................................................................ 7 Jump Lists ...................................................................................................................................................... 7 Print from Windows Explorer ........................................................................................................................ 7 Send an email attachment from anywhere on the desktop ......................................................................... 7 Send an email without opening Outlook ....................................................................................................... 7 Basic right-click tips .................................................................................................................... 8 Right-clicks in Microsoft Office programs ..................................................................................................... 8 Right-clicks with files ..................................................................................................................................... 8 Right-clicks with pictures ............................................................................................................................... 8 Right-clicks with the taskbar and desktop..................................................................................................... 8 Using Outlook - Office 2010 ........................................................................................................ 9 File Tab — Backstage View ............................................................................................................................ 9 Print Documents ............................................................................................................................................ 9 Print & Print Preview ..................................................................................................................................... 9 Customising the ribbon ............................................................................................................................... 10 Add screenshots .......................................................................................................................................... 11 Spell Checking .......................................................................................................................... 12 Protected File .............................................................................................................................................. 12 Clipboard ..................................................................................................................................................... 12 Working Smarter ...................................................................................................................... 14 Taking control of your email ..................................................................................................... 14 Change the way Outlook Opens .................................................................................................................. 14 Schedule uninterrupted time to process and organize email ..................................................... 15

Welcome message from author
This document is posted to help you gain knowledge. Please leave a comment to let me know what you think about it! Share it to your friends and learn new things together.
Transcript
INFORMATION TECHNOLOGY SERVICES
ITS TRAINING DIVISION – [5/02/2013] Page 1 of 34 Working Smarter Outlook 2010
Hardcopies of this document are considered uncontrolled. Please refer to UOW website or intranet for latest version.
Working Smarter with MS Outlook 2010 Useful Website: https://intranet.uow.edu.au/myit/services/email/
Contents What’s new and working smarter with Office 2010 ..................................................................... 4
What’s new in Office 2010 ............................................................................................................................ 6
Tips ............................................................................................................................................ 7
Full Screen View ............................................................................................................................................ 7
Desktop .......................................................................................................................................................... 7
Transparency of Folders ................................................................................................................................ 7 Snipping Tool ................................................................................................................................................. 7
Pin programs to the Task Bar ........................................................................................................................ 7 Jump Lists ...................................................................................................................................................... 7
Print from Windows Explorer ........................................................................................................................ 7 Send an email attachment from anywhere on the desktop ......................................................................... 7
Send an email without opening Outlook ....................................................................................................... 7
Basic right-click tips .................................................................................................................... 8
Right-clicks in Microsoft Office programs ..................................................................................................... 8
Right-clicks with files ..................................................................................................................................... 8 Right-clicks with pictures ............................................................................................................................... 8
Right-clicks with the taskbar and desktop ..................................................................................................... 8
Using Outlook - Office 2010 ........................................................................................................ 9
File Tab — Backstage View ............................................................................................................................ 9
Print Documents ............................................................................................................................................ 9 Print & Print Preview ..................................................................................................................................... 9
Customising the ribbon ............................................................................................................................... 10
Add screenshots .......................................................................................................................................... 11
Spell Checking .......................................................................................................................... 12
Protected File .............................................................................................................................................. 12 Clipboard ..................................................................................................................................................... 12
Working Smarter ...................................................................................................................... 14
Taking control of your email ..................................................................................................... 14
Change the way Outlook Opens .................................................................................................................. 14
Schedule uninterrupted time to process and organize email ..................................................... 15

INFORMATION TECHNOLOGY SERVICES
ITS TRAINING DIVISION – [5/02/2013] Page 2 of 34 Working Smarter Outlook 2010
Hardcopies of this document are considered uncontrolled. Please refer to UOW website or intranet for latest version.
Process one item at a time, starting at the top ........................................................................................... 15 Use the "Four Ds for Decision-Making" model............................................................................................ 15
Set up a simple and effective email reference system ................................................................................ 17 Creating folders ........................................................................................................................................... 17
Action Information ...................................................................................................................................... 18
Streamlining your tasks in Outlook ........................................................................................... 18
Customize your view ................................................................................................................................... 18
Converting emails into Tasks ....................................................................................................................... 19 Converting emails into appointments ......................................................................................................... 20
Work with the To-Do Bar ............................................................................................................................. 20 Date Headers ............................................................................................................................................... 20
All Day Events .............................................................................................................................................. 20
Splitters and More Indicators ...................................................................................................................... 21 Private Appointments .................................................................................................................................. 21
Show As: Information and Un-answered Meeting Requests ...................................................................... 21 More Customization – To-Do Bar Options .................................................................................................. 22
Create and track assigned tasks .................................................................................................................. 22 Send status reports for tasks from Outlook ................................................................................................ 22
Settings .................................................................................................................................... 23
Searching ................................................................................................................................. 23
Canned Responses and Sharing with colleagues ........................................................................ 25
Meeting Requests with a Preview of your Calendar .................................................................. 26
Introducing Quick Steps ........................................................................................................... 27
Create new items when Outlook is minimized or not running ................................................................... 28 Create an Outlook item from the taskbar ................................................................................................... 28
Create & Use Email Templates in Outlook 2010 ........................................................................ 29
Cool Tricks for Calendar ............................................................................................................................... 30
Hints to Economise on your Email Quota .................................................................................................... 30
Ensure your email gets read ..................................................................................................... 31
Make the purpose of the message clear ..................................................................................................... 31
Tell recipients what action you want them to take ..................................................................................... 31 Provide the proper data and documents .................................................................................................... 31
Send the message only to relevant recipients ............................................................................................ 32
Use the CC line wisely .................................................................................................................................. 32 Ask "final questions" before you click Send ................................................................................................ 32
Bonus: Don't send junk email ...................................................................................................................... 32

INFORMATION TECHNOLOGY SERVICES
ITS TRAINING DIVISION – [5/02/2013] Page 3 of 34 Working Smarter Outlook 2010
Hardcopies of this document are considered uncontrolled. Please refer to UOW website or intranet for latest version.
Vacation Checklist .................................................................................................................... 33
Decline upcoming meetings ........................................................................................................................ 33
Make sure your mailbox doesn’t exceed size limits .................................................................................... 33 Block off time in your calendar ................................................................................................................... 33
Keep your password from expiring ............................................................................................................. 33
Turn on Automatic Replies (Out of Office) .................................................................................................. 33 Secure your laptop ...................................................................................................................................... 34

INFORMATION TECHNOLOGY SERVICES
ITS TRAINING DIVISION – [5/02/2013] Page 4 of 34 Working Smarter Outlook 2010
Hardcopies of this document are considered uncontrolled. Please refer to UOW website or intranet for latest version.
What’s new and working smarter with Office 2010 This is not an Intro to Windows, Word or Outlook course. The aim of this course is to show how new and old features can help users to work smarter using the new operating system and software applications.
New and improved
Featured
New features by program and version OFFICE 2010
OFFICE 2007
Office 2010
Easily customize the Ribbon in every Office 2010 application.
Quickly access file management tasks, such as open, save, and print, with the new Backstage view.
Cut and Paste to reuse content with Paste Live Preview, which enables you to see what your additions will look like.
Add screenshots to capture and incorporate visual illustrations into your work in Word, excel, Outlook and PowerPoint.
Documents downloaded from the internet or loaded from another source are placed in protected mode when opened.
Word 2010
Organize your documents and navigate easily with the new navigation pane.
Edit and apply effects to photos without additional software.
Add powerful special effects to words with new text effects.
New proofing options for Spell Check.
Excel 2010

INFORMATION TECHNOLOGY SERVICES
ITS TRAINING DIVISION – [5/02/2013] Page 5 of 34 Working Smarter Outlook 2010
Hardcopies of this document are considered uncontrolled. Please refer to UOW website or intranet for latest version.
Highlight important data trends in seconds using Sparklines.
Clarify information with colour schemes and data bars in Conditional Formatting.
Spend less time shifting through data with new PowerPivot features.
PowerPoint 2010
Apply sophisticated effects to pictures, like colour saturation and artistic filters.
Embed, trim, add bookmarks and special effects to videos right in PowerPoint.
New Animation Painter allows you to copy any formatting and effects applied to one object to another object.
Add Smart Guides to help align objects and shapes precisely with other objects.
Custom Shapes allows the creation of new shapes by combining existing shapes.
Reading View, use this tool to view your presentation as a slide show, but within a window so that you can still switch between windows and tasks.
Equations allows you to create mathematical equations on your slides.
Outlook 2010
Streamline your Inbox with Conversation View and Ignore features.
Make scheduling simple with new Calendar Preview and Multiple Calendar View.
Quicksteps allows you to combine multiple steps into one, for example ‘Reply and Delete’.
New schedule feature called Scheduled View which provides a better insight into your daily schedule, as recorded in your Outlook calendar.
Quicksteps allows you to combine multiple steps into one, for example ‘Reply and Delete’.
The Calendar Preview shows a slice of your calendar in the meeting request allowing you to read the request and check that date on your calendar at the same time.

INFORMATION TECHNOLOGY SERVICES
ITS TRAINING DIVISION – [5/02/2013] Page 6 of 34 Working Smarter Outlook 2010
Hardcopies of this document are considered uncontrolled. Please refer to UOW website or intranet for latest version.
What’s new in Office 2010 • The ribbon is now fully available in all applications within Microsoft Office. • You can customise the Ribbon in Office 2010 to create your own tabs and groups, and to add your
favourite commands to them. • In Office 2010, the Office button has been removed, and has been replaced by a tab named ‘File’.
Clicking on the File tab, switches the application to the ‘Backstage’ view to access commands for saving, sharing, customising, and printing your work.
• You can save time when you use Cut and Paste to reuse the content with Paste Live Preview, which enables you to see what your additions will look like before you drop them in place.
• Streamlined printing: Now in Office 2010, Print Preview has been combined with Print, so instead of working through multiple dialog boxes, you get one-page view how the file will look and print.
• Quickly add screenshots to capture and incorporate visual illustrations into your work in Word, Excel, Outlook & PowerPoint. After you add the screenshot, you can use the tools on the Picture Tools tab to edit and enhance the screenshot.
• Protected View: In an ever-increasing attempt to protect you from attack, documents downloaded from the internet or loaded from another source are placed in protected mode when opened — this means they can’t be edited or changed until you specifically enable it.

INFORMATION TECHNOLOGY SERVICES
ITS TRAINING DIVISION – [5/02/2013] Page 7 of 34 Working Smarter Outlook 2010
Hardcopies of this document are considered uncontrolled. Please refer to UOW website or intranet for latest version.
Tips
Full Screen View Drag the window you are currently working on to the top of the screen to maximise the view to full screen.
Desktop Show desktop by clicking on the bar in the bottom right corner of your screen. You can also hold the Windows key and press the space bar.
Transparency of Folders To get rid of the transparent surrounds in folders and files, Go to the Start menu > Control Panel > Appearance and Personalization and click on Change the Theme. Leave on Aero themes (this allows Live Preview in ask Bar). Click Window Color (bottom of screen). Deselect EnableTransparency. Click Save changes and close the window.
Snipping Tool Use the Snipping Tool from the Start Menu to capture screen clippings.
Pin programs to the Task Bar Add MS Outlook to the Task bar. Right click on MS Outlook in the Start menu and choose Pin to Task Bar.
Jump Lists Right click on a program icon in the task bar to see Recently used documents, along with certain apps specific functions.
Print from Windows Explorer If you need to print a document, let’s say a Microsoft Word document that you have received as an attachment and saved to your desktop, there’s no need to launch Word first. Find the file that you downloaded, right-click its icon, and then click Print. This will automatically send the document to your printer without launching Word.
Send an email attachment from anywhere on the desktop Here’s a really handy tip.
Locate a file anywhere on your hard drive that you want to email, right-click the file’s icon, click Send To, and then click Mail Recipient. A new mail message will open with the file attached and ready to send. But what’s really speedy about this tip is that your mail program doesn’t open. This action creates only a single new mail message.
To send your attachment, type the recipient's email address in the To text field, add any accompanying message, and then click the Send icon. The subject and attachment fields are already set.
Send an email without opening Outlook If you have the Outlook icon pinned to your Task Bar you can right click and send a message without opening Outlook, in fact you can do this with any application, eg Word.

INFORMATION TECHNOLOGY SERVICES
ITS TRAINING DIVISION – [5/02/2013] Page 8 of 34 Working Smarter Outlook 2010
Hardcopies of this document are considered uncontrolled. Please refer to UOW website or intranet for latest version.
Basic right-click tips Maybe you’ve seen some of these menus but haven’t taken much notice, or you haven’t realized how pervasive—and how useful—they are. The items on the lists change depending on where you are and what you’re doing. They’ll give you speed and convenience without the need to memorize keyboard shortcuts.
Right-clicks in Microsoft Office programs
Right-clicks with files Use both the CTRL+C and CTRL+V keyboard shortcuts and the right-click menus to copy selected text from one place to another in a document. This also works on files. For example, you can right-click a file in a folder and then click Cut, Copy, Delete, or Rename. You can even click Send To to copy a file directly to another location.
And here’s a handy way to open a folder that’s been compressed. Right-click the folder name, point to Extract All (Windows 7 only) or Open With, and then click an option for extracting the files.
Right-clicks with pictures When you double-click a photo on your computer, it opens in a program, such as Windows Live Photo Gallery, that is your default program for opening pictures. If you want to open a photo in another program (for example, if you want to edit it in Microsoft Paint), simply right-click the picture icon, click Open With, and then click the program you want to use to open the file.
You can also print the picture right from this menu, without even opening the file.
Right-clicks with the taskbar and desktop Sometimes, during a multitasking session you can lose control of the number of windows you have open. Regain control by right-clicking the taskbar and then choosing an arrangement for displaying the open windows on the desktop so that you can see them.
Likewise, if you have lots of files open for a particular program, click the program icon in the taskbar and then click Close all Windows to close all the files that are open in that program at once.
INFORMATION TECHNOLOGY SERVICES
ITS TRAINING DIVISION – [5/02/2013] Page 9 of 34 Working Smarter Outlook 2010
Hardcopies of this document are considered uncontrolled. Please refer to UOW website or intranet for latest version.
Using Outlook - Office 2010 Most of these features are across the whole Office suite. We will be using MS Outlook to demonstrate.
File Tab — Backstage View The Backstage view replaces the Office button in Office 2007, and includes new sharing and publishing features.
• To see the Backstage view window, click the File tab in the upper left corner of your document, next to the Home tab.
• To exit the Backstage view, click any tab at the top of the Ribbon or click on the image of your document in the upper-right corner.
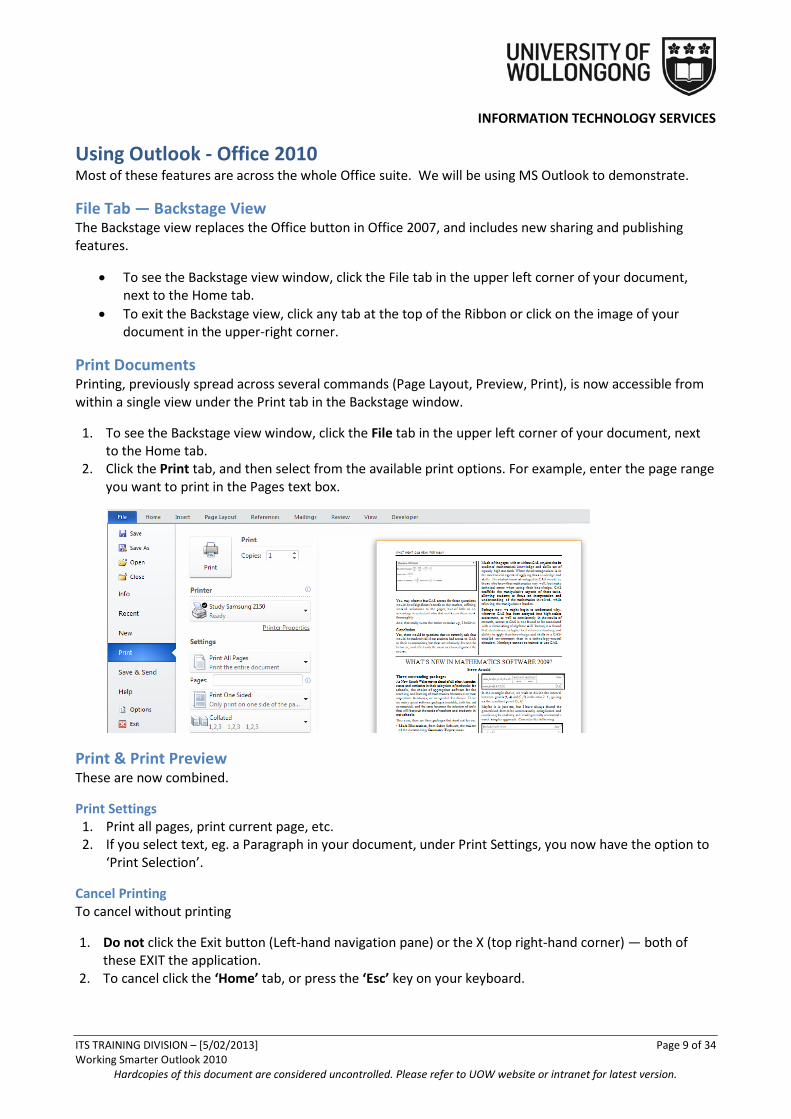
Print Documents Printing, previously spread across several commands (Page Layout, Preview, Print), is now accessible from within a single view under the Print tab in the Backstage window.
1. To see the Backstage view window, click the File tab in the upper left corner of your document, next to the Home tab.
2. Click the Print tab, and then select from the available print options. For example, enter the page range you want to print in the Pages text box.
Print & Print Preview These are now combined.
Print Settings 1. Print all pages, print current page, etc. 2. If you select text, eg. a Paragraph in your document, under Print Settings, you now have the option to
‘Print Selection’.
Cancel Printing To cancel without printing
1. Do not click the Exit button (Left-hand navigation pane) or the X (top right-hand corner) — both of these EXIT the application.
2. To cancel click the ‘Home’ tab, or press the ‘Esc’ key on your keyboard.

INFORMATION TECHNOLOGY SERVICES
ITS TRAINING DIVISION – [5/02/2013] Page 10 of 34 Working Smarter Outlook 2010
Hardcopies of this document are considered uncontrolled. Please refer to UOW website or intranet for latest version.
Customising the ribbon You can customise the Ribbon to include custom groups and custom tabs that contain the commands that you use most often.
What you can do What you can’t do
• Add custom group, and then add commands to this custom group.
• Rename a default tab or group. • Change the order of tabs or groups. • Hide a tab. • Switch back to use the default tabs and
groups.
• Add commands to a default tab. • Add commands to a default group. • Change an icon assigned to a default
group
Add a New Tab to the Ribbon
Working smarter: Create your own Tab that contains all the items you use frequently that are currently spread across multiple tabs (remove the clutter).
1. Right-click on any Tab. 2. Select Customize the Ribbon … 3. Click on New Tab button. 4. Right-click on ‘New Tab (Custom)’. 5. Select Rename (rename your tab, eg. My
Tab). Click OK. 6. Add more new groups by clicking on the New
Group button. 7. Right-click the ‘New Group (Custom)’. 8. Rename each group. 9. Select an icon for each group (this is used when you resize a Window). 10. In the Choose command from list, choose the commands you want to add to your new tab, click
Add, and then click OK to update the Ribbon. You can also drag and drop new commands in each group.
Example:
Add a New Group to the Ribbon 1. Right-click on any Tab.
2. Select Customize the Ribbon …

INFORMATION TECHNOLOGY SERVICES
ITS TRAINING DIVISION – [5/02/2013] Page 11 of 34 Working Smarter Outlook 2010
Hardcopies of this document are considered uncontrolled. Please refer to UOW website or intranet for latest version.
3. Right click on the Tab name, and add new groups by clicking on the New Group Button (should be highlighted)
4. Right-click the ‘New Group (Custom)’ and choose rename
5. Select an icon for each group (this is used when you resize a Window).
6. In the Choose command from list, choose the commands you want to add to your new tab, click Add, and then click OK to update the Ribbon. You can also drag and drop new commands in each group.
To reset – Right click on any tab , select customize Ribbon, on the bottom right of the window next to Customize, choose Reset and then choose Reset all customization.
Tip: You can customise the name on the tab, its location in the Ribbon, and reset the Ribbon to its default settings from the [Application] Options window.
Add screenshots You can quickly and easily add a screenshot to your email message to enhance the readability or capture information without leaving the program that you are working in. This feature is available in Microsoft Excel, Outlook, PowerPoint, and Word. You can use it to take a picture of all or part of the windows open on your computer. These screenshots are easy to read in printed documents and on PowerPoint slides that you project.
Only one screenshot at a time can be added. To add multiple screenshots, repeat steps 2 and 3 below.
1. Click the document that you want to add the screenshot to.
2. On the Insert tab, in the Illustrations group (Word, Excel, Outlook) — Images group (PowerPoint), click Screenshot.
Do one of the following:
3. To add the whole window, click the thumbnail in the Available Windows gallery.
4. To add part of the window, click Screen Clipping, and when the pointer becomes a cross, press and hold the left mouse button to select the area of your screen that you want to capture.
5. If you have multiple windows open, click the window you want to clip from before clicking Screen Clipping. When you click Screen Clipping, the program you are working in is minimized and only the window behind it is available for clipping.
Tip: After you add the screenshot, you can use the tools on the Picture Tools tab to edit and enhance the screenshot.

INFORMATION TECHNOLOGY SERVICES
ITS TRAINING DIVISION – [5/02/2013] Page 12 of 34 Working Smarter Outlook 2010
Hardcopies of this document are considered uncontrolled. Please refer to UOW website or intranet for latest version.
Spell Checking Review tab — Spelling and Grammar. (Keyboard shortcut F7)
Protected File
Protected View is a read-only mode in which most editing functions have been disabled. There are several reasons why a file opens in Protected View:
• The file was opened from an Internet location. • The file was received as an Outlook 2010 attachment and the computer policy has defined the
sender unsafe. • The file was opened from an unsafe location. • Or, the following Office file types can cause file-validation errors:
o Word 97-2003 files (.doc, .dot) o Excel 97-2003 files (.xls, .xla, .xlt, .xlm, .xlb, .xlt) o PowerPoint 97-2003 files (.ppt, .pot., pps, .ppa)
If you only need to read the file, and don’t have to edit it, you can remain in Protected View. If you know the file is from a trustworthy source, and you want to edit, save, or print the file, you can exit Protected View by clicking “Enable Editing” on the yellow Message Bar. After you leave Protected View, it becomes a trusted document.
Clipboard When you cut or copy a block of text in a message in Outlook 2010, the block is placed into a storage area known as the Clipboard. In Outlook, the Clipboard can hold more than one thing at time (up to 24 items). You can copy, copy, copy and then use the special Clipboard pane to selectively paste text back into your document. The technique is called collect and paste: (Make sure you open the clipboard first – step 1 below)
1. Click the dialog box launcher in the lower-right corner of the Clipboard group on the Home tab, right next to the word Clipboard.
The Clipboard pane then appears in the writing area of the Word window. The scrolling list contains the last several items you copied, not only from Word but from other programs, as well.
2. Position the insertion pointer in your document where you want to paste the text.
Otherwise, text from the Clipboard gets pasted wherever the pointer happens to be.
3. In the Clipboard pane, simply click the mouse on the selection of text that you want to paste into your document.

INFORMATION TECHNOLOGY SERVICES
ITS TRAINING DIVISION – [5/02/2013] Page 13 of 34 Working Smarter Outlook 2010
Hardcopies of this document are considered uncontrolled. Please refer to UOW website or intranet for latest version.
The text is copied from the Clipboard and inserted into your document at the insertion pointer’s location.
Alternatively, you can click the Paste All button to paste every item from the Clipboard into your document.
4. To remove a single item from Word’s Clipboard, point the mouse at that item and click the downward-pointing triangle to the right of the item.
A shortcut menu opens.
5. To clear all items on the Clipboard, click the Clear All button at the top of the Clipboard task pane.
You can’t undo any clearing or deleting that’s done in the Clipboard task pane.

INFORMATION TECHNOLOGY SERVICES
ITS TRAINING DIVISION – [5/02/2013] Page 14 of 34 Working Smarter Outlook 2010
Hardcopies of this document are considered uncontrolled. Please refer to UOW website or intranet for latest version.
Working Smarter
Taking control of your email If your email Inbox is out of control, you might want to rethink your methods for organising your email and emptying your Inbox. Developing a new approach to processing your Inbox can help you to gain more control, improve your response time, and keep up with critical actions and due dates.
“I think I’m well organised but one email can throw out my whole day”
“I intended to just have a quick look at email but ended up spending the whole morning dealing with emails”
Do these sound like you…read on for some hints on how to reign in your time and take back control of your day.
Outlook is not just an email client – it is a tool for organising your time more effectively and this document will show you some hints for getting the most out of Outlook. Using the Calendar and Tasks – although it takes some time initially – will benefit you in the long run. This document will take you through some quick tips but it’s not magic, you will need to put in the effort. Make a start by changing the way Outlook opens.
Change the way Outlook Opens Try changing your settings so that when you open Outlook first thing, you see a summary of your appointments, tasks and unread emails in your Inbox. This is called Outlook Today
In your list of folders, click on your mailbox (should be the first one in the list) Outlook today will open as shown above. Click Customize Outlook Today
Click the Startup checkbox so that this is the first thing you will see when you open Outlook. Choose which folders you would like to see under Messages and the number of days in your calendar.

INFORMATION TECHNOLOGY SERVICES
ITS TRAINING DIVISION – [5/02/2013] Page 15 of 34 Working Smarter Outlook 2010
Hardcopies of this document are considered uncontrolled. Please refer to UOW website or intranet for latest version.
Schedule uninterrupted time to process and organize email How many times are you interrupted every day? It’s nearly impossible to complete anything when there are constant interruptions from the phone, people stopping by your office, and instant messaging. So it's critical that you set aside uninterrupted time to process and organize your email.
The way you access your email is also important.
Conversation view in Office 2010 enables you to organize email folders by date and conversation. When Conversation view is turned on, messages that share the same subject appear as conversations that can be viewed as expanded or collapsed, helping you to quickly review and act on messages or complete conversations. Use this view instead of jumping from Inbox to Sent folder to see the full thread of a conversation. Note: if people do not use the Reply function or change the subject of emails, their email may not be included in the conversation.
Also, improved search tools in Office 2010 make it easier to narrow your search results by using criteria, like sender or subject keywords, and other information, such as attachments. The Search Tools contextual tab includes a set of filters that efficiently focus your search to isolate the items that you want.
Process one item at a time, starting at the top When you sit down to process your email, the first step is to sort it by the order in which you will process it. For example, you can filter by date, by subject, or even by the sender or receiver of the email message. In Outlook 2010, on the View tab, in the Arrangement group, click the arrangement option you want.
Tip: In Outlook 2010, enable the reading pane so that you can view your messages without having to open them. To enable the reading pane, on the View tab, in the Layout group, click Reading Pane and choose it’s position.
Resist the temptation to jump around in your Inbox in no particular order. Begin processing the message at the top of your Inbox and only move to the second one after you've handled the first. This can be hard at first, when you might have thousands of messages in your Inbox.
The expanded Ribbon in Office 2010 is designed to help you quickly find the tools that you need to complete your tasks. Features are organised in logical groups collected together under tabs. You can also customize the Ribbon to include tabs you personalize to match your own style.
The Quick Steps feature, new in Outlook 2010, speeds up managing your email even more. This feature enables you to perform the multi-stepped tasks you use most often, such as moving email to a specific folder or moving a message and replying to it with a meeting request, with a single click. The Quick Steps gallery includes buttons for one-click file and flag, sending messages to your team, and other popular commands.
Use the "Four Ds for Decision-Making" model The "Four Ds for Decision-Making" model (4 Ds) is a valuable tool for processing email, helping you to quickly decide what action to take with each item and how to remove it from your Inbox.
Decide what to do with each and every message
How many times have you opened, reviewed, and closed the same email message or conversation? Those messages are getting lots of attention but very little action. It is better to handle each email message only
INFORMATION TECHNOLOGY SERVICES
ITS TRAINING DIVISION – [5/02/2013] Page 16 of 34 Working Smarter Outlook 2010
Hardcopies of this document are considered uncontrolled. Please refer to UOW website or intranet for latest version.
once before taking action—which means you have to decide what to do with it and where to put it. With the 4 Ds model, you have four choices:
1. Delete it 2. Do it 3. Delegate it 4. Defer it
Generally, you can delete about half of all the email you get. But some people shudder when they hear the phrase "delete email." People are hesitant to delete messages for fear that they might need them at some point. That's understandable, but ask yourself honestly: What percentage of information that you keep do you actually use?
If you do use a large percentage of what you keep, your method is working. But many of us keep a lot more than we use. Here are some questions to ask yourself to help you decide what to delete:
1. Does the message relate to a meaningful objective you're currently working on? If not, you can probably delete it or file it.
2. Does the message contain information you can find elsewhere? If so, delete it. 3. Does the message contain information that you will refer to within the next six months? If not, file
it or delete it. 4. Does the message contain information that you're required to keep? If not, delete it.
Do it (in less than two minutes)
If you can't delete the email messages, ask yourself, "What specific action do I need to take?" and "Can I do it in less than two minutes?" If you can, just do it.
There is no point in filing an email or closing an email if you can complete the associated task in less than two minutes. You could file the message, you could respond to the message, or you could make a phone call. You can probably handle about one-third of your email messages in less than two minutes.
Delegate it
If you can't delete it or do it in two minutes or less, can you forward the email to an appropriate team member who can take care of the task?
If you can delegate it (forward it to another team member to handle), do so right away. You should be able to compose and send the delegating message in about two minutes. After you have forwarded the message, delete the original message or move it into your email reference system.
Defer it
If you cannot delete it, do it in less than two minutes, or delegate it, the action required is something that only you can accomplish and that will take more than two minutes. Because this is your dedicated email processing time, you need to defer it and deal with it after you are done processing your email. You’ll probably find that about 20 percent of your email messages have to be deferred.
There are two things you can do to defer a message: Turn it into an actionable task, or turn it into an appointment. When you're using Outlook, you can defer emails that require action by dragging the messages to your Task List to turn them into tasks. Name the task to clearly state the required action so that you don't have to reopen the email message. The result is a clearly defined list of actions on your Task

INFORMATION TECHNOLOGY SERVICES
ITS TRAINING DIVISION – [5/02/2013] Page 17 of 34 Working Smarter Outlook 2010
Hardcopies of this document are considered uncontrolled. Please refer to UOW website or intranet for latest version.
List that you can prioritize and schedule to complete on your Calendar. Or you can turn the message into a meeting request by dragging it to your Calendar.
Tip: Use the To-Do Bar in Outlook 2010 to drag an email message from an email folder to a date on your Calendar or to your Task List. On the View tab, in the Layout group, click the To-Do Bar. When the bar appears, drag the message to your Calendar or to your Task List. This copies the message to the new location; it doesn’t move it out of the original mail folder, so you’ll still be able to find what you need.
Using the 4 Ds model on a daily basis makes it easier to handle a large quantity of email. On average, people can process about 100 email messages an hour. If you receive 40 to 100 messages per day, all you need is one hour of uninterrupted email processing time to get through your Inbox.
Of course, if you have a backlog of hundreds of messages, it will take time to get to the point where your daily routine keeps you up to date. It's important to get that backlog down, so it is suggested that you set blocks of time aside to work through it. Then, you can really enjoy processing your messages every day using the 4 Ds.
Set up a simple and effective email reference system The first step toward an organised Inbox is understanding the difference between reference information and action information.
Reference information is information that is not required to complete an action; it is information that you keep in case you need it later. Reference information is stored in your reference system—an email reference folder.
Action information is information you must have to complete an action. Action information is stored with the action, either on your to-do list or on your Calendar (drop the email into a calendar appointment).
Most people receive a considerable amount of reference information through email. Sometimes as much as one-third of your email is reference information. So it is essential to have a system that makes it easy to transfer messages from your Inbox into your email reference system—a series of email file folders where you store reference information to ensure you have easy access to it later.
Creating folders You need to decide whether you store your emails on the server or locally (on your computer). Be aware that storing emails on the server will use up your email quota. Full details on creating and managing folders are available in the document “Email Using Outlook 2010” at https://intranet.uow.edu.au/myit/services/email/UOW049769.html
Create a folder on the Server (uses quota but always available)
• Right click on your mailbox name and choose New Folder • Type a name for the folder and click OK
Create a Folder Locally (does not use quota but only available on your computer)
• Go to the File tab and click Account Settings and from the drop down list choose Account Settings • Click on the Data Files Tab, and then click Add • Type a name for your folder (eg local jbloggs) and click OK • Click Close on the next window
DO NOT CHANGE THE LOCATION OR FILE TYPE OF LOCAL FOLDERS
Local folders migrated from 2007 may be called Outlook, archives, etc
INFORMATION TECHNOLOGY SERVICES
ITS TRAINING DIVISION – [5/02/2013] Page 18 of 34 Working Smarter Outlook 2010
Hardcopies of this document are considered uncontrolled. Please refer to UOW website or intranet for latest version.
After you take care of filing your reference information, you can use the next three steps to handle the email that you have to do something with—your action information.
Action Information So now we’ve taken care of the reference information, how can we deal with the action items? Using tasks and calendar will enable us to manage our time more effectively.
Streamlining your tasks in Outlook 1. Use tasks – drag and drop to tasks 2. Block time to complete tasks – drag and drop to calendar 3. Set tasks to show by Start date on calendar
Every job requires a variety of tasks during a given day. Maybe yours includes meeting with clients, preparing a presentation, or collaborating with team members on an important project. No matter what you are doing, staying on top of all the tasks you need to perform is crucial. By organizing them effectively, you can plan ahead for tomorrow and improve your productivity at the same time.
At the most basic level, the Tasks features of Microsoft Outlook help you create lists of task-related items. But dig a little deeper, and you will find they do much more for you than simply holding your to-do list. Following these tips for using Outlook Tasks features will help you stay better organized and keep you steps ahead of your deadlines.
Customize your view In Outlook Tasks, you can find your tasks and view their status at a glance. Choosing the appropriate view saves time. For example, you can prioritize the items that are most critical on your list without scrolling through all the other tasks that are still marked as incomplete. Or if you prefer to tackle the task that needs to be completed first or sort your tasks by project or client name, the options in Tasks can help you organize your tasks the way that works best for you and the project at hand.
To find the task view that works best for you, in Outlook 2010, in the Navigation pane, on the left side of the window, click Tasks. On the Ribbon, click the View tab, and then, in the Current View group, click Change View. Also, Home Tab > Current View Group
For a basic view of your tasks and main details, click Simple List. In this view, you see columns for Task Subject, Due Date, Categories, In Folder, and Sort by: Flag Status.
For a view of your tasks that shows more details, click the View tab, click Change View, and then click Detailed. Additional columns appear, including Status, Due Date, % Complete, and more.
In addition to changing the view, you can easily sort your task list in various ways. Here’s how:
On the View tab, in the Arrangement group, click the sorting method you want to use: Start Date, Due Date, Categories, Type, Importance, Assignment Folder, and Modified Date. When you click the method you want to use, your list of task items is automatically reorganized. Try different options until you find one that works best for your tasks. Add Text - Highlight
NB: Best practice suggests it is more efficient to view tasks by Start Date. If you don’t see Start Date as one of your columns, insert it as follows:
• Right click on any column heading, eg Task Subject • Choose View Settings…

INFORMATION TECHNOLOGY SERVICES
ITS TRAINING DIVISION – [5/02/2013] Page 19 of 34 Working Smarter Outlook 2010
Hardcopies of this document are considered uncontrolled. Please refer to UOW website or intranet for latest version.
• Click on Columns • Locate Start Date in left column and click Add • You can then use the Move Up button to reorder columns • Click OK and OK again
You can further customize any of the views to suit your needs exactly. For example, open your task list in Detailed view, as described earlier in this article. In the Current View group, click View Settings. The Advanced View Settings: Detailed dialog box appears.
The Advanced View Settings dialog box gives you more choices for modifying the Tasks view. The Advanced View Settings dialog box is available for each view. You can use it to add or remove categories, set filtering parameters, and even adjust type size and font.
To reset a Tasks view that you’ve customized back to its original settings, click the View tab, click Reset View, and then, when the dialog box asks you if you’re sure you want to reset the view, click Yes.
Experiment with different options. If you don’t like the way your tasks appear, you can always reset the view to the default settings or choose a new one. The trick is to decide which view helps you streamline your tasks so that you aren't digging for information. Create unique views that provide the information you need. This is your chance to personalize Outlook to meet your goals.
Converting emails into Tasks This is a skill and a process to assist in keeping your Inbox clear and a guaranteed way to stay on top of all action items contain in email messages. A key part of being well organized and managing a heavy workload is NOT using your Inbox as your To-Do list.
1. After reading a message that requires action, close the email and ask yourself: What is it you need to do? When do you need to do it?
2. Place your cursor over the email, press and hold-down your Right mouse button and drag the email to the tasks folder, then click Move Here as Task with Attachment on the pop-up menu. Outlook moves the email from your Inbox to the task.
Choices
• Copy Here as Task with Text: this copies the text from the email message to the task, but does not include any attached files.
• Copy Here as Task with Attachment: this copies the entire E-mail from the Inbox to the task. Any attached files (Word, Excel, etc.) are included and you can still reply to the E-Mail. The original email stays in the Inbox. Use this option if you need the email for future reference and file it in an Email folder.
• Move Here as Task with Attachment: this moves the entire email from the Inbox to the task. Any attached files (Word, Excel, etc) are included and you can still reply to the Email.
3. Edit the Subject line, Enter a start & End date if required, Set Priority.
4. Click Save and Close (Alt+S). You should see tasks in daily or weekly Calendar view (if not, go to the View tab in Calendar and in the Layout group, on the Daily Task List choose Normal). This is a good time to set time/s in your calendar to work on and complete the task.
INFORMATION TECHNOLOGY SERVICES
ITS TRAINING DIVISION – [5/02/2013] Page 20 of 34 Working Smarter Outlook 2010
Hardcopies of this document are considered uncontrolled. Please refer to UOW website or intranet for latest version.
Tips: To add future emails to an existing task, open the task and on the insert tab click ITEM, then select the email(s) you want to add to the task and click OK.
To move more than on email to a task, use Ctrl+Click to select the emails you want and then right-drag the emails to the tasks folder.
Converting emails into appointments Another way to help keep your Inbox empty is to convert an email pertaining to an appointment or event directly into an appointment on your Calendar.
1. Using your Right mouse button, drag the email to the Calendar on the right and on the pop-up menu click Move Here as Appointment with Attachment.
2. Edit the Subject line, start date, time, end date, time fields.
3. Click Save and Close.
Work with the To-Do Bar Another handy Outlook feature is the To-Do Bar. You can set it up to display your calendar, appointment reminders, and list of tasks—even when you’re not using the Tasks features in Outlook. Here’s how:
1. While in Mail, Calendar, Contacts or Tasks, click the View tab, and then, in the Layout group, click To-Do Bar to open a drop-down menu.
2. If Normal is not already selected, click Normal to display the To-Do Bar on the right side of the window.
3. To further customize what appears in the To-Do Bar, click To-Do Bar again to open the drop-down menu. Select one or more of the following options:
a. Click Date Navigator to see a calendar page in the To-Do Bar. b. Click Appointments to see upcoming appointment in the To-Do Bar. c. Click Task List to see your list of tasks in the To-Do Bar.
If you selected Date Navigator, Appointments, and Task List, the To-Do Bar displays a calendar view, upcoming appointments, and your task list. The To-Do Bar remains visible even as you switch between Mail, Calendar, Contacts, Tasks, or Notes in Outlook.
To turn off or minimize the To-Do Bar, simply click To-Do Bar to open the drop-down menu, and then click Minimized or Off.
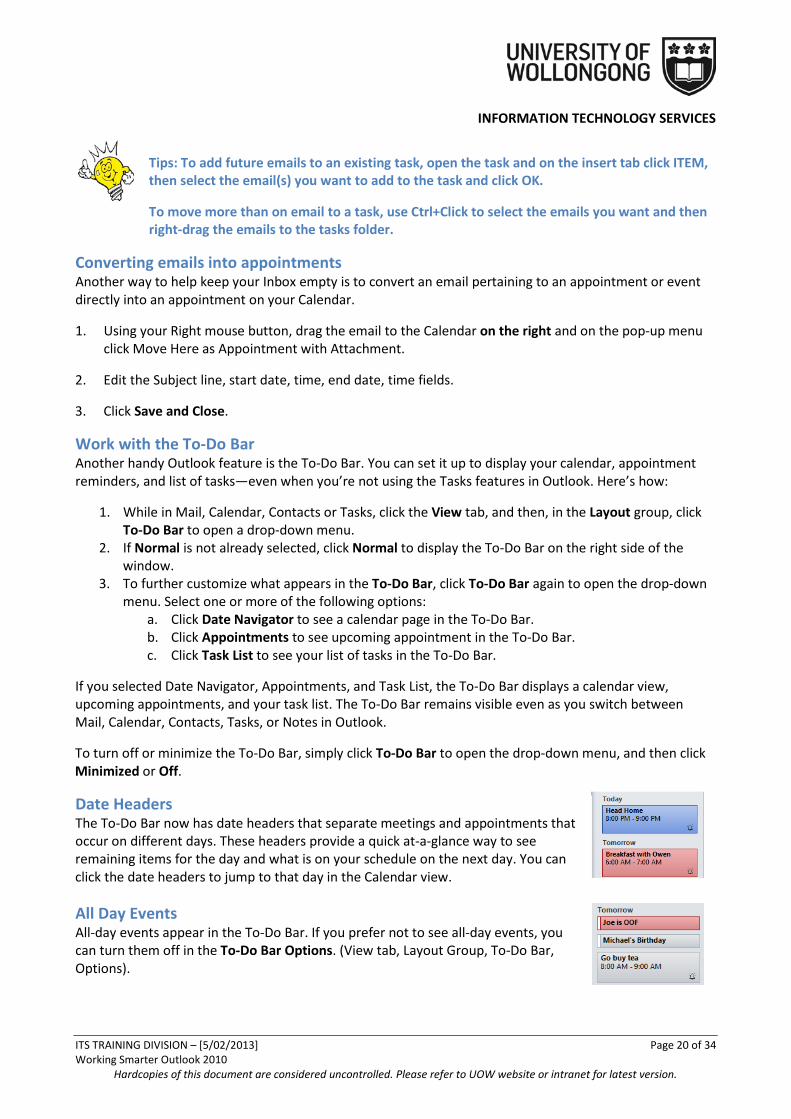
Date Headers The To-Do Bar now has date headers that separate meetings and appointments that occur on different days. These headers provide a quick at-a-glance way to see remaining items for the day and what is on your schedule on the next day. You can click the date headers to jump to that day in the Calendar view.
All Day Events All-day events appear in the To-Do Bar. If you prefer not to see all-day events, you can turn them off in the To-Do Bar Options. (View tab, Layout Group, To-Do Bar, Options).

INFORMATION TECHNOLOGY SERVICES
ITS TRAINING DIVISION – [5/02/2013] Page 21 of 34 Working Smarter Outlook 2010
Hardcopies of this document are considered uncontrolled. Please refer to UOW website or intranet for latest version.
Splitters and More Indicators To see more appointments, drag the splitter down. To see more tasks, drag the splitter up. Text at the end of the appointments section alerts you if there are more meetings for the day you are viewing. You can resize the appointment portion of the To-Do Bar to see the remaining items.
Private Appointments Private appointments are identified with a lock icon. Additionally, through the To-Do Bar Options, you can hide private details from appearing.
If the details are hidden, you can view the details by resting your mouse pointer over the private item. This can be useful if you often work in a public place and you don’t want people to see what is on your calendar.
Show As: Information and Un-answered Meeting Requests Just like in your calendar, the To-Do Bar indicates whether a calendar item is marked as Free, Busy, Tentative, or Out of Office.
Additionally, meeting requests that you have not answered appear with the same visual representation as the calendar. Click a meeting request in the To-Do Bar, and then send your response using the tabs in the ribbon.

INFORMATION TECHNOLOGY SERVICES
ITS TRAINING DIVISION – [5/02/2013] Page 22 of 34 Working Smarter Outlook 2010
Hardcopies of this document are considered uncontrolled. Please refer to UOW website or intranet for latest version.
More Customization – To-Do Bar Options In Outlook 2010, customizing your To-Do Bar is easier than ever with the To-Do Bar Options available in the ribbon. On the View tab, in the Layout group, click To-Do Bar, and then select the items you want to appear. Click Options for additional customizations.
Create and track assigned tasks When you collaborate on a team or manage the work of others, you may want to delegate a task to someone else and keep track of its progress. Outlook makes it nice and easy to create and track a task that you assign. Here’s how:
1. To create a new task, on the Home tab, click New Task. (If you are viewing Mail, on the Home tab, in the New section, select New Items, select Tasks) Click the Assign Task button.
2. In the To box, enter the name or email address of the person you want to assign the task to. 3. For a new task, in the Subject box, type a task name. (In an existing task, the Subject box is already
filled in.) 4. Select the due date and status options you want. 5. Select or clear the Keep an updated copy of this task on my task list check box and the Send me a
status report when this task is complete check box.
Note: If you select the Send me a status report when this task is complete check box, you will receive a status report for each completed occurrence of the task.
1. If you want the task to recur, click Recurrence. 2. Select the options you want, and then click OK.
Note: If you assign a recurring task, a copy of the task remains in your task list, but it won't be updated.
1. In the body of the task, type instructions or information about the task. 2. Click Send .
Send status reports for tasks from Outlook If you ever have a client or task that is of utmost importance to your manager, this tip will become a favourite. In Outlook, you can send a periodic status report. It's a great way to communicate that you’re managing things efficiently and remind your boss how well organized you are.
The report is automatically generated from Outlook to an email message that you send.
Here’s how to do it:
1. In Outlook, open the task for which you want to send a status report. 2. On the Task tab, in the Manage Task group, click Send Status Report. 3. Enter recipient names in the To, Cc, and Bcc boxes. If the task was assigned to you, the names of
people on the update list are automatically added. 4. Add any other information you want in the email message. 5. Click Send.
Now you have a status report ready to send.

INFORMATION TECHNOLOGY SERVICES
ITS TRAINING DIVISION – [5/02/2013] Page 23 of 34 Working Smarter Outlook 2010
Hardcopies of this document are considered uncontrolled. Please refer to UOW website or intranet for latest version.
Settings Email can be very distracting. One of the ways to avoid distraction at the start of your day is to have Outlook initially open in Outlook Today as discussed earlier in this document. Another option is to open in Calendar.
The default set up on Outlook is for your email to be the first thing you see when you log into Outlook. Think about changing this view so that you see an overview of your day (via Outlook Today – discussed earlier in this document) or view your Calendar first. When you start to use the Calendar effectively, you will get an overall view of your day and if you stick to the appointments you make, you will get back some of the control that we all seem to struggle with. Below are the steps to take if you would like to see your Calendar prior to opening your email.
• Go to the File menu and click Options • Click Advanced • At the Outlook Start and Exit section, click Browse and select Calendar [you might like to check the
“Empty Deleted Items when Exiting Outlook box here] • Click OK • Click OK again
Searching Using the Search tab you can drastically narrow down your search. It’s possible to search only emails from a specific contact, only the subject line, only emails with attachments, only emails sent within a certain time frame, only emails that are unread, only emails that are categorized, and more. You can also open recent searches. When you click in the Search field shown below, the Search Tools open
Here are some tips for efficient searching:
• In the search box use combinations eg username “&” subject • In the search box, use inverted commas to search for phrases
You can also save searches for future reference. These are set up as folders and once set up will appear in your list of folders under Search Folders. Here’s how to set them up.
Go to the Folder tab and click the New Search Folder button.

INFORMATION TECHNOLOGY SERVICES
ITS TRAINING DIVISION – [5/02/2013] Page 24 of 34 Working Smarter Outlook 2010
Hardcopies of this document are considered uncontrolled. Please refer to UOW website or intranet for latest version.
This opens a dialog box with a number of popular choices ready to configure and create.
To create a folder that keeps tabs on all mails from specific people, just click Choose and select the person or persons you want to track. Click OK. Note: this works on past and future emails that fit the search criteria.
If you want to go off the beaten track, go to the Folder tab, click New Search Folder and select Create a custom Search Folder at the bottom of the scrollable list and click Choose to specify criteria for the search. Type a name for the folder and then click the Criteria button. The following window opens with a number of choices for criteria. Name it and then click the Criteria button This will open up several tabs packed with Search Folder possibilities When you’ve finished creating Search Folders, look for them in the Search Folders section at the bottom of your Mailbox in the left pane of Outlook. Right click any Search Folders that you plan to check at least once a day and select Show in Favorites. It's amazing how much time this feature can save you.
Tip: Check the default “Large mail” search folder when looking for ways to reduce your email quota. It will show you large emails stored in your email. Find it by clicking on the Folder tab, click New Search Folder, scroll down to Large Mail folder

INFORMATION TECHNOLOGY SERVICES
ITS TRAINING DIVISION – [5/02/2013] Page 25 of 34 Working Smarter Outlook 2010
Hardcopies of this document are considered uncontrolled. Please refer to UOW website or intranet for latest version.
Canned Responses and Sharing with colleagues A good idea when working with teams is to set up some “canned” responses and put them in a folder which you share with the team. The team can then copy and paste the email and change if appropriate.
1. Create an email with the canned response and send it to yourself.
2. Create a folder on the server and give it a meaningful name
3. Move the canned email from your Inbox to the new folder
4. Giving permissions: Right click on your Mailbox (top of the list of folders – [email protected]) and choose Folder Permissions.
5. Click Add and type the name of the person/s to share and click OK
6. Back in the properties window, choose the permission level of REVIEWER and click OK
7. Next, right click on the folder you wish to share and choose Properties and click on the Permissions tab
8. Click Add and type the name of the person/s to share and click OK
9. Back in the properties window, choose the permission level of EDITOR and Click OK
Now “share” it with your colleagues. They will need to set up to see it in their list of folders. Here’s how to they do it.
1. In Outlook 2010, from the File tab, select Account Settings. From the drop-down list, select Account Settings and click the Change button.
2. At the bottom of the next window, click More Settings...
3. Click the Advanced tab, and then click Add... This allows you to add mailboxes to your Outlook Folder List.
4. In the "Add Mailbox" field, enter the username or name (in lastname, firstname format) of the person to whose mailbox you have shared access.
5. Click OK, Click Next, Click Finish and then close the final window
6. You should now see the name of the person giving you sharing rights in the Folder List. (If you can't see the Folder List, select View, and then Folder List.) Any folders that a user gives you permission to access should be listed under the other person's mailbox. If you cannot expand the Folder List, the other person has not given you permission to access the mailbox.
7. If you like, you can create a shortcut to a folder by dragging it to the Favorites area (top of the folder list)

INFORMATION TECHNOLOGY SERVICES
ITS TRAINING DIVISION – [5/02/2013] Page 26 of 34 Working Smarter Outlook 2010
Hardcopies of this document are considered uncontrolled. Please refer to UOW website or intranet for latest version.
Meeting Requests with a Preview of your Calendar Handling meeting requests usually involves two important steps – reading the meeting request and checking your calendar to see if you’re available. To save you time, Outlook 2010 simplifies that process and combines those steps into a single experience with the Calendar Preview.
The Calendar Preview shows a slice of your calendar in the meeting request allowing you to read the request and check that date on your calendar at the same time:
Now that you can see your calendar and the meeting request at the same time, you have the convenience of checking your schedule for that day and immediately make an informed decision about whether you can attend the meeting, all without leaving your inbox.
The Calendar Preview also works well with recurring meetings. When you receive a request for a recurring meeting, the Calendar Preview enables you to view each instance of the recurring meeting or just those with conflicting appointments:
With the Calendar Preview, you can confidently handle any meeting request without leaving your inbox because you’ll always know exactly how that meeting affects your schedule.
Cool trick:
If you have a conflicting meeting, double click the Calendar Preview and your calendar will open to that day, allowing you to update your schedule as you see fit.

INFORMATION TECHNOLOGY SERVICES
ITS TRAINING DIVISION – [5/02/2013] Page 27 of 34 Working Smarter Outlook 2010
Hardcopies of this document are considered uncontrolled. Please refer to UOW website or intranet for latest version.
Introducing Quick Steps What are Quick Steps? Quick Steps are easy-to-use one-click buttons which perform multiple actions at once. If you file your mail, they can be a life saver – one click and that conversation is filed away and marked as read. If you send e-mail to the same people over and over – one click and you have a new email to your team. As your work style in Outlook changes, you can configure Quick Steps to work the way you do.
So you like to file your mail… It turns out that 70% of people file mail into folders in Outlook. In Outlook 2007, and every release before that, there were two ways of filing manually: either you dragged it to the folder or you clicked “Move to folder” and chose the folder. Enter Quick Steps: out of the box, the first two Quick Steps are all about filing your mail. The first Quick Step allows you to file mail into a folder (by default the last folder you filed mail into) and mark it as read in one click. The second Quick Step, Move to: ? is there to give you the idea that you could have a series of Quick Steps for each folder you file into regularly.
The first time you click on a Quick Step (other than Forward:FYI, Meeting Reply, or Reply & Delete) you’ll be prompted to set it up.
Once it is set up, you won’t see this dialog again. In this example, you can just click “1-Reference” in the Ribbon to file mail away.
Not into filing? Quick Steps still has something to offer! Have you ever been on a long e-mail conversation and you just need to get into a room and sort it out? Click Meeting Reply and set up a meeting with the people on the conversation. There are also a series of Quick Steps that you can set up: To Manager, Team E-mail, and Team Meeting. You can decide who is on “your team” the first time you click them.

INFORMATION TECHNOLOGY SERVICES
ITS TRAINING DIVISION – [5/02/2013] Page 28 of 34 Working Smarter Outlook 2010
Hardcopies of this document are considered uncontrolled. Please refer to UOW website or intranet for latest version.
Want to create your own? To create your own Quick Step, just click Create New. You’ll be able to pick from a list of actions. Note that in this dialog box you can also change the icon (just click on the dot in the upper left), pick a shortcut key, and write your own custom tooltip – to help you remember what this Quick Step is for.
Get more sophisticated: Manage your Quick Steps You can rearrange, duplicate, modify, and delete any Quick Step from the Manage Quick Steps dialog. And if you don’t like what you’ve come up with, you can always reset Quick Steps back to the defaults.
Cool trick:
To get to this dialog quickly, just click on the small arrow in the lower right corner of the Quick Steps group in the Ribbon.
Create new items when Outlook is minimized or not running New email messages, appointments, meetings, contacts, and tasks can be created from the Windows 7 taskbar or Start menu using Jump Lists. Jump Lists give you quick access to creating Microsoft Outlook 2010 items without switching from another program that you are using. And, if Outlook isn’t running, you can still send a message or meeting request, or create contacts, tasks, or add an item to your calendar by using Start menu Jump Lists.
Create an Outlook item from the taskbar If Outlook is running, use the Jump List on the taskbar to quickly create an Outlook item.
Tip You can also use the Jump List if Outlook is pinned to the taskbar.
1. Right-click the Outlook button on the taskbar.
2. Click New E-mail Message, New Appointment, New Meeting, New Contact, or New Task.

INFORMATION TECHNOLOGY SERVICES
ITS TRAINING DIVISION – [5/02/2013] Page 29 of 34 Working Smarter Outlook 2010
Hardcopies of this document are considered uncontrolled. Please refer to UOW website or intranet for latest version.
Create & Use Email Templates in Outlook 2010 While sending an email, sometimes you realise that it is the same email you sent last week or few days back and you will probably need to send the exact email with same recipient address, subject, body text again in coming days. Before sending email, save it as an email template. Outlook 2010 provides you with an option to create an email template for later use.
Create a new email and compose the content suggest you leave the To field blank
Now on the File menu, click Save as
From Save as type list, select Outlook Template and give the template an appropriate name. Your template is saved and ready for future use.
To use the template, click on the Developer tab (if you don’t have a Developer tab, go to File menu, click Options, and in left pane click Customize Ribbon, from right pane enable Developer check-box. Click OK to see Developer tab on the ribbon.)
Now click on the Developer tab, and click Choose Form.

INFORMATION TECHNOLOGY SERVICES
ITS TRAINING DIVISION – [5/02/2013] Page 30 of 34 Working Smarter Outlook 2010
Hardcopies of this document are considered uncontrolled. Please refer to UOW website or intranet for latest version.
This will bring up the Choose Form window. From the Look In drop-down list, select User Templates in File System and from the main dialog window, select the previously created template and click Open. An email will open with all the details you put in the template. You can fill in the blanks and sent it. The template will remain the same for future use.
Cool Tricks for Calendar • Drag and drop meetings on your calendar to copy or move a meeting (use right click whilst
dragging for a choice of copying or moving the meeting) • When filling in times for meetings, use shortcuts, eg 6p for 6.00pm; next Monday, Christmas Day,
etc • Drag meetings to extend or lessen times • View group schedules – under the action menu • Time periods right click on grid on left (weekly or daily view only • Auto pics – small calendar on right – select day – duration select • To view a number of days in your calendar click on day one and hold Alt and press a number • To view a number of non consecutive days - use the small calendar (top left of screen) and hold
Ctrl and click on the days you wish to view
Hints to Economise on your Email Quota
• Store your sent messages in a local folder. If you must store them on the server, you will be using quota and should regularly check your Sent Folder and delete or move messages to a local folder
• Set your preferences to Purge Deleted Messages when you exit your email client or empty it regularly (weekly)
• Save email attachments to your computer and then delete them from your Inbox (More details on economising on your quota at https://intranet.uow.edu.au/myit/services/email/UOW124469.html
How much quota?
• On the File tab, click on Info. • Mailbox Cleanup.
This image cannot currently be displayed.

INFORMATION TECHNOLOGY SERVICES
ITS TRAINING DIVISION – [5/02/2013] Page 31 of 34 Working Smarter Outlook 2010
Hardcopies of this document are considered uncontrolled. Please refer to UOW website or intranet for latest version.
Ensure your email gets read Most people get so much email every day that they might spend as little as 15 seconds scanning a message to determine how it applies to them. Now, imagine that other people are reading your email the same way. If they can’t quickly identify the purpose of your message, they’ll probably delete it or leave it in the Inbox for “later”— if later ever comes.
Make the purpose of the message clear When recipients receive your email message, they should be able to see at a quick glance how the message relates to them and why it’s important. They may be looking at a preview of your message in Microsoft Outlook or on an iPhone or iPad. Or they may see only Subject lines in their Inbox. If your Subject line is confusing and irrelevant, your email will surely get deleted in a hurry. Here are some examples of what can be included in Subject lines to make sure the reader opens your mail:
A standard subject heading such as "Action Requested," "Response Requested," "FYI," or "Read Only," depending on the action indicated in the body of the message.
The meaningful objective or supporting project that the message relates to, for example, "2011 budget forecasting."
The required action if applicable, for example, "Consolidate budget."
The due date if applicable, for example, "Due by 7 July."
An example of an effective Subject line is "Action Requested—Consolidate budget for 2011 and return to me by June 15th."
Tell recipients what action you want them to take Be completely clear about the actions you want the recipients to take. Be specific and put all the material that is related to an action in one place. To get even faster responses, talk about how the action relates to the recipient's objectives, and always give due dates. It's also important to clarify what type of action you want the recipient to take. There are basically four types of actions you could request. If you make this level of detail clear, the recipient will be most likely to read the email and take the action right away. The four actions include:
Action: The recipient needs to perform an action. For example, "Provide a proposal for a 5% reduction in Travel & Entertainment expense."
Respond: The recipient needs to respond to your message with specific information. For example, "Let me know by cob today if you can attend the staff meeting at 9:00 A.M. on Friday."
Read only: The recipient needs to read your message to make sure they understand something. No response is necessary. For example, "Please read the attached sales plan before our next staff meeting on August 12th."
FYI only: The recipient should file your message for future reference. No response is necessary. In fact, even reading the message is optional. For example, "Enclosed for your records are your completed expense reports."
Provide the proper data and documents Make sure you give recipients all of the information they need to complete an action or respond successfully to your request. Your co-workers shouldn't have to come back to you asking for information,
INFORMATION TECHNOLOGY SERVICES
ITS TRAINING DIVISION – [5/02/2013] Page 32 of 34 Working Smarter Outlook 2010
Hardcopies of this document are considered uncontrolled. Please refer to UOW website or intranet for latest version.
whether it is a supporting document or a link to a file on a shared website. You can include supporting information in the body of the message, in an attached file, or in an attached email.
Send the message only to relevant recipients Target your message to the appropriate audience. Only people who have to complete an action on the Subject line should receive your message. Be thoughtful and respectful when you enter names on the To line. People observe your thoughtfulness and the results are more effective. Here are two simple questions to help you filter the To line recipients:
Does this email relate to the recipient's objectives?
Is the recipient responsible for the action in the Subject line?
Use the CC line wisely It's tempting to put loads of people on the CC line to cover your bases, but doing so is one of the fastest ways to create an unproductive environment. Here are some things to consider when using the CC line:
No action or response should be expected of individuals on the CC line. The recipient needs to only read or file the message.
Only those individuals whose meaningful objectives are affected by the email should be included on the message. If you are not sure that the information is related to a co-worker's objectives, check with that person to see if they want to receive your email on that topic.
Ask "final questions" before you click Send The final thing to do is check your work to be sure you are supporting meaningful actions. Sending clear, well-defined messages can reduce the volume of email you send and receive, encouraging correct action, saving time, and limiting email trails. Make sure you ask the following questions before you send the message:
Have I clarified purpose and actions?
Have I included supporting documents and written a clear Subject line?
Did I write the message clearly enough that it does not come back to me with questions?
Am I sending the message to the correct recipients?
Have I run the spelling checker and edited the message for grammar and jargon?
Finally, if you ask someone to phone you, give them a day/time when you will be available.
Bonus: Don't send junk email One of the quickest ways to get onto your recipients' "delete radar" is to overwhelm them with meaningless email. Responding to email with "I got your email, thanks," or sending out lots of irrelevant data that you think they might want to know about is a quick way to create a track record of sending unproductive mail.
To summarize, it is incredibly easy to create an unproductive culture using email. Follow these guidelines and you can be sure you and your team are able to keep focused on meaningful objectives and don't create email overload.
INFORMATION TECHNOLOGY SERVICES
ITS TRAINING DIVISION – [5/02/2013] Page 33 of 34 Working Smarter Outlook 2010
Hardcopies of this document are considered uncontrolled. Please refer to UOW website or intranet for latest version.
Vacation Checklist Whether you’re leaving the office for the holidays, going on vacation, or taking a business trip, there are a number of things you can do to prepare your computer for your time away.
Cancelling appointments and letting people know you’ll be gone are just a few of the things you should do to make sure your responsibilities are covered and let people know you’re not available to meet. Here are some best practices to see to it that your work goes on smoothly, even when you’re gone.
Decline upcoming meetings Decline or cancel any meetings that are scheduled while you’re gone. To decline a meeting using Microsoft Outlook 2010:
1. Open the meeting occurrence and click Decline. 2. If you’re the organizer of the meeting, either arrange for a co-worker to run it or send a
cancellation. a. To cancel the meeting in Outlook 2010, select the meeting occurrence and then, on the
Calendar Tools Meeting tab of the Ribbon, in the Actions group, click Cancel Meeting.
Make sure your mailbox doesn’t exceed size limits If you’re gone for a long time, you run the risk of your Outlook mailbox exceeding the size limit. A full Inbox will prevent you from sending or receiving email while you’re gone. Before you leave, use the Mailbox Cleanup tool in Outlook to check and manage the size of your mailbox. To use Mailbox Cleanup in Outlook 2010, click the File tab to open Backstage view. Then, on the Info tab, click Cleanup Tools. You can view the total size of your mailbox and individual folders, or find and archive items older than a certain date. If you may need extra email quota whilst overseas, contact ITS to increase your quota.
Block off time in your calendar Don’t forget to mark your Outlook calendar to show co-workers that you’re gone. That way, they’ll see you’re not available and won’t schedule meetings with you. To block off the time, just create an appointment in Outlook that shows you’re out of the office:
1. In Outlook 2010, with your Calendar open, on the Home tab, in the New group, click New Appointment.
2. In Start time, select the date you’re leaving. In End time, select the date you’re returning. 3. If you’re leaving for just one day, select the All day event box. 4. Under Show time as, select Out of Office. 5. Click Save and Close.
Keep your password from expiring In order to protect the University's information and transactions, passwords on sponsored user accounts must be changed every 90 days. Prior to your password expiring, you will be notified via email several times. If you’re going away and your password is due to expire, change your password prior to taking leave at https://intranet.uow.edu.au/myit/manage/password/
Turn on Automatic Replies (Out of Office) In Outlook 2010 you can use Automatic Replies (Out of Office) to notify people who send you email messages that you’re away. This Outlook feature enables you to set an automated reply to messages sent to you while you’re out. In the reply, let people know who to contact while you’re gone. You can also set up rules to file the messages you receive or to send special responses to specific people.

INFORMATION TECHNOLOGY SERVICES
ITS TRAINING DIVISION – [5/02/2013] Page 34 of 34 Working Smarter Outlook 2010
Hardcopies of this document are considered uncontrolled. Please refer to UOW website or intranet for latest version.
• To use Automatic Replies (Out of Office) in Outlook 2010, on the File tab, in Backstage view, click the Info tab, and select Automatic Replies.
You can create an autoreply message to let people both inside and outside of your organization know important information—such as when you’ll be back and who to contact in your absence. However, auto replies to people outside your organization is NOT recommended as you will attract SPAM.
Secure your laptop Laptop computers are a common target of theft. If you’re not taking your laptop with you on vacation, take it home or lock it in your desk.
Need help? Contact ITS Helpdesk on ext 3000 or via the IT Support Wizard on the Staff Intranet.
Related Documents


![[MS-OXMSG]: Outlook Item (.msg) File Formatdownload.microsoft.com/download/5/D/D/.../[MS-OXMSG].pdf · [MS-OXMSG]: Outlook Item (.msg) File Format ... The Outlook Item (.msg) File](https://static.cupdf.com/doc/110x72/5afaaabb7f8b9a44658f5754/ms-oxmsg-outlook-item-msg-file-ms-oxmsgpdfms-oxmsg-outlook-item-msg.jpg)