Revised: August 4, 2008 Introduction to Word 2007

Welcome message from author
This document is posted to help you gain knowledge. Please leave a comment to let me know what you think about it! Share it to your friends and learn new things together.
Transcript

Revised: August 4, 2008
Introduction to Word 2007

Table of Contents STARTING WORD ...................................................................................................................... 1
OBJECTIVES ............................................................................................................................... 1
WELCOME TO WORD 2007 ..................................................................................................... 2
COMPONENTS OF THE WORD WINDOW........................................................................... 4 THE OFFICE ORB (AND THE QUICK ACCESS TOOLBAR) ............................................................... 6 THE RIBBON ................................................................................................................................. 7 CONTEXTUAL TOOLS ................................................................................................................... 7 LIVE PREVIEW ............................................................................................................................. 7 LAYOUT AND ZOOM ..................................................................................................................... 8 DIALOG LAUNCHERS ................................................................................................................... 8 GALLERIES ................................................................................................................................... 8
OPEN A DOCUMENT ............................................................................................................... 10 VIEW BUTTONS .......................................................................................................................... 11 SCROLL BARS ............................................................................................................................ 13 SELECT BROWSE OBJECT ........................................................................................................... 14
NAVIGATION TECHNIQUES ................................................................................................ 15
USE THE MOUSE ........................................................................................................................ 15 USING THE KEYBOARD .............................................................................................................. 15
CREATE NEW DOCUMENT ................................................................................................... 17
SAVE A DOCUMENT ............................................................................................................... 19 CREATE A NEW FOLDER ............................................................................................................ 21
SAVE AS ...................................................................................................................................... 22 SAVE AS WORD 97-2003 DOCUMENT ........................................................................................ 22 PDF OR XPS FORMAT ............................................................................................................... 22
SELECT TEXT ........................................................................................................................... 24 MOUSE METHOD ........................................................................................................................ 24 USING THE SELECTION AREA ..................................................................................................... 24
EDIT TEXT ................................................................................................................................. 25
DELETE TEXT ............................................................................................................................. 25
CHANGE TEXT CASE ............................................................................................................. 25
FORMAT TEXT ......................................................................................................................... 26 MINI TOOLBAR .......................................................................................................................... 26
PARAGRAPH FORMATTING ................................................................................................ 29 TEXT ALIGNMENT ...................................................................................................................... 29 DISPLAY NON PRINTING CHARACTERS ...................................................................................... 29

FORMAT PAINTER ...................................................................................................................... 30
CUTTING, COPYING AND PASTING TEXT ....................................................................... 31 THE PASTE OPTIONS BUTTON .................................................................................................... 31
AUTOMATED FEATURES ...................................................................................................... 33
AUTOCORRECT .......................................................................................................................... 33 ADD WORDS IN AUTOCORRECT ................................................................................................. 35 DELETE WORDS IN AUTOCORRECT ........................................................................................... 35 AUTOCORRECT OPTIONS BUTTON ............................................................................................. 35 AUTOFORMAT AS YOU TYPE ...................................................................................................... 36
SPELLING AND GRAMMAR CHECKER ............................................................................ 39 AUTOMATIC SPELLING AND GRAMMAR CHECKER ..................................................................... 39 SPELLING AND GRAMMAR OPTIONS ........................................................................................... 41 CHECK SPELLING AND GRAMMAR ALL AT ONCE ....................................................................... 42
PRINT PREVIEW ...................................................................................................................... 43
PAGE SETUP ............................................................................................................................. 45
MARGINS ................................................................................................................................... 45 ORIENTATION ............................................................................................................................ 48 PAPER SIZE AND SOURCE ........................................................................................................... 48 LAYOUT ..................................................................................................................................... 50
HELP ............................................................................................................................................ 51
SEARCH RESULTS ...................................................................................................................... 52
SUMMARY ................................................................................................................................. 52

Information Technology Services The College of Saint Rose
Introduction to Word 2007 Page 1
Starting Word
Before starting any program, look at the taskbar to see if the program you want is already open. If there’s a button on the taskbar that corresponds to the program you want to work with, click the button. Remember that the taskbar displays a button for each program that is open. If Word is shown on the taskbar, for example, and you ignore it and use one of the methods listed below to open Word, you actually open another copy of the Word program, thereby using up lots of memory unnecessarily, which could lead to problems. Word can be started two different ways. To open Word, do one of the following:
Double-click the Word shortcut icon on the desktop.
Select Start from the Taskbar, go to Programs Microsoft Office and click on Microsoft
Word2007 from the submenu. When you open Word, you are looking at a blank new document. At the very top is the title
bar, which reads, “Document 1 – Microsoft Word”.
Objectives
In this introductory level, you will learn Word basics, including: Become familiar with the document window and the new user interface. Work with the ribbon and tab commands. Navigate in Word. Create, Save and Open documents. Edit and format text. Move and copy text. Learn about some automated features in Word. Check Spelling and Grammar. Print Preview and Printing. Set Page Layout. Use online Help.

Information Technology Services The College of Saint Rose
Introduction to Word 2007 Page 2
Welcome to Word 2007
Microsoft Word is a common word processing software application that is both user-friendly and powerful. This state-of-the-art program offers many time-saving features that enhance functionality. The user can create and modify documents of any size - from a simple memo to a full-length book - using Microsoft Word. Members of the campus community are using a few different versions of Word including: Word 2007 and Word 2003. Word 2007 comes with a substantial number of changes and enhancements, as well as a dramatic new user interface design that is a major departure from previous versions. Some thoughts you may have when you first open the new version are depicted below.
What happened to the file menu?
The old style menu system from Office 2003, Office XP, and earlier versions has been replaced with a ribbon in order to make it easier to find the features that you need to use.
Where is the help menu and the Type a question help box? As part of the user interface redesign, it was moved to the MS Office System Help window and renamed Type words to search for. Just click the blue and white circle containing a question mark for help. What is nice is the new pin tool that holds the current help page open so that you can refer to it while you work.
The Office Orb = the old file menu. The orb is a circle with the Office logo in it located in the top left hand corner of the application. The Office Orb contains the same tasks that you would find in the old file menu. For example, if you wanted to create a new document in Word 2007, you would click on the Office Orb, in the top left corner of the screen, and then select ‘New’.
What happened to the file menu??
Where is the help menu? What on earth is
that orb in the top left corner?

Information Technology Services The College of Saint Rose
Introduction to Word 2007 Page 3
Likewise if you wanted to save your document in Word 2007, you would click on the Office Orb, and select ‘Save’.

Information Technology Services The College of Saint Rose
Introduction to Word 2007 Page 4
Components of the Word Window
The set of commands displayed in the user interface varies, depending on the command tab selected.
Document Window
Ruler
Status bar
Document Browser
Ribbon
Help
Views Zoom Slider
Minimize Word
Maximize/Restore Word
Close Word
Title Bar Office Button
Quick Access Toolbar
Vertical Scroll Bar
Page number Click for the go to dialog box
Command Tabs
Insertion Point
Name of Command Sets

Information Technology Services The College of Saint Rose
Introduction to Word 2007 Page 5
Component Name Description
Title Bar Displays document name followed by program name.
Office Button Displays a list of options such as the most recently opened documents. Replaces the file menu in previous releases of Microsoft Office, along with some new commands such as Finish and Publish. Select Finish→ Inspect Document, to check a file for hidden metadata or personal information.
Ribbon Area containing the tabs and commands divided into groups.
Command Tabs Commands organized in groups that relate directly to tasks.
Horizontal Ruler Used to set margins, indents, and tabs.
Command Sets Command sets are the commands available for the selected tab that relate to what you're trying to do. The name of the command set appears below the commands. For example, Clipboard, Font, and Paragraph.
Quick Access Toolbar
Contains frequently used commands such as the Save, Undo, and Redo icons. You can customize this toolbar to add tools you frequently use.
Vertical Ruler Used to set top and bottom margins.
Document Window The work area in which you create and display documents.
Status Bar Displays number of pages and words, view buttons and the zoom slider bar.
I-Beam pointer Used to move the insertion point or to select text.
Insertion Point The vertical line that indicates where text will be entered as you type.
Mouse Pointer Indicates the position of the mouse. The pointer appears as an (I-beam) in the
document window and arrow pointer in all other locations.
View Buttons Change document views to show or hide various features in the document window.
Scroll Bars Enables you to view other areas of the document.
Document Browser Use to navigate to a particular object in your document, such as a table.
Zoom Slider Enables you to enlarge or reduce the display of your document.
Help Click to display online help for Microsoft Word.

Information Technology Services The College of Saint Rose
Introduction to Word 2007 Page 6
The Office Orb (and the Quick Access Toolbar)
Click the Orb with the Office Logo to get access to commands that were previously in the file menu such as New, Open, Save, Save As, Print, Close and Exit. Additional commands such as Prepare, Send, and Publish are new to Word 2007.
The Quick Access Toolbar provides you quick access to features you regularly use. The default button are Save, Undo and Repeat the last action. At the end there is a drop down arrow to customize it.
Another way to customize the Quick Access toolbar is to right-click on a command, and select Add to Quick Access Toobar.
Pin a document to have it always appear in the recent documents list.

Information Technology Services The College of Saint Rose
Introduction to Word 2007 Page 7
The Ribbon The Ribbon is the major part of the new user interface. Once you are familiar with the Ribbon you should be able to find things much quicker than before. The menu system that you used to see in previous versions of Microsoft Office has been replaced by a series of command tabs on the ribbon that directly relate to the tasks you need to accomplish. The new command tabs in Word are ‘Home’, ‘Insert’, ‘Page Layout’, ‘References’, ‘Mailings’, ‘Review’, ‘View’ and ‘Developer’. Command Tabs Command Tabs describe the task you may be trying to complete and display all the buttons and options you would need to complete that task. Different commands appear in the user interface depending on the tab selected. For example, if you want to insert something into your document, you click on the ‘Insert’ tab. All the items that you can insert into your document appear in the Ribbon. From here you can insert a table, picture or some clipart etc.
In another example, you would click the ‘Page Layout’ tab, if you want to change the layout of your page. Here you can set your page margins, orientation etc. This filtering mechanism cuts down on the number of menus, commands, and dialog boxes you have to sift through in order to find the items you want.
Contextual Tools Another great feature of the Ribbon is that it is contextual. In other words, it displays commands related to the task you are performing at that point in time. For example, if you double-click on a picture in your document, a special ‘Format' tab appears in the ribbon and shows you all the different things you can do to the picture.
When you are not working on the picture and click off it, that tab disappears so it does not clutter the menu. Like magic!
Live Preview Live Preview enables you to try a choice before you select it. When you consider an option, you can point to it. The effect is then applied to your document so that you can see how it will look. If you want to keep the change, click the option. For example while I am working on a picture in my document, I can point to the picture styles and preview the effect before I apply it. This is cool!

Information Technology Services The College of Saint Rose
Introduction to Word 2007 Page 8
Layout and Zoom The layout and zoom options are now located in the bottom right hand corner of the document window. This is where you can select the document layout you wish to view.
For example, if you want to view in Print Layout, simply click on the Print Layout button in the bottom right hand corner of the window. If you want to change to full screen reading, or web layouts, again click on the buttons in the bottom right hand corner. In the Zoom Slider area there are two methods to change the zoom, or how big or small everything looks on the screen. One method is to click on the ‘100%’ and then select your zoom level. Alternatively you can use the zoom slider. By dragging the zoom slider to the left, the document will zoom out, making everything look smaller. By dragging the zoom slider to the right, the document will zoom in, making everything look bigger.
Dialog Launchers Some command sets on the user interface are also available in traditional style dialog boxes. To display the dialog box, click the dialog launcher in the lower–right corner of the command set.
Galleries Galleries provide a visual example so that it is easier to find and select the look you want for the documents. Galleries with multiple selections such as the margins shown below, display as drop-down galleries from which you make your selection.

Information Technology Services The College of Saint Rose
Introduction to Word 2007 Page 9
Open a Document
To open an existing document, follow the steps below.
1. Click the Office button and select Open, OR press Ctrl-O on the keyboard.
2. The Open dialog box appears, as shown below.
3. In the Look in box drop down list, open the folder where the document resides.
4. Double-click on the document to open it.
View
Delete Up one level
Tools - provides access to File Management tools
Back Look in– displays folders
Other folders

Information Technology Services The College of Saint Rose
Introduction to Word 2007 Page 10
View buttons You can display files and folders in the Open and Save As dialog boxes using the following eight views: Thumbnails, Tiles, Icons, List, Properties, Preview, and, WebView.
My favorite is Details, because you can click on the column heading and sort by name or date modified, etc. This helps me find the document I need a lot faster!
View Description Thumbnails Displays the files and folders as thumbnails. Tiles Displays the files and folders as large tiles. Icons Displays the files as icons List Displays the files and folders in a list view (names only). Details Displays details concerning a file, such as size, file type, and date modified.
You can change the sort order of documents and folders by clicking the column heading buttons, such as Name, Size, Type, and Modified.
Properties Displays information about the selected file, such as title and author. Preview Displays a “picture” of the file’s content. WebView N/A

Information Technology Services The College of Saint Rose
Introduction to Word 2007 Page 11
Scroll Bars The scroll bar allows you to view other areas of the document.
To move up or down one line click on the scroll bar arrows.
Click in the vertical scroll bar above or below the scroll box to move up or down one screen.
Drag the vertical scroll box to move up or down a relative distance. The position of the scroll box correlates to the position of the text in the document.
Scroll bar box
Next page
Select browse object
Previous page
View Ruler
Scroll bar arrow

Information Technology Services The College of Saint Rose
Introduction to Word 2007 Page 12
Select Browse Object Use the Select Browse Object button on the scroll bar to navigate through the document by objects. You can browse by pages, graphics, headings, edits, sections, and tables.
1. On the vertical scroll bar click on the select browse object button .
2. From the Browse Object palette, select the object you want to browse by.
3. For example, if you choose Browse by table, the insertion point will move to the next table in
your document.
Your double arrow scroll bar buttons will change to browse by the object you selected. For example, it will bring you to the next table in your document rather than the next page in your document.

Information Technology Services The College of Saint Rose
Introduction to Word 2007 Page 13
Navigation Techniques
Use the Mouse The I-beam pointer is used to move the insertion point or to select text. Move the I-beam
and click in your document. The insertion point or vertical line that displays indicates the location of the next character that is typed.
You can use the scroll wheel on your mouse to view different pages in the document as well.
Using the Keyboard You can use your keyboard to move the insertion point in a document using the keyboard
actions described below:
Press this Key To Move the Insertion Point
Left or right one character.
Up or down one line.
Ctrl Ctrl Left or right one word.
Ctrl � Ctrl Up or down one paragraph.
Page Up Up one window.
Page Down Down one window.
Ctrl Page Up To the top of the page.
Ctrl Page Down To the top of the next page.
Home To the beginning of the line.
End To the end of the line.
Ctrl-Home To the beginning of the document.
Ctrl- End To the end of the document.

Information Technology Services The College of Saint Rose
Introduction to Word 2007 Page 14
Create New Document
Whenever you create a new Word document, it is based on the Normal.dotm template. This template applies default formatting and layouts to your document. For example, the default font is Calibri with 1 inch page margins. The following exercise leads you through the steps of creating and saving a memo. At this point, you should be in a blank new document. Note: When you open Word you can just start typing your text. As you type, notice that when
you reach the right margin, the text automatically wraps to the next line. This wonderful feature is called Word Wrap. You only need to press <Enter> (which creates a hard return) when you want to create a new paragraph.
Exercise – Type a Memo 1. Make sure you are in a blank new document. 2. Type a memo that looks similar to the example below. Follow the steps listed on the next
page to complete the memo. To: John Doe From: Jane Doe Re: Vacation Date: July 6, 2008 I will be out on vacation for the next two weeks. Please give my work to Joe Smith during my absence. I will see you when I return.

Information Technology Services The College of Saint Rose
Introduction to Word 2007 Page 15
Memo Exercise 1. Type To: and press Tab. Notice on the ruler that the default tab stop is ½ an inch.
2. Type John Doe. Press Enter twice.
3. Type From: and press Tab.
4. Type Jane Doe. Press Enter twice.
5. Type Re: and press Tab.
6. Type Vacation. Press Enter twice.
7. Type Date: and press Tab.
8. To have the current date inserted in your document, select Insert, Date & Time.
9. From the Date and Time dialog box, select a date format, and click OK.
10. Press Enter a few times to create some blank space after the date.
11. Type three consecutive hyphens (---) and press Enter. This should produce a horizontal line across the page if the ‘border lines’ option is turned on that computer. Press Enter one more time.
12. Type a brief message such as: ‘I will be out on vacation for the next two weeks. Please give my work to (enter your co-worker’s name here) during my absence. I will see you when I return’.
13. Save your document.

Information Technology Services The College of Saint Rose
Introduction to Word 2007 Page 16
Save a Document
When you create a document, it is stored in the computer’s memory temporarily. You must save a document to store it for future use. In this version, your file names are not limited to eight characters and may contain spaces. File names cannot contain any of the following characters: Forward slash / Question mark ? Back slash \ Quotation mark “ Greater than > Colon : Less than < Semicolon ; Asterisk * Pipe symbol |
1. To save a document, click the Save button on the quick access toolbar or click on the office button and choose save.
2. The Save As dialog box appears the first time you save a document. You are prompted to
enter a file name and specify the location to save it in. In the example below, we name the file ‘vacation memo’ and save it to the ‘Manuals’ folder, which is a subfolder I created in My Documents. You can create folders as well; see the directions on the next page.
3. Type in a meaningful file name. Notice that the new file extension for a Word 2007 document is .docx.
4. The default saves in the My Documents folder. It is best to save in the My Documents folder or a subfolder you created within My Documents. This will help you find files easily.
Up one level
Type in a File Name here
Create new folder Important - The folder that appears here is the folder you are saving your document in.
View

Information Technology Services The College of Saint Rose
Introduction to Word 2007 Page 17
Create a New Folder You can create other folders within My Documents to help organize your files. Notice in the previous example that I created a folder called manuals in which I save all related documents in that folder. You too can get organized! 1. Before you save the memo, in the Save As dialog box, create a new folder.
2. Click the Create New Folder button in the Save As dialog box. Type “My Memos” as the folder name and press Enter or click OK.
3. The My Memos folder now appears in the My Documents contents list.
4. To save a document in a particular folder, first double-click to open the folder.

Information Technology Services The College of Saint Rose
Introduction to Word 2007 Page 18
Save As
The Save As command provides you with the options shown below. Save as allows you to save the document with another name, thereby creating a copy of the document. This comes in handy if you need most of the content in a document and need to change only a few things. This saves you lots of time.
Save As Word 97-2003 Document If you are sharing a document with someone who does not have Word 2007, loaded on their computer then you need to save it as a Word97-2003 document. This will make it backwards compatible. If you send a Word 2007 document to someone who does not have this software they will not be able to open the document without installing conversion software on their computer.
PDF or XPS Format By using an add-in, you can save or export a file from your Microsoft Office program into the following formats:
“Portable Document Format (PDF). PDF is a fixed-layout electronic file format that preserves document formatting and enables file sharing. The PDF format ensures that when the file is viewed online or printed, it retains exactly the format that you intended, and that data in the file cannot be easily changed. The PDF format is also useful for documents that will be reproduced by using commercial printing methods.
XML Paper Specification (XPS). XPS is a fixed-layout electronic file format that preserves document formatting and enables file sharing. The XPS format ensures that when the file is viewed online or printed, it retains exactly the format that you intended, and that data in the file cannot be easily changed.”

Information Technology Services The College of Saint Rose
Introduction to Word 2007 Page 19
Select Text
In order to edit, format, move or copy text, you need to select the text first. There are several methods that can be used to select text, as described below.
Mouse Method
To Select Technique
Any amount of text Click before the first character, hold the left mouse button down and drag until the desired text is highlighted.
A word Double-click the word. A sentence Hold down Ctrl, and then click anywhere in the sentence. A paragraph Triple-click anywhere in the paragraph. A large block of text Click at the start of the selection, hold down the Shift key,
scroll to the end of the selection and click.
Using the Selection Area
To Select Technique
A line of text Move the pointer to the left of the line until it changes to a right-pointing arrow, and then click. (See illustration below)
Multiple lines of text Move the pointer to the left of the lines until it changes to a right-pointing arrow, click and drag up or down.
A paragraph Move the pointer to the left of the paragraph until it changes to a right-pointing arrow, and then double-click.
Multiple paragraphs Move the pointer to the left of the paragraphs until it changes to a right-pointing arrow, and then double-click and drag up or down.
An entire document Move the pointer to the left of any document text until it changes to a right-pointing arrow, and then triple-click, or press the Ctrl key and click once in the selection area.
Example of using the selection area to select a single line of text:

Information Technology Services The College of Saint Rose
Introduction to Word 2007 Page 20
Edit Text Unlike a typewriter, where you have to retype an entire page if there is an error, editing in Word is easy. If you need to insert a word or paragraph or would like to delete a word, you can easily make the changes.
Use the navigation and selection techniques to assist in editing text.
Delete Text Use your Delete and Backspace keys to delete text one character at a time.
The Delete key will delete one character to the right of the insertion point.
The Backspace key will delete a character to the left of the insertion point.
Change Text Case
You can change the case of a word or sentence without retyping the text. For example, if you accidentally hit your Caps Lock key, and your sentence is in all caps, you can easily change this to lowercase without retyping the text.
1. Select the text that you want to change.
2. On the Home tab, in the Font group, click Change Case , and then click the capitalization option that you want.
Option Description
Sentence Case Capitalizes the first letter of a sentence and leaves all other letters as lowercase.
lowercase Changes all of the letters to lower case.
UPPERCASE Changes all of the letters to uppercase.
Title Case Capitalizes each word in the selected text.
tOGGLE cASE Changes all uppercase words to lowercase and all lowercase words to uppercase.

Information Technology Services The College of Saint Rose
Introduction to Word 2007 Page 21
Format Text
Word contains many features that make formatting a breeze! When you format text, it changes how a document looks on screen and when it is printed. You can format text to make documents more attractive and easier to read.
You can enhance text by changing the font face and size. You can add emphasis with color, or apply attributes such as bold, italic and underline. The Font group (shown below) in the ‘Home’ tab contains a number of buttons you can use to apply character formatting to text in a document. If you are unfamiliar with what the different commands are, just hover your mouse pointer over a button and a screen tip appears that describes it.
To format specific text, select the text and click the formatting command you want to apply.
To select all of the text in your document choose Select All from the Select drop-down arrow at the end of ribbon in the Home tab. Or on your keyboard press Ctrl-A.
Mini Toolbar You can also format text in Word without using the Ribbon. Right-clicking a selection displays the Mini toolbar and a shortcut menu from which you can make your formatting selections. The Mini toolbar is a set of commonly used formatting controls, such as Font, color, or Alignment. It appears faded whenever you select text within your document. Move your cursor over the toolbar and it will prominently display. You can then make your formatting selections. When you move the pointer slowly away from the mini toolbar is fades. Move it too far from the Mini toolbar and it disappears.

Information Technology Services The College of Saint Rose
Introduction to Word 2007 Page 22
Exercise In the following exercise, you will make some formatting changes to the Vacation memo. First, let’s change the font for all of the text.
1. On the ‘Home’ tab, the Select command resides at the end of the ribbon. In the Editing group, click Select, and then click Select All.
2. Click the font drop-down arrow.
3. Select the desired font from the list.
4. Type the text “Memorandum” at the top of the memo. 5. Select the text and make it boldface.
6. Select your colleague’s name and highlight it. Click the Text Highlight Color tool . This makes text look like it was marked with a highlighter pen. Click the drop down arrow and select a color.

Information Technology Services The College of Saint Rose
Introduction to Word 2007 Page 23
7. Apply an underline to the word two, to emphasize that you will be on vacation for two
weeks. Notice that the underline command has a drop down arrow with other cool choices to select from!

Information Technology Services The College of Saint Rose
Introduction to Word 2007 Page 24
Paragraph Formatting
A paragraph is created whenever you type any amount of text followed by pressing the Enter key. Paragraph formatting is the basic building block of most documents. It retains information such as paragraph spacing, line spacing, alignment, paragraph borders and shading, bullets and numbering, and indents and tabs. These commands reside in the paragraph group located on the ‘Home’ tab shown below.
When you apply paragraph formatting to text in your document, Word stores it in the paragraph mark (¶) that falls at the end of each paragraph.
When you press your enter key, you create another paragraph, and the formatting you specified is copied or carried over to the next paragraph.
Text Alignment By default in word, paragraphs are aligned at the left margin and ragged at the right. The four text alignment buttons (left, center, right and justify) in the bottom row allow you to change the alignment of text within a paragraph.
1. Click in the paragraph in which you want to change the alignment. Click the desired alignment button in the paragraph group.
Display Non Printing Characters
You can show or hide non printing characters such as a paragraph mark and other hidden formatting symbols.
1. To show or hide formatting marks, click the Show/Hide button in the paragraph group in the Home tab. The marks that appear will not appear on the printed document. They are useful to view where you pressed the spacebar, or tab key or enter for a paragraph return.

Information Technology Services The College of Saint Rose
Introduction to Word 2007 Page 25
Format Painter The format painter is a tool available in the Microsoft suite applications. It basically works the same in Excel, PowerPoint, Access and Word. It can be used to quickly copy formatting attributes to other text in your document. Using Format Painter can save you time and aggravation. For example, instead of manually applying multiple formats to text such as font size, font style, paragraph alignment, etc. to each new section of your document, you can quickly copy all of the formatting attributes by using the format painter. Copy Paragraph and Character Formatting 1. To copy both paragraph attributes (such as alignment, indentation, and so on) and character
attributes (such as font and font effects), select the text whose formatting you want to copy plus the paragraph mark that follows the text.
To copy only character attributes, select the text without selecting the paragraph mark.
2. In the ‘Home’ tab clipboard group, click Format Painter.
3. Highlight the text you want to apply the formatting to. The text takes on the new formatting! Tip: If you want to apply the same formatting to more than one item, select the formatting you
want, double-click Format Painter, and then select each word, phrase, or paragraph you want to apply formatting to.
4. When you're finished, press ESC to turn the format painter off.

Information Technology Services The College of Saint Rose
Introduction to Word 2007 Page 26
Cutting, Copying and Pasting Text
When you edit a document you may want to move or copy text to another location in the document. You can complete these tasks in 4 easy steps using the buttons in the clipboard group in the ‘Home’ tab shown below.
1. Select the text you want to cut or copy.
2. Click the Cut or Copy button in the Clipboard group. This places text on the clipboard which is temporary storage. Click the Clipboard group dialog box launcher to view the items on the clipboard.
3. Position the insertion point at the location where you want the text inserted.
4. Click the Paste button in the Clipboard group.
You can also move and copy text using your mouse.
Drag and Drop 1. Select the text you want to cut or copy.
Note: To copy text using the drag and drop method, hold Ctrl while dragging. Release the mouse button first, and then release the Ctrl key. The text remains in its original location, and a copy of the text is placed at the drop point.
2. Position the mouse pointer inside the selected text until it turns into an arrow pointer.
3. Hold the left mouse button down, and drag to the desired location.
4. Release the mouse button
The Paste Options Button When you cut or copy text from one part of the document to another (or between documents) the formatting of your text may change. This occurs when the formatting stored in that paragraph is different than the location of pasted text. Luckily, the paste options button appears when you paste text from one location to another. Click the paste options button and the list displays as shown below. Here you can specify to keep source formatting, match destination formatting, or keep text only.
Cut
Copy Paste
Clipboard group dialog box launcher

Information Technology Services The College of Saint Rose
Introduction to Word 2007 Page 27
Information Technology Services The College of Saint Rose
Introduction to Word 2007 Page 28
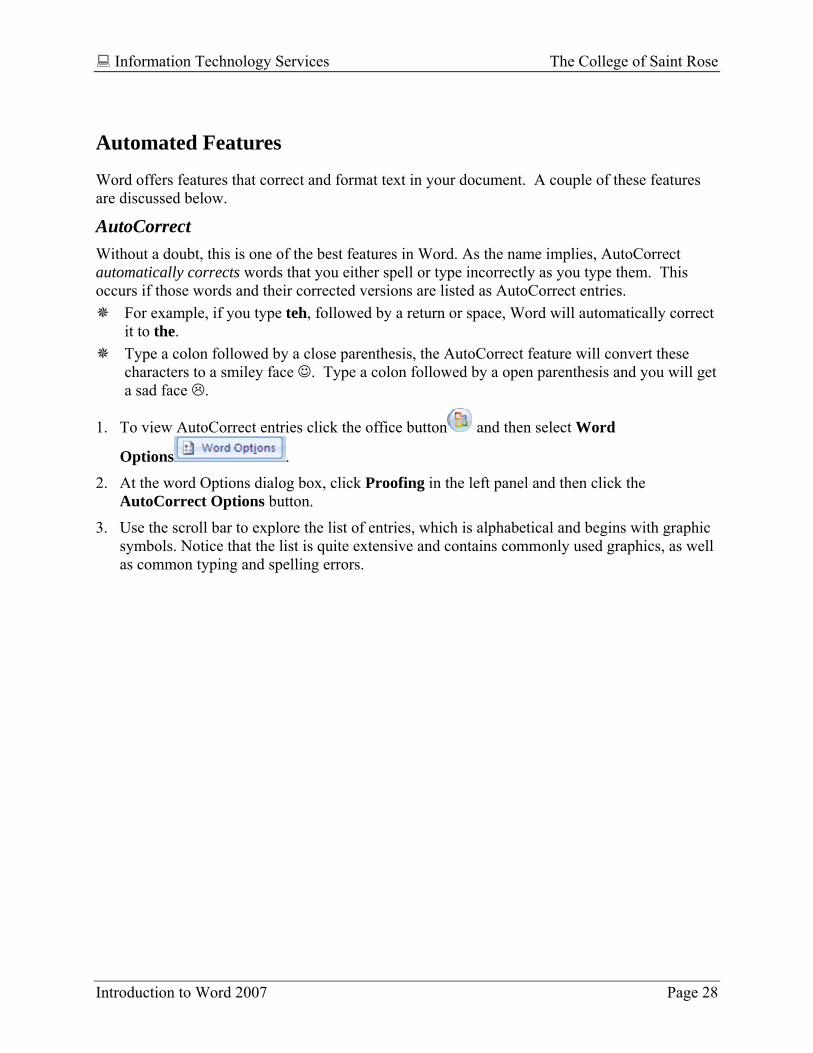
Automated Features
Word offers features that correct and format text in your document. A couple of these features are discussed below.
AutoCorrect Without a doubt, this is one of the best features in Word. As the name implies, AutoCorrect automatically corrects words that you either spell or type incorrectly as you type them. This occurs if those words and their corrected versions are listed as AutoCorrect entries.
For example, if you type teh, followed by a return or space, Word will automatically correct it to the.
Type a colon followed by a close parenthesis, the AutoCorrect feature will convert these characters to a smiley face ☺. Type a colon followed by a open parenthesis and you will get a sad face .
1. To view AutoCorrect entries click the office button and then select Word
Options .
2. At the word Options dialog box, click Proofing in the left panel and then click the AutoCorrect Options button.
3. Use the scroll bar to explore the list of entries, which is alphabetical and begins with graphic symbols. Notice that the list is quite extensive and contains commonly used graphics, as well as common typing and spelling errors.

Information Technology Services The College of Saint Rose
Introduction to Word 2007 Page 29

Information Technology Services The College of Saint Rose
Introduction to Word 2007 Page 30
Add Words in AutoCorrect You can add commonly misspelled words, frequent typographical errors, or abbreviations to AutoCorrect. To add an entry to AutoCorrect
1. Click in the replace text box and type the word you want replaced
2. Press the Tab key or move the insertion point into the With text box.
4. Type the correct version of the word.
5. Click OK.
6. The next time you misspell the word it will automatically correct!
Delete Words in AutoCorrect 1. Click in the replace text box; type the word you want replaced.
2. Click Delete.
3. Click OK.
AutoCorrect Options Button On occasion when you do not want text to be corrected, you can undo a correction or specify that AutoCorrect stop automatically correcting occurrences of that specific text. This can be easily accomplished using the AutoCorrect Options button. The Autocorrect button may display or a small blue box appears below text that AutoCorrect has just corrected.
When you rest the mouse pointer over the blue box, it changes to the Autocorrect Options button. Click this button, and a drop-down list displays options from which you can make a selection, as shown in the examples below.

Information Technology Services The College of Saint Rose
Introduction to Word 2007 Page 31
AutoFormat as you Type Word automatically format certain kinds of text as you type, such as automatically replacing a typed hyphen ( - ) with a dash ( – ).
Use the AutoFormat As You Type options to control the automatic formatting that you want.
1. In the AutoCorrect dialog box click the AutoFormat As You Type tab.
2. Select or clear the check boxes for the options that you want to enable or disable.
The Options are explained below.
Replace as you type "Straight quotes" with “smart quotes” - Replaces straight quotation marks ( " " ) and straight apostrophes ( ' ) with curved, open- and closed-quotation marks ( ) and curved apostrophes ( ). Fractions (1/2) with fraction character (½) - Replaces typed fractions (1/2) with a single character fraction (½). *Bold* and _italic_ with real formatting - Applies bold font to any text enclosed in asterisks (*); applies italic font to any text enclosed in underscores (_). Internet and network paths with hyperlinks - Replaces typed Internet addresses, network paths, and e-mail addresses with hyperlinks. Ordinals (1st) with superscript - Replaces ordinal numbers that show the relative position of an item in a sequence (for example, 1st, 2nd, or 3rd) with superscript ( ). Hyphens (--) with dash (—) - Replaces a double hyphen (--) with an em dash (—); replaces a

Information Technology Services The College of Saint Rose
Introduction to Word 2007 Page 32
single hyphen with a space before and after ( - ) with an en dash (–).
Apply as you Type
Automatic bulleted lists - Creates a bulleted list when a line of text starts with one of the following characters *, -, or > followed by a space or tab. Border lines - Draws a line when you type three consecutive instances of the following characters ~, #, *, -, _, or = on a new line, and then press ENTER. For example, typing ~~~ on a new line, and then pressing ENTER draws a wavy line across the page. Built-in Heading styles - Applies heading styles to paragraphs of five or less words that do not end with punctuation after you press ENTER two times. For Heading 1, type a new line; for Heading 2, precede the new line with a single tab; for Heading 3, precede the new line with two tabs. Note: Press ENTER two times after the previous paragraph to automatically apply heading styles. Automatic numbered lists - Creates a numbered list when a line of text starts with the number 1 followed by a period or tab. Tables - Creates a single row table when you insert a sequence of plus signs (+) and hyphens (-) at the start of a line of text, and then press ENTER. You must begin and end the sequence with a plus sign. For example, +---+---+------+ creates a single row table with three columns. The column width is equal to the number of hyphens typed between the plus signs.
Automatically as you Type Format beginning of list item like the one before it - Formats the lead-in text of a list item like the lead -in text of the previous list item. Lead-in formatting is repeated up to the first punctuation character of the list item, typically a period, colon, hyphen, em dash, question mark, exclamation point, or similar character. Note Only formatting that applies to all the lead-in text is repeated in the next list item. Formatting that
applies to a section of the lead-in text is not repeated in the lead-in text of subsequent list items. Set left- and first-indent with tabs and backspaces – Indent the first line of a paragraph by putting the cursor before the first line, and then pressing the TAB key. Indent the whole paragraph by putting the cursor before any line in the paragraph (except the first line), and then pressing the TAB key. To remove an indent, put the cursor before the first line of the paragraph, and then press the BACKSPACE key. Define styles based on your formatting - Applies a built-in style to manually formatted text when the text has the same formatting as a built-in style. Note To enable this feature, you must clear the Keep track of formatting check box. In the Word
Options dialog box, click Advanced, and then clear the Keep track of formatting check box.

Information Technology Services The College of Saint Rose
Introduction to Word 2007 Page 33
Spelling and Grammar Checker
Word provides two ways to check spelling and grammar: while you type or all at once.
Automatic Spelling and Grammar Checker As you type a document, Word uses wavy red underlines to indicate possible spelling errors and wavy green underlines to indicate possible grammatical errors. This is Automatic Spelling and Grammar Checker.
The Spelling checker is used to indicate that the word you typed is not in the program’s dictionary. Let’s try it out.
1. Right-click on the misspelled word with the red underline. It will list suggestions, which you can choose as replacement text.
2. Choose the correct word from the shortcut menu.
3. The misspelled work is replaced with the correct spelling!
Other options on the shortcut menu include the option to Ignore all instances of the word in the current document.
If the unrecognized word is not close to anything in the dictionary, no suggestions appears on the context menu.
Add to Dictionary adds the word or name to the dictionary (you are actually adding it to your own custom dictionary). You should add all proper names, technical terms or acronyms that you use frequently in correspondence or documentation to the dictionary.
Choose AutoCorrect to add the word to your AutoCorrect list.

Information Technology Services The College of Saint Rose
Introduction to Word 2007 Page 34
Spelling and Grammar Options By default the check spelling and grammar as you type option is turned on. If the wavy underlines clutter your document, you can temporarily hide them until you are ready to correct the errors.
1. Click the office button and then select Word Options .
2. At the word Options dialog box, click Proofing in the left panel.
3. In the Word Options dialog box under the heading correcting spelling and grammer in word you can turn on or off the desired options. Turn off the Check spelling as you type and Check grammar with Spelling check boxes.
4. Click OK. 5. Check the boxes to turn these options back on.

Information Technology Services The College of Saint Rose
Introduction to Word 2007 Page 35
Check Spelling and Grammar all at Once 1. Press the Ctrl - Home keys to move to and start checking the spelling and grammar from the
beginning of the document.
2. On the ribbon select the ‘Review’ tab.
3. Click the Spelling & Grammar button. 4. The Spelling and Grammar dialog box displays the first spelling or grammar error. 5. You can choose Ignore this instance of the word or have Word Ignore All instances in the
document. 6. You can also Add this word to the directory. 7. Under Suggestions, choose the correct word and click on Change. Click on Change All to
change all misspelled instances of this word in the document. 8. Click on AutoCorrect to add the word to the AutoCorrect list.

Information Technology Services The College of Saint Rose
Introduction to Word 2007 Page 36
Print Preview
1. Before printing your document, you may use Print Preview to see a snapshot of it in full-page view and make changes to the document before printing.
2. Click on the office button. Select Print→ Print Preview.

Information Technology Services The College of Saint Rose
Introduction to Word 2007 Page 37
3. Move the mouse slowly along each item. A tool tip will appear with the description of each
tool’s function.
4. Click the Close Print Preview button to return to your document.

Information Technology Services The College of Saint Rose
Introduction to Word 2007 Page 38
Page Setup
From the Page Layout tab or in Print Preview you can change page setup options such as your margins, page orientation or paper size.
Margins 1. On the Page Layout tab, in the Page Setup group, click Margins.
2. Select the margin type that you want. For the most common margin width, click Normal.
When you click the margin type that you want, your entire document automatically changes to the margin type that you have selected.
3. You can also specify your own margin settings. Click Custom Margins and the Page Setup dialog box opens.

Information Technology Services The College of Saint Rose
Introduction to Word 2007 Page 39
4. Enter new values for the margins in the Top, Bottom, Left, and Right boxes. Click OK.
Apply to To change the margins for part of a document, such as a section or selected text, first select the text or click in the document section. Enter the new margins in the Page Setup dialog box. From the Apply to drop down list select the desired option.
If you chose selected text, Microsoft Word automatically inserts section breaks (a mark that is inserted to depict the end of a section. A section break stores the section formatting elements, such as the margins, page orientation, headers and footers, and sequence of page numbers.) Default To change the default margins, in the Page Setup dialog box, click the Default button, and then click Yes. The new default settings are saved in the template on which the document is based. Each new document based on that template automatically uses the new margin settings.

Information Technology Services The College of Saint Rose
Introduction to Word 2007 Page 40
Orientation 1. To change your page orientation, click on the Page Layout tab. Select Orientation, choose
Portrait or Landscape.
Paper Size and Source
1. To change your paper size or source, click on the Page Layout tab. Select Size. Select an option from the list. Letter size is the default, or you can choose other paper sizes, such as legal.
2. Click More Paper Sizes to specify the paper source, or the paper tray from which you wish to draw paper. You may need to change from the default if, for instance, you wish to print on letterhead or any other special paper that has its own paper tray.

Information Technology Services The College of Saint Rose
Introduction to Word 2007 Page 41
Layout The layout area is where you can make any “publishing” types of changes. You can prevent the headers and footers from printing on the first page, or designate different headers and footers for odd and even pages, which is often the case when writing a book or manual. You also have the option of adding line numbers to your document, if necessary. 1. Click the Layout tab. Make the desired changes.
2. Click OK to return to your document.

Information Technology Services The College of Saint Rose
Introduction to Word 2007 Page 42
Help
1. Click the blue and white question mark , or press F1. This connects you to Office online help.
2. Type in a search term for the item you need help with. The example below seeks help on the format painter.
3. Click Search.
4. Microsoft Word Help displays the Search Results. Click on the link for the description that best answers your question. In this example click “Use the Format Painter.
Information Technology Services The College of Saint Rose
Introduction to Word 2007 Page 43
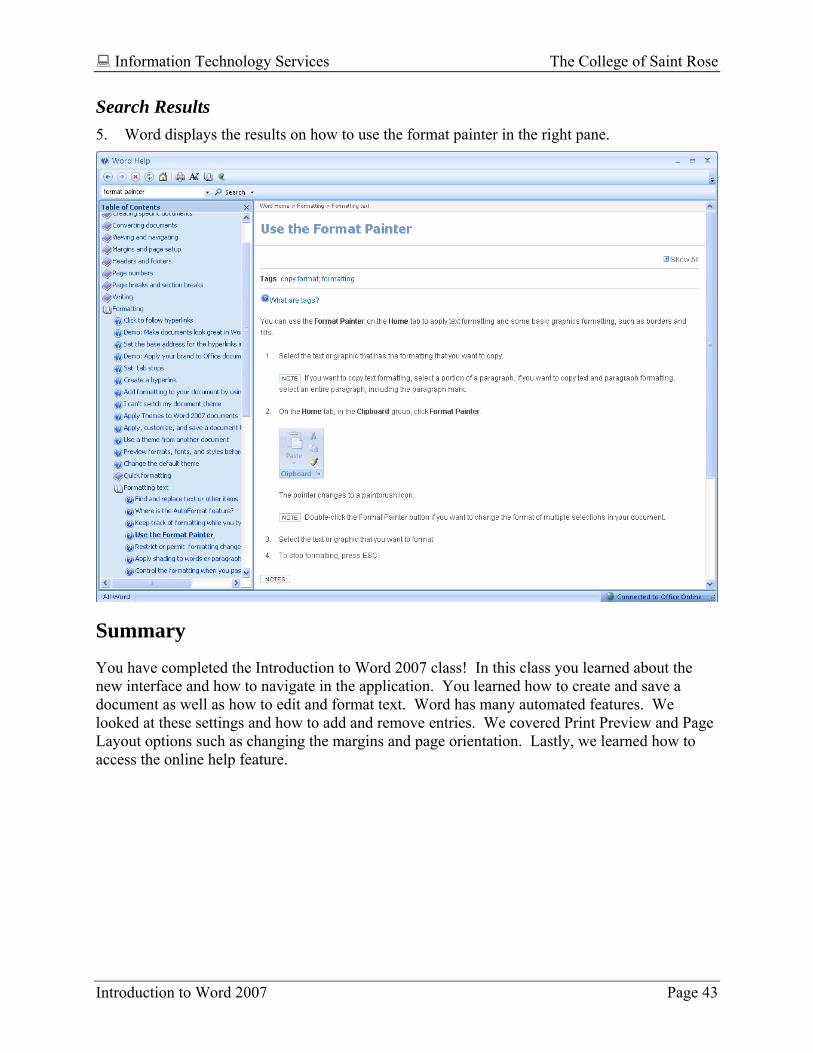
Search Results 5. Word displays the results on how to use the format painter in the right pane.
Summary
You have completed the Introduction to Word 2007 class! In this class you learned about the new interface and how to navigate in the application. You learned how to create and save a document as well as how to edit and format text. Word has many automated features. We looked at these settings and how to add and remove entries. We covered Print Preview and Page Layout options such as changing the margins and page orientation. Lastly, we learned how to access the online help feature.
Related Documents