Wireless LAN Access Point PCWA-A320 Troubleshooting Guide Leitfaden zur Fehlerbehebung Guide de dépannage www.vaio-link.com

Welcome message from author
This document is posted to help you gain knowledge. Please leave a comment to let me know what you think about it! Share it to your friends and learn new things together.
Transcript
Wireless LANAccess PointPCWA-A320
Troubleshooting GuideLeitfaden zur FehlerbehebungGuide de dépannage
www.vaio-link.com

Troubleshooting Guide . . . . . . . . . . . .page 3
Leitfaden zur Fehlerbehebung . . . . . . Seite 15
Guide de dépannage . . . . . . . . . . . . . .page 29
.


3
Troubleshooting Guide

4
Trademarks● Sony, VAIO, the logo, the logo and the Eco Info
logo are trademarks of Sony Corporation.
● Microsoft and Windows are registered trademarks of Microsoft Corporation in the United States and/or other countries.
● In this manual, Microsoft® Windows® XP Home Edition and Microsoft® Windows® XP Professional are referred to as Windows XP.
● All other names of systems, products and services are trademarks of their respective owners. In this manual the TM or ® marks are not specified.
™

5
IntroductionThis document provides solutions to common problems encountered with the Wireless LAN Access Point.Please refer to this guide before contacting Sony�s customer service department.
Case 1 - I cannot find the Access Point with the Access Point Scan Utility
Did you wait long enough?
The scanning process may take some time. After clicking Scan, wait at least 30 seconds before checking the results.
Can you see the IP address of the computer?
With the computer setting Obtain IP address automatically enabled, perform the following steps. For information on how to set the IP address of the computer, see Windows Help.
Windows Me
1 From the Start menu, select Run.
2 Enter winipcfg in the Run dialog box and click OK.
3 From the list in the IP Setup dialog box, select the Wireless LAN interface that you are using (PC Card, computer internal wireless LAN, etc).
4 Make sure an IP address is shown in the IP address field.
5 If the IP address is 0.0.0.0 or an address starting with 169.254 is displayed, click Release and then Renew.
● If an IP address with 169.254 is displayed, a suitable IP address was not obtained with Obtain IP address automatically and your Windows operating system assigned an address to the Wireless LAN PC Card. In this condition, a correct network connection is not possible. Perform the setup again as described in the Quick Start Guide.
Windows 2000 and Windows XP
1 Click Start, point to Programs (All programs in Windows XP) and then Accessories and click Command prompt.
2 In the command prompt window, enter ipconfig/all and press <Enter>.
3 Check the IP address setting information of the Wireless LAN interface that you are using (PC Card, computer internal Wireless LAN, etc).The description field shows the name of the Wireless LAN interface.
4 If the IP address is 0.0.0.0 or an address starting with 169.254 is displayed, enter ipconfig/renew and press <Enter>.A new IP address is assigned.

6
Is the Access Point on?
When the Access Point is on, the Status indicator flashes slowly.
Is the Windows XP Internet Connection Firewall function enabled?
If the Internet Connection Firewall function is enabled, communication may not be possible. Follow the procedure below to check or change the settings:1. Click Start and then Control Panel.2. In Control Panel, double-click Network Connections.If Network Connections does not appear, click Switch to classic view.3. In the Network Connections window, right-click the icon of the wireless network that you want to use and click Properties.4. Click the Advanced tab and (if selected) deselect the Protect my computer and network by limiting or preventing access to this computer from the Internet check box.5. Click OK.
★ Refer to the Windows XP Help for details about the Internet Connection Firewall function.
● Make sure that you take appropriate security measures when the Internet Connection Firewall function is disabled. Except when configuring the Access Point, it is strongly recommended that you enable the Internet Connection Firewall function at all times.If the problem still persists after verifying all the above, proceed to Case 2.
Case 2 - There is no communication between the computer and the Access Point
Is the Wireless LAN interface (PC Card, Wireless LAN Converter, etc) correctly installed. Does you computer detect the interface?
Proceed as follows to verify:
1 Make sure that the Wireless LAN PC Card or Wireless LAN Converter is correctly installed on your computer. If they are not, refer to the appropriate documentation and reinstall them.
2 If the Wireless LAN PC Card or Wireless LAN Converter is correctly installed on your desktop, right-click My Computer and then click Properties from the shortcut menu that appears.Under Windows XP, you can right-click My Computer on the Start menu and then click Properties on the shortcut menu that appears.
3 On the Hardware tab, click Device Manager.Under Windows Me, click the Device Manager tab.
7
4 Double-click Network adapters and verify whether the network interface connected to the Wireless LAN PC Card or Ethernet card appears in the list.
5 If the network interface connected to the Wireless LAN PC Card or Wireless LAN Converter does not appear in the list, refer to the appropriate documentation for details about how to make your computer detect the interface.
Did you see the IP address of the computer?
Refer to Case 1 to obtain the IP address.If an IP address starting with 169.254 is displayed, a suitable IP address was not obtained with Obtain IP address automatically and Windows has automatically assigned an address to the LAN PC Card. In this condition, a correct network connection is not possible. Perform the setup again as described in the Quick Start Guide.
Is your computer properly configured for wireless communication?
When using the Access Point functions under factory default settings, configure the computer as follows (Windows XP andthe Wireless LAN PC Card):
1 Click Start and then Control Panel.
2 In Control Panel, double-click Network Connections.If Network Connections does not appear, click Switch to classic view.
3 In the Network Connections window, right-click the icon of the wireless network to which you want to connect and click View Available Wireless Networks.
4 In the Connect to Wireless Network dialog box, select the Access Point from Available Wireless Networks and click Connect. When using the Access Point functions under factory default settings, check the 6-character identifier printed on the label inside the rear cover of the wireless unit.
Are the Network Name (SSID) and Data Encryption (WEP) settings configured correctly?
To connect to the Access Point, the Network Name (SSID) and Data Encryption (WEP) settings must be the same on the computer and the Access Point.
When using the Access Point functions under factory default settings, use the settings listed above. With Windows Me and Windows 2000, verify the Access Point Network Name (SSID) and Data Encryption (WEP) settings of the Wireless LAN PC Card as described in its documentation.
8
With Windows XP and the Wireless LAN PC Card, proceed as follows to verify the settings:
1 Open the Connect to Wireless Network dialog box.
2 Select the Network Name (SSID) of the Access Point from Available Wireless Networks.
3 If data encryption is enabled for the Access Point, enter the correct Encryption Key (network key) in the Data Encryption (WEP) field.
4 Click Connect.If the connection is not established, reset the Access Point functions to the factory default settings as described in Case 6 and then set up the Access Point functions again as described in the Quick Start Guide.
Is the wireless network connection acting as a network bridge? (Windows XP only)
1 Click Start, point to Connect To and click Show all connections.
2 Confirm that the wireless network connection in question is not acting as a network bridge.
3 If the wireless network connection is configured as a network bridge, right-click the wireless network connection icon and click Remove from bridge.
Case 3 - I cannot display the Access Point Setup PageIs the Web browser of the computer used for the Access Point setup configured to use a proxy server?
Make sure that no proxy setting is enabled for the IP address ofthe Access Point.While the proxy server setting is disabled, it may not be possible to display other pages except for the Access Point Setup Page.
Example 1: Using Microsoft Internet Explorer
1 On the Tools menu, click Internet Options.The Internet Options dialog box appears.
2 On the Connection tab, click LAN Settings.The Local Area Network (LAN) Settings dialog box appears.If there are dial-up profiles in the Dial-up box, make sure that you select the Never dial a connection check box.
3 If the Use a proxy server for your LAN check box is selected (these settings do not apply to dial-up or VPN connections), deselect the check box and click OK.

9
4 When the Access Point setup is complete, return the proxy setting to its original condition.
Example 2 : Using Netscape
1 Start the web browser on the computer used for the Access Point setup.
2 On the Edit menu, click Preferences.
3 In Category, click Advanced and click the Proxies button.
4 Select Direct connection to the Internet and click OK.
5 When the Access Point setup is complete, return the proxy setting to its original condition.
Case 4 - I do not know which Access Point to selectVerify the MAC address indicated on the label inside the back cover of the Wireless Unit. In the Access Point list of the Access Point Scan Utility, select the Access Point with the same MAC address.
Case 5 - I can no longer connect after the Access Point settings had been changed
I forgot the Access Point settings
If you forgot the settings of the Access Point, reset the Access Point to its factory defaults as described in Case 6 and then perform the setup again as described in the Quick Start Guide.
The Network Name (SSID) or Encryption (WEP) key was changed
With Windows Me or Windows 2000, refer to the instruction manual provided with the wireless LAN PC Card you are using and change the computer settings so that they match the Access Point settings.
With Windows XP and the Wireless LAN PC Card, follow the procedure below to change the computer settings:
1 Perform steps 1 and 2 of Case 2, section Is your computer properly configured for wireless communication?
2 Click Advanced.
3 From Available Networks, select the same name that you set for the Access Point Network Name (SSID) and click Configure.If the network has the same name of one appearing in Preferred networks, select the network from the list in Preferred networks and click Remove to remove it from the list.

10
4 If WEP encryption is enabled, select the Data encryption (WEP enabled) check box, deselect the The key is provided for me automatically check box and enter the WEP key set for the Access Point in the Network key field.
5 Click OK.● If you have forgotten your Access Point settings, refer to the procedure described
in Case 6.
Case 6 - I forgot my settingsYou can reset the Access Point to its factory defaults as follows:
1 Check that the Access Point is on.
2 Use a paper clip or a similar object to hold down the Reset switch at the bottom of the Wireless Unit for at least one second.When you press the switch, the Status indicator on the front of the Wireless Unit lights red. After one second, the indicator starts to flash.Take care not to press the Quick Setup switch by mistake.
3 When the status indicator flashes red, release the Reset switch.The Access Point restarts automatically and all its settings revert to the factory defaults.
Case 7 - If Easy Setup is used after Advanced Setup, what about items not included in Easy Setup?If you reconfigure the unit with Easy Setup after using Advanced Setup, the items not included in Easy Setup are set as follows:
● In the table, - indicates blank settings.
ITEM SETTING
Frequency (channel) Auto Select
Broadcast Network Name (SSID) Yes
Access Control Accept all
Connection Method Obtain IP address automatically (DHCP)
DNS Server -
Speed Auto-Detect
Setup Switch Enable
Time Server (NTP Server) -

11
Case 8 - How can I replace a wired connection between a DSL modem and the computer with a wireless link?Aside from the LAN Access Point, a Wireless LAN PC Card supportingthe IEEE 802.11g standard and/or a wireless LAN converter are required.
Case 9 - How do I use the Quick Setup switch?The Quick Setup switch is used to configure the Access Point together with the 2.4 GHz Wireless LAN Converter PCWA-DE30. For details, seethe Wireless LAN Converter PCWA-DE30 Quick Start Guide.
Case 10 - After pressing the Quick Setup switch, the Status indicator starts flashing redIf the Quick Setup switch is held down for more than one second, the Status indicator starts to flash red. 30 seconds later, the status indicator begins flashing slowly to indicate normal operation (white).
The Quick Setup switch is used to set up the separately availableWireless LAN Converter PCWA-DE30.
For more information on how to use the Quick Setup switch, refer to the Wireless LAN Converter PCWA-DE30 Quick Start Guide.
Case 11 - I cannot connect with an IEEE 802.11b-compliant Wireless LAN PC Card● Check whether the Access Point Connection Mode is set to 802.11g only.
You can change the Access Point Connection Mode with Advanced Setup.
● When the 2.4 GHz Wireless LAN PC Card PCWA-C100 is used, do not set the key length to WEP 128 Bit. Otherwise connection will not be possible. Instead set the key length to WEP 64 Bit.
Case 12 - After updating the firmware, the Status indicator’s flashing pattern is strangeIf the indicator flashes slowly white with occasional red flashes, the update was not completed successfully. Perform the update again.*
* The white flashing pattern (9 seconds on, 1 second off) and the red flashing pattern (2 seconds on, 8 seconds off) occur simultaneously.
12
Case 13 - The Current IP address settings of your PC may not allow you to access the Access Point setup. To configure the Access Point, the IP address of your PC and the IP address of the Access Point should be in the same subnet mask message appears.
Are there several active network interfaces?
Temporarily disable all the network interfaces except the one that you want to use with the Wireless LAN Access Point.
1 On your desktop, right-click My Computer and then click Properties from the shortcut menu that appears.Under Windows XP, you can right-click My Computer on the Start menu and then click Properties on the shortcut menu that appears.
2 On the Hardware tab, click Device Manager.Under Windows Me, click the Device Manager tab.
3 Right-click the network interfaces that you want to disable and then click Disable.A confirmation message appears.
4 Click Yes.The selected network interface is disabled.
Are the computer and Access Point IP address set up so that they can communicate?
Modify the IP address of your computer so that it matches the IP address. In the explanation the following values for the Access Point have been used:
IP address: 192.168.11.xxx (where xxx is a number between 0 and 255, except 1).Subnet mask: 255.255.255.0
With Windows XP and the Wireless LAN PC Card
1 On the Start menu, point to Connect To and then right-click Wireless Network Connection.
2 Click Properties on the shortcut menu that appears.
3 Select Internet Protocol (TCP/IP) and then click Properties.
4 Select Use the following IP address and then enter 192.168.11.xxx in the IP address box and 255.255.255.0 in the Subnet mask box.
5 Click OK.
13
With Windows 2000
1 On the Start menu, point to Settings and then click Network and Dial-up Connections.
2 Right-click Local Area Connection and click Properties on the shortcut menu that appears.
3 Select Internet Protocol (TCP/IP) and then click Properties.
4 Select Use the following IP address and then enter 192.168.11.xxx in the IP address box and 255.255.255.0 in the Subnet mask box.
5 Click OK.
With Windows Me
1 On the Start menu, point to Settings and then click Control Panel.
2 Right-click Network.
3 Select TCP/IP - "network card name" and then click Properties.If there is no such item in the list, click Add. In the Select Network Component Type dialog box, select Protocol, click Add and then adda TCP/IP.
4 On the ID address tab, select Specify an IP address and then enter 192.168.11.xxx in the IP address box and 255.255.255.0 in the Subnet mask box.
5 Click OK.Restart your computer.
Case 14 - The Wireless LAN PC Card or Wireless LAN Converter is set up correctly, but I still cannot connect to the Access Point.Use the Access Point setup page to verify whether access control settings are made.
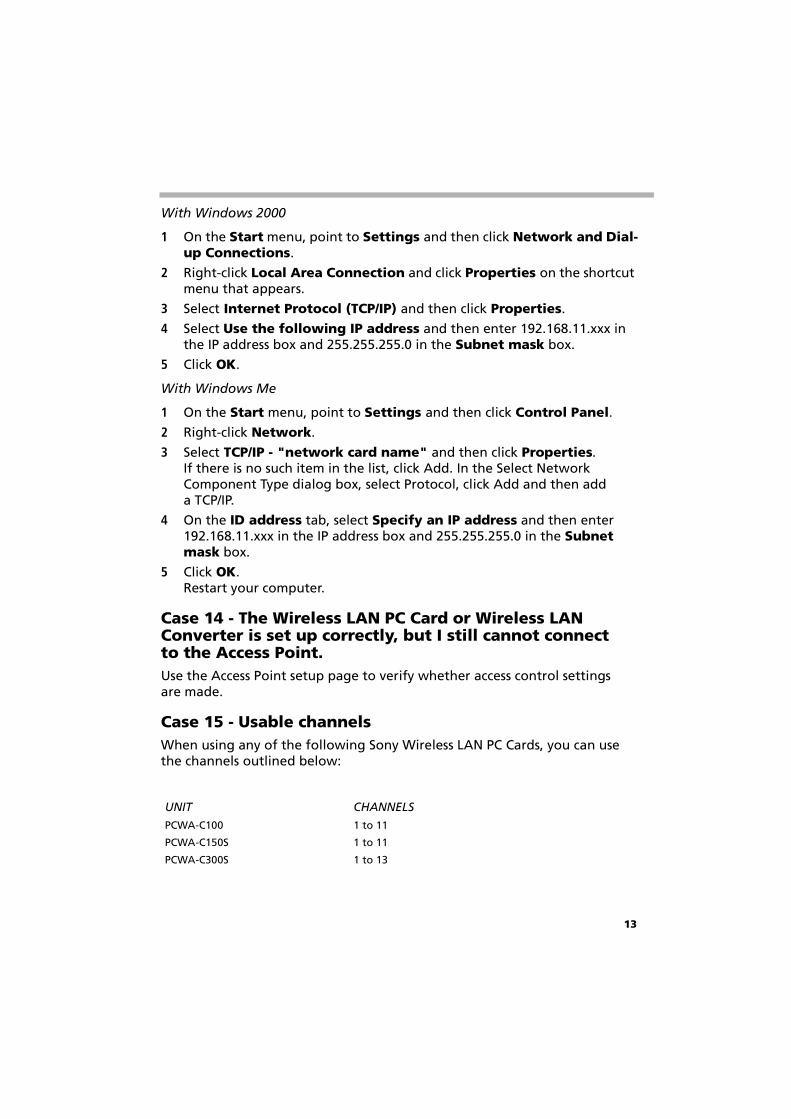
Case 15 - Usable channelsWhen using any of the following Sony Wireless LAN PC Cards, you can use the channels outlined below:
UNIT CHANNELS
PCWA-C100 1 to 11
PCWA-C150S 1 to 11
PCWA-C300S 1 to 13

14

15
Fehlerbehebung

16
Marken● Sony, VAIO, das -Logo, das -Logo und das Eco
Info-Logo sind Marken der Sony Corporation.
● Microsoft und Windows sind eingetragene Marken der Microsoft Corporation in den USA und/oder in anderen Ländern.
● In diesem Handbuch werden Microsoft® Windows® XP Home Edition und Microsoft® Windows® XP Professional als Windows XP bezeichnet.
● Alle anderen System-, Produkt- und Dienstleistungsnamen sind Marken ihrer jeweiligen Inhaber. Auf die Zeichen � und ® wird in diesem Handbuch verzichtet.
™
17
EinführungDieses Dokument liefert Lösungen für häufige Probleme, die beim Wireless LAN Access Point auftreten.Bevor Sie sich an die Kundendienstabteilung von Sony wenden, sollten Sie zuerst im vorliegenden Handbuch nachschlagen.
Fall 1: Mit dem Dienstprogramm Access Point Scan Utility kann ich den Access Point nicht finden
Haben Sie lange genug gewartet?
Die Sendersuche kann eine Weile dauern. Warten Sie mindestens 30 Sekunden nach dem Klicken auf Scannen, bevor Sie das Ergebnis überprüfen.
Wird die IP-Adresse des Computers angezeigt?
Wenn auf dem Computer die Einstellung IP-Adresse automatisch beziehen aktiviert ist, führen Sie die folgenden Schritte aus. Um zu erfahren, wie die IP-Adresse des Computers festgelegt wird, lesen Sie in der Hilfe von Windows nach.
Windows Me
1 Wählen Sie im Menü Start die Option Ausführen.
2 Geben Sie im Dialogfeld Ausführen den Befehl winipfcfg ein, und klicken Sie auf OK.
3 Wählen Sie im Dialogfeld IP-Konfiguration die zurzeit verwendete Wireless LAN-Schnittstelle aus (PC Card, eingebaute Wireless-LAN-Karte o. ä.).
4 Stellen Sie sicher, dass im Feld IP-Adresse eine IP-Adresse angezeigt wird.
5 Wenn die IP-Adresse 0.0.0.0 lautet oder mit 169.254 beginnt, klicken Sie auf Freigeben und dann auf Aktualisieren.
● Wenn eine IP-Adresse angezeigt wird, die mit 169.254 beginnt, wurde über die Einstellung IP-Adresse automatisch beziehen keine geeignete IP-Adresse angefordert und Ihr Windows-Betriebssystem hat der Wireless LAN PC Card eine Adresse zugeteilt. Unter diesen Umständen kann keine korrekte Netzwerkverbindung hergestellt werden. Führen Sie die Einrichtung erneut durch, wie in der Kurzanleitung erläutert wird.
18
Windows 2000 und Windows XP
1 Klicken Sie auf Start, zeigen Sie auf Programme (unter Windows XP heißt die Option Alle Programme) und auf Zubehör, und klicken Sie dann auf Eingabeaufforderung.
2 Geben Sie im Fenster �MS-DOS-Eingabeaufforderung� den Befehl ipconfig/all ein, und drücken Sie die <Eingabetaste>.
3 Überprüfen Sie die IP-Adressangaben der zurzeit verwendeten Wireless LAN-Schnittstelle (PC Card, eingebaute Wireless-LAN-Karte o. ä.).Im Feld �Beschreibung� wird der Name der Wireless-LAN-Schnittstelle angezeigt.
4 Wenn die angezeigte IP-Adresse 0.0.0.0 lautet oder mit 169.254 beginnt, geben Sie den Befehl ipconfig/renew ein, und drücken Sie die <Eingabetaste>.Eine neue IP-Adresse wurde zugewiesen.
Ist der Access Point eingeschaltet?
Bei eingeschaltetem Access Point blinkt die Statusanzeige langsam.
Ist unter Windows XP die Funktion Internetverbindungsfirewall aktiviert?
Wenn die Internetverbindungsfirewall aktiviert ist, wird die Kommunikation möglicherweise blockiert. Gehen Sie folgendermaßen vor, um die Einstellungen zu prüfen oder zu ändern:1. Klicken Sie auf Start und dann auf Systemsteuerung.2. Doppelklicken Sie in der Systemsteuerung auf Netzwerkverbindungen.Wenn Netzwerkverbindungen nicht angezeigt wird, klicken Sie auf Zur klassischen Ansicht wechseln.3. Klicken Sie im Fenster Netzwerkverbindungen mit der rechten Maustaste auf das Symbol für das Wireless-Netzwerk, das Sie verwenden möchten, und klicken Sie auf Eigenschaften.4. Klicken Sie auf die Registerkarte Erweitert, und deaktivieren Sie das Kontrollkästchen Diesen Computer und das Netzwerk schützen, indem das Zugreifen auf diesen Computer vom Internet eingeschränkt oder verhindert wird (sofern es aktiviert ist).5. Klicken Sie auf OK.
★ Einzelheiten über die Internetverbindungsfirewall finden Sie in der Hilfe zu Windows XP.
● Stellen Sie sicher, dass Sie geeignete Sicherheitsvorkehrungen treffen, wenn die Internetverbindungsfirewall deaktiviert ist. Außer für die Konfiguration des Access Point empfehlen wir, die Firewall-Funktion für Internetverbindungen immer zu aktivieren.Falls das Problem nach der Kontrolle aller oben genannten Punkte immer noch nicht beseitigt ist, fahren Sie mit Fall 2 fort.

19
Fall 2: Zwischen Computer und Access Point findet keine Kommunikation statt
Ist die Wireless LAN-Schnittstelle (PC Card, Wireless LAN Converter o.ä.) korrekt installiert? Erkennt Ihr Computer die LAN-Schnittstelle?
Gehen Sie zur Überprüfung wie folgt vor:
1 Stellen Sie sicher, dass die Wireless LAN PC Card bzw. der Wireless LAN Converter auf dem Computer richtig installiert ist. Falls nicht, nehmen Sie die zugehörige Dokumentation zur Hand, und wiederholen Sie die Installation.
2 Wenn die Wireless LAN PC Card oder der Wireless LAN Converter auf dem Computer richtig installiert ist, klicken Sie mit der rechten Maustaste auf Arbeitsplatz und im gezeigten Kontextmenü dann auf Eigenschaften.Unter Windows XP können Sie auch über das Menü Start auf Arbeitsplatz klicken. Im anschließend eingeblendeten Kontextmenü klicken Sie dann auf Eigenschaften.
3 Klicken Sie auf die Registerkarte Hardware und dann auf Geräte-Manager.Klicken Sie unter Windows Me auf die Registerkarte Geräte-Manager.
4 Doppelklicken Sie auf Netzwerkkarten, und prüfen Sie, ob die Netzwerkschnittstelle, die mit der Wireless LAN PC Card oder dem Ethernet-Karte verbunden ist, in der Liste erscheint.
5 Falls die Netzwerkschnittstelle, die mit der Wireless LAN PC Card bzw. dem Wireless LAN Converter verbunden ist, nicht in der Liste erscheint, sehen Sie in der Begleitdokumentation nach, wie Sie die Erkennung der LAN-Schnittstelle auf dem Computer aktivieren können.
Wurde die IP-Adresse des Computers angezeigt?
Lesen Sie die Anweisungen unter Fall 1, um die IP-Adresse zu beziehen.Wenn eine IP-Adresse angezeigt wird, die mit 169.254 beginnt, wurde über die Einstellung IP-Adresse automatisch beziehen keine geeignete IP-Adresse angefordert und Windows hat der LAN PC Card eine Adresse zugeteilt. Unter diesen Umständen kann keine korrekte Netzwerkverbindung hergestellt werden. Führen Sie die Einrichtung erneut durch, wie in der Kurzanleitung erläutert wird.
20
Ist Ihr Computer für die Funkkommunikation korrekt eingerichtet?
Wenn Sie die Access Point-Funktionen unter den werkseitigen Standarde-instellungen benutzen, konfigurieren Sie den Computer wie folgt (Windows XP und Wireless LAN PC Card):
1 Klicken Sie auf Start und dann auf Systemsteuerung.
2 Doppelklicken Sie in der Systemsteuerung auf Netzwerkverbindungen.Wenn Netzwerkverbindungen nicht angezeigt wird, klicken Sie auf Zur klassischen Ansicht wechseln.
3 Klicken Sie im Fenster Netzwerkverbindungen mit der rechten Maustaste auf das Symbol für das Wireless-Netzwerk, zu dem Sie eine Verbindung herstellen möchten, und klicken Sie auf Verfügbare drahtlose Netzwerke anzeigen.
4 Wählen Sie im Dialogfeld Mit dem drahtlosen Netzwerk verbinden den Access Point unter Verfügbare Wireless-Netzwerke aus, und klicken Sie auf Verbinden. Bei Verwendung der Access Point-Funktionen mit den werksseitigen Standardeinstellungen, überprüfen Sie den 6-stelligen Identifikationscode, der sich auf dem Etikett auf der Innenseite des Rückwanddeckels am Wireless-Gerät befindet.
Sind der Netzwerkname (SSID) und die Einstellungen für die Datenverschlüsselung (WEP) richtig konfiguriert?
Zum Aufbauen von Verbindungen mit dem Access Point müssen die Einstellungen für Netzwerkname (SSID) und Datenverschlüsselung (WEP) auf dem Computer wie auch auf dem Access Point identisch sein.
Bei Verwendung der Access Point-Funktionen mit den werksseitigen Standardeinstellungen sollten Sie mit den oben aufgeführten Einstellungen arbeiten. Überprüfen Sie unter Windows Me und Windows 2000 die Access Point-Einstellungen für Netzwerkname (SSID) und Datenverschlüsselung (WEP) wie in der jeweiligen Dokumentation erläutert.
Um die Einstellungen unter Windows XP und bei der Wireless LAN PC Card nachzuprüfen, gehen Sie wie folgt vor:
1 Öffnen Sie das Dialogfeld Mit dem drahtlosen Netzwerk verbinden.
2 Wählen Sie unter Verfügbare Wireless-Netzwerke den Netzwerknamen (SSID) des Access Points aus.
3 Wenn die Datenverschlüsselung für den Access Point aktiviert ist, geben Sie den richtigen Chiffrierschlüssel (Netzwerkschlüssel) in das Feld Datenverschlüsselung (WEP) ein.

21
4 Klicken Sie auf Verbinden.Wenn die Verbindung nicht hergestellt wird, setzen Sie den Access Point wieder auf die Werksvorgaben wie unter Fall 6 beschrieben zurück; richten Sie danach die Access Point-Funktionen (wie in der Kurzanleitung erläutert) erneut ein.
Ist die Wireless-LAN-Verbindung als Netzwerkbrücke eingerichtet? (nur Windows XP)
1 Klicken Sie auf Start, zeigen Sie auf Verbinden mit, und klicken Sie auf Alle Verbindungen anzeigen.
2 Vergewissern Sie sich, dass die betreffende Funknetzwerkverbindung nicht als Netzwerkbrücke betrieben wird.
3 Wenn die Funknetzwerkverbindung als Netzwerkbrücke konfiguriert ist, klicken Sie mit der rechten Maustaste auf das Symbol für die Funknetzwerkverbindung, und klicken Sie dann auf Vor der Brücke entfernen.
Fall 3: Ich kann die Access Point-Setup-Seite nicht aufrufenIst für den Webbrowser auf dem Computer, über den der Access Point konfiguriert werden soll, ein Proxy-Server eingestellt?
Stellen Sie sicher, dass für die IP-Adresse des Access Points keine Proxy-Einstellung festgelegt ist.Solange die Proxyserver-Einstellung deaktiviert ist, ist es eventuell nicht möglich, andere Seiten als die Access Point-Setup-Seite anzuzeigen.
Beispiel 1: Microsoft Internet Explorer
1 Wählen Sie im Menü Extras den Befehl Internetoptionen.Das Dialogfeld Internetoptionen wird angezeigt.
2 Klicken Sie in der Registerkarte Verbindungen auf LAN-Einstellungen.Das Dialogfeld Einstellungen für lokales Netzwerk (LAN) wird angezeigt.Falls im Feld für die DFÜ- und VPN-Einstellungen DFÜ-Netzwerkprofile eingerichtet sind, stellen Sie sicher, dass das Kontrollkästchen Keine Verbindung wählen aktiviert ist.
3 Wenn das Kontrollkästchen Proxyserver für LAN verwenden aktiviert ist (diese Einstellungen gelten nicht für DFÜ- oder VPN-Verbindungen), deaktivieren Sie das Kontrollkästchen, und klicken Sie auf OK.
4 Wenn die Access Point-Konfiguration abgeschlossen ist, setzen Sie die Proxy-Einstellung wieder auf den ursprünglichen Zustand zurück.

22
Beispiel 2: Netscape
1 Starten Sie den Webbrowser auf dem Computer, mit dem der Access Point eingerichtet werden soll.
2 Klicken Sie im Menü Bearbeiten auf Einstellungen.
3 Klicken Sie unter Kategorie auf Erweitert und dann auf die Schaltfläche Proxies.
4 Wählen Sie die Option Direkte Verbindung zum Internet, und klicken Sie auf OK.
5 Wenn die Access Point-Konfiguration abgeschlossen ist, setzen Sie die Proxy-Einstellung wieder auf den ursprünglichen Zustand zurück.
Fall 4: Ich weiß nicht, welchen Access Point ich auswählen sollÜberprüfen Sie die MAC-Adresse, die auf dem Etikett im Deckel auf der Rückseite der Wireless-Einheit steht. Wählen Sie dann in der Access Point-Liste des Dienstprogramms Access Point Scan Utility den Access Point mit genau dieser MAC-Adresse aus.
Fall 5: Nach dem Ändern der Access Point-Einstellungen kann ich keine Verbindung mehr herstellen
Die Access Point-Einstellungen habe ich vergessen
Falls Sie die Einstellungen für den Access Point vergessen haben, stellen Sie am Access Point wieder die Werksvorgaben (vgl. Erläuterungen unter Fall 6) ein, und führen Sie die Einrichtung danach unter Beachtung der Kurz-anleitung erneut durch.
Der Netzwerkname (SSID) oder der Chiffrierschlüssel (WEP) wurde geändert
Lesen Sie unter Windows Me oder Windows 2000 in der Bedienungsanleitung der verwendeten Wireless LAN PC Card nach, wie die Computereinstellungen so geändert werden können, dass sie mit den Access Point-Einstellungen übereinstimmen.
Um die Einstellungen des Computers unter Windows XP und bei der Wireless LAN PC Card zu ändern, gehen Sie wie folgt vor:
1 Führen Sie unter Fall 2 die Schritte 1 und 2 unter der Überschrift �Ist Ihr Computer für die Funkkommunikation korrekt eingerichtet� aus.
2 Klicken Sie auf Erweitert.

23
3 Wählen Sie unter Verfügbare Netzwerke denselben Namen aus, den Sie als Access Point-Netzwerknamen (SSID) festgelegt haben, und klicken Sie auf Konfigurieren.Wenn der Name des Netzwerks bereits unter Bevorzugte Netzwerke aufgeführt wird, wählen Sie das Netzwerk aus der Liste unter Bevorzugte Netzwerke aus, und klicken Sie auf Entfernen, um den Eintrag aus der Liste zu löschen.
4 Falls die WEP-Verschlüsselung aktiviert ist, aktivieren Sie das Kontroll-kästchen Datenverschlüsselung (WEP aktiviert), deaktivieren Sie das Kontrollkästchen Schlüssel wird automatisch bereitgestellt, und geben Sie den WEP-Schlüssel in das Feld �Netzwerkschlüssel� ein, der für den Access Point eingestellt ist.
5 Klicken Sie auf OK.● Wenn Sie Ihre Access Point-Einstellungen vergessen haben, lesen Sie die Anweisungen
unter Fall 6 nach.
Fall 6: Ich habe meine Einstellungen vergessenAm Access Point können Sie folgendermaßen wieder die Werksvorgaben einstellen:
1 Prüfen Sie, ob der Access Point eingeschaltet ist.
2 Halten Sie den Reset-Schalter unten an der Wireless-Einheit mit einer Büroklammerspitze oder einem ähnlichen Gegenstand mindestens eine Sekunde lang gedrückt.Wenn Sie den Schalter drücken, leuchtet die Kontrollleuchte vorne an der Wireless-Einheit rot. Nach einer Sekunde beginnt die Anzeige zu blinken.Achten Sie darauf, nicht versehentlich den Schalter für die Schnell-konfiguration zu betätigen.
3 Wenn die Kontrollleuchte rot blinkt, lassen Sie den Reset-Schalter wieder los.Der Access Point startet mit den Werksvorgaben automatisch neu.

24
Fall 7: Wenn nach einem erweiterten Setup die Option einfaches Setup benutzt wird, was geschieht mit den Einstellungen, die im einfachen Setup nicht enthalten sind?Wenn Sie nach einem erweiterten Setup das Gerät anhand eines einfachen Setups neu konfigurieren, werden die Optionen, die im einfachen Setup nicht enthalten sind, wie folgt eingestellt:
● In der Tabelle steht ��� für leere Werte.
Fall 8: Wie kann ich eine kabelgebundene Netzwerk-verbindung zwischen einem DSL-Modem und dem Computer durch eine Funkverbindung ersetzen?Neben dem Access Point im LAN ist dazu eine Wireless LAN PC Card mit Unterstützung der Norm IEEE 802.11g und/oder ein Wireless LAN Converter erforderlich.
Fall 9: Wie wird der Schalter zur Schnellkonfiguration benutzt?Mit dem Schalter zur Schnellkonfiguration kann der Access Point zusammen mit dem 2,4 GHz Wireless LAN Converter des Modells PCWA-DE30 konfiguriert werden. Einzelheiten dazu finden Sie in der Kurzanleitung zum Wireless LAN Converter PCWA-DE30.
OPTION EINSTELLUNG
Frequenz (Kanal) Automatisch auswählen
Netzwerkname übermitteln (SSID) Ja
Zugriffskontrolle Alle akzeptieren
Verbindungsmethode IP-Adresse automatisch beziehen (DHCP)
DNS-Server �
Geschwindigkeit Automatisch erkennen
Schalter für Schnellkonfiguration Aktivieren
Zeitserver (NTP-Server) �
25
Fall 10: Nach dem Betätigen des Schalters zur Schnellkonfiguration blinkt die Kontrollleuchte rotWenn der Schalter zur Schnellkonfiguration länger als eine Sekunde gedrückt gehalten wird, beginnt die Kontrollleuchte rot zu blinken. 30 Sekunden danach blinkt die Kontrollleuchte nur noch langsam, um den regulären Betrieb anzuzeigen (weiß).
Mit dem Schalter zur Schnellkonfiguration wird der separat erhältliche Wireless LAN Converter PCWA-DE30 eingerichtet.
Weitere Informationen über die Verwendung des Schnellkonfigurations-schalters finden Sie in der Kurzanleitung zum Wireless LAN Converter PCWA-DE30.
Fall 11: Zu einer IEEE 802.11b-kompatiblen Wireless LAN PC Card kann ich keine Verbindung herstellen● Prüfen Sie, ob als Access Point-Verbindungsmodus nur 802.11g eingestellt
ist. In der Option Erweitertes Setup können Sie den Verbindungsmodus für den Access Point ändern.
● Bei Verwendung der 2,4 GHz Wireless LAN PC Card PCWA-C100 legen Sie die Länge des Verschlüsselungsschlüssels nicht auf WEP 128 Bit fest. In dem Fall kann keine Verbindung hergestellt werden. Legen Sie anstatt dessen die Länge des Verschlüsselungsschlüssels auf WEP 64 Bit fest.
Fall 12: Nach der Aktualisierung der Firmware macht sich an der Kontrollleuchte ein seltsames Blinkmuster bemerkbarWenn die Kontrollleuchte in weiß und vereinzelt in rot langsam blinkt, wurde die Aktualisierung nicht fehlerfrei durchgeführt. Wiederholen Sie die Aktualisierung.*
* Das weiß blinkende Muster (9 Sekunden an, 1 Sekunde aus) und das rot blinkende Muster (2 Sekunden am, 8 Sekunden aus) sind gleichzeitig zu sehen.

26
Fall 13: Die Meldung „Mit den Einstellungen für die aktuelle IP-Adresse Ihres PCs haben Sie möglicherweise keinen Zugriff auf das Access Point-Setup. Zum Konfigurieren des Access Point sollten die IP-Adresse Ihres PCs und die IP-Adresse des Access Point in derselben Subnet-Mask enthalten sein“ wird angezeigt.
Sind mehrere Netzwerkschnittstellen aktiv?
Alle übrigen Netzwerkschnittstellen außer derjenigen, die Sie für den Zugriff auf den Wireless LAN Access Point benutzen möchten, sollten Sie vorübergehend deaktivieren.
1 Klicken Sie auf dem Desktop mit der rechten Maustaste auf Arbeitsplatz und anschließend im Kontextmenü auf Eigenschaften.Unter Windows XP können Sie auch über das Menü Start auf Arbeitsplatz klicken. Im anschließend eingeblendeten Kontextmenü klicken Sie dann auf Eigenschaften.
2 Klicken Sie auf die Registerkarte Hardware und dann auf Geräte-Manager.Klicken Sie unter Windows Me auf die Registerkarte Geräte-Manager.
3 Klicken Sie mit der rechten Maustaste auf die Netzwerkschnittstellen, die Sie deaktivieren möchten, und klicken Sie anschließend auf Deaktivieren.Daraufhin wird eine Bestätigungsmeldung eingeblendet.
4 Klicken Sie auf Ja.Die gewählte Netzwerkschnittstelle wird deaktiviert.
Sind die IP-Adressen für Computer und Access Point so gewählt, dass eine Kommunikation möglich ist?
Ändern Sie die IP-Adresse Ihres Computers, um diese an den Adressbereich des Access Points anzugleichen. In den Erläuterungen wurden folgende Werte für den Access Point verwendet:
IP-Adresse: 192.168.11.xxx (wobei xxx eine Zahl zwischen 0 und 255 ausge-nommen der 1 ist).Subnet-Mask: 255.255.255.0

27
Windows XP und Wireless LAN PC Card
1 Zeigen Sie im Menü Start auf Verbinden mit, und klicken Sie mit der rechten Maustaste auf Drahtlose Netzwerkverbindung.
2 Klicken Sie anschließend im Kontextmenü auf Eigenschaften.
3 Klicken Sie auf Internet Protocol (TCP/IP) und dann auf Eigenschaften.
4 Wählen Sie Folgende IP-Adresse verwenden, und geben Sie in das IP-Adressfeld den Wert 192.168.11 und in das Feld Subnet-Mask den Wert 255.255.255.0 ein.
5 Klicken Sie auf OK.
Windows 2000
1 Zeigen Sie im Menü Start auf Einstellungen, und klicken Sie dann auf Netzwerk- und DFÜ-Verbindungen.
2 Klicken Sie mit der rechten Maustaste auf LAN-Verbindung, und wählen Sie anschließend im Kontextmenü Eigenschaften.
3 Klicken Sie auf Internet Protocol (TCP/IP) und dann auf Eigenschaften.
4 Wählen Sie Folgende IP-Adresse verwenden, und geben Sie in das IP-Adressfeld den Wert 192.168.11 und in das Feld Subnet-Mask den Wert 255.255.255.0 ein.
5 Klicken Sie auf OK.
Windows Me
1 Zeigen Sie im Menü Start, auf Einstellungen, und klicken Sie anschließend auf Systemsteuerung.
2 Klicken Sie mit der rechten Maustaste auf Netzwerk.
3 Wählen Sie TCP/IP – Netzwerkkartenname, und klicken Sie dann auf Eigenschaften.Wenn sich solch ein Eintrag nicht in der Liste befindet, klicken Sie auf Hinzufügen. Wählen Sie im Dialogfeld Typ der Netzwerkkomponente die Option Protokoll, klicken Sie auf Hinzufügen, und fügen Sie nun das Protokoll TCP/IP hinzu.
4 Wählen Sie auf der Registerkarte IP-Adresse die Option IP-Adresse festlegen, und geben Sie in das IP-Adressfeld den Wert 192.168.11.xxx und in das Feld Subnet-Mask den Wert 255.255.255.0 ein.
5 Klicken Sie auf OK.Starten Sie Ihren Computer erneut.
28
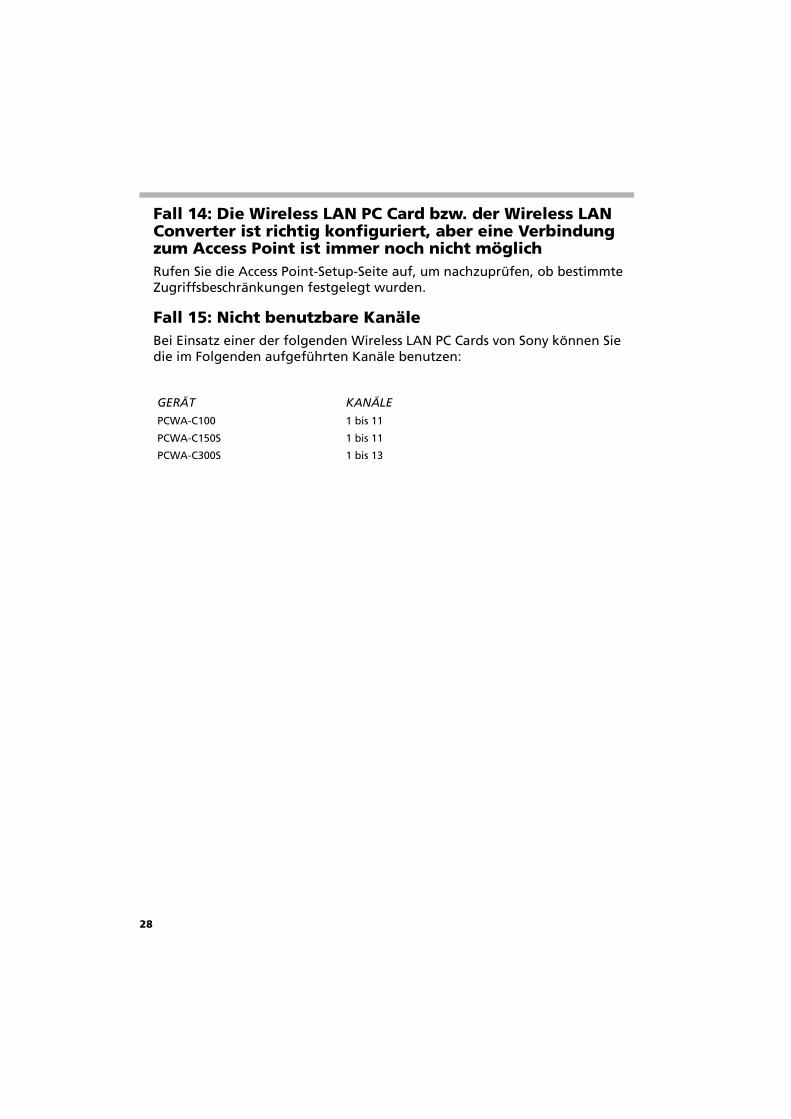
Fall 14: Die Wireless LAN PC Card bzw. der Wireless LAN Converter ist richtig konfiguriert, aber eine Verbindung zum Access Point ist immer noch nicht möglichRufen Sie die Access Point-Setup-Seite auf, um nachzuprüfen, ob bestimmte Zugriffsbeschränkungen festgelegt wurden.
Fall 15: Nicht benutzbare KanäleBei Einsatz einer der folgenden Wireless LAN PC Cards von Sony können Sie die im Folgenden aufgeführten Kanäle benutzen:
GERÄT KANÄLE
PCWA-C100 1 bis 11
PCWA-C150S 1 bis 11
PCWA-C300S 1 bis 13

29
Guide de dépannage

30
Marques commerciales● Sony, VAIO, le logo , le logo et le logo Eco Info
sont des marques commerciales de Sony Corporation.
● Microsoft et Windows sont des marques commerciales de Microsoft Corporation, déposées aux États-Unis et/ou dans d�autres pays.
● Microsoft® Windows® XP Édition familiale et Microsoft® Windows® XP Professionnel sont ci-après nommés Windows XP.
● Tous les autres noms de systèmes, de produits et de services sont des marques commerciales de leurs propriétaires respectifs. Les symboles TM et ® ne sont pas repris dans ce manuel.
™

31
PrésentationLe présent document fournit des solutions aux problèmes couramment rencontrés avec le point d�accès LAN sans fil.Consultez le présent manuel avant de contacter le service d�assistance à la clientèle de Sony.
Cas 1 – Je ne trouve pas le point d’accès à l’aide d’Access Point Scan Utility
Avez-vous attendu suffisamment longtemps ?
La recherche peut prendre un certain temps. Cliquez sur Rechercher, puis patientez au moins 30 secondes avant de consulter les résultats.
Voyez-vous l�adresse IP de l�ordinateur ?
Après avoir activé le paramètre Obtenir une adresse IP automatiquement sur votre ordinateur, procédez comme suit. Pour plus d�informations sur la définition de l�adresse IP de l�ordinateur, consultez l�aide de Windows.
Windows Millennium Edition
1 Dans le menu Démarrer, sélectionnez Exécuter.
2 Saisissez winipcfg dans la boîte de dialogue Exécuter et cliquez sur OK.
3 Dans la liste de la boîte de dialogue Configuration IP, sélectionnez l�interface LAN sans fil utilisée (carte PC Card, réseau LAN interne, etc.).
4 Vérifiez que l�adresse IP apparaît dans le champ Adresse IP.
5 Si l�adresse IP est 0.0.0.0 ou commence par 169.254, cliquez sur Libérer, puis sur Renouveler.
● Si l�adresse IP affichée commence par 169.254, aucune adresse valable n�a été obtenue à l�aide de la fonction Obtenir une adresse IP automatiquement et votre système d�exploitation Windows a attribué une adresse à la carte PC Card LAN sans fil. Dans ce cas, il sera impossible d�établir une connexion réseau correcte. Procédez de nouveau à la configuration, comme indiqué dans le Guide de mise en route.
Windows 2000 et Windows XP
1 Cliquez sur Démarrer, pointez sur Programmes (Tous les programmes sous Windows XP), puis sur Accessoires, et cliquez enfin sur Invite de commandes.
2 Dans la fenêtre d�invite de commandes, saisissez ipconfig/all et appuyez sur la touche <Entrée>.

32
3 Vérifiez les paramètres de l�adresse IP de l�interface LAN sans fil utilisée (carte PC Card, réseau LAN sans fil interne, etc.).Le nom de l�interface LAN sans fil est indiqué dans le champ de description.
4 Si l�adresse IP est 0.0.0.0 ou commence par 169.254, saisissezipconfig/renew et appuyez sur la touche <Entrée>.Une nouvelle adresse IP est attribuée.
Le point d�accès est-il allumé ?
Lorsque le point d�accès est allumé, l�indicateur d�état clignote lentement.
La fonction de pare-feu de connexion Internet de Windows XP est-elle activée ?
Le cas échéant, il se peut que la communication soit impossible. Suivez la procédure ci-dessous pour vérifier ou modifier les paramètres :1. Cliquez sur Démarrer, puis sur Panneau de configuration.2. Dans le Panneau de configuration, double-cliquez sur l�icône Connexions réseau.Si l�icône Connexions réseau ne s�affiche pas, cliquez sur Basculer vers l’affichage classique.3. Dans la fenêtre Connexions réseau, cliquez avec le bouton droit sur l�icône correspondant au réseau sans fil que vous souhaitez utiliser et cliquez sur Propriétés.4. Cliquez sur l�onglet Paramètres avancés et au besoin, désactivez la case à cocher Protéger mon ordinateur et le réseau en limitant ou interdisant l’accès à cet ordinateur à partir d’Internet.5. Cliquez sur OK.
★ Consultez l’aide de Windows XP pour plus d’informations sur la fonction de pare-feu de connexion Internet.
● Veillez à prendre des mesures de sécurité appropriées lorsque la fonction de pare-feu de connexion Internet est désactivée. Excepté lors de la configuration du point d�accès, il est vivement recommandé d�activer la fonction de pare-feu de connexion Internet en permanence.Si le problème persiste après les vérifications ci-dessus, passez au cas 2.

33
Cas 2 – Aucune communication n’est établie entre l’ordinateur et le point d’accès
L�interface LAN sans fil (carte PC Card, convertisseur LAN sans fil, etc.) est-elle correctement installée ? L�ordinateur détecte-t-il l�interface ?
Pour vérifier, procédez comme suit :
1 Vérifiez que la carte PC Card LAN sans fil ou le convertisseur LAN sans fil sont correctement installés sur votre ordinateur. Dans le cas contraire, consultez la documentation appropriée et réinstallez-les.
2 Si la carte PC Card LAN sans fil ou le convertisseur LAN sans fil sont correctement installés sur le Bureau, cliquez avec le bouton droit sur Poste de travail, puis cliquez sur Propriétés dans le menu contextuel qui s�affiche.Sous Windows XP, cliquez avec le bouton droit sur Poste de travail dans le menu Démarrer, puis cliquez sur Propriétés dans le menu contextuel qui s�affiche.
3 Sous l�onglet Matériel, cliquez sur Gestionnaire de périphériques.Sous Windows Millennium Edition, cliquez sur l�onglet Gestionnaire de périphériques.
4 Double-cliquez sur Cartes réseau et vérifiez si l�interface réseau connectée à la carte PC Card LAN sans fil ou à la carte Ethernet figure dans la liste.
5 Si l�interface réseau connectée à la carte PC Card LAN sans fil ou au convertisseur LAN sans fil ne figure pas dans la liste, consultez la documentation appropriée pour en savoir plus sur la détection de l�interface par votre ordinateur.
Avez-vous vu l�adresse IP de l�ordinateur ?
Reportez-vous au cas 1 pour obtenir l�adresse IP.Si l�adresse IP affichée commence par 169.254, aucune adresse valable n�a été obtenue à l�aide de la fonction Obtenir une adresse IP automatiquement et Windows a attribué automatiquement une adresse à la carte PC Card LAN. Dans ce cas, il sera impossible d�établir une connexion réseau correcte. Procédez de nouveau à la configuration, comme indiqué dans le Guide de mise en route.
34
La configuration de votre ordinateur convient-elle pour la communication sans fil ?
Lorsque vous utilisez les fonctions du point d�accès définies sur les paramètres par défaut, configurez l�ordinateur comme suit (Windows XP et carte PC Card LAN sans fil) :
1 Cliquez sur Démarrer, puis sur Panneau de configuration.
2 Dans le Panneau de configuration, double-cliquez sur l�icône Connexions réseau.Si l�icône Connexions réseau ne s�affiche pas, cliquez sur Basculer vers l’affichage classique.
3 Dans la fenêtre Connexions réseau, cliquez avec le bouton droit sur l�icône correspondant au réseau sans fil auquel vous souhaitez vous connecter et cliquez sur Afficher les réseaux sans fil disponibles.
4 Dans la boîte de dialogue Connexion à un réseau sans fil, sélectionnez le point d�accès sous Réseaux sans fil disponibles et cliquez sur Connecter. Lorsque vous utilisez les fonctions du point d�accès définies sur les paramètres par défaut, regardezl�identifiant composé de 6 caractères imprimé sur l�étiquette située dans le volet arrière de l�unité sans fil.
Le nom de réseau (SSID) et les paramètres de cryptage de données (WEP) sont-ils correctement définis ?
Pour établir la connexion au point d�accès, le nom de réseau (SSID) et les paramètres de cryptage de données (WEP) doivent être les mêmes sur l�ordinateur et le point d�accès.
Lorsque vous utilisez les fonctions du point d�accès définies sur les paramètres par défaut, utilisez les paramètres indiqués ci-dessous. Sous Windows Millennium Edition et Windows 2000, vérifiez le nom de réseau (SSID) du point d�accès et les paramètres de cryptage de données (WEP) de la carte PC Card LAN sans fil comme indiqué dans leurs documentations respectives.
Sous Windows XP et avec la carte PC Card LAN sans fil, procédez comme suit pour vérifier les paramètres :
1 Ouvrez la boîte de dialogue Connexion à un réseau sans fil.
2 Sélectionnez le nom de réseau (SSID) du point d�accès dans la liste Réseaux sans fil disponibles.
3 Si vous avez activé le cryptage de données pour le point d�accès, saisissez la clé de cryptage (clé de réseau) dans le champ Cryptage de données(WEP).
35
4 Cliquez sur Connecter.Si la connexion ne s�établit pas, restaurez les paramètres par défaut des fonctions du point d�accès, comme indiqué dans le cas 6, puis reconfigurez les fonctions du point d�accès, comme indiqué dansle Guide de mise en route.
La connexion réseau sans fil fait-elle office de pont réseau ? (Windows XP uniquement)
1 Cliquez sur Démarrer, pointez sur Connexions, puis cliquez sur Afficher toutes les connexions.
2 Confirmez que la connexion réseau sans fil en question n�agit pas comme un pont réseau.
3 Si la connexion réseau sans fil est configurée comme un pont réseau, cliquez avec le bouton droit sur l�icône de la connexion réseau sans fil, puis cliquez sur Supprimer du pont.
Cas 3 – Je ne parviens pas à ouvrir la page de configuration du point d’accèsLe navigateur Web de l�ordinateur utilisé pour la configuration du point d�accès est-il configuré pour l�utilisation d�un serveur proxy ?
Assurez-vous qu�aucun paramètre du proxy n�est activé pour l�adresse IP du point d�accès.Pendant que le paramètre du serveur proxy est désactivé, il se peut que l�affichage de pages autres que la page de configuration du point d�accès soit impossible.
Exemple 1 : avec Microsoft Internet Explorer
1 Dans le menu Outils, cliquez sur Options Internet.La boîte de dialogue Options Internet s�affiche.
2 Sous l�onglet Connexions, cliquez sur Paramètres LAN.La boîte de dialogue Paramètres du réseau local (LAN) s�affiche.S�il y a des profils réseau dans la boîte de dialogue Accès à distance, veillez à activer la case à cocher Ne jamais établir de connexion.
3 Si la case à cocher Utiliser un serveur proxy pour votre réseau local est activée (ces paramètres ne s�appliquent pas à des connexions d�accès à distance ou à des connexions VPN), désactivez cette case à cocher et cliquez sur OK.
4 Une fois la configuration du point d�accès terminée, rétablissez les paramètres d�origine du serveur proxy.
36
Exemple 2 : avec Netscape
1 Démarrez le navigateur Web sur l�ordinateur utilisé configurerle point d�accès.
2 Dans le menu Édition, cliquez sur Préférences.
3 Sous Catégorie, cliquez sur Avancées, puis sur Proxy.
4 Sélectionnez Connexion directe à Internet et cliquez sur OK.
5 Une fois la configuration du point d�accès terminée, rétablissez les paramètres d�origine du serveur proxy.
Cas 4 – Je ne sais pas quel point d’accès sélectionnerVérifiez l�adresse MAC qui figure sur l�étiquette située dans le volet arrière de l�unité sans fil. Dans la liste des points d�accès d�Access Point Scan Utility, sélectionnez le point d�accès dont l�adresse MAC est la même.
Cas 5 – Je ne parviens plus à établir une connexion après avoir modifié les paramètres du point d’accès
J�ai oublié les paramètres du point d�accès
Si vous avez oublié quels étaient les paramètres du point d�accès, restaurez les paramètres par défaut du point d�accès, comme indiqué dans le cas 6, puis procédez de nouveau à la configuration, comme indiqué dans le Guide de mise en route.
Le nom de réseau (SSID) ou la clé de cryptage (WEP) ont été modifiés
Sous Windows Millennium Edition ou Windows 2000, consultez le manuel d�utilisation fourni avec la carte PC Card LAN sans fil utilisée et modifiez les paramètres de l�ordinateur de sorte qu�ils correspondent à ceux du point d�accès.
Sous Windows XP et avec la carte PC Card LAN sans fil, suivez la procédurci-dessous pour modifier les paramètres de l�ordinateur :
1 Exécutez les étapes 1 et 2 du cas 2, dans la section La configuration de votre ordinateur convient-elle pour la communication sans fil ?
2 Cliquez sur Avancé.
3 Dans le menu Réseaux disponibles, sélectionnez le nom que vous avez défini pour nom de réseau (SSID) du point d�accès, et cliquez sur Configurer.Si le réseau porte le même nom qu�un réseau figurant sous Réseaux favoris, sélectionnez le réseau dans la liste Réseaux favoris et cliquez sur Supprimer pour le supprimer de la liste.
37
4 Si le cryptage WEP est activé, activez la case à cocher Cryptage de données (WEP activé), désactivez la case à cocher La clé m’est fournie automatiquement et saisissez dans le champ Clé réseau la clé WEP définie pour le point d�accès.
5 Cliquez sur OK.● Si vous avez oublié quels étaient les paramètres du point d�accès, reportez-vous à
la procédure décrite dans le cas 6.
Cas 6 – J’ai oublié mes paramètresPour restaurer les paramètres par défaut du point d�accès, procédez comme suit :
1 Vérifiez que le point d�accès est allumé.
2 À l�aide d�un trombone ou d�un objet similaire, maintenez enfoncé le bouton de réinitialisation situé en bas de l�unité sans fil pendant au moins une seconde.Pendant que vous appuyez sur le bouton de réinitialisation, l�indicateur d�état situé sur la face avant de l�unité sans fil est allumé (rouge). Après une seconde, l�indicateur commence à clignoter.Faites attention à ne pas appuyer par erreur sur le bouton de configuration rapide.
3 Lorsque l�indicateur est rouge clignotant, relâchez le bouton de réinitialisation.Le point d�accès redémarre automatiquement et les paramètres d�usine sont restaurés.
38
Cas 7 – Si la Configuration simplifiée est utilisée après la Configuration avancée, qu’adviendra-t-il des éléments qui ne sont pas inclus dans la Configuration simplifiée ?Si vous reconfigurez l�unité à l�aide de la Configuration simplifiée après avoir utilisé la Configuration avancée, les éléments qui ne sont pas inclus dans la première sont définis comme suit :
● Dans ce tableau, le symbole - indique une configuration vierge.
Cas 8 – Comment puis-je remplacer la connexion câblée d’un modem DSL avec l’ordinateur par une liaison sans fil ?À part un point d�accès LAN, il vous faut une carte PC Card LAN sans fil qui prend en charge la technologie IEEE 802.11g et/ou un convertisseur LAN sans fil.
Cas 9 – Comment le bouton de configuration rapide s’utilise-t-il ?Le bouton de configuration rapide sert à configurer le point d�accès et le Wireless LAN Converter PCWA-DE30 (2,4 GHz). Pour en savoir plus, consultez le Guide de mise en route du Wireless LAN Converter PCWA-DE30.
Cas 10 – J’ai appuyé sur le bouton de configuration rapide et l’indicateur d’état commence à clignoter en rougeSi le bouton de configuration rapide est maintenu enfoncé pendant plus d�une seconde, l�indicateur d�état commence à clignoter en rouge. 30 secondes plus tard, l�indicateur d�état commence à clignoter plus lentement pour signaler un fonctionnement normal (blanc).
ÉLÉMENT PARAMÈTRE
Fréquence (canal) Sélection automatique
Diffusion du nom de réseau (SSID) Oui
Contrôle d�accès Accepter tout
Méthode de connexion Obtenir une adresse IP automatiquement
Serveur DNS -
Vitesse Détection automatique
Bouton de configuration Activer
Serveur de temps (serveur NTP) -

39
Le bouton de configuration rapide sert à configurer le Wireless LAN Converter PCWA-DE30 vendu séparément.
Pour plus d�informations sur l�utilisation du bouton de configuration rapide, consultez le Guide de mise en route du Wireless LAN Converter PCWA-DE30.
Cas 11 – Je ne parviens pas à établir une connexion avec une carte PC Card LAN sans fil compatible avec la norme IEEE 802.11b.● Vérifiez si le mode de connexion du point d�accès est défini sur 802.11g
only. Vous pouvez modifier le mode de connexion du point d�accès à l�aide de la Configuration avancée.
● Si vous utilisez une carte PC Card LAN sans fil (2,4 GHz) PCWA-C100, ne définissez pas la longueur de clé sur WEP 128 bits. Sinon, la connexion sera impossible. Définissez plutôt la longueur de clé sur WEP 64 bits.
Cas 12 – J’ai mis à jour le microprogramme, et depuis, l’indicateur d’état clignote de façon étrangeSi l�indicateur clignote lentement en blanc et quelquefois en rouge, la mise à jour n�a pas été effectuée avec succès. Procédez de nouveau à la mise à jour.*
* La lumière blanche (allumée 9 secondes, éteinte 1 seconde) et la lumière rouge (allumée 2 secondes, éteinte 8 secondes) clignotent simultanément.
Cas 13 – Le message suivant s’affiche : Il se peut que les paramètres de configuration de l’adresse IP actuellement définis pour votre ordinateur ne vous autorisent pas à accéder à la configuration du point d’accès. Pour configurer le point d’accès, l’adresse IP de votre ordinateur et celle du point d’accès doivent figurer dans le même masque de sous-réseau.
Plusieurs interfaces réseau sont-elles actives ?
Désactivez temporairement toutes les interfaces réseau, sauf celle que vous souhaitez utiliser avec le point d�accès LAN sans fil.
1 Sur le Bureau, cliquez avec le bouton droit sur Poste de travail, puis cliquez sur Propriétés dans le menu contextuel qui s�affiche.Sous Windows XP, cliquez avec le bouton droit sur Poste de travail dans le menu Démarrer, puis cliquez sur Propriétés dans le menu contextuel qui s�affiche.
2 Sous l�onglet Matériel, cliquez sur Gestionnaire de périphériques.Sous Windows Millennium Edition, cliquez sur l�onglet Gestionnaire de périphériques.
40
3 Cliquez avec le bouton droit sur l�interface réseau que vous souhaitez désactiver et cliquez sur Désactiver.Un message de confirmation s�affiche.
4 Cliquez sur Oui.L�interface réseau est désactivée.
L�ordinateur et le point d�accès sont-ils configurés pour communiquer ensemble ?
Modifiez l�adresse IP de l�ordinateur afin qu�elle corresponde à l�adresse IP du point d�accès. Dans l�explication, les valeurs attribuées au point d�accès suivantes ont été utilisées :
Adresse IP : 192.168.11.xxx (où xxx est un nombre compris entre 0 et 255, sauf 1).Masque de sous-réseau : 255.255.255.0
Sous Windows XP et avec la carte PC Card LAN sans fil
1 Dans le menu Démarrer, pointez sur Connexions, puis cliquez avec le bouton droit sur Connexion réseau sans fil.
2 Cliquez sur Propriétés dans le menu contextuel qui s�affiche.
3 Sélectionnez Protocole Internet (TCP/IP), puis cliquez sur Propriétés.
4 Sélectionnez Utiliser l’adresse IP suivante, puis saisissez 192.168.11.xxx dans la zone de l�adresse IP et 255.255.255.0 dans la zone Masque de sous-réseau.
5 Cliquez sur OK.
Sous Windows 2000
1 Dans le menu Démarrer, pointez sur Paramètres, puis cliquez sur Connexions réseau et accès à distance.
2 Cliquez avec le bouton droit sur Connexion au réseau local et cliquez sur Propriétés dans le menu contextuel qui s�affiche.
3 Sélectionnez Protocole Internet (TCP/IP), puis cliquez sur Propriétés.
4 Sélectionnez Utiliser l’adresse IP suivante et saisissez 192.168.11.xxx dans la zone de l�adresse IP et 255.255.255.0 dans la zone Masque de sous-réseau.
5 Cliquez sur OK.
Sous Windows Millennium Edition
1 Dans le menu Démarrer, pointez sur Paramètres, puis cliquez sur Panneau de configuration.
2 Double-cliquez sur l�icône Réseau.
41
3 Sélectionnez TCP/IP – "nom de la carte réseau", puis cliquez sur Propriétés.Si cet élément ne figure pas dans la liste, cliquez sur Ajouter. Dans la boîte de dialogue Sélection du type de composant réseau, sélectionnez Protocole, cliquez sur Ajouter pour ajouter un TCP/IP.
4 Sous l�onglet Adresse IP, sélectionnez Spécifier une adresse IP, puis saisissez 192.168.11.xxx dans la zone de l�adresse IP et 255.255.255.0 dans la zone Masque de sous-réseau.
5 Cliquez sur OK.Redémarrez l�ordinateur.
Cas 14 – La carte PC Card LAN sans fil ou le convertisseur LAN sans fil sont configurés correctement, mais ce n’est toujours pas le cas du point d’accèsOuvrez la page de configuration du point d�accès pour vérifier si le contrôle d�accès est configuré.
Cas 15 – Canaux à utiliserSi vous utilisez l�une des cartes PC Card LAN sans fil de Sony, vous pouvez utiliser les canaux décrits ci-dessous :
UNITÉ CANAUX
PCWA-C100 1 à 11
PCWA-C150S 1 à 11
PCWA-C300S 1 à 13

42
SID
Related Documents