MOVIE MAKER Basic tutorial By Siti Mariam B

Windows Movie Maker 2012 basic tutoral
Aug 17, 2015
Welcome message from author
This document is posted to help you gain knowledge. Please leave a comment to let me know what you think about it! Share it to your friends and learn new things together.
Transcript

MOVIE MAKERBasic tutorial
By Siti Mariam BAB

Purpose of Editing• Remove unwanted footage
• Get rid of flawed and NG footage
• Choose the best footage• Only the best take (version) of a scene is used
• Create a flow and continuity• Make sure the video is following the story
• Add effects, graphics, music, etc• Beautify the video by adding extra elements

New/Save projectOpen Windows Movie Maker and start a new project. Save project immediately.
This menu is where the File menu would be but it is not labelled.
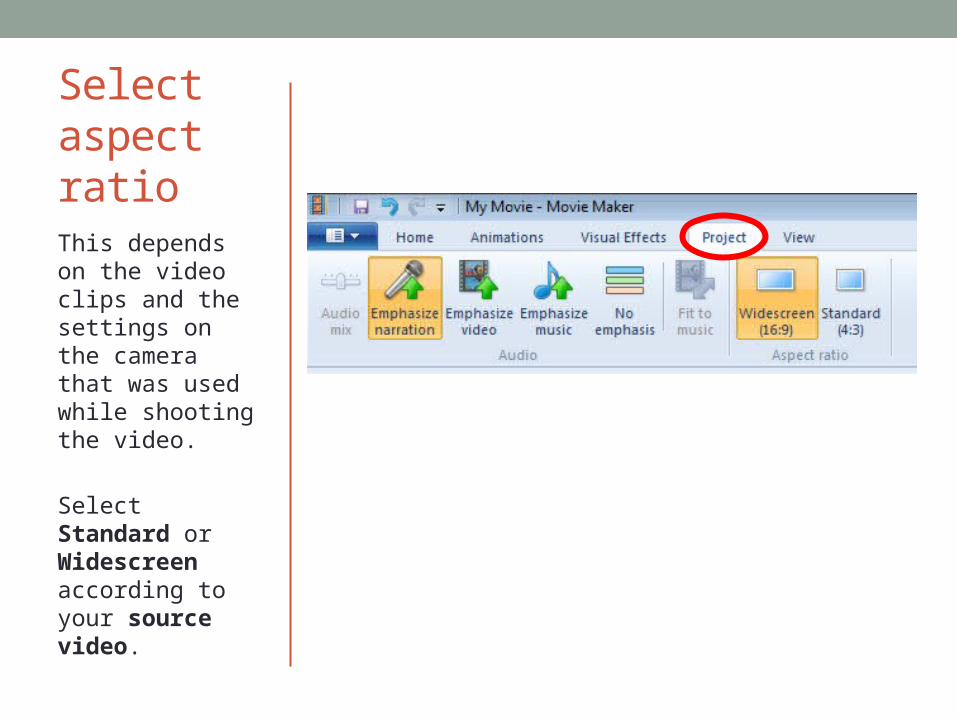
Select aspect ratioThis depends on the video clips and the settings on the camera that was used while shooting the video.
Select Standard or Widescreen according to your source video.

Add clips to projectLocate the clips in your computer.
Open the folder.
Select all clips needed. (CTRL + CLICK / SHIFT+ CLICK to select more than one)
Click Open.

Playing a clip
Click on clip to select it.
Press the spacebar once to play. Press the spacebar again to stop.
Grab and drag the playhead to “scrub” the video forward and back.
Playhead
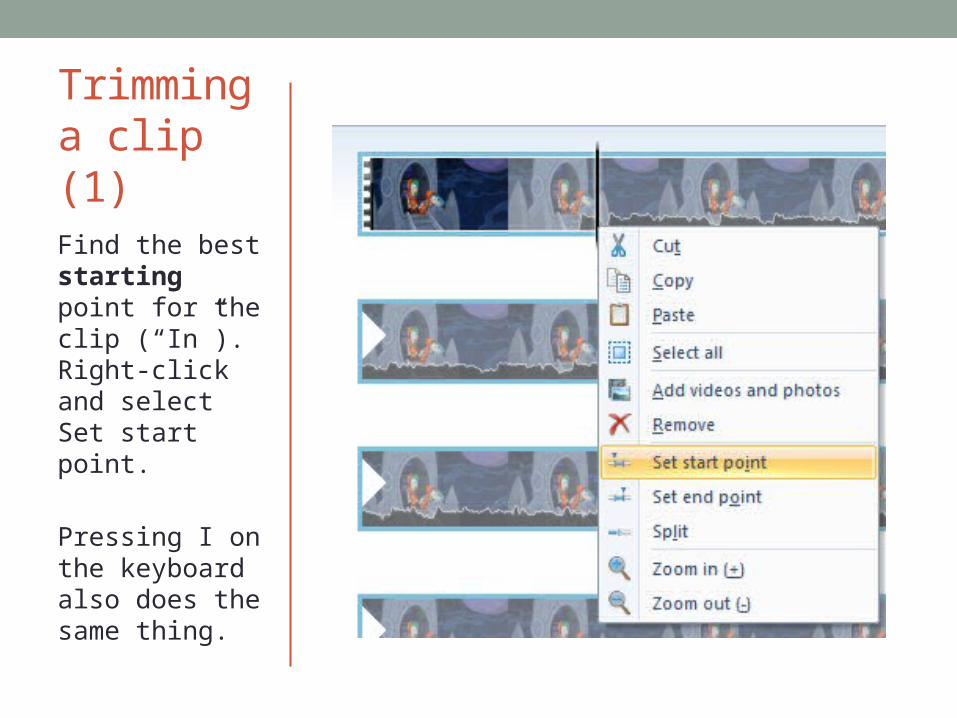
Trimming a clip (1)Find the best starting point for the clip (“In”). Right-click and select Set start point.
Pressing I on the keyboard also does the same thing.
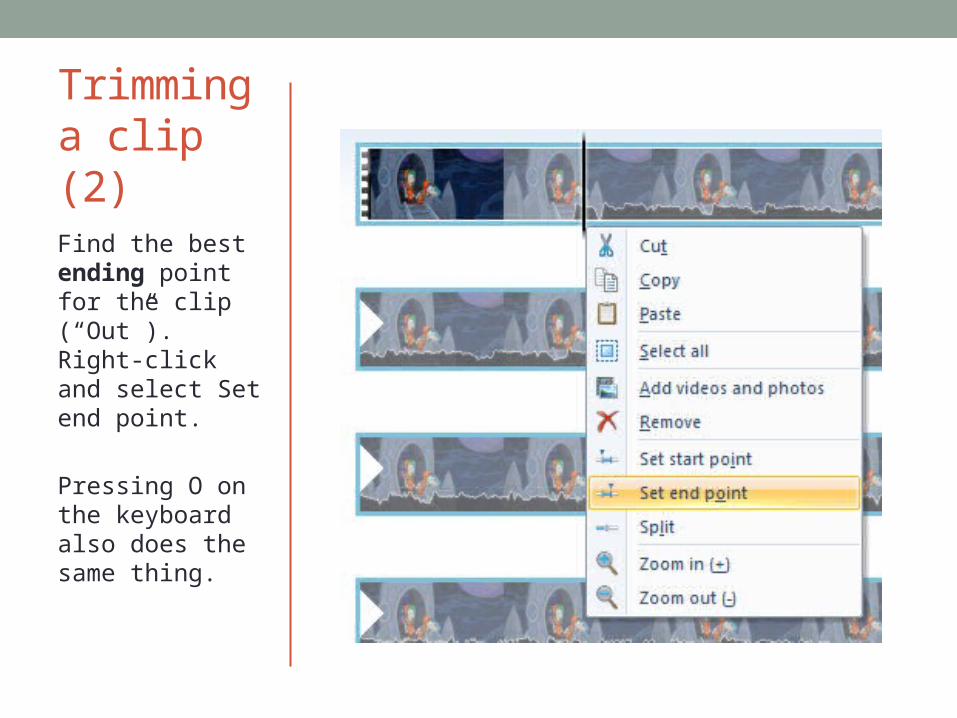
Trimming a clip (2)Find the best ending point for the clip (“Out”). Right-click and select Set end point.
Pressing O on the keyboard also does the same thing.

Trim toolProvides better control for trimming.
Click and drag the sliders to adjust the in and out points.
Click on save trim.

Moving a clipDrag and drop the clip to where you want to place it.
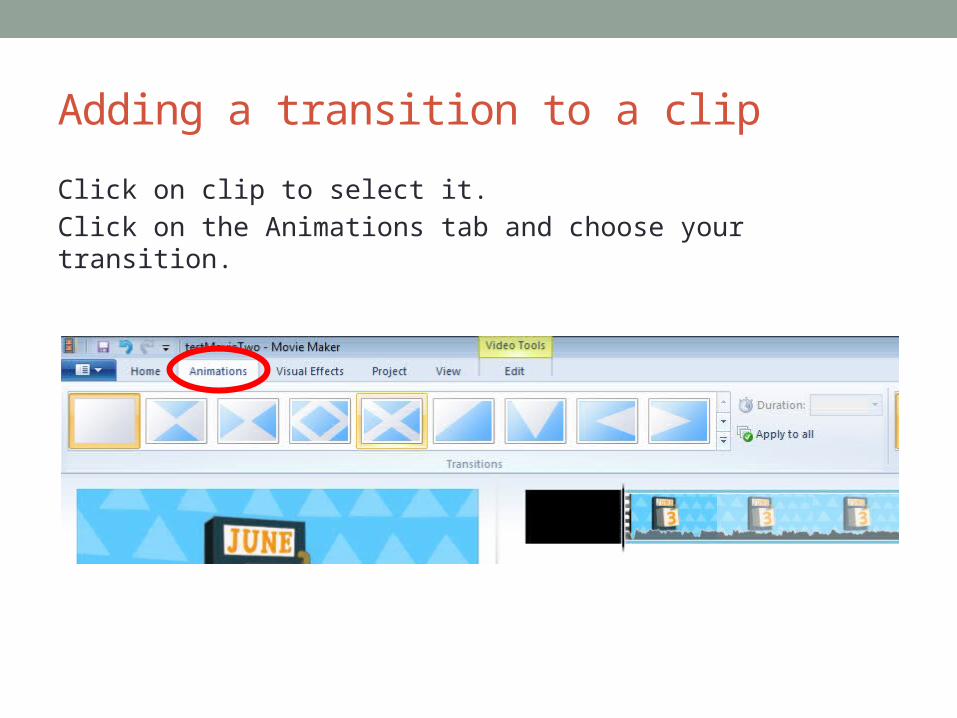
Adding a transition to a clip
Click on clip to select it.
Click on the Animations tab and choose your transition.
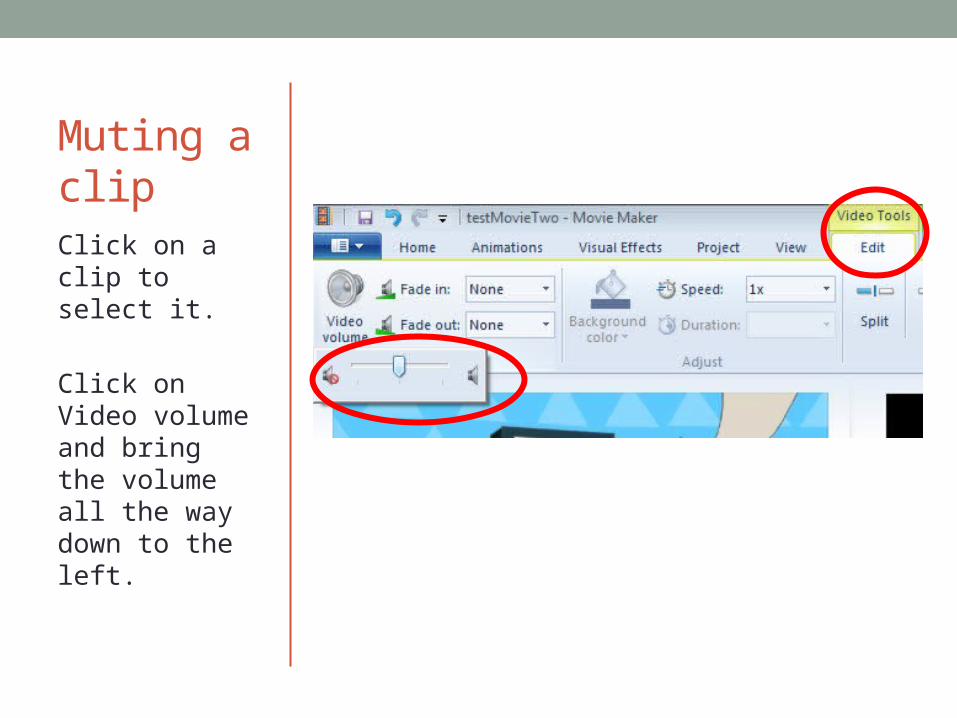
Muting a clipClick on a clip to select it.
Click on Video volume and bring the volume all the way down to the left.
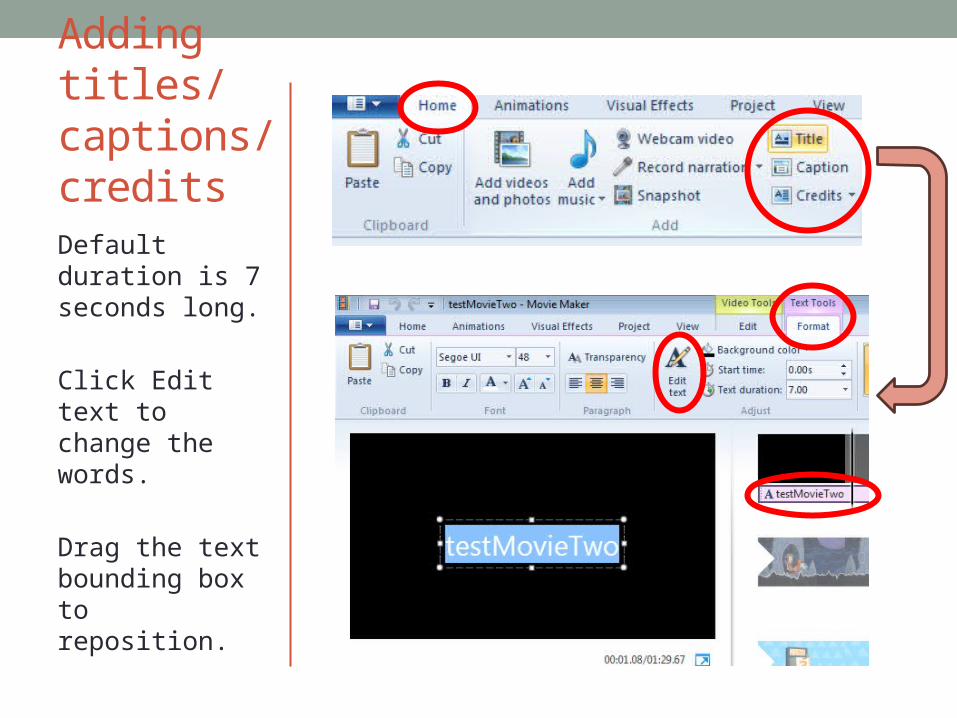
Adding titles/ captions/ creditsDefault duration is 7 seconds long.
Click Edit text to change the words.
Drag the text bounding box to reposition.

Adding audioLocate the audio clips in your computer.
Open the folder.
Select all clips needed. (CTRL + CLICK / SHIFT+ CLICK to select more than one)
Click Open.

PositioningaudioThe green bar represents the audio file. Drag and position anywhere you want.
Audio files can also be trimmed.

PositioningaudioThe green bar represents the audio file. Drag and position anywhere you want.
Audio files can also be trimmed.

Exporting a videoTo make your project into a video, you have to export the file.
Click the arrow beside Save movie to view the presets for exporting.
Creating a video• To produce your finished video, trim each clip and move
it into position. Adjust the in and out points as needed.• Adjust volume of clips.• Delete any other unnecessary clips.• Export your movie.
• If audio is needed, import audio and position as needed. Trim and adjust volume if needed.
SAVE OFTEN!

Keyboard shortcuts
• CTRL + S = save• CTRL + Z = undo• CTRL + Y = redo• F11 = Preview full screen
• F12 = Save as
• Spacebar = play/pause• I = set start point• O = set end point• J = move playhead left• L = move playhead right
• K = play/pause• + = zoom in• - = zoom out
Related Documents