Introduction This is Windows API tutorial. This tutorial will teach you the basics and more advanced topics of programming in Windows API with the C programming language. It does not cover MFC. (Microsoft Foundation Classes is a widely used C++ library for developing C++ aplications on Windows.) This tutorial has been created and tested on Windows XP. The examples have been built using Pelles C compiler. If you plan to read this tutorial, you are advised to download and install this compiler. (It is a freeware.) If you want to use some other compiler make sure that is supports the C99 standard. Windows API The Windows API is the source code interface that is used to create Windows applications. In order to create Windows applications, we must download the Windows SDK. (Formerly known as Platform SDK.) The SDK (Software Development Kit) contains header files, libraries, samples, documentation and tools that use the Windows API to develop applications. The Windows API is created for C and C++ programming languages. It is the most direct way to create Windows applications. (If we install Pelles C, the Windows SDK is already included.) The Windows API can be divided into several areas: Base services Security Graphics User interface Multimedia Windows shell Networking The Base services provide access to the fundamental resources on Windows. These include file systems, devices, processes, threads, registry or error handling. The Security area provides functions, interfaces, objects and other programming elements for authentication, authorization, cryptography and other security related tasks. The Graphics subsystem includes the GDI (Graphics Device Interface), GDI+, DirectX or OpenGL. The User Interface provides functionality to create windows and controls. The Multimedia component provides tools for working with video, sound and input devices. The functions of the Windows shell interface allow applications to access the functionality provided by the operating system shell. The Network services provide access to the network capabilities of the Windows OS. The Windows API is an abstract specification of the programming interface to the Windows operating system. It consists of declarations of functions, unions, structures, data types, macros, constants and other programming elements. The Windows API is described mainly by the MSDN (Microsoft Developer Network) and resides in the Windows C headers. The official implementation of the Windows API functions is located in dynamic libraries (DLLs). For example kernel32.dll, user32.dll, gdi32.dll or shell32.dll in the Windows system directory. There

Welcome message from author
This document is posted to help you gain knowledge. Please leave a comment to let me know what you think about it! Share it to your friends and learn new things together.
Transcript

IntroductionThis is Windows API tutorial. This tutorial will teach you the basics and more advanced topics of programming in Windows API with the C programming language. It does not cover MFC. (Microsoft Foundation Classes is a widely used C++ library for developing C++ aplications on Windows.) This tutorial has been created and tested on Windows XP. The examples have been built using Pelles C compiler. If you plan to read this tutorial, you are advised to download and install this compiler. (It is a freeware.) If you want to use some other compiler make sure that is supports the C99 standard.
Windows APIThe Windows API is the source code interface that is used to create Windows applications. In order to create Windows applications, we must download the Windows SDK. (Formerly known as Platform SDK.) The SDK (Software Development Kit) contains header files, libraries, samples, documentation and tools that use the Windows API to develop applications. The Windows API is created for C and C++ programming languages. It is the most direct way to create Windows applications. (If we install Pelles C, the Windows SDK is already included.)
The Windows API can be divided into several areas:
Base services Security Graphics User interface Multimedia Windows shell Networking
The Base services provide access to the fundamental resources on Windows. These include file systems, devices, processes, threads, registry or error handling. The Security area provides functions, interfaces, objects and other programming elements for authentication, authorization, cryptography and other security related tasks. The Graphics subsystem includes the GDI (Graphics Device Interface), GDI+, DirectX or OpenGL. The User Interface provides functionality to create windows and controls. The Multimedia component provides tools for working with video, sound and input devices. The functions of the Windows shell interface allow applications to access the functionality provided by the operating system shell. The Network services provide access to the network capabilities of the Windows OS.
The Windows API is an abstract specification of the programming interface to the Windows operating system. It consists of declarations of functions, unions, structures, data types, macros, constants and other programming elements. The Windows API is described mainly by the MSDN (Microsoft Developer Network) and resides in the Windows C headers. The official implementation of the Windows API functions is located in dynamic libraries (DLLs). For example kernel32.dll, user32.dll, gdi32.dll or shell32.dll in the Windows system directory. There

are third-party implementations of Windows API. Most notably the Wine and the ReactOS projects.
Windows API is a dynamic entity. The number of functions continuously grows with every new version of Windows OS and new service packs. There are also some important differences between the server versions and desktop versions of the operating system. Also some functions are not oficially documented.
Pelles CPelles C is an excellent C compiler and integrated development environment (IDE) for the C programming language. It supports both 32-bit Windows (x86) and 64-bit Windows (x64). It implements both C99 and C11 standards. Pelles C has an integrated resource editor, bitmap, icon and cursor editor and a hex-dump editor. It is developed by a Swedish developer Pelle Orinius. It comes with Windows SDK, so we can immediately start creating Windows applications without further installations.
Pelles C is a freeware. We can download Pelles C from the following link: Pelles C download.
MSDNThe MSDN (Microsoft Developer Network) is a central portal for Windows development. It is a huge collection of material related to development of Windows applications using Microsoft tools. (Third party software like Qt4 or Java Swing is not covered.) It is the most complete reference for the Windows API. The following two links are good entry points for the Windows API reference. The Windows Development reference and the Windows API list.
This chapter was an introduction to the Windows API.
Main functionsIn this part of the Winapi tutorial, we will talk about main functions.
The main() function prototypesThe main() function is an entry point to a C program. However, it is not the first program to run. When the entry point is main(), the program execution actually begins in a function called mainCRTStartup(). This function is located in the C runtime library. It initializes things like the memory manager, file I/O support, and the argv parameter. After that, the mainCRTStartup() function will call the main() function.
int main(void);int main(int argc, char **argv);int main(int argc, char *argv[]);

These are the function prototypes for the main() function for the classic console program.
#include <stdio.h>#include <stdlib.h>
int main(int argc, char **argv) { puts("This is a classic C program.");
return EXIT_SUCCESS;}
The above source code presents an example of a classic C program.
The wmain function prototypesThe previous main function prototypes could receive only ASCII characters. If we want a program that could receive wide characters from the command line, we will use the wmain function prototypes.
int wmain(void);int wmain(int argc, wchar_t **argv);int wmain(int argc, wchar_t *argv[]);
The above wmain function prototypes take wchar_t characters on the command line. When we use these prototypes, the execution begins in a function called wmainCRTStartup() which will later call the wmain() function.
#include <windows.h>#include <wchar.h>
int wmain(int argc, wchar_t **argv) { PDWORD cChars = NULL; HANDLE std = GetStdHandle(STD_OUTPUT_HANDLE); if (std == INVALID_HANDLE_VALUE) { wprintf(L"Cannot retrieve standard output handle\n (%d)", GetLastError()); } WriteConsoleW(std, argv[1], wcslen(argv[1]), cChars, NULL); return EXIT_SUCCESS;}
We have a wmain() function which can receive wide characters. The example prints the first argument of the console program.
int wmain(int argc, wchar_t **argv) {
The wchar_t type of the second parameter of the wmain() function tells us, that the program input is in wide characters.
HANDLE std = GetStdHandle(STD_OUTPUT_HANDLE);
The GetStdHandle() function returns a handle to a standard output.
if (std == INVALID_HANDLE_VALUE) { wprintf(L"Cannot retrieve standard output handle\n (%d)", GetLastError());}
In case of an error, we receive a INVALID_HANDLE_VALUE return code. For this situation we print an error message.
WriteConsoleW(std, argv[1], wcslen(argv[1]), cChars, NULL);
We use the WriteConsoleW() function to write to console in wide characters.
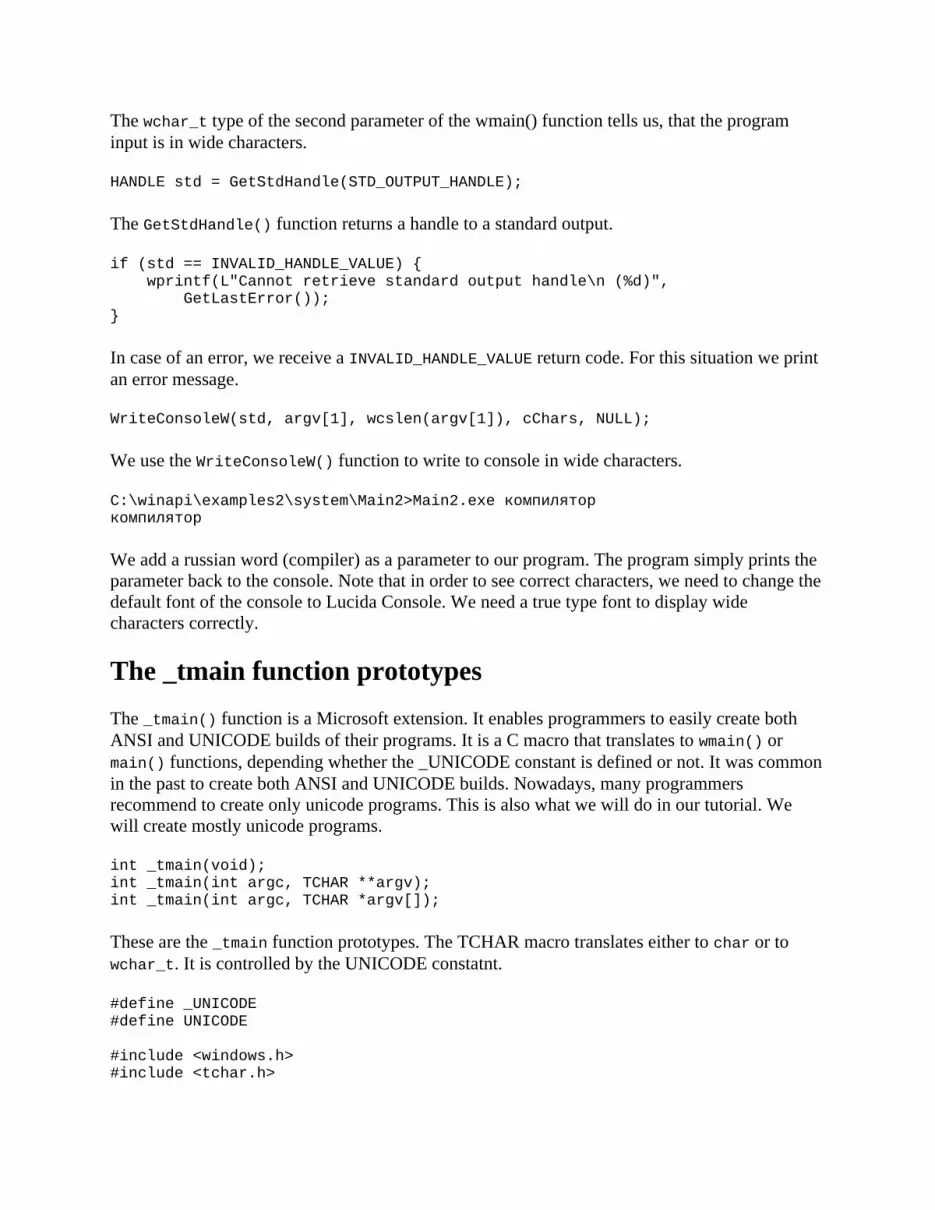
C:\winapi\examples2\system\Main2>Main2.exe компиляторкомпилятор
We add a russian word (compiler) as a parameter to our program. The program simply prints the parameter back to the console. Note that in order to see correct characters, we need to change the default font of the console to Lucida Console. We need a true type font to display wide characters correctly.
The _tmain function prototypesThe _tmain() function is a Microsoft extension. It enables programmers to easily create both ANSI and UNICODE builds of their programs. It is a C macro that translates to wmain() or main() functions, depending whether the _UNICODE constant is defined or not. It was common in the past to create both ANSI and UNICODE builds. Nowadays, many programmers recommend to create only unicode programs. This is also what we will do in our tutorial. We will create mostly unicode programs.
int _tmain(void);int _tmain(int argc, TCHAR **argv);int _tmain(int argc, TCHAR *argv[]);
These are the _tmain function prototypes. The TCHAR macro translates either to char or to wchar_t. It is controlled by the UNICODE constatnt.
#define _UNICODE#define UNICODE
#include <windows.h>#include <tchar.h>
int _tmain(int argc, TCHAR *argv[]) { PDWORD cChars = NULL; HANDLE std = GetStdHandle(STD_OUTPUT_HANDLE);
if (std == INVALID_HANDLE_VALUE) { _tprintf(L"Cannot retrieve standard output handle\n (%d)", GetLastError()); } WriteConsole(std, argv[1], _tcslen(argv[1]), cChars, NULL);
return EXIT_SUCCESS;}
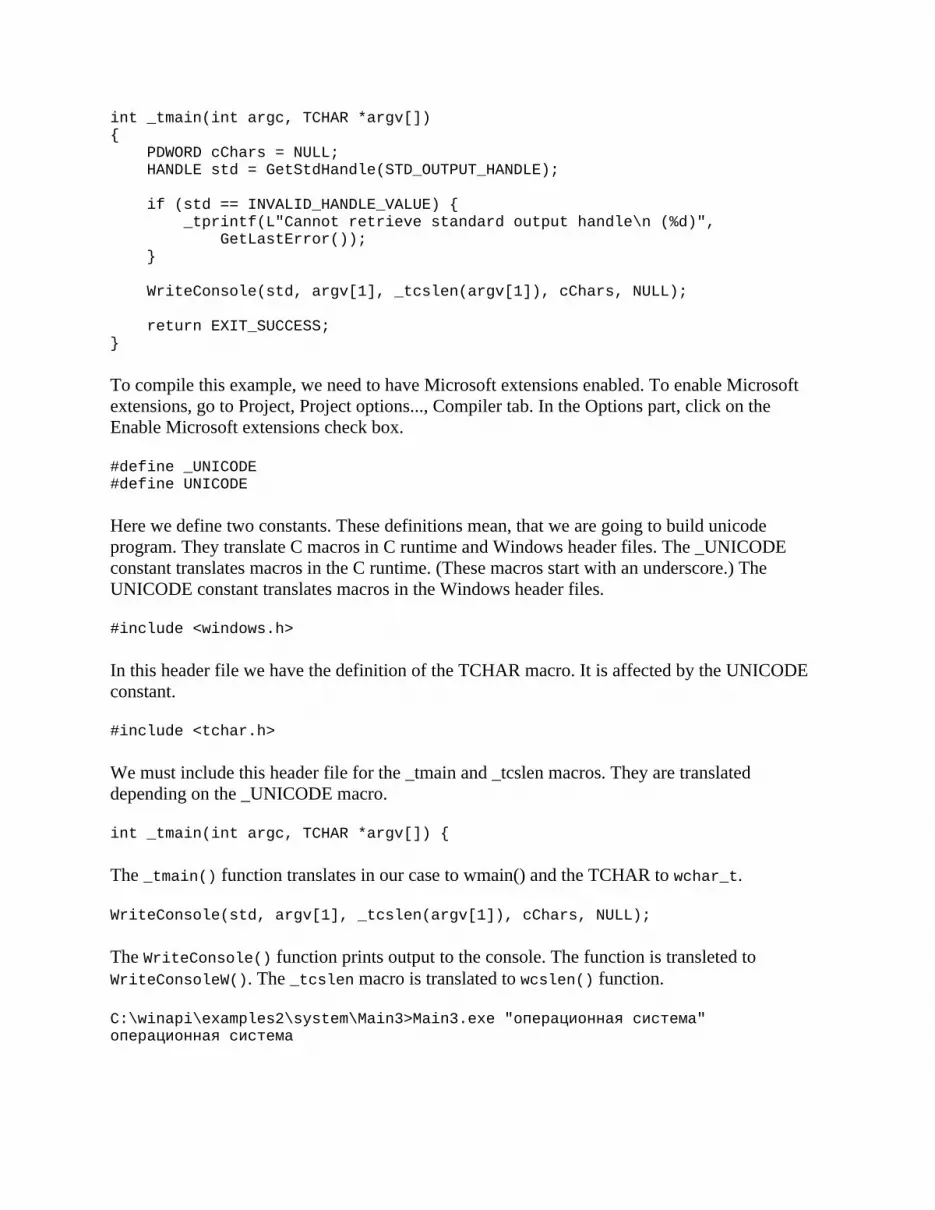
To compile this example, we need to have Microsoft extensions enabled. To enable Microsoft extensions, go to Project, Project options..., Compiler tab. In the Options part, click on the Enable Microsoft extensions check box.
#define _UNICODE#define UNICODE
Here we define two constants. These definitions mean, that we are going to build unicode program. They translate C macros in C runtime and Windows header files. The _UNICODE constant translates macros in the C runtime. (These macros start with an underscore.) The UNICODE constant translates macros in the Windows header files.
#include <windows.h>
In this header file we have the definition of the TCHAR macro. It is affected by the UNICODE constant.
#include <tchar.h>
We must include this header file for the _tmain and _tcslen macros. They are translated depending on the _UNICODE macro.
int _tmain(int argc, TCHAR *argv[]) {
The _tmain() function translates in our case to wmain() and the TCHAR to wchar_t.
WriteConsole(std, argv[1], _tcslen(argv[1]), cChars, NULL);
The WriteConsole() function prints output to the console. The function is transleted to WriteConsoleW(). The _tcslen macro is translated to wcslen() function.
C:\winapi\examples2\system\Main3>Main3.exe "операционная система"операционная система

The program takes another russian word (operating system) as a parameter and prints it to the console.
The WinMain function prototypesSo far we had console main functions. For graphical user interface development, we have to use one of the WinMain function prototypes.
int WINAPI wWinMain(HINSTANCE hInstance, HINSTANCE hPrevInstance, PWSTR pCmdLine, int nCmdShow);int WINAPI WinMain(HINSTANCE hInstance, HINSTANCE hPrevInstance, LPSTR lpCmdLine, int nCmdShow);int APIENTRY _tWinMain(HINSTANCE hInstance, HINSTANCE hPrevInstance, LPTSTR lpCmdLine, int nCmdShow);
These three function prototypes are used for entry points for Windows GUI applications. The wWinMain() function pCmdLine parameter contains the command-line arguments as a Unicode string. The WinMain() function pCmdLine parameter contains the command-line arguments as an ANSI string. The _tWinMain is a C macro that translates to other two function prototypes, depending whether the _UNICODE constant is defined or not.
When the entry point is WinMain(), the execution of the program begins in WinMainCRTStartup(). In case of wWinMain(), the execution begins in wWinMainCRTStartup().
#include <windows.h>
int WINAPI wWinMain(HINSTANCE hInstance, HINSTANCE hPrevInstance, PWSTR szCmdLine, int CmdShow){ MessageBoxW(NULL, szCmdLine, L"Title", MB_OK);
return EXIT_SUCCESS;}
This code shows a small message box on the screen. It shows the first command line argument. The argument can be supplied on the command line, or in the Project options on the General tab. There is an edit box called Command line arguments, where we can supply our command line arguments too.
int WINAPI wWinMain(HINSTANCE hInstance, HINSTANCE hPrevInstance, PWSTR szCmdLine, int CmdShow)
The third parameter of the wWinMain() function is a PWSTR (pointer to wide string). It accepts wide characters.

Figure: A message box
In this part of the Winapi tutorial, we have mentioned main functions.
Working with stringsIn C language there is no string data type. A string literal in a program is an array of characters. Whenever we say string we mean an array of characters.
We have multiple of functions for working with strings. Both in C runtime library (CRT) and in Windows API. First we will describe some Winapi string functions.
The string lengthOne of the most common requirements is to figure out the length of the string. The lstrlen() function returns the lenght of the specified string in characters. It does not count the terminating null character.
int WINAPI lstrlenA(LPCSTR lpString);int WINAPI lstrlenW(LPCWSTR lpString);
The ANSI and the UNICODE functions take the string as a parameter and return the number of characters in the string.
#include <windows.h>#include <wchar.h>
int wmain(void) { char *name = "Jane"; wchar_t *town = L"Bratislava";
wprintf(L"The length of the name string is %d\n", lstrlenA(name)); wprintf(L"The town string length is %d\n", lstrlenW(town));
return 0;}
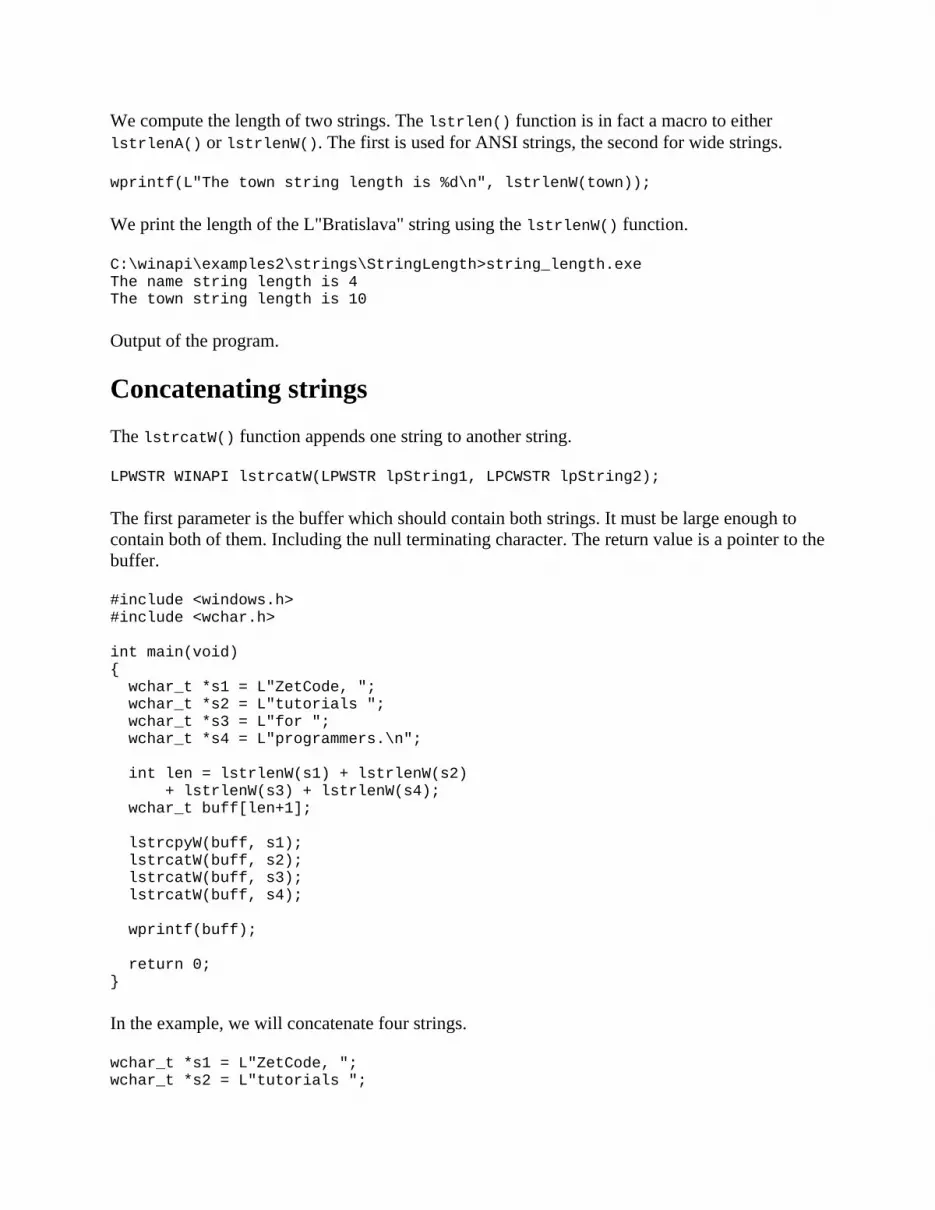
We compute the length of two strings. The lstrlen() function is in fact a macro to either lstrlenA() or lstrlenW(). The first is used for ANSI strings, the second for wide strings.
wprintf(L"The town string length is %d\n", lstrlenW(town));
We print the length of the L"Bratislava" string using the lstrlenW() function.
C:\winapi\examples2\strings\StringLength>string_length.exeThe name string length is 4The town string length is 10
Output of the program.
Concatenating stringsThe lstrcatW() function appends one string to another string.
LPWSTR WINAPI lstrcatW(LPWSTR lpString1, LPCWSTR lpString2);
The first parameter is the buffer which should contain both strings. It must be large enough to contain both of them. Including the null terminating character. The return value is a pointer to the buffer.
#include <windows.h>#include <wchar.h>
int main(void) { wchar_t *s1 = L"ZetCode, "; wchar_t *s2 = L"tutorials "; wchar_t *s3 = L"for "; wchar_t *s4 = L"programmers.\n";
int len = lstrlenW(s1) + lstrlenW(s2) + lstrlenW(s3) + lstrlenW(s4); wchar_t buff[len+1]; lstrcpyW(buff, s1); lstrcatW(buff, s2); lstrcatW(buff, s3); lstrcatW(buff, s4);
wprintf(buff);
return 0;}
In the example, we will concatenate four strings.
wchar_t *s1 = L"ZetCode, ";wchar_t *s2 = L"tutorials ";

wchar_t *s3 = L"for ";wchar_t *s4 = L"programmers.\n";
These are the strings that we are going to concatenate.
int len = lstrlenW(s1) + lstrlenW(s2) + lstrlenW(s3) + lstrlenW(s4);
We compute the length of the four strings using the lstrlenW() function.
wchar_t buff[len+1];
We create a buffer to hold the final string. Note that we add 1 to include the null character.
lstrcpyW(buff, s1);
We copy the first string to the buffer using the lstrcpyW() function.
lstrcatW(buff, s2);lstrcatW(buff, s3);lstrcatW(buff, s4);
We append the remaining strings with the lstrcatW() function.
C:\winapi\examples2\strings\Cat>Cat.exeZetCode, tutorials for programmers.
Output of the program.
Converting charactersWe have two methods for converting characters either to uppercase or to lowercase. The CharLowerW() function converts a character string or a single character to lowercase. The CharUpperW() function converts a character string or a single character to uppercase. If the operand is a character string, the function converts the characters in place. In other words, they are modified.
LPWSTR WINAPI CharLowerW(LPWSTR lpsz);LPWSTR WINAPI CharUpperW(LPWSTR lpsz);
The functions modify the strings in place and return a pointer to the modified string.
#include <windows.h>#include <wchar.h>
#pragma comment(lib, "User32.lib")
int wmain(void) {

wchar_t str[] = L"Europa";
CharLowerW(str); wprintf(L"%ls\n", str);
CharUpperW(str); wprintf(L"%ls\n", str);
return 0;}
We have one string which we convert to lowercase and uppercase.
CharLowerW(str);wprintf(L"%ls\n", str);
We convert the str string to lowercase with the CharLowerW() method. The string is modified in place.
C:\winapi\examples2\strings\UpperLower>UpperLower.exeeuropaEUROPA
Output of the UpperLower.exe program.
Comparing stringsWe often need to compare two strings. The lstrcmpW() function compares two strings. It returns 0 if the strings are equal. The comparison is case sensitive. This means that "Cup" and "cup" are two different strings. The lstrcmpiW() yields case insensitive string comparison. For this function, "Cup" and "cup" are equal.
int WINAPI lstrcmpW(LPCWSTR lpString1, LPCWSTR lpString2);int WINAPI lstrcmpiW(LPCWSTR lpString1, LPCWSTR lpString2);
The functions take two strings as parameters. The return value indicates the equality of the strings. 0 value is returned for equal strings.
#include <windows.h>#include <wchar.h>
#define STR_EQUAL 0
int wmain(void){ wchar_t *s1 = L"Strong"; wchar_t *s2 = L"strong"; if (lstrcmpW(s1, s2) == STR_EQUAL) { wprintf(L"%ls and %ls are equal\n", s1, s2); } else {

wprintf(L"%ls and %ls are not equal\n", s1, s2); }
wprintf(L"When applying case insensitive comparison:\n"); if (lstrcmpiW(s1, s2) == STR_EQUAL) { wprintf(L"%ls and %ls are equal\n", s1, s2); } else { wprintf(L"%ls and %ls are not equal\n", s1, s2); }
return 0;}
We have two strings. We compare them using both case sensitive and case insensitive string comparison.
if (lstrcmpW(s1, s2) == STR_EQUAL) { wprintf(L"%ls and %ls are equal\n", s1, s2);} else { wprintf(L"%ls and %ls are not equal\n", s1, s2);}
If the lstrcmpW() function returns STR_EQUAL, which is defined to 0, then we print to the console that the two strings are equal. Otherwise we print that they are not equal.
C:\winapi\examples2\strings\Compare>Compare.exeStrong and strong are not equalWhen applying case insensitive comparison:Strong and strong are equal
The Compare.exe program gives the above output.
Filling a bufferFilling a buffer with formatted data is essential in C programming. The wsprintfW() function writes formatted data to the specified buffer.
#include <windows.h>#include <wchar.h>
#pragma comment(lib, "User32.lib")
int wmain(void){ SYSTEMTIME st; wchar_t buff[50];
GetLocalTime(&st); wsprintfW(buff, L"Today is %lu.%lu.%lu\n", st.wDay, st.wMonth, st.wYear);
wprintf(buff);

return 0;}
We build a string which is filled with the current date.
wchar_t buff[50];
In this particular case we can safely assume that the string will not exceed 50 characters.
GetLocalTime(&st);
The GetLocalTime() function retrieves the current local date and time.
wsprintfW(buff, L"Today is %lu.%lu.%lu\n", st.wDay, st.wMonth, st.wYear);
The wsprintfW() fills the buffer with a wide string. Arguments are copied to the string according to the format specifier.
wprintf(buff);
The contents of the buffes is printed to the console.
C:\winapi\examples2\strings\Data2Buffer>Data2Buffer.exeToday is 22.9.2012
Output of the example.
Character typesCharacters have various types. They can be digits, spaces, letters, punctuation or control characters.
BOOL WINAPI GetStringTypeW(DWORD dwInfoType, LPCWSTR lpSrcStr, int cchSrc, LPWORD lpCharType);
The GetStringTypeW() function retrieves character type information for the characters in the specified Unicode string. The first parameter is a flag specifying the info types.
Flag Meaning
CT_CTYPE1 Retrieve character type information
CT_CTYPE2 Retrieve bidirectional layout information
CT_CTYPE3 Retrieve text processing information

Table: Character info types
The second parameter is the Unicode string for which to retrieve the character types. The third parameter is the size of the string. The final parameter is a pointer to an array of 16-bit values. The length of this array must be large enough to receive one 16-bit value for each character in the source string.
The GetStringTypeW() function returns a value, which is a combination of types. We can query a specific type with the & operator.
Value Meaning
C1_DIGIT Decimal digits
C1_SPACE Space characters
C1_PUNCT Punctuation
C1_CNTRL Control characters
C1_ALPHA Any linguistic character
Table: Partial list of character types
#include <windows.h>#include <wchar.h>
int wmain(void) { wchar_t str[] = L"7 white, 3 red roses.\n";
int alphas = 0; int digits = 0; int spaces = 0; int puncts = 0; int contrs = 0;
int size = lstrlenW(str); WORD types[size];
BOOL rv = GetStringTypeW(CT_CTYPE1, str, size, types);
if (!rv) { wprintf(L"Could not get character types (%ld)", GetLastError()); return EXIT_FAILURE; }
for (int i=0; i<size; i++) {
if (types[i] & C1_ALPHA) { alphas++; }

if (types[i] & C1_DIGIT) { digits++; }
if (types[i] & C1_SPACE) { spaces++; }
if (types[i] & C1_PUNCT) { puncts++; }
if (types[i] & C1_CNTRL) { contrs++; } }
wprintf(L"There are %ld letter(s), %ld digit(s), " L"%ld space(s), %ld punctuation character(s), " L"and %ld control character(s)\n", alphas, digits, spaces, puncts, contrs);
return 0;}
We have a short sentence. The GetStringTypeW() function is used to determine the character types of the string.
wchar_t str[] = L"7 white, 3 red roses.\n";
This is a short sentence consisting of various wide characters.
int alphas = 0;int digits = 0;int spaces = 0;int puncts = 0;int contrs = 0;
These variables will be used to count letters, digits, spaces, punctuation and control characters.
int size = lstrlenW(str);WORD types[size];
We get the size of the string and create and array of values. The size does not include the null terminating character. We can add 1 to include it. It will be counted as a control character.
BOOL rv = GetStringTypeW(CT_CTYPE1, str, size, types);
We get the character types of the sentence. The types array is filled with character type values.
if (types[i] & C1_DIGIT) { digits++;

}
If the value contains the C1_DIGIT flag, we increase the digits counter.
C:\winapi\examples2\strings\Letters>Letters.exeThere are 13 letter(s), 2 digit(s), 5 space(s), 2 punctuation character(s), and1 control character(s)
Output of the example.
The CRT string functionsThere are also lots of string functions in the C Run-Time (CRT) library. Many of them are duplicates to the Winapi functions. It is a matter of opinion which types of string functions should be used. The CRT functions have some small overhead since they call Winapi functions underneath.
#include <windows.h>#include <wchar.h>
#define STR_EQUAL 0
int wmain(void){ wchar_t str1[] = L"There are 15 pines";
wprintf(L"The length of the string is %ld characters\n", wcslen(str1));
wchar_t buf[20]; wcscpy(buf, L"Wuthering"); wcscat(buf, L" heights\n"); wprintf(buf);
if (wcscmp(L"rain", L"rainy")== STR_EQUAL) { wprintf(L"rain and rainy are equal strings\n"); } else { wprintf(L"rain and rainy are not equal strings\n"); }
return 0;}
In the example we present a few string functions from the CRT library.
wprintf(L"The length of the string is %ld characters\n", wcslen(str1));
The wcslen() returns the number of characters in the string.
wcscpy(buf, L"Wuthering");

The wcscpy copies a string to a string buffer.
wcscat(buf, L" heights\n");
The wcscat() function appends a string to a string buffer.
if (wcscmp(L"rain", L"rainy")== STR_EQUAL) { wprintf(L"rain and rainy are equal strings\n");} else { wprintf(L"rain and rainy are not equal strings\n");}
The wcscmp() compares two string.
C:\winapi\examples2\strings\CRTStrings>CRTStrings.exeThe length of the string is 18 charactersWuthering heightsrain and rainy are not equal strings
Output of the example.
In this part of the Winapi tutorial, we have worked with strings.
Date & timeIn this part of the Windows API tutorial, we will work with date and time.
The SYSTEMTIME structure is used to work with date and time in Windows API. The time can be either coordinated universal time (UTC) or local time. It has the following members:
WORD wYear;WORD wMonth;WORD wDayOfWeek;WORD wDay;WORD wHour;WORD wMinute;WORD wSecond;WORD wMilliseconds;
The SYSTEMTIME structure is filled either with the GetSystemTime() function or the GetLocalTime() function. We can then access the members of the structure to get the current date or time.
The FILETIME structure contains a 64-bit value representing the number of 100-nanosecond intervals since January 1, 1601 (UTC). With this value we are able to compute the Windows API epoch or the datetime differences.
DWORD dwLowDateTime;DWORD dwHighDateTime;
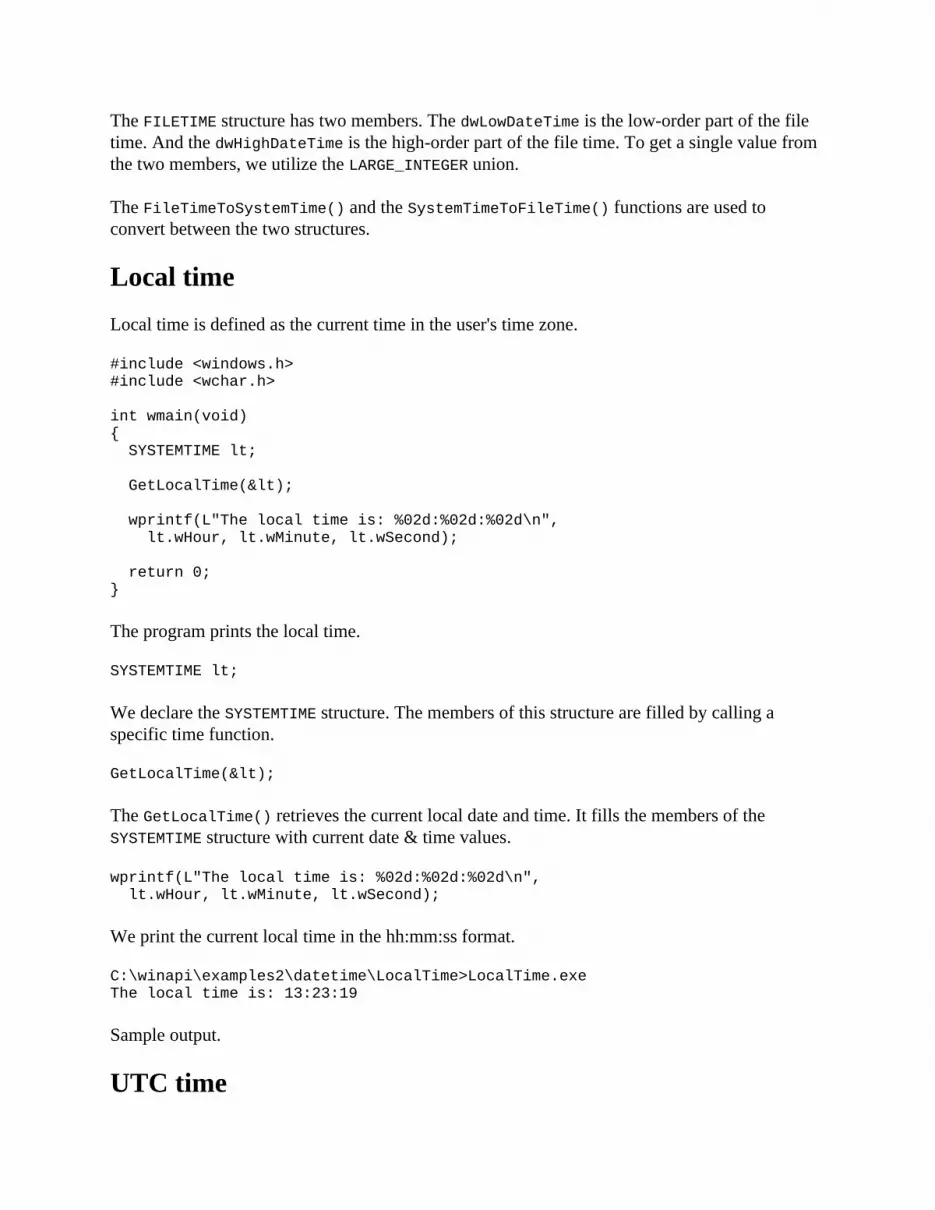
The FILETIME structure has two members. The dwLowDateTime is the low-order part of the file time. And the dwHighDateTime is the high-order part of the file time. To get a single value from the two members, we utilize the LARGE_INTEGER union.
The FileTimeToSystemTime() and the SystemTimeToFileTime() functions are used to convert between the two structures.
Local timeLocal time is defined as the current time in the user's time zone.
#include <windows.h>#include <wchar.h>
int wmain(void){ SYSTEMTIME lt; GetLocalTime(<); wprintf(L"The local time is: %02d:%02d:%02d\n", lt.wHour, lt.wMinute, lt.wSecond);
return 0;}
The program prints the local time.
SYSTEMTIME lt;
We declare the SYSTEMTIME structure. The members of this structure are filled by calling a specific time function.
GetLocalTime(<);
The GetLocalTime() retrieves the current local date and time. It fills the members of the SYSTEMTIME structure with current date & time values.
wprintf(L"The local time is: %02d:%02d:%02d\n", lt.wHour, lt.wMinute, lt.wSecond);
We print the current local time in the hh:mm:ss format.
C:\winapi\examples2\datetime\LocalTime>LocalTime.exeThe local time is: 13:23:19
Sample output.
UTC time

Our planet is a sphere. It revolves round its axis. The Earth rotates towards the east. So the Sun rises at different times in different locations. The Earth rotates once in about 24 hours. Therefore, the world was divided into 24 time zones. In each time zone, there is a different local time. This local time is often further modified by the daylight saving.
There is a pragmatic need for one global time. One global time helps to avoid confusion about time zones and daylight saving time. The UTC (Universal Coordinated time) was chosen to be the primary time standard. UTC is used in aviation, weather forecasts, flight plans, air traffic control clearances and maps. Unlike local time, UTC does not change with a change of seasons.
The Windows API has the GetSystemTime() function to get the UTC time.
#include <windows.h>#include <wchar.h>
int wmain(void){ SYSTEMTIME st; GetSystemTime(&st); wprintf(L"The system time is: %02d:%02d:%02d\n", st.wHour, st.wMinute, st.wSecond);
return 0;}
In the example we compute the UTC time.
SYSTEMTIME st;
The UTC time will be stored in the SYSTEMTIME structure.
GetSystemTime(&st);
We retrive the UTC time using the GetSystemTime() function.
wprintf(L"The system time is: %02d:%02d:%02d\n", st.wHour, st.wMinute, st.wSecond);
The UTC time is printed to the console in the hh:mm:ss format.
C:\winapi\examples2\datetime\SystemTime>SystemTime.exeThe system time is: 21:11:13
Output.
Date

The GetLocalTime() function is also used to determine the current date.
#include <windows.h>#include <wchar.h>
int wmain(void){ SYSTEMTIME st; GetLocalTime(&st); wprintf(L"Today is: %d-%02d-%02d\n", st.wYear, st.wMonth, st.wDay);
return 0;}
The above program prints today's date.
SYSTEMTIME st;
We declare a SYSTEMTIME structure.
GetLocalTime(&st);
We fill the SYSTEMTIME members with current local time and date values.
wprintf(L"Today is: %d-%02d-%02d\n", st.wYear, st.wMonth, st.wDay);
The current date is printed to the console. We have chosen the Gregoriand big-endian date format.
C:\winapi\examples2\datetime\Today>Today.exeToday is: 2012-10-07
Output of the program.
Determining a leap yearA leap year is a year containing an additional day. The reason for an extra day in the calendar is the difference between the astronomical and the calendar year. The calendar year has exactly 365 days, while the astronomical year, the time for the earth to make one revolution around the Sun, is 365.25 days. The difference is 6 hours which means that in four years time we are missing one day. Because we want to have our calendar synchronized with the seasons, we add one day to February each four years. (There are exceptions.) In the Gregorian calendar, February in a leap year has 29 days instead of the usual 28. And the year lasts 366 days instead of the usual 365.
#include <windows.h>#include <stdbool.h>#include <wchar.h>
bool isLeapYear(int);
int wmain(void){ int years[] = { 2000, 2002, 2004, 2008, 2012, 1900, 1800, 1600, 1200, 1000 }; int size = sizeof(years)/sizeof(int);
for (int i=0; i<size; i++) { if (isLeapYear(years[i])) { wprintf(L"%ld is a leap year\n", years[i]); } else { wprintf(L"%ld is not a leap year\n", years[i]); } }
return 0;}
bool isLeapYear(int year){ if ((year % 100 == 0) && (year % 400 == 0)) { return true; } if ((year % 4 == 0) && (year % 100 !=0)) { return true; }
return false;}
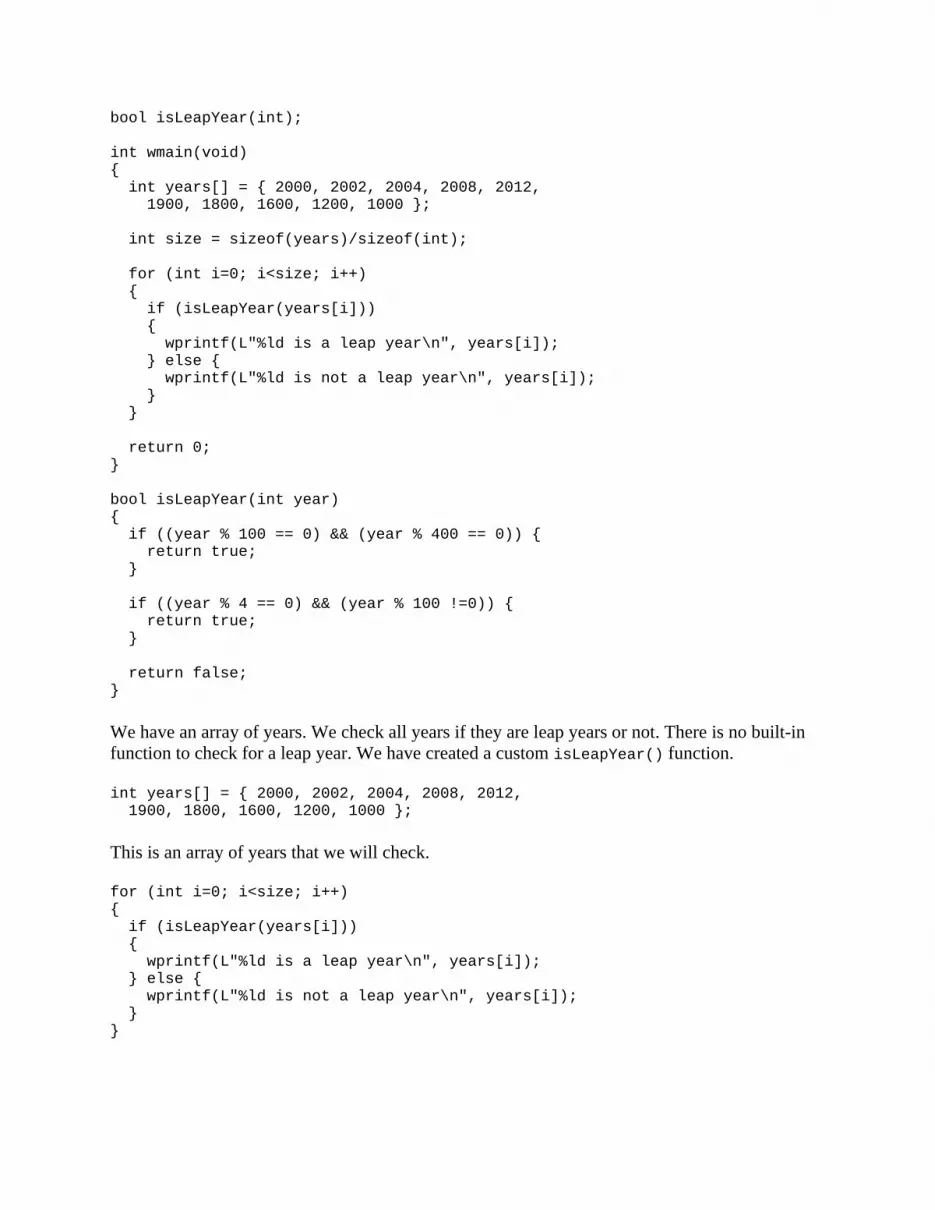
We have an array of years. We check all years if they are leap years or not. There is no built-in function to check for a leap year. We have created a custom isLeapYear() function.
int years[] = { 2000, 2002, 2004, 2008, 2012, 1900, 1800, 1600, 1200, 1000 };
This is an array of years that we will check.
for (int i=0; i<size; i++){ if (isLeapYear(years[i])) { wprintf(L"%ld is a leap year\n", years[i]); } else { wprintf(L"%ld is not a leap year\n", years[i]); }}
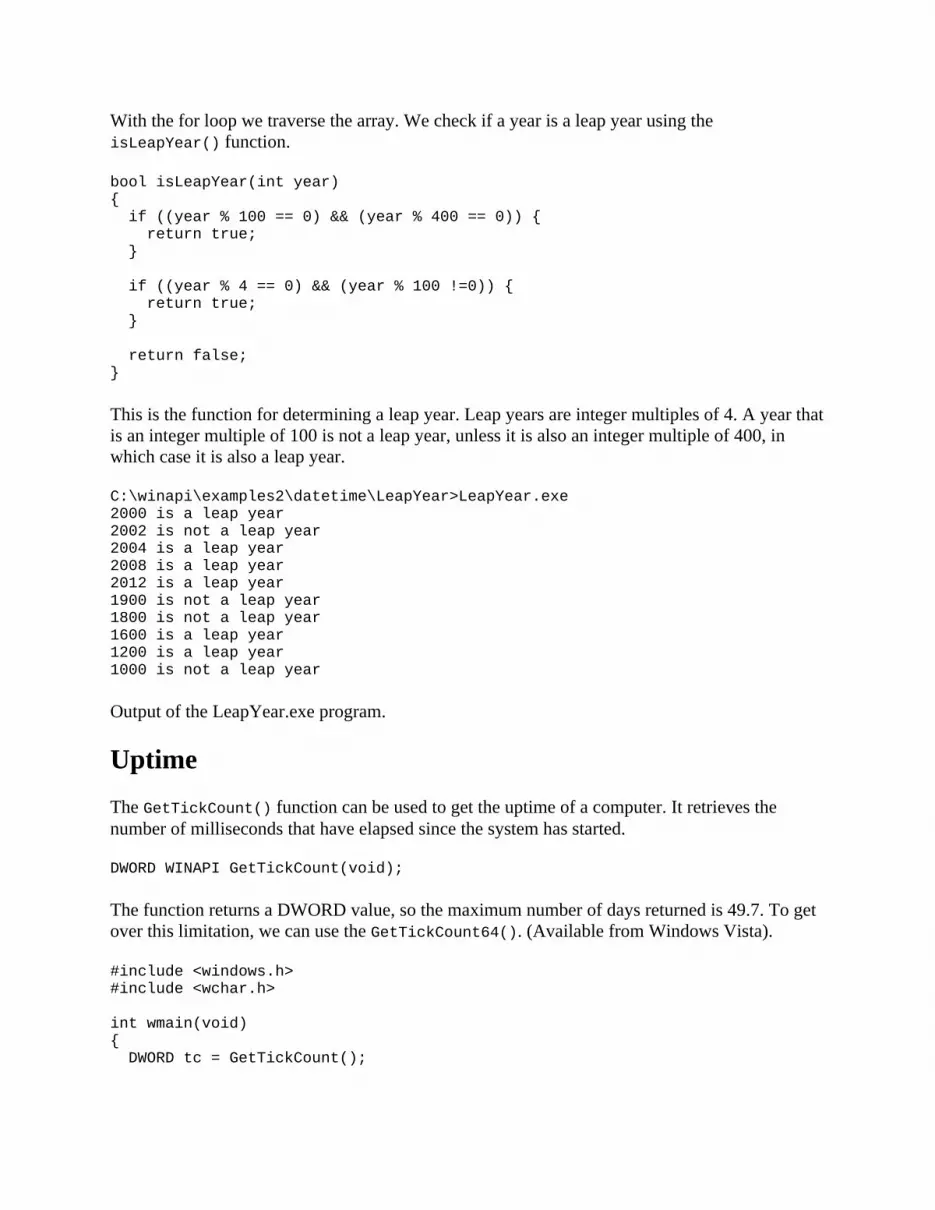
With the for loop we traverse the array. We check if a year is a leap year using the isLeapYear() function.
bool isLeapYear(int year){ if ((year % 100 == 0) && (year % 400 == 0)) { return true; } if ((year % 4 == 0) && (year % 100 !=0)) { return true; }
return false;}
This is the function for determining a leap year. Leap years are integer multiples of 4. A year that is an integer multiple of 100 is not a leap year, unless it is also an integer multiple of 400, in which case it is also a leap year.
C:\winapi\examples2\datetime\LeapYear>LeapYear.exe2000 is a leap year2002 is not a leap year2004 is a leap year2008 is a leap year2012 is a leap year1900 is not a leap year1800 is not a leap year1600 is a leap year1200 is a leap year1000 is not a leap year
Output of the LeapYear.exe program.
UptimeThe GetTickCount() function can be used to get the uptime of a computer. It retrieves the number of milliseconds that have elapsed since the system has started.
DWORD WINAPI GetTickCount(void);
The function returns a DWORD value, so the maximum number of days returned is 49.7. To get over this limitation, we can use the GetTickCount64(). (Available from Windows Vista).
#include <windows.h>#include <wchar.h>
int wmain(void) { DWORD tc = GetTickCount();

short seconds = tc / 1000 % 60; short minutes = tc / 1000 / 60 % 60; short hours = tc / 1000 / 60 / 60 % 24; short days = tc / 1000 / 60 / 60 / 24 % 7; short weeks = tc / 1000 / 60 / 60 / 24 / 7 % 52;
wprintf(L"Computer has been running for: "); if (weeks > 0 && weeks != 1) { wprintf(L"%hi weeks ", weeks); } else if (weeks == 1) { wprintf(L"1 week "); }
if (days > 0 && days != 1) { wprintf(L"%hi days ", days); } else if (days == 1) { wprintf(L"1 day "); }
if (hours > 0 && hours != 1) { wprintf(L"%hi hours ", hours); } else if (hours == 1) { wprintf(L"1 hour "); }
if (minutes > 0 && minutes != 1) { wprintf(L"%hi minutes ", minutes); } else if (minutes == 1) { wprintf(L"1 minute "); }
wprintf(L"and %hi seconds\n", seconds); return 0;}
The program prints the uptime of a computer. We use the GetTickCount() function. It works correctly if the computer is running less than 49.71 days or 4294967296 ms. After that the DWORD value overflows.
DWORD tc = GetTickCount();
We get the number of milliseconds the computer is running. The maximum number a DWORD variable can store is ULONG_MAX.
short seconds = tc / 1000 % 60; short minutes = tc / 1000 / 60 % 60; short hours = tc / 1000 / 60 / 60 % 24; short days = tc / 1000 / 60 / 60 / 24 % 7; short weeks = tc / 1000 / 60 / 60 / 24 / 7 % 52;
We compute the seconds, minutes, hours, days and weeks.
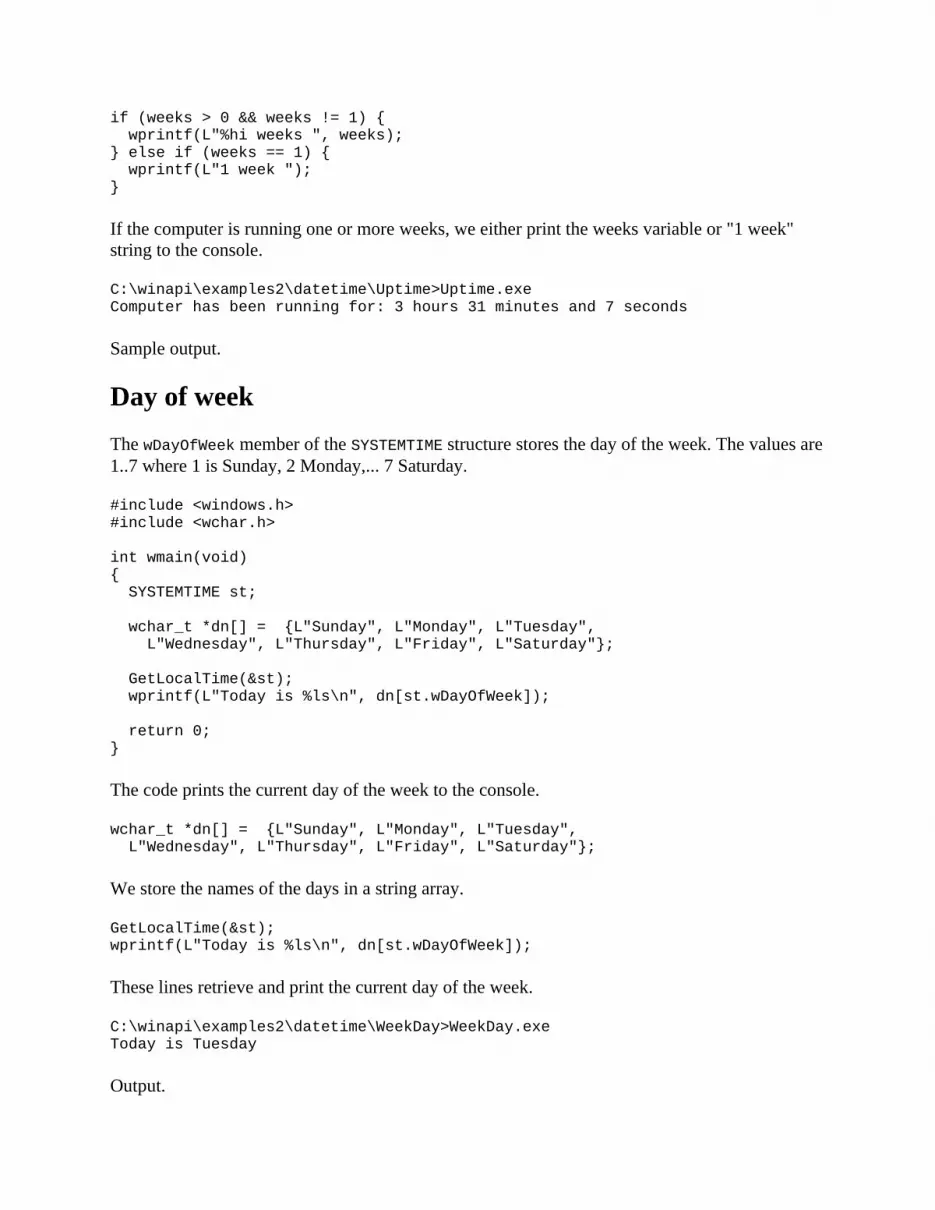
if (weeks > 0 && weeks != 1) { wprintf(L"%hi weeks ", weeks);} else if (weeks == 1) { wprintf(L"1 week ");}
If the computer is running one or more weeks, we either print the weeks variable or "1 week" string to the console.
C:\winapi\examples2\datetime\Uptime>Uptime.exeComputer has been running for: 3 hours 31 minutes and 7 seconds
Sample output.
Day of weekThe wDayOfWeek member of the SYSTEMTIME structure stores the day of the week. The values are 1..7 where 1 is Sunday, 2 Monday,... 7 Saturday.
#include <windows.h>#include <wchar.h>
int wmain(void){ SYSTEMTIME st;
wchar_t *dn[] = {L"Sunday", L"Monday", L"Tuesday", L"Wednesday", L"Thursday", L"Friday", L"Saturday"};
GetLocalTime(&st); wprintf(L"Today is %ls\n", dn[st.wDayOfWeek]);
return 0;}
The code prints the current day of the week to the console.
wchar_t *dn[] = {L"Sunday", L"Monday", L"Tuesday", L"Wednesday", L"Thursday", L"Friday", L"Saturday"};
We store the names of the days in a string array.
GetLocalTime(&st);wprintf(L"Today is %ls\n", dn[st.wDayOfWeek]);
These lines retrieve and print the current day of the week.
C:\winapi\examples2\datetime\WeekDay>WeekDay.exeToday is Tuesday
Output.

The epochAn epoch is an instant in time chosen as the origin of a particular era. For example in western Christian countries the time epoch starts from day 0, when Jesus was born (is believed to be born). Another example is the French Republican Calendar which was used for twelve years. The epoch was the beginning of the Republican Era which was proclaimed on September 22, 1792, the day the First Republic was declared and the monarchy abolished. Computers have their epochs too. One of the most popular is the Unix time. The Unix epoch is the time 00:00:00 UTC on 1 January 1970 (or 1970-01-01T00:00:00Z ISO 8601). The date and time in a computer is determined according to the number of seconds or clock ticks that have elapsed since the defined epoch for that computer or platform.
Windows operating system has several epochs. Microsoft Excel, MS SQL Server or FAT32 filesystem have different time epochs. The Windows API epoch is January 1, 1601, 00:00:00 UTC. The reason for choosing this date was the 400th anniversary of accepting of the Gregorian calendar. The anniversary falled at the time when Windows NT was designed. The FILETIME structure contains a 64-bit value representing the number of 100-nanosecond intervals since January 1, 1601 (UTC).
#include <windows.h>#include <wchar.h>
int wmain(void){ FILETIME ft; GetSystemTimeAsFileTime(&ft);
LARGE_INTEGER li;
li.LowPart = ft.dwLowDateTime; li.HighPart = ft.dwHighDateTime;
long long int hns = li.QuadPart; wprintf(L"%lli hundreds of nanoseconds have elapsed " "since Windows API epoch\n", hns);
return 0;}
The code example computes the number of 100-nanosecond intervals elapsed from the Windows API epoch till this moment.
FILETIME ft;
We declare the FILETIME structure. It has two members. The dwLowDateTime holds the low-order part of the file time. The dwHighDateTime holds the high-order part of the file time.
LARGE_INTEGER li;

The LARGE_INTEGER is a union which helps us to convert the members of the FILETIME structure to 100-nanosecond intervals.
li.LowPart = ft.dwLowDateTime;li.HighPart = ft.dwHighDateTime;
The values of the FILETIME structure are copied to the large integer union members.
long long int hns = li.QuadPart;
The QuadPart member stores the number of hundreds of nanoseconds determined from the LowPart and HighPart members. It is a huge number stored as a 64-bit integer.
wprintf(L"%lli hundreds of nanoseconds have elapsed " "since Windows API epoch\n", hns);
The value is printed to the console.
C:\winapi\examples2\datetime\Epoch>Epoch.exe129939979517540965 hundreds of nanoseconds have elapsed since Windows API epoch
Sample output.
Days until XMasThe Windows API does not have any functions to calcuate the difference between two days. We have to do the math ourselves.
#include <windows.h>#include <stdbool.h>#include <wchar.h>
int wmain(void){ FILETIME ft1; FILETIME ft2; SYSTEMTIME st = {0}; LARGE_INTEGER li1; LARGE_INTEGER li2;
st.wYear = 2012; st.wMonth = 12; st.wDay = 25;
bool r = SystemTimeToFileTime(&st, &ft1);
if (!r) { wprintf(L"Failed to convert system time to file time\n (%d)", GetLastError()); return 1;

} GetSystemTimeAsFileTime(&ft2); li1.LowPart = ft1.dwLowDateTime; li1.HighPart = ft1.dwHighDateTime;
li2.LowPart = ft2.dwLowDateTime; li2.HighPart = ft2.dwHighDateTime;
long long int dif = li1.QuadPart - li2.QuadPart;
int days2xmas = dif / 10000000L / 60 / 60 / 24;
if (days2xmas == 1) { wprintf(L"There is one day until Christmas\n", days2xmas); } else if (days2xmas == 0) { wprintf(L"Today is Chritmas"); } else { wprintf(L"There are %d days until Christmas\n", days2xmas); } return 0;}
The code example computes the number of days until the Christmas.
FILETIME ft1;FILETIME ft2;SYSTEMTIME st = {0}; LARGE_INTEGER li1; LARGE_INTEGER li2;
We need FILETIME, SYSTEMTIME structures and LARGE_INTEGER unions to do our computations.
st.wYear = 2012;st.wMonth = 12;st.wDay = 25;
The SYTEMTIME structure is filled with the values for the Christmas day.
bool r = SystemTimeToFileTime(&st, &ft1);
The system time for the Christmas day is converted to file time.
GetSystemTimeAsFileTime(&ft2);
We get the current date as a file time using the GetSystemTimeAsFileTime() function.
li1.LowPart = ft1.dwLowDateTime;li1.HighPart = ft1.dwHighDateTime;
li2.LowPart = ft2.dwLowDateTime;

li2.HighPart = ft2.dwHighDateTime;
We fill the two unions with the low-order and high-order parts of the file time.
long long int dif = li1.QuadPart - li2.QuadPart;
The difference between the two dates is computed.
int days2xmas = dif / 10000000L / 60 / 60 / 24;
The difference is expressed in 100-nanoseconds. This value is converted to days.
C:\winapi\examples2\datetime\DaysToXMas>DaysToXMas.exeThere are 79 days until Christmas
Output.
Comparing timesThe CompareFileTime() function can be used to compare two file times. The function returns -1 when the first time specified is earlier. It returns 0, when the two times are equal. And it returns 1 when the first time is later than the second file time.
#include <windows.h>#include <stdbool.h>#include <wchar.h>
int wmain(void){ SYSTEMTIME st1 = {0}; SYSTEMTIME st2 = {0}; FILETIME ft1; FILETIME ft2;
st1.wYear = 2012; st1.wMonth = 4; st1.wDay = 12;
st2.wYear = 2012; st2.wMonth = 5; st2.wDay = 12;
bool r1 = SystemTimeToFileTime(&st1, &ft1);
if (!r1) { wprintf(L"Failed to convert system time to file time\n (%d)", GetLastError()); return 1; } bool r2 = SystemTimeToFileTime(&st2, &ft2);

if (!r2) { wprintf(L"Failed to convert system time to file time\n (%d)", GetLastError()); return 1; } short ct = CompareFileTime(&ft1, &ft2);
if (ct == -1) { wprintf(L"4/12/2012 comes before 5/12/2012\n"); } else if (ct == 0) { wprintf(L"4/12/2012 is equal to 5/12/2012\n"); } else if (ct == 1) { wprintf(L"4/12/2012 comes after 5/12/2012\n"); }
return 0;}
We define two times. We use the CompareFileTime() to figure out which time is earlier than the other one.
st1.wYear = 2012;st1.wMonth = 4;st1.wDay = 12;
st2.wYear = 2012;st2.wMonth = 5;st2.wDay = 12;
The two times are defined.
bool r1 = SystemTimeToFileTime(&st1, &ft1);
if (!r1) { wprintf(L"Failed to convert system time to file time\n (%d)", GetLastError()); return 1;}
bool r2 = SystemTimeToFileTime(&st2, &ft2);
if (!r2) { wprintf(L"Failed to convert system time to file time\n (%d)", GetLastError()); return 1;}
The system times are converted to file times using the SystemTimeToFileTime() function calls.
short ct = CompareFileTime(&ft1, &ft2);
The two file times are compared with the CompareFileTime() function.

if (ct == -1) { wprintf(L"4/12/2012 comes before 5/12/2012\n");} else if (ct == 0) { wprintf(L"4/12/2012 is equal to 5/12/2012\n");} else if (ct == 1) { wprintf(L"4/12/2012 comes after 5/12/2012\n");}
Depending on the returned value, we print a message.
C:\winapi\examples2\datetime\CompareTime>CompareTime.exe4/12/2012 comes before 5/12/2012
Output.
In this part of the Winapi tutorial, we have worked with date & time.
A WindowEverything is a window in Windows. At least from the programmer's point of view. A main window, a button a static text even an icon. All are windows. A static text is only a special kind of a window. So is the desktop area.
WinMain functionEvery Windows application must have at least two functions. The WinMain function and the window procedure. The WinMain function is the entry point to a Windows application.
The wWinMain function initializes the application, shows the application window on the screen and enters the main loop.
int WINAPI wWinMain(HINSTANCE hInstance, HINSTANCE hPrevInstance, PWSTR pCmdLine, int nCmdShow);
The hInstance is a handle of an instance. It is a 32-bit number identifying the instance of our program within the OS environment. This number is given by Windows, when the program starts executing. The hPrevInstance parameter is always NULL. It is a legacy from the 16-bit Windows. Windows programs can still be started from the command line. The parameters given are stored in pCmdLine. The nCmdShow value specifies, how the window will be displayed. Minimized, maximized or hidden.
The wWinMain function terminates, when it receives the WM_QUIT message.
Registering a window

Before we can create a window, we must register it within the Windows. All windows must be registered. Later on we will see, that we do not register a window, when we create a button, static text etc. This is because these controls are predefined. They have already been registered. Programming in Winapi & C means working with structures a lot. To register a window, we must create and fill an WNDCLASS structure. We set the window style, extra allocation bytes, window class name, handle of the program instance, background brush, optional menu name, window procedure, handle of the cursor and icon. Finally, we call the RegisterClass() function.
Creating a windowThe window is created by calling the CreateWindow() function.
HWND CreateWindow(LPCTSTR lpClassName, LPCTSTR lpWindowName, DWORD dwStyle, int x, int y, int nWidth, int nHeight, HWND hWndParent, HMENU hMenu, HINSTANCE hInstance, LPVOID lpParam);
The lpClassName uniquely identifies the window. It is the name, under we registered the window. The lpWindowName is a window name. Its effect depends on the context. It can be title of the window in parent windows or a label in child windows like button or static text. Windows can be created using several styles. For this, we have the dwStyle parameter. The x, y specify the initial horizontal and vertical position of the window. The nWidth and nHeight specify the window width and height. The hWndParent is a handle to the parent window. For windows that do not have parents, we use NULL. For a parent window the hMenu is an optional handle to the menu, for a child window, it is a control identifier. The hInstance is a handle to the program instance. The lpParam is the last parameter, it is an optional value passed to the window during the WM_CREATE message. The CreateWindow() function returns a handle to the newly created window.
MessagesThe WinMain function creates a message loop. It is an endless cycle which runs during the life of the application. Message loop is a programming construct that waits for and dispatches events or messages in a program. Windows communicate using messages. A message is an integer value that identifies a specific event. May it be a button click, resizing of the window or closing of an application. There can be multiple messages created in one moment. The messages cannot be processed all at the same time. Therefore there is a message queue. The message enters the message queue and waits until it is processed. The GetMessage() function retrieves the message from the message queue. The DispatchMessage() function dispatches a message to a window procedure. If the application obtains character input, we include the TranslateMessage() function in the loop.
Window procedure
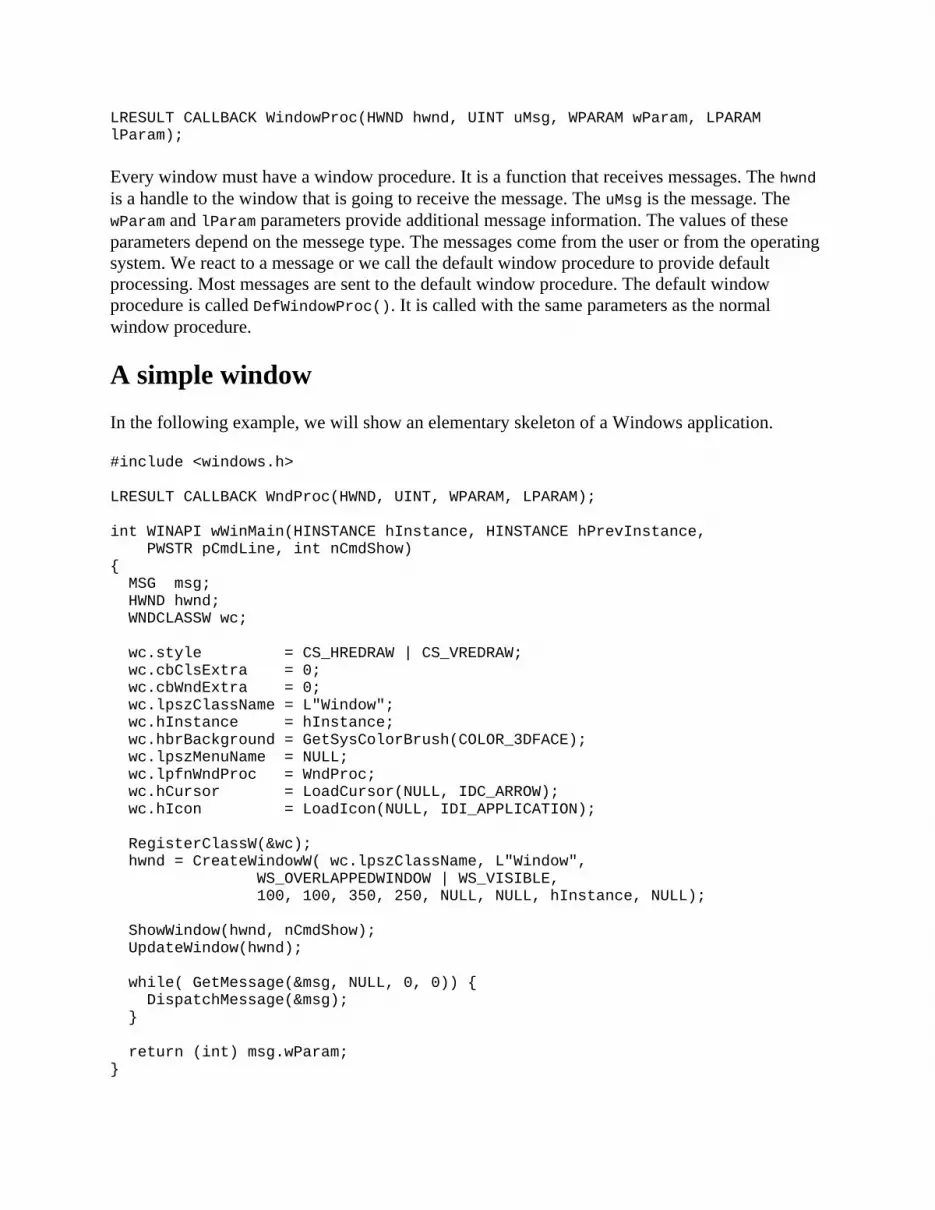
LRESULT CALLBACK WindowProc(HWND hwnd, UINT uMsg, WPARAM wParam, LPARAM lParam);
Every window must have a window procedure. It is a function that receives messages. The hwnd is a handle to the window that is going to receive the message. The uMsg is the message. The wParam and lParam parameters provide additional message information. The values of these parameters depend on the messege type. The messages come from the user or from the operating system. We react to a message or we call the default window procedure to provide default processing. Most messages are sent to the default window procedure. The default window procedure is called DefWindowProc(). It is called with the same parameters as the normal window procedure.
A simple windowIn the following example, we will show an elementary skeleton of a Windows application.
#include <windows.h>
LRESULT CALLBACK WndProc(HWND, UINT, WPARAM, LPARAM);
int WINAPI wWinMain(HINSTANCE hInstance, HINSTANCE hPrevInstance, PWSTR pCmdLine, int nCmdShow){ MSG msg; HWND hwnd; WNDCLASSW wc;
wc.style = CS_HREDRAW | CS_VREDRAW; wc.cbClsExtra = 0; wc.cbWndExtra = 0; wc.lpszClassName = L"Window"; wc.hInstance = hInstance; wc.hbrBackground = GetSysColorBrush(COLOR_3DFACE); wc.lpszMenuName = NULL; wc.lpfnWndProc = WndProc; wc.hCursor = LoadCursor(NULL, IDC_ARROW); wc.hIcon = LoadIcon(NULL, IDI_APPLICATION); RegisterClassW(&wc); hwnd = CreateWindowW( wc.lpszClassName, L"Window", WS_OVERLAPPEDWINDOW | WS_VISIBLE, 100, 100, 350, 250, NULL, NULL, hInstance, NULL);
ShowWindow(hwnd, nCmdShow); UpdateWindow(hwnd);
while( GetMessage(&msg, NULL, 0, 0)) { DispatchMessage(&msg); }
return (int) msg.wParam;}
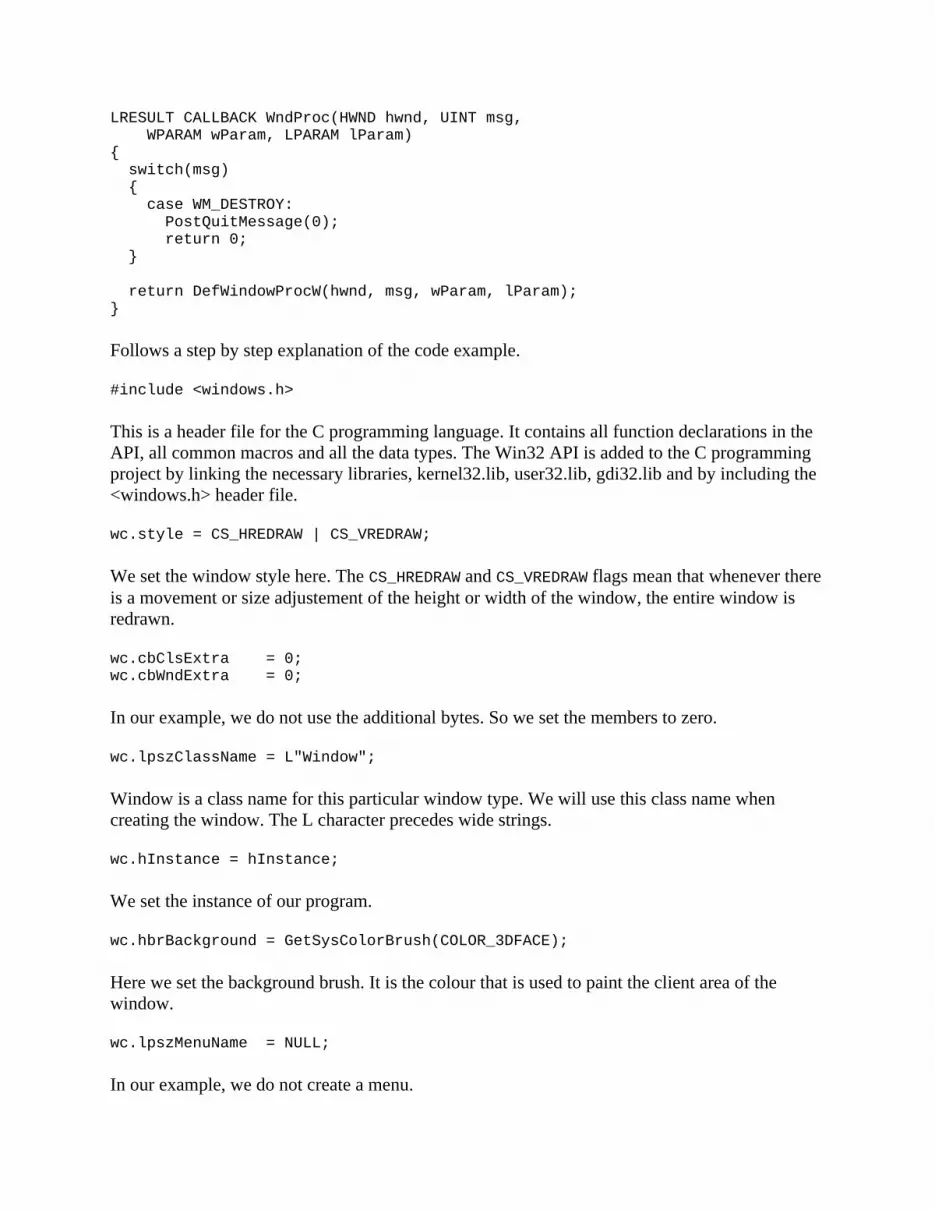
LRESULT CALLBACK WndProc(HWND hwnd, UINT msg, WPARAM wParam, LPARAM lParam){ switch(msg) { case WM_DESTROY: PostQuitMessage(0); return 0; }
return DefWindowProcW(hwnd, msg, wParam, lParam);}
Follows a step by step explanation of the code example.
#include <windows.h>
This is a header file for the C programming language. It contains all function declarations in the API, all common macros and all the data types. The Win32 API is added to the C programming project by linking the necessary libraries, kernel32.lib, user32.lib, gdi32.lib and by including the <windows.h> header file.
wc.style = CS_HREDRAW | CS_VREDRAW;
We set the window style here. The CS_HREDRAW and CS_VREDRAW flags mean that whenever there is a movement or size adjustement of the height or width of the window, the entire window is redrawn.
wc.cbClsExtra = 0;wc.cbWndExtra = 0;
In our example, we do not use the additional bytes. So we set the members to zero.
wc.lpszClassName = L"Window";
Window is a class name for this particular window type. We will use this class name when creating the window. The L character precedes wide strings.
wc.hInstance = hInstance;
We set the instance of our program.
wc.hbrBackground = GetSysColorBrush(COLOR_3DFACE);
Here we set the background brush. It is the colour that is used to paint the client area of the window.
wc.lpszMenuName = NULL;
In our example, we do not create a menu.

wc.lpfnWndProc = WndProc;
We provide the window procedure for the window class.
wc.hCursor = LoadCursor(NULL, IDC_ARROW);wc.hIcon = LoadIcon(NULL, IDI_APPLICATION);
We set the cursor and the icon for our application. We load them from system resources.
RegisterClassW(&wc);
We register the window class with the system.
ShowWindow(hwnd, nCmdShow);UpdateWindow(hwnd);
These two lines show the window on the screen. The nCmdShow specifies, how we display the window on the screen.
while( GetMessage(&msg, NULL, 0, 0)) { DispatchMessage(&msg);}
This is the message loop. We receive messages from the message queue using the GetMessage() function and dispatch them to the window procedure using the DispatchMessage() call.
switch(msg) { case WM_DESTROY: PostQuitMessage(0); return 0; }
return DefWindowProcW(hwnd, msg, wParam, lParam);
In the windows procedure, we react to the WM_DESTROY message. The PostQuitMessage() sends the WM_QUIT message to the message queue. All other messages are sent to the default processing using the DefWindowProcW() function call.

Figure: A window
In this part of the Winapi tutorial, we have created a basic window.
First stepsIn this part of the Winapi tutorial, we will create some simple examples.
Simple programHere is the most simple program. It will pop up a small dialog box.
#include <windows.h>
int WINAPI wWinMain(HINSTANCE hInstance, HINSTANCE hPrevInstance, PWSTR pCmdLine, int CmdShow){ MessageBoxW(NULL, L"First Program", L"First", MB_OK);
return 0;}
A small dialog box is shown on the screen. It has a caption, message and an OK button.
#include <windows.h>
We include the basic function declarations, constants, data types and structures.
int WINAPI wWinMain(HINSTANCE hInstance, HINSTANCE hPrevInstance, PWSTR pCmdLine, int CmdShow)
The wWinMain() function is an entry point to our application.

MessageBoxW(NULL, L"First Program", L"First", MB_OK);
The MessageBoxW() function displays a simple message box. The first parameter is the owner window. In our case, the dialog box has no owner. The next two parameters provide the message text and the caption. The last parameter defines the message dialog type. We have a dialog box with one OK button.
Simple message box
Centering a windowIn the next code example, we will center the window on the screen.
#include <windows.h>
LRESULT CALLBACK WndProc(HWND, UINT, WPARAM, LPARAM);void CenterWindow(HWND);
int WINAPI wWinMain(HINSTANCE hInstance, HINSTANCE hPrevInstance, PWSTR pCmdLine, int nCmdShow){ MSG msg; WNDCLASSW wc = {0}; wc.lpszClassName = L"Center"; wc.hInstance = hInstance; wc.hbrBackground = GetSysColorBrush(COLOR_3DFACE); wc.lpfnWndProc = WndProc; wc.hCursor = LoadCursor(0, IDC_ARROW); RegisterClassW(&wc); CreateWindowW(wc.lpszClassName, L"Center", WS_OVERLAPPEDWINDOW | WS_VISIBLE, 100, 100, 250, 150, 0, 0, hInstance, 0);
while( GetMessage(&msg, NULL, 0, 0)) { TranslateMessage(&msg); DispatchMessage(&msg); }
return (int) msg.wParam;}
LRESULT CALLBACK WndProc(HWND hwnd, UINT msg, WPARAM wParam, LPARAM lParam){

switch(msg) { case WM_CREATE: { CenterWindow(hwnd); return 0; }
case WM_DESTROY: { PostQuitMessage(0); return 0; } }
return DefWindowProcW(hwnd, msg, wParam, lParam);}
void CenterWindow(HWND hwnd){ RECT rc; GetWindowRect(hwnd, &rc) ; SetWindowPos(hwnd, 0, (GetSystemMetrics(SM_CXSCREEN) - rc.right)/2, (GetSystemMetrics(SM_CYSCREEN) - rc.bottom)/2, 0, 0, SWP_NOZORDER|SWP_NOSIZE);}
In order to center a window on the screen, we need to have the dimensions of the window and of the screen.
case WM_CREATE:{ CenterWindow(hwnd); return 0;}
We call the user defined CenterWindow() function during the WM_CREATE message.
GetWindowRect(hwnd, &rc) ;
With the GetWindowRect() function, we retrieve the dimensions of the bounding rectangle of the specified window.
SetWindowPos(hwnd, 0, (GetSystemMetrics(SM_CXSCREEN) - rc.right)/2, (GetSystemMetrics(SM_CYSCREEN) - rc.bottom)/2, 0, 0, SWP_NOZORDER|SWP_NOSIZE);
The SetWindowPos() method positions a window on the screen. The GetSystemMetrics() function is used to get the width and height of the screen.

More WindowsA window is created from a specific window class. A window class defines a set of behaviors that several windows might have in common. Some classes are already predefined in the system. A custom window class must be registered. After that, we can create windows of this new window class. A window is created using by calling the CreateWindowW() function. Its first parameter is the window class name.
Each window has a window procedure. It is a function that is called by the OS, when users interact with the window. In the following example, we create three windows. One parent window and two child windows.
#include <windows.h>
LRESULT CALLBACK WndProc(HWND, UINT, WPARAM, LPARAM);LRESULT CALLBACK PanelProc(HWND, UINT, WPARAM, LPARAM);
void RegisterRedPanelClass(void);void RegisterBluePanelClass(void);
int WINAPI wWinMain(HINSTANCE hInstance, HINSTANCE hPrevInstance, PWSTR lpCmdLine, int nCmdShow)
{ MSG msg; WNDCLASSW wc = {0}; wc.lpszClassName = L"ColorWindows"; wc.hInstance = hInstance; wc.hbrBackground = GetSysColorBrush(COLOR_3DFACE); wc.lpfnWndProc = WndProc; wc.hCursor = LoadCursor(0, IDC_ARROW); RegisterClassW(&wc); CreateWindowW(wc.lpszClassName, L"ColorWindows", WS_OVERLAPPEDWINDOW | WS_VISIBLE, 100, 100, 250, 180, 0, 0, hInstance, 0);
while( GetMessage(&msg, NULL, 0, 0)) { TranslateMessage(&msg); DispatchMessage(&msg); }
return (int) msg.wParam;}
LRESULT CALLBACK WndProc( HWND hwnd, UINT msg, WPARAM wParam, LPARAM lParam){ switch(msg) { case WM_CREATE:
RegisterRedPanelClass();

CreateWindowW(L"RedPanelClass", NULL, WS_CHILD | WS_VISIBLE, 20, 20, 80, 80, hwnd, (HMENU) 1, NULL, NULL);
RegisterBluePanelClass();
CreateWindowW(L"BluePanelClass", NULL, WS_CHILD | WS_VISIBLE, 120, 20, 80, 80, hwnd, (HMENU) 2, NULL, NULL);
break;
case WM_DESTROY: PostQuitMessage(0); return 0; }
return DefWindowProcW(hwnd, msg, wParam, lParam);}
LRESULT CALLBACK PanelProc( HWND hwnd, UINT msg, WPARAM wParam, LPARAM lParam ){ switch(msg) { case WM_LBUTTONUP: Beep(50, 40); break; }
return DefWindowProcW(hwnd, msg, wParam, lParam);}
void RegisterRedPanelClass(void) { HBRUSH hbrush = CreateSolidBrush(RGB(255, 0, 0));
WNDCLASSW rwc = {0}; rwc.lpszClassName = L"RedPanelClass"; rwc.hbrBackground = hbrush; rwc.lpfnWndProc = PanelProc; rwc.hCursor = LoadCursor(0, IDC_ARROW); RegisterClassW(&rwc); }
void RegisterBluePanelClass(void) { HBRUSH hbrush = CreateSolidBrush(RGB(0, 0, 255));
WNDCLASSW rwc = {0}; rwc.lpszClassName = L"BluePanelClass"; rwc.hbrBackground = hbrush;

rwc.lpfnWndProc = PanelProc; rwc.hCursor = LoadCursor(0, IDC_ARROW);
RegisterClassW(&rwc);}
We have an application window with two child windows. The two child windows have blue and red backgrounds.
HBRUSH hbrush = CreateSolidBrush(RGB(255, 0, 0));...rwc.hbrBackground = hbrush;
To create a coloured window background, we create a custom solid brush by calling the CreateSolidBrush() function. To specify a colour, we use the RGB macro. As we know, any color can be created by combining red, green a blue colours. Then we set the hbrBackground parameter of the window class structure to this newly created brush.
RegisterRedPanelClass();
CreateWindowW(L"RedPanelClass", NULL, WS_CHILD | WS_VISIBLE, 20, 20, 80, 80, hwnd, (HMENU) 1, NULL, NULL);
First we register a new window class. After this step, we create a window of this class.
Both of our child windows share the PanelProc window procedure. This procedure is called by the Windows OS when we interact with it.
case WM_LBUTTONUP:
Beep(50, 40); break;
We interact with our child windows, when we click on them. By left clicking on the child window, the Windows OS calls the child window procedure and sends a WM_LBUTTONUP message. In our example, we call the Beep() function. If we left click on the background of the two child windows, we hear a beep sound.
void RegisterRedPanelClass(void) { HBRUSH hbrush = CreateSolidBrush(RGB(255, 0, 0));
WNDCLASSW rwc = {0}; rwc.lpszClassName = L"RedPanelClass"; rwc.hbrBackground = hbrush; rwc.lpfnWndProc = PanelProc; rwc.hCursor = LoadCursor(0, IDC_ARROW); RegisterClassW(&rwc); }

This function registers a new window class. Windows of this window class type have red backgrounds. Edit, Button or Static controls are created from predefined window classes, which are already available to all processes. So in these cases we do not need to register a window class for them.
Figure: More windows
The escape keyApplications are often terminated by pressing the escape key. A message box is also shown to confirm the termination.
#include <windows.h>
LRESULT CALLBACK WndProc(HWND, UINT, WPARAM, LPARAM);
int WINAPI wWinMain(HINSTANCE hInstance, HINSTANCE hPrevInstance, PWSTR pCmdLine, int CmdShow){ MSG msg; WNDCLASSW wc = {0}; wc.lpszClassName = L"Escape"; wc.hInstance = hInstance; wc.hbrBackground = GetSysColorBrush(COLOR_3DFACE); wc.lpfnWndProc = WndProc; wc.hCursor = LoadCursor(0, IDC_ARROW); RegisterClassW(&wc); CreateWindowW(wc.lpszClassName, L"Escape", WS_OVERLAPPEDWINDOW | WS_VISIBLE, 100, 100, 250, 180, 0, 0, hInstance, 0);
while( GetMessage(&msg, NULL, 0, 0)) { TranslateMessage(&msg); DispatchMessage(&msg); }
return (int) msg.wParam;}

LRESULT CALLBACK WndProc( HWND hwnd, UINT msg, WPARAM wParam, LPARAM lParam ){ switch(msg) { case WM_KEYDOWN:
if (wParam == VK_ESCAPE) { int ret = MessageBoxW(NULL, L"Are you sure to quit?", L"Message", MB_OKCANCEL); if ( ret == IDOK) { SendMessage(hwnd, WM_CLOSE, 0, 0); } } break;
case WM_DESTROY:
PostQuitMessage(0); break; }
return DefWindowProcW(hwnd, msg, wParam, lParam);}
It is a common practice to ask a user if he really wants to close an application. If we have a clock or a calculator than it does not matter that much. But if we have a text editor or a drawing application, it does matter. We might accidentally press the escape key and loose all our modifications.
case WM_KEYDOWN:
if (wParam == VK_ESCAPE) { int ret = MessageBoxW(NULL, L"Are you sure to quit?", L"Message", MB_OKCANCEL); if ( ret == IDOK) {
SendMessage(hwnd, WM_CLOSE, 0, 0); } } break;
If we press a key, the window procedure receives a WM_KEYDOWN message. The wParam parameter has a key code. We can close the window by sending a WM_CLOSE message.
Moving a windowWhen we move a window on the screen, the window procedure receives the WM_MOVE message. In our example we display the current window position on the screen.
#include <windows.h>#include <wchar.h>

LRESULT CALLBACK WndProc(HWND, UINT, WPARAM, LPARAM);void CreateLabels(HWND);
HWND hwndSta1;HWND hwndSta2;
int WINAPI wWinMain(HINSTANCE hInstance, HINSTANCE hPrevInstance, PWSTR pCmdLine, int CmdShow){ HWND hwnd; MSG msg;
WNDCLASSW wc = {0}; wc.lpszClassName = L"Moving"; wc.hInstance = hInstance ; wc.hbrBackground = GetSysColorBrush(COLOR_3DFACE); wc.lpfnWndProc = WndProc; wc.hCursor = LoadCursor(0, IDC_ARROW); RegisterClassW(&wc); hwnd = CreateWindowW(wc.lpszClassName, L"Moving", WS_OVERLAPPEDWINDOW | WS_VISIBLE, 150, 150, 250, 180, 0, 0, hInstance, 0);
CreateLabels(hwnd);
while( GetMessage(&msg, NULL, 0, 0)) { TranslateMessage(&msg); DispatchMessage(&msg); } return (int) msg.wParam;}
LRESULT CALLBACK WndProc(HWND hwnd, UINT msg, WPARAM wParam, LPARAM lParam){
wchar_t buf[10]; RECT rect;
switch(msg) { case WM_MOVE: GetWindowRect(hwnd, &rect);
_itow(rect.left, buf, 10); SetWindowTextW(hwndSta1, buf);
_itow(rect.top, buf, 10); SetWindowTextW(hwndSta2, buf);
break;
case WM_DESTROY: PostQuitMessage(0); break;
}
return DefWindowProcW(hwnd, msg, wParam, lParam);}
void CreateLabels(HWND hwnd){
CreateWindowW(L"static", L"x: ", WS_CHILD | WS_VISIBLE, 10, 10, 25, 25, hwnd, (HMENU) 1, NULL, NULL);
hwndSta1 = CreateWindowW(L"static", L"150", WS_CHILD | WS_VISIBLE, 40, 10, 55, 25, hwnd, (HMENU) 2, NULL, NULL);
CreateWindowW(L"static", L"y: ", WS_CHILD | WS_VISIBLE, 10, 30, 25, 25, hwnd, (HMENU) 3, NULL, NULL);
hwndSta2 = CreateWindowW(L"static", L"150", WS_CHILD | WS_VISIBLE, 40, 30, 55, 25, hwnd, (HMENU) 4, NULL, NULL);}
Normally, we would create the static text controls during the WM_CREATE message. This was not possible. Because the window is being moved during the creation and we receive error messages. We wanted to access a window that did not exist yet. That's why we put the creation of the static text windows in a separate function, which is called immediately after the main window is created.
void CreateLabels(HWND hwnd){
CreateWindowW(L"static", L"x: ", WS_CHILD | WS_VISIBLE, 10, 10, 25, 25, hwnd, (HMENU) 1, NULL, NULL);
hwndSta1 = CreateWindowW(L"static", L"150", WS_CHILD | WS_VISIBLE, 40, 10, 55, 25, hwnd, (HMENU) 2, NULL, NULL);
CreateWindowW(L"static", L"y: ", WS_CHILD | WS_VISIBLE, 10, 30, 25, 25, hwnd, (HMENU) 3, NULL, NULL);
hwndSta2 = CreateWindowW(L"static", L"150", WS_CHILD | WS_VISIBLE, 40, 30, 55, 25, hwnd, (HMENU) 4, NULL, NULL);

}
There are four static text controls. Two of them change during the life of the application. So we need only two handles.
case WM_MOVE: GetWindowRect(hwnd, &rect);
_itow(rect.left, buf, 10); SetWindowTextW(hwndSta1, buf);
_itow(rect.top, buf, 10); SetWindowTextW(hwndSta2, buf);
break;
To get the window coordinates, we call the GetWindowRect() function. The coordinate is a number. We must convert the number to characters. To accomplish this, we use the _itow() function call.
Figure: Moving a window
Flashing a windowSometimes when an important event happens, the title bar or/and the taskbar button start to flash. The flashing is the change of the title bar from inactive status to active status and vice versa. This is a common feature in Miranda IM, when we receive a new message.
#include <windows.h>
LRESULT CALLBACK WndProc(HWND, UINT, WPARAM, LPARAM);
int WINAPI wWinMain(HINSTANCE hInstance, HINSTANCE hPrevInstance, PWSTR lpCmdLine, int nCmdShow){ MSG msg; WNDCLASSW wc = {0}; wc.lpszClassName = L"Flash";

wc.hInstance = hInstance; wc.hbrBackground = GetSysColorBrush(COLOR_3DFACE); wc.lpfnWndProc = WndProc; wc.hCursor = LoadCursor(0,IDC_ARROW);
RegisterClassW(&wc); CreateWindowW(wc.lpszClassName, L"Flash", WS_OVERLAPPEDWINDOW | WS_VISIBLE, 100, 100, 250, 180, 0, 0, hInstance, 0);
while( GetMessage(&msg, NULL, 0, 0)) { TranslateMessage(&msg); DispatchMessage(&msg); }
return (int) msg.wParam;}
LRESULT CALLBACK WndProc(HWND hwnd, UINT msg, WPARAM wParam, LPARAM lParam ){ FLASHWINFO fwi;
switch(msg) { case WM_CREATE:
CreateWindowW(L"Button", L"Flash", WS_CHILD | WS_VISIBLE, 10, 10, 80, 25, hwnd, (HMENU) 1, NULL, NULL); break;
case WM_COMMAND:
fwi.cbSize = sizeof(fwi); fwi.dwFlags = FLASHW_ALL; fwi.dwTimeout = 0; fwi.hwnd = hwnd; fwi.uCount = 4;
FlashWindowEx(&fwi); break;
case WM_DESTROY:
PostQuitMessage(0); break; }
return DefWindowProcW(hwnd, msg, wParam, lParam);}
In order to flash a window, we must do two steps. Create and fill a FLASHWINFO structure and call the FlashWindowEx() function.
fwi.dwFlags = FLASHW_ALL;
We have set the FLASHW_ALL flag. This will flash both the title bar and the taskbar button. To flash only the titlebar, we use FLASHW_CAPTION. To flash the taskbar button, we can use the FLASHW_TRAY flag.
fwi.dwTimeout = 0;
The dwTimeout member is the rate at which the window is to be flashed, in milliseconds. If dwTimeout is zero, the function uses he default cursor blink rate.
fwi.hwnd = hwnd;fwi.uCount = 4;
Here we set which window to flash and how many times we want to flash it. In our case, we will flash the main window four times.
FlashWindowEx(&fwi);
This function call actually starts the flashing.
In this part of the Winapi tutorial, we have created some simple examples.
MenusIn this part of the Winapi tutorial, we will create menus and toolbars. A menu is a group of commands located in a menubar. A menubar contains a list of menus. Menus can contain either menu items or other menus calls submenus. A menu item that carries out a command is called a command item or a command. On Windows, menubar is sometimes called a toplevel menu, menus and submenus are called popup menus. Menu items are usually grouped into some logical groups. These groups are divided by a separator. The separator is a small vertical line.
A simple menuIn the following example, we will create a menubar and three menu commands. We will also create a separator.
#include <windows.h>
LRESULT CALLBACK WndProc(HWND, UINT, WPARAM, LPARAM);void AddMenus(HWND);
#define IDM_FILE_NEW 1#define IDM_FILE_OPEN 2#define IDM_FILE_QUIT 3
int WINAPI wWinMain(HINSTANCE hInstance, HINSTANCE hPrevInstance,
PWSTR lpCmdLine, int nCmdShow){ MSG msg; WNDCLASSW wc = {0}; wc.lpszClassName = L"Menu"; wc.hInstance = hInstance; wc.hbrBackground = GetSysColorBrush(COLOR_3DFACE); wc.lpfnWndProc = WndProc; wc.hCursor = LoadCursor(0, IDC_ARROW);
RegisterClassW(&wc); CreateWindowW(wc.lpszClassName, L"Menu", WS_OVERLAPPEDWINDOW | WS_VISIBLE, 100, 100, 200, 150, 0, 0, hInstance, 0);
while( GetMessage(&msg, NULL, 0, 0)) { TranslateMessage(&msg); DispatchMessage(&msg); }
return (int) msg.wParam;}
LRESULT CALLBACK WndProc(HWND hwnd, UINT msg, WPARAM wParam, LPARAM lParam){ switch(msg) { case WM_CREATE: AddMenus(hwnd); break;
case WM_COMMAND: switch(LOWORD(wParam)) { case IDM_FILE_NEW: case IDM_FILE_OPEN: Beep(50, 100); break; case IDM_FILE_QUIT: SendMessage(hwnd, WM_CLOSE, 0, 0); break; } break;
case WM_DESTROY: PostQuitMessage(0); break; }
return DefWindowProcW(hwnd, msg, wParam, lParam);}
void AddMenus(HWND hwnd) { HMENU hMenubar; HMENU hMenu;

hMenubar = CreateMenu(); hMenu = CreateMenu();
AppendMenuW(hMenu, MF_STRING, IDM_FILE_NEW, L"&New"); AppendMenuW(hMenu, MF_STRING, IDM_FILE_OPEN, L"&Open"); AppendMenuW(hMenu, MF_SEPARATOR, 0, NULL); AppendMenuW(hMenu, MF_STRING, IDM_FILE_QUIT, L"&Quit");
AppendMenuW(hMenubar, MF_POPUP, (UINT_PTR)hMenu, L"&File"); SetMenu(hwnd, hMenubar);}
Two menu items will make a short sound. THe third will terminate the application.
case WM_COMMAND: switch(LOWORD(wParam)) { case IDM_FILE_NEW: case IDM_FILE_OPEN: Beep(50, 100); break; case IDM_FILE_QUIT: SendMessage(hwnd, WM_CLOSE, 0, 0); break; } break;
If we select a menu item, the window procedure receives the WM_COMMAND message. The menu item id is in the low order word of the wParam value.
hMenubar = CreateMenu();hMenu = CreateMenu();
Menubar and menus are all created using the CreateMenu() function call.
AppendMenuW(hMenu, MF_STRING, IDM_FILE_NEW, L"&New");AppendMenuW(hMenu, MF_STRING, IDM_FILE_OPEN, L"&Open");AppendMenuW(hMenu, MF_SEPARATOR, 0, NULL);AppendMenuW(hMenu, MF_STRING, IDM_FILE_QUIT, L"&Quit");
AppendMenuW(hMenubar, MF_POPUP, (UINT_PTR)hMenu, L"&File");
Menu items and submenus are created using the AppendMenuW() function call. What are we going to append, depends on the flag. The MF_STRING appends a label, the MF_SEPARATOR appends a separator and the MF_POPUP appends a menu.
SetMenu(hwnd, hMenubar);
Finally, we set the menubar calling the SetMenu() function.

Figure: A simple menu
A popup menuA popup menu is also called context menu. It is a list of commands that appears under some context. For example, in a Firefox web browser, when we right click on a web page, we get a context menu. Here we can reload a page, go back or view page source. If we right click on a toolbar, we get another context menu for managing toolbars.
#include <windows.h>
LRESULT CALLBACK WndProc(HWND, UINT, WPARAM, LPARAM);
#define IDM_FILE_NEW 1#define IDM_FILE_OPEN 2#define IDM_FILE_QUIT 3
int WINAPI wWinMain(HINSTANCE hInstance, HINSTANCE hPrevInstance, PWSTR lpCmdLine, int nCmdShow){ MSG msg; WNDCLASSW wc = {0}; wc.lpszClassName = L"Application"; wc.hInstance = hInstance; wc.hbrBackground = GetSysColorBrush(COLOR_3DFACE); wc.lpfnWndProc = WndProc; wc.hCursor = LoadCursor(0, IDC_ARROW);
RegisterClassW(&wc); CreateWindowW(wc.lpszClassName, L"Popup Menu", WS_OVERLAPPEDWINDOW | WS_VISIBLE, 100, 100, 200, 150, 0, 0, hInstance, 0);
while( GetMessage(&msg, NULL, 0, 0)) { TranslateMessage(&msg); DispatchMessage(&msg); }
return (int) msg.wParam;}

LRESULT CALLBACK WndProc( HWND hwnd, UINT msg, WPARAM wParam, LPARAM lParam ){ HMENU hMenu; POINT point;
switch(msg) { case WM_COMMAND: switch(LOWORD(wParam)) { case IDM_FILE_NEW: case IDM_FILE_OPEN: Beep(50, 100); break; case IDM_FILE_QUIT: SendMessage(hwnd, WM_CLOSE, 0, 0); break; } break;
case WM_RBUTTONUP: point.x = LOWORD(lParam); point.y = HIWORD(lParam); hMenu = CreatePopupMenu(); ClientToScreen(hwnd, &point);
AppendMenuW(hMenu, MF_STRING, IDM_FILE_NEW, L"&New"); AppendMenuW(hMenu, MF_STRING, IDM_FILE_OPEN, L"&Open"); AppendMenuW(hMenu, MF_SEPARATOR, 0, NULL); AppendMenuW(hMenu, MF_STRING, IDM_FILE_QUIT, L"&Quit"); TrackPopupMenu(hMenu, TPM_RIGHTBUTTON, point.x, point.y, 0, hwnd, NULL); DestroyMenu(hMenu); break;
case WM_DESTROY: PostQuitMessage(0); break; }
return DefWindowProcW(hwnd, msg, wParam, lParam);}
We have an example with a context menu that has three menu items.
case WM_RBUTTONUP: point.x = LOWORD(lParam); point.y = HIWORD(lParam);...
The WM_RBUTTONUP message is posted when the user releases the right mouse button while the cursor is in the client area of a window. The low-order word of the lParma specifies the x-coordinate of the cursor. The high-order word specifies the y-coordinate of the cursor. The coordinates are relative to the upper-left corner of the client area.
hMenu = CreatePopupMenu();
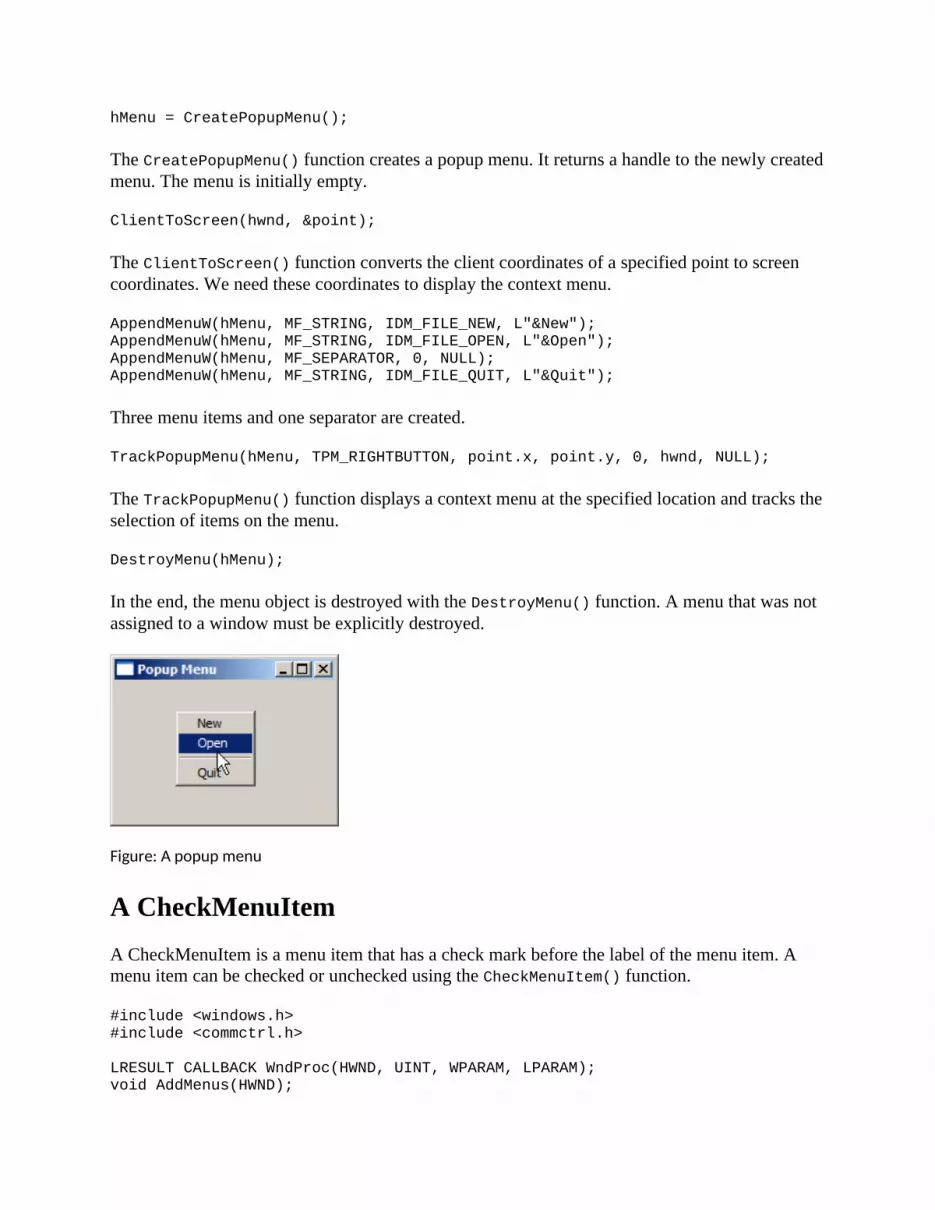
The CreatePopupMenu() function creates a popup menu. It returns a handle to the newly created menu. The menu is initially empty.
ClientToScreen(hwnd, &point);
The ClientToScreen() function converts the client coordinates of a specified point to screen coordinates. We need these coordinates to display the context menu.
AppendMenuW(hMenu, MF_STRING, IDM_FILE_NEW, L"&New");AppendMenuW(hMenu, MF_STRING, IDM_FILE_OPEN, L"&Open");AppendMenuW(hMenu, MF_SEPARATOR, 0, NULL);AppendMenuW(hMenu, MF_STRING, IDM_FILE_QUIT, L"&Quit");
Three menu items and one separator are created.
TrackPopupMenu(hMenu, TPM_RIGHTBUTTON, point.x, point.y, 0, hwnd, NULL);
The TrackPopupMenu() function displays a context menu at the specified location and tracks the selection of items on the menu.
DestroyMenu(hMenu);
In the end, the menu object is destroyed with the DestroyMenu() function. A menu that was not assigned to a window must be explicitly destroyed.
Figure: A popup menu
A CheckMenuItemA CheckMenuItem is a menu item that has a check mark before the label of the menu item. A menu item can be checked or unchecked using the CheckMenuItem() function.
#include <windows.h>#include <commctrl.h>
LRESULT CALLBACK WndProc(HWND, UINT, WPARAM, LPARAM);void AddMenus(HWND);

#define IDM_VIEW_STB 1
HWND ghSb;HMENU ghMenu;
int WINAPI wWinMain(HINSTANCE hInstance, HINSTANCE hPrevInstance, PWSTR lpCmdLine, int nCmdShow){ MSG msg; WNDCLASSW wc = {0}; wc.lpszClassName = L"Menu"; wc.hInstance = hInstance; wc.hbrBackground = GetSysColorBrush(COLOR_3DFACE); wc.lpfnWndProc = WndProc; wc.hCursor = LoadCursor(0, IDC_ARROW);
RegisterClassW(&wc); CreateWindowW(wc.lpszClassName, L"CheckMenu", WS_OVERLAPPEDWINDOW | WS_VISIBLE, 100, 100, 350, 250, 0, 0, hInstance, 0);
while( GetMessage(&msg, NULL, 0, 0)) { TranslateMessage(&msg); DispatchMessage(&msg); }
return (int) msg.wParam;}
LRESULT CALLBACK WndProc(HWND hwnd, UINT msg, WPARAM wParam, LPARAM lParam){ UINT state;
switch(msg) { case WM_CREATE: AddMenus(hwnd); InitCommonControls();
ghSb = CreateWindowExW(0, STATUSCLASSNAMEW, NULL, WS_CHILD | WS_VISIBLE, 0, 0, 0, 0, hwnd, (HMENU) 1, GetModuleHandle(NULL), NULL);
break;
case WM_COMMAND: switch(LOWORD(wParam)) { case IDM_VIEW_STB: state = GetMenuState(ghMenu, IDM_VIEW_STB, MF_BYCOMMAND);
if (state == SW_SHOWNA) {
ShowWindow(ghSb, SW_HIDE); CheckMenuItem(ghMenu, IDM_VIEW_STB, MF_UNCHECKED); } else { ShowWindow(ghSb, SW_SHOWNA); CheckMenuItem(ghMenu, IDM_VIEW_STB, MF_CHECKED); } break; } break;
case WM_SIZE: SendMessage(ghSb, WM_SIZE, wParam, lParam); break;
case WM_DESTROY: PostQuitMessage(0); break; }
return DefWindowProcW(hwnd, msg, wParam, lParam);}
void AddMenus(HWND hwnd) { HMENU hMenubar;
hMenubar = CreateMenu(); ghMenu = CreateMenu();
AppendMenuW(ghMenu, MF_STRING, IDM_VIEW_STB, L"&Statusbar"); CheckMenuItem(ghMenu, IDM_VIEW_STB, MF_CHECKED);
AppendMenuW(hMenubar, MF_POPUP, (UINT_PTR) ghMenu, L"&View"); SetMenu(hwnd, hMenubar);}
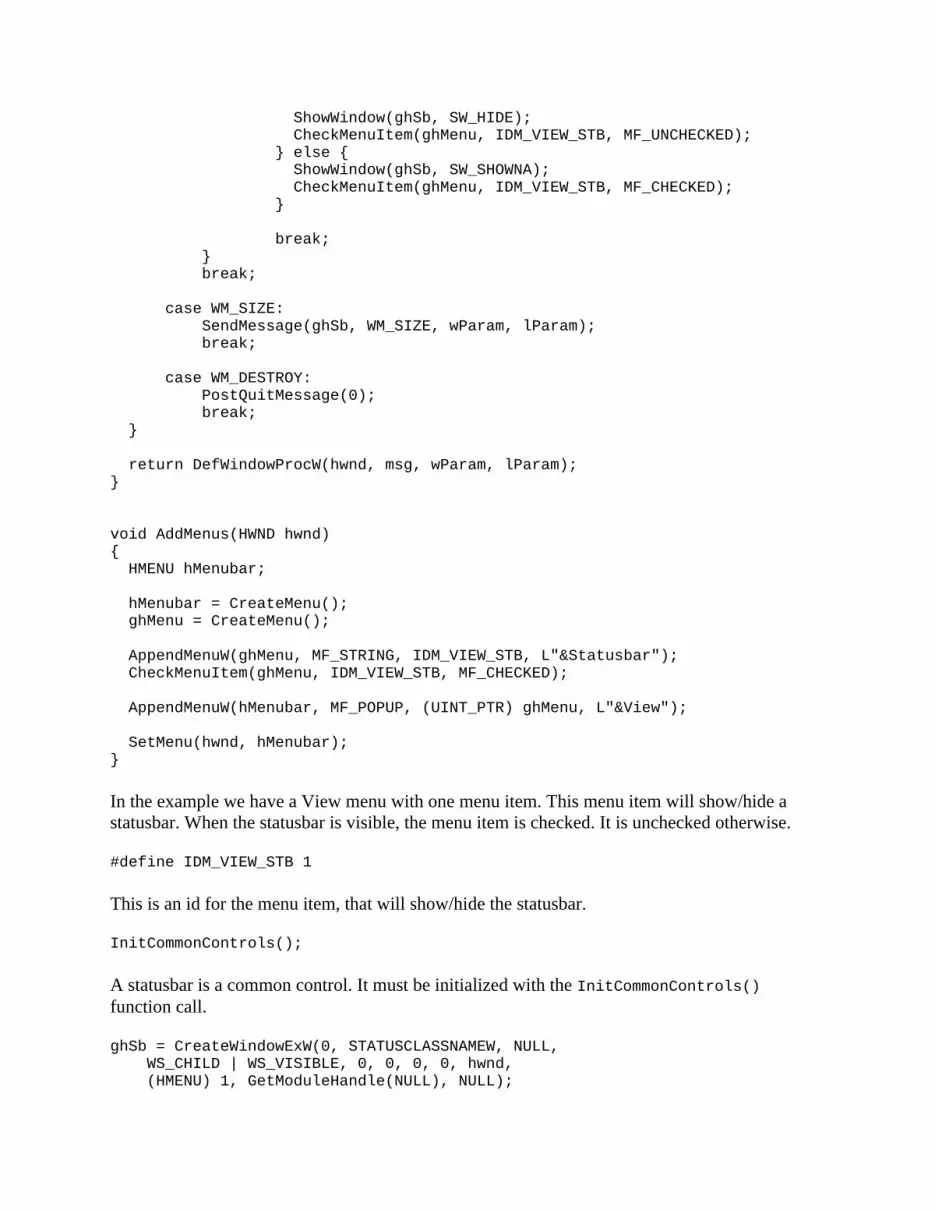
In the example we have a View menu with one menu item. This menu item will show/hide a statusbar. When the statusbar is visible, the menu item is checked. It is unchecked otherwise.
#define IDM_VIEW_STB 1
This is an id for the menu item, that will show/hide the statusbar.
InitCommonControls();
A statusbar is a common control. It must be initialized with the InitCommonControls() function call.
ghSb = CreateWindowExW(0, STATUSCLASSNAMEW, NULL, WS_CHILD | WS_VISIBLE, 0, 0, 0, 0, hwnd, (HMENU) 1, GetModuleHandle(NULL), NULL);

This code creates a statusbar.
state = GetMenuState(ghMenu, IDM_VIEW_STB, MF_BYCOMMAND);
We get the state of the Statusbar menu item.
if (state == SW_SHOWNA) { ShowWindow(ghSb, SW_HIDE); CheckMenuItem(ghMenu, IDM_VIEW_STB, MF_UNCHECKED); } else { ShowWindow(ghSb, SW_SHOWNA); CheckMenuItem(ghMenu, IDM_VIEW_STB, MF_CHECKED); }
Depending on its state, we show/hide the statusbar control using the ShowWindow() function. The menu item is checked/unchecked accordingly with the CheckMenuItem function.
case WM_SIZE: SendMessage(ghSb, WM_SIZE, wParam, lParam); break;
We resize the statusbar to fit the window after the window is being resized.
Figure: A CheckMenuItem
In this part of the Winapi tutorial, we have covered menus.
DialogsDialog windows or dialogs are an indispensable part of most modern GUI applications. A dialog is defined as a conversation between two or more persons. In a computer application a dialog is a window which is used to "talk" to the application. A dialog is used to input data, modify data,

change the application settings etc. Dialogs are important means of communication between a user and a computer program.
Modeless DialogModeless dialogs does not restrict you to working with a particular window. A user can switch between a dialog box and other windows of a program. A typical modeless dialog is a Find/Replace dialog or a floating toolbar.
#include <windows.h>
LRESULT CALLBACK WndProc(HWND, UINT, WPARAM, LPARAM);LRESULT CALLBACK DialogProc(HWND, UINT, WPARAM, LPARAM);
void CreateDialogBox(HWND);void RegisterDialogClass(HWND);
HINSTANCE ghInstance;
int WINAPI WinMain( HINSTANCE hInstance, HINSTANCE hPrevInstance, LPSTR lpCmdLine, int nCmdShow ){ MSG msg ; HWND hwnd;
WNDCLASS wc = {0};
wc.lpszClassName = TEXT( "Window" ); wc.hInstance = hInstance ; wc.hbrBackground = GetSysColorBrush(COLOR_3DFACE); wc.lpfnWndProc = WndProc; RegisterClass(&wc); hwnd = CreateWindow( wc.lpszClassName, TEXT("Window"), WS_OVERLAPPEDWINDOW | WS_VISIBLE, 100, 100, 250, 150, NULL, NULL, hInstance, NULL);
ghInstance = hInstance;
while( GetMessage(&msg, NULL, 0, 0)) { DispatchMessage(&msg); } return (int) msg.wParam;}
LRESULT CALLBACK WndProc( HWND hwnd, UINT msg, WPARAM wParam, LPARAM lParam ){ switch(msg) { case WM_CREATE: RegisterDialogClass(hwnd); CreateWindow(TEXT("button"), TEXT("Show dialog"), WS_VISIBLE | WS_CHILD , 20, 50, 95, 25,

hwnd, (HMENU) 1, NULL, NULL); break;
case WM_COMMAND: CreateDialogBox(hwnd); break;
case WM_DESTROY: { PostQuitMessage(0); return 0; } } return DefWindowProc(hwnd, msg, wParam, lParam);}
LRESULT CALLBACK DialogProc( HWND hwnd, UINT msg, WPARAM wParam, LPARAM lParam ){
switch(msg) { case WM_CREATE:
CreateWindow(TEXT("button"), TEXT("Ok"), WS_VISIBLE | WS_CHILD , 50, 50, 80, 25, hwnd, (HMENU) 1, NULL, NULL); break;
case WM_COMMAND:DestroyWindow(hwnd);break;
case WM_CLOSE: DestroyWindow(hwnd); break;
} return (DefWindowProc(hwnd, msg, wParam, lParam));
}
void RegisterDialogClass(HWND hwnd) { WNDCLASSEX wc = {0}; wc.cbSize = sizeof(WNDCLASSEX); wc.lpfnWndProc = (WNDPROC) DialogProc; wc.hInstance = ghInstance; wc.hbrBackground = GetSysColorBrush(COLOR_3DFACE); wc.lpszClassName = TEXT("DialogClass"); RegisterClassEx(&wc);
}
void CreateDialogBox(HWND hwnd){

CreateWindowEx(WS_EX_DLGMODALFRAME | WS_EX_TOPMOST, TEXT("DialogClass"), TEXT("Dialog Box"), WS_VISIBLE | WS_SYSMENU | WS_CAPTION , 100, 100, 200, 150, NULL, NULL, ghInstance, NULL);}
A dialog is only a special kind of a window. It is created as a normal window with some specific flags.
CreateWindowEx(WS_EX_DLGMODALFRAME | WS_EX_TOPMOST, TEXT("DialogClass"), TEXT("Dialog Box"), WS_VISIBLE | WS_SYSMENU | WS_CAPTION , 100, 100, 200, 150, NULL, NULL, ghInstance, NULL);
The dialog is crated with a combination of regular flags WS_VISIBLE | WS_SYSMENU | WS_CAPTION and extended flags WS_EX_DLGMODALFRAME | WS_EX_TOPMOST.
Figure: Modeless dialog
Common Dialog BoxesThese are dialogs for performing common tasks. Opening and saving files, printing documents, choosing color etc. Common dialog boxes save programmers a lot of work. They help promote standards in applications.
Color dialog box
This is a common dialog for choosing color.
#include <windows.h>
LRESULT CALLBACK WndProc(HWND, UINT, WPARAM, LPARAM);LRESULT CALLBACK PanelProc(HWND, UINT, WPARAM, LPARAM);
void RegisterPanel(void);COLORREF ShowColorDialog(HWND);

COLORREF gColor = RGB(255, 255, 255);
int WINAPI WinMain( HINSTANCE hInstance, HINSTANCE hPrevInstance, LPSTR lpCmdLine, int nCmdShow ){ MSG msg ; WNDCLASS wc = {0}; wc.lpszClassName = TEXT( "Color dialog box" ); wc.hInstance = hInstance ; wc.hbrBackground = GetSysColorBrush(COLOR_3DFACE); wc.lpfnWndProc = WndProc ; RegisterClass(&wc); CreateWindow( wc.lpszClassName, TEXT("Color dialog box"), WS_OVERLAPPEDWINDOW | WS_VISIBLE, 150, 150, 250, 200, 0, 0, hInstance, 0);
while( GetMessage(&msg, NULL, 0, 0)) { DispatchMessage(&msg); } return (int) msg.wParam;}
LRESULT CALLBACK WndProc( HWND hwnd, UINT msg, WPARAM wParam, LPARAM lParam ){
static HWND hwndPanel;
switch(msg) { case WM_CREATE: { CreateWindow(TEXT("button"), TEXT("Color"),
WS_VISIBLE | WS_CHILD , 20, 30, 80, 25, hwnd, (HMENU) 1, NULL, NULL);
RegisterPanel(); hwndPanel = CreateWindow(TEXT("Panel"), NULL,
WS_CHILD | WS_VISIBLE, 130, 30, 80, 80, hwnd, (HMENU) 2, NULL, NULL);
break;}
case WM_COMMAND:{
gColor = ShowColorDialog(hwnd); InvalidateRect(hwndPanel, NULL, TRUE); break;
}
case WM_DESTROY: { PostQuitMessage(0); break;

} }
return DefWindowProc(hwnd, msg, wParam, lParam);}
LRESULT CALLBACK PanelProc( HWND hwnd, UINT msg, WPARAM wParam, LPARAM lParam ){ HDC hdc; PAINTSTRUCT ps; RECT rect;
switch(msg) { case WM_PAINT: { GetClientRect(hwnd, &rect); hdc = BeginPaint(hwnd, &ps); SetBkColor(hdc, gColor); ExtTextOut(hdc, 0, 0, ETO_OPAQUE, &rect, TEXT(""), 0, NULL); EndPaint(hwnd, &ps); break; } } return DefWindowProc(hwnd, msg, wParam, lParam);}
COLORREF ShowColorDialog(HWND hwnd) {
CHOOSECOLOR cc; static COLORREF crCustClr[16];
ZeroMemory(&cc, sizeof(cc)); cc.lStructSize = sizeof(cc); cc.hwndOwner = hwnd; cc.lpCustColors = (LPDWORD) crCustClr; cc.rgbResult = RGB(0, 255, 0); cc.Flags = CC_FULLOPEN | CC_RGBINIT; ChooseColor(&cc);
return cc.rgbResult;}
void RegisterPanel(void) {
WNDCLASS rwc = {0}; rwc.lpszClassName = TEXT( "Panel" ); rwc.hbrBackground = (HBRUSH) GetStockObject(WHITE_BRUSH); rwc.lpfnWndProc = PanelProc; RegisterClass(&rwc);}

In our example, we have a button control and a child window. The color of the child window is white at the beginning.We can change the color of the child window, by pressing on the button and choosing a custom color value.
COLORREF gColor = RGB(255, 255, 255);
We define a global color value. White by default.
gColor = ShowColorDialog(hwnd);
The color dialog box is shown in the ShowColorDialog() user function. The function returns the chosen color value.
CHOOSECOLOR cc;
To create a color dialog box, we must define and fill a CHOOSECOLOR structure.
cc.rgbResult = RGB(0, 255, 0); cc.Flags = CC_FULLOPEN | CC_RGBINIT;
If we provide the CC_RGBINIT than the rgbResult member is the initial selected color, when the dialog is displayed. If the user clicks the OK button, rgbResult specifies the user's color selection.
ChooseColor(&cc);
The color dialog box is displayed.
gColor = ShowColorDialog(hwnd); InvalidateRect(hwndPanel, NULL, TRUE);
After we obtain the color value, we call the InvalidateRect() function. This function will send WM_PAINT message to our child window.
SetBkColor(hdc, gColor); ExtTextOut(hdc, 0, 0, ETO_OPAQUE, &rect, TEXT(""), 0, NULL);
In the panel procedure, we change the background color of the child window. Besides displaying text on the window, the ExtTextOut() function can also change the window background color. We won't display any text, we only change the background color. If we provide the ETO_OPAQUE flag, the ExtTextOut() function will use the color, specified by the SetBkColor() function.

Figure: Color dialog box
Openfile dialog box
This is a common dialog for opening files. Don't use UNICODE, to compile this example.
#include <windows.h>
LRESULT CALLBACK WndProc(HWND, UINT, WPARAM, LPARAM);void CreateMenubar(HWND);void OpenDialog(HWND);void LoadFile(LPSTR);
#define IDM_FILE_NEW 1HWND ghwndEdit;
int WINAPI WinMain( HINSTANCE hInstance, HINSTANCE hPrevInstance, LPSTR lpCmdLine, int nCmdShow ){ MSG msg ; WNDCLASS wc = {0}; wc.lpszClassName = TEXT( "Opendialog" ); wc.hInstance = hInstance ; wc.hbrBackground = GetSysColorBrush(COLOR_3DFACE); wc.lpfnWndProc = WndProc ; wc.hCursor = LoadCursor(0, IDC_ARROW);
RegisterClass(&wc);
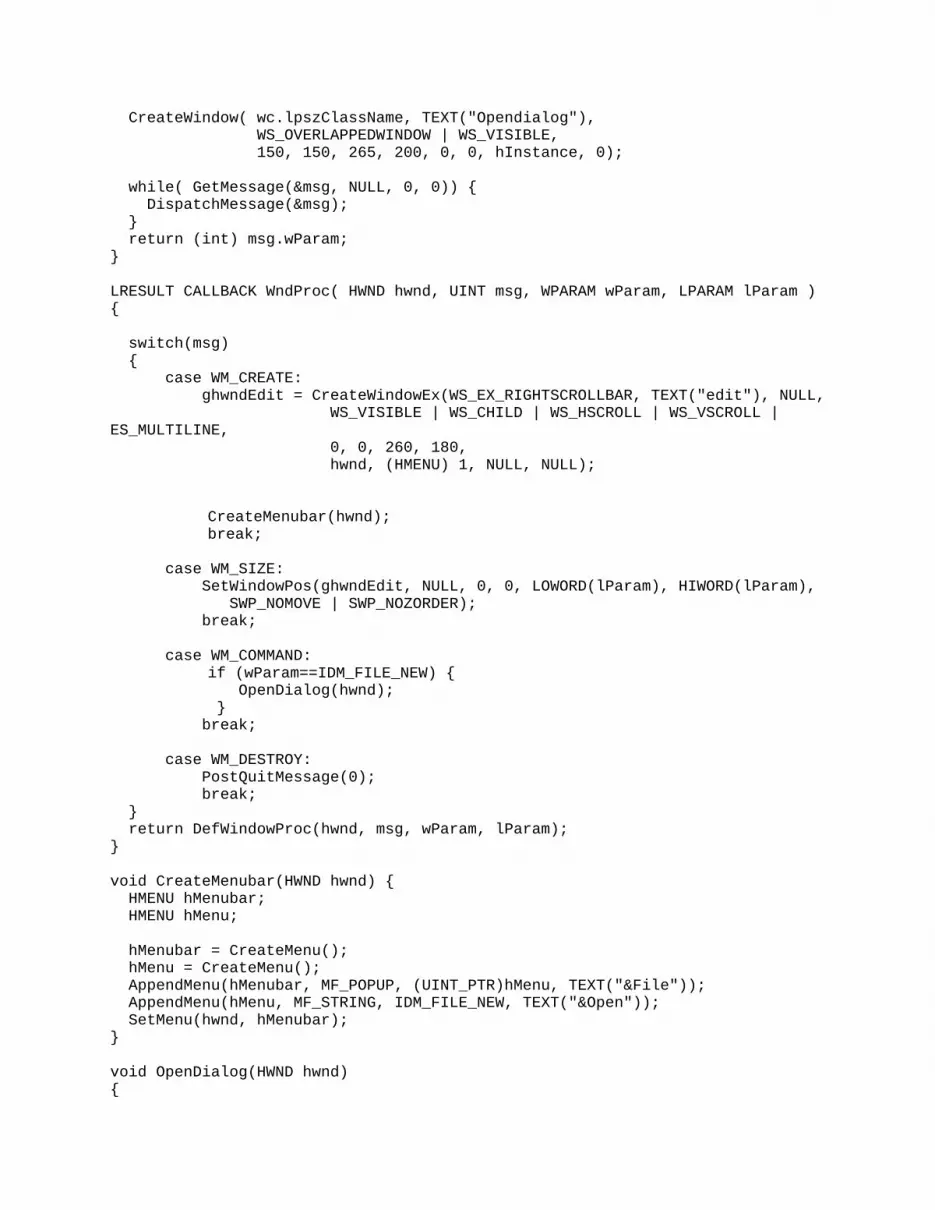
CreateWindow( wc.lpszClassName, TEXT("Opendialog"), WS_OVERLAPPEDWINDOW | WS_VISIBLE, 150, 150, 265, 200, 0, 0, hInstance, 0);
while( GetMessage(&msg, NULL, 0, 0)) { DispatchMessage(&msg); } return (int) msg.wParam;}
LRESULT CALLBACK WndProc( HWND hwnd, UINT msg, WPARAM wParam, LPARAM lParam ){ switch(msg) { case WM_CREATE: ghwndEdit = CreateWindowEx(WS_EX_RIGHTSCROLLBAR, TEXT("edit"), NULL, WS_VISIBLE | WS_CHILD | WS_HSCROLL | WS_VSCROLL | ES_MULTILINE, 0, 0, 260, 180, hwnd, (HMENU) 1, NULL, NULL);
CreateMenubar(hwnd); break;
case WM_SIZE: SetWindowPos(ghwndEdit, NULL, 0, 0, LOWORD(lParam), HIWORD(lParam), SWP_NOMOVE | SWP_NOZORDER); break;
case WM_COMMAND: if (wParam==IDM_FILE_NEW) {
OpenDialog(hwnd); }
break;
case WM_DESTROY: PostQuitMessage(0); break; } return DefWindowProc(hwnd, msg, wParam, lParam);}
void CreateMenubar(HWND hwnd) { HMENU hMenubar; HMENU hMenu;
hMenubar = CreateMenu(); hMenu = CreateMenu(); AppendMenu(hMenubar, MF_POPUP, (UINT_PTR)hMenu, TEXT("&File")); AppendMenu(hMenu, MF_STRING, IDM_FILE_NEW, TEXT("&Open")); SetMenu(hwnd, hMenubar);}
void OpenDialog(HWND hwnd) {

OPENFILENAME ofn; TCHAR szFile[MAX_PATH];
ZeroMemory(&ofn, sizeof(ofn)); ofn.lStructSize = sizeof(ofn); ofn.lpstrFile = szFile; ofn.lpstrFile[0] = '\0'; ofn.hwndOwner = hwnd; ofn.nMaxFile = sizeof(szFile); ofn.lpstrFilter = TEXT("All files(*.*)\0*.*\0"); ofn.nFilterIndex = 1; ofn.lpstrInitialDir = NULL; ofn.lpstrFileTitle = NULL; ofn.Flags = OFN_PATHMUSTEXIST | OFN_FILEMUSTEXIST;
if(GetOpenFileName(&ofn)) LoadFile(ofn.lpstrFile);}
void LoadFile(LPSTR file){ HANDLE hFile; DWORD dwSize; DWORD dw;
LPBYTE lpBuffer = NULL;
hFile = CreateFile(file, GENERIC_READ, 0, NULL, OPEN_EXISTING, 0, NULL); dwSize = GetFileSize(hFile, NULL); lpBuffer = (LPBYTE) HeapAlloc(GetProcessHeap(), HEAP_GENERATE_EXCEPTIONS, dwSize + 1); ReadFile(hFile, (LPWSTR)lpBuffer, dwSize, &dw, NULL); CloseHandle(hFile); lpBuffer[dwSize] = 0; SetWindowText(ghwndEdit, (LPSTR) lpBuffer); HeapFree(GetProcessHeap(), 0, lpBuffer);}
In this example, we create a window with a multiline edit control.
To create an openfile dialog box, we create and fill the OPENFILENAME structure.
ofn.lpstrFile = szFile;
If the OpenFileName() function returns TRUE, the name of the selected file is in the lpstrFile member.
ofn.lpstrFilter = TEXT("All files(*.*)\0*.*\0");
This defines the file filter. In our example, the dialog shows all file types.
ofn.nFilterIndex = 1;

Specifies the index of the currently selected filter in the File Types combo box control.
if(GetOpenFileName(&ofn)) LoadFile(ofn.lpstrFile);
We call the GetOpenFileName() function to show the Openfile dialog box. If we click on the Open button, the function returns TRUE and we call the user defined LoadFile() function.
Inside the LoadFile() function, we read the file and put the contents of the file into the edit control. We create a file handle. Than we find out the file size. Allocate dynamic memory for the contents of the file. Read the contents into the memory and put them into the edit control. To put the contents into the edit control, we call the SetWindowText() function. We must not forget to close the file handle and free the dynamic memory.
Figure: Openfile dialog box
In this part of the Winapi tutorial, we worked with dialogs.
Windows controls I

Controls are basic building blocks of a windows application. Controls are called widgets in UNIX environment.
Static controlThe static control displays text and graphics. The static control cannot be selected. It cannot have keyboard focus.
#include <windows.h>
LRESULT CALLBACK WndProc(HWND, UINT, WPARAM, LPARAM);
int WINAPI wWinMain(HINSTANCE hInstance, HINSTANCE hPrevInstance, PWSTR lpCmdLine, int nCmdShow){ MSG msg; WNDCLASSW wc = {0}; wc.lpszClassName = L"Static Control"; wc.hInstance = hInstance; wc.hbrBackground = GetSysColorBrush(COLOR_3DFACE); wc.lpfnWndProc = WndProc; wc.hCursor = LoadCursor(0,IDC_ARROW);
RegisterClassW(&wc); CreateWindowW(wc.lpszClassName, L"Criminal", WS_OVERLAPPEDWINDOW | WS_VISIBLE, 100, 100, 330, 270, 0, 0, hInstance, 0);
while( GetMessage(&msg, NULL, 0, 0)) { TranslateMessage(&msg); DispatchMessage(&msg); }
return (int) msg.wParam;}
LRESULT CALLBACK WndProc(HWND hwnd, UINT msg, WPARAM wParam, LPARAM lParam){ static wchar_t *lyrics = L"I know you told me I should stay away\n\I know you said he's just a dog astray\n\He is a bad boy with a tainted heart\n\And even I know this ain't smart\n\\n\But mama, I'm in love with a criminal\n\And this type of love isn't rational, it's physical\n\Mama, please don't cry, I will be alright\n\All reason aside, I just can't deny, love the guy\n\";
switch(msg) {

case WM_CREATE: CreateWindowW(L"STATIC", lyrics, WS_CHILD | WS_VISIBLE | SS_LEFT, 20, 20, 300, 230, hwnd, (HMENU) 1, NULL, NULL); break;
case WM_DESTROY:
PostQuitMessage(0); break; }
return DefWindowProcW(hwnd, msg, wParam, lParam);}
We show lyrics of a song on a window.
CreateWindowW(L"STATIC", lyrics, WS_CHILD | WS_VISIBLE | SS_LEFT, 20, 20, 300, 230, hwnd, (HMENU) 1, NULL, NULL);break;
Here we create the static control. We display text. It is aligned to the left.
Static control
ButtonA button is a simple control. It has a text label. It is used to trigger an action. When we click on a button, it sends a WM_COMMAND message to its parent window. The low-order word of the wParam parameter contains the control identifier.

#include <windows.h>
LRESULT CALLBACK WndProc(HWND, UINT, WPARAM, LPARAM);
int WINAPI wWinMain(HINSTANCE hInstance, HINSTANCE hPrevInstance, PWSTR lpCmdLine, int nCmdShow){ MSG msg; WNDCLASSW wc = {0}; wc.lpszClassName = L"Buttons"; wc.hInstance = hInstance; wc.hbrBackground = GetSysColorBrush(COLOR_3DFACE); wc.lpfnWndProc = WndProc; wc.hCursor = LoadCursor(0, IDC_ARROW);
RegisterClassW(&wc); CreateWindowW(wc.lpszClassName, L"Buttons", WS_OVERLAPPEDWINDOW | WS_VISIBLE, 150, 150, 230, 150, 0, 0, hInstance, 0);
while( GetMessage(&msg, NULL, 0, 0)) { TranslateMessage(&msg); DispatchMessage(&msg); }
return (int) msg.wParam;}
LRESULT CALLBACK WndProc(HWND hwnd, UINT msg, WPARAM wParam, LPARAM lParam){ switch(msg) { case WM_CREATE:
CreateWindowW(L"button", L"Beep", WS_VISIBLE | WS_CHILD , 20, 50, 80, 25, hwnd, (HMENU) 1, NULL, NULL);
CreateWindowW(L"button", L"Quit", WS_VISIBLE | WS_CHILD , 120, 50, 80, 25, hwnd, (HMENU) 2, NULL, NULL); break;
case WM_COMMAND:
if (LOWORD(wParam) == 1) { Beep(40, 50); }
if (LOWORD(wParam) == 2) { PostQuitMessage(0); }

break;
case WM_DESTROY:
PostQuitMessage(0); break; }
return DefWindowProcW(hwnd, msg, wParam, lParam);}
In our example we have created two buttons. On button will beep. The other one will close the window.
case WM_COMMAND:
if (LOWORD(wParam) == 1) { Beep(40, 50); }
if (LOWORD(wParam) == 2) { PostQuitMessage(0); }
break;
The control id is in the LOWORD of the wParam. Depending on the control id, we call the Beep() function or the PostQuitMessage() function.
Button controls
Check boxA check box control is a box that you can click to turn an option on or off.
#include <windows.h>#include <stdbool.h>
LRESULT CALLBACK WndProc(HWND, UINT, WPARAM, LPARAM);

int WINAPI wWinMain(HINSTANCE hInstance, HINSTANCE hPrevInstance, PWSTR lpCmdLine, int nCmdShow){ MSG msg; WNDCLASSW wc = {0}; wc.lpszClassName = L"Check Box"; wc.hInstance = hInstance ; wc.hbrBackground = GetSysColorBrush(COLOR_3DFACE); wc.lpfnWndProc = WndProc; wc.hCursor = LoadCursor(0, IDC_ARROW);
RegisterClassW(&wc); CreateWindowW(wc.lpszClassName, L"Check Box", WS_OVERLAPPEDWINDOW | WS_VISIBLE, 150, 150, 230, 150, 0, 0, hInstance, 0);
while( GetMessage(&msg, NULL, 0, 0)) { TranslateMessage(&msg); DispatchMessage(&msg); }
return (int) msg.wParam;}
LRESULT CALLBACK WndProc(HWND hwnd, UINT msg, WPARAM wParam, LPARAM lParam){ bool checked = true;
switch(msg) { case WM_CREATE:
CreateWindowW(L"button", L"Show Title", WS_VISIBLE | WS_CHILD | BS_CHECKBOX, 20, 20, 185, 35, hwnd, (HMENU) 1, NULL, NULL);
CheckDlgButton(hwnd, 1, BST_CHECKED); break;
case WM_COMMAND:
checked = IsDlgButtonChecked(hwnd, 1);
if (checked) {
CheckDlgButton(hwnd, 1, BST_UNCHECKED); SetWindowTextW(hwnd, L"");
} else {
CheckDlgButton(hwnd, 1, BST_CHECKED); SetWindowTextW(hwnd, L"Check Box"); } break;

case WM_DESTROY:
PostQuitMessage(0); break; }
return DefWindowProcW(hwnd, msg, wParam, lParam);}
In our example, we show or hide the window title depending on the state of the check box. In Windows, check box is a special kind of a button. We create a check box, if we set a specific style to the button class. In our example, it is BS_CHECKBOX.
checked = IsDlgButtonChecked(hwnd, 1);
We determine the state of the check box using the IsDlgButtonChecked() function.
CheckDlgButton(hwnd, 1, BST_UNCHECKED);
We check and uncheck the check box using the CheckDlgButton() function.
SetWindowTextW(hwnd, L"");
The SetWindowTextW() function sets the title of the window.
Checkbox control
Edit ControlEdit control is a rectangular child window. Edit control is used to enter and edit text. It can be single line or multiline.
#include <windows.h>
#define ID_EDIT 1#define ID_BUTTON 2
LRESULT CALLBACK WndProc(HWND, UINT, WPARAM, LPARAM);
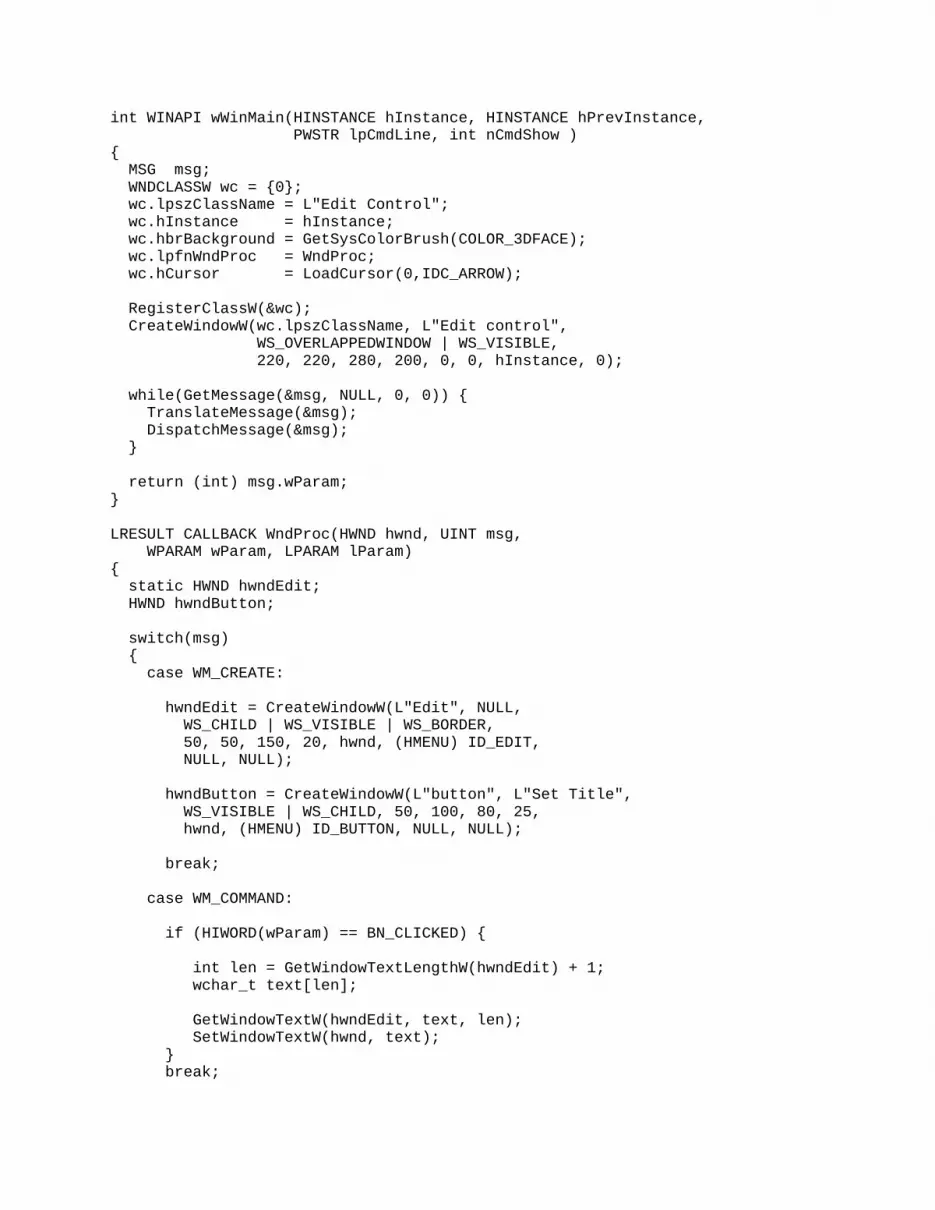
int WINAPI wWinMain(HINSTANCE hInstance, HINSTANCE hPrevInstance, PWSTR lpCmdLine, int nCmdShow ){ MSG msg; WNDCLASSW wc = {0}; wc.lpszClassName = L"Edit Control"; wc.hInstance = hInstance; wc.hbrBackground = GetSysColorBrush(COLOR_3DFACE); wc.lpfnWndProc = WndProc; wc.hCursor = LoadCursor(0,IDC_ARROW);
RegisterClassW(&wc); CreateWindowW(wc.lpszClassName, L"Edit control", WS_OVERLAPPEDWINDOW | WS_VISIBLE, 220, 220, 280, 200, 0, 0, hInstance, 0);
while(GetMessage(&msg, NULL, 0, 0)) { TranslateMessage(&msg); DispatchMessage(&msg); }
return (int) msg.wParam;}
LRESULT CALLBACK WndProc(HWND hwnd, UINT msg, WPARAM wParam, LPARAM lParam){ static HWND hwndEdit; HWND hwndButton;
switch(msg) { case WM_CREATE:
hwndEdit = CreateWindowW(L"Edit", NULL, WS_CHILD | WS_VISIBLE | WS_BORDER, 50, 50, 150, 20, hwnd, (HMENU) ID_EDIT, NULL, NULL);
hwndButton = CreateWindowW(L"button", L"Set Title", WS_VISIBLE | WS_CHILD, 50, 100, 80, 25, hwnd, (HMENU) ID_BUTTON, NULL, NULL);
break;
case WM_COMMAND:
if (HIWORD(wParam) == BN_CLICKED) {
int len = GetWindowTextLengthW(hwndEdit) + 1; wchar_t text[len];
GetWindowTextW(hwndEdit, text, len); SetWindowTextW(hwnd, text); } break;

case WM_DESTROY: PostQuitMessage(0); break; }
return DefWindowProcW(hwnd, msg, wParam, lParam);}
In our example, we have an edit control and a button. We can put some text into the edit control. If we click on the button, the entered text will be displayed in the titlebar of the main window.
if (HIWORD(wParam) == BN_CLICKED) {
int len = GetWindowTextLengthW(hwndEdit) + 1; wchar_t text[len];
GetWindowTextW(hwndEdit, text, len); SetWindowTextW(hwnd, text);}
The GetWindowTextLengthW() returns the text length entered. Notice, that we add 1 to the length. This is to include the zero terminator. Try to omit it and see what happens. The GetWindowTextW() receives the text from the edit control. We use hwndEdit as an id. The SetWindowTextW() sets the text for the window. In this context, it is a title of the main window.
Figure: Edit control
In this part of the Winapi tutorial, we have covered Windows controls.
Controls II.We continue with Windows Controls. We will show how to use a Trackbar, a Tooltip and a Month calendar control.
Trackbar

A trackbar is a window that contains a slider and optional tick marks. We move the slider using the mouse or keyboard. A trackbar is used to select discrete values from a range of consecutive values. This control is called a slider on other platforms.
#include <windows.h>#include <commctrl.h>
LRESULT CALLBACK WndProc(HWND, UINT, WPARAM, LPARAM);void CreateControls(HWND hwnd);void UpdateLabel(void);
HWND hTrack;HWND hlbl;
int WINAPI wWinMain(HINSTANCE hInstance, HINSTANCE hPrevInstance, PWSTR lpCmdLine, int nCmdShow){ HWND hwnd; MSG msg ;
WNDCLASSW wc = {0}; wc.lpszClassName = L"Trackbar"; wc.hInstance = hInstance ; wc.hbrBackground = GetSysColorBrush(COLOR_3DFACE); wc.lpfnWndProc = WndProc ; wc.hCursor = LoadCursor(0,IDC_ARROW); RegisterClassW(&wc); hwnd = CreateWindowW(wc.lpszClassName, L"Trackbar", WS_OVERLAPPEDWINDOW | WS_VISIBLE, 100, 100, 350, 180, 0, 0, hInstance, 0); while( GetMessage(&msg, NULL, 0, 0)) { TranslateMessage(&msg); DispatchMessage(&msg); }
return (int) msg.wParam;}
LRESULT CALLBACK WndProc( HWND hwnd, UINT msg, WPARAM wParam, LPARAM lParam ){ switch(msg) { case WM_CREATE: CreateControls(hwnd); break;
case WM_HSCROLL: UpdateLabel(); break;
case WM_DESTROY: PostQuitMessage(0); break; }
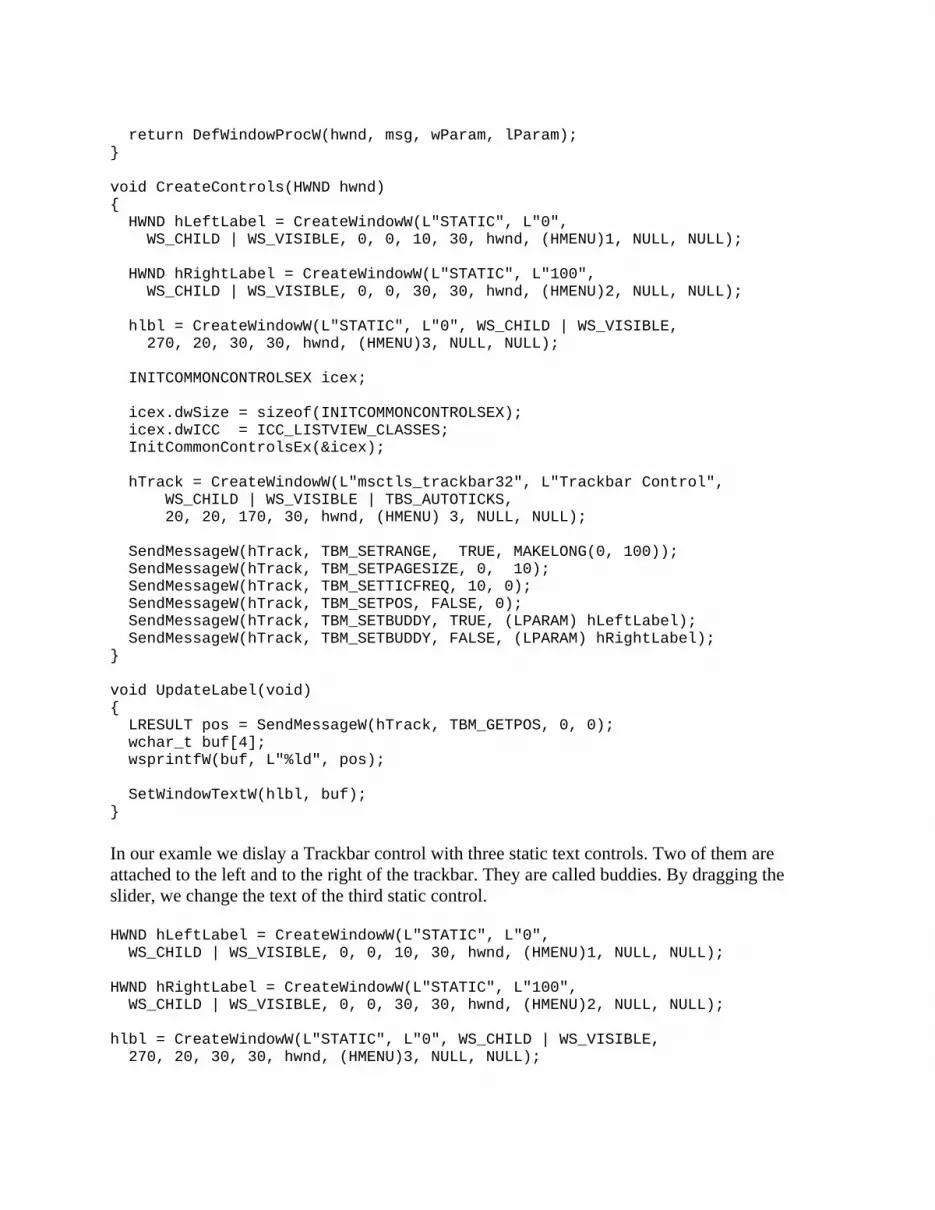
return DefWindowProcW(hwnd, msg, wParam, lParam);}
void CreateControls(HWND hwnd){ HWND hLeftLabel = CreateWindowW(L"STATIC", L"0", WS_CHILD | WS_VISIBLE, 0, 0, 10, 30, hwnd, (HMENU)1, NULL, NULL);
HWND hRightLabel = CreateWindowW(L"STATIC", L"100", WS_CHILD | WS_VISIBLE, 0, 0, 30, 30, hwnd, (HMENU)2, NULL, NULL);
hlbl = CreateWindowW(L"STATIC", L"0", WS_CHILD | WS_VISIBLE, 270, 20, 30, 30, hwnd, (HMENU)3, NULL, NULL);
INITCOMMONCONTROLSEX icex;
icex.dwSize = sizeof(INITCOMMONCONTROLSEX); icex.dwICC = ICC_LISTVIEW_CLASSES; InitCommonControlsEx(&icex);
hTrack = CreateWindowW(L"msctls_trackbar32", L"Trackbar Control", WS_CHILD | WS_VISIBLE | TBS_AUTOTICKS, 20, 20, 170, 30, hwnd, (HMENU) 3, NULL, NULL);
SendMessageW(hTrack, TBM_SETRANGE, TRUE, MAKELONG(0, 100)); SendMessageW(hTrack, TBM_SETPAGESIZE, 0, 10); SendMessageW(hTrack, TBM_SETTICFREQ, 10, 0); SendMessageW(hTrack, TBM_SETPOS, FALSE, 0); SendMessageW(hTrack, TBM_SETBUDDY, TRUE, (LPARAM) hLeftLabel); SendMessageW(hTrack, TBM_SETBUDDY, FALSE, (LPARAM) hRightLabel); }
void UpdateLabel(void){ LRESULT pos = SendMessageW(hTrack, TBM_GETPOS, 0, 0); wchar_t buf[4]; wsprintfW(buf, L"%ld", pos);
SetWindowTextW(hlbl, buf);}
In our examle we dislay a Trackbar control with three static text controls. Two of them are attached to the left and to the right of the trackbar. They are called buddies. By dragging the slider, we change the text of the third static control.
HWND hLeftLabel = CreateWindowW(L"STATIC", L"0", WS_CHILD | WS_VISIBLE, 0, 0, 10, 30, hwnd, (HMENU)1, NULL, NULL);
HWND hRightLabel = CreateWindowW(L"STATIC", L"100", WS_CHILD | WS_VISIBLE, 0, 0, 30, 30, hwnd, (HMENU)2, NULL, NULL);
hlbl = CreateWindowW(L"STATIC", L"0", WS_CHILD | WS_VISIBLE, 270, 20, 30, 30, hwnd, (HMENU)3, NULL, NULL);

Three static controls are created. Two controls will display the minimum and maximum value of the Trackbar control. The last one will display the currently selected value.
INITCOMMONCONTROLSEX icex;
icex.dwSize = sizeof(INITCOMMONCONTROLSEX);icex.dwICC = ICC_LISTVIEW_CLASSES;InitCommonControlsEx(&icex);
If we want to use one of the common controls, we need to load the common control DLL (comctl32.dll) and register specific common control classes from the DLL. The InitCommonControlsEx() must call this function before creating a common control.
hTrack = CreateWindowW(L"msctls_trackbar32", L"Trackbar Control", WS_CHILD | WS_VISIBLE | TBS_AUTOTICKS, 20, 20, 170, 30, hwnd, (HMENU) 3, NULL, NULL);
A Trackbar common control is created. The TBS_AUTOTICKS style creates a tick mark for each increment in its range of values.
SendMessageW(hTrack, TBM_SETRANGE, TRUE, MAKELONG(0, 100)); SendMessageW(hTrack, TBM_SETPAGESIZE, 0, 10); SendMessageW(hTrack, TBM_SETTICFREQ, 10, 0); SendMessageW(hTrack, TBM_SETPOS, FALSE, 0);
We are not yet finished with the Trackbar control. We send four messages to the control. We send a TBM_SETRANGE to set the trackbar range. To set the page size, we send the TBM_SETPAGESIZE message. To set the tick frequency, we send the TBM_SETTICFREQ message. To set the current slider position we send the TBM_SETPOS.
SendMessageW(hTrack, TBM_SETBUDDY, TRUE, (LPARAM) hLeftLabel); SendMessageW(hTrack, TBM_SETBUDDY, FALSE, (LPARAM) hRightLabel);
We set the Trackbar buddies by sending the TBM_SETBUDDY message. The third parameter will decide, whethe the buddy is located to the left (TRUE) or to the right (FALSE) of the control.
case WM_HSCROLL: UpdateLabel(); break;
When we move the Trackbar slider, the window procedure receives the WM_HSCROLL message. (In case of a horizontal trackbar.)
void UpdateLabel(void){ LRESULT pos = SendMessageW(hTrack, TBM_GETPOS, 0, 0); wchar_t buf[4]; wsprintfW(buf, L"%ld", pos);
SetWindowTextW(hlbl, buf);}
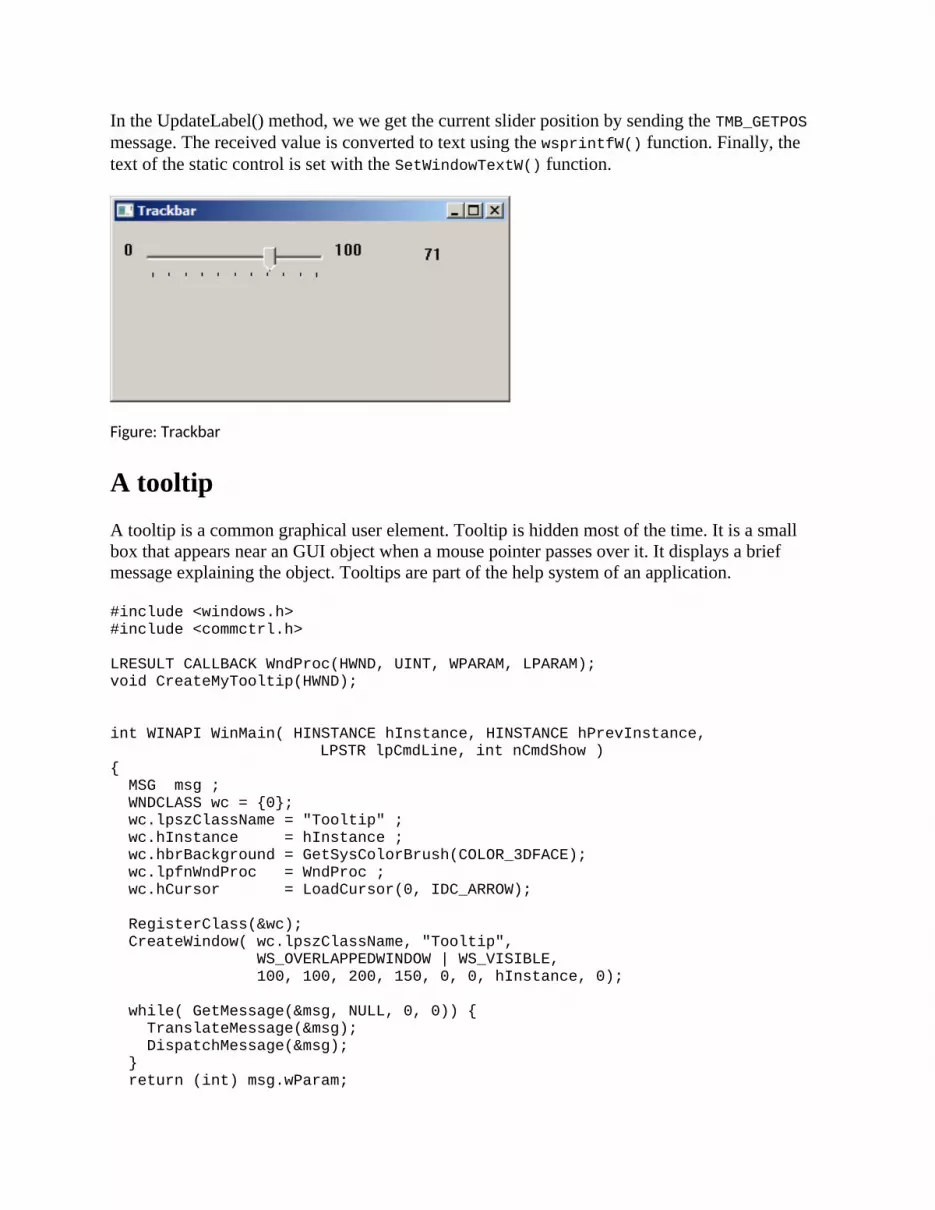
In the UpdateLabel() method, we we get the current slider position by sending the TMB_GETPOS message. The received value is converted to text using the wsprintfW() function. Finally, the text of the static control is set with the SetWindowTextW() function.
Figure: Trackbar
A tooltipA tooltip is a common graphical user element. Tooltip is hidden most of the time. It is a small box that appears near an GUI object when a mouse pointer passes over it. It displays a brief message explaining the object. Tooltips are part of the help system of an application.
#include <windows.h>#include <commctrl.h>
LRESULT CALLBACK WndProc(HWND, UINT, WPARAM, LPARAM);void CreateMyTooltip(HWND);
int WINAPI WinMain( HINSTANCE hInstance, HINSTANCE hPrevInstance,LPSTR lpCmdLine, int nCmdShow )
{ MSG msg ; WNDCLASS wc = {0}; wc.lpszClassName = "Tooltip" ; wc.hInstance = hInstance ; wc.hbrBackground = GetSysColorBrush(COLOR_3DFACE); wc.lpfnWndProc = WndProc ; wc.hCursor = LoadCursor(0, IDC_ARROW); RegisterClass(&wc); CreateWindow( wc.lpszClassName, "Tooltip", WS_OVERLAPPEDWINDOW | WS_VISIBLE, 100, 100, 200, 150, 0, 0, hInstance, 0);
while( GetMessage(&msg, NULL, 0, 0)) { TranslateMessage(&msg); DispatchMessage(&msg); } return (int) msg.wParam;

}
LRESULT CALLBACK WndProc( HWND hwnd, UINT msg, WPARAM wParam, LPARAM lParam ){ switch(msg) { case WM_CREATE: CreateMyTooltip(hwnd); break;
case WM_DESTROY: PostQuitMessage(0); break; } return DefWindowProc(hwnd, msg, wParam, lParam);}
void CreateMyTooltip (HWND hwnd){
INITCOMMONCONTROLSEX iccex; HWND hwndTT;
TOOLINFO ti; char tooltip[30] = "A main window"; RECT rect; iccex.dwICC = ICC_WIN95_CLASSES; iccex.dwSize = sizeof(INITCOMMONCONTROLSEX); InitCommonControlsEx(&iccex);
hwndTT = CreateWindowEx(WS_EX_TOPMOST, TOOLTIPS_CLASS, NULL, WS_POPUP | TTS_NOPREFIX | TTS_ALWAYSTIP, 0, 0, 0, 0, hwnd, NULL, NULL, NULL );
SetWindowPos(hwndTT, HWND_TOPMOST, 0, 0, 0, 0, SWP_NOMOVE | SWP_NOSIZE | SWP_NOACTIVATE); GetClientRect (hwnd, &rect);
ti.cbSize = sizeof(TOOLINFO); ti.uFlags = TTF_SUBCLASS; ti.hwnd = hwnd; ti.hinst = NULL; ti.uId = 0; ti.lpszText = tooltip; ti.rect.left = rect.left; ti.rect.top = rect.top; ti.rect.right = rect.right; ti.rect.bottom = rect.bottom;
SendMessage(hwndTT, TTM_ADDTOOL, 0, (LPARAM) (LPTOOLINFO) &ti);}
In our example, we set a tooltip for the main window.

INITCOMMONCONTROLSEX iccex; ... iccex.dwICC = ICC_WIN95_CLASSES; iccex.dwSize = sizeof(INITCOMMONCONTROLSEX); InitCommonControlsEx(&iccex);
A tooltip is a part of common controls. We must initialize common controls.
Creation of a tooltip consists of several steps. We must create a tooltip window. Then we make it a topmost window, so that it is not covered by another window. We create a tooltip text and TOOLTIPINFO structure. The structure must be filled with important info. The window handle, tooltip text and the rectangle, which will our tooltip cover. In our example, our tooltip will cover the whole client area of a window.
SendMessage(hwndTT, TTM_ADDTOOL, 0, (LPARAM) (LPTOOLINFO) &ti);
The tooltip is really added to the window, after we send the TTM_ADDTOOL message.
Month Calendar ControlA Month Calendar is a complex control which is used to select a a date. We can select a date in a simple and intuitive way.
#include <windows.h>#include <commctrl.h>#include <wchar.h>
#define DATE_SIZE 20
LRESULT CALLBACK WndProc(HWND, UINT, WPARAM, LPARAM);void CreateControls(HWND);void GetSelectedDate(HWND, HWND);
HWND hlbl;HWND hMonthCal;
int WINAPI WinMain(HINSTANCE hInstance, HINSTANCE hPrevInstance, LPSTR lpCmdLine, int nCmdShow)
{ HWND hwnd; MSG msg; WNDCLASSW wc = {0}; wc.lpszClassName = L"Month Calendar"; wc.hInstance = hInstance ; wc.hbrBackground = GetSysColorBrush(COLOR_3DFACE); wc.lpfnWndProc = WndProc ; wc.hCursor = LoadCursor(0,IDC_ARROW); RegisterClassW(&wc);
hwnd = CreateWindowW(wc.lpszClassName, L"Month Calendar", WS_OVERLAPPEDWINDOW | WS_VISIBLE, 100, 100, 250, 300, 0, 0, hInstance, 0);
while( GetMessage(&msg, NULL, 0, 0)) { DispatchMessage(&msg); }
return (int) msg.wParam;}
LRESULT CALLBACK WndProc( HWND hwnd, UINT msg, WPARAM wParam, LPARAM lParam ){ LPNMHDR lpNmHdr;
switch(msg) { case WM_CREATE:
CreateControls(hwnd); break;
case WM_NOTIFY:
lpNmHdr = (LPNMHDR) lParam;
if (lpNmHdr->code==MCN_SELECT) { GetSelectedDate(hMonthCal, hlbl); } break;
case WM_DESTROY:
PostQuitMessage(0); break; }
return DefWindowProcW(hwnd, msg, wParam, lParam);}
void CreateControls(HWND hwnd){ hlbl = CreateWindowW(L"STATIC", L"",

WS_CHILD | WS_VISIBLE, 80, 240, 80, 30, hwnd, (HMENU)1, NULL, NULL);
INITCOMMONCONTROLSEX icex;
icex.dwSize = sizeof(icex); icex.dwICC = ICC_DATE_CLASSES; InitCommonControlsEx(&icex);
hMonthCal = CreateWindowW(L"SysMonthCal32", L"", WS_BORDER | WS_CHILD | WS_VISIBLE | MCS_NOTODAYCIRCLE, 20, 20, 200, 200, hwnd, (HMENU)2, NULL, NULL);}
void GetSelectedDate(HWND hMonthCal, HWND hlbl){ SYSTEMTIME time; wchar_t date[DATE_SIZE];
ZeroMemory(&time, sizeof(SYSTEMTIME)); SendMessage(hMonthCal, MCM_GETCURSEL, 0, (LPARAM) &time); swprintf(date, DATE_SIZE, L"%d-%d-%d", time.wYear, time.wMonth, time.wDay); SetWindowTextW(hlbl, date);}
In our example, we have two controls. A month calendar control and a static text. The selected date from the month calendar control is dispalyed in the static text.
hMonthCal = CreateWindowW(L"SysMonthCal32", L"", WS_BORDER | WS_CHILD | WS_VISIBLE | MCS_NOTODAYCIRCLE, 20, 20, 200, 200, hwnd, (HMENU)2, NULL, NULL);
Here we create a month calendar control. The class name to create a month calender control is L"SysMonthCal32". If we use the MCS_NOTODAYCIRCLE window style, the today's date is not circled.
INITCOMMONCONTROLSEX icex;
icex.dwSize = sizeof(icex);icex.dwICC = ICC_DATE_CLASSES;InitCommonControlsEx(&icex);
To register a month calendar control, we specify the ICC_DATE_CLASSES flag for the dwICC member of the INITCOMMONCONTROLSEX structure.
case WM_NOTIFY:
lpNmHdr = (LPNMHDR) lParam;
if (lpNmHdr->code==MCN_SELECT) { GetSelectedDate(hMonthCal, hlbl); } break;
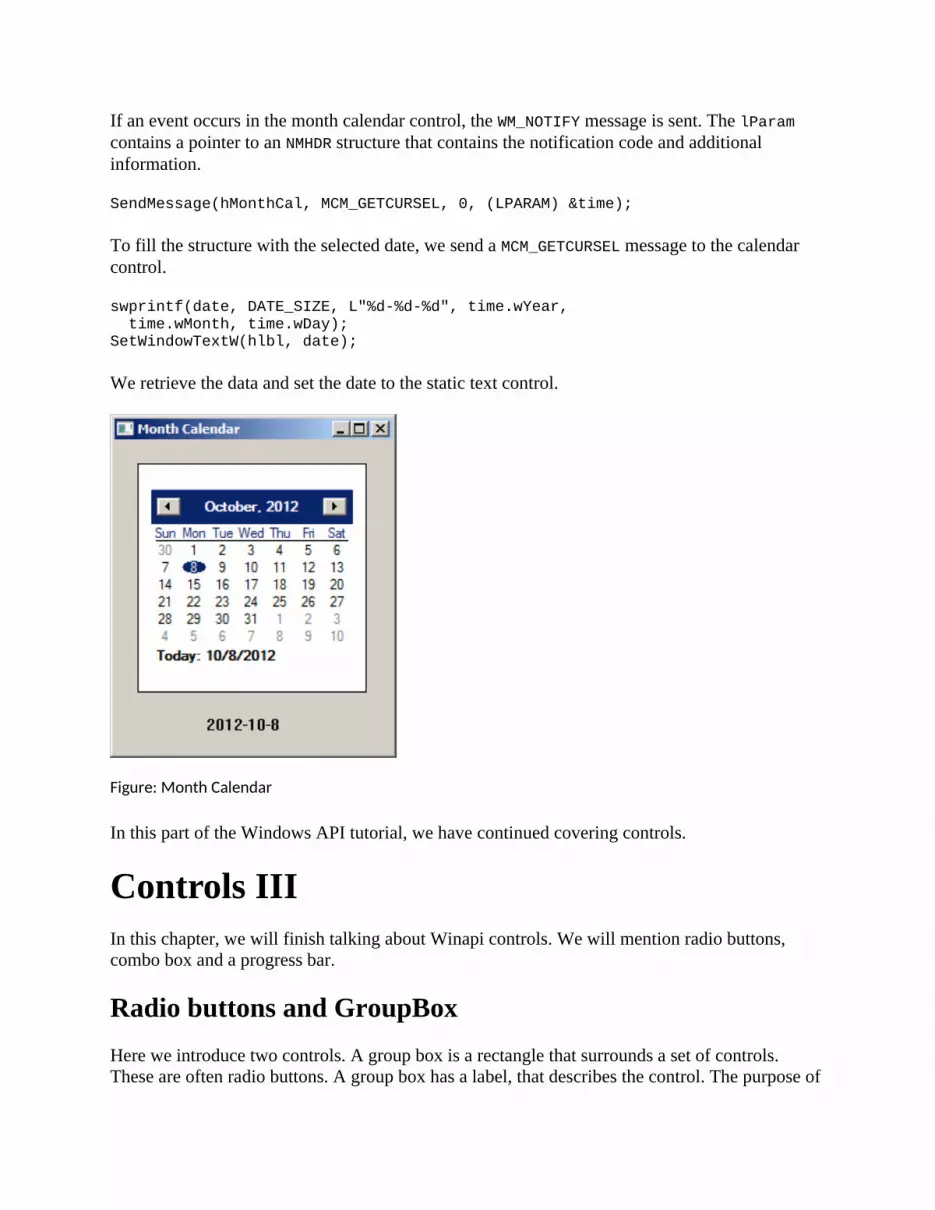
If an event occurs in the month calendar control, the WM_NOTIFY message is sent. The lParam contains a pointer to an NMHDR structure that contains the notification code and additional information.
SendMessage(hMonthCal, MCM_GETCURSEL, 0, (LPARAM) &time);
To fill the structure with the selected date, we send a MCM_GETCURSEL message to the calendar control.
swprintf(date, DATE_SIZE, L"%d-%d-%d", time.wYear, time.wMonth, time.wDay);SetWindowTextW(hlbl, date);
We retrieve the data and set the date to the static text control.
Figure: Month Calendar
In this part of the Windows API tutorial, we have continued covering controls.
Controls IIIIn this chapter, we will finish talking about Winapi controls. We will mention radio buttons, combo box and a progress bar.
Radio buttons and GroupBoxHere we introduce two controls. A group box is a rectangle that surrounds a set of controls. These are often radio buttons. A group box has a label, that describes the control. The purpose of

this control is to group controls, that are somehow related. A radio button is a special kind of button, that can be selected by the user, but not cleared. It allows the user to select a single exclusive choice from a group of options.
#include <windows.h>
#define ID_BLUE 1#define ID_YELLOW 2#define ID_ORANGE 3
LRESULT CALLBACK WndProc(HWND, UINT, WPARAM, LPARAM);
HINSTANCE g_hinst;COLORREF g_color;
int WINAPI WinMain( HINSTANCE hInstance, HINSTANCE hPrevInstance, LPSTR lpCmdLine, int nCmdShow){ HWND hwnd; MSG msg ; WNDCLASS wc = {0}; wc.lpszClassName = TEXT("GroupBox"); wc.hInstance = hInstance ; wc.hbrBackground = GetSysColorBrush(COLOR_3DFACE); wc.lpfnWndProc = WndProc ; wc.hCursor = LoadCursor(0,IDC_ARROW);
g_hinst = hInstance; RegisterClass(&wc); hwnd = CreateWindow(wc.lpszClassName, TEXT("GroupBox"), WS_OVERLAPPEDWINDOW | WS_VISIBLE, 100, 100, 300, 170, 0, 0, hInstance, 0);
while( GetMessage(&msg, NULL, 0, 0)) { DispatchMessage(&msg); } return (int) msg.wParam;}
LRESULT CALLBACK WndProc( HWND hwnd, UINT msg, WPARAM wParam, LPARAM lParam ){ HDC hdc; PAINTSTRUCT ps; HBRUSH hBrush, holdBrush; HPEN hPen, holdPen;
switch(msg) { case WM_CREATE: CreateWindow(TEXT("button"), TEXT("Choose Color"), WS_CHILD | WS_VISIBLE | BS_GROUPBOX, 10, 10, 120, 110, hwnd, (HMENU) 0, g_hinst, NULL); CreateWindow(TEXT("button"), TEXT("Blue"),

WS_CHILD | WS_VISIBLE | BS_AUTORADIOBUTTON, 20, 30, 100, 30, hwnd, (HMENU)ID_BLUE , g_hinst, NULL); CreateWindow(TEXT("button"), TEXT("Yellow"), WS_CHILD | WS_VISIBLE | BS_AUTORADIOBUTTON, 20, 55, 100, 30, hwnd, (HMENU)ID_YELLOW , g_hinst, NULL); CreateWindow(TEXT("button"), TEXT("Orange"), WS_CHILD | WS_VISIBLE | BS_AUTORADIOBUTTON, 20, 80, 100, 30, hwnd, (HMENU)ID_ORANGE , g_hinst, NULL); break;
case WM_COMMAND: if (HIWORD(wParam) == BN_CLICKED) { switch (LOWORD(wParam)) {
case ID_BLUE: g_color = RGB(0, 76, 255); break; case ID_YELLOW: g_color = RGB(255, 255, 0); break; case ID_ORANGE: g_color = RGB(255, 123, 0); break;}
InvalidateRect(hwnd, NULL, TRUE); }
break;
case WM_PAINT: hdc = BeginPaint(hwnd, &ps); hBrush = CreateSolidBrush(g_color); hPen = CreatePen(PS_NULL, 1, RGB(0, 0, 0)); holdPen = SelectObject(hdc, hPen); holdBrush = (HBRUSH) SelectObject(hdc, hBrush);
Rectangle(hdc, 160, 20, 260, 120);
SelectObject(hdc, holdBrush); SelectObject(hdc, holdPen); DeleteObject(hPen); DeleteObject(hBrush); EndPaint(hwnd, &ps); break;
case WM_DESTROY: PostQuitMessage(0); break; } return DefWindowProc(hwnd, msg, wParam, lParam);}
In our example, we have a group box with three radio buttons. By clicking on the radio button, we select a background color for the rectangle on the right.
CreateWindow(TEXT("button"), TEXT("Choose Color"), WS_CHILD | WS_VISIBLE | BS_GROUPBOX,

10, 10, 120, 110, hwnd, (HMENU) 0, g_hinst, NULL);
A group box is a special kind of a button with BS_GROUPBOX style.
CreateWindow(TEXT("button"), TEXT("Blue"), WS_CHILD | WS_VISIBLE | BS_AUTORADIOBUTTON, 20, 30, 100, 30, hwnd, (HMENU)ID_BLUE , g_hinst, NULL);
A radiobutton is also only a special kind of a button with BS_AUTORADIOBUTTON style.
case ID_BLUE: g_color = RGB(0, 76, 255); break;
If we click on the radio button, we fill a global variable with a selected color. This variable will be used to create a brush, that will fill the rectangle.
InvalidateRect(hwnd, NULL, TRUE);
We invalidate the rectangle (in this case whole window), which will cause the client area to be redrawn. This will launch a WM_PAINT message. During the WM_PAINT message, we draw the rectangle. Drawing is explained in GDI chapter in more detail.
Figure: GroupBox, Radio boxes
ComboBox
A combo box is a combination of an edit box or static text and a list. A combo box is used when we need to select an item from a list of available options.
#include <windows.h>
LRESULT CALLBACK WndProc(HWND, UINT, WPARAM, LPARAM);
HINSTANCE g_hinst;

int WINAPI WinMain( HINSTANCE hInstance, HINSTANCE hPrevInstance, LPSTR lpCmdLine, int nCmdShow){ HWND hwnd; MSG msg ; WNDCLASS wc = {0}; wc.lpszClassName = TEXT("Application"); wc.hInstance = hInstance ; wc.hbrBackground = GetSysColorBrush(COLOR_3DFACE); wc.lpfnWndProc = WndProc ; wc.hCursor = LoadCursor(0,IDC_ARROW);
g_hinst = hInstance; RegisterClass(&wc); hwnd = CreateWindow(wc.lpszClassName, TEXT("Combo Box"), WS_OVERLAPPEDWINDOW | WS_VISIBLE, 100, 100, 270, 170, 0, 0, hInstance, 0);
while( GetMessage(&msg, NULL, 0, 0)) { DispatchMessage(&msg); } return (int) msg.wParam;}
LRESULT CALLBACK WndProc( HWND hwnd, UINT msg, WPARAM wParam, LPARAM lParam ){
static HWND hwndCombo, hwndStatic; const TCHAR *items[] = { TEXT("FreeBSD"), TEXT("OpenBSD"), TEXT("Ubuntu"), TEXT("Solaris") }; int i; LRESULT sel = 0;
switch(msg) { case WM_CREATE: hwndCombo = CreateWindow(TEXT("combobox"), NULL, WS_CHILD | WS_VISIBLE | CBS_DROPDOWN, 10, 10, 120, 110, hwnd, NULL, g_hinst, NULL);
CreateWindow(TEXT("button"), TEXT("Drop down"), WS_CHILD | WS_VISIBLE, 150, 10, 90, 25, hwnd, (HMENU)1, g_hinst, NULL);
hwndStatic = CreateWindow(TEXT("static"), TEXT(""), WS_CHILD | WS_VISIBLE, 150, 80, 90, 25, hwnd, NULL, g_hinst, NULL);
for ( i = 0; i < 4; i++ ) { SendMessage(hwndCombo, CB_ADDSTRING, 0, (LPARAM) items[i]); }
break;

case WM_COMMAND: if (HIWORD(wParam) == BN_CLICKED) { SendMessage(hwndCombo, CB_SHOWDROPDOWN, (WPARAM) TRUE, 0); } if ( HIWORD(wParam) == CBN_SELCHANGE) { sel = SendMessage(hwndCombo, CB_GETCURSEL, 0, 0); SetWindowText(hwndStatic, items[sel]); SetFocus(hwnd); }
break;
case WM_DESTROY: PostQuitMessage(0); break; } return DefWindowProc(hwnd, msg, wParam, lParam);}
In our example, we put three controls on the window. A combo box, a button and a static text. The static text displays the currently selected item from the combo box. It is used to demonstrate the CBN_SELCHANGE combo box message. The button programatically opens the combo box.
hwndCombo = CreateWindow(TEXT("combobox"), NULL, WS_CHILD | WS_VISIBLE | CBS_DROPDOWN, 10, 10, 120, 110, hwnd, NULL, g_hinst, NULL);
To create a combo box, we use the combobox string. We use the CBS_DROPDOWN flag.
for ( i = 0; i < 4; i++ ) { SendMessage(hwndCombo, CB_ADDSTRING, 0, (LPARAM) items[i]); }
We fill the combo box with items. To add a string to the combo box, we send a CB_ADDSTRING message.
If we select an item from the combo box, the window procedure receives the WM_COMMAND message with the notification message CBN_SELCHANGE in the high-order word of the wParam parameter.
sel = SendMessage(hwndCombo, CB_GETCURSEL, 0, 0); SetWindowText(hwndStatic, items[sel]); SetFocus(hwnd);
We figure out the currently selected item. We send a CB_GETCURSEL message to the combo box. The function returns the index of the currently selected item. We set the static text to the currently selected string. Finally, we set focus to the main window. By default the combo box has the focus. But it looks ugly, so I changed programatically the focus.

Figure: Combo box
Progress barA progress bar is a control that is used, when we process lengthy tasks. It is animated so that the user knows, that our task is progressing.
#include <windows.h>#include <commctrl.h>
#define ID_BUTTON 1#define ID_TIMER 2
LRESULT CALLBACK WndProc(HWND, UINT, WPARAM, LPARAM);HINSTANCE g_hinst;
int WINAPI WinMain( HINSTANCE hInstance, HINSTANCE hPrevInstance, LPSTR lpCmdLine, int nCmdShow){
HWND hwnd; MSG msg ; WNDCLASS wc = {0}; wc.lpszClassName = TEXT("Application"); wc.hInstance = hInstance ; wc.hbrBackground = GetSysColorBrush(COLOR_3DFACE); wc.lpfnWndProc = WndProc ; wc.hCursor = LoadCursor(0,IDC_ARROW);
g_hinst = hInstance; RegisterClass(&wc); hwnd = CreateWindow(wc.lpszClassName, TEXT("Progress bar"), WS_OVERLAPPEDWINDOW | WS_VISIBLE, 100, 100, 260, 170, 0, 0, hInstance, 0);
while( GetMessage(&msg, NULL, 0, 0)) {

DispatchMessage(&msg); } return (int) msg.wParam;}
LRESULT CALLBACK WndProc( HWND hwnd, UINT msg, WPARAM wParam, LPARAM lParam ){
static HWND hwndPrgBar; static int i = 1; INITCOMMONCONTROLSEX InitCtrlEx;
InitCtrlEx.dwSize = sizeof(INITCOMMONCONTROLSEX); InitCtrlEx.dwICC = ICC_PROGRESS_CLASS; InitCommonControlsEx(&InitCtrlEx);
switch(msg) { case WM_CREATE: hwndPrgBar = CreateWindowEx(0, PROGRESS_CLASS, NULL, WS_CHILD | WS_VISIBLE | PBS_SMOOTH, 30, 20, 190, 25, hwnd, NULL, g_hinst, NULL);
CreateWindow(TEXT("button"), TEXT("Start"), WS_CHILD | WS_VISIBLE, 85, 90, 80, 25, hwnd, (HMENU) 1, g_hinst, NULL);
SendMessage(hwndPrgBar, PBM_SETRANGE, 0, MAKELPARAM(0, 150)); SendMessage(hwndPrgBar, PBM_SETSTEP, 1, 0 ); break;
case WM_TIMER: SendMessage( hwndPrgBar, PBM_STEPIT, 0, 0 ); i++; if ( i == 150 ) KillTimer(hwnd, ID_TIMER); break; case WM_COMMAND: i = 1; SendMessage( hwndPrgBar, PBM_SETPOS, 0, 0 ); SetTimer(hwnd, ID_TIMER, 5, NULL); break;
case WM_DESTROY: KillTimer(hwnd, ID_TIMER); PostQuitMessage(0); break; } return DefWindowProc(hwnd, msg, wParam, lParam);}
In our example, we have a progress bar and a button. The button (re)starts to progress bar control. We use a timer to update the progress bar.

hwndPrgBar = CreateWindowEx(0, PROGRESS_CLASS, NULL, WS_CHILD | WS_VISIBLE | PBS_SMOOTH, 30, 20, 190, 25, hwnd, NULL, g_hinst, NULL);
We create a progress bar control with PROGRESS_CLASS class name and PBS_SMOOTH style.
SendMessage( hwndPrgBar, PBM_SETRANGE, 0, MAKELPARAM(0, 150)); SendMessage( hwndPrgBar, PBM_SETSTEP, 1, 0 );
We set the range of the progress bar and it's step.
i = 1; SendMessage( hwndPrgBar, PBM_SETPOS, 0, 0 ); SetTimer(hwnd, ID_TIMER, 5, NULL);
When we press the start button, we set the i value to 1, set the initial position of the progress bar and start the timer. The timer will send periodically a WM_TIMER message to the window procedure. Until it is killed.
case WM_TIMER: SendMessage( hwndPrgBar, PBM_STEPIT, 0, 0 ); i++; if ( i == 150 ) KillTimer(hwnd, ID_TIMER); break;
During the WM_TIMER message, we update the progress bar by one step sending the PBM_STEPIT message. We kill the timer, when the progress bar stops processing.
Figure: Progress bar
In this part of the Winapi tutorial, we have finished covering Winapi controls.
Advanced Windows ControlsIn this section of the Winapi C tutorial, we will talk about more advanced windows controls.

Tab ControlA tab control joins multiple windows with corresponding tabs.
#include <windows.h>#include <commctrl.h>
#define ID_TABCTRL 1#define EDIT 2#define BTN_ADD 3#define BTN_DEL 4#define BTN_DELALL 5
LRESULT CALLBACK WndProc(HWND, UINT, WPARAM, LPARAM);HWND hTab, hEdit;HINSTANCE g_hinst;
int WINAPI WinMain( HINSTANCE hInstance, HINSTANCE hPrevInstance, LPSTR lpCmdLine, int nCmdShow ){ MSG msg ; WNDCLASS wc = {0}; wc.lpszClassName = TEXT( "Application" ); wc.hInstance = hInstance ; wc.hbrBackground = GetSysColorBrush(COLOR_3DFACE); wc.lpfnWndProc = WndProc ; wc.hCursor = LoadCursor(0,IDC_ARROW);
g_hinst = hInstance; RegisterClass(&wc); CreateWindow( wc.lpszClassName, TEXT("Tab Control"), WS_OVERLAPPEDWINDOW | WS_VISIBLE, 100, 100, 380, 230, 0, 0, hInstance, 0);
while( GetMessage(&msg, NULL, 0, 0)) { TranslateMessage(&msg); DispatchMessage(&msg); } return (int) msg.wParam;}
LRESULT CALLBACK WndProc(HWND hwnd, UINT msg, WPARAM wParam, LPARAM lParam)
{
TCITEM tie; TCHAR text[250]; LRESULT count, id; INITCOMMONCONTROLSEX icex;
switch(msg) {
case WM_CREATE:

icex.dwSize = sizeof(INITCOMMONCONTROLSEX); icex.dwICC = ICC_TAB_CLASSES; InitCommonControlsEx(&icex);
hTab = CreateWindow(WC_TABCONTROL, NULL, WS_CHILD | WS_VISIBLE, 0, 0, 200, 150, hwnd,(HMENU) ID_TABCTRL, g_hinst, NULL);
hEdit = CreateWindow("edit",NULL,WS_CHILD | WS_VISIBLE | WS_BORDER, 250, 20, 100, 25, hwnd, (HMENU) EDIT, g_hinst, NULL); CreateWindow("button","add", WS_CHILD | WS_VISIBLE | BS_PUSHBUTTON, 250, 50, 100, 25, hwnd, (HMENU) BTN_ADD, g_hinst, NULL);
CreateWindow("button", "del", WS_CHILD | WS_VISIBLE | BS_PUSHBUTTON, 250, 80, 100, 25, hwnd, (HMENU) BTN_DEL, g_hinst, NULL);
CreateWindow("button","delall", WS_CHILD | WS_VISIBLE | BS_PUSHBUTTON, 250, 110, 100, 25, hwnd, (HMENU) BTN_DELALL, g_hinst, NULL); break;
case WM_COMMAND:
switch(LOWORD(wParam)) {
case BTN_ADD: GetWindowText(hEdit, text, 250);
if (lstrlen(text) !=0 ) { tie.mask = TCIF_TEXT; tie.pszText = text; count = SendMessage(hTab, TCM_GETITEMCOUNT, 0, 0); SendMessage(hTab, TCM_INSERTITEM, count, (LPARAM) (LPTCITEM) &tie); } break;
case BTN_DEL: id = SendMessage(hTab, TCM_GETCURSEL, 0, 0); if (id != -1) { SendMessage(hTab, TCM_DELETEITEM, 0, id); } break;
case BTN_DELALL: SendMessage(hTab, TCM_DELETEALLITEMS, 0, 0); break; } break;
case WM_DESTROY: PostQuitMessage(0); break; } return(DefWindowProc(hwnd, msg, wParam, lParam));

}
In our example, we use one tab control, one edit control and three buttons. We will dynamically create and delete new tabs on the tab control.
hTab = CreateWindow(WC_TABCONTROL, NULL, WS_CHILD | WS_VISIBLE, 0, 0, 200, 150, hwnd,(HMENU) ID_TABCTRL, g_hinst, NULL);
We use the WC_TABCONTROL window class to create a tab control.
if (lstrlen(text) !=0 ) { tie.mask = TCIF_TEXT; tie.pszText = text; count = SendMessage(hTab, TCM_GETITEMCOUNT, 0, 0); SendMessage(hTab, TCM_INSERTITEM, count, (LPARAM) (LPTCITEM) &tie);}
To add a new tab, we fill the TCITEM structure. We provide the type of data to be set (in our case TCIF_TEXT) and the actual text. Then we send two messages. The first message will get the number of tabs on the tab control. It will be used in the second message. The second one will insert a new tab to the control, using the count variable and the TCIF_TEXT structure.
id = SendMessage(hTab, TCM_GETCURSEL, 0, 0); if (id != -1) { SendMessage(hTab, TCM_DELETEITEM, 0, id); }
To delete an specific tab, we need the current selected tab. We figure it out by sending the TCM_GETCURSEL message to the tab control. To actually delete the tab, we send the TCM_DELETEITEM, specifying the item to be deleted in the wParam parameter.
SendMessage(hTab, TCM_DELETEALLITEMS, 0, 0);
To delete all tabs from the tab control, we send the TCM_DELETEALLITEMS message.

Figure: Tab Control
ListBoxA list box is a simple list control, from which user can select one or more items. Selected items are marked.
#include <windows.h>#include <strsafe.h>
#define IDC_LIST 1#define IDC_STATIC 2
LRESULT CALLBACK WndProc(HWND, UINT, WPARAM, LPARAM);
HINSTANCE g_hinst;
typedef struct { TCHAR name[30]; TCHAR job[20]; int age;
} Friends;
Friends friends[] = { {TEXT("Erika"), TEXT("waitress"), 18}, {TEXT("Thomas"), TEXT("programmer"), 25}, {TEXT("George"), TEXT("police officer"), 26}, {TEXT("Michael"), TEXT("producer"), 38}, {TEXT("Jane"), TEXT("steward"), 28}, };
int WINAPI WinMain( HINSTANCE hInstance, HINSTANCE hPrevInstance, LPSTR lpCmdLine, int nCmdShow )

{ MSG msg ; WNDCLASS wc = {0}; wc.lpszClassName = TEXT( "Application" ); wc.hInstance = hInstance; wc.hbrBackground = GetSysColorBrush(COLOR_3DFACE); wc.lpfnWndProc = WndProc; wc.hCursor = LoadCursor(0, IDC_ARROW);
g_hinst = hInstance; RegisterClass(&wc); CreateWindow( wc.lpszClassName, TEXT("List Box"), WS_OVERLAPPEDWINDOW | WS_VISIBLE, 100, 100, 340, 200, 0, 0, hInstance, 0);
while( GetMessage(&msg, NULL, 0, 0)) { TranslateMessage(&msg); DispatchMessage(&msg); } return (int) msg.wParam;}
LRESULT CALLBACK WndProc(HWND hwnd, UINT msg, WPARAM wParam, LPARAM lParam){
static HWND hwndList, hwndStatic; int i, sel; TCHAR buff[100];
switch(msg) {
case WM_CREATE: hwndList = CreateWindow(TEXT("listbox") , NULL, WS_CHILD | WS_VISIBLE | LBS_NOTIFY, 10, 10, 150, 120, hwnd,(HMENU) IDC_LIST, g_hinst, NULL);
hwndStatic = CreateWindow(TEXT("static") , NULL, WS_CHILD | WS_VISIBLE, 200, 10, 120, 45, hwnd,(HMENU) IDC_STATIC, g_hinst, NULL);
for (i = 0; i < ARRAYSIZE(friends); i++) { SendMessage(hwndList, LB_ADDSTRING, 0, (LPARAM) friends[i].name); }
break; case WM_COMMAND: if (LOWORD(wParam) == IDC_LIST) { if (HIWORD(wParam) == LBN_SELCHANGE) { sel = (int) SendMessage(hwndList, LB_GETCURSEL, 0, 0); StringCbPrintf(buff, ARRAYSIZE(buff), TEXT("Job: %s\nAge: %d"),
friends[sel].job, friends[sel].age); SetWindowText(hwndStatic, buff); } } break;
case WM_DESTROY: PostQuitMessage(0); break; } return (DefWindowProc(hwnd, msg, wParam, lParam));}
In this example, we display a list box control and a static text control. By selecting a person from a list box, we display his job and age in the static control.
hwndList = CreateWindow(TEXT("listbox") , NULL, WS_CHILD | WS_VISIBLE | LBS_NOTIFY, 10, 10, 150, 120, hwnd,(HMENU) IDC_LIST, g_hinst, NULL);
A basic list box is created with listbox window class and LBS_NOTIFY message.
for (i = 0; i < ARRAYSIZE(friends); i++) { SendMessage(hwndList, LB_ADDSTRING, 0, (LPARAM) friends[i].name); }
We fill the list box. To do this, we send multiple LB_ADDSTRING messages to the list box control.
if (HIWORD(wParam) == LBN_SELCHANGE) { sel = (int) SendMessage(hwndList, LB_GETCURSEL, 0, 0); StringCbPrintf(buff, ARRAYSIZE(buff), TEXT("Job: %s\nAge: %d"), friends[sel].job, friends[sel].age); SetWindowText(hwndStatic, buff); }
If we select an item from a list box, the window procedure receives a LBN_SELCHANGE message. First we determine the currently selected item by sending a LB_GETCURSEL message to the list box. Then we copy the job name and age from the friends structure to the buff variable. Finally, we set the static text with SetWindowText() function call.

Figure: List Box
In this part of the Winapi tutorial, we have covered advanced Winapi controls.
Creating Custom ControlsHere we will demostrate, how to create our own custom controls. The Winapi has a collection of various prebuilt controls. More specific controls have to be created manually. We use the GDI to create custom controls.
The Burning controlThis control can be found in various media burning applications, like Nero Burning ROM.
#include <windows.h>#include <commctrl.h>#include <wchar.h>
LRESULT CALLBACK PanelProc(HWND, UINT, WPARAM, LPARAM);LRESULT CALLBACK WndProc(HWND, UINT, WPARAM, LPARAM);
HINSTANCE g_hinst;LRESULT g_pos = 150;
int WINAPI wWinMain(HINSTANCE hInstance, HINSTANCE hPrevInstance, PWSTR lpCmdLine, int nCmdShow){ HWND hwnd; MSG msg; WNDCLASSW wc = {0};
wc.lpszClassName = L"Application"; wc.hInstance = hInstance;

wc.hbrBackground = GetSysColorBrush(COLOR_3DFACE); wc.lpfnWndProc = WndProc; wc.hCursor = LoadCursor(0, IDC_ARROW);
g_hinst = hInstance; RegisterClassW(&wc); hwnd = CreateWindowW(wc.lpszClassName, L"Burning control", WS_OVERLAPPEDWINDOW | WS_VISIBLE | WS_CLIPCHILDREN, 100, 100, 400, 250, 0, 0, hInstance, 0);
while( GetMessage(&msg, NULL, 0, 0)) { DispatchMessage(&msg); }
return (int) msg.wParam;}
LRESULT CALLBACK WndProc(HWND hwnd, UINT msg, WPARAM wParam, LPARAM lParam){
static HWND hwndTrack, hwndBurn; WNDCLASSW rwc = {0}; INITCOMMONCONTROLSEX InitCtrlEx;
InitCtrlEx.dwSize = sizeof(INITCOMMONCONTROLSEX); InitCtrlEx.dwICC = ICC_BAR_CLASSES; InitCommonControlsEx(&InitCtrlEx);
switch(msg) { case WM_CREATE: rwc.lpszClassName = L"BurningControl";
rwc.hbrBackground = GetSysColorBrush(COLOR_BTNFACE); rwc.style = CS_HREDRAW; rwc.lpfnWndProc = PanelProc; rwc.hCursor = LoadCursor(0, IDC_ARROW); RegisterClassW(&rwc);
hwndBurn = CreateWindowExW(WS_EX_STATICEDGE , L"BurningControl", NULL, WS_CHILD | WS_VISIBLE, 0, 330, 490, 30, hwnd, (HMENU)1, NULL, NULL);
hwndTrack = CreateWindowExW(0, TRACKBAR_CLASSW, NULL, WS_CHILD | WS_VISIBLE | TBS_FIXEDLENGTH | TBS_NOTICKS, 40, 25, 150, 25, hwnd, (HMENU) 2, g_hinst, NULL);
SendMessage(hwndTrack, TBM_SETRANGE, TRUE, MAKELONG(0, 750)); SendMessage(hwndTrack, TBM_SETPAGESIZE, 0, 20); SendMessage(hwndTrack, TBM_SETTICFREQ, 20, 0); SendMessage(hwndTrack, TBM_SETPOS, TRUE, 150);

break;
case WM_SIZE:
SetWindowPos(hwndBurn, NULL, 0, HIWORD(lParam)-30, LOWORD(lParam), 30, SWP_NOZORDER); break;
case WM_HSCROLL:
g_pos = SendMessage(hwndTrack, TBM_GETPOS, 0, 0); InvalidateRect(hwndBurn, NULL, TRUE); break;
case WM_DESTROY:
PostQuitMessage(0); break; }
return DefWindowProcW(hwnd, msg, wParam, lParam);}
LRESULT CALLBACK PanelProc(HWND hwnd, UINT msg, WPARAM wParam, LPARAM lParam){ HBRUSH hBrushYellow, hBrushRed, holdBrush; HPEN hPen, holdPen; HFONT hFont, holdFont; PAINTSTRUCT ps; RECT rect, rect2; wchar_t *cap[] = { L"75", L"150", L"225", L"300", L"375", L"450", L"525", L"600", L"675"};
HDC hdc; int till; int step, full; int i;
switch(msg) { case WM_PAINT: hdc = BeginPaint(hwnd, &ps);
GetClientRect(hwnd, &rect);
till = (rect.right / 750.0) * g_pos; step = rect.right / 10.0; full = (rect.right / 750.0) * 700; hBrushYellow = CreateSolidBrush(RGB(255, 255, 184)); hBrushRed = CreateSolidBrush(RGB(255, 110, 110));

hPen = CreatePen(PS_NULL, 1, RGB(0, 0, 0)); holdPen = SelectObject(hdc, hPen);
hFont = CreateFontW(13, 0, 0, 0, FW_MEDIUM, 0, 0, 0, 0, 0, 0, 0, 0, L"Tahoma");
holdFont = SelectObject(hdc, hFont); if(till > full) { SelectObject(hdc, hBrushYellow); Rectangle(hdc, 0, 0, full, 30); holdBrush = SelectObject(hdc, hBrushRed); Rectangle(hdc, full, 0, till, 30);
} else { holdBrush = SelectObject(hdc, hBrushYellow); Rectangle(hdc, 0, 0, till, 30); }
SelectObject(hdc, holdPen);
for ( i = 1; i < 10; i++) {
MoveToEx(hdc, i*step, 0, NULL); LineTo(hdc, i*step, 7);
rect2.bottom = 28; rect2.top = 8; rect2.left = i*step-10; rect2.right = i*step+10;
SetBkMode(hdc, TRANSPARENT) ; DrawTextW(hdc, cap[i-1], wcslen(cap[i-1]), &rect2, DT_CENTER); }
SelectObject(hdc, holdBrush); DeleteObject(hBrushYellow); DeleteObject(hBrushRed);
DeleteObject(hPen);
SelectObject(hdc, holdFont); DeleteObject(hFont); EndPaint(hwnd, &ps); break; }
return DefWindowProcW(hwnd, msg, wParam, lParam);}
In our example, we display a trackbar control and our custom burning control. The trackbar control is used to control the state of the burning control.
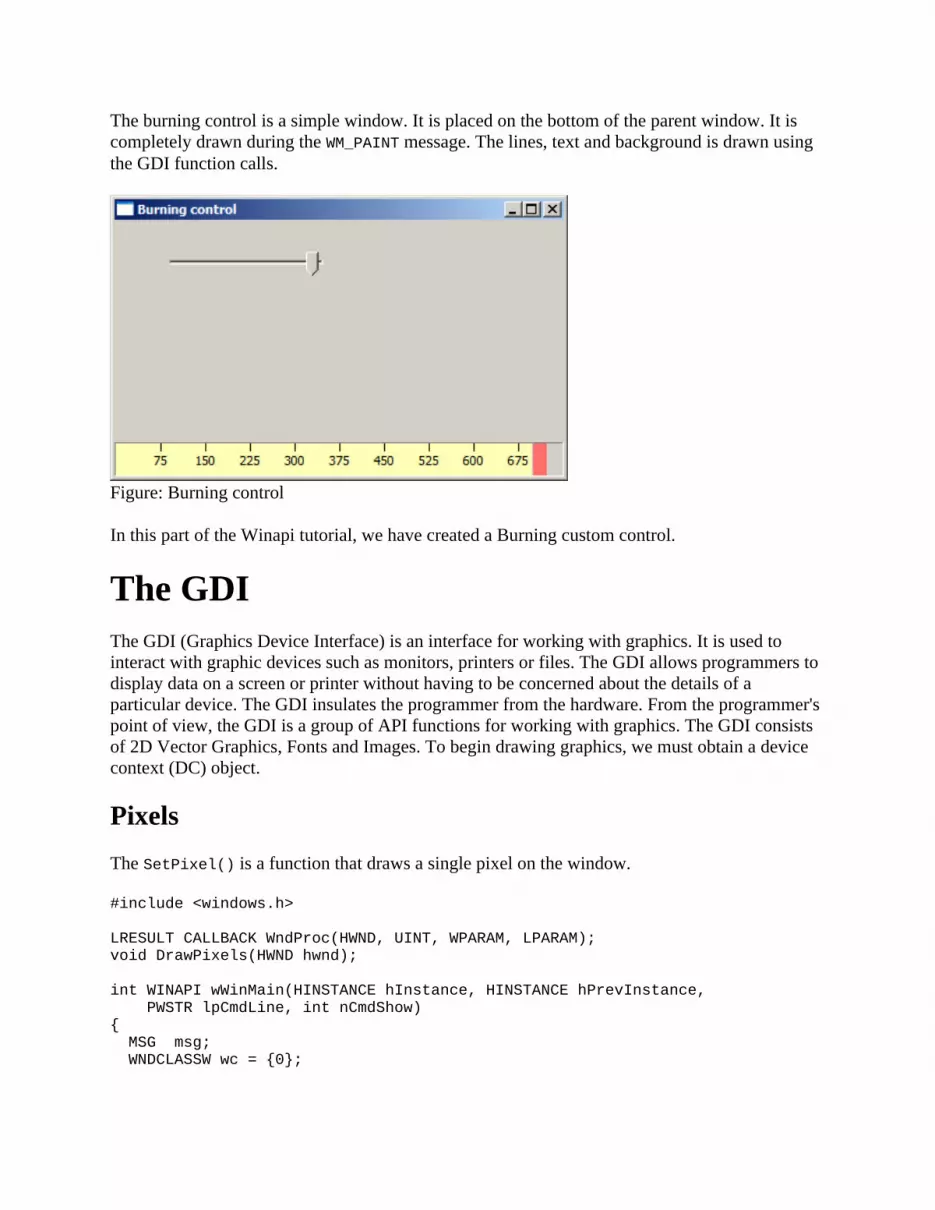
The burning control is a simple window. It is placed on the bottom of the parent window. It is completely drawn during the WM_PAINT message. The lines, text and background is drawn using the GDI function calls.
Figure: Burning control
In this part of the Winapi tutorial, we have created a Burning custom control.
The GDIThe GDI (Graphics Device Interface) is an interface for working with graphics. It is used to interact with graphic devices such as monitors, printers or files. The GDI allows programmers to display data on a screen or printer without having to be concerned about the details of a particular device. The GDI insulates the programmer from the hardware. From the programmer's point of view, the GDI is a group of API functions for working with graphics. The GDI consists of 2D Vector Graphics, Fonts and Images. To begin drawing graphics, we must obtain a device context (DC) object.
PixelsThe SetPixel() is a function that draws a single pixel on the window.
#include <windows.h>
LRESULT CALLBACK WndProc(HWND, UINT, WPARAM, LPARAM);void DrawPixels(HWND hwnd);
int WINAPI wWinMain(HINSTANCE hInstance, HINSTANCE hPrevInstance, PWSTR lpCmdLine, int nCmdShow){ MSG msg; WNDCLASSW wc = {0};

wc.style = CS_HREDRAW | CS_VREDRAW; wc.lpszClassName = L"Pixels"; wc.hInstance = hInstance; wc.hbrBackground = GetSysColorBrush(COLOR_3DFACE); wc.lpfnWndProc = WndProc; wc.hCursor = LoadCursor(0, IDC_ARROW);
RegisterClassW(&wc); CreateWindowW(wc.lpszClassName, L"Pixels", WS_OVERLAPPEDWINDOW | WS_VISIBLE, 100, 100, 250, 150, NULL, NULL, hInstance, NULL);
while( GetMessage(&msg, NULL, 0, 0)) { TranslateMessage(&msg); DispatchMessage(&msg); }
return (int) msg.wParam;}
LRESULT CALLBACK WndProc(HWND hwnd, UINT msg, WPARAM wParam, LPARAM lParam){ switch(msg) { case WM_PAINT:
DrawPixels(hwnd); break;
case WM_DESTROY:
PostQuitMessage(0); return 0; }
return DefWindowProcW(hwnd, msg, wParam, lParam);}
void DrawPixels(HWND hwnd){ PAINTSTRUCT ps; RECT r;
HDC hdc = BeginPaint(hwnd, &ps);
GetClientRect(hwnd, &r);
for (int i=0; i<1000; i++) { int x = (rand() % r.right - r.left); int y = (rand() % r.bottom - r.top); SetPixel(hdc, x, y, RGB(255, 0, 0)); }
EndPaint(hwnd, &ps);}

In our example we display randomly 1000 red pixels on the client area of a window.
wc.style = CS_HREDRAW | CS_VREDRAW;
These two flags cause the window to be redrawn when it is resized.
case WM_PAINT:
DrawPixels(hwnd); break;
Drawing is performed in a reaction to the WM_PAINT message. The actual drawing is delegated to the DrawPixels() method.
HDC hdc = BeginPaint(hwnd, &ps);
The BeginPaint() function prepares the specified window for painting. It fills a PAINTSTRUCT structure with information about the painting. It returns a handle to a display device context for the specified window.
GetClientRect(hwnd, &r);
We retrieve the the coordinates of a window's client area. We will randomly draw on a window and we need to know, where we can draw at the moment.
for (int i = 0; i<1000; i++) { int x = (rand() % r.right - r.left); int y = (rand() % r.bottom - r.top); SetPixel(hdc, x, y, RGB(255, 0, 0));}
1000 points are randomly drawn on the window. The SetPixel() function draws a pixel at a specified location using a chosen colour.
EndPaint(hwnd, &ps);
At the end of the painting we call the EndPaint() functions. The function releases the display device context that BeginPaint() retrieved.

Figure: Pixels
RectangleTo draw a rectangle, we use the Rectangle() function.
BOOL Rectangle(HDC hdc, int nLeftRect, int nTopRect, int nRightRect, int nBottomRect);
The first parameter of the function is the handle to the device context. The next two parameters are the x, y coordinates of the upper-left corner of the rectangle. The last two parameters are the x, y coordinates of the lower-right corner of the rectangle. If the function fails, the return value is zero. If it succeeds, the return value is non-zero.
#include <windows.h>
LRESULT CALLBACK WndProc(HWND, UINT, WPARAM, LPARAM);
int WINAPI wWinMain(HINSTANCE hInstance, HINSTANCE hPrevInstance, PWSTR lpCmdLine, int nCmdShow){ MSG msg; WNDCLASSW wc = {0};
wc.style = CS_HREDRAW | CS_VREDRAW; wc.lpszClassName = L"Rectangle"; wc.hInstance = hInstance; wc.hbrBackground = GetSysColorBrush(COLOR_3DFACE); wc.lpfnWndProc = WndProc; wc.hCursor = LoadCursor(0, IDC_ARROW);
RegisterClassW(&wc); CreateWindowW(wc.lpszClassName, L"Rectangle", WS_OVERLAPPEDWINDOW | WS_VISIBLE, 100, 100, 250, 200, NULL, NULL, hInstance, NULL);
while( GetMessage(&msg, NULL, 0, 0)) { DispatchMessage(&msg); }
return (int) msg.wParam;}
LRESULT CALLBACK WndProc(HWND hwnd, UINT msg, WPARAM wParam, LPARAM lParam){ HDC hdc; PAINTSTRUCT ps;
switch(msg) { case WM_PAINT:

hdc = BeginPaint(hwnd, &ps); Rectangle(hdc, 50, 50, 200, 100); EndPaint(hwnd, &ps); break;
case WM_DESTROY:
PostQuitMessage(0); return 0; }
return DefWindowProcW(hwnd, msg, wParam, lParam);}
The outline of the rectangle is drawn using the current pen. The background is drawn using the current brush.
Rectangle(hdc, 50, 50, 200, 100);
The rectangle is drawn using the Rectangle() function. We draw the rectangle using two points. Top left point and bottom right point.
Figure: Rectangle
PenPen is an elementary graphics object. It is used to draw lines, curves and outlines of rectangles, ellipses, polygons or other shapes.
The CreatePen() function creates a logical pen with a specified style, width and colour.
#include <windows.h>
LRESULT CALLBACK WndProc(HWND, UINT, WPARAM, LPARAM);void DrawLines(HWND);
int WINAPI wWinMain(HINSTANCE hInstance, HINSTANCE hPrevInstance, PWSTR lpCmdLine, int nCmdShow){

MSG msg; WNDCLASSW wc = {0};
wc.style = CS_HREDRAW | CS_VREDRAW; wc.lpszClassName = L"Pens"; wc.hInstance = hInstance; wc.hbrBackground = (HBRUSH) GetStockObject(WHITE_BRUSH); wc.lpfnWndProc = WndProc; wc.hCursor = LoadCursor(0, IDC_ARROW);
RegisterClassW(&wc); CreateWindowW(wc.lpszClassName, L"Pens", WS_OVERLAPPEDWINDOW | WS_VISIBLE, 100, 100, 250, 180, NULL, NULL, hInstance, NULL);
while( GetMessage(&msg, NULL, 0, 0)) { DispatchMessage(&msg); }
return (int) msg.wParam;}
LRESULT CALLBACK WndProc(HWND hwnd, UINT msg, WPARAM wParam, LPARAM lParam){ switch(msg) { case WM_PAINT:
DrawLines(hwnd); break;
case WM_DESTROY:
PostQuitMessage(0); return 0; }
return DefWindowProcW(hwnd, msg, wParam, lParam);}
void DrawLines(HWND hwnd) { PAINTSTRUCT ps;
HDC hdc = BeginPaint(hwnd, &ps); HPEN hPen1 = CreatePen(PS_SOLID, 1, RGB(0, 0, 0)); HPEN hPen2 = CreatePen(PS_DASH, 1, RGB(0, 0, 0)); HPEN hPen3 = CreatePen(PS_DOT, 1, RGB(0, 0, 0)); HPEN hPen4 = CreatePen(PS_DASHDOT, 1, RGB(0, 0, 0)); HPEN hPen5 = CreatePen(PS_DASHDOTDOT, 1, RGB(0, 0, 0));
HPEN holdPen = SelectObject(hdc, hPen1); MoveToEx(hdc, 50, 30, NULL); LineTo(hdc, 200, 30);
SelectObject(hdc, hPen2);
MoveToEx(hdc, 50, 50, NULL); LineTo(hdc, 200, 50);
SelectObject(hdc, hPen2); MoveToEx(hdc, 50, 70, NULL); LineTo(hdc, 200, 70);
SelectObject(hdc, hPen3); MoveToEx(hdc, 50, 90, NULL); LineTo(hdc, 200, 90);
SelectObject(hdc, hPen4); MoveToEx(hdc, 50, 110, NULL); LineTo(hdc, 200, 110);
SelectObject(hdc, holdPen); DeleteObject(hPen1); DeleteObject(hPen2); DeleteObject(hPen3); DeleteObject(hPen4); DeleteObject(hPen5);
EndPaint(hwnd, &ps); }
In our example, we draw 5 different lines. Using 5 different pen styles.
case WM_PAINT:
DrawLines(hwnd); break;
The actual drawing is delegated to the DrawLines() method.
HPEN hPen1 = CreatePen(PS_SOLID, 1, RGB(0, 0, 0));
The CreatePen() function creates a logical pen with a specified style, width and colour. The PS_SOLID stands for a solid pen. We use the RGB macro to generate a colour for the pen.
SelectObject(hdc, hPen1);
To activate a pen, we call the SelectObject() function.
MoveToEx(hdc, 50, 30, NULL);LineTo(hdc, 200, 30);
To draw lines, we use the MoveToEx() and the LineTo() functions.
DeleteObject(hPen1);DeleteObject(hPen2);DeleteObject(hPen3);DeleteObject(hPen4);DeleteObject(hPen5);

In the end, we clean up resources.
Figure: Lines
BrushA Brush is an elementary graphics object. It is used to paint the background of graphics shapes, such as rectangles, ellipses or polygons. A brush can be a solid colour a hatch or a custom bitmap pattern.
#include <windows.h>
LRESULT CALLBACK WndProc(HWND, UINT, WPARAM, LPARAM);void DrawRectangles(HWND);
int WINAPI wWinMain(HINSTANCE hInstance, HINSTANCE hPrevInstance, PWSTR lpCmdLine, int nCmdShow){ MSG msg; WNDCLASSW wc = {0};
wc.style = CS_HREDRAW | CS_VREDRAW; wc.lpszClassName = L"Brush"; wc.hInstance = hInstance; wc.hbrBackground = GetSysColorBrush(COLOR_3DFACE); wc.lpfnWndProc = WndProc; wc.hCursor = LoadCursor(0, IDC_ARROW);
RegisterClassW(&wc); CreateWindowW(wc.lpszClassName, L"Solid Brush", WS_OVERLAPPEDWINDOW | WS_VISIBLE, 100, 100, 220, 240, NULL, NULL, hInstance, NULL);
while (GetMessage(&msg, NULL, 0, 0)) { DispatchMessage(&msg); }
return (int) msg.wParam;}
LRESULT CALLBACK WndProc( HWND hwnd, UINT msg, WPARAM wParam, LPARAM lParam)

{ switch(msg) { case WM_PAINT:
DrawRectangles(hwnd); break;
case WM_DESTROY:
PostQuitMessage(0); return 0; }
return DefWindowProcW(hwnd, msg, wParam, lParam);}
void DrawRectangles(HWND hwnd){ PAINTSTRUCT ps;
HDC hdc = BeginPaint(hwnd, &ps); HPEN hPen = CreatePen(PS_NULL, 1, RGB(0, 0, 0)); HPEN holdPen = SelectObject(hdc, hPen);
HBRUSH hBrush1 = CreateSolidBrush(RGB(121, 90, 0)); HBRUSH hBrush2 = CreateSolidBrush(RGB(240, 63, 19)); HBRUSH hBrush3 = CreateSolidBrush(RGB(240, 210, 18)); HBRUSH hBrush4 = CreateSolidBrush(RGB(9, 189, 21));
HBRUSH holdBrush = SelectObject(hdc, hBrush1);
Rectangle(hdc, 30, 30, 100, 100); SelectObject(hdc, hBrush2); Rectangle(hdc, 110, 30, 180, 100); SelectObject(hdc, hBrush3); Rectangle(hdc, 30, 110, 100, 180); SelectObject(hdc, hBrush4); Rectangle(hdc, 110, 110, 180, 180);
SelectObject(hdc, holdPen); SelectObject(hdc, holdBrush);
DeleteObject(hPen); DeleteObject(hBrush1); DeleteObject(hBrush2); DeleteObject(hBrush3); DeleteObject(hBrush4);
EndPaint(hwnd, &ps);}
In the following example, we create 4 rectangles filled with 4 different solid colours.
HBRUSH hBrush1 = CreateSolidBrush(RGB(121, 90, 0));

Here we create a solid colour brush.
HBRUSH holdBrush = SelectObject(hdc, hBrush1);
A new brush is selected into the device context.
Figure: Solid brush
Hatch brushesThere are six predefined hatch brushes available. In our example, we show all of them.
#include <windows.h>
LRESULT CALLBACK WndProc(HWND, UINT, WPARAM, LPARAM);void DrawRectangles(HWND hwnd);
int WINAPI wWinMain(HINSTANCE hInstance, HINSTANCE hPrevInstance, PWSTR lpCmdLine, int nCmdShow){ MSG msg; WNDCLASSW wc = {0};
wc.style = CS_VREDRAW | CS_HREDRAW; wc.lpszClassName = L"Brush"; wc.hInstance = hInstance; wc.hbrBackground = GetSysColorBrush(COLOR_3DFACE); wc.lpfnWndProc = WndProc; wc.hCursor = LoadCursor(0, IDC_ARROW);
RegisterClassW(&wc); CreateWindowW(wc.lpszClassName, L"Hatch brushes", WS_OVERLAPPEDWINDOW | WS_VISIBLE, 100, 100, 300, 220, NULL, NULL, hInstance, NULL);
while( GetMessage(&msg, NULL, 0, 0)) { DispatchMessage(&msg);
}
return (int) msg.wParam;}
LRESULT CALLBACK WndProc(HWND hwnd, UINT msg, WPARAM wParam, LPARAM lParam){ switch(msg) { case WM_PAINT:
DrawRectangles(hwnd); break;
case WM_DESTROY:
PostQuitMessage(0); return 0; }
return DefWindowProcW(hwnd, msg, wParam, lParam);}
void DrawRectangles(HWND hwnd){ PAINTSTRUCT ps;
HDC hdc = BeginPaint(hwnd, &ps); HPEN hPen = CreatePen(PS_NULL, 1, RGB(0, 0, 0)); HPEN holdPen = SelectObject(hdc, hPen);
HBRUSH hBrush1 = CreateHatchBrush(HS_BDIAGONAL, RGB(0, 0, 0)); HBRUSH hBrush2 = CreateHatchBrush(HS_FDIAGONAL, RGB(0, 0, 0)); HBRUSH hBrush3 = CreateHatchBrush(HS_CROSS, RGB(0, 0, 0)); HBRUSH hBrush4 = CreateHatchBrush(HS_HORIZONTAL, RGB(0, 0, 0)); HBRUSH hBrush5 = CreateHatchBrush(HS_DIAGCROSS, RGB(0, 0, 0)); HBRUSH hBrush6 = CreateHatchBrush(HS_VERTICAL, RGB(0, 0, 0));
HBRUSH holdBrush = SelectObject(hdc, hBrush1);
DWORD col = GetSysColor(COLOR_BTNFACE); SetBkColor(hdc, col);
Rectangle(hdc, 30, 30, 100, 80); SelectObject(hdc, hBrush2); Rectangle(hdc, 110, 30, 180, 80); SelectObject(hdc, hBrush3); Rectangle(hdc, 190, 30, 260, 80); SelectObject(hdc, hBrush4); Rectangle(hdc, 30, 110, 100, 160); SelectObject(hdc, hBrush5); Rectangle(hdc, 110, 110, 180, 160); SelectObject(hdc, hBrush6); Rectangle(hdc, 190, 110, 260, 160);
SelectObject(hdc, holdPen);

SelectObject(hdc, holdBrush);
DeleteObject(hPen); DeleteObject(hBrush1); DeleteObject(hBrush2); DeleteObject(hBrush3); DeleteObject(hBrush4); DeleteObject(hBrush5); DeleteObject(hBrush6);
EndPaint(hwnd, &ps);}
This example is very similar to the previous one. We only use a new function call CreateHatchBrush()
HBRUSH hBrush1 = CreateHatchBrush(HS_BDIAGONAL, RGB(0, 0, 0));
A diagonal hatch brush is created.
HBRUSH holdBrush = SelectObject(hdc, hBrush1);
The brush is selected into the device context. A handle to the old brush is returned.
DeleteObject(hBrush1);
The brush object is deleted.
Figure: Hatch brush
ShapesShapes are more sophisticated geometrical objects. We will draw various geometrical shapes in the following example.
#include <windows.h>

LRESULT CALLBACK WndProc(HWND, UINT, WPARAM, LPARAM);
int WINAPI wWinMain(HINSTANCE hInstance, HINSTANCE hPrevInstance, PWSTR lpCmdLine, int nCmdShow){ MSG msg; WNDCLASSW wc = {0};
wc.style = CS_HREDRAW | CS_VREDRAW; wc.lpszClassName = L"Shapes"; wc.hInstance = hInstance; wc.hbrBackground = GetSysColorBrush(COLOR_3DFACE); wc.lpfnWndProc = WndProc; wc.hCursor = LoadCursor(0, IDC_ARROW);
RegisterClassW(&wc); CreateWindowW(wc.lpszClassName, L"Shapes", WS_OVERLAPPEDWINDOW | WS_VISIBLE, 100, 100, 390, 230, NULL, NULL, hInstance, NULL);
while( GetMessage(&msg, NULL, 0, 0)) { DispatchMessage(&msg); }
return (int) msg.wParam;}
LRESULT CALLBACK WndProc(HWND hwnd, UINT msg, WPARAM wParam, LPARAM lParam){ HDC hdc; PAINTSTRUCT ps; const POINT polygon[10] = { 30, 145, 85, 165, 105, 110, 65, 125, 30, 105 }; const POINT bezier[4] = {280, 160, 320, 160, 325, 110, 350, 110};
switch(msg) { case WM_PAINT:
hdc = BeginPaint(hwnd, &ps);
Ellipse(hdc, 30, 30, 120, 90); RoundRect(hdc, 150, 30, 240, 90, 15, 20); Chord(hdc, 270, 30, 360, 90, 270, 45, 360, 45); Polygon(hdc, polygon, 5); Rectangle(hdc, 150, 110, 230, 160); PolyBezier(hdc, bezier, 4);
EndPaint(hwnd, &ps); break;
case WM_DESTROY:
PostQuitMessage(0); return 0;

}
return DefWindowProcW(hwnd, msg, wParam, lParam);}
In our example, we have created an ellipse, a rounded rectangle, a chord, a polygon, a rectangle and a bezier curve.
Ellipse(hdc, 30, 30, 120, 90);
The Ellipse() function draws an ellipse. The parameters of the function are the x, y coordinates of the upper-left and bottom-right of corner a bounding rectangle. The ellipse is drawn within this rectangle.
RoundRect(hdc, 150, 30, 240, 90, 15, 20);
The RoundRect() function draws a rectangle with rounded corners.
Chord(hdc, 270, 30, 360, 90, 270, 45, 360, 45);
The Chord() function draws a chord.
Polygon(hdc, polygon, 5);
The Polygon() function draws a polygon consisting of two or more vertices connected by straight lines. The polygon is a pointer to an array of POINT structures that specify the vertices of the polygon. The last parameter is the number of points in the array.
Rectangle(hdc, 150, 110, 230, 160);
The Rectangle() function draws a rectangle. The parameters of the function are the x, y coordinates of the upper-left and lower-right corner of the rectangle.
PolyBezier(hdc, bezier, 4);
The PolyBezier() function draws one or more Bézier curves. The second parameter is a pointer to an array of POINT structures that contains the endpoints and control points of the curve. The third parameter is the number of points in the array.
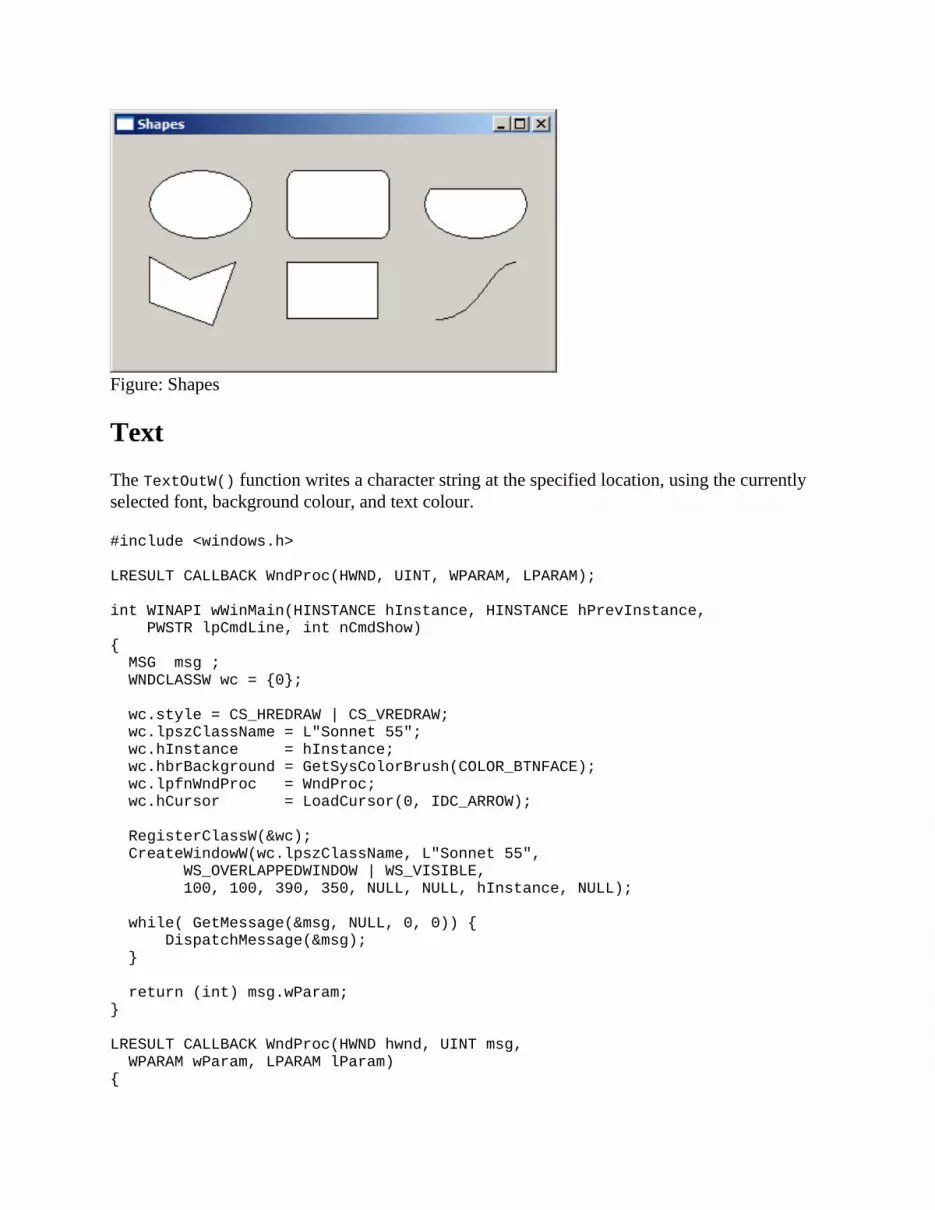
Figure: Shapes
TextThe TextOutW() function writes a character string at the specified location, using the currently selected font, background colour, and text colour.
#include <windows.h>
LRESULT CALLBACK WndProc(HWND, UINT, WPARAM, LPARAM);
int WINAPI wWinMain(HINSTANCE hInstance, HINSTANCE hPrevInstance, PWSTR lpCmdLine, int nCmdShow){ MSG msg ; WNDCLASSW wc = {0};
wc.style = CS_HREDRAW | CS_VREDRAW; wc.lpszClassName = L"Sonnet 55"; wc.hInstance = hInstance; wc.hbrBackground = GetSysColorBrush(COLOR_BTNFACE); wc.lpfnWndProc = WndProc; wc.hCursor = LoadCursor(0, IDC_ARROW);
RegisterClassW(&wc); CreateWindowW(wc.lpszClassName, L"Sonnet 55", WS_OVERLAPPEDWINDOW | WS_VISIBLE, 100, 100, 390, 350, NULL, NULL, hInstance, NULL);
while( GetMessage(&msg, NULL, 0, 0)) { DispatchMessage(&msg); }
return (int) msg.wParam;}
LRESULT CALLBACK WndProc(HWND hwnd, UINT msg, WPARAM wParam, LPARAM lParam){

HDC hdc; PAINTSTRUCT ps;
DWORD color;
HFONT hFont, holdFont;
static wchar_t *ver1 = L"Not marble, nor the gilded monuments"; static wchar_t *ver2 = L"Of princes, shall outlive this powerful rhyme;"; static wchar_t *ver3 = L"But you shall shine more bright in these contents"; static wchar_t *ver4 = L"Than unswept stone, besmear'd with sluttish time."; static wchar_t *ver5 = L"When wasteful war shall statues overturn,"; static wchar_t *ver6 = L"And broils root out the work of masonry,"; static wchar_t *ver7 = L"Nor Mars his sword, nor war's quick fire shall burn"; static wchar_t *ver8 = L"The living record of your memory."; static wchar_t *ver9 = L"'Gainst death, and all oblivious enmity"; static wchar_t *ver10 = L"Shall you pace forth; your praise shall still find room"; static wchar_t *ver11 = L"Even in the eyes of all posterity"; static wchar_t *ver12 = L"That wear this world out to the ending doom."; static wchar_t *ver13 = L"So, till the judgment that yourself arise,"; static wchar_t *ver14 = L"You live in this, and dwell in lovers' eyes.";
switch(msg) { case WM_PAINT:
hdc = BeginPaint(hwnd, &ps);
color = GetSysColor(COLOR_BTNFACE); SetBkColor(hdc, color);
hFont = CreateFontW(15, 0, 0, 0, FW_MEDIUM, 0, 0, 0, 0, 0, 0, 0, 0, L"Georgia"); holdFont = SelectObject(hdc, hFont);
TextOutW(hdc, 50, 20, ver1, lstrlenW(ver1)); TextOutW(hdc, 50, 40, ver2, lstrlenW(ver2)); TextOutW(hdc, 50, 60, ver3, lstrlenW(ver3)); TextOutW(hdc, 50, 80, ver4, lstrlenW(ver4)); TextOutW(hdc, 50, 100, ver5, lstrlenW(ver5)); TextOutW(hdc, 50, 120, ver6, lstrlenW(ver6)); TextOutW(hdc, 50, 140, ver7, lstrlenW(ver7)); TextOutW(hdc, 50, 160, ver8, lstrlenW(ver8)); TextOutW(hdc, 50, 180, ver9, lstrlenW(ver9)); TextOutW(hdc, 50, 200, ver10, lstrlenW(ver10)); TextOutW(hdc, 50, 220, ver11, lstrlenW(ver11)); TextOutW(hdc, 50, 240, ver12, lstrlenW(ver12)); TextOutW(hdc, 50, 260, ver13, lstrlenW(ver13)); TextOutW(hdc, 50, 280, ver14, lstrlenW(ver14));
SelectObject(hdc, holdFont); DeleteObject(hFont);
EndPaint(hwnd, &ps); break;

case WM_DESTROY:
PostQuitMessage(0); return 0; }
return DefWindowProcW(hwnd, msg, wParam, lParam);}
We draw a few verses on the window with the TextOutW() function.
color = GetSysColor(COLOR_BTNFACE);SetBkColor(hdc, color);
By default, if we draw some text on the client area of the window, the background is set to white color. We can change this by setting the background color using the SetBkColor() function. We used the typical Windows gray color. The GetSysColor() function is used to get the system colors used in buttons, title or backround of window controls.
hFont = CreateFontW(15, 0, 0, 0, FW_MEDIUM, 0, 0, 0, 0, 0, 0, 0, 0, L"Georgia");holdFont = SelectObject(hdc, hFont);
Here we create a font object. There are 14 parameters. We don't have to specify all of them. We used only the font size, font weight and fontface parameters.
TextOutW(hdc, 50, 20, verse1, lstrlenW(verse1));
The text is drawn onto the window using the TextOutW() function.

Figure: Text
In this part of the Winapi tutorial, we did some drawing.
The GDIThe GDI (Graphics Device Interface) is an interface for working with graphics. It is used to interact with graphic devices such as monitors, printers or files. The GDI allows programmers to display data on a screen or printer without having to be concerned about the details of a particular device. The GDI insulates the programmer from the hardware. From the programmer's point of view, the GDI is a group of API functions for working with graphics. The GDI consists of 2D Vector Graphics, Fonts and Images. To begin drawing graphics, we must obtain a device context (DC) object.
PixelsThe SetPixel() is a function that draws a single pixel on the window.
#include <windows.h>
LRESULT CALLBACK WndProc(HWND, UINT, WPARAM, LPARAM);void DrawPixels(HWND hwnd);
int WINAPI wWinMain(HINSTANCE hInstance, HINSTANCE hPrevInstance, PWSTR lpCmdLine, int nCmdShow){ MSG msg; WNDCLASSW wc = {0};
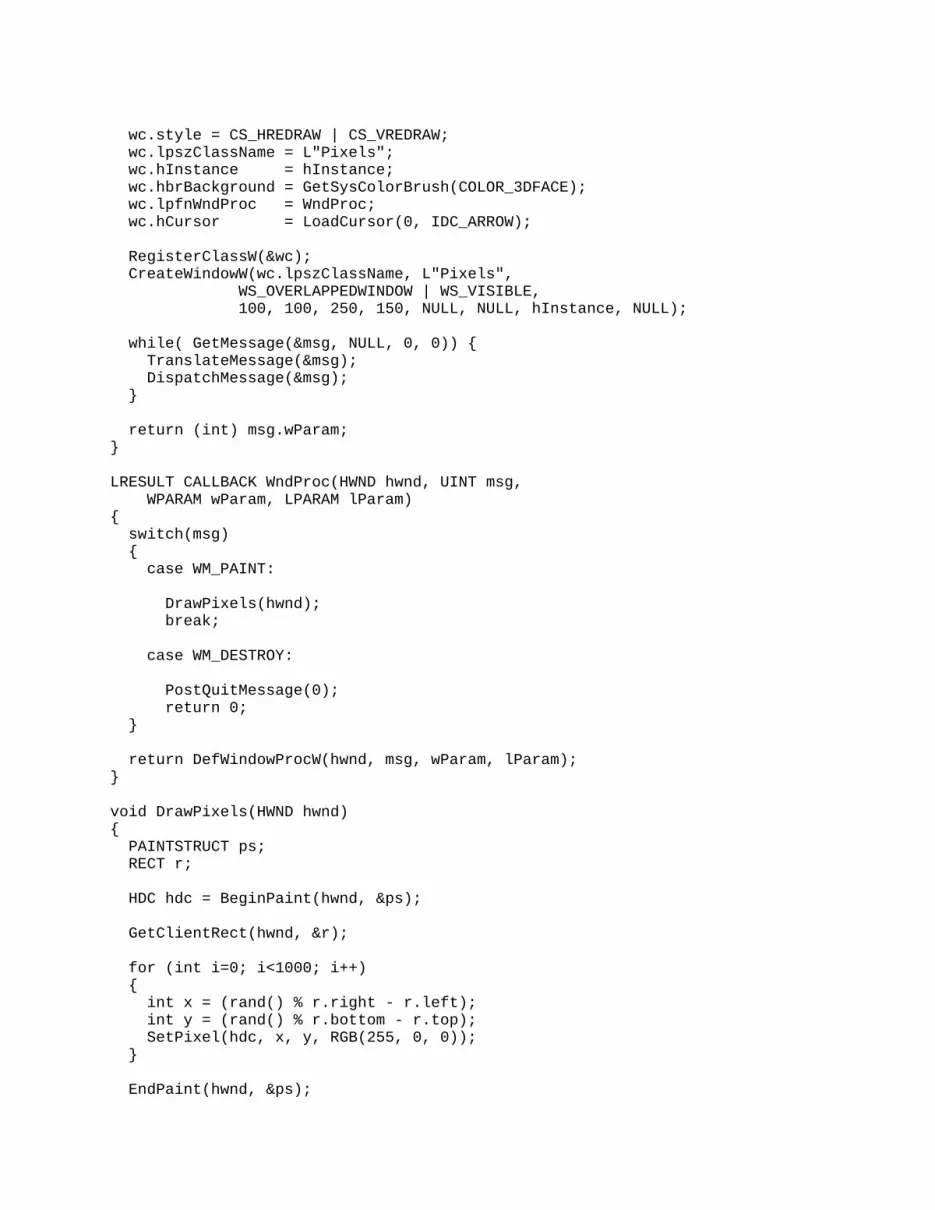
wc.style = CS_HREDRAW | CS_VREDRAW; wc.lpszClassName = L"Pixels"; wc.hInstance = hInstance; wc.hbrBackground = GetSysColorBrush(COLOR_3DFACE); wc.lpfnWndProc = WndProc; wc.hCursor = LoadCursor(0, IDC_ARROW);
RegisterClassW(&wc); CreateWindowW(wc.lpszClassName, L"Pixels", WS_OVERLAPPEDWINDOW | WS_VISIBLE, 100, 100, 250, 150, NULL, NULL, hInstance, NULL);
while( GetMessage(&msg, NULL, 0, 0)) { TranslateMessage(&msg); DispatchMessage(&msg); }
return (int) msg.wParam;}
LRESULT CALLBACK WndProc(HWND hwnd, UINT msg, WPARAM wParam, LPARAM lParam){ switch(msg) { case WM_PAINT:
DrawPixels(hwnd); break;
case WM_DESTROY:
PostQuitMessage(0); return 0; }
return DefWindowProcW(hwnd, msg, wParam, lParam);}
void DrawPixels(HWND hwnd){ PAINTSTRUCT ps; RECT r;
HDC hdc = BeginPaint(hwnd, &ps);
GetClientRect(hwnd, &r);
for (int i=0; i<1000; i++) { int x = (rand() % r.right - r.left); int y = (rand() % r.bottom - r.top); SetPixel(hdc, x, y, RGB(255, 0, 0)); }
EndPaint(hwnd, &ps);

}
In our example we display randomly 1000 red pixels on the client area of a window.
wc.style = CS_HREDRAW | CS_VREDRAW;
These two flags cause the window to be redrawn when it is resized.
case WM_PAINT:
DrawPixels(hwnd); break;
Drawing is performed in a reaction to the WM_PAINT message. The actual drawing is delegated to the DrawPixels() method.
HDC hdc = BeginPaint(hwnd, &ps);
The BeginPaint() function prepares the specified window for painting. It fills a PAINTSTRUCT structure with information about the painting. It returns a handle to a display device context for the specified window.
GetClientRect(hwnd, &r);
We retrieve the the coordinates of a window's client area. We will randomly draw on a window and we need to know, where we can draw at the moment.
for (int i = 0; i<1000; i++) { int x = (rand() % r.right - r.left); int y = (rand() % r.bottom - r.top); SetPixel(hdc, x, y, RGB(255, 0, 0));}
1000 points are randomly drawn on the window. The SetPixel() function draws a pixel at a specified location using a chosen colour.
EndPaint(hwnd, &ps);
At the end of the painting we call the EndPaint() functions. The function releases the display device context that BeginPaint() retrieved.

Figure: Pixels
RectangleTo draw a rectangle, we use the Rectangle() function.
BOOL Rectangle(HDC hdc, int nLeftRect, int nTopRect, int nRightRect, int nBottomRect);
The first parameter of the function is the handle to the device context. The next two parameters are the x, y coordinates of the upper-left corner of the rectangle. The last two parameters are the x, y coordinates of the lower-right corner of the rectangle. If the function fails, the return value is zero. If it succeeds, the return value is non-zero.
#include <windows.h>
LRESULT CALLBACK WndProc(HWND, UINT, WPARAM, LPARAM);
int WINAPI wWinMain(HINSTANCE hInstance, HINSTANCE hPrevInstance, PWSTR lpCmdLine, int nCmdShow){ MSG msg; WNDCLASSW wc = {0};
wc.style = CS_HREDRAW | CS_VREDRAW; wc.lpszClassName = L"Rectangle"; wc.hInstance = hInstance; wc.hbrBackground = GetSysColorBrush(COLOR_3DFACE); wc.lpfnWndProc = WndProc; wc.hCursor = LoadCursor(0, IDC_ARROW);
RegisterClassW(&wc); CreateWindowW(wc.lpszClassName, L"Rectangle", WS_OVERLAPPEDWINDOW | WS_VISIBLE, 100, 100, 250, 200, NULL, NULL, hInstance, NULL);
while( GetMessage(&msg, NULL, 0, 0)) { DispatchMessage(&msg); }
return (int) msg.wParam;}
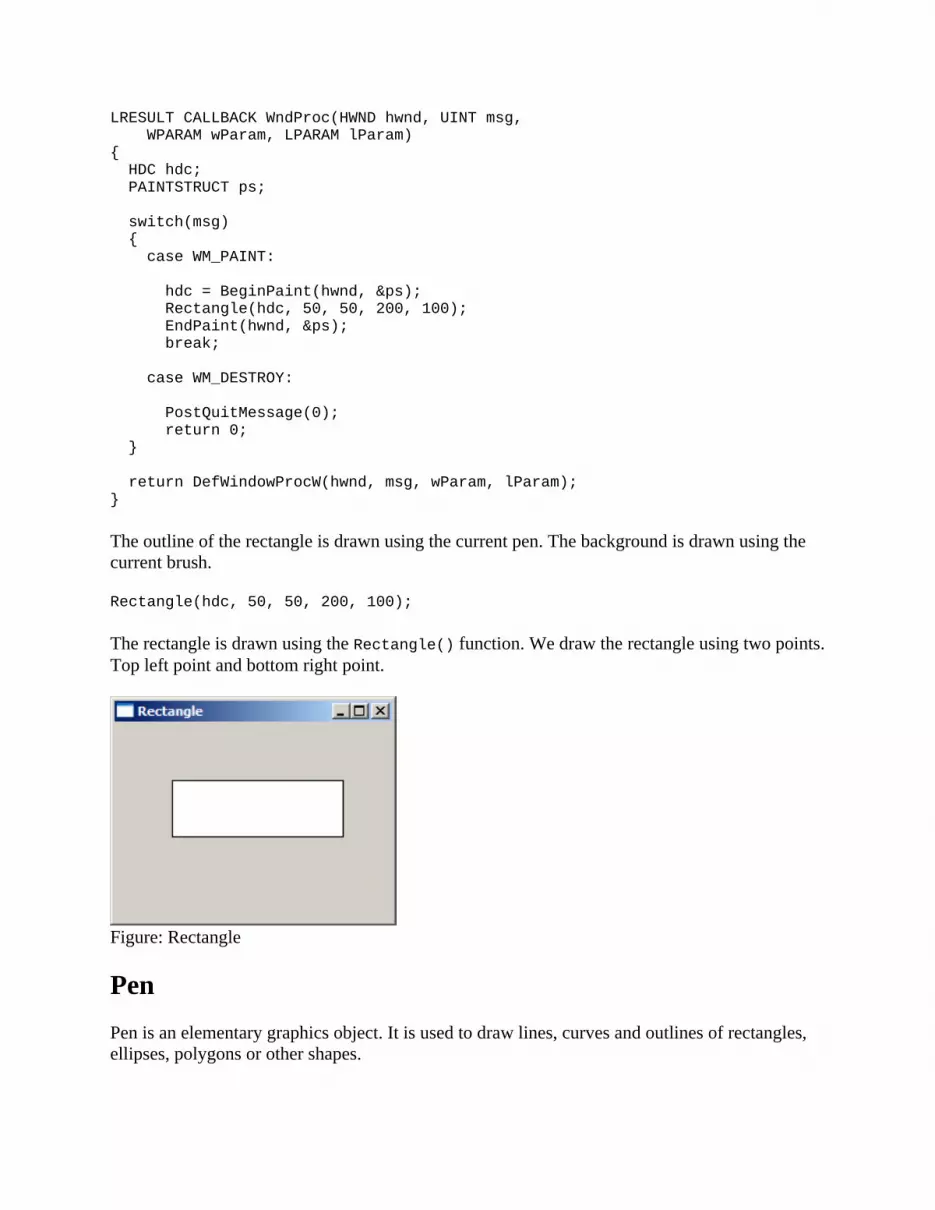
LRESULT CALLBACK WndProc(HWND hwnd, UINT msg, WPARAM wParam, LPARAM lParam){ HDC hdc; PAINTSTRUCT ps;
switch(msg) { case WM_PAINT:
hdc = BeginPaint(hwnd, &ps); Rectangle(hdc, 50, 50, 200, 100); EndPaint(hwnd, &ps); break;
case WM_DESTROY:
PostQuitMessage(0); return 0; }
return DefWindowProcW(hwnd, msg, wParam, lParam);}
The outline of the rectangle is drawn using the current pen. The background is drawn using the current brush.
Rectangle(hdc, 50, 50, 200, 100);
The rectangle is drawn using the Rectangle() function. We draw the rectangle using two points. Top left point and bottom right point.
Figure: Rectangle
PenPen is an elementary graphics object. It is used to draw lines, curves and outlines of rectangles, ellipses, polygons or other shapes.

The CreatePen() function creates a logical pen with a specified style, width and colour.
#include <windows.h>
LRESULT CALLBACK WndProc(HWND, UINT, WPARAM, LPARAM);void DrawLines(HWND);
int WINAPI wWinMain(HINSTANCE hInstance, HINSTANCE hPrevInstance, PWSTR lpCmdLine, int nCmdShow){ MSG msg; WNDCLASSW wc = {0};
wc.style = CS_HREDRAW | CS_VREDRAW; wc.lpszClassName = L"Pens"; wc.hInstance = hInstance; wc.hbrBackground = (HBRUSH) GetStockObject(WHITE_BRUSH); wc.lpfnWndProc = WndProc; wc.hCursor = LoadCursor(0, IDC_ARROW);
RegisterClassW(&wc); CreateWindowW(wc.lpszClassName, L"Pens", WS_OVERLAPPEDWINDOW | WS_VISIBLE, 100, 100, 250, 180, NULL, NULL, hInstance, NULL);
while( GetMessage(&msg, NULL, 0, 0)) { DispatchMessage(&msg); }
return (int) msg.wParam;}
LRESULT CALLBACK WndProc(HWND hwnd, UINT msg, WPARAM wParam, LPARAM lParam){ switch(msg) { case WM_PAINT:
DrawLines(hwnd); break;
case WM_DESTROY:
PostQuitMessage(0); return 0; }
return DefWindowProcW(hwnd, msg, wParam, lParam);}
void DrawLines(HWND hwnd) { PAINTSTRUCT ps;
HDC hdc = BeginPaint(hwnd, &ps);

HPEN hPen1 = CreatePen(PS_SOLID, 1, RGB(0, 0, 0)); HPEN hPen2 = CreatePen(PS_DASH, 1, RGB(0, 0, 0)); HPEN hPen3 = CreatePen(PS_DOT, 1, RGB(0, 0, 0)); HPEN hPen4 = CreatePen(PS_DASHDOT, 1, RGB(0, 0, 0)); HPEN hPen5 = CreatePen(PS_DASHDOTDOT, 1, RGB(0, 0, 0));
HPEN holdPen = SelectObject(hdc, hPen1); MoveToEx(hdc, 50, 30, NULL); LineTo(hdc, 200, 30);
SelectObject(hdc, hPen2); MoveToEx(hdc, 50, 50, NULL); LineTo(hdc, 200, 50);
SelectObject(hdc, hPen2); MoveToEx(hdc, 50, 70, NULL); LineTo(hdc, 200, 70);
SelectObject(hdc, hPen3); MoveToEx(hdc, 50, 90, NULL); LineTo(hdc, 200, 90);
SelectObject(hdc, hPen4); MoveToEx(hdc, 50, 110, NULL); LineTo(hdc, 200, 110);
SelectObject(hdc, holdPen); DeleteObject(hPen1); DeleteObject(hPen2); DeleteObject(hPen3); DeleteObject(hPen4); DeleteObject(hPen5);
EndPaint(hwnd, &ps); }
In our example, we draw 5 different lines. Using 5 different pen styles.
case WM_PAINT:
DrawLines(hwnd); break;
The actual drawing is delegated to the DrawLines() method.
HPEN hPen1 = CreatePen(PS_SOLID, 1, RGB(0, 0, 0));
The CreatePen() function creates a logical pen with a specified style, width and colour. The PS_SOLID stands for a solid pen. We use the RGB macro to generate a colour for the pen.
SelectObject(hdc, hPen1);
To activate a pen, we call the SelectObject() function.

MoveToEx(hdc, 50, 30, NULL);LineTo(hdc, 200, 30);
To draw lines, we use the MoveToEx() and the LineTo() functions.
DeleteObject(hPen1);DeleteObject(hPen2);DeleteObject(hPen3);DeleteObject(hPen4);DeleteObject(hPen5);
In the end, we clean up resources.
Figure: Lines
BrushA Brush is an elementary graphics object. It is used to paint the background of graphics shapes, such as rectangles, ellipses or polygons. A brush can be a solid colour a hatch or a custom bitmap pattern.
#include <windows.h>
LRESULT CALLBACK WndProc(HWND, UINT, WPARAM, LPARAM);void DrawRectangles(HWND);
int WINAPI wWinMain(HINSTANCE hInstance, HINSTANCE hPrevInstance, PWSTR lpCmdLine, int nCmdShow){ MSG msg; WNDCLASSW wc = {0};
wc.style = CS_HREDRAW | CS_VREDRAW; wc.lpszClassName = L"Brush"; wc.hInstance = hInstance; wc.hbrBackground = GetSysColorBrush(COLOR_3DFACE); wc.lpfnWndProc = WndProc; wc.hCursor = LoadCursor(0, IDC_ARROW);
RegisterClassW(&wc); CreateWindowW(wc.lpszClassName, L"Solid Brush",

WS_OVERLAPPEDWINDOW | WS_VISIBLE, 100, 100, 220, 240, NULL, NULL, hInstance, NULL);
while (GetMessage(&msg, NULL, 0, 0)) { DispatchMessage(&msg); }
return (int) msg.wParam;}
LRESULT CALLBACK WndProc( HWND hwnd, UINT msg, WPARAM wParam, LPARAM lParam){ switch(msg) { case WM_PAINT:
DrawRectangles(hwnd); break;
case WM_DESTROY:
PostQuitMessage(0); return 0; }
return DefWindowProcW(hwnd, msg, wParam, lParam);}
void DrawRectangles(HWND hwnd){ PAINTSTRUCT ps;
HDC hdc = BeginPaint(hwnd, &ps); HPEN hPen = CreatePen(PS_NULL, 1, RGB(0, 0, 0)); HPEN holdPen = SelectObject(hdc, hPen);
HBRUSH hBrush1 = CreateSolidBrush(RGB(121, 90, 0)); HBRUSH hBrush2 = CreateSolidBrush(RGB(240, 63, 19)); HBRUSH hBrush3 = CreateSolidBrush(RGB(240, 210, 18)); HBRUSH hBrush4 = CreateSolidBrush(RGB(9, 189, 21));
HBRUSH holdBrush = SelectObject(hdc, hBrush1);
Rectangle(hdc, 30, 30, 100, 100); SelectObject(hdc, hBrush2); Rectangle(hdc, 110, 30, 180, 100); SelectObject(hdc, hBrush3); Rectangle(hdc, 30, 110, 100, 180); SelectObject(hdc, hBrush4); Rectangle(hdc, 110, 110, 180, 180);
SelectObject(hdc, holdPen); SelectObject(hdc, holdBrush);
DeleteObject(hPen); DeleteObject(hBrush1);

DeleteObject(hBrush2); DeleteObject(hBrush3); DeleteObject(hBrush4);
EndPaint(hwnd, &ps);}
In the following example, we create 4 rectangles filled with 4 different solid colours.
HBRUSH hBrush1 = CreateSolidBrush(RGB(121, 90, 0));
Here we create a solid colour brush.
HBRUSH holdBrush = SelectObject(hdc, hBrush1);
A new brush is selected into the device context.
Figure: Solid brush
Hatch brushesThere are six predefined hatch brushes available. In our example, we show all of them.
#include <windows.h>
LRESULT CALLBACK WndProc(HWND, UINT, WPARAM, LPARAM);void DrawRectangles(HWND hwnd);
int WINAPI wWinMain(HINSTANCE hInstance, HINSTANCE hPrevInstance, PWSTR lpCmdLine, int nCmdShow){ MSG msg; WNDCLASSW wc = {0};
wc.style = CS_VREDRAW | CS_HREDRAW; wc.lpszClassName = L"Brush";

wc.hInstance = hInstance; wc.hbrBackground = GetSysColorBrush(COLOR_3DFACE); wc.lpfnWndProc = WndProc; wc.hCursor = LoadCursor(0, IDC_ARROW);
RegisterClassW(&wc); CreateWindowW(wc.lpszClassName, L"Hatch brushes", WS_OVERLAPPEDWINDOW | WS_VISIBLE, 100, 100, 300, 220, NULL, NULL, hInstance, NULL);
while( GetMessage(&msg, NULL, 0, 0)) { DispatchMessage(&msg); }
return (int) msg.wParam;}
LRESULT CALLBACK WndProc(HWND hwnd, UINT msg, WPARAM wParam, LPARAM lParam){ switch(msg) { case WM_PAINT:
DrawRectangles(hwnd); break;
case WM_DESTROY:
PostQuitMessage(0); return 0; }
return DefWindowProcW(hwnd, msg, wParam, lParam);}
void DrawRectangles(HWND hwnd){ PAINTSTRUCT ps;
HDC hdc = BeginPaint(hwnd, &ps); HPEN hPen = CreatePen(PS_NULL, 1, RGB(0, 0, 0)); HPEN holdPen = SelectObject(hdc, hPen);
HBRUSH hBrush1 = CreateHatchBrush(HS_BDIAGONAL, RGB(0, 0, 0)); HBRUSH hBrush2 = CreateHatchBrush(HS_FDIAGONAL, RGB(0, 0, 0)); HBRUSH hBrush3 = CreateHatchBrush(HS_CROSS, RGB(0, 0, 0)); HBRUSH hBrush4 = CreateHatchBrush(HS_HORIZONTAL, RGB(0, 0, 0)); HBRUSH hBrush5 = CreateHatchBrush(HS_DIAGCROSS, RGB(0, 0, 0)); HBRUSH hBrush6 = CreateHatchBrush(HS_VERTICAL, RGB(0, 0, 0));
HBRUSH holdBrush = SelectObject(hdc, hBrush1);
DWORD col = GetSysColor(COLOR_BTNFACE); SetBkColor(hdc, col);
Rectangle(hdc, 30, 30, 100, 80);

SelectObject(hdc, hBrush2); Rectangle(hdc, 110, 30, 180, 80); SelectObject(hdc, hBrush3); Rectangle(hdc, 190, 30, 260, 80); SelectObject(hdc, hBrush4); Rectangle(hdc, 30, 110, 100, 160); SelectObject(hdc, hBrush5); Rectangle(hdc, 110, 110, 180, 160); SelectObject(hdc, hBrush6); Rectangle(hdc, 190, 110, 260, 160);
SelectObject(hdc, holdPen); SelectObject(hdc, holdBrush);
DeleteObject(hPen); DeleteObject(hBrush1); DeleteObject(hBrush2); DeleteObject(hBrush3); DeleteObject(hBrush4); DeleteObject(hBrush5); DeleteObject(hBrush6);
EndPaint(hwnd, &ps);}
This example is very similar to the previous one. We only use a new function call CreateHatchBrush()
HBRUSH hBrush1 = CreateHatchBrush(HS_BDIAGONAL, RGB(0, 0, 0));
A diagonal hatch brush is created.
HBRUSH holdBrush = SelectObject(hdc, hBrush1);
The brush is selected into the device context. A handle to the old brush is returned.
DeleteObject(hBrush1);
The brush object is deleted.

Figure: Hatch brush
ShapesShapes are more sophisticated geometrical objects. We will draw various geometrical shapes in the following example.
#include <windows.h>
LRESULT CALLBACK WndProc(HWND, UINT, WPARAM, LPARAM);
int WINAPI wWinMain(HINSTANCE hInstance, HINSTANCE hPrevInstance, PWSTR lpCmdLine, int nCmdShow){ MSG msg; WNDCLASSW wc = {0};
wc.style = CS_HREDRAW | CS_VREDRAW; wc.lpszClassName = L"Shapes"; wc.hInstance = hInstance; wc.hbrBackground = GetSysColorBrush(COLOR_3DFACE); wc.lpfnWndProc = WndProc; wc.hCursor = LoadCursor(0, IDC_ARROW);
RegisterClassW(&wc); CreateWindowW(wc.lpszClassName, L"Shapes", WS_OVERLAPPEDWINDOW | WS_VISIBLE, 100, 100, 390, 230, NULL, NULL, hInstance, NULL);
while( GetMessage(&msg, NULL, 0, 0)) { DispatchMessage(&msg); }
return (int) msg.wParam;}
LRESULT CALLBACK WndProc(HWND hwnd, UINT msg, WPARAM wParam, LPARAM lParam){ HDC hdc;

PAINTSTRUCT ps; const POINT polygon[10] = { 30, 145, 85, 165, 105, 110, 65, 125, 30, 105 }; const POINT bezier[4] = {280, 160, 320, 160, 325, 110, 350, 110};
switch(msg) { case WM_PAINT:
hdc = BeginPaint(hwnd, &ps);
Ellipse(hdc, 30, 30, 120, 90); RoundRect(hdc, 150, 30, 240, 90, 15, 20); Chord(hdc, 270, 30, 360, 90, 270, 45, 360, 45); Polygon(hdc, polygon, 5); Rectangle(hdc, 150, 110, 230, 160); PolyBezier(hdc, bezier, 4);
EndPaint(hwnd, &ps); break;
case WM_DESTROY:
PostQuitMessage(0); return 0; }
return DefWindowProcW(hwnd, msg, wParam, lParam);}
In our example, we have created an ellipse, a rounded rectangle, a chord, a polygon, a rectangle and a bezier curve.
Ellipse(hdc, 30, 30, 120, 90);
The Ellipse() function draws an ellipse. The parameters of the function are the x, y coordinates of the upper-left and bottom-right of corner a bounding rectangle. The ellipse is drawn within this rectangle.
RoundRect(hdc, 150, 30, 240, 90, 15, 20);
The RoundRect() function draws a rectangle with rounded corners.
Chord(hdc, 270, 30, 360, 90, 270, 45, 360, 45);
The Chord() function draws a chord.
Polygon(hdc, polygon, 5);

The Polygon() function draws a polygon consisting of two or more vertices connected by straight lines. The polygon is a pointer to an array of POINT structures that specify the vertices of the polygon. The last parameter is the number of points in the array.
Rectangle(hdc, 150, 110, 230, 160);
The Rectangle() function draws a rectangle. The parameters of the function are the x, y coordinates of the upper-left and lower-right corner of the rectangle.
PolyBezier(hdc, bezier, 4);
The PolyBezier() function draws one or more Bézier curves. The second parameter is a pointer to an array of POINT structures that contains the endpoints and control points of the curve. The third parameter is the number of points in the array.
Figure: Shapes
TextThe TextOutW() function writes a character string at the specified location, using the currently selected font, background colour, and text colour.
#include <windows.h>
LRESULT CALLBACK WndProc(HWND, UINT, WPARAM, LPARAM);
int WINAPI wWinMain(HINSTANCE hInstance, HINSTANCE hPrevInstance, PWSTR lpCmdLine, int nCmdShow){ MSG msg ; WNDCLASSW wc = {0};
wc.style = CS_HREDRAW | CS_VREDRAW; wc.lpszClassName = L"Sonnet 55"; wc.hInstance = hInstance; wc.hbrBackground = GetSysColorBrush(COLOR_BTNFACE);

wc.lpfnWndProc = WndProc; wc.hCursor = LoadCursor(0, IDC_ARROW);
RegisterClassW(&wc); CreateWindowW(wc.lpszClassName, L"Sonnet 55", WS_OVERLAPPEDWINDOW | WS_VISIBLE, 100, 100, 390, 350, NULL, NULL, hInstance, NULL);
while( GetMessage(&msg, NULL, 0, 0)) { DispatchMessage(&msg); }
return (int) msg.wParam;}
LRESULT CALLBACK WndProc(HWND hwnd, UINT msg, WPARAM wParam, LPARAM lParam){ HDC hdc; PAINTSTRUCT ps;
DWORD color;
HFONT hFont, holdFont;
static wchar_t *ver1 = L"Not marble, nor the gilded monuments"; static wchar_t *ver2 = L"Of princes, shall outlive this powerful rhyme;"; static wchar_t *ver3 = L"But you shall shine more bright in these contents"; static wchar_t *ver4 = L"Than unswept stone, besmear'd with sluttish time."; static wchar_t *ver5 = L"When wasteful war shall statues overturn,"; static wchar_t *ver6 = L"And broils root out the work of masonry,"; static wchar_t *ver7 = L"Nor Mars his sword, nor war's quick fire shall burn"; static wchar_t *ver8 = L"The living record of your memory."; static wchar_t *ver9 = L"'Gainst death, and all oblivious enmity"; static wchar_t *ver10 = L"Shall you pace forth; your praise shall still find room"; static wchar_t *ver11 = L"Even in the eyes of all posterity"; static wchar_t *ver12 = L"That wear this world out to the ending doom."; static wchar_t *ver13 = L"So, till the judgment that yourself arise,"; static wchar_t *ver14 = L"You live in this, and dwell in lovers' eyes.";
switch(msg) { case WM_PAINT:
hdc = BeginPaint(hwnd, &ps);
color = GetSysColor(COLOR_BTNFACE); SetBkColor(hdc, color);
hFont = CreateFontW(15, 0, 0, 0, FW_MEDIUM, 0, 0, 0, 0, 0, 0, 0, 0, L"Georgia"); holdFont = SelectObject(hdc, hFont);
TextOutW(hdc, 50, 20, ver1, lstrlenW(ver1)); TextOutW(hdc, 50, 40, ver2, lstrlenW(ver2));

TextOutW(hdc, 50, 60, ver3, lstrlenW(ver3)); TextOutW(hdc, 50, 80, ver4, lstrlenW(ver4)); TextOutW(hdc, 50, 100, ver5, lstrlenW(ver5)); TextOutW(hdc, 50, 120, ver6, lstrlenW(ver6)); TextOutW(hdc, 50, 140, ver7, lstrlenW(ver7)); TextOutW(hdc, 50, 160, ver8, lstrlenW(ver8)); TextOutW(hdc, 50, 180, ver9, lstrlenW(ver9)); TextOutW(hdc, 50, 200, ver10, lstrlenW(ver10)); TextOutW(hdc, 50, 220, ver11, lstrlenW(ver11)); TextOutW(hdc, 50, 240, ver12, lstrlenW(ver12)); TextOutW(hdc, 50, 260, ver13, lstrlenW(ver13)); TextOutW(hdc, 50, 280, ver14, lstrlenW(ver14));
SelectObject(hdc, holdFont); DeleteObject(hFont);
EndPaint(hwnd, &ps); break;
case WM_DESTROY:
PostQuitMessage(0); return 0; }
return DefWindowProcW(hwnd, msg, wParam, lParam);}
We draw a few verses on the window with the TextOutW() function.
color = GetSysColor(COLOR_BTNFACE);SetBkColor(hdc, color);
By default, if we draw some text on the client area of the window, the background is set to white color. We can change this by setting the background color using the SetBkColor() function. We used the typical Windows gray color. The GetSysColor() function is used to get the system colors used in buttons, title or backround of window controls.
hFont = CreateFontW(15, 0, 0, 0, FW_MEDIUM, 0, 0, 0, 0, 0, 0, 0, 0, L"Georgia");holdFont = SelectObject(hdc, hFont);
Here we create a font object. There are 14 parameters. We don't have to specify all of them. We used only the font size, font weight and fontface parameters.
TextOutW(hdc, 50, 20, verse1, lstrlenW(verse1));
The text is drawn onto the window using the TextOutW() function.

Figure: Text
In this part of the Winapi tutorial, we did some drawing.
Related Documents