Creating a wiki ‘Web 2 tools in the EFL classroom for creative and collaborative learning’

Welcome message from author
This document is posted to help you gain knowledge. Please leave a comment to let me know what you think about it! Share it to your friends and learn new things together.
Transcript

Creating a wiki
‘Web 2 tools in the EFL classroom for creative and collaborative learning’
2
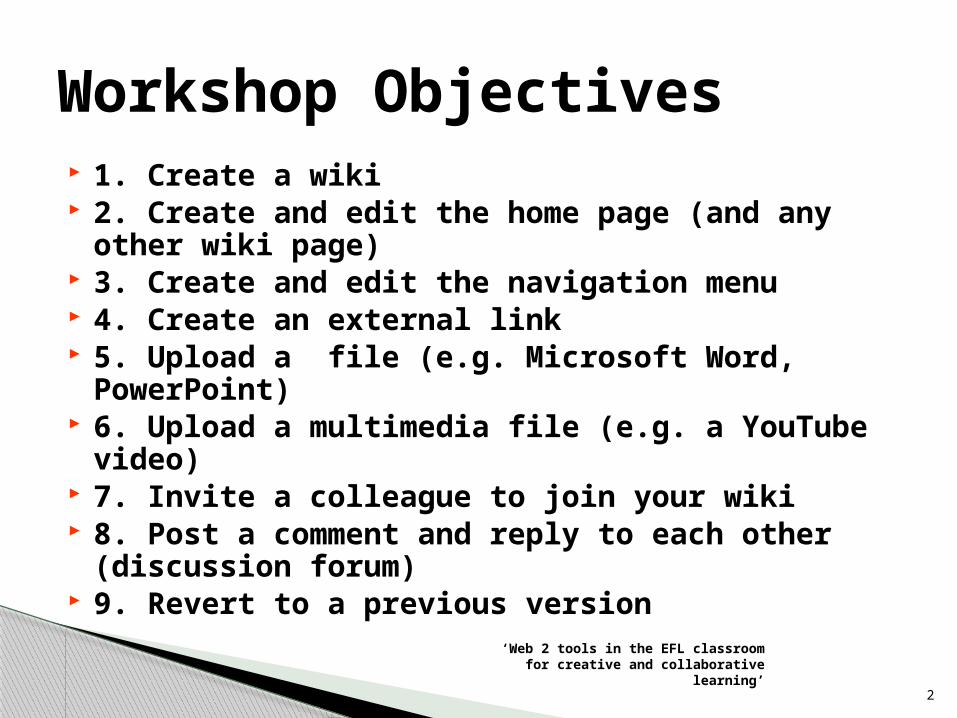
1. Create a wiki 2. Create and edit the home page (and any
other wiki page) 3. Create and edit the navigation menu 4. Create an external link 5. Upload a file (e.g. Microsoft Word,
PowerPoint) 6. Upload a multimedia file (e.g. a YouTube
video) 7. Invite a colleague to join your wiki 8. Post a comment and reply to each other
(discussion forum) 9. Revert to a previous version
‘Web 2 tools in the EFL classroom for creative and collaborative learning’
Workshop Objectives
3
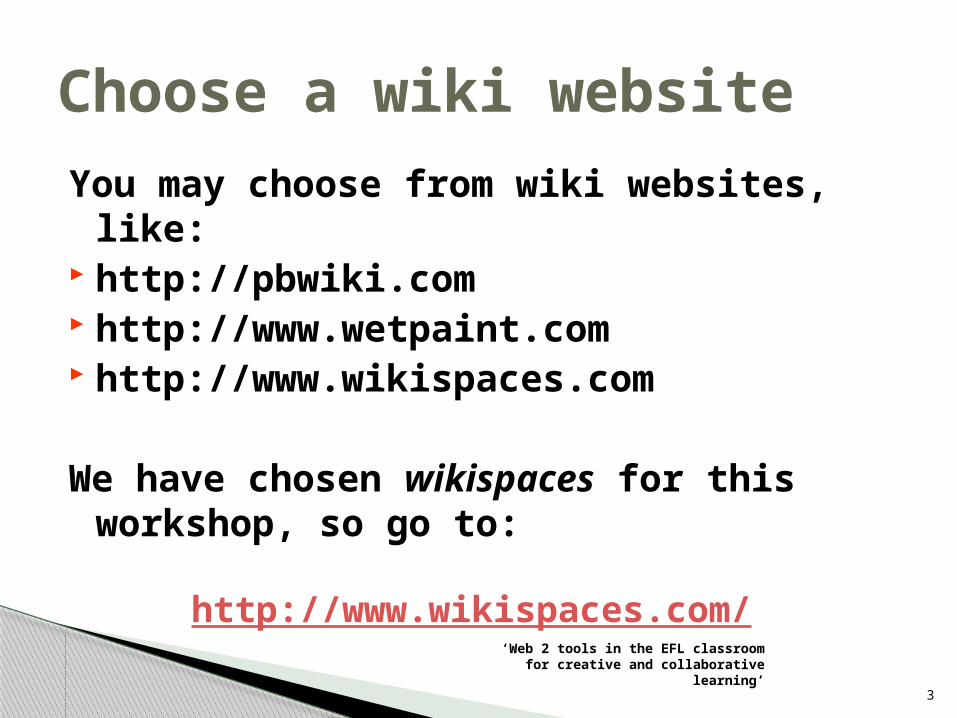
You may choose from wiki websites, like:
http://pbwiki.com http://www.wetpaint.com http://www.wikispaces.com
We have chosen wikispaces for this workshop, so go to:
http://www.wikispaces.com/
Choose a wiki website
‘Web 2 tools in the EFL classroom for creative and collaborative learning’

4
Objective 1: Create a wikiStep 1: On the wikispaces website, click on ‘Education’.
This option is for classroom
use
‘Web 2 tools in the EFL classroom for creative and collaborative learning’
5
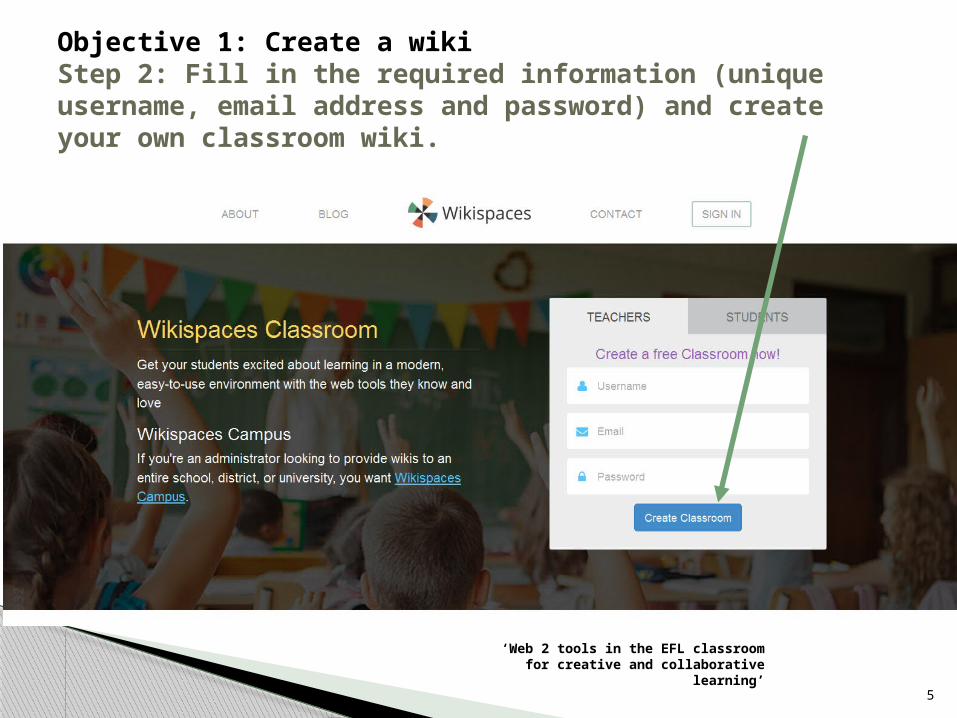
Objective 1: Create a wikiStep 2: Fill in the required information (unique username, email address and password) and create your own classroom wiki.
‘Web 2 tools in the EFL classroom for creative and collaborative learning’

6
Objective 1: Create a wikiStep 2: Think carefully about the URL you’ll create. Fill in the required information and create your wiki.
Required information
Remember to press the ‘Create’ button.
Think of a name for your wiki.
Tip: It could include the name of the class you’ll be using it for or your name.
‘Web 2 tools in the EFL classroom for creative and collaborative learning’

7
Objective 1: Create a wikiCongratulations! You’ve just created your own wiki!!! (this is the home page of the Classroom wiki type)
Your username should appear here!
To be allowed to edit pages, you must always be logged in.
On the left corner, the name of your wiki appears!
‘Web 2 tools in the EFL classroom for creative and collaborative learning’
8
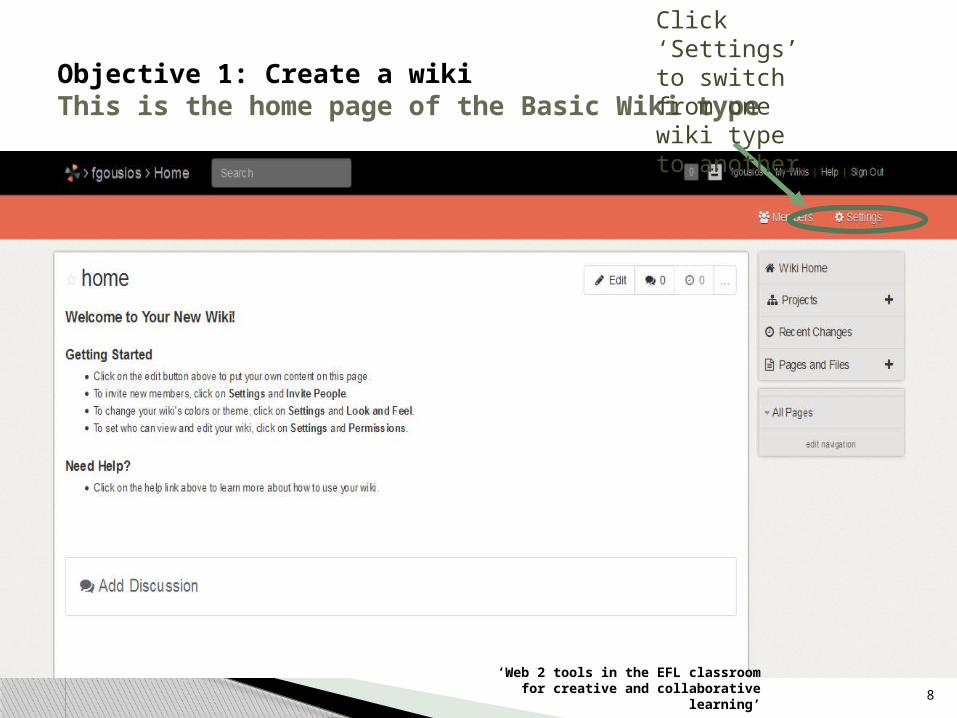
Objective 1: Create a wikiThis is the home page of the Basic Wiki type
Click ‘Settings’ to switch from one wiki type to another
‘Web 2 tools in the EFL classroom for creative and collaborative learning’

HOU AGG66 CS2 Sat 8/12/2012 9
Objective 1: Create a wikiCongratulations! You’ve just created your own wiki!!! (this is the home page of the Classroom wiki type)
Click ‘General’ and then the wiki type you want
‘Wiki’ is a fully editable wiki
‘Basic website’ looks like a website and can only be edited by you‘Classroom’ has got the least editable interface. It’s ideal for project work
10
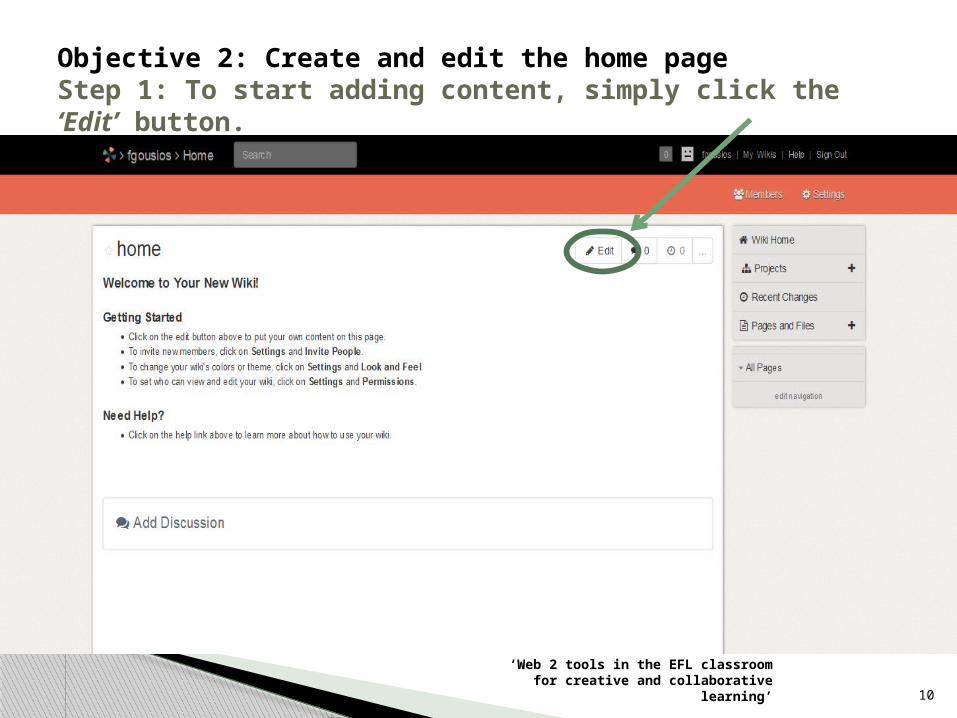
Objective 2: Create and edit the home pageStep 1: To start adding content, simply click the ‘Edit’ button.
‘Web 2 tools in the EFL classroom for creative and collaborative learning’
11
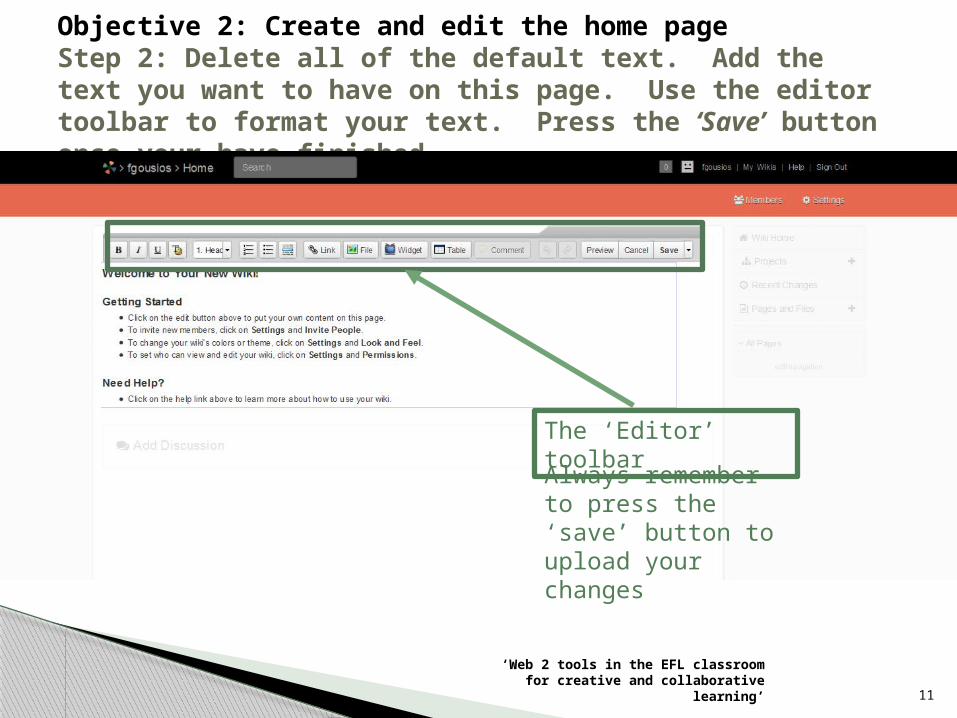
Objective 2: Create and edit the home pageStep 2: Delete all of the default text. Add the text you want to have on this page. Use the editor toolbar to format your text. Press the ‘Save’ button once your have finished.
The ‘Editor’ toolbar
Always remember to press the ‘save’ button to upload your changes
‘Web 2 tools in the EFL classroom for creative and collaborative learning’
12
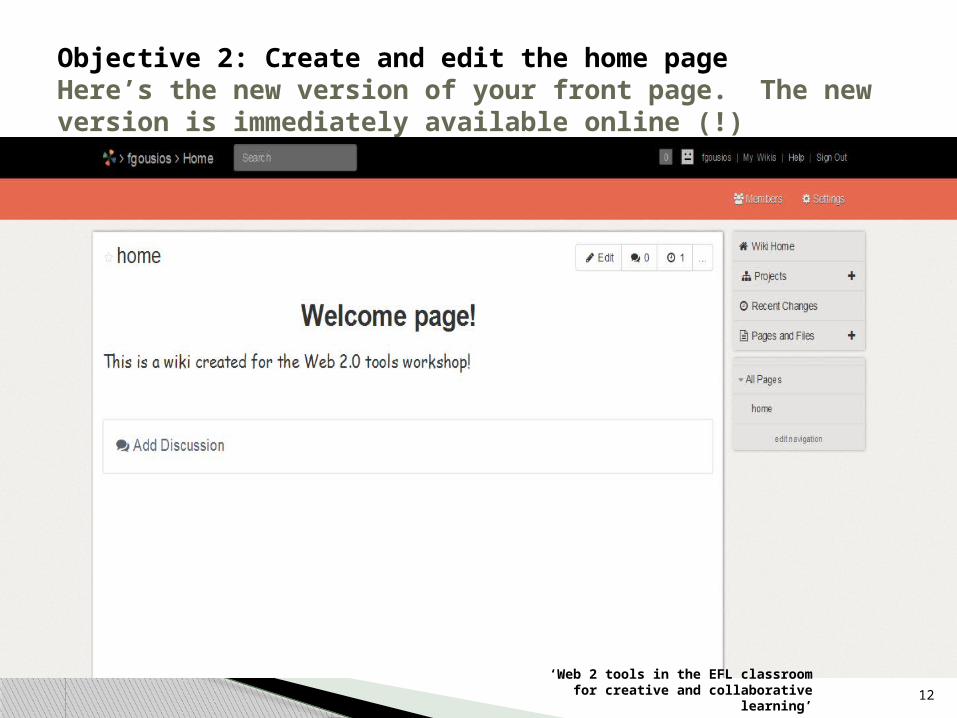
Objective 2: Create and edit the home pageHere’s the new version of your front page. The new version is immediately available online (!)
‘Web 2 tools in the EFL classroom for creative and collaborative learning’

HOU AGG66 CS2 Sat 8/12/2012 13
Objective 3: Create and edit the navigation menuStep 1: To create a new page, you need to create a link to that page in the navigation menu. Click on ‘edit navigation’ on the SideBar tab.
‘Web 2 tools in the EFL classroom for creative and collaborative learning’
14
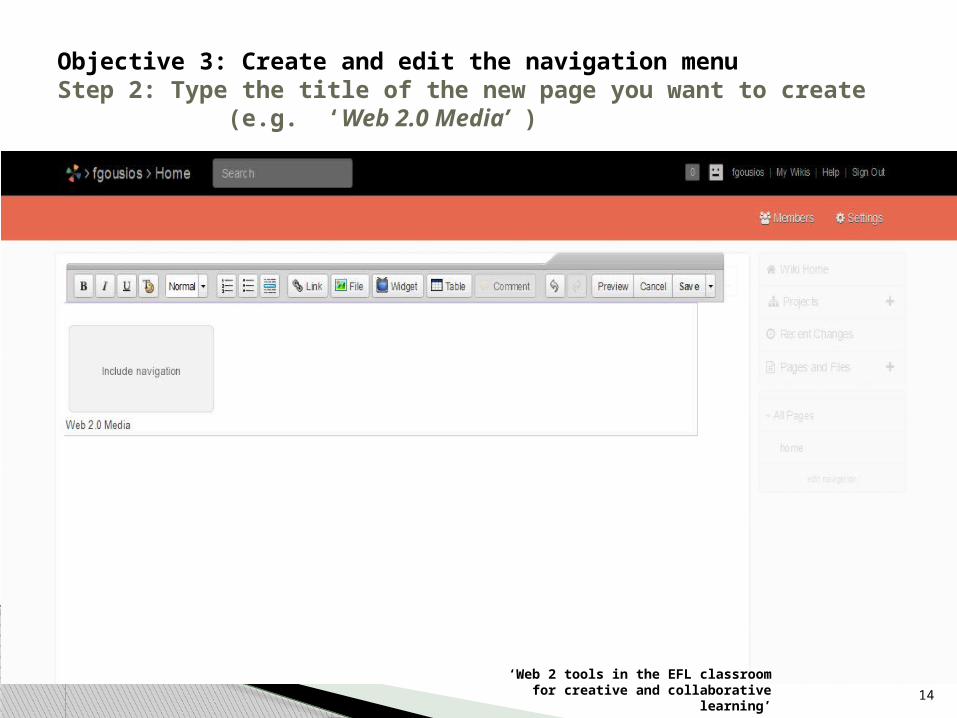
Objective 3: Create and edit the navigation menuStep 2: Type the title of the new page you want to create (e.g. ‘Web 2.0 Media’ )
‘Web 2 tools in the EFL classroom for creative and collaborative learning’
15
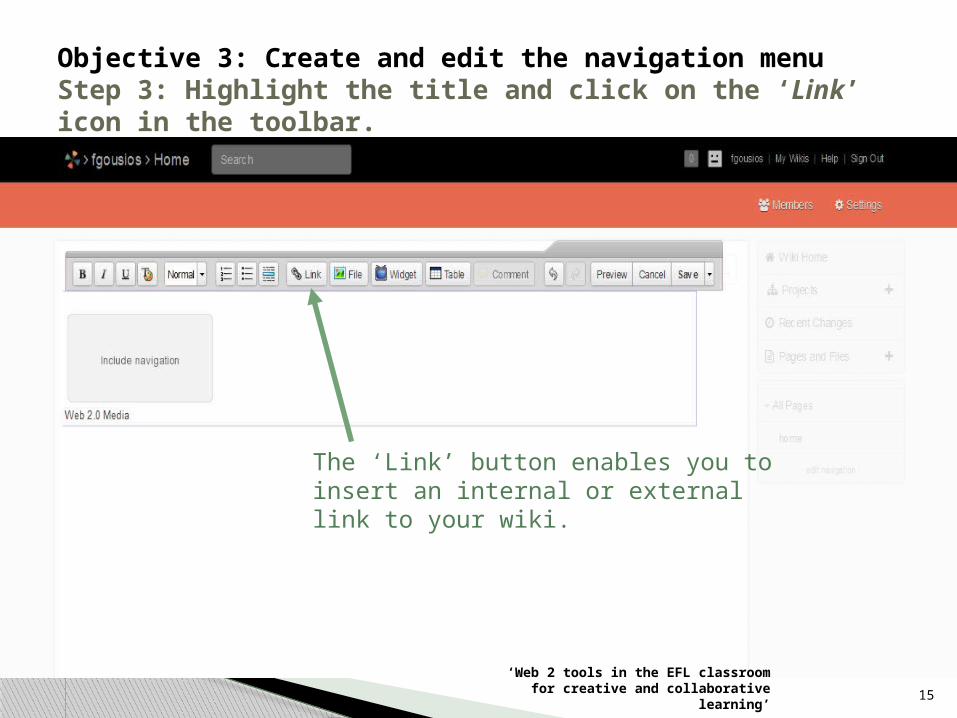
Objective 3: Create and edit the navigation menuStep 3: Highlight the title and click on the ‘Link’ icon in the toolbar.
The ‘Link’ button enables you to insert an internal or external link to your wiki.
‘Web 2 tools in the EFL classroom for creative and collaborative learning’

HOU AGG66 CS2 Sat 8/12/2012 16
Objective 3: Create and edit the navigation menuStep 4: The ‘Insert Link’ window appears. Press the ‘Add Link’ button to create a link within your wiki (internal link).

17
Objective 3: Create and edit the navigation menuStep 5: The title of the page you want to create should now appear underlined in blue – as a hyperlink. Save!
New navigation option
Save it!
‘Web 2 tools in the EFL classroom for creative and collaborative learning’
18
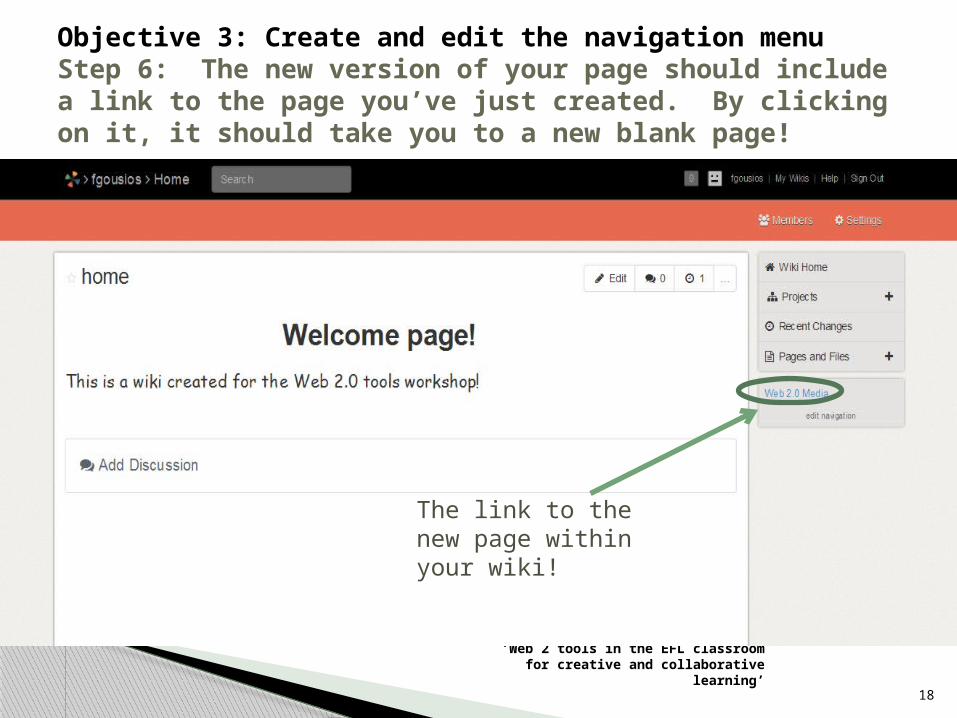
Objective 3: Create and edit the navigation menuStep 6: The new version of your page should include a link to the page you’ve just created. By clicking on it, it should take you to a new blank page!
‘Web 2 tools in the EFL classroom for creative and collaborative learning’
The link to the new page within your wiki!

HOU AGG66 CS2 Sat 8/12/2012 19
Objective 3: Create and edit the navigation menuMethod 2: Simply click on the ‘add’ button next to ‘Pages and Files’.
‘Web 2 tools in the EFL classroom for creative and collaborative learning’

20
Objective 3: Create and edit the navigation menuMethod 2: Write the name of the new page. Click ‘Create’. You are ready.
‘Web 2 tools in the EFL classroom for creative and collaborative learning’

21
Objective 4 : Create an external linkStep 1: To create an external link, click on the edit icon, type the title of the page you want to link to (e.g. Cambridge Online Dictionary), highlight it and click on the ‘Link’ button.
‘Web 2 tools in the EFL classroom for creative and collaborative learning’

22
Objective 4 : Create an external linkStep 2: In the ‘Address’ field, write the URL of the website you want to create a link to (e.g. http://dictionary.cambridge.org/). Press the ‘Add Link’ button and then the ‘Save’ button on the toolbar!
If you want the website to open in a new window, check the New Window button
‘Web 2 tools in the EFL classroom for creative and collaborative learning’

23
Objective 5: Upload a fileStep 1: Click the ‘Edit’ button and press the ‘File’ button on the ‘Editor’ toolbar. In the window ‘Images and files’ press the ‘Upload Files’ button.
‘Web 2 tools in the EFL classroom for creative and collaborative learning’
24
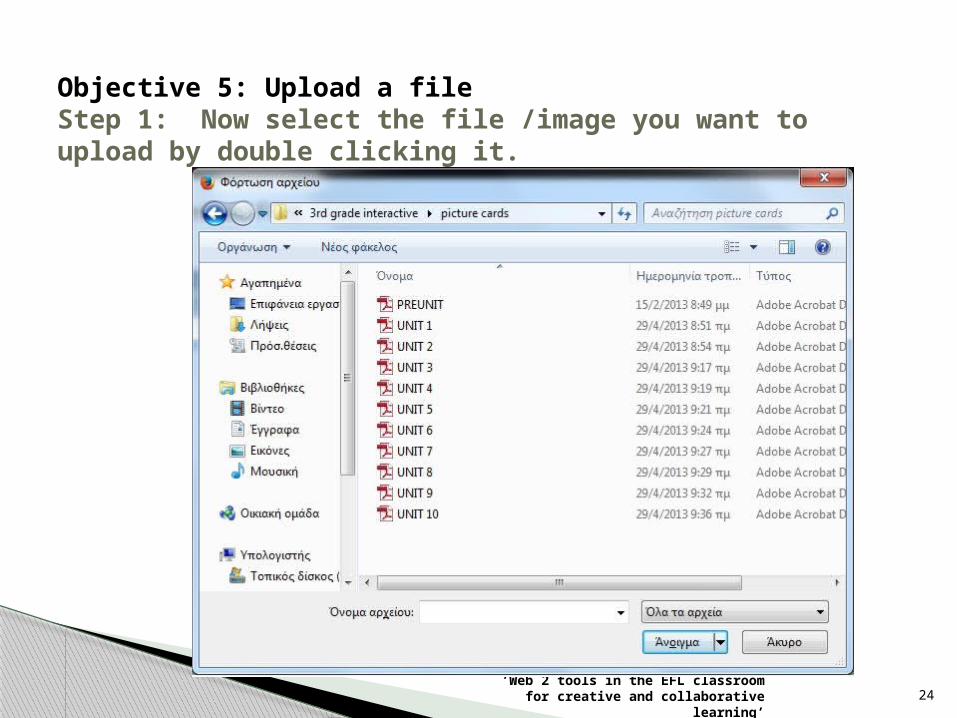
Objective 5: Upload a fileStep 1: Now select the file /image you want to upload by double clicking it.
‘Web 2 tools in the EFL classroom for creative and collaborative learning’
25
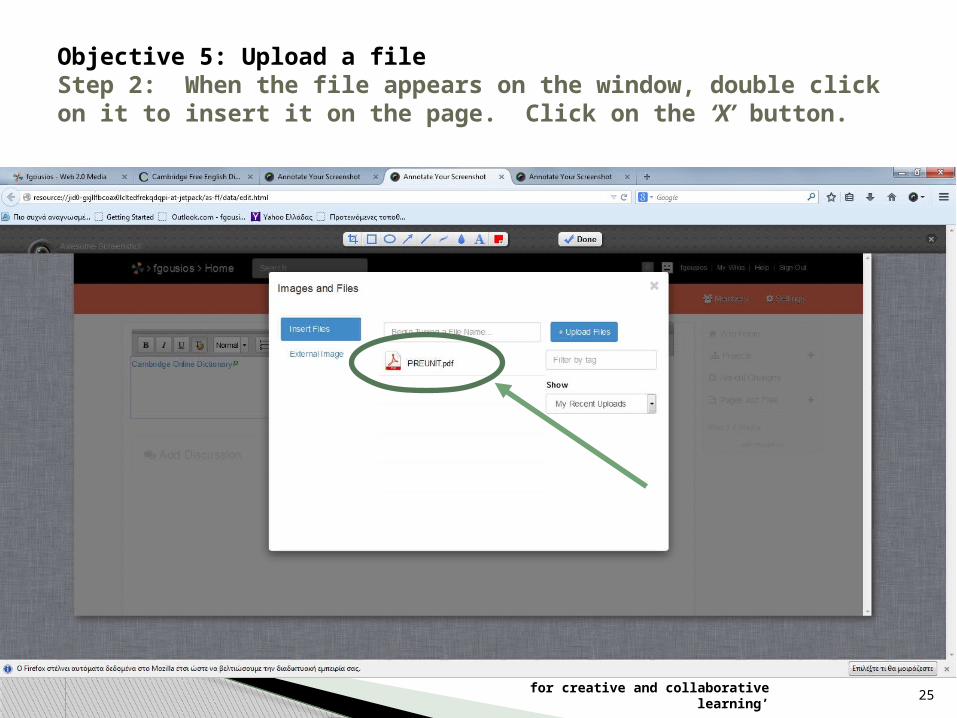
Objective 5: Upload a fileStep 2: When the file appears on the window, double click on it to insert it on the page. Click on the ‘X’ button.
‘Web 2 tools in the EFL classroom for creative and collaborative learning’

26
Objective 5: Upload a fileNow the members of the wiki can access the file by downloading it!
‘Web 2 tools in the EFL classroom for creative and collaborative learning’
27
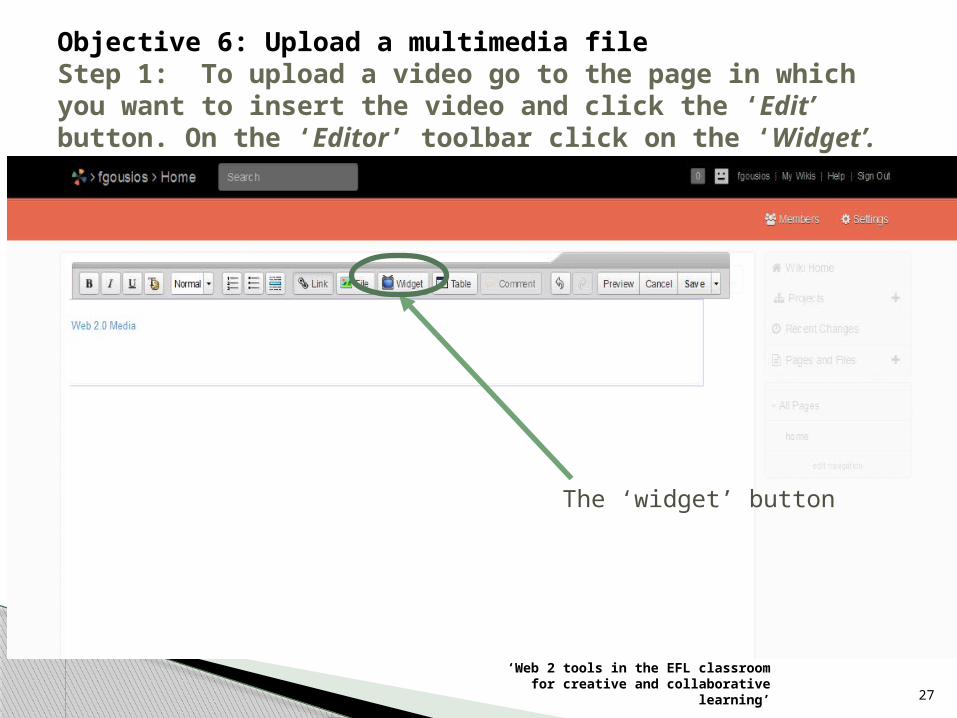
Objective 6: Upload a multimedia fileStep 1: To upload a video go to the page in which you want to insert the video and click the ‘Edit’ button. On the ‘Editor’ toolbar click on the ‘Widget’.
‘Web 2 tools in the EFL classroom for creative and collaborative learning’
The ‘widget’ button
28
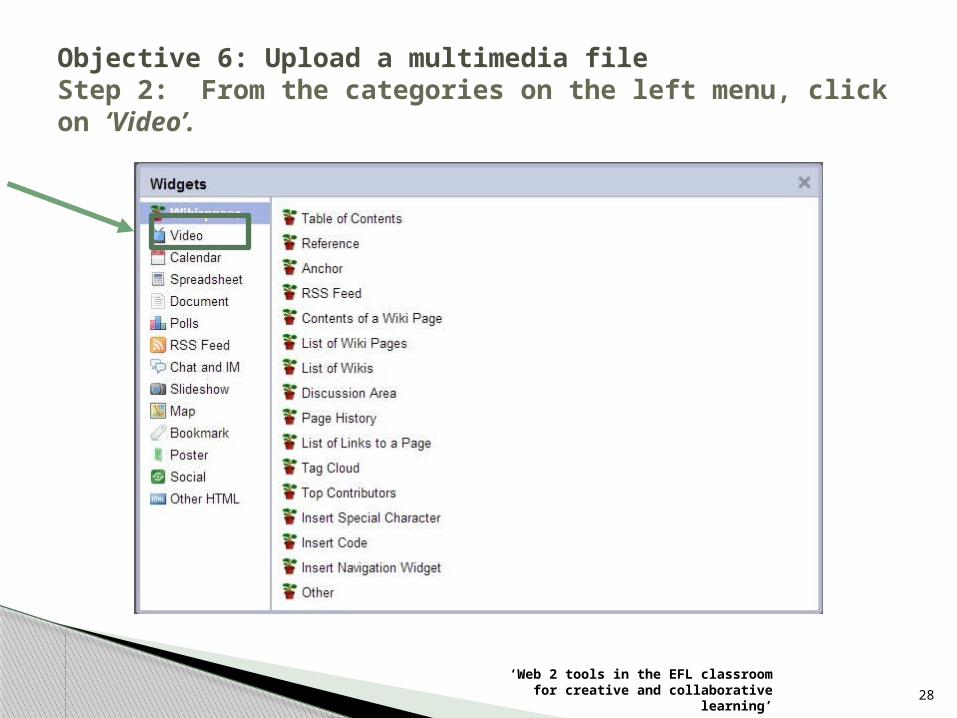
Objective 6: Upload a multimedia fileStep 2: From the categories on the left menu, click on ‘Video’.
‘Web 2 tools in the EFL classroom for creative and collaborative learning’
29
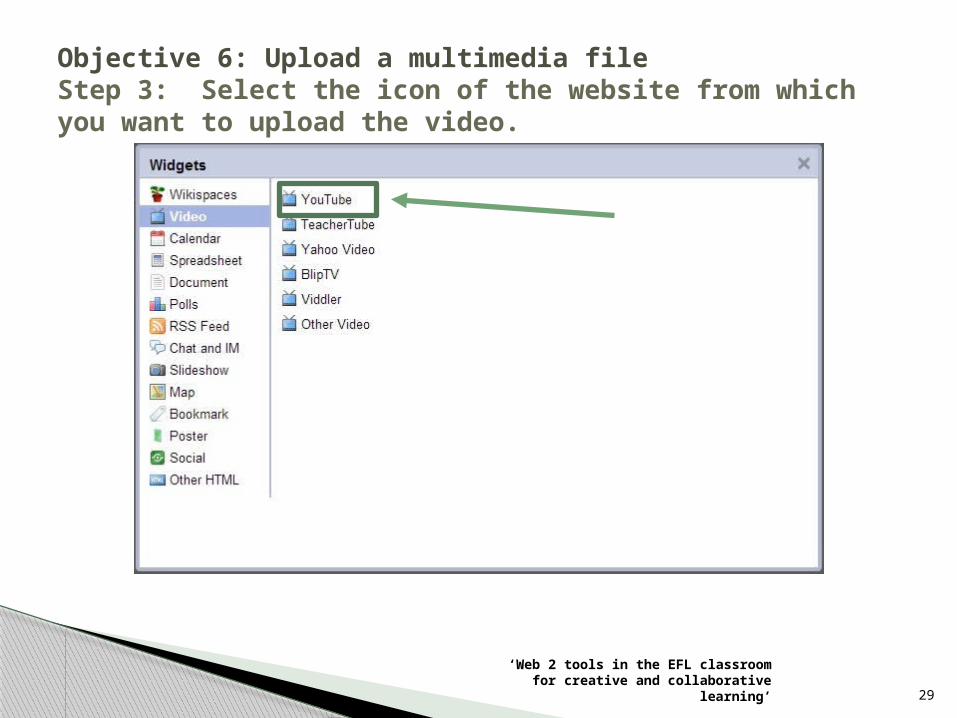
Objective 6: Upload a multimedia fileStep 3: Select the icon of the website from which you want to upload the video.
‘Web 2 tools in the EFL classroom for creative and collaborative learning’

30
Objective 6: Upload a multimedia fileStep 4: Once you click on the icon you want (e.g. ‘You Tube’), the ‘Widgets’ window appears. This provides a set of instructions explaining how to embed the video.
Follow instructions to upload a video.
‘Web 2 tools in the EFL classroom for creative and collaborative learning’
31
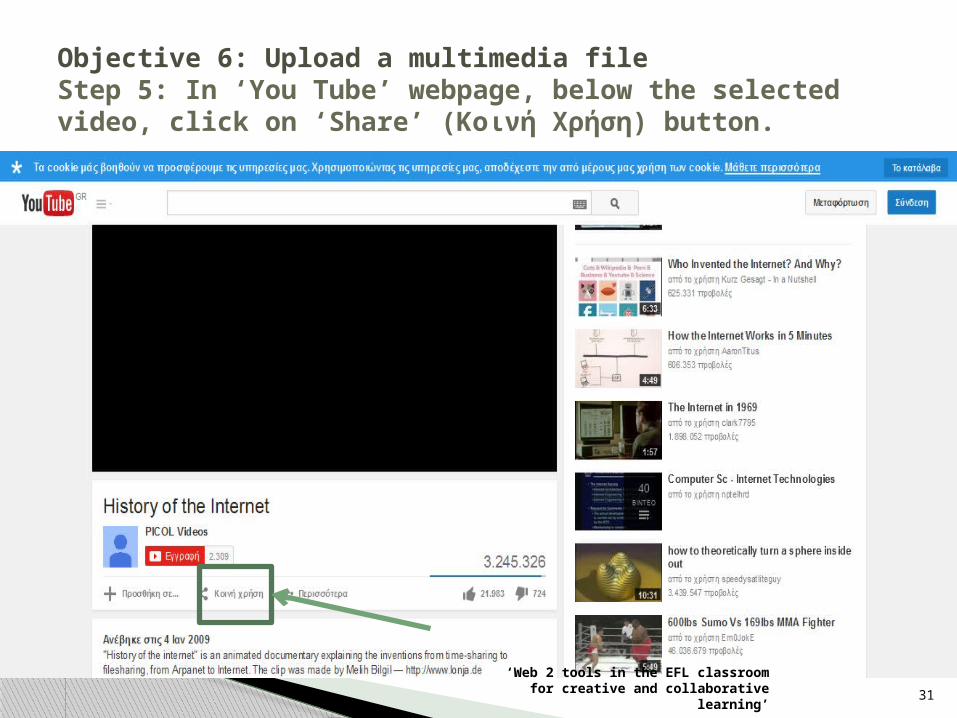
Objective 6: Upload a multimedia fileStep 5: In ‘You Tube’ webpage, below the selected video, click on ‘Share’ (Κοινή Χρήση) button.
‘Web 2 tools in the EFL classroom for creative and collaborative learning’
32
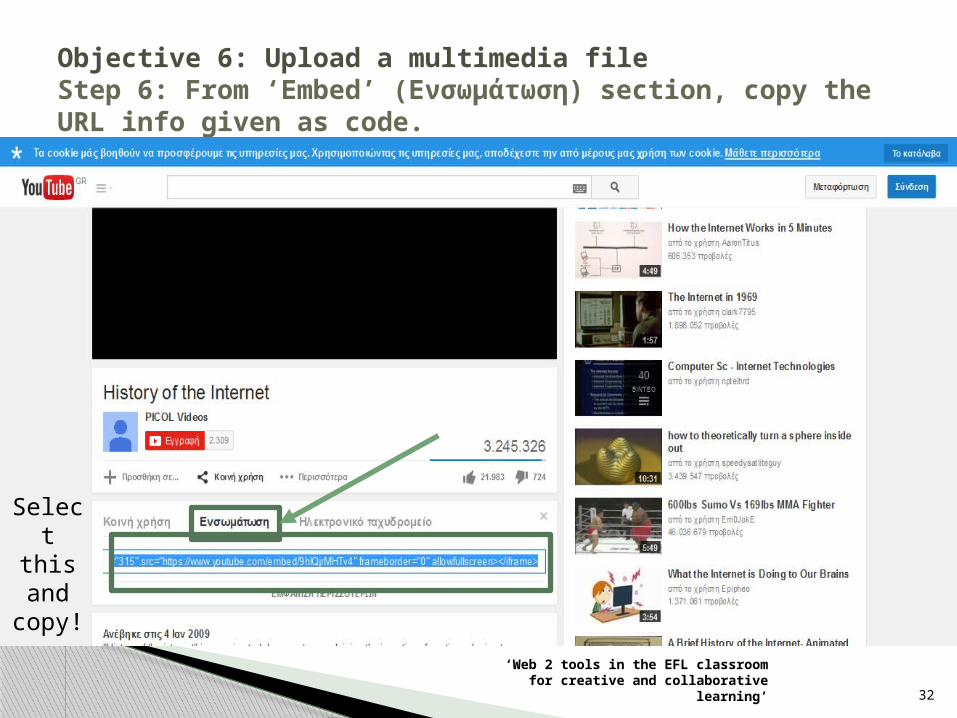
Objective 6: Upload a multimedia fileStep 6: From ‘Embed’ (Ενσωμάτωση) section, copy the URL info given as code.
Select this and
copy!
‘Web 2 tools in the EFL classroom for creative and collaborative learning’

33
Objective 6: Upload a multimedia fileStep 7: Now you can watch your embedded video directly from your wiki!
‘Web 2 tools in the EFL classroom for creative and collaborative learning’
34
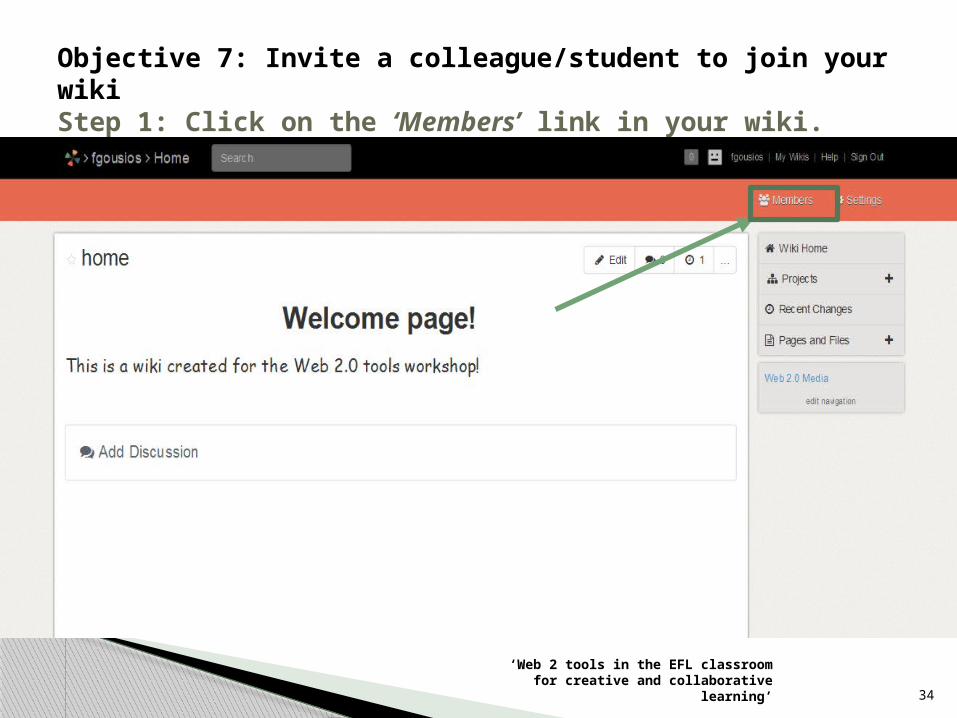
Objective 7: Invite a colleague/student to join your wikiStep 1: Click on the ‘Members’ link in your wiki.
‘Web 2 tools in the EFL classroom for creative and collaborative learning’
35
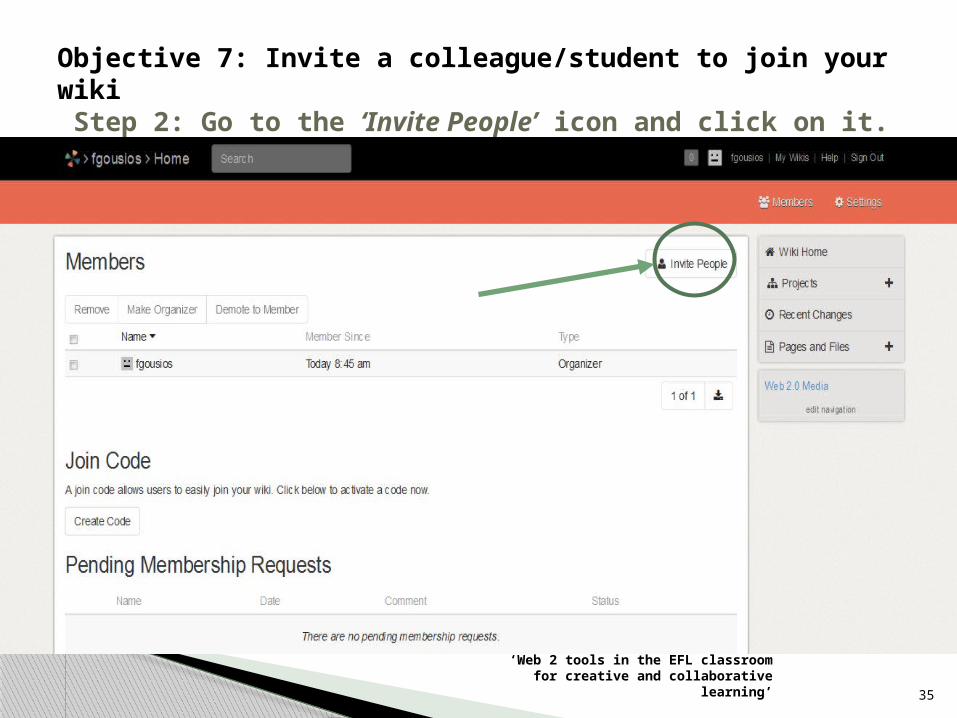
Objective 7: Invite a colleague/student to join your wiki Step 2: Go to the ‘Invite People’ icon and click on it.
‘Web 2 tools in the EFL classroom for creative and collaborative learning’
36
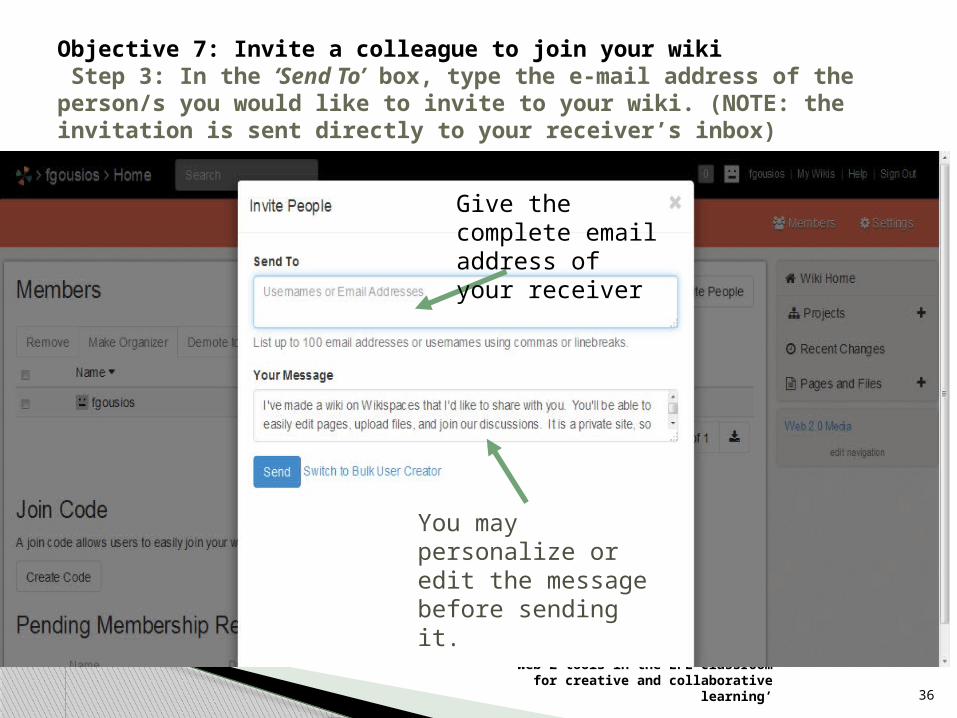
Objective 7: Invite a colleague to join your wiki Step 3: In the ‘Send To’ box, type the e-mail address of the person/s you would like to invite to your wiki. (NOTE: the invitation is sent directly to your receiver’s inbox)
‘Web 2 tools in the EFL classroom for creative and collaborative learning’
Give the complete email address of your receiver
You may personalize or edit the message before sending it.

37
Objective 8: Post a comment and reply to each otherStep 1: Go to the ‘Discussion Forum’ icon and start a discussion
‘Web 2 tools in the EFL classroom for creative and collaborative learning’
This is the
number of
posts
38
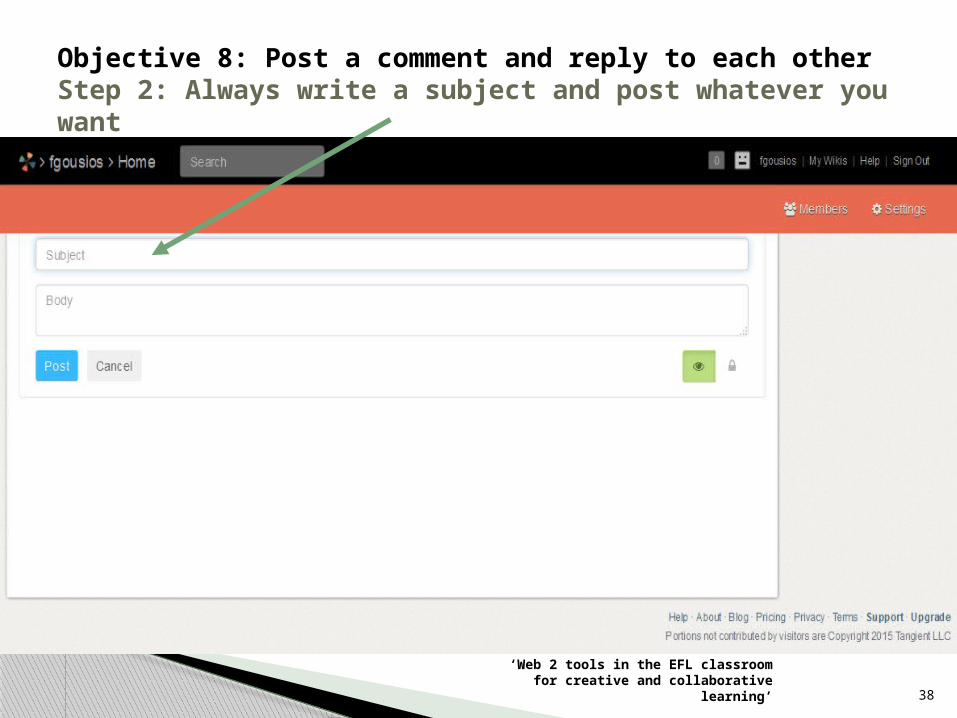
Objective 8: Post a comment and reply to each otherStep 2: Always write a subject and post whatever you want
‘Web 2 tools in the EFL classroom for creative and collaborative learning’
39
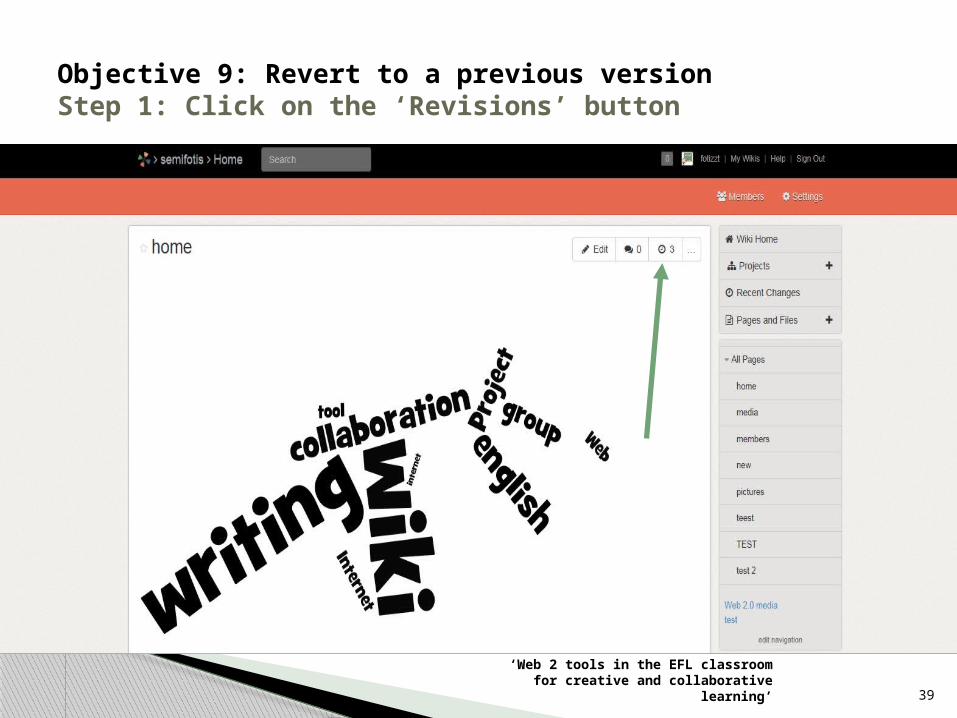
Objective 9: Revert to a previous versionStep 1: Click on the ‘Revisions’ button
‘Web 2 tools in the EFL classroom for creative and collaborative learning’
40
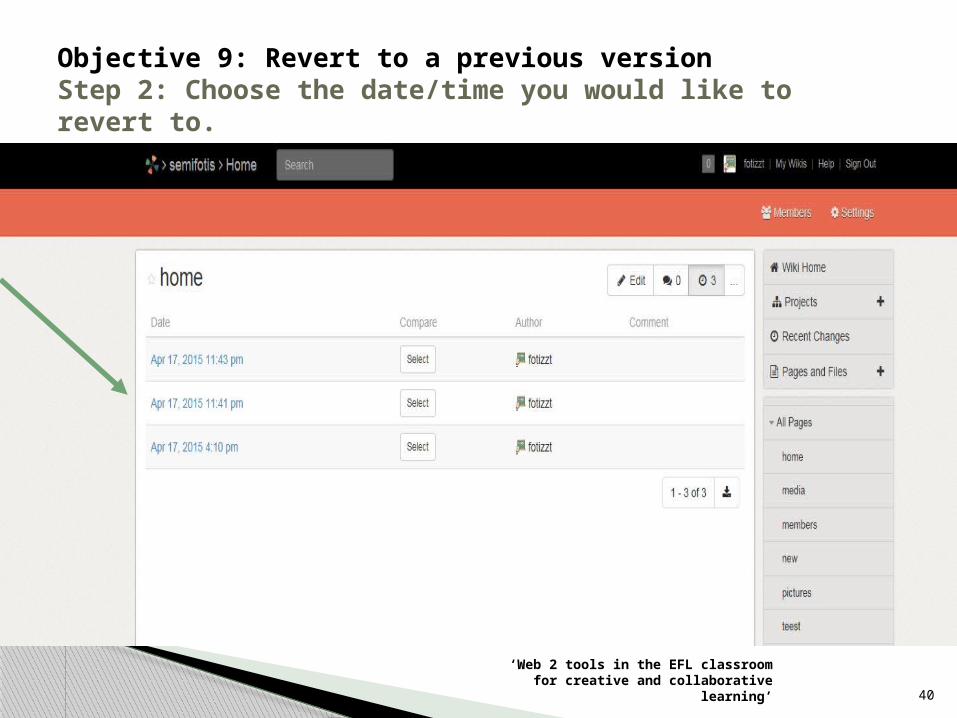
Objective 9: Revert to a previous versionStep 2: Choose the date/time you would like to revert to.
‘Web 2 tools in the EFL classroom for creative and collaborative learning’

41
Objective 9: Revert to a previous versionStep 3: Click on the ‘Revert to this version’ button.
‘Web 2 tools in the EFL classroom for creative and collaborative learning’
42
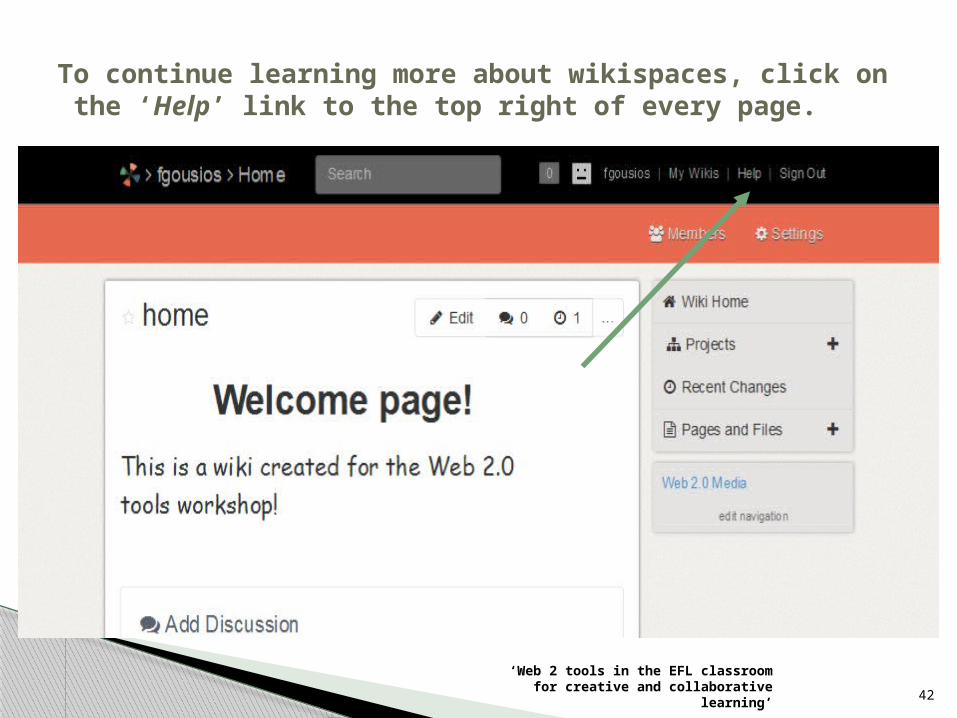
To continue learning more about wikispaces, click on the ‘Help’ link to the top right of every page.
‘Web 2 tools in the EFL classroom for creative and collaborative learning’
43
Thank you!
‘Web 2 tools in the EFL classroom for creative and collaborative learning’
Related Documents
![APNIC Routing II Workshop - start [APNIC TRAINING WIKI]...2017/07/24 · APNIC Routing II Workshop Jakarta, Indonesia 24 July 2017 Proudly Supported by: Overview Routing II Workshop](https://static.cupdf.com/doc/110x72/60d37c079d0e53615f543b53/apnic-routing-ii-workshop-start-apnic-training-wiki-20170724-apnic.jpg)