© The State of Queensland (The Office of the Queensland School Curriculum Council) 2000 SCIENCE LOWER PRIMARY Level YEARS 1 TO 10 SOURCEBOOK MODULE W hy materials are used for particular purposes Strand Natural and Processed Materials Key concept The uses of materials are determined by their properties, some of which can be changed. Purpose Activities in this module are designed to help students understand that different materials are used for particular purposes. Students have opportunities to: • collect information about the various types of materials used for specific purposes; • look for alternative materials to use in place of purpose-made ones; • make links between properties of materials and their uses; • describe the properties of common materials; • explain how and why the uses of materials have changed over time. Overview of activities The following table shows the activities in this module and the way in which these are organised in introductory, developmental and culminating phases. F 1 2 3 4 5 6 B6 Developmental Building Cleaning Clothing Recreation Sticky glue Water, water everywhere! First aid scenario Culminating Making a water- resistant box Introductory Useful materials Material timelines SCIENCE

Welcome message from author
This document is posted to help you gain knowledge. Please leave a comment to let me know what you think about it! Share it to your friends and learn new things together.
Transcript
© The State of Queensland (The Office of the Queensland School Curriculum Council) 2000
SCIENCE
LOWER PRIMARY
Level
YEARS 1 TO 10 SOURCEBOOK MODULE
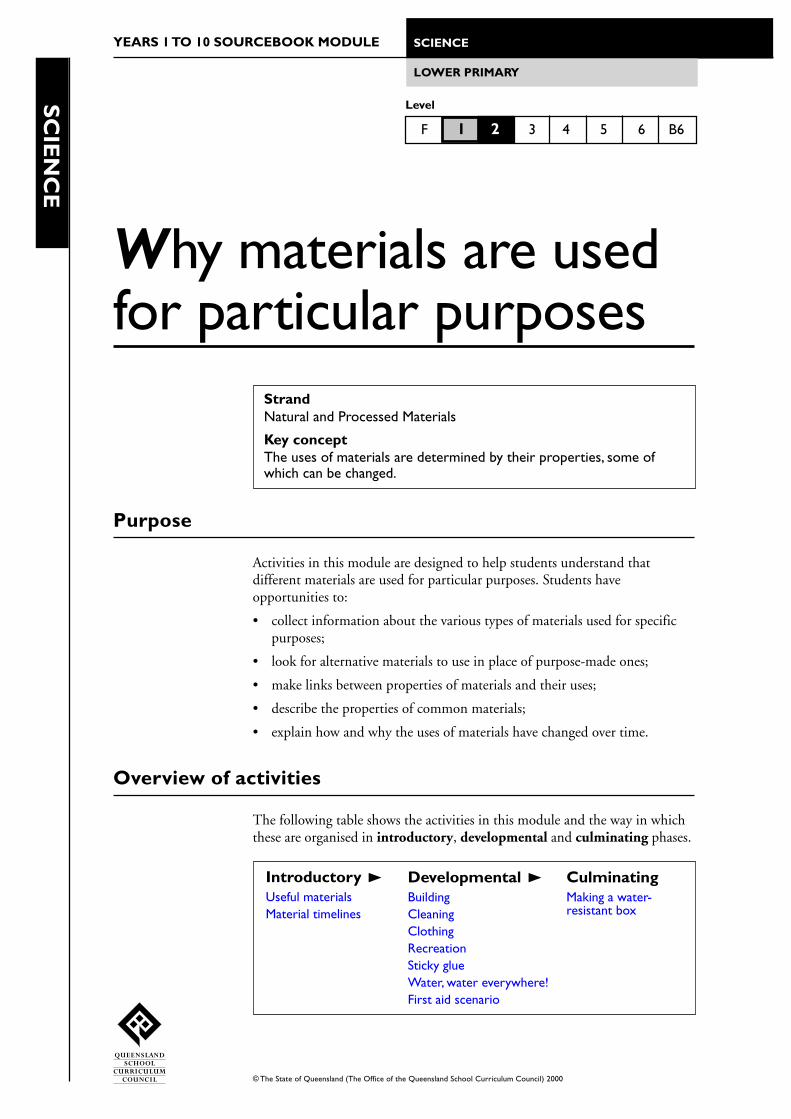
Why materials are usedfor particular purposes
StrandNatural and Processed Materials
Key conceptThe uses of materials are determined by their properties, some ofwhich can be changed.
Purpose
Activities in this module are designed to help students understand thatdifferent materials are used for particular purposes. Students haveopportunities to:
• collect information about the various types of materials used for specificpurposes;
• look for alternative materials to use in place of purpose-made ones;
• make links between properties of materials and their uses;
• describe the properties of common materials;
• explain how and why the uses of materials have changed over time.
Overview of activities
The following table shows the activities in this module and the way in whichthese are organised in introductory, developmental and culminating phases.
F 1 2 3 4 5 6 B6
DevelopmentalBuildingCleaningClothingRecreationSticky glueWater, water everywhere!First aid scenario
CulminatingMaking a water-resistant box
IntroductoryUseful materialsMaterial timelines
SC
IEN
CE
• SCIENCE • • SOURCEBOOK MODULE •
2 © The State of Queensland (The Office of the Queensland School Curriculum Council) 2000
WH
Y M
ATER
IALS A
RE U
SED FO
R PA
RTIC
ULA
R PU
RPO
SES • LOW
ER PR
IMA
RY
Core learning outcomes
This module focuses on the following core learning outcomes from theYears 1 to 10 Science Syllabus:
1.3 Students look for alternative ways that familiar materials can be used.
2.3 Students explain why common materials are used in particularsituations.
Core content
This module incorporates the following core content from the syllabus:
Natural materials
• organic — plants (wood, fibres), animals (wool, glue)
• inorganic — rocks, minerals
Processed materials
• plastics, salts, synthetic fibres, paper, brick, cement
Uses
• building, tools, clothing, food, cleaning, medicine, recreation
Changes made to properties of materials to meet required uses
Assessment strategy
Suggestions for gathering information about student learning are provided ineach of the activities in this module. Once sufficient information has beencollected, judgments can be made about students’ demonstrations ofoutcomes. Typical demonstrations of this module’s intended outcomes areprovided here to indicate the pattern of behaviour to look for when makingjudgments.
1.3 Students look for alternative ways that familiar materials can be used.
Students may:
• describe properties of familiar materials, using appropriate terminology;
• describe various uses of one material and identify the properties that makeit useful for that purpose.
2.3 Students explain why common materials are used in particularsituations.
Students may:
• make links between common materials and their uses;
• explain the properties that make materials useful in particular situations;
• explain how various materials have changed their usefulness throughouthistory;
• describe the properties of materials that are used in a particular situation,such as building a house.
Natural andProcessed Materials
Natural andProcessed Materials
Natural andProcessed Materials
Natural andProcessed Materials

• SCIENCE • • SOURCEBOOK MODULE •
3© The State of Queensland (The Office of the Queensland School Curriculum Council) 2000
WH
Y M
ATER
IALS A
RE U
SED FO
R P A
RTIC
ULA
R PU
RPO
SES • LOW
ER PR
IMA
RY
Background information
Current scientific conceptions
Properties of a material refer to the distinctive attributes of the material.Properties can be observed with the naked eye, by using a magnifying lens ormicroscope, or by testing and measuring. They are inherent to materials butcan be changed in a variety of ways — for example, by combining materialsor changing the material’s underlying structure. Materials have been processedsince early times; they are processed to change their properties.
Throughout this module it is important that students continually make linksbetween the properties and uses of the materials. The property of:
• absorbency is the ability of the material to soak up liquids or gases;
• density is the state or quality of compactness — density = mass/volume;
• flexibility is the ability of a material to be bent, twisted, stretched or rolled;
• solubility is the degree to which a material dissolves and depends on thetemperature and nature of the solvent;
• strength is the ability of a material to resist or absorb forces without achange in form;
• texture is the appearance and feel of materials — for example, rough,smooth, sticky, grainy;
• transparency is the ability of a material to transmit light so that objects canbe seen distinctly through the material.
The uses of materials refer to common or known uses, as well as past andpotential uses. Discussion should include the uses that people from differentcultures may make of the material.
Conservation of materials and stewardship of resources is an issue in themanagement of resources for the future.
Students’ prior understandings
Students’ prior understandings may differ from current scientific conceptionsin a range of ways. Some students may think that:
• familiar materials in their environment are present for their benefit;
• the material is used only for the purpose that the student has alwayschosen.
Students may never have considered that materials have specific properties orthat they can be used for particular purposes.
Teachers could enhance students’ understandings by successively presenting arange of scenarios that challenge students’ thinking — for example, the use ofdifferent materials in different products found in the classroom, home andwider community. Teachers could encourage a diversity of suggestions toenable the students to critically explore their understandings about materialsand their uses.
• SCIENCE • • SOURCEBOOK MODULE •
4 © The State of Queensland (The Office of the Queensland School Curriculum Council) 2000
WH
Y M
ATER
IALS A
RE U
SED FO
R PA
RTIC
ULA
R PU
RPO
SES • LOW
ER PR
IMA
RY
Terminology
Terms associated with natural and processed materials and uses of materialsare essential to the activities in this module — for example:
bricksbuildingcementcleaningclothingconserve
Students may already be familiar with some of these terms and understandtheir meanings and use in scientific contexts. If so, the activities in thismodule will provide opportunities for them to evaluate current usage. If not,these activities will provide opportunities for students to develop theirunderstandings.
School authority policies
Teachers need to be aware of and observe school authority policies that maybe relevant to this module.
Safety policies are of particular relevance to the activities that follow. It isessential that demonstrations and student activities are conducted accordingto procedures developed through appropriate risk assessments at the school.
In this module, teachers need to consider safety issues relating to use of:
• hot water;
• cleaning agents;
• various glues.
fabricsfirst aidfoodglassgluemetals
paperplasticsrecreationrockssaltsoap
sugartoolswaterwood
• SCIENCE • • SOURCEBOOK MODULE •
5© The State of Queensland (The Office of the Queensland School Curriculum Council) 2000
WH
Y M
ATER
IALS A
RE U
SED FO
R P A
RTIC
ULA
R PU
RPO
SES • LOW
ER PR
IMA
RY
Useful materials
Focus
This activity provides opportunities for students to understand that differentmaterials are used for particular purposes.
Students use library resources to identify the types of materials illustrated andtheir uses.
Materials
For the teacher:
• Resource Sheet 1, ‘Concept map of objects and materials’
For the class:
• library books illustrating a range of common materials being used ina variety of situations
• butcher’s paper and poster pens
Teaching considerations
Organise learning centres where students can browse through library books.Prepare a list of materials illustrated in the books in case students have difficultyidentifying them — for example, wood, metal, cloth and glass.
Model the drawing of a concept map for students. Start with ‘objects I know’ (useResource Sheet 1 as a guide) and help students focus on materials and their uses.
Working scientifically
Time: 40 minutes
Students help the teacher create a concept map about ‘objects I know’.
Students form groups at learning centres where they search the librarybooks for pictures of common materials being used in a variety of situations.
Students then share their findings from the library books. They identifyby name common materials and their uses. Students discuss how they willmake a map of the information they have collected from the library bookssimilar to the one modelled by the teacher.
In groups, students draw concept maps to help explain the different usesof materials that they have discussed.
Students share their concept maps and explain the uses based on theproperties of the material — for example, ‘We drink water because it is aliquid and it stops us from being thirsty’.
Gathering information about student learningSources of information could include:
• students’ contributions to discussions and their use of terminology;
• students’ concept maps and their explanations.
Accessing resources
Making links
Suggesting
Explaining ideas anddecisions
R ResourceSheet 1
Introductory
A C T I V I T Y

• SCIENCE • • SOURCEBOOK MODULE •
6 © The State of Queensland (The Office of the Queensland School Curriculum Council) 2000
WH
Y M
ATER
IALS A
RE U
SED FO
R PA
RTIC
ULA
R PU
RPO
SES • LOW
ER PR
IMA
RY
Material timelines
Focus
This activity provides opportunities for students to explain why commonmaterials have been used in particular situations throughout history.
Students discuss and illustrate uses of materials from historical contexts.
Materials
For the teacher:
• Resource Sheet 2, ‘Uses of materials’
• Resource Sheet 3, ‘Cloze — materials and their uses’
For the class:
• reference materials
• A4 blank paper for illustrating
• felt pens or coloured pencils
Teaching considerations
Allow space for a large display.
The uses of materials, and the materials used for particular purposes, havechanged over the years. Some examples are provided on Resource Sheet 2.Ideas from the Resource Sheet could be used to prompt discussion.
About the activityCloze is a literacy strategy where text is given to students with parts of the textomitted. Students draw on the meaning of the remaining text to fill in the missingparts. There is not necessarily one correct answer. The exercise can be extendedto one where inferences are drawn and generalisations made about the contentof the text and the strategies used to complete the task.
Prepare a cloze paragraph that focuses on the materials selected to help studentsreflect. Prepare it in large print on A3 paper so that it may be used with the classgroup. Some examples are provided on Resource Sheet 3.
Working scientifically
Time: 60 minutes
Students share their prior knowledge of materials that were used in earliertimes. They offer some explanations of why each material was useful.
Students collect pictures which they annotate with the names of thematerials shown, their purpose and why those materials were used for thatpurpose. The pictures could be of historical or present-day situations.
Students create a timeline around the room using the pictures.
Students discuss how new materials have been developed, often replacingmaterials previously used for particular purposes. For example, wood was usedto make horse-drawn coaches while metal is used to make modern-day cars.Wood is used in older-style houses for window frames while aluminium isused for many modern window frames.
Accessing resourcesForecasting andbackcasting
Making comparisons
Illustrating
Introductory
A C T I V I T Y
R ResourceSheet 3
R ResourceSheet 2
• SCIENCE • • SOURCEBOOK MODULE •
7© The State of Queensland (The Office of the Queensland School Curriculum Council) 2000
WH
Y M
ATER
IALS A
RE U
SED FO
R P A
RTIC
ULA
R PU
RPO
SES • LOW
ER PR
IMA
RY
Students collate the information they have collected about materials andtheir properties and uses. The collation could be done as a wall chart, mobileor simple computer database spreadsheet.
Students complete a cloze exercise related to their specific observationsand discussions.
Gathering information about student learningSources of information could include:
• students’ contributions to discussions and explanations;
• students’ annotated pictures;
• students’ collation of information;
• students’ completed cloze exercises.
• SCIENCE • • SOURCEBOOK MODULE •
8 © The State of Queensland (The Office of the Queensland School Curriculum Council) 2000
WH
Y M
ATER
IALS A
RE U
SED FO
R PA
RTIC
ULA
R PU
RPO
SES • LOW
ER PR
IMA
RY
Handling materialsSeeking reasons
Making comparisons
Constructing andusing models
Building
Focus
This activity provides opportunities for students to explain why commonmaterials are used in particular situations in building houses.
Students construct and use models of houses.
Materials
For each group of students:
• construction materials to build model houses
• card strips for labels
For the class:
• video clips of house building or a carpenter at work (optional)
• display of building tools (optional)
Teaching considerations
Organise equipment at learning centres that can remain for a period of time.
About the activityProvide materials for modelling that allow students to reflect their localcommunity housing. Sensitivity to students’ circumstances may be necessary whencomparing different kinds of housing.
Provide examples of materials and their uses to which the students can respond— for example, ‘The walls of the house could be made of sponge’. ‘No, because asponge soaks up the rain and water would come inside the house.’
Organise a display of tools and discuss the display in terms of the properties ofthe materials used — for example, the builder’s level is made from plastic andwood or metal so it is relatively unbreakable and has ‘see-through’ windows.
Show an appropriate video clip of a house being built to help students linkproperties of materials with their uses. A video clip from a home improvementshow would be suitable.
Some students may not readily differentiate between ‘hard’ and ‘strong’ orbetween ‘weak’ and ‘light’; the specific uses of these terms might need to bediscussed.
SafetyInform students of safe practices when using scissors.
Working scientifically
Time: varied
Students build a model house using available construction materials.They label modelling materials with the name of the material used in a realhouse, and the reason for its use — for example, concrete needs to be strongto act as a base to hold up the house.
Students discuss the uses of various materials and the reasons for usingparticular materials. They share explanations of their houses with the class,emphasising the materials, properties and uses.
Developmental
A C T I V I T Y
!
• SCIENCE • • SOURCEBOOK MODULE •
9© The State of Queensland (The Office of the Queensland School Curriculum Council) 2000
WH
Y M
ATER
IALS A
RE U
SED FO
R P A
RTIC
ULA
R PU
RPO
SES • LOW
ER PR
IMA
RY
Students make comparisons between their models and a real house. Theydiscuss their ideas on ‘houses of the future’ and, considering the demandsimposed, suggest possible materials that may be used.
Gathering information about student learningSources of information could include:
• students’ contributions to discussions and explanations;
• students’ construction of model houses;
• students’ labelling of models with materials and properties;
• students’ comparisons between model and real houses, based on theproperties and uses of construction materials.
• SCIENCE • • SOURCEBOOK MODULE •
10 © The State of Queensland (The Office of the Queensland School Curriculum Council) 2000
WH
Y M
ATER
IALS A
RE U
SED FO
R PA
RTIC
ULA
R PU
RPO
SES • LOW
ER PR
IMA
RY
Cleaning
Focus
This activity provides opportunities for students to test cleaning materials andto explain why particular materials are used in certain situations.
Materials
For each group of students:
• vinegar
• cake of soap
• laundry detergent
• sand
• sodium bicarbonate (bicarbonate of soda)
• salt
• cooking oil, motor oil, machine oil (any one, or all three)
• kitty litter and sand (for cleaning up oil spills)
• water
• dirty cups or saucepans (crockery smeared with sauce and margarine issuitable)
• chart paper and poster pens
• disposable gloves (optional)
For each student:
• planning and reporting worksheets (see the sourcebook guidelines,appendix 3)
Teaching considerations
Organise work areas outside and close to a water source.
About the activityDiscuss various uses for the materials provided — for example:• oil stops objects squeaking when they rub together and forms a layer over
metals that contain iron, which protects them from rusting;• soap is a cleaning agent that can also be used as a lubricant.
Use planning and reporting worksheets to help students structure theirinvestigations.
SafetyStudents should not taste any materials.
Students should identify any materials to which they might have an allergicreaction. Wearing disposable gloves and working in a well-ventilated room mayreduce the chance of adverse reactions.
Developmental
A C T I V I T Y
!

• SCIENCE • • SOURCEBOOK MODULE •
11© The State of Queensland (The Office of the Queensland School Curriculum Council) 2000
WH
Y M
ATER
IALS A
RE U
SED FO
R P A
RTIC
ULA
R PU
RPO
SES • LOW
ER PR
IMA
RY
Working scientifically
Time: 30 minutes
Students working in small groups discuss the common uses and theproperties of the materials provided.
Students are challenged to find out which material cleans a dirty itemmost effectively. They decide whether to dissolve the cleaning material or touse it dry. Students use the planning and reporting worksheets to structuretheir investigations. They could use a table like the one below to recordresults.
After testing, students list the cleaning materials in order from mosteffective to least effective.
Students suggest explanations for the observed results, including variablessuch as the kind of ‘dirt’, the amount of ‘dirt’, and the nature of the objectthat was ‘dirty’. Led by the teacher, they reflect on uses for the materialsinvestigated.
Students make charts of other possible uses for the listed materials anddisplay them.
Gathering information about student learningSources of information could include:
• students’ contributions to discussions;
• students’ completed planning and reporting worksheets;
• students’ charts about uses of materials.
Handling materials
Identifying variablesLooking foralternatives
Creatingpresentations
Comparison of cleaning products
oil stains on cotton soap Fabric was rubbed Most of the stainwith soap for disappeared.30 seconds andrinsed in hot water.
Product used How it was used What happened What was beingcleaned
• SCIENCE • • SOURCEBOOK MODULE •
12 © The State of Queensland (The Office of the Queensland School Curriculum Council) 2000
WH
Y M
ATER
IALS A
RE U
SED FO
R PA
RTIC
ULA
R PU
RPO
SES • LOW
ER PR
IMA
RY
Clothing
Focus
This activity provides opportunities for students to explain which propertiesof common materials make them useful as insulators.
Students test the effectiveness of fabrics as insulators.
Materials
For each small group:
• 4 thermometers
• 4 plastic bottles or beakers
• 3 types of fabric (for example, wool, cotton and nylon) in dark and lightcolours to wrap around the bottles
• warm water
• notepads and pencils for each group, or a class chart
Teaching considerations
Organise activity in a wet area.
Adjust the times of individual experiments to suit your classroom management.
Ensure students engage in discussion, illustrating, reading and similar tasks inbetween recordings.
Water at a temperature of 50–55°C will give reasonable results without beinga danger to students.
About the activityBottles containing hot water can be used to represent human bodies. A fabriccovering for these bottles would represent clothing.
Discuss the variables of the experiment and how these may be controlled —for example, the amount of water used, the size and shape of the bottles, fabricsize and colour, number of layers of fabric, combinations of fabrics used, andtemperature measurement. Discuss with students the use of a ‘control’ bottle,without insulation, as a comparison.
Negotiate with students the question that they will investigate. The planning andreporting worksheets could be used to help students structure theirinvestigations (see the sourcebook guidelines, appendix 3).
Consider the temperature of the day and its effect on the rate of cooling. Thegreater the difference in temperature between an object and its surroundings, thefaster heat will be exchanged between them. It may be better to do this activity ata cooler time of the day or year.
SafetyUse plastic containers in preference to glass.
Dispense hot water for students.
Inform students of safe practices when handling hot objects — for example, wallsof unprotected glass beakers filled with hot water may cause burns if studentsgrasp beakers with bare hands.
Developmental
A C T I V I T Y
!
• SCIENCE • • SOURCEBOOK MODULE •
13© The State of Queensland (The Office of the Queensland School Curriculum Council) 2000
WH
Y M
ATER
IALS A
RE U
SED FO
R P A
RTIC
ULA
R PU
RPO
SES • LOW
ER PR
IMA
RY
Working scientifically
Time: 45 minutes preparation
Students discuss the properties of different fabrics that are used forclothing. They discuss the fabrics that they wear in summer, when they aretrying to stay cool, and those that they wear in winter, when they are trying tokeep warm.
Students discuss their understandings of the term ‘insulation’ and howthis relates to reasons for wearing clothes.
Students formulate questions related to the effectiveness of differentfabrics as insulators. In groups, they select a question to investigate, determinethe variables involved and plan their experiments. Students could use theplanning and reporting worksheets as a guide.
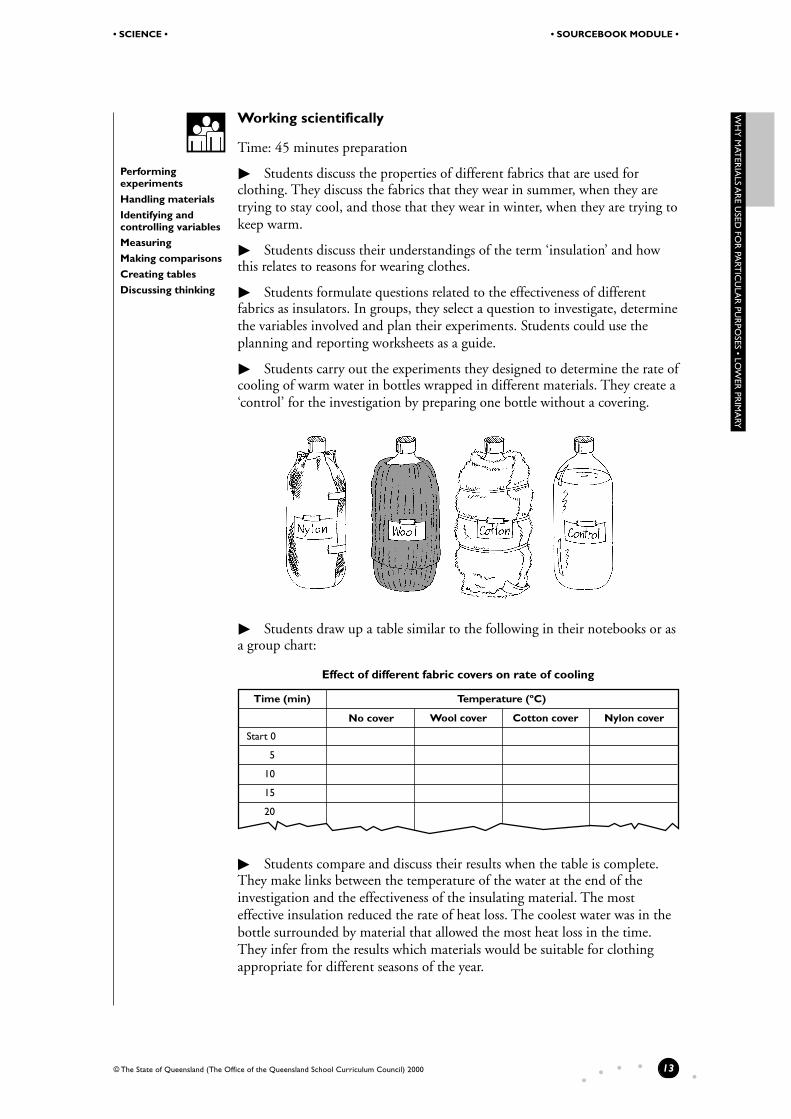
Students carry out the experiments they designed to determine the rate ofcooling of warm water in bottles wrapped in different materials. They create a‘control’ for the investigation by preparing one bottle without a covering.
Students draw up a table similar to the following in their notebooks or asa group chart:
Students compare and discuss their results when the table is complete.They make links between the temperature of the water at the end of theinvestigation and the effectiveness of the insulating material. The mosteffective insulation reduced the rate of heat loss. The coolest water was in thebottle surrounded by material that allowed the most heat loss in the time.They infer from the results which materials would be suitable for clothingappropriate for different seasons of the year.
Performingexperiments
Handling materials
Identifying andcontrolling variablesMeasuring
Making comparisons
Creating tables
Discussing thinking
Effect of different fabric covers on rate of cooling
Start 0
5
10
15
20
Time (min) Temperature (ºC)
No cover Wool cover Cotton cover Nylon cover

• SCIENCE • • SOURCEBOOK MODULE •
14 © The State of Queensland (The Office of the Queensland School Curriculum Council) 2000
WH
Y M
ATER
IALS A
RE U
SED FO
R PA
RTIC
ULA
R PU
RPO
SES • LOW
ER PR
IMA
RY
Students write an explanation of their experiment, including theinferences drawn.
Students describe the properties of the fabric (light, heavy, thick, thin;tightly or loosely woven fibres; colour and lustre) and relate these to itsusefulness with regard to particular situations such as seasons. They elaborateon this thinking by extending discussion to other situations where the type offabric is important — for example, the fabrics used in sportswear need to belight and cool.
Gathering information about student learningSources of information could include:
• students’ contributions to discussions;
• students’ planning of experiments;
• students’ written explanations of their experiments, including theirfindings and inferences.
• SCIENCE • • SOURCEBOOK MODULE •
15© The State of Queensland (The Office of the Queensland School Curriculum Council) 2000
WH
Y M
ATER
IALS A
RE U
SED FO
R P A
RTIC
ULA
R PU
RPO
SES • LOW
ER PR
IMA
RY
Recreation
Focus
This activity provides opportunities for students to explain why commonmaterials are used in particular recreational situations.
Students plan a camping trip.
Materials
For each small group:
• chart paper and felt pens
Teaching consideration
Organise students for small groups or for individual activity.
Working scientifically
Time: 30 minutes
The teacher leads students in a discussion of the equipment that theyhave taken camping or the equipment that they think needs to be taken. Theysuggest why each piece of equipment is necessary and the characteristics itwould require.
Students plan a camping trip on which purpose-built campingequipment is not used. They improvise using familiar objects in new waysaccording to the properties of the materials used to make the object. Forexample, they might use a tin can for boiling water, a bed sheet for a tent anda school bag for a pack. They explain why these alternatives would or wouldnot be useful, with reference to the properties of the substitute. For example,a bed sheet would not make a good tent because it is not waterproof. A tincan could be used as a billy if it had a handle.
Students share with the class their plans and explanations for thealternatives that they suggested.
Gathering information about student learningSources of information could include:
• students’ contributions to discussions and their suggestions;
• students’ plans and explanations.
Developmental
A C T I V I T Y
Making plans
Applying ideas andconcepts
Looking foralternativesClarifying ideas andconcepts
• SCIENCE • • SOURCEBOOK MODULE •
16 © The State of Queensland (The Office of the Queensland School Curriculum Council) 2000
WH
Y M
ATER
IALS A
RE U
SED FO
R PA
RTIC
ULA
R PU
RPO
SES • LOW
ER PR
IMA
RY
Sticky glue
Focus
This activity provides opportunities for students to assess and discuss theproperties and suitability of a range of glues for a particular purpose.
Students build a boat from wood and glue and test its water resistance.
Materials
For each small group:
• PVA glue, wood glue (PVA-based), paper paste, flour and water glue,glue stick, glue-gun glue
• beakers
• water
• disposable gloves
• thin flat sheets of wood (such as balsa) and ice-block sticks
• bucket or basin of water
Teaching considerations
Prepare equipment at learning centres in a wet area.
SafetyA glue-gun with an on/off trigger is safest and should be used only by a teacher orother adult. Check available glues for toxicity and other safety issues before use.
Working scientifically
Time: 45 minutes
Students discuss the everyday use of each type of glue.
Students determine which glues dissolve in water. They then discuss thepracticality of using each glue for making a raft or boat.
Led by the teacher, students collect information about the specific use ofeach glue. They make links between the properties of the glues and the usesmade of them.
Students share their findings with the whole class.
Students then build a raft or boat using the glue of their choice. They testthe water resistance of their rafts and boats in water and discuss their results.
Gathering information about student learningSources of information could include:
• students’ contributions to discussions;
• students’ investigative and testing processes.
Developmental
A C T I V I T Y
Collectinginformation
Designing andperformingexperiments
Handling materials
Looking for patternsand meaningsAssessing andreassessing
Examining andevaluating
Making comparisons
Discussingthinking
!

• SCIENCE • • SOURCEBOOK MODULE •
17© The State of Queensland (The Office of the Queensland School Curriculum Council) 2000
WH
Y M
ATER
IALS A
RE U
SED FO
R P A
RTIC
ULA
R PU
RPO
SES • LOW
ER PR
IMA
RY
Water, water everywhere!
Focus
This activity provides opportunities for students to demonstrate theirunderstanding that water can be used for many purposes due to its properties.
Materials
• water and containers
• posters and pamphlets on conserving water
Teaching considerations
Organise the activity in an outside wet area.
About the activityGive a brief explanation of the water cycle in an age-appropriate manner if it willhelp students. Consider using resources and choosing issues from waterconservation campaigns to support the activity.
Define for students the terms ‘conservation’ and ‘resource’:• conservation: the preservation of natural resources so as to keep them
available for future generations; to preserve them from loss, decay, waste orinjury — for example, water and coal.
• resource: a source of supply, support or aid.
Working scientifically
Time: 30 minutes
In groups, students engage in investigative play with water and considerthe different uses of water because of its properties. They discuss theirthinking with the class.
In groups, students consider the following questions:• What sources of water do you know about?
• What do people use water for?
• What do we use instead of water?
• What will happen if we do not have clean water for the future?
• Why are dams built?
• Why do some people have tank water?
They discuss their responses to the questions with group members and thenlist their group’s ideas. Students share their ideas with the rest of the class.
Students reflect on the properties of water that make it a valuableresource.
Students discuss conservation of water. They explore the meanings of theterms ‘conservation’, ‘conserving’ and ‘resource’. Students browse throughliterature describing conservation strategies and issues regarding water.
Each student makes a statement of how they are going to start orcontinue to conserve water for the future.
Formulatingquestions
Playing
Developing possible,probable andpreferred optionsReflecting andconsidering
Discussing thinking
Envisioningalternative futures
Developmental
A C T I V I T Y

• SCIENCE • • SOURCEBOOK MODULE •
18 © The State of Queensland (The Office of the Queensland School Curriculum Council) 2000
WH
Y M
ATER
IALS A
RE U
SED FO
R PA
RTIC
ULA
R PU
RPO
SES • LOW
ER PR
IMA
RY
Students create a concept map centred around water that links sources ofwater with its properties and uses, and includes ways of conserving water forthe future.
Gathering information about student learningSources of information could include:
• students’ contributions to discussions;
• students’ suggestions for future options, reflections about propertiesand statements on conservation;
• students’ concept maps.
• SCIENCE • • SOURCEBOOK MODULE •
19© The State of Queensland (The Office of the Queensland School Curriculum Council) 2000
WH
Y M
ATER
IALS A
RE U
SED FO
R P A
RTIC
ULA
R PU
RPO
SES • LOW
ER PR
IMA
RY
First aid scenario
Focus
This activity provides opportunities for students to demonstrate theirunderstanding that common materials with particular properties can be usedto provide novel solutions in unexpected situations.
Materials
• materials for splints (e.g. lengths of wood, sticks)• materials for strapping (e.g. belts, stockings, pantyhose, T-shirts, socks)
Teaching considerations
In this activity, students consider a situation when first aid is required andsuggest ways in which everyday materials may be used for this purpose whenconventional materials such as bandages and ice packs are not available.
Invite a guest speaker — for example, nurse, doctor, ambulance officer — to talkto students about their suggestions and offer further ideas and information.
If possible, obtain newspaper articles about emergencies in which first aid wasneeded. Encourage students to relate these to the ideas and informationdiscussed during the activity.
Working scientifically
Time: 45 minutes
Students are presented with a problem and are challenged to find asolution — for example, ‘You and a friend go bushwalking. Your friend fallsdown, breaks a leg and has cuts and bruises causing bleeding. You are to useonly the available materials to give first aid until the rescue helicopter arrives’.
In pairs, students think of solutions to the problem and experiment withthe materials to test their ideas. They share their solutions with the class.
A nurse, doctor or ambulance officer presents various solutions toproblems caused by accidents and subsequent injuries, including the one inthe problem considered earlier.
Students reflect on the solutions presented and state the fact that theythink is most significant.
Gathering information about student learningSources of information could include:
• students’ contributions to group discussions and creative solutions;
• students’ reflections.
Engaging withproblems
Examining andevaluatingExploring andelaborating ideas
Developmental
A C T I V I T Y

• SCIENCE • • SOURCEBOOK MODULE •
20 © The State of Queensland (The Office of the Queensland School Curriculum Council) 2000
WH
Y M
ATER
IALS A
RE U
SED FO
R PA
RTIC
ULA
R PU
RPO
SES • LOW
ER PR
IMA
RY
Making a water-resistant box
Focus
This activity provides opportunities for students to apply ideas and conceptsas they select and use materials to make a decorated water-resistant box.
Materials
Materials required will depend on the box designs decided on by the students.
Teaching considerations
Organise students to work in groups of three or four to complete a problem-solving task. A suggested task is:• Construct a box with a decorated lid that will keep the contents dry if the
box is immersed in water for at least 12 hours. The decoration on the lid andthe structure of the box should be unaffected by the water.
• Evaluate the box using criteria that have been agreed on by the class.• Present the evaluation to the class.
Questions to assist in determining the criteria for evaluation could include:• Did the contents of the box remain dry for the full 12 hours?• Did water enter the box through the material used for its construction, or
through the joins, or through crevices between the lid and its seating?• Was there any buckling or other change in shape of the sides of the box?• Did the colours of the decoration fade or disappear? Did this happen
immediately or did it take a long time?• Did the decoration soften, dissolve or fall off?
Students who are unable to construct a box could modify an existing box tomake it waterproof. They evaluate the modification.
Working scientifically
As a class, students discuss the task and decide on ways of testing theboxes, and criteria for judging the effectiveness of the water-resistant box.
In small groups, students suggest materials that could be used toconstruct and decorate the box. Questions for discussion could include:
• What properties will the materials need to have?
• What do we know about properties of the materials that have beensuggested as suitable for making the box?
• What do we know about properties of the materials that have beensuggested as suitable for decorating the box?
• In what situation are these materials being used?
• How do these materials have to be treated to make them waterproof —for example, waxed or painted?
• What could be used to fasten the parts of the box together?
• What do we know about the different glues or fasteners (nails, screws,staples)?
Collectinginformation
Exploringphenomena
Formulatingquestions
Handling materialsMaking and judgingobservations
Applying ideas andconcepts
Assessing andreassessing
Dealing in an orderlymanner with theparts of a complexwholeExamining andevaluating
Culminating
A C T I V I T Y
• SCIENCE • • SOURCEBOOK MODULE •
21© The State of Queensland (The Office of the Queensland School Curriculum Council) 2000
WH
Y M
ATER
IALS A
RE U
SED FO
R P A
RTIC
ULA
R PU
RPO
SES • LOW
ER PR
IMA
RY
Students formulate questions to which they need answers and decidehow they will find the answers. Working in their groups, students share thetasks of gathering the necessary information. This may involve testing eachmaterial for properties that they think will be required. Students report theirfindings to the group.
Students decide which materials they will use and how they willconstruct the box. They make the box, test it in the agreed way and preparean evaluation based on the agreed criteria. They suggest ways in which theirdesigns could have been changed to make them more effective.
The boxes and evaluations are displayed for the rest of the class. The classdiscusses the results and decides on the best design of a box to meet thecriteria. If time and resources permit, this box could be constructed accordingto this design and then tested.
Gathering information about student learningSources of information could include:
• students’ contributions to discussions;
• students’ plans for their products;
• students’ testing and evaluation of the products.
Creatingpresentations
Discussing thinkingNegotiating

• SCIENCE • • SOURCEBOOK MODULE •
22 © The State of Queensland (The Office of the Queensland School Curriculum Council) 2000
WH
Y M
ATER
IALS A
RE U
SED FO
R PA
RTIC
ULA
R PU
RPO
SES • LOW
ER PR
IMA
RY
Reso
urce Sheet 1
R1Concept map of objects and materials
carpet
floor
wood
fridge pencils
wood graphite wood plastic
toys
arts and crafts
steelcars
wool
vinylrubber
plastic
climbingequipment
toys
steel recycledplastic
wood cotton
ObjectsI know
home school
other at play
table

• SCIENCE • • SOURCEBOOK MODULE •
23© The State of Queensland (The Office of the Queensland School Curriculum Council) 2000
WH
Y M
ATER
IALS A
RE U
SED FO
R P A
RTIC
ULA
R PU
RPO
SES • LOW
ER PR
IMA
RY
Reso
urce Sheet 2
R2The uses of materials, and the materials used for particular purposes, have changed overthe years. Some examples, grouped in categories, are provided below. Ideas from this resourcesheet could be used by teachers to prompt discussion.
Minerals
• Clays were used to decorate people and places. Clays with differentmineral content from different areas provided different colours.
• Some clays were used for medicinal purposes. Kaolin, a kind of clay, isstill used to calm some digestive disorders.
• Coal found lying on the surface of the earth was burned to provide heat.
• Metals that softened in fire were used to make strong edges and pointson tools and weapons, as well as armour to protect warriors. Today,weapons are likely to be made from one polymer and protective vestsfrom another polymer such as Twaron fibre. Polymers usually have astructure based around carbon or silicon atoms.
• Synthetic fibres are made from petroleum products.
• Early cans were made of tin. Today they are made of aluminium or steel.Many containers are made of plastics which are synthetic polymers.
• Rocks were used in earlier times to make stone axes and spear headsbecause the rock could be chipped away to form a particular shape andit was hard; today tools are made of metals, synthetic and compositematerials.
• Horse shoes were made of a metal easily softened in the fire andshaped. Today horse shoes are made of a different metal that can beshaped by hammering.
• Irons used to smooth out wrinkles in clothes were very heavy andheated on a stove. Today electric irons are heated by electricity, are lightby comparison and quick to heat and cool.
Fabrics
• Natural fibres were used for clothing and home furnishings. Fibres suchas flax, coconut, jute, hemp, bamboo, cotton, wool, papyrus and feltprovided for a wide range of needs. Most are still used today; some areeven enjoying a resurgence in popularity and are used both alone andwith polymer fibres.
• Cotton cloths were chosen to be wrapped around Christmas puddingsbefore boiling because the cotton ‘breathed’. Today such cloths mayinclude synthetics with similar properties.
Uses of materials
(continued)
• SCIENCE • • SOURCEBOOK MODULE •
24 © The State of Queensland (The Office of the Queensland School Curriculum Council) 2000
WH
Y M
ATER
IALS A
RE U
SED FO
R PA
RTIC
ULA
R PU
RPO
SES • LOW
ER PR
IMA
RY
Reso
urce Sheet 2
R2Uses of materials (continued)
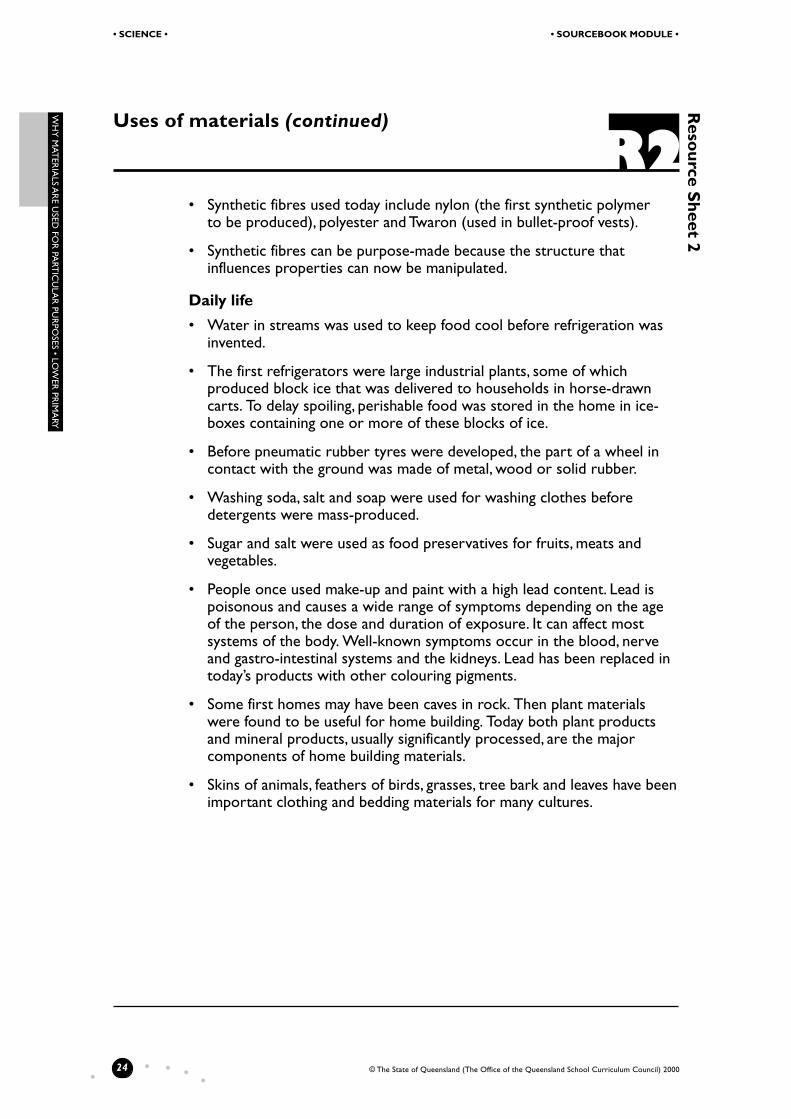
• Synthetic fibres used today include nylon (the first synthetic polymerto be produced), polyester and Twaron (used in bullet-proof vests).
• Synthetic fibres can be purpose-made because the structure thatinfluences properties can now be manipulated.
Daily life
• Water in streams was used to keep food cool before refrigeration wasinvented.
• The first refrigerators were large industrial plants, some of whichproduced block ice that was delivered to households in horse-drawncarts. To delay spoiling, perishable food was stored in the home in ice-boxes containing one or more of these blocks of ice.
• Before pneumatic rubber tyres were developed, the part of a wheel incontact with the ground was made of metal, wood or solid rubber.
• Washing soda, salt and soap were used for washing clothes beforedetergents were mass-produced.
• Sugar and salt were used as food preservatives for fruits, meats andvegetables.
• People once used make-up and paint with a high lead content. Lead ispoisonous and causes a wide range of symptoms depending on the ageof the person, the dose and duration of exposure. It can affect mostsystems of the body. Well-known symptoms occur in the blood, nerveand gastro-intestinal systems and the kidneys. Lead has been replaced intoday’s products with other colouring pigments.
• Some first homes may have been caves in rock. Then plant materialswere found to be useful for home building. Today both plant productsand mineral products, usually significantly processed, are the majorcomponents of home building materials.
• Skins of animals, feathers of birds, grasses, tree bark and leaves have beenimportant clothing and bedding materials for many cultures.
• SCIENCE • • SOURCEBOOK MODULE •
25© The State of Queensland (The Office of the Queensland School Curriculum Council) 2000
WH
Y M
ATER
IALS A
RE U
SED FO
R P A
RTIC
ULA
R PU
RPO
SES • LOW
ER PR
IMA
RY
The following paragraphs may be used as a guide to prepare your own clozeparagraph, based on the activities of your students and the materials they havediscussed. These paragraphs have been created to be used as a masked cloze.They can be enlarged on A3 paper for use in a whole-of-class or group discussion.
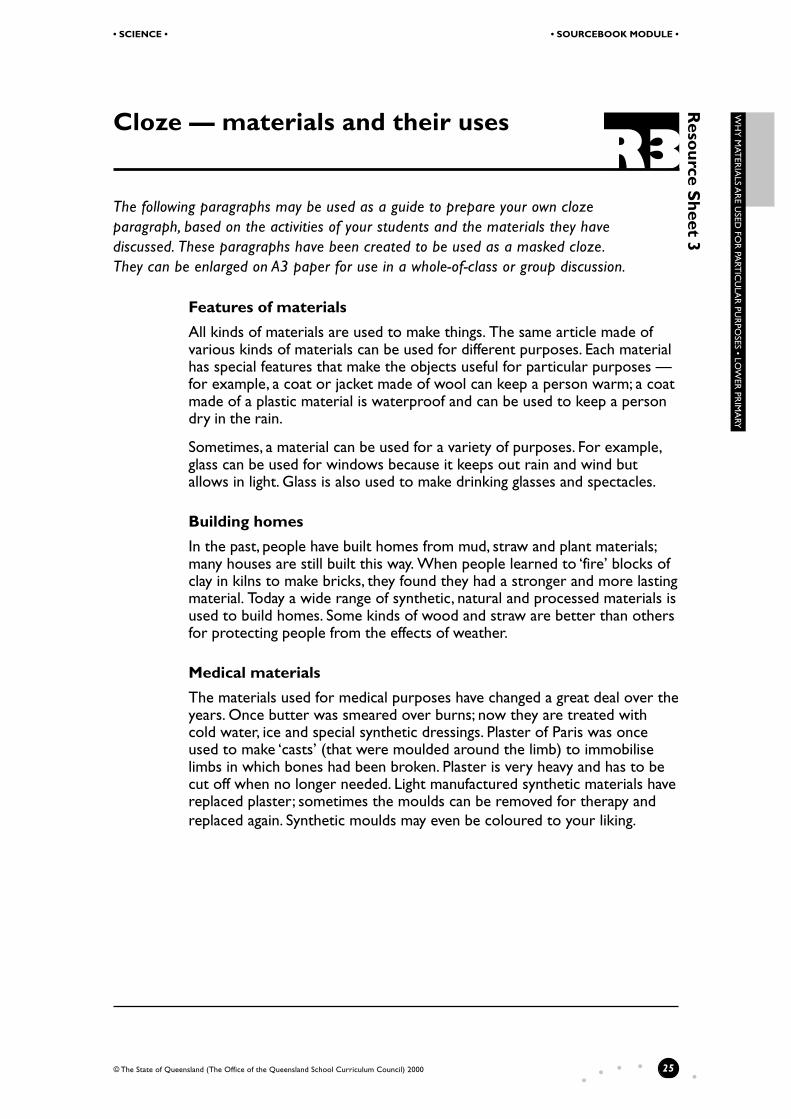
Features of materials
All kinds of materials are used to make things. The same article made ofvarious kinds of materials can be used for different purposes. Each materialhas special features that make the objects useful for particular purposes —for example, a coat or jacket made of wool can keep a person warm; a coatmade of a plastic material is waterproof and can be used to keep a persondry in the rain.
Sometimes, a material can be used for a variety of purposes. For example,glass can be used for windows because it keeps out rain and wind butallows in light. Glass is also used to make drinking glasses and spectacles.
Building homes
In the past, people have built homes from mud, straw and plant materials;many houses are still built this way. When people learned to ‘fire’ blocks ofclay in kilns to make bricks, they found they had a stronger and more lastingmaterial. Today a wide range of synthetic, natural and processed materials isused to build homes. Some kinds of wood and straw are better than othersfor protecting people from the effects of weather.
Medical materials
The materials used for medical purposes have changed a great deal over theyears. Once butter was smeared over burns; now they are treated withcold water, ice and special synthetic dressings. Plaster of Paris was onceused to make ‘casts’ (that were moulded around the limb) to immobiliselimbs in which bones had been broken. Plaster is very heavy and has to becut off when no longer needed. Light manufactured synthetic materials havereplaced plaster; sometimes the moulds can be removed for therapy andreplaced again. Synthetic moulds may even be coloured to your liking.
Cloze — materials and their usesR
esource S
heet 3
R3


Acknowledgments
This module is based on material developed by Rita McNaught who attended a modulewriting workshop organised by the Science Teachers’ Association of Queensland and theQueensland School Curriculum Council.
This sourcebook module should be read in conjunction with the following QueenslandSchool Curriculum Council materials:
Years 1 to 10 Science SyllabusYears 1 to 10 Science Sourcebook: GuidelinesScience Initial In-service Materials
ISBN 0 7345 2094 8
© The State of Queensland (The Office of the Queensland School Curriculum Council) 2000
Queensland schools are permitted to make multiple copies of this module without infringing copyrightprovided the number of copies does not exceed the amount reasonably required for teaching purposes inany one school. Copying for any other purposes except for purposes permitted by the AustralianCopyright Act 1968 is prohibited.
Every reasonable effort has been made to obtain permission to use copyright material in all sourcebookmodules. We would be pleased to hear from any copyright holder who has been omitted.
The State of Queensland and the Queensland School Curriculum Council make no statements,representations, or warranties about the accuracy, quality, adequacy or completeness of, and users shouldnot rely on, any information contained in this module.
The State of Queensland and the Queensland School Curriculum Council disclaim all responsibility andliability (including without limitation, liability in negligence) for all expenses, losses, damages and costswhatsoever (including consequential loss) users might incur to person or property as a result of use of theinformation or the information being inaccurate, inadequate, or incomplete.
Any inquiries should be addressed to:Queensland School Curriculum CouncilPO Box 317Brisbane Albert Street, Q 4002Australia
Telephone: (07) 3237 0794Facsimile: (07) 3237 1285Website: http://www.qscc.qld.edu.auEmail: [email protected]
Illustrations by Stephen Francis
PIP 99160
Related Documents