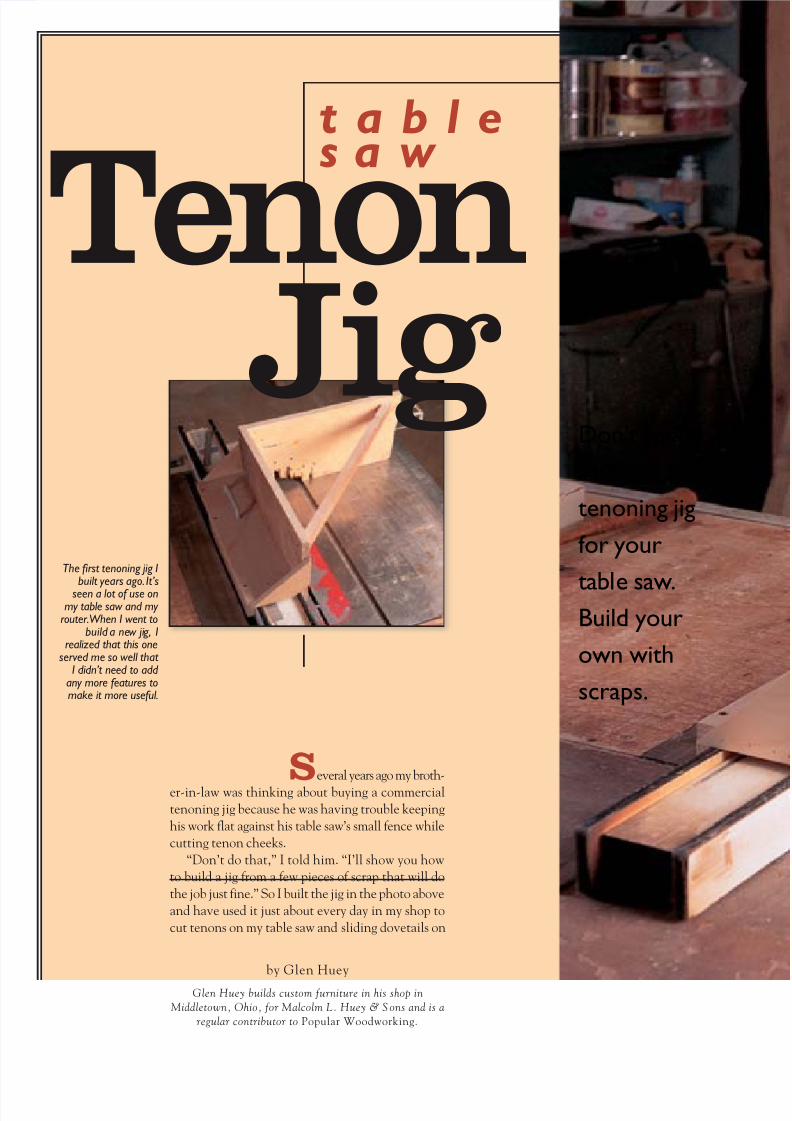
table saw several years ago my broth- er-in-law was thinking about buying a commercial tenoning jig because he was having trouble keeping his work flat against his table saw’s small fence while cutting tenon cheeks. “Don’t do that,” I told him. “I’ll show you how to build a jig from a few pieces of scrap that will do the job just fine.” So I built the jig in the photo above and have used it just about every day in my shop to cut tenons on my table saw and sliding dovetails on The first tenoning jig I built years ago. It’s seen a lot of use on my table saw and my router.When I went to build a ne w ji g, I realized that this one served me so well that I didn’t need to add any more features to make it more useful. Don’t spend $ 100 on a tenoning jig for your tabl e saw . Build your own with scraps. by Glen Huey Glen Huey builds custom furniture in his shop in Middletown, Ohio, for Malcolm L. Huey & S ons and is a regular contributor to Popular Woodworking. Tenon J i g

Welcome message from author
This document is posted to help you gain knowledge. Please leave a comment to let me know what you think about it! Share it to your friends and learn new things together.
Transcript
8/10/2019 Web Table Saw Tenon Jig New
http://slidepdf.com/reader/full/web-table-saw-tenon-jig-new 1/4
t a b l es a w
several years ago my broth-
er-in-law was thinking about buying a commercial
tenoning jig because he was having trouble keeping
his work flat against his table saw’s small fence while
cutting tenon cheeks.
“Don’t do that,” I told him. “I’ll show you how
to build a jig from a few pieces of scrap that will do
the job just fine.” So I built the jig in the photo above
and have used it just about every day in my shop to
cut tenons on my table saw and sliding dovetails on
The first tenoning jig Ibuilt years ago. It’s
seen a lot of use onmy table saw and my
router.When I went tobuild a new jig, I
realized that this oneserved me so well that
I didn’t need to add any more features tomake it more useful.
Don’t spend
$100 on a
tenoning jig
for your
table saw.Build your
own with
scraps.
by Glen Huey
Glen Huey builds custom furniture in his shop in
Middletown, Ohio, for Malcolm L. Huey & S ons and is a
regular contributor to Popular Woodworking.
Tenon
Jig
8/10/2019 Web Table Saw Tenon Jig New
http://slidepdf.com/reader/full/web-table-saw-tenon-jig-new 2/4
8/10/2019 Web Table Saw Tenon Jig New
http://slidepdf.com/reader/full/web-table-saw-tenon-jig-new 3/4
A
B
C
F
E
D
E
Corner brace "F"is nailed in place
then screwed from each end.
Nails
1 5/8"drywall screw
1 5/8"drywall screws
Nails
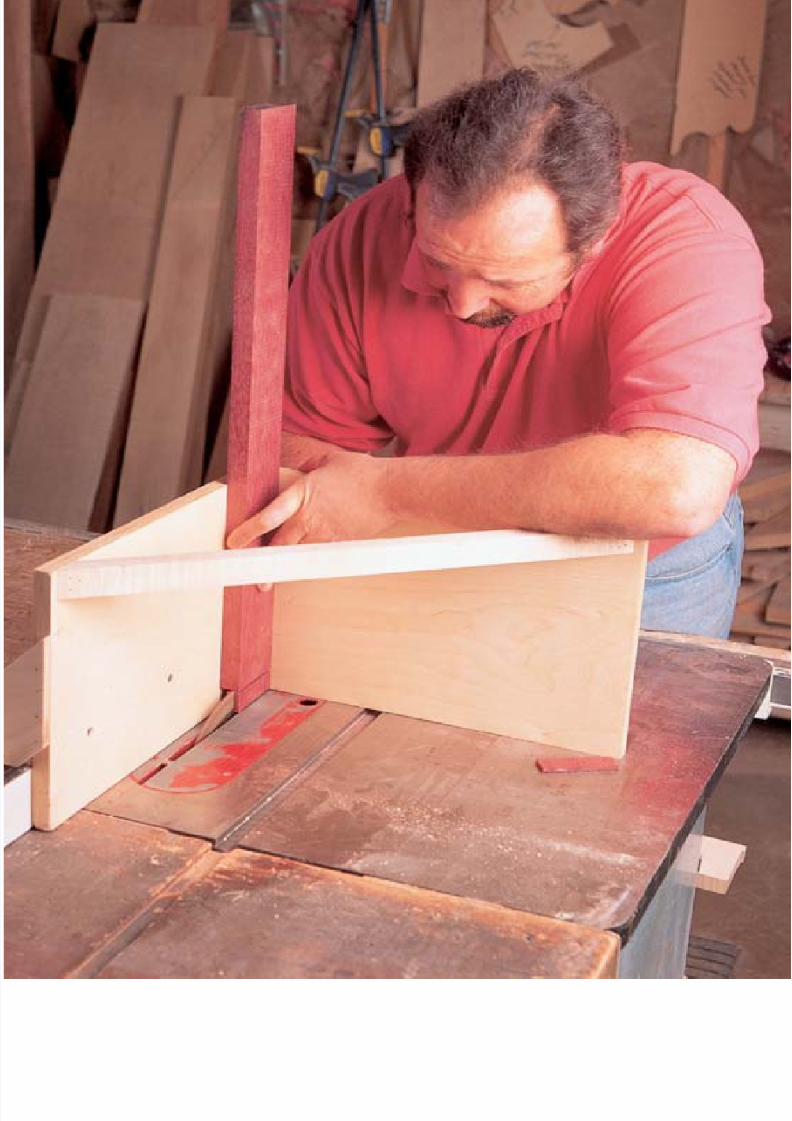
Here’s the side pieceheld in place against the
top runner. You want thetop runner to be snug against the top of your fence (above left).Thetriangular braces(above right) keep theside and top runner square and sturdy for years to come.
Schedule of Materials • Tenon Jig
No. Ltr. Item Dimensions T W L Material1 A Back 3 ⁄ 4" x 10" x 151 ⁄ 4" Plywood1 B Side 3 ⁄ 4" x 10" x 16" Plywood1 C Top runner 3 ⁄ 4" x 43 ⁄ 4" x 16" Plywood1 D Side runner 3 ⁄ 4" x 21 ⁄ 2" x 16" Plywood2 E Triangular braces 3 ⁄ 8" x 3" x 71 ⁄ 2" Plywood1 F Corner brace 7 ⁄ 8" x 1" x 21" Hardwood*
* Piece is long; cut to fit.
8/10/2019 Web Table Saw Tenon Jig New
http://slidepdf.com/reader/full/web-table-saw-tenon-jig-new 4/4
my router table. The high side and back
keep my tenons in position as I cut the
cheeks. It’s difficult to mess up a tenon
with this jig.
When I decided to retire the old jig and
build a new one, I thought about adding
some fancy features. Then I realized that
simple is best, and I stuck with my origi-
nal design. This jig is built to be used with
a commercial Biesemeyer fence. If you
don’t have a Biesemeyer, you’ll have to
change the dimensions of the top and side
runners, but that’s simple to do.
Simplicity Itself
Basically, this jig is two pieces of plywood
in an “L” shape that have a couple pieces
of wood screwed to them to allow them to
ride the table saw’s fence. After settling
on the dimensions that are right for your
fence, cut all your pieces to size. First clamp
the side piece and top runner in position
on your fence. Mark where the two pieces
intersect and screw and glue the two pieces
together. Be sure to countersink the screw
heads in the side piece. Position the side
runner in place under the top runner. You
want it to be tight against the
fence — but not too tight.
Screw it into place. Now glue and screw the large
back piece to the side piece.
You want the angle to be 90
degrees between the two
pieces, so check your work. Later you’ll
add a corner brace that will keep this angle
fixed at 90 degrees. Attach the two trian-
gular braces to the side and runners. Attach
the braces with nails and glue.
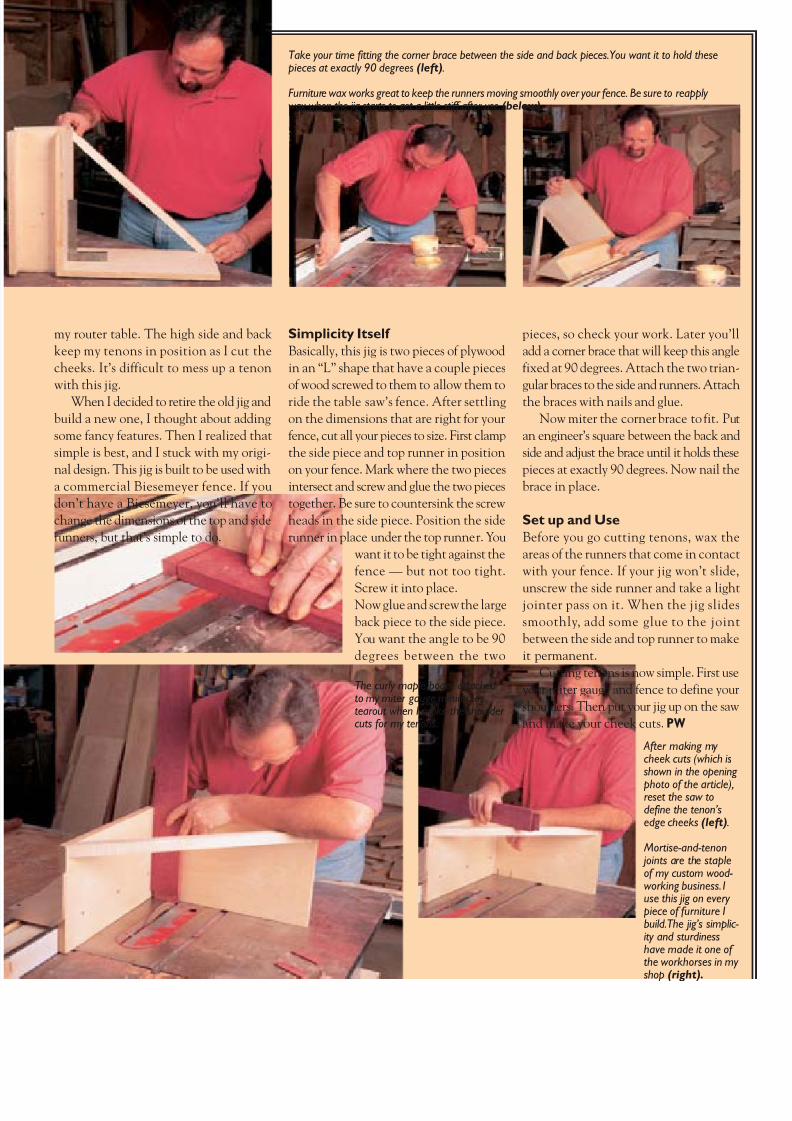
Now miter the corner brace to fit. Put
an engineer’s square between the back and
side and adjust the brace until it holds these
pieces at exactly 90 degrees. Now nail the
brace in place.
Set up and Use
Before you go cutting tenons, wax the
areas of the runners that come in contact
with your fence. If your jig won’t slide,
unscrew the side runner and take a lightjointer pass on it. When the jig slides
smoothly, add some glue to the joint
between the side and top runner to make
it permanent.
Cutting tenons is now simple. First use
your miter gauge and fence to define your
shoulders. Then put your jig up on the saw
and make your cheek cuts. PW
Take your time fitting the corner brace between the side and back pieces.You want it to hold thesepieces at exactly 90 degrees (left).
Furniture wax works great to keep the runners moving smoothly over your fence. Be sure to reapply wax when the jig starts to get a little stiff after use (below).
After making my cheek cuts (which isshown in the opening
photo of the article),reset the saw todefine the tenon’sedge cheeks (left).
Mortise-and-tenon joints are the stapleof my custom wood-working business. Iuse this jig on every piece of furniture Ibuild.The jig’s simplic-ity and sturdinesshave made it one of the workhorses in my shop (right).
The curly maple board attached to my miter gauge minimizestearout when I make the shoulder cuts for my tenons.
Related Documents


